Introduction
Unfortunately, during this amazing period, the Dec Alpha I had acquired specifically for this research had died. However, I was able to find an amazing group of people to not only go through with this research but take it upon themselves to provide an amazing working ISO image release! Needless to say, this is beyond my knowledge, and this is obviously a guest post
Background
In ~1997, Microsoft started work on a project dedicated to porting Windows NT to use 64-bit addressing on 64-bit machines. Before this, Windows NT used the 32-bit mode or ABI of 64-bit machines. This effort was internally referred to as “Sundown”, otherwise referred to as “Win64”. The ports consisted of not only to the Itanium/IA-64 architecture (which later shipped as Windows XP 64-Bit Edition) but also to the 64-bit DEC Alpha architecture.
Compaq dropped support for Windows on Alpha in mid-1999, and Microsoft stopped the development of 32-bit Windows NT for Alpha soon afterwards, with Windows 2000 build 2128 (RC2) being the last build. Due to a lack of physical IA-64 hardware and the slowness of the simulator, Microsoft continued to work on the AXP64 port of Windows till mid-2000, to help fix general issues related to 64-bit addressing. You can read more about this project here.
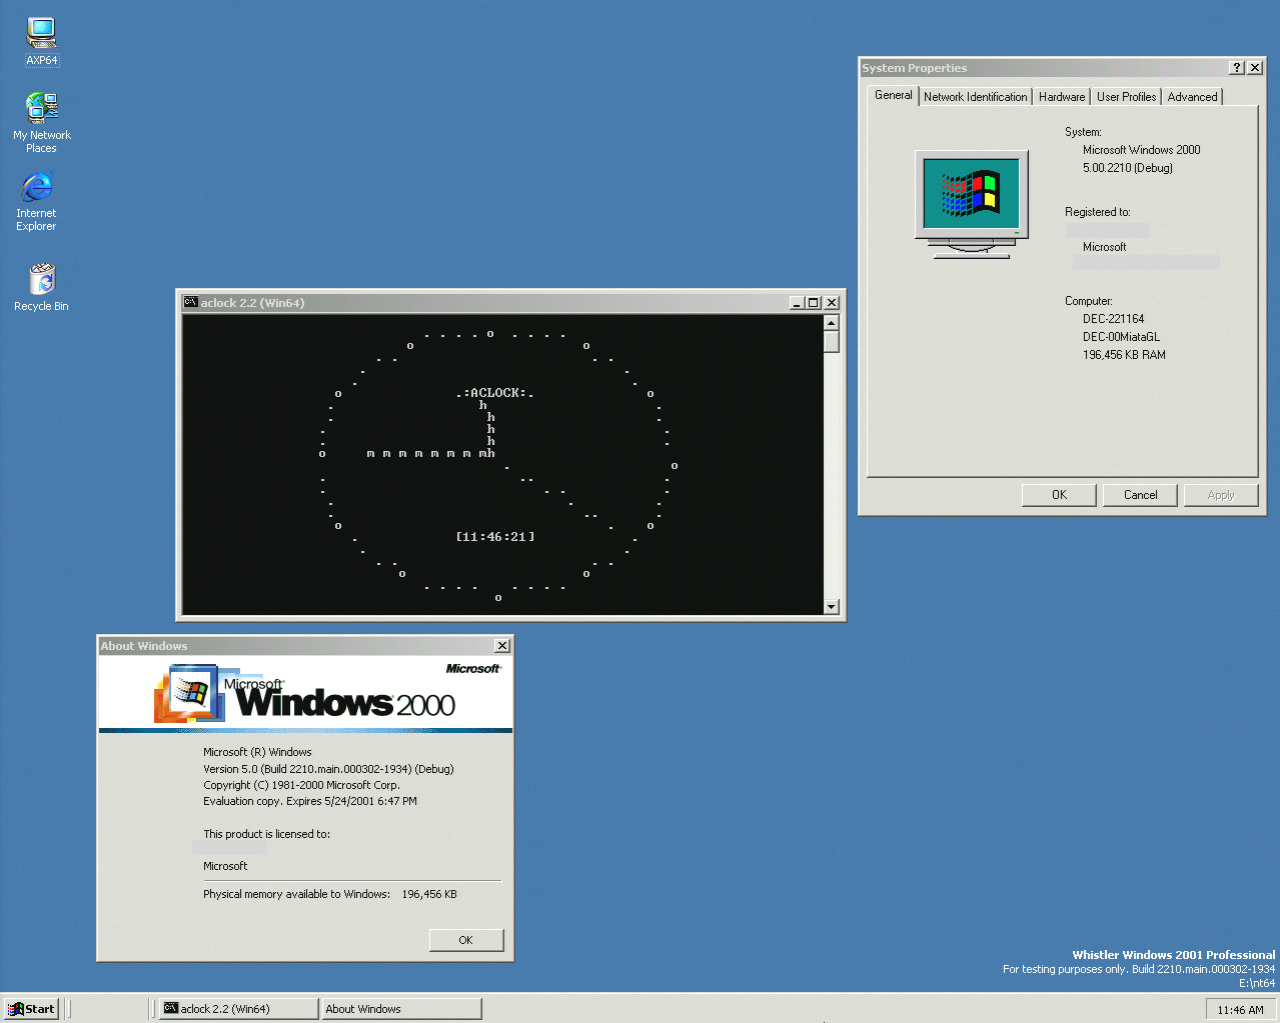
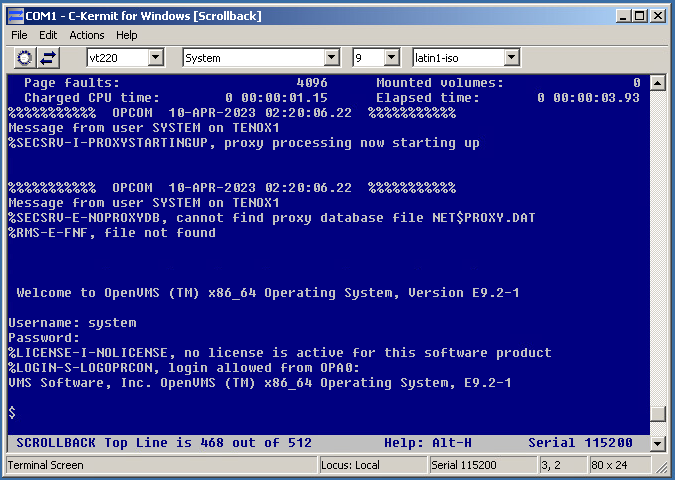
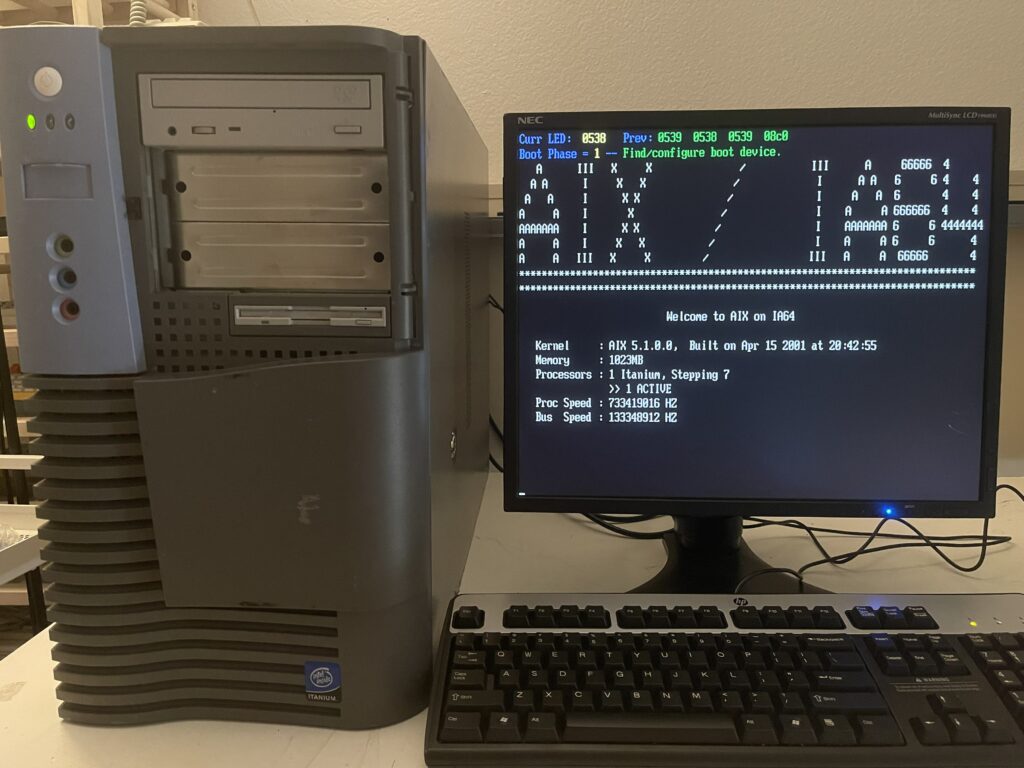
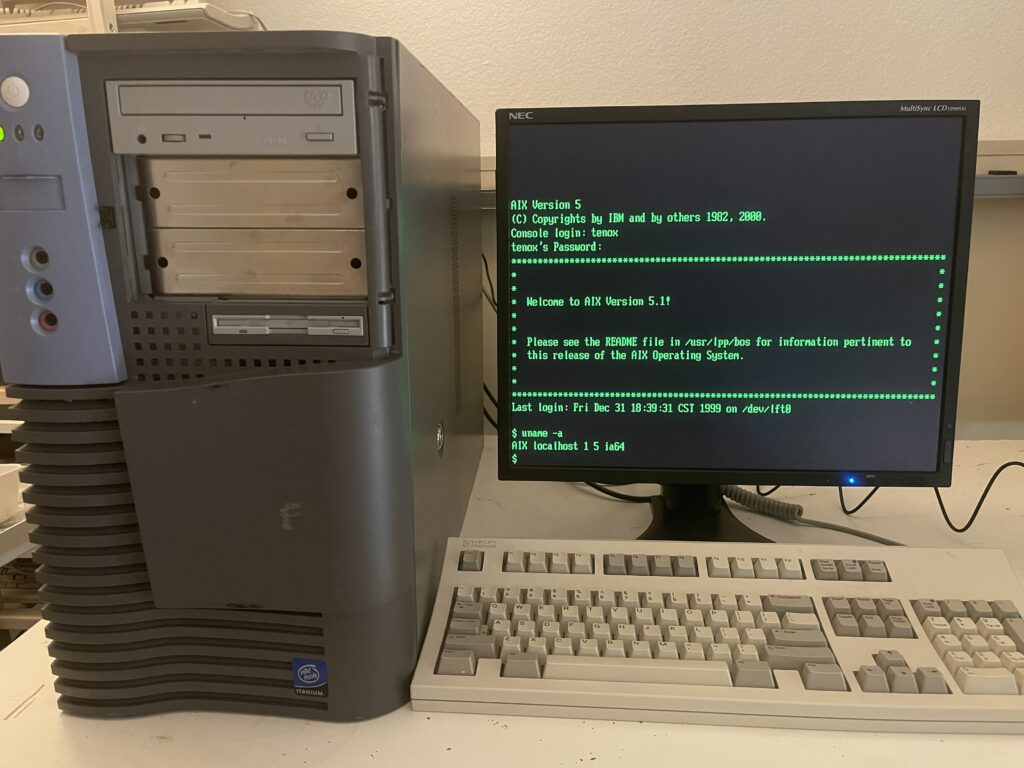
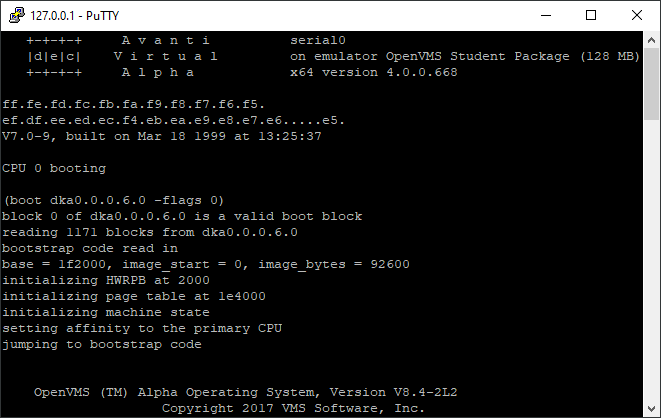
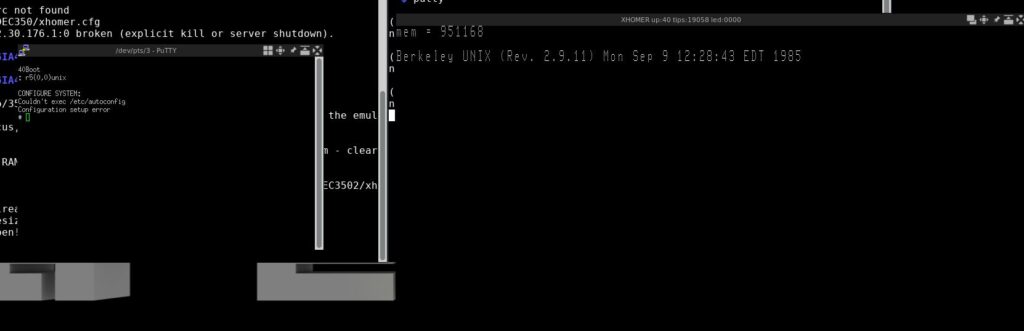
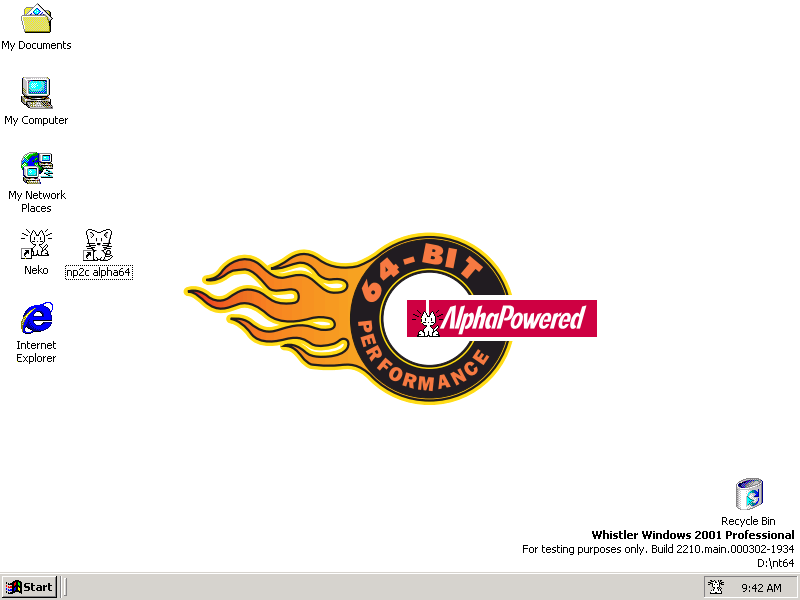
In May 2023, a disk image containing an installation of an AXP64 build of Windows XP (Whistler) build 2210 was discovered by a guest reader of this site, and a team (amarioguy, neozeed, pivotman319, starfrost and Tenox) was later assembled to help make this release possible.
Why Repack To ISO
When I saw the news about this build, I asked my friends why didn’t neozeed or Tenox share the full disk image, they told me that the disk image contained PII (Personally Identifiable Data) and neeozeed would like to have them removed first. I have some experience with cleaning up Windows builds, so I joined their Discord server and offered to help, then I got sent a full sector dump of that disk. I scanned the build 2210 partition with a file recovery tool that I stole from a data recovery shop when I worked there, and to my amazement, quite a few files in the deleted \$WIN_NT.~LS directory (a place for holding temporary setup files) survived (more importantly, setupdd.sys, txtsetup.sif, setupldr and the hiv*.inf files). Since all the files required for a clean install from ISO/CD are there, this build can be repacked into an ISO which is guaranteed to contain no personal information!
Recovery
The first thing I did was I recovered all of the files in the deleted \$WIN_NT.~LS directory, but since the integrity of files recovered from NTFS and FAT partitions cannot be guaranteed, I checked every single one of them. Most of those files were Microsoft Cabinet (CAB) archives, so I wrote a tool called CabChk to verify that 1) they are valid CAB archives, 2) there is only one file per archive, 3) the name of the compressed file is the same as the name of the archive and 4) the compressed file extracts fine. This helped me to verify most of those 4600 files, but I had to verify the remaining 300 or so files by hand because they’re not CAB archives and that task alone took days to complete. After verifying all the recovered files, it turned out that 85% of them survived while the remaining 15% didn’t.
Repacking
A lot of those overwritten files are actually in the Windows directory (NT64) of that 2210 install, so I copied them out and recompressed the appropriate ones. I set my computer to the time zone Microsoft used and compressed them with the Cabinet Tool (CABARC) parameters Microsoft used. Microsoft used UTC-8 and the following CABARC parameters:
CABARC -m LZX:21 N [output_cab] [input_file]After repacking and copying over the files, the number of missing files went from about 650 all the way down to roughly 30 :).
Missing User Mode Setup Stub
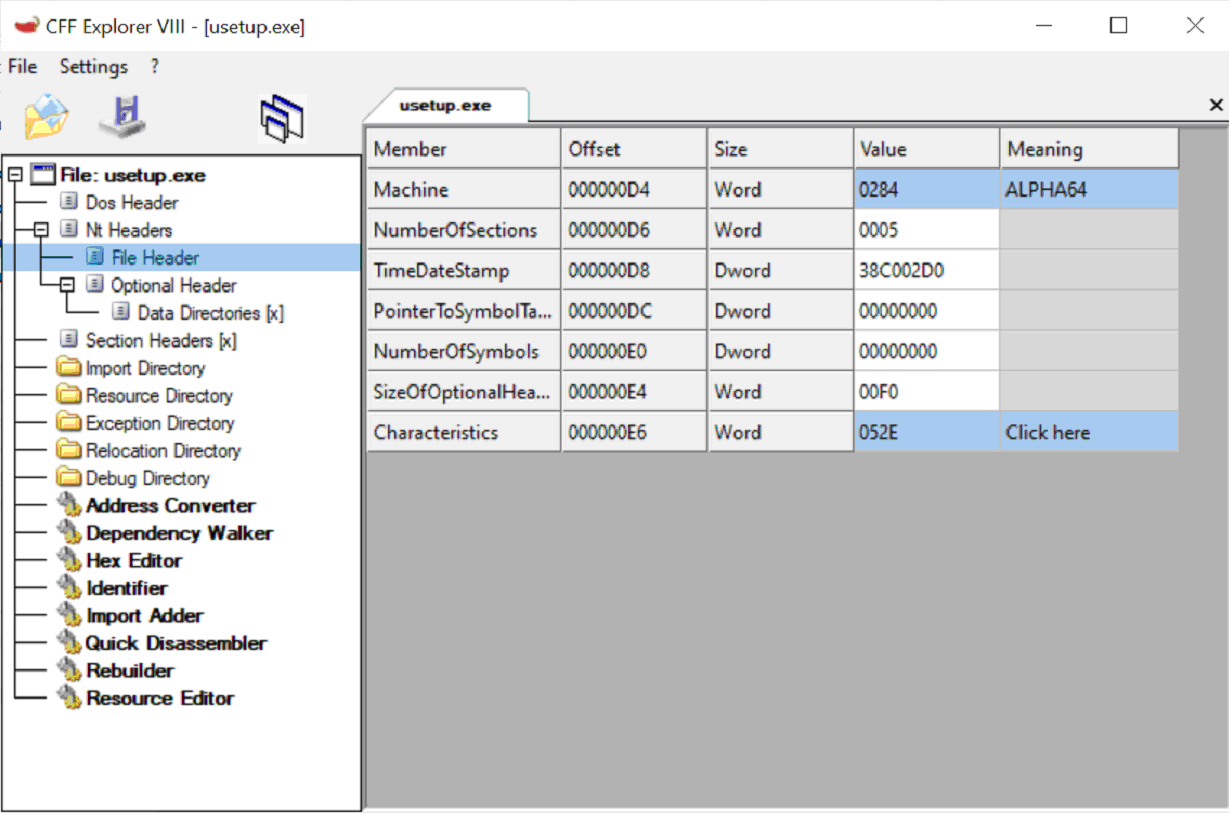
Unfortunately, usetup.exe was one of those 30 or so files. It doesn’t do much as it’s a stub, but nonetheless without it, text mode setup won’t start. My original idea was to decompile I386 build 2211’s usetup.exe (as it has only about 20 functions) and recompile it for AXP64 with the toolchain discovered earlier on, but I had to wait for someone to cross compile it on an Alpha for me. While I was waiting, I searched that partition for substrings in the I386 usetup.exe and I got a match!
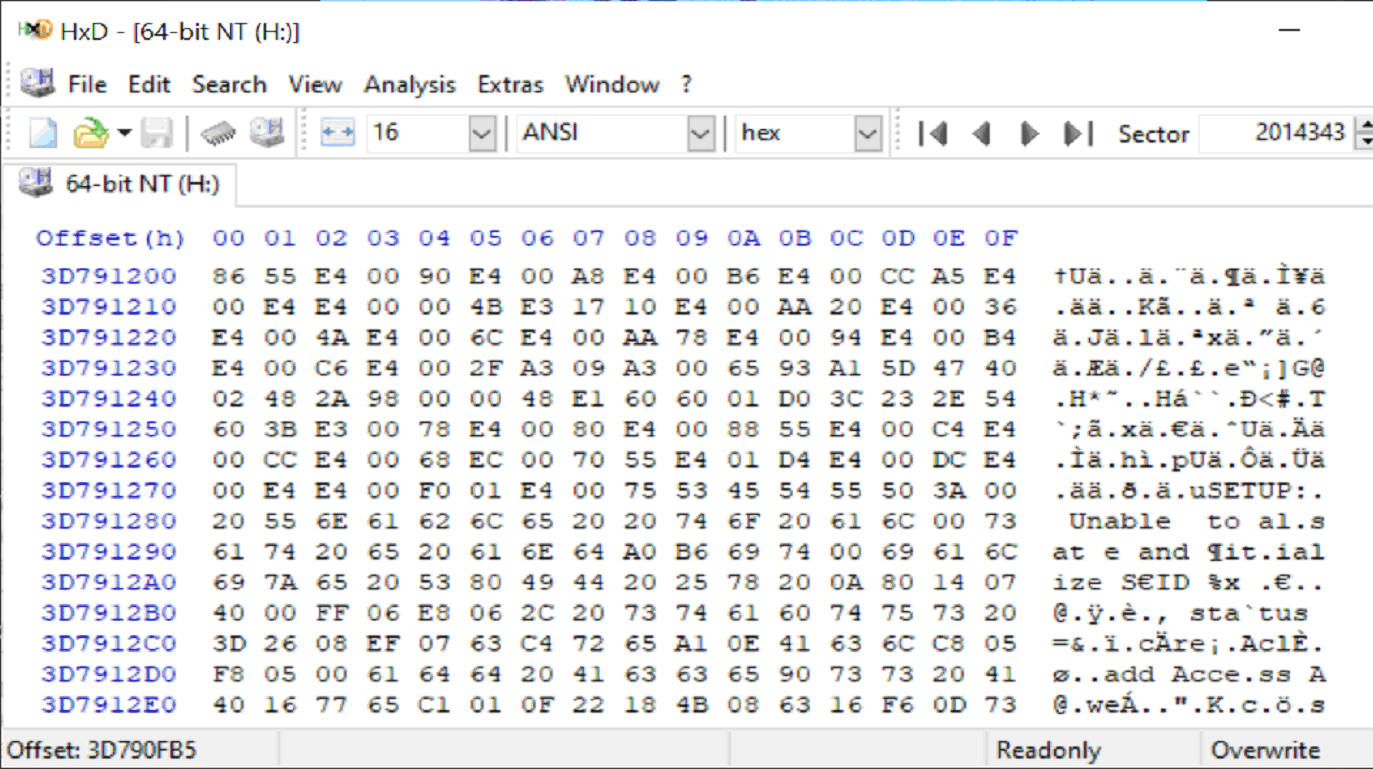
It’s compressed, but since LZNT1 is a simple and weak-ish compression algorithm, you can sort of recognise the original data. I cobbled together an LZNT1 decompressor and decompressed that 32 KiB chunk, and indeed it’s the AXP64 usetup.exe!
E:\Projects\LZNTTool>LZNTTool -d "E:\Whistler 2210 AXP64 Recovery\usetup_compressed_0.bin" "E:\Whistler 2210 AXP64 Recovery\usetup_0.bin"
Decompression successful.

E:\Projects\LZNTTool>wsl hexdump -C -v -s 0x600 -n 0x200 "../../Whistler 2210 AXP64 Recovery/usetup_0.bin"
I then searched for strings expected to be in the second 32 KiB chunk and then the third chunk and so on, until I got all of them recovered. After decompressing all of the 5 chunks, I concatenated them together into one single executable and yay, we now have the original AXP64 usetup.exe!
E:\Projects\PEChkSum>PEChkSum "E:\Whistler 2210 AXP64 Recovery\usetup.exe"
Expected checksum is: 0x00035E4E
Actual checksum is: 0x00035E4E

"E:\Whistler 2210 AXP64 Recovery\usetup.exe" is valid.
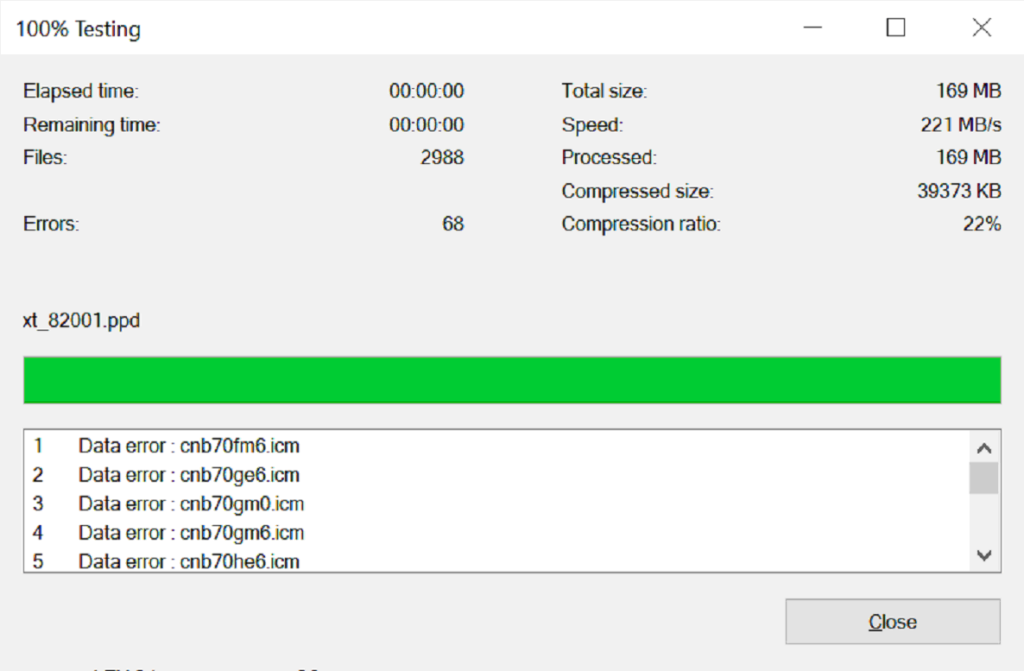
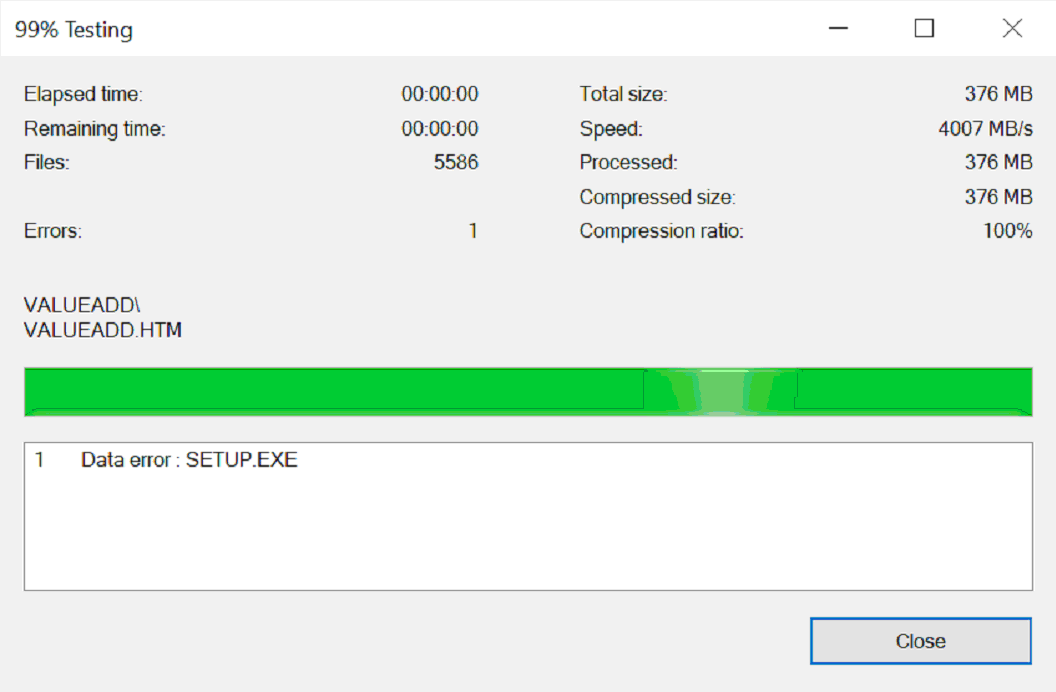
Broken Driver Cabinet
pivotman319 pointed out to me that some files in driver.cab were dead, and indeed, Setup did not work with that broken cabinet:

There were 2 copies of driver.cab on that disk, sadly the deleted one in $WIN_NT.~LS got overwritten and the one in \NT64\Driver Cache\axp64… well, 68 errors 😢:
Looking at the broken files, I noticed a pattern – all of them came from 3 blocks – 5, 36 and 37. What on Earth are “blocks”? Well, let’s talk about how CAB archives work first.
Files in CAB archives are stored in blocks, where each block stores 1 or more files. When files are added to a CAB archive, they are all concatenated together into one big file. The concatenated big file is then split into multiple sub-blocks (with default size of 0x8000 bytes) and each of them gets compressed and then concatenated together to form the compressed block. So, for small corruptions (bit-rots and etc.), theoretically only 0x8000 bytes are lost and the rest should still be recoverable, but tools like 7-Zip will refuse to extract anything beyond the point of corruption.
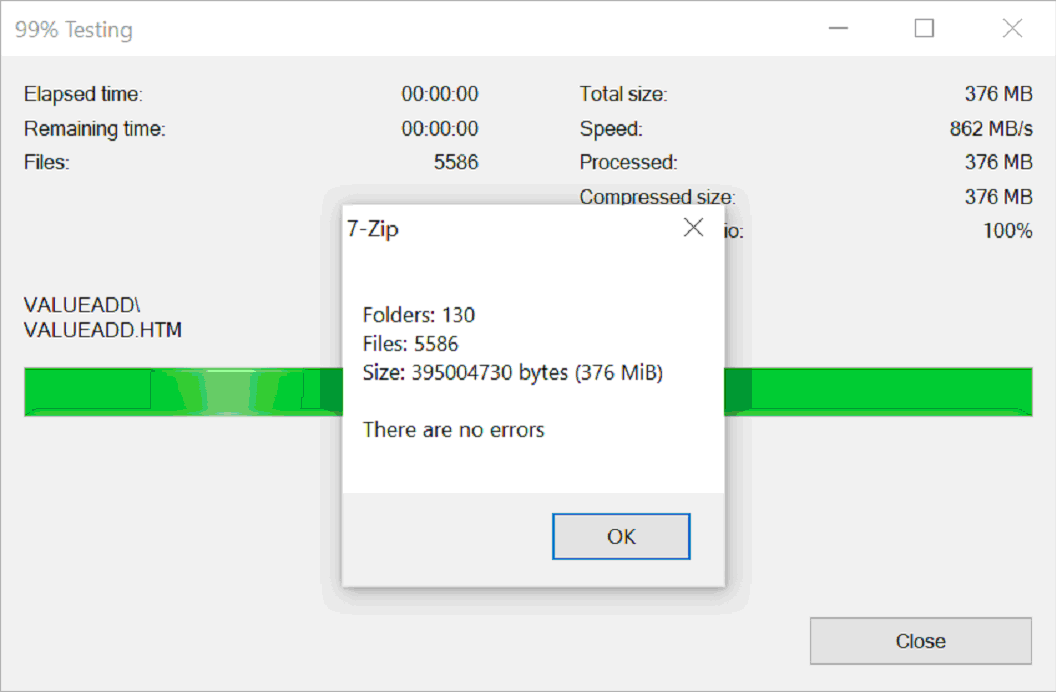
Now looking at the corruption in driver.cab, 2 of the 3 blocks can be fully recovered because we have all of those files in uncompressed form. Block 5 contains mostly printer-related files that are arch- and build-independent, so they can all be borrowed from build 2211 i386. Block 37 has only 1 broken file (win32k.sys) which exists on the hard drive (in system32). To fix these blocks, I simply took the uncompressed files, compressed them and replaced the broken blocks with the newly created ones.
And after fixing block 37:

I then ran my CabScan tool on the fixed CAB and as expected, there is only one bad sub-block left:
E:\Projects\CabScan>CabScan "E:\Whistler 2210 AXP64 Recovery\driver (fix).cab"
Offset 0x0253FD75:
    Expected checksum is 0x568C0AC3
    Checksum is 0x1CEBB9DE
    Original size is 0x00008000
    Compressed size is 0x00003862

Detected 1 bad sub-block(s) in 1 bad block(s).
So, what can we say about the corruption?
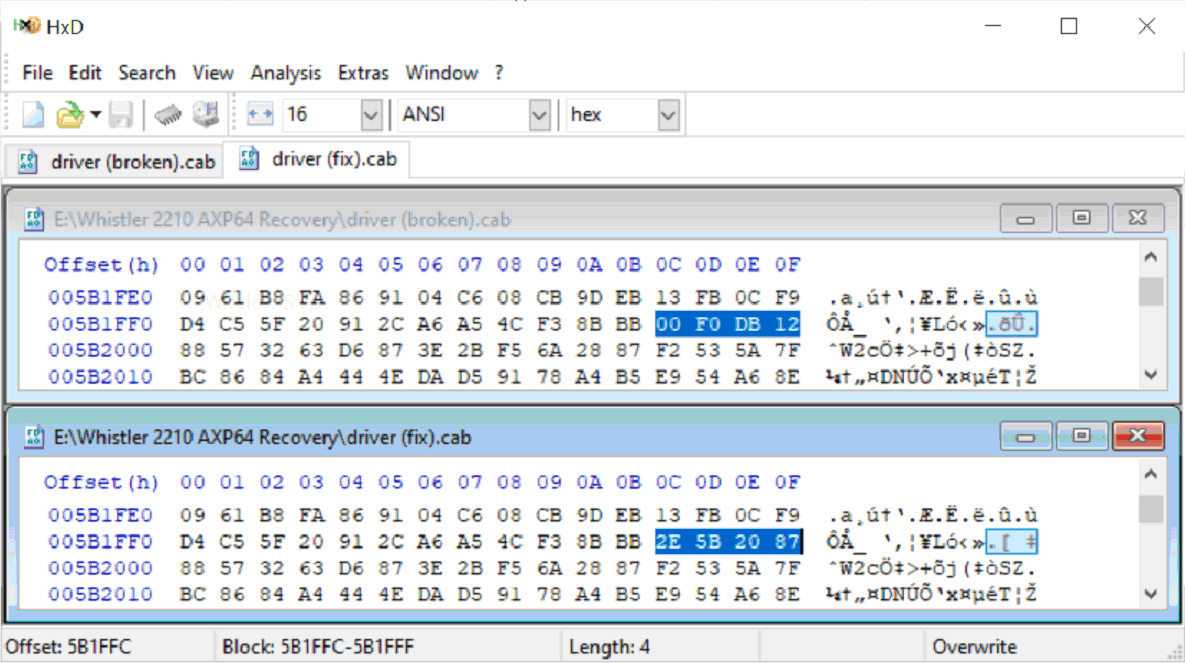
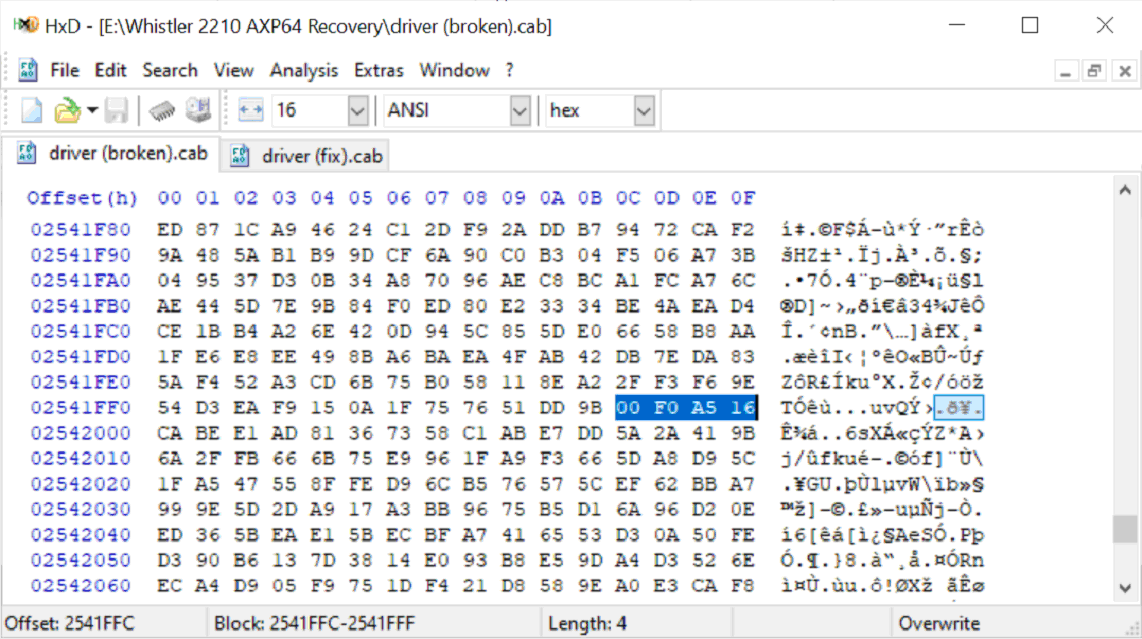
- Size: 4 bytes
- Location: Last 4 bytes of a 0x2000 section
- Pattern: Starts with 00 F0 (possibly the result of a buggy NTFS driver)
Knowing these, I immediately located the 4 corrupted bytes in block 36:
So how did I recover those 4 bytes, did I brute force them? Nope, I used the checksum to calculate them! Here is the checksum algorithm Microsoft used for CAB archives:

And as you can see, it’s very simple, so it took me almost no time to work out the 4 missing bytes (4A ED 16 71) from the checksum 0x568C0AC3! With block 36 fixed, as expected, all files are now good!

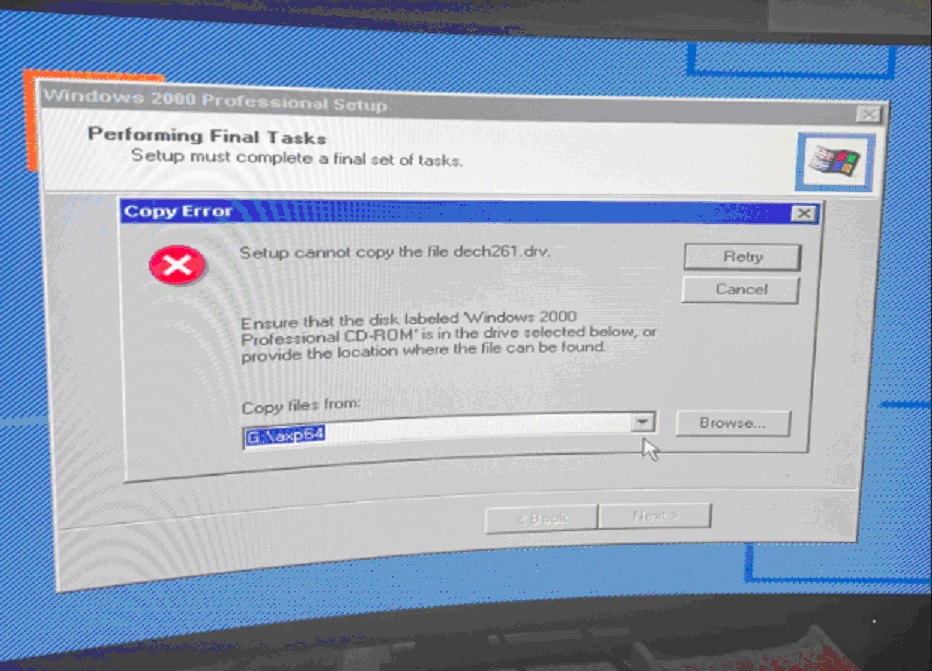
Buggy Setup Loader
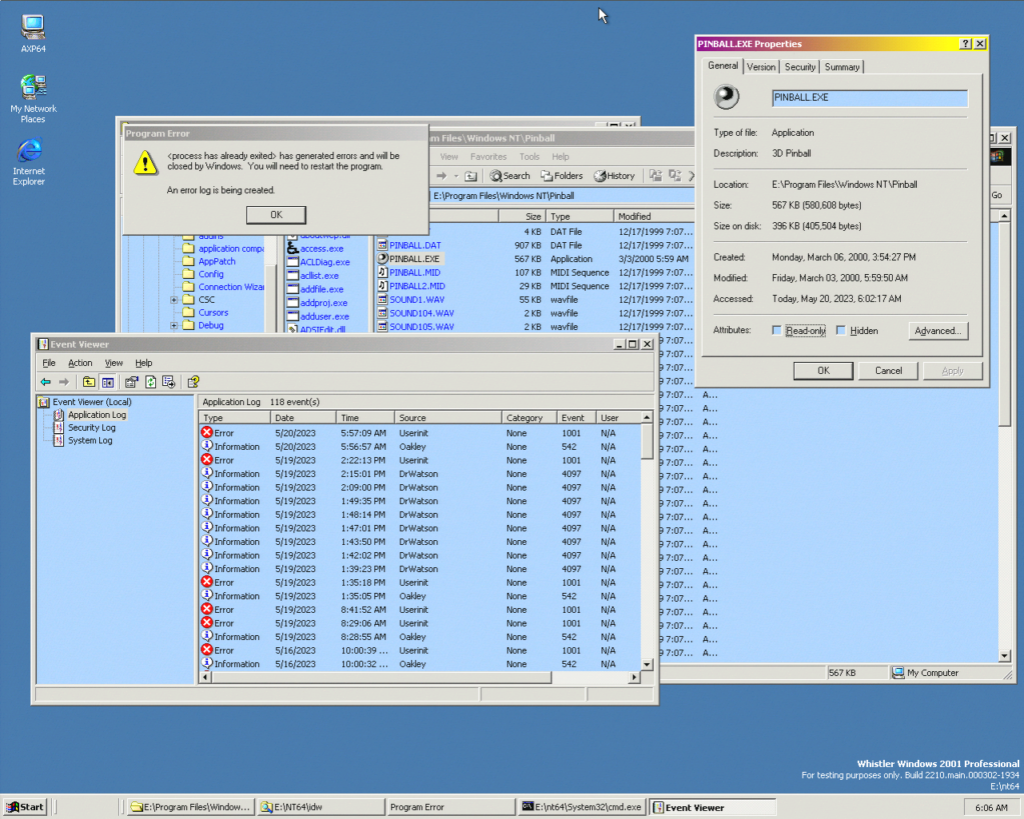
I thought I got everything necessary recovered and fixed, so I packaged up the files and sent them to G-Nug85 to test… and it didn’t work:
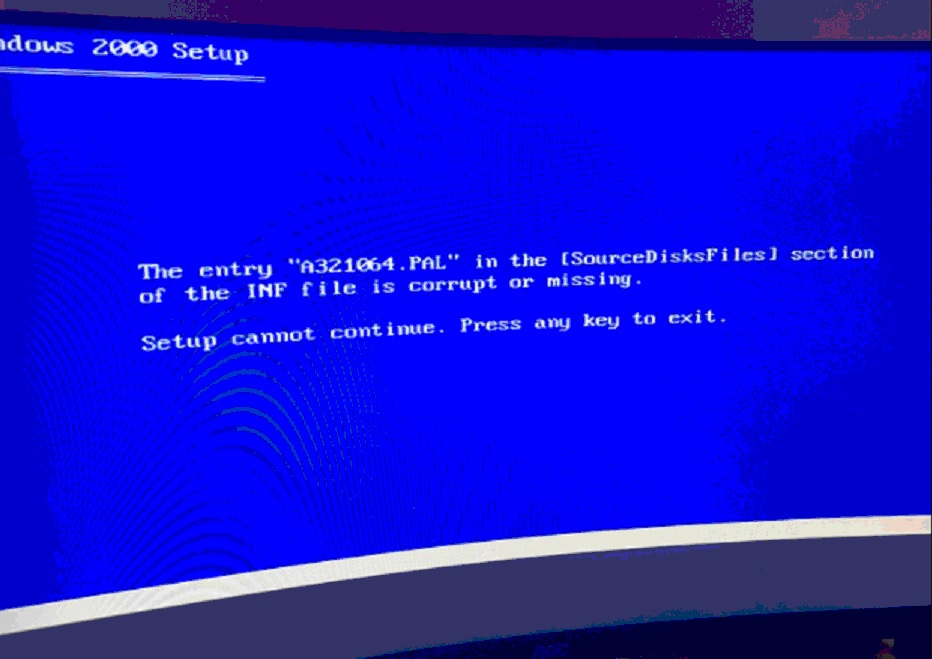
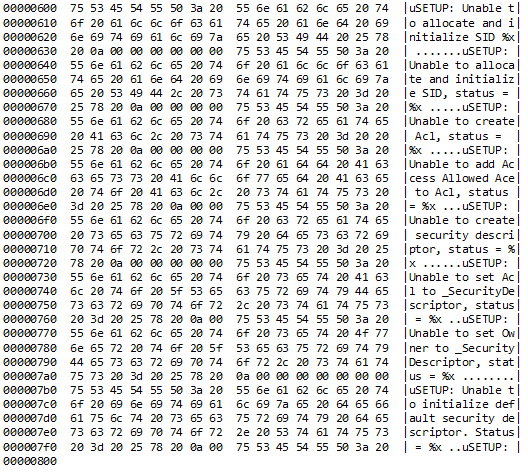
It failed to find A321064.PAL in the [SourceDisksFiles] section of txtsetup.sif. Well, this is an AXP64 build and A321064.PAL is a 32-bit PALcode image… why would it be there? Needless to say, copying that file to the disc image didn’t help. I have literally spent days on this stupid issue and who would have expected this:
E:\Whistler 2210 AXP64 Recovery>wsl strings -t x SETUPLDR | wsl grep -i '.pal'
  91f68 A321064.PAL
The culprit of the problem was they hard coded the name “A321064.PAL”… in the setup loader executable… how stupid!
We can tell from this that Microsoft has never made ISOs or discs for AXP64 builds, otherwise they would’ve found and fixed this bug. Well, maybe they did eventually try installing AXP64 builds from disc, because it’s fixed by the time of Windows XP SP1, but that’s long after this build:
#if defined(_AXP64_)
        SlGetDisk("a121165.p64");
#else
        SlGetDisk("A321064.PAL");
#endif
Oh well, I replaced the hard coded “A321064.PAL” with “a121165.p64” and what do you know, it’s working!
Finishing Touches
That install went smoothly, but one error did pop up during second stage setup:
A missing driver – big deal, hey? We actually have the build 2209 AXP64 version of this driver, so I injected it to the ISO and Setup happily accepted it.
I’ve also copied the Arc Installation Program (ARCINST) from Windows 2000 build 2128 AXP32 to the AXP64 directory of the ISO, because it is required for disk partitioning if you don’t have AlphaBIOS (and yes, it works because it’s not a Windows executable).
Supported Machines
Microsoft compiled several HALs for this build, but not all of them are listed in txtsetup.sif, the following machines are supported by default:
- Digital Personal Workstation A-Series
- Digital AlphaServer 4×00 5/xxx Family
- Digital AlphaServer/AlphaStation 1200 5/xxx Family
- Digital Alpha 21264/Tsunami Uniprocessor
- Digital Alpha 21264/Tsunami Multiprocessor
The following machines may be supported if you replace textsetup.sif with a modified version:
- Digital Alpha EB164
- Digital Alpha PC164SX
- Digital Alpha XL 300/366 Family
- Digital AlphaPC 164LX
- Digital AlphaServer 1000 5/xxx Family
- Digital AlphaServer 1000a 5/xxx Family
- AlphaServer 800 5/xxx (Corelle)
- AlphaStation 600A 5/500 (Alcor Primo)
We have only tested this build on the Digital Personal Workstation A-Series, AlphaServer DS10 and the AlphaServer 800, so there is no guarantee that the other HALs work (though they should).
Also, since this is a checked build, it does run slower than a retail build, and by default it will expect you to have a kernel debugger attached. Be sure to add the /NODEBUG flag to the bootloader to improve performance. I had noticed the SDL spite test demo going from 60fps to 70fps on my Alpha Personal Workstation 500a before it had died.
For Preservation
As I have said earlier on, Microsoft has never made ISOs/discs for AXP64 builds, so please don’t preserve the ISO file (eg: don’t upload it to BetaArchive). I know BA prefer ISOs over folder dumps, so let me tell you this mrpijey, the ISO is a franken-build with a patched Setup Loader and files from 2128, 2209 and 2211. We have a folder dump of the original files from the \NTDev network share with original high-precision timestamps just for preservation, so please for the sake of preservation, use this. Also don’t even think about creating an ISO out of the folder dump, you’ll end up with a non-existent thing that doesn’t work.
Download
ISO for Installation: https://mega.nz/file/q5AhhDJR#MsLYxxvmAdYDQ101fUHoGyzJ5Pk0EFsc2xdYH1p9qxQ
Whistler 2210 axp64 installable
Folder Dump for Preservation: https://mega.nz/file/r5gE3RxQ#4VfviMdQo44wJZT0df0cw8o4kE30lvSQKBZklma0mtg
Modified TXTSETUP.SIF For Other Machines: https://mega.nz/file/zsBVAJDD#5oQVM6U2AwseTJ54lOmN1E7BHTDFuwOuWdZOykmXP8E
Special Thanks
- to the person who sent us the disk image
- to Microsoft for not wiping that disk before throwing it away
- to pivotman319 for verifying recovered files and finding missing files
- to Tenox for testing
- to G-Nug85 for testing and providing photos used in this post
- to Furball for testing
- to lbdm for testing
- to myself… I guess?
Special Offer – Windows 2000 RC2 AXP32 Full ISO
The ISO on BetaArchive is the same as the ISO on WinWorld, which was originally named usa_2128_axpfre_win2000.pro_beta3_cairo.iso… hmm, that doesn’t sound very ‘Microsoft’!
Yep, definitely not original. Even worse, SETUP.EXE is broken/truncated:
The fact that the AXP32 2128 ISO we’ve had for over a decade is both unoriginal and incomplete is truly shocking! Well, I have something to offer – an at least complete Windows 2000 build 2128 AXP32 ISO from my private collection:
The SETUP.EXE in this ISO is good and complete! The CDIMAGE parameters used to build this image matches what was used to build ISOs of AXP32 builds from the same era and the disc label (W2PAS_EN) is much more sensible than “Cairo_2128”. The only thing that doesn’t make sense is the timestamp – 1999-09-23 12:00:00. Microsoft used 1999-09-10 as the timestamp for all other copies of build 2128, so I’m not sure why this one is different. It’s worth noting that all files from the incomplete ISO also have the strange 1999-09-23 timestamp, so I guess it’s not a coincidence ¯\_(ツ)_/¯.
Download: https://mega.nz/file/qoYyUbLB#oKArX_Qqh_kjnESnT6dQD8NGTg05_CMhKMxW4FKuhjEWindows 2000 build 2128 DEC Alpha