My favourite PowerMac is a Nintendo Wii

(This is a guest post by Rairii)
Mac OS 7.6 booting on the Wii
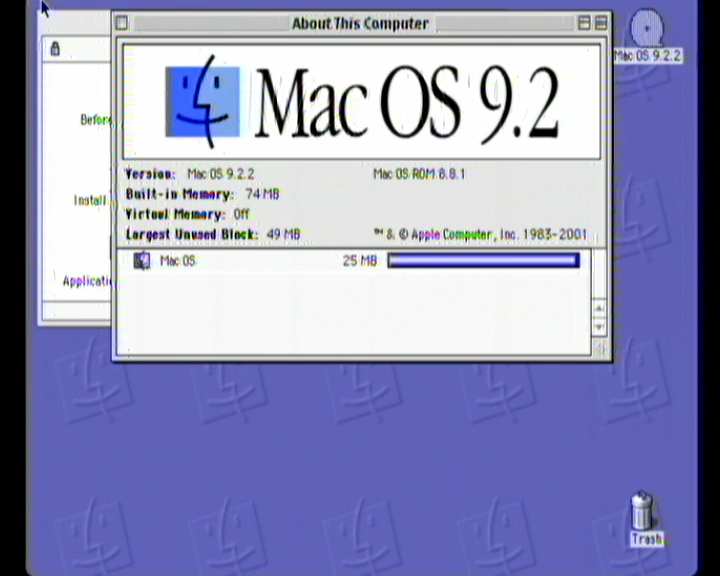
Mac OS 9.2.2 booted on the Wii

So today I reached a nice milestone in one of my projects: my work porting classic Mac OS to PowerPC systems with what I affectionately call ArtX chipsets (Nintendo GameCube, Wii, eventually Wii U; the GameCube’s Flipper integrated chipset was very much designed by ArtX as it was effectively finished when ATI acquired the company, and the Wii’s Vegas (and its later revision Bollywood) and Wii U’s Latte are effectively straight successors) reached the desktop for the first time, most likely the first time since the CHRP clone era that someone outside of Apple brought up classic Mac OS on a new system to the desktop. Despite still being nowhere near ready for a public release, I want to talk about the challenges I faced with this project so far.

But first, why port classic Mac OS to this hardware in the first place? I’d already ported NT of course, and during that work I acquired some PowerPC Mac laptops which I also ended up porting NT to, work on one port improved the others and so on. This got me acquainted with the classic Mac OS, and I fell in love with the jank as it were (hacks upon hacks upon hacks going back to the 1980s is something I’d definitely describe as “jank”). Not to mention the m68k part of the TBXI is called “SuperMario”, and was for the entire PowerPC era. I wonder if a developer was a fan in the early 1990s?

Also, for the record: I started this project on 2025-06-22 (when I forked upstream openbios), no kind of coding agent or LLM was used, all coding, reversing and debugging work done by myself. I do these projects for fun and to learn, if I used “AI” it wouldn’t be fun and I wouldn’t learn anything.

Let’s start with the initial boot. “New World” classic Mac OS starts out with a bootloader called the “Trampoline”, which runs on an Open Firmware environment. So I needed to port OpenBIOS. Luckily, around this time Goldfish64 had started his own port of Mac OS X to the Wii, and he’d made an OpenBIOS port that I could use some drivers from, although for various reasons I didn’t just want to use his port directly (which was only targeting Wii/Wii U, I wanted to target GameCube too). I also decided to reuse some existing code to make some driver development easier (specifically the display driver), and thus changed my existing NT ARC firmware loader to load a big endian ELF instead.

I needed some small number of disk drivers for initial bringup, so decided to port my two drivers for devices on the EXI bus (this is just Nintendo and Macronix’s name for SPI), the “SD Gecko” (which is just a straight through adapter for a GameCube memory card slot allowing for SD over SPI), and the “EXI-IDE” (my driver is actually not correct to real hardware, but to my inaccurate emulation in my Dolphin tree allowing for testing under emulator with the low level debugging support that implies).

I wasn’t sure what kind of on-disk format I wanted to use (these drivers on my earlier NT port ran entirely using disk images on a FAT filesystem, due to the requirement for compatibiltiy with existing homebrew loaders that load executables from FAT filesystems, but this would naturally be limited to 4GB images for FAT32, and later versions of classic Mac OS needed more), so for initial testing I just took the “Mac OS ROM” TBXI file and placed it directly on a FAT filesystem as \ppc\bootinfo.txt for OpenBIOS to load it on boot.

So with that I could get the Trampoline running. I decided that I should try and apply as many patches to the image as possible as close to run-time as possible, so mostly untouched existing CD images could be used eventually.

The first issue I had was that the Trampoline makes some assumptions of the physical address space layout that are not true for this system. The physical address of a buffer gets calculated as an invalid address, so I patched that to an address guaranteed to be valid, and also the corresponding code setting up the memory chunk list/page table entries for the kernel.

Additionally, the Trampoline expects that physical addresses from 0x8000_0000 onwards corresponds to memory mapped I/O (on existing systems this code ran on, this would correspond to PCI-bus address space). This is not the case here, and in fact on Wii U, this address would correspond to part of RAM. There was also another assumption that broke on these systems, with holes between areas of RAM in the physical address space, some of which were partially filled by memory-mapped I/O.

The way I fixed this was to patch the initialisation of this MMIO mapping in the kernel memory chunk list, to a map of physical address 0x0100_0000 (partway through one area of RAM) to virtual address 0xE000_0000, with length 0x1000_0000. This specifically maps the whole of the MMIO, plus the end of one RAM area and (for post-GameCube systems) the start of another. (I may change this in future, as on the Wii U, physical address range 0xD000_0000-0xEFFF_FFFF is mapped to a part of the Radeon R7xx GPU called “HDP”, which can be used to map a view of physical memory with specific swizzling and/or endianness swapping, such that a texture in some GPU-specific format can appear to be a linear framebuffer. It depends on whether I need to use this block ) The function used for initialising a mapping in the Trampoline changed at some point and I ended up detecting the older version and hooking the function so I could work around it (earlier versions used a 16-bit page count, later versions used 32-bit). Additionally, older versions of the Trampoline sets up unconditional 1:1 mappings for physical memory above 0x8000_0000, which needs to be removed as they conflict with the mappings set up earlier.

There follows various assorted patches that assume specific hardware. These include: patching out setting some bitflags which correspond to the presence of a microcontroller found on all PowerPC Macintosh hardware, attempting to recalculate the bus frequency using a specific hardware timer, and various register writes and fixups related to a specific interrupt controller device (it’s little endian because it’s on the PCI bus, and naturally, not present here).

Finally, the final call to jump into the loaded kernel initialisation code is hooked so additional patches can be made later after everything is loaded into memory.

Additionally, the device tree must be hacked up a bit to be in a shape the Trampoline will accept. The interrupt controller is faked to be one of the recognised ones (the little endian one from above, because at a register level it’s closest to the Flipper interrupt controller present on all the ArtX chipsets, albeit on Wii U it was changed somewhat to add support for the additional PowerPC cores). The address of the frame buffer in the device tree is changed to the uncached virtual address (in the 0xExxx_xxxx mapping), and finally a fake Mac99-compatible power management device is added to the device tree, so the Trampoline prepares a power management driver for it, that can be replaced later.

As mentioned above, the kernel initialisation is hooked so extra patches can be made. On the kernel side, there is only one patch to be made: the kernel contains several interrupt controller drivers, the one chosen is patched to match the Flipper interrupt controller, with one of the unused ones sacrificed to gain more space for this. The main difference here is that the expected interrupt controller (whose driver is patched) has a legacy mode where it raises a PowerPC interrupt whenever the interrupts change (not just when interrupts are raised) so this needs to be worked around by masking the raised interrupts in the kernel and then unmasking them later on in drivers’ interrupt handlers.

Additional patches are made in the “SuperMario” m68k code, and in PowerPC native executables. The m68k code has various codepaths that read and write directly to native interrupt controller registers, these need to be patched. The function pointers for enabling and disabling audio interrupts need to be stubbed out (there’s already an entry in that table that points to a stub, which is helpful). A function called early in the boot process to initialise the ADB and power management microcontroller does not check if the hardware actually exists, and if it doesn’t it clobbers parts of low memory. A function for initialising hardware interrupts has a bug due to a copy-paste blunder, the intent was to skip past the code for initialising the interrupt for serial port 2 if the hardware isn’t present, but the developers forgot to change the jump label when copy-pasting the code from serial port 1, which causes an infinite loop if serial port 2 doesn’t exist. As for native code, there’s more code that reads and writes to interrupt controller registers which needs to be correctly patched. The USBShimKeyboard driver initialisation code fails to handle the state where no USB controller exists and in that case will call a NULL pointer inside the m68k emulator. The power management driver mentioned above is also replaced entirely here (currently I use the stub driver from BlueBox but plan to write my own later to add proper support for shutting down and restarting).

All of this is enough to get the TBXI to boot to blinking floppy – after that I wrote a display driver (thanks to Elliott Nunn for his virtio driver, it was very helpful) so I could see it correctly, followed by a driver for the gamecube controller ports (porting from my NT driver for the same) so I could move the mouse cursor around without USB.

At this point I started to implement a block IO driver (for EXI devices), but ended up getting stuck thinking about how to deal with how the disk format should be laid out and how the driver should work. Then Mac OS for CHRP got dumped, and I got sidetracked with patching up the later TBXI images to boot it, thinking running 7.x would be useful on a GameCube which doesn’t even have enough RAM to support 8.0 at minimum requirements, and after that I got sidetracked with other projects. Almost a year later I came back to it, implemented my preferred disk format in OpenBIOS and decided to hack up a driver faking SCSI (some other drivers did this, most notably classic Mac OS drivers for various SATA controllers). There were a few issues I found when writing the fake-SCSI driver too: I had to add another patch to the m68k code to force loading the disk driver (and I mean this, a driver loaded from the disk itself, basically implementing the actual disk devices on top of some partitioned block device) as a newer type rather than the older type (the older type was effectively obsolete when the first PowerPC systems released anyway, and I don’t even support the old-style calls from my fake SCSI driver, which is probably why it crashed trying to load it as an older type driver), and also found an interesting quirk where the optical disc driver (loaded from the block device itself) emulates 512-byte sectors on 2048- or 2352-byte sector block devices by making a read call setting up 3 scatter-gather buffers, except it never checked if the underlying SCSI driver actually supports scatter-gather, so I had to implement support for that on reads.

I still saw a blinking floppy though, some debugging showed me what was being rejected, a PowerPC function StartLib!GetStartupDevice was being called to get the boot device, and it made some assumptions of both the device tree and that there was some kind of built in SCSI device that needed separate handling. The first one was simple enough (fix the device tree in my driver’s initialisation code), the second one was more interesting in that I had to grovel into internal structures to fix an index in 3 different places (including the device tree) to ensure it was non-zero and so the correct code path would be executed.

With this done I saw a happy Mac icon for the first time, but then got rejected by the HFS boot sector (something errored and it returned). This turned out to be a bug in my own driver: I was debugging in dolphin with a hacked up EXI-IDE device; reading and writing data in PIO mode for IDE devices deals in 16-bit words, and I didn’t expect my code to get passed a completely unaligned odd buffer address (low 4 bits equal to 1), so I had to modify my low level driver to not even attempt EXI DMA for such an address. The bug manifested as a byte effectively failing to be written out, with remaining data getting offset by one byte; at least this happened when reading the header of a resource fork, and what failed was the validity checks for this data, making it much easier to debug (I ended up dumping RAM and comparing with the expected data from the disk image I was using).

After this, Mac OS 9.2.2 started to boot in my hacked up Dolphin tree, very slowly. It took an hour before it finally crashed, and then I tried 7.6, which also crashed, but earlier. I realised that it was probably crashing trying to load MacsBug, removed it, and after about 20 minutes I was staring at the desktop.
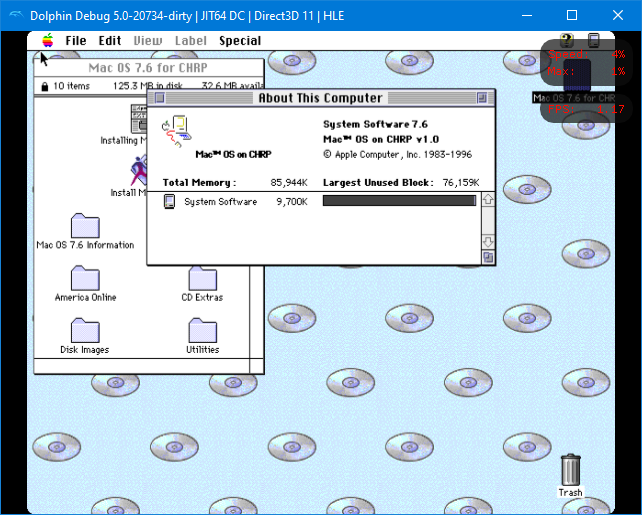
Mac OS 7.6 booted in my hacked up Dolphin tree

The following morning I tested on real hardware (using SD over SPI). This basically booted 7.6 within 40 seconds, and this was supposed to be the slowest access mode for an SD card! My previous experience was writing an NT driver for SD over SPI though, and perhaps that is more of an outlier. See this video installing NT on a GameCube using such a block device, and note that the NT text setup file copy is sped up 64 times – it’s VERY slow. The difference here is that I get to hog the whole CPU when performing a transfer – in fact there’s no other option, if I return a value specifying the transfer is asynchronous, the caller proceeds to busy-wait for interrupts in a loop waiting for the transfer to complete (although the busy-wait does check for all controllers present on the system).

Later on I added some hacked up crash handler so I could try to debug what was going on with MacsBug… it turned out to be an emulation error, no such crash occured when loading MacsBug on real hardware. I then found out the reason Mac OS 9.2.2 was crashing on boot was because of Open Transport, removing it from the Extensions folder caused it to boot perfectly fine. My guess is that Open Transport can’t handle no serial or network device being present at all.

As I mentioned, my port is still nowhere near release. Next up will be bringing up the Wii’s SD controller, then the USB controller (I’ve already done some reversing work related to that, I know there’s a vibecoded EHCI driver now, that’ll probably only aid in reversing work really), then getting the port brought up on the Wii U. At some point I want to play around with patches for blowing through at least some of the RAM barriers too.
A quick video on installing Windows NT 4.0 with Wack0’s maciNTosh 0.05

First, I have to say it works incredibly well!

The biggest gotcha seems to be that the MSDE/Visual C++ 4.0 studio crashes. And pinball doesn’t work. Very possible some issue with the dingus PowerMac emulator.

For anyone wanting to follow along, I put the CD-ROM Image on archive.org:

https://archive.org/details/nt40wks-en_grackle_0.05

Along with everything needed for dingusppc:

https://archive.org/details/dingusppc

And I run it simply run it as:

dingusppc.exe -r -m imacg3 -b imacboot.u3 --rambank1_size=128 --hdd_img=2000.disk --cdr_img=nt40wks-en_grackle_0.05.iso

I did add some quality-of-life updates including:

  • Service Pack 2 for Windows NT
  • Internet Explorer 3.0
  • Wx86 (run limited x86 binaries on PowerPC)
  • Info Zip/Unzip
  • Neko 98
  • DooM
  • Neko Project II 
  • Command line Visual C++ 4.0

I’ve tried to port MAME 0.36 & Fallout1-RE, but both I’m having some DirectX issues. I’m honestly surprised MAME links. It’s getting harder and harder to find those old win32 update packages for MAME. Not sure anyone saved them?

Windows NT 3.51

And as a bonus, for those wanting 3.51, I’ve also setup a CD-ROM with SP5:

Windows NT 3.51 Workstation for PowerPC with maciNTosh/grackle 0.05

Installation is about the same, just use the 3.x framebuffer driver.

Patreon

I also want to give a huge thanks to the fine folks over on my Patreon for helping to finance stuff like this:

B&W G3 incoming!

With any luck, it’ll get me to a native experience, and allow for some debugging!

Rairii’s incredible port of ARC & Drivers for NT PowerPC to G3 Macintoshes

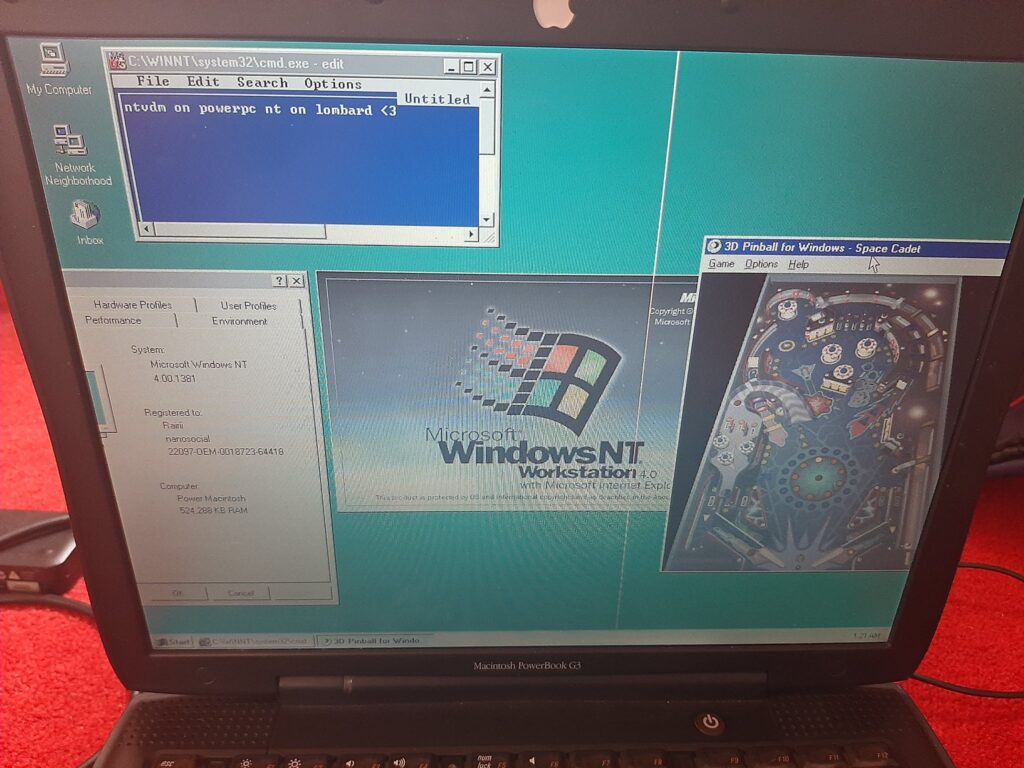
Windows NT on a Macintosh Powerbook G3 (Lombard)

This has been a rush of excitement! Rairii published their port of the ARC & Drivers needed to get NT 4.0 working on commodity PowerMac hardware over on github. And what about running it under emulation? Once more again Rairii provided a custom fork of dingusppc, again over on github!

A custom CD-ROM worked best (for me?!) for installation, combining the ARC & Drivers, along with a copy of Windows NT Workstation onto a single disc. Rairii provided the magical recipie for creating the ISO:

genisoimage -joliet-long -r -V 'NT_arcfw' -o ../jj.iso --iso-level 4 --netatalk -hfs -probe -map ../hfs.map -hfs-parms MAX_XTCSIZE=2656248 -part -no-desktop -hfs-bless ./System -hfs-volid NT/ppc_arcfw .

And the needed hfs.map:

# ext.  xlate  creator  type    comment
.hqx    Ascii  'BnHx'   'TEXT'  "BinHex file"
.sit    Raw    'SIT!'   'SITD'  "StuffIT Expander"
.mov    Raw    'TVOD'   'MooV'  "QuickTime Movie"
.deb    Raw    'Debn'   'bina'  "Debian package"
.bin    Raw    'ddsk'   'DDim'  "Floppy or ramdisk image"
.img    Raw    'ddsk'   'DDim'  "Floppy or ramdisk image"
.b      Raw    'UNIX'   'tbxi'  "bootstrap"
BootX   Raw    'UNIX'   'tbxi'  "bootstrap"
yaboot  Raw    'UNIX'   'boot'  "bootstrap"
vmlinux Raw    'UNIX'   'boot'  "bootstrap"
.conf   Raw    'UNIX'   'conf'  "bootstrap"
*       Ascii  '????'   '????'  "Text file"

I went ahead and made the image, and added in Service Pack 2, Internet Explorer 3 and IIS3 onto the same CD-ROM to make things easier for me to deal with. It’s on archive.org.

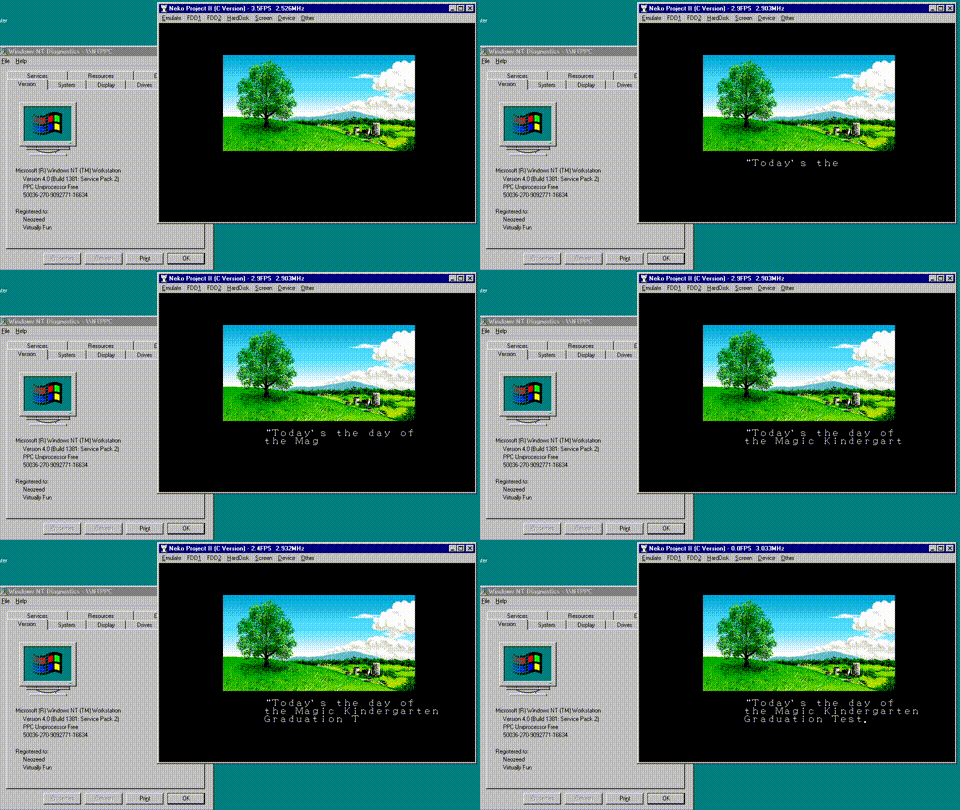
On Discord and impromptu porting session broke, out and we got NP21 up and running!

NP21

Unfortunately, it is very slow. I have no idea how it performs on real hardware, it’s entirely possible that it really is unplayable. It’s still pretty amazing that the OS booted up and I could actually compile something!

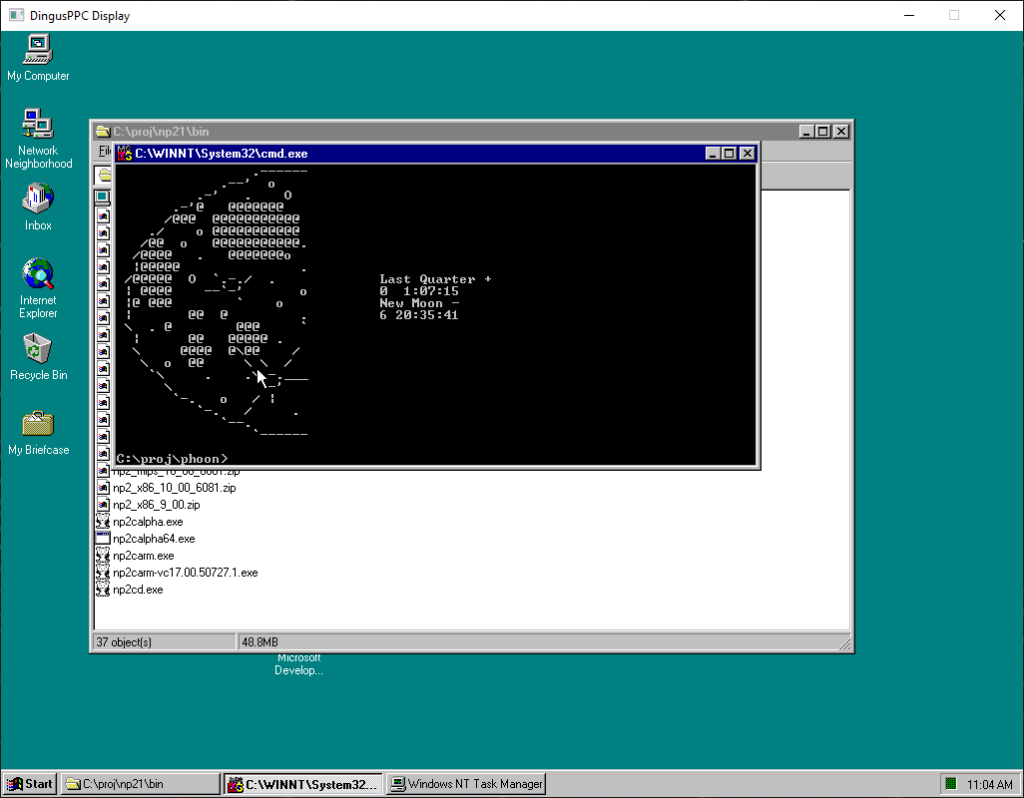
Even the usual fun text mode stuff from Phoon, Infocom’87, F2C, compiled!

Phoon!

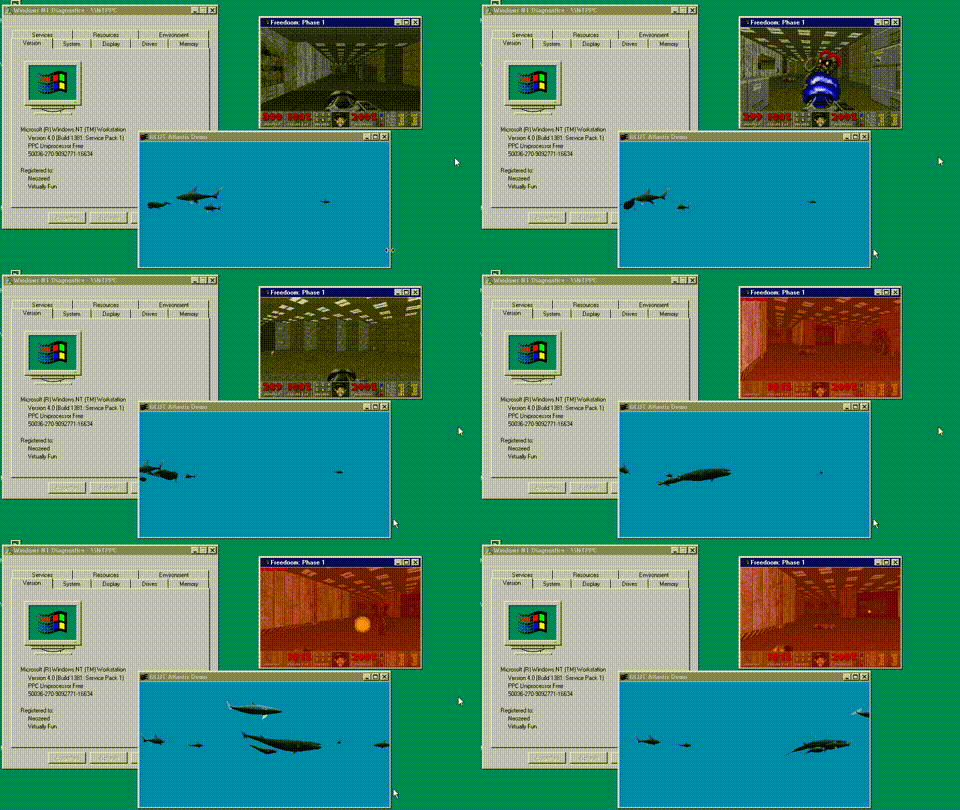
But will it run DooM?

DooM & Atlantis

Of course, it runs! I’m using the 32bit C code from Sydney (ChatGPT), which runs just great.

Into 3D space

I was able to compile GLuT on the way to try to build ssystem but there is two textured OpenGL calls missing, meaning that the more fun OpenGL stuff simply will not work.

Setting expectations

As a matter of fact, lots of weird stuff doesn’t work, the install is very touchy so don’t expect a rock-solid experience, but instead it was incredibly fun to try to get a bunch of stuff up and running.

Thanks again to @Rairii for all their hard work! This is beyond amazing!

— it’s 3am and I’m exhausted, but I had to share this out some how some way!

NT ON PowerPC! It’s happening!

In Defense of the Mac Pro 2023

guest post by neozeed‘s nephew

There are a few reasons to get an M2 Mac Pro and although many will say the Studio is a better buy for value: that’s only true if you’re not after these important considerations:

  • The ability to install your own *bootable* SSD: nearly every major Mac reviewer ignored this insanely important feature.
  • The ability to install internal storage (and go beyond 8 TB), period: do we really want a cocktail of external HDDs attached? I don’t!
  • The ability to install an internal USB A licensing dongle: unless you’re sharing your dongle over the network with 3rd party software from an RPi hiding in a closet (you should try VirtualHere if you want cross-platform dongle sharing it’s great), you don’t want to accidentally shear it off costing thousands of dollars of lost licensing.
  • The Magic Keyboard and (black) Magic Mouse are bundled (this is not the case with the Mac Studio or the MacBook Pro adding a substanstial cost. However, since the AppleCare+ is more expensive for the Mac Pro over the Mac Studio you could argue these costs cancel themselves out… unless you’re Icarus with a wax wallet instead of wax wings and never purchase AppleCare+).

Recently ‘GoFetch’ made the headlines, but it’s irrelevant for a variety of reasons in my opinion: 1) you won’t have WAN-exploitable instances of GoFetch in the real world, 2) it does indeed affect some Intel processors and probably others. The way all processors are designed now with speculative execution, CVE-after-CVE is unavoidable so the sensationalization has worn out its appeal. Even the once-ironclad AMD processors are afflicted with a bunch of nasty CVEs now too. \rant

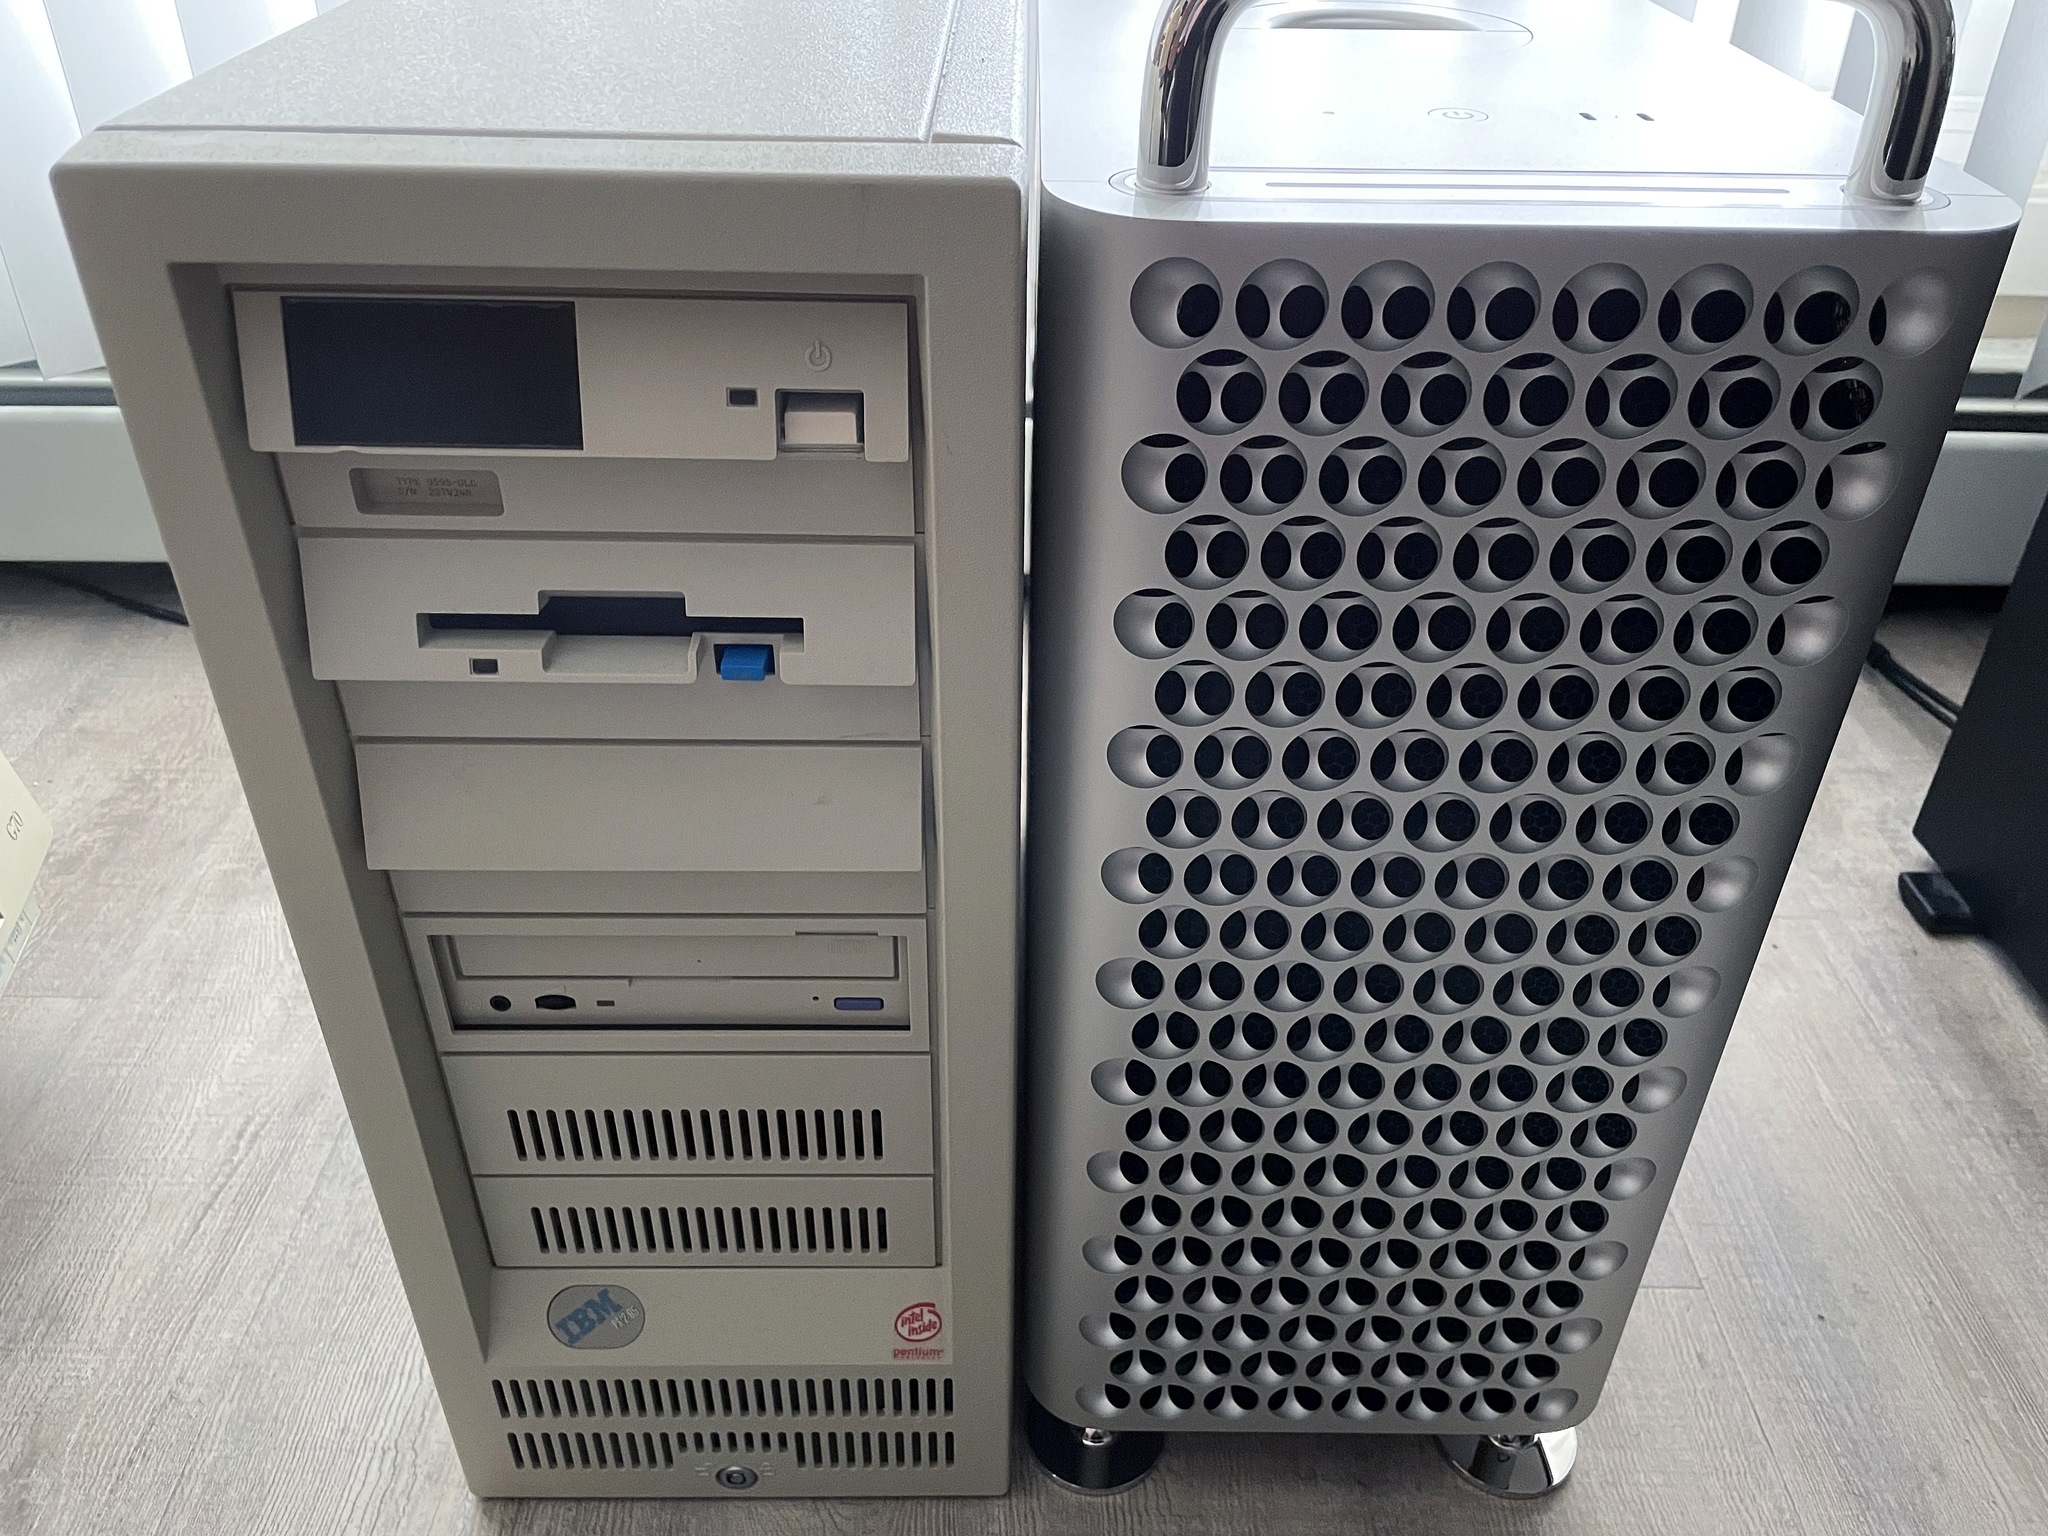
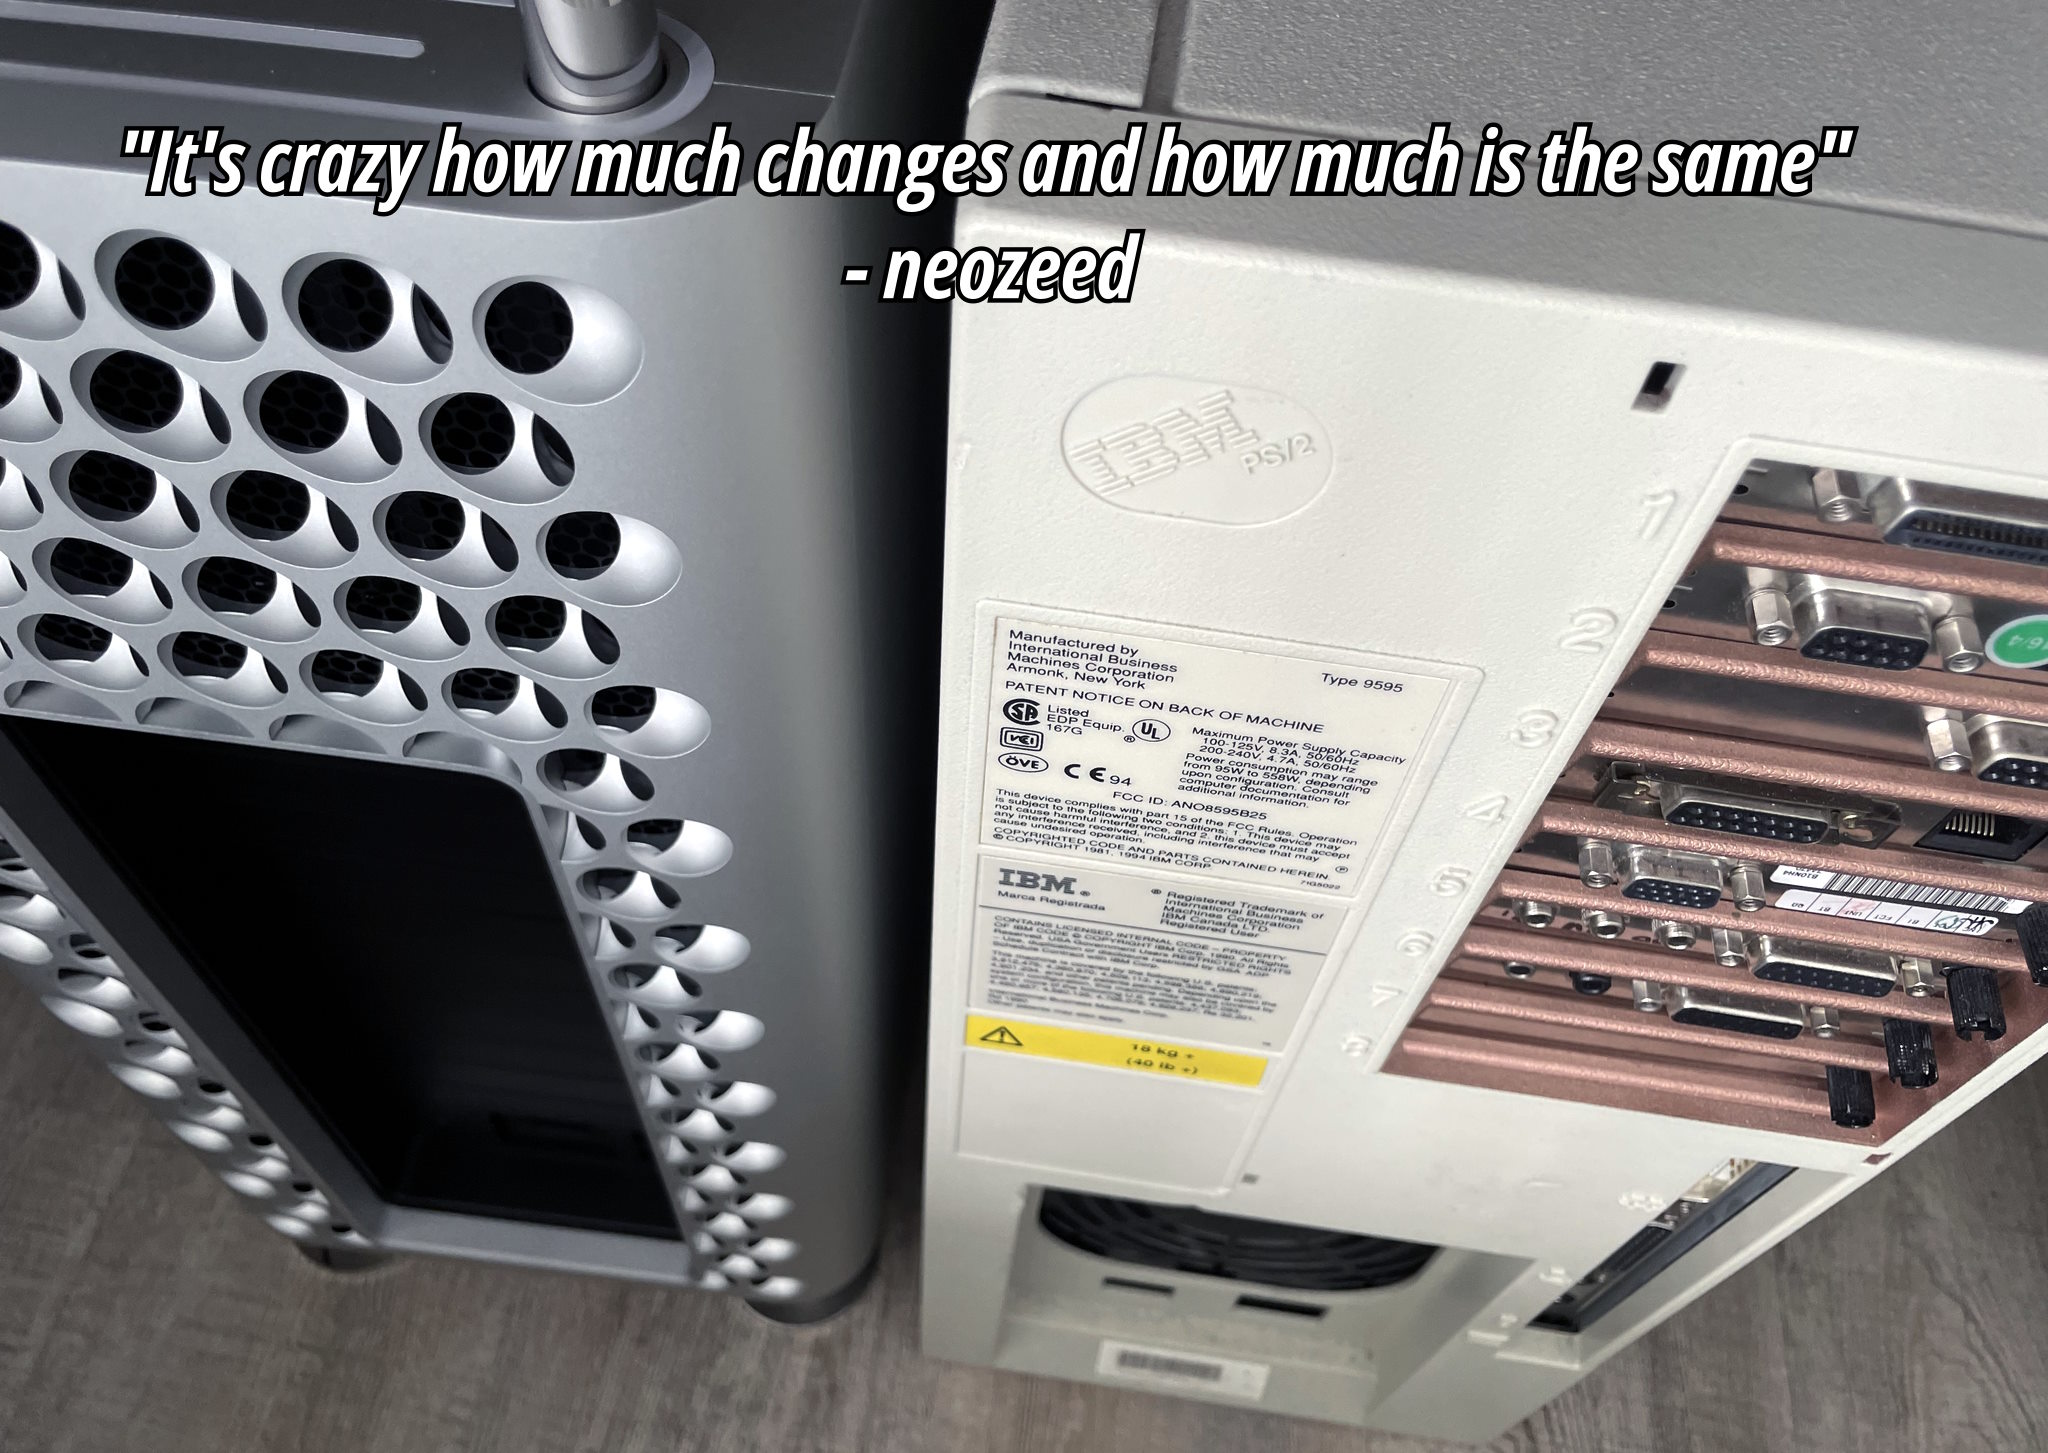
Mac Pro vs PS/2 Model 95

After an eye-watering $8000: refurbished base model with AppleCare+ ๐Ÿคฎ๐Ÿ’ธ๐Ÿ’ธ, we’re greeted with our new friend. The Cheese Grater (2023 Mac Pro) has befriended the Ardent Tool of Capitalism (PS/2 Model 95)! It’s odd how both share silly nicknames and a very similar height sans handles. Both systems symbolize the same sentiment that Louis Ohland shared many years ago: “Think of a business computer being used for purely personal reasons. Fist pump at the man! Isn’t using a corporate tool because you can an expression of free will?”*

*Louis Ohland is the guy who nicknamed the PS/2 Model 95, the Ardent Tool of Capitalism.

Q&A

Q: will I grate cheese on both of them?

A: only if you clean up the cheese residue for me. Are Personal System/2s even food-safe???

Storage

Sonnet M.2 4×4 NVMe PCI-e

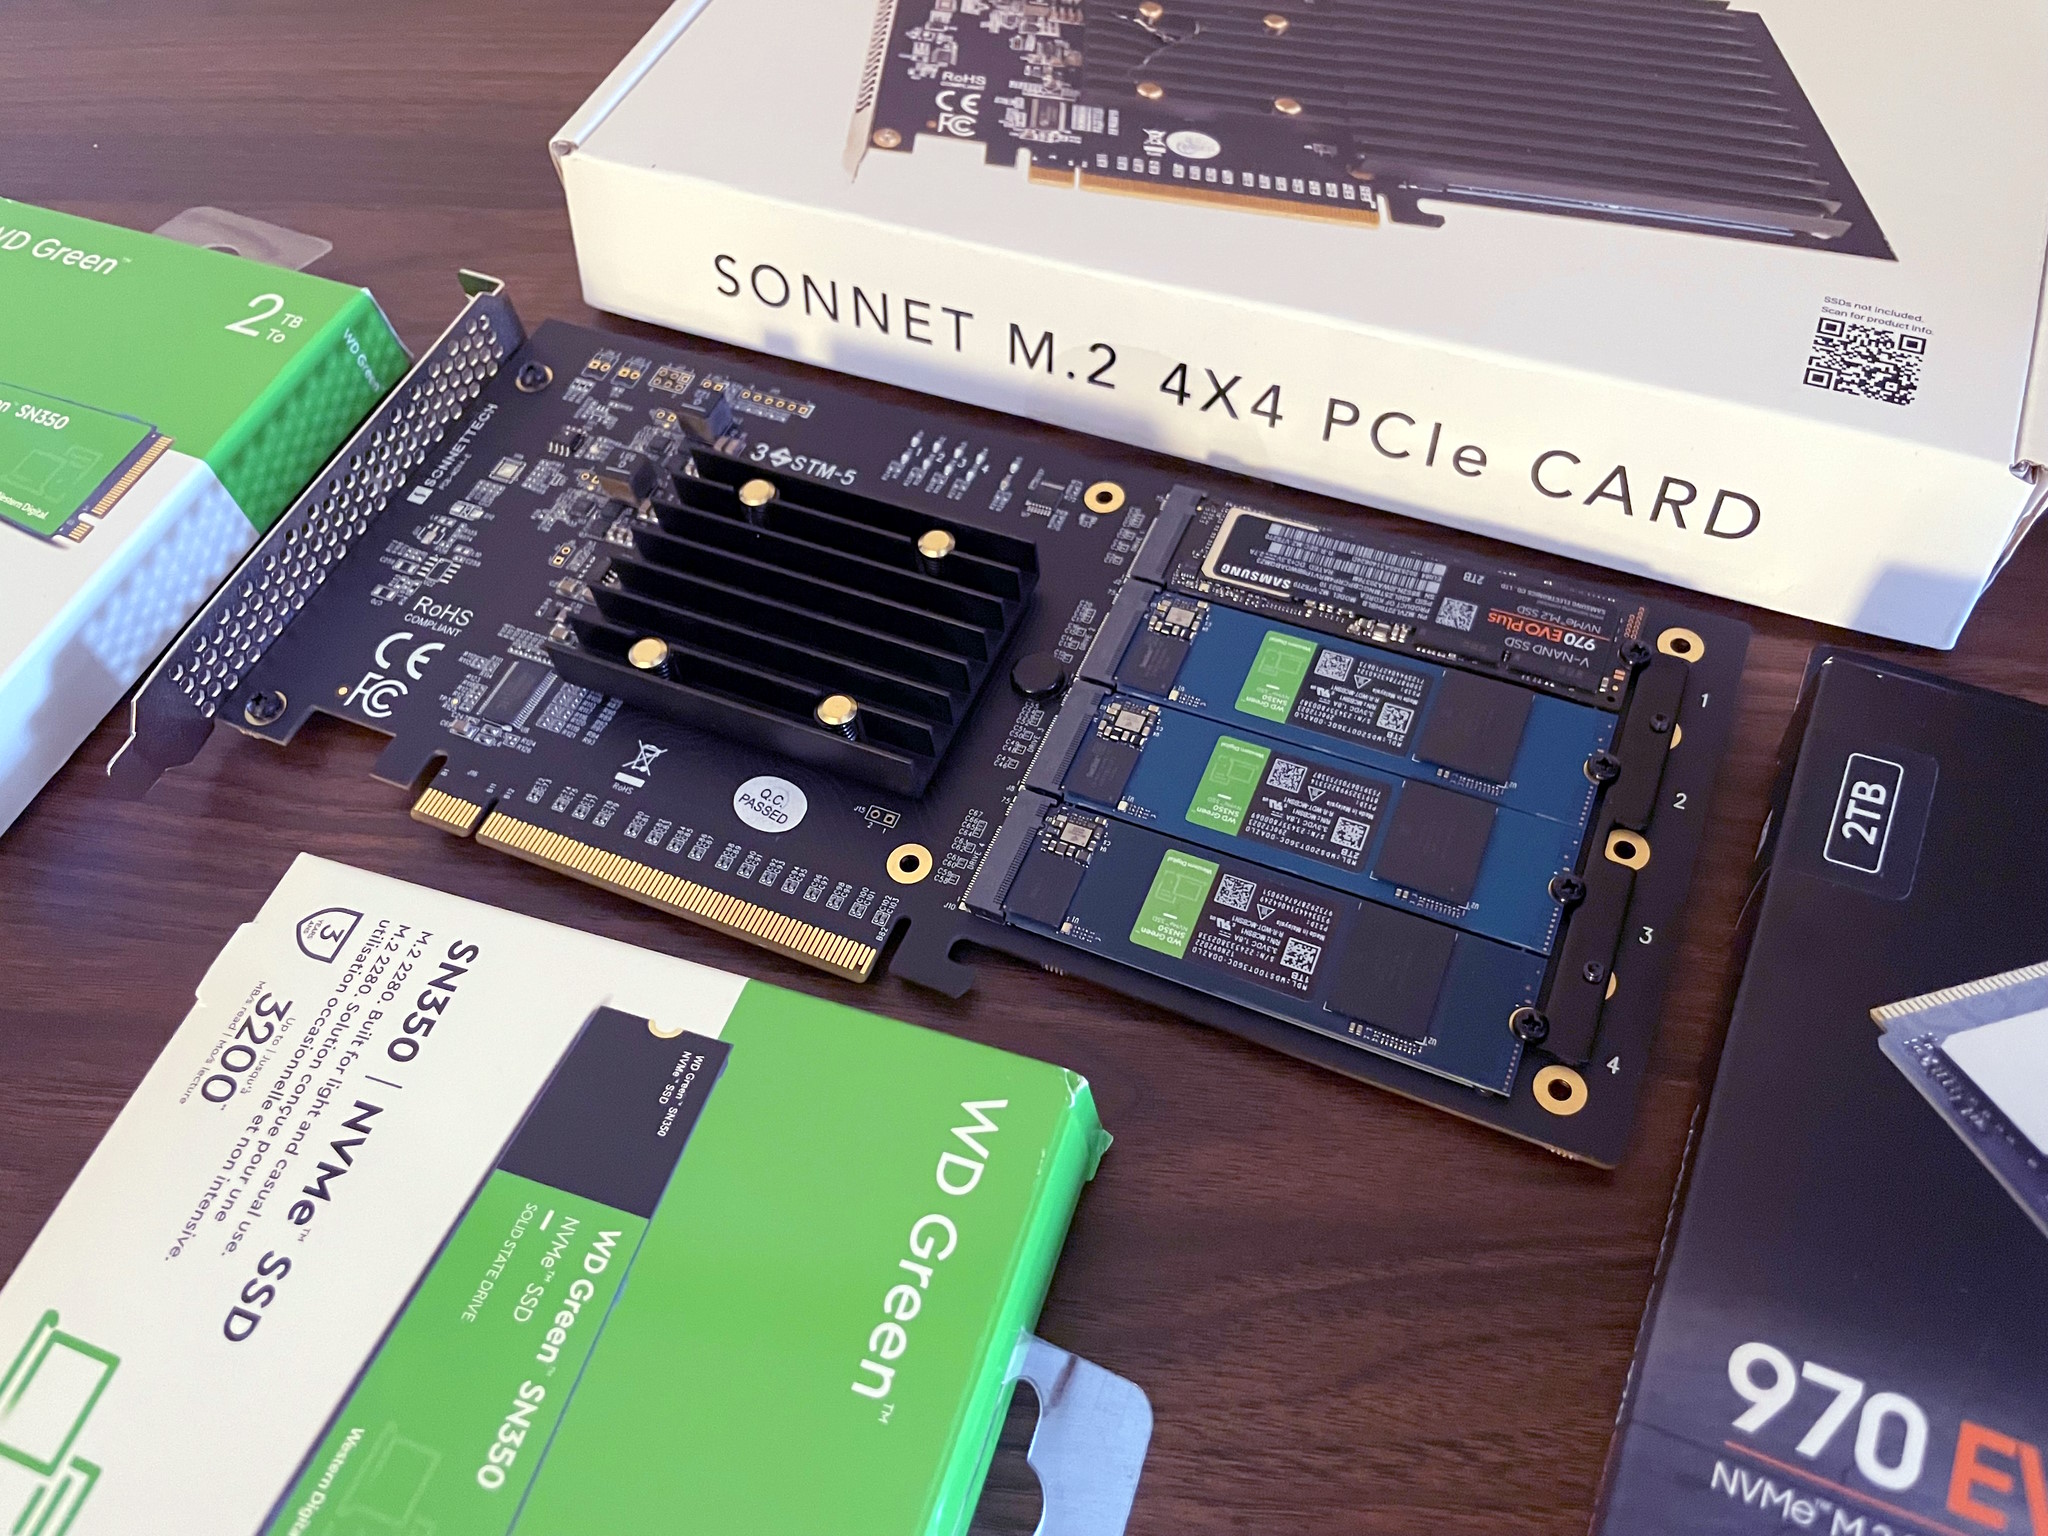
The first thing we’ll need to do is install an NVMe PCI-e card. I’m going with the overly-priced “Sonnet M.2 4×4”, because the 2×4 card is nearly the same price making it a horribly valued product and we may as well expand this thing with four NVMes to get our money’s worth. It’s not really clear if the Sonnet M.2 4×4’s controller outperforms the Sonnet M.2 2×4 (they don’t use the same one), but both operate on gen 3 and the NVMes themselves are gen 3 so none of it really matters. There are much cheaper NVMe PCI-e cards but most are not compatible with Macs, you’re paying the tax for the fancy firmware… otherwise buy a much cheaper card if you’re on Windows or Linux. The card only came in a pink ‘static suppressant bag’ instead of a true antistatic bag which is laughable at how much sonnet is charging, and Amazon appears to have taken a bite out of the box.

For the primary boot NVMe we’re going with a 2TB 970 EVO Plus. I know Louis Rossmann decried them as being unreliable after he torched a bunch in some custom gaming rigs with sketchy PSUs, but they’re good drives if you don’t kill them with dirty PSU voltage rails. Always use quality PSUs folks. This is why many Maxtors failed due to the ST SMOOTH chips receiving power from PSUs outputting higher than 12v, and not the drives themselves… same thing applies today when you eclipse 12v on your power rails. I’ve also been running one in a ThinkPad for more than a year and it’s been fine.

For the remaining tertiary storage we’re going with some WD Green SN350s: solely because they’re compatible with macOS — the macOS compatibility with NVMes is very specific unfortunately. Otherwise I would have went with more TeamGroup 4TB drives as they’re one of the best value for money (particularly the TM8FP4004T0C101, it uses better NANDs than the more expensive and inferior 4TB offerings from Crucial and WD). Yeah… the cost of NVMe disks isn’t absolute, sometimes cheaper ones use better NANDs and you can be fleeced by brand recognition and false-positive specs on gen4 which I imagine is what Crucial capitalizes on.

[If you don’t know what I’m talking about: the Crucial and Western Digital NVMe drives always cheap out and use QLC NANDs instead of proper TLC NANDs as TeamGroup and Samsung do; and obviously they’re not going to advertise they’re cheating you and will price their products the same as the competition. Very similar to the whole SMR/CMR debacle, why would Western Digital tell you you’re buying something cheaper at a premium cost??? Caching is an entirely different thing separate to this and usually only the Samsung drives have ‘true’ dedicated cache logic, which is why I’m using the 970 EVO Plus as a boot/OS NVMe]

reinstalling MacOS

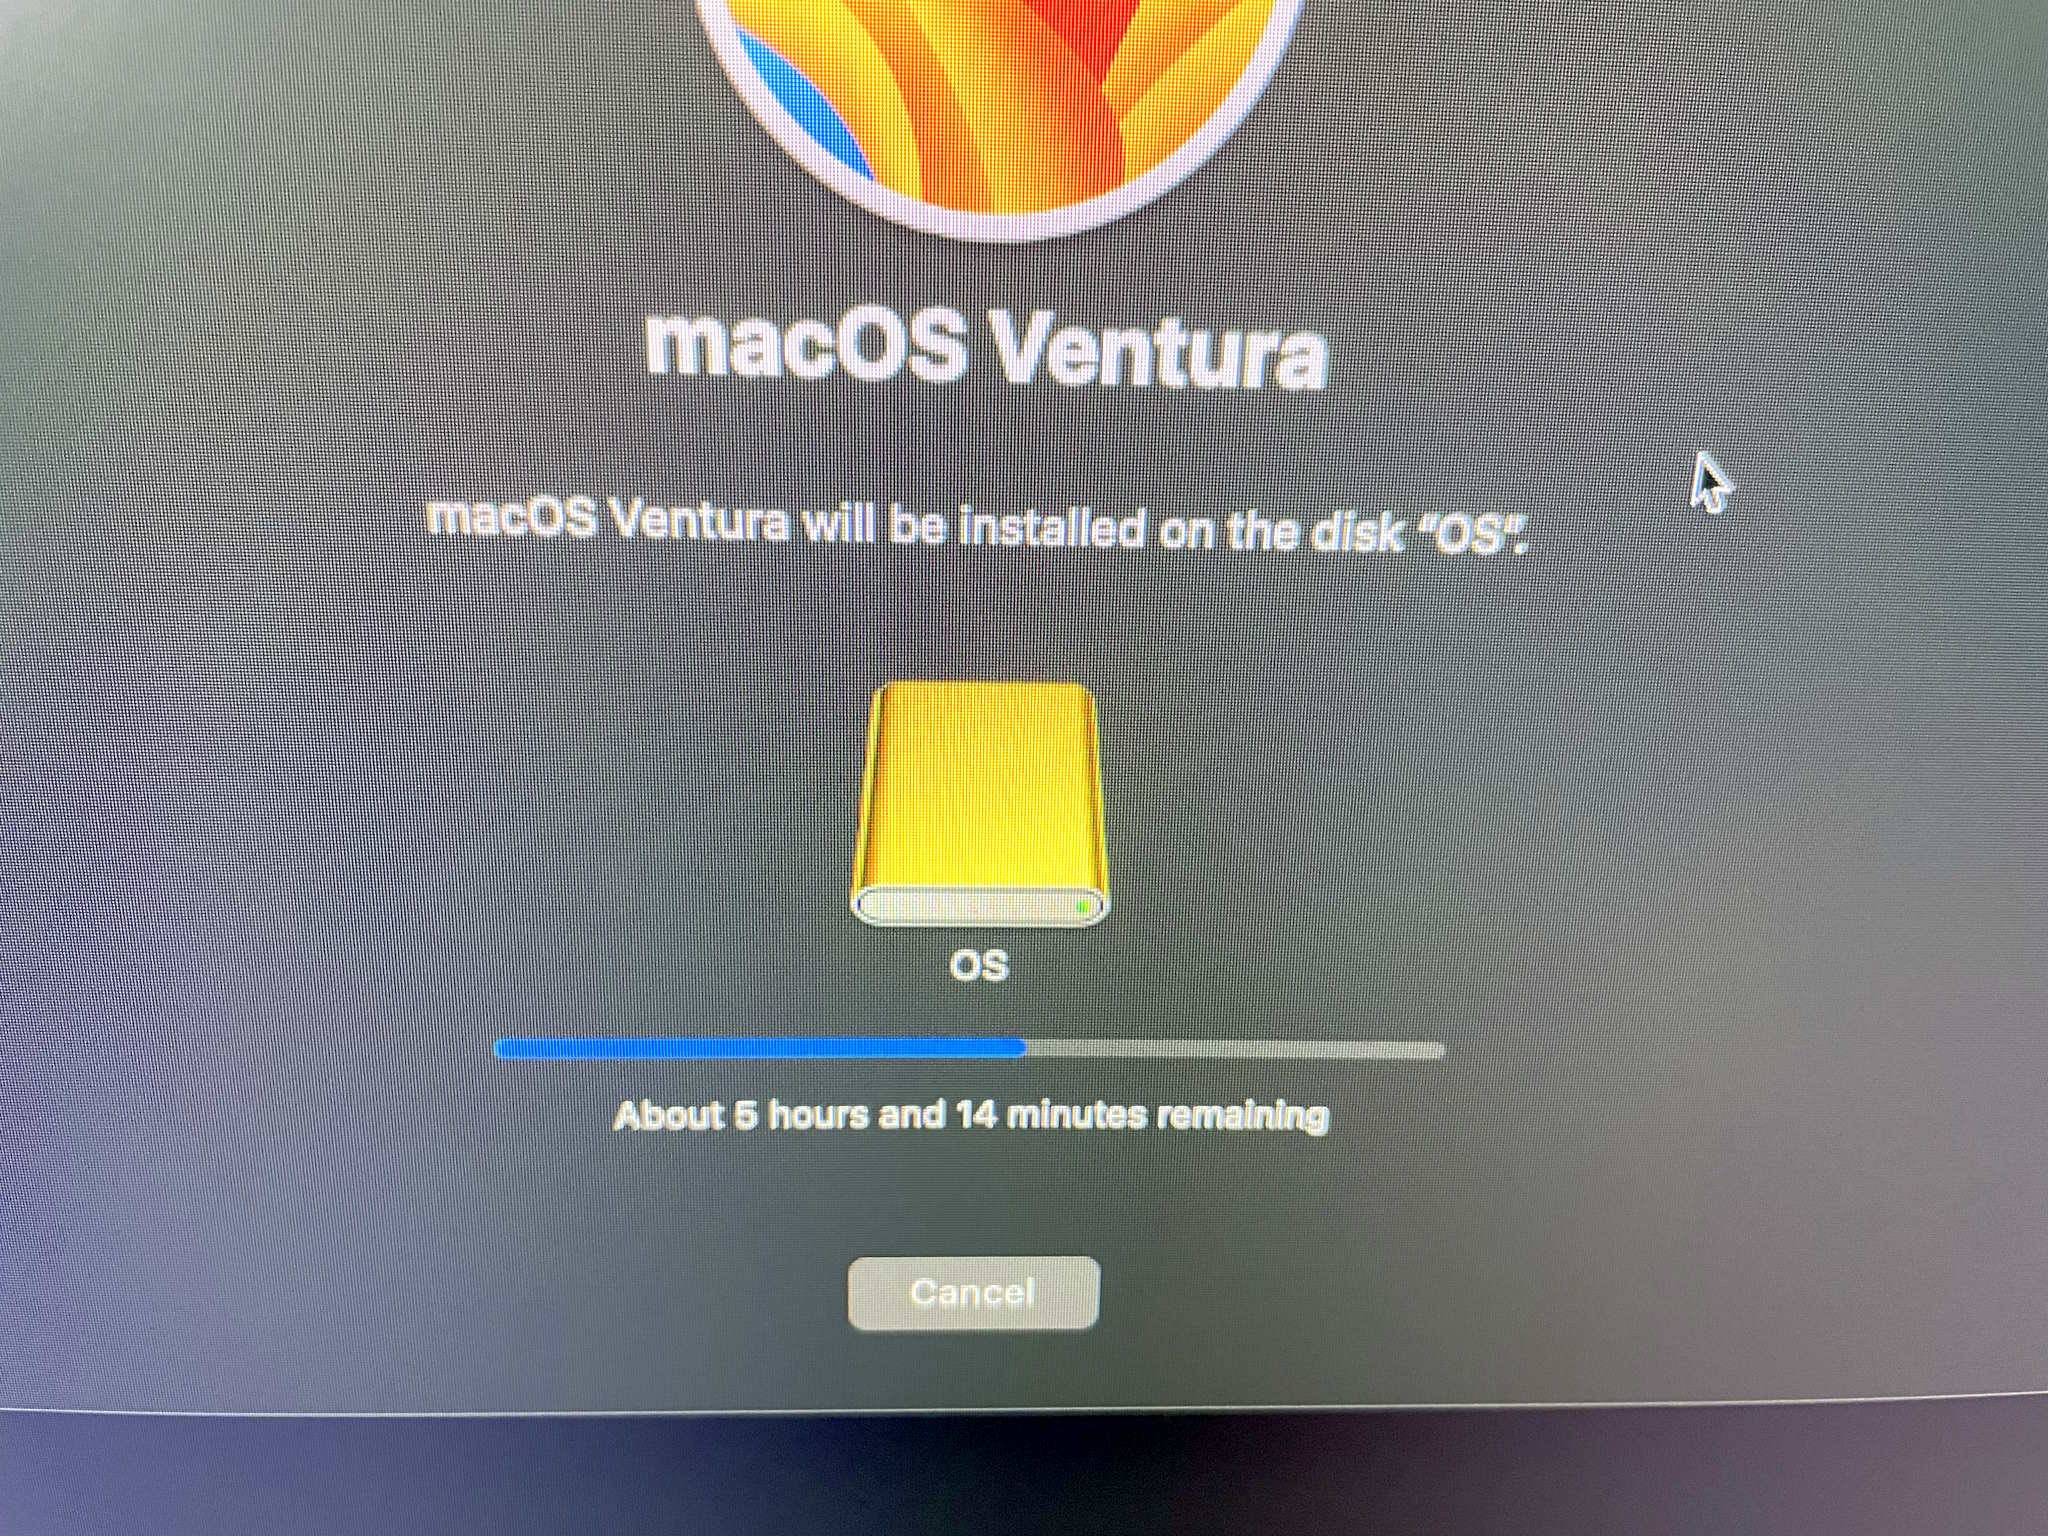
Fortunately we don’t need a second mac to perform OS reinstallation so the ‘Apple Configurator’ is not needed. The procedure is as simple as this: Press & hold power button until the recovery menu pops up, choose ‘continue’, choose reinstall OS, choose the new drive (in this case the Samsung drive I just formatted as “OS”). I know a lot of people raise an eyebrow requiring a second mac for when the system does actually need to be completely restored if it can’t boot into the internal recovery mode; just when you haven’t paid Apple enough you also need a second Mac to perform recovery and restoration. Even neozeed himself encountered this problem and with a heavy sigh (a very heavy sigh) and mild disbelief, set up a macOS VM for restoration since he only owns one. ๐Ÿ˜‚

Once this is completed we’ll no longer be using the proprietary SSD that’s present on the Mac Pro. It DOES still need to be present in the system for the computer to POST (Apple marries it against the security IC so it’s intrinsic and serialized to the computer based on configured storage), but presumably as it won’t be written to anymore it’ll never become exhausted from write cycles… and even if it did fail over time, as a result of ordering the bottom-of-the-barrel 1TB model I could just buy another ‘cheap’ 1TB card which would allow the system to resume POSTing once again. If the soldered-in RAM or CPU fails then it’s game over; as much micro-soldering as I do, I refuse to purchase even more tools to swap out underfilled BGA ICs… and then of course you have to hope employees at Foxconn actually managed to sneak out unused genuine ones to be resold on AliExpress or eBay. *sigh*

With us now being able to use our own bootable SSD, the primary failure and annoyance of ARM-based Macs is now mitigated. For the Mac Studio you could buy backup replacement SSDs to constantly replace as they wear out (they would have to match what storage size the system was preconfigured with), but keep in mind I can add 8TB cheaply and have my own bootable SSD. And in the event you need to do data recovery or read the drive on another system, anything — even your grandma’s phonograph — can read NVMes so it’s much less of a hassle. As much as I hate to say it I think the Mac Studio makes less sense over the Mac Pro BECAUSE of the storage… you’re already buying an overpriced computer, may as well go the full distance for proper storage? Everyone’s living in the honeymoon phase right now while all of the NANDs are under warranty and still functioning… but once they start failing it’ll be a nasty money pit at best, or unfixable at worst. And do you know how many people make one computer their whole life and allow it to spontaneously fail with no backups?

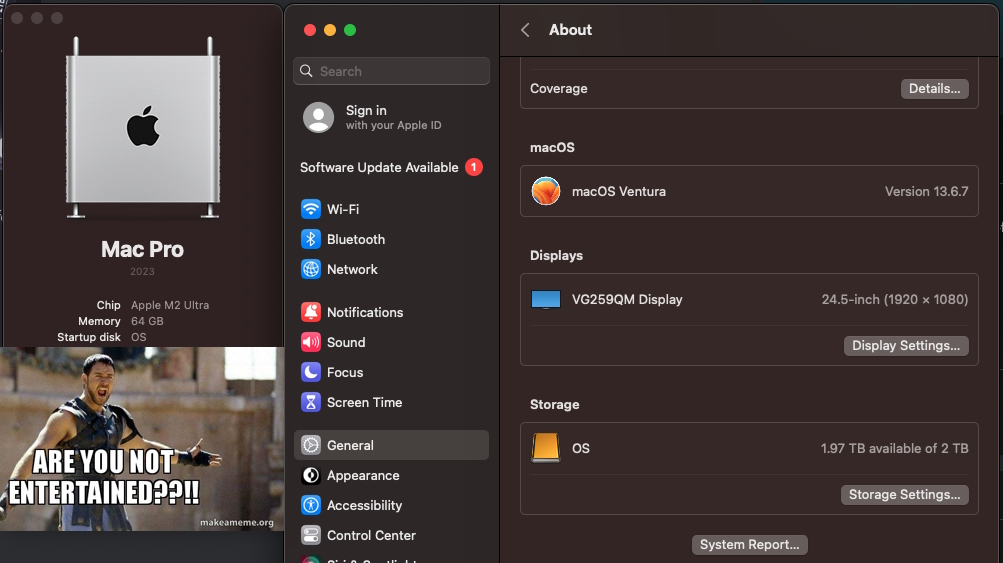
ARE YOU NOT ENTERTAINED?

An ARM-based Mac using internal NVMes, is that not a nice thing? ARE YOU NOT ENTERTAINED? And no need to pay ~$2000 for 8TB. I did have to shell out $400 for the stupid SoNNeT card and $400 for the SSDs… buuut if I paid $2000 worth of SSDs I would far eclipse 8TB. In this screenshot you can also see the ‘OS’ Samsung SSD now the primary ‘Startup disk’. Fortunately, Apple’s utility automatically switched it over after I reinstalled the OS to this drive shockingly enough, so nothing more needed even on that.

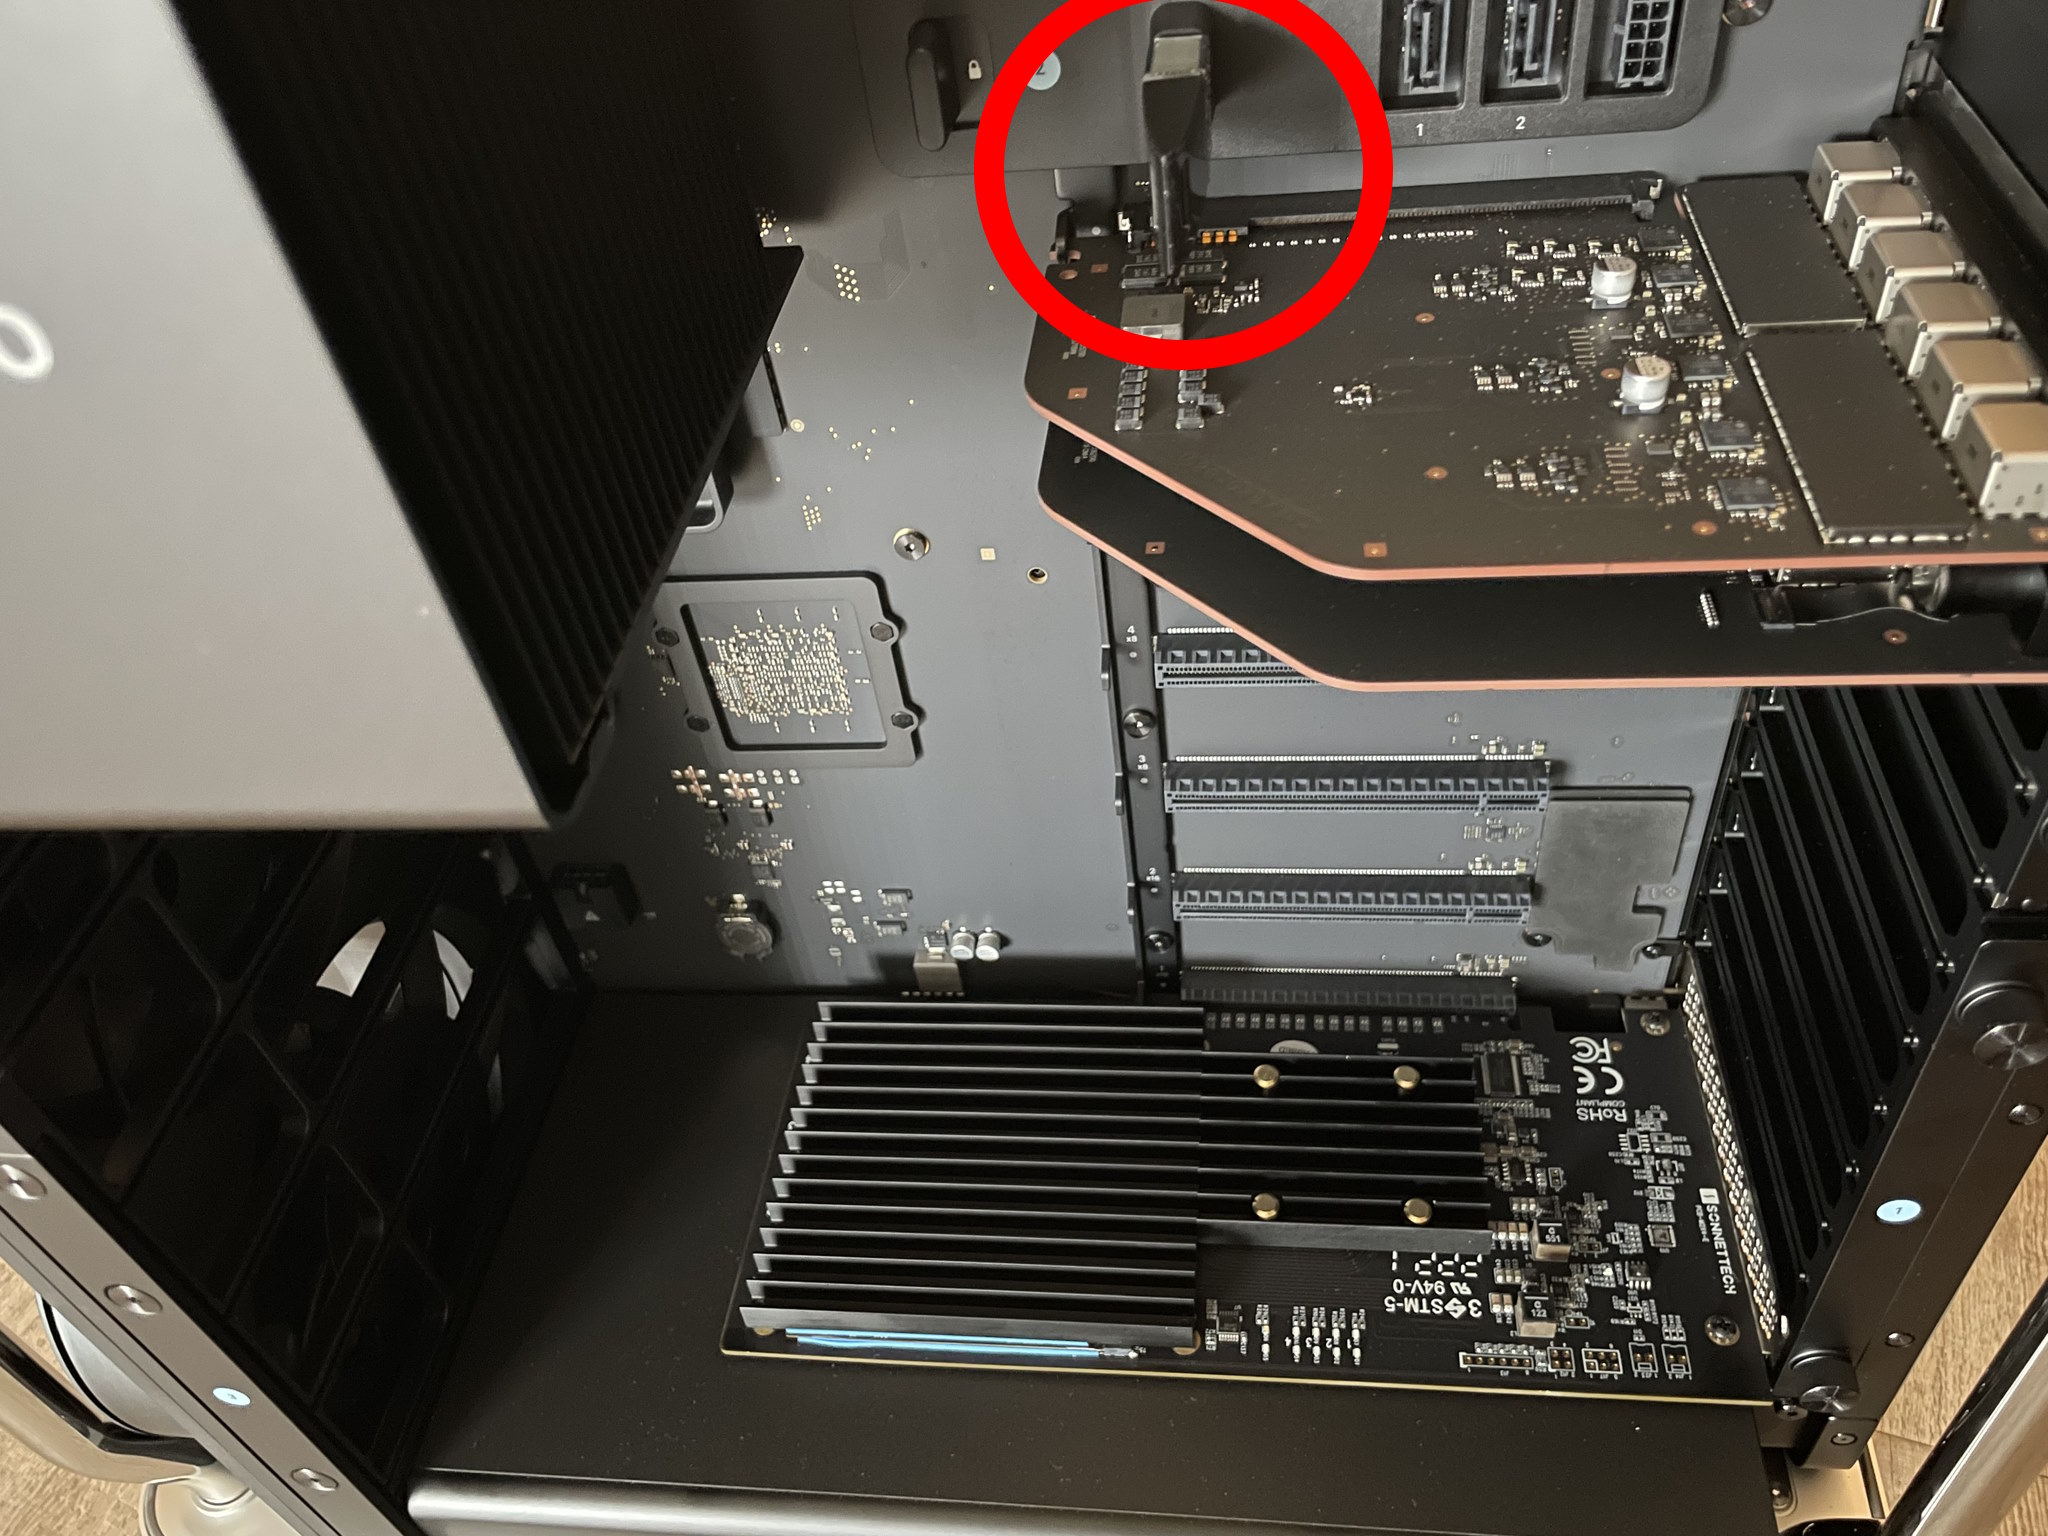
Internal USB, perfect for Dongles:

Installing the iLok dongle

The iLok licensing dongle installs nicely inside the internal USB A port. Kind of reminds me of those internal VMware USB A ports meant for the ESX installation… and then you know they’d eventually go bad or corrupt themselves and the internal IT of that company never makes a backup so then you need to reconfigure ESX from scratch… good times. What? I’m not salty, not salty at all. The Sonnet NVMe card being installed on the first slot (bottom) does seem to bring more attention to the fact there’s so many unpopulated PCI-e slots.

What should be used as the display option?

1. The Dell UltraSharp U3224KB 6K actually has a few potential compatibility problems with macOS or the hardware (it’s not really well-known as Dell support gave up troubleshooting it), so you’ll get various screen distortions. It’s also possibly one of the most UGLY products I’ve ever seen in my life… the web camera looks like a malignancy, and I absolutely can’t stand silver-painted plastic. Complain about Apple’s prices all you want, at least they use nice materials.

2. The Pro Display XDR is just a little bit too much for my taste and sometimes temperamental as it’s such a complicated display (contrary to popular mythology it does not use OLED technology so it shouldn’t burn out over time). I honestly don’t think I would encounter any problems if I bought a Pro Display XDR but the cost is too much.

It’s Free Real Estate –

3. That basically leaves us with the Studio Display. A lot of the 3rd party Samsung/ASUS/LG 4K or 5K offerings have dramatically inferior colour or a larger pixel size… and there’s still the potential aspect of compatibility since non-Apple hardware sometimes doesn’t play nicely. While the Studio Display is much-maligned with its high cost and strangely attached power plug, its DPI is the same as the Pro Display XDR you just get less screen real-estate and inferior contrast which I don’t care too much about. It will still look much better than your garden variety LG 27โ€ 4K UHD Ultrafine because the colour is calibrated very well and it gets decently bright… again… I wish YouTube reviewers would point some of these things out instead assume that every display is equivalent to Apple’s offerings when they’re not. And in the event, you do find the 5K 27″ displays from other manufacturers they’re still at 60Hz. The refurbished Studio Display I had my eye on from Apple is no longer available, so I’ll be waiting for a bit until they stock another one… or maybe they’ll get a heavily marked down Pro Display XDR…. in the meantime, I’m stuck using one of my gaming monitors which has 240Hz and strobing to reduce ghosting, which does work on macOS!.. and makes macOS look so different since I’m used to how it looks with all of the ghosting all the time.

Another little something that’s rarely discussed: the nano-texture glass option causes a slight ‘frosting’ which is especially noticeable on text… it’s only meant as a compromise if you’re working in a literal sun room, sometimes more expensive does not mean better. This is exemplified with the M2 MacBook Air situation: if you opted for the superior GPU it ended up running more slowly because of the thermal throttling so the lower-end GPU option is more performant, lol. Of course Apple doesn’t always disclose these caveats or finer details, but their divisions responsible for publishing the products may not be privy to them.

Peripherals:

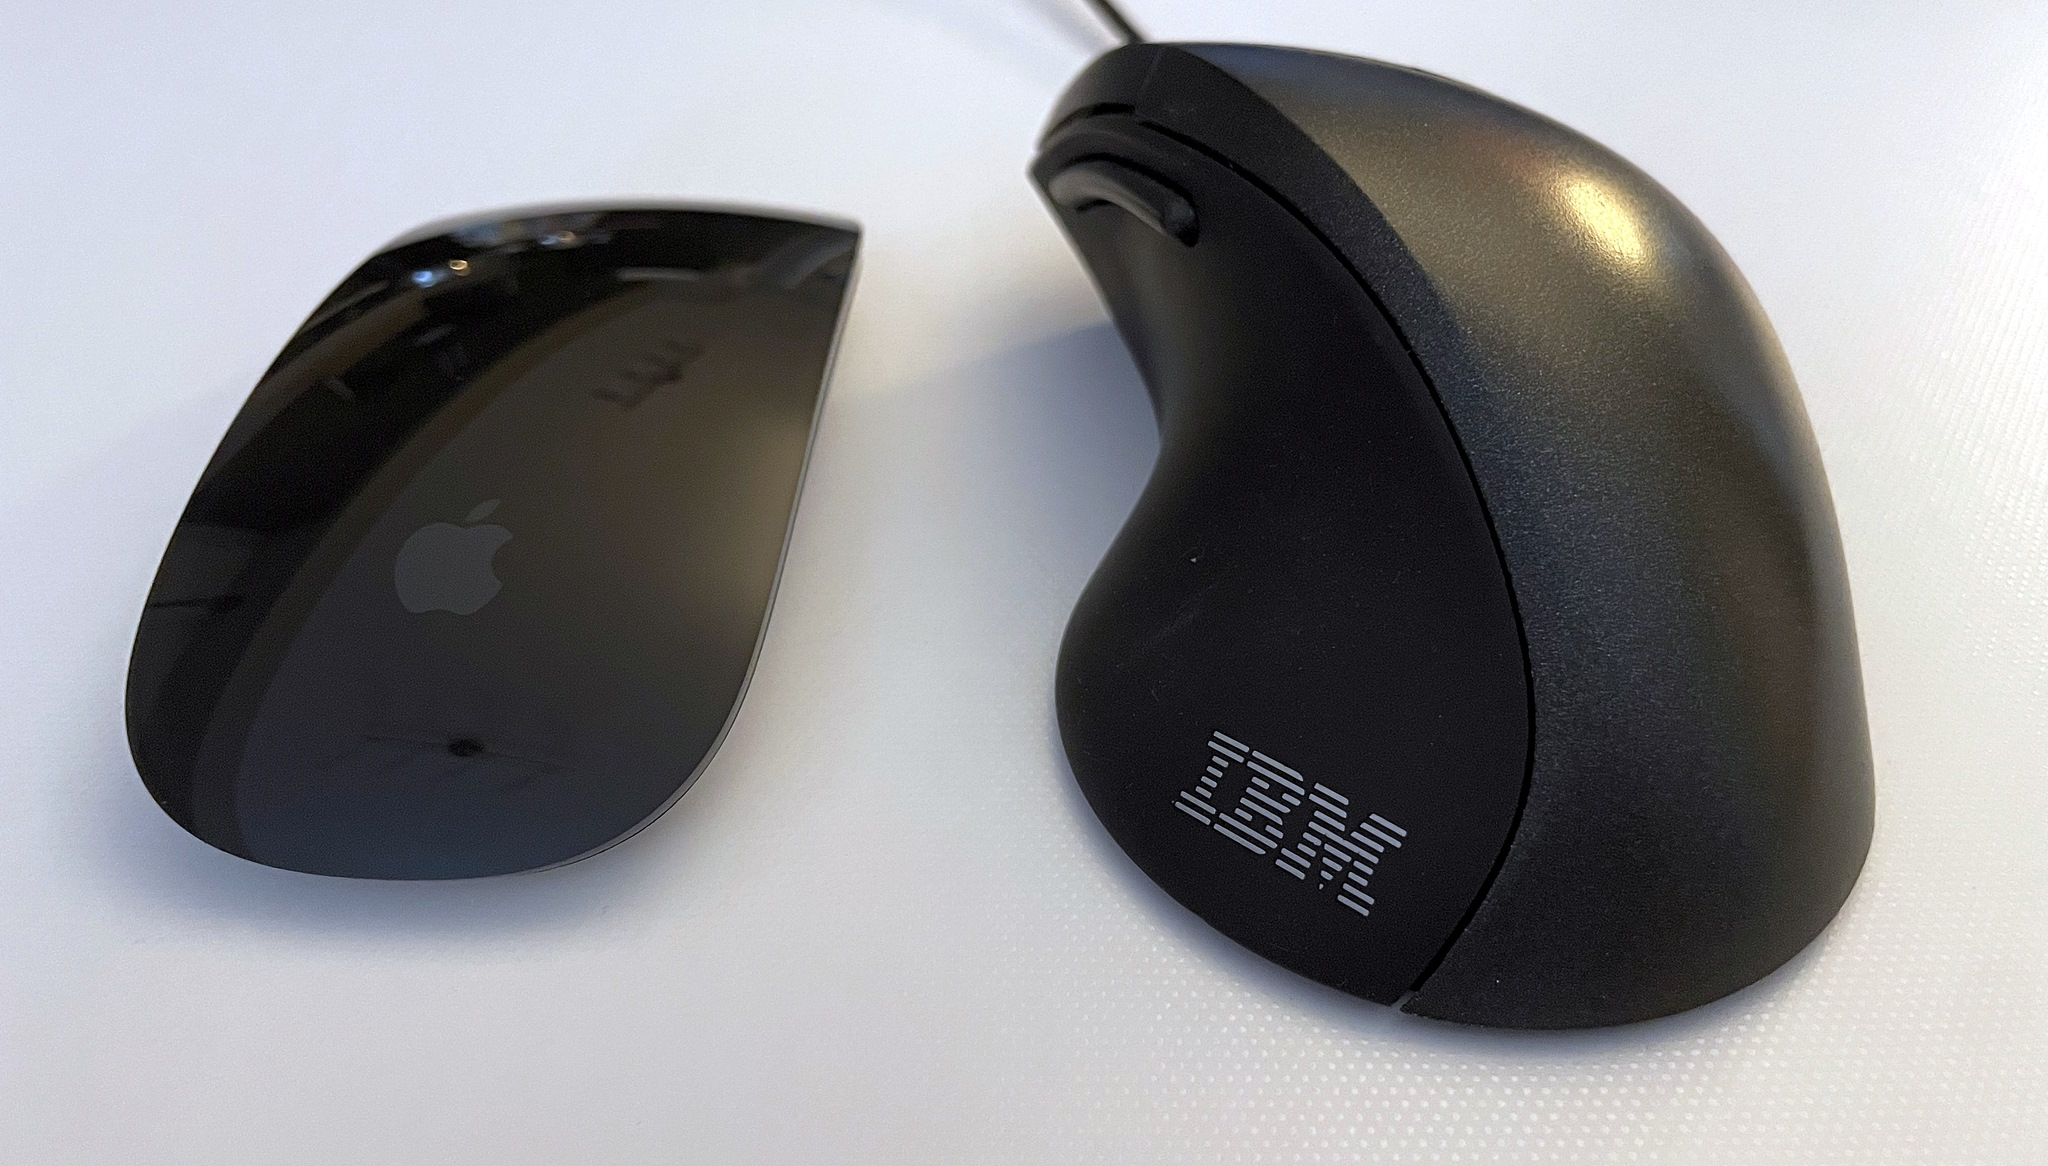
Onto the peripherals: I will indeed be using the Magic Mouse… before your jaw drops and you grab some tomatoes while calling me a heretic, let me explain. The Magic Mouse is one of the few peripherals with velocity sensitive 360ยบ scrolling AND fully integrated in the UI of the operating system. This is extraordinarily similar and analogous to IBM’s ScrollPoint which also offered dynamic 360ยบ scrolling and to a lesser extent the TrackPoint scrolling but which only offers vertical and horizontal. Needless to say 360ยบ scrolling and horizontal scrolling is something I use all the time and cannot fathom why we still even have (notched!) mouse wheels. It’s bizarrely a mouse Apple seemingly designed specifically for me and nobody else, I imagine average or larger hands would be extremely uncomfortable with it and Apple really should offer a larger version to encompass a better demographic.

Men & Mice

The Magic Mouse and ScrollPoint Pro share very similar design philosophies in the way we scroll. I also made another strange discovery when I was looking for some more flat slick mousepads since the Magic Mice don’t work well on cloth ones at all, and that are these 3M ‘Precise’ mouse pads: AMAZON LINK.

Apparently the 3M mouse pads have a reflective material which allows the lasers to use less strength and thus supposedly saves 50% battery life, some Magic Mouse users affirmed this, so we’ll see how this goes down. It’s kind of surprising I’ve never heard of any tech reviewers mention these because saving 50% of battery life on a wireless mouse is huge.

Keyboards..

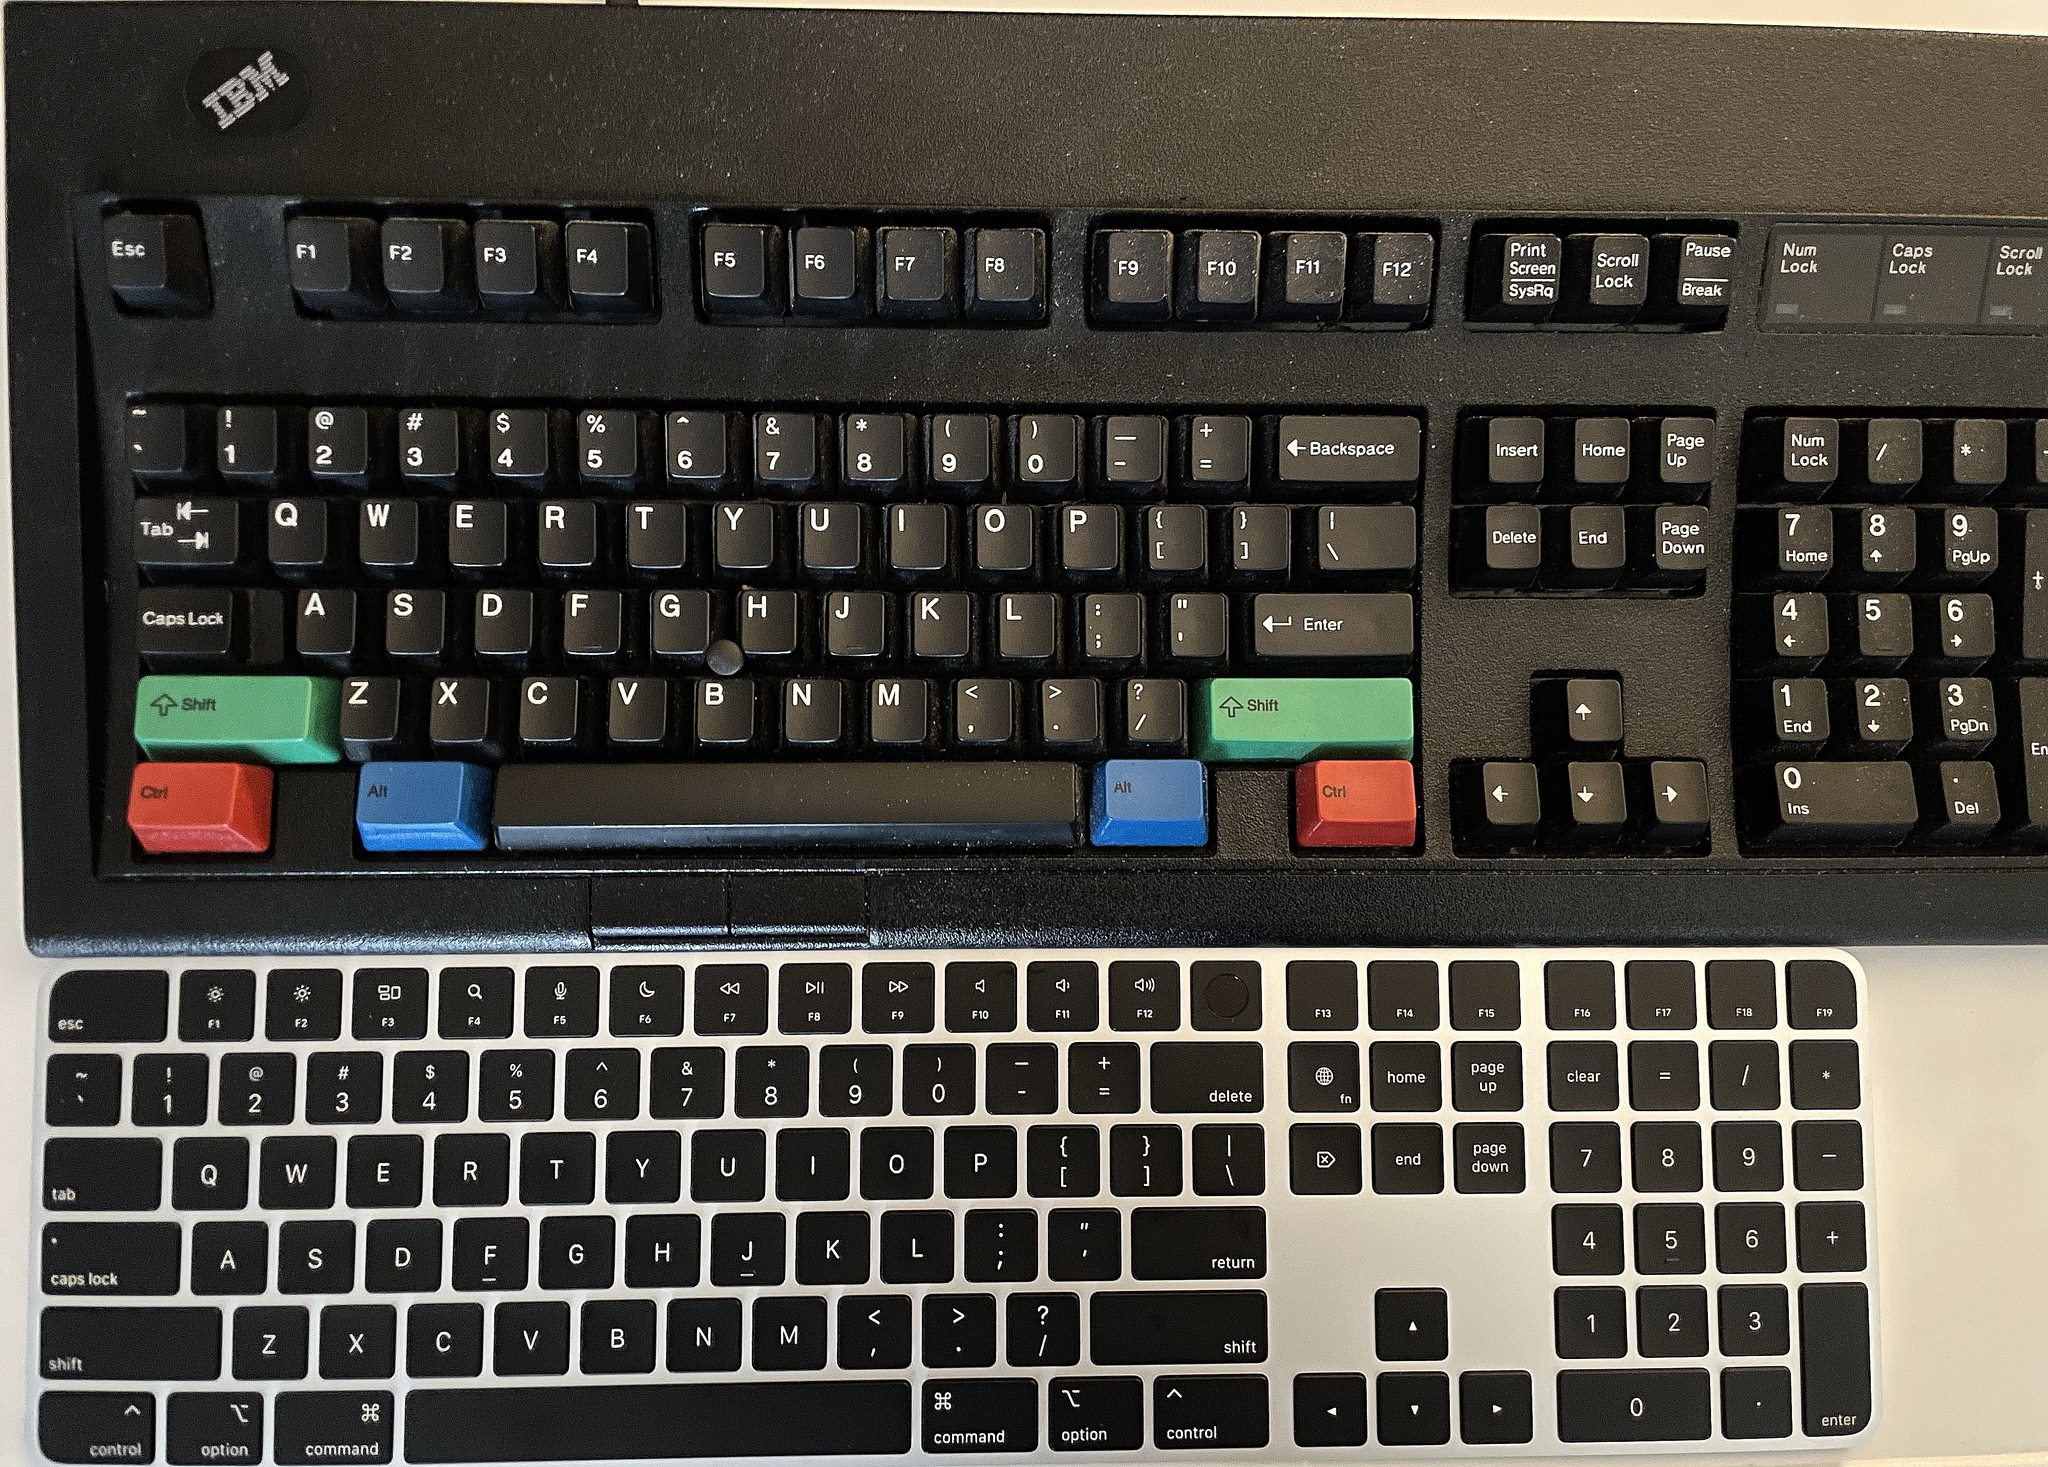
There’s a lot of good reasons to NOT use Bluetooth keyboards due to wireless keylogging, there’s not going to be anyone with that talent in rural Canada so I’m in the clear. You could buy a Matias keyboard but they’re actually worse in many aspects than the 1st party Apple keyboards: the legend printing is of dramatically worse quality, the surface of the keycaps don’t have that special velvety texture, and the snappiness of the scissor switches is probably worse. While I have many mechanical keyboards, I don’t care so much about it anymore. The Apple Magic Keyboard is just a little bit too flat for my tastes today so I ordered a “ESC Flip PRO Computer Keyboard Stand”, which can stick on the back and give you different height adjustments if needed.

onboard LEDs everywhere.

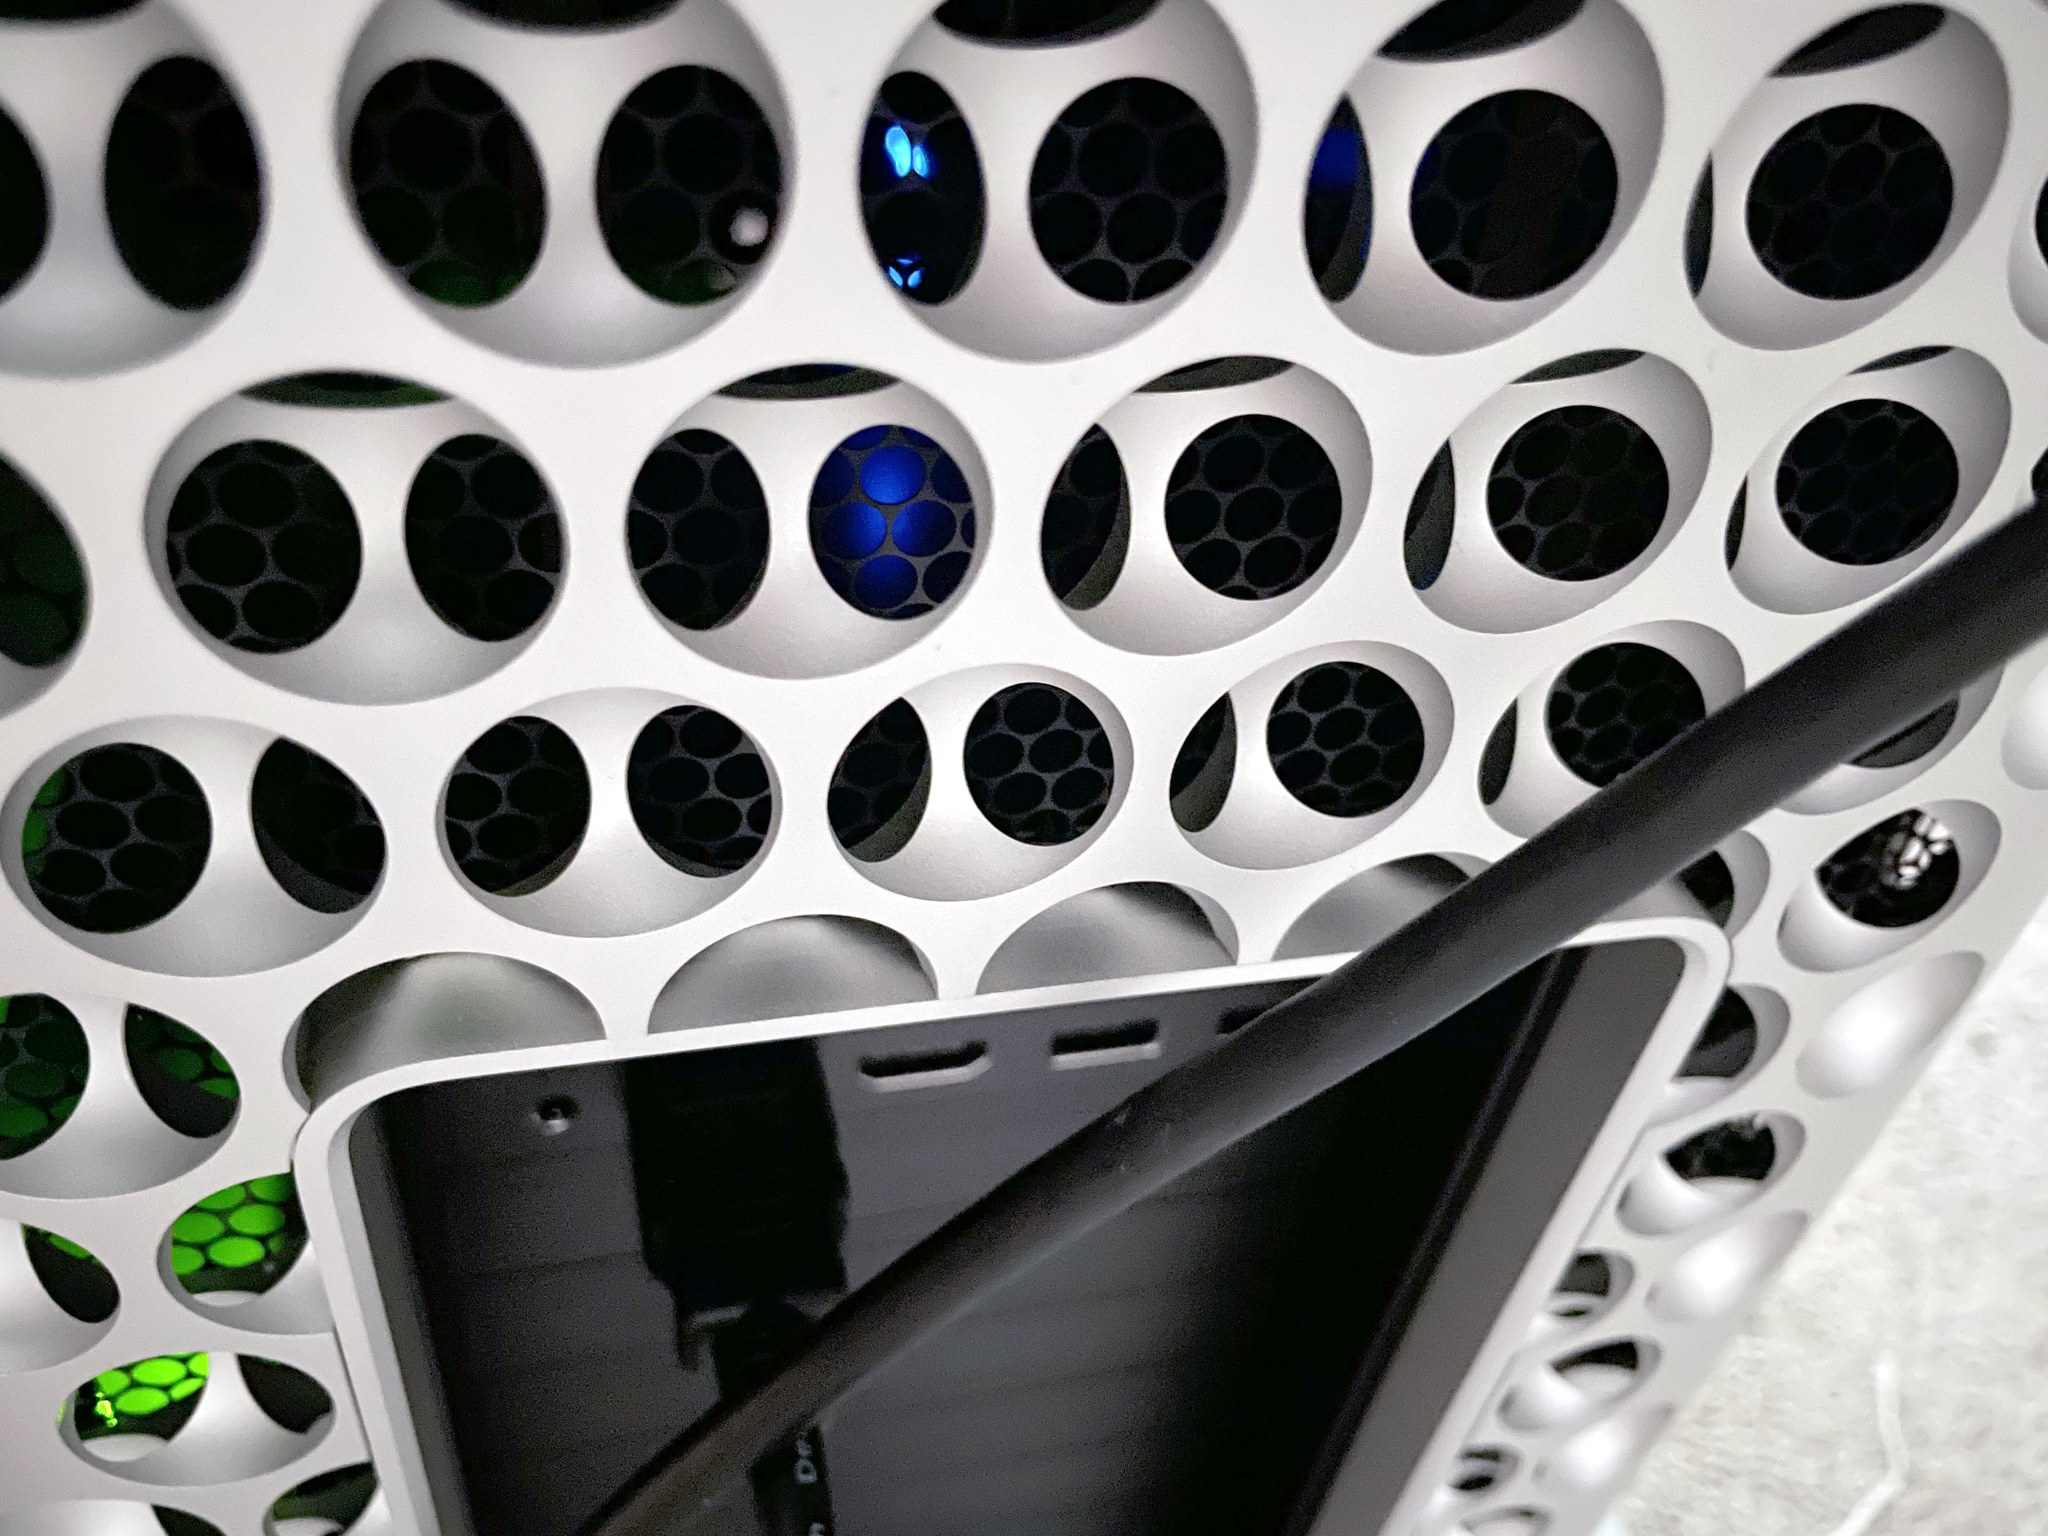
Both the iLok and Sonnet NVMe card have so many LEDs on them you can see the lightshow through the rear of the ‘grater’ now.

Now my plans are to use this thing for at least a decade to get my money’s worth: will 64GB of RAM be enough? To that I say: 64GB ought to be enough for anybody. The only major hindrance will be the forced software obsolescence when the Apple overlords declare it will not be receiving anymore updates… and then you know things like the Roland Cloud and other major vendor software will cease to get updates and functionally work. It’s appalling at how all software is heavily DRMed and requires a live account to work against. At the very least when WWIII breaks out I’ll have plenty of premium aluminum to donate to the state, forged by Tim Apple himself!

For the record I was never really an ‘Apple person’, but they’ve finally fixed all of the problems (mice have two buttons and the keyboard layout is restored to be more IBM-like) and made a product that fulfills everything I’ve ever wanted… AND forced developers to program for ARM: so now my Stallman-not-approved-absolutely-proprietary audio software runs incredibly well on a non-x86 platform. Astounding. Yeah there were some 3rd party mice that had two buttons for Macs ‘back in the day’ but a good portion of the *software* and games weren’t programmed for a real right click rendering it useless. I remember watching a ‘making-of’ video of the Myst developers pushing down Ctrl with the mouse to right click EVERY SINGLE TIME in their 3D modelling software and nearly fell off my chair… it’s quite jarring when you need to press a button on the keyboard at the same time with clicking the mouse so I’ve no idea how they tolerated that. Maybe they loved doing it? Who knows.

It’s crazy how much changes, and how much is the same

Announcing Cockatrice III 0.5g

Now with better pcap filter in place. I had an issue with 86box and how NetBEUI wasn’t working. It didn’t hit me at the time but cold-brewed caught it, that the 86box didn’t have the multicast addresses in the default pcap filter.. We need the filter to not send EVERY packet to the VM, and to also filter out the VM’s own packets so it doesn’t loop and send traffic to itself (which hopefully would just get discarded, but there is no point doing it in the first place!)

Before I had it set to this:

(ether dst 09:00:07:ff:ff:ff) or (ether dst ff:ff:ff:ff:ff:ff)

It’s allowing one Multicast address for AppleTalk and the general ethernet broadcast address. Which is more or less okay but for everything else, you want to catch a wider net. The better choice is to use built in pcap macros:

((ether broadcast) or (ether multicast)

I can confirm that these do work for 86box, so I’ve copied the same into Cockatrice III. For those who wonder what the difference between Basilisk II & Cockatrice III is, I basically took a super old version of Basilisk II, ripped out as much platform code as I could, re-ported it to basic SDL, removed all the fancy clipboard/meta/drive sharing integration code, added a pcap network option to use the raw network for AppleTalk, and took the SCSI emulation from Previous so I can partition and format virtual ‘SCSI’ disks that I’ve even been able to use in a BlueSCSI!. I’ve sat down with a debugger some years ago and went through the SLiRP code catching as many faults when using Internet Explorer as I could, I think most of the ‘fix’ involved renaming clashing symbols, and while it’s not perfect it was a lot more stable than the default stuff. Although I haven’t touched it in years, and probably should look to borrowing a more modern version from elsewhere.

0.5g in action

Linking this thing with TDM GCC is becoming a bit of a challenge so in case I forget here is how I’m currently statically linking libgcc/libg++ along with winpthread. All it should need now is SDL & working WinSock which every Win32 should have!

c++ -o CockatriceIII.exe        obj/main.o obj/main_sdl.o obj/prefs.o obj/prefs_dummy.o obj/sys_unix_sdl.o obj/rom_patches.o obj/slot_rom.o obj/rsrc_patches.o obj/emul_op.o obj/macos_util.o obj/xpram.o obj/xpram_dummy.o obj/timer.o obj/timer_common.o obj/clip_dummy.o obj/adb.o obj/serial.o obj/serial_dummy.o obj/ether.o obj/sony.o obj/disk.o obj/cdrom.o obj/scsi.o obj/video.o obj/video_sdl.o obj/audio.o obj/extfs.o obj/user_strings.o obj/user_strings_unix.o obj/sdl_pcap.o obj/scsi_dummy.o obj/audio_sdl.o obj/prefs_editor_dummy.o obj/basilisk_glue.o obj/memory.o obj/newcpu.o obj/readcpu.o obj/cpustbl.o obj/cpudefs.o obj/cpuemu.o obj/fpu_ieee.o cockatricerc.o ..\slirp\libslirp.a ..\drmingw-0.7.7-win32\lib\libexchndl.a -Wl,-Bdynamic -lSDL -lws2_32  -liphlpapi -Wl,-Bstatic -lgcc -lstdc++ -lwinpthread -static -static-libgcc -static-libstdc++

I’ve been able to map to my internal servers just fine, and connect using Internet Explorer so I suppose everything is fine!

All the cool kids love github so here you got, you can get it from the latest releases:

Releases ยท neozeed/CockatriceIII (github.com)

I’ll have to re-sync sourceforge. Although I do keep more resources on sourceforge since it’s clearly a lot better at file hosting.

so I was excited to try this protoweb thing!

mjd -protoweb

I saw this video and I was like sold! I have this PowerMac 6400/180 so I figured this would be good. The problem was my network card was acting up so I figured instead of troubleshooting it Iโ€™ll just format it and go from there.

the machine is very much an Old World Macintosh, so that limits me from OS X. It’s 603ev CPU itโ€™s not all that advanced either. I have an 8.1 ISO that Iโ€™ve been using under 68k emulation but the limit it has is old multimedia stuff ins t 68k compatible as nobody would imagine emulation putting 68k at speeds above a gigahertz.

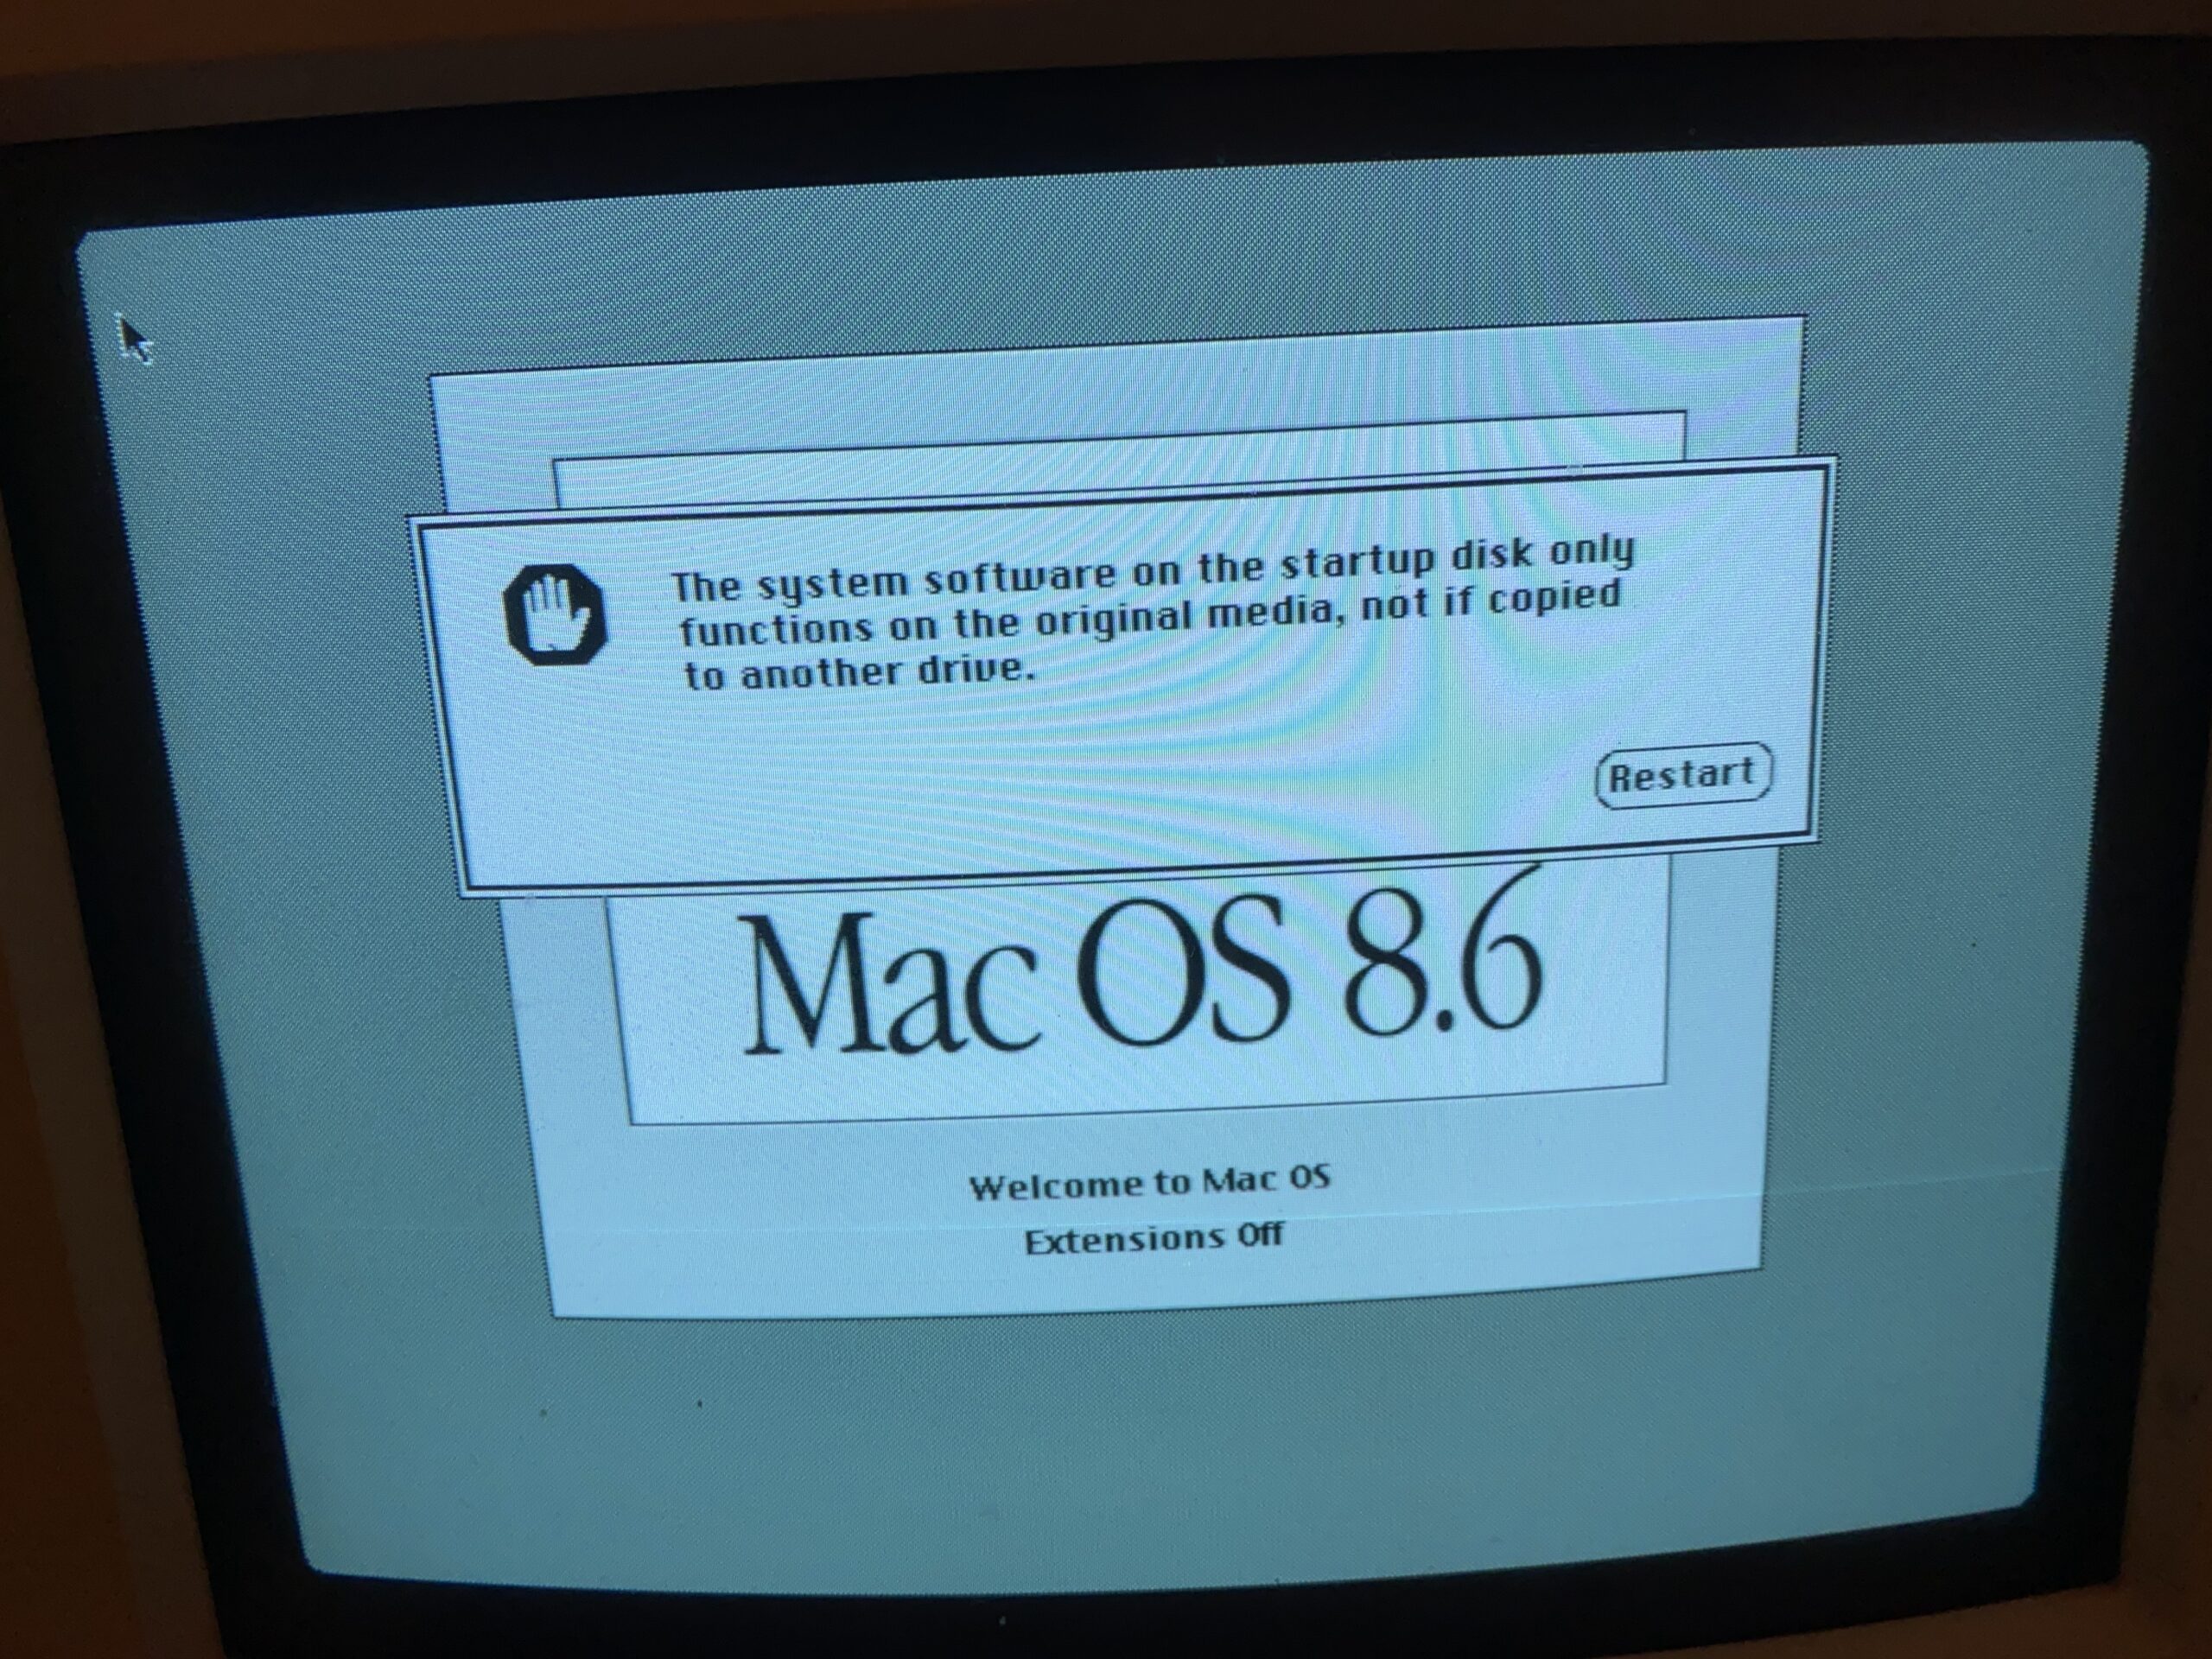
I went looking for a 8.6 ISO, and that is where the fun hit me again that many so-called ISO images arenโ€™t. Rather they are giant floppy disk images with the media headers and/or partition tables being obliterated. As an ISO they don’t detect at all, and as a giant floppy, of course they don’t boot as MacOS checks if it is on read-only media.

This ISO isn’t an ISO

very annoying

I did manage to finally find one that does work however!

working ISO

I forgot where I found it though. I did save it to archive.org, since I have another 5 versions of this downloaded, none of which will boot. https://archive.org/details/mac-os-8.6-working-iso

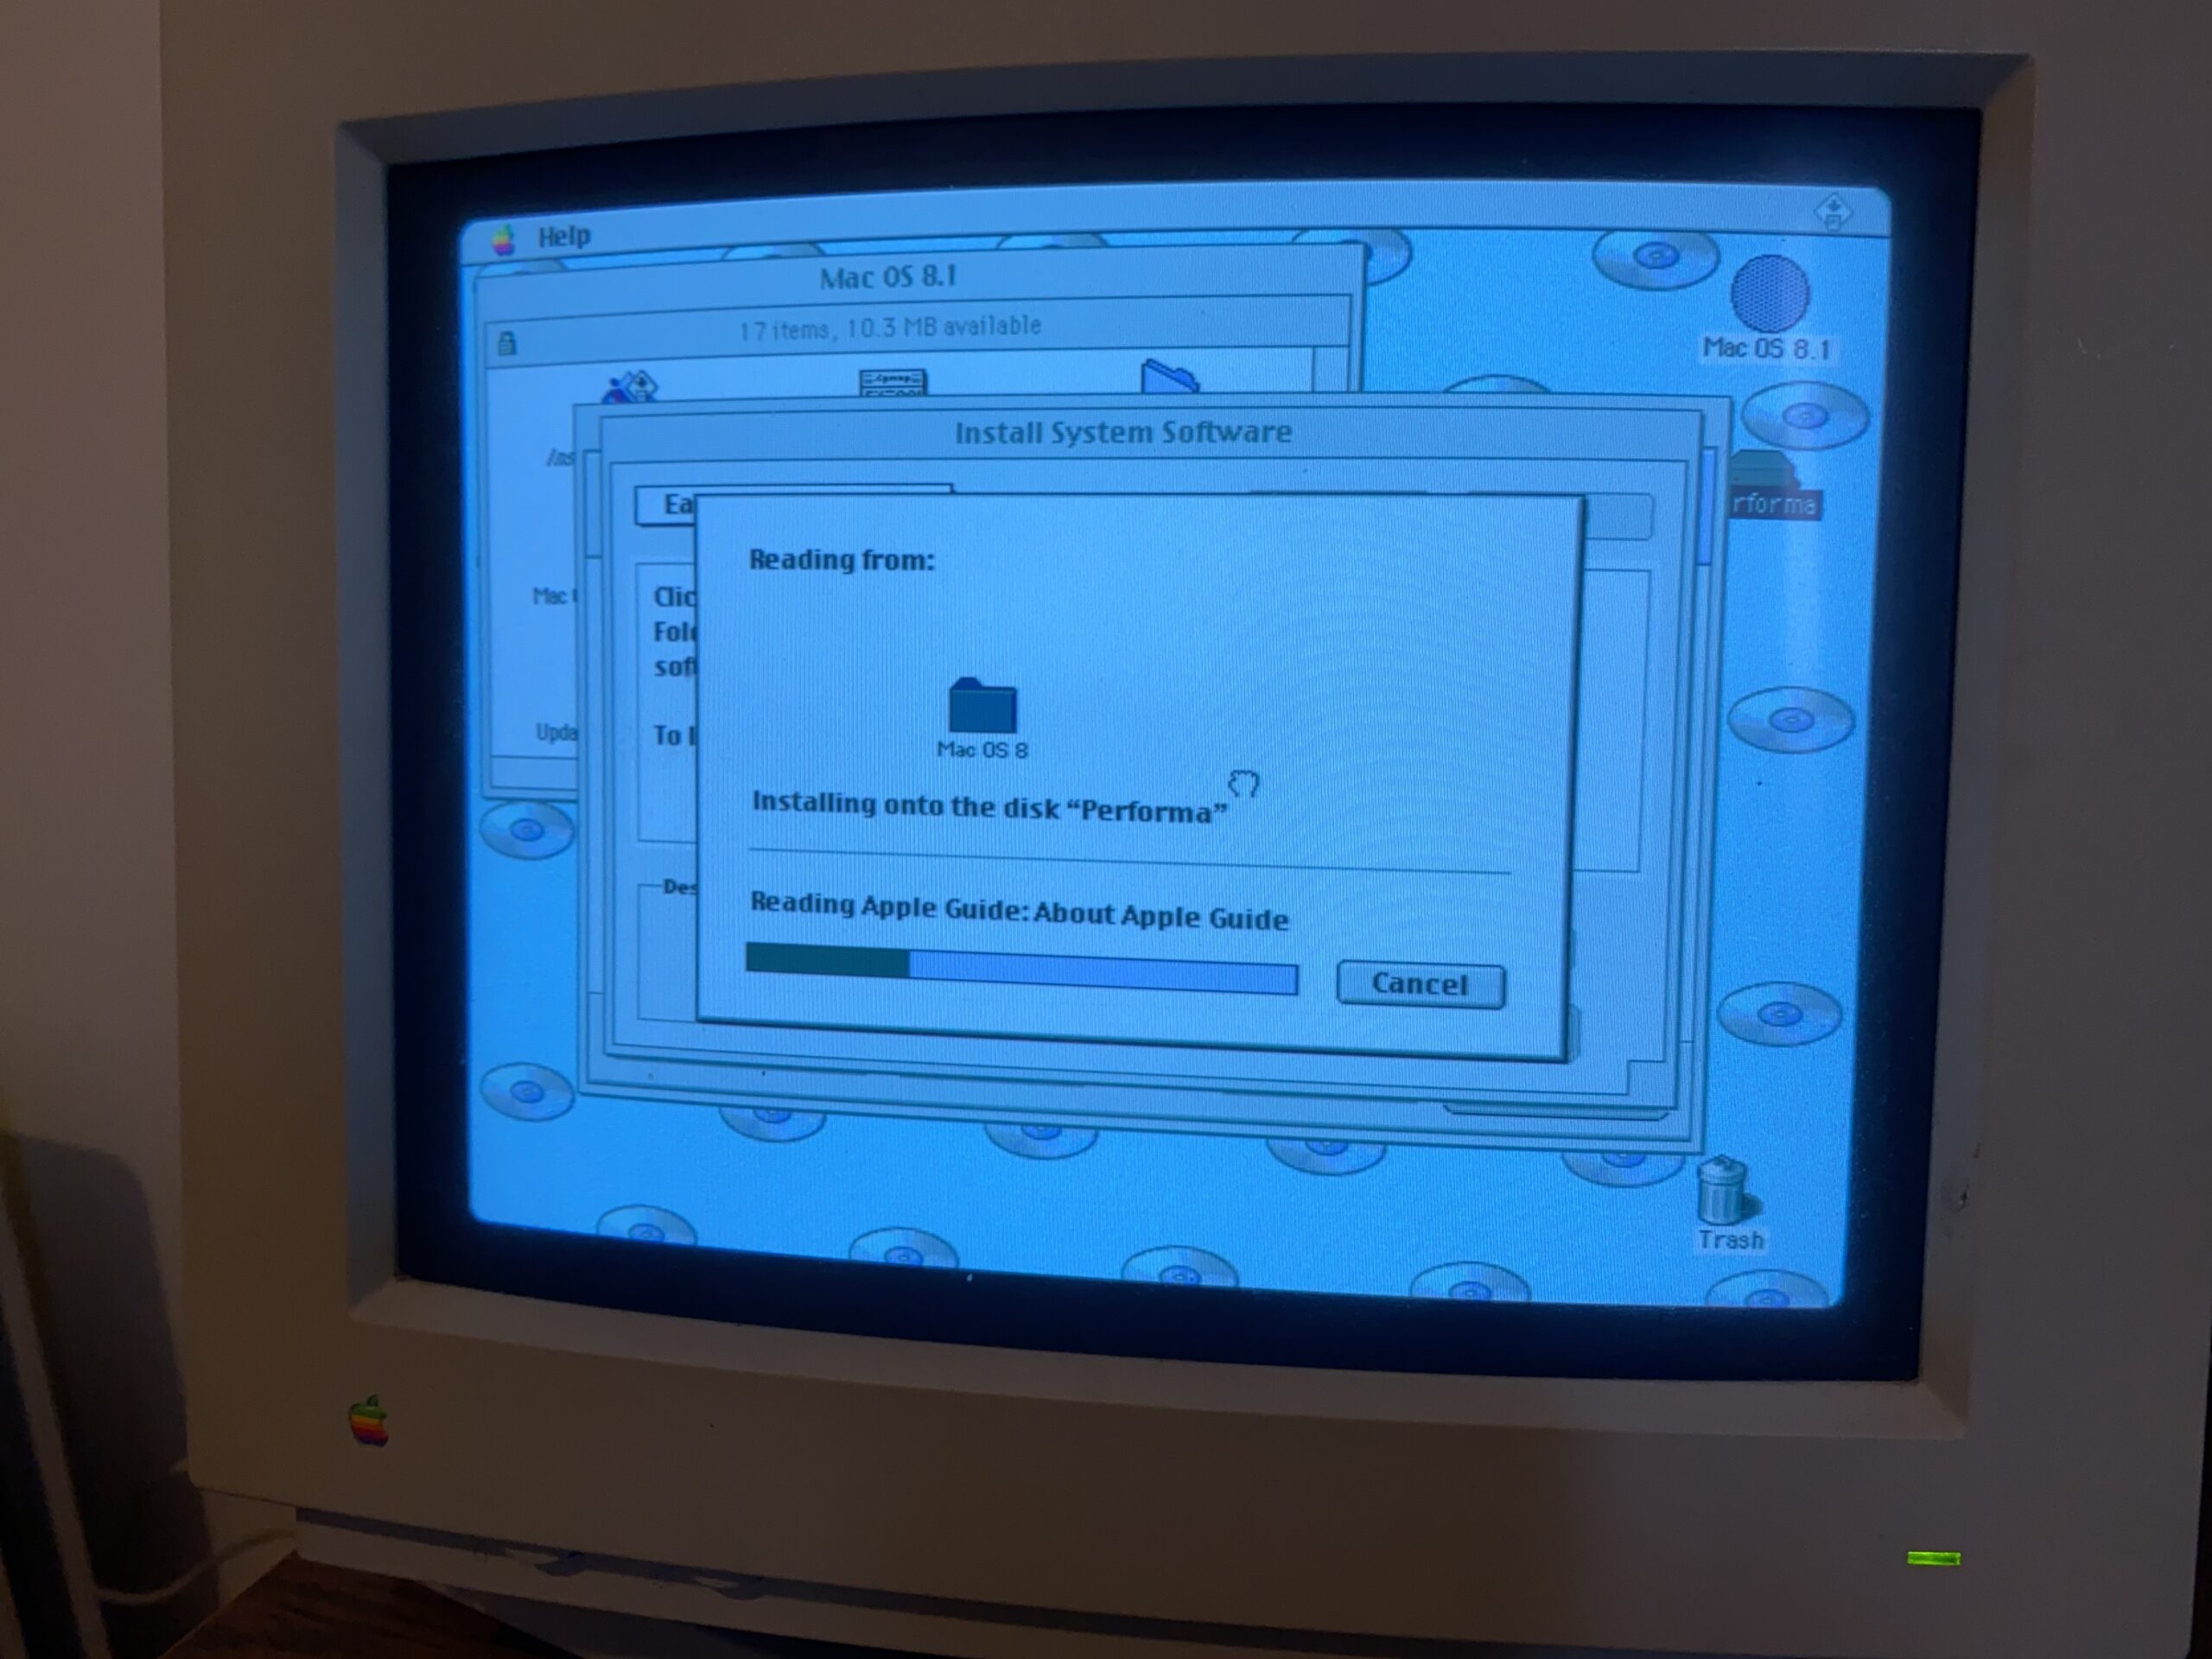
I should also add the MacOS 8.1 CD-ROM image Ive been using as again,l I have the same issue where so many are headderless ‘floppies’ and not actual CD-ROM’s that don’t work in Cockatrice III or an actual Mac using BlueSCSI.

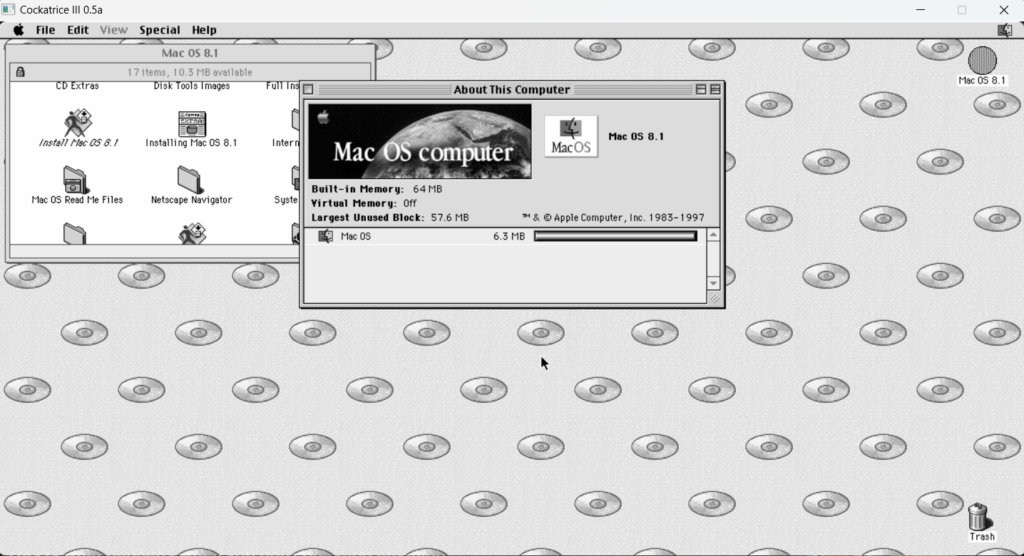
MacOS 8.1 CD-ROM on Cockatrice III

Sorry the image shows in black & white, but as you can see from the CD-ROM background it is in fact booted from the CD-ROM. You can download it from here: https://archive.org/details/mac-os-8.1-iso_202401

In no time, I was able to get online only to find that the power Mac pluginโ€™s seem to be unavailable for anything and unsupported.

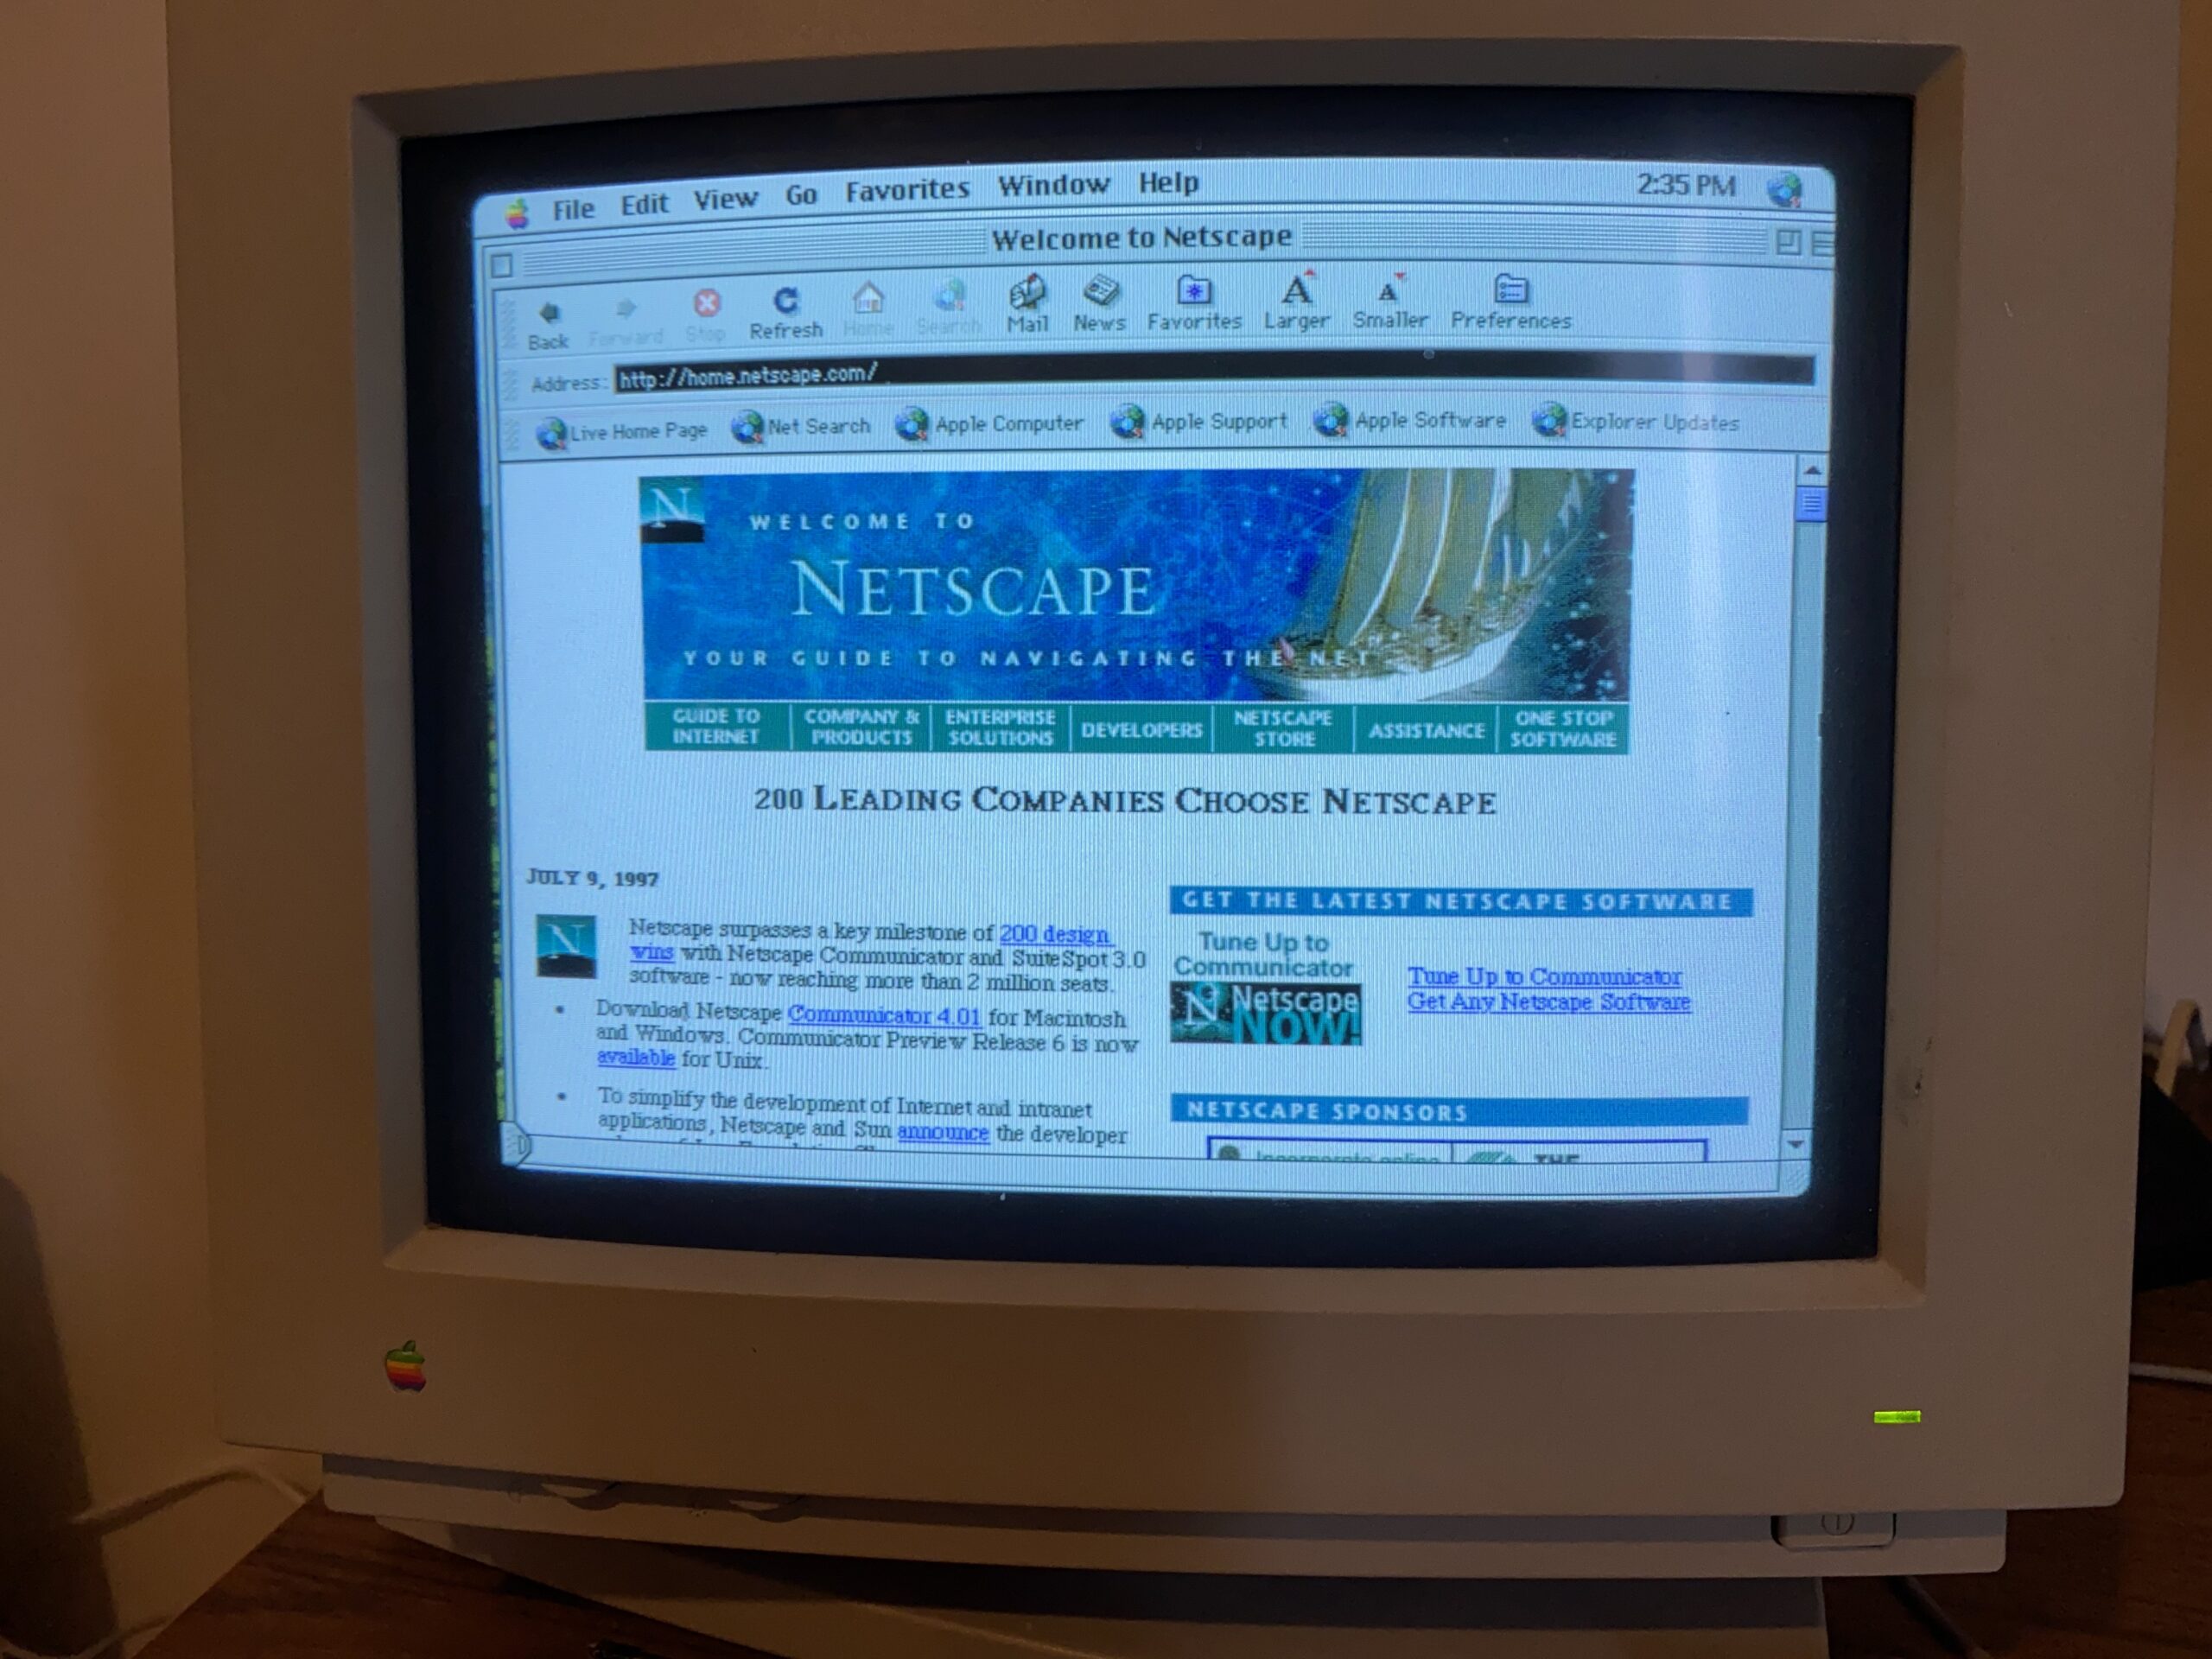
old netscape website

but the rendition of the old Netscape page was a treat!

Now I do have a Windows Surface RT tablet, and sure enough pluggin the proxy values, and YES the video site does work!

Warpstream on Windows RT

Very cool! So it turns out Protoweb can actually save all those old devices that work fine enough, but not fine enough for ‘Modern platforms’.

A wild Macintosh Plus appears!

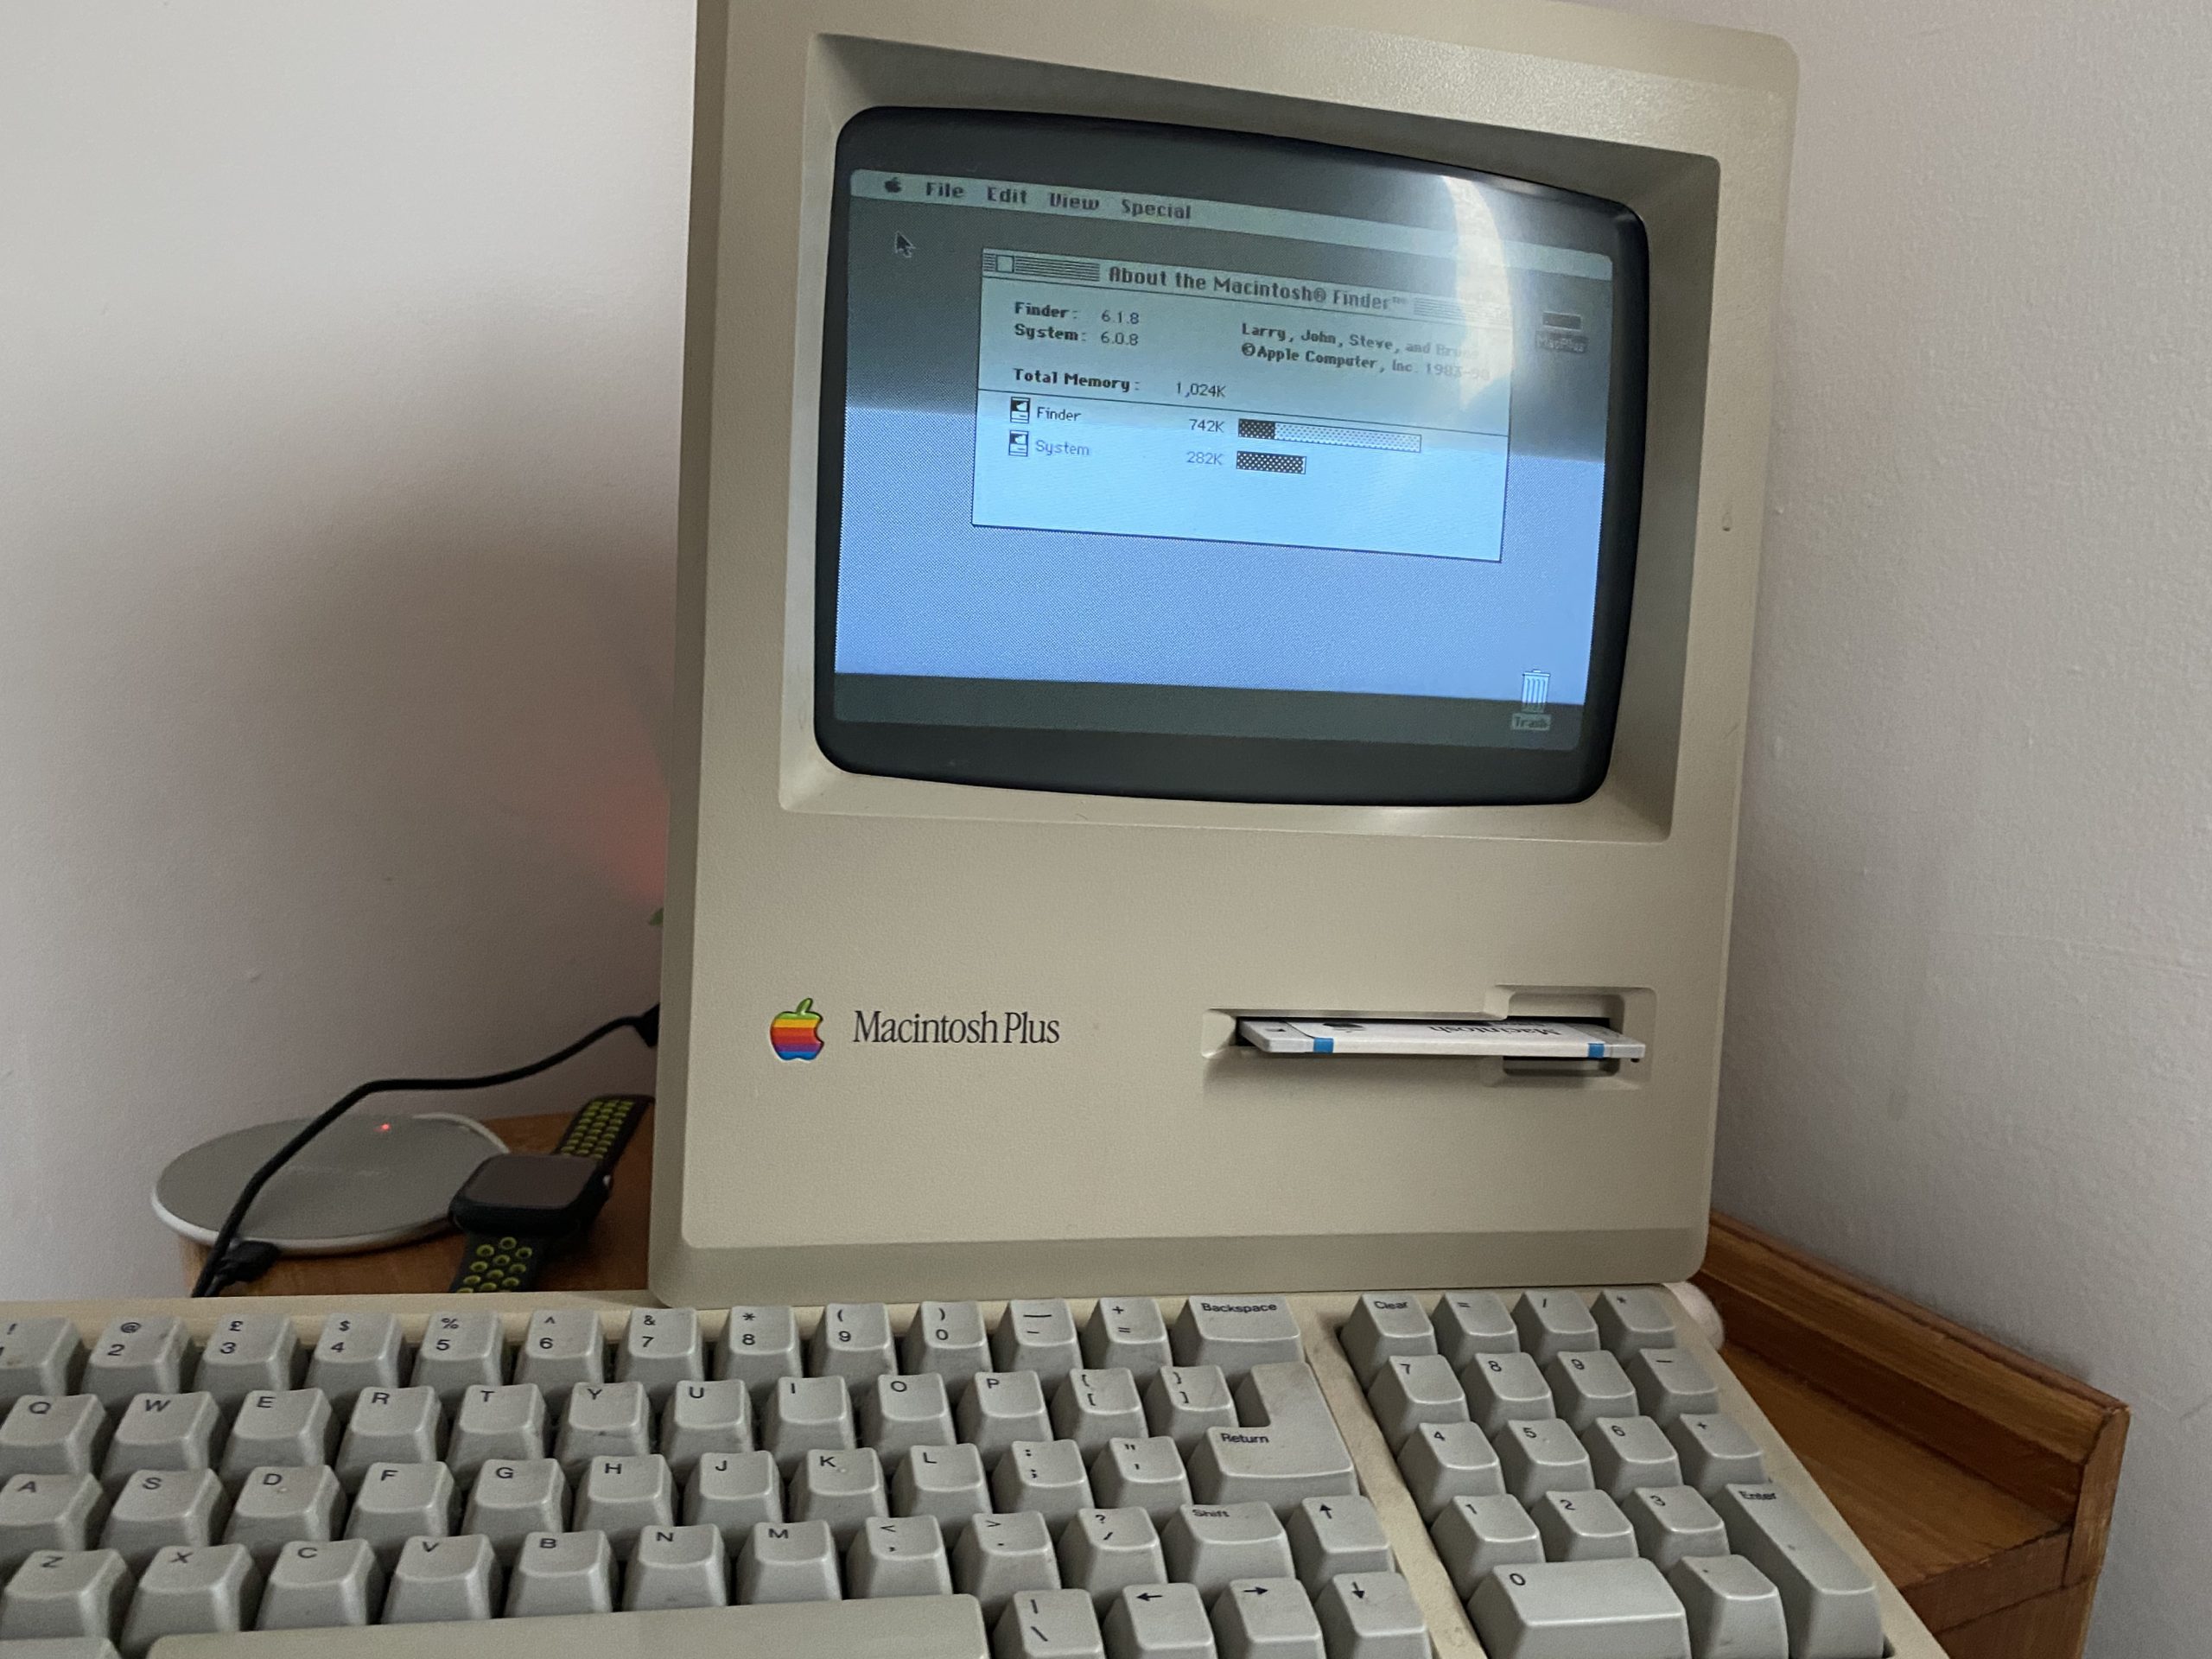
1MB Macintosh Plus, with extended keyboard & original mouse.
Mac Plus!

This was rather unexpected, but this auction for a loaded Macintosh Plus had shown up, and it was shipping local, and very cheap for what it was. It included the larger keyboard, original mouse, and an external 20MB hard disk.

Rodime ro652 20mb hard disk
Assembled in Scotland!

Sadly, the hard disk is dead. And not like dead dead, but dead dead dead! After I freed the disk from the external enclosure, and tried to power it on, stand alone, the PSU refused to start as the disk has a hard short in the board somewhere. And I can’t say that I’m all that surprised that a hard disk from 1989 is broken. I’m more surprised that someone was using this in 1989 and didn’t take the plunge and upgrade the machine to the full 4Mb of ram.

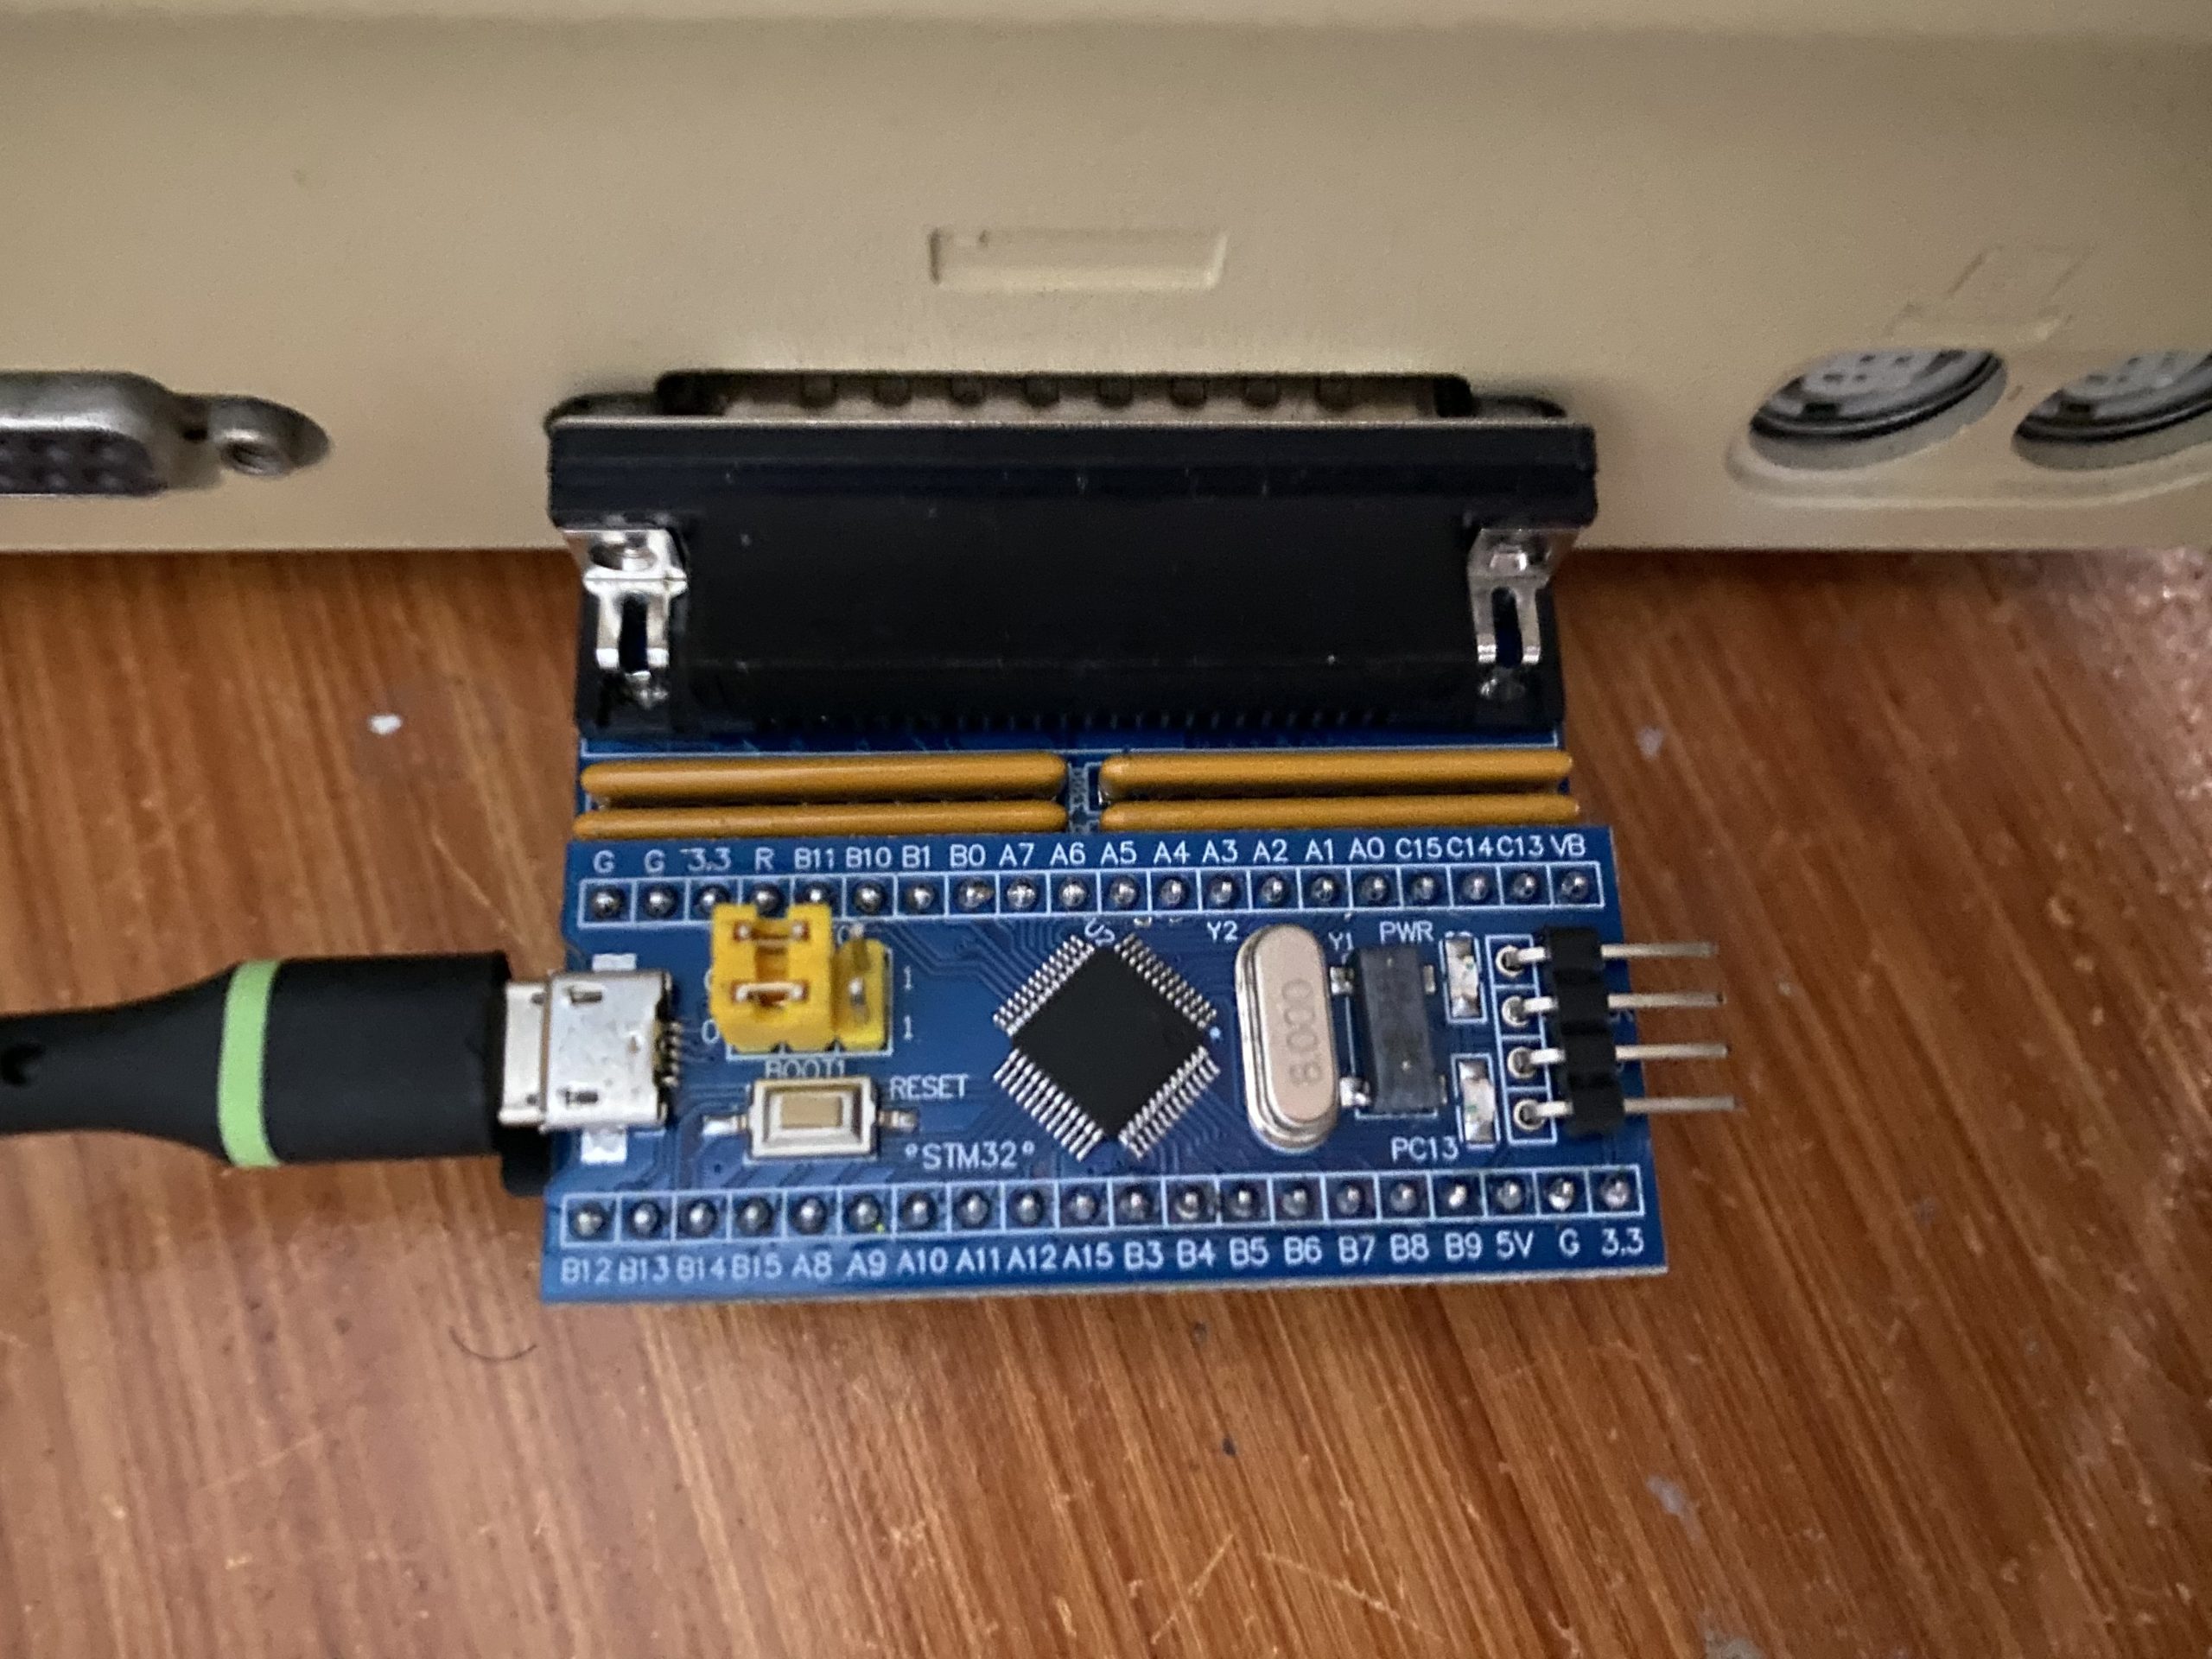
Anyways I have this chunk of plastic and glass on a desk, but I can’t do a thing with it. I’ve heard of various SCSI emulators out there, and decided to go with a bluescsi v1 with a DB25 interface as they are generally cheaper, and the Macintosh Plus isn’t exactly all that fast so the effort of the v2 is mostly lost.

bluescsi on the back of the Macintosh Plus
Bluescsi module on the back of the Macintosh Plus

Documentation on the bluescsi is scant, but it seems that a diode needs to be soldered onto the Macintosh Plus motherboard to enable bus power, so you don’t need an external USB power source. I’m a bit worried about opening up this thing as I’ms suspecting the plastics are a log weaker than they look, so I opted for just using a USB cable to power the device.

Anyways let me cut to the chase, I have an 8Gb Micro SD card that I formatted ExFAT (the documentation says Fat32 will work, but I found it might work once, but it’ll definitely never work after a reboot), with a single file emulating a 100Mb hard disk (Luxurious!). I named the file simply ‘HD10_512.hda’ which specifies it’s a hard disk, SCSI ID 1, target 0, 512 bytes/sector and it’s a ‘hda’ image. It’s what the Bluescsi want’s so don’t fight it!

To prepare the virtual hard disk, I used Cockatrice III, since the Macintosh Quadra 800 emulation includes SCSI, which let me create a raw disk image, partition it, and format it under MacOS 8.1. The real trick was installing the operating system.

I first tried MacOS 7.0.1, but it would boot up greeting me with the error that needs more than 1Mb of ram. I tried installing a MacOS 6.0.8 manually, but it crashed saying the system folder was corrupt, and then it just went empty disk mac on further boots.

I’m not sure what the problem was, it’s possible it was the filesystem on the card, or some other issued with the Macintosh, I have no idea.

So I broke down and ordered a pre-installed diskette with MacOS 6.08.

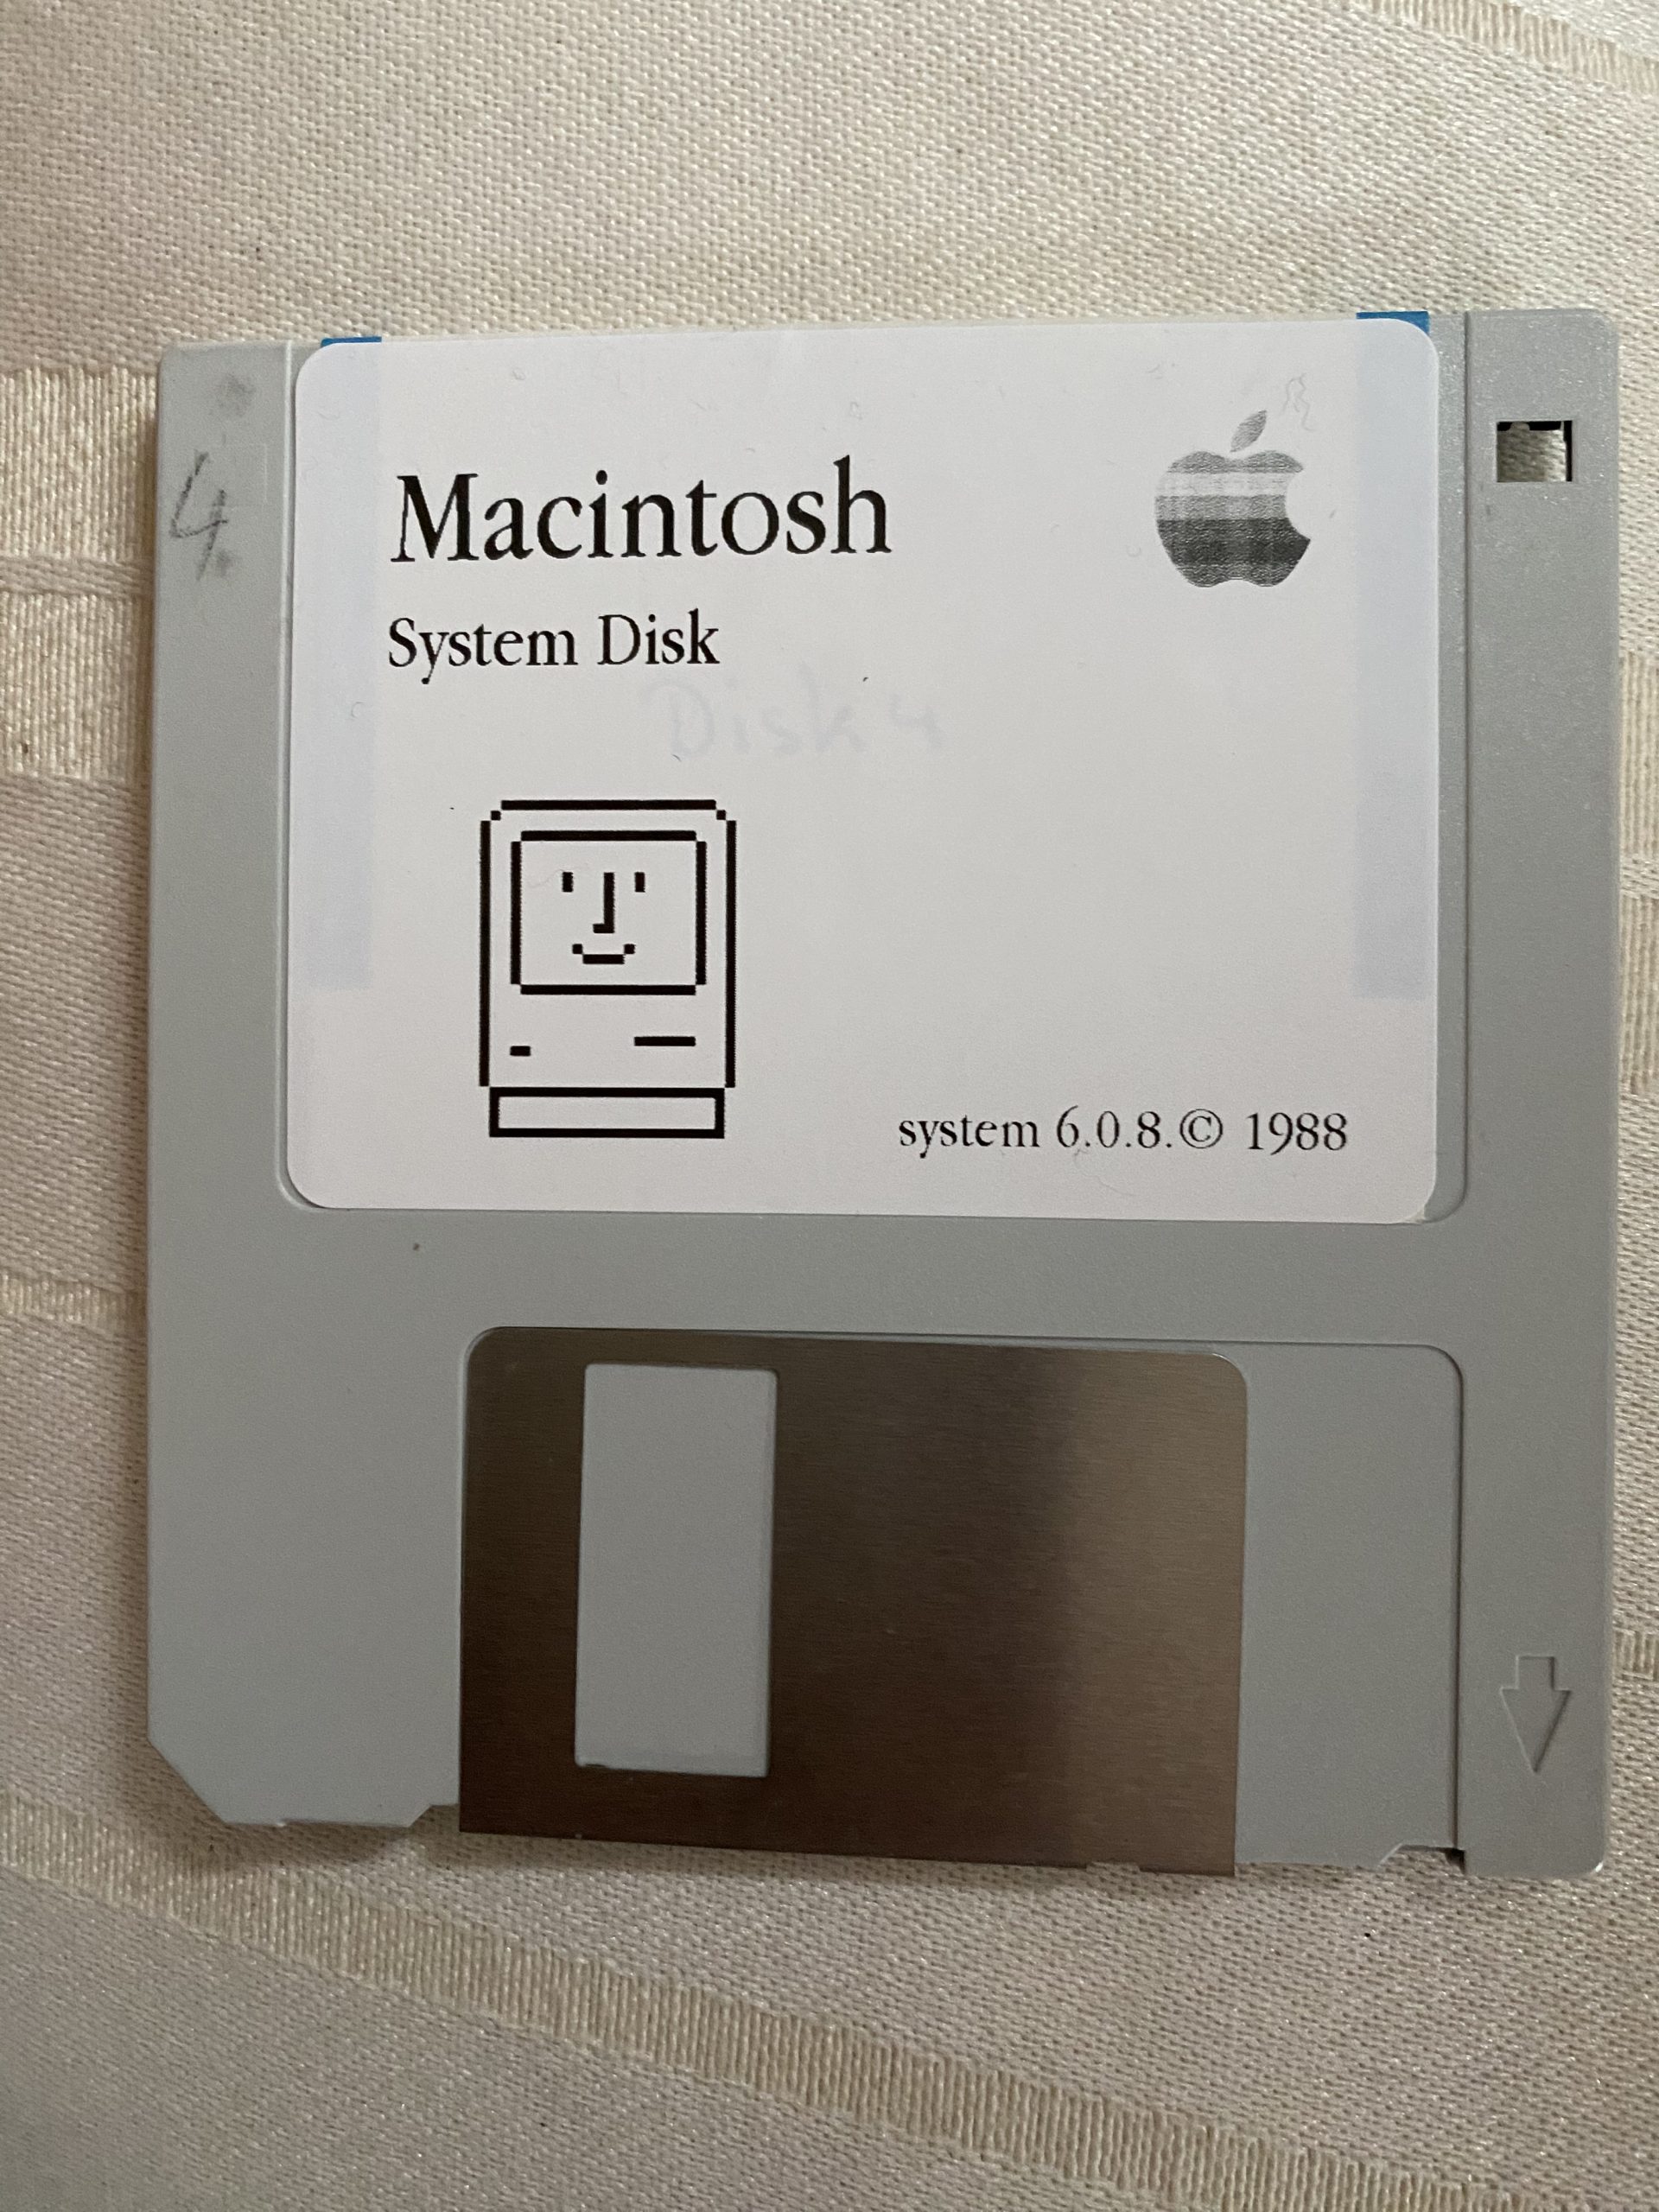
reproduction System 6.0.8 disk
Repurposed System 6.0.8 disk

I booted off the diskette, and amazingly the floppy drive worked! And in about a minute I had booted up, and it saw the hard disk! I dragged the System folder over the hard disk, and rebooted, and yeah it booted right up!

Obviously, the next step will be to get a proper screwdriver to open this thing, figure out how to discharge the CRT so I don’t kill myself, and add some additional RAM. I know it’ll be slow but I do want to see MacMiNT run on this thing! Maybe I’ll find/order the needed diode and make the DB25 bus powered eliminating one cable.

A long long long time ago I did own a Macintosh Plus, with 4Mb of RAM, although I mostly used it as a terminal, since it powered up quickly (it was the mid 90s!) and doesn’t take up that much space, so maybe I can slave it to an ESP32?

**UPDATE

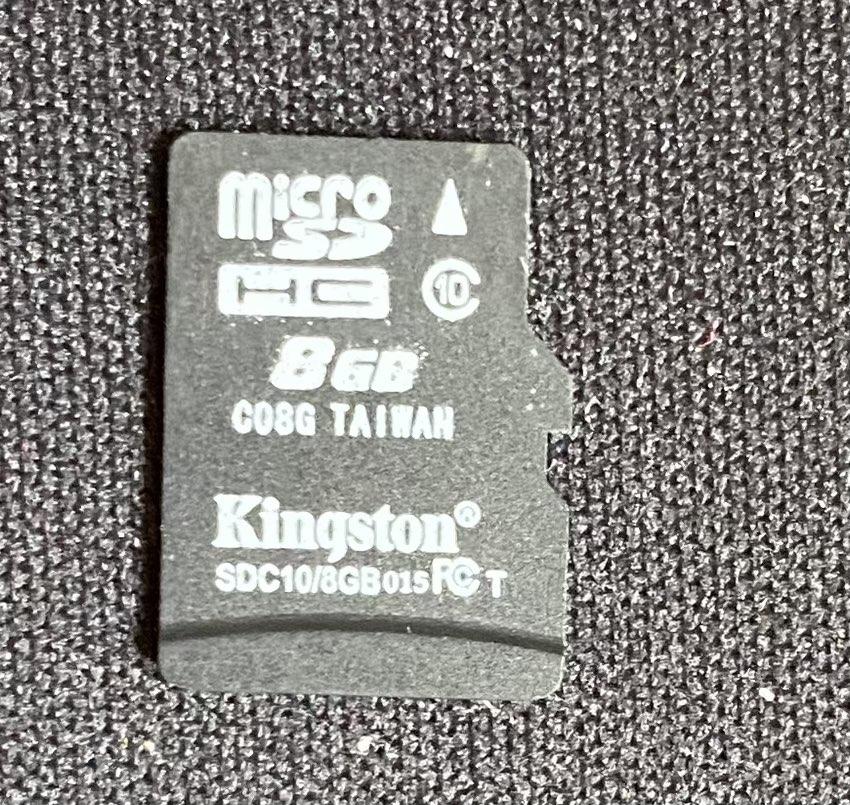
I had been using some generic 8GB microSD card on this, and while it seemed mostly fine on the Macintosh Plus, I had since managed to score a Performa 6400. I had been using this Kingston generic 8GB card, and it had frequent timeouts writing/reading on the Performa. As a matter of fact if the SD card was plugged in at powerup with an ISO image it would crash the Mac.

Kingston SDC10/8GB 015FCT C08G… no good!

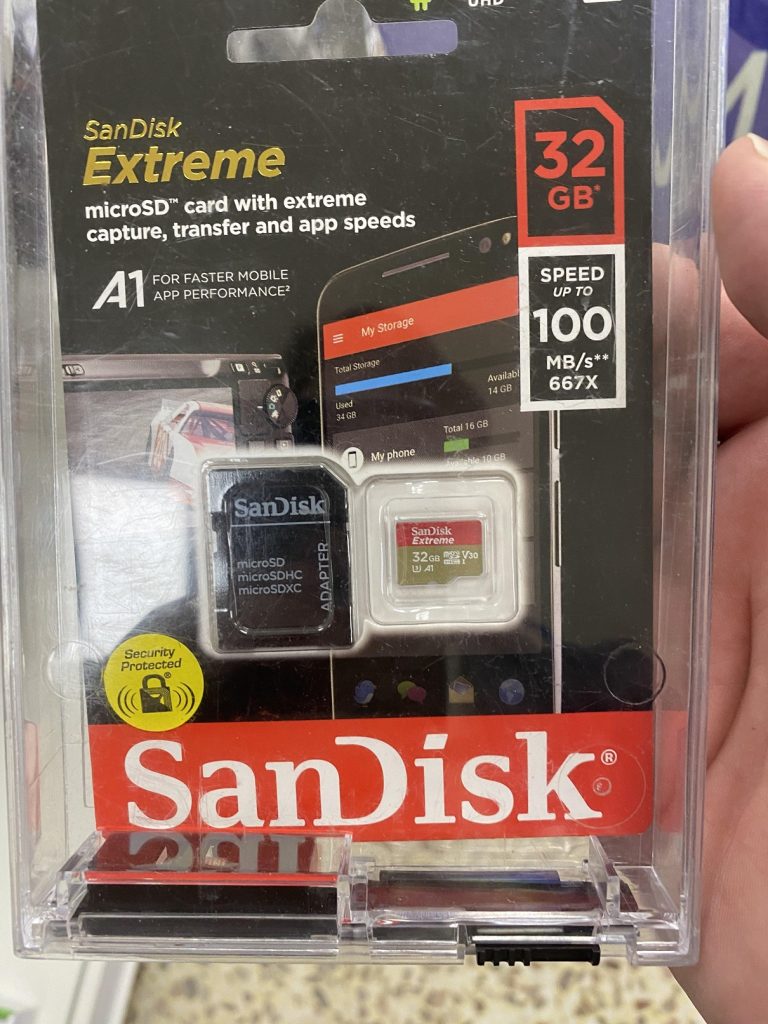
I scored this SanDisk Extreme 32GB for ร‚ยฃ15. A bit pricy but it turns out totally worth it!

ร‚ยฃ15 SanDisk Extreme!

Not only does the Performa not crash with an ISO image but it’s pretty darn quick! Well worth the purchase as all my weird issues seemingly just disappear!

So yeah, lesson learned, don’t go cheap on flash.