32bits of disappointment, upgrading the IBM PS/2 model 60

So long..

While I had enjoyed this fully loaded 286, it was getting a bit annoying with all the 32bit limitations I was running into. Frontier Elite was a 32bit program, Obviously no WIndows/386 nor any DooM. It seems that most of the MS-DOS fun I had really was 32bit only. So with this PS/2 model 60, I did the only real thing I could do:

PS/2 80 motherboard

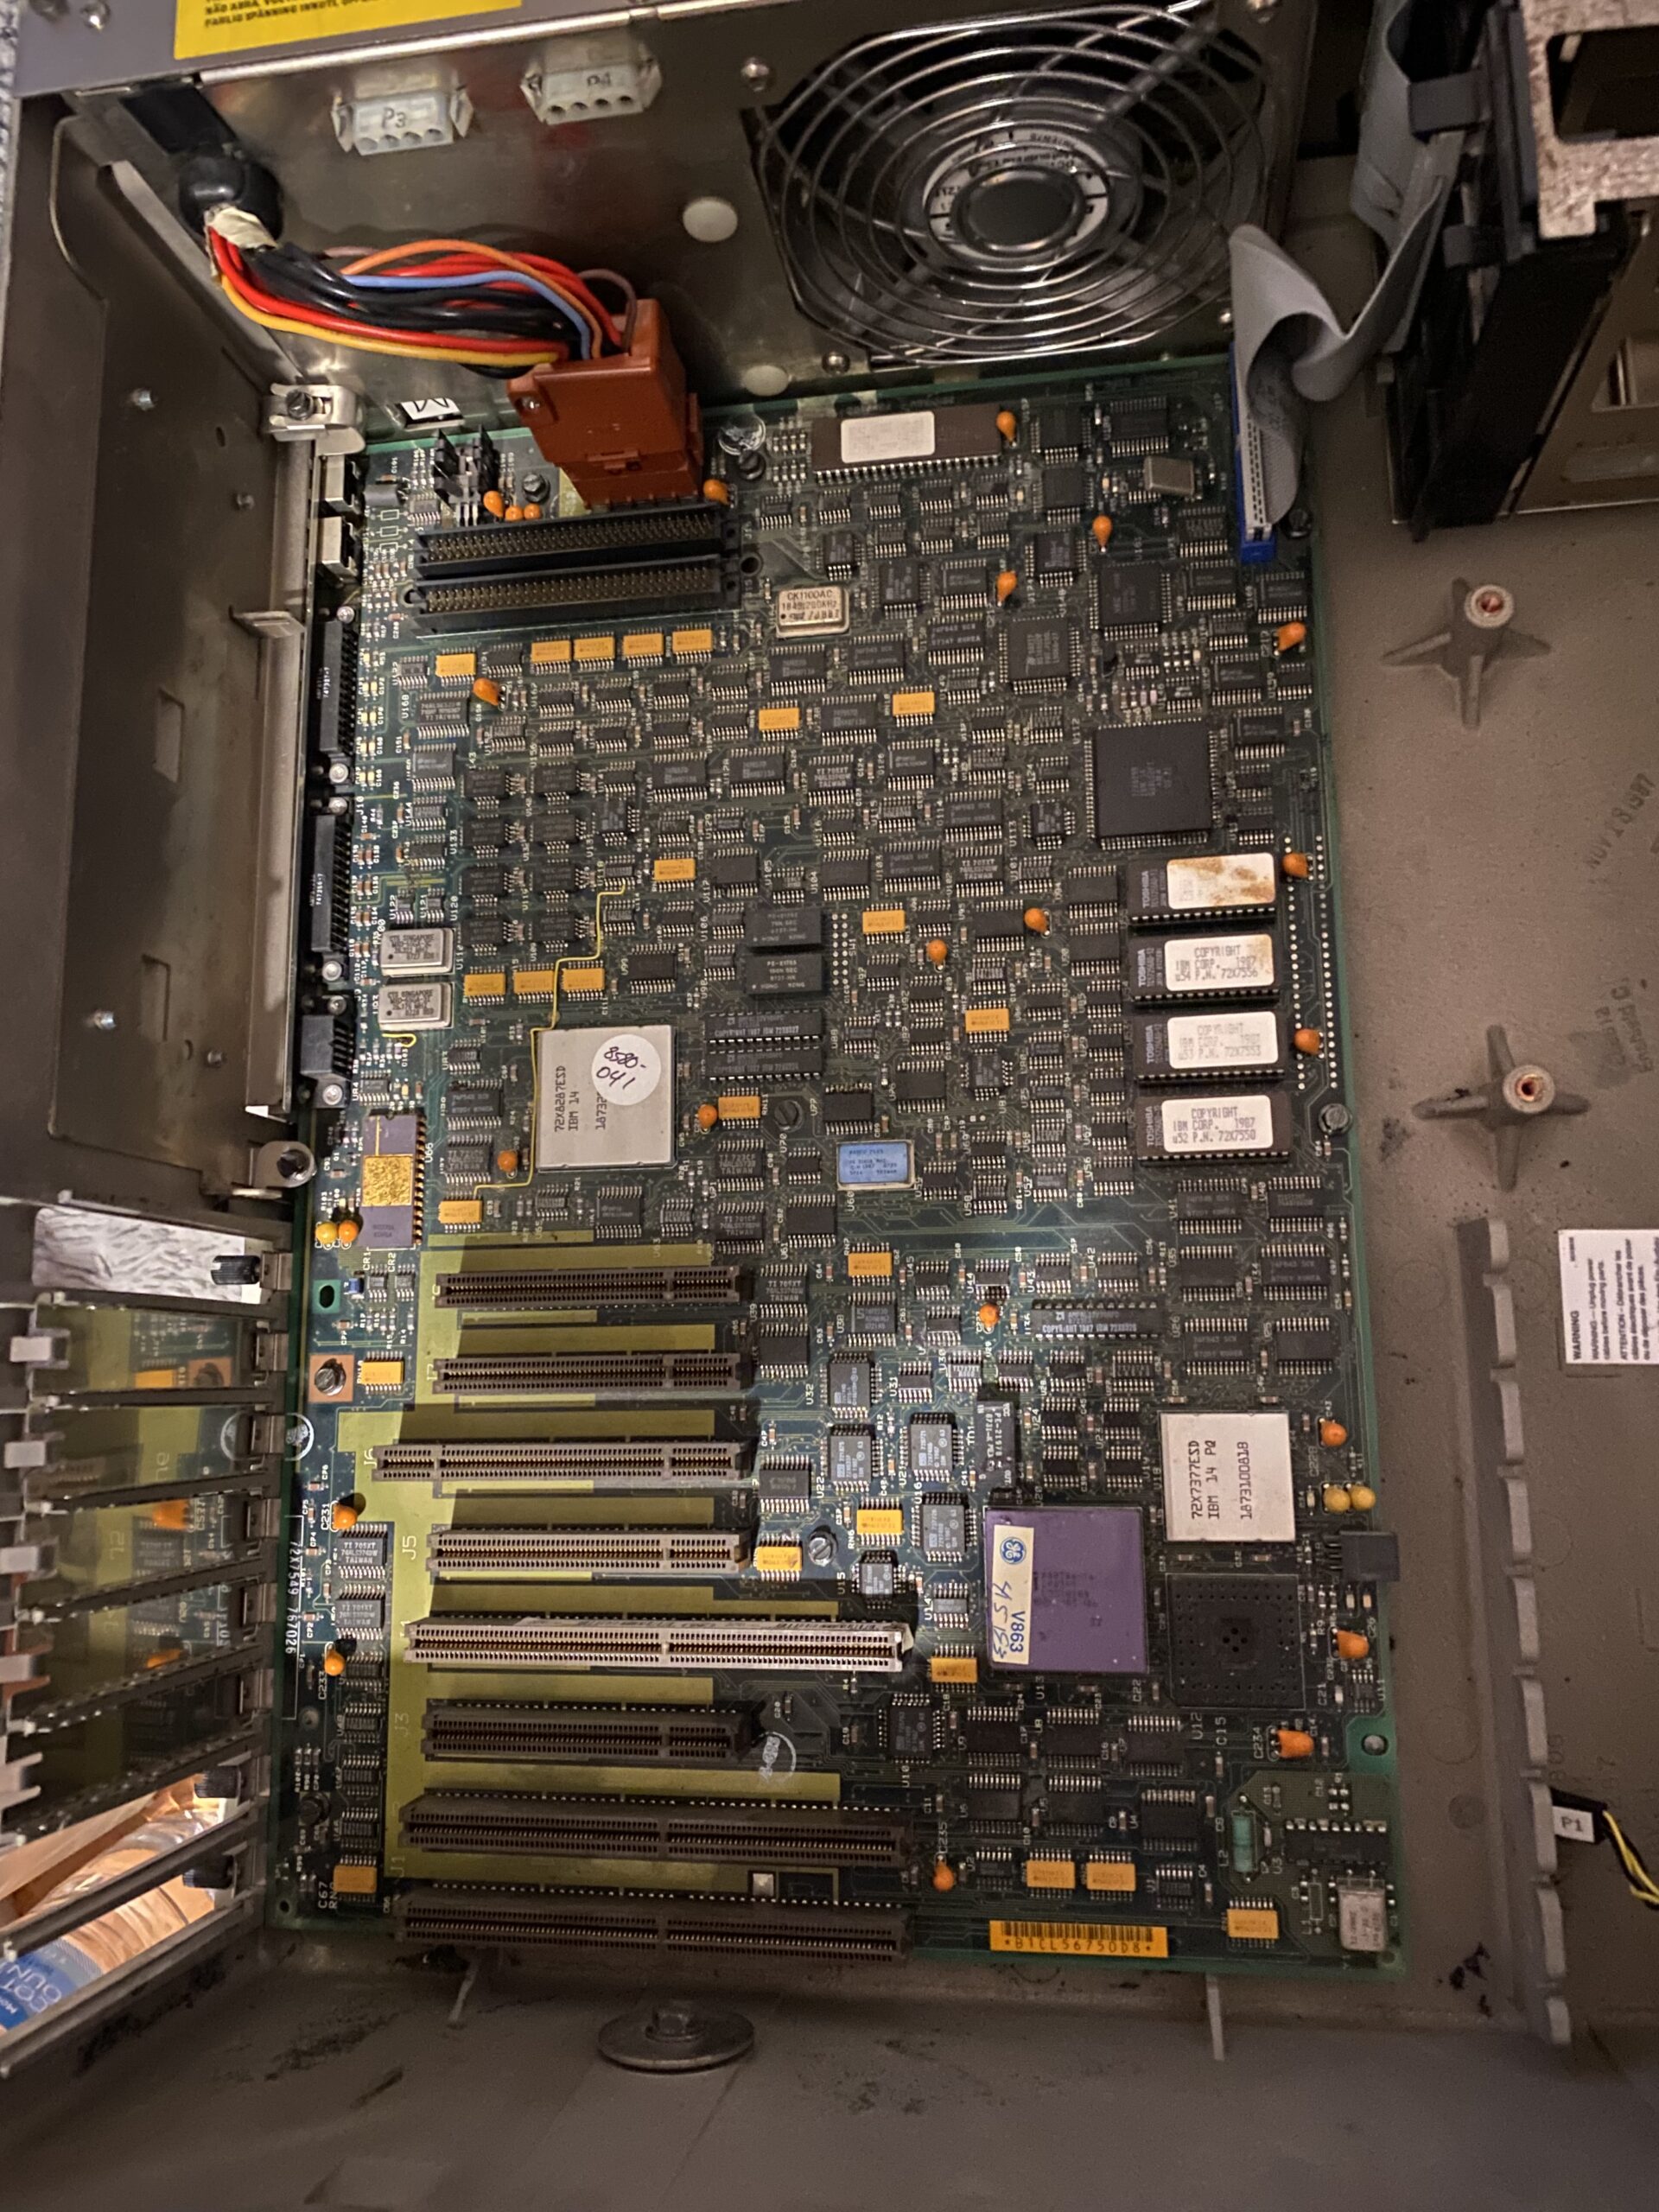
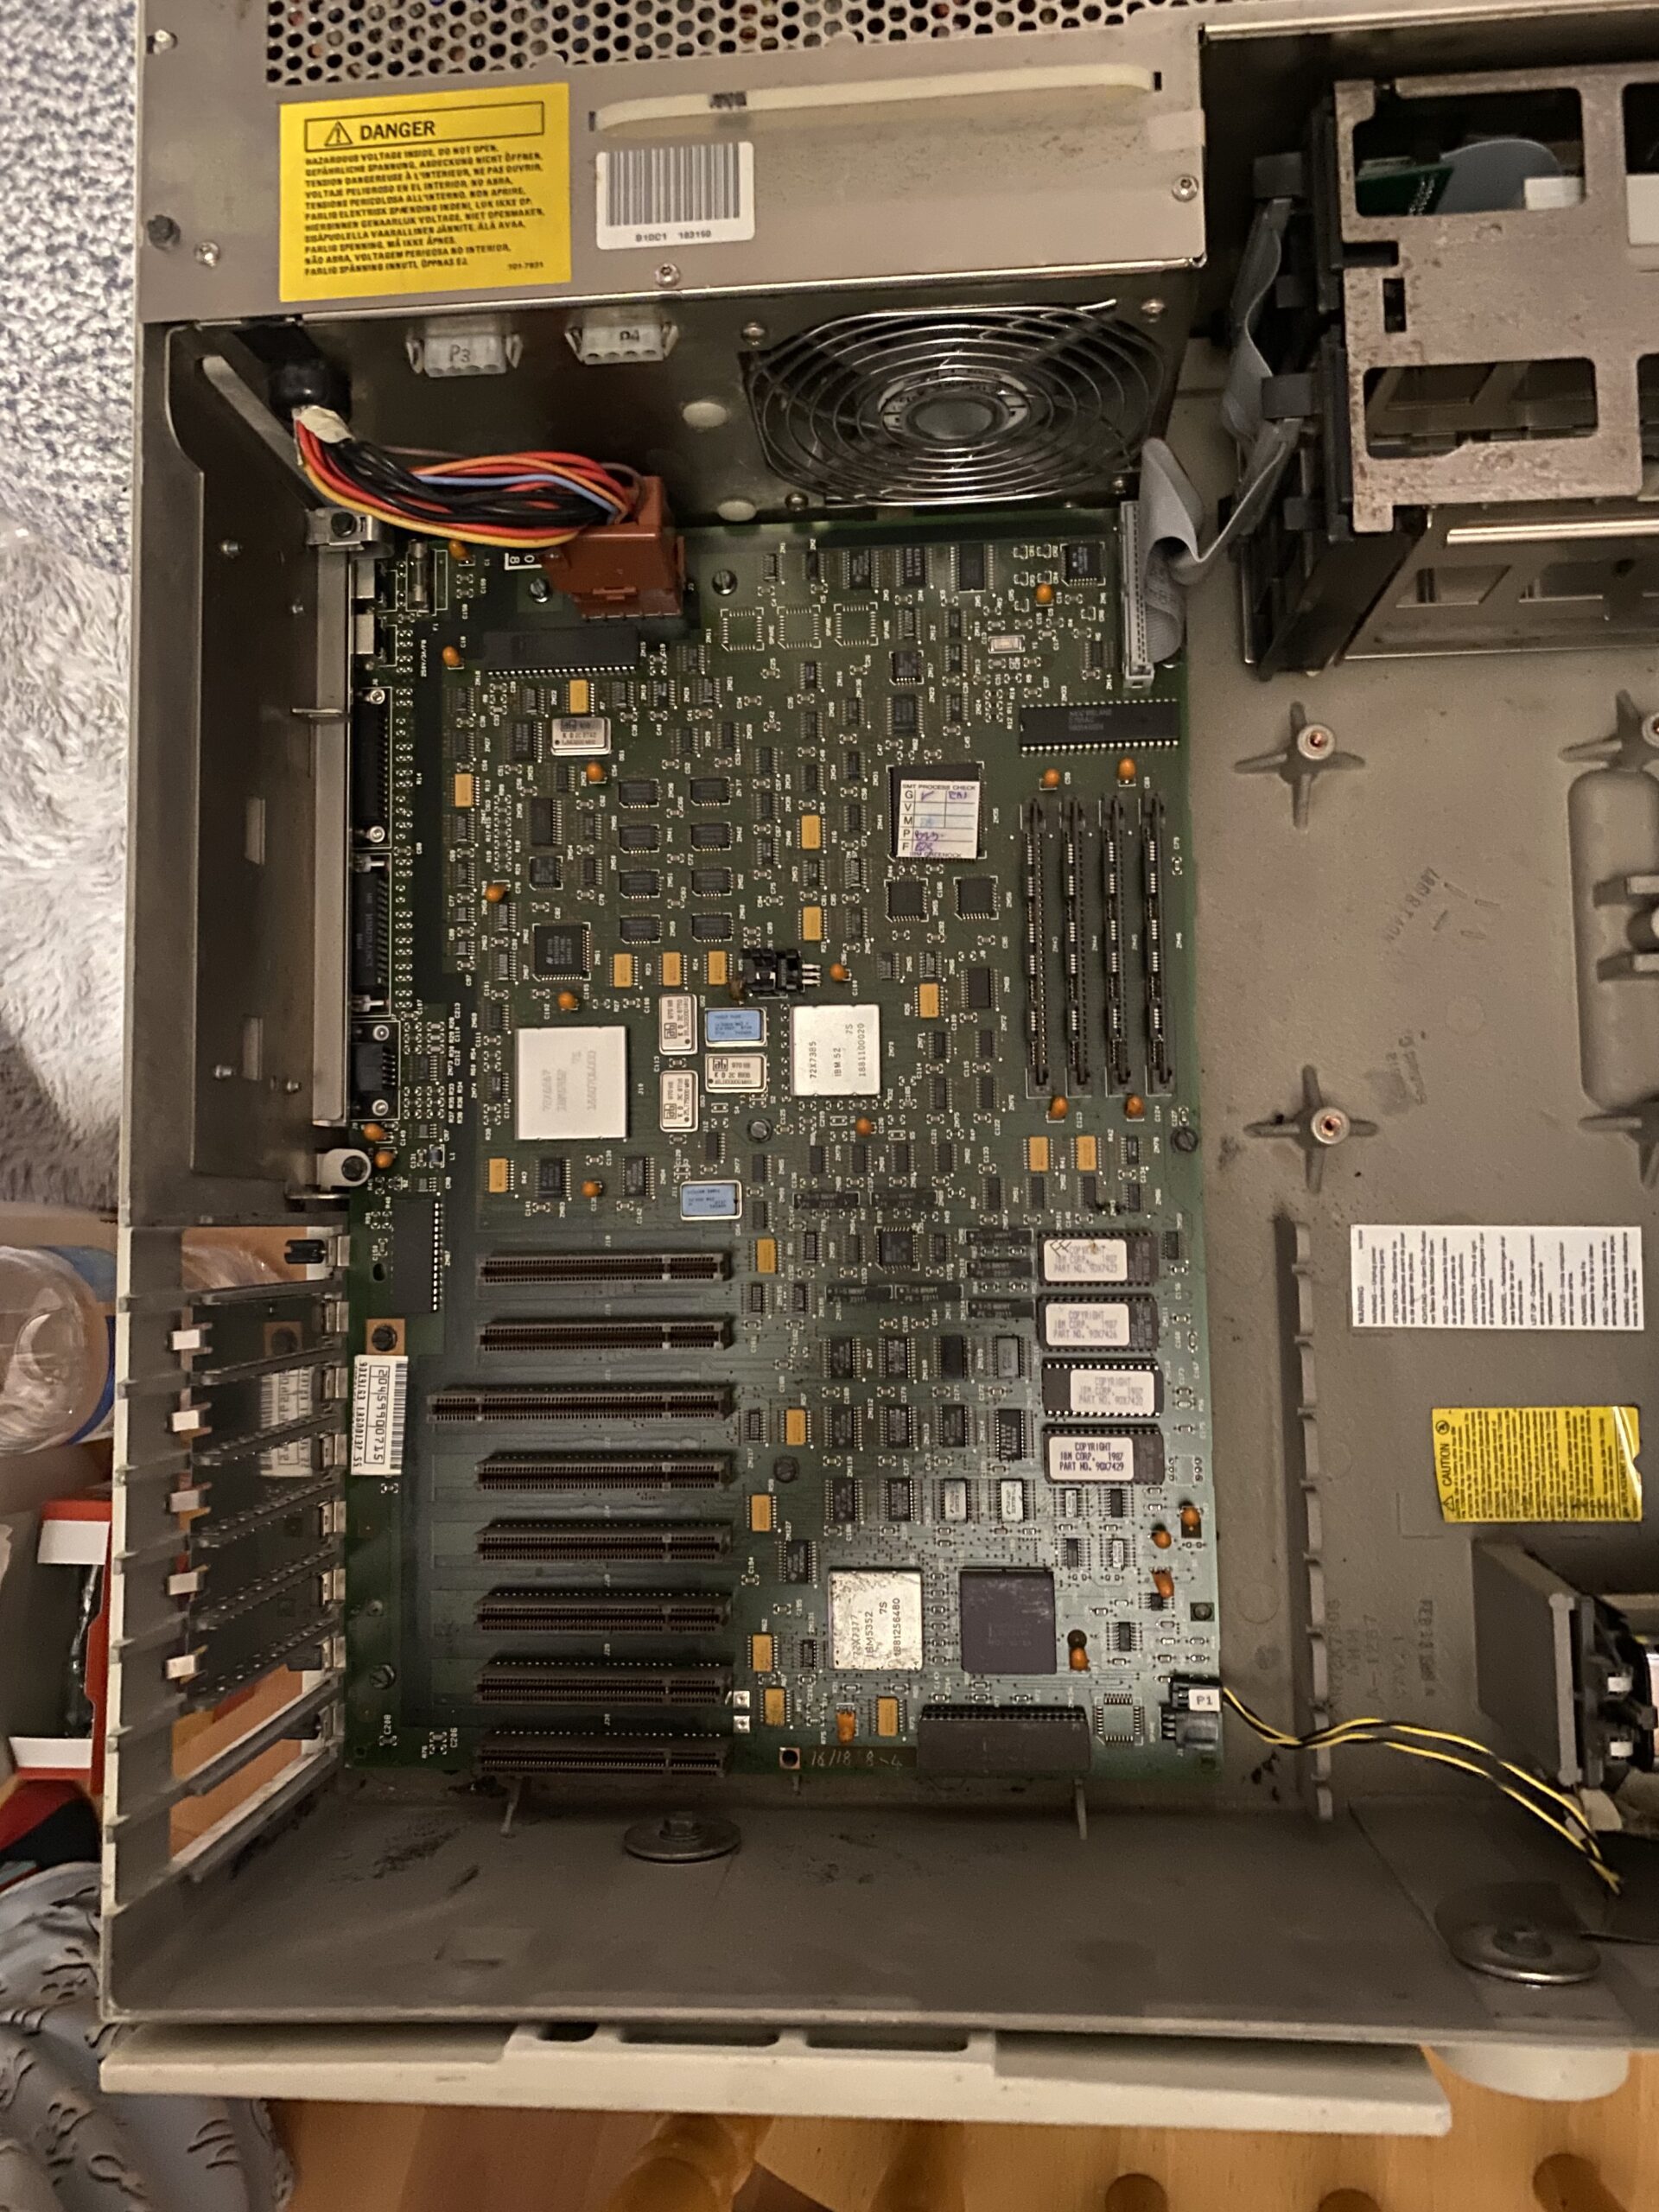
I swapped the motherboard with a PS/2 model 80 board. I had seen this on eBay for a bit of an excessive price, offered 40% of said price, and woke up to having shockingly won the bid. Of course it also means that I need special 32bit RAM to boot the board, because “IBM”.

a 1MB module

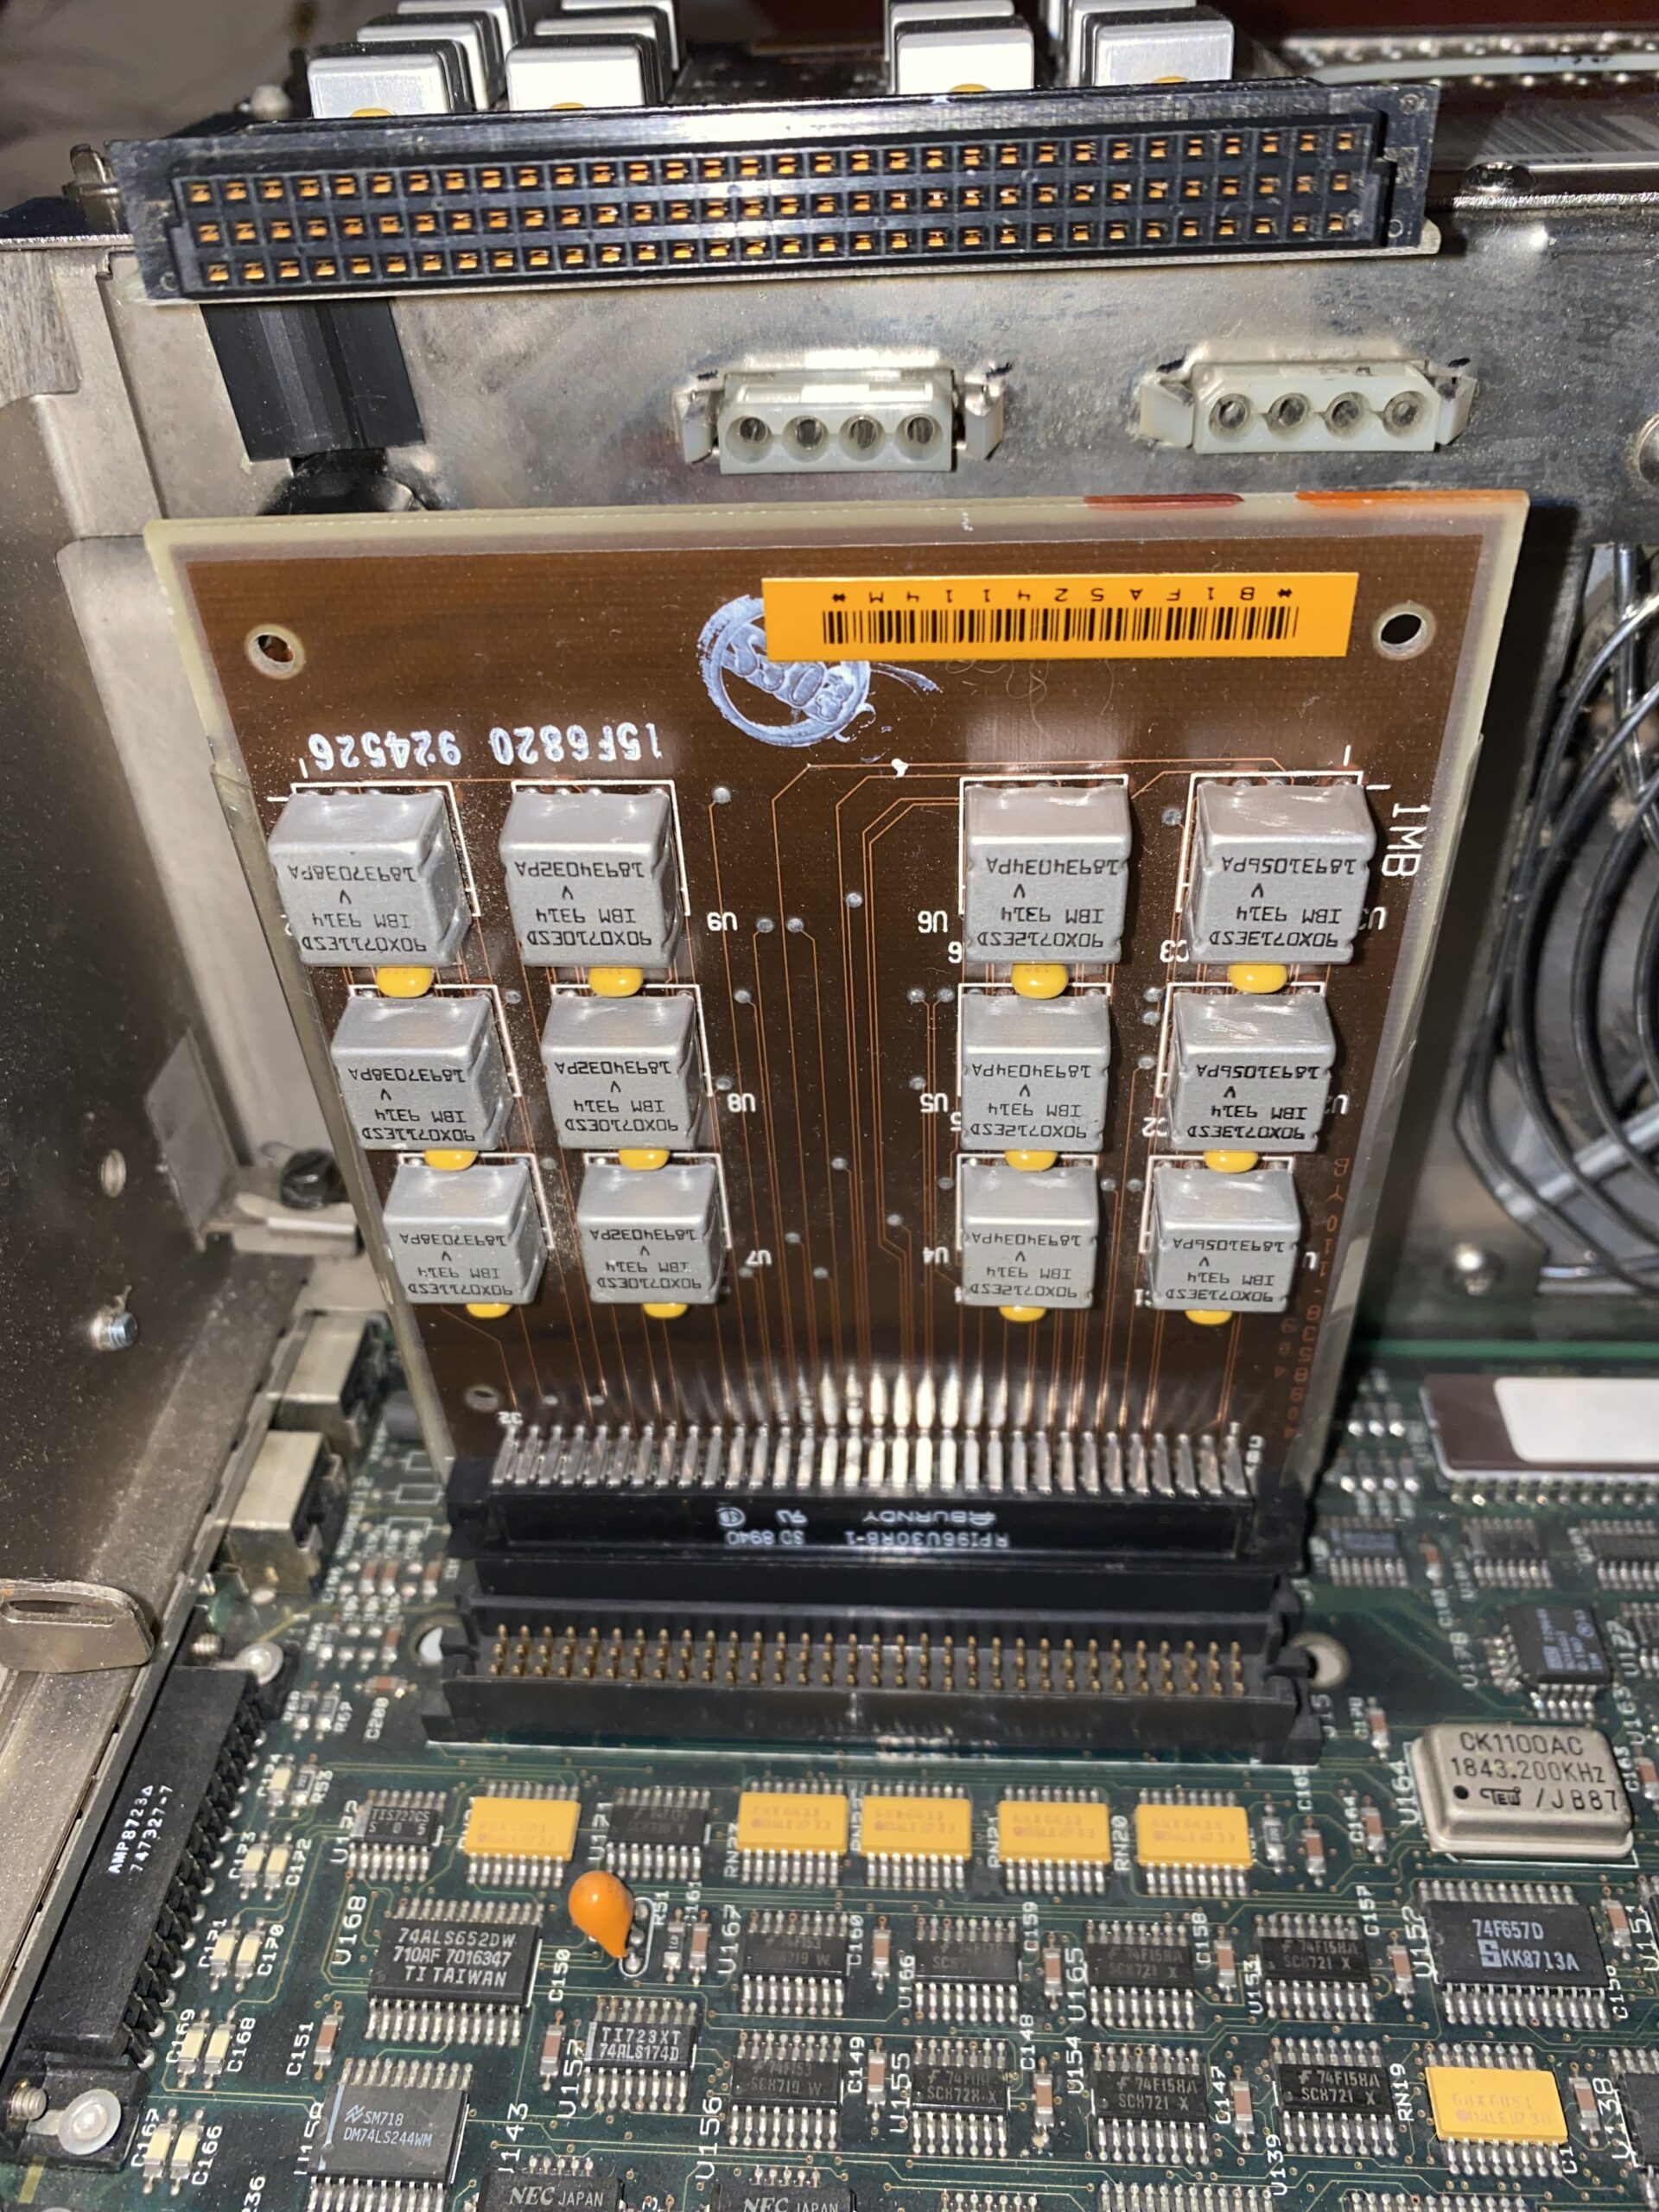
I picked up 2 of these 1MB modules, they are 3 chip much like the SIMMS I had used on the PS/2 model 60 motherboard. So these are no doubt parity 256k in each row, and 2 cards giving it 2MB of RAM right off the bat. I got lucky to find these 2 cards in country and at a really reasonable rate, when compared to all the others. They did make 4MB & 8MB cards, but naturally they are incredibly expensive.

Bootup

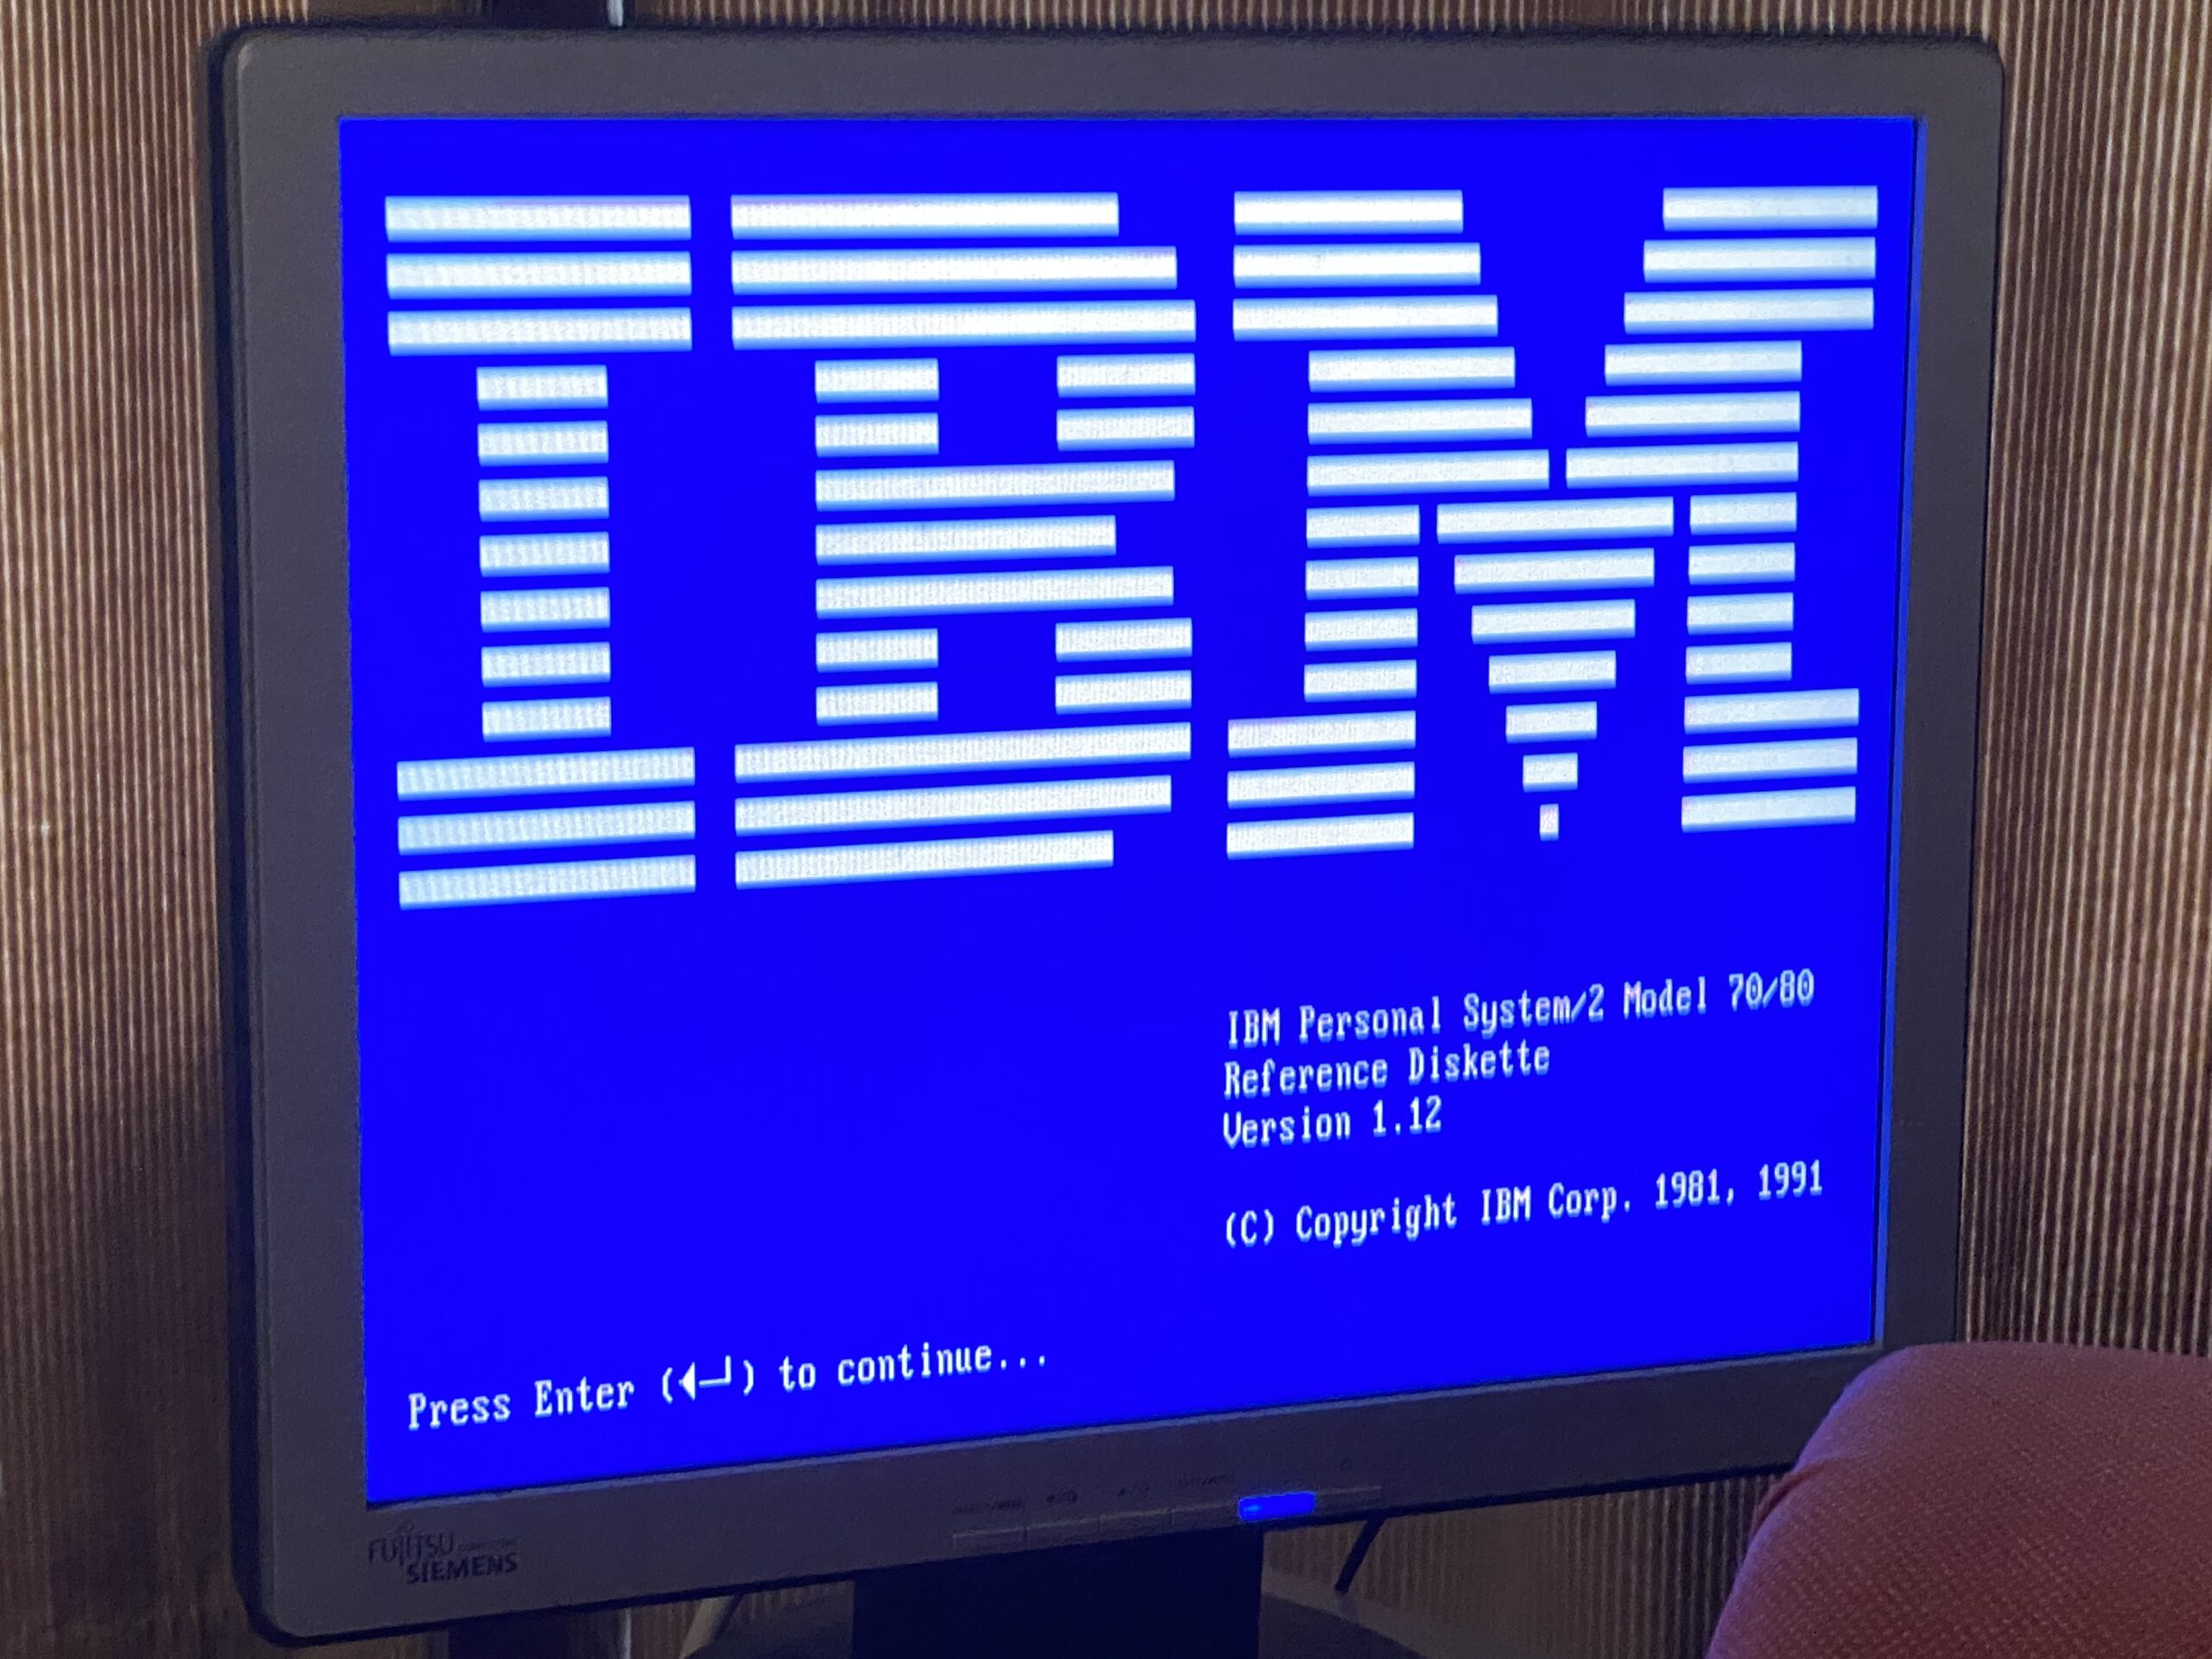
Luckily for me the board & RAM worked (the board was listed as working), and running setup from the gotek was painless. However for the heck of it, I put in the Boca RAM/2 board to see if it works. It does. It also does the same thing where once the Boca RAM/2 board is configured the setup program only crashes on running it, meaning I need to disconnect the battery backed RAM.

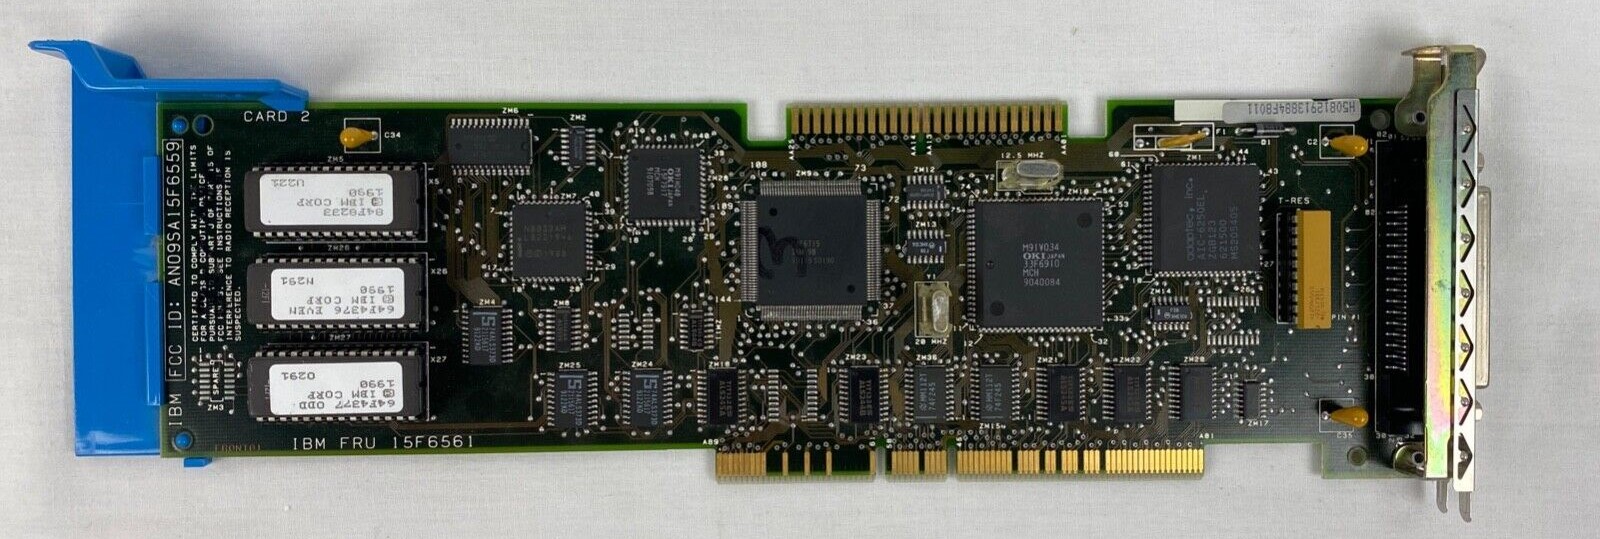
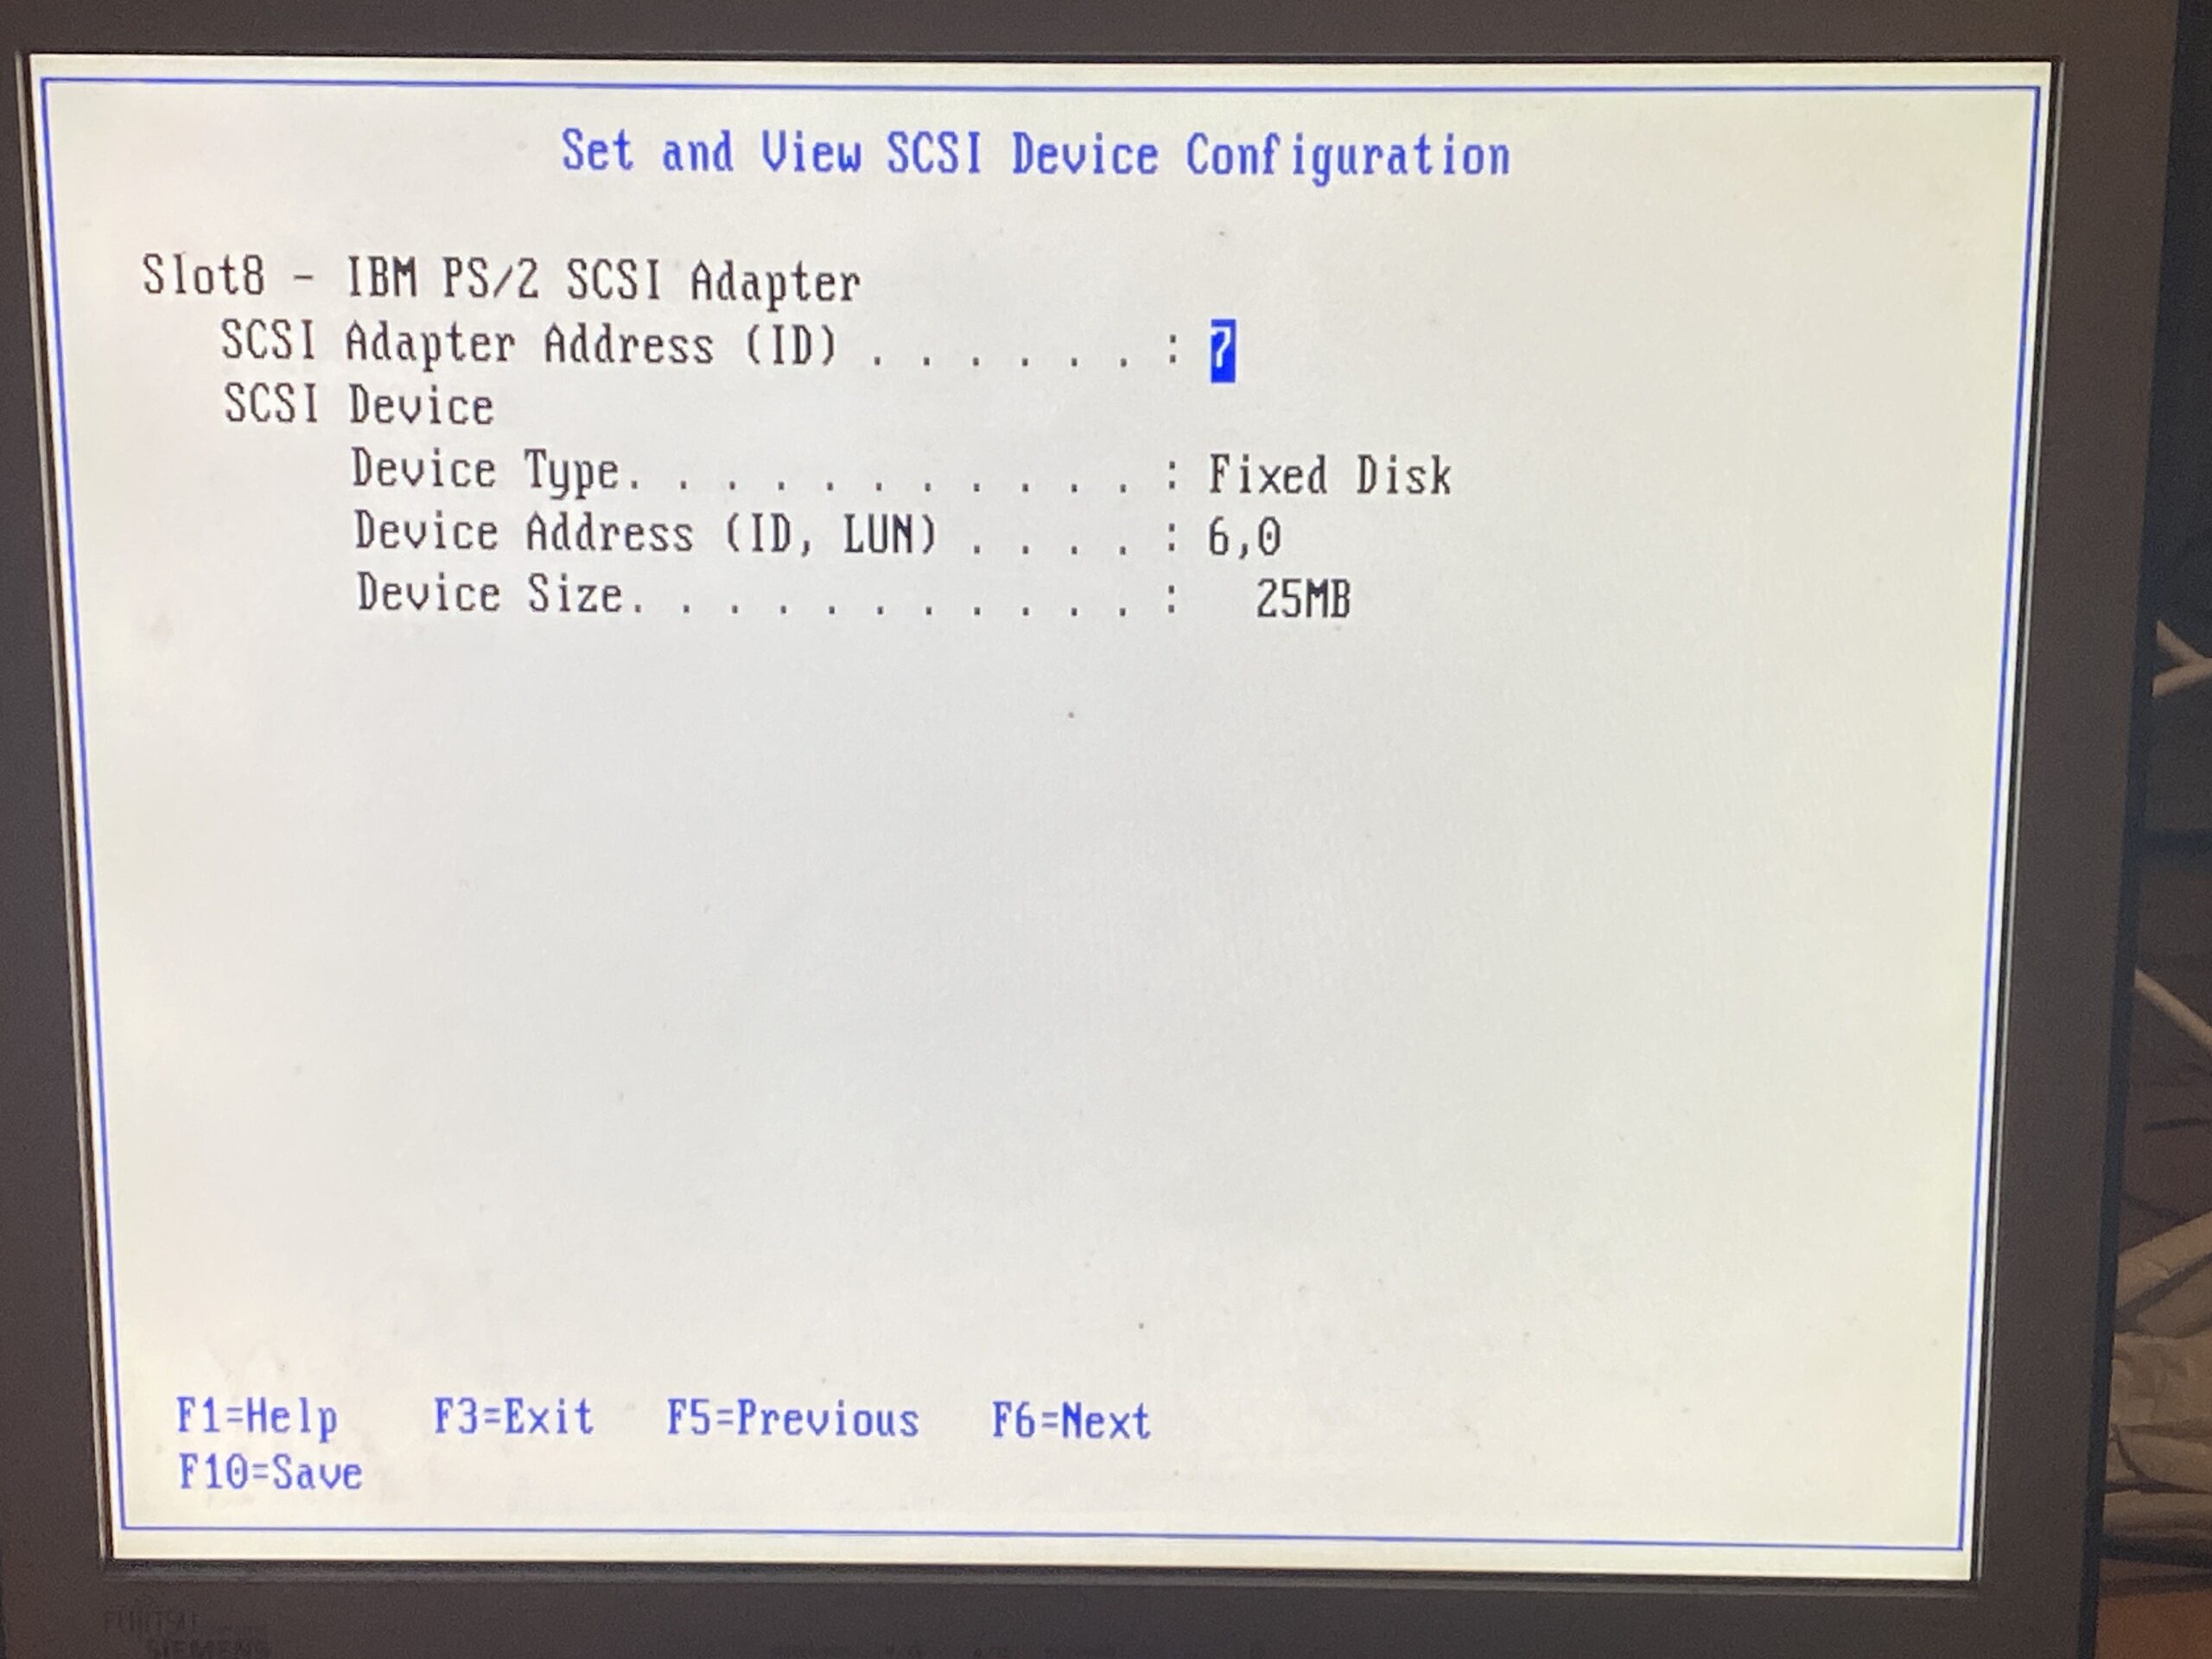
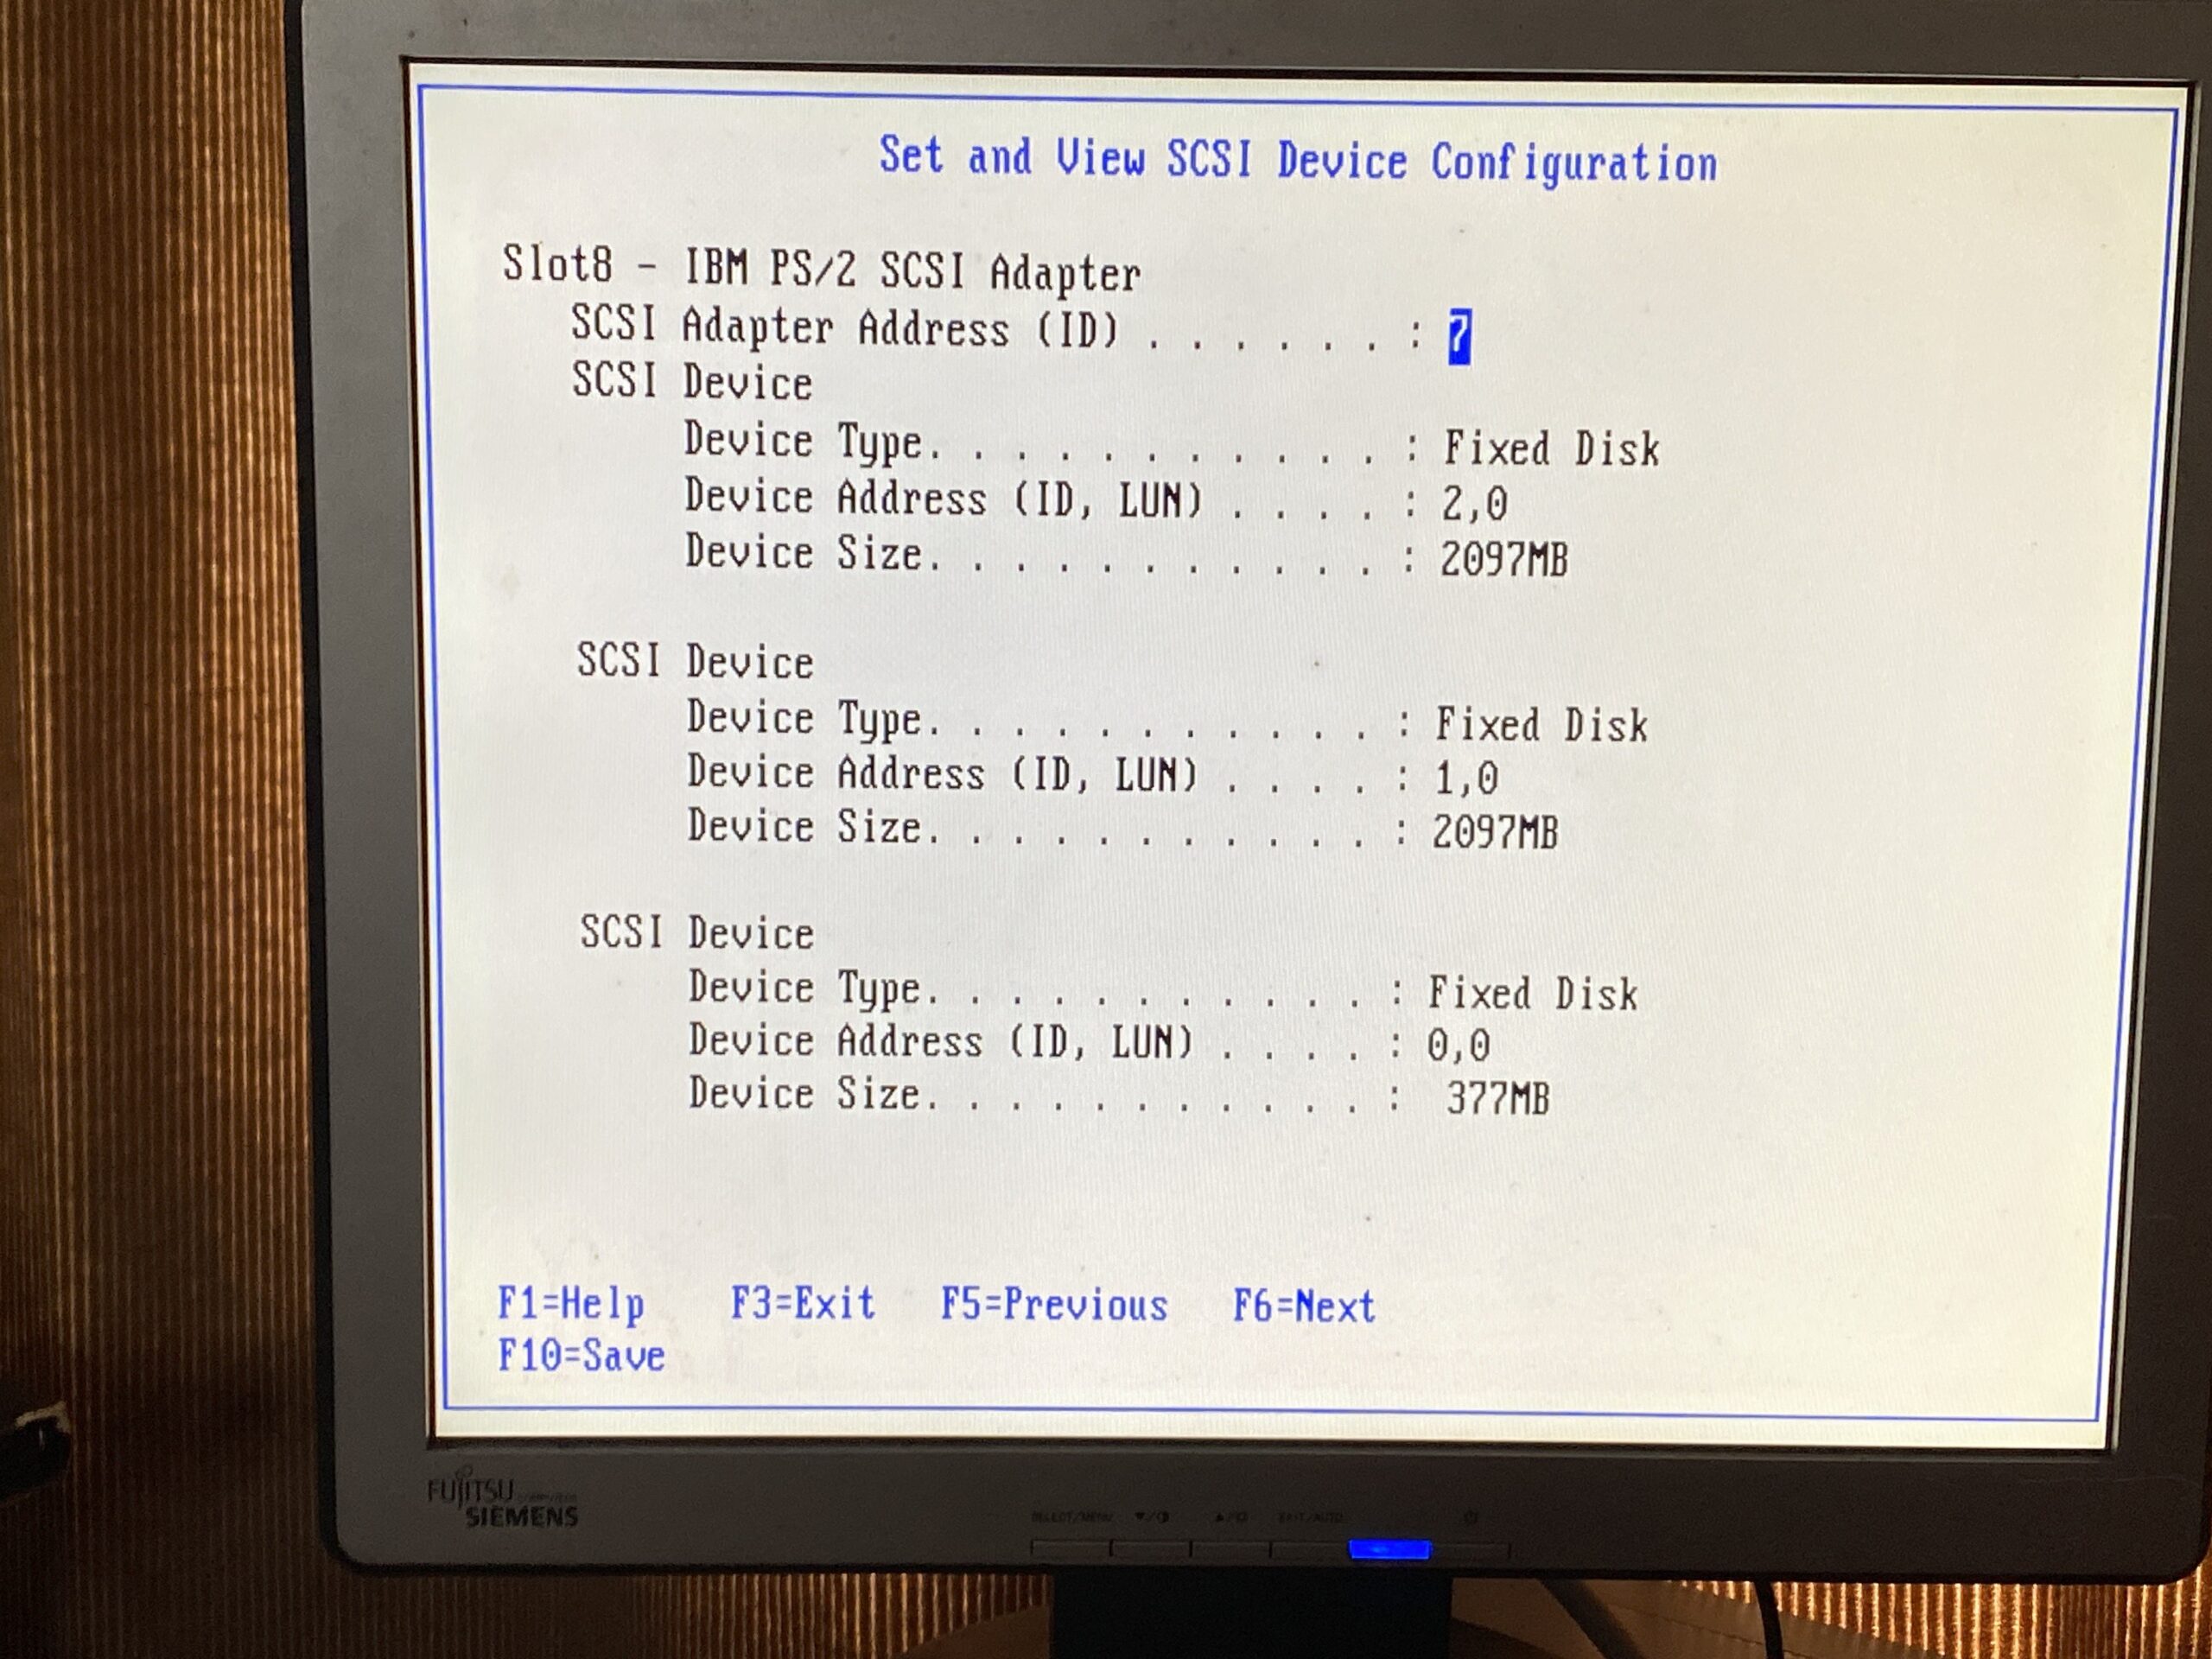
I thought I could avoid setting up the RAM card, but oddly enough until I did so it would not initialize the SCSI card. Oh, sure it showed up in the setup program, saw all my disks and everything, but it would not boot or show up from a boot disk.

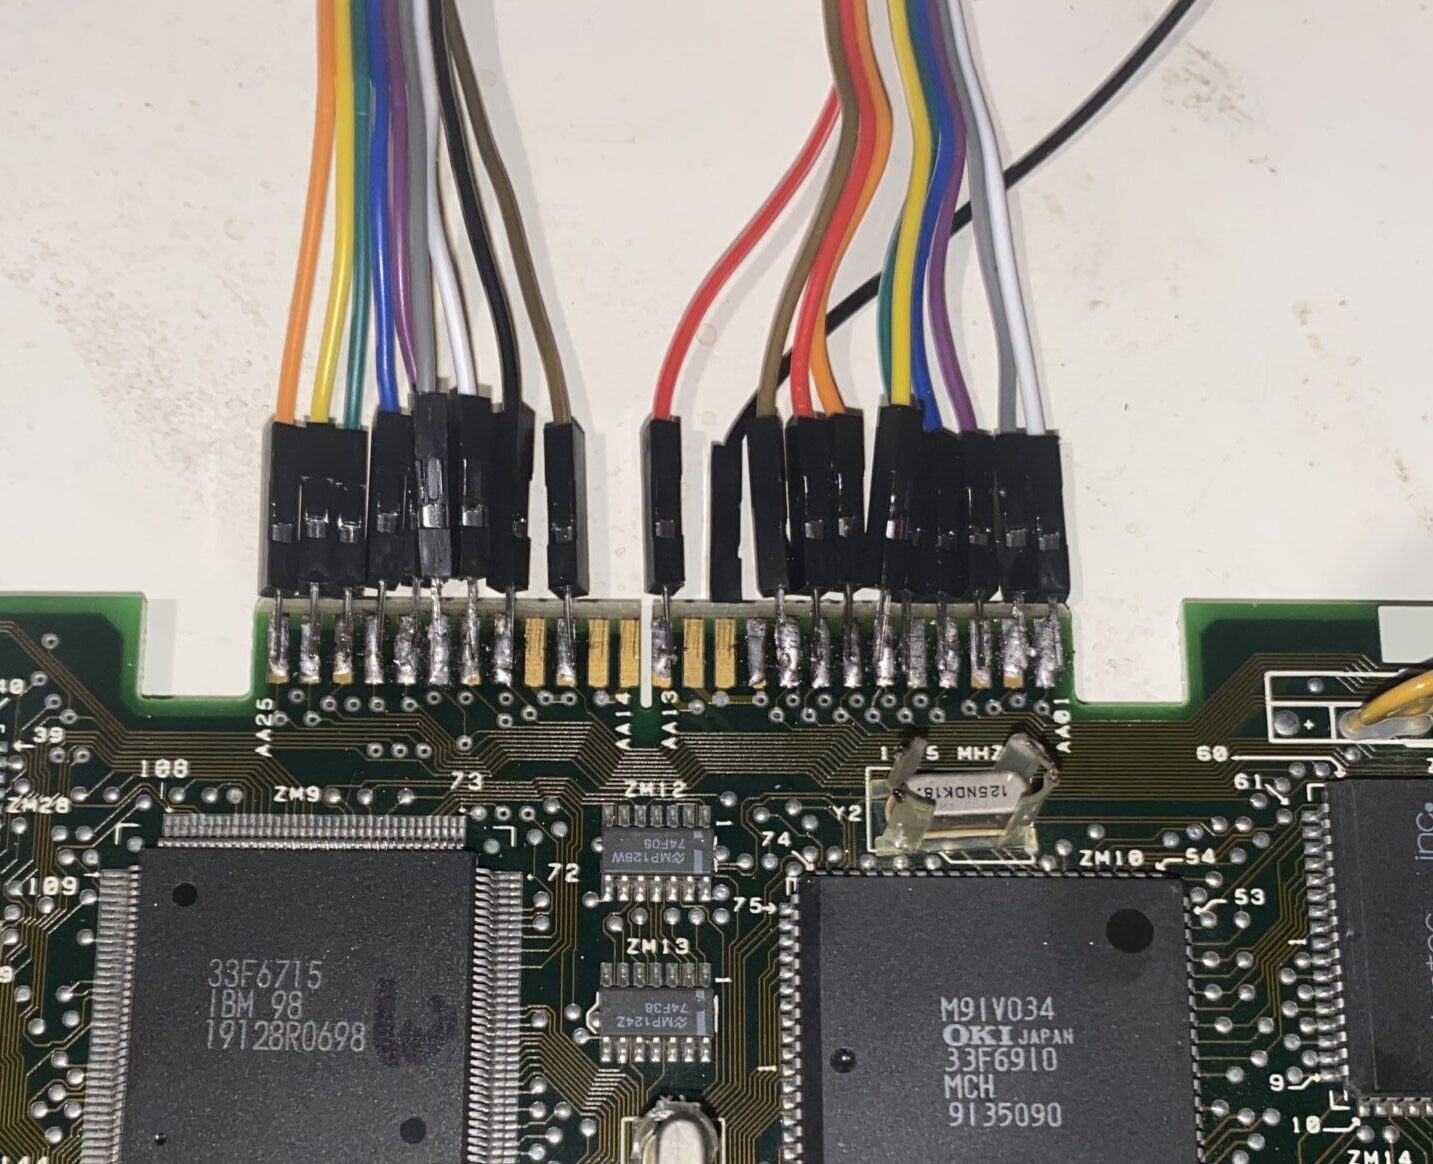
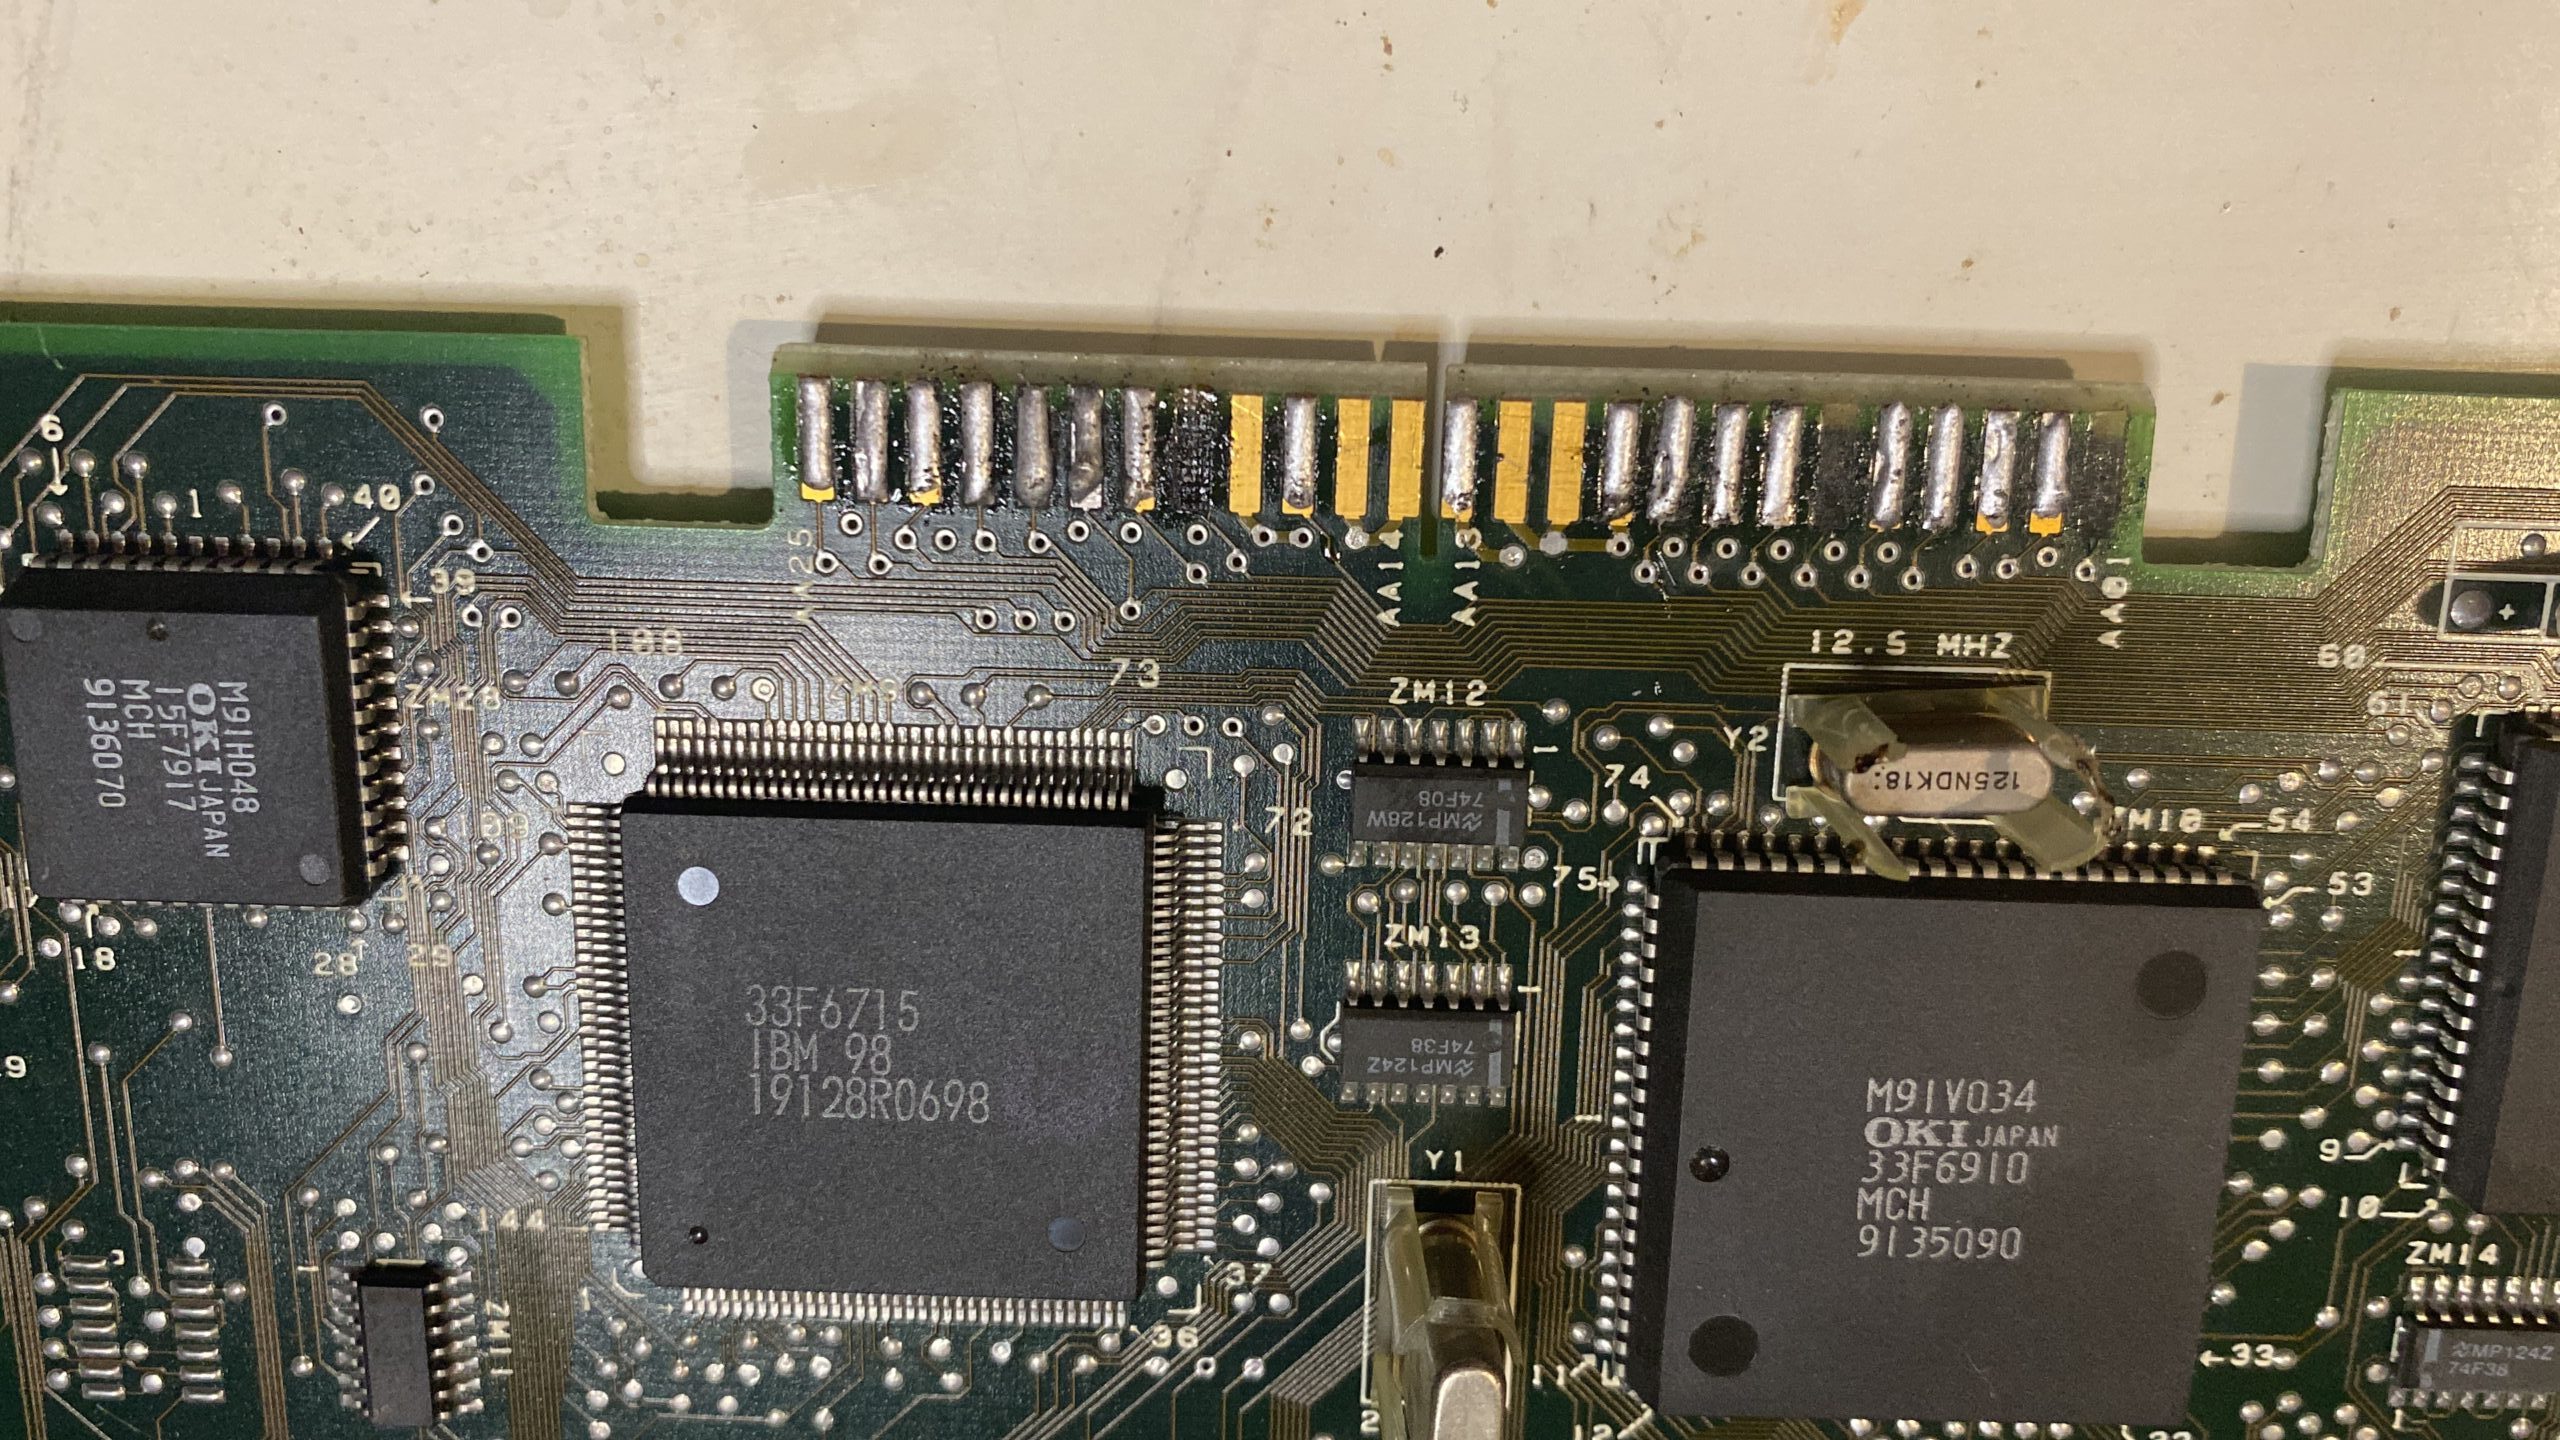
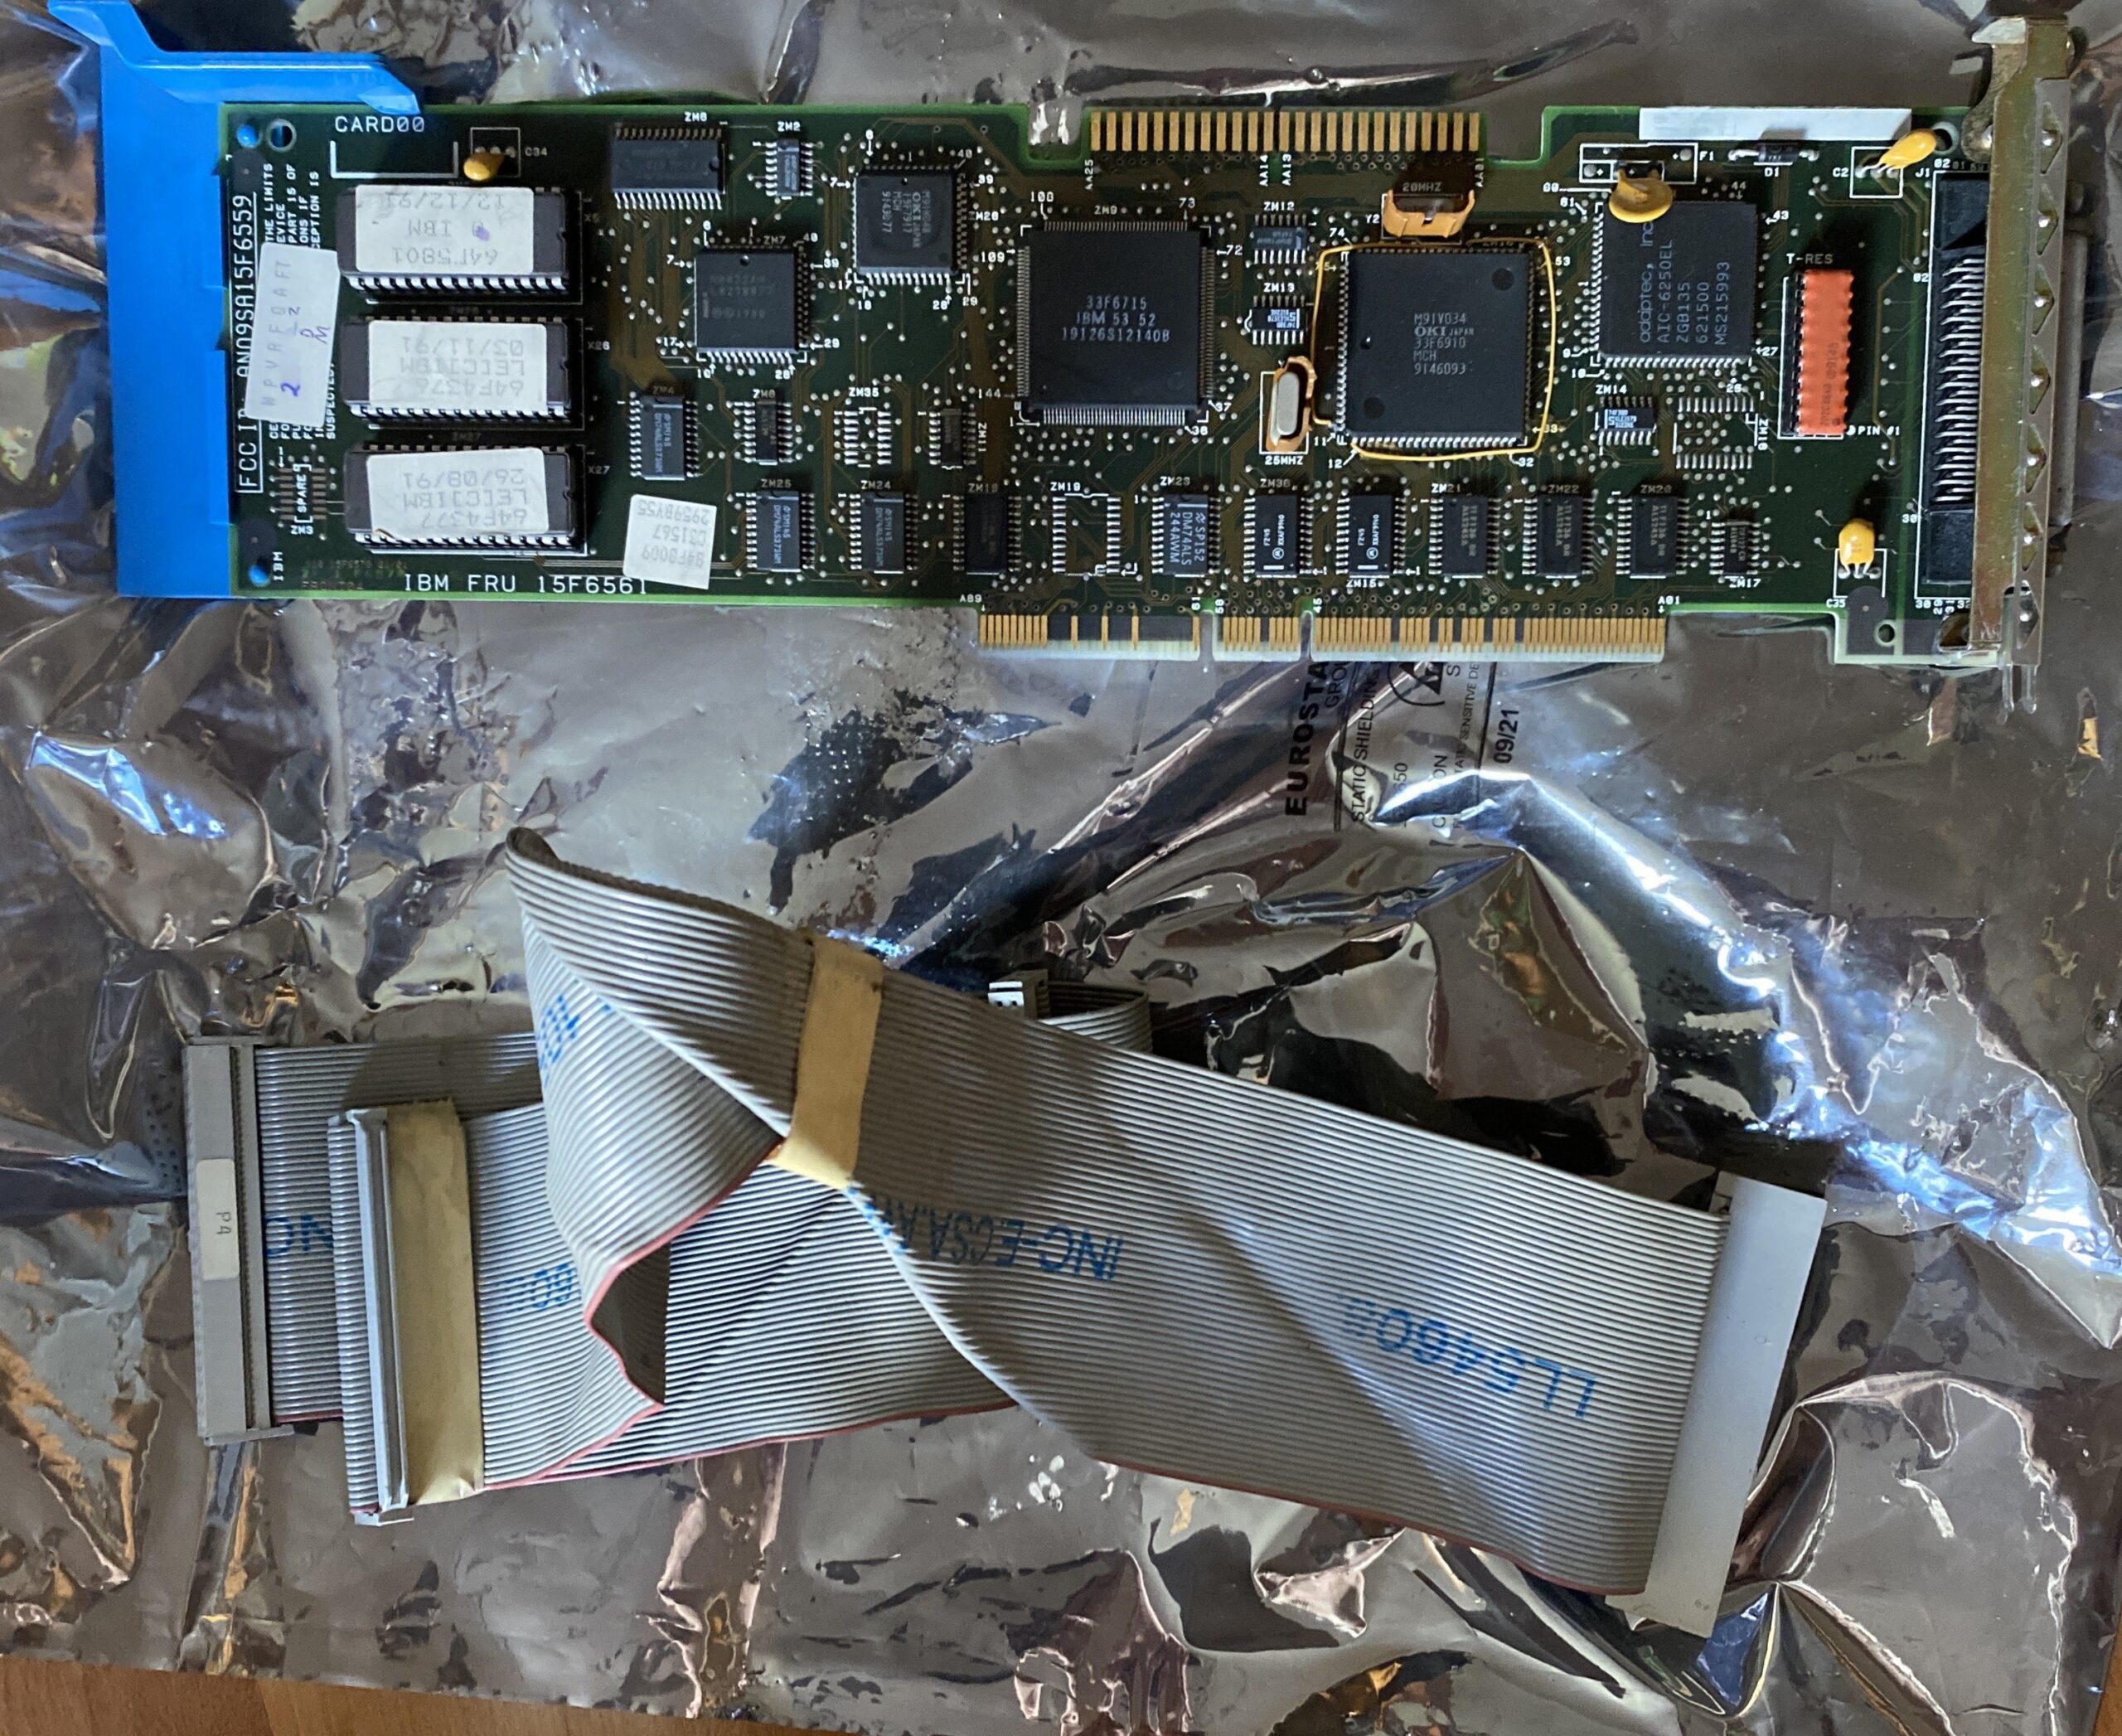
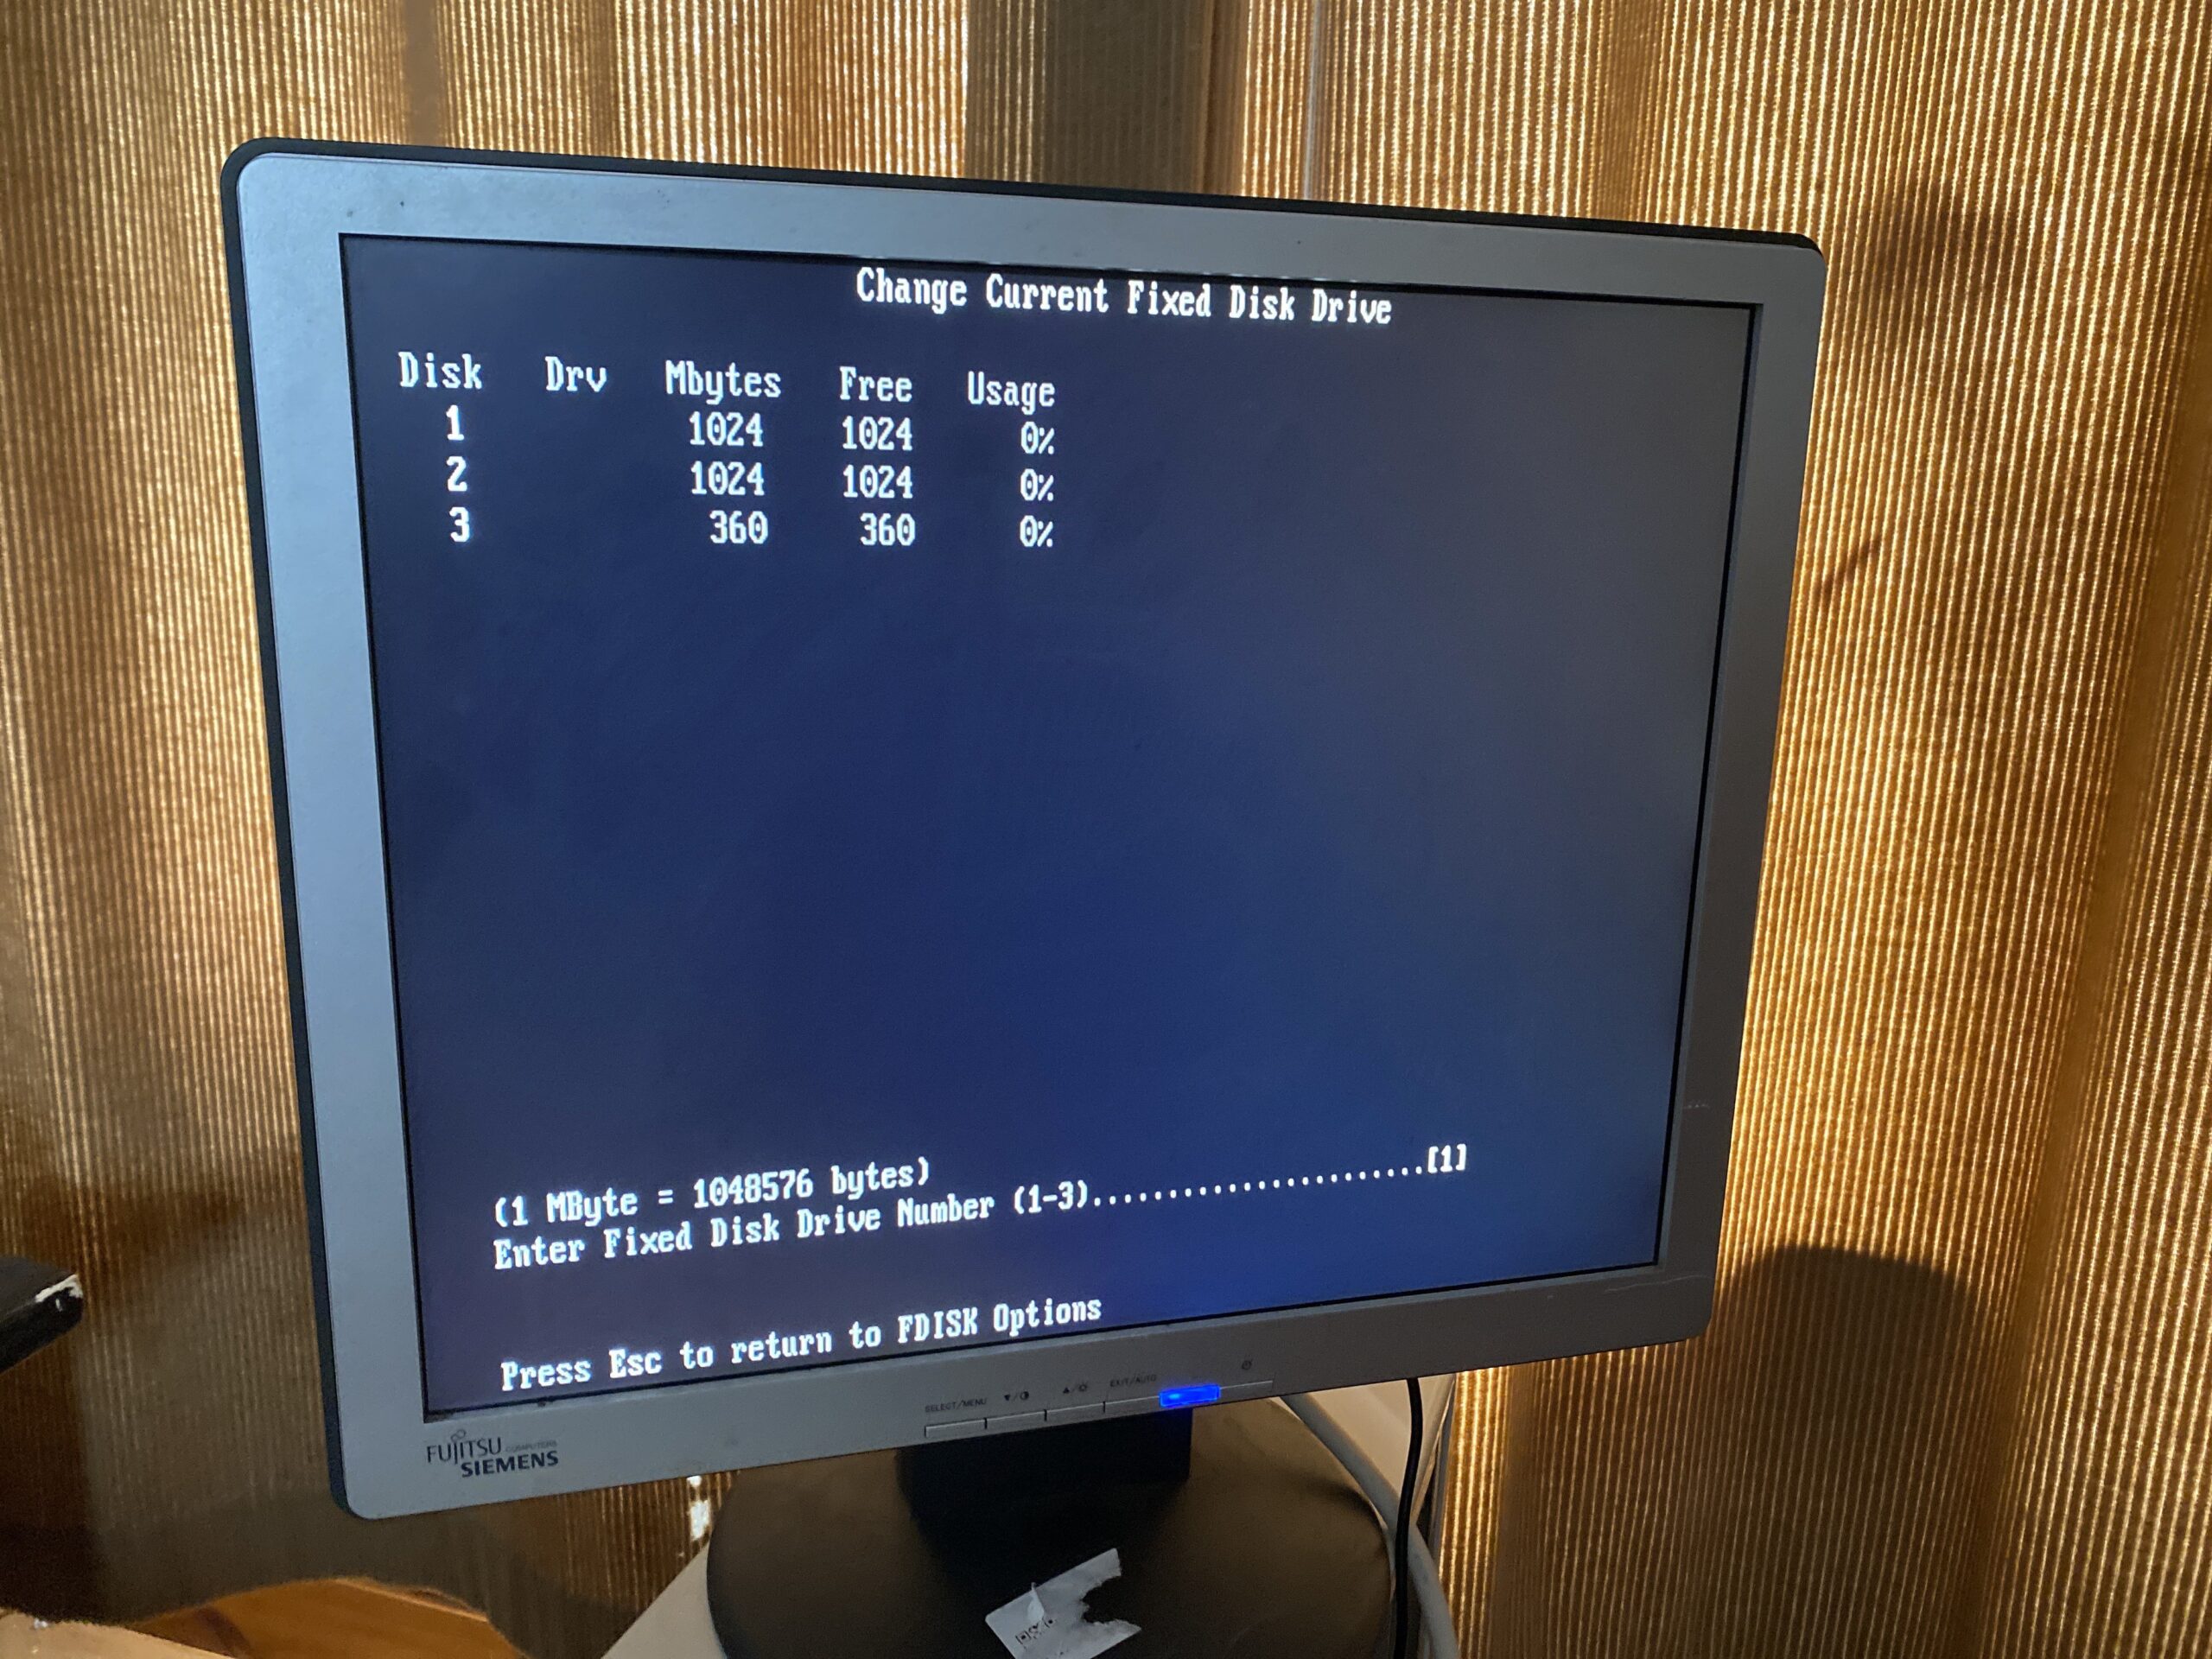
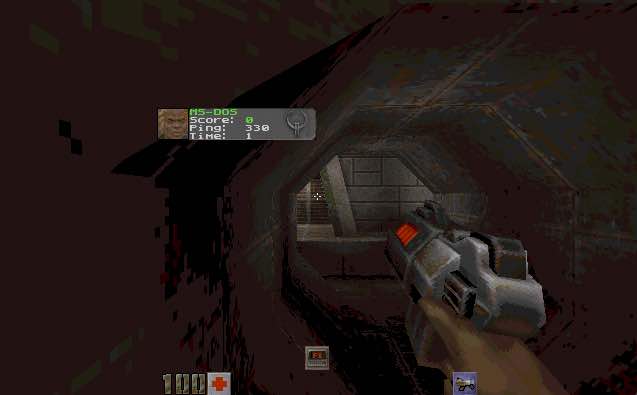
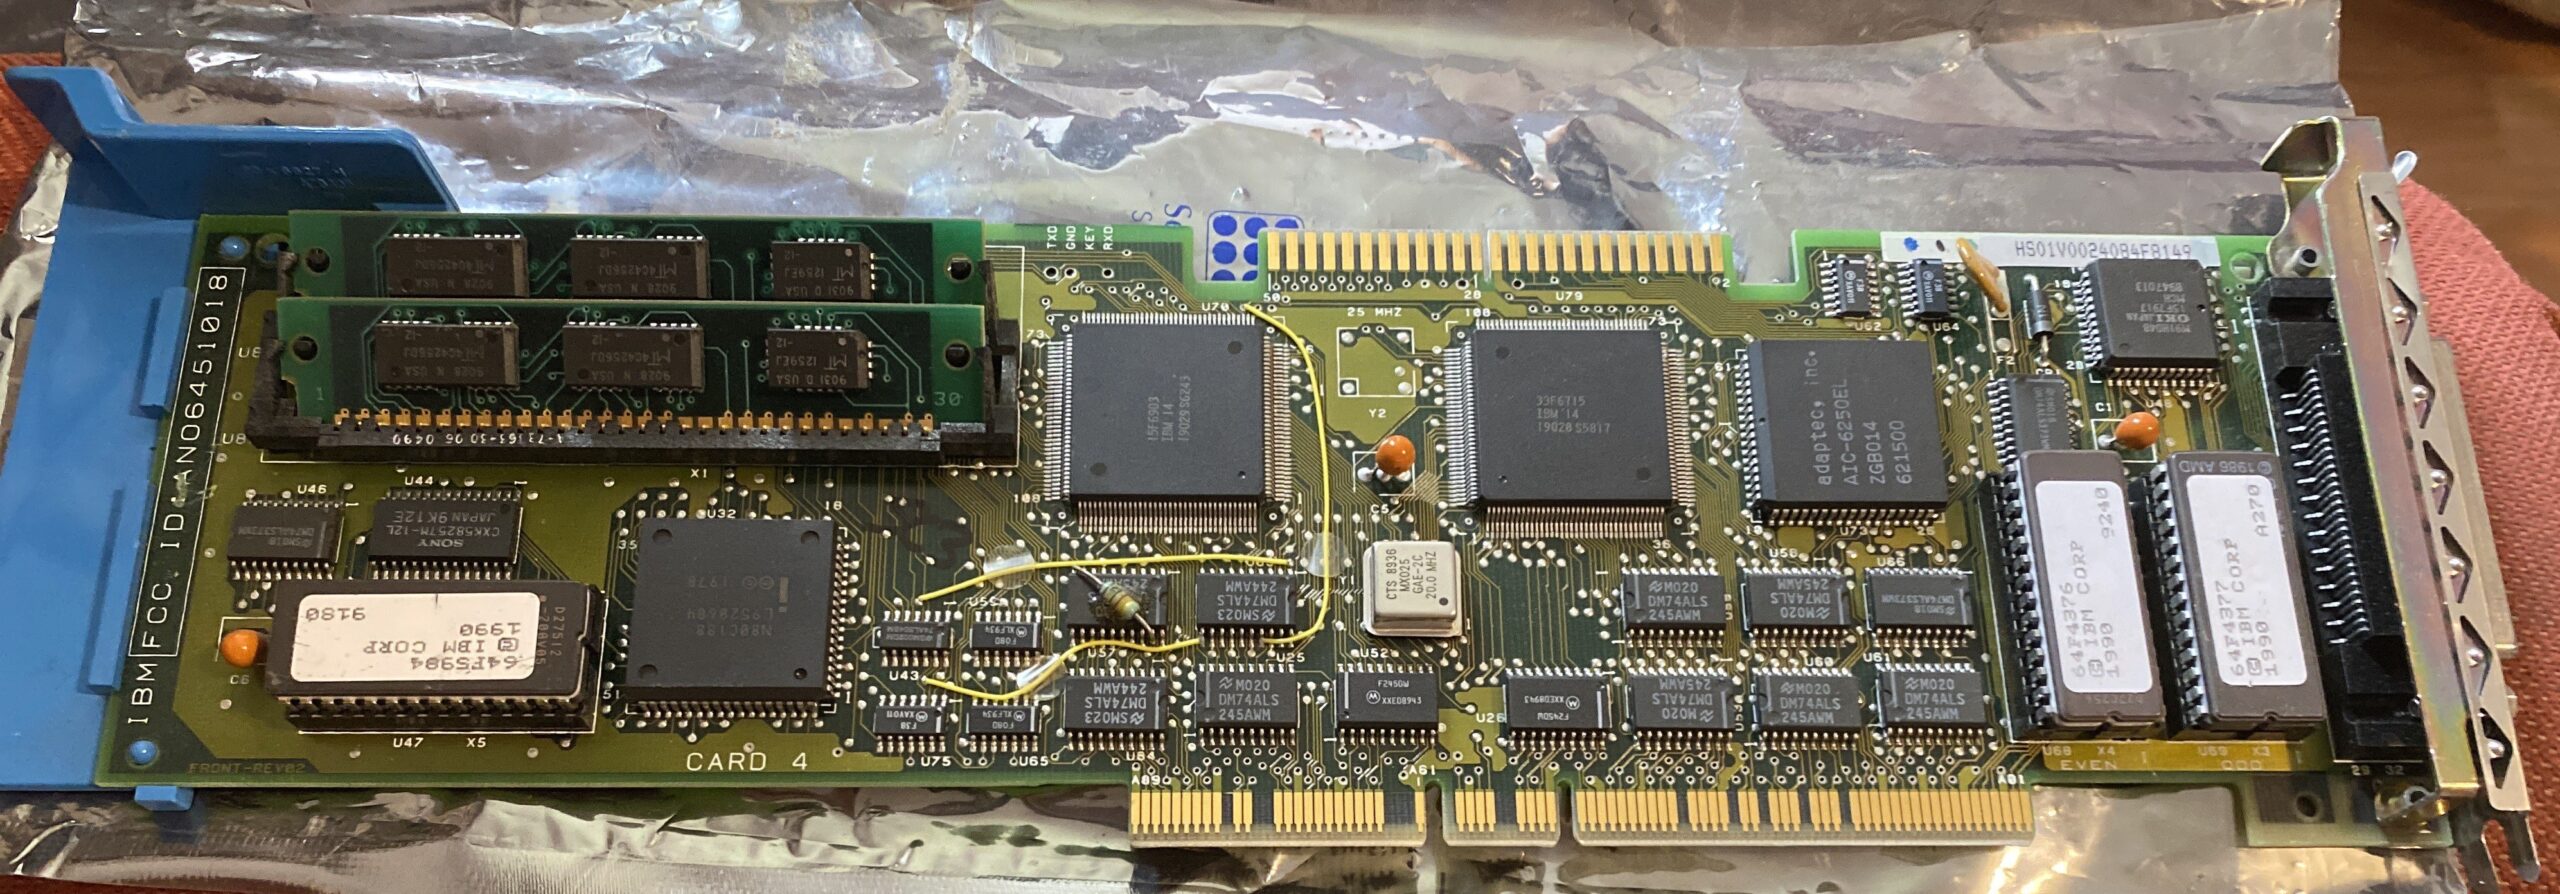
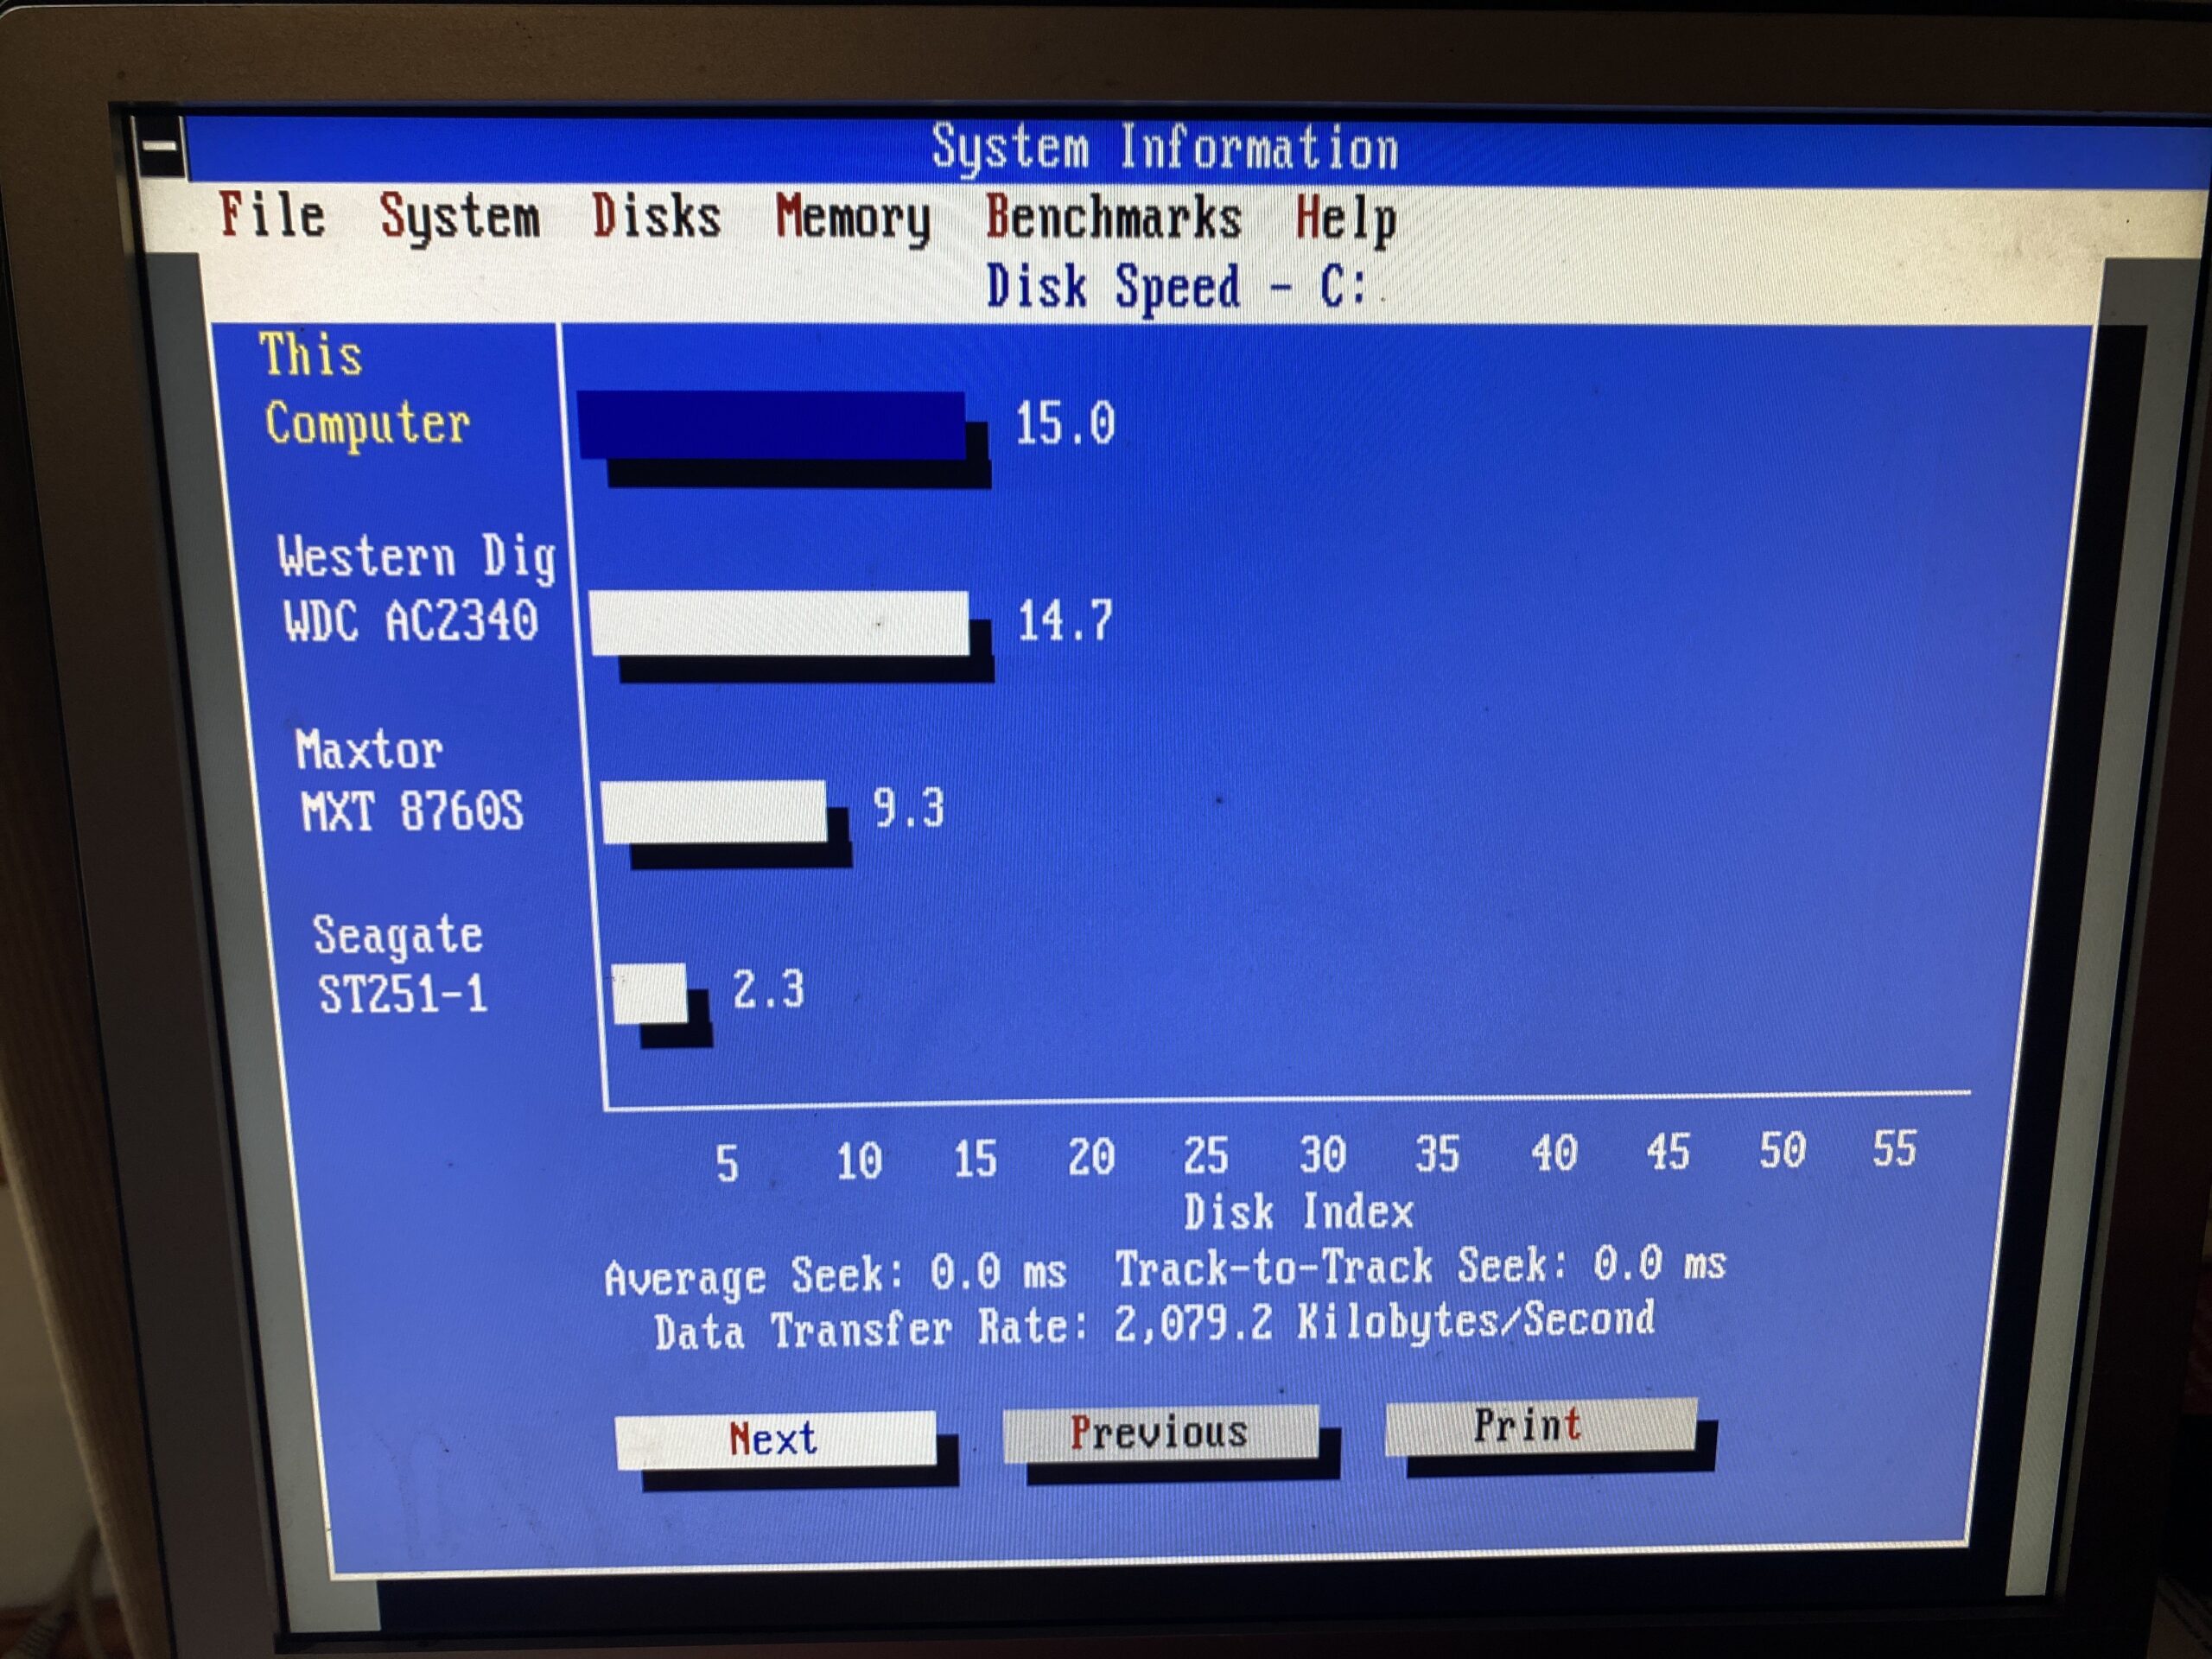
So now let’s re-visit the painful world of SCSI disks. I had bought one SCSI controller, and tore some pads off for being impatient, bought another and had it working fine with the approved cable, crashed the PS/2 MCA SCSI market, and then bought the caching faster controller card, to only reveal that it is in fact slower than the stupid card.

But it’s a 32bit card!

And now I have 32bit slots and a 32bit processor! Surely it’s going to ROCK!!!!….?
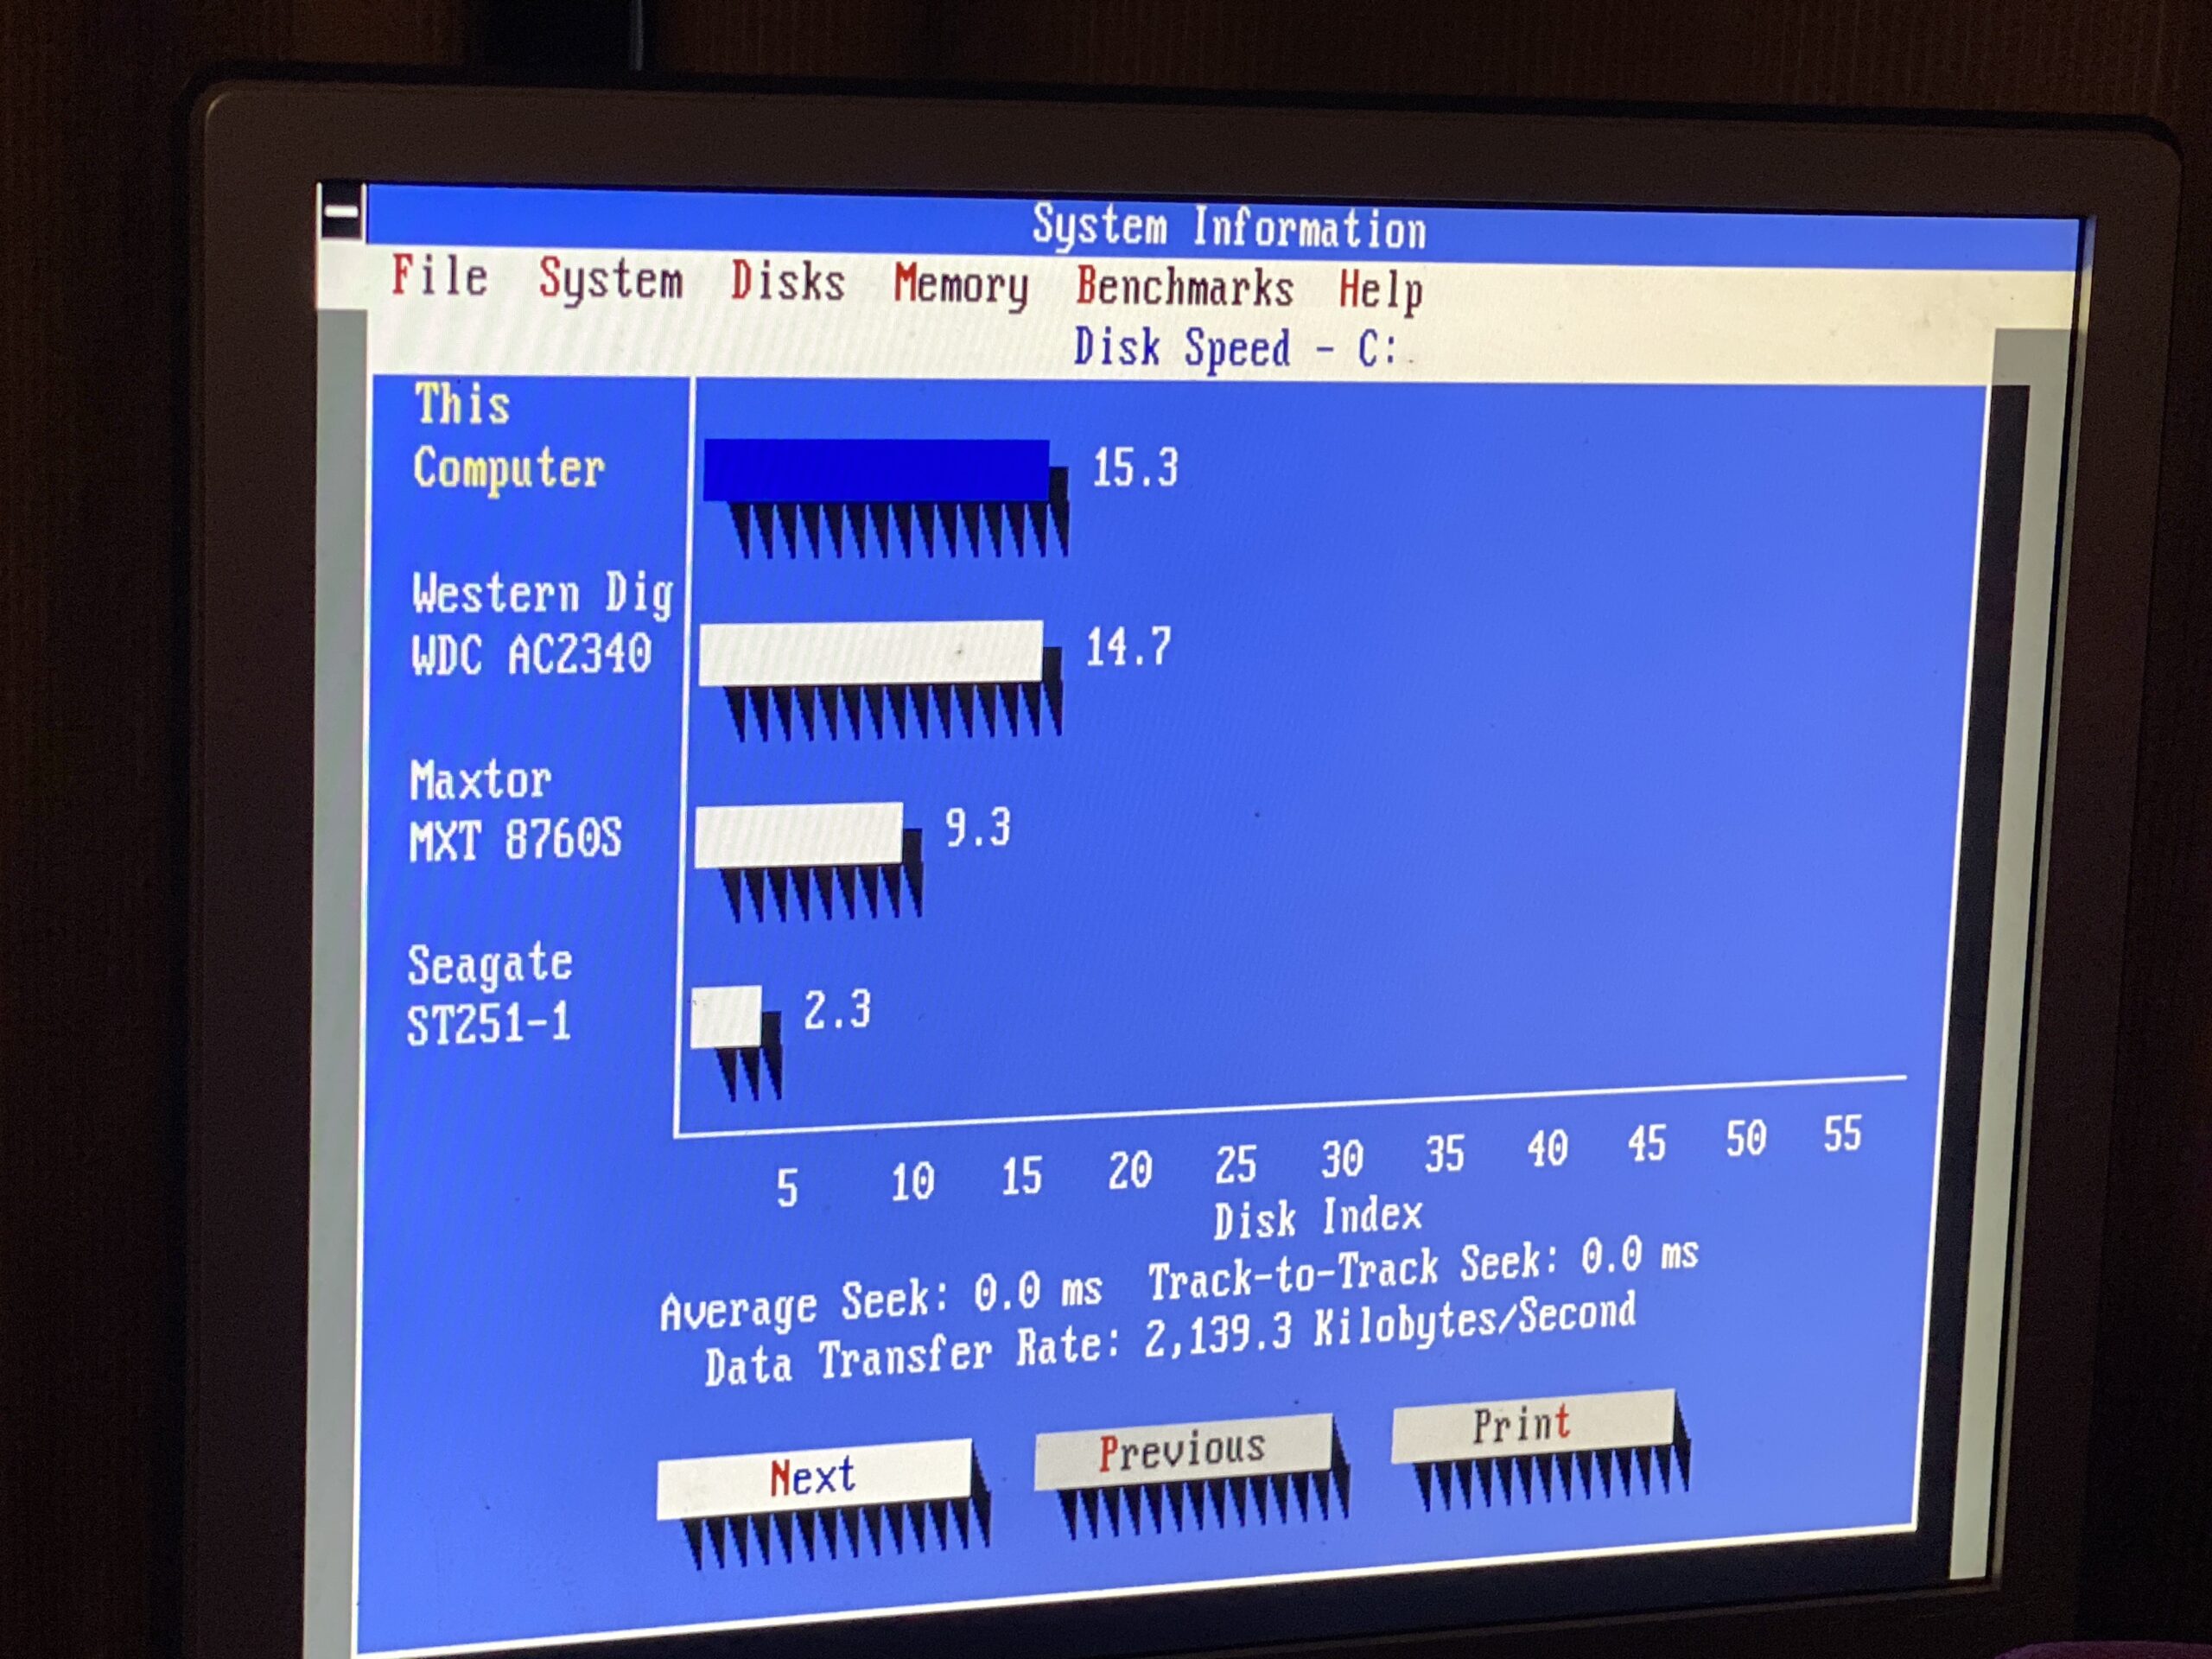
32bits of disappointment

It’s 0.3% faster.

What the actual FUCK. I mean ok BlueSCSI is great, and we’ve seen it perform faster with the ‘stupid’ card. I can’t imagine paying the $999 MSRP of this faster caching card to find out its slower. Nor the massive upgrade cost of going 32bit to find out its only slightly faster.

Wow.

Just Wow.

LANDMARK 6.00

That said, v86 mode is really cool!

My goto test for v86 is BattleTech the crescent hawk’s inception. I mean if Windows/386 can run this, everything else should be able to. And yeah, 16Mhz is almost enough to run this in a window. It screen tears like crazy and is just slow. But at least it runs!

Warning beeper music!

Although football was capable of doing this full screen in 1987, and Windows/386 could run it in a window in 1987 as well, it wasn’t until 1989/90 that OS/2 could with the much delayed 32bit version. Of course, the divorce happened after Windows 3.0 became such a massive seller, and OS/2 was delayed. again. While I had no issues under 86Box, I had plenty of weird issues on real hardware that seem to magically sort themselves out by running Infocom’s Planetfall first. I don’t know why either.

16Mhz Wing Commander

And luckily there is some difference in running at 16Mhz. Although I haven’t tried EMM386 on/off yet. The 286 had it’s excuse of copying pages in & out of protected mode, and the switch time being so horrific. But the 386 should be instant, only limited by it’s slow bus and I guess 4MB of slow RAM.

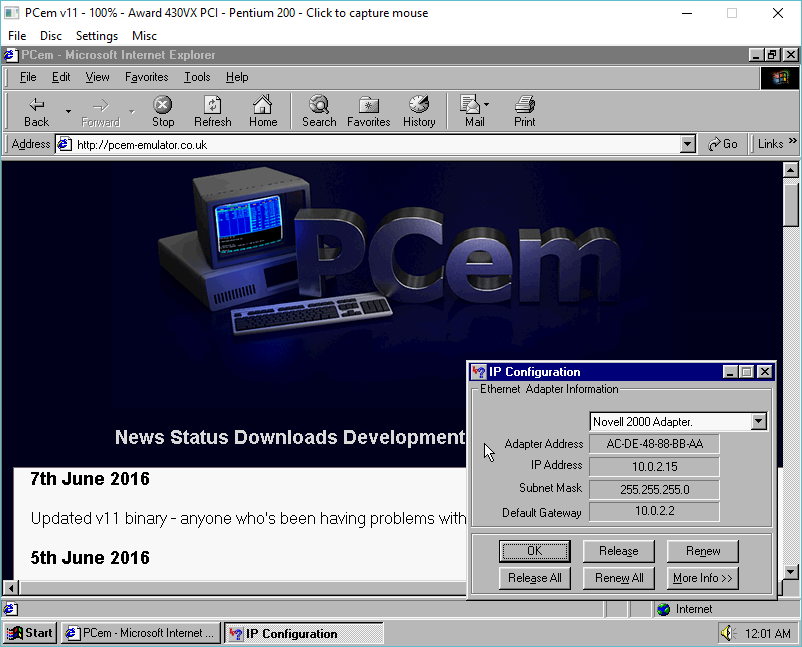
But what about DooM?

DooM v1.1 low resolution not quite postage stamp sized

Yes DooM v1.1 runs! I’ll have to try some Fast DooM later to see how much faster it can be! I’d like to think itll be faster but I am not holding out much hope.

Many of the bench stuff I had setup on the 286 to compare to the 386 sadly depend on a math processor. The problem of course is that 80287’s are very cheap for some reason. 80387’s however are not.

eBay special

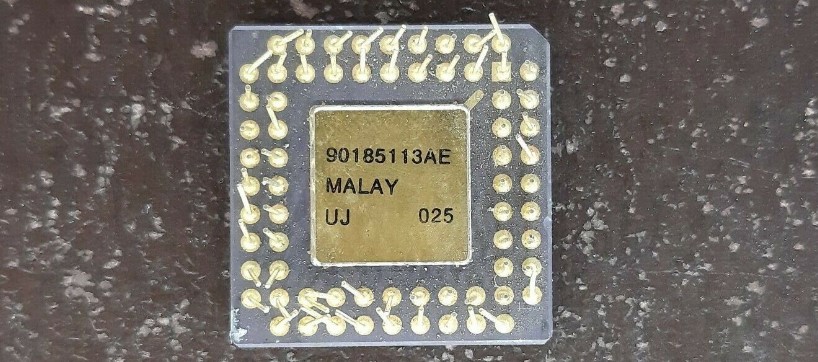
And the majority of them look like this. I don’t know how on earth people have hundreds of 80287’s to sell at super cheap prices, but 80387’s all seem to have been trampled, or had their inner core’s turned into slag. I will keep a lookout, although knowing my luck it may be cheaper to find another motherboard with a 386/387 paring.

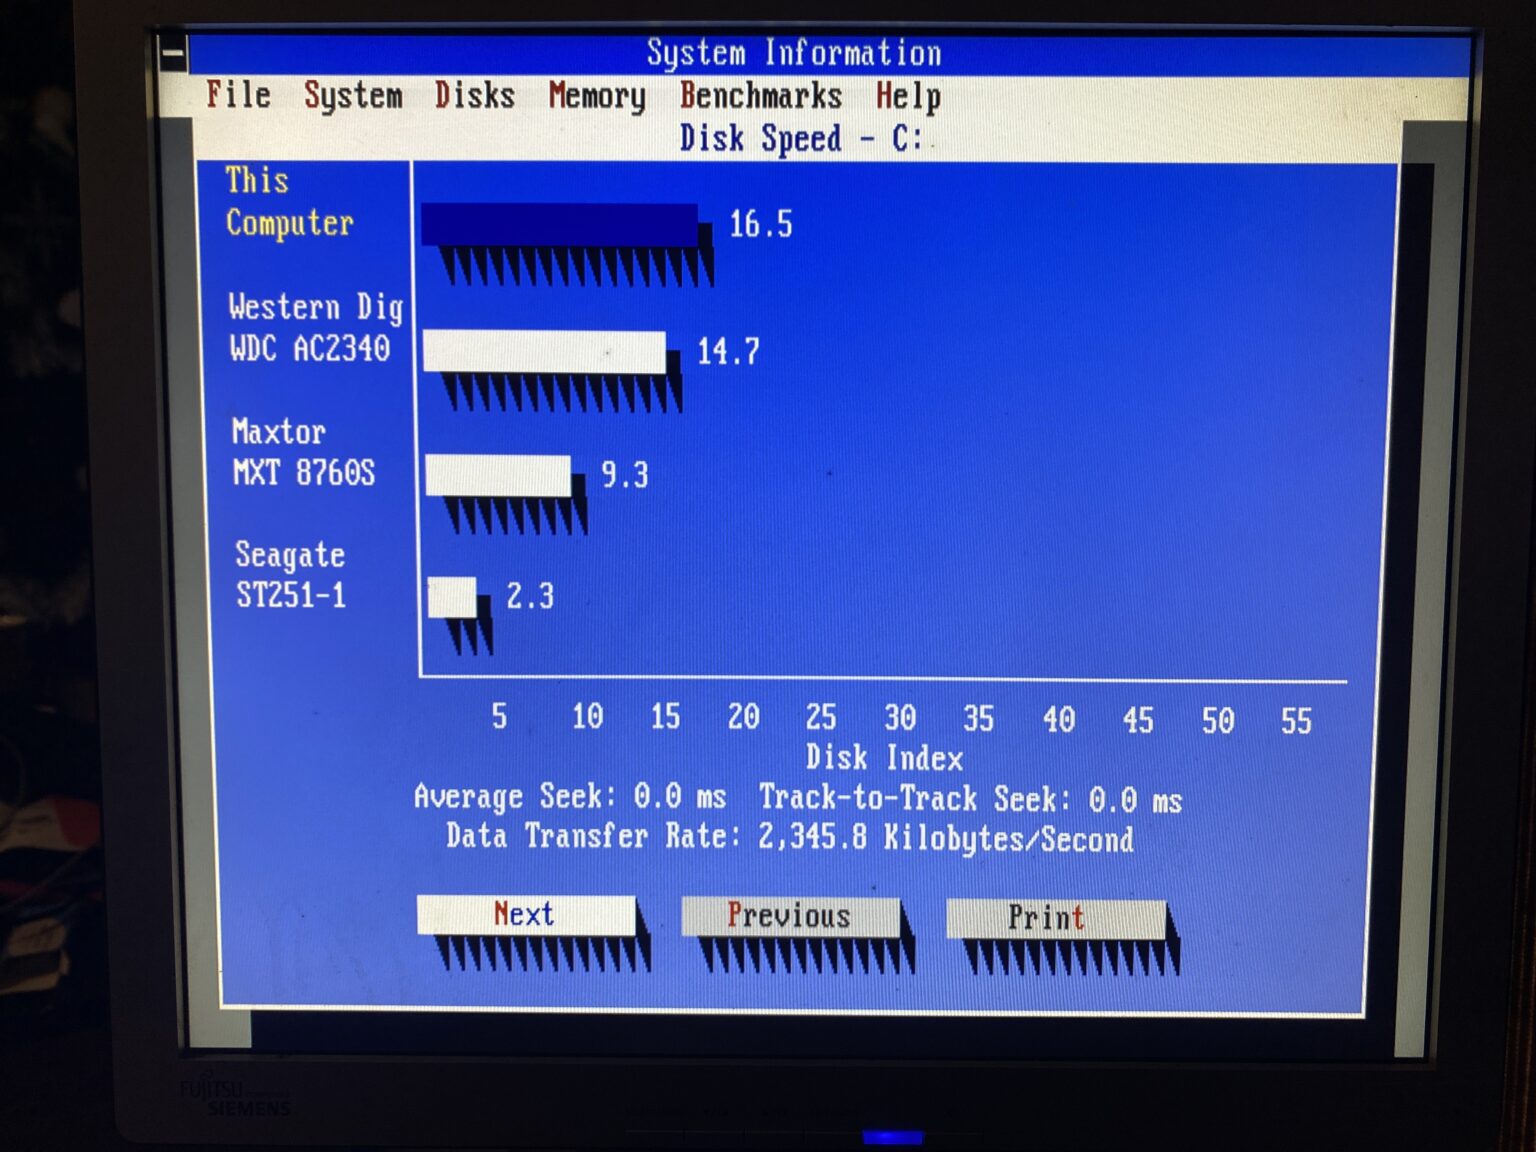
Speaking of OS/2 and weird crashes, I got this fun one from OS/2 trying to run sysinfo:

trap 000e on 038600b1

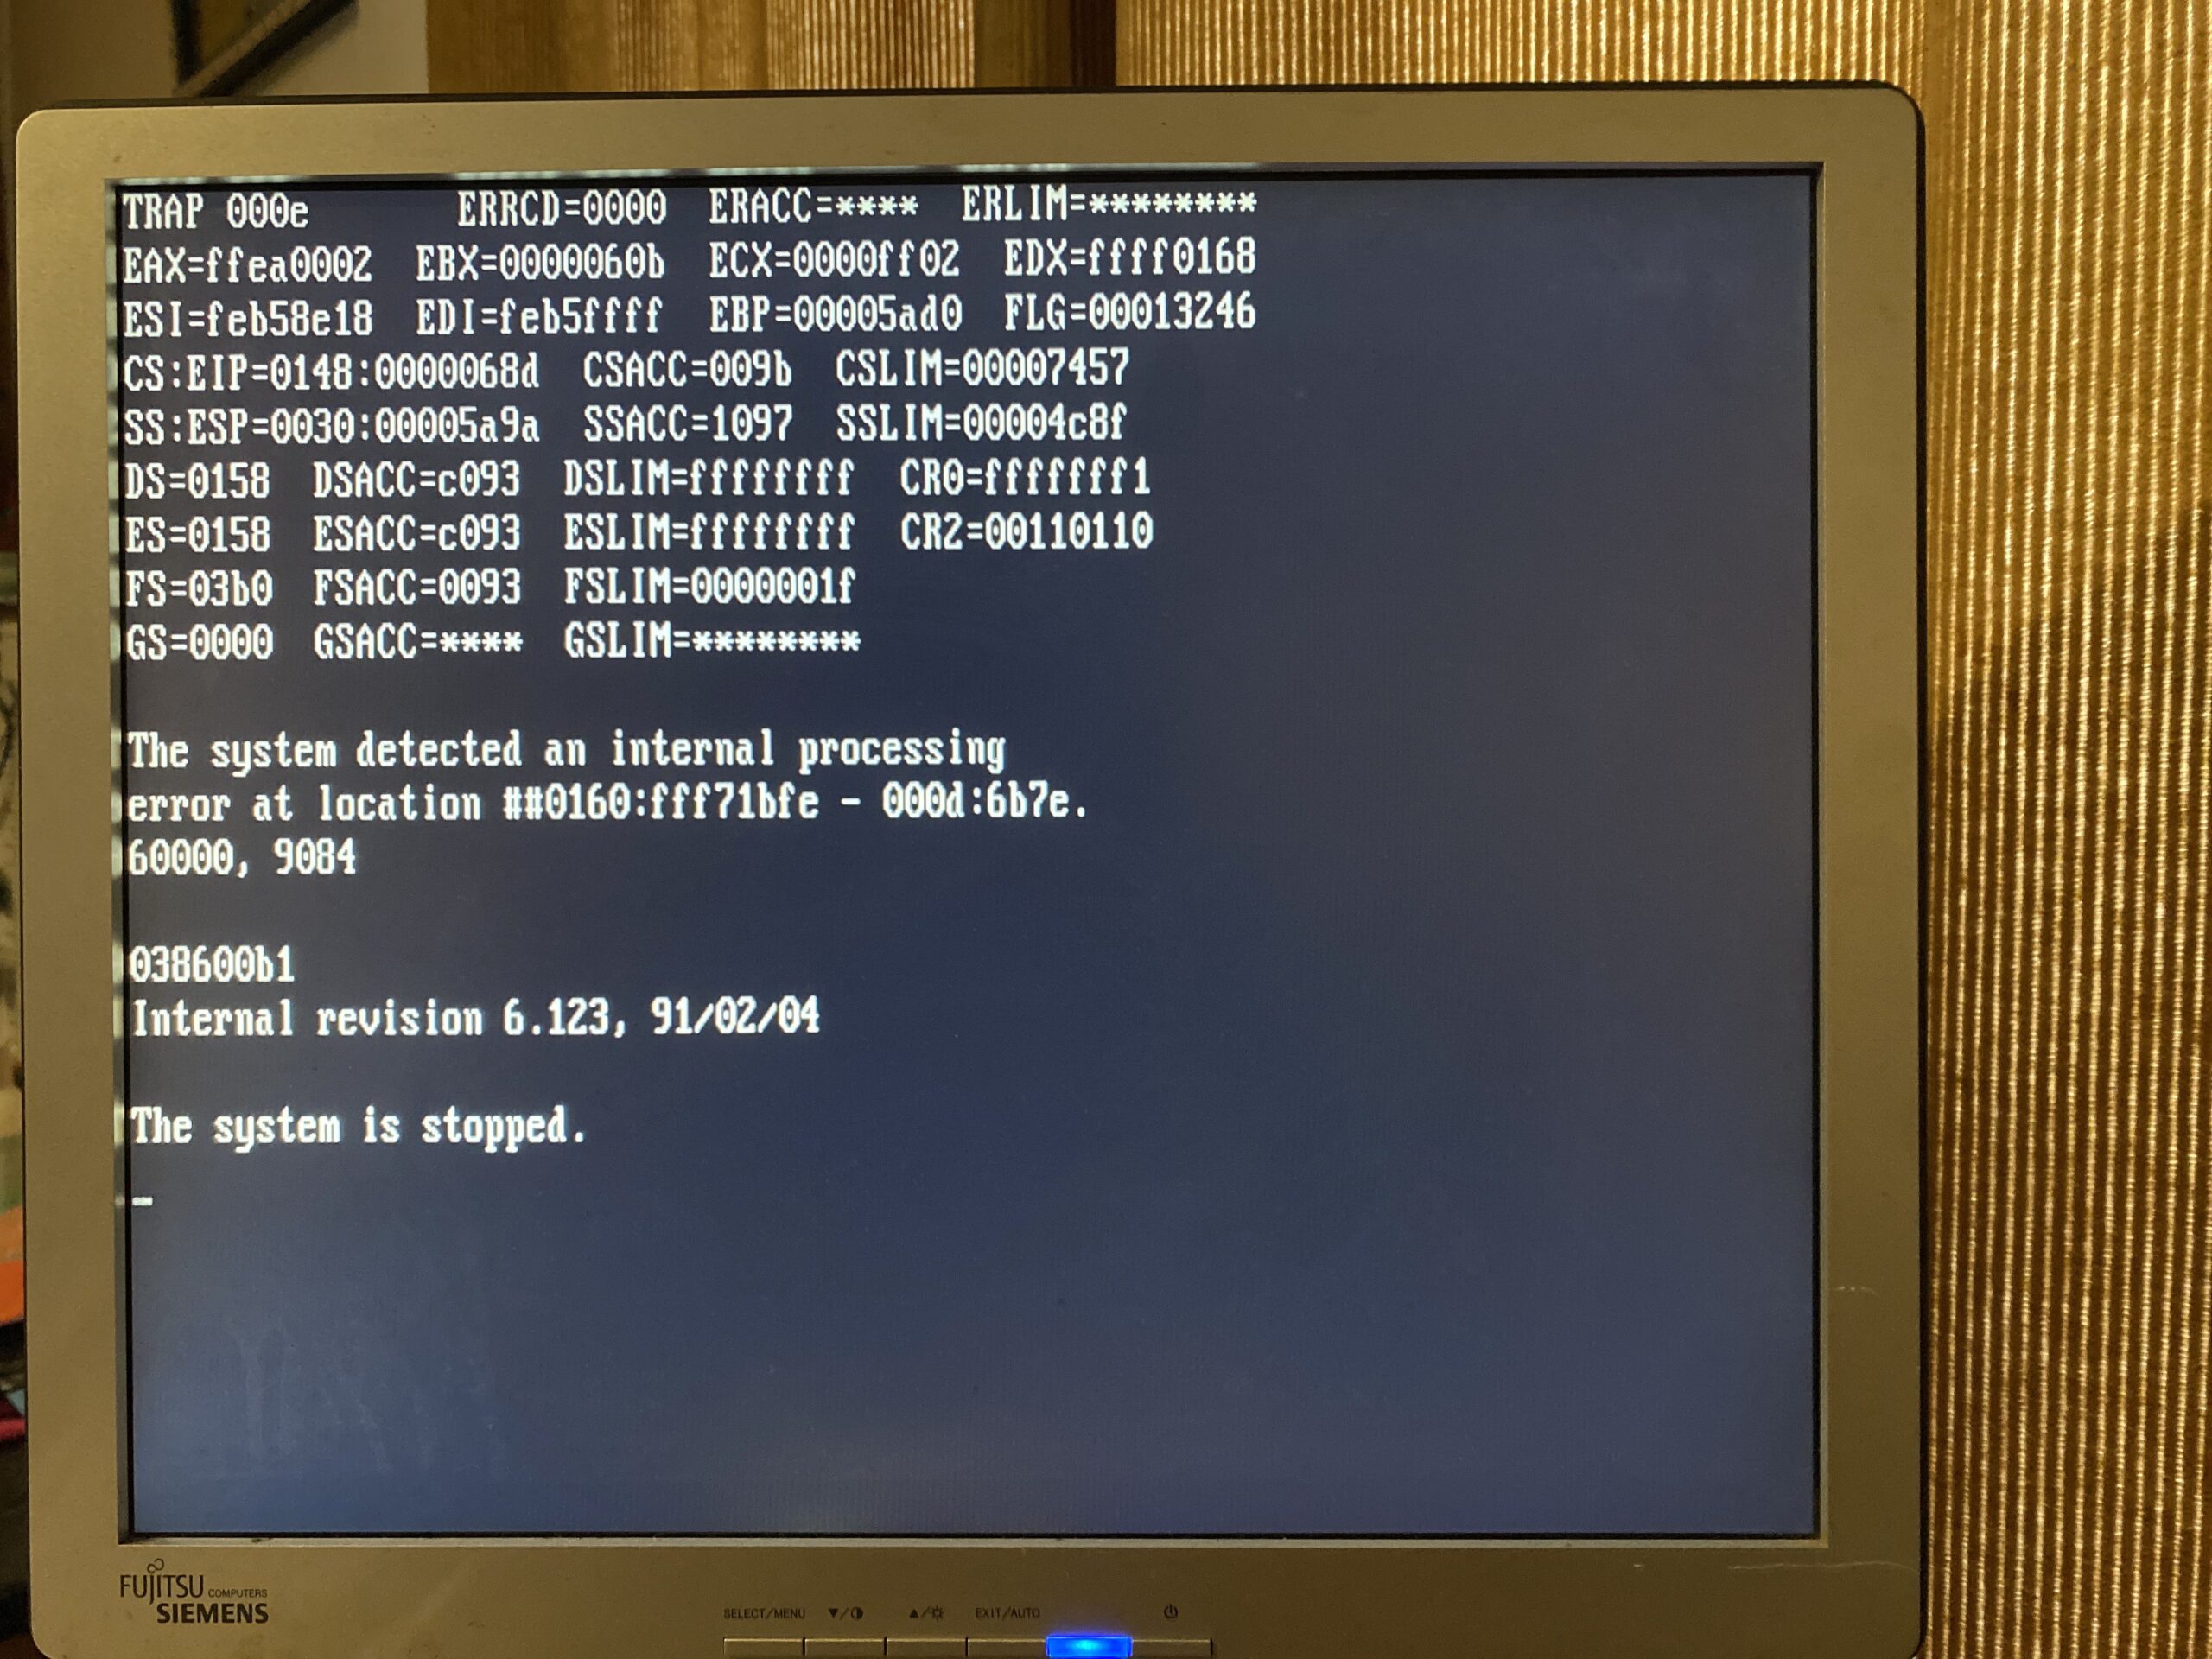
While I’d seen plenty of trapcodes in my time, but I know less than nothing about reading them. Maybe it’s burred in there somewhere. The one odd thing was the 038600b1 part… Since the 386 is a 16Mhz part, maybe it’s a crazy old version? While it does have the ΣΣ mark, maybe there is other troublesome 386’s? I really don’t know. Or maybe OS/2 is just really more sensitive to having 2MB 32bit RAM + 4MB 16bit RAM.

Way back in the old times, I had upgraded from a 12Mhz 286 to a 16Mhz 286, and life was great, although I left out of all the 32bit personal computer revolution. After a lot of hard work, I managed to secure a 386sx 16Mhz board with 4MB of RAM. It was awesome although yeah SLOW. Clock for clock, task for task the 386sx was at best the same speed. Sometimes I’d swear the 286 was faster. A few months later though I made the insane trade of some complete in box Infocom games, along with cash and was able to score a 386DX 16Mhz, along with 4MB of 32bit RAM on some massive board. Surely this was going to be great right? I found pretty much the same thing there was no perceivable difference at all. At least back then it was 1992? and the capacitor plague was still decades away, and you could just call the BBS of the motherboard vendor and download the disks if needed (I didn’t need to). It was, frankly, a big letdown after so much ’32/32 is far superior to 32/16′ and here we are again in the future and the SCSI card bears it out, that id basically didn’t matter.

I guess it really comes as no surprise that the 386 does everything the 286 can just better.

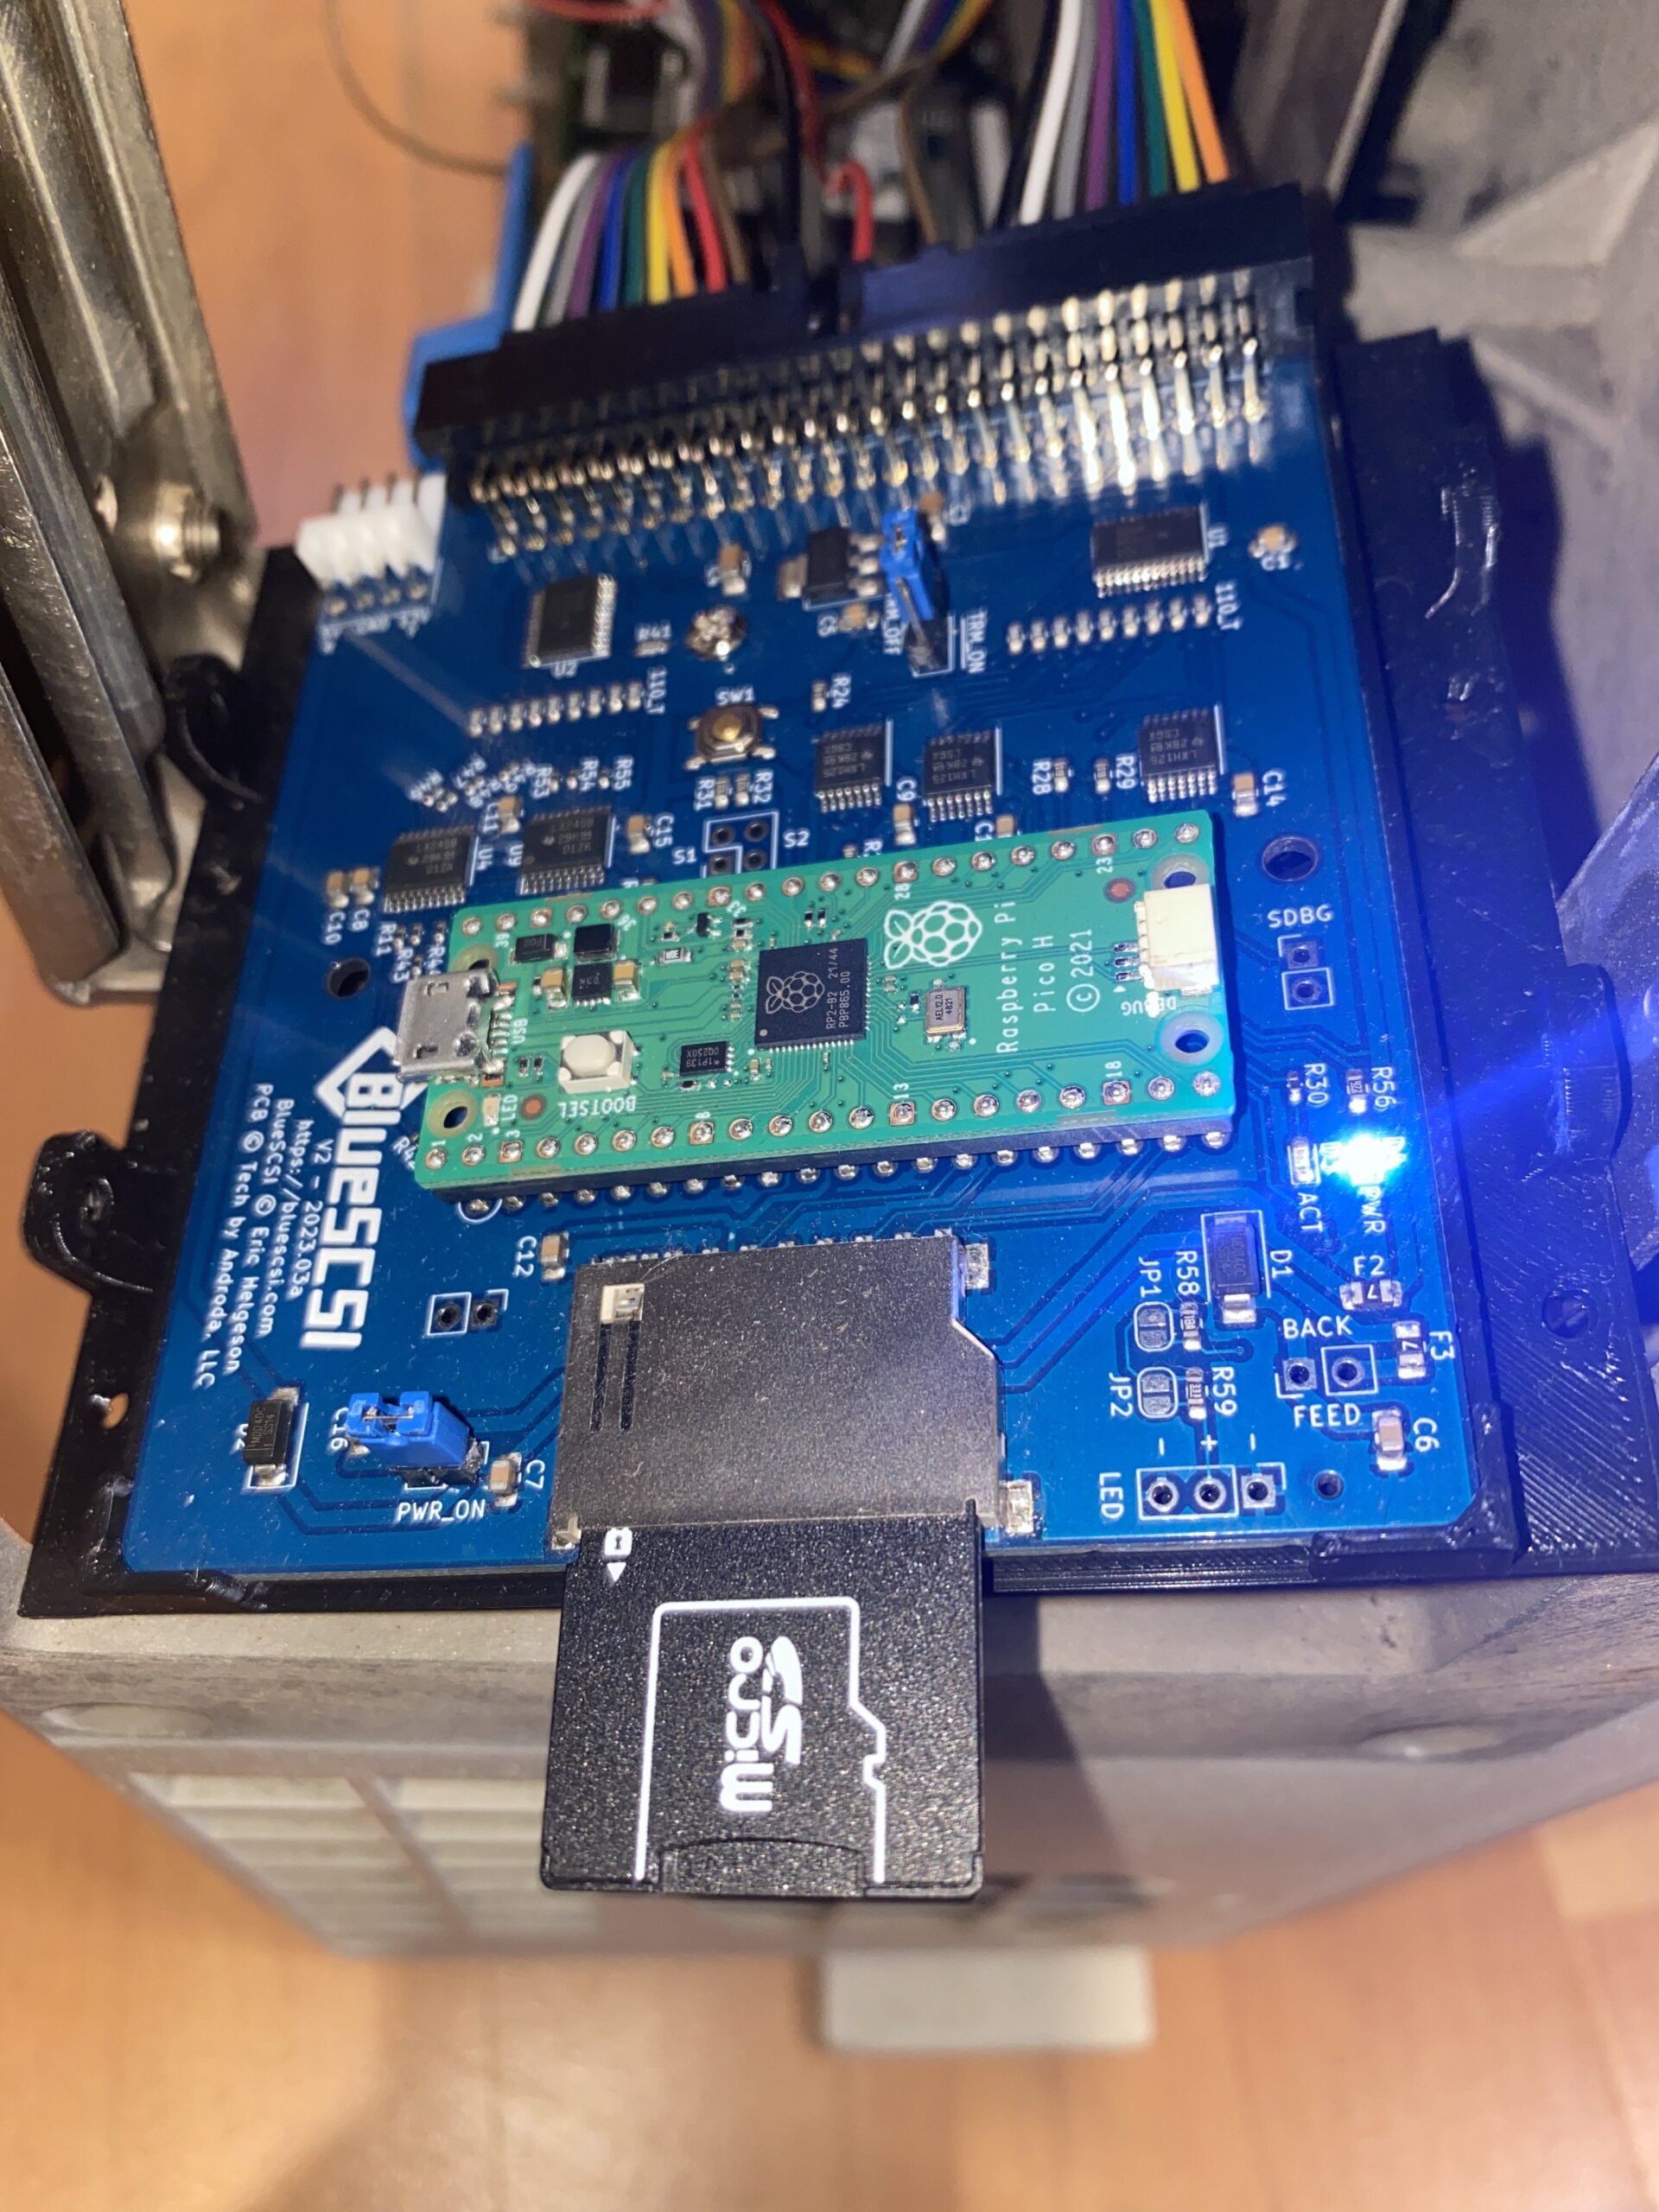
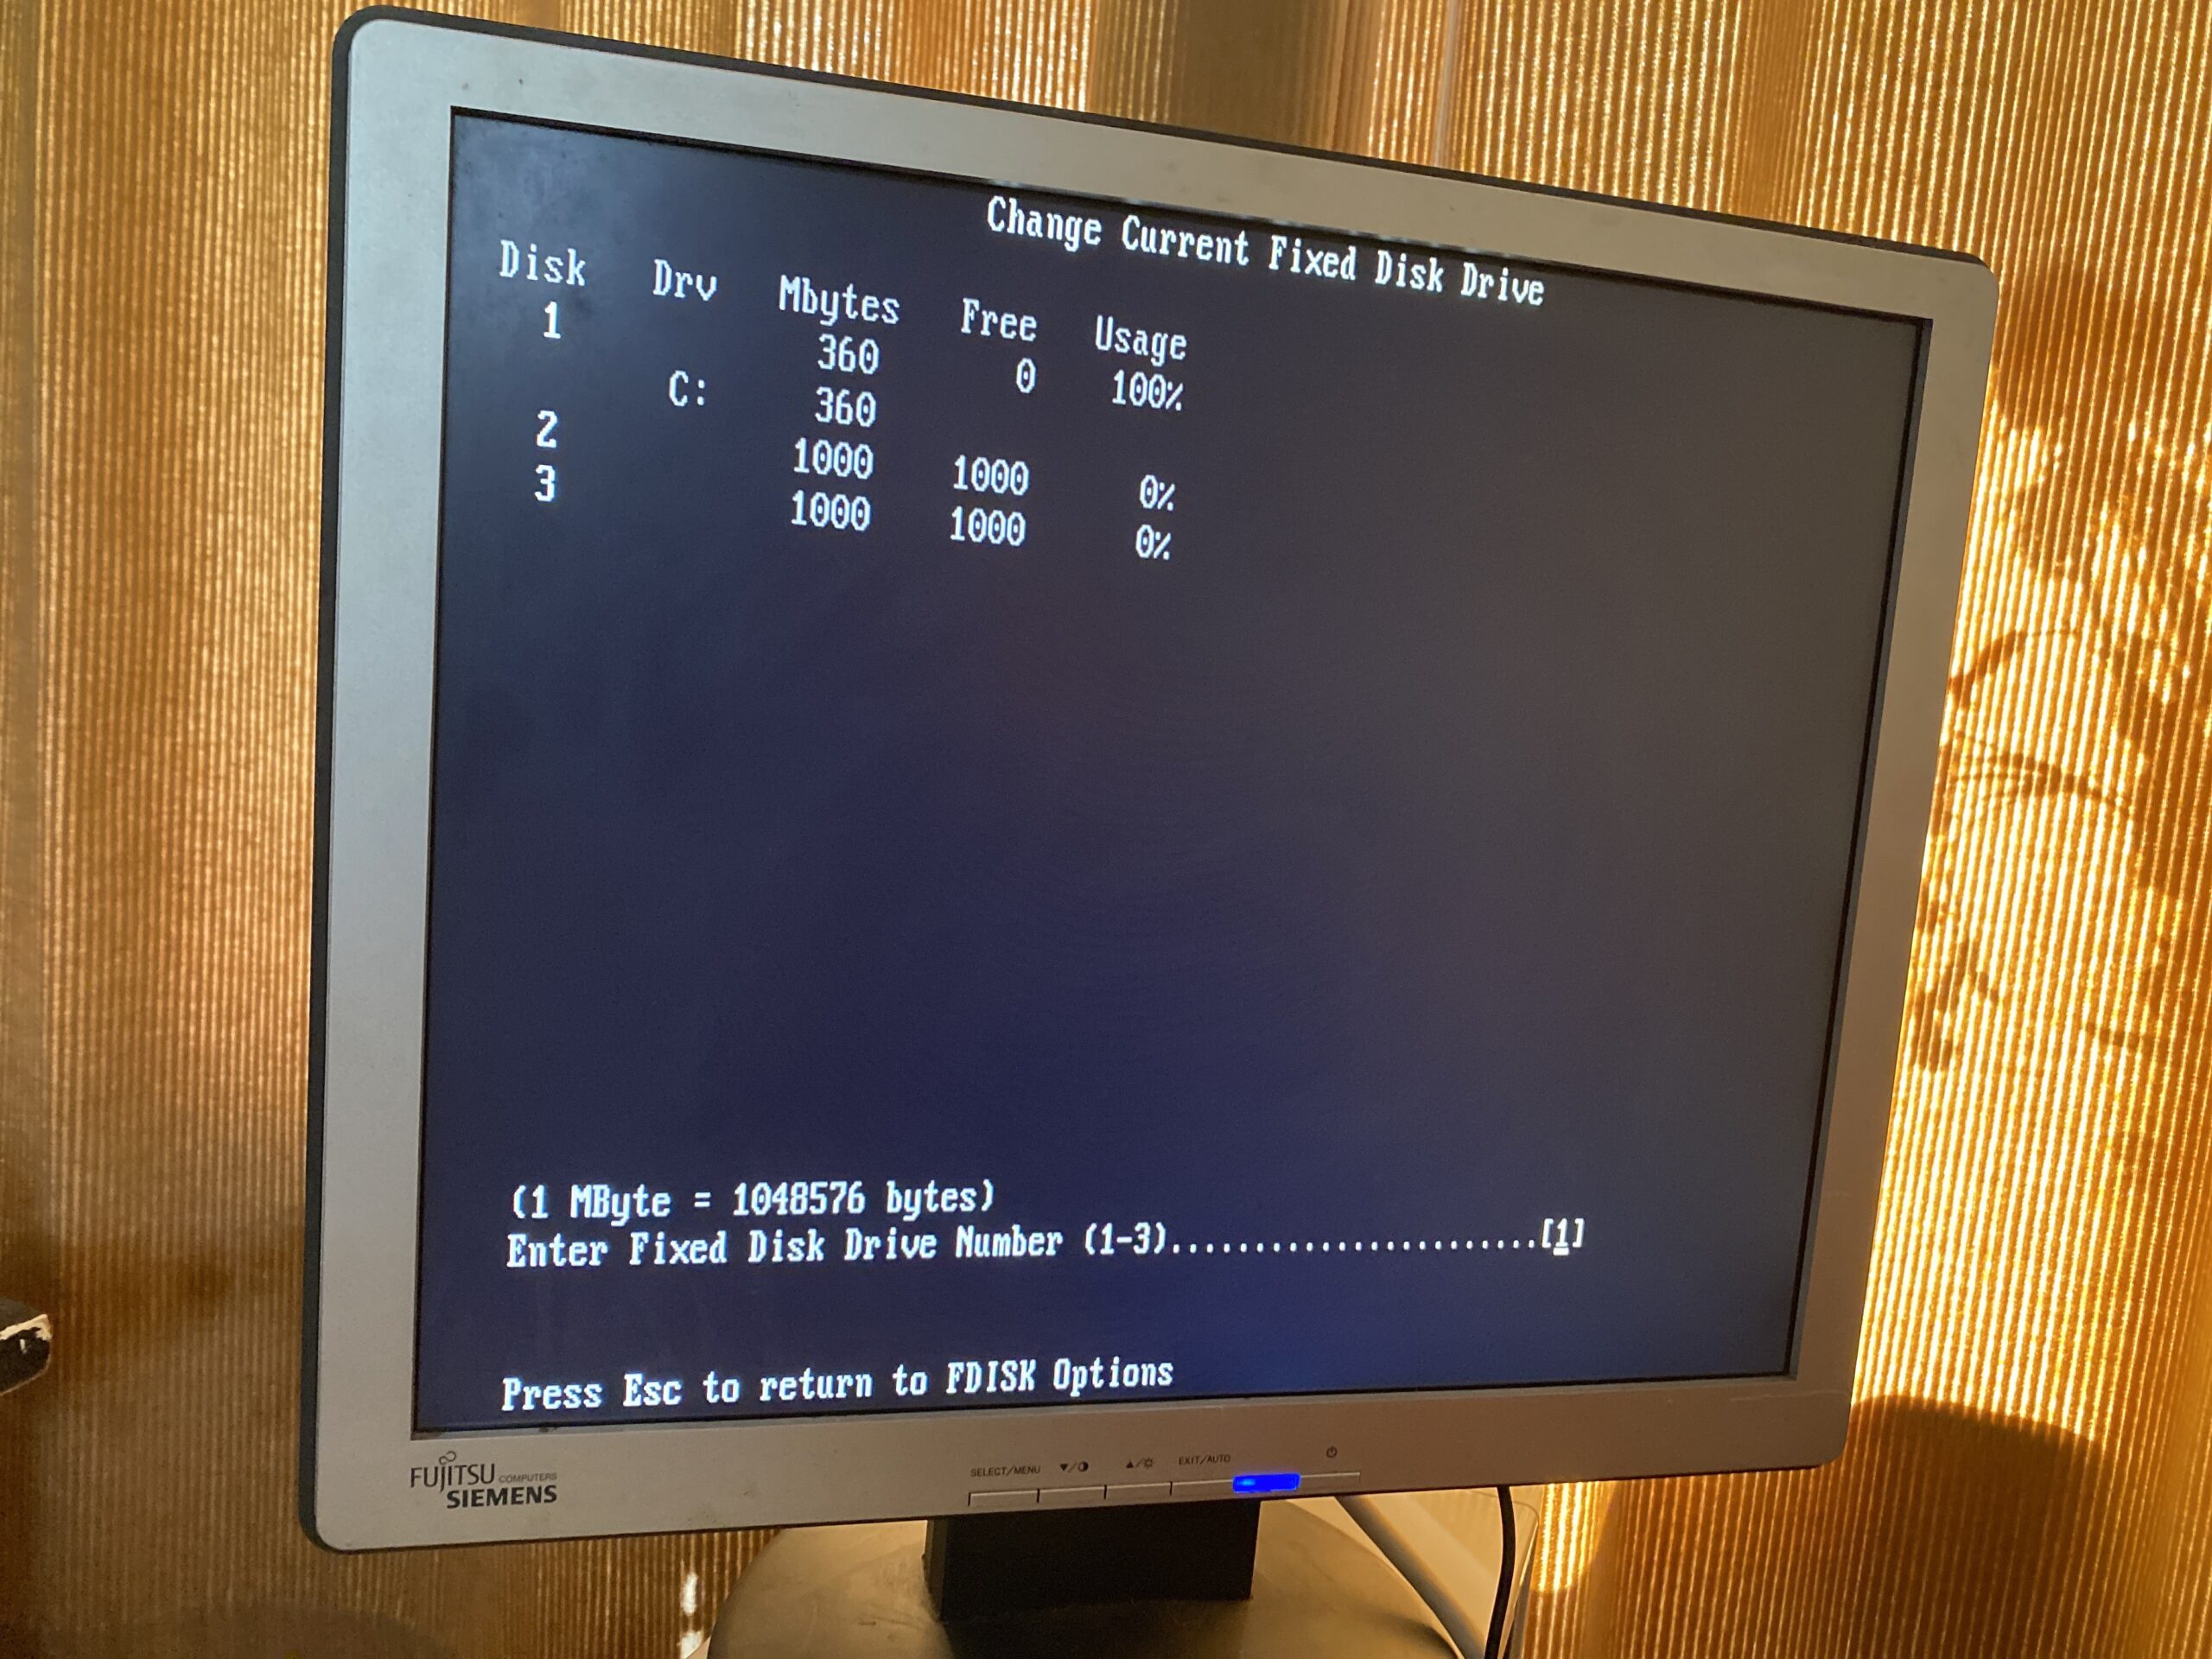
So, what have we learned? The PS/2 model 60/80 chassis is the exact same thing. The low clocked 386 chips are super unimpressive, no doubt the magic in the intel family really didn’t hit until the DX2/66 and beyond. Beta versions of software act weird, oh, and that the backup program from MS-DOS 5.00 can actually backup a dual booted OS/2 install & restore it just fine. That was a bigger surprise for me, as the great thing about the BlueSCSI i that I can have so many drives, so I made a backup of the C: OS drive and trashed it quite a bit. Not expecting anything, but yes, a restore actually worked.

Installing the IBM SCSI / A ‘tribble’ card in an IBM PS/2 model 60, using BlueSCSI, and a tale of painful lessons.

As a follow up to Installing a Gotek floppy emulator, this time I’m adding something desperately needed, mass storage using a SCSI card.

IBM SCSI / A adapter

The machine is the 40Mb MFM based model, the cheapest option of getting a PS/2 model 60 back in the day. MFM hard disks are incredibly old, and sadly the eventual end point for these old disks is death. While I had investigated a MFM disk emulator they are very costly, with prices starting at $299 USD. Ouch. However, from my Dec Alpha experiments I do have the BlueSCSI was available for a more reasonable £52. So all I would need was a SCSI adapter, and I’d be good to go, right? Mostly.

Looking at the card, you can see that it doesn’t use a standard 50 pin connector. I guess it being the 1980s and IBM trying to re-capture the PC market by going all in with proprietary connectors, they used a 50 pin IDC connector to attach the 50pin SCSI ribbon cable. This would prove to be disastrous for me later on. I initially had no luck finding an original cable, while the SCSI cards themselves seem to be plentiful on eBay. I guess me buying 2 of them has triggered a lot of movement in the market. Another source of concern is that the 286 is 16bit, and the card is advertised as being 32bit, but rest assured the notched middle part seems to indicate that the card is 32bit/16bit compatible. I can attest it works in my PS/2 just fine.

My terrible idea + terrible soldering

I had decided that since I do have a bunch of jumper cables, I could just solder them directly to the card fingers. I only have one device, so I don’t really need a ribbon cable, the BlueSCSI can emulate multiple devices, so I figured it’d be fine. Of the 50 pins in a SCSI ribbon more than half are ground, so I figured I only needed to solder up about 25 connections, just like how Apple got away with 25 pin connections. I did tone out the pins looking for the +5v power signal, along with checking the common ground, where the flip side of the SCSI card is all ground.

I had connected it up, and the machine saw the blue SCSI, but for some reason it was always reading 25Mb.

I was unable to figure out what was going on, so when I went to inspect my setup, I had seen one of the cables had disconnected. Uh-Oh.

Card edge fingers torn off

As I pulled the card out of the computer, 3 more cables had popped off, revealing that the fingers were nowhere near as strong as I had thought, and the fingers had been torn off the card. Very sad. The card still ‘works’ but it’d need someone with a good eye and soldering skills to re-attach the pads, or just solder bodge wires from the test points on the card to the IDC connector.

Obviously if I’d known the fingers were so fragile, I’d have not done this. But I was impatient for the IDC connector to arrive (it took about a month), and I really thought I could get away with it. So I don’t know if it matters for anyone else, but yeah it turns out these fingers are nowhere near as strong to side to side forcers as I had thought. Also I was told “on the internet, so you know it’s true”‘ that various super glues are conductive, so test before you think about trying to do it live.

IBM SCSI Adapter FRU 15F6561 IBM MICROCHANNEL SCSI 32 bit MCA Card + Cable

And that is when this pair showed up, another SCSI card, but this time with the illusive cable. There is something weird how the universe times things.

So got this card & cable set (If it was available 3 weeks ago, obviously I would have ordered this one as it has the ribbon!).

Where the magic happens, BlueSCSI!

Not knowing much about the IBM PS/2 SCSI/A adapter, I went ahead in BlueSCSI, and setup a 380MB disk on SCSI ID 0, a 1GB disk on ID1, and a 2GB disk on ID2. That’s when I found out that the adapter initialises the bus backwards.

I had thought it was a weird thing in the setup utility, so I booted up MS-DOS and ran FDISK to reveal that it really does read the ID’s backwards.

Obviously with the BlueSCSI they are just files on a SD card, so it’s trivial to just rename them.

I had also thought it was weird that the reference disk reads the disks being 2GB just fine, so I double up with both data disks being 2GB.

And sure enough, MS-DOS only sees 1GB per bigger disk. After search for a bit, it turns out that the 1GB limitation is a known thing and newer ROMs can work around the issue. Eagle eye’d might have noticed the first adapter had ROMs from 1990, while the second card has ROMs from 1991. But the better ROMs come from a totally different card. Normally I might have been annoyed, but since my disks are virtual I can just give myself 5x1GB data disks, along with that 360MB OS disk.

ALL THE DISKS!

This is the best part of virtual peripherals, is that you can load out what would have been super expensive, and impractical for being era correct. Instead, now it’s super easy, barely an inconvenience. I can’t imagine trying to use physical disks in 2023.

One of the reasons I kept the smaller ‘C’ drive was to make for installing OSs a bit easier, as many older things hate ‘large’ disks. But being able to connect so many gives so much flexibility.

It’s a shame the MFM hard disk emulators are a bit expensive, even with my screwup it was still cheaper to go with SCSI, and the BlueSCSI basically just works, the only weird behaviour is all on the ‘tribble’ SCSI / A adapter.

Elijah Miller’s NEC v30 on a Pi hat

v30 on a board

While talking about home brew 8080 and 8086 systems on Discord an ebay search brought me to Elijah’s store page where this small little curiosity was up for sale. It’s literally just a NEC v30 on a Raspberry Pi hat, for a mere $15 USD! Interestingly enough the v30 can operate at 3.3v meaning no special hardware is required to interface to the GPIO bus on a Pi. This reminds me so much of the CP/M cartridge for the Commodore 64, and the price being so right I quickly ordered one and eagerly awaited to 2 weeks shipping to Asia.

While I have Pi 4’s that I run Windows 10 on to drive some displays & power point, I wanted to use the slightly faster Pi400 for this. The Pi400 has a compatible GPIO expansion port so just like a cartridge it’s a simple matter of slotting the card, powering up and building the software. While there is an included binary, it’s a 32bit one, and I’m running Manjaro on the Pi400 for a similar look/feel as the PineBook Pro. Anyways the dependences are SDL2, and an odly named ‘wiringPi’ library that allows C programs to interface to the GPIO.

You can download the emulator over on homebrew8088, specifically the Raspberry Pi Second Project. The last ‘ver 2’ download has the project configured for a v30 which is an 8086 analogue, unlike the v20 which is an 8088. When physically interfacing to the processor things like this really matter!

With the emulator built it was pretty simple to fire it up, and boot into MS-DOS:

first boot!

I have to admit I was a little startled at first as I really had no idea if this was going to work at all. I’d spoken to an engineer friend and he was saying plugging a CPU directly into the GPIO bus, and toggling connections to actually emulate the board was both crazy and that without any electrical buffers it’d most likely either fry the processor and maybe the Pi as well. I suspect this being low voltage may be sparing both, although I have no EE so I’m not going to pretend to know.

Loading up Norton SI confirms what Elijah had posted on Ebay is that it runs very slowly about 1/3rd the speed of an XT. Now I may not know anything about hardware but this seemed at least something a profiler could at least tell me what is going on, and if someone like me helicoptering in on the shoulder of giants could see something.

gcc -I/usr/include/SDL2 -pg -O2 *.cpp -o pi -lSDL2 -lwiringPi -lpthread -lstdc++

This will build a profiled version of the emulator that’ll let us know which functions are being called both the number of times, and how much time to do so. Not knowing anything but having profiled other emulators, the usual pattern is that you spend most time fetching and possibly translating memory; Both in feeding instructions and pushing/popping data from stack and pointers. Waiting is usually for initialisation and for IO.

Once you’ve run your profiled executable, it’ll dump a binary file gmon.out which you can then use gprof to format to a text file like this:

gprof pi gmon.out > report.txt

And then looking at the report you can see where the top time, along with top calls are. Some things just take a while to complete and other well they get called far too often.

Each sample counts as 0.01 seconds. % cumulative self self total
time seconds seconds calls s/call s/call name
39.91 0.71 0.71 286883 0.00 0.00 Print_Char_9x16(SDL_Render er*, int, int, unsigned char)
16.30 1.00 0.29 1 0.29 1.02 Start_System_Bus(int)
12.37 1.22 0.22 1100374 0.00 0.00 Data_Bus_Direction_8086_OUT()
7.87 1.36 0.14 5954106 0.00 0.00 CLK()

As expected Start_System_Bus takes 1 second, followed by 1,100,374 calls to set the Data_Bus_Direction_8086_OUT (no doubt the Pi needs to alternate between reading and writing to the CPU), followed by 5,954,106 ticks of the CLK function. Of course the real culprit is Print_Char_9x16 which was called 286,883 times, and is responsible for nearly 40% of the tuntime!

Obviously for a simple MS-DOS boot the screen should not be calling any print char anywhere near this many times. Clearly something is amiss. Not knowing anything I added a simple counter to block at the top of the Print_Char_9x16 function to let it only execute 1:1000 times, and I got this:

Obviously it’s not right, which means that the culprit really isn’t Print_Char_9x16 but rather what is calling it. It was a simple change to each of the Mode functions to only render a fraction of the time, and I changed it to a define to let me fire it more often. This is a simple diff, assuming WordPress doesn’t screw it up. It’s not pretty but it gets the job done.

$ diff -ruN ver2/vga.cpp ver2-j/vga.cpp 
--- ver2/vga.cpp	2020-07-29 10:36:51.000000000 +0800
+++ ver2-j/vga.cpp	2021-06-04 01:51:33.546124473 +0800
@@ -1,5 +1,9 @@
 #include "vga.h"
 
+static int do9x16 = 0;
+#define VIDU 5000
+
+
 void Print_Char_18x16(SDL_Renderer *Renderer, int x, int y, unsigned char Ascii_value)
 {
 	for (int i = 0; i < 9; i++)
@@ -23,6 +27,12 @@
 
 void Mode_0_40x25(SDL_Renderer *Renderer, char* Video_Memory, char* Cursor_Position)
 {
+do9x16++;
+if(do9x16>VIDU)
+        {do9x16=0;}
+else
+        {return;}
+
 	int index = 0; 
 	for (int j = 0; j < 25; j++)
 	{
@@ -36,6 +46,7 @@
 	Print_Char_18x16(Renderer, (Cursor_Position[0] * 18), (Cursor_Position[1] * 16), 0xDB);
 	SDL_RenderPresent(Renderer);	
 }
+
 void Print_Char_9x16(SDL_Renderer *Renderer, int x, int y, unsigned char Ascii_value)
 {
 	for (int i = 0; i < 9; i++)
@@ -57,6 +68,12 @@
 }
 void Mode_2_80x25(SDL_Renderer *Renderer, char* Video_Memory, char* Cursor_Position)
 {
+do9x16++;
+if(do9x16>VIDU)
+        {do9x16=0;}
+else
+        {return;}
+
 	int index = 0; 
 	for (int j = 0; j < 25; j++)
 	{
@@ -102,6 +119,12 @@
 
 void Graphics_Mode_320_200_Palette_0(SDL_Renderer *Renderer, char* Video_Memory)
 {
+do9x16++;
+if(do9x16>VIDU)
+        {do9x16=0;}
+else
+        {return;}
+
 	SDL_RenderClear(Renderer);
 			int index = 0; 				
 			for (int j = 0; j < 100; j++)
@@ -156,6 +179,12 @@
 }
 void Graphics_Mode_320_200_Palette_1(SDL_Renderer *Renderer, char* Video_Memory)
 {
+do9x16++;
+if(do9x16>VIDU)
+        {do9x16=0;}
+else
+        {return;}
+
 	SDL_RenderClear(Renderer);
 			int index = 0; 
 			for (int j = 0; j < 100; j++)

While it feels more responsive on the console, it’s still incredibly slow. SI was returning the same speed which means that although we aren’t hitting the screen anywhere near as often it’s still doing far too much. Is it really a GPIO bus limitation? Again I have no idea. But the next function of course is the clock.

First I tried dividing the usleep in half thinking that maybe it’s not getting called enough. And running SI revealed that I’d gone from a 0.3 to a 0.1! Obviously this is not the desired effect! So instead of a divide I multiplied it by four:

diff -ruN ver2/timer.cpp ver2-j/timer.cpp 
--- ver2/timer.cpp	2020-08-12 00:32:13.000000000 +0800
+++ ver2-j/timer.cpp	2021-06-04 02:06:25.505904407 +0800
@@ -7,7 +7,7 @@
 {
    while(Stop_Flag != true)
    {
-      usleep(54926); 
+      usleep(54926*4); 
       IRQ0();
    }
 }

Now re-running SI I get this:

Norton SI with clock multiplied by four

Now it’s scoring a 1.5! Obviously these are all ‘magic numbers’ and tied to the Pi400 and more importantly I haven’t studied the code at all, I’m not trying to disparage or anything, if anything it’s just a quick example why profiling your code can be so important! At the same time trying to run games is so incredibly slow I don’t even know if my changes had any actual impact to speed as emulation of benchmarks can be such a finickie thing.

My goto game, Battletech 3025 Crescent Hawks Inception loads to the first splash but then seems to hang. I could be impatient or there could be further issues but I’m just some impatient tourist with a C compiler…

With my changes and re-running the profiler I now see this:

Each sample counts as 0.01 seconds.
  %   cumulative   self              self     total           
 time   seconds   seconds    calls  us/call  us/call  name    
 95.41    129.23   129.23 22696621     5.69     5.69  Read_Memory_Array(unsigned long long, char*, int)
  2.90    133.15     3.92                             Start_System_Bus(int)
  0.88    134.34     1.19 64369074     0.02     0.02  CLK()
  0.30    134.74     0.40                             keyboard()
  0.16    134.96     0.22   412873     0.53     0.53  Print_Char_9x16(SDL_Render
er*, int, int, unsigned char)
  0.08    135.07     0.11 11273939     0.01     0.01  Data_Bus_Direction_8086_OUT()

Which is now what I expect with the bulk of the emulation now calling Read_Memory, with the Clock following that and of course our tamed screen renderer (although its still called far too much!) with the Data_Bus_Direction being further down the list. No doubt some double buffering and checking what changed in between calls would go a LONG way to optimise it, just as would actually studying the source code.

The one cool thing about this is that if I wanted to write a PC emulator this way gives me the confidence that the CPU is not only 100% cycle accurate, but it’s 100% bug for bug accurate since we are using a physical processor.

And again for $15 USD + Shipping I cannot recommend this enough!

Virtualization Challenge IV – QNX 1.2

(This is a guest post by Antoni Sawicki aka Tenox)

This is a Virtualization Challenge. A competition to virtualize an OS inside emulator/hypervisor. (Previously 1 / 2 / 3)

This time the object of the competition is QNX version 1.2. A demo disk is covered here. This is the set of floppy disks:

As you can see the boot disk is copy-protected. As such I have imaged these disks using both KryoFlux and SuperCard Pro. The magnetic flux stream images are available here. For verification I have converted the raw stream of the demo disk in to a sector image using HFE tool. The converted disk boots and works correctly in an emulator. The demo disk can also help with analyzing the boot process since it’s known to work.

The contest is to virtualize the OS, install it and provide a fully working hard disk image with the OS installed. Any emulator of your choice or method is acceptable as long as anyone can download and run it. The prize is $100 via PayPal and of course the fame! 🙂 The winner will be whoever comments the article first with a verifiable working solution.

A bonus $50 prize will be awarded if you can patch the boot floppy disk so that it can be installed as if the copy protection was never there.

Good luck!!!

UPDATE: The competition has ben won: QNX 1.2 Virtualized

UPDATE 2 : QNX 1.2 challenge Act II – HDD Boot

UPDATE 3: Reverse-engineering QNX 1.2 to boot from HDD

QNX 1.1 Demo Disk

(This is a guest post by Antoni Sawicki aka Tenox)

Fresh from the oven, or rather Kryoflux dump – a QNX version 1.1 Demo Disk:

QNX 1.1 Demo Disk

I managed to boot it on 86Box:

QNX 1.1 booted on 86Box Emulator

For the readers with more curiosity and time at their hands please could you try it on different emulators and comment what works and what doesn’t.

For the less curious this how the demo actually looks like once you log in as demo user:

QNX 1.1 Demo Menu

As the authors demand to make as many copies of this disk as possible here it is. Please download and spread!

I also managed to dump the rest of QNX 1.2 including boot disk, utils and even c compiler. Unfortunately the boot disk is copy protected:

I have raw stream dump made with Kryoflux as well as regular disk images. If you are interested in circumventing checking the copy protection so the system could be run in an emulator let me know in a comment. Perhaps time for another Virtualization Challenge?

Previously:

Virtualizing QNX 2

QNX Windows – First Look

QNX 2.21 Arrived Today

PCem v15 released!

The new dynamic recompiler appears to be much more faster, although if you want maximum performance, make sure to set your video card to the fastest possible performance.

I was doing my typical DooM thing, and the performance was abysmal. But I did have an 8bit VGA card selected, so what would I really expect? Interestingly enough in ‘low resolution’ mode it performed quite well, but setting it to the artificial ‘fastest PCI/VLB’ speed it was performing just great.

PCem v15 released. Changes from v14 :

  • New machines added – Zenith Data SupersPort, Bull Micral 45, Tulip AT Compact, Amstrad PPC512/640, Packard Bell PB410A, ASUS P/I-P55TVP4, ASUS P/I-P55T2P4, Epox P55-VA, FIC VA-503+
  • New graphics cards added – Image Manager 1024, Sigma Designs Color 400, Trigem Korean VGA
  • Added emulation of AMD K6 family and IDT Winchip 2
  • New CPU recompiler. This provides several optimisations, and the new design allows for greater portability and more scope for optimisation in the future
  • Experimental ARM and ARM64 host support
  • Read-only cassette emulation for IBM PC and PCjr
  • Numerous bug fixes

Thanks to dns2kv2, Greatpsycho, Greg V, John Elliott, Koutakun, leilei, Martin_Riarte, rene, Tale and Tux for contributions towards this release.

As always PCem can be downloaded here:

Booting a PC over serial port via ROM Basic!

Galaxian via Basic over the serial port

I was sent this link while out for vacation: https://github.com/retrohun/blog/tree/master/dt/bootingfromcom1

So this is great for machines that included the seemingly useless ‘casette basic’ as you could maybe shove over something to config the machine, maybe ‘rom dos’ directly into ram to fdisk/format without using disks… Interesting stuff to say the least!

As requested, PCem v11 with networking

via SLiRP

via SLiRP

injecting networking was no more difficult than it was in version 10.  It’s only a few changes to pc.c, if you look at the USENETWORKING define you’ll see them.  The best notes are on the forum.

I haven’t changed or improved anything it still requires manual configuration.

Downloads are available on my site as pcem_v11_networking.7z.  You’ll have to defeat the password protection, as always.  I included the source, it ought to be trivial to rebuild.

*For anyone using an old version the ‘nvr’ directory is missing, so PC-em is unable to create new non volatile ram save files, meaning you always loose your BIOS settings.  Sorry I missed that one.

PCem v11 released

I haven’t had time to follow it, but great news!

PCem v11 released. Changes from v10.1 :

  • New machines added – Tandy 1000HX, Tandy 1000SL/2, Award 286 clone, IBM PS/1 model 2121
  • New graphics card – Hercules InColor
  • 3DFX recompiler – 2-4x speedup over previous emulation
  • Added Cyrix 6×86 emulation
  • Some optimisations to dynamic recompiler – typically around 10-15% improvement over v10, more when MMX used
  • Fixed broken 8088/8086 timing
  • Fixes to Mach64 and ViRGE 2D blitters
  • XT machines can now have less than 640kb RAM
  • Added IBM PS/1 audio card emulation
  • Added Adlib Gold surround module emulation
  • Fixes to PCjr/Tandy PSG emulation
  • GUS now in stereo
  • Numerous FDC changes – more drive types, FIFO emulation, better support of XDF images, better FDI support
  • CD-ROM changes – CD-ROM IDE channel now configurable, improved disc change handling, better volume control support
  • Now directly supports .ISO format for CD-ROM emulation
  • Fixed crash when using Direct3D output on Intel HD graphics
  • Various other fixes

Thanks to Battler, SA1988, leilei, Greatpsycho, John Elliott, RichardG867, ecksemmess and cooprocks123e for contributions towards this release.

Downloads are available for Windows & Linux.

Porting Quake II to MS-DOS pt4

Bringing it all home for release day.

Bringing it all home for release day.

Since the last update we got some help in a few fields that have really fleshed out this ‘experimental’ port into a full fledged port.  First RayerR helped us with the fun of getting us onto the latest deployment of DJGPP, 2.05 (rc1).  It’s always nice to be in the latest available release.  Next in a passing comment, Ruslan Starodubov had mentioned that he had gotten a much older build of our QDOS to support the Intel HDA sound chipset via the  MPXPlay sound library.  I wrote to the author of MPXPlay, Pádár Attila asking for us to distribute his source in our project, and he granted permission.

So at this point things were looking good.  The only ‘feature’ that modern OS’s really held over us was the ability to dynamically load and unload game modules on the fly.  I had tried to use DLM, but it stripped the DPMI functionality out of the MS-DOS Extender making the port really useless.  I tried to build the newer DXE3 support but had no luck.  I suspect now my native tool chain was interfering with the build process. But Maraakate managed to get it to not only build, but to run!

Adding in DX3 support was relatively painless.  I first looked at DJGPP’s FAQ and downloaded the example code.  In the example code there was small helper functions to make unions and check the symbols.  If they didn’t exist a printf was spit out to alert you about it.  To resolve the issue you simply just add DXE_EXPORT to the other list of missing exports.

Compiling the game code was easy, again referring to the example I saw that basically they compiled it the same, but at link time you use DX3GEN and -U flag to ignore unresolved symbols.

The biggest head scratcher was the Sys_GetGameAPI failing to find GetGameAPI from the DX3.  After some piddling around I noticed that it listed GetGameAPI as _GetGameAPI inside the DX3 itself.  I added the underscore and it worked!

Other things that were relatively to easy to import was R1Q2’s HTTP downloading code.  Compiling CURL was kind of tricky because of the linking order, but thankfully neozeed figured it out quickly.

All of Yamagi’s Quake 2 updated game DLLs were all diff’d by hand using BeyondCompare to make sure I didn’t clash using some newer functions that weren’t available in DJGPP.  I also merged their Zaero code with their baseq2 code by comparing Zaeros code to the Quake 2 SDK, marking every thing that was changed.  The result is a really stable Zaero game code.  If you haven’t played Zaero check it out.  I think it’s a lot better than Rogue, but Xatrix is probably my favourite (even over stock Q2).

Other cool things I’m glad to get into the code was the GameSpy Browser.  It took me quite a bit of work to get it where it is, but it’s really nice to just be able to ping to a master server (a custom GameSpy emulator I wrote specifically for Q2DOS.  Source is not finalized yet, but will be available soon for those curious), pick a server and go!  All in DOS!

So here we are at the end of the journey.  Or at least safe enough for a 1.0 release.

To recap, we have:

* VGA
* SVGA (LFB modes only)
* Mouse
* Keyboard
* SoundBlaster and Gravis UltraSound Family
* CD-ROM music
* OGG music
* Networking (You need a packet driver)
* Loading/unloading game DLLs in DX3 format.
* Intel HDA support -hda
* Mouse wheel support with -mwheel

And I should add, that it works GREAT on my MSI Z87 motherboard.

You can download Quake II for MS-DOS on bitbucket.  And as always the source is available here.

Don’t forget you can always make bootable USB stick with DOS, or CD-ROMs.

Continued in Part 5!