This is about as weird as it sounds. While many disregard WSLv1 as being borderline useless, it can still quickly bridge the gap when you need something in user-space, and quickly. And for those of us on Windows 10 (I could upgrade this machine, but I haven’t bothered as I don’t have a real GPU for it), there is no real UI. But how to solve this?
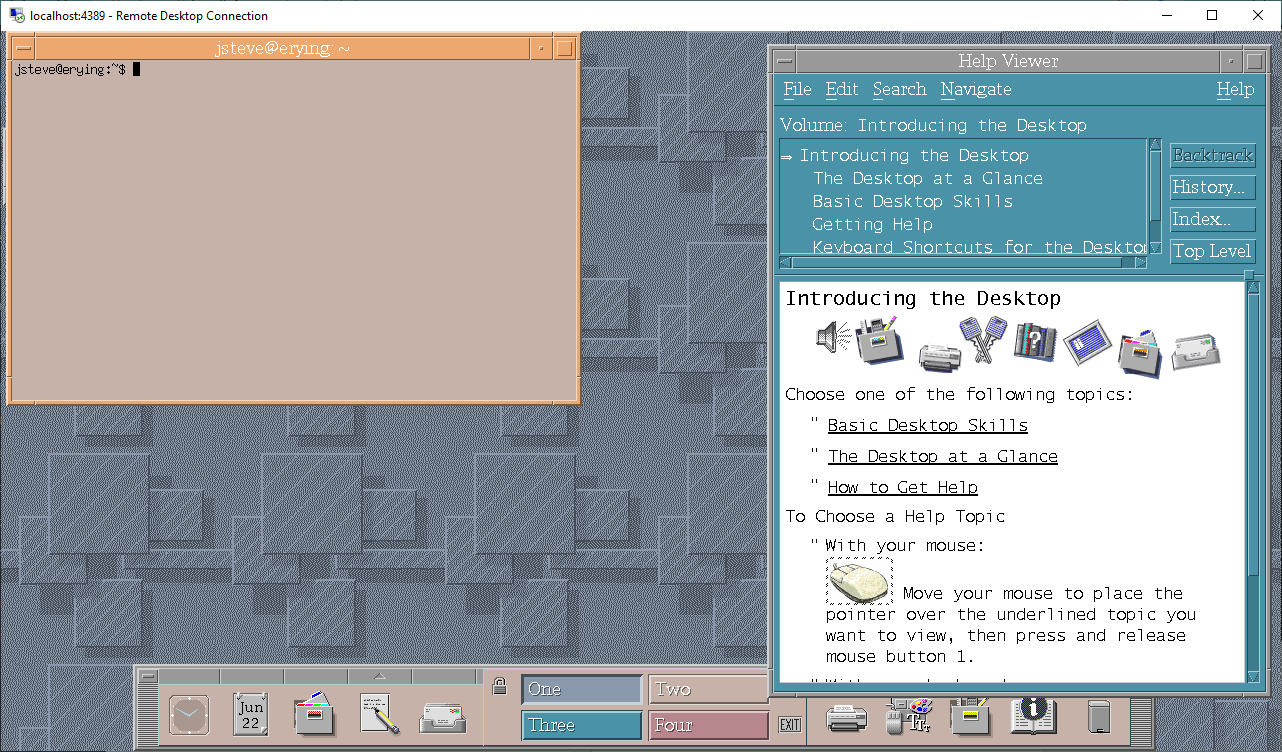
Well, the first thing is xrdp. Xrdp is an RDP server that will allow any halfway good Unix machine become a terminal server, very ‘Citrix like’. Combine that with the Xorg virtual frame buffer, and now you have a display surface that is basically exported over RDP. I did modify it to listen on a different port so I could retain RDP to Windows 10 by modifying xrdp.ini:
port=4389
port=ask4389
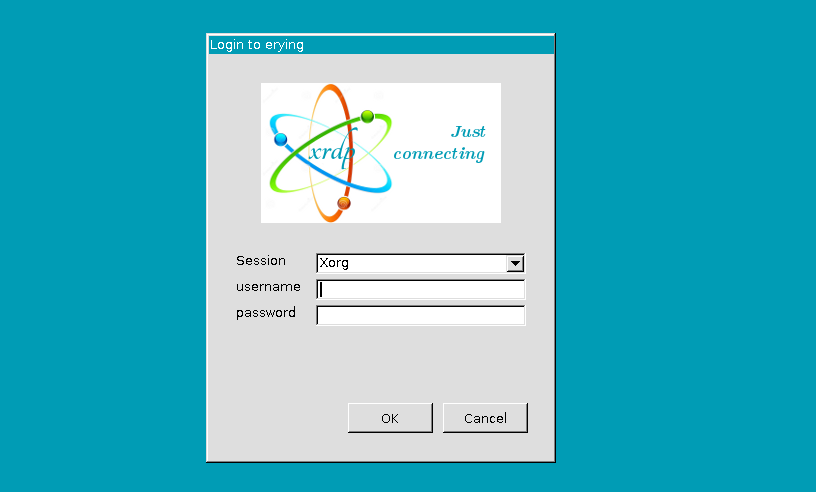
Now the real fun comes from CDE.
I built 2.5.1 from source, following the guide, with 2 important notes: Make sure you install and activate the UTF!!!. The other thing that was trashing my build was that WSLv1 picks up the Windows path, and it has spaces in it, which confuse the build process. Be sure to export something like:
With all the bits in place, the next issue is the RPC. I couldn’t figure out how to start the ‘safe mode’ version, so it will absolutely need RPC. But it turns out that you just have to start the rpcbind manually, since WSLv1 doesn’t have a real ‘startup’. I also saw a lot of errors trying to talk to dbus, so may as well start that up as well.
The topic had come up again about running Core3 aka the Star Wars Galaxies EMUlated server at home. It’s always been a somewhat involved setup, but with the advent of the Windows Subsystem for Linux, there exists the ability to export and import filesystems as if they were containers. With that in hand I went ahead and set one up.
I initially targeted the older WSL v1, as it supports far more hardware, and I didn’t want to leave so many behind. The added benefit of targeting v1, is that the end user can upgrade the filesystem to v2 if they so choose. The only real difference in this project between v1 & v2 is that v1 cannot run the needed MySQL instance. This isn’t a showstopper however as there exists MySQL & MariaDB native versions for Windows.
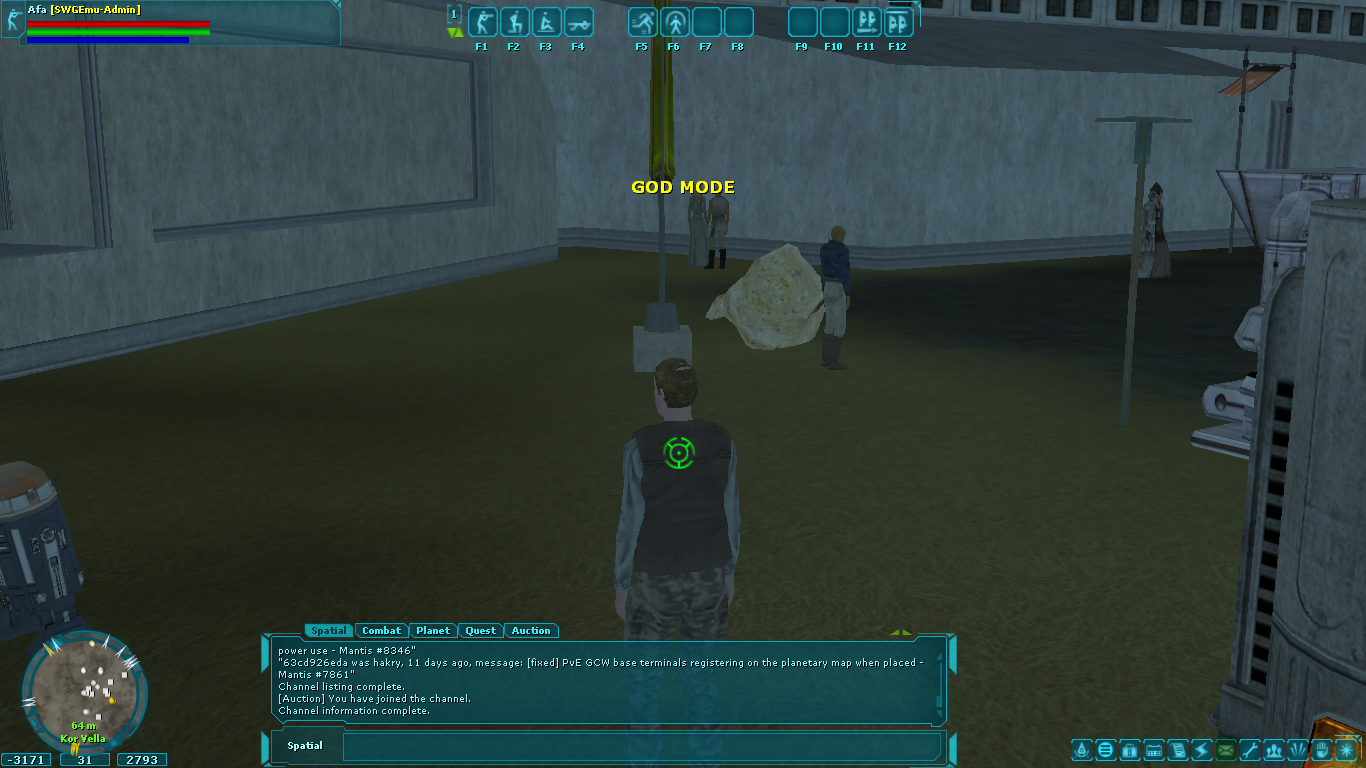
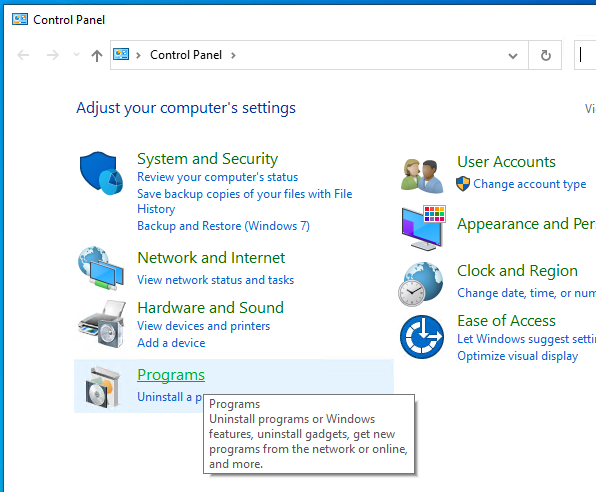
Obviously, you’ll need Windows 10 or 11 to do this. From what I can tell even the home version of Windows 10 has WSL capabilities, so this doesn’t pose any problems. Simply open the legacy control panel (Windows+R then type in ‘control’), and go to the Programs.
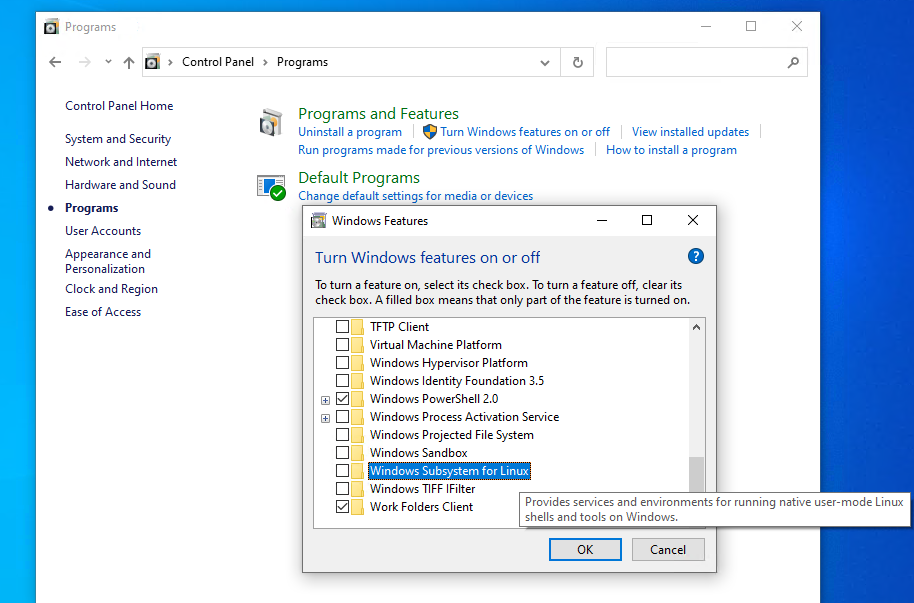
and then ‘Turn Windows features on or off’, scroll down and select ‘Windows Subsystem for Linux’.
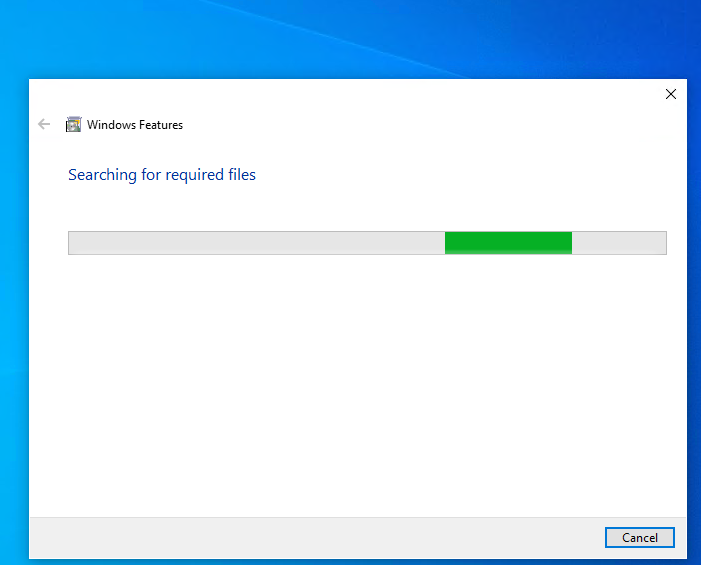
Hit OK, and it’ll download what is needed from the internet.
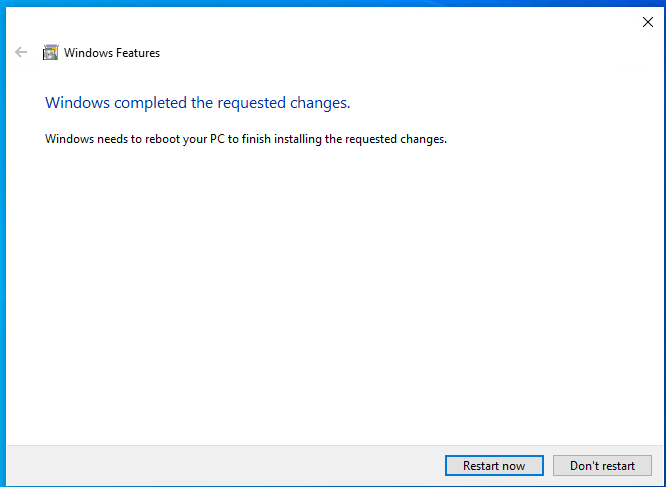
This shouldn’t take too long, then it’ll want to reboot the computer.
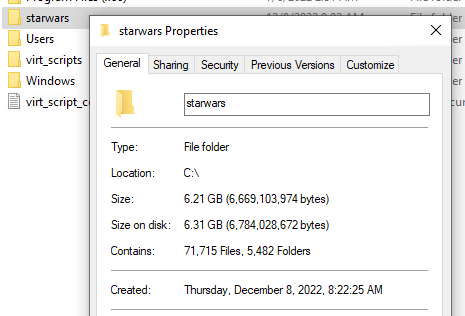
Keep in mind that the filesystem is 4.8GB. It will take some time to download. If the torrent servers are functioning I would highly recommend that.
Once it’s installed and it’s generated it’s own databases it’ll need just under 7GB of disk space. So figure that you need 15GB free for this fun experiment.
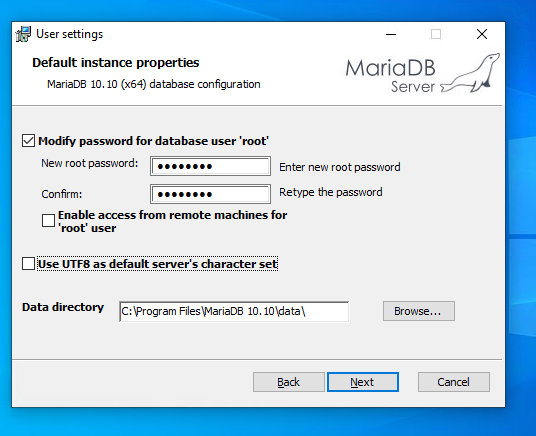
The first step is to install the database server. We will need to know the settings in order to configure the swgemu server.
You can use any MySQL, but Maria is fully GPL, and small, and more importantly doesn’t involve Oracle.
The install is pretty striaghtfoward.
GNU software requires it reproduce the license sooo here we are.
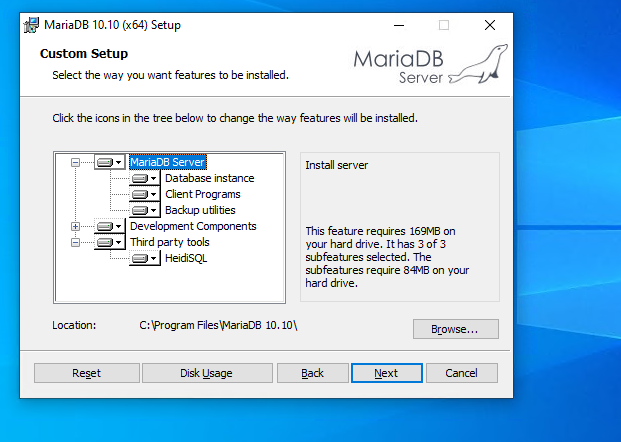
I would HIGHLY recommend use the default option of install everything.
It will ask for a root password. In this example I’m using ‘password’, of course you can use anything you want, as long as you remember it. You don’t have to allow remote machine access to the database as WSLv1 runs in the same userspace on Windows, so it’ll effectively be connecting to itself.
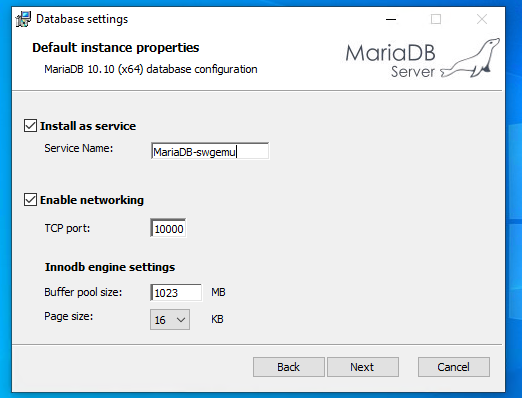
I use TCP port 10000 as I want the default port 3306 for another insance. Again it’s all up to you but you will have to remember what port you put it on. Ports below 1000 are highly NOT recommended as they need special permission. I left the buffer pool as default
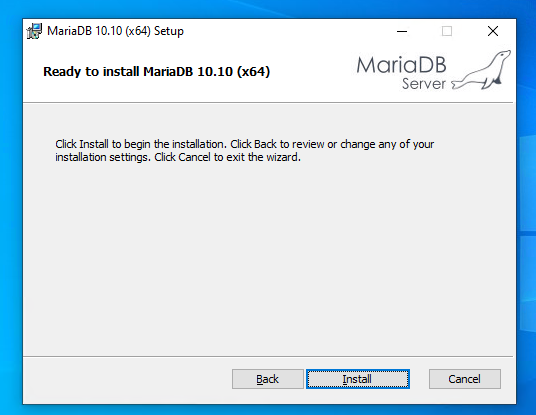
With those options set we can let it do the install.
Now the database is installed, and we can go onto restoring the WSL image, and then configuring the core3 server
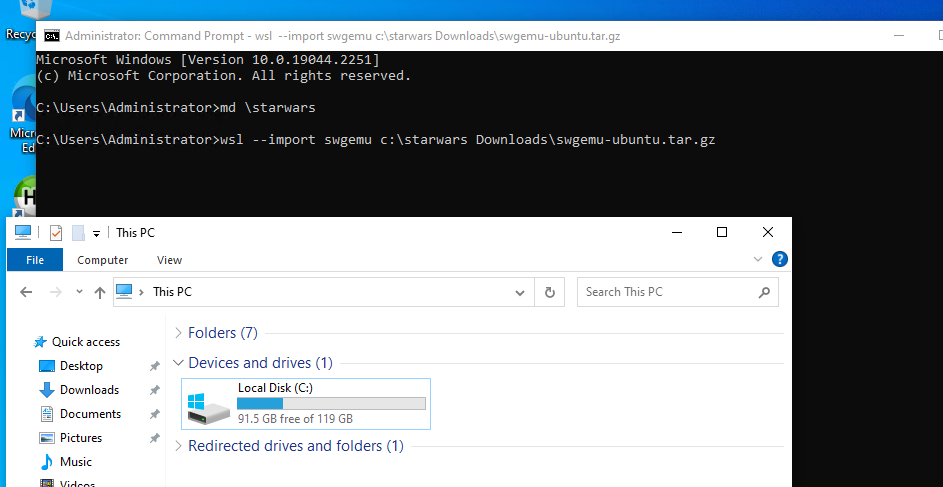
Firstly we need place to put it, On the machine I built it on it was the D: drive, but for this re-deploy on a new machine I’m using the C: drive. It’s all up to you but it MUST be a locally attached disk, no USB disks.
Simply create the target directory and run the import command something like this:
Once it’s done you can check the subsystem status:
C:\Users\Administrator>wsl --list -v
  NAME      STATE           VERSION
* swgemu    Stopped         1
You may have more than one installed, so we’ll refer to this one by it’s name ‘swgemu’.
You can start the instance with wsl -d swgemu:
C:\Users\Administrator>wsl -d swgemu
Welcome to Ubuntu 22.04.1 LTS (GNU/Linux 4.4.0-19041-Microsoft x86_64)

 * Documentation:  https://help.ubuntu.com
 * Management:     https://landscape.canonical.com
 * Support:        https://ubuntu.com/advantage

  System information as of Thu Dec  8 09:02:39 EST 2022

  System load:    0.5185546875   Processes:             7
  Usage of /home: unknown        Users logged in:       0
  Memory usage:   28%            IPv4 address for eth0: 198.46.174.160
  Swap usage:     0%


0 updates can be applied immediately.


This message is shown once a day. To disable it please create the
/root/.hushlogin file.
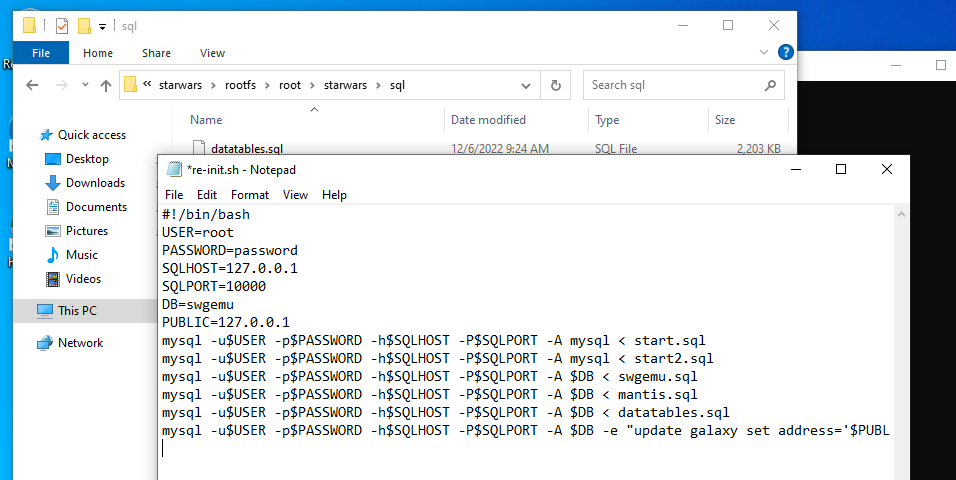
You will need to edit the script to create the databases. I like using vi, but you may not. The easiest way is to just browse to the location and open it up in notepad. The path to browse is:
C:\starwars\rootfs\root\starwars\sql
You can drag/drop re-init.sh on notepad, or make the file association, it’s all up to you.
I had set the SQLHOST to the LAN IP I have, you should set it to 127.0.0.1 . The PUBLIC address is the one that you’ll be connecting to. You can set it to your LAN address, or a public one if you know it (you’ll have to setup NAT), or if you are running it all on one machine for testing, it’s fine to be 127.0.0.1.
Save the file re-init.sh and now you have to run it.
root@DESKTOP-E4F55FE:~# cd starwars/sql/
root@DESKTOP-E4F55FE:~/starwars/sql# ./re-init.sh
mysql: [Warning] Using a password on the command line interface can be insecure.
ERROR 1008 (HY000) at line 1: Can't drop database 'swgemu'; database doesn't exist
mysql: [Warning] Using a password on the command line interface can be insecure.
mysql: [Warning] Using a password on the command line interface can be insecure.
mysql: [Warning] Using a password on the command line interface can be insecure.
mysql: [Warning] Using a password on the command line interface can be insecure.
mysql: [Warning] Using a password on the command line interface can be insecure.
root@DESKTOP-E4F55FE:~/starwars/sql#
The first SQL query will attempt to drop the swgemu database. In this case it doesn’t exist, so the first error is expected. Nothing to worry about. That gives us the database, now it’s time to configure the server.
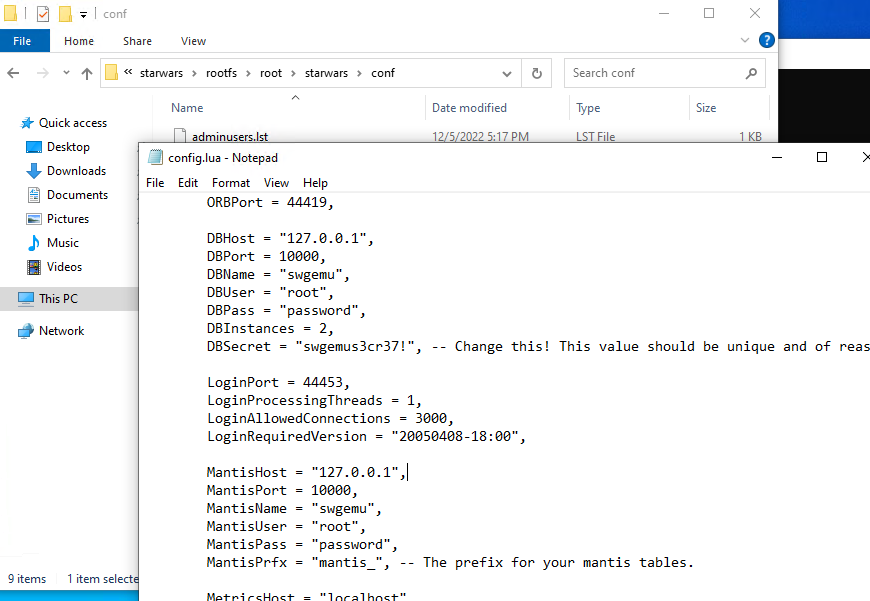
You can use explorer to browse to:
C:\starwars\rootfs\root\starwars\conf
Now open/drop on notepad the file config.lua
Again change the DBHost, and MantisHost to 127.0.0.1, and update the password for root, if you have changed it. You may also want to change the DBSecret, but since this is all for fun, I’m leaving it stock.
Now it’s time to run the server.
root@DESKTOP-E4F55FE:~/starwars/sql# cd ..
root@DESKTOP-E4F55FE:~/starwars# ./core3
(0 s) [Core] Server start, pid: 105, time: Thu Dec  8 09:11:54 2022
(0 s) [ConfigManager] Did not find conf/config-local.lua
(0 s) [DatabaseManager] converting database objects to new format
(0 s) [DatabaseManager] finished converting data to new format
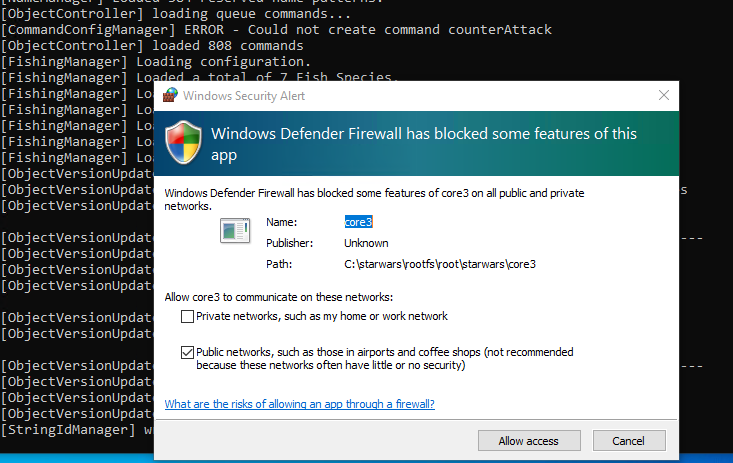
There will be a lot of messages going on, and this will take a few minutes. During the first run Windows will ask for network access permissions. Be sure to check both boxes allowing WAN and LAN access.
Check both boxes!
I have a Lenovo C20 and it takes about 2 minutes, depending on your config it may take longer or shorter.
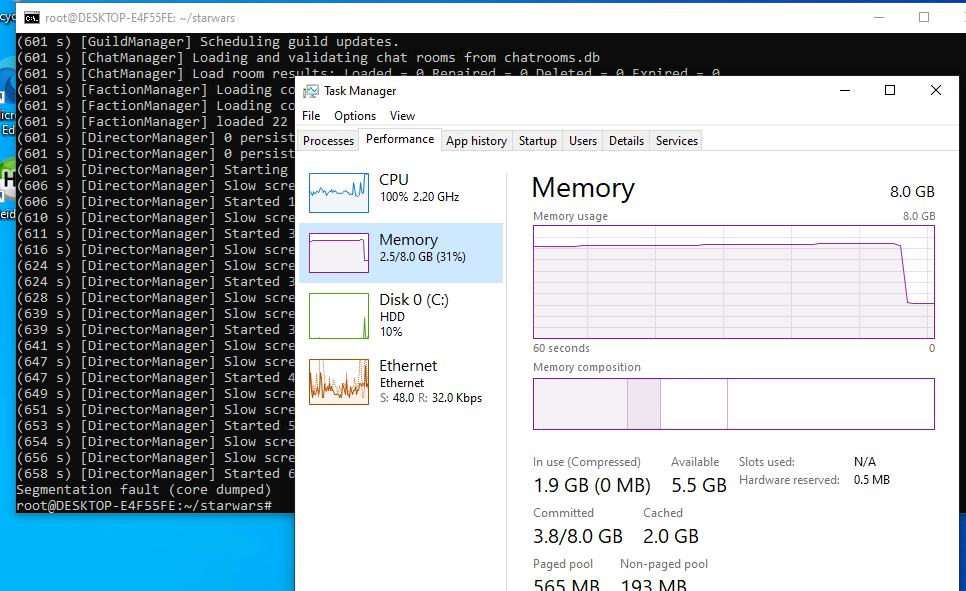
One thing to point out is that I have configured Core3 for all the worlds, and this will need more than 8GB of ram to start up. So if you get something like this:
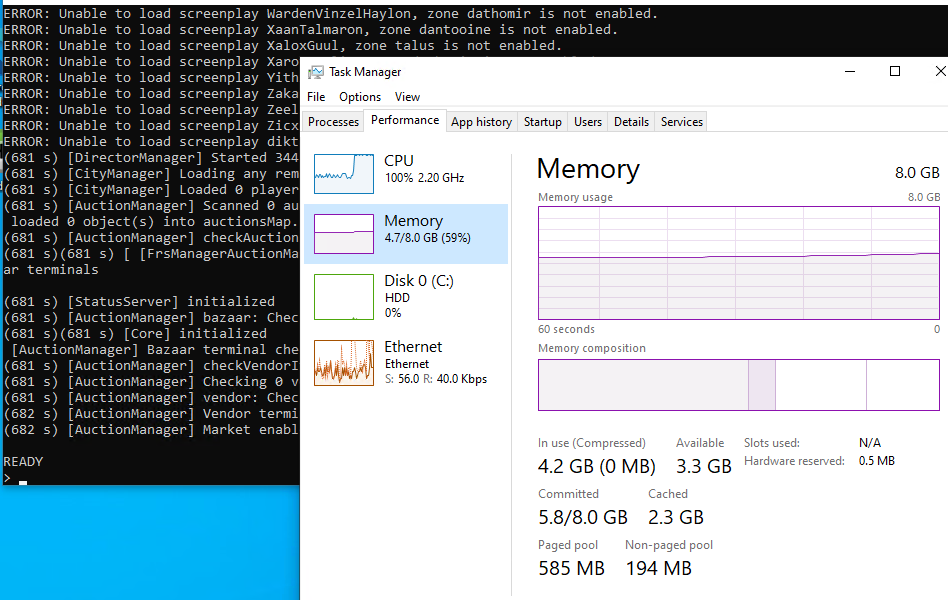
If this happens, you’ll have to try a minimal config, commenting out the areas from the config. On this test system, it only has 8GB of RAM, and that isn’t enough to have everything. However the minimal of the training & Tatooine fits no problem:
On the machine I originally set this up on, it has 32GB of RAM, so the processes needing just under 7GB of RAM wasn’t an issue. However an 8GB machine just isn’t enough as I found out the hard way re-producing my install.
Since we have previously allowed the Core3 application LAN/WAN access you should be able to connect. If you set the public address to something public, you will need to setup your firewall to forward the following ports to the machine hosting Core3
Otherwise you’ll need to open the following ports and protocols:
TCP 44419 TCP 44455 UDP 44453 UDP 44462 UDP 44463
Again making this a WSLv1 setup makes this easier as Windows runs core3 in the same memory space.
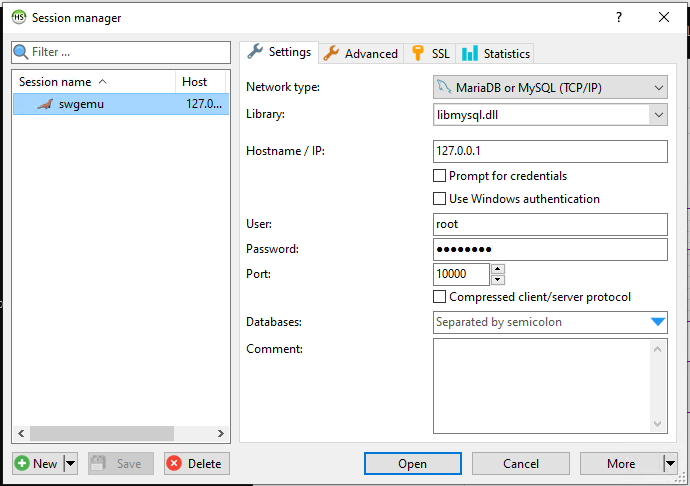
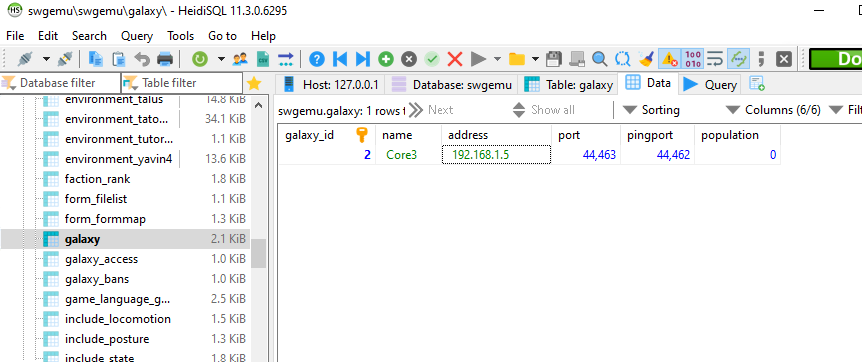
With any luck you should now be able to connect to the address you have specified as your PUBLIC address. If you want to change, you can either update the re-init.sh script and re-run it, destroying everything, or run the HeidiSQL tool, and just update it.
I had to set it to use libmysql.dll . As always remember your root password, and what Port you used to setup MariaDB. With the profile saved you can open it up.
The address field tells the clients what IP address they can find the server on, so it can the the LAN if you are staying at home, or it has to be a Publicly accessible one. Another alternative is something like Hamachi, which lets you create your own virtual network of machines. It’s great, but not all that cheap, but the added benefit is that your server isn’t a public resource, so you know exactly who is connecting.
If you want to be open but in control I’ve used this in the past to great success.
If you do change the IP you have to restart the core3 program.
Simply type in ‘exit’ at the console and it’ll start to gracefully shutdown.
Then simply start it again with a ./core3
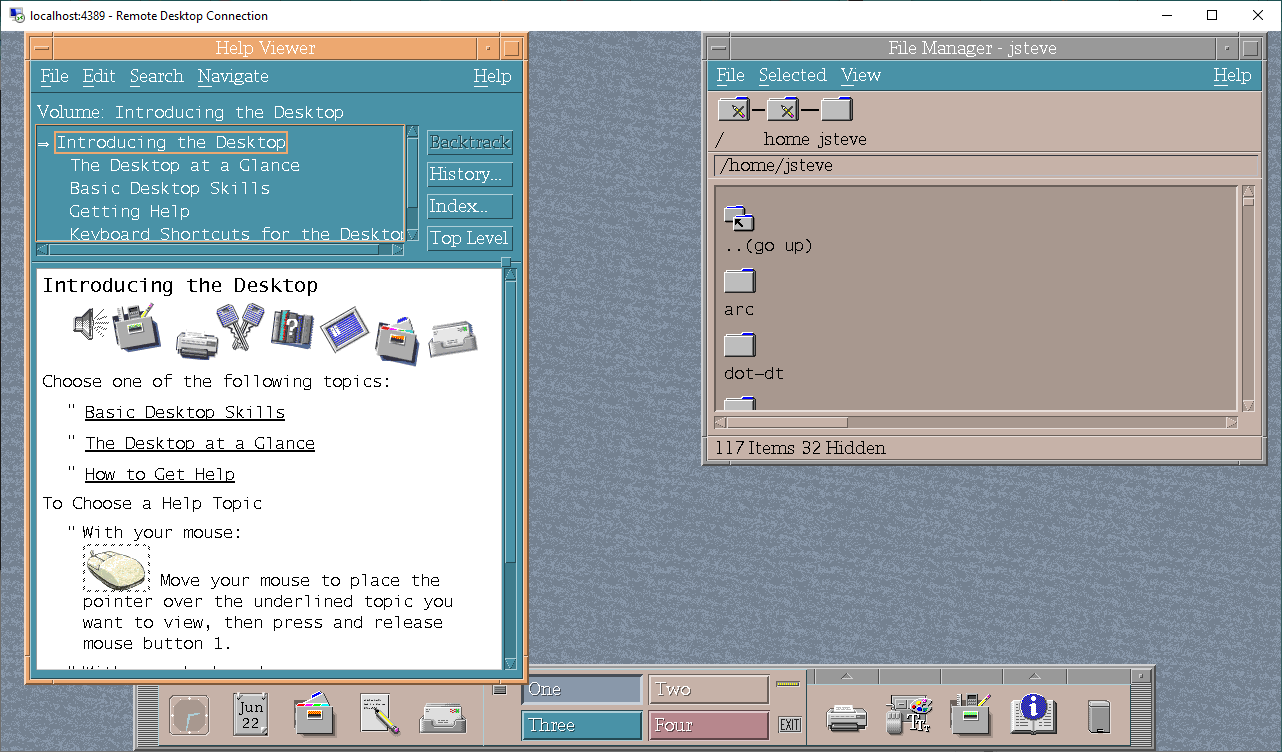
If you want to enable the god mode, I assume you have read how what changes to make on the client side, and the table to edit is the accounts table, once you have logged in, it’ll create your record, and you can find it on HeidiSQL and change the admin_level field to 15. With this set the next character you create will be a ‘god’.
It’s worth noting that your 1st player won’t have the god mode enabled, but rather the 2nd onward will have the GOD mode flag set.
To enable the / commands (aka the whole fun of god mode!) you need to edit the swgemu.cfg file in your Star Wars Galaxies directory. You need to uncomment the following line:
# .include “user.cfg”
Next you need to create a user.cfg file in that directory with the following:
Now any server you can login to you can run exciting commands like
/setspeed 10 30
I’m not going to go into setting up the client, installing the SWGEMU stuff and how to add custom servers, as I assume you already know how to do so. This is more to let people run their own instances at home, or among friends.
On building core3 for yourself, be aware that by default it’ll use a ‘native’ config option that tunes the compiler to generate code as fast as possible for YOUR processor. So if you want to run it somewhere else, it has a good chance of not running. I had to edit the following files:
Also I have access to a Windows 2019 Server which is Windows 10 1809 based, and it doesn’t support the import-export of filesystems. So this won’t be a clean install, I guess it’d be easier to copy files over from Windows 10, and install Ubuntu 20.22 from the store.
So sadly I didn’t keep the source files as I thought they were evergreen, and yeah turns out they are NOT. But thankfully there is a 2011 set on archive.org listed as enwiki-20110620-item-1-of-2 and enwiki-20110620-item-2-of-2. Sadly there isn’t any torrents of these files, and it seems as of today the internet archive torrent servers are dead so a direct download is needed.
Getting started
You are going to need a LOT of disk space. It’s about 10GB for the downloaded compressed data, and with the pages blown out to a database it’s ~60GB. Yes it’s massive. Also enough space for a Debian 7 VM, or a lot of your time trying to decode ancient perl. Yes it really is a write only language. I didn’t bother trying to figure out why it doesn’t work instead I used netcat and a Debian 7 VM.
Thanks to trn he suggested aria2c which did a great job of downloading stuff, although one URL at a time, but that’s fine.
aria2c -x 16 -s 16 -j 16 <<URL>>
I downloaded the following files:
enwiki-20110620-all-titles-in-ns0.gz
enwiki-20110620-category.sql.gz
enwiki-20110620-categorylinks.sql.gz
enwiki-20110620-externallinks.sql.gz
enwiki-20110620-flaggedpages.sql.gz
enwiki-20110620-flaggedrevs.sql.gz
enwiki-20110620-image.sql.gz
enwiki-20110620-imagelinks.sql.gz
enwiki-20110620-interwiki.sql.gz
enwiki-20110620-iwlinks.sql.gz
enwiki-20110620-langlinks.sql.gz
enwiki-20110620-oldimage.sql.gz
enwiki-20110620-page.sql.gz
enwiki-20110620-pagelinks.sql.gz
enwiki-20110620-pages-articles.xml.bz2
enwiki-20110620-pages-logging.xml.gz
enwiki-20110620-page_props.sql.gz
enwiki-20110620-page_restrictions.sql.gz
enwiki-20110620-protected_titles.sql.gz
enwiki-20110620-redirect.sql.gz
enwiki-20110620-site_stats.sql.gz
enwiki-20110620-templatelinks.sql.gz
enwiki-20110620-user_groups.sql.gz
although the bulk of what you want as a single file is enwiki-20110620-pages-articles.xml.bz2, which is 7.5 GB, downloading the rest of the files is another 10GB rouding this out to 17.5GB of files to download. Yikes!
MySQL on WSLv2
I’m using Ubuntu 20.04 LTS on Windows 11, so adding MySQL is done via the MariaDB version with a simple apt-get install:
[ERROR] mysqld: Can't create/write to file '/var/run/mysqld/mysqld.pid' (Errcode: 2 "No such file or directory")
Additionally you’ll need to tell it to bind to 0.0.0.0 instead of 127.0.0.1 as we’ll want this on the network. I’m on an isolated LAN so it’s fine by me, but of course your millage may vary. For me a simple diff of the config directory is this:
diff -ruN etc/mysql/mariadb.conf.d/50-server.cnf /etc/mysql/mariadb.conf.d/50-server.cnf
--- etc/mysql/mariadb.conf.d/50-server.cnf      2021-11-21 08:22:31.000000000 +0800
+++ /etc/mysql/mariadb.conf.d/50-server.cnf     2022-03-11 10:01:45.369272200 +0800
@@ -27,7 +27,7 @@

 # Instead of skip-networking the default is now to listen only on
 # localhost which is more compatible and is not less secure.
-bind-address            = 127.0.0.1
+bind-address            = 0.0.0.0

 #
 # * Fine Tuning
@@ -43,6 +43,11 @@
 #max_connections        = 100
 #table_cache            = 64

+key_buffer_size = 1G
+max_allowed_packet = 1G
+query_cache_limit = 18M
+query_cache_size = 128M
+
 #
 # * Logging and Replication
 #
As far as I know MySQL doesn’t run on WSLv1. So people with that restriction are kind of SOL. At the same time for me, Debian 7 doesn’t run on Hyper-V so I had to run VMware Player. And well if you can’t run Hyper-V/WSLv2 then you can run it all on Debian 7 which is probably eaiser. Although you’ll probably hit some performance issues in the import that either my machine is fast enough I don’t care or the newer stuff is pre-configured for machines larger than an ISA/PCI gen1 Pentium 60.
I run mysqld manually in a window as I am only doing this adhoc not as a service. Although on a Windows 10 machine to reproduce and test this, mysqld wont run interactively, instead I had to do the ‘service mysql start’ to get it running. So I guess you’ll have to find out the hard way.
Next, be sure to create the database and a user to so this will work:
create database wikidb;
create user 'wikiuser'@'%' IDENTIFIED BY 'password';
GRANT ALL PRIVILEGES ON wikidb.* TO 'wikiuser'@'%' WITH GRANT OPTION;
show grants for 'wikiuser'@'%';
Something like this works well. Yes the password is password but it’s all internal so who cares. If you don’t like it, change it as needed.
With the database & user created you’ll want to make sure that you can connect from the Debian 7 machine with something like this:
mysql -h 192.168.6.10 -uwikiuser -ppassword wikidb
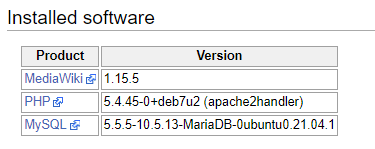
As I don’t think PHP 7 or whatever is modern will run the ancient MediaWiki version 1.15.5 (which I’m using).
This is my setup as I’m writing this so bear with me.
Prepping Apache
Since I have that Debian 7 VM, I used that for setting up MediaWiki. Looking at my apt-cache I believe I loaded the following modules:
mysql-client
mysql-common
apache2
apache2.2-bin
apache2.2-common
apache2-mpm-prefork
apache2-mpm-worker
apache2-utils
libapache2-mod-php5
php5-cli
php5-common
php5-mysql
lua5.1
liblua5.1
On the Apache side I have the following extension enabled:
alias authz_default authz_user deflate mime reqtimeout
auth_basic authz_groupfile autoindex dir negotiation setenvif
authn_file authz_host cgi env php5 status
Which I think is pretty generic.
I used mediawiki-1.15.5 as the basis mostly because I had started with an incomplete 2010 dump, but after finding this 2011 dump I probably should have gone with 1.16.5 or 1.17.5.. Oh well. When connecting from Debian 7 to my ‘modern’ MariaDB there is one table that needs to be updated, otherwise it’ll fail. A simple diff that needs to be applied (that was with the least amount of effort spent by me!) is this:
--- maintenance/tables.sql      2009-03-20 19:20:39.000000000 +0800
+++ /var/www/maintenance/tables.sql     2022-03-07 14:21:25.580318700 +0800
@@ -1099,7 +1099,7 @@

 CREATE TABLE /*_*/trackbacks (
   tb_id int PRIMARY KEY AUTO_INCREMENT,
-  tb_page int REFERENCES /*_*/page(page_id) ON DELETE CASCADE,
+  tb_page int,
   tb_title varchar(255) NOT NULL,
   tb_url blob NOT NULL,
   tb_ex text,
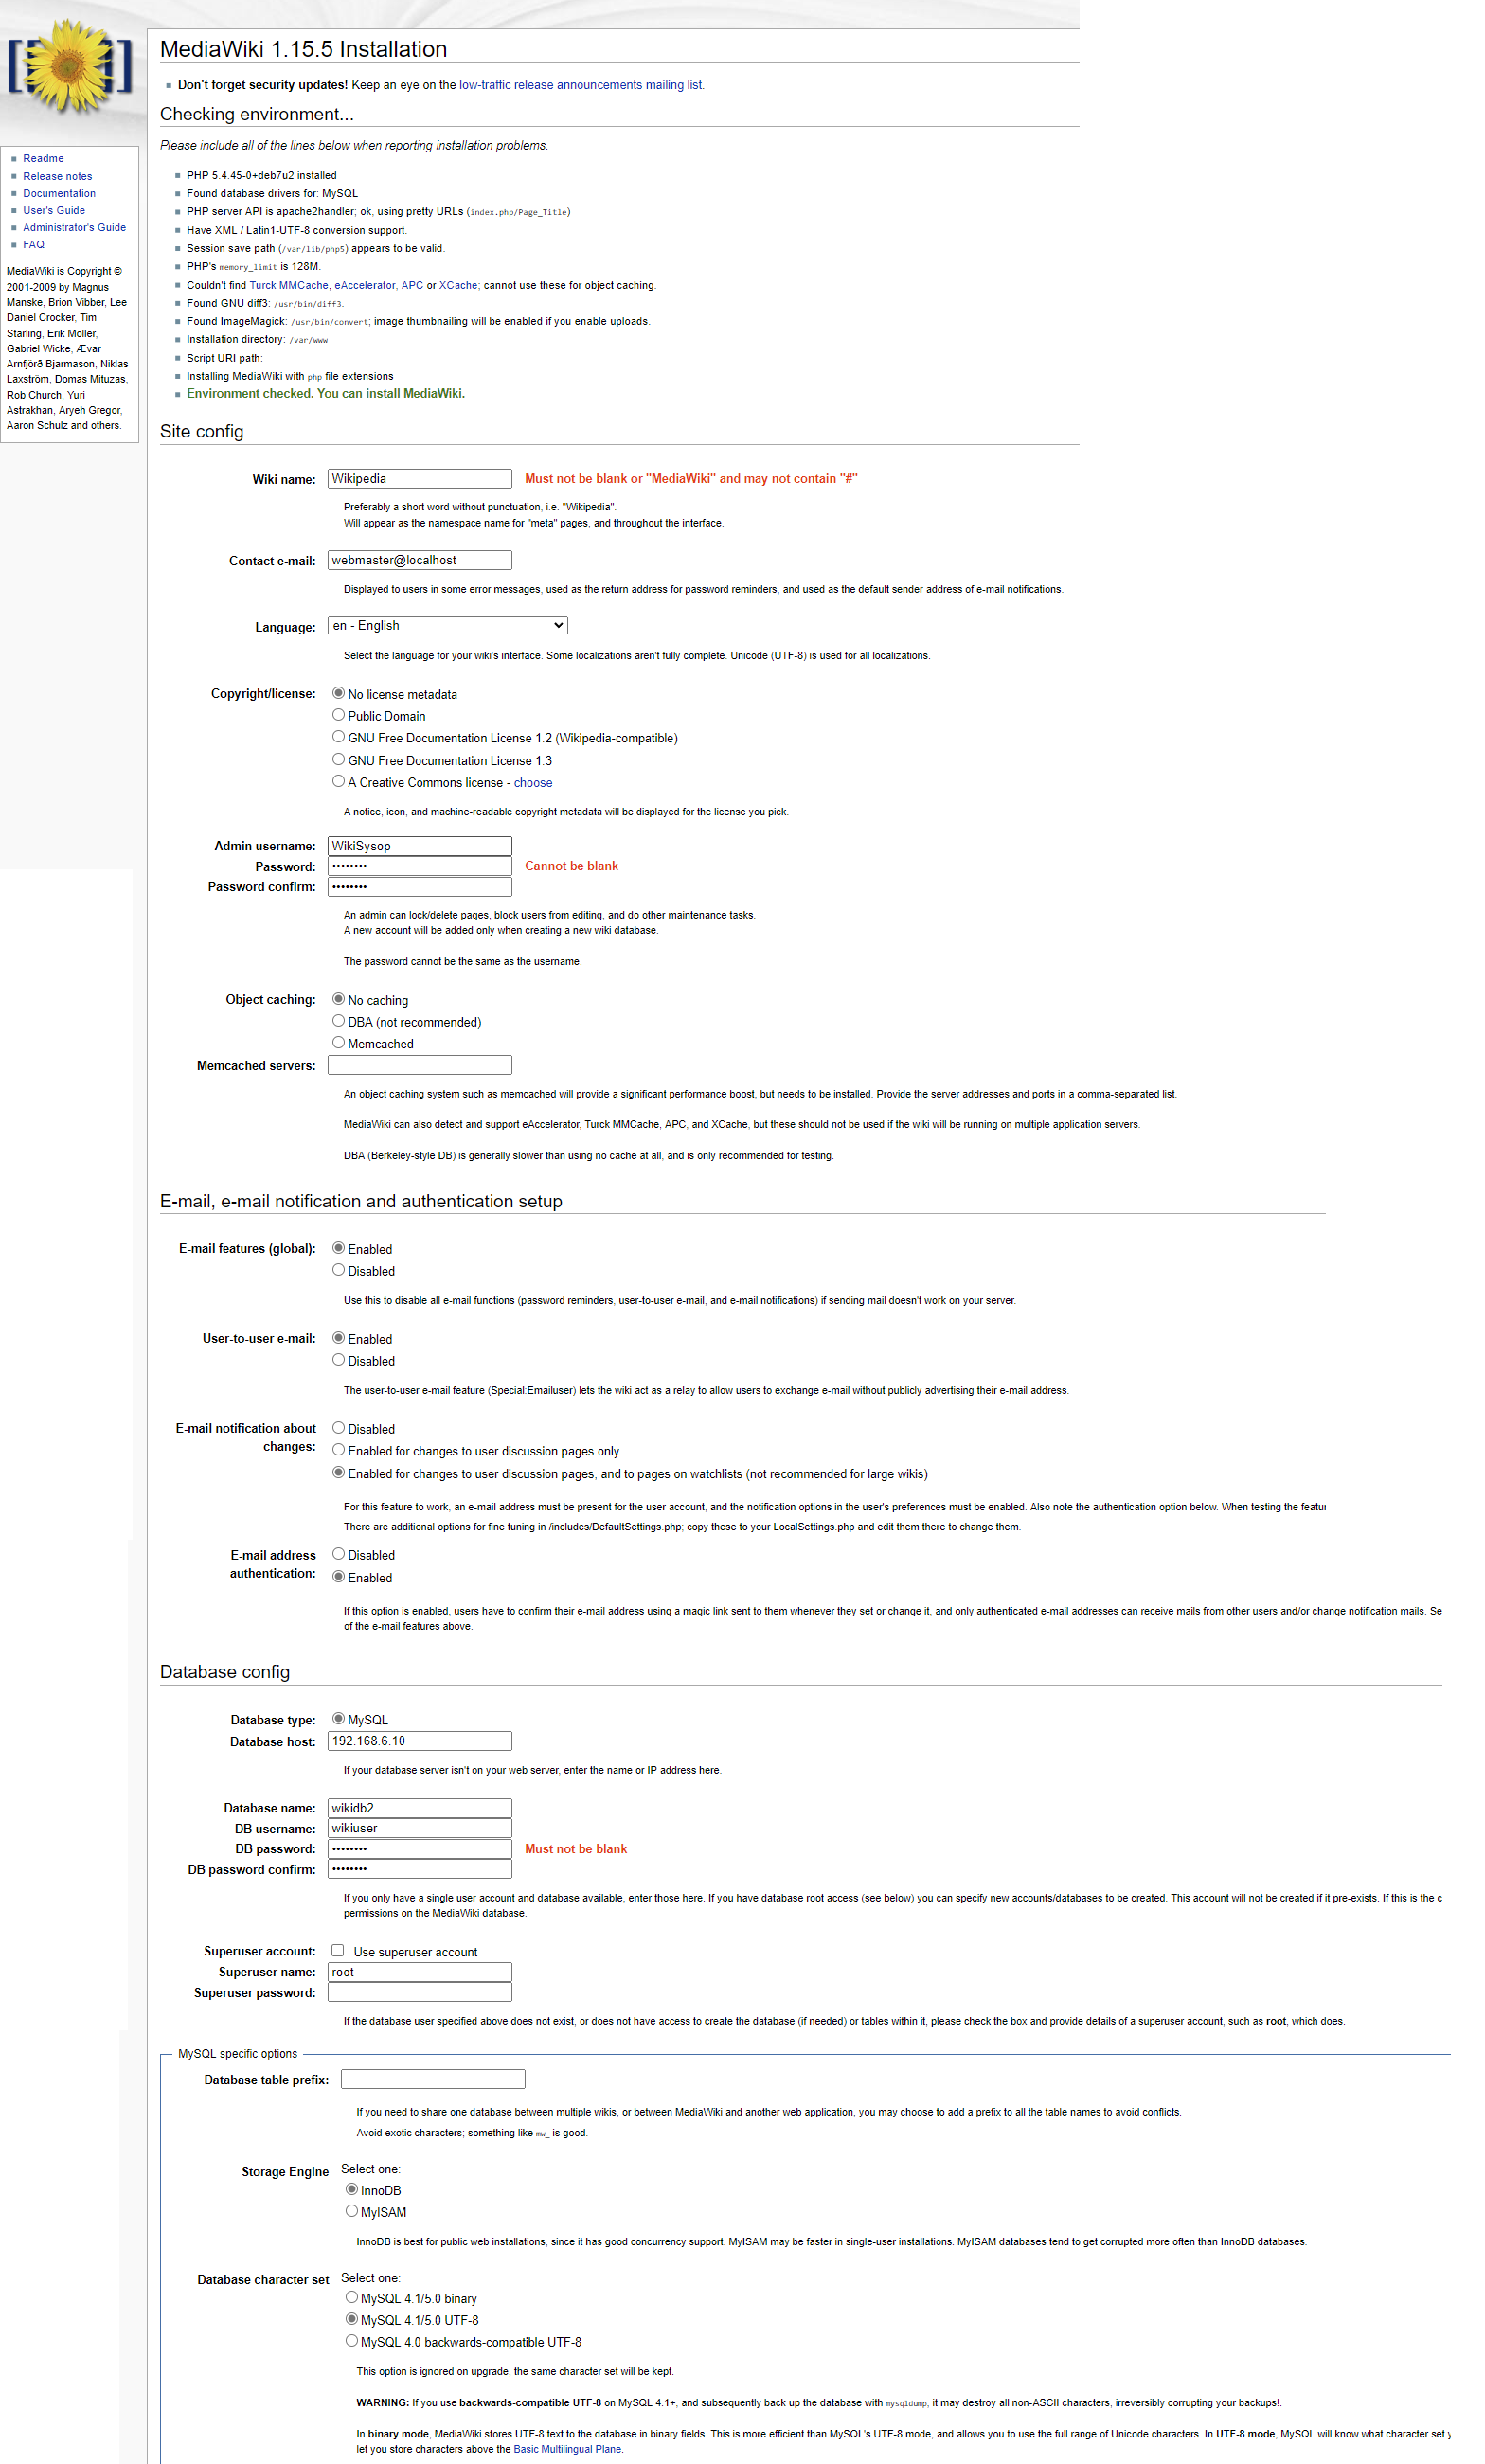
All being well and patched you can do the install! I just do a super basic install, nothing exciting. In my setup the MySQL server is on 192.168.6.10. I don’t think I changed much of anything?
And with that done if all goes well you’ll get the install completed!
If you get anything else, drop the database (the permission grants stay, because MySQL doesn’t actually drop thing associated with databases.. :shrug:.
Next in the extensions folder I grabbed Scribunto-REL1_35-04b897f.tar.gz, which is still on the extensions site. This required Lua 5.1 and the following to be appended to the LocalSetings.php
Keep in mind the original extensions I used are not, and appear to not have been archived, so yeah.
Doing the pages.xml import
You can find the version 0.5 media wiki import script on archive.org. Obviously check the first 5-10 lines of the decompressed bz2 file to see what version you have if you are deviating and look around IA to time travel to see if there is a matching one. I have no idea about modern ones as this is hard enough trying to reproduce an old experiment.
First you need to make some files to setup the pre-post conditions of the insert. It’s about 11,124,050 pages, give or take.
pre.sql
SET autocommit=0;
SET unique_checks=0;
SET foreign_key_checks=0;
BEGIN;
post.sql
COMMIT;
SET autocommit=1;
SET unique_checks=1;
SET foreign_key_checks=1;
Running the actual import
I’m assuming that 192.168.6.33 is the Debian 7 machine, 192.168.6.10 is the Windows 11 machine.
On my setup it takes about 2.5 hours to load the database, which will be about 51GB.
11340000 pages (1231.805/s), 11340000 revisions (1231.805/s) in 9206 seconds
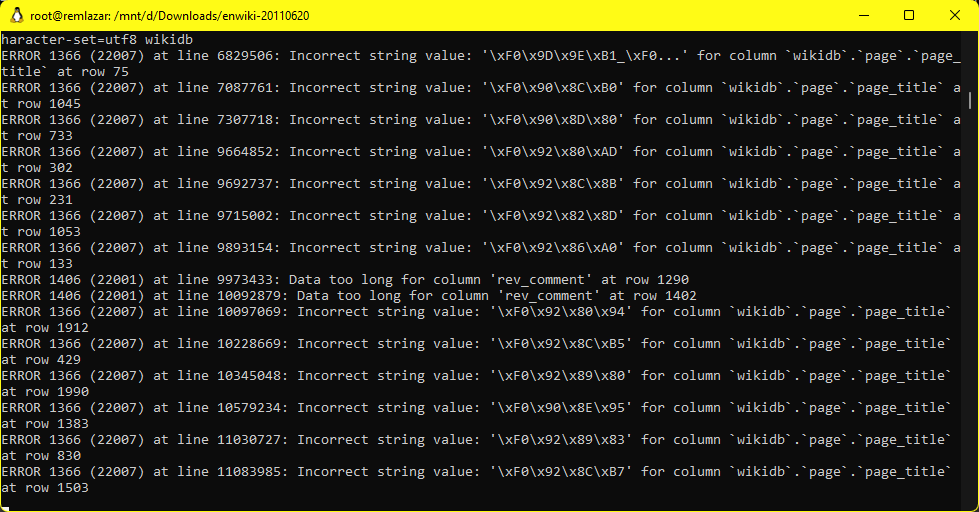
The savvy among you may notice the -f flag to the mysql parser. And yes that is because there *will* be errors during the process.
I’m not sure what how or what to do about it, but without the -f (force) flag the process will stop around the 2 million row mark. Doing it forced allows the process to continue.
With that done I get the following tallies…
MariaDB [(none)]> SELECT table_name, table_rows FROM INFORMATION_SCHEMA.TABLES    WHERE TABLE_SCHEMA = 'wikidb' and
table_rows > 0;
+---------------+------------+
| table_name    | table_rows |
+---------------+------------+
| interwiki     |         85 |
| objectcache   |         10 |
| page          |   10839464 |
| revision      |   11357659 |
| text          |   14491759 |
| user_groups   |          2 |
+---------------+------------+
9 rows in set (0.002 sec)
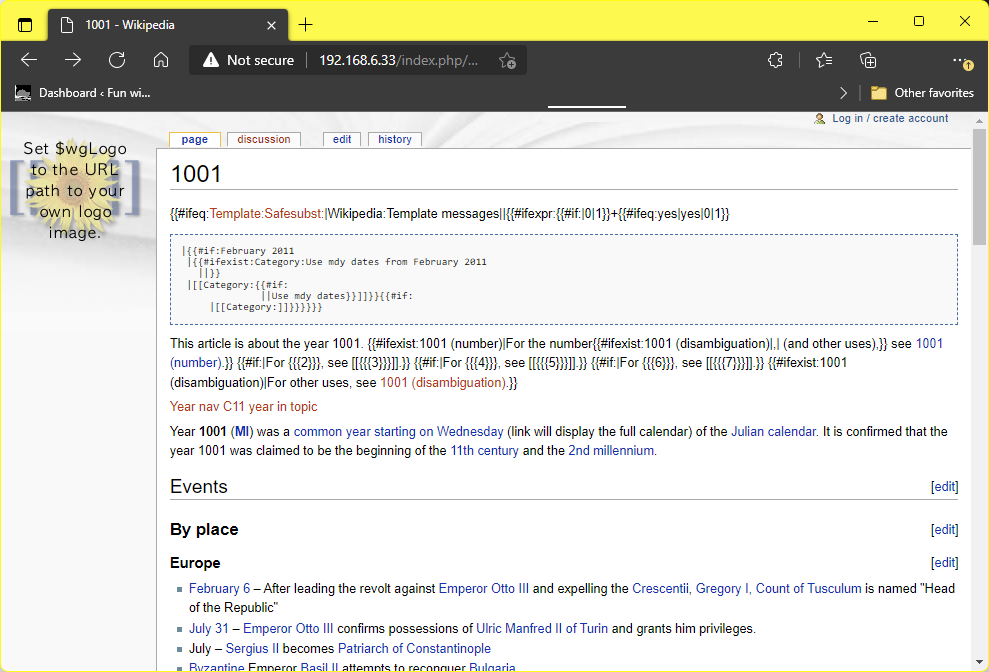
If all of this worked (amazing!) then search for something like 1001 and be greeted with:
1001: a non odyssey
MySQL disappointments
So with this in place, having some 51GB laying around just seemed lame. Using WSLv2 I setup a compressed folder on NTFS and moved the data directory into there and it gets it down to a somewhat more manageable 20GB. Since the data doesn’t change I had a better idea, SquashFS. Well it compresses down to 12GB, HOWEVER for the life of me I can’t find anything concrete on using a read only backing store to MySQL. Even general mediawiki stuff seems to want to write to all the tables, I guess it’s index searching?! Insane! And it appears MySQL can only use single file storage units per table? Yeah this isn’t MSSQL with stuff like a database from CD-ROM with the log on a floppy. I tried doing a union overlay filesytem but it makes a 100% copy of a file that changes. That’s not good. I guess using qemu-img for a compressed qcow2 with a writable diff file could hide the read only compressed backing store, but I’ve already lost interest.
Maybe it’s just me, but it seems like there should be a way to write logs/updates/scratch to a RW place, and keep the majority of the data read-only (and highly compressed).
Why doesn’t stuff format correctly
There seems to be a lot of formatting nonsense going on, I probably should step up to mediawiki 1.17. And I’ll add in loading the other SQL tables since they are straight up inserts. Also the extensions I know I loaded don’t seem to exist in any form anymore, and the images I snapshotted of the install are all long gone. It’ll require more diving around.
One of the great things about Windows 11 was the inclusion of the Windows Subsystem for Linux or WSL. It wasn’t available at launch but it started with v1 a simple ELF loader and an implementation of the Linux kernel on the NTOS kernel. Being a re-implementation of Linux it was great for what did work, however many things did not. Compared to other Unix subsystems for NT over the years however WSLv1 was the best no question.
Not being enough however, Microsoft took a page out of the old WinOS/2 days and stubbed a Linux kernel to run under Hyper-V, allowing it to run far more applications, and for me giving the ability to use applications that alter memory space, and allowing i386/x32 applications to run. You could happily export your X-11 display to a Windows based X server, and get applications that way. But this isn’t 1993 so it was very limiting.
Enter WSLg
The big change is the ability to use RDP to hook both Wayland and Pulse Audio bringing Linux ‘desktop’ X11 applications to the Windows desktop. Also added in is virtual GPU capabilities allowing accelerated 3D, along with CUDA applications to run (although with a performance penalty.
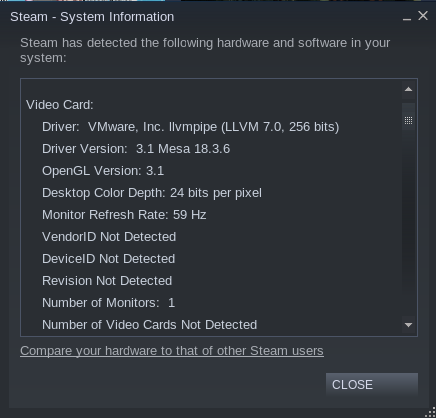
The downshot for me, is that my existing Debian 10 install was not picking this up, and was somehow picking up a VMware
VMware llvmpipe
I have no idea how or why it was picking this up. While I did have the VMware Player installed, the newer versions backend through Hyper-V.
I did find this article, which gave me a path to get where I wanted, although the transition of an existing v2 instance didn’t work for me. Maybe Debian 10 is too weird. I don’t know.
Not sure where how to proceed I backed up my home directory and un-installed VMware Player and purged my existing Debian 10. I installed that Ubuntu Community Preview which promises to include all the new and exciting features.
$ glxinfo -B
name of display: :0
display: :0  screen: 0
direct rendering: Yes
Extended renderer info (GLX_MESA_query_renderer):
    Vendor: Microsoft Corporation (0xffffffff)
    Device: D3D12 (NVIDIA GeForce RTX 2070) (0xffffffff)
    Version: 21.0.3
    Accelerated: yes
    Video memory: 40710MB
    Unified memory: no
    Preferred profile: core (0x1)
    Max core profile version: 3.3
    Max compat profile version: 3.1
    Max GLES1 profile version: 1.1
    Max GLES[23] profile version: 3.0
OpenGL vendor string: Microsoft Corporation
OpenGL renderer string: D3D12 (NVIDIA GeForce RTX 2070)
OpenGL core profile version string: 3.3 (Core Profile) Mesa 21.0.3
OpenGL core profile shading language version string: 3.30
OpenGL core profile context flags: (none)
OpenGL core profile profile mask: core profile

OpenGL version string: 3.1 Mesa 21.0.3
OpenGL shading language version string: 1.40
OpenGL context flags: (none)

OpenGL ES profile version string: OpenGL ES 3.0 Mesa 21.0.3
OpenGL ES profile shading language version string: OpenGL ES GLSL ES 3.00
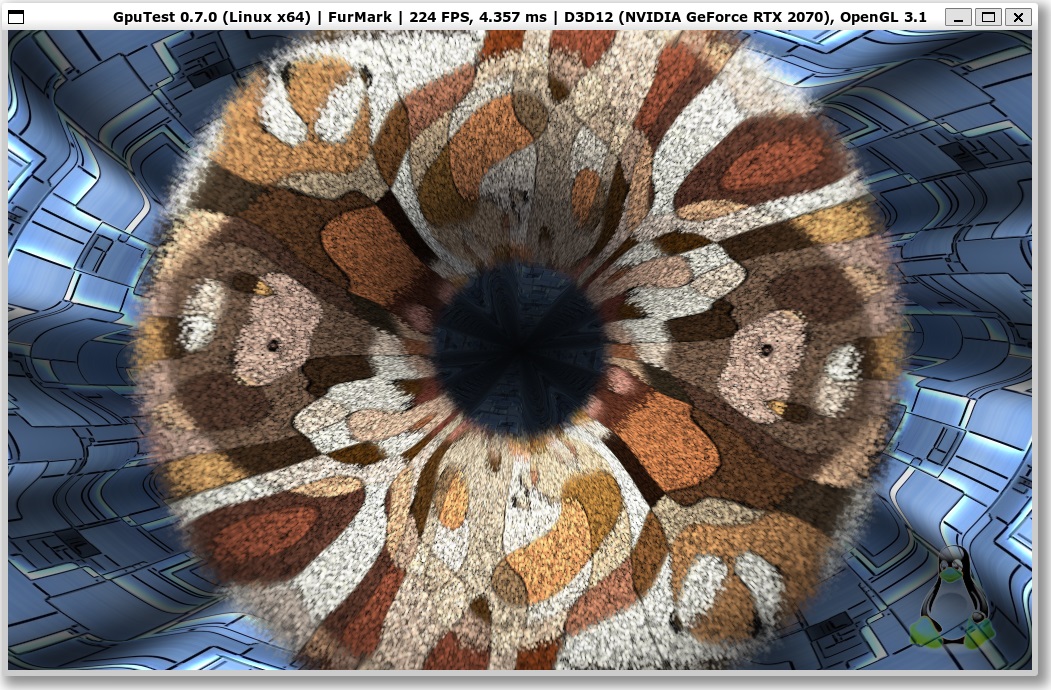
Now this is looking MUCH better.
224FPS! FurMark
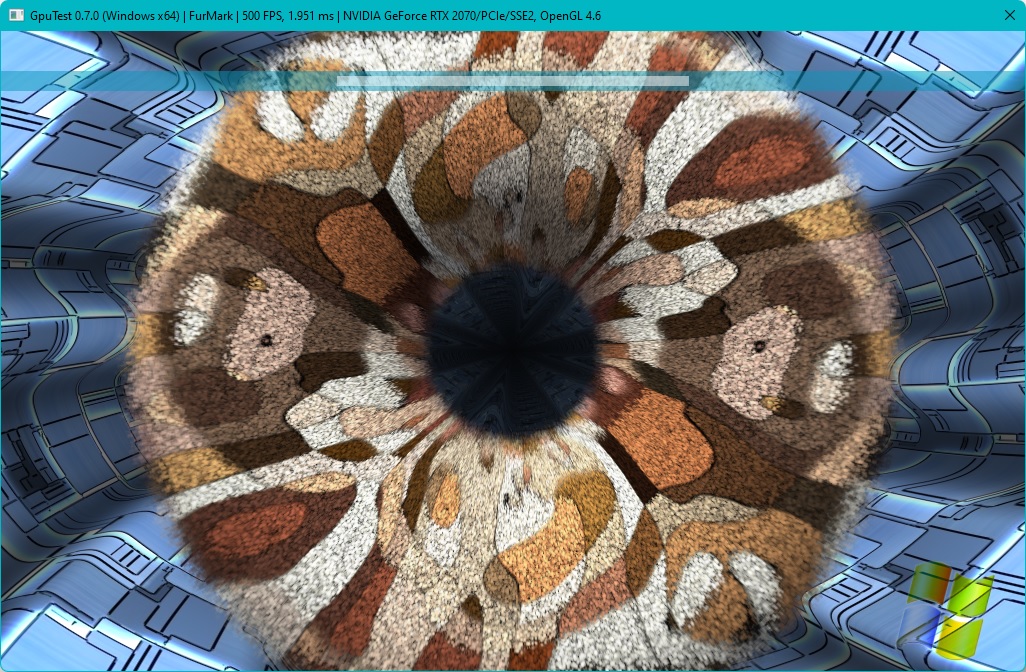
Now compare this to a native version of FuMark:
500 FPS
So it’s a 50% haircut. Ouch.
Gaming however using steam (yes steam runs!) reveals some other deeper issues. The mouse tracking is WAY off. So for FPS stuff you’ll spend a lot of time staring at the ceiling or the floors. The next issue is there is no mouselock, so things that rely on being able to move the mouse far beyond a screen length is impossible to play. To be fair it’s a preview, and so far I have to admit Windows 11 feels more like a technical preview. Also I don’t know what the deal is or anything about profiling it but KOTOR2 is insanely slow. Although at least with 3d acceleration running it’s not 1 frame every 5 seconds.
That’s right ARM Linux userland! I still have high hopes for Windows on ARM (I have 2 Windows RT devices now!!) although I’m not holding my breath.
Maybe there will be some ARM boards that are suitable for the desktop that aren’t over 1k USD.. That’d be nice.
Interesting trivia is that the Linux Subsystem started it’s life on ARM as a way to run Android binaries on Windows Phone. And true to everything Microsoft does, it got to the point where it could start to run things (albeit poorly) and was summarily killed. Although it’s found life despite the original false start as a general ‘text mode’ subsystem for Windows.
However running Linux binaries on Windows currently just shows that NTOS isn’t as efficient as the Linux kernel when it comes to emulating the Linux ABI. Although this was the original ‘dream’ of the microkernel, and a POSIX subsystem for NT was always part of the original design, although it really was more of a checkbox for GSA contracts, and outside of being able to use pax & vi it really was handicapped by not having BSD extensions, and especially by not having any access to the TCP/IP stack.
EDIT*
I should add these notes from the future past for the future me, when messing around with Windows Server 2019 build 1809 when they finally brought the Linux Subsystem into the fold. Unpacking the distribution and running the ‘setup’ sets it up DIRECTLY into that directory. So put it where you want it.
When you mess that up, you have to use the wslconfig program!
Of note is:
wslconfig /list /all Lists all distributions, including ones that aren’t currently usable. They may be in the process of installing, uninstalling, or are in a broken state.
wslconfig /unregister <DistributionName> Unregisters the distribution from WSL so it can be reinstalled or cleaned up.
This way you can now clean up your mess, and get Linux installed right.