This reply from Zir was so large and so detailed I didn’t feel it felt to be burred on an older post but rather given it’s own chance for a full pager. -editor
I should have posted this a LONG time ago, back when the actual winner was announced, but procrastination is what it is. Better latter than never, I guess. Actually, I did receive a half-prize for my efforts, but went unmentioned (Which at times I don’t mind. Privacy is privacy).
Mihai Gaitos was a savior of sorts because he appeared at the right moment, when I was already hitting a brick wall as that was the limit of my skills. When I noticed that there was no way to complete the challenge by brute forcing but that programming skills were required to reverse engineering, or do something from scratch like the winner did, I knew it was out of my league.
Programming always eluded me even though I always considered it an essential skill. Yet, I’m still proud of the things I did to get there, as I’m normally a very lazy person that likes to read how people does stuff but rarely do it myself. At the end of the day, money makes me dance and that is why I got involved, so I’m a capitalist pig at heart, heh.
When I first saw the challenge posted, I passed it to a few programmer friends to see if they were interested in giving it a try (Who doesn’t want a chance at a significant money prize? Good friends always tell others about opportunities). Among those, one had its own hobby OS project and another is a freelancer programmer that did some private homebrew DOS games, so I considered them skilled enough to try. Sadly, none of them showed interest.
I noticed that after like two days of the challenge being posted, there were still no comments, which I thought that was rare cause the previous challenge with a 100 U$D prize receive a ton of comments and general interest, and with a prize 20 times bigger, it would guarantee the participation of highly skilled people, so I found quite weird that no one completed it by then. Either it was too hard to be done in 48 hours, which would make me totally unqualified, or no one noticed it on the first place, which would make me potentially lucky (And neozeed Blog not very popular, then. Shame on him!). Is also possible than other potential challengers also thought that with heavy competence they may not have made it before another one got crowned winner, either. I took the last two line of thoughts.
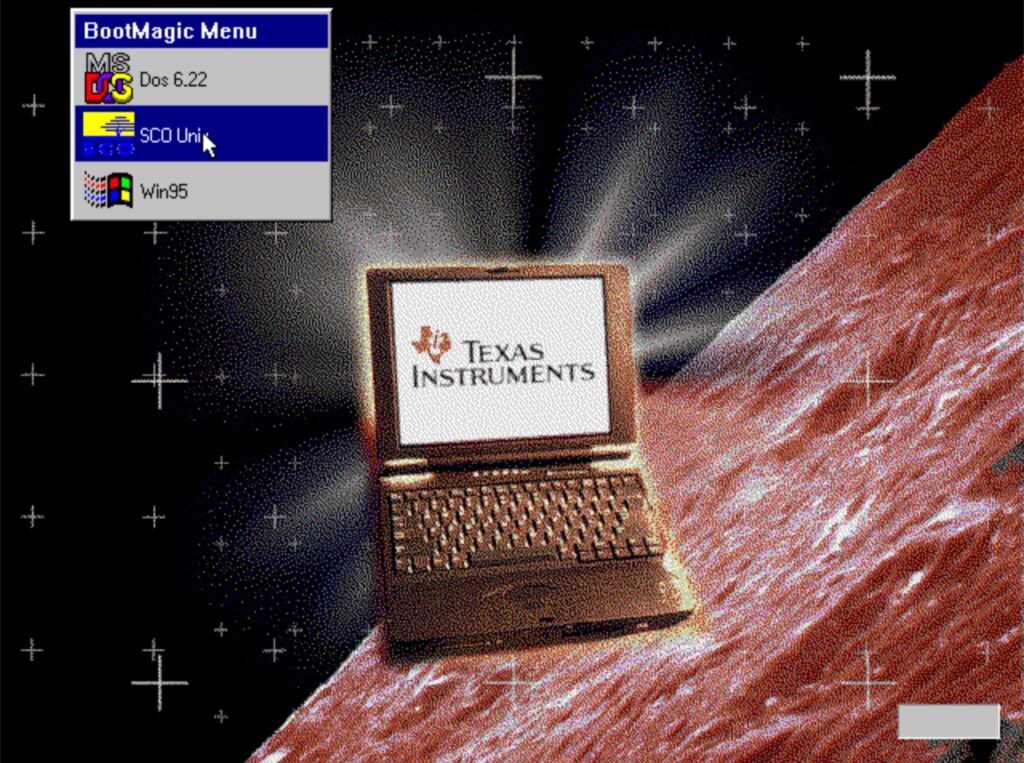
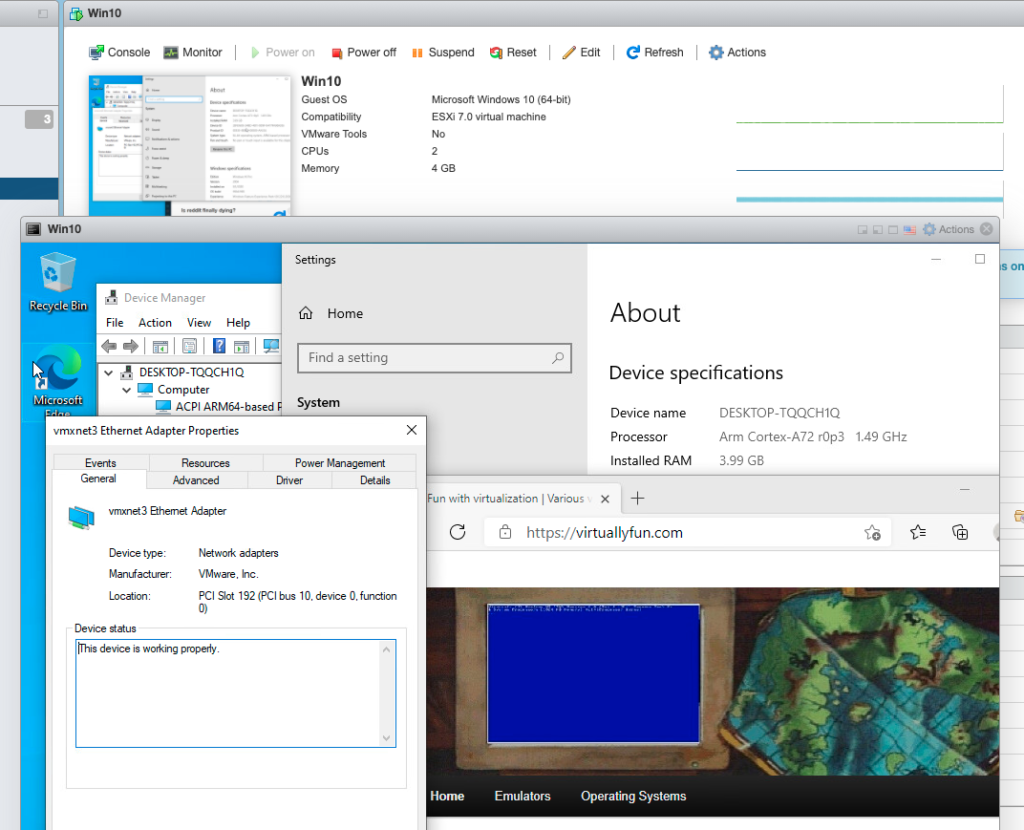
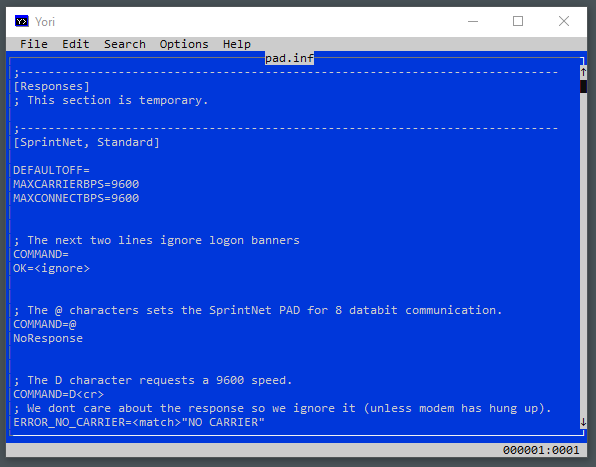
My inspiration about having enough skills to complete the challenge came from the rules of the challenge itself, as it explicitly mentioned that some things like mix-and-match Boot Loaders were allowed. As I had recently read about some people managing to get Windows XP x64 booted in UEFI Mode by using a Boot Loader from a Vista beta version before such support was removed from later versions, I thought that I had a solid idea worth trying that was possible for me to do.
That is precisely what I did. I thought that it worked, and hastily uploaded my result (My first comment in this Blog), THEN noticed that I actually mixed up the QNX 2 Kernel with 1.2 userspace, since in 1.2 the Kernel was by default out-of-filesystem thus not a file that can be easily be overwritten during a copy. I had to backtrack my claim.
By the time I did so, I caught A LOT of people’s attention. Since I thought that I was close enough, and I had to save face after my first failure, I decided to keep pushing forward (Which I don’t regret, it was both fun AND profitable). The rest is story. The single thing which I’m still not entirely convinced about is the lack of other participants until Mihai Gaitos posted that he was going to get into the challenge, given the fact than for the previous ones multiple people posted (forty being one of the previous winners), so I don’t know if monopolizing the comments section with my updates as the only contestant at that point dissuaded others of participating that would have done so had I never posted on the first place.
After both self-glorifying and self-deprecating, what comes next is obviously my QNX impressions.
I heard about QNX a few times (Ironically, I think that the first time was on an OS/2 Museum guest article made in 2013 by… guess who, Tenox), and by the comments of people that actually used it, it was held in high esteem, since a common phrase when talking about QNX was that “it was years ahead of its time”. Actually, I even found highly surprising than the two programmers I mentioned that I told about the challenge actually remembered QNX from a floppy demo that was distributed in a local computer magazine from the the middle 90’s (As they mentioned that it had a built-in browser and fitted in a 1.44M floppy, the obvious one is the QNX 4.05 Demo floppy, qnx_demo_405_network.ISO.xz in Tenox’s repository). It seems than that demo was something special if it could generate a lasting impression and made some people remember QNX just for it alone.
First, keep in mind my actual OS usage experience: I was a child playing DOS games during the golden era of the middle 90’s, and got into Windows 9x/XP like every other average consumer. My first true experience with anything non-Microsoft was Linux beginning in 2013, when I decided to try PCI Passthrough with Xen to make a Windows gaming VM as an excuse for a main Windows user to try something else (This was before doing so became common). At some point I even wrote a guide about that, but since no more than 2 or 3 people used it when it was still up to date (And due to being based on Arch Linux, I had to occasionally recheck everything to make sure that it was still updated), and then everyone and their moms began to write guides by the time that standalone QEMU with VFIO became better than Xen for passthrough, I lost interest.
The point is, I can’t really make any proper comparisons due to the fact that my first hand experience with OS variety is limited. Since I have almost no other direct experience, most of my knowledge about the existence of other OSes and their capabilities comes from Wiki articles, Blog posts, scans from computer magazines, comments from other people with first hand experience, etc. Thus, since things always fits into contexts, I can’t really compare a lot of aspects against other contemporaries, but more like my own impressions against what I know of that era.
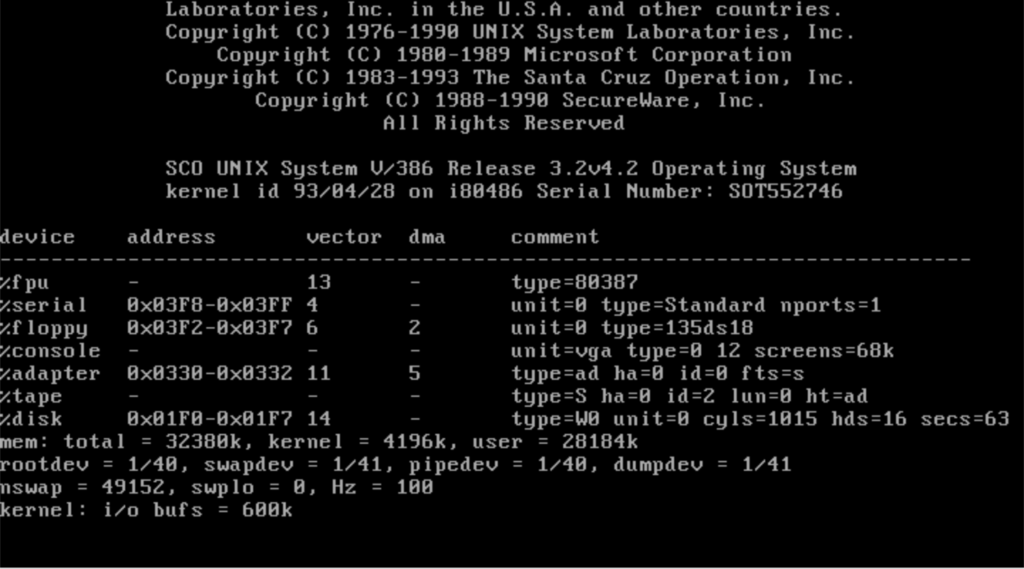
QNX seemed perhaps far too close to a modern command line Linux distribution than I was expecting, as after I managed to understand a few command differences (Like how mount worked), the basics seemed to be mostly the same. I pondered whenever this is because QNX was “years ahead of its time”, or because UNIX OSes were already quite mature even by early 80’s, as if during the last 4 decades the basics didn’t changed that much. Yet, I can’t directly compare it to other UNIXes for what I already said. The documentation, like most 80’s stuff, is quite complete and easy to understand and follow, like the manual installation chapter, which reads like a walkthrough.
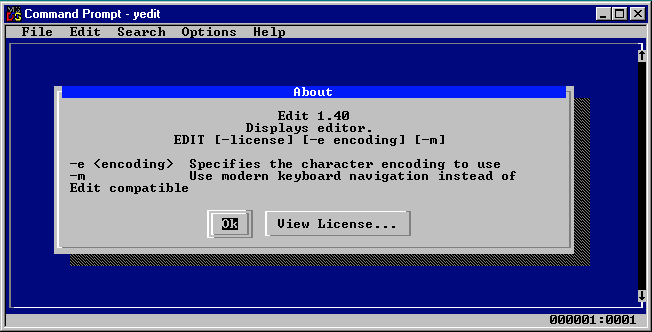
Perhaps the only thing I didn’t like was the text editor, because vi style editors actually force me to RTFM to be able to edit and save something whereas mainstream text editors tend to be usually intuitive about the most basic functionality. If I recall correctly, my issue was that I couldn’t actually get it to switch back and forth from edit mode to command mode, which seems to be because the editor manual was mentioning the location of certain keys based on the layout of the 84-Key Model F Keyboard, which I’m not used to, and I was also confused due to old terms that no one uses today (Carriage Return is supposed to be Enter, Backspace, or maybe Escape?).
Among the things I found quite interesting about QNX is that it was based on a MicroKernel paradigm. Being something from the early 80’s, the first thought was about how it fitted into the Linus Torvalds vs Tanenbaum debate:
https://en.wikipedia.org/wiki/Tanenbaum%E2%80%93Torvalds_debate
The resume of that debate is that Torvalds favored Monolithic Kernels whereas Professor Tanenbaum was all about MicroKernels. What that debate seems to be missing, is a practical comparison between actual working, fully featured OSes instead of theoretical mumbo jumbo about Kernel design. That is where QNX fits in, since, being a very early, fully featured third party UNIX-like based on MicroKernel, looks like a good representative of that class. I think that before hearing about QNX, I didn’t knew about any other Kernel based on that design paradigm, much less a full OS, that wasn’t either squarely aimed at embedded systems, or was experimental or educational in nature, thus comparing a full blown GNU/Linux to QNX for this debate seems natural to me. I don’t know if there are other candidates to fit into such comparison by the middle of the 90’s, when this topic began.
Also, what I noticed is that people seems to associate MicroKernel based OSes (Including QNX) with “Real Time OS”, and think about those as something highly specialized usually targeting embedded systems, whereas I see no reason for them to not be usable as a generalist OS. I mean, early on its life QNX was called QUNIX, so it seems that it was intended to be related to the *NIX family. The focus on being a RTOS seems to have put it far from its original identity. Even if from a marketing or commercial point of view that was better, I find it rather curious than it scared away certain types of users who somehow don’t think RTOSes can directly compete with a *NIX.
There are, however, side stories that makes my affair with QNX far more interesting. Going back to my experiences, during my time toying around with QEMU, it became obvious that mastering virtualization was quite harder than it looks, since in order to learn all what QEMU can do via either virtualization or emulation, at some point you will start reading about stuff so old that eventually it makes convenient to start to learn orderly by the very beginning: The 1981 IBM PC. Thus I ended up with a nice hobby of digital archeology, which is the reason I usually see this Blog and OS/2 Museum, among others.
Albeit it is a massive amount of knowledge, it seemed easier to digest if you start piling stuff on top of it so you can follow how the whole platform evolved. The end result is that I wrote this (Still not finished, nor know if I ever will), focusing on how the PC platform evolved:
https://zirblazer.github.io/htmlfiles/pc_evolution.html?ver=123
From my findings, one of the most jaw-dropping moments was perhaps when I hear that Microsoft already had its own licensed UNIX version, XENIX, from BEFORE their involvement with the IBM PC. Supposedly, anything UNIX was very hard to port to the 8088 CPU due to lack of advanced (For the time) Processor features like a MMU for Virtual Memory/Memory Protection, making multitasking far harder to implement, albeit there were at least two other UNIXes that were ported to run on the IBM PC. Since QNX can be added to that list, too, being an UNIX-like with multitasking capabilities that could even run on the original IBM PC with its 8088, it impresses me a bit more as that was supposed to not be easy to do.
Just by learning about the existence of XENIX, I eventually began to look down on PC DOS. I knew that early DOS versions were a rather dull and bare OS and that it was pretty much for “lights on” purposes (I even refer to PC DOS 1.0 as being only useful as a “FAT File System API”), but when you realize what was already possible even by the early 80’s, it gets far more disappointing, and is even more surprising that it managed to last as long as it did. One has to wonder how much lease of life DOS got from things like Expanded Memory, the XMS API, and the amazing 386 features for backwards compatibility that ended up being used for EMMs then 386 DOS Extenders, all of which actually made DOS quite usable until the end of the millennium. But I’m sure that other OS alternatives could also have got there too, while being far less messy.
What picked my curiosity is that Microsoft in the early 80’s appeared to want to replace DOS with XEDOS (A single user XENIX variant) a few years before the whole OS/2 affair with IBM. Seems that DOS wasn’t considered very scalable from even its earliest days, plus the 286 MMU made UNIX on x86 far more viable. Microsoft wanting to push an enterprise UNIX Kernel as a DOS replacement somehow seems similar to what it would eventually do 15 years later when it pushed the server/enterprise NT as the Win9x replacement. Stagnation on getting a proper DOS replacement allowed those hacks that extended its useful life to proliferate, and made even harder to get rid of it.
When reading about this, I saw a sort of power vacuum around 1985-1986 (Post IBM PC/AT and pre Compaq DeskPro 386 and OS/2) where DOS was already showing its limitations, yet there were barely any means to extend it, and no solid replacement on the horizon. After noticing that power vacuum, I thought about whenever there were any chances for an “UNIX for the masses”, like XEDOS was supposed to be, to have a chance at capturing enough marke tshare to snowball as a prominent DOS replacement and dethrone it, thus changing history as we know it. This is exactly what hit me the most when hearing about QNX and its capabilities, more so after using it.
Before, I only thought about Microsoft discontinuing DOS to replace it with XEDOS to force the market that way, I never considered than a third party could potentially outdo it. QNX was an already available UNIX-like OS that ticks all the boxes, and even has FAT compatibility, so I see it as something that could have been perfect for such role (I don’t know how good compatibility was for running DOS applications from within QNX, but there was nothing stopping you from Dual Booting, and even the QNX MBR Boot Loader was capable of that without changing the Active Partition, whereas the MBR Boot Loader from DOS didn’t and forced you to do so).
At this point what I pondered is whenever QSS ever had any idea similar to that, or if they just were comfortable enough with selling QNX to those that would typically use UNIX systems, namely enterprise customers (I don’t know when QNX began to focus on marketing itself as an embedded RTOS instead of a third party UNIX-like). Yet, these things are in the realm of business decisions more than any technical merit, which QNX seems to have plenty of.
I don’t know specifics about QNX and UNIXes prices in general, but is not hard to figure out that they fetched quite a lot thus it may not have made much sense to pursue individual hobbyists in low value, volume markets, and drag down the price of commercial UNIXes as a whole (Which incidentally is what GNU/Linux would eventually do by giving a full UNIX-like for free). I privately asked Mr. Dodge about whenever back then they ever thought about getting QNX into the mainstream, but he dodged that question (Pun intended). However, the ICON computer for education markets being powered by QNX somehow reminds me of the Apple II which was also prominent in that market segment, but I don’t know whenever QSS actually thought of it as a means to get into the average consumer mindshare, or if they never pursuit mainstream or hobbyist users at all.
This is the part where I get into Bill Gates, and how Microsoft took over the world with the Jurassic DOS. What I find most notorious about his business strategy was that from early on, he always seemed to want to go for the bottom of the barrel, by bundling Microsoft Software everywhere. But perhaps the most interesting revelation, was on the way that he consciously used piracy as a second route to end users, as said by him in this famous 1998 quote:
https://www.latimes.com/archives/la-xpm-2006-apr-09-fi-micropiracy9-story.html
“Although about 3 million computers get sold every year in China, people don’t pay for the software. Someday they will, though,†Gates told an audience at the University of Washington. “And as long as they’re going to steal it, we want them to steal ours. They’ll get sort of addicted, and then we’ll somehow figure out how to collect sometime in the next decade.â€
So piracy ain’t so bad if you can get a return in some way or another. Is also interesting to note than the same Bill Gates wrote the less known Open Letter to Hobbyists in 1976, and is worth to notice the difference in tone:
https://en.wikipedia.org/wiki/Open_Letter_to_Hobbyists
Seems that at some point in time (Perhaps the middle of the 80’s, as Microsoft seems to have dropped most copy protections by then. The breaking point was after some false positives with menacing messages in Word that made it to the news, if I recall correctly), Bill Gates figured out that piracy was highly beneficial to get the installed user base of some of its mainstream middleware products as widespread as possible. That strategy always made total sense to me, because even if people doesn’t outright pay for the Software they consume, it gets vastly more exposition to the public, making their developers more known (Brand recognition) and also becoming a better target for developers wanting to port Software to other platforms with more potential customers (Thus an OS may be considered middleware). It also pushes your formats (Like Word .doc) as some de facto standard that forces even more people to use or at least be compatible with your products since you can’t really miss support for the formats of the market share leaders, at least if you share documents or any stuff with any other normal human being instead of just your geek circle. It is a very wide snowball effect, and is not entirely detrimental for the ecosystem of the pirated Software, but I would say that it is worse for any possible competition, as they lose potential sales and get absolutely NOTHING in return. This was part of Bill Gates stratagem, for sure.
As one of the challenges involved cracking the copy protection, I wondered if QNX would have benefited in the long run from piracy on the early days if people get to know it more, and growth its user base at the cost of potential legit sales. If getting mainstream was the goal, maybe. Just ask AutoDesk, perhaps it wouldn’t be as known if it wasn’t because piracy of its Software like AutoCAD was rampant (And its availability discourages people to look around for other cheaper or even free Software), ignoring the fact than the original licenses were usually a four digit number, just like an UNIX was these days.
This whole piracy point is where I think that Bill Gates was ahead of the curve, the race-to-the-bottom to get Microsoft Software everywhere, bundled with everything, and at any cost, and saw piracy as a means to an end. I can’t think of any other viable plan for an “UNIX for the masses” that was commercial in nature without involving piracy, giving than it was going to compete with “free” Microsoft products (Unless you could bundle as much as Microsoft). Then in the 90’s we got Linux and all the free BSD variants, yet still they couldn’t take over the already well established mainstream DOS, Windows, and their massive Software ecosystem. It was too late by then.
I always found all this stuff quite interesting, since after all, all those decisions shaped our current world, and I have a fetish for “what if” scenarios. For example, what would have happened if IBM, for the IBM PC, had picked the Motorola 68000 instead of the Intel 8088, which was one of the other potential choices? Would the rest of events have been unfold in the same way? Would the IBM PC be at least as successful and influential as it was? Would the 68K give programmers less headaches due to the supposedly cleaner ISA? Would we still be using 68K ISA based Processors with 40 years of backwards compatibility? Would a modern Processor based on the 68K ISA be smaller, faster, less buggy, than our current x86 Processors? Would Intel and AMD still exist as such?
Perhaps the most awe-inspiring story is how the Intel 386 came to be. What makes it one of my favorite interviews, is that you get ALL of the juicy details, that gives you the complete context you need to understand how the decisions were made, why one option was picked over the other, and what these other choices were. How was the internal situation at Intel, what they thought about their competition, what were the plans and how they changed over time, etc. You can get a complete picture of how it was being part of making history. For those that are interested in stories like that, I absolutely recommend this one:
https://archive.computerhistory.org/resources/access/text/2015/06/102702019-05-01-acc.pdf
https://archive.computerhistory.org/resources/access/text/2015/06/102702022-05-01-acc.pdf
Come to think: Intel thought about the entire x86 lineup as some stopgap filler product because the next generation iAPX 432 was going to be the long term, forward thinking architecture. When it was finally available, it was a catastrophe. Then simultaneously, Intel DRAM business also began to take a downturn due to the dramatically increased competition from Asian semiconductor manufacturers. The only thing left for Intel, was putting everything onto the x86 basket thanks to the newfound success of the IBM PC, and the end result was nothing short of a miracle. I still recall seeing on retro forums ex-IBMers mentioning than Intel would be irrelevant or not exist at all if wasn’t because IBM picked the 8088 on the first place, and I can’t say that they aren’t right.
There are things that in retrospective are incredible to read, like that in the initial design stages they were still discussing about whenever the 386 should be backwards compatible or not with the previous x86 CPUs, which would be a rather obvious choice right now (Intel would eventually do a non-Real Mode compatible, 32 Bits only 386: The 376. If you never hear about it before, you can guess how successful it was). Or how several decisions made for the 286 due to the pressure of the Zilog MMU ended up becoming a totally useless baggage that 35 years later is still present in every x86 Processor.
Point is, neither x86 nor DOS were actually designed to scale in a forward looking manner. They were both stopgap products by both Microsoft and Intel, which, by accident, ended up becoming the de facto standards even though there were superior options at the time. Yes, I know that this is something that happened a lot of times both in computing history and in other completely different technologies, and each person has his own favorite technology that should have taken over the world but lost against another, inferior one. And yes, I know that QNX ended up being successful in the embedded market and that is probable than either directly or indirectly I have used it at some point as part of another product, yet I find a bit depressing that it isn’t very known outside its niche, nor part of the computing pop culture.
Why would I care about all that? Because I have ambitions of Total World Domination™, of course! So learning about why certain things took over the world (Specially those that shouldn’t have) is something that I’m always fascinated about.
My first attempt was with pushing passthrough based setup relying on IOMMU virtualization as a means to make a fully functional Windows gaming VM, so that you could containerize Windows and leave bare metal to host something else (Initially Xen + Linux, then Linux with QEMU-KVM-VFIO) with just minor loss of performance and compatibility, as getting Windows out of direct Hardware access serves as a means of transitioning to something else. Albeit I score some users, the vast majority of people was like, “why bother?”. Ironically, years later the Techtubers made these setups popular and there are plenty of users now, so I can say that the tech was successful, but I failed at making outside people notice.
My next (And current) attempt was trying to push Coreboot (Or any other means of open source Firmware) to the masses, as a means of being able to provide long term support to a Motherboard Firmware instead of being dependent on the Motherboard vendor will to fix issues or add Firmware features (Which they will never do, cause this kills a lot of incentive to upgrade to newer ones during the same platform lifespan). You can read my efforts trying to educate consumers here:
https://zirblazer.github.io/htmlfiles/coreboot.html?ver=123
Ironically, I got into this after noticing how broken IOMMU support was in the early generations of the tech even when the Hardware was fully capable, simply because no consumer Motherboard vendor bothered to consistently implement it properly at the Firmware level, nor they fixed it upon requests. At this point I got annoyed of having to deal with them for Firmware support and decided to look for alternatives.
Perhaps what surprised me the most is that there is less people interested in this than passthrough, even though there are thriving BIOS modding communities where everyone tries to achieve what the Motherboard vendors didn’t wanted to openly provide. But most people seems to not care about alternatives that solve the issue from the root since if they can get what they want via modding the proprietary BIOSes, there is less incentive for a proper solution (Reminds me of DOS Extenders and all those things that allowed Jurassic DOS to have a two decade useful life). Thus there is a lack of consumer demand even among people that should think like me.
In resume, I’m still looking for the meaning of life, existence, and everything.