And there is a map of all the locales and when the launch. I was busy working and didn’t notice that Hong Kong had already launched.
many geo zones!
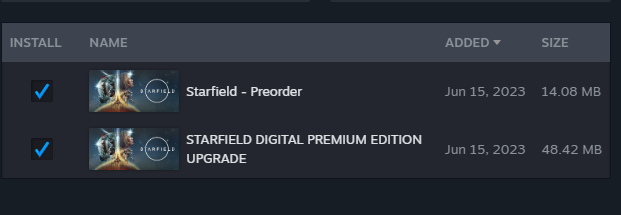
Thankfully I did get a payment voucher which fully covered the super fancy edition. Sadly there was no option for GPU’s so I’m going to try this with an OG 6GB GTX Titan.
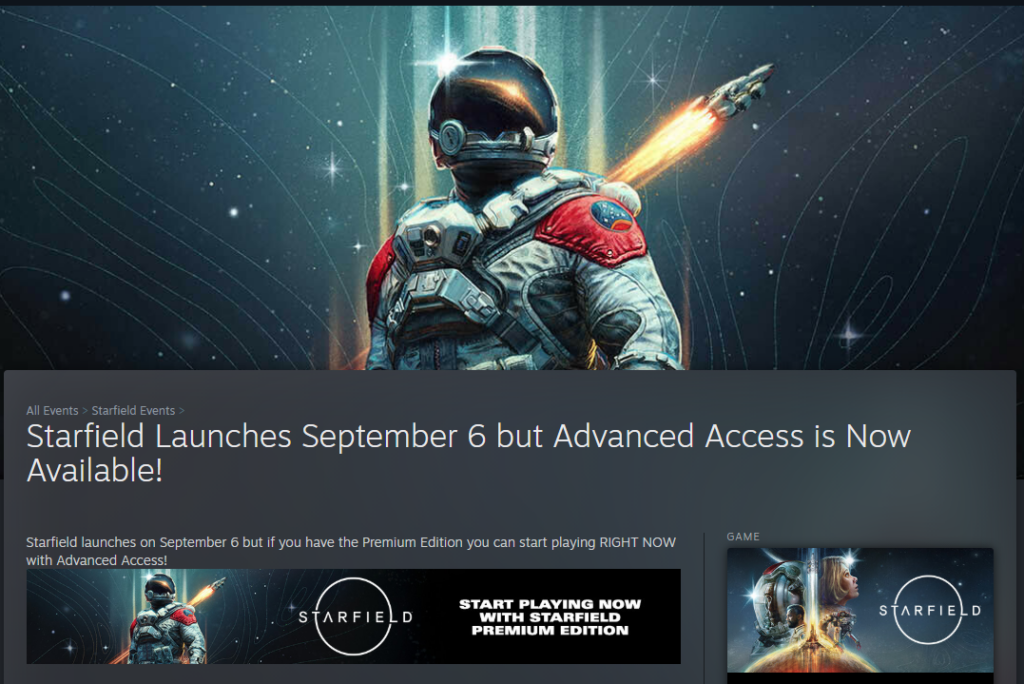
It was a bit weird to figure out if I could run the game or not but I did get a pop up that today was the day so I guess so.
0% verified
I’ll have no choice but to update as it goes, so nothing yet to report.
I’m just hoping it’s not the hollow world experience of Fallout 76.
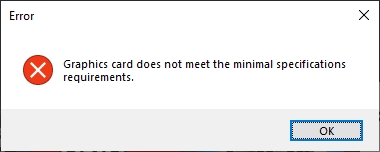
After all that downloading, turns out it doesn’t like my video card at all.
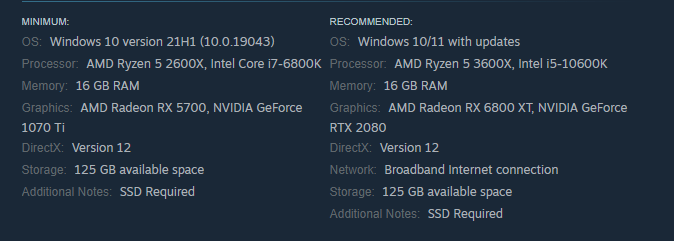
So yeah GTX 1070ti minimum. wow.
So I abused a work machine that ironically has a decent mobile GPU. swapped some storage and booted into the game, played a few hours.. And yeah
Old tyme Bethesda quality
When |I could, I took a detour to Earth’s moon, and went out for a walk. Naturally there was a base less then half a click away, and naturally it had 30 insurgents automatically hostile. What a vast but populated world. And then the NPC following me around suddenly took off her space suit, and broke the whole thing. I wanted to maybe get an ARC but apparente it doesn’t run at all on ARC. Seems kinda fishy to me tho. NVIDIA released a new driver like today for the special launch. I don’t know if there will be any fallout.
With all that Dec Alpha talk, and how hard it is to get hardware, and how seemingly exclusionary it is, I thought I would try to touch on a more available 64bit ‘risc’ platform, for the masses!
While a couple years ago I had touched on running Windows 10 on the Raspberry Pi 4, in the brave new world of 2023 getting ahold of a pi4 is expensive, hard to find, and kind of depressive, which lead me to this (old) but exciting project, the Renegade Project!
Long story short, there exists enough drivers & information to facilitate a port to the Snapdragon 845, a 64bit System On a Chip( SOAC!), meaning that if you have a device with this chip it *can* be slightly possible to install Windows 10 onto it.
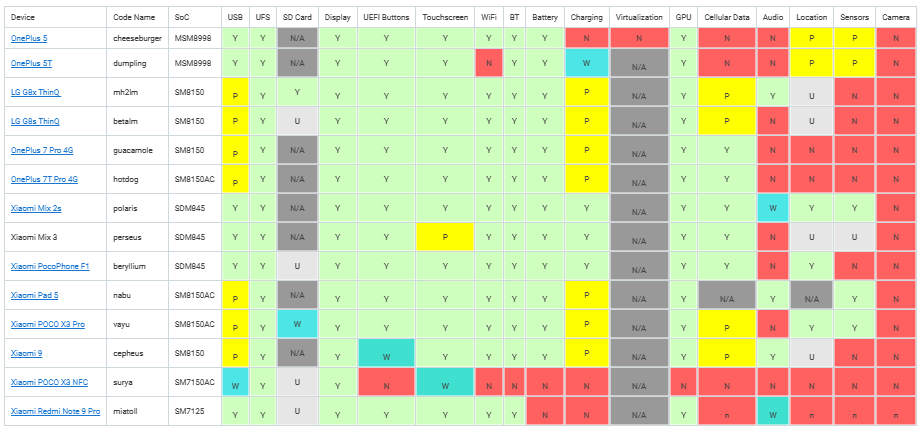
system compatibility matrix, for ants.
Glancing at the system matrix, to me the glaring hole is Charging. 3 systems outright support it, all of them from Xiaomi, the Xiaomi Mix 2s, Xiaomi Mix 3 & the Xiaomi PocoPhone F1. Looking around eBay to start this adventure I found a PocoPhone F1!
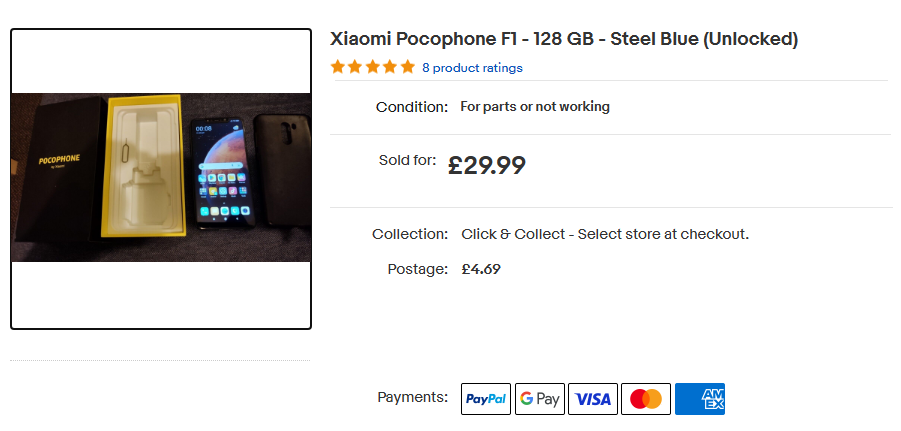
Getting the Phone
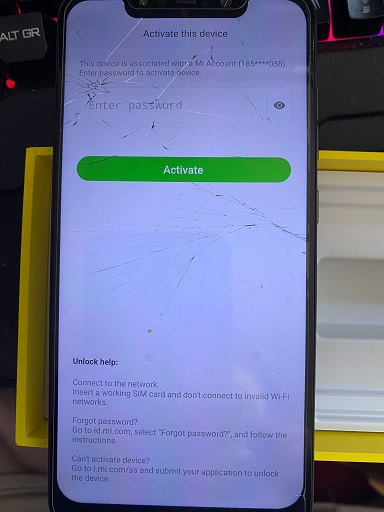
This seemed like a good start, 29.99, 128GB of flash storage, and I’d later learn 6GB of RAM. The first problem came from Xiaomi. Turns out that the phone was still locked, the seller had neglected to logout from his Xiaomi account. Even worse though he had forgotten his login and password. Calling Xiaomi support was basically worthless. Without unlocking the phone on a reset to root the phone lead me to this:
Locked!
I got lucky however after talking to the seller, he agreed to go above and beyond and we were able to unlock the phone together. So everything went well. If you do buy one of these phones used, MAKE SURE TO CHECK THE XIOAMI login id! It has to be unlocked and blank so you can register it and get the unlock. It will require a valid email & phone number + sim for it to send/receive SMS codes.
I should add that we’ve cleared the first few hurdles of precuring the device and unlocking it. And I’m glossing over stuff. Getting to this point was not easy and took a week. The unlock process is not intuitive, and I’m sure many phones are sold out there that have their google access wiped, but have not been logged out all the way, or the flash erased. I can’t show you mine as I ended up erasing Android but be aware of this!
Getting ready for Windows
Basically on the Android side there is three main modes, the boot, the recovery and the ‘fastboot’ mode. Holding power & down brings you to fastboot, where using the fastboot tool you can load an image from your PC into ram and execute it. EDK2 UEFI firmware, is the first part or the renegade project you’ll encouter. It’s really powerful, allowing you to not only boot into Windows, but it also supports a linux disk target mode, allowing you to partition and access the flash directly from a PC. Naturally this is SUPER dangerous, and backup your modem files!
With the phone unlocked softbooting E2DK you can put it into a target disk mode, connect it to a pc and partition away!
disk mode… for ants!
The guide (section 1.2) advices pushing the disk tools to the phone booted up in twrp-3.7.0_9-0-beryllium.img. Honestly its easier to just partition it on your computer. HOWEVER if you were to use Windows, there is a slight issue:
The device may no longer be able to boot into fastboot mode
I ran into this issue and thought I had bricked my phone. I was actually in the middle of researching how to do a physical hard reset, and place it into EDL mode (taking it apart and finding which pads to short, when I found this section of the troubleshooting guide, where it’s the partition names. So instead, I ended up doing the partitioning on a Virtual Machine using VMware and Ubuntu.
Before I did anything, this is what the phone partition table looked like. It’s an exceptional amount. The new parted v 3.0 that is recommended to use, doesn’t support the resize command so I had to manually do the numbers after destroying partition 21.
Originally, I had made a 32Gb partition to keep some Android functionality but somewhere it just stopped booting. But I didn’t care.
Obviously dont follow this. I’m only providing output as an example.
If I were more patient, I guess I would have dd’d the entire phone to get a full entire backup. But I didn’t get this phone to run Android, so I really don’t care.
There is a LOT of disks being presented to Windows, in case you ever wondered how those 128GB flash devices get sold with only 114GB of user space.
So many partitions!
And even that 112GB is actually usable!
Remember the system partition needs the boot,esp flags, and the windows partition is msftdata. Also make sure the partition names are either single words, or NO words. Spaces will kill the fastboot mode.
I put all the disks that are presented in offline mode, so I don’t get confused. Make sure you are going to mess with the right volumes when formatting after the partitioning. This is NOT for the novice, it would be easy to not only brick the phone but screw up your existing install. If you have physical disks attached you don’t absolutely need, remove them or put them offline to make sure you don’t screw up.
I used diskpart to select the appropriate volumes and format them.
select disk 8
select volume 5
format quick fs=fat32 label="System"
assign letter="S"
select volume 6
format quick fs=ntfs label="Windows"
assign letter="W"
This isn’t a guide, just a reflection of what I went through.
With the disk now formatted, it’s a matter of selecting an OS to install.
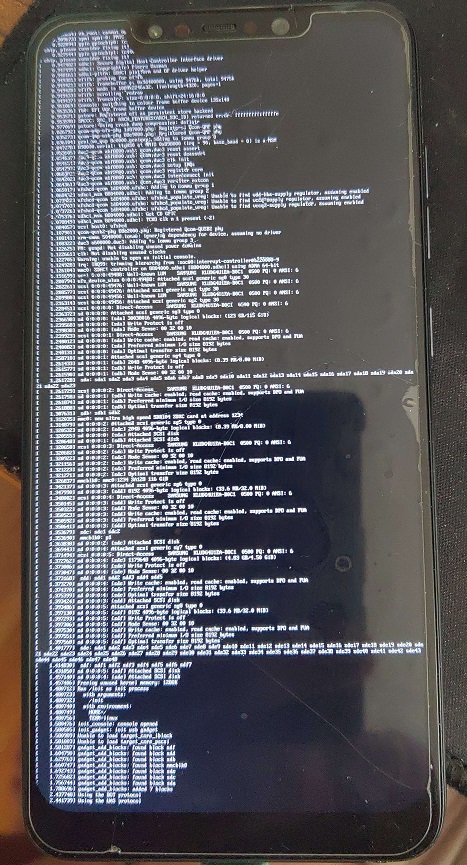
I had really bad luck picking random versions of Windows, so I looked until I could find a confirmed working version in this video, Rodando o Windows 10 ARM nativamente em um Dispositivo Android (Pocophone F1 + UEFI). Long story short, it’s Windows build 210521-1658 with version 0.4 of the bootloader. Long story short I messed with LOTS of Windows on ARM driver sets, before I finally had the brave idea to just load it with no drivers:
booted
But that image is far too stale, and expires out very quickly, reducing any useful functionality once it’s connected to the internet. So it’s something that probably could be fixed, but it’s far easier to just grab an image that’s newer.
The x86_64 image I’m using now is 19045.3031, so I guessed to pick something comparable on ARM64. I used something called 19045.3031_arm64_en-us_professional, although it too was out of date, but Windows update brought it up to 22H2 19045.3086 . I had tried the downloader tool and apply all the updates offline, but I had issues. I suspect now in retrospect it was drivers.
Another thing I learned the hard way is that some of these images have multiple OS images installed. I guess it’s de-duplication, along with compression, but be sure to index the image first! I accidentally installed a Home version. Yuck.
dism /Get-ImageInfo /imagefile:install.wim

Index : 1
Name : Windows 10 Home
Description : Windows 10 Home
Size : 17,706,743,995 bytes

Index : 4
Name : Windows 10 Pro
Description : Windows 10 Pro
Size : 17,836,320,420 bytes
So just don’t go wildly apply image #1. I wasted too much time on that one.
But in the release I’m using it’s image #1. I checked. Trust me.
The S volume needs to be populated with the UEFI boot files. I had foolishly thought the boot.wim file would include the boot files, but instead bcdboot can set it up based on the location of a Windows install.
bcdboot W:\Windows /s S: /f UEFI
The next thing to do is install the drivers.
I was lucky enough to get some insight into some driver combination to work, and I came up with this much:
minimal 2210.1-fix
USB beryllium v2.0rc2
FG beryllium v2.0rc2
The key of course is that there is a minimal set in 2210.1-fix that will bring the system up with working USB. The FG package brings in enough of the power management to know the battery status.
The drivers are not signed, so that means we need to change a bunch of boot flags. I also turned on debugging so have Windows dump core files, so you can run analysts on them with Windgb.
S:
cd S:\EFI\Microsoft\Boot
bcdedit /store BCD /set "{default}" testsigning on
bcdedit /store BCD /set "{default}" nointegritychecks on
bcdedit /store BCD /set "{default}" recoveryenabled no
bcdedit /store BCD /set "{default}" debug on
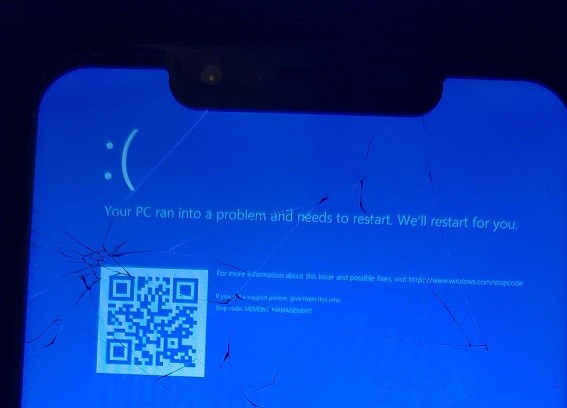
Of course the catch being that with no drivers loaded it’s in a super basic mode, with no USB, no touch screen, no power management, no wifi no nothing. So it’s a brick. But at least we’ve reproduced enough to show that you can boot Windows.
Sadly, loading all the drives from 2210.1-fix or beryllium v2.0rc2 lead to this:
the cracked glass adds to the feeling.
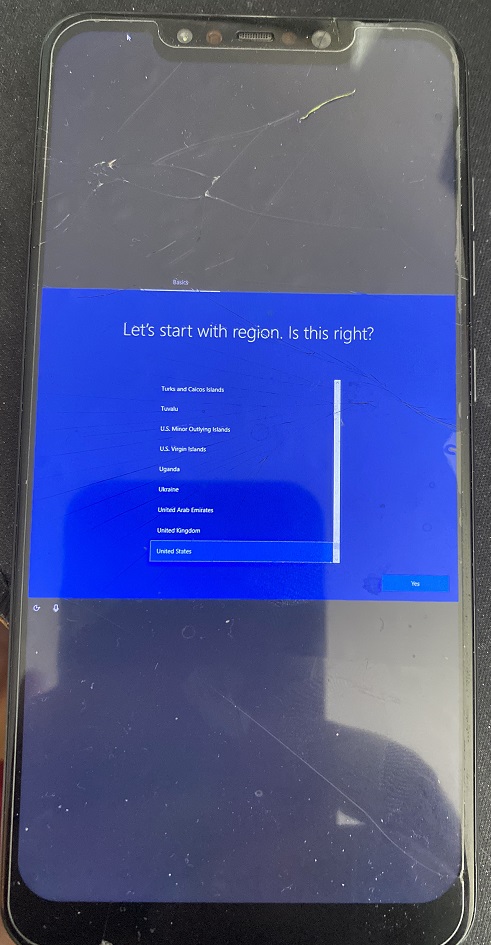
Add in a much needed OTG adapter and a mouse or keyboard, and you can complete the installation.
However, since I left off the majority of the device drivers as I didn’t want to spend forever trying to track it down, I used a random USB to Ethernet adapter and thankfully It just worked!
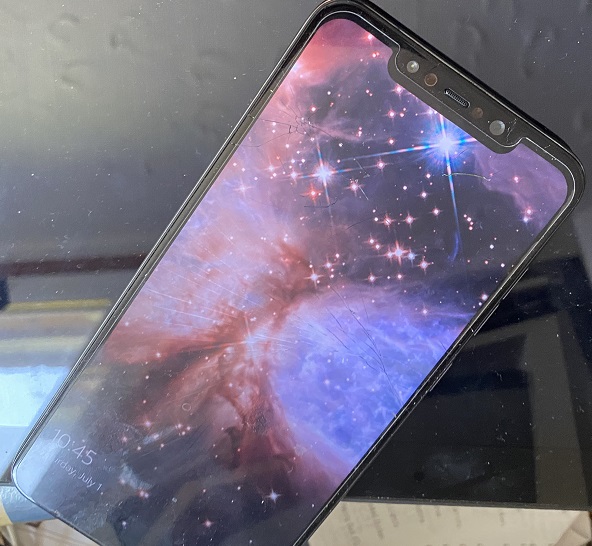
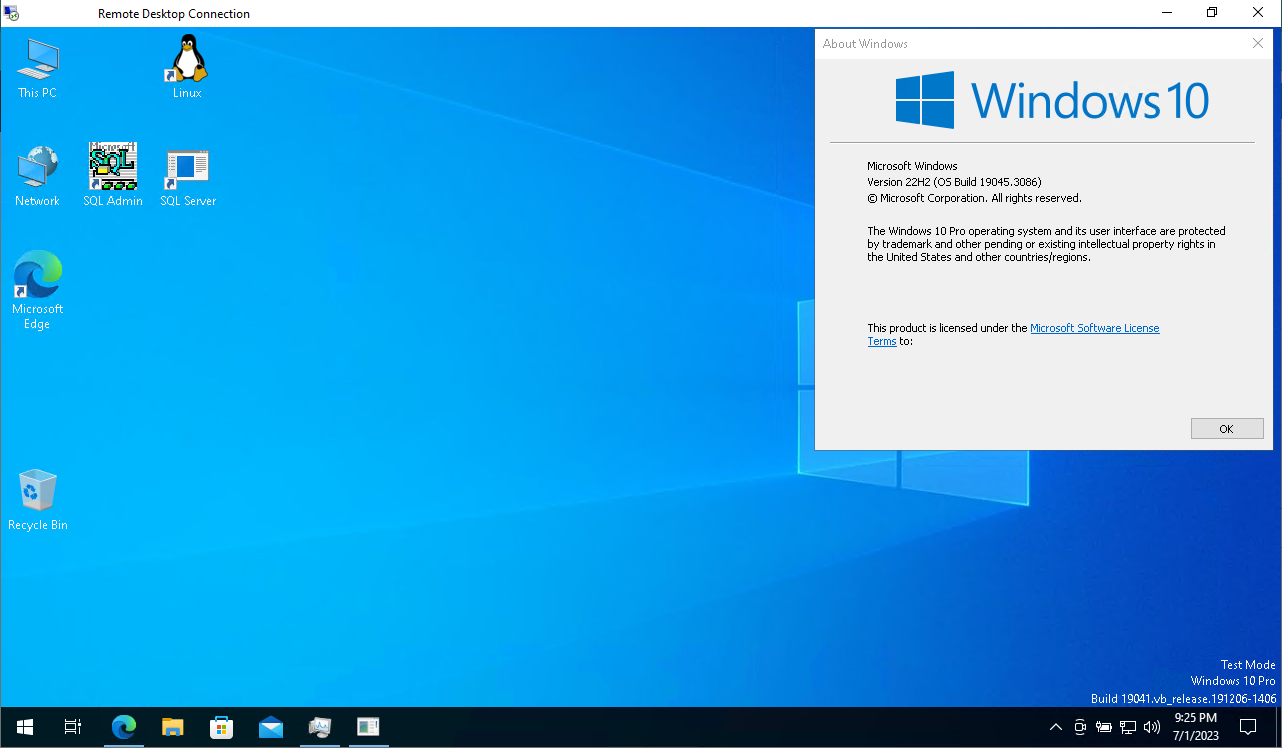
Accessing the phone over RDP.
I added a fancy USB 3.0 ‘dock’ with USB-C connector that you can plug a charger into, so that not only can the phone stay connected to power, but there is room for the Ethernet. It also has HDMI, perhaps is the drivers were more stable, it could be a viable desktop? And I have what I wanted, which was a non Intel/AMD 64bit platform that is hopefully more reliable than the Alpha64 platform, and maybe something to do some kind of contrast of the past vs future
This was NOT a simple thing to go through. I would be extremely hesitant to advise other people to follow suit. But in the off chance anyone who wants to do it, might have a better idea of what is involved.
The topic had come up again about running Core3 aka the Star Wars Galaxies EMUlated server at home. It’s always been a somewhat involved setup, but with the advent of the Windows Subsystem for Linux, there exists the ability to export and import filesystems as if they were containers. With that in hand I went ahead and set one up.
I initially targeted the older WSL v1, as it supports far more hardware, and I didn’t want to leave so many behind. The added benefit of targeting v1, is that the end user can upgrade the filesystem to v2 if they so choose. The only real difference in this project between v1 & v2 is that v1 cannot run the needed MySQL instance. This isn’t a showstopper however as there exists MySQL & MariaDB native versions for Windows.
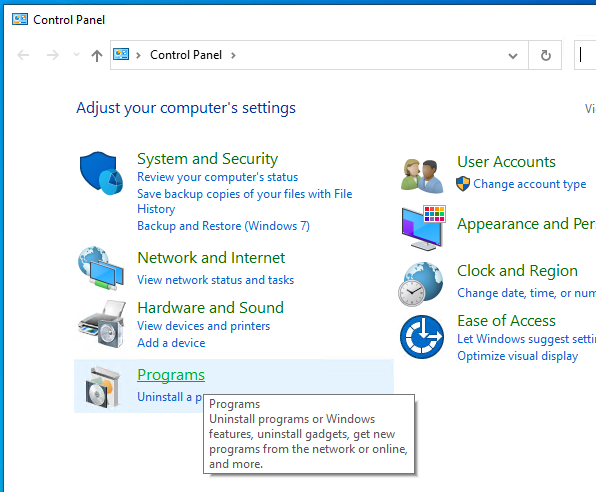
Obviously, you’ll need Windows 10 or 11 to do this. From what I can tell even the home version of Windows 10 has WSL capabilities, so this doesn’t pose any problems. Simply open the legacy control panel (Windows+R then type in ‘control’), and go to the Programs.
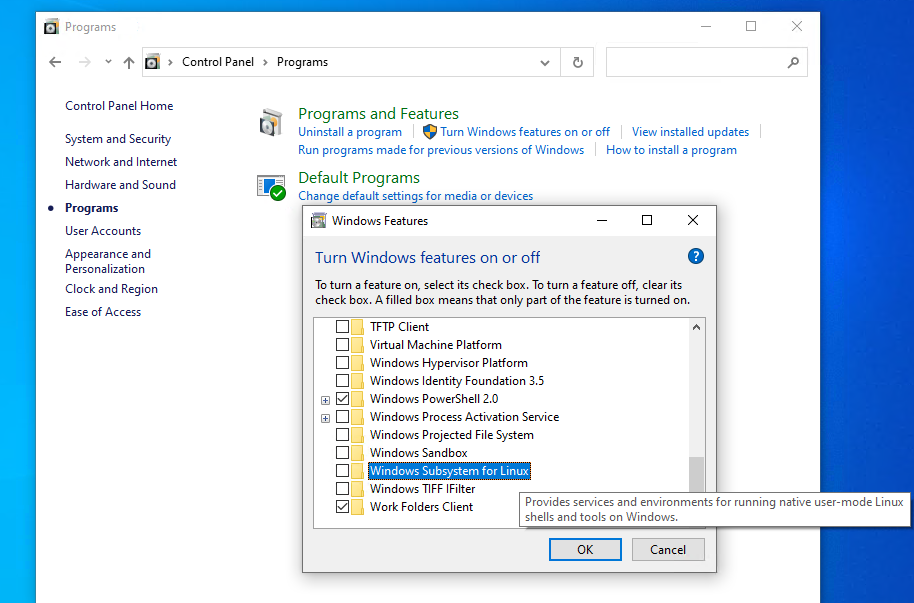
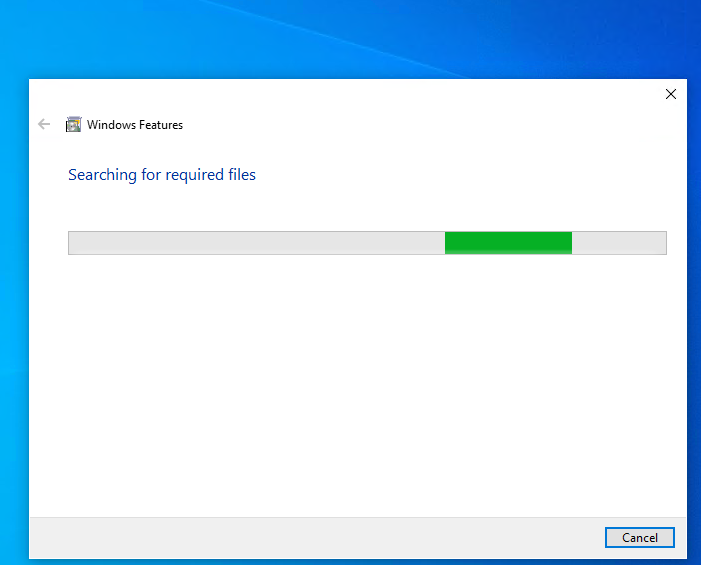
and then ‘Turn Windows features on or off’, scroll down and select ‘Windows Subsystem for Linux’.
Hit OK, and it’ll download what is needed from the internet.
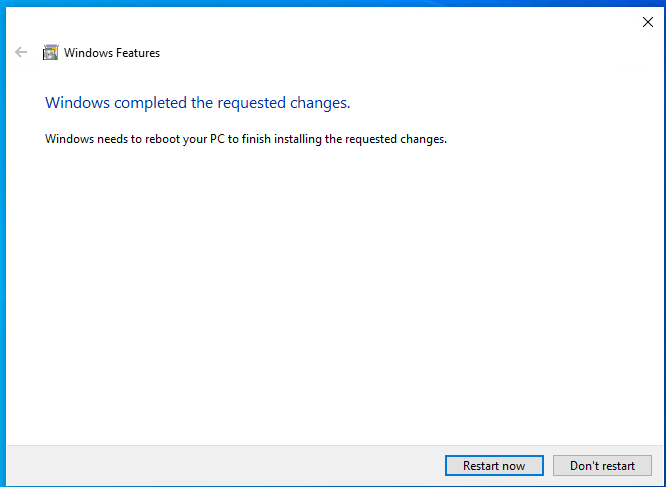
This shouldn’t take too long, then it’ll want to reboot the computer.
Keep in mind that the filesystem is 4.8GB. It will take some time to download. If the torrent servers are functioning I would highly recommend that.
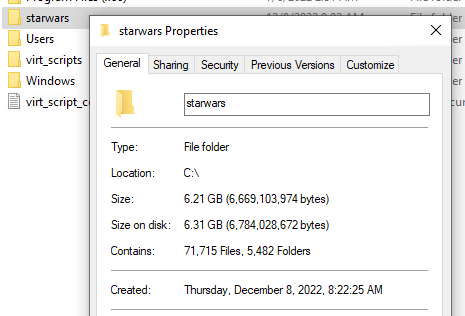
Once it’s installed and it’s generated it’s own databases it’ll need just under 7GB of disk space. So figure that you need 15GB free for this fun experiment.
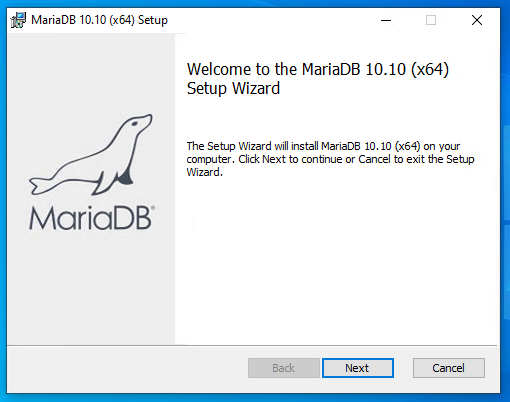
The first step is to install the database server. We will need to know the settings in order to configure the swgemu server.
You can use any MySQL, but Maria is fully GPL, and small, and more importantly doesn’t involve Oracle.
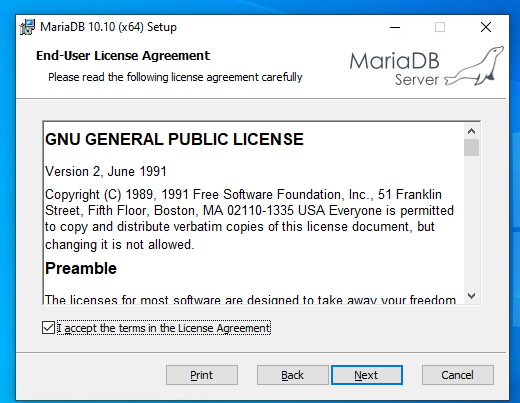
The install is pretty striaghtfoward.
GNU software requires it reproduce the license sooo here we are.
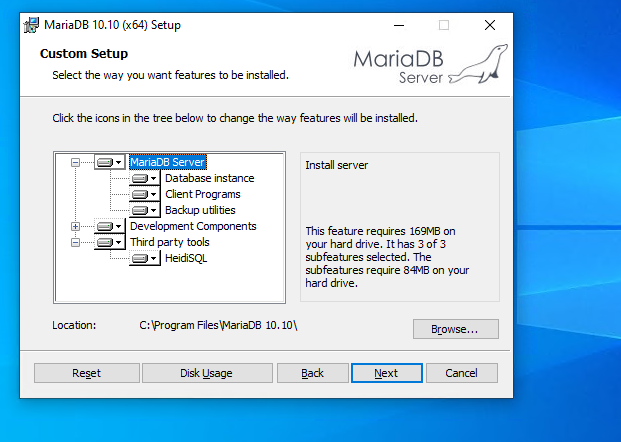
I would HIGHLY recommend use the default option of install everything.
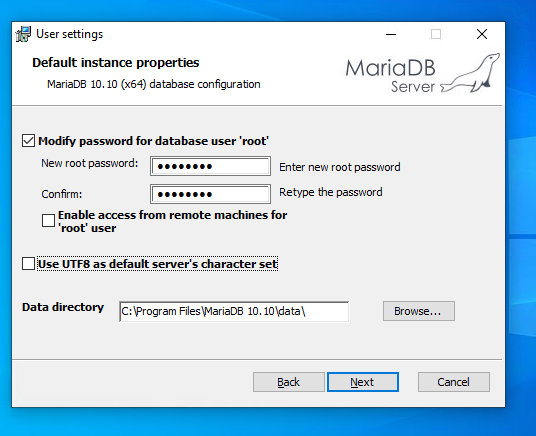
It will ask for a root password. In this example I’m using ‘password’, of course you can use anything you want, as long as you remember it. You don’t have to allow remote machine access to the database as WSLv1 runs in the same userspace on Windows, so it’ll effectively be connecting to itself.
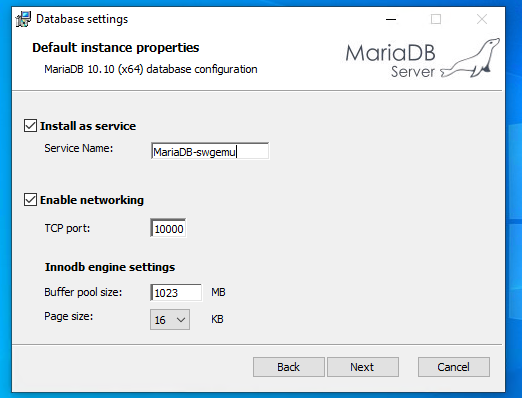
I use TCP port 10000 as I want the default port 3306 for another insance. Again it’s all up to you but you will have to remember what port you put it on. Ports below 1000 are highly NOT recommended as they need special permission. I left the buffer pool as default
With those options set we can let it do the install.
Now the database is installed, and we can go onto restoring the WSL image, and then configuring the core3 server
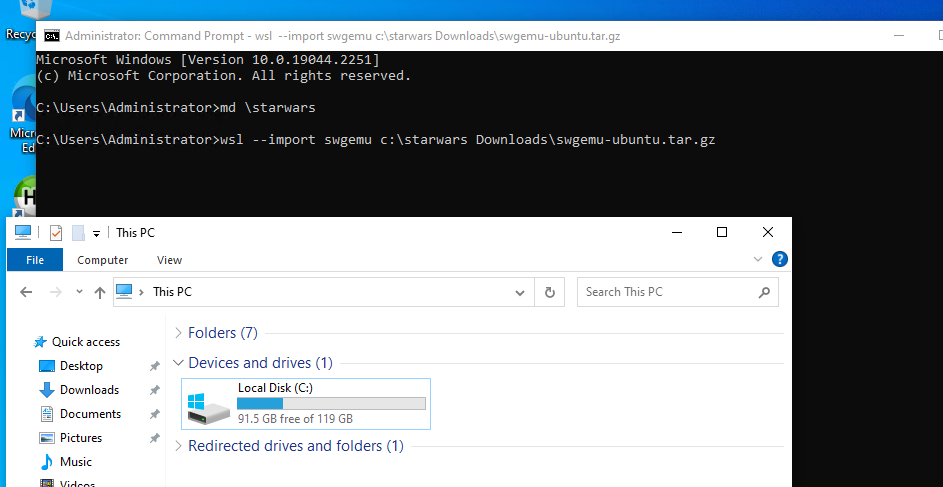
Firstly we need place to put it, On the machine I built it on it was the D: drive, but for this re-deploy on a new machine I’m using the C: drive. It’s all up to you but it MUST be a locally attached disk, no USB disks.
Simply create the target directory and run the import command something like this:
Once it’s done you can check the subsystem status:
C:\Users\Administrator>wsl --list -v
  NAME      STATE           VERSION
* swgemu    Stopped         1
You may have more than one installed, so we’ll refer to this one by it’s name ‘swgemu’.
You can start the instance with wsl -d swgemu:
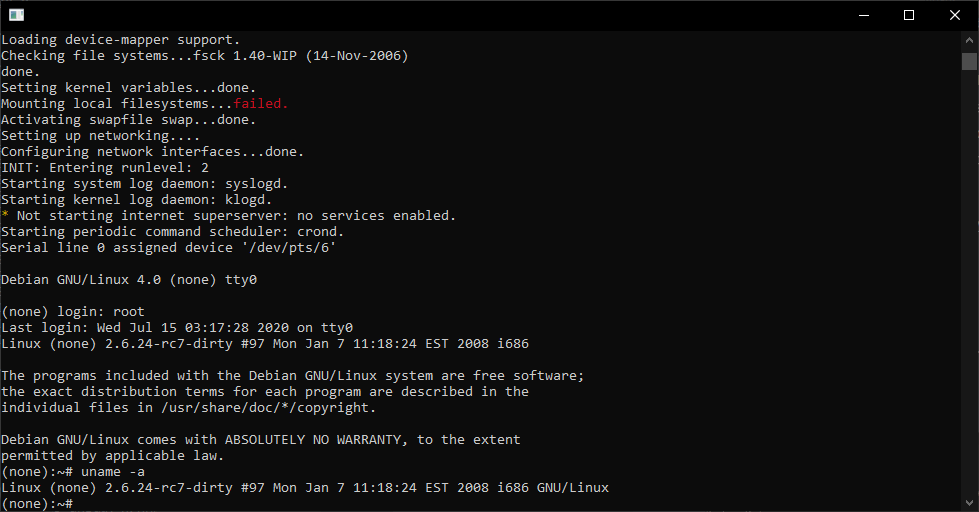
C:\Users\Administrator>wsl -d swgemu
Welcome to Ubuntu 22.04.1 LTS (GNU/Linux 4.4.0-19041-Microsoft x86_64)

 * Documentation:  https://help.ubuntu.com
 * Management:     https://landscape.canonical.com
 * Support:        https://ubuntu.com/advantage

  System information as of Thu Dec  8 09:02:39 EST 2022

  System load:    0.5185546875   Processes:             7
  Usage of /home: unknown        Users logged in:       0
  Memory usage:   28%            IPv4 address for eth0: 198.46.174.160
  Swap usage:     0%


0 updates can be applied immediately.


This message is shown once a day. To disable it please create the
/root/.hushlogin file.
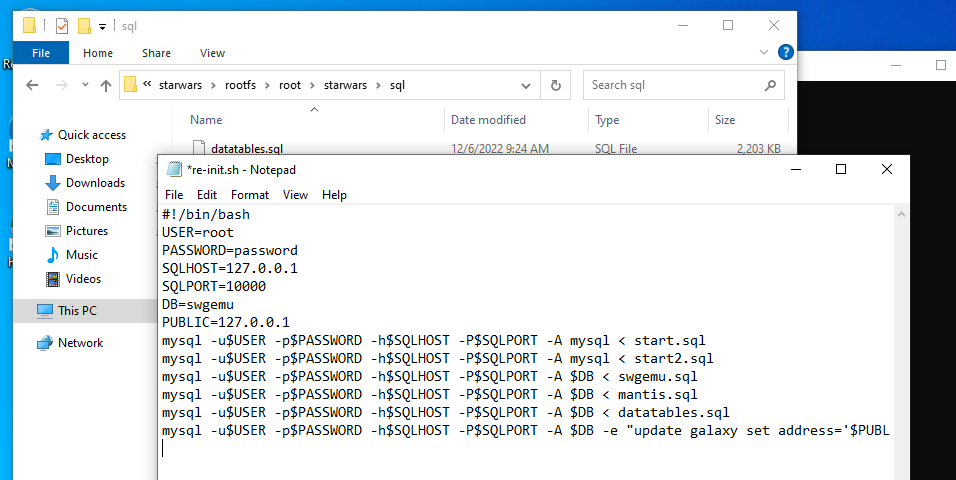
You will need to edit the script to create the databases. I like using vi, but you may not. The easiest way is to just browse to the location and open it up in notepad. The path to browse is:
C:\starwars\rootfs\root\starwars\sql
You can drag/drop re-init.sh on notepad, or make the file association, it’s all up to you.
I had set the SQLHOST to the LAN IP I have, you should set it to 127.0.0.1 . The PUBLIC address is the one that you’ll be connecting to. You can set it to your LAN address, or a public one if you know it (you’ll have to setup NAT), or if you are running it all on one machine for testing, it’s fine to be 127.0.0.1.
Save the file re-init.sh and now you have to run it.
root@DESKTOP-E4F55FE:~# cd starwars/sql/
root@DESKTOP-E4F55FE:~/starwars/sql# ./re-init.sh
mysql: [Warning] Using a password on the command line interface can be insecure.
ERROR 1008 (HY000) at line 1: Can't drop database 'swgemu'; database doesn't exist
mysql: [Warning] Using a password on the command line interface can be insecure.
mysql: [Warning] Using a password on the command line interface can be insecure.
mysql: [Warning] Using a password on the command line interface can be insecure.
mysql: [Warning] Using a password on the command line interface can be insecure.
mysql: [Warning] Using a password on the command line interface can be insecure.
root@DESKTOP-E4F55FE:~/starwars/sql#
The first SQL query will attempt to drop the swgemu database. In this case it doesn’t exist, so the first error is expected. Nothing to worry about. That gives us the database, now it’s time to configure the server.
You can use explorer to browse to:
C:\starwars\rootfs\root\starwars\conf
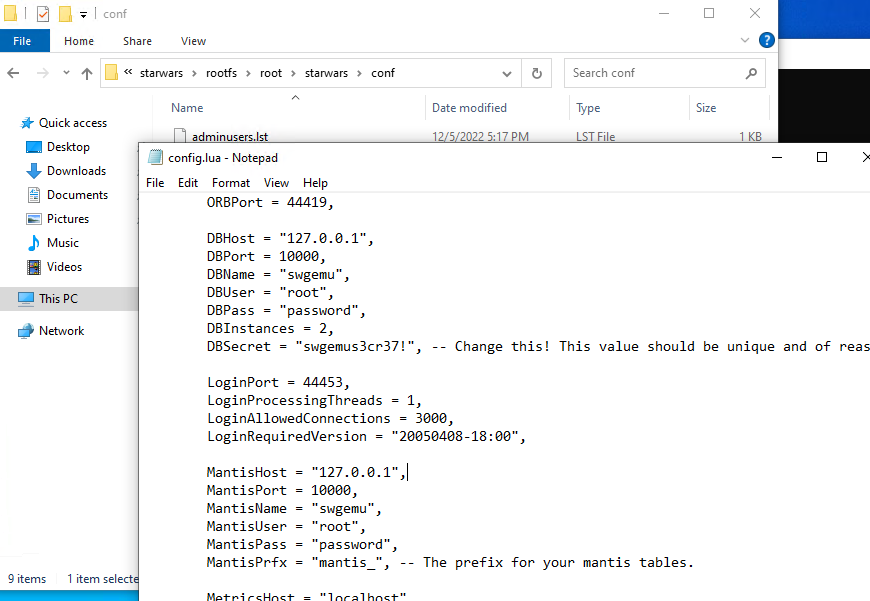
Now open/drop on notepad the file config.lua
Again change the DBHost, and MantisHost to 127.0.0.1, and update the password for root, if you have changed it. You may also want to change the DBSecret, but since this is all for fun, I’m leaving it stock.
Now it’s time to run the server.
root@DESKTOP-E4F55FE:~/starwars/sql# cd ..
root@DESKTOP-E4F55FE:~/starwars# ./core3
(0 s) [Core] Server start, pid: 105, time: Thu Dec  8 09:11:54 2022
(0 s) [ConfigManager] Did not find conf/config-local.lua
(0 s) [DatabaseManager] converting database objects to new format
(0 s) [DatabaseManager] finished converting data to new format
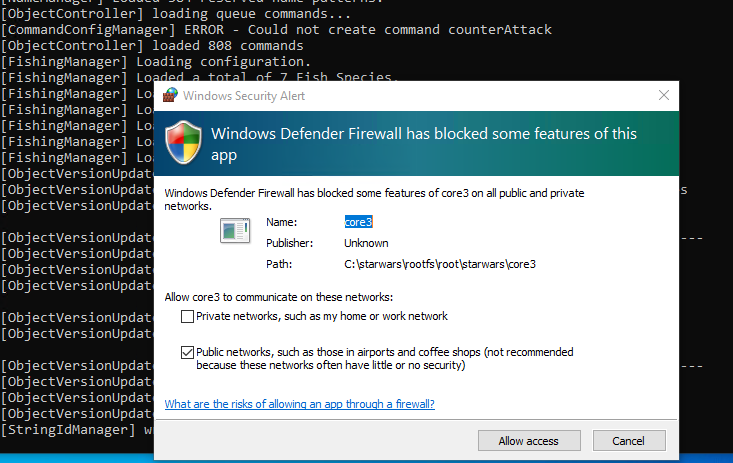
There will be a lot of messages going on, and this will take a few minutes. During the first run Windows will ask for network access permissions. Be sure to check both boxes allowing WAN and LAN access.
Check both boxes!
I have a Lenovo C20 and it takes about 2 minutes, depending on your config it may take longer or shorter.
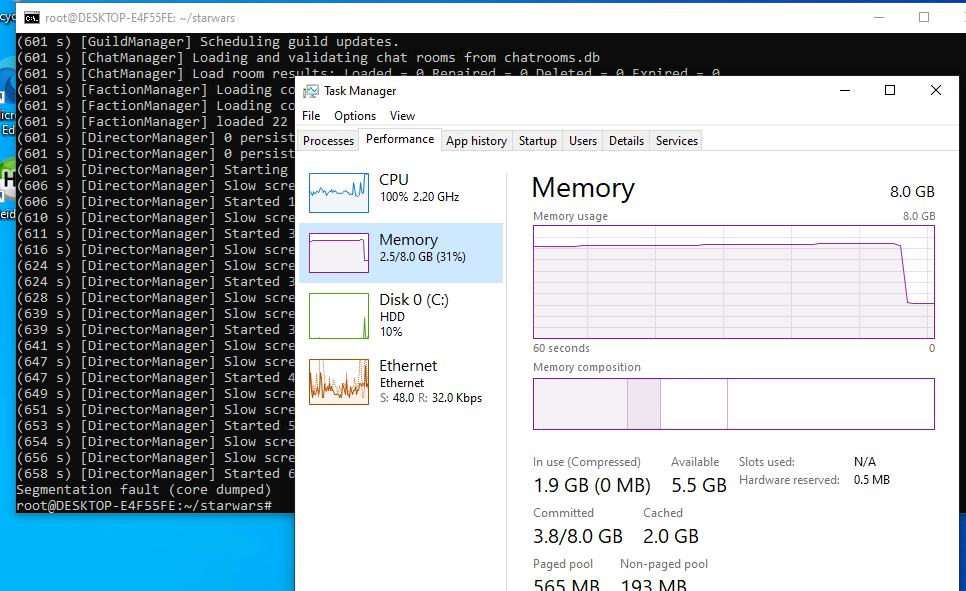
One thing to point out is that I have configured Core3 for all the worlds, and this will need more than 8GB of ram to start up. So if you get something like this:
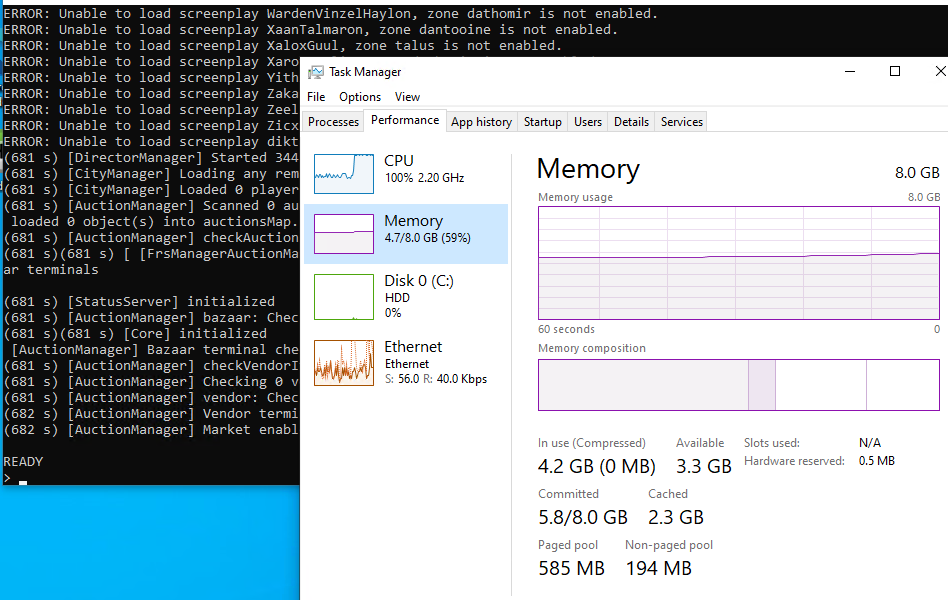
If this happens, you’ll have to try a minimal config, commenting out the areas from the config. On this test system, it only has 8GB of RAM, and that isn’t enough to have everything. However the minimal of the training & Tatooine fits no problem:
On the machine I originally set this up on, it has 32GB of RAM, so the processes needing just under 7GB of RAM wasn’t an issue. However an 8GB machine just isn’t enough as I found out the hard way re-producing my install.
Since we have previously allowed the Core3 application LAN/WAN access you should be able to connect. If you set the public address to something public, you will need to setup your firewall to forward the following ports to the machine hosting Core3
Otherwise you’ll need to open the following ports and protocols:
TCP 44419 TCP 44455 UDP 44453 UDP 44462 UDP 44463
Again making this a WSLv1 setup makes this easier as Windows runs core3 in the same memory space.
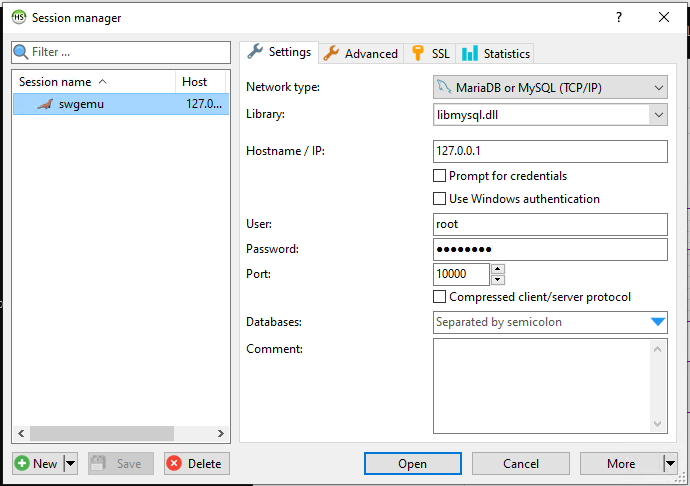
With any luck you should now be able to connect to the address you have specified as your PUBLIC address. If you want to change, you can either update the re-init.sh script and re-run it, destroying everything, or run the HeidiSQL tool, and just update it.
I had to set it to use libmysql.dll . As always remember your root password, and what Port you used to setup MariaDB. With the profile saved you can open it up.
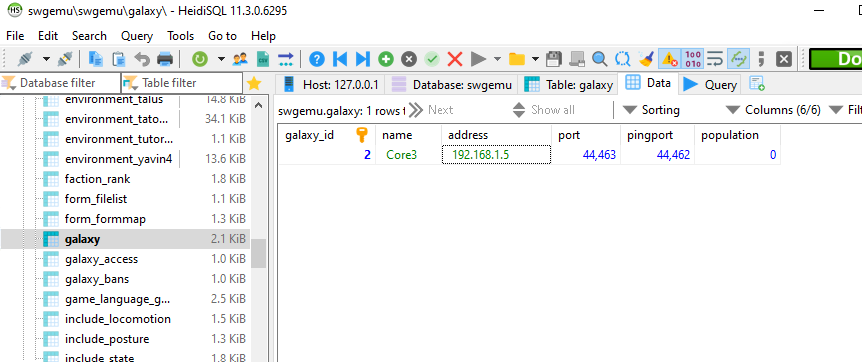
The address field tells the clients what IP address they can find the server on, so it can the the LAN if you are staying at home, or it has to be a Publicly accessible one. Another alternative is something like Hamachi, which lets you create your own virtual network of machines. It’s great, but not all that cheap, but the added benefit is that your server isn’t a public resource, so you know exactly who is connecting.
If you want to be open but in control I’ve used this in the past to great success.
If you do change the IP you have to restart the core3 program.
Simply type in ‘exit’ at the console and it’ll start to gracefully shutdown.
Then simply start it again with a ./core3
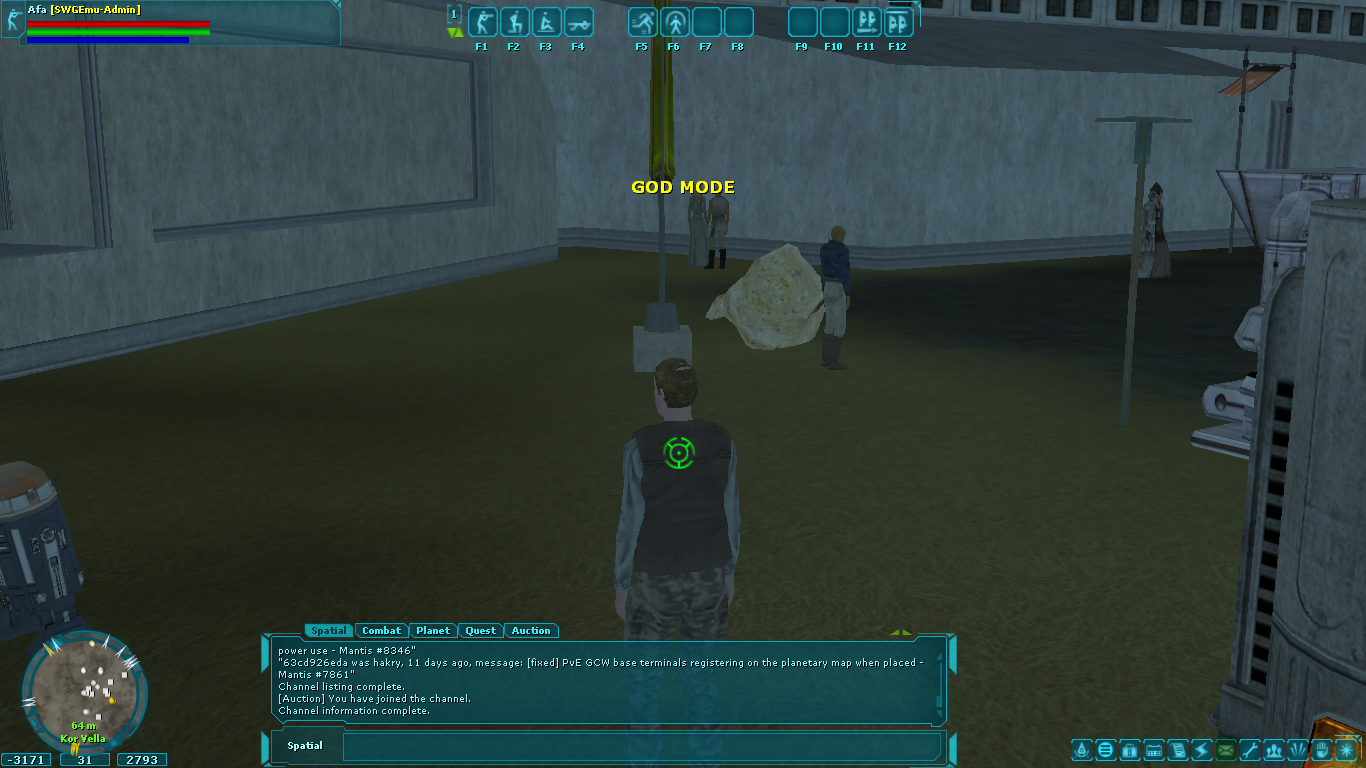
If you want to enable the god mode, I assume you have read how what changes to make on the client side, and the table to edit is the accounts table, once you have logged in, it’ll create your record, and you can find it on HeidiSQL and change the admin_level field to 15. With this set the next character you create will be a ‘god’.
It’s worth noting that your 1st player won’t have the god mode enabled, but rather the 2nd onward will have the GOD mode flag set.
To enable the / commands (aka the whole fun of god mode!) you need to edit the swgemu.cfg file in your Star Wars Galaxies directory. You need to uncomment the following line:
# .include “user.cfg”
Next you need to create a user.cfg file in that directory with the following:
Now any server you can login to you can run exciting commands like
/setspeed 10 30
I’m not going to go into setting up the client, installing the SWGEMU stuff and how to add custom servers, as I assume you already know how to do so. This is more to let people run their own instances at home, or among friends.
On building core3 for yourself, be aware that by default it’ll use a ‘native’ config option that tunes the compiler to generate code as fast as possible for YOUR processor. So if you want to run it somewhere else, it has a good chance of not running. I had to edit the following files:
Also I have access to a Windows 2019 Server which is Windows 10 1809 based, and it doesn’t support the import-export of filesystems. So this won’t be a clean install, I guess it’d be easier to copy files over from Windows 10, and install Ubuntu 20.22 from the store.
Well one nice thing about Windows 10 is that it has a built in ssh/scp client! Although telnet is optional, I get that it’s insecure but jeez what is a retro user to do?
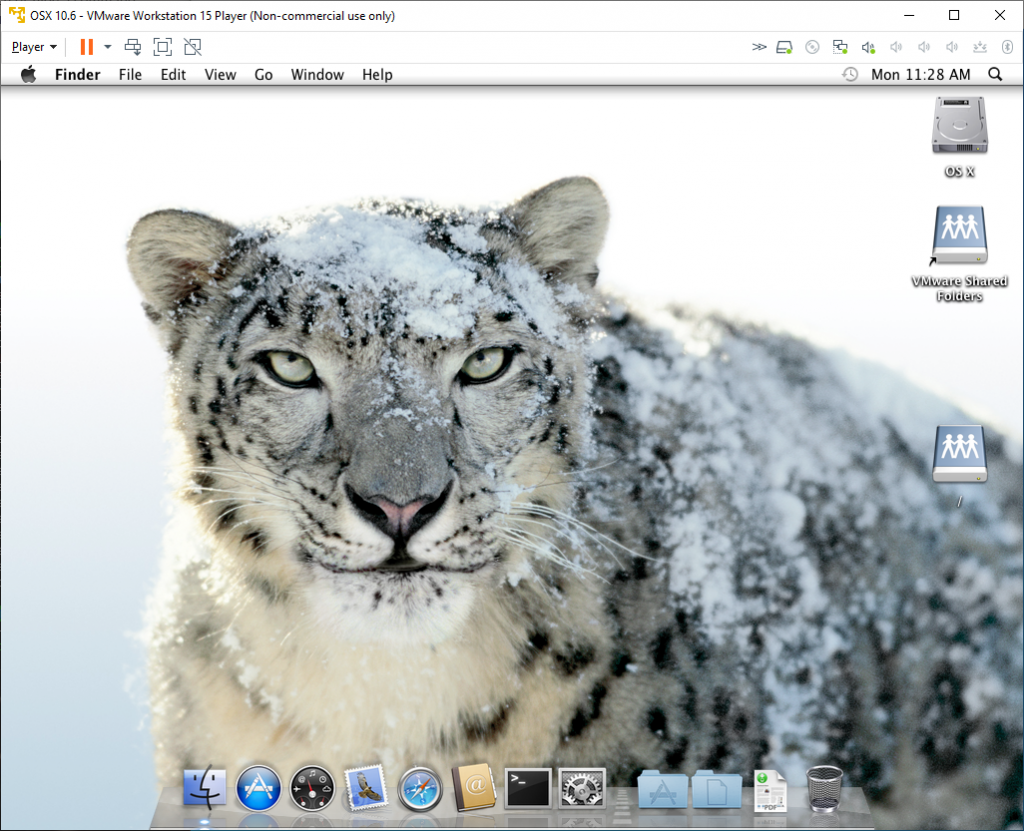
Anyways the subject at hand is copying files from somewhere that has spaces in the path. In this case I need a copy of OS X Snow Leopard from my Mac Pro cylinder to this junk Fujitsu Celsius. I’m still having USB issues, but I’d like to get my data off of an external disk formatted in HFS+. And for ‘reasons’ I wanted to use something “native” but I don’t feel like building a Hackintosh. While not a strict tutorial on getting Snow Leopard running, I did upload my old download of Empire EFI on archive.org as this kind of stuff is damned near impossible to find.
So back to the matter at hand, I have this VM setup on my Mac Pro, and I want it on this Windows machine. You’d think it would be something like this:
scp -C [email protected]:"/Users/neozeed/Virtual Machines.localized/OSX 10.6/*" .
Password:
scp: /Users/neozeed/Virtual: No such file or directory
scp: Machines.localized/OSX: No such file or directory
scp: 10.6/*: No such file or directory
Okay so double quotes didn’t work. How about a Unix style escape for spaces? I mean it *is* scp after all, maybe it doesn’t know it’s on Windows.
C:\osx>scp -C [email protected]:"/Users/neozeed/Virtual\ Machines.localized/OSX\ 10.6/*" .
Password:
scp: /Users/neozeed/Virtual: No such file or directory
scp: Machines.localized/OSX: No such file or directory
scp: 10.6/*: No such file or directory
Well maybe it parses it like C, so you need double backslash? NO that doesn’t work either. Talk about frustrating. So, in an act of insanity, I tried single quoting the interior spaces around double quotes, something idiotic like a bash variable:
C:\osx>scp -C [email protected]:"/Users/neozeed/Virtual' 'Machines.localized/OSX' '10.6/*" .
Password:
Mac OS Snow Leopard.vmdk                                                               69%   11GB  16.0MB/s   05:16 ETA
And yes, now it’s transferring. I’m just using a cheap 50zt 5 port 100Mbit dumb switch. It’s good enough and it’ll probably take some 30 minutes to transfer all the bits, but it’s working.
So there you go. You may not need it now, or tomorrow but it’ll save you the 20 minutes of frustration!
In my “C:\Program Files (x86)\Windows Kits\10\Emulation\Mobile\10.0.14393.0” directory I have a modest 2GB file called flash.vhd which contains the phone image. I copy it to where I run my VM’s and run it with the XDE emulator:
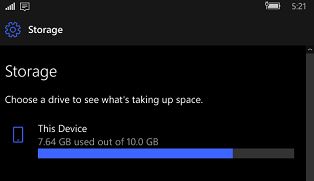
And I’m running in no time, I login, load some apps, then I notice the storage:
What is this, a phone for ants?
What?! the disk image is a paultry 10GB. I guess the idea is that you wouldn’t actually try to load up the emulator like it’s your daily driver, rather you load YOUR app and only YOUR app, and just pretend that this isn’t some weird offshoot nostalgia machine.
Well needless to say something needs to be done about this storage situation.
I look and find this package, vhdutils. I had to go to some sketchy site, but it did include source. I should put this somewhere more legit to take away from all those weird squatters.
So with stuff installed onto my phone I’m almost at 7GB physical 7.6 virtual space. I could go all crazy with 128 or 256GB but it’d largely be stuff I bought… which of course thanks to the magical world of DRM won’t play.
Yeah I guess you are welcome that I bought all those movies, and stuff but sure I wasn’t going to watch them on this phone… emulator. Thanks. thanks again.
So the resize vhd is quick. brutal. and efficient. I go with 64GB, because, why not? I could probably just grow it again if I needed to.
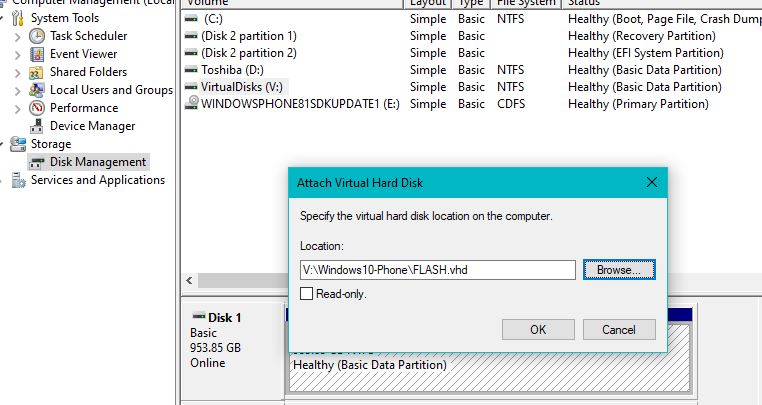
Now for the fun part. We need to attach the vhd, and resize the volume. I hope you like diskpart.
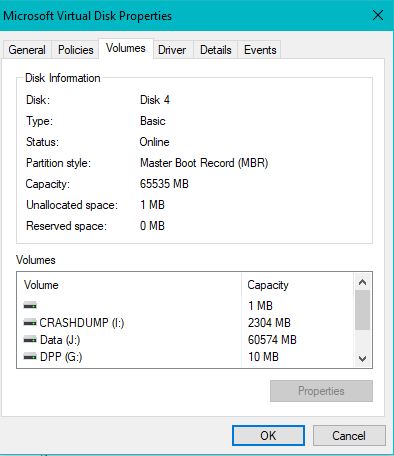
In the MMC I attach the disk image.. it’ll pop a few folders as it’s got a bunch of drive letters. I’ve never explored a phone, I don’t know if the ARM images are just as weird.
Even more strange, it’s MBR!
So if you were thinking, lots of partitions, and a clear win for GPT, sadly this isn’t it.
Sadly there is no free partitions (although one hiding could be deleted…?) And the UI doesn’t support expanding a logical drive (the green container). But diskpart does.
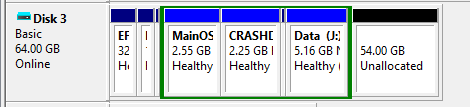
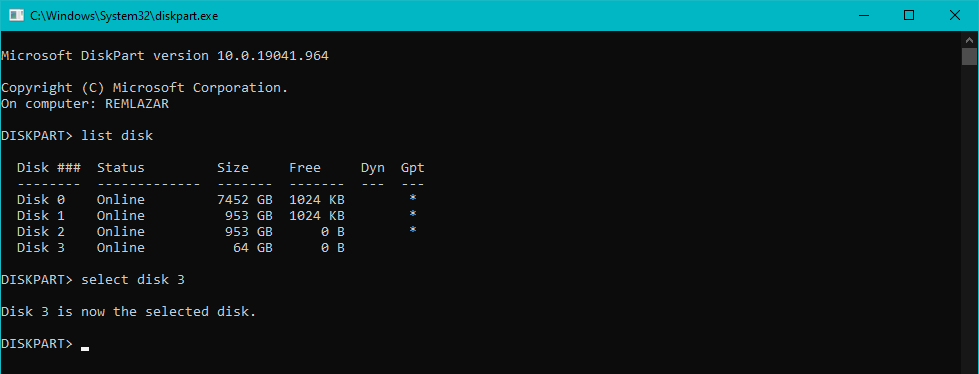
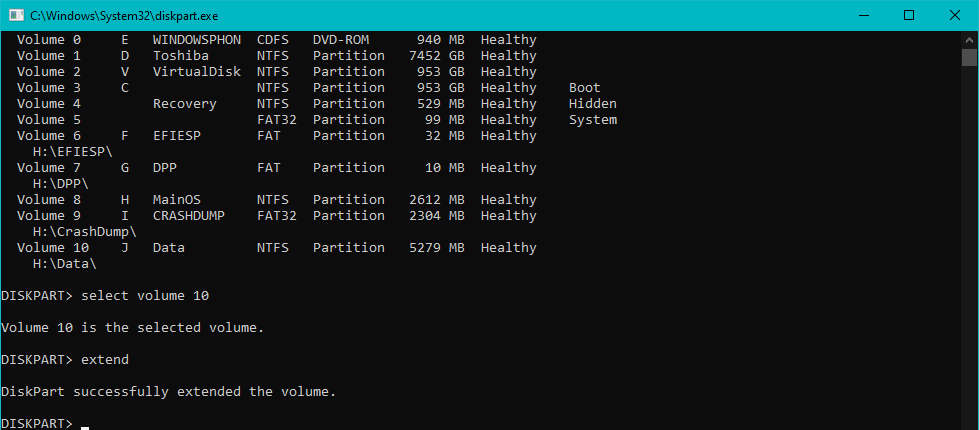
As indicated above the emulator’s vhd is disk3. You can see it’s the 64GB disk. Select it.
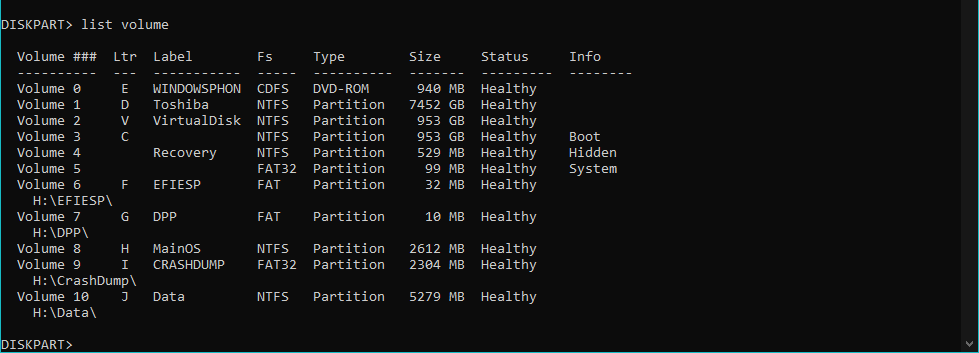
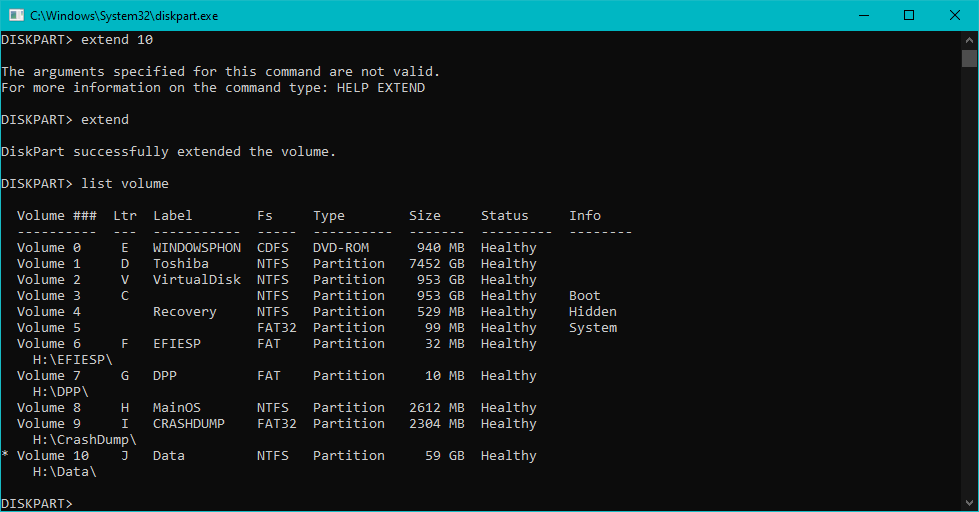
Next list the volumes. The Data disk (J:) is what we want so select Volume 10.
Literally just ‘select volume 10’ and ‘extend’. Don’t tell me this is difficult.
Listing the volumes again will show a 59GB Data partition. Congratulations we did it!
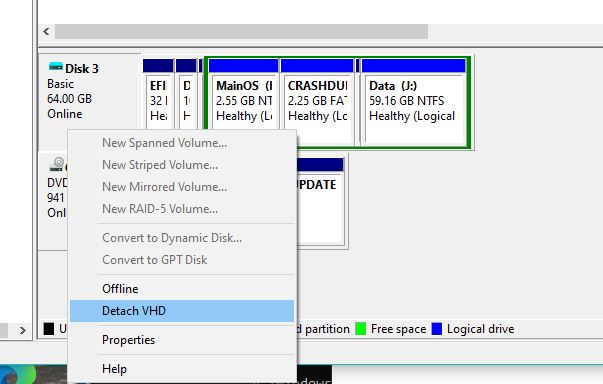
Back in the MMC, you’ll see it as well how the Data partition, along with the green extended partition is now taking up the entire disk. So we can now Detach the VHD, and run the emulator again!
Nice!
And just like that we now have plenty of free space on the emulator.
I downloaded some games, and some music. It’s nice to be back home.
It’s not an extensive list as I didn’t game much on my phone but here is what I know works:
Final Fantasy 1
Heroes of Larkwood
Skulls of the Shogun
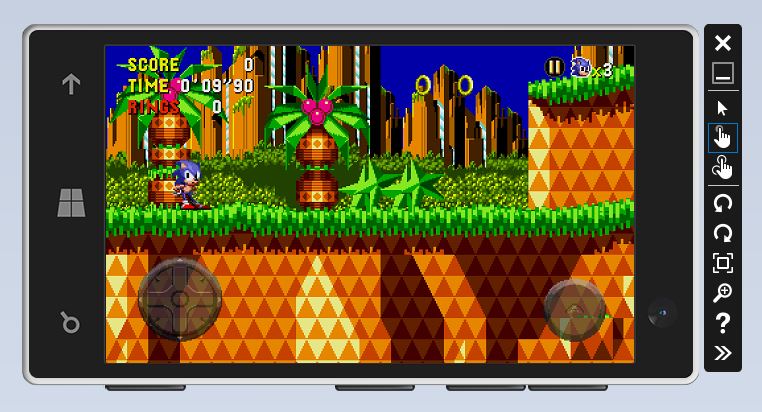
Sonic CD
FL Studio
Candy Crush Saga
Pixel Dungeon +
Halo Spartan Asslt just closes, and Asphalt 8: Airborne doesn’t get the screen size right so it’s impossible to click enough buttons.
Sonic CD on Windows Phone 10
It’s nice that sonic runs, (haha) although using a mouse makes it impossible to control.
Now one fun thing is that the emulator is x86, nor ARM based so I converted the VHD to a VMDK, ran it under VMware, and YES it RUNS… sort of.
Perhaps a format that never was to be, the Phone/Tablet but it boots quickly and is so responsive. Windows without most of the .. Windows bits. I guess the real experiment will have to be will it run on a Surface?
It’s all 32bit anyways, and such an evolutionary dead end. Pitty.
So you are in a hurry and need to build a network in a box. It was a bit of a surprise, and you have no time. On site there is ONE computer, it’s a NUC. A tiny one. And you cannot replace the base OS for “reasons”… No problem, you say, just add in Hyper-V and you can build an ‘older’ but useful domain controller, exchange server, VPN & utility servers and then yeah you find out the killer:
Ugh
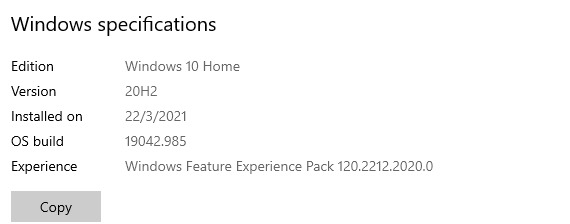
Windows 10 Home.
Well it turns out that you actually *CAN* install Windows 10 with a little command line shake and bake:
pushd "%~dp0"
dir /b %SystemRoot%\servicing\Packages\*Hyper-V*.mum >hyper-v.txt
for /f %%i in ('findstr /i . hyper-v.txt 2^>nul') do dism /online /norestart /add-package:"%SystemRoot%\servicing\Packages\%%i"
del hyper-v.txt
Dism /online /enable-feature /featurename:Microsoft-Hyper-V -All /LimitAccess /ALL
pause
I picked up this tip from TheWindowsClub. And yep, it works!
Super cool!
Of course this also means you can turn your unsuspecting parent’s home machine into a remote server….
(This is a guest post from Antoni Sawicki aka Tenox)
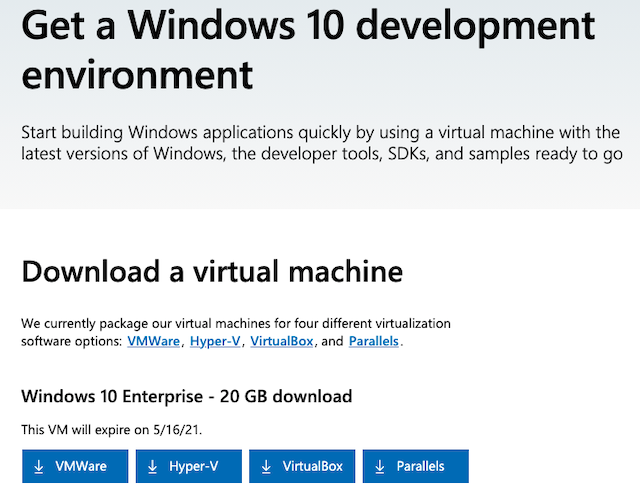
I have been living under a rock for several years now when it comes to Windows development. Recently wanting to do some maintenance on couple of my projects I needed to download Visual Studio and Windows SDK. Poking around the download page I have discovered that Microsoft now provides a fully pre-installed VMs with Visual Studio, SDK etc. for VMware, Hyper-V, VirtualBox and Parallels. That’s actually super cool and handy. Thank you Microsoft!
Looks like this has been available for 3 or 4 years now. Oh well.
As far as computers go, Raspberry Pi’s are cheap. The latest (and vastly incompatible) Pi4 is no real exception. Now you’d think Microsoft would want to get WoA (Windows on ARM) into as many hands as possible to get people to port apps to the new cpu architecture. But that is not the case.
As of this moment there is no real desktop machines, the only route to go is with the laptops, which are the few models from Lenovo, HP, Acer and Microsoft themselves. Brand new these things are not cheap, and of course people find out quickly enough that the emulation just isn’t quite there (not all that surprising) and of course the lack of native apps doesn’t help. It’s that chicken/egg problem that can only be solved by getting hardware into people’s hands.
Developers!
So getting back to to the Pi, on ETA Prime’s channel I saw this video, which quickly went over how to get Windows 10 up and running in no time flat.
Pi4 (4GB/8GB it doesn’t matter thanks to a DMA bug you can only use 3GB)
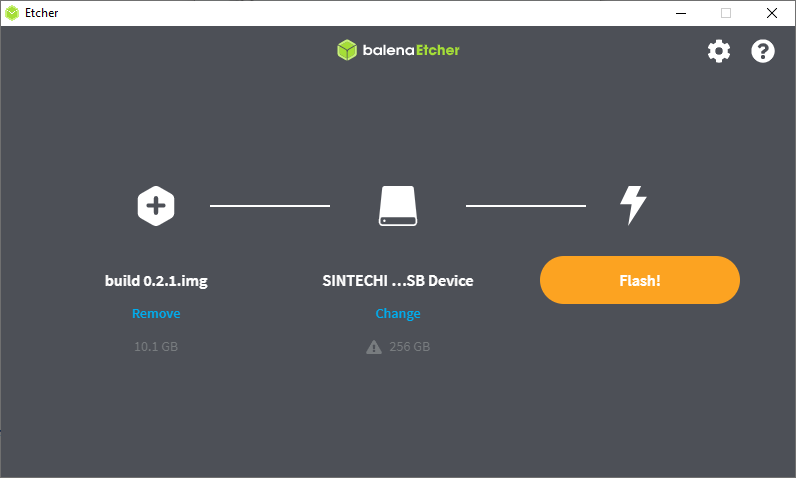
On the Discord look for the #download-links and look for build 0.2.1 After you extract it, the image should be about 10GB
10,100,932,608 build 0.2.1.img
With a MD5 checksum of: aad51a0e02ba947d24d543ff8ed612b0
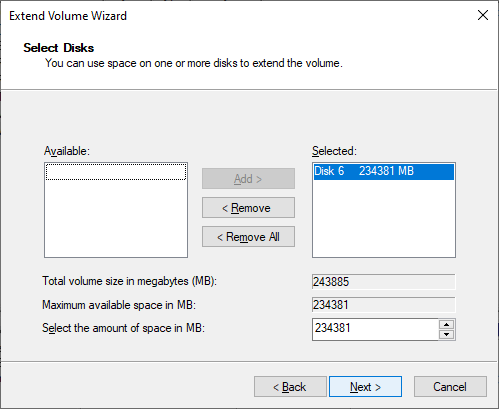
Use etcher to write the image to the SD. It took me about 5 minutes to do so. No bigge. I unplugged the SD/IDE/USB adapter thing I’m using, plugged it back in, and used Windows disk manager to expand the partition to take up the rest of the disk. It’s not terribly complicated to setup.
SSD FlashedRight click and select ExtendThe default option will consume the entire disk
After that slap in the SD to your Pi4 and away you go. Or so I first thought.
Realistically you also need:
A USB Hub
A USB Ethernet adapter (I have some cheapo no name realtek)
A USB audio card
A mini HDMI to regular human sized HDMI cables/adapters
a 5Amp USB charger for extra power!
As I found out rather quickly that the only peripherals that are working is the USB ports. However the USB controller has some DMA bug where it can’t xfer higher than 3GB which caps the current memory ceiling to 3GB.
Otherwise the Pi will think and reboot a few times, and about 15-30 minutes later (I didn’t time it, I walked out) you’ll be up and running Windows 10 on ARM!
It’s heavily customized in that when Windows boots up it is only consuming about 1GB of RAM. So that gives us just under 2GB for user programs. GREAT! Included is the setup program for the latest beta of Microsoft Edge (with the chromium engine) so at least you can actually hit web sites. However Google doesn’t like it, so if you are going to try to watch anything with DRM it will not work.
While many people complain about STEAM, game compatibility, really what on earth were you expecting? Naturally people will want to know how fast it is, and well… It’s not. Although it does have 4 cores, running at 1.5Ghz, there is barely any cache (well compared to an i7/Xeon), and it’s clearly not a power house of a box. The only real test of a machine like this is going to be native stuff. And speaking of, it’s nice that my previous builds for ARM still work! The sales guy that borrwed the ASUS should be back soon so I can do some side by side comparisons of how slow they are.
In addition to DOSBox, Neko98, and frontvm, I managed to get MAME 0.36 cross compiled and I had to disable the DirectX input and output, as although they do compile they have issues on the Pi4. So it’s GDI all the way. That said, it does run:
This isn’t the port you want, or the platform to play it on. I’m using the command line Visual C++ tools to build this, and MAME 0.37 drifted to being more of a MinGW thing, and I just don’t feel like fighting the build process.
Another point of fun, is that this processor & OS does have x86 compatibility you can take things to the extreme with OTVDM, and run Win16 based programs on Windows 10 for ARM! Not that I would know why you want Excel 3.0, but rest assured, it works fine.
The platform supports WSL, so I went ahead and installed Ubuntu 18 & 20… and both have one apparently known catastrophic failure on the Pi’s. When trying to update packages the updater crashes. The fault is apparently in dirmngr, or the usual Linux bandaid of switching distros. There doesn’t appear to be any ‘fix’ to this, so if anyone knows what to do, I’m all ears. Also don’t enable WSL2, it’ll hang at the bootloader. I ended up having to reflash the disk.
In my quick conclusion, is this the RISC Windows workstation of the future? No, not really. It’s more the $50(+peripherals) tyre kicker edition. It’s a cheap way into the platform, to see what the fuss is all about. This machine feels like a low end i3, the CPU just isn’t there, it’s only a BCM2711 Cortex-A72, so there isn’t all that much to be expected. On the other hand it’s FAR FAR FAR cheaper than something like the Surface X. If you have the hardware it’s worth checking out if you are interested in non x86 Windows. Otherwise you aren’t going to miss much.
Since WSL2 runs an actual Linux kernel that means you can run 32bit binaries! And that now means you can run stuff like ancient unmodified UML kernels on Windows! Isn’t that great!
I followed my old posts here & here, to get running or the short version being:
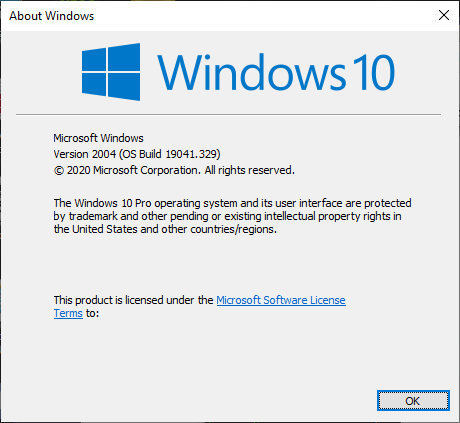
I finally got the update to version 2004 of Windows 10 (OS Build 19041.329) which now includes support for running a Linux kernel inside a VM, using paravirtual drivers letting it hook into Windows 10. It reminds me of WinOS/2 where, OS/2 would run Windows 3.1 in a virtual machine, but using special drivers it could redirect it on the native filesystem, and paint the windows on the OS/2 desktop.
So the first thing is make sure you have 2004, winver should look like this:
You will need to go to the old control panel, and enable the Virtual Machine Platform. For those of you using VMware, you’ll need at least version 15.5.5 (15.5.6 is current as of the time of me writing this). I’d suggest you do that before turning on this, but some people like to live dangerously. Also fully shut down all your VM’s otherwise things will end up giving you errors (as you’ll see later).
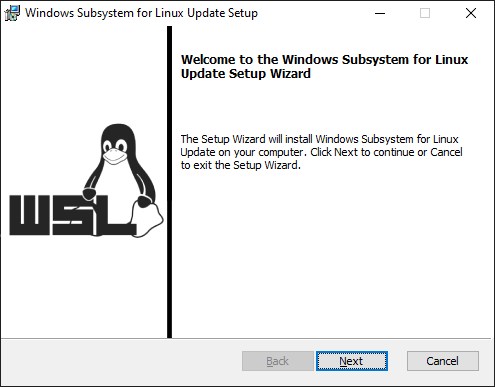
After the Virtual Machine Platform is installed, your machine will need to reboot. After a reboot, you’ll need to download the Linux Update to the system, available at:
It’s a simple install, and only takes a few seconds. I didn’t have to reboot.
now for the fun parts, you’ll need to list and shut down (terminate) your running WSL’s if you have any running.
C:\Users\neozeed>wsl --list --verbose
NAME STATE VERSION
Debian Running 1
As you can see I only have one, and it’s called Debian, and it is currently running something. Let’s kill it!
C:\Users\neozeed>wsl -t Debian
C:\Users\neozeed>wsl --list --verbose
NAME STATE VERSION
Debian Stopped 1
And now it’s stopped. The command to upgrade is pretty simple:
C:\Users\neozeed>wsl --set-version Debian 2
Conversion in progress, this may take a few minutes…
For information on key differences with WSL 2 please visit https://aka.ms/wsl2
And yes, you can also stop the WSL instance, and move it back to version 1, if you find 2 not doing what you want. However on first impressions, WSL2 is significantly faster.
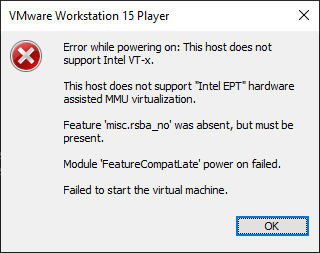
If you are running VMware, and you didn’t shut down your VM’s you’ll get this lovely message when you try to resume:
The save state will be deleted, but rest assured it’ll launch okay (at least mine did!)
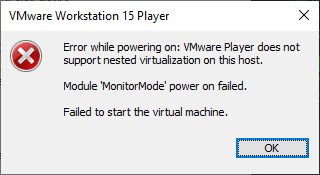
10.6 the last great OS X
One sad consequence of using the Microsoft Virtual Machine framework is that nesting is no longer available.
which is kind of a bummer, as that was the killer feature.