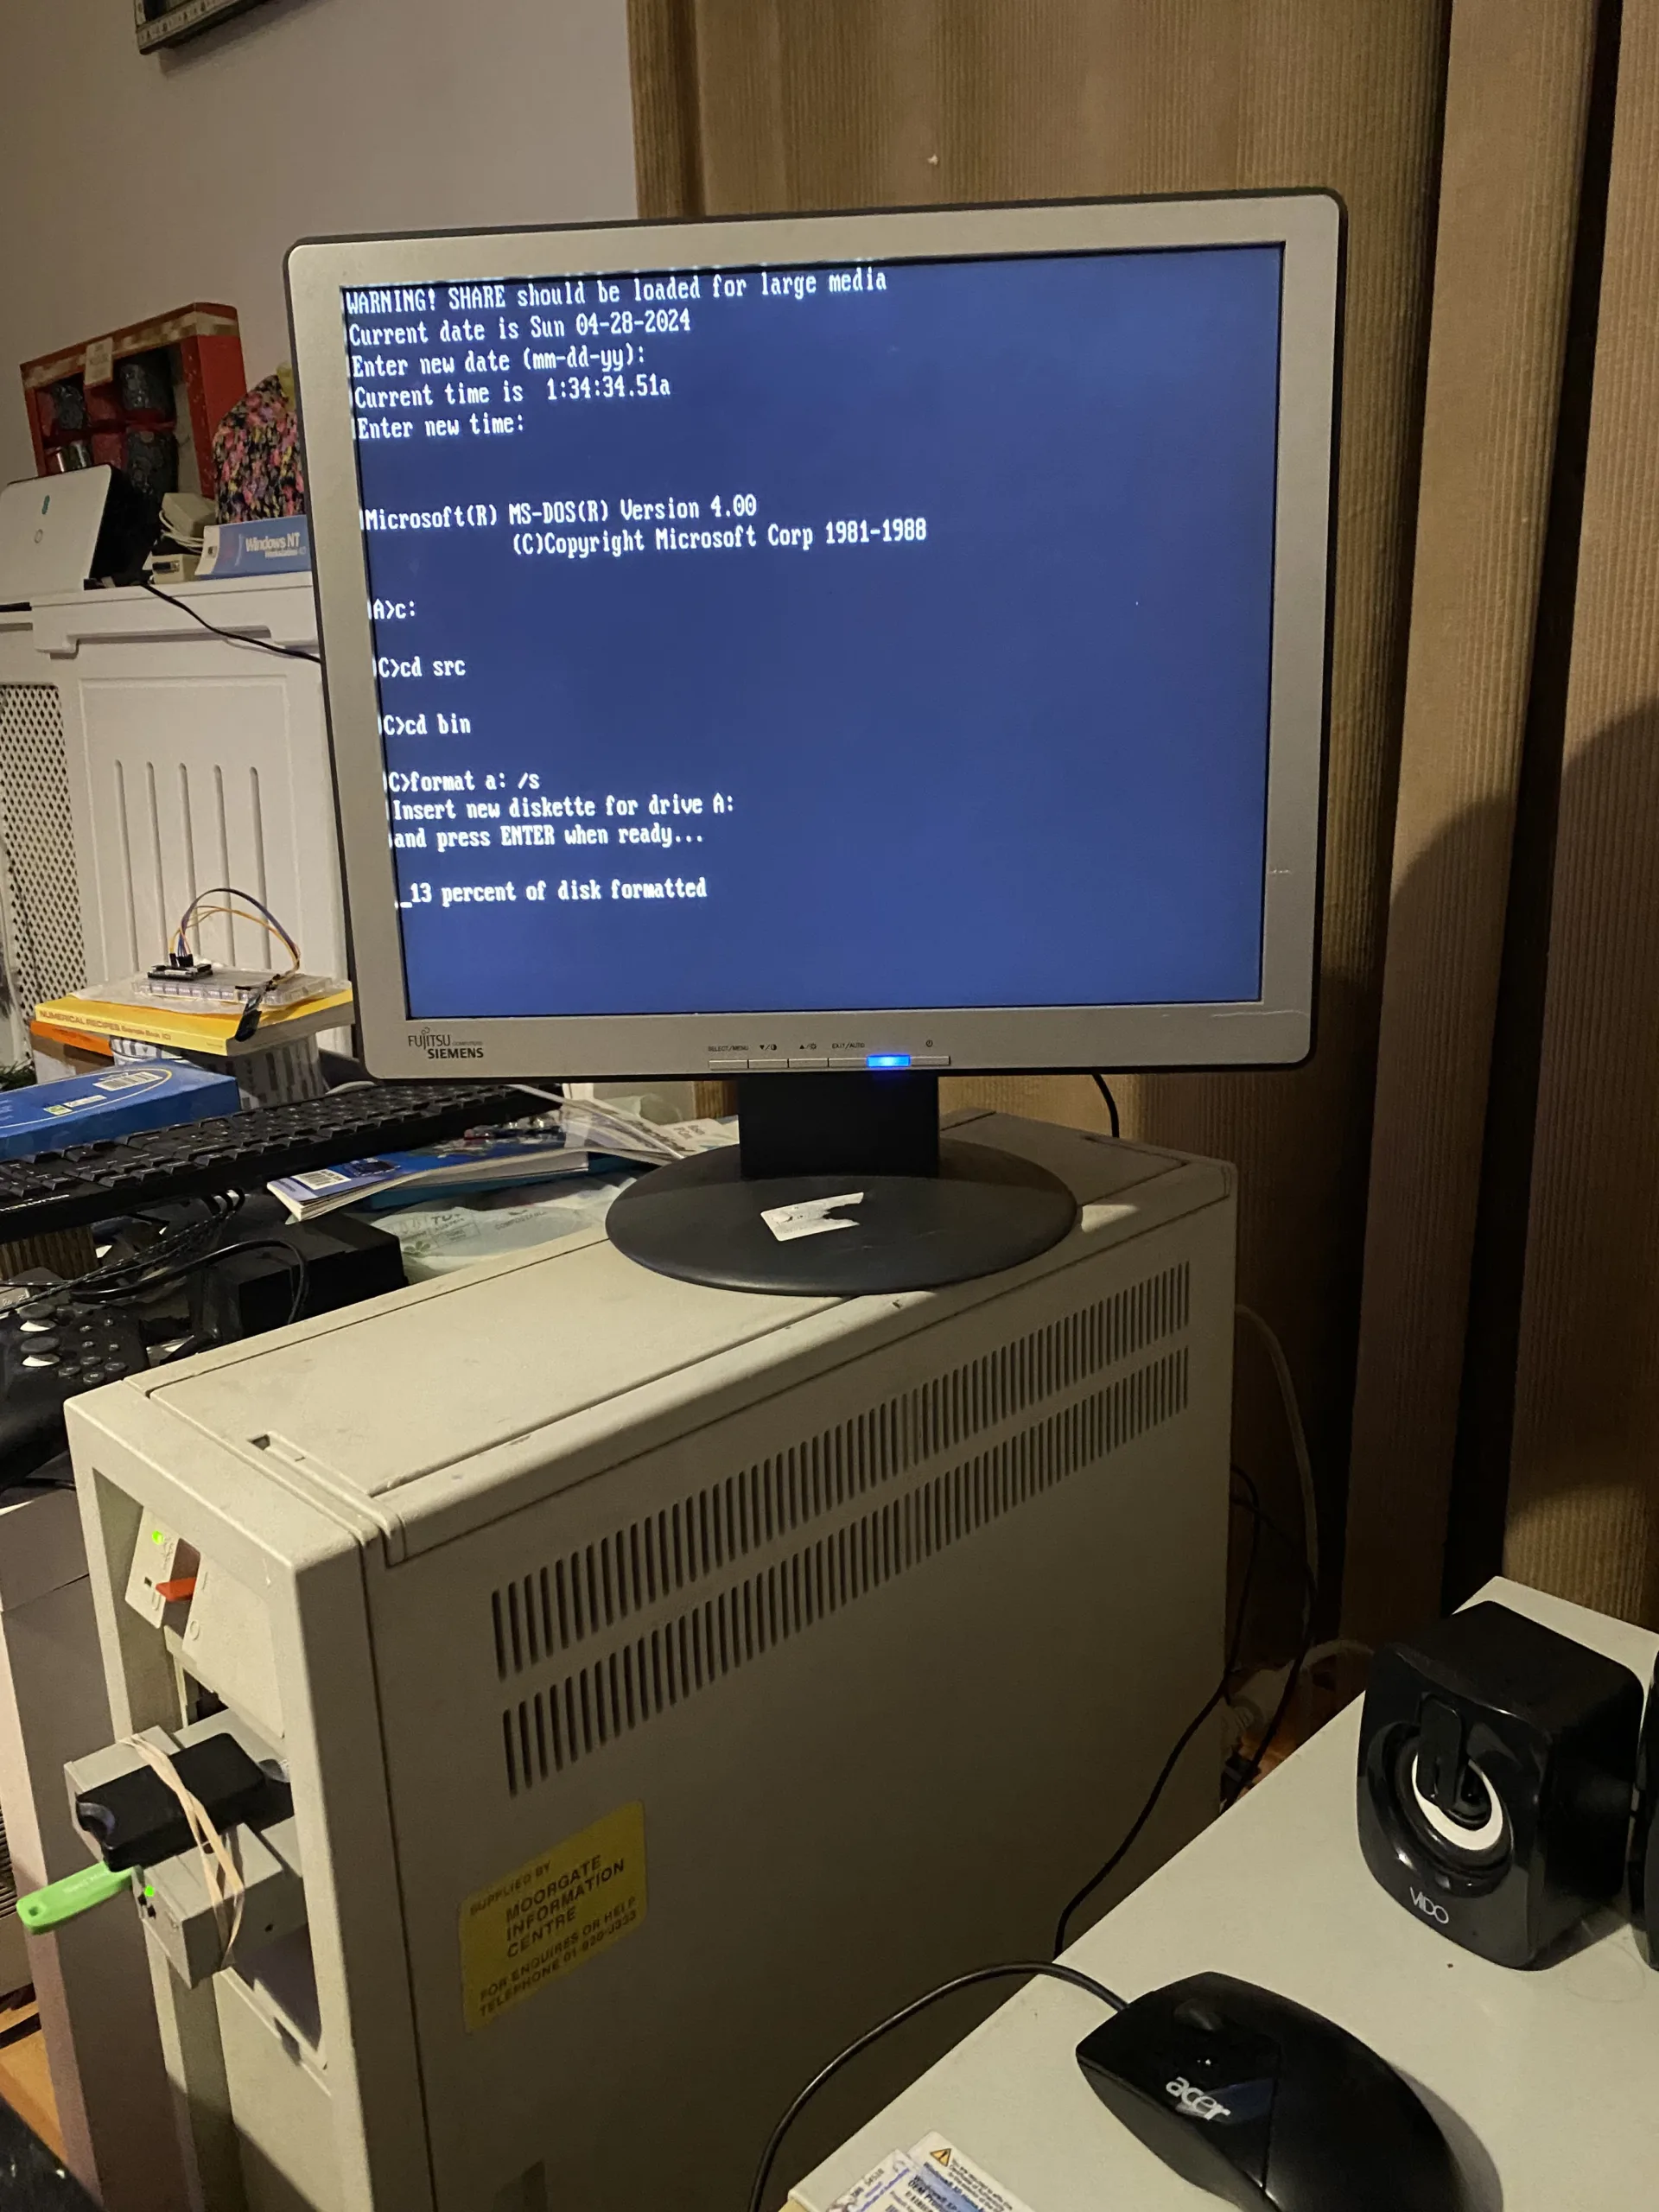
With a 16Mhz 80386 it took 70 minutes. I just formatted a blank image on the gotek, copied IO.SYS, MSDOS.SYS and COMMAND.COM, then rebooted. went back to the compiled DOS 4, and re-formatted the floppy as a system disk so the attributes are set. (DOS 5 lets you change system files), and yeah. It can be done!
Let me spell out the steps, in this case I’m going to use Windows 10. I use the git from the WSL (Windows subsystem for Linux) I have DOSBox mount c:\dos as my c: drive . ZIP/UNZIP are Info-ZIP versions, you MUST have the Win32 native version!
- md \dos
- md \dos\temp
- wsl git clone https://github.com/microsoft/MS-DOS
- cd MS-DOS\v4.0
- zip -r \dos\temp\src.zip src\*.*
- cd \dos
- unzip -a -LL temp\src.zip
- start dosbox
- cd \src
- edit setenv.bat to reflect the paths:
  set BAKROOT=c:
  set LIB=%BAKROOT%\src\tools\bld\lib
  set INCLUDE=%BAKROOT%\src\tools\bld\inc
  set PATH=%PATH%;%BAKROOT%\src\tools
- setenv
- nmake
it will then fail in mapper on getmsg.asm change the 3 chars to a '-'
- nmake
- cd ..
- nmake
continuing from dosbox, you need a 1.44mb fat formatted disk image somedos144.img . I used a dos 6.22 diskette, it needs the bootsector already in place to load io.sys/msdos.sys
- cd \src
- md bin
- cpy bin
- imgmount a somedos144.img -t floppy
- a:
- del *.*
- copy c:\src\bin\io.sys
- copy c:\src\bin\msdos.sys
- copy c:\src\bin\http://command.com
- boot -l a:
And now I’ve booted MS-DOS 4.00 from within DOBOX!
Also as interest to most people there is a bug in msload.asm, where DOS 4.0 won’t boot on a lot of machines, from VMware, Qemu and even my PS/2. It’s a small fix to the IO.SYS initial stack being too small. Props to Michal Necasek for the fix!
For further guidance here is a video spelling it all out:
I’ts MS-DOS 4.0 Internal Work #2.06 – May 23, 1984, with copyrights from both IBM & Microsoft.
I don’t have time to make any comment much further other than having had been listing to people in on making this happen, and it’s been a long struggle to make this all happen, and it’s so amazing to see their hard work make it out into the wild!
DOS 4 is the basis of what would eventually become OS/2, just as I’m sure that it’s use of NE executables will reveal a far tighter integration with Windows, giving hints of the future that should have been!
** EDIT So it’s just DOS 4.00, with a lot of information on EU/MT DOS4. There is now a blog post over on Scott Hanselman – Scott Hanselman’s Blog‘s talking about the details of this release!
Credit goes to starfrost, this was nearly a year in the works!
In the previous posts, we’ve gone through the excruciating fun of installing Rhapsody DR2, and of course built the Rhapsody kernel from source. But now it’s time to build the software that can build software.
Enter the apt*
Of course we can’t just start building apt, rather we need to start at the 1990’s super star scripting language that revolutionized massive, shared code libraries, accelerating web development, and building the modern web, of course I’m talking about PERL.
Even back in the original effort building Perl was a slog. Even with temporary wins with miniperl it quickly fell apart from missing symbols. When it comes to the system libraries Darwin is not complete, rather it’s a lot of amputations from OPENSTEP. Which of course, itself was amputated from NeXTSTEP. I’m not sure what held back NeXTSTEP from being ‘open’ back when ‘open’ meant published specifications, not open source, or open in any other sense of the way, like The Open Group being a gatekeeping organization that is NOT open at all.
Anyways, Perl from the Darwin 0.1 downloads & the 0.3 CD-ROM don’t build. I gave up and moved to the OS X Server version and that one did build! As much as I could diff them out and find the breaking difference, honestly, it’s just easier to stick with what works.
/pub/Darwin/PublicSource/Darwin
I should point out that the source to Darwin was preserved on this now defunct site “next.68k.org”, which in turn was also preserved on the defunct site “nextftp.onionmixer.net“. Amazing how mirrors go. Other fun things on the ftp site include MacOSX-Server public sources, which did include the Perl that we built.
Darwin 0.3
Darwin 0.3 however was pressed onto CD-ROM, and distributed out to the masses. It took me a short while to get a tip to a hidden server that had a copy, which really was a massive breakthrough as it had a far more complete set of files than the 0.1 ftp dump. However at the same time there are files in the 0.1 dump that are not in the 0.3. Was there ever a 0.2? I have no idea, the mailing lists don’t seem to have been preserved so I really don’t know. Does anyone have any other ftp site archives? Not to my knowledge but I’d be more than happy to be wrong.
With a working Perl the next thing to do is to patch the buildtools & dpkg to not be PowerPC centric. It’s no secret that all the official effort going on was to get OpenSTEP up and running on Apple PowerPC’s and to transition away from OPENSTEP to Rhapsody, the MacOS 8 Platinum feeling type OS, where everyone was going to love the ‘Coca’ API, and dump the old MacOS stuff or be forced to run it in the ‘BlueBox’ MacOS 8 emulator. Obviously this future didn’t happen as developers were not interested in rewriting for Steve’s decade+ fever dream of a Unix for the ‘rest of us’, instead they wanted their existing software to ‘just work’ and the Carbon API had to be created, along with a drastically different and modern looking OS X.
Frequently in the build tools it’s a matter of looking for ppc/powerpc and replacing them with i386. It’s really no surprise that Darwin always built on intel, and it had to, as it’s life depended on it. Back when NeXT hit their first real big stumbling blocks of being a vertical platform is that they just couldn’t compete in the hardware space. But dumping the 68k based black boxes, they could now take their software and port it to the much more coveted RISC platforms, and shipping with NeXTSTEP 3.3 they supported both SPARC & HPPA. There had always been talks of further platforms like MIPS or DEC Alpha, but these never materialized, much like the i860 which had been relegated to a simple Postscript co-processor.
Anyways.. Keeping with yesterday’s setup, and of course the .darwin-builder-04-23-2024.iso CD-ROM with all the stuff we need, let’s DOIT!
phase 2 completed
With phase 3 completed we are now ready to build the rest of the system. I hope you are excited! As I’m sure hoping you kept the original disk layout from the prior setup, or I’ve totally trashed your system by now.
I should say that deb files are just specially tagged ‘ar’ archives, that contain a data & control files telling apt how to process them. In this case I’ve taken the cc_783.1-1_i386-apple-darwin.deb file and modified it to contain the OS X 10.0 modified CC compiler. Apt had stumbled on building it, and I’m not interested into troubleshooting why or how. Basically, use ar to extract the contents of the deb, then tar to expand the data, replace the files, tar to put the files back into the data tar file, and ar to rebuild the archive.
ar r cc_783.1-1_i386-apple-darwin.deb debian-binary control.tar.gz data.tar.gz
In this case, debian-binary is a text file that simply contains ‘2.0’. Amazing!
The first thing to do is build a manifest of what needs to be built. I just simply extract all the ‘fixed’ source that I’d used last time to build Darwin, apply patches were needed, and then kick off the process with a darwin-buildall.
In this case I skip building the C compiler, as it takes too long, and I’ve already done it. If you really want to do it, you can do so at your own leisure. GDB has issues building, and I haven’t even begun to tackle them. As you can guess the format of the manifest is pretty simple:
dir /usr/src/CoreOSMakefiles-1/ all
dir /usr/src/Csu-1/ all
dir /usr/src/Libc-1/ all
dir /usr/src/LibcAT-1/ all
Debian uses deb’s to populate a fake root directory in order to cross compile the packages. This is like installing multiple copies of the operating system, and that is why we use a separate scratch disk. This can consume several gigabytes when it’s done.
Also this presented the chicken/egg problem with how do you make debs from a system that needs debs? Thankfully NCommander had done extensive work with Debian / Canonical and was able to fake enough of a ‘build-base’ fakery that satisfied the build system just enough to start building stuff. In this weird way all roads lead back to the first build-base. Thankfully we live in the future where VMs are fast, and virtual disks are cheap.
I then create the /built directory, where the compiled deb’s will be populated, and copy in my modified compiler Debian into the built directory so that it’s used in all the compiling. On the CD-ROM I have 2 selections of deb files, the ‘deb’ directory from when I’d originally done this back in 2017, and the ‘fresh’ directory that I’ve just built. You can always manually source where the debs some come.
Re-creating the steps from 7 years ago the first phase was to build the Darwin kernel. Like everything else, once you know what is involved, it’s not all that difficult. But as always finding out the steps to get there is half the fun!
I’m going to assume if you want to follow along, that you’ve completed the first part of this exercise, and you have a Rhapsody DR 2 system up and running. Due to some issues I’ve had with creating a lot of files & filesystem corruption, we are going to create and add two more disks to the system. On Qemu we need to add them via the CLI:
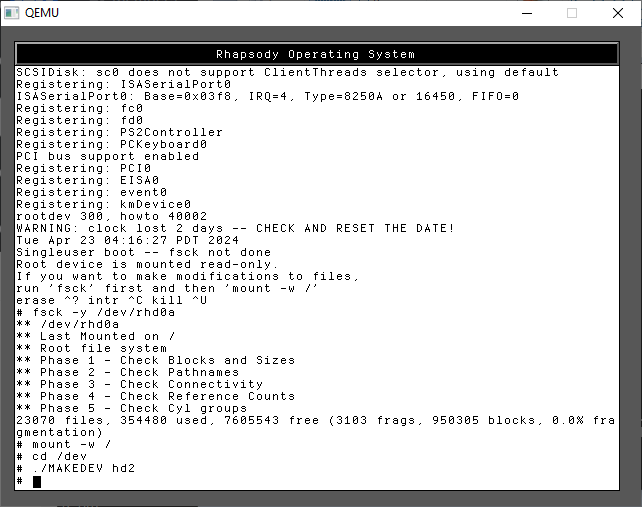
Step one is to boot into single user mode. As we need to prep & format the disks under Darwin before the system starts up.
We need to check the hard disk, and then create the device names for the third hard disk.
fsck -y /dev/rhd0a
mount -w /
cd /dev
./MAKEDEV hd2
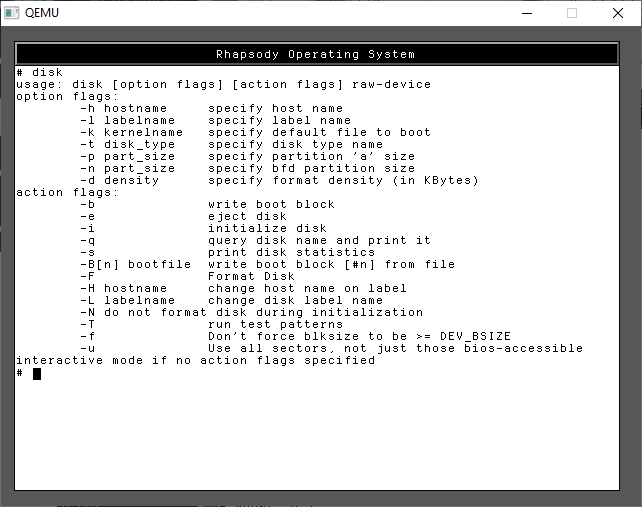
Now we need to run the ‘disk’ command which will abstract the whole volume creation. There are numerous flags, but we don’t need all that many.
disk -i -l 'src' /dev/rhd1a
disk -i -l 'scratch' /dev/rhd2a
The output scrolls off the screen, so I didn’t capture it, but you’ll see all the inodes being created, it’s a lot of output!
With the disks created, we can now shut down the VM
shutdown -h now
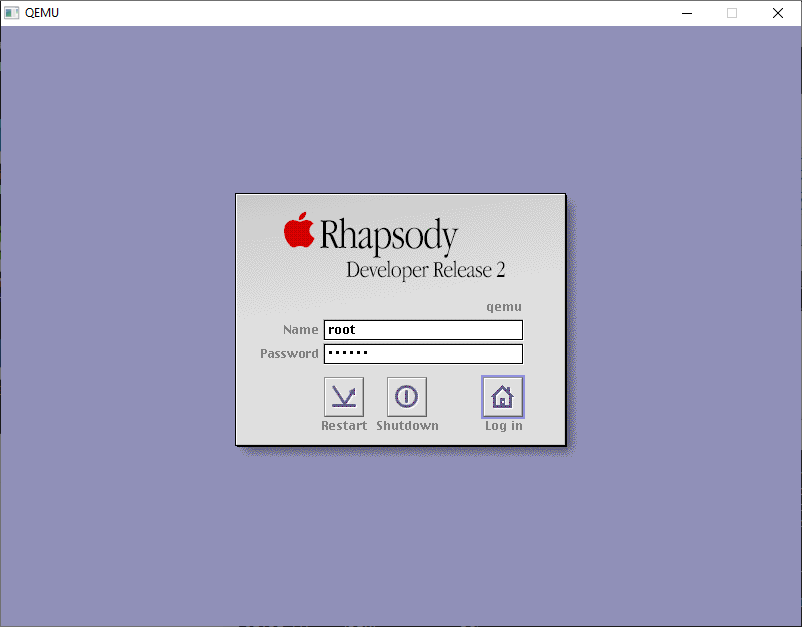
and then restart Qemu, and let it boot up normally. We’ll get to the login screen, login as the root user.
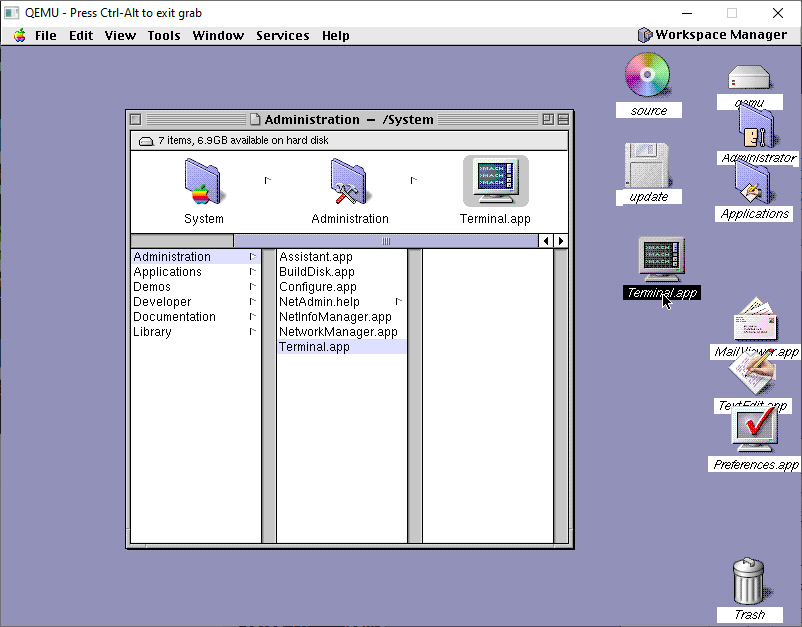
The first thing I’d recommend is to drag the Terminal.app from /System/Administration to the desktop to make it easier to get to. Rhapsody, unlike NeXTSTEP & OPENSTEP doesn’t have any dock, as the goal back then was to make Rhapsody look and feel more like Platinum MacOS.
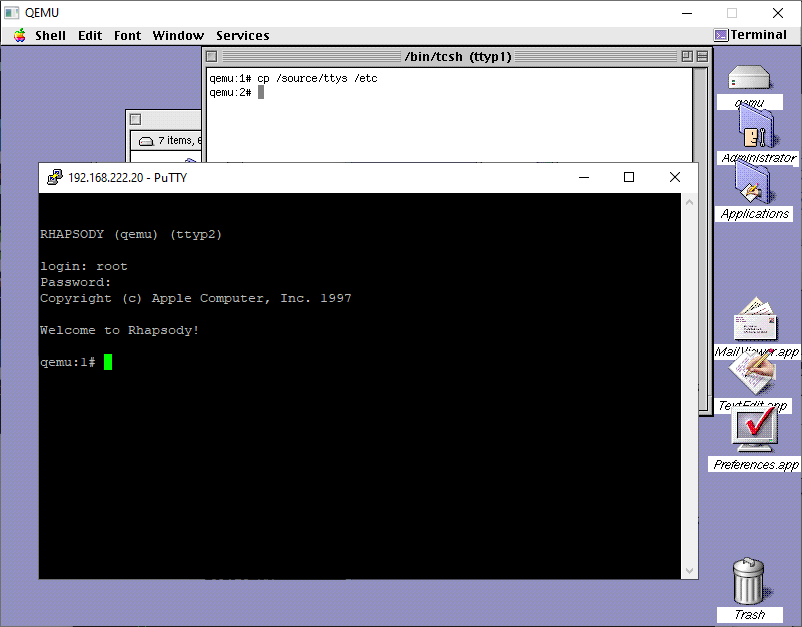
The next thing to do is to make the system very insecure by allowing remote root logins. It’s just easier to deal with. You could use sed or just copy the one I provided from the CD-ROM.
cp /source/ttys /etc
And with that in place, its easy enough to telnet into the VM so you can copy/paste stuff in and out with ease!
You should now be able to verify that all 3 disks are mounted:
# mount | grep hd.a
/dev/hd0a on / (local)
/dev/hd1a on /src (local)
/dev/hd2a on /scratch (local)
From here it should be very simple to kick off the build process:
/source/phase1.sh
And this will kick off the build, recreating all the fun steps I’d gone through so many years ago. These projects now are building in the following order:
kernel-1
driverkit-139.1-1
cc-798
bootstrap_cmds-1
objc-1
The first phase of the script will unpack both the kernel & driverkit and install their respective header files into the OS. NeXT a bunch of symlinks are created to link the system to the driverkit. Next I decided to build the ObjectiveC compiler from 10.0, hoping it’s more bugfixed and slightly more optimized than what was available back in 1999. Building the compiler is a little involved, as a good GCC tradition is to be cross compiled first, then re-compile itself with itself, then do that again and verify that the 3rd recompile outputs the same as the second one. Yes it’s a thing. Yes it’s slow. Yes you are lucky to live in the future, this was really painful back in the day.
With the kernel compiled, we can then compile the bootstrap commands, and the objectiveC runtime that is used by the kernel. Nothing too exciting here.
DriverKit however….
The PCMCIA code was not included in any of the 0.x Darwins, so for laptop enthusiasts you are basically SOL. As a matter of fact, a lot of weird stuff was pruned out, that either could be ‘touched’ or borrowed from the PowerPC port and massaged into place. Luckily I had at least figured out a simple fix for PCIKernBus.h so at least PCI works.
Likewise for the kernel, there was some guessing on the EISA config, which also overlaps ISA, along with having to remove the PCMCIA cardbus .. bus.
APM crash
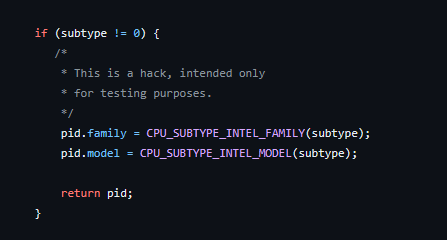
I had issues with the APM (Advanced Power Management), another laptopisim I suspect. I had to amputate that.
for testing purposes
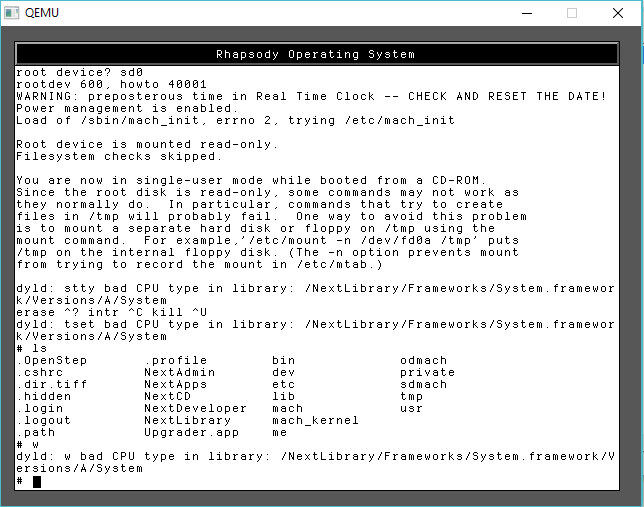
Naturally the cpuid code is broken much like early NT (I wonder if both were contributed by intel?), so it doesn’t detect any half way modern Pentium processors correctly which causes it to fall all the way back to the i386, which unfortunately, Rhapsody is compiled as 486 (remember NeXTSTEP had fat binaries allowing you to recompile for different processors and ship a single binary that can be ‘lipo’d into the appropriate one for the host). So being degraded to a 386 means nothing works.
bad CPU type in library!
yay.
Luckily patching the cpuid was pretty simple just force it always to be a Pentium. It is 1999 afterall.
I’ve done my best to make this a single script to run, and all being well you’ll get something that looks like errors, but it should be fine?!
System/Library/Frameworks/System.framework/Versions/B/Headers/bsd/i386/table.h
System/Library/Frameworks/System.framework/Versions/B/Headers/bsd/i386/types.h
System/Library/Frameworks/System.framework/Versions/B/Headers/bsd/i386/user.h
System/Library/Frameworks/System.framework/Versions/B/Headers/bsd/i386/vmparam.h
private/
private/dev/
private/dev/MAKEDEV
private/tftpboot/
private/tftpboot/mach_kernel
mach_kernel
tar: private/dev: Could not change access and modification times: Permission denied
tar: private/dev: Cannot change mode to 0755: Permission denied
tar: private/dev: Cannot chown to uid 0 gid 0: Permission denied
tar: Error exit delayed from previous errors
A quick look around shows that there is tgz files indicating that things have been compiled. I did backup the old original kernel as “rhapsody-gcc.tgz” in case you ever need it. Can’t imagine why but who knows?
You should now be able to reboot into the kernel that you’d compiled!
Next up is Phase 2, where we compile the tools to enter the dark magic that is the Debian build system. Yes, you read that right, Apple/NeXT was all in on Debian.
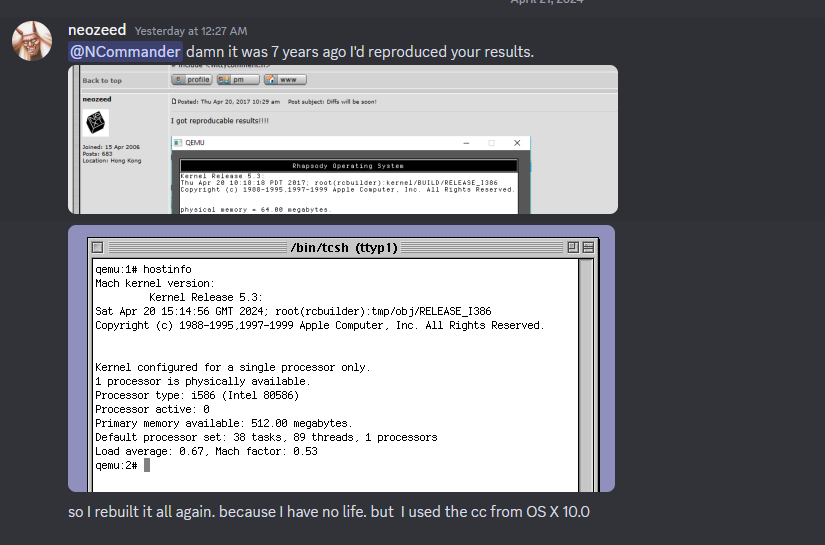
It’s hard to believe it’s been 7 years ago since I reproduced Ncommander‘s adventure in building the Mach kernel from Darwin 0.1 sources that had been found years ago. At one point we’d managed to build enough of Darwin to do a dump/restore onto a new disk image, and have a mostly built Darwin system save for a hand full of files.
Time goes on by, and memories fade, and I thought it’d be worth going over the adventure, yet again. Just as it was true back then, I thought I’d reproduce the same setup that I’d been using back then. Qemu was a new and exciting thing back then, and
the Disk driver is VERY picky and honestly ancient Qemu is a pretty solid option to emulate NeXTSTEP/OPENSTEP/Rhapsody with some patches to both 0.8 & 0.9 by Michael Engel, which change a nested interrupt and add support for a busmouse, as the PS/2 mouse doesn’t work for some unknown reason. I know many are scared of old Qemu, but the disk support is pretty solid and the CPU recompilation is very fast, so having to rely on MinGW v3 isn’t so terrible.
While I had hid away a lot of these resources on archive.org, I thought it was best to just go back to the oldest post I had where I had painfully documented how to compile Qemu and get it working with NeXTSTEP, back on BSDnexus. I’m so glad I took the time so long ago to not only write it down, and add screenshots, but also tag the version numbers. Software drift, especially free software can be so difficult to pin down, and it’s nice to be able to return to a known good value. I went ahead and placed the recreated toolchain over on archive.org.
Rhapsody is a weird OS, in that NeXT had kind of given up on the OS market after their NeXT RISC Workstation had basically died with the 88k, and even their early abandoned PowerPC 601 aka MC98000/98601 port. Apple had left a few of the changelogs, in the source code. It’s very interesting stuff! I guess to go off on my own tangent NeXT was just too early, the cube with it’s Unix & magnetic optical media and great audio DSP capabilities was just too ahead of the curve. What the cube couldn’t pull off in 1988, the iMac and OS X sure did in 2001.
I also added UDP support to this Qemu so I could use the HecnetNT bridge trick giving me the ability to telnet/ftp into the VM greatly reducing my pain. Back in the day I had used NFS and the network slirp redirection. But I like having direct access so much more!
Rhapsody throws up yet another fun ‘road block’ in that the mouse buttons map backwards for some reason. It’s a trivial fix in the source code, but I made it a runtime option in case I needed or wanted to run NeXTSTEP. And it was a good thing, as I did need to find the NXLock.h file for building one part of Darwin.
When building Darwin, I started with the last x86 version of NeXTSTEP that was available, and that was Apple ”Rhapsody” / Titan1U x86 Developer Release 2. My thinking at the time and still is that the closer you can get your build to whatever they were using as ‘current’ the easier this will be.
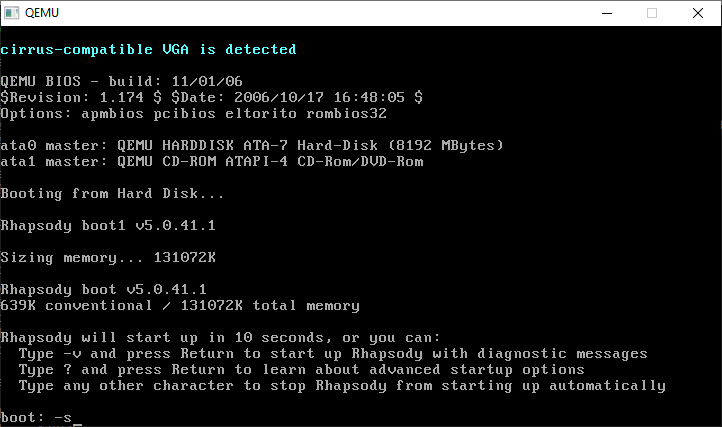
Rhapsody can support an 8GB disk, so let’s go with that. This always has an issue with people that try much larger, and just fail, so for my sake and yours let’s just go with 8.
You may be wondering, why only use 128MB of RAM? Well there is a bug in the shipping Rhapsody kernel that prevents booting on machines with more than 192? MB of RAM. Naturally, once we are to the point of building our own kernels this won’t be a problem but for now we are limited.
The bootloader will give us a few seconds to do anything fancy, I just hit -v so I always have the verbose boot.
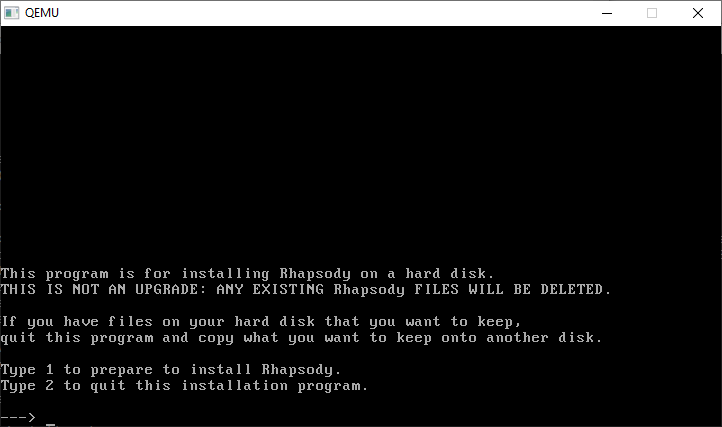
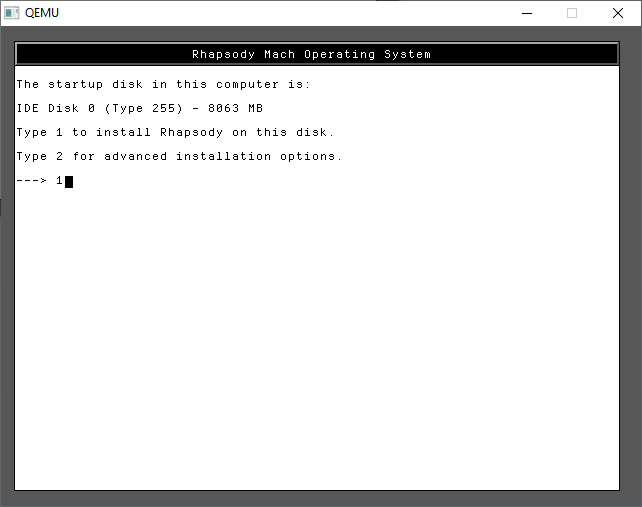
From here it’s just a few options to go thru the installer
And a disk change is required
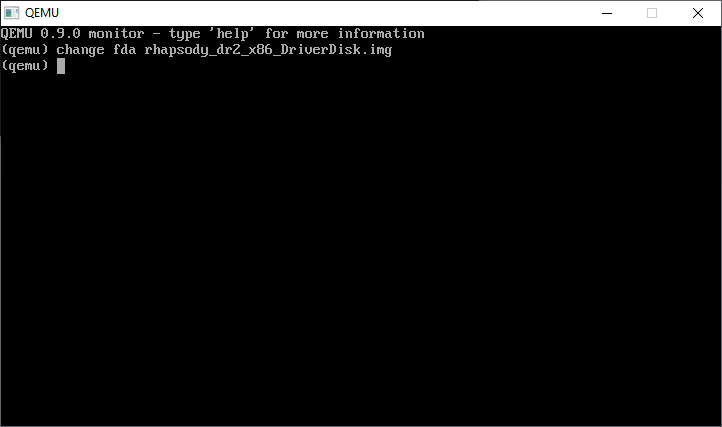
CONTROL+ALT+2 will bring up the monitor prompt, where we can change the disk
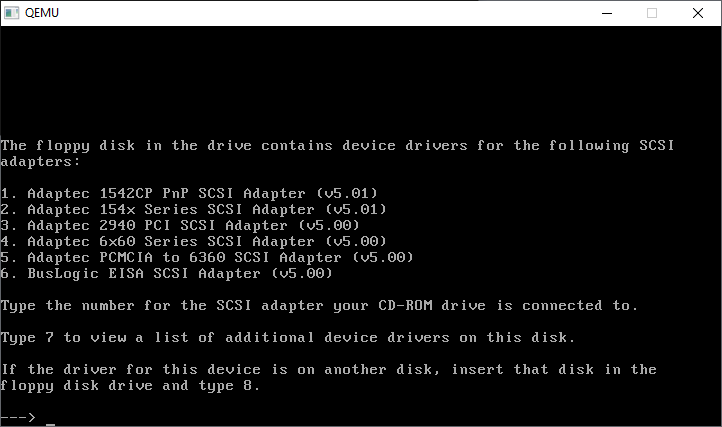
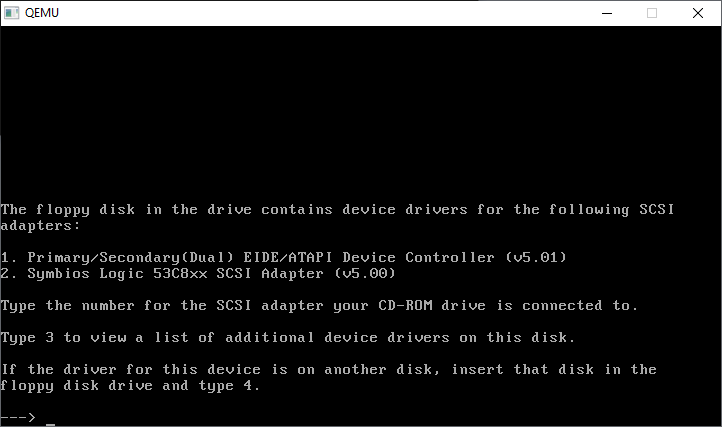
CONTROL+ALT+1 will return us to the console. Now we have to go through all the SCSI cards, and kind of compatible IDE cards
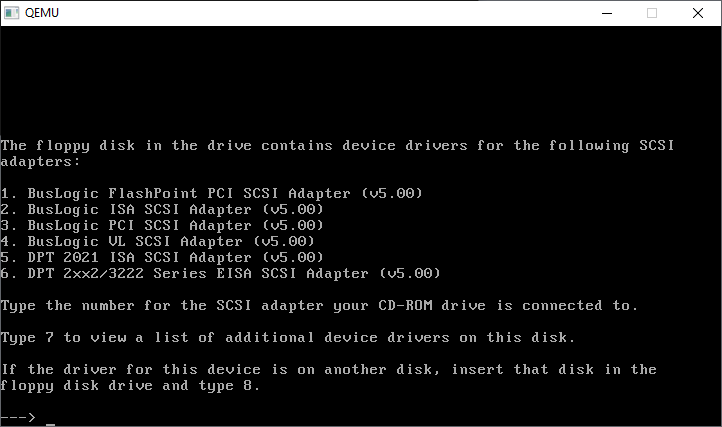
Further..
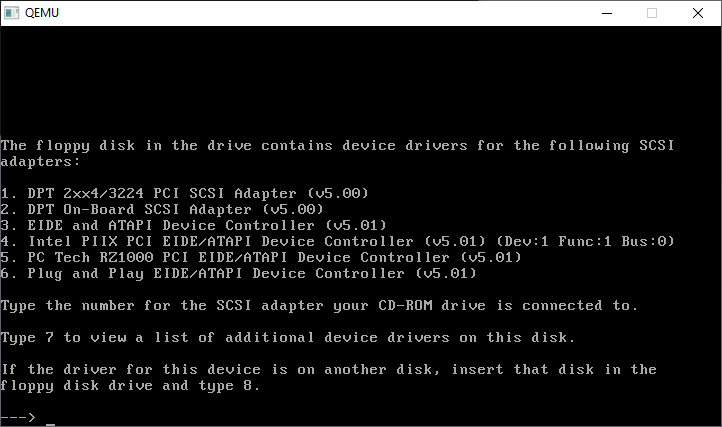
Further still…
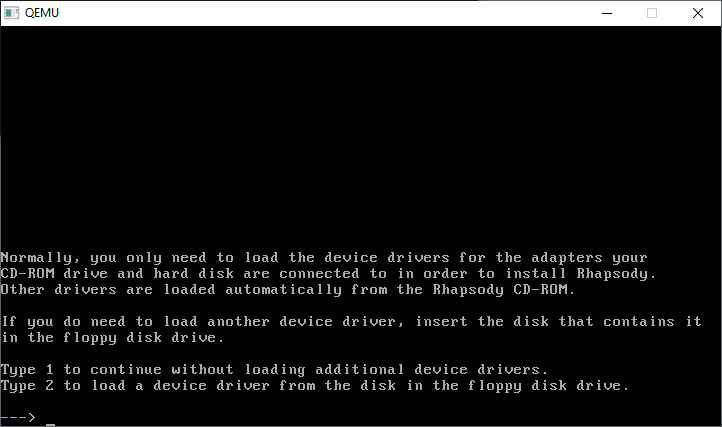
And how select the Primary/Secondary(DUAL) EIDE/ATAPI Device Controller (v5.01)
We only need the one driver, so we’re good to go!
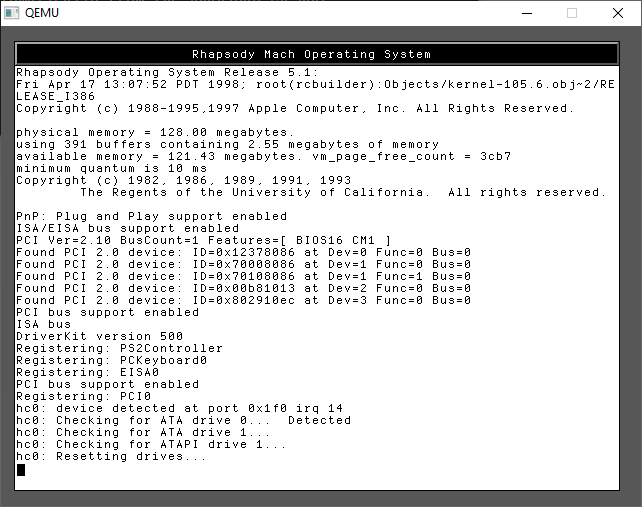
Continuing onwards will now start the kernel, along with a change to graphical mode. Just like a NeXT!
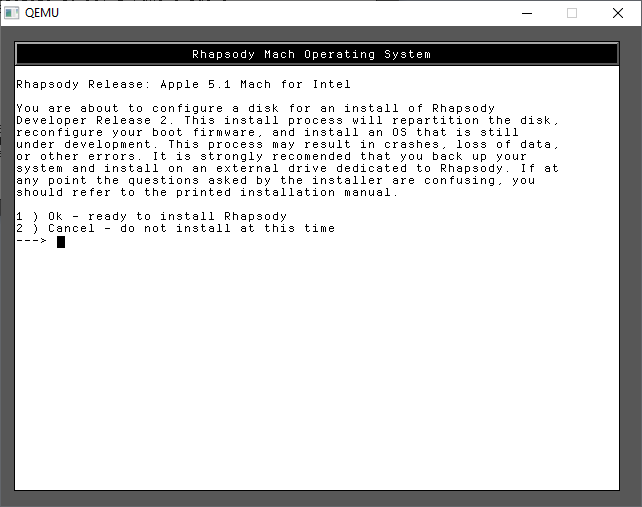
Now we can confirm again we want to install
As you can see there is our hard disk!
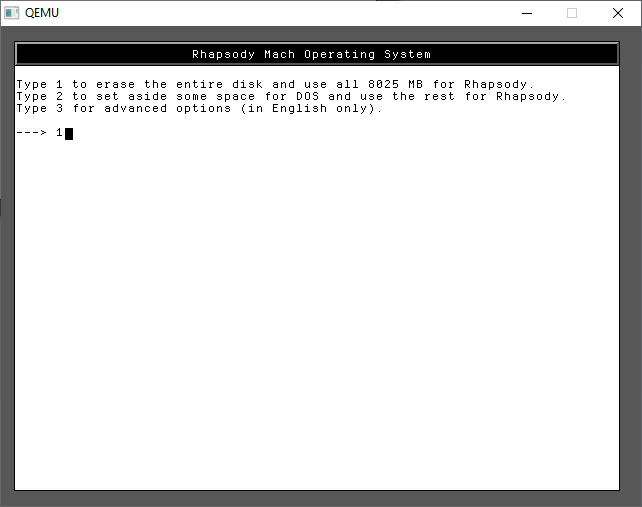
In the future we don’t need to dual boot so, just give it the entire disk.
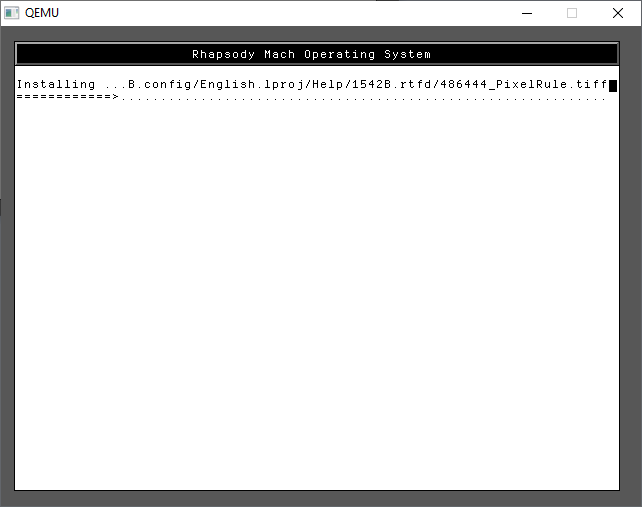
A few more 1’s and we are finally installing!
Trust me it’s fast on Qemu!
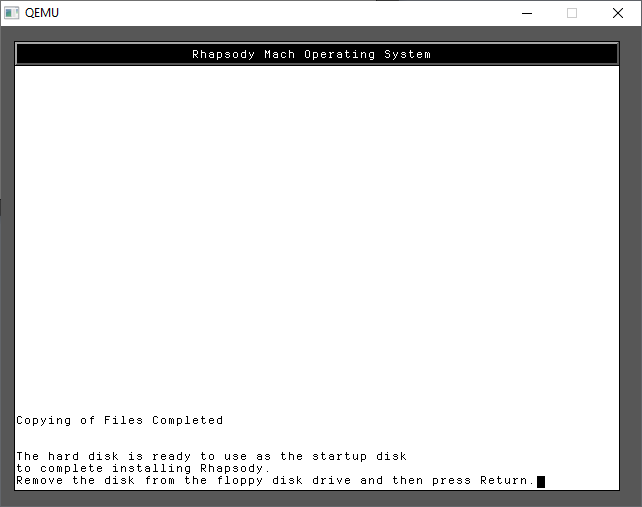
And just like that, we’ve completed the first part of the install.
You can use CONTROL+ALT+2 to toggle back to the monitor and type in
eject fda
to eject the floppy, then it’s CONTROL+ALT+1 to return to the display and have it reboot. Qemu won’t try to boot to the hard disk, and with no disk in the drive, it’ll hang at the BIOS. Now is a good time to close Qemu and backup the hard disk. Mostly because I hate repeating this stuff.
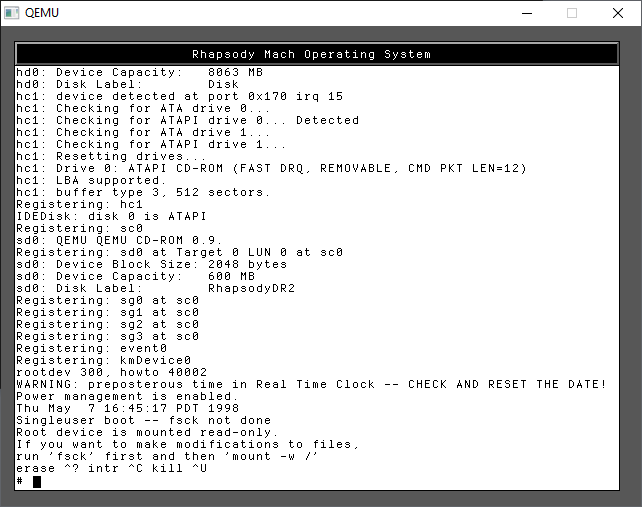
Type in -s for SINGLE USER MODE. This is where a lot of Unix problems got solved in the old days
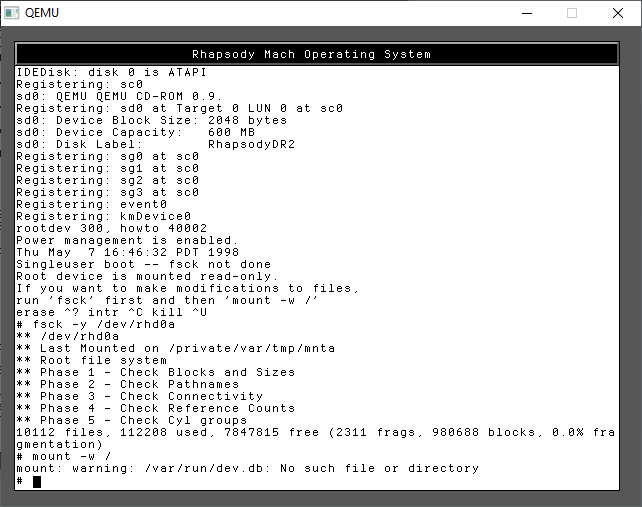
It’s a little tricky as this does involve typing. As instructed we need to check the hard disk prior to mounting it read/write
run the commands:
fsck -y /dev/rhd0a
mount -w /
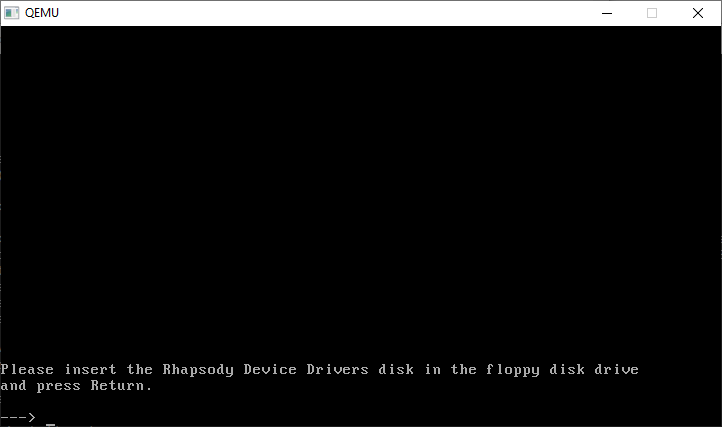
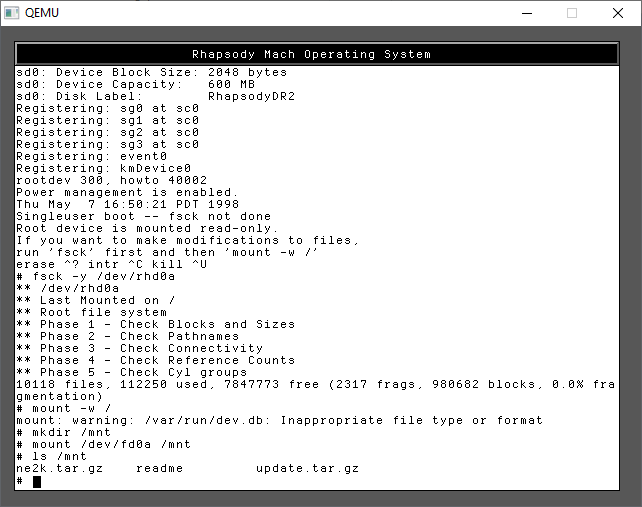
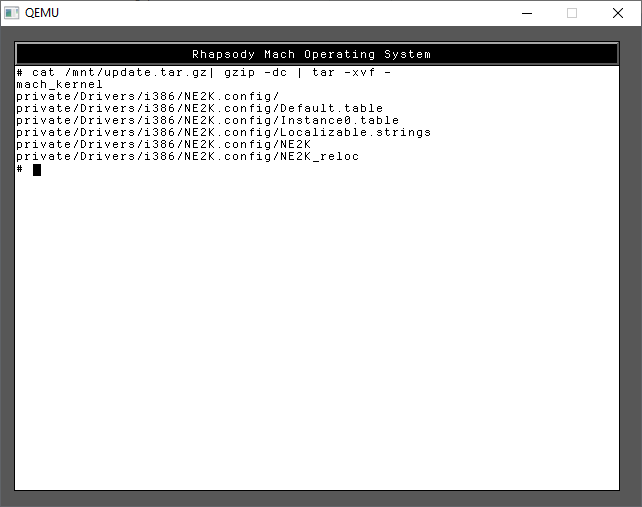
Now we can mount the floppy disk
mkdir /mnt
mount /dev/fd0a /mnt
ls /mnt
I’ve included both the kernel & NE2000 driver in one file, and JUST the NE2000 driver in the other. For my sake I use the first one, update.tar.gz as I wanted to use the newer kernel ASAP. tar -zxvf didn’t want to run, so I did a rather awkward version to achieve the same thing.
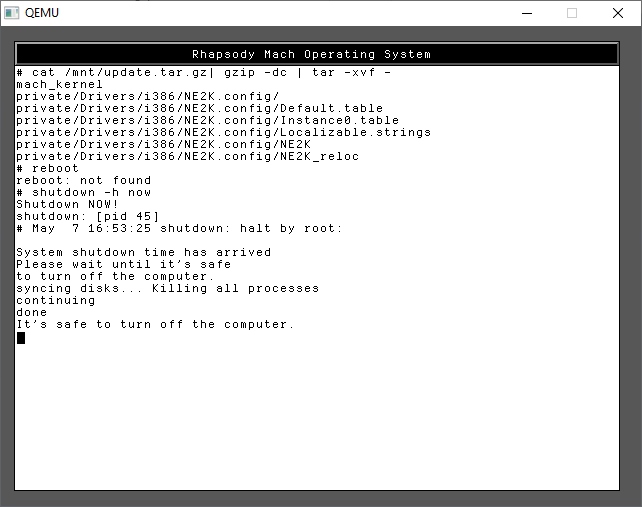
cat /mnt/update.tar.gz | gzip -dc | tar -xvf -
With the files in place, you can now shut down the system with a simple
shutdown -h now
Once more again, I’d shut down the emulator, and backup the hard disk. If anything goes wrong you can restore your backups at any phase, at least saving some time!
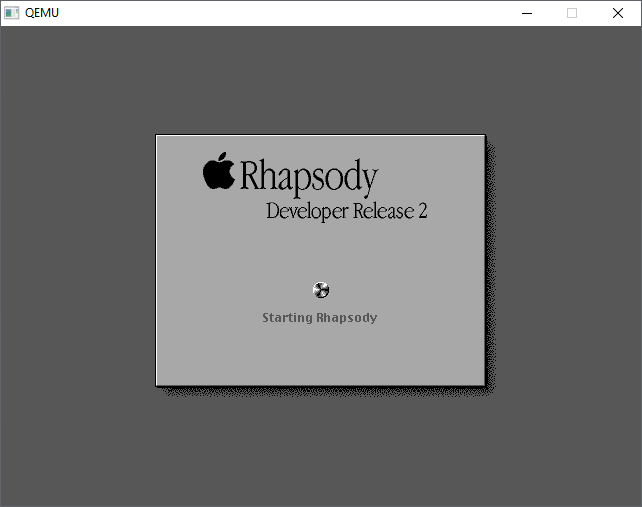
Next is the graphical install. In this case I use the hecnet bridge to give full access, you can setup with the slirp driver with a simple “-net user” but it doesn’t matter at the moment Since I opted for the newer kernel, I can take advantage of the 512MB RAM.
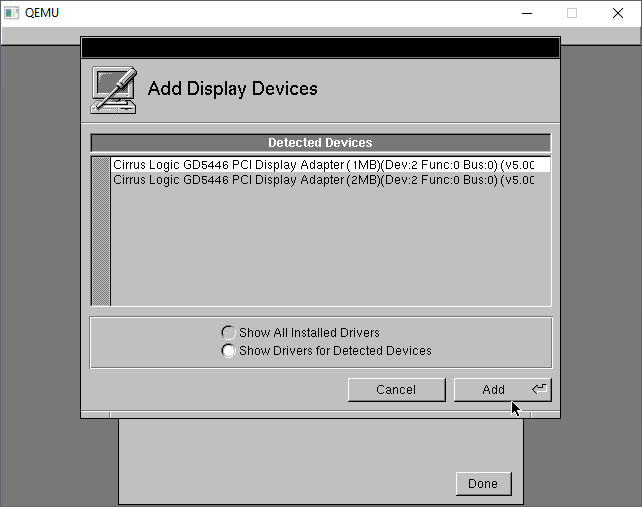
Now we have to setup the hardware. It should be somewhat straight forward, first we start with the monitor. The mouse should be working although I find that I have to move slowly. Sorry it tracks weird on real hardware too.
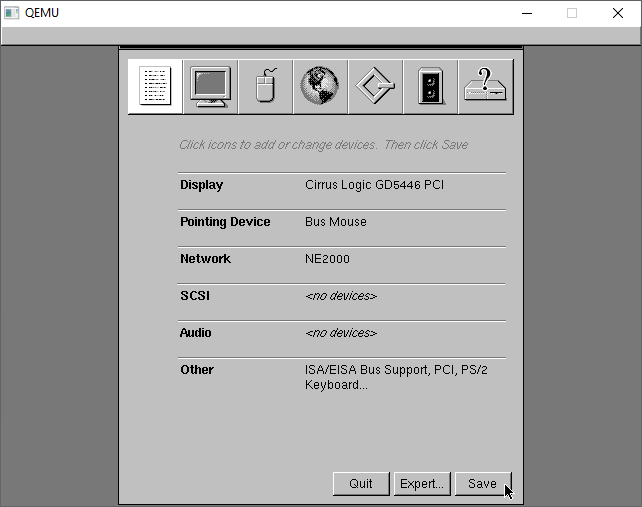
The Cirrus Logic GD5446 should be detected automatically, I just go with the default 1MB
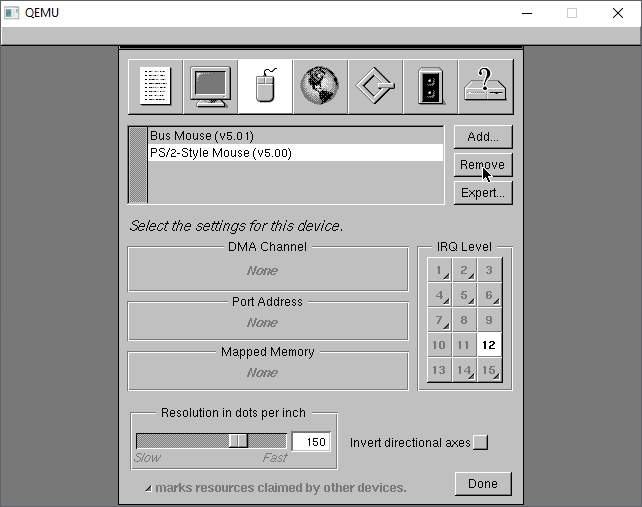
Next under the mice, select the PS/2 mouse and remove it
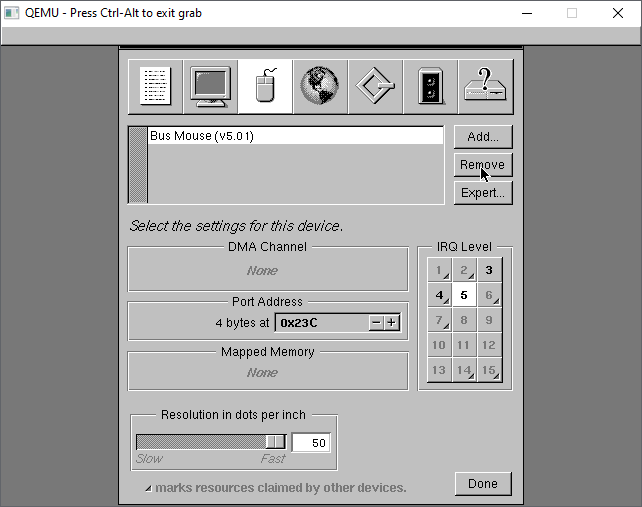
This leaves us with the Bus Mouse driver.
Under the network tab, the NE2000 should be automatically detected.
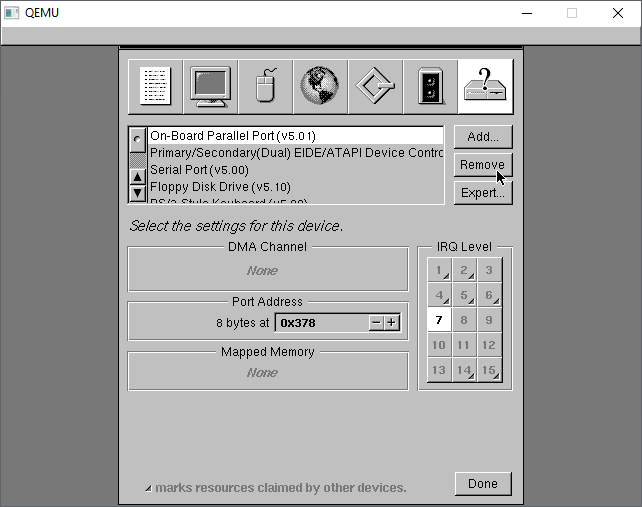
On the last tab, I make a habit of removing the Parallel port freeing IRQ 7, in case I wanted it for something else.
Back to the summary, we now have Cirrus Logic video, NE2k networking, with no SCSI, no Audio.
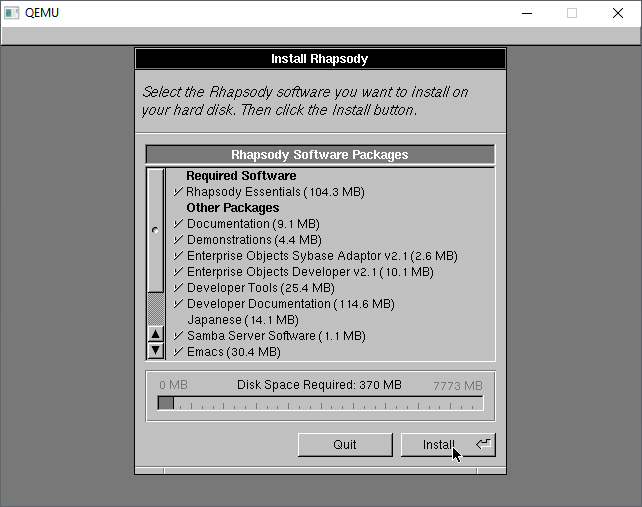
With the config saved, now we can just install as is. I un-installed Japanese, but it doesn’t matter. You absolutely need the Development Tools, so may as well go with eveything.
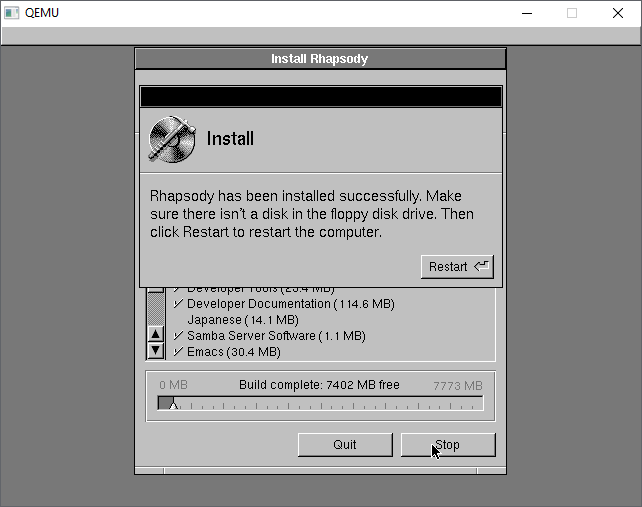
The installation only takes a few minutes and we are ready to reboot
The kernel will now shut down.
Once more again this is a great time to make another backup of the hard disk. At this point this is a great backup to save, as we’ve installed the OS, and selected drivers, in the next reboot we’ll be personalizing the operating system.
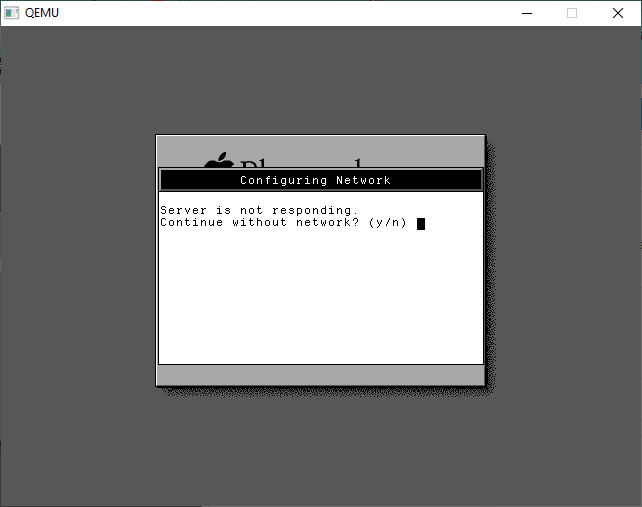
We can re-run the last config once the disk has been saved. We’ll be greeted with a message that the Server isn’t responding. Answer YES to continue without networking.
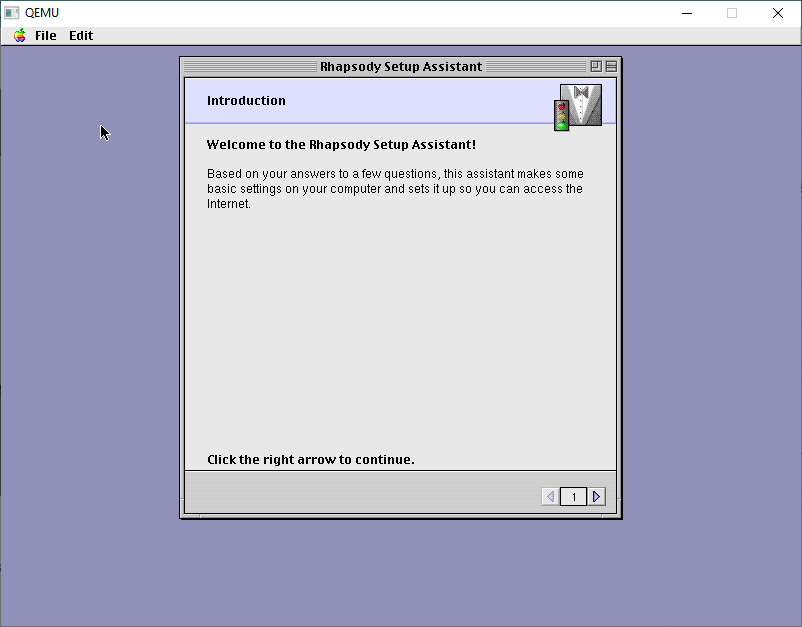
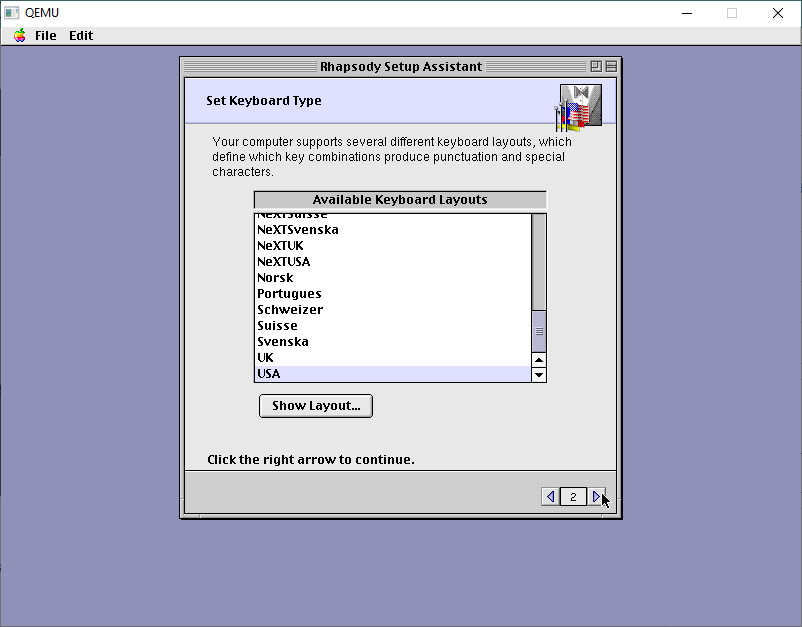
From here we are in the Setup Assistant, taking a nod from MacOS 8
I use USA keyboards. The best keyboards! I touch type so I don’t have to deal with weird layouts.
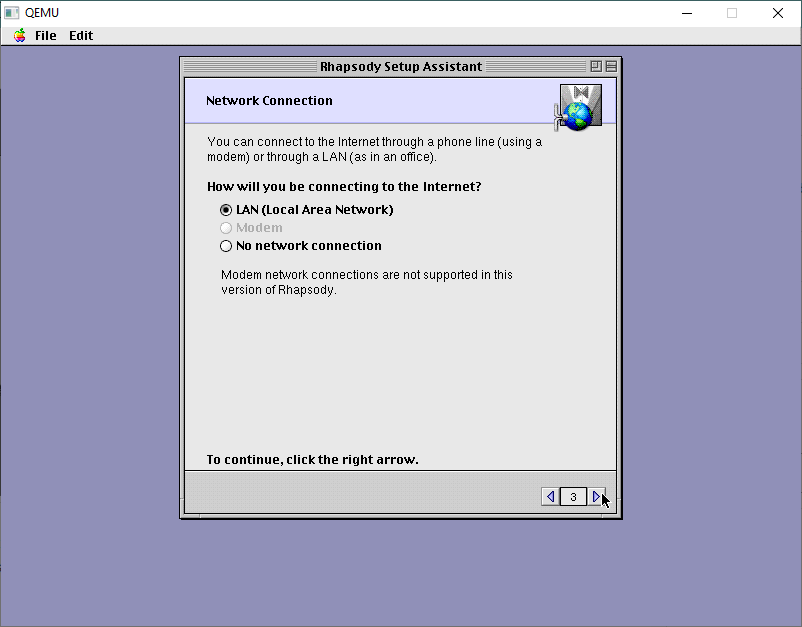
Specify for a LAN connection
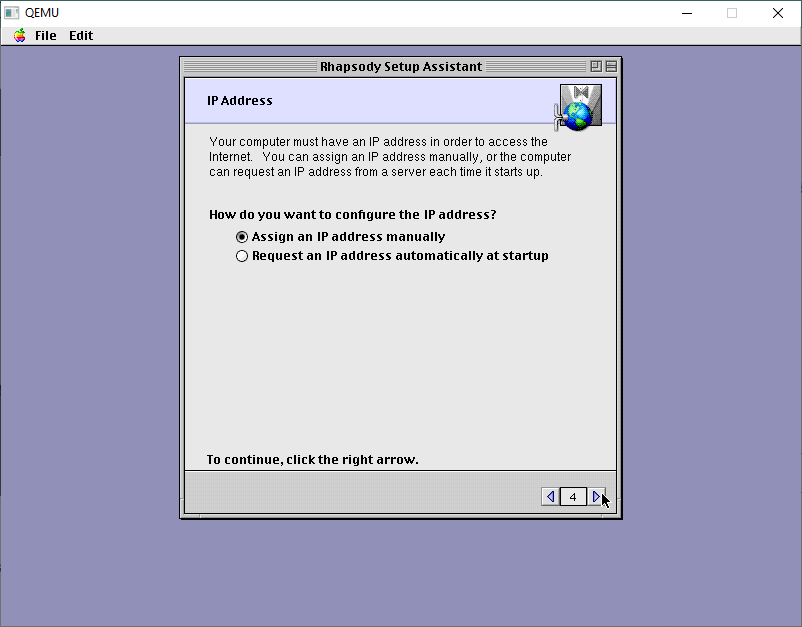
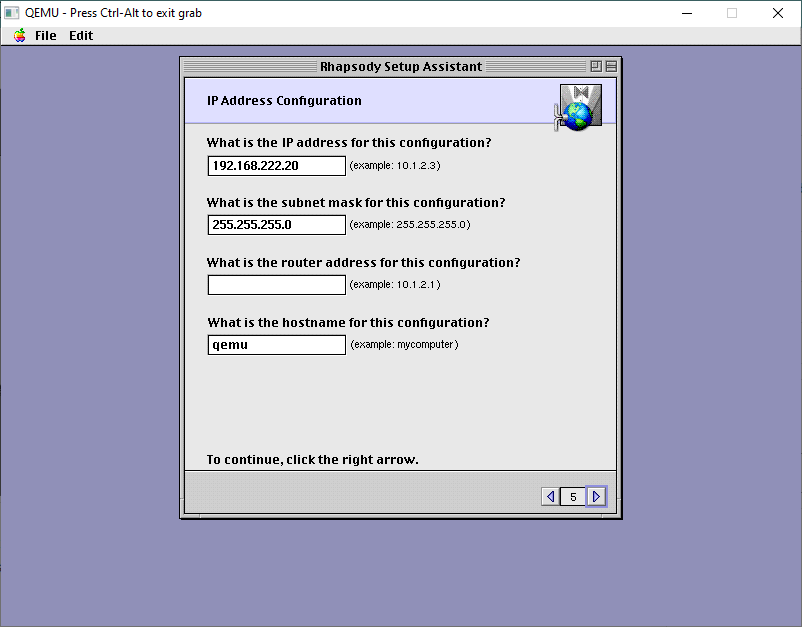
There is no DHCP support so specify a manual IP address.
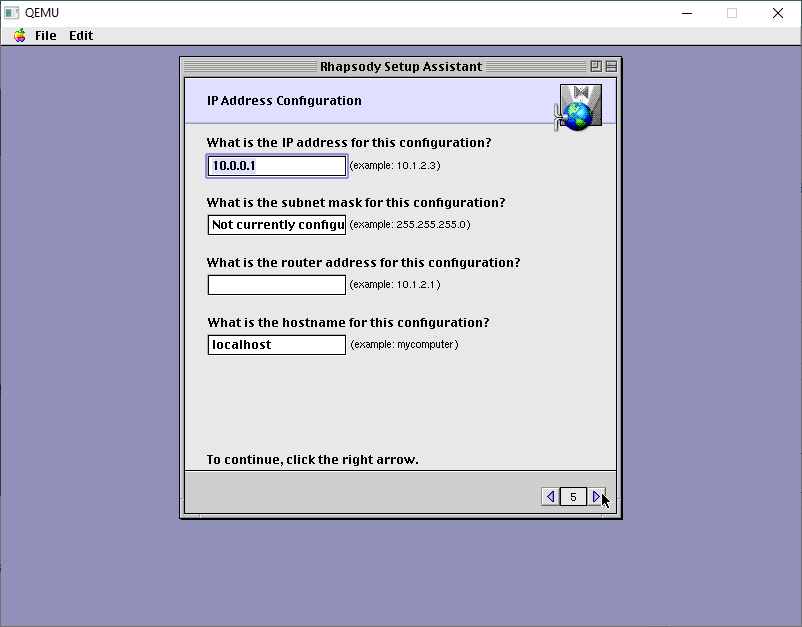
The default stuff is just wrong.
On my LAN this is good enough. DONT add a router. It’ll just confuse it.
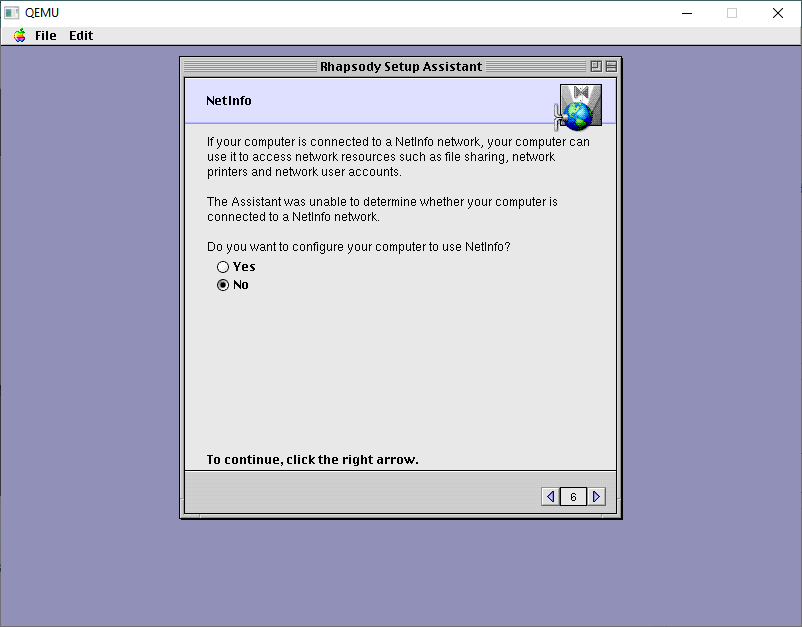
We don’t have or want NetInfo. This would be the server to give out IP addresses, and authentication. We don’t need it!
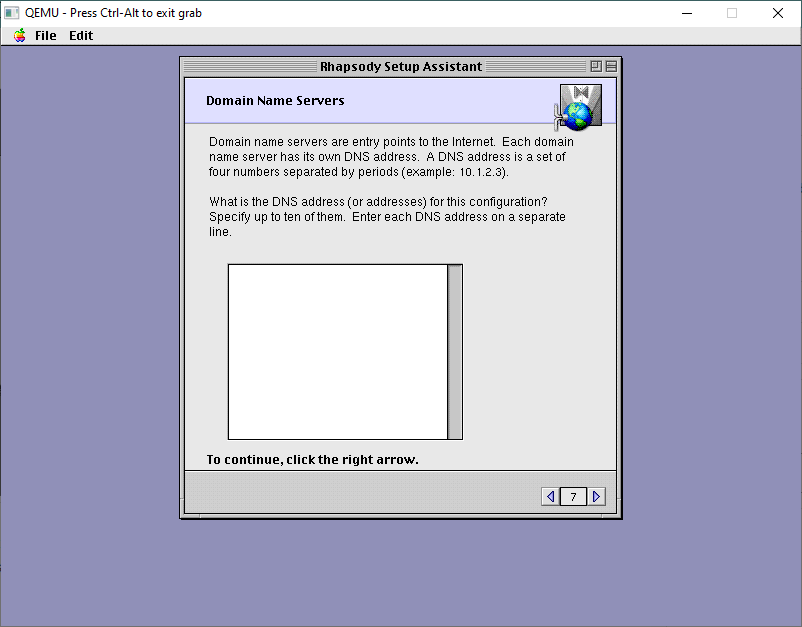
Leave the DNS servers blank
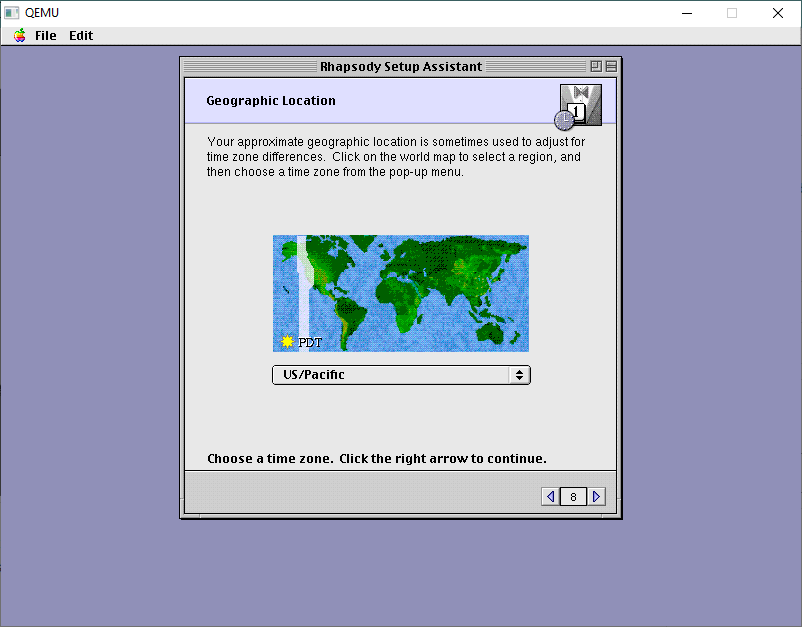
You can setup any location, it doesn’t matter.
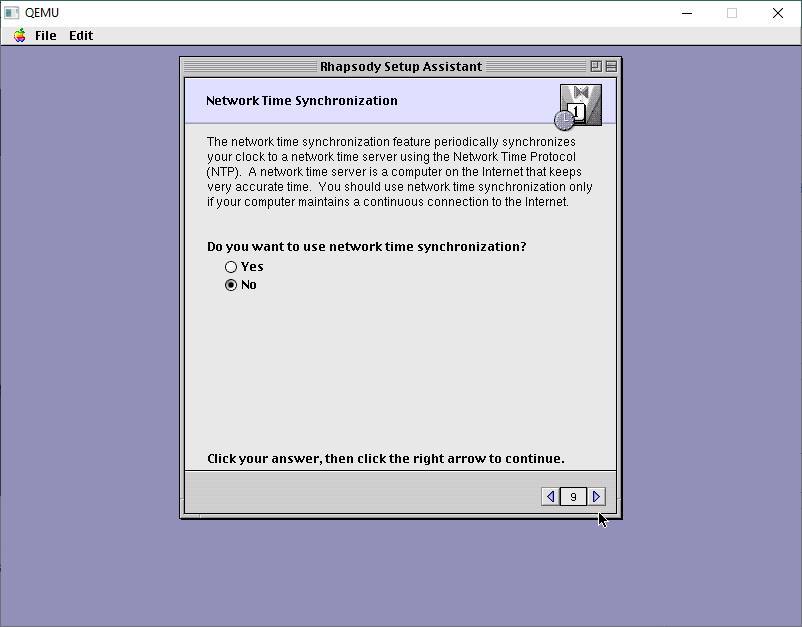
Likewise, with NTP, turn it off.
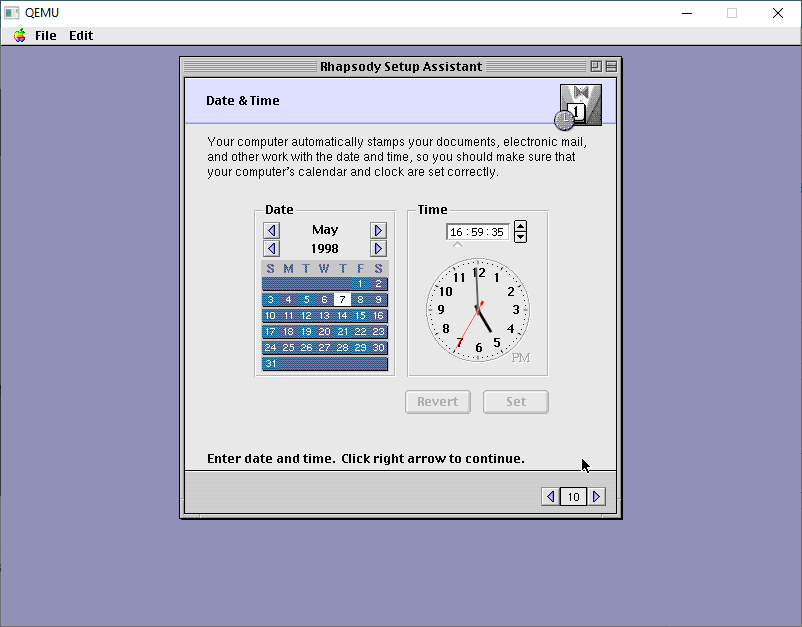
We will then get the option to set the date/time manually. The default time is far too old and it’ll break stuff.
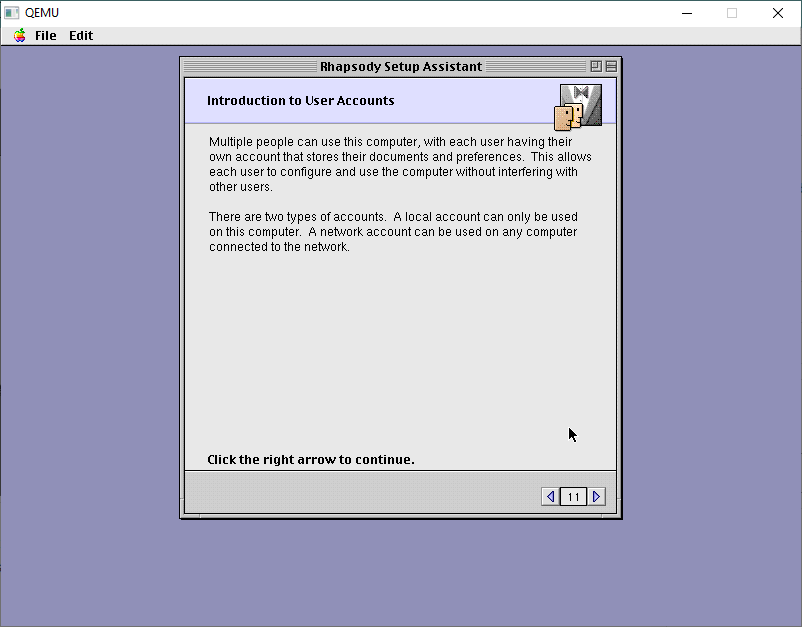
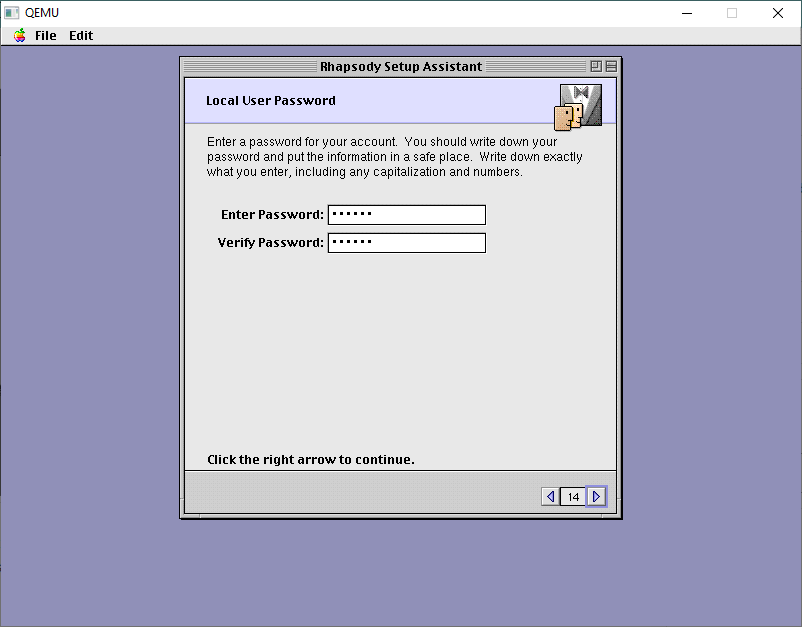
Next up is user accounts.
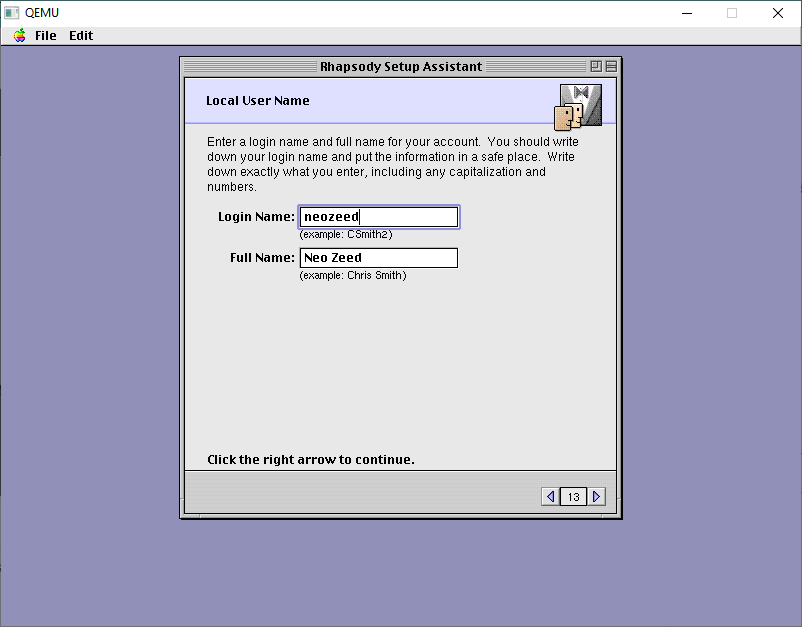
I always make local accounts.
Come up with some creative name
and a password
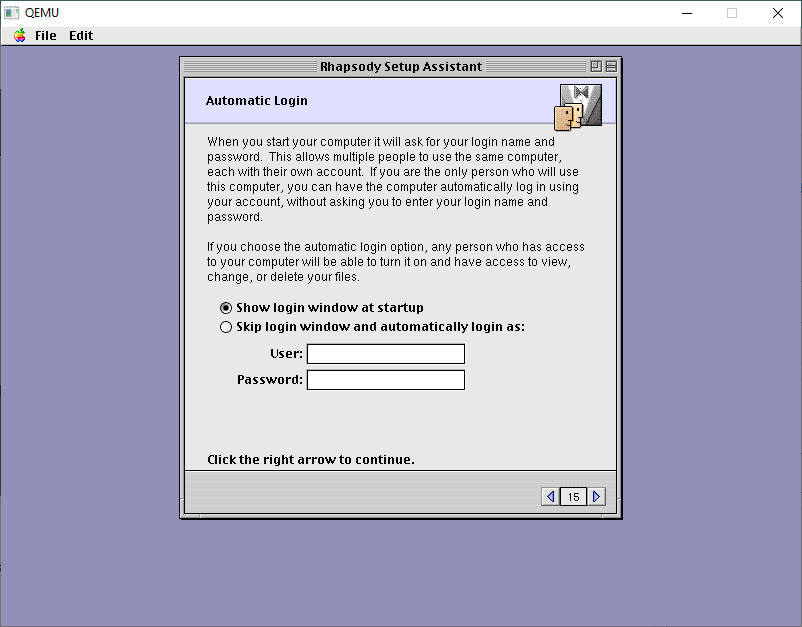
I don’t have it doing any automatic login. You can if you want, it’s all up to you, this one doesn’t matter.
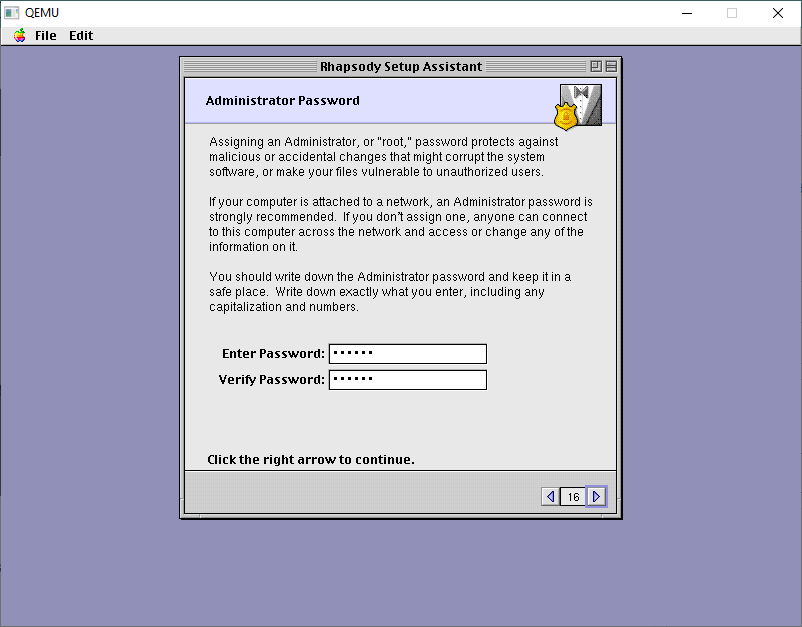
Next is an Administrator password
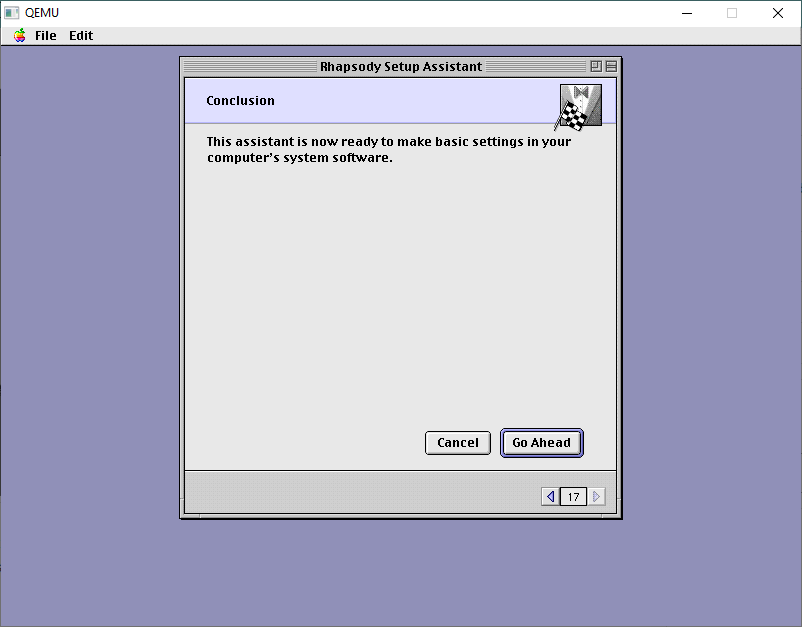
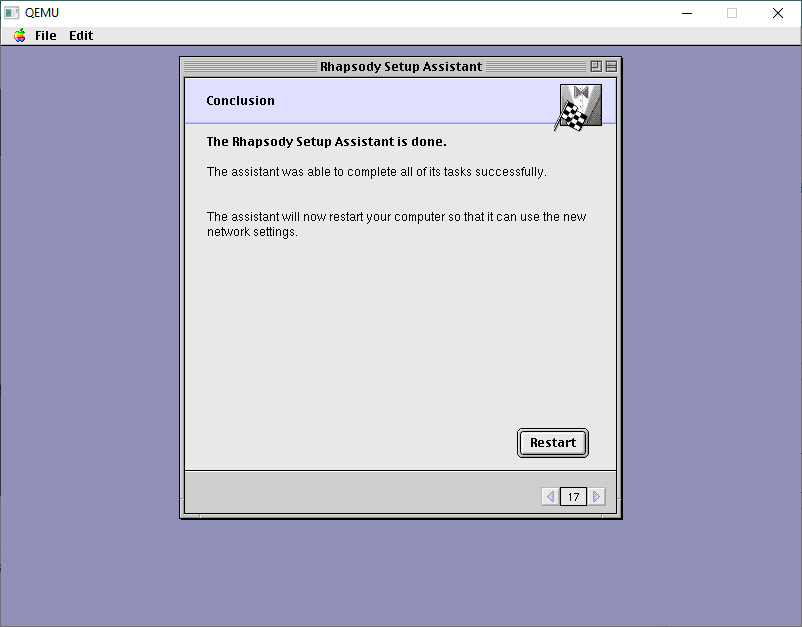
And now we can apply our changes.
It takes seconds!
And now we’ere done. You may want yet another backup as this is tedious!
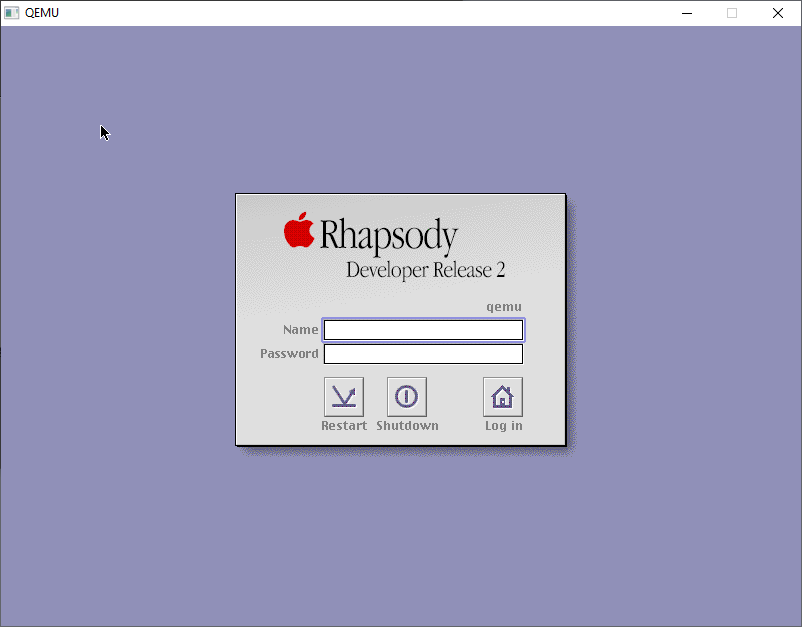
With the final configured backup in hand, now we can boot back one more time, and now we’re in SVGA mode!
Rhapsody DR2 Login Screen
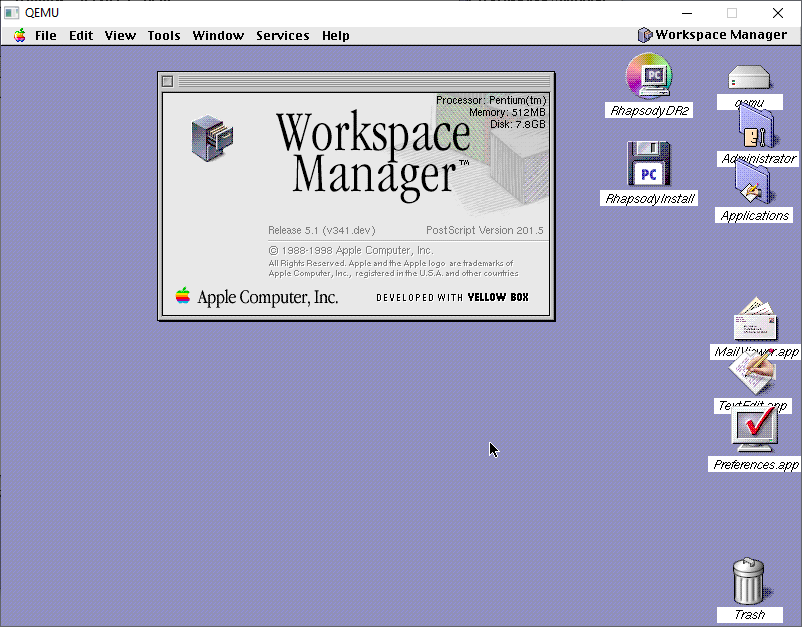
Logging in as root will give me the desktop
Desktop
And there we are, all installed.
For anyone brave enough to have read all of this, but wants the quick and easy version, it’s up on archive.org!
In part two I’ll pick up with the source CD-ROM I’ve prepared, so we can start compiling Darwin!
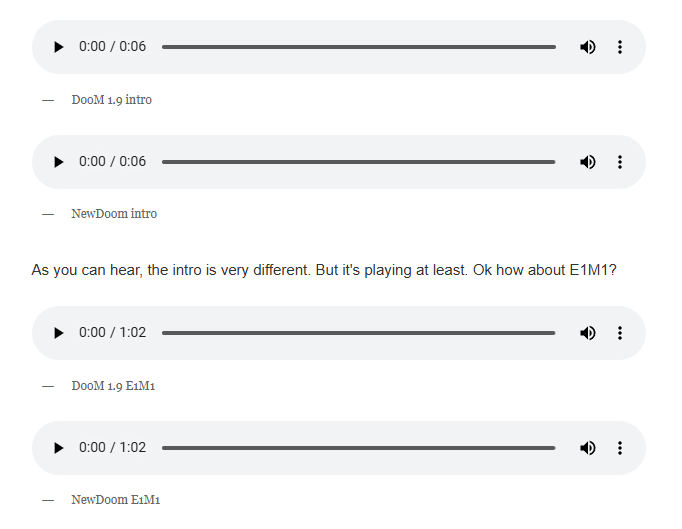
DoomNew, is a rather ambitious project by Maraakate, to attempt to revert the old linuxdoom-1.10 to something more akin to what shipped for DooM 1.9 using Hexen/Heretic source code to fill in many of the blanks in a very Jurassic Park like manipulation of it’s DNA (source code). It’s great and gives you a very cool MS-DOS based engine using the original Watcom tools. But there is always the one catch, which is that it relies on the original sound library, DMX.
And unfortunately, nobody has been able to get ahold of Paul Radek to see if he’d be okay with any kind of open-source license. So, sadly DMX has been a long-standing stumbling block for that ‘authentic’ super vanilla DOS DooM.
Enter the Raptor
Raptor: Call of the Shadows
Fast forward to a few days ago, and I come across dosraptor on github. I had a copy of this back in the day, it was bundled on CD-ROM or something. I am absolutely terrible at games like this, but I did remember this one being incredibly fluid, and fun despite me having no skill. Raptor was written by Scott Host, and it’s still on sale over on steam! The source had been cleaned up with help from skynettx, nukeykt and NY00123.
I went ahead and built it from source, and in no time I was up and running. I found Watcom 9.5 was the best path to go with. I even made a ‘release‘ for those who don’t want the joy of building from source, and of course picked up a copy on both steam and his site. While building the source code, and looking at the directory tree that’s when I noticed apodmx:
This is a DMX sound library wrapper, which is powered by the
Apogee Sound System, the latter being written by Jim Dose for
3D Realms. When used together, they form a replacement for DMX.

The DMX wrapper was written by Nuke.YKT for PCDoom, a DOS port
of id Software's Doom title from the 90s.

It also includes the mus2mid converter, contributed by Ben Ryves for
Simon Howard's Chocolate Doom port, as well as the PC Speaker frequency table, dumped by Gez from a DOOM2.EXE file and later also added to Chocolate Doom.

A few years later, this wrapper was modified by NY00123; Mostly to be built as a standalone library, while removing dependencies on game code.
So it turns out that Raptor used DMX, just like DooM!
Well, isn’t that incredible!
Now the first question I had, was apodmx a direct drop-in replacement for DMX? Well basically, yes! Let’s check out the Adlib driver!
I think I legit got DMCA’d over the DooM intro
The Apogee Sound System is softer, and not quite the same as DMX, but compared to nothing I’m more than happy with it. The AdLib is kind of a weird card to drive, and I guess it’s not to surprising that there is such a variance.
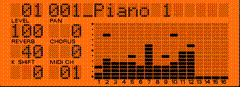
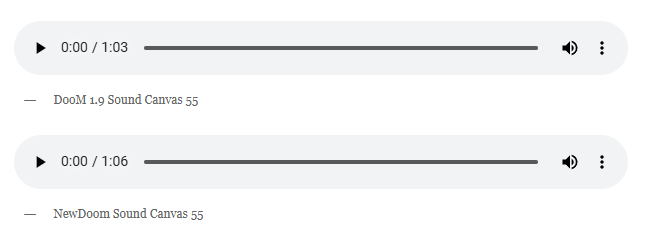
How about a Roland Sound Canvas?
Nuked-SC55: Roland SC-55 emulation
Sadly, mine is inaccessible, but thanks to nukeykt there is the Nuked-SC55: Roland SC-55 series emulation. I had to setup the MidiLoop as expected, and configure DosBox for the Loop and now I have a virtual Sound Canvas. So let’s see how the two engines deal with a common instrument!
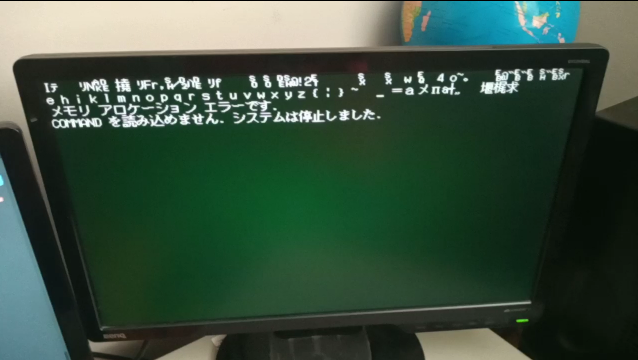
Sometime in June 2023, I came across a Twitter post by kuma_neko24 where he detailed his struggles in getting Policenauts to work on his PC-9821 V166. As I own the exact same machine, I figured I should give it a shot myself and report the results. Unfortunately, while I was experimenting, I had hit a strange situation where certain executable files would randomly corrupt themselves and become unusable:
I figured the game might’ve been the culprit, but after restoring the most recent backup, the same thing happened not long after, without even trying to play the game. I’ve done Memtests of the SDRAM, as well as block level diagnosis of the CF card, and they were fine, so I attributed it to a corrupt filesystem.
I then restored a much older backup, and moved over all the known good files from the recent backup. Things seemed fine for a while, but then the exact same situation happened again. I decided to look into the issue in more detail, and I’ve noticed that affected files like WIN.COM and KRNL386.EXE were 3KB larger…. as we’ll see later, this should’ve been an immediate red flag, but I yet again brushed it off as a bad filesystem or CF card.
Fast forward to March 2024, and I got myself a set of new CompactFlash cards. I had once again restored the last known good backup, and for about a day everything seemed alright, until….
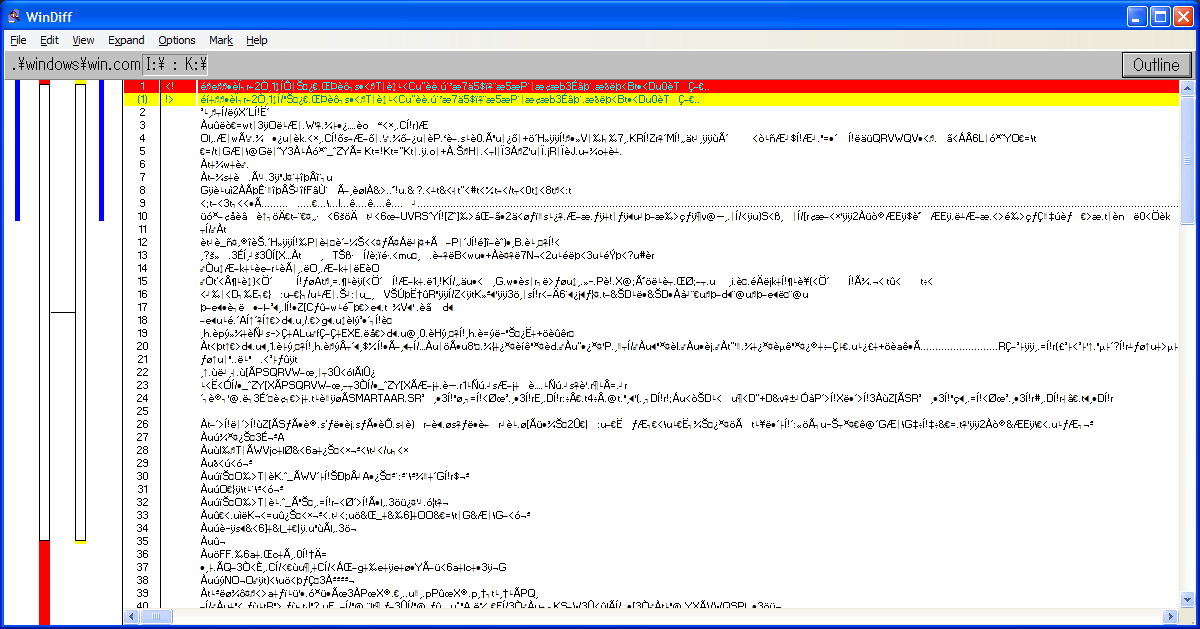
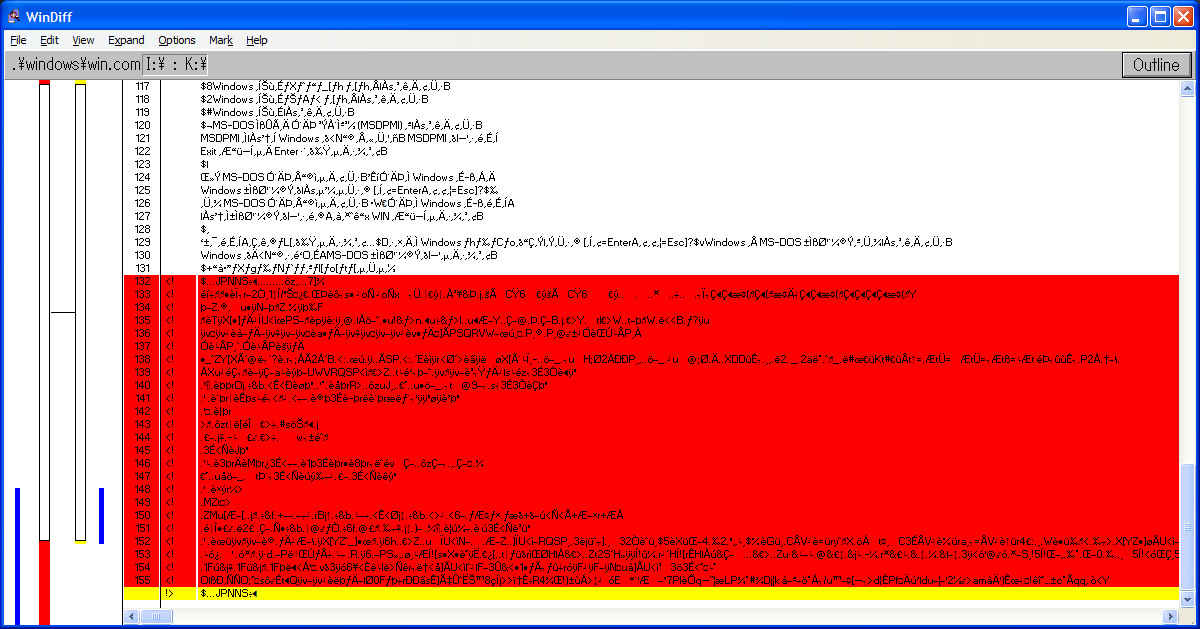
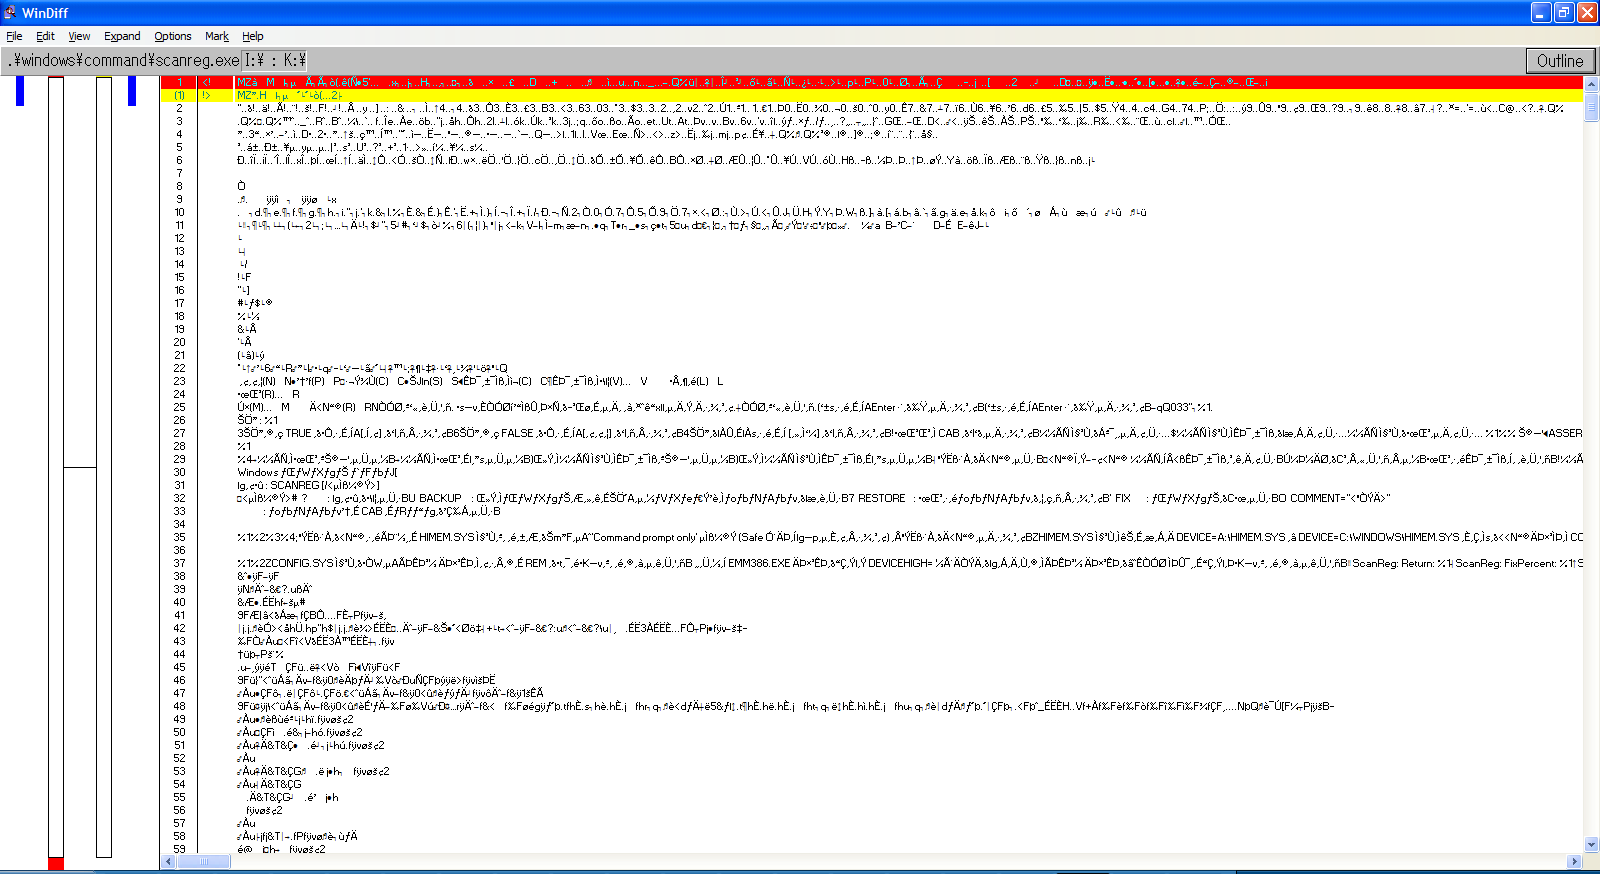
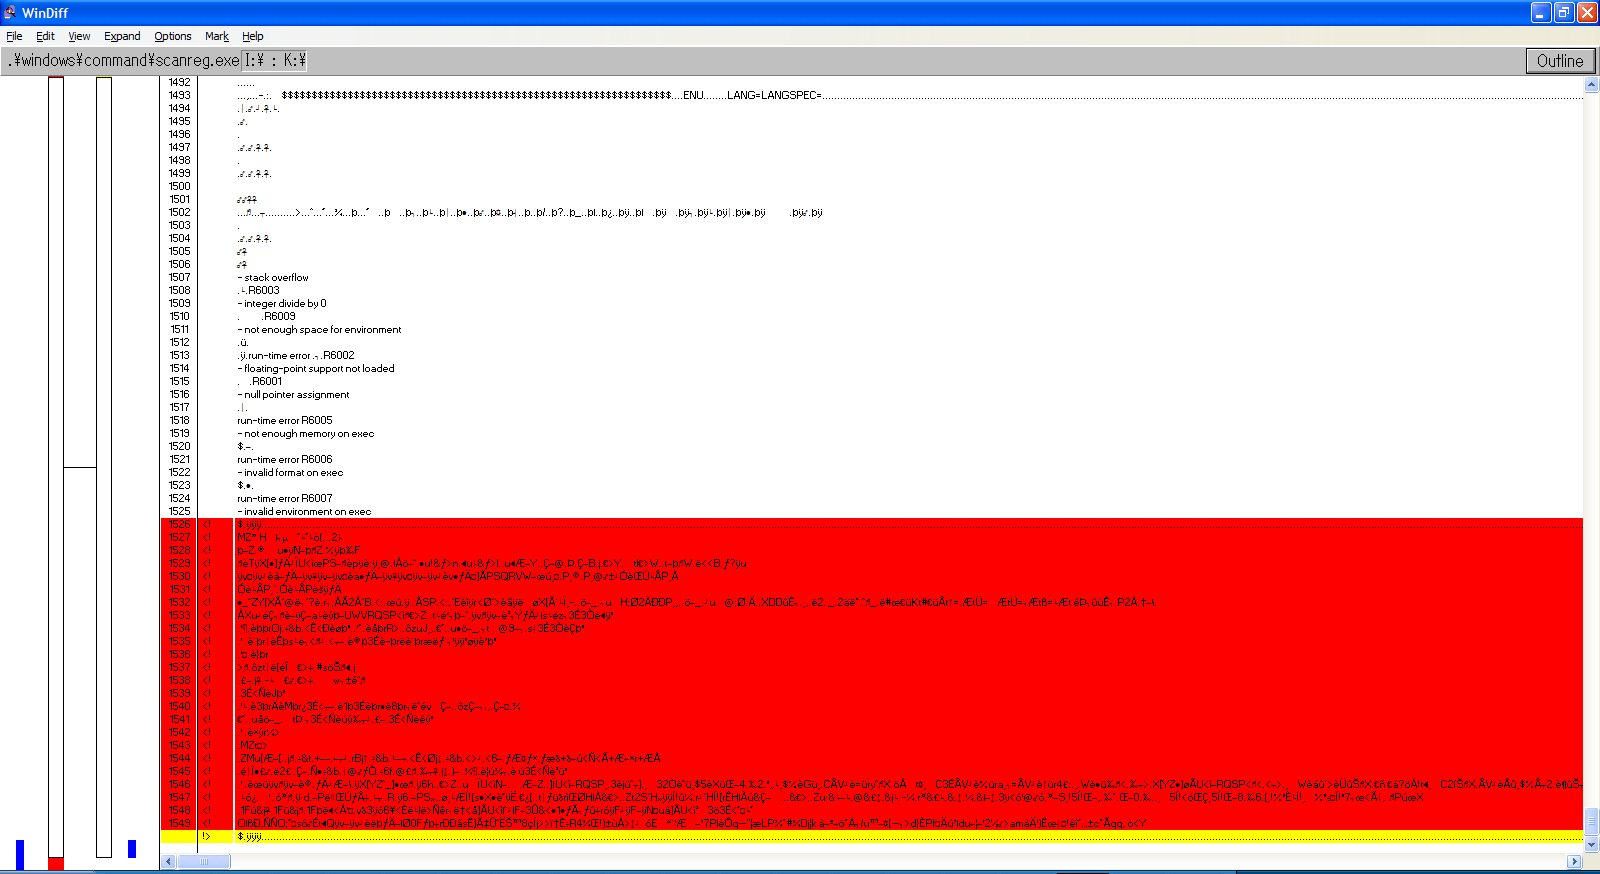
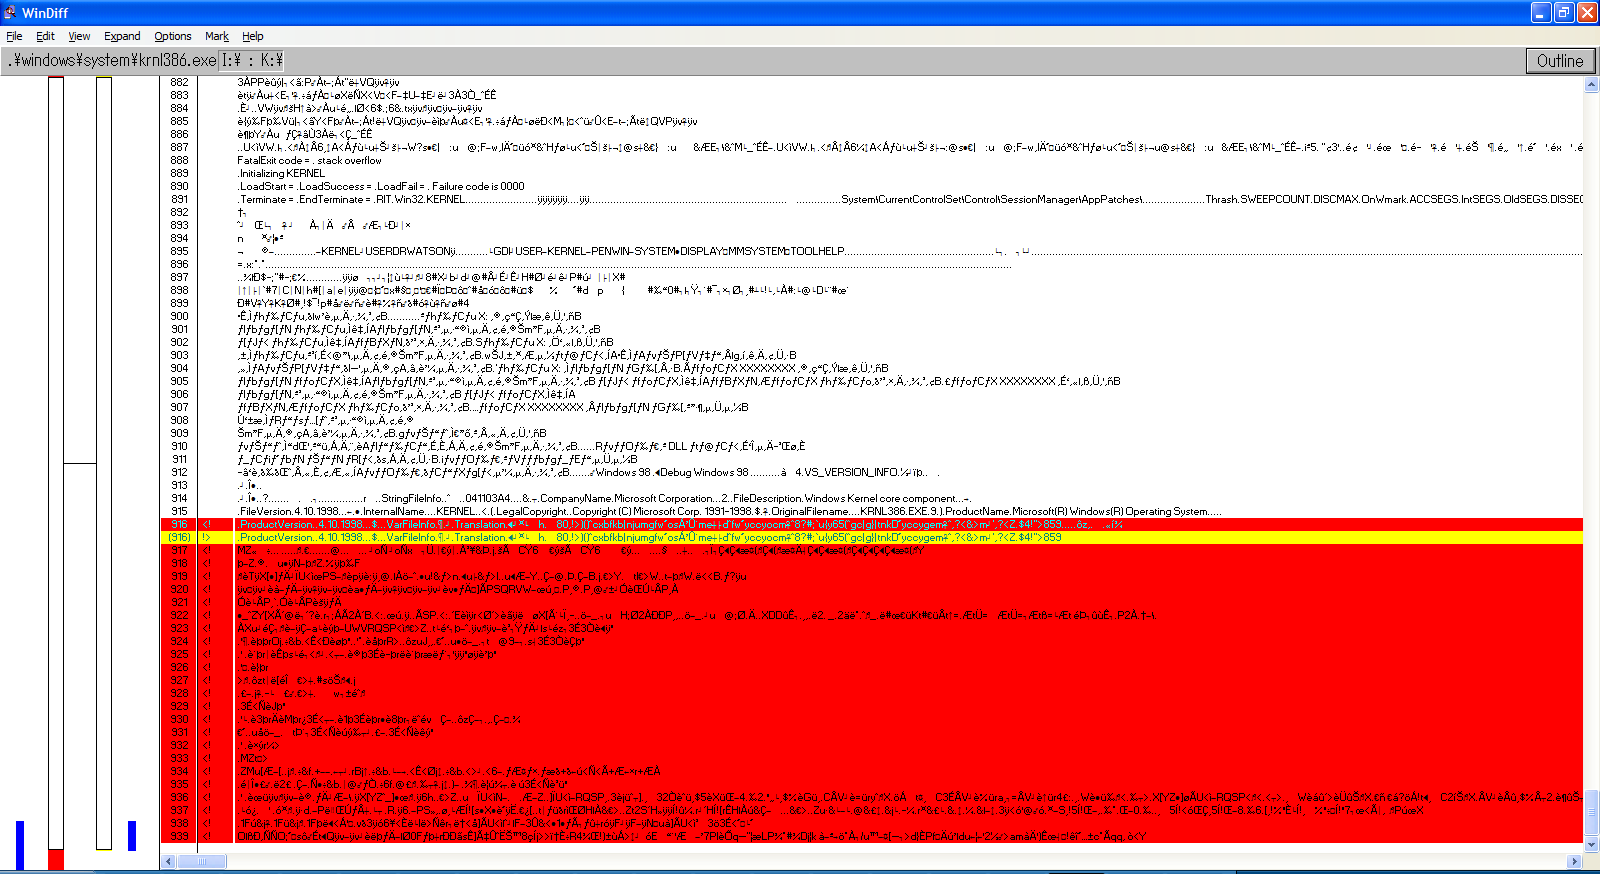
Needless to say, all my previous hypotheses turned out to be wrong. As such, I investigated yet again into the corrupted files, and used windiff to take a closer look into what actually changed. Let’s take a look at WIN.COM, SCANREG.EXE and KRNL386.EXE:
We can observe the following pattern:
The files always grow in size
windiff shows that the header is modified and that a bunch of garbage is added at EOF
It’s always the same exact garbage
Additional examinations show that MEM.EXE also has these modifications
MZ headers are present, so it’s certainly executable code
By every metric, this isn’t a set of accidental corruptions, these are deliberate infections.
I then proceeded to take a sample of the suspiciously added code, did a byte scan of every file on the card, and isolated the following programs as infected:
A:\WINDOWS\WIN.COM
A:\WINDOWS\COMMAND\MEM.EXE
A:\WINDOWS\COMMAND\SCANREG.EXE
A:\WINDOWS\SYSTEM\KRNL386.EXE
B:\RECYCLED\DB51.EXE
B:\WIN31\WIN.COM
B:\WIN31\SYSTEM\DOSX.EXE
B:\SBVGM\VGMPlay.exe
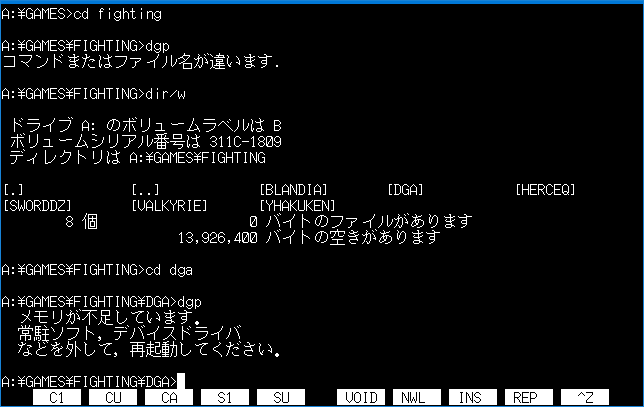
B:\GAMES\FIGHTING\DGA\DGP.EXE
Most of these are self-explanatory, apart from the last two. VGMPlay is a program by Scali that allows playback of OPN(A) and OPL3 VGM files even on PC-98s without a SoundBlaster 16/98. I know this program is not the culprit, since the original program I got is clean. DGP, on the other hand, is a different story, and it needs a bit of a foreword.
Duelists and queens!
DGP is a shorthand for “Duelist Gaiden Plus”, which refers to the game “Queen of Duelist Gaiden Alpha Plus”.
The original Queen of Duelist is a rubbish game not worth anybody’s time or any further mentions. Queen of Duelist Gaiden Alpha is the 1994 sequel, which is a significantly better game, and arguably one of the best fighters for any personal computer at the time, featuring:
10 fully voiced characters
Adjustable game speed
Dual PWM sampling over the integrated PC beeper speaker
Decent performance on a 286, and more
At the end of 1994, Agumix released an upgrade for the game called “Queen of Duelist Gaiden Alpha+”, which introduces some quality of life improvements. This update requires the original Gaiden Alpha to already be installed, although it doesn’t do any differential patching, it just replaces existing files with newer variants, and adds the DGP.EXE executable to be used instead of DGA.EXE. Shockingly, all of my older backups containing the patch, as well as the dump of the disk itself (available on Neo Kobe PC-9801) contain the suspicious code.
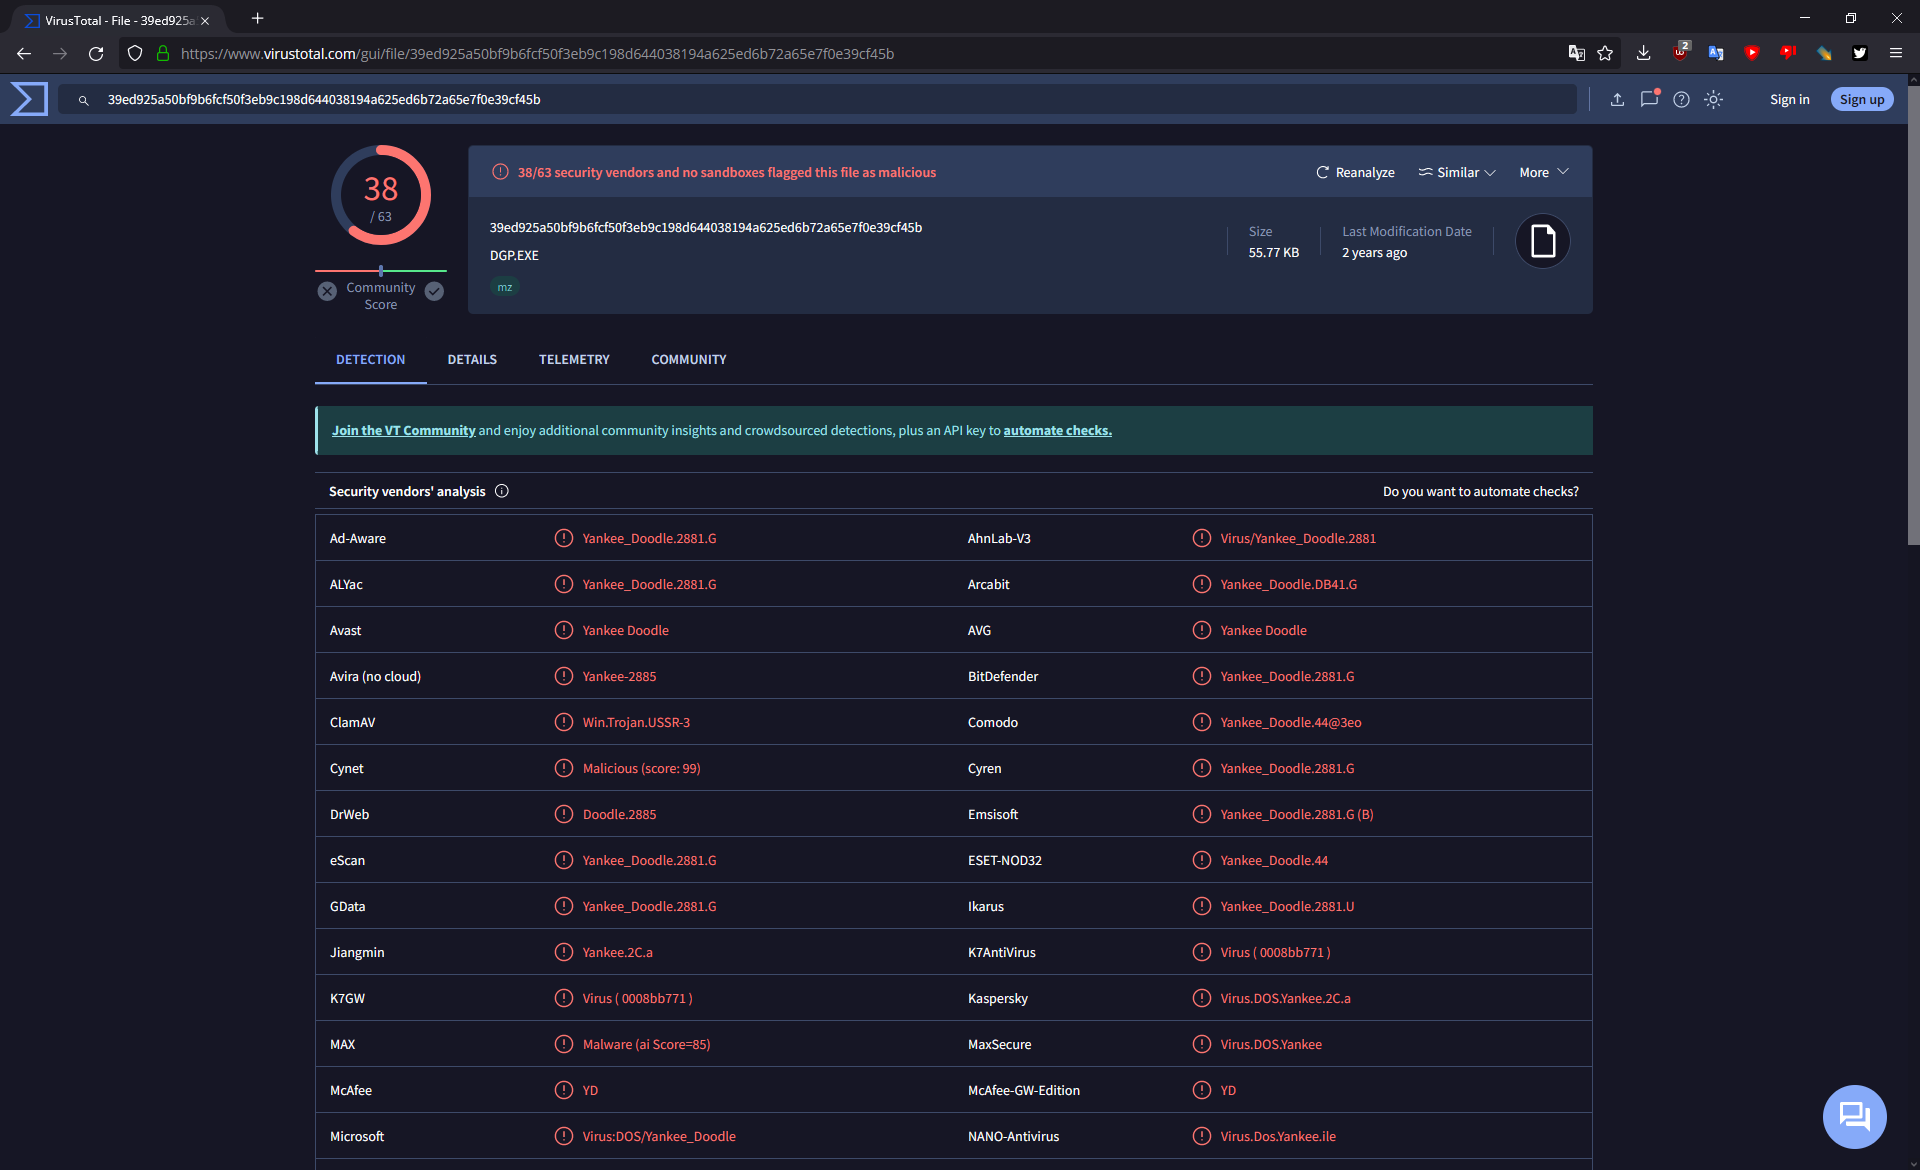
I didn’t expect it to return any results at first, but I uploaded DGP.EXE to VirusTotal for scanning, and well…
Who would’ve thought, the update was distributed with a copy of the Yankee Doodle virus embedded within!
Yankee Doodle is a very simple COM and EXE self-injecting virus from 1989. When executed, it resides in memory and infects COM and EXE files that use certain INT 21h DOS API calls, which include the files in the above list. It’s payload is normally supposed to play the Yankee Doodle tune through the PC speaker at 17h every day, but on PC-98 what it does instead is catastrophically fail and crash the entire system. It’s infection routines, however, do work.
A thing worth pointing out is that the infection routine is not automated. It will only engage when executing other programs from DOS manually. This should never be possible after starting the game, since there’s no way to return to the DOS command line without a full system reboot…
… unless you tried to start the game with not enough free memory, after which the game will dump you back to DOS. Pretty much every DOS user would, in situations like this, start MEM (preferrably with the /C and /P flags) to check what uses so much memory and how little remains free.
Sadly, for us, Yankee Doodle remains memory resident in this case, and it infects MEM as soon as it’s run, which explains how it got infected. Now every time you check your memory, the virus will be waiting to spread further.
Well, now what?
No known clean copy of the Plus version is known to be in circulation, and the only available source currently is the compromised disk image on Neo Kobe. Additionally, nobody knows if the game was originally distributed with the infection, or if the person sharing a dump of the game around through P2P back in the 1990s had infected his copy. As such, unless an original physical copy is found on auction, dumped, and confirmed clean, the only solution is to patch out the infectious payload from the game. Until then, do not play Queen of Duelist Gaiden Alpha Plus on your PC-98 machine!
EDIT 2024-03-31: Fortunately it appears that the “Alt 1” dump available on Neo Kobe has a clean copy of DGP.EXE. DrNyquist has also confirmed that this torrent also has a clean dump.
Conclusion: steer clear of the primary dump on Neo Kobe, use the others mentioned above.