or the Unbridled rage of living on the trailing edge.
I hosted a Porting Party last where where I setup my Dec Alpha as a terminal server allowing people from all over the world to connect in and cross compile software for the 64bit version of Windows for the Dec Alpha. While many problems were overcome, and many more remain, I have to say the most annoying thing was joining a domain hosted by a SAMBA server.
In my mind, I though the easiest way to get files in & out of the Alpha was not to use something like IIS/FTP where it would probably lead to end-less issues with text/binary/active/passive modes, but rather I should rent a VPS, install the OS default SAMBA and just map drives. The benefit of the VPS is that it has a public address, so no NAT is required. The VPS had an option for either CentOS (no) or Debian 10. I went with the Debian, and did an in place upgrade to 11, then 12. Nothing special.
I’d never actually used SAMBA as a domain controller before, but I thought this would be a fun experiment. So the idea is then that the VPS running SAMBA is the Domain Controller, and my Alpha joins it as a member server. Everyone else can use Windows or any SAMBA client and map drives, and then copy files to the VPS, and then copy back and forth from the Alpha to the VPS. This part worked fine.
What didn’t work was SAMBA version 4.
I had come up with this config, based on the fragments of the default config, and and hints from samba.org.
[global]
    netbios name = PDC
    passdb backend = tdbsam
    server max protocol = NT1
    username map = /usr/local/samba/etc/username.map
    workgroup = ALPHAPARTY
    server string = Samba Server
    security = user
    hosts allow = 127.0.0.1, <<<peoples networks...>>>
    load printers = yes
    log file = /usr/local/samba/var/log.%m
    max log size = 50
    passdb backend = tdbsam
    local master = yes
    os level = 33
    domain master = yes
    preferred master = yes
    domain logons = yes
    wins support = yes
    dns proxy = no
    add user script = /usr/sbin/useradd %u
    add group script = /usr/sbin/groupadd %g
    add machine script = /usr/sbin/adduser -n -g machines -c Machine -d /dev/null -s /bin/false %u
    delete user script = /usr/sbin/userdel %u
    delete user from group script = /usr/sbin/deluser %u %g
    delete group script = /usr/sbin/groupdel %g
[homes]
    comment = Home Directories
    browseable = no
    writable = yes
[printers]
    comment = All Printers
    path = /usr/spool/samba
    browseable = no
    guest ok = no
    writable = no
    printable = yes
[public]
    comment = share for everyone
    path = /public
    public = yes
    writable = yes
    printable = no
    creaet mask = 0777
I had endless issues with the machine account not being either created correctly or not being authenticated. I tried manually creating it, to no avail. No matter what I tried it didn’t work.
Working with NT 4.0 must be depreciated or something but no matter what I tried IT JUST DIDN’T WORK.
Feeling outraged, I purged the old Samba, downloaded the source code to 3.6.25, built that, and using the same configuration I had tried to put together, it just worked.
Creating both a Linux user & directory, and the SAMBA credentials. On the terminal server, all that remains was assigning a local home directory & profile directories, as you really don’t want those over the WAN.
I have no idea if this is a warning to others, or whatever the larger issue is.
Porting Party II
At any rate I’ll be running another porting party this coming weekend. I can host cross compiling fine, but we need people with the 64bit Whistler beta installed to test. The best way to get details is over on discord. Lately the IRC bridge is down more than it’s up, and I can’t effectively send out passwords & get your network block to allow access to the RDP, since I’m not going to open up worldwide access to a Windows NT 4.0 SP5 machine.
Porting Party II
So for anyone interested in porting their C/C++ to either the 32bit Alpha Windows, or 64bit Alpha Windows come join us on discord!
I’ll fire up the Alpha on Friday afternoon GMT and expect the event to run all weekend!
(This is a guest post by Antoni Sawicki aka Tenox)
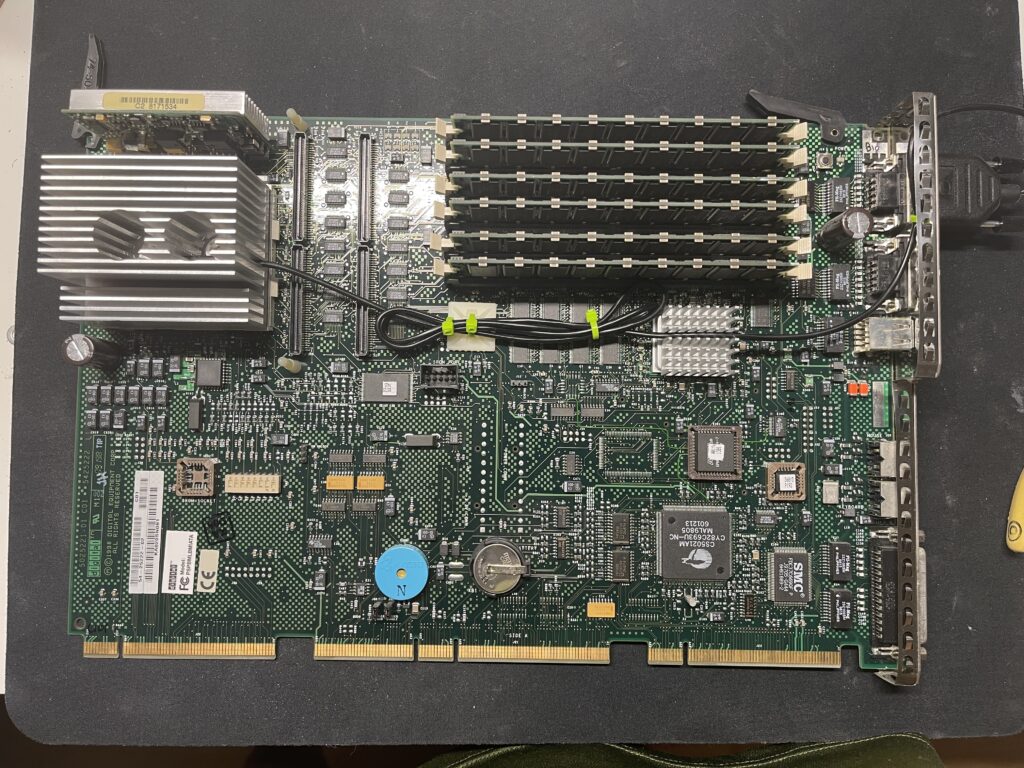
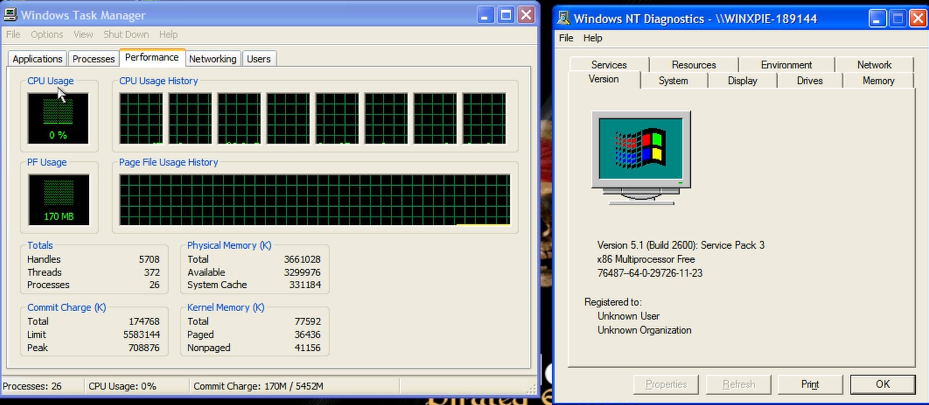
I’m preparing a Windows NT RISC exhibition for VCF West 2023. While the CHM building is air conditioned, it’s far far from ideal and we have a rather hot summer. Most of the vintage machines lack CPU power management. Some, such as Alphas, are notorious for overheating. Despite installing modern fans and heatsinks, this still makes me uneasy. I wanted to come up with some thermal monitoring system to see whats going on in real time. Maybe alert or shut down if things go out of hand.
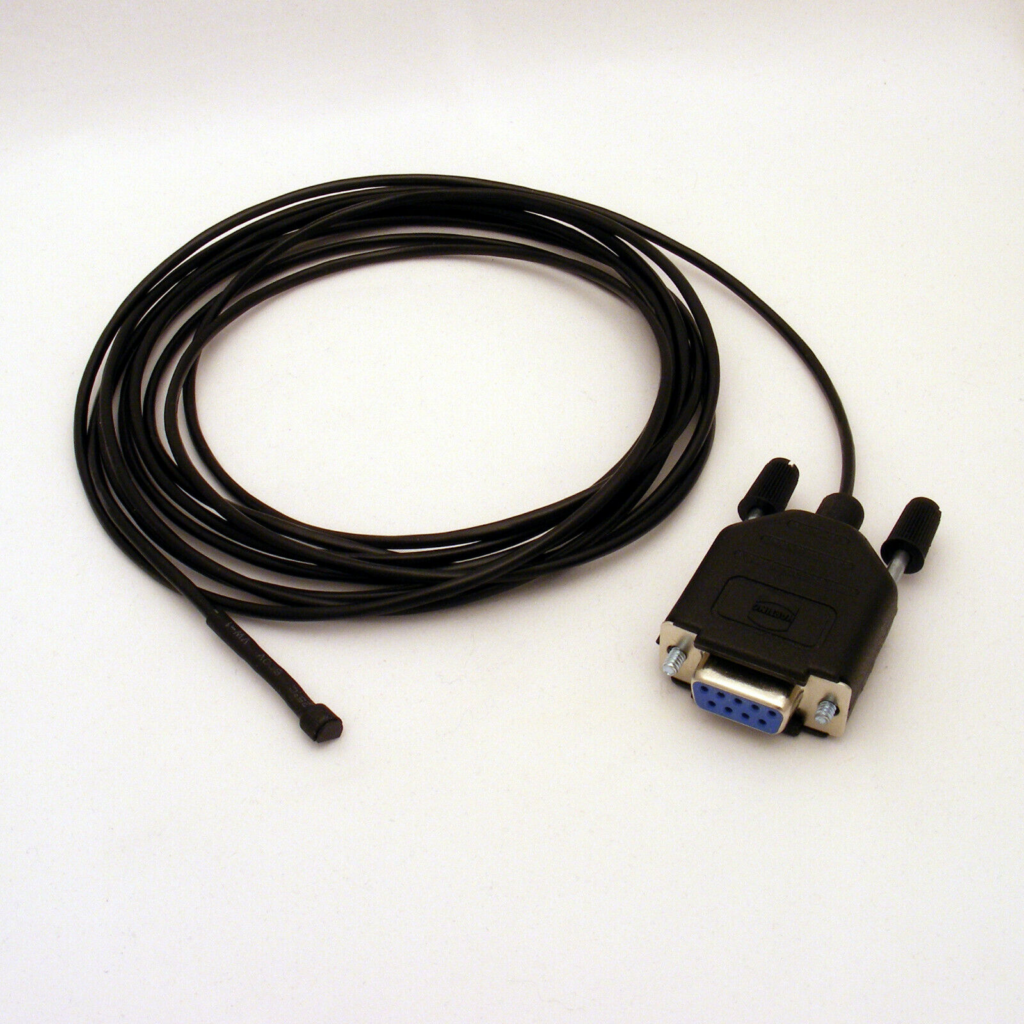
For a while now I been thinking about using Arduino with a thermistor. It would read the temperature sensor and send the data via serial port to the host. This should universally work for most old computers, as they commonly have serial ports. However, upon some prototyping I realized that between custom pcb/wiring, power requirements and TTL to RS232 converter, the whole thing was becoming a little too complicated for what I really wanted. Fortunately I came across a rather ingenious solution – someone sells this item on eBay:
It’s basically a thermal probe with RS232 interface, emitting a plain text ASCII string output. No drivers or software required. They are a little bit pricey. Perhaps readers can find a cheaper version. However it’s absolutely a perfect solution for what I really wanted. Note that the seller can make shorter cables on request. The default 3m is insanely long for this purpose.
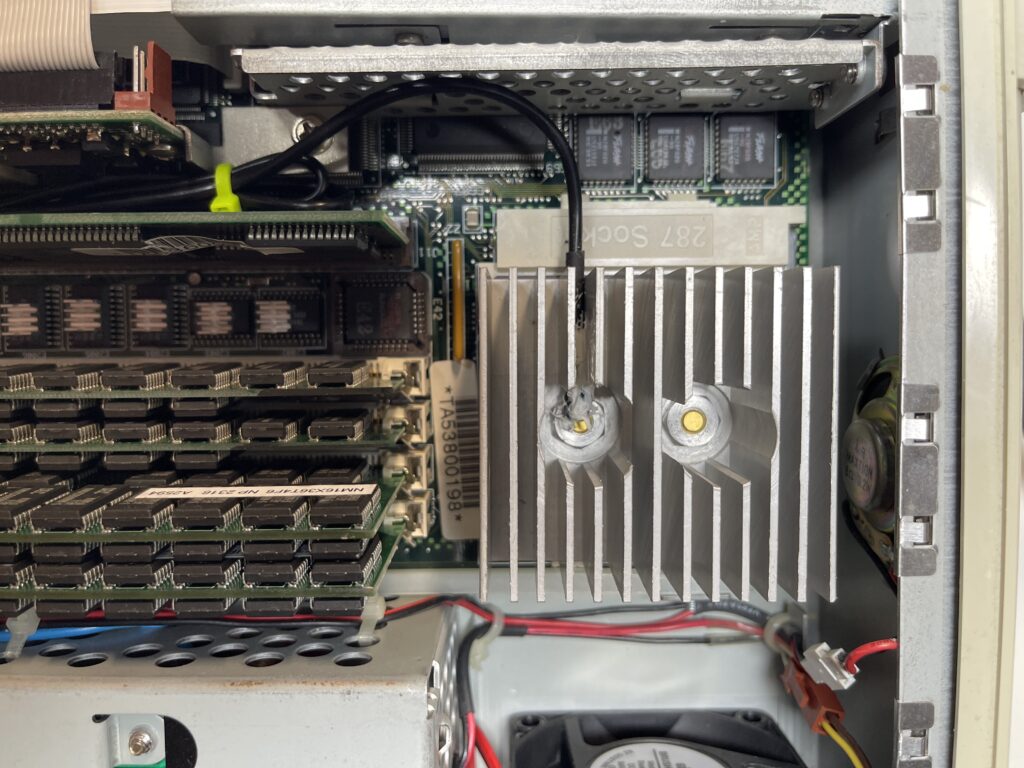
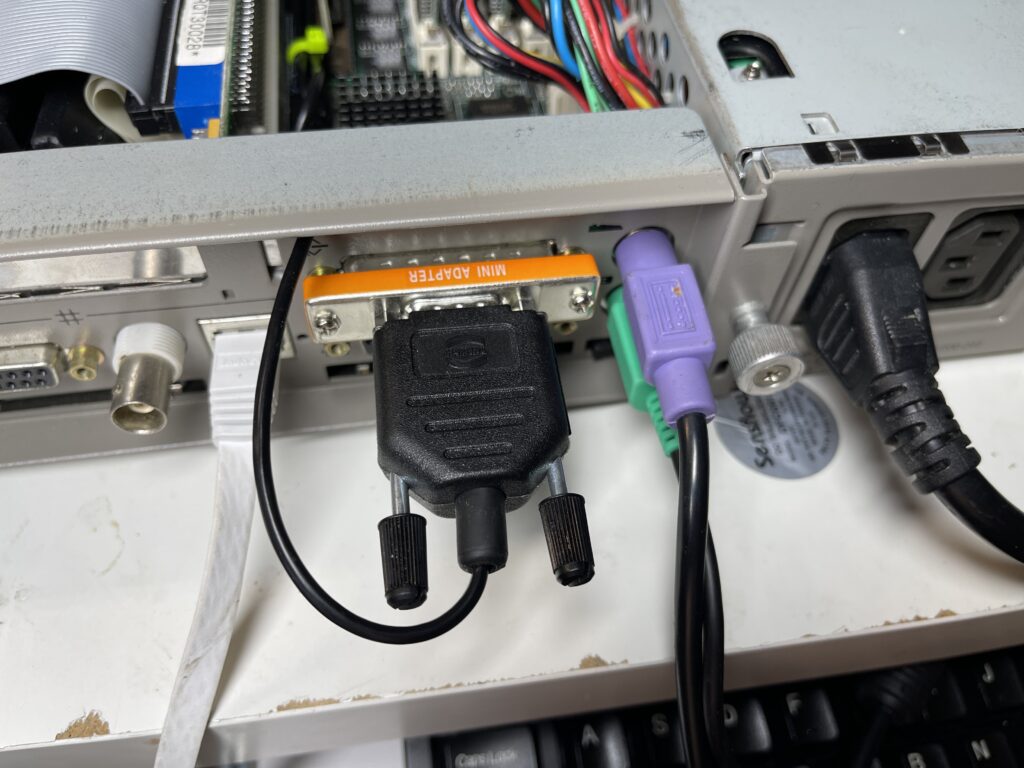
With help of some thermal glue, installed the probe in to the CPU heat sink and routed the cable to a COM port in the back.
Above pictures are from Multia and PWS.
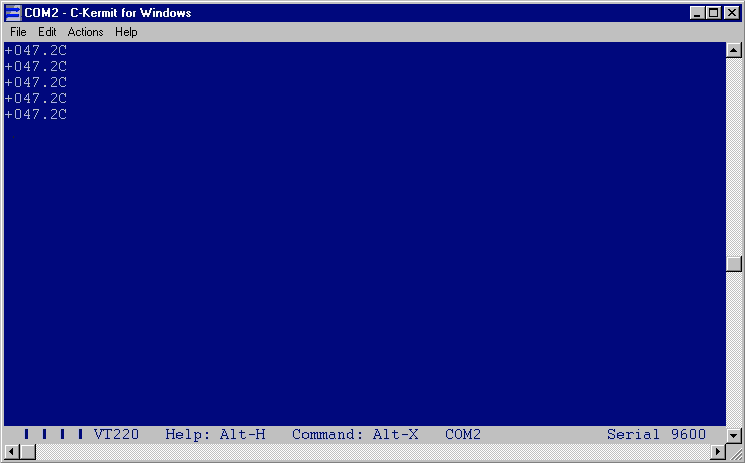
You can simply read the temperature as an ASCII string from the COM port:
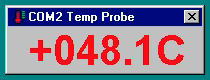
However since this is a prestigious event I wanted something fancier. Also a simple terminal can’t really tell when was the data received and therefore is current. I banged out a simple Win32 app to have something nice on the screen:
If there is no update from serial port in last 10 seconds, “no data” will be shown. The text label changes color if the temperature goes over a threshold to warn if things are getting too hot.
I even added a thermal shutdown, if it goes over a critical value. However this only works on Windows 2000 and above. Earlier Windows NT versions lacked ACPI HAL support to invoke power down. Fortunately this will work nicely for 2210 build on PWS 500 and Windows XP on Itanium!
After VCF I’ll make something for Unix and VMS as well. Perhaps also a service / daemon version that can run in the background and doesn’t require GUI.
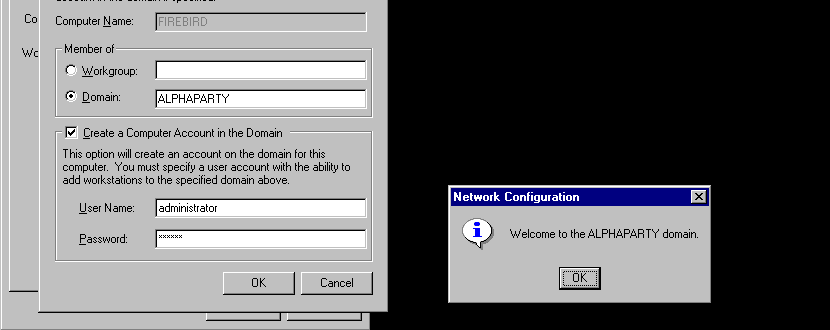
I want to have an internet server that people can map drives to, for copying data in/out for the upcoming Dec Alpha AXP64 building extravaganza! I wan tot use my Dec Alpha for building since it’s got a gigabyte of RAM. One of the hard parts is that NT 4 is beyond obsolete, and twice as much on the DEC Alpha. I was figuring renting a VPS, and using it as a SAMBA server so people can simply map a drive from home, copy files to the VPS, terminal server to the Alpha, and copy files to & from the internet. Easy right?!
I was non stop getting this error:
System error 1326 has occurred.

Login failure: unknown user name or bad password.
Except I knew the username & password was correct.
The key part involved a few parameters to get it working. Although many people reported success by simply setting the protocol level, for me I had to set that and the lanman/ntlm auth to yes. Trying to enable NT4 compatible encryption didn’t work either.
[global]
   workgroup = WORKGROUP
   server min protocol = NT1
   client min protocol = NT1
   lanman auth=yes
   ntlm auth=yes
I’m not sure if it’s all that helpful to the world at large, or if it’s just super common knowledge, but I haven’t setup SAMBA in like forever. I guess I could go one further and join it to the domain but that doesn’t seem like it’s all that needed or all that smart.
This was a silly side project that got out of hand, building an XP physical machine to run some old software. Over in the UK, there is this fantastical store, CeX that sells all kinds of retro crap, often for cheap. Normally I wouldn’t care but with pc titles going from £0.50 to £3 it seemed like some fun 1990’s computing value right there!
I had been slowly amassing a collection of bargain bin, garbage tier games ‘from back in the day’ and while I had been running a few on VMware on Windows 10, with that sub £5 copy of Windows XP home, it sadly didn’t help with so many games being copy protected.
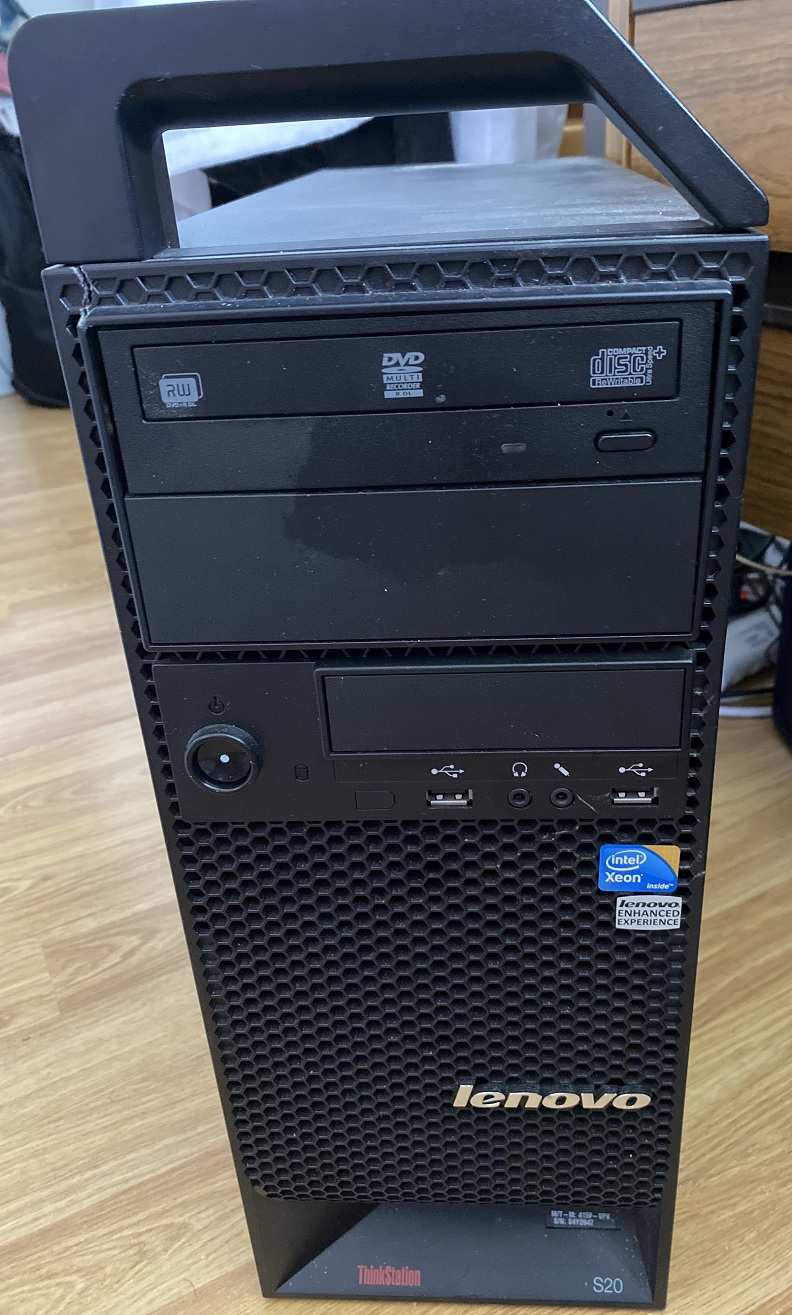
I would need a physical machine, and that is where this hunk of junk the S20 fell into place.
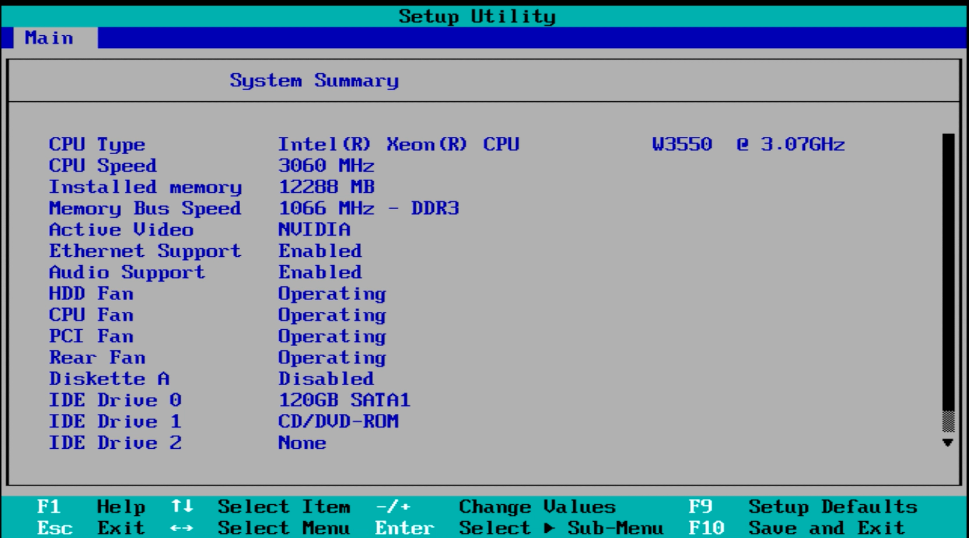
S20 is way overkill!
When it comes to Windows XP, the S20 is no slouch. With 12GB of RAM, a Nehalem 3Ghz Xeon W3550 @3Ghz, 2x 120GB SSD drives, and a functional optical disk, this makes for a great system. Rounding out the absurdity is a Nvidia Quadro 4000 with 2GB of VRAM. I’m pretty sure when XP was new I was still using a PII 233Mhz with 256Mb of RAM. So yeah, this is way overkill.
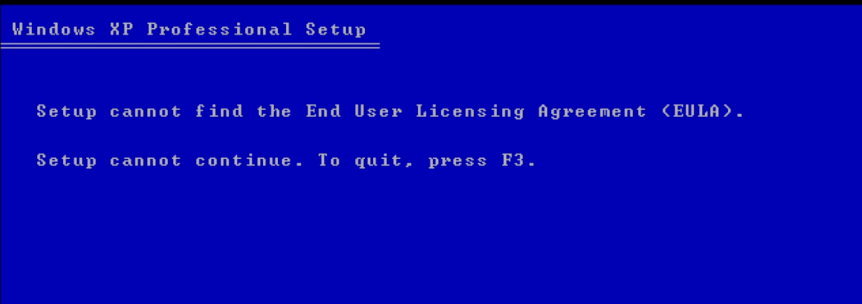
Since all the disks are SATA, the default install CD won’t work. As a matter of fact, not much works on the retail CD-ROM. I tried to use rufus but…
Setup cannot find the End User Licensing Agreement (EULA).
I got this strange error from the USB stick. It appears after some searching it’s seeing the CD-ROM and trying to load the rest of the installer from there. Further searches said don’t use Rufus, instead use “WinSetupFromUSB-1-10“. I figured if I was going to use something like this, that I’d want some crazy pirated/hacked up to date version of XP to compliment the whole hacked up experience, so I went with the seemingly reputable “Windows XP SP3 Integral Edition 2022-6-16“.
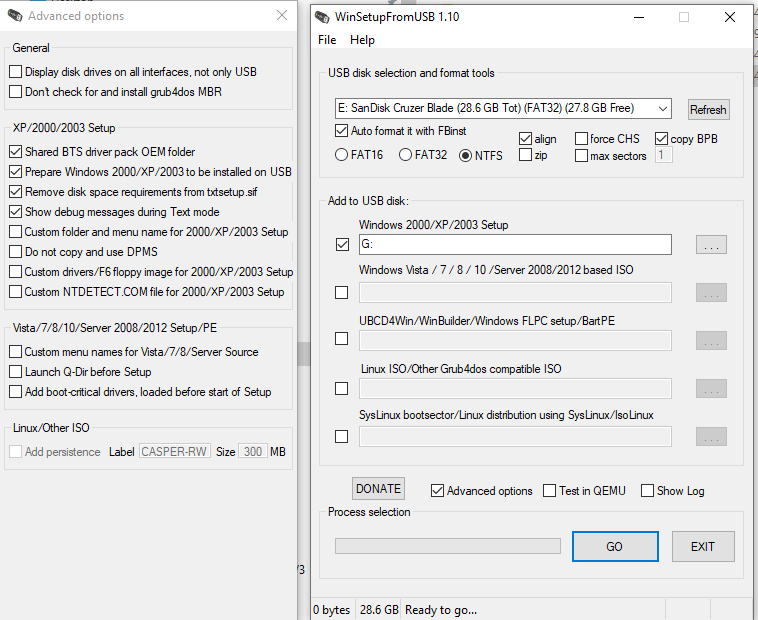
WinSetupFromUSB 1.10
Options seemed to be somewhat straightforward, make sure it targets your USB drive! not any external backups. It does recommend you reformat with NTFS & set the alignment for a much needed speed improvement. Other than checking a few boxes to make sure it’s got the BTS driver pack & it’s a 2000/XP/2003 from USB install it pretty much worked.
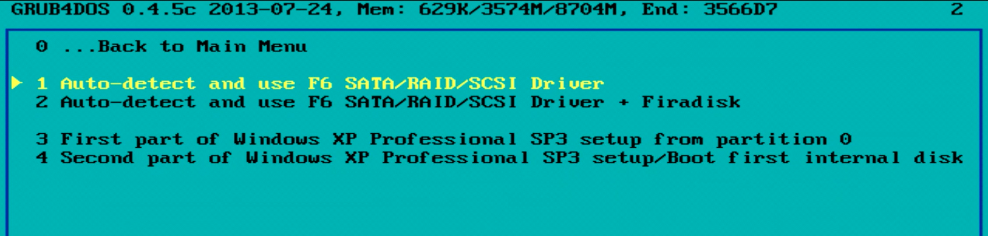
After rebooting to the USB, be sure to select the
By selecting this option it’ll inject the needed ‘modern’ disk drivers. Otherwise it just wont work (EULA error or inaccessible boot device).
If everything goes well it’ll have injected a tonne of drivers, allowing the install to work.
Once the text part of setup is completed, be sure to boot off the USB again, again choosing option 1 to Auto-detect and use SATA/RAID/SCSI, but then choose option 4 for the Second part of the Windows XP setup.
Windows PE?
From here the setup feels very Windows PE. I suspect it is, but it’ll continue basically unattended and on it’s own. From here you can just boot directly from the hard disk, once it’s finished installing. It will prompt for the USB stick again to add all the additional options
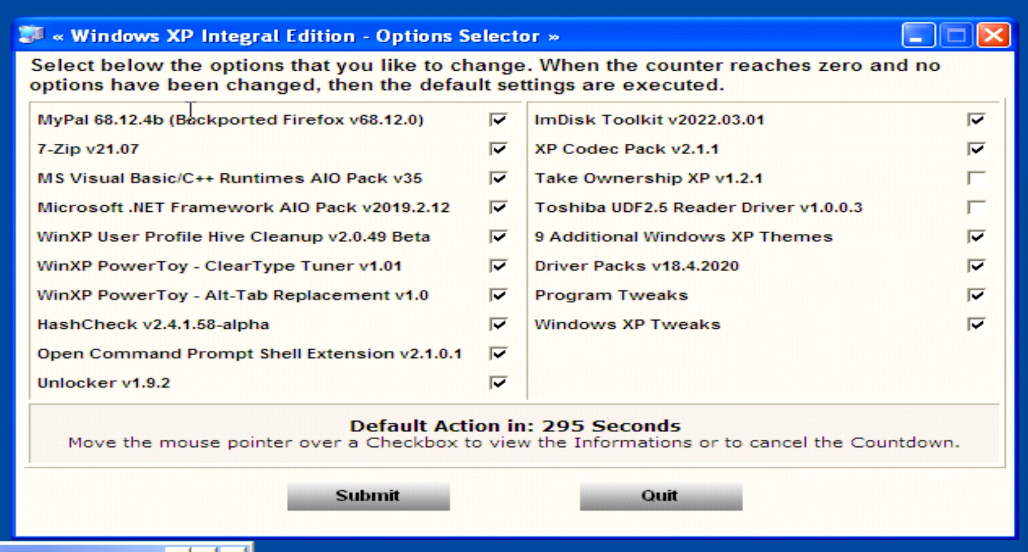
Optional options!
I didn’t know what to exclude or pick, So I just chose them all.
It did take about 20 minutes, but at least by the end I did have a very usable XP install.
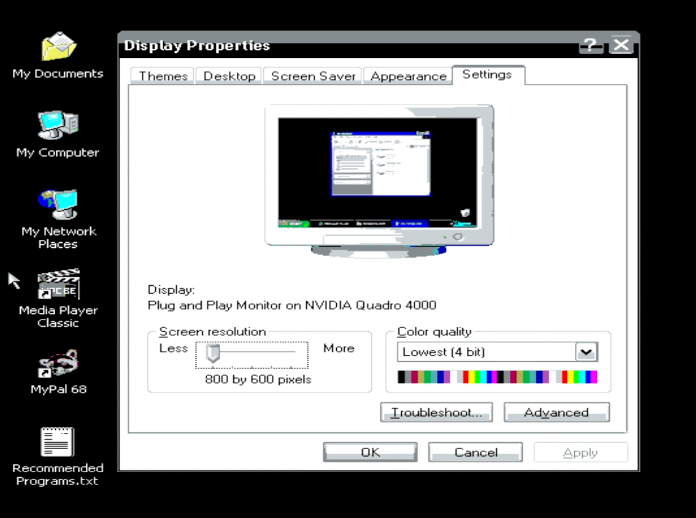
Trying the first Quadro Driver I could find, and I got knocked down to 640×480 in 4bit colour. It sucked. I don’t know what the deal was.
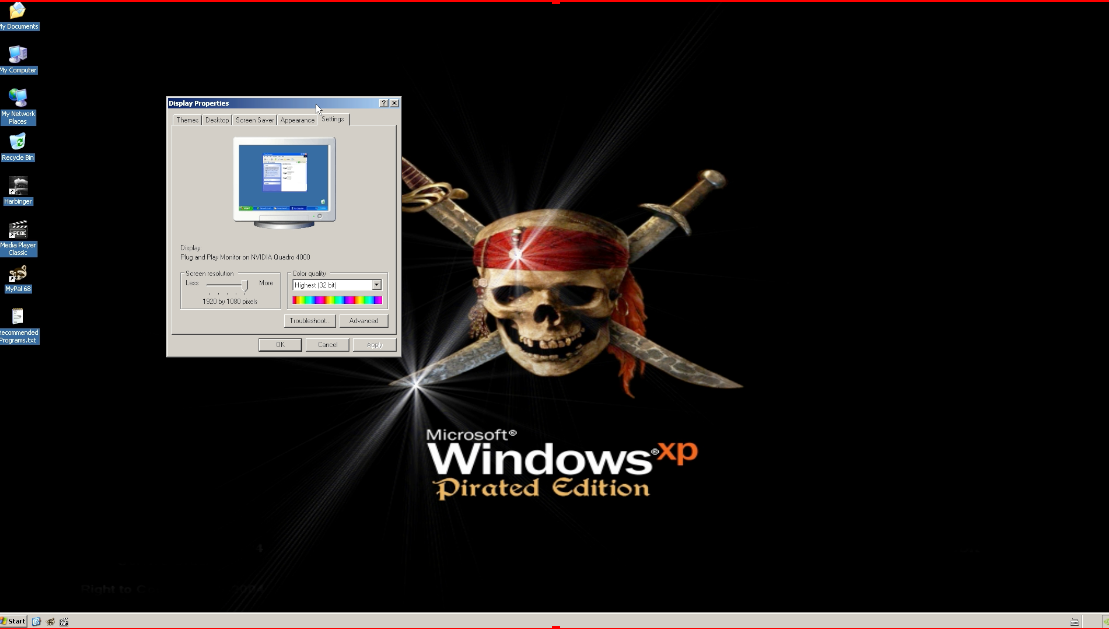
320.92 is the version that worked for me!
Working Video
With video working, the next step is all the reaming device drivers. Ohver on Phils Computer Lab, he had mentioned snappy driver installer, but the first link I hit on google was some virus loaded thing. Luckily since this is a fresh install it wasn’t at all painful to shove the USB back in and format the machine. I think I was also spared a lot of damage as it was constantly failing with a “bcrypt.dll missing” error. Saved by being obsolete!
Instead, I found the one on sourceforge.net, and it was working as expected.
Adding the audio drivers took a few attempts at installing stuff, rebooting, trying the windows auto-detect, rebooting, re-running snappy driver, and a few more reboots, and I got the NVIDIA audio and the built in audio working.
Overkill XP
One thing is that some games fail entirely on XP. While GTA: Vice City had been running on Windows 10, it fails to do anything on XP. Older games with Win16 setup programs do run but Games like Links LS 1999 fail completely to run. I think the system has both too many cores, too much RAM, and it’s just plain too fast.
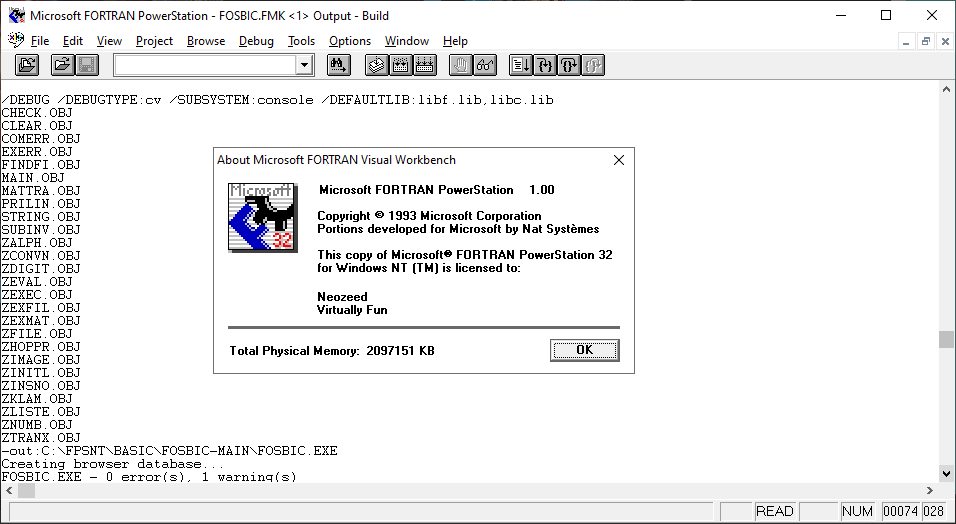
This is the FOSBIC1 compiler developed at the University of Gießen, Germany
in the late 70s for the CDC 3300 batch system.

It is a BASIC compiler and runtime system which is written in FORTRAN IV.

The text book from which the source code was copied implies that it is
a modified version of a BASIC compiler named UWBIC from the University of Washington, developed by William Sharp in 1967, for their IBM 7094.
So, without going into it much further I went ahead and made a few minor changes to get it running on Microsoft Fortran
Compiled!
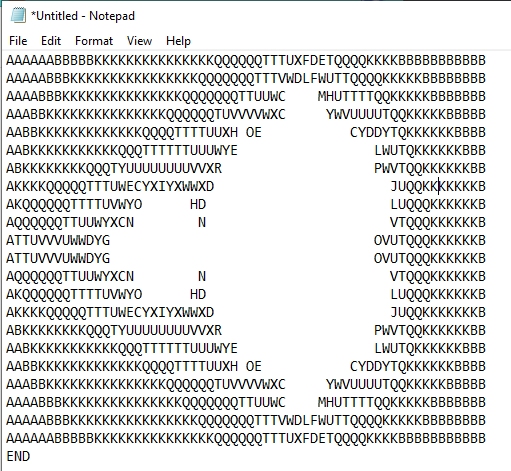
Instead of some boring example, I thought I’d try some Mandelbrot, so going through this collection on rosettacode, I thought the OS/8 version looked simple enough to work with.
Sadly it doesn’t seem to be very ASCII so it doesn’t understand numerical characters. Maybe I’m doing it wrong I didn’t see anything. Just as my attempt to set a string variable to itself + a new letter then print that string strangely failed. Also it does weird stuff with strings, again it maybe me, but I’m impatient. This is terrible, and yeah I know.
                                        TESTCOMPILER -- BASIC BWL 5 GIESSEN -- VERSION 6/76-04

                   10 X1=59
                   11 Y1=21
                   20 I1=-1.0
                   21 I2=1.0
                   22 R1=-2.0
                   23 R2=1.0
                   30 S1=(R2-R1)/X1
                   31 S2=(I2-I1)/Y1
                   40 FOR Y=0 TO Y1
                   50 I3=I1+S2*Y
                   60 FOR X=0 TO X1
                   70 R3=R1+S1*X
                   71 Z1=R3
                   72 Z2=I3
                   80 FOR N=0 TO 30
                   90 A=Z1*Z1
                   91 B=Z2*Z2
                   100 IF A+B>4.0 GOTO 130
                   110 Z2=2*Z1*Z2+I3
                   111 Z1=A-B+R3
                   120 NEXT N
                   130 REM PRINT CHR$(0062-N);
                   131 IF N=0  THEN 200
                   132 IF N=1  THEN 202
                   133 IF N=10 THEN 204
                   134 IF N=11 THEN 206
                   135 IF N=12 THEN 208
                   136 IF N=14 THEN 210
                   137 IF N=15 THEN 212
                   138 IF N=16 THEN 214
                   139 IF N=17 THEN 216
                   140 IF N=19 THEN 218
                   141 IF N=2  THEN 230
                   142 IF N=20 THEN 232
                   143 IF N=22 THEN 234
                   144 IF N=23 THEN 236
                   145 IF N=24 THEN 238
                   146 IF N=25 THEN 240
                   147 IF N=3  THEN 242
                   148 IF N=30 THEN 244
                   149 IF N=31 THEN 246
                   150 IF N=4  THEN 248
                   151 IF N=5  THEN 250
                   152 IF N=6  THEN 252
                   153 IF N=7  THEN 254
                   154 IF N=8  THEN 256
                   155 IF N=9  THEN 258
                   200 PRINT 'A';
                   201 GOTO 439
                   202 PRINT 'B';
                   203 GOTO 439
                   204 PRINT 'C';
                   205 GOTO 439
                   206 PRINT 'D';
                   207 GOTO 439
                   208 PRINT 'E';
                   209 GOTO 439
                   210 PRINT 'F';
                   211 GOTO 439
                   212 PRINT 'G';
                   213 GOTO 439
                   214 PRINT 'H';
                   215 GOTO 439
                   216 PRINT 'I';
                   217 GOTO 439
                   218 PRINT 'J';
                   219 GOTO 439
                   230 PRINT 'K';
                   231 GOTO 439
                   232 PRINT 'L';
                   233 GOTO 439
                   234 PRINT 'M';
                   235 GOTO 439
                   236 PRINT 'N';
                   237 GOTO 439
                   238 PRINT 'O';
                   239 GOTO 439
                   240 PRINT 'P';
                   241 GOTO 439
                   242 PRINT 'Q';
                   243 GOTO 439
                   244 PRINT 'R';
                   245 GOTO 439
                   246 PRINT '-';
                   247 GOTO 439
                   248 PRINT 'T';
                   249 GOTO 439
                   250 PRINT 'U';
                   251 GOTO 439
                   252 PRINT 'V';
                   253 GOTO 439
                   254 PRINT 'W';
                   255 GOTO 439
                   256 PRINT 'X';
                   257 GOTO 439
                   258 PRINT 'Y';
                   259 GOTO 439
                   439 REM
                   440 NEXT X
                   450 PRINT '-EOL'
                   460 NEXT Y
                   461 PRINT 'END'
                   470 END
It runs in batches, so it’s not interactive. Very mainframe/1960’s minicomputer like. I guess it’s fitting again being in FORTRAN.
******************* EVERYTHING SEEMS OK -- LET'S GO AHEAD

                    PERCENT OF AVAILABLE STORAGE USED               31.081
                    PERCENT OF AVAILABLE DATA STORAGE USED            .000
                    PERCENT OF AVAILABLE NUMBERED STATEMENTS USED   30.294

AA    A    A    A    A    B    B    B    B    B    K    K    K    K    K
K    K    K    K    K    K    K    K    K    K    Q    Q    Q    Q    Q
Q    T    T    T    U    X    F    D    E    T    Q    Q    Q    Q    K
K    K    K    B    B    B    B    B    B    B    B    B    B    B    -EOL
I’m not sure what is up with the AA and after that, it’s all tabulated. I ended up running it through sed to remove the spaces, and using notepad to stitch the lines together. I guess I could have bash’d it some more but.. I’m impatient.
So yeah, it looks like it worked! Very amazing. And of course it’s crazy fast but that should be expected I suppose. I don’t like the hard coded table, but I just wanted to get it to generate an image.
Sadly, the author of the compiler, Weber seems to have disappeared, and the publisher Paul Haupt died in 1978, a year after this being published.
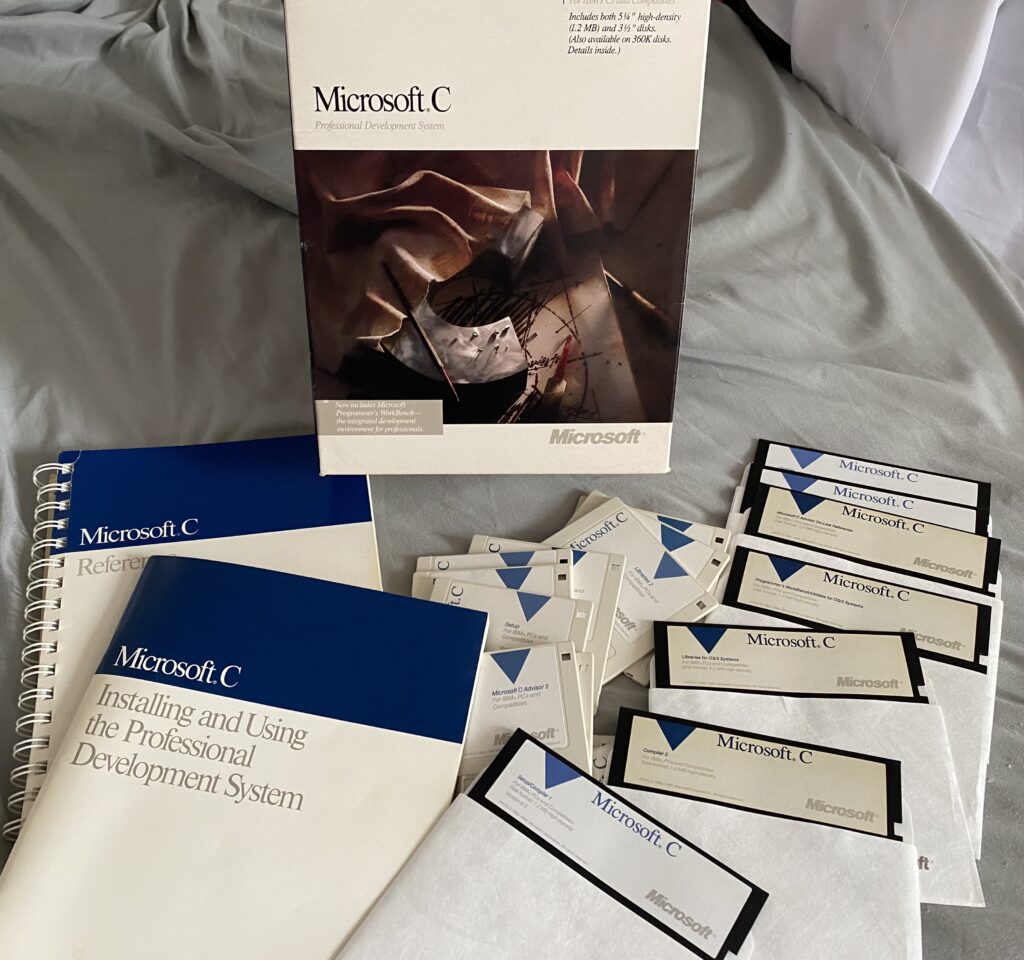
So, a while back I had found this up on eBay. As much as I’m trying not to buy old stuff I just couldn’t resist. And the price was just too good, I’d just have to forego going out to dinner for a week.
I had been using it to mess around with a poorly ported Hack 1.03, although I haven’t done much with that in a while.
One thing is for sure, that the old MS-DOS memory limits were becoming more and more of an issue. Sadly, they didn’t include the QuickC for Windows product which had the benefit of building in protected mode for access to far more memory, nor did they include any DOS Extender to even allow larger runtime access. Obviously you were expected to run this under MSOS/2 1.2 in this era. Although targeting OS/2 protected mode allowed easier integration with PharLap’s 286 based DOS Extender.
Since this was the OS/2 era, the Windows 3.0 SDK was a separate product.
There was another release, the 6.00ax version which included a DOS Extender, allowing the compiler to access 16MB of ram, as reported in this leaflet in a combined Microsoft C & Windows 3.0 SDK package.
The followup Microsoft C/C++ 7.0 addressed many of these shortcomings, but of course famously removed targeting OS/2. There was a later update that at least provided OS/2 compiled version of the binaries allowing you to run it under OS/2. I never tried to see if it could be paired with the OS/2 SDK, and manually made to generate OS/2 executables. I suspect not.
The larger thing is that Microsoft C 386 remained a ‘hidden’ product on Xenix, and the 32bit OS/2 and NTOS/2 betas.
With all that Dec Alpha talk, and how hard it is to get hardware, and how seemingly exclusionary it is, I thought I would try to touch on a more available 64bit ‘risc’ platform, for the masses!
While a couple years ago I had touched on running Windows 10 on the Raspberry Pi 4, in the brave new world of 2023 getting ahold of a pi4 is expensive, hard to find, and kind of depressive, which lead me to this (old) but exciting project, the Renegade Project!
Long story short, there exists enough drivers & information to facilitate a port to the Snapdragon 845, a 64bit System On a Chip( SOAC!), meaning that if you have a device with this chip it *can* be slightly possible to install Windows 10 onto it.
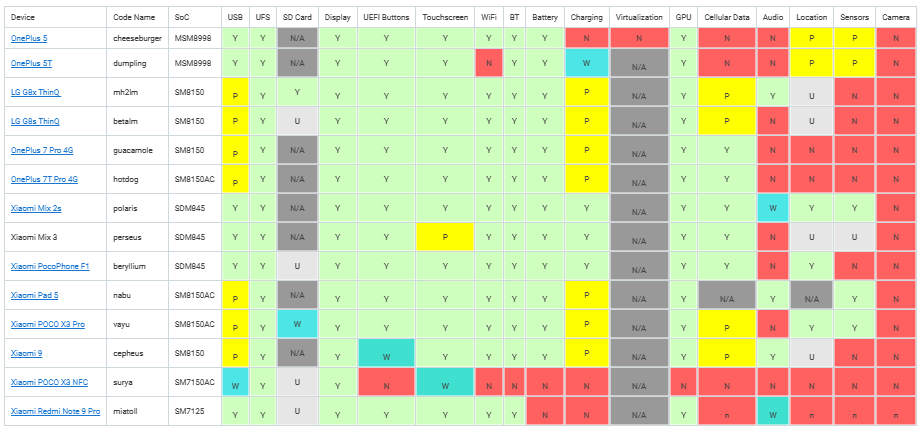
system compatibility matrix, for ants.
Glancing at the system matrix, to me the glaring hole is Charging. 3 systems outright support it, all of them from Xiaomi, the Xiaomi Mix 2s, Xiaomi Mix 3 & the Xiaomi PocoPhone F1. Looking around eBay to start this adventure I found a PocoPhone F1!
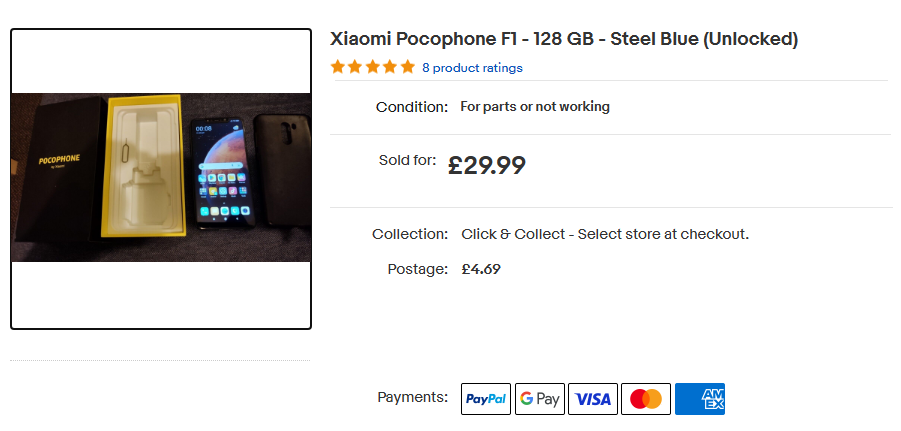
Getting the Phone
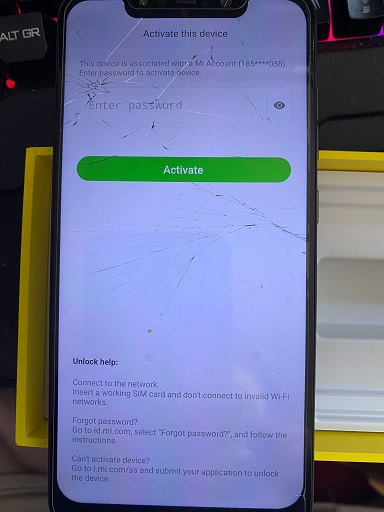
This seemed like a good start, 29.99, 128GB of flash storage, and I’d later learn 6GB of RAM. The first problem came from Xiaomi. Turns out that the phone was still locked, the seller had neglected to logout from his Xiaomi account. Even worse though he had forgotten his login and password. Calling Xiaomi support was basically worthless. Without unlocking the phone on a reset to root the phone lead me to this:
Locked!
I got lucky however after talking to the seller, he agreed to go above and beyond and we were able to unlock the phone together. So everything went well. If you do buy one of these phones used, MAKE SURE TO CHECK THE XIOAMI login id! It has to be unlocked and blank so you can register it and get the unlock. It will require a valid email & phone number + sim for it to send/receive SMS codes.
I should add that we’ve cleared the first few hurdles of precuring the device and unlocking it. And I’m glossing over stuff. Getting to this point was not easy and took a week. The unlock process is not intuitive, and I’m sure many phones are sold out there that have their google access wiped, but have not been logged out all the way, or the flash erased. I can’t show you mine as I ended up erasing Android but be aware of this!
Getting ready for Windows
Basically on the Android side there is three main modes, the boot, the recovery and the ‘fastboot’ mode. Holding power & down brings you to fastboot, where using the fastboot tool you can load an image from your PC into ram and execute it. EDK2 UEFI firmware, is the first part or the renegade project you’ll encouter. It’s really powerful, allowing you to not only boot into Windows, but it also supports a linux disk target mode, allowing you to partition and access the flash directly from a PC. Naturally this is SUPER dangerous, and backup your modem files!
With the phone unlocked softbooting E2DK you can put it into a target disk mode, connect it to a pc and partition away!
disk mode… for ants!
The guide (section 1.2) advices pushing the disk tools to the phone booted up in twrp-3.7.0_9-0-beryllium.img. Honestly its easier to just partition it on your computer. HOWEVER if you were to use Windows, there is a slight issue:
The device may no longer be able to boot into fastboot mode
I ran into this issue and thought I had bricked my phone. I was actually in the middle of researching how to do a physical hard reset, and place it into EDL mode (taking it apart and finding which pads to short, when I found this section of the troubleshooting guide, where it’s the partition names. So instead, I ended up doing the partitioning on a Virtual Machine using VMware and Ubuntu.
Before I did anything, this is what the phone partition table looked like. It’s an exceptional amount. The new parted v 3.0 that is recommended to use, doesn’t support the resize command so I had to manually do the numbers after destroying partition 21.
Originally, I had made a 32Gb partition to keep some Android functionality but somewhere it just stopped booting. But I didn’t care.
Obviously dont follow this. I’m only providing output as an example.
If I were more patient, I guess I would have dd’d the entire phone to get a full entire backup. But I didn’t get this phone to run Android, so I really don’t care.
There is a LOT of disks being presented to Windows, in case you ever wondered how those 128GB flash devices get sold with only 114GB of user space.
So many partitions!
And even that 112GB is actually usable!
Remember the system partition needs the boot,esp flags, and the windows partition is msftdata. Also make sure the partition names are either single words, or NO words. Spaces will kill the fastboot mode.
I put all the disks that are presented in offline mode, so I don’t get confused. Make sure you are going to mess with the right volumes when formatting after the partitioning. This is NOT for the novice, it would be easy to not only brick the phone but screw up your existing install. If you have physical disks attached you don’t absolutely need, remove them or put them offline to make sure you don’t screw up.
I used diskpart to select the appropriate volumes and format them.
select disk 8
select volume 5
format quick fs=fat32 label="System"
assign letter="S"
select volume 6
format quick fs=ntfs label="Windows"
assign letter="W"
This isn’t a guide, just a reflection of what I went through.
With the disk now formatted, it’s a matter of selecting an OS to install.
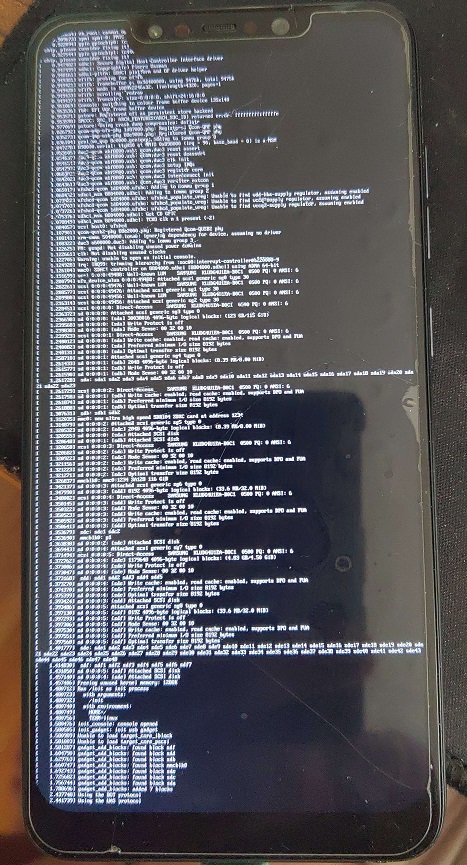
I had really bad luck picking random versions of Windows, so I looked until I could find a confirmed working version in this video, Rodando o Windows 10 ARM nativamente em um Dispositivo Android (Pocophone F1 + UEFI). Long story short, it’s Windows build 210521-1658 with version 0.4 of the bootloader. Long story short I messed with LOTS of Windows on ARM driver sets, before I finally had the brave idea to just load it with no drivers:
booted
But that image is far too stale, and expires out very quickly, reducing any useful functionality once it’s connected to the internet. So it’s something that probably could be fixed, but it’s far easier to just grab an image that’s newer.
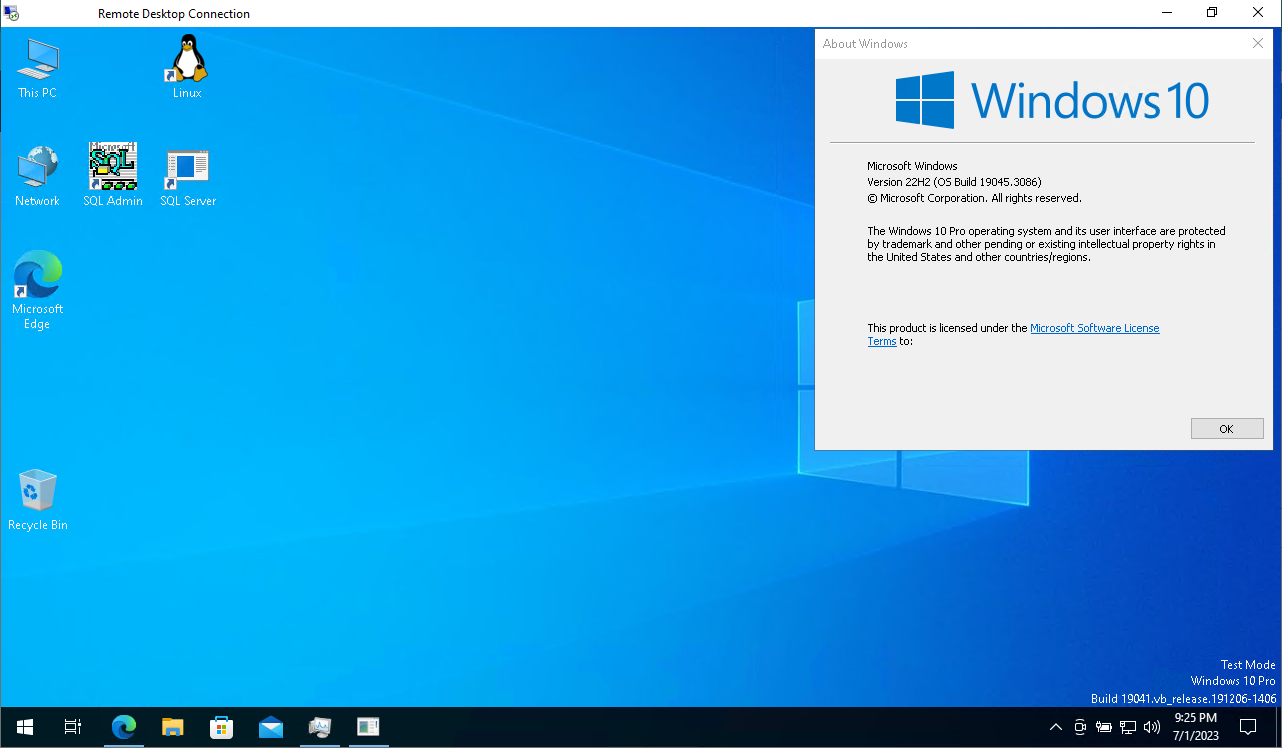
The x86_64 image I’m using now is 19045.3031, so I guessed to pick something comparable on ARM64. I used something called 19045.3031_arm64_en-us_professional, although it too was out of date, but Windows update brought it up to 22H2 19045.3086 . I had tried the downloader tool and apply all the updates offline, but I had issues. I suspect now in retrospect it was drivers.
Another thing I learned the hard way is that some of these images have multiple OS images installed. I guess it’s de-duplication, along with compression, but be sure to index the image first! I accidentally installed a Home version. Yuck.
dism /Get-ImageInfo /imagefile:install.wim

Index : 1
Name : Windows 10 Home
Description : Windows 10 Home
Size : 17,706,743,995 bytes

Index : 4
Name : Windows 10 Pro
Description : Windows 10 Pro
Size : 17,836,320,420 bytes
So just don’t go wildly apply image #1. I wasted too much time on that one.
But in the release I’m using it’s image #1. I checked. Trust me.
The S volume needs to be populated with the UEFI boot files. I had foolishly thought the boot.wim file would include the boot files, but instead bcdboot can set it up based on the location of a Windows install.
bcdboot W:\Windows /s S: /f UEFI
The next thing to do is install the drivers.
I was lucky enough to get some insight into some driver combination to work, and I came up with this much:
minimal 2210.1-fix
USB beryllium v2.0rc2
FG beryllium v2.0rc2
The key of course is that there is a minimal set in 2210.1-fix that will bring the system up with working USB. The FG package brings in enough of the power management to know the battery status.
The drivers are not signed, so that means we need to change a bunch of boot flags. I also turned on debugging so have Windows dump core files, so you can run analysts on them with Windgb.
S:
cd S:\EFI\Microsoft\Boot
bcdedit /store BCD /set "{default}" testsigning on
bcdedit /store BCD /set "{default}" nointegritychecks on
bcdedit /store BCD /set "{default}" recoveryenabled no
bcdedit /store BCD /set "{default}" debug on
Of course the catch being that with no drivers loaded it’s in a super basic mode, with no USB, no touch screen, no power management, no wifi no nothing. So it’s a brick. But at least we’ve reproduced enough to show that you can boot Windows.
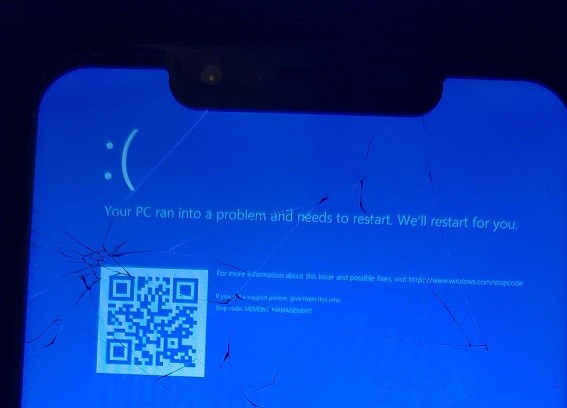
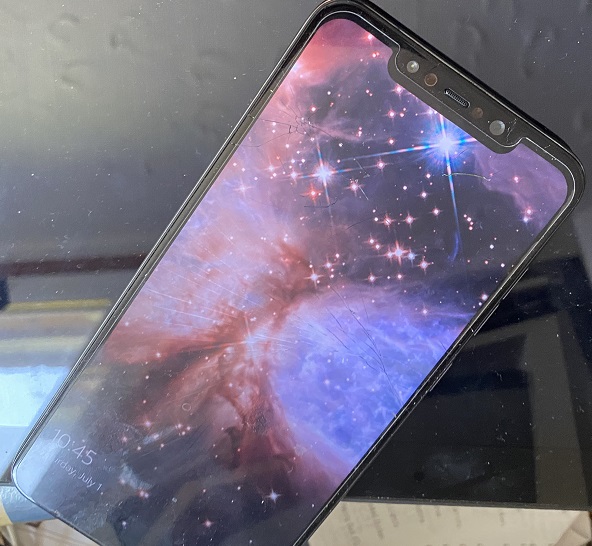
Sadly, loading all the drives from 2210.1-fix or beryllium v2.0rc2 lead to this:
the cracked glass adds to the feeling.
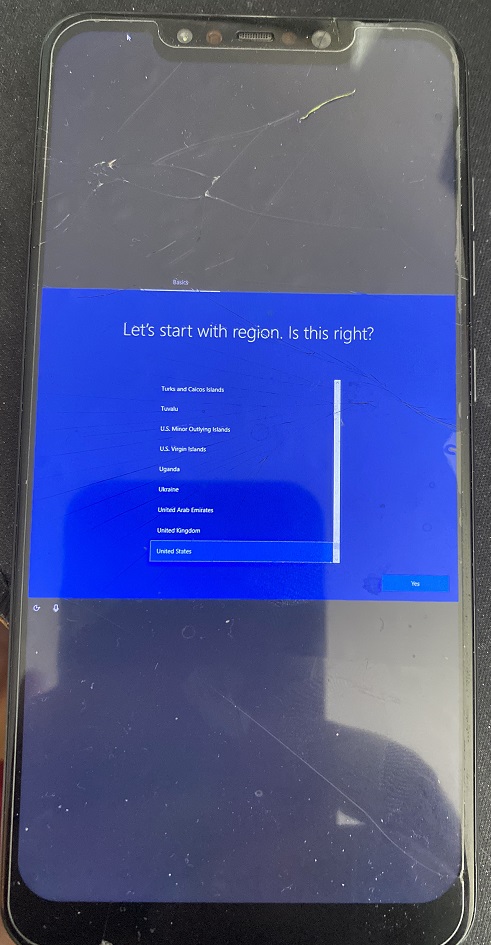
Add in a much needed OTG adapter and a mouse or keyboard, and you can complete the installation.
However, since I left off the majority of the device drivers as I didn’t want to spend forever trying to track it down, I used a random USB to Ethernet adapter and thankfully It just worked!
Accessing the phone over RDP.
I added a fancy USB 3.0 ‘dock’ with USB-C connector that you can plug a charger into, so that not only can the phone stay connected to power, but there is room for the Ethernet. It also has HDMI, perhaps is the drivers were more stable, it could be a viable desktop? And I have what I wanted, which was a non Intel/AMD 64bit platform that is hopefully more reliable than the Alpha64 platform, and maybe something to do some kind of contrast of the past vs future
This was NOT a simple thing to go through. I would be extremely hesitant to advise other people to follow suit. But in the off chance anyone who wants to do it, might have a better idea of what is involved.