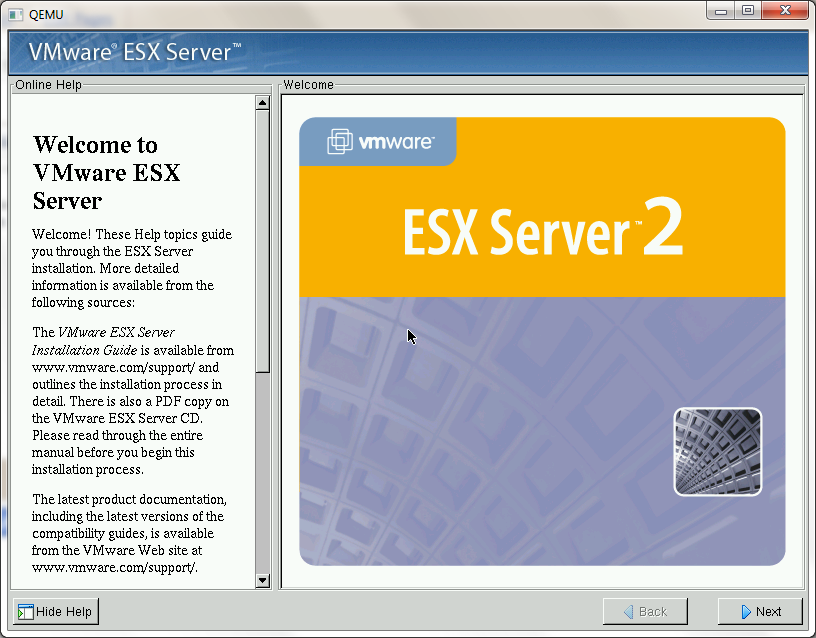
Installing VMware ESXi 5.5.0 Update 3 on KVM

Well I had no luck with the boot process hanging during initialization.  I searched a little, and came across this thread, stating :

The line that says “Running inside a VM; adjusting spinout timeout to 180 seconds” would suggest that KVM implements enough of our backdoor interface to make it look like we’re running under a VMware hypervisor.  When we’re running in this environment, we use the backdoor to get the host TSC frequency.  I suspect that KVM doesn’t implement the “GETMHZ” backdoor call, so we are confused about the TSC frequency.  The 30ms delay turns into … 30 hours?  30 years?

So they had a source code change for QEMU 1.7.0, however it obviously doesn’t work in 2.x.  It was rolled up stream, and then made into a switch to disable with a simple flag to add into the command line.

-machine vmport=off

So with that set I ran the following:

kvm -vnc 0.0.0.0:1 -cpu host \
-machine vmport=off \
-m 4096M \
-smp cpus=2 \
-drive file=esx-1.qcow2,if=ide,index=0,media=disk \
-serial telnet:127.0.0.1:5001,server,nowait \
-monitor tcp:127.0.0.1:6001,server,nowait \
-cdrom /root/VMware-VMvisor-Installer-5.5.0.update03-3116895.x86_64.iso -boot d \
-net none \
-device vmxnet3,mac=00:2e:3c:92:26:00,netdev=esx-0 \
-device vmxnet3,mac=00:2e:3c:92:26:01,netdev=esx-1 \
-device e1000,mac=00:2e:3c:92:26:02,netdev=esx-2 \
-device e1000,mac=00:2e:3c:92:26:03,netdev=esx-3 \
-netdev socket,id=esx-0,udp=127.0.0.1:10000,localaddr=127.0.0.1:20000 \
-netdev socket,id=esx-1,udp=127.0.0.1:10001,localaddr=127.0.0.1:20001 \
-netdev socket,id=esx-2,udp=127.0.0.1:10002,localaddr=127.0.0.1:20002 \
-netdev socket,id=esx-3,udp=127.0.0.1:10003,localaddr=127.0.0.1:20003

And now I can boot up, and install VMWare!

ESXi 5.5.0 on Qemu KVM

By default you will not be permitted to start any virtual machine.  To get around this you have to enable VMWare to run nested.
Add the following to /etc/vmware/config under ESX:

vmx.allowNested=TRUE

And then you are good to go!

VM running on nested ESXi 5.5.0

Running VMWare ESXi 6.5 under Linux/KVM!

So with VIRL in hand, the next thing I wanted to do was play with some LACP, and VMWare ESX.  Of course the best way to do this is under KVM as you can use UDP to bounce packets around between virtual machines, like the VIRL L2 switch.  I went ahead and fired up 5.5 and got this nice purple screen of death.

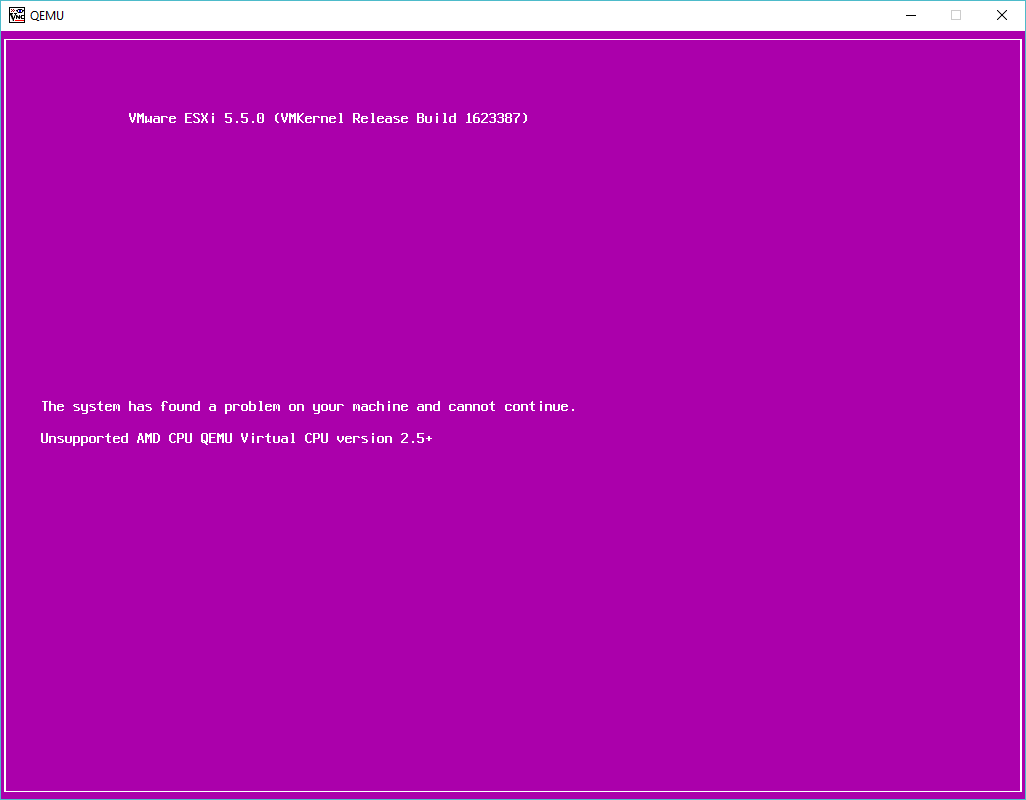
Purple screen of death!

So naturally I need to force the processor type.  Also after reading a few sites, I needed to turn on a nested & ignore_msrs settings:

root@ubuntu:/etc/modprobe.d# cat qemu-system-x86.conf

options kvm_amd nested=1
options kvm ignore_msrs=1

Naturally if you are using an Intel processor the statements need to reflect that.  All being well you will see something like this in your log file:

Mar 7 11:34:38 ubuntu kernel: [ 14.802132] kvm: Nested Virtualization enabled
Mar 7 11:34:38 ubuntu kernel: [ 14.802134] kvm: Nested Paging enabled

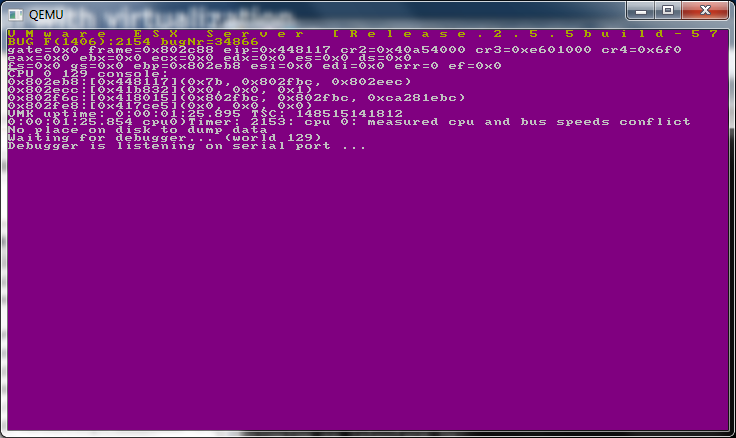
I got a little further trying to install VMWare ESXi 5.5 update 3, however it just hangs on Intitializing timing…

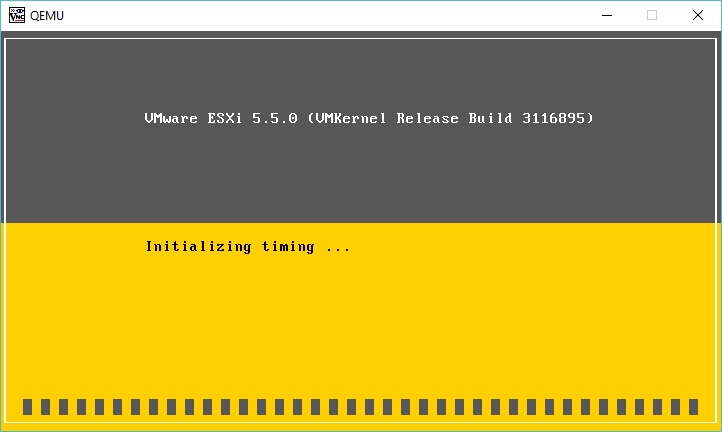
vMWare 5.5.0 update 3 hanging

(I did later solve the 5.5 problem in a follow up here!)

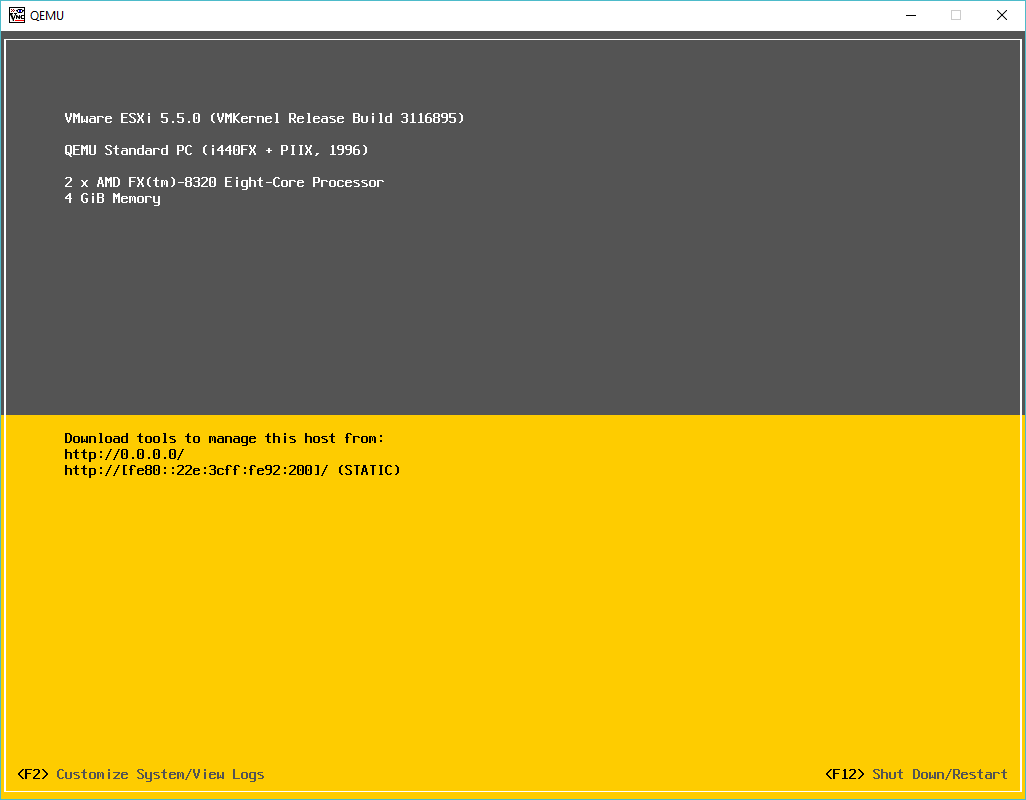
After going nowhere with that, I went ahead and downloaded VMWare ESXi 6.5 which as of today is the latest version, and that installed just fine!

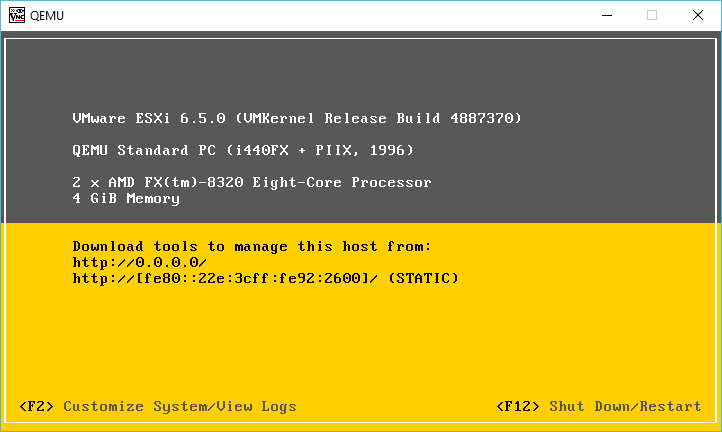
ESXi 6.5.0 running under KVM

For anyone brave or crazy enough to think about reproducing this, here is my install command line (yes Im doing this old school way on purpose)

kvm -vnc 0.0.0.0:1 -cpu host \
-machine pc-i440fx-2.1 \
-m 4096M \
-smp cpus=2 \
-boot order=d \
-drive file=esx-1.qcow2,if=ide,index=0,media=disk \
-serial telnet:127.0.0.1:5001,server,nowait \
-monitor tcp:127.0.0.1:6001,server,nowait \
-net none \
-device vmxnet3,mac=00:2e:3c:92:26:00,netdev=esx-0 \
-device vmxnet3,mac=00:2e:3c:92:26:01,netdev=esx-1 \
-device vmxnet3,mac=00:2e:3c:92:26:02,netdev=esx-2 \
-device vmxnet3,mac=00:2e:3c:92:26:03,netdev=esx-3 \
-netdev socket,id=esx-0,udp=127.0.0.1:10000,localaddr=127.0.0.1:20000 \
-netdev socket,id=esx-1,udp=127.0.0.1:10001,localaddr=127.0.0.1:20001 \
-netdev socket,id=esx-2,udp=127.0.0.1:10002,localaddr=127.0.0.1:20002 \
-netdev socket,id=esx-3,udp=127.0.0.1:10003,localaddr=127.0.0.1:20003 \
-cdrom VMware-VMvisor-Installer-5.5.0.update03-3116895.x86_64.iso \
-boot d

As you can see it really isn’t that involved, well once you get the formatting to make some sense.  And to run it normally I run it something like this:

kvm -vnc 0.0.0.0:1 -cpu host \
-machine pc-i440fx-2.1 \
-m 4096M \
-smp cpus=2 \
-drive file=esx-1.qcow2,if=ide,index=0,media=disk \
-serial telnet:127.0.0.1:5001,server,nowait \
-monitor tcp:127.0.0.1:6001,server,nowait \
-net none \
-device vmxnet3,mac=00:2e:3c:92:26:00,netdev=esx-0 \
-device vmxnet3,mac=00:2e:3c:92:26:01,netdev=esx-1 \
-device vmxnet3,mac=00:2e:3c:92:26:02,netdev=esx-2 \
-device vmxnet3,mac=00:2e:3c:92:26:03,netdev=esx-3 \
-netdev socket,id=esx-0,udp=127.0.0.1:10000,localaddr=127.0.0.1:20000 \
-netdev socket,id=esx-1,udp=127.0.0.1:10001,localaddr=127.0.0.1:20001 \
-netdev socket,id=esx-2,udp=127.0.0.1:10002,localaddr=127.0.0.1:20002 \
-netdev socket,id=esx-3,udp=127.0.0.1:10003,localaddr=127.0.0.1:20003

So it’s basically the same, just no mounted CD-ROM image.  Now this is all fun, but what about networking?  As I had mentioned before, I bought a VIRL license, which includes a l2 Catalyst image, so why not use that, instad of a ‘traditional’ Linux bridge?  Sure!  In this example I’m going to connect the 4 ethernet ports from the ESXi into the first 4 ports on the cisco switch, with the last port connecting to a Linux bridge, that I then route to, as I wanted all my lab crap on a seperate network.  To start the switch I use this script:

kvm \
-m 768M \
-smp cpus=1 \
-boot order=c \
-drive file=vios_l2-adventerprisek9-m.vmdk.SSA.152-4.0.55.E.qcow2,if=ide,index=0,media=disk \
-serial telnet:127.0.0.1:5000,server,nowait \
-monitor tcp:127.0.0.1:51492,server,nowait \
-net none \
-device e1000,mac=00:2e:3c:92:26:00,netdev=gns3-0 \
-device e1000,mac=00:2e:3c:92:26:01,netdev=gns3-1 \
-device e1000,mac=00:2e:3c:92:26:02,netdev=gns3-2 \
-device e1000,mac=00:2e:3c:92:26:03,netdev=gns3-3 \
-device e1000,mac=00:2e:3c:92:26:04 \
-device e1000,mac=00:2e:3c:92:26:05 \
-device e1000,mac=00:2e:3c:92:26:06 \
-device e1000,mac=00:2e:3c:92:26:07 \
-device e1000,mac=00:2e:3c:92:26:08 \
-device e1000,mac=00:2e:3c:92:26:09 \
-device e1000,mac=00:2e:3c:92:26:0a \
-device e1000,mac=00:2e:3c:92:26:0b,netdev=gns3-tap \
-netdev socket,id=gns3-0,udp=127.0.0.1:20000,localaddr=127.0.0.1:10000 \
-netdev socket,id=gns3-1,udp=127.0.0.1:20001,localaddr=127.0.0.1:10001 \
-netdev socket,id=gns3-2,udp=127.0.0.1:20002,localaddr=127.0.0.1:10002 \
-netdev socket,id=gns3-3,udp=127.0.0.1:20003,localaddr=127.0.0.1:10003 \
-netdev tap,id=gns3-tap,ifname=tap0,script=/etc/qemu-ifup \
-nographic

Now as you can see the udp sockets are inverse of eachother, meaning that the ESX listens on 10000 and sends to 127.0.0.1 on port 20000, while the switch listesns on 20000, and sends packets to 10000 for the first ethernet interface pair.

By default VMware only assigns the first NIC into the first virtual switch, so after enabling CDP, we can see we have basic connecitivity:

AMD-kvm#sho run int gig0/1
Building configuration…

Current configuration : 99 bytes
!
interface GigabitEthernet0/1
media-type rj45
speed 1000
duplex full
no negotiation auto
end

AMD-kvm#show cdp neigh
Capability Codes: R – Router, T – Trans Bridge, B – Source Route Bridge
S – Switch, H – Host, I – IGMP, r – Repeater, P – Phone,
D – Remote, C – CVTA, M – Two-port Mac Relay

Device ID Local Intrfce Holdtme Capability Platform Port ID
KVMESX-1 Gig 0/0 155 S VMware ES vmnic0

Total cdp entries displayed : 1

And of course the networking actually does work… I created a quick VM, and yep, It’s online!

AMD-kvm#show mac address-table
Mac Address Table
——————————————-

Vlan Mac Address Type Ports
—- ———– ——– —–
1 000c.2962.09e5 DYNAMIC Gi0/0
1 002e.3c92.2600 DYNAMIC Gi0/0
1 76b0.3336.34b3 DYNAMIC Gi2/3
Total Mac Addresses for this criterion: 3

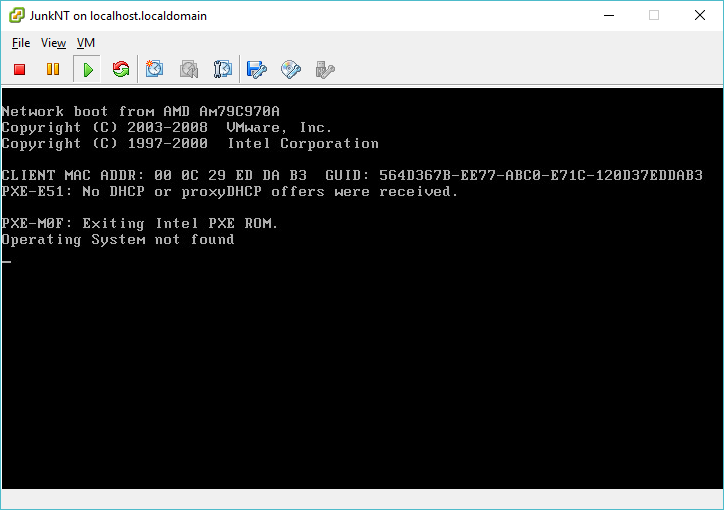
And of course some obliguttory pictures:

Nested ESXi running a simple NT 4.0 server

And:

Welcome to IIS 2.0

With ip forwarding turned on my Ubuntu server, and an ip address assigned to my bridge interface, I can then access the NT 4.0 VM from my laptop directly.

Nex’t time to make the L2 more complicated, and add in some L3 insanity…

Nothing worse than a firewall crash

So for my email setup I use an OpenBSD firewall behind a hardware firewall (provided by the telecom), and from there I use OpenVPN to connect up to the VPS that in turn forwards email to my Exchange server.

It works great.

Except that the OpenBSD VM just crashed.  And to top it off I had no other way of accessing inwards except for some test machine that luckily was still on, and I had SSH enabled, along with port redirection.

So a few seconds with putty and you can redirect a local port on your computer to connect to a port on the remote network.  Dangerous as hell but, it certainly can save the day! (Yes you can even SSH to a machine, and then OpenVPN to it….)

Checking VMware KB 1012382 details a list of what ports are needed by which versions of their products to do what.

[table]
Product,Port,Protocol,Source,Target,Purpose
ESXi 5.x,443,TCP,VI / vSphere Client, ESXi/ESX Host, VI / vSphere Client to ESXi/ESX Host management connection
ESXi 5.x,902,TCP,vSphere Client, ESXi 5.x vSphere, Client access to virtual machine consoles (MKS)
[/table]


Putty port redirection

Putty port redirection

These are the two ports needed for basic checking in on the status of a standalone ESXi machine. So in this case I can point the VMware fat client to attach to 127.0.0.1, and add in redirects for TCP ports 443 & 902, which let me login, and start a remote console to see how the VMs are doing.

In later versions, you need to use a proper host name.  To set this up edit your %windir%\system32\drivers\etc\hosts file, and make sure you have something like this:

127.0.0.1       localhost esxiloop

And then point the client to esxiloop, and it ought to connect.

VMWare ESX 2.5 on Qemu 0.14.0

Ok this is going to sound crazy but here we go!

Today I’m migrating this old SQL 7/Windows 2000 database server from VMWare ESX 3.5 to Proxmox VE. However this server started out on a VMWare ESX 2.5 server. And in the subsequent years had been decommissioned , and never updated but rather just copied onto the 3.5 cluster as we decommissioned the 2.5 cluster. At least I figured disk space was cheap enough we should keep the old VMs that “we will never need again” because.. Eventually someone will panic, and realize they need it again.

In the first step of doing so I needed to remove the old version of VMWare tools. But the catch is, this old version requires you to have the msi package handy to remove it. Well isn’t that a fun little catch. And you’ll find all kinds of ideas on what to do now that you don’t have your original “VMWare Tools.msi”. And more importantly you’ll now realize that you should have not only saved your old ISOs of ESX, but you should have also pulled out the tools ISOs and saved them as well.

Luckily I did save the software keys thought! Although I suspect that is also somewhere on their website, but they make it a chore to find the old stuff.. At any rate with 30 minutes of searching I finally came across the last version of 2.5, ESX Server 2.5.5 Build 57619.

Now it would seem that the VMWare tools are kept in an RPM file. Which is going to be a major pita for me to extract on Windows so I decided to take the more insane route, and install ESX on Qemu!

First I create a 5GB IDE disk to boot VMWare ESX server off, and a 10GB SCSI disk for the vmfs.

qemu-img.exe create -f raw esx25.disk 5G
Formatting ‘esx25.disk’, fmt=raw size=5368709120

qemu-img.exe create -f qcow2 esx-scsi.disk 10G
Formatting ‘esx-scsi.disk’, fmt=qcow2 size=10737418240 encryption=off cluster_size=0

With the disks created, I then fire up Qemu like this:

qemu-system-x86_64 -cpu Opteron_G2 -L pc-bios -m 512 -hda esx25.disk -drive file=esx-scsi.disk,if=scsi,bus=0,unit=0 -option-rom 8xx_64.rom -net nic,model=e1000 -net user -net nic,model=e1000 -redir tcp:8088::80 -redir tcp:8022::22 -redir tcp:8433::443 -cdrom \install\esx-2.5.5-57619.iso -boot d

This pulls in a few things, the SCSI configuration along with the AMD CPU type configuration that I’ve touched on previously.

qemu 0.14.0 ESX 2.5 boot

And away we go!

ESX 2.5 install

And Qemu should easily boot the graphical installer.

ESX 2.5 system

So using my configuration, I dedicate one Ethernet card to ESX, another to the guests, and share the SCSI adapter between the console and the guests…

ESX 2.5 partitions

And when it comes to the partitioning, I simply extended the root partition to the rest of the drive, and setup vmfs2 on the SCSI disk. I’m not even thinking about clustering, I’m primarily after the extensions.

installing

Installation takes about 20 minutes. It is just the way it is. The pegasus cimom for linux takes forever, along with the provider-esx package. I have no idea why, it’s probably thousands of little files or something crazy like that. But be patient, it’ll install.

ESX 2.5 installed

And there we go, a successful installation!

Now VMWare will want to reboot, I just kill Qemu, and then launch it booting off the IDE harddisk (-boot c).

ESX 2.5 boot options

Now we get an ESX and Linux boot menu. I’m feeling brave, so let’s try to boot ESX!

vmkernel loading..

It’s loading…

Purple screen of death

And it panics. Bug 1406:2154 BugNr=34866
“measured cpu and bus speeds conflict”

Oh well. But we can boot into Linux, and scp out the extensions! Which do hide in /usr/lib/vmware/isoimages/windows.iso . So it’s not a total loss. I did notice on VMWare Fusion there was a setting for ESX, perhaps I can run ESX 2.5.5 on my Mac? Perhaps, but I’ll try that for later.

Now with the ISO finally in hand, I put it in my VM, and tell it to uninstall the extensions, I provide it with the VMWare Tools.msi and I get…

The file VMWare Tools.msi is not a valid installation package for the product VMware Tools.
Try to find the installation package ‘VMware Tools.msi’ in a folder from which you can install VMware Tools.

However the ISO did offer a chance to ‘upgrade’ my apparently older 2.5 extensions. So I did that, rebooted, then with a matching level ISO I was able to remove them. Wow was that convoluted! If anything I guess we’ve found out you want to hold onto these extension CD’s not matter what.. You never know if someone comes in with an old VM, or if you had a decommissioned VM that suddenly has to be brought back to life, it’s best to have these handy to get them back into shape. Just because your setup is all ‘complete’ it doesn’t stop people from throwing you curve balls.