While I had enjoyed this fully loaded 286, it was getting a bit annoying with all the 32bit limitations I was running into. Frontier Elite was a 32bit program, Obviously no WIndows/386 nor any DooM. It seems that most of the MS-DOS fun I had really was 32bit only. So with this PS/2 model 60, I did the only real thing I could do:
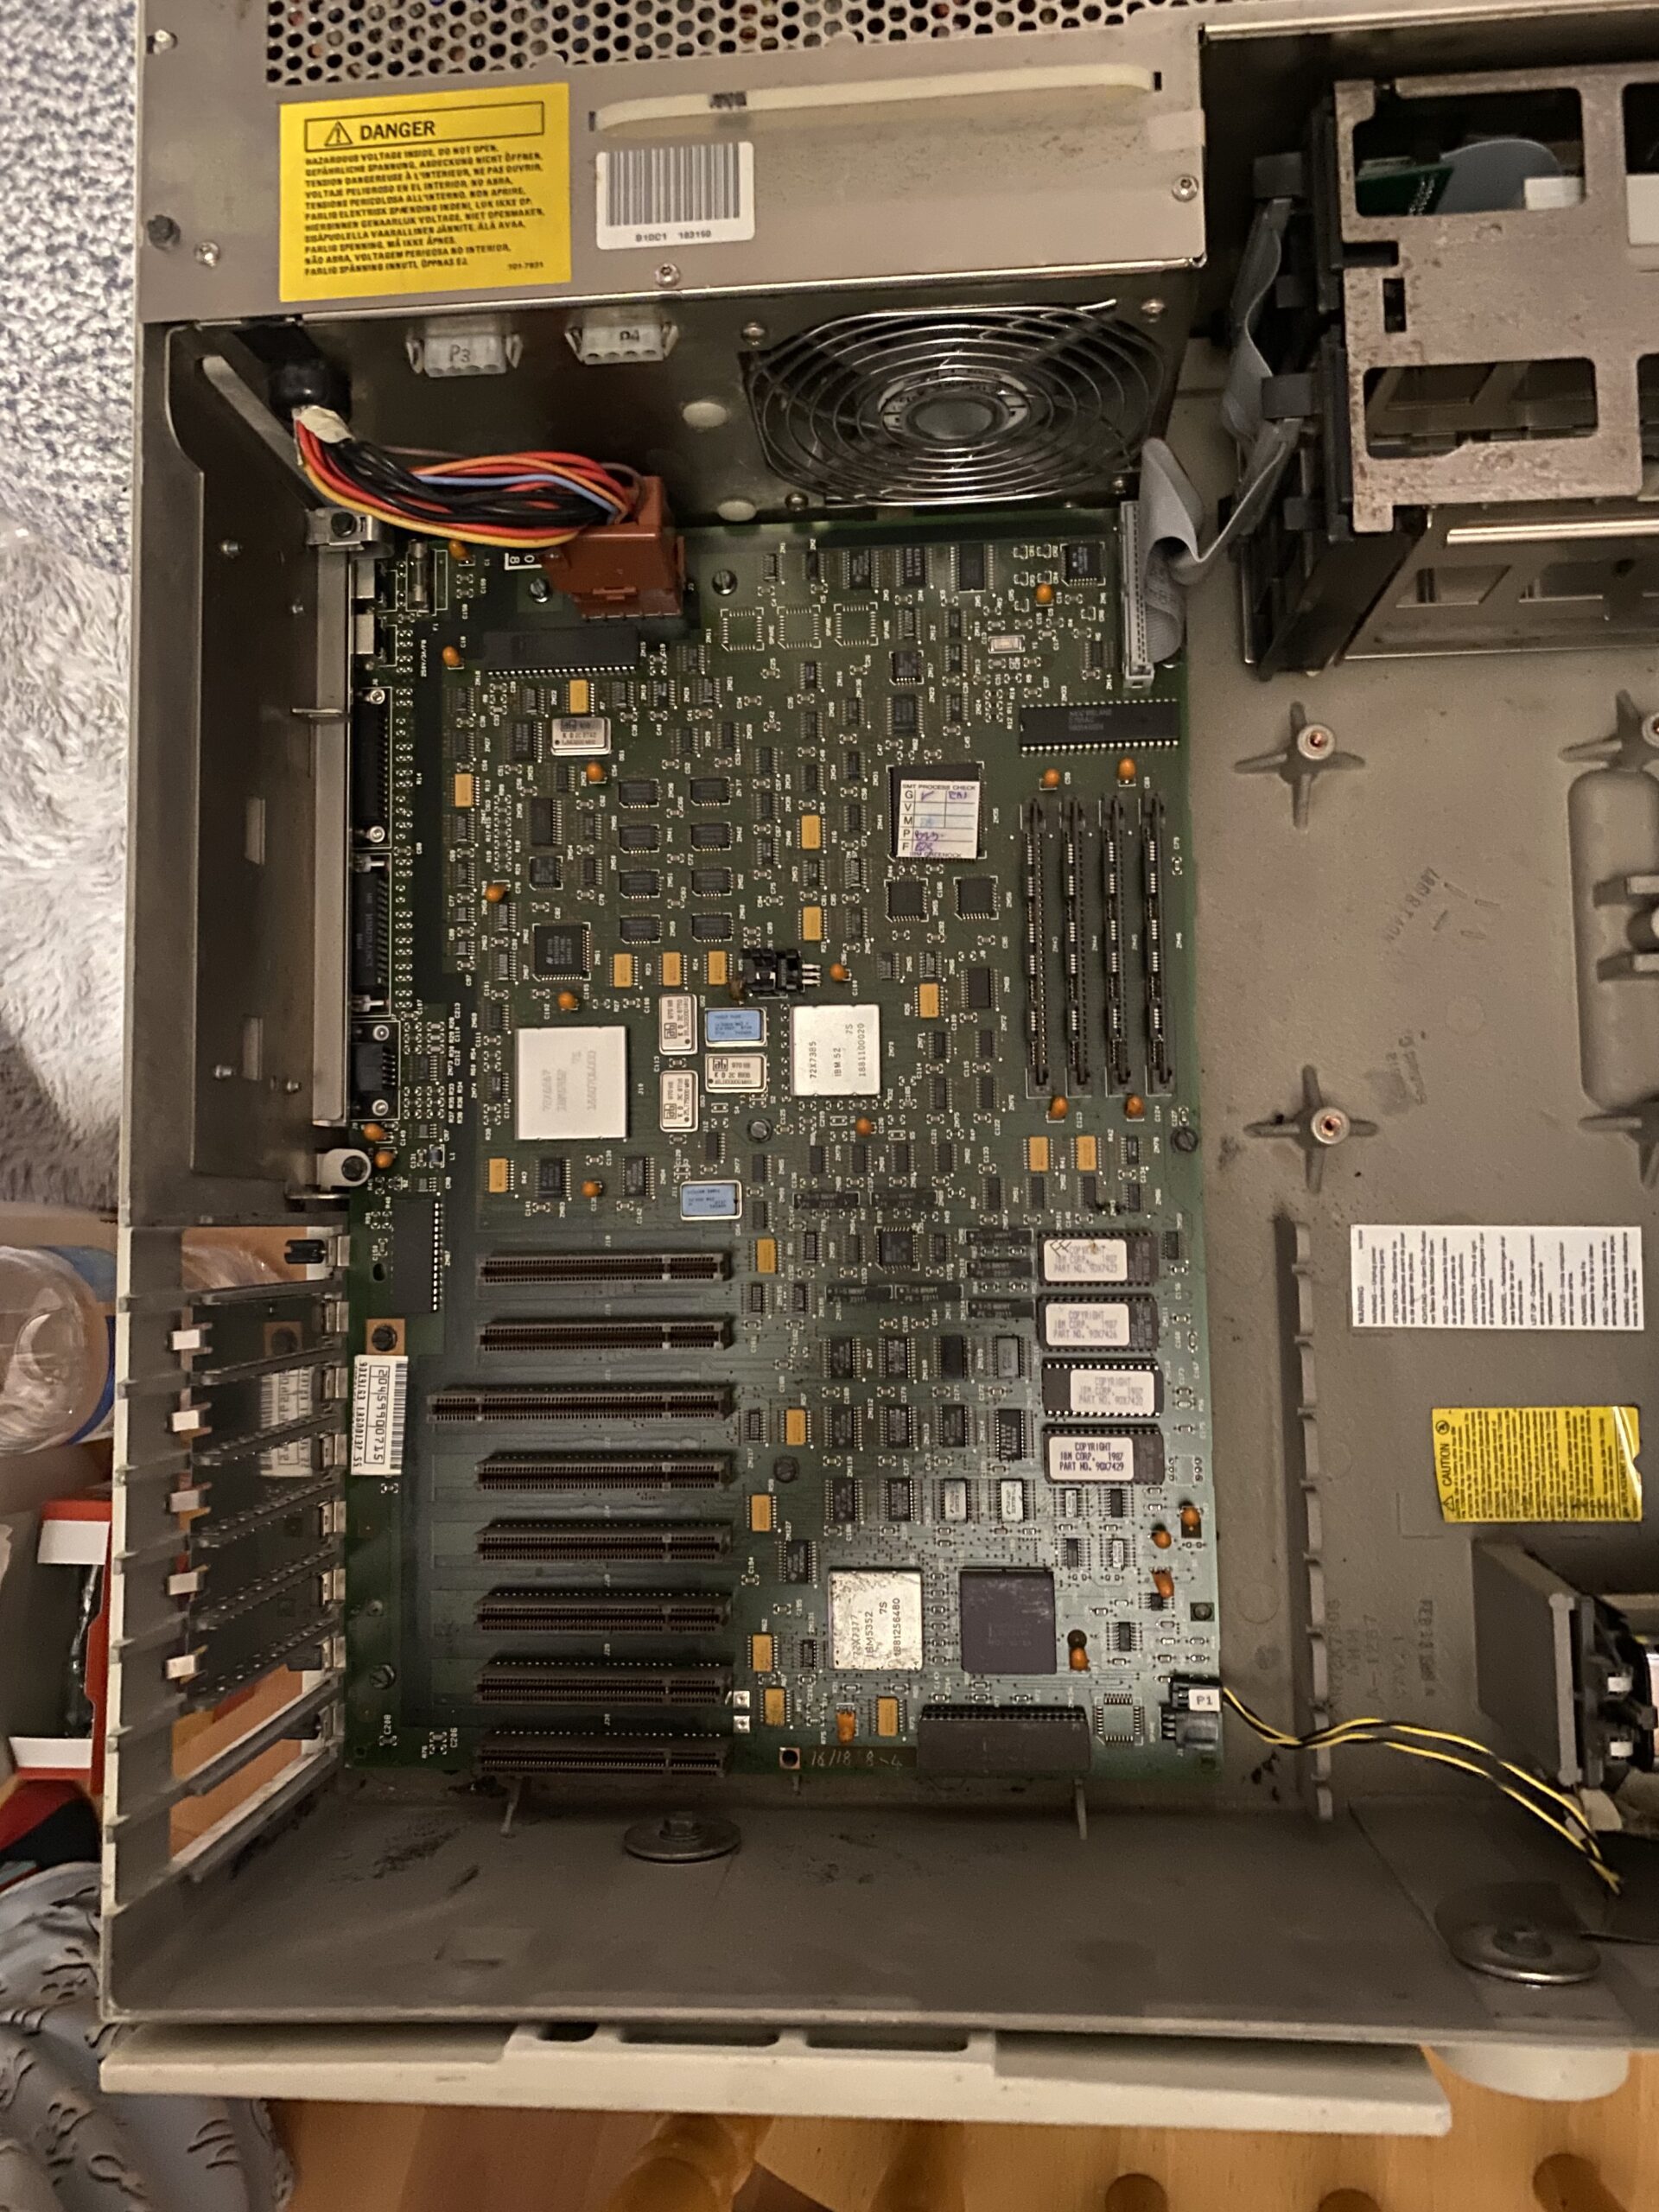
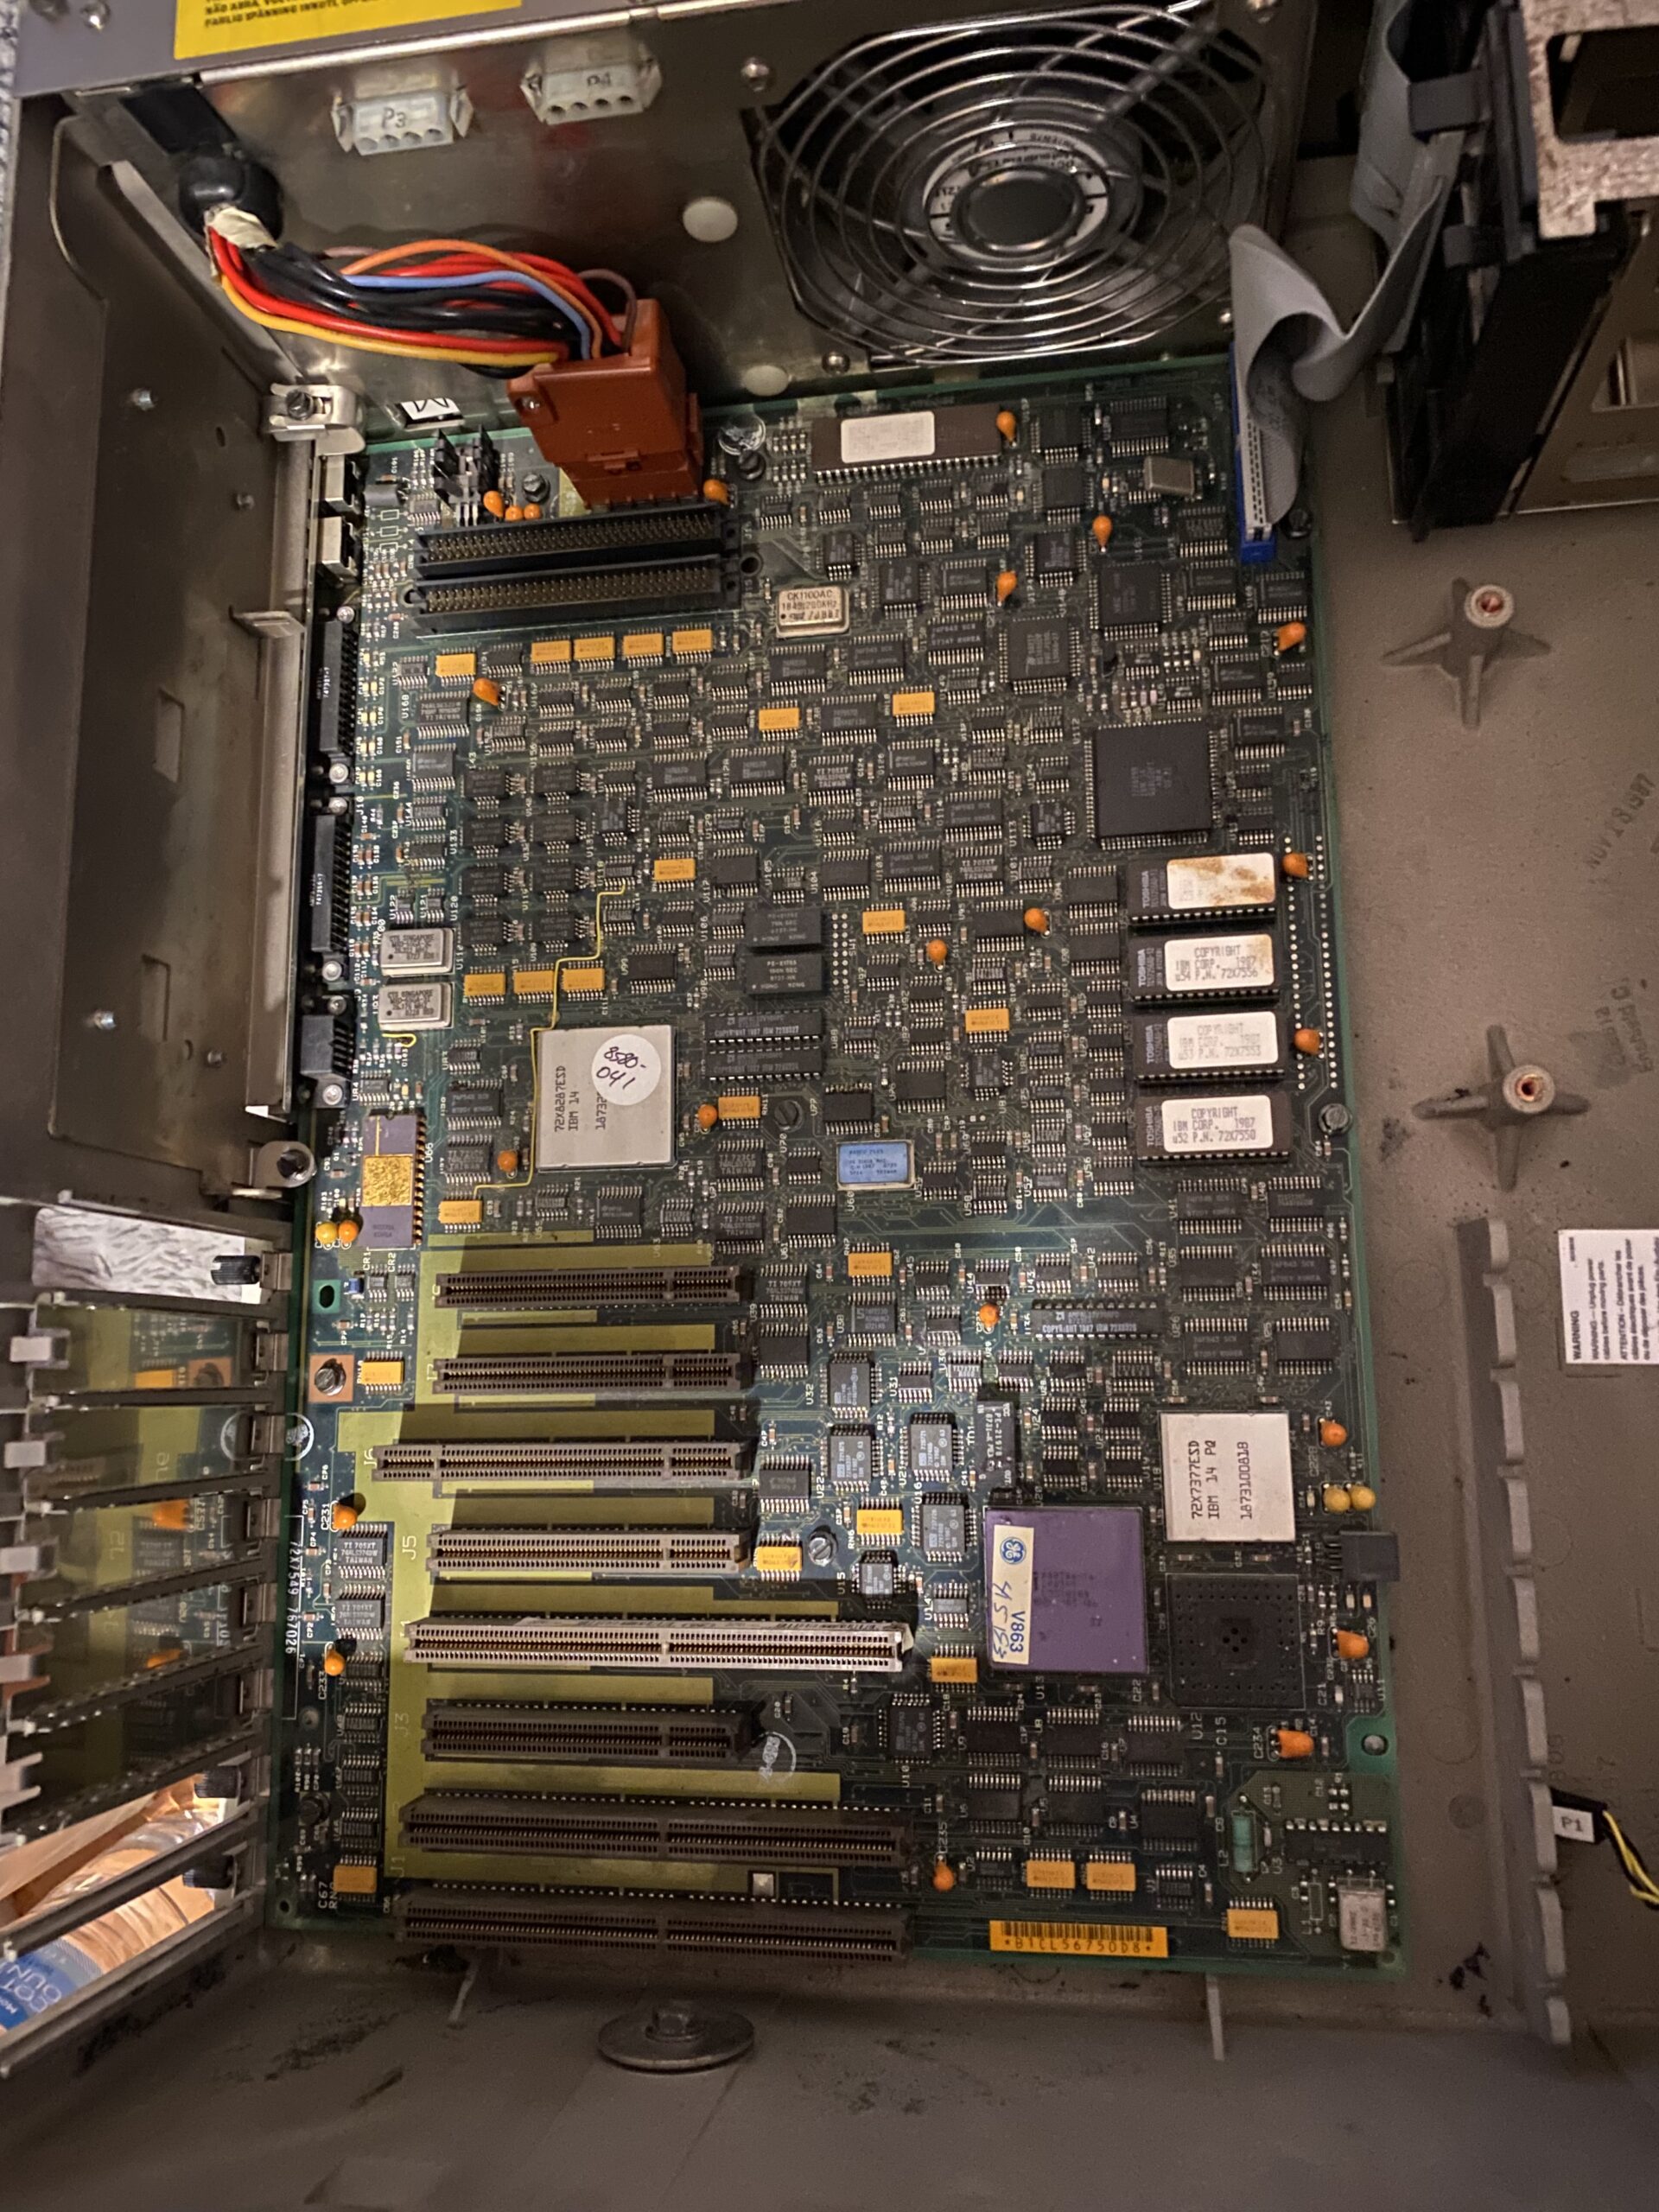
PS/2 80 motherboard
I swapped the motherboard with a PS/2 model 80 board. I had seen this on eBay for a bit of an excessive price, offered 40% of said price, and woke up to having shockingly won the bid. Of course it also means that I need special 32bit RAM to boot the board, because “IBM”.
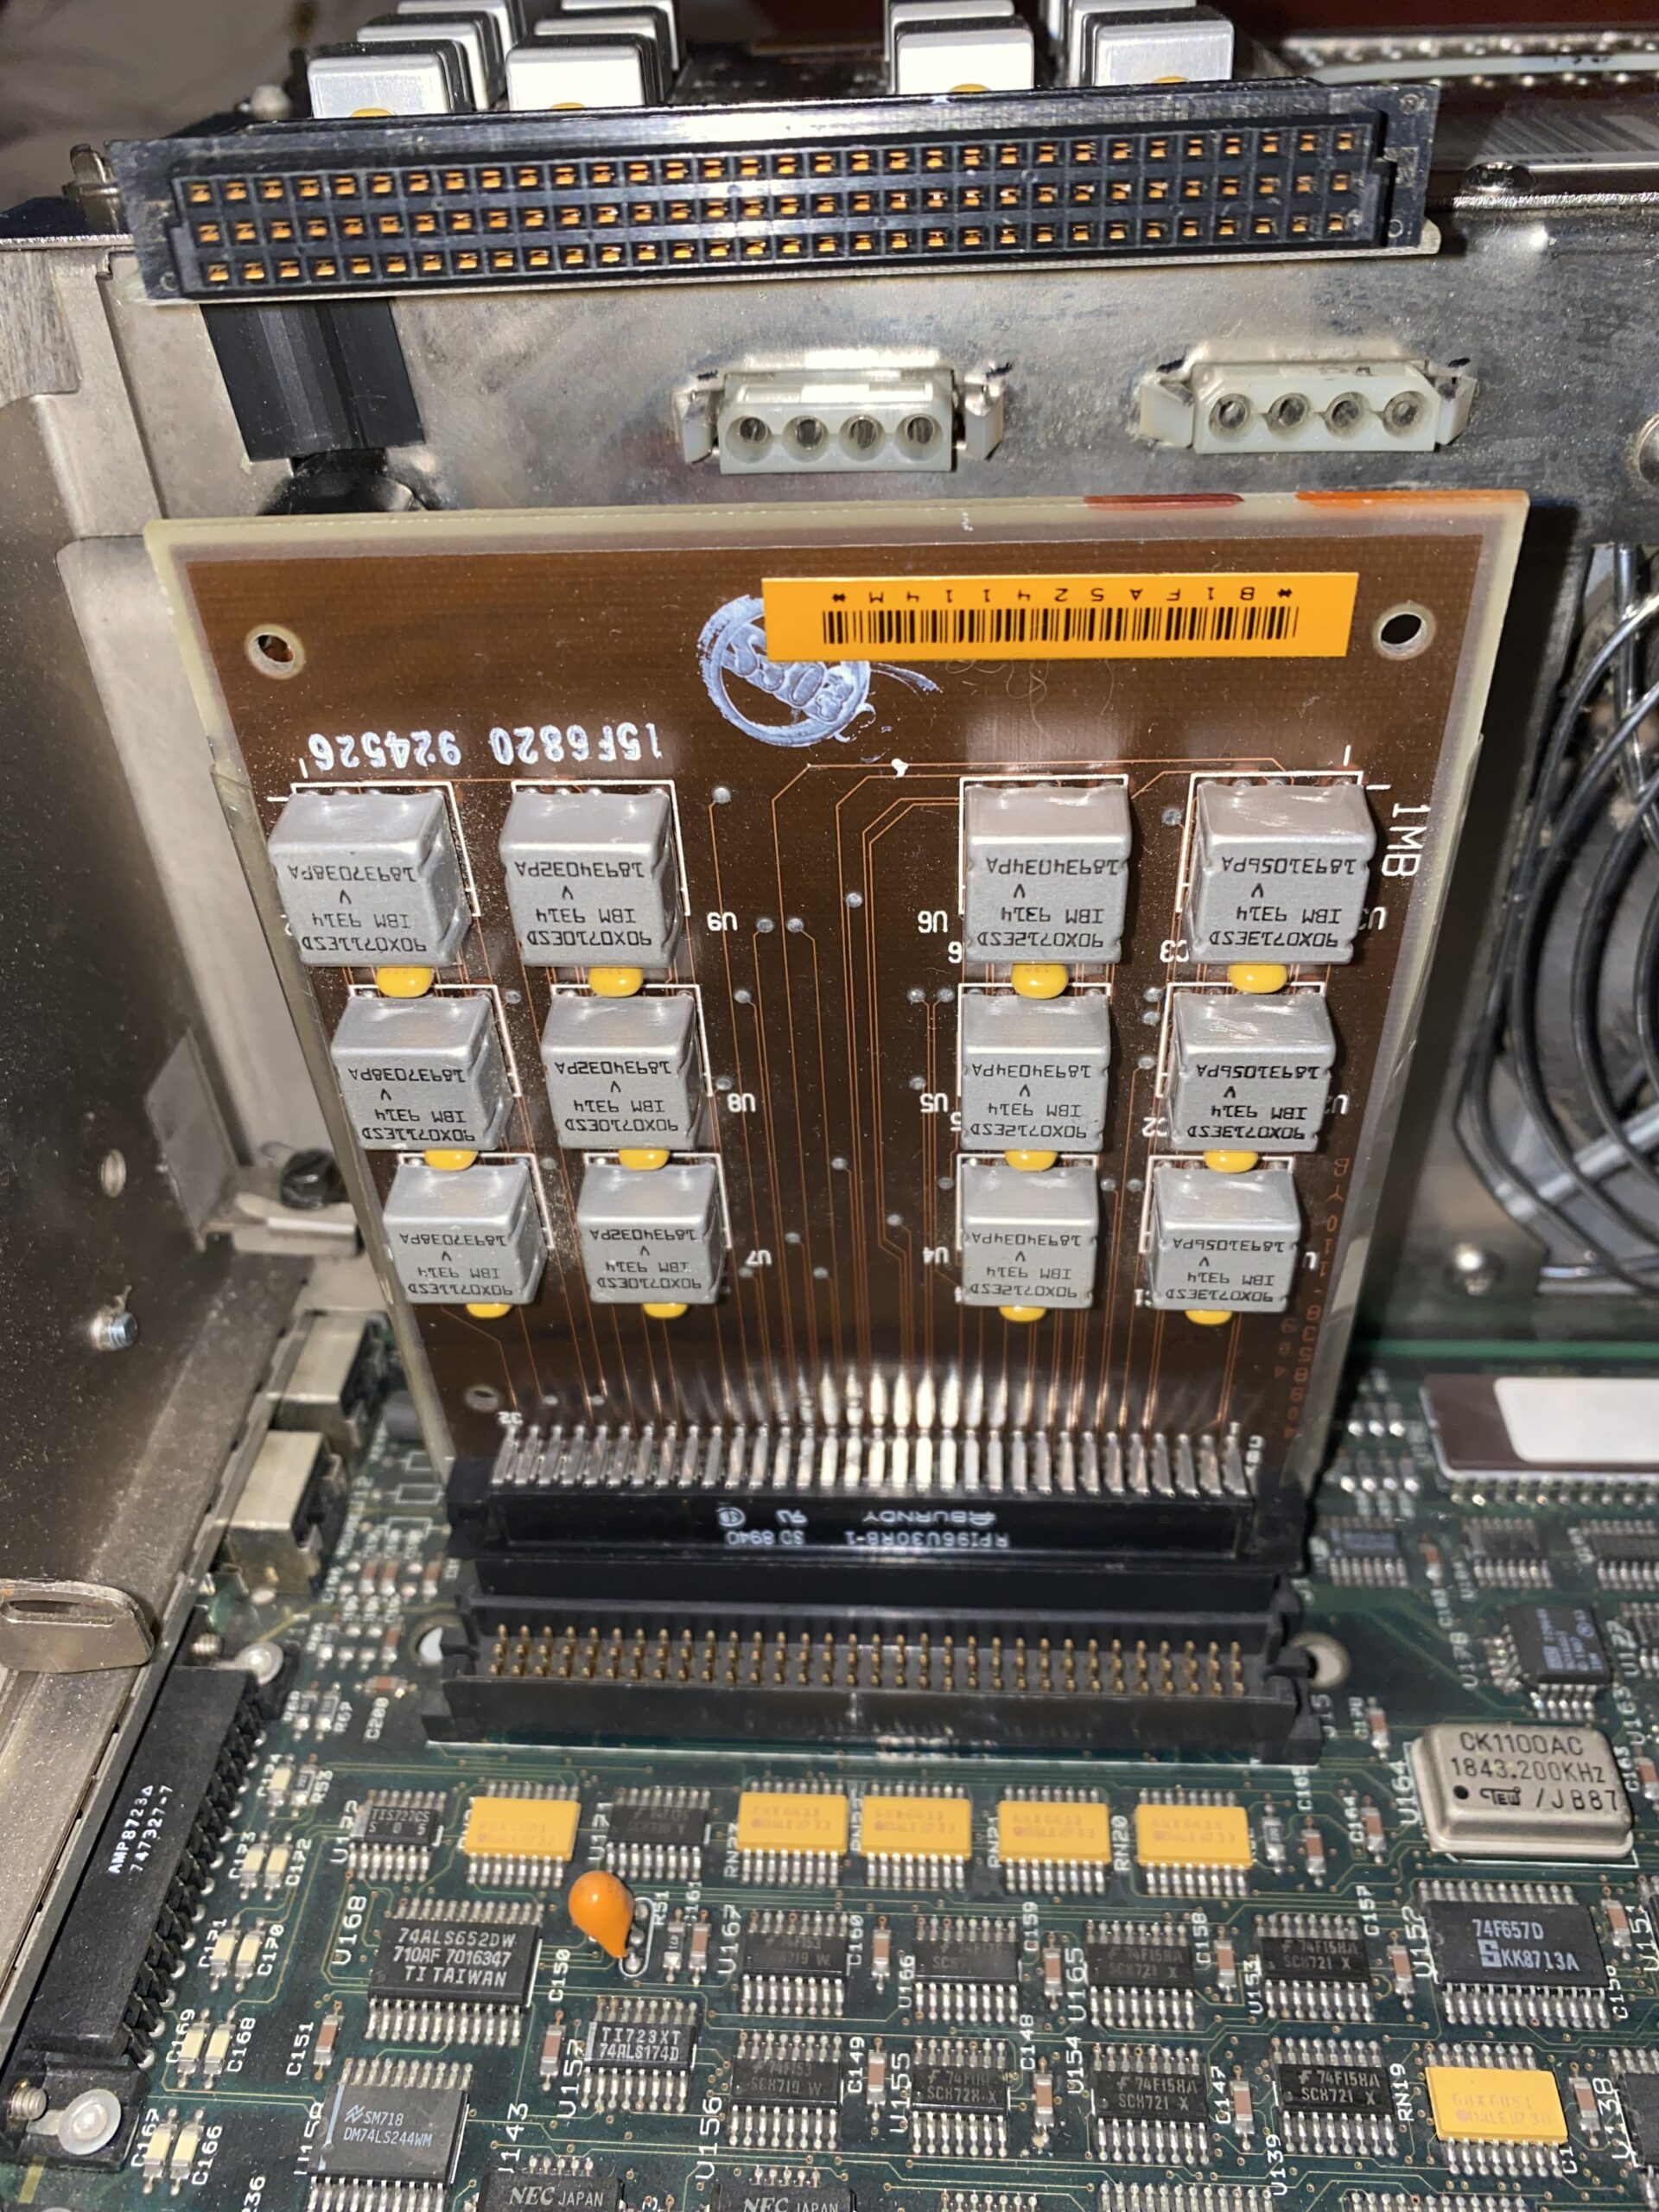
a 1MB module
I picked up 2 of these 1MB modules, they are 3 chip much like the SIMMS I had used on the PS/2 model 60 motherboard. So these are no doubt parity 256k in each row, and 2 cards giving it 2MB of RAM right off the bat. I got lucky to find these 2 cards in country and at a really reasonable rate, when compared to all the others. They did make 4MB & 8MB cards, but naturally they are incredibly expensive.
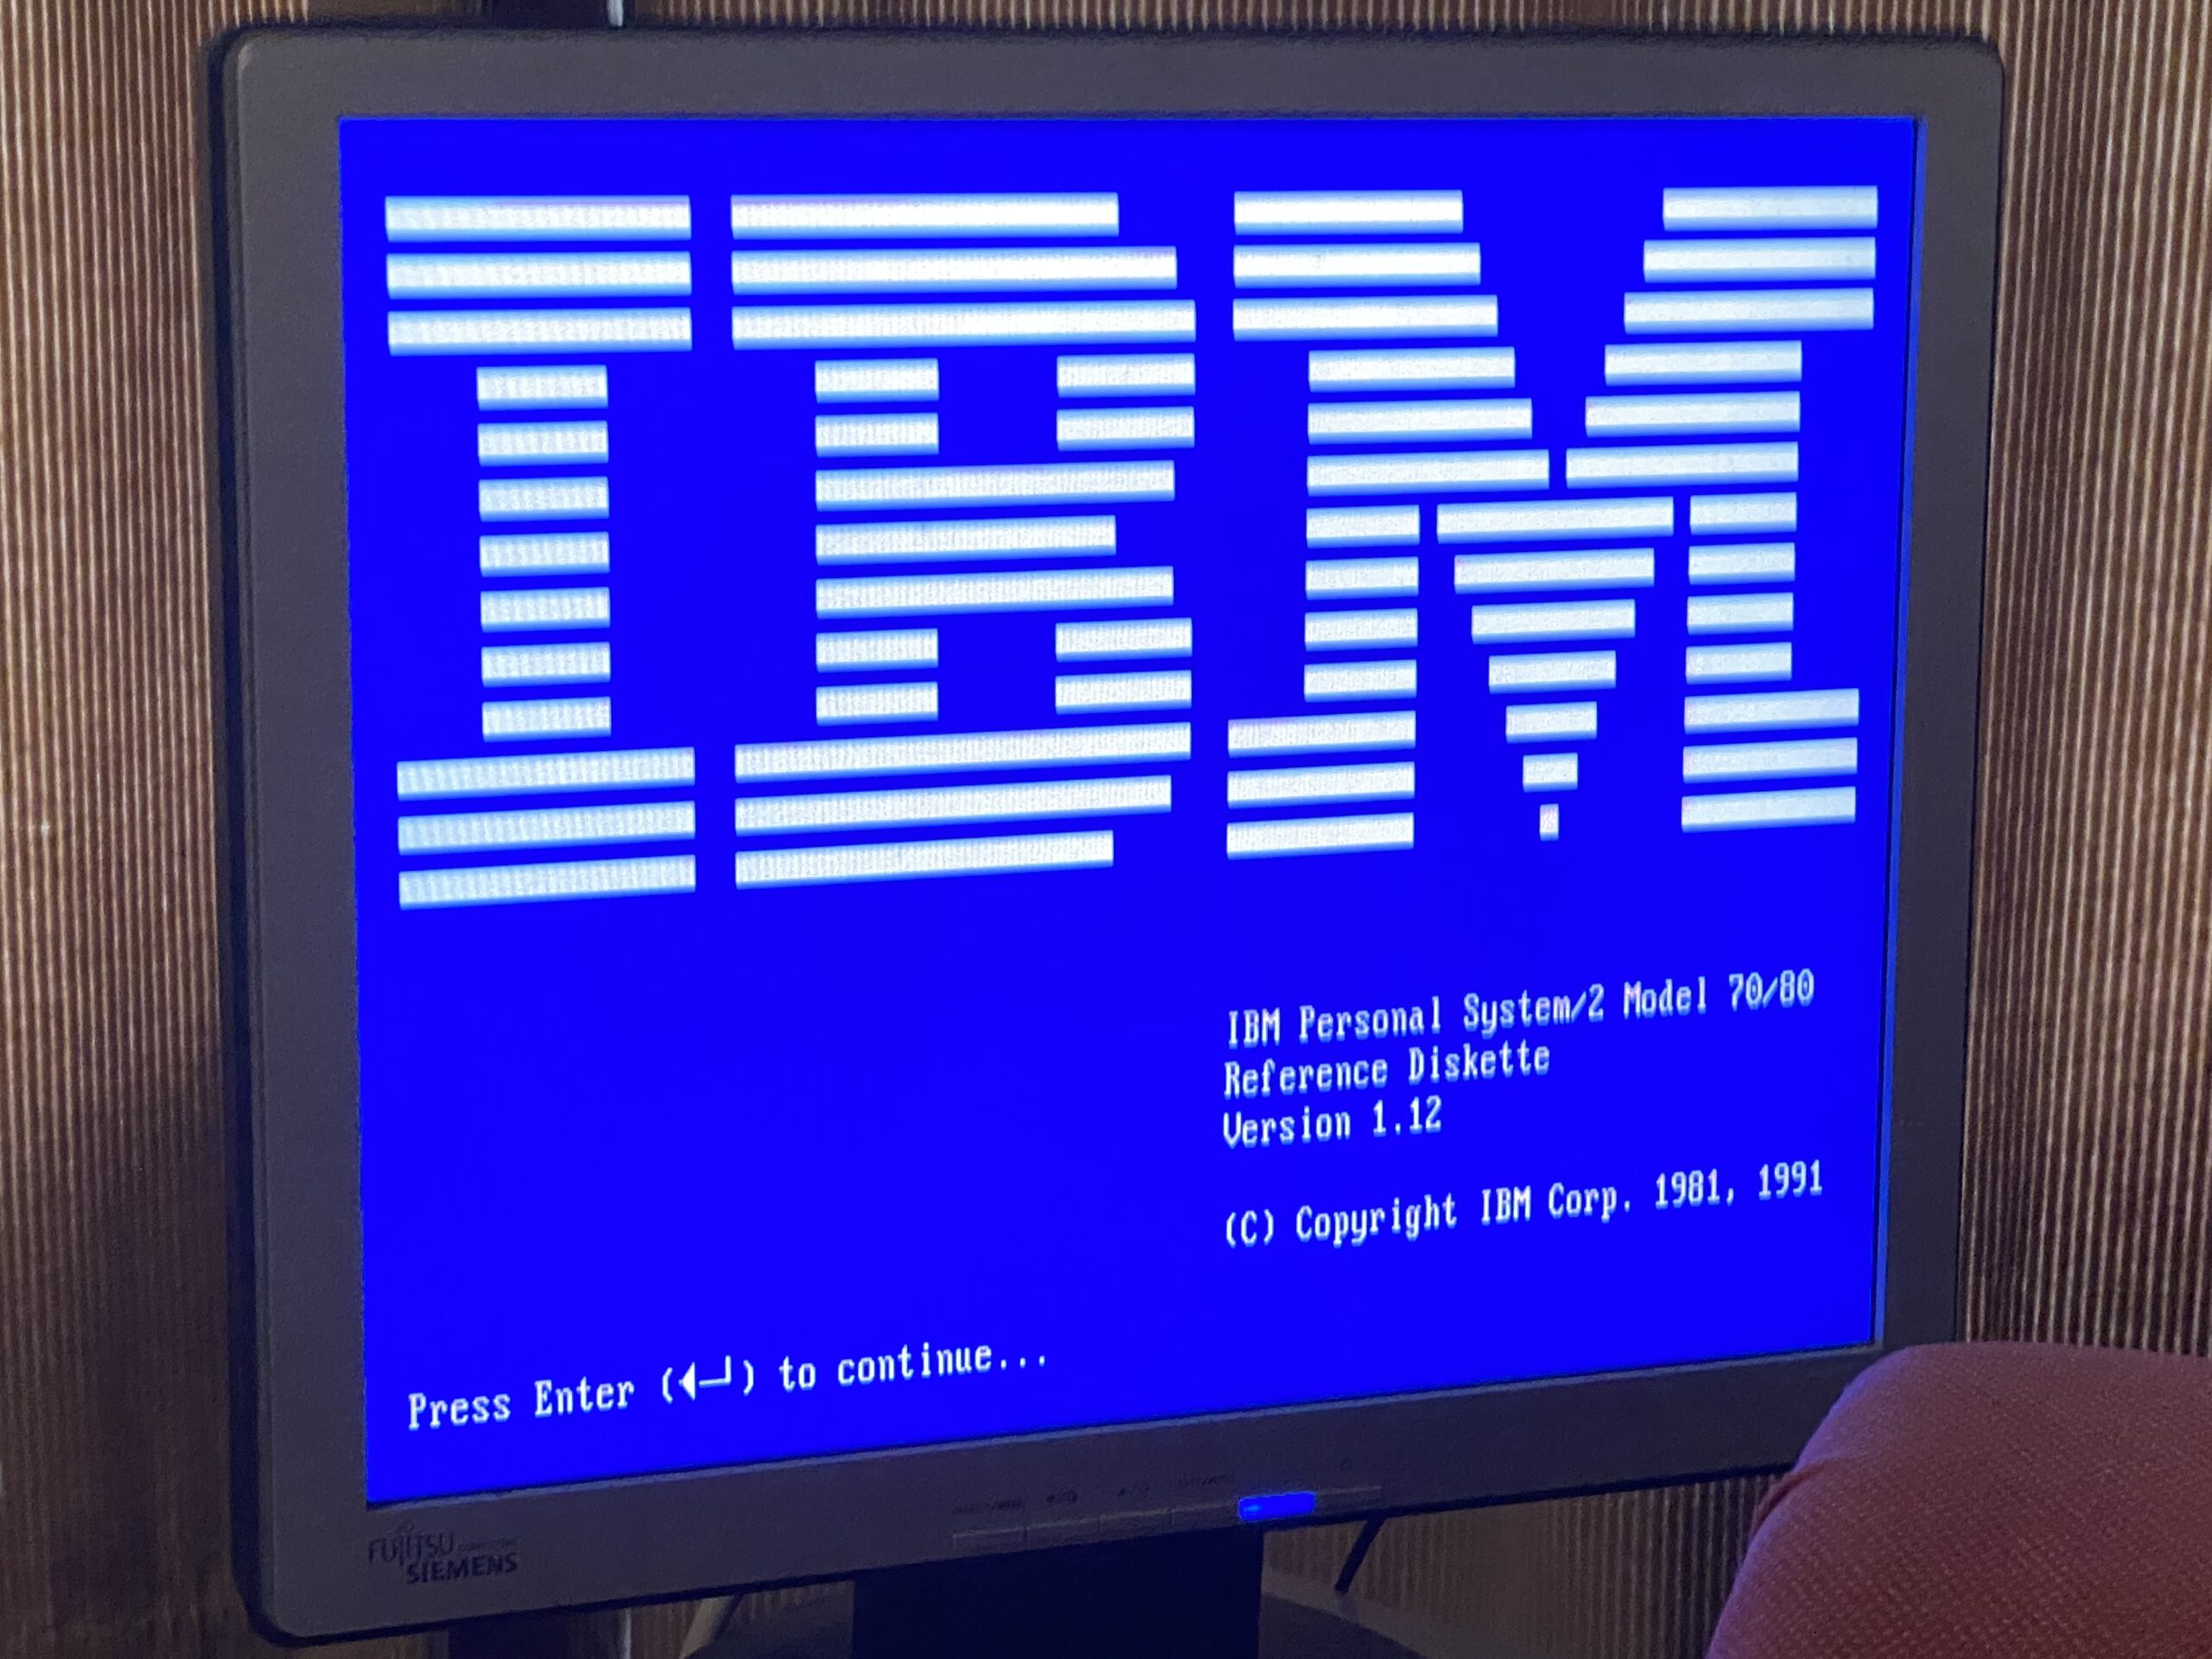
Bootup
Luckily for me the board & RAM worked (the board was listed as working), and running setup from the gotek was painless. However for the heck of it, I put in the Boca RAM/2 board to see if it works. It does. It also does the same thing where once the Boca RAM/2 board is configured the setup program only crashes on running it, meaning I need to disconnect the battery backed RAM.
I thought I could avoid setting up the RAM card, but oddly enough until I did so it would not initialize the SCSI card. Oh, sure it showed up in the setup program, saw all my disks and everything, but it would not boot or show up from a boot disk.
And now I have 32bit slots and a 32bit processor! Surely it’s going to ROCK!!!!….?
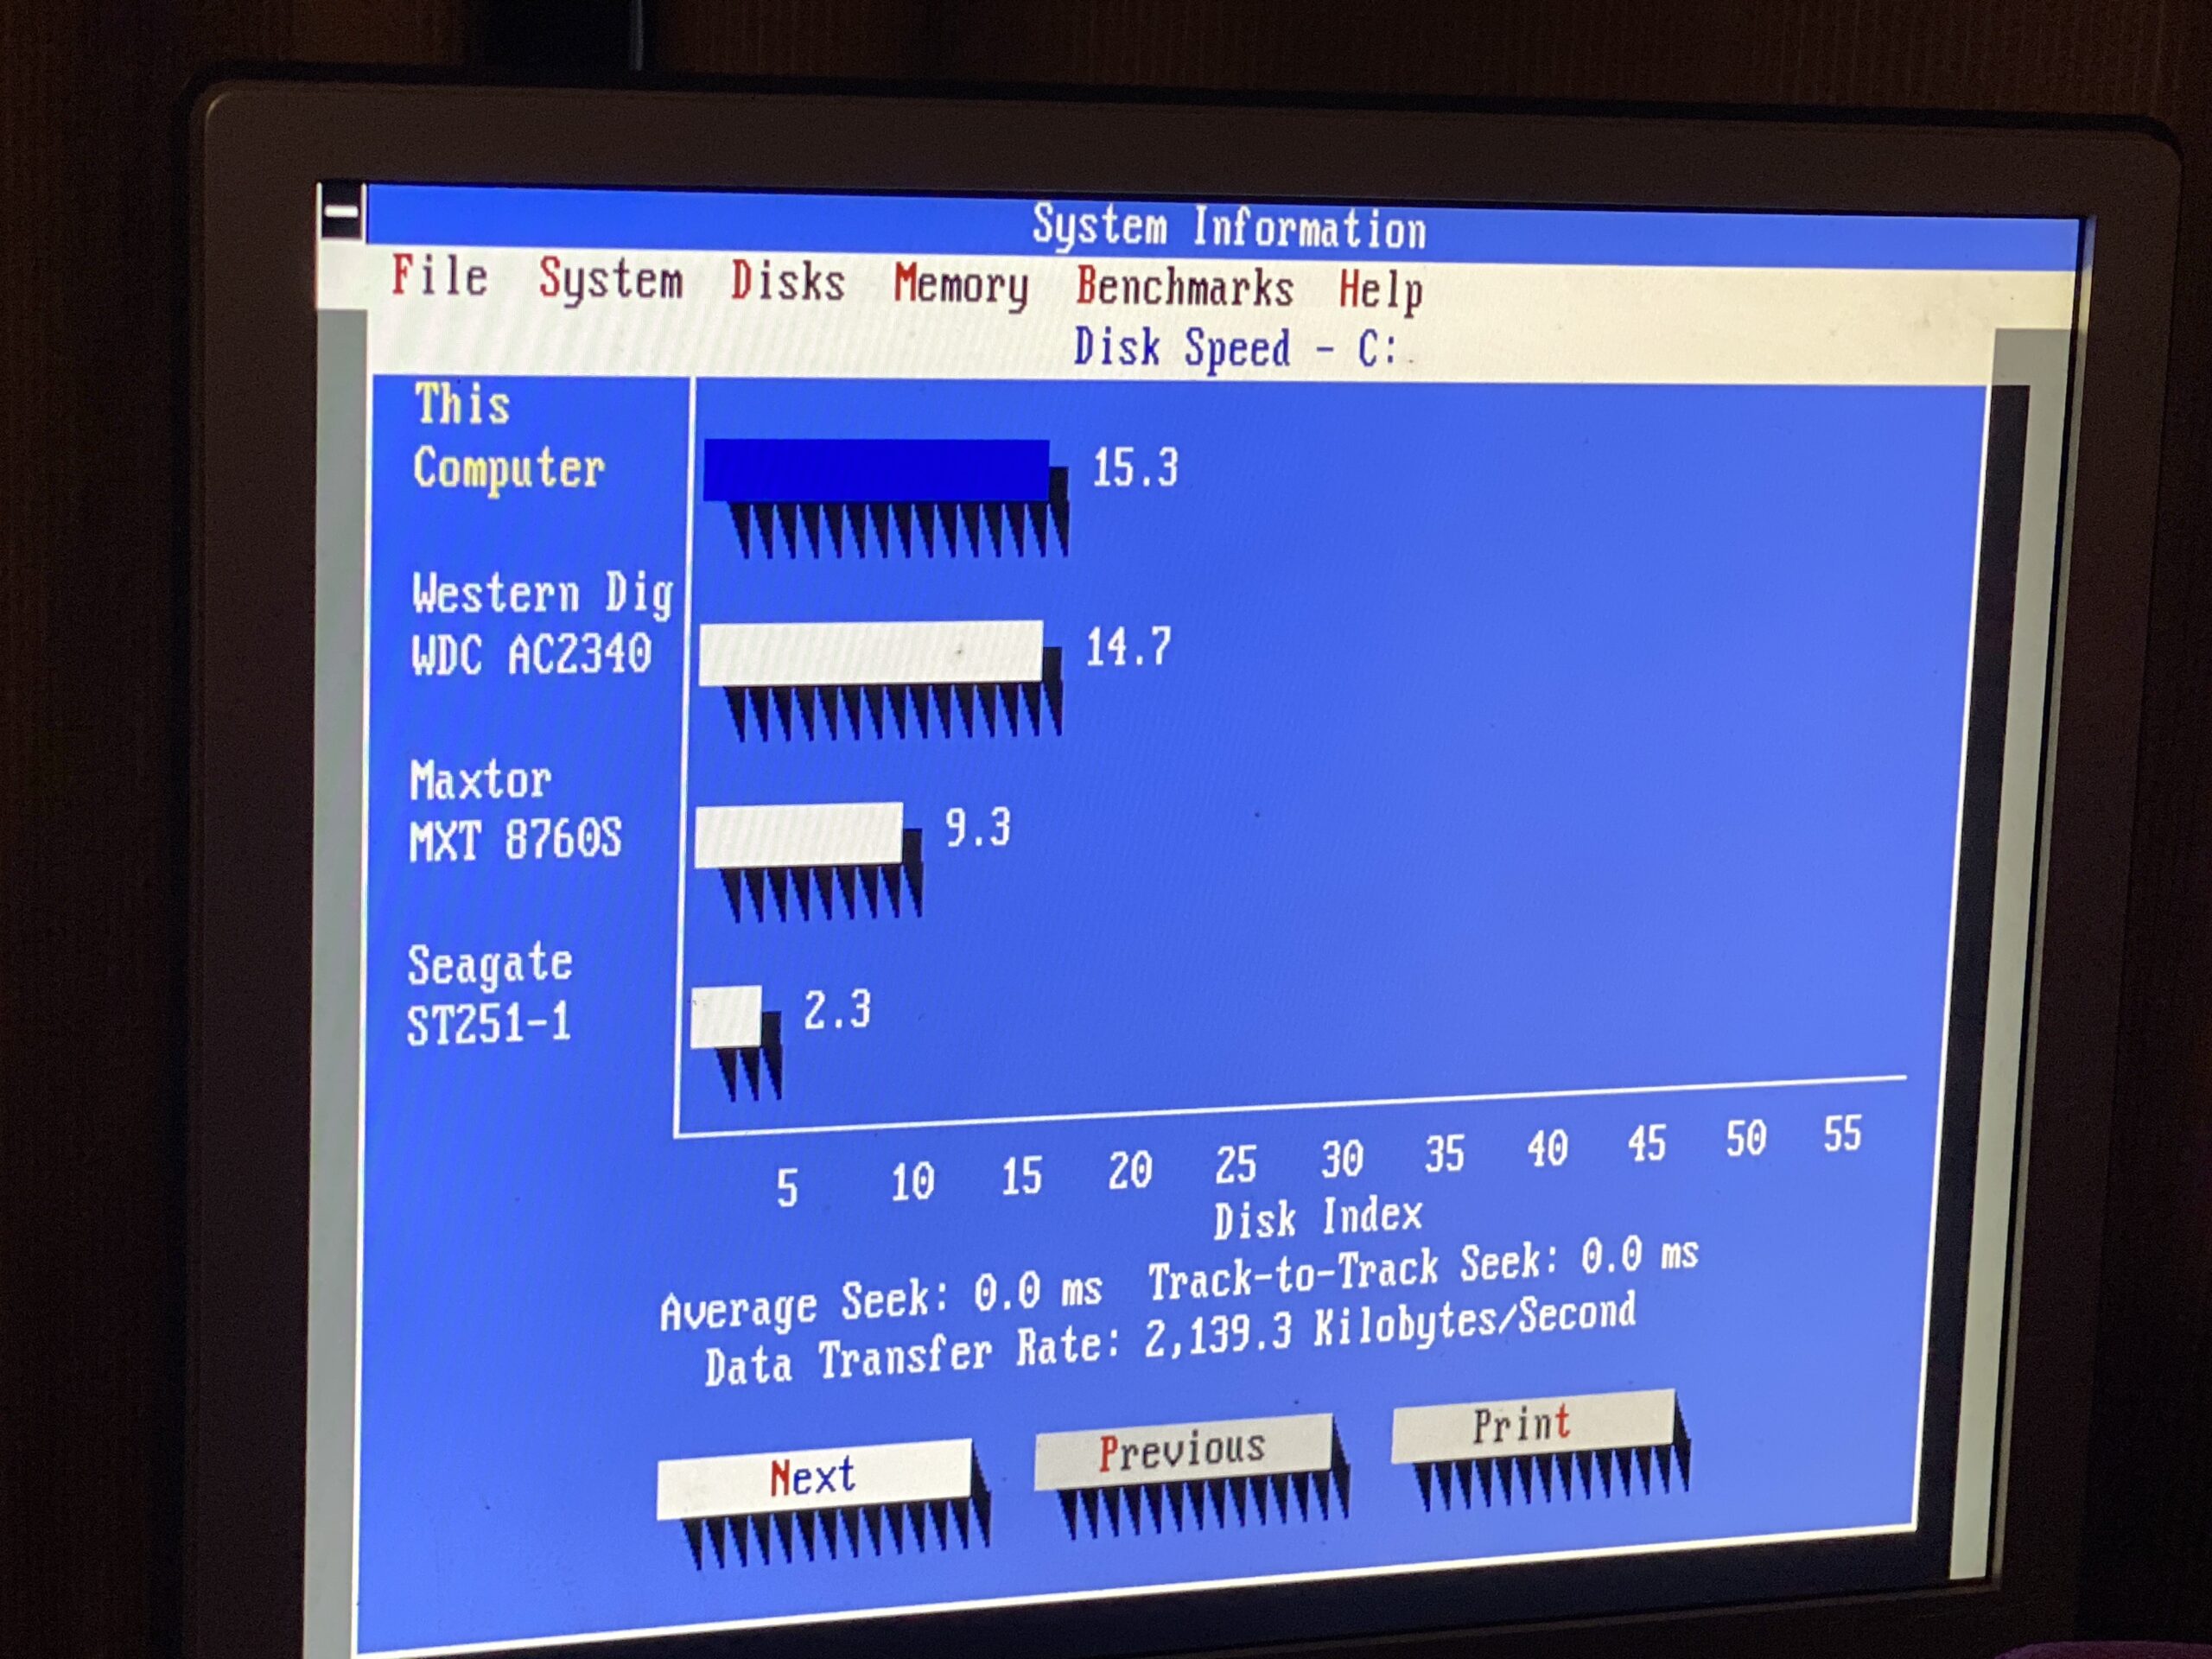
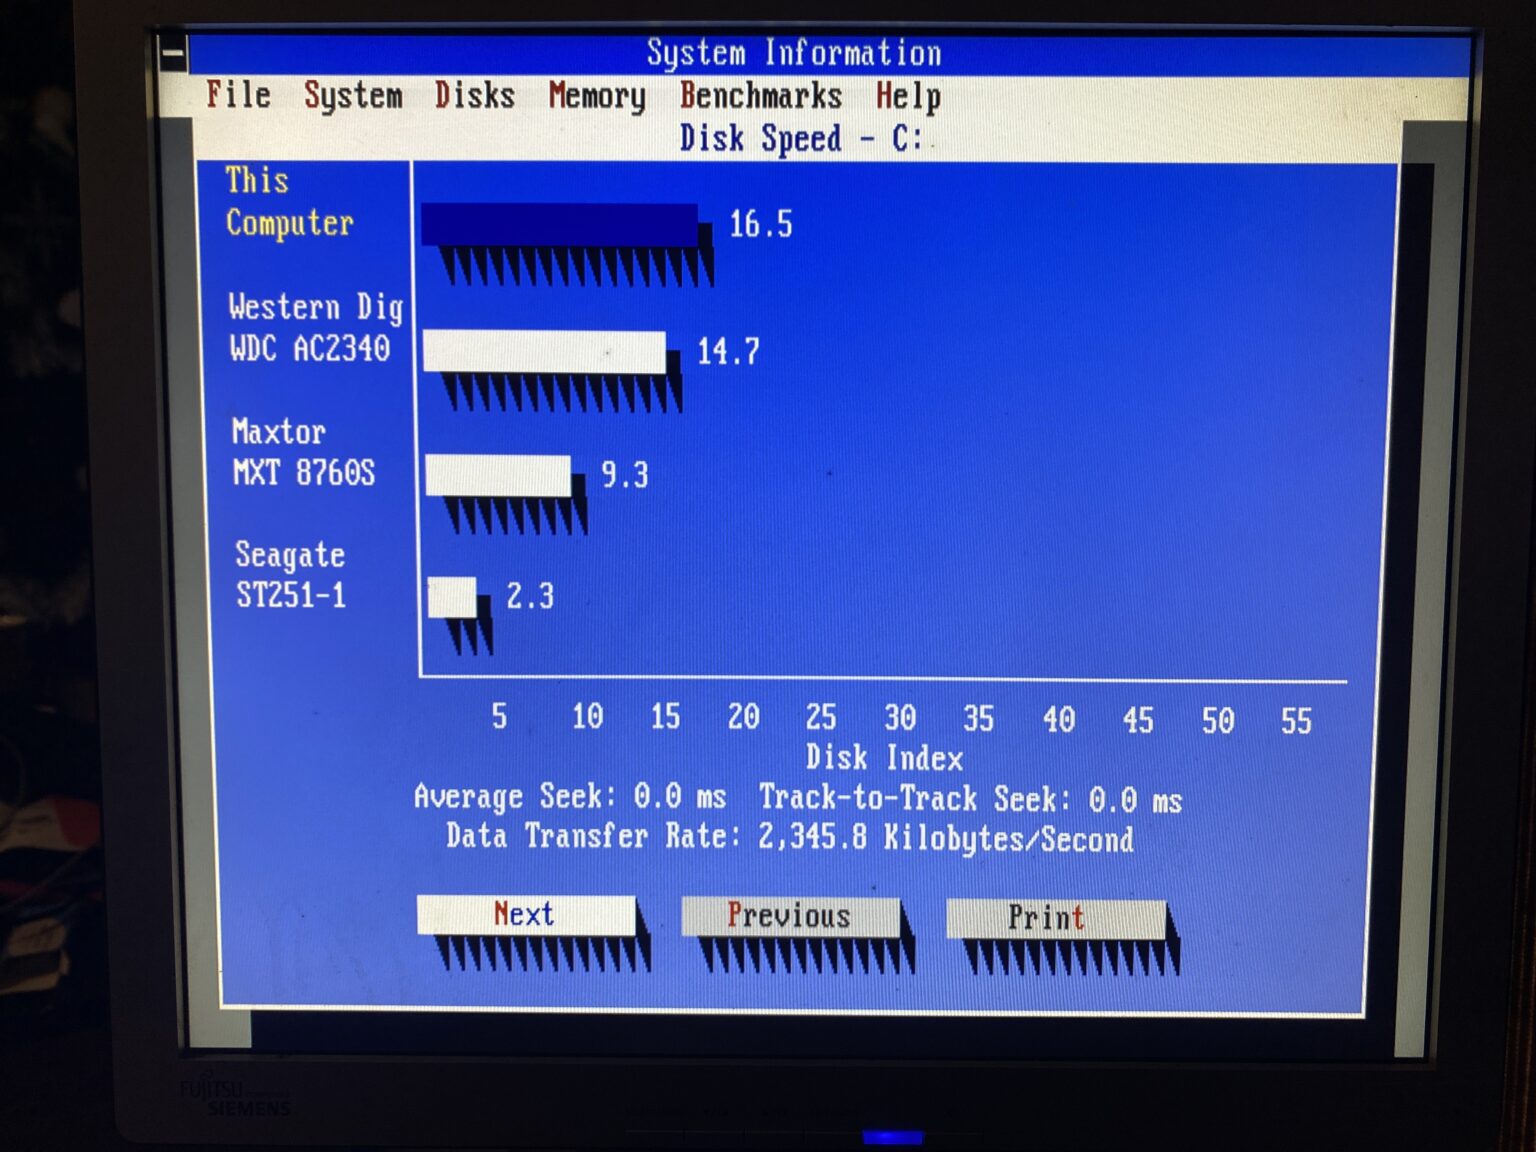
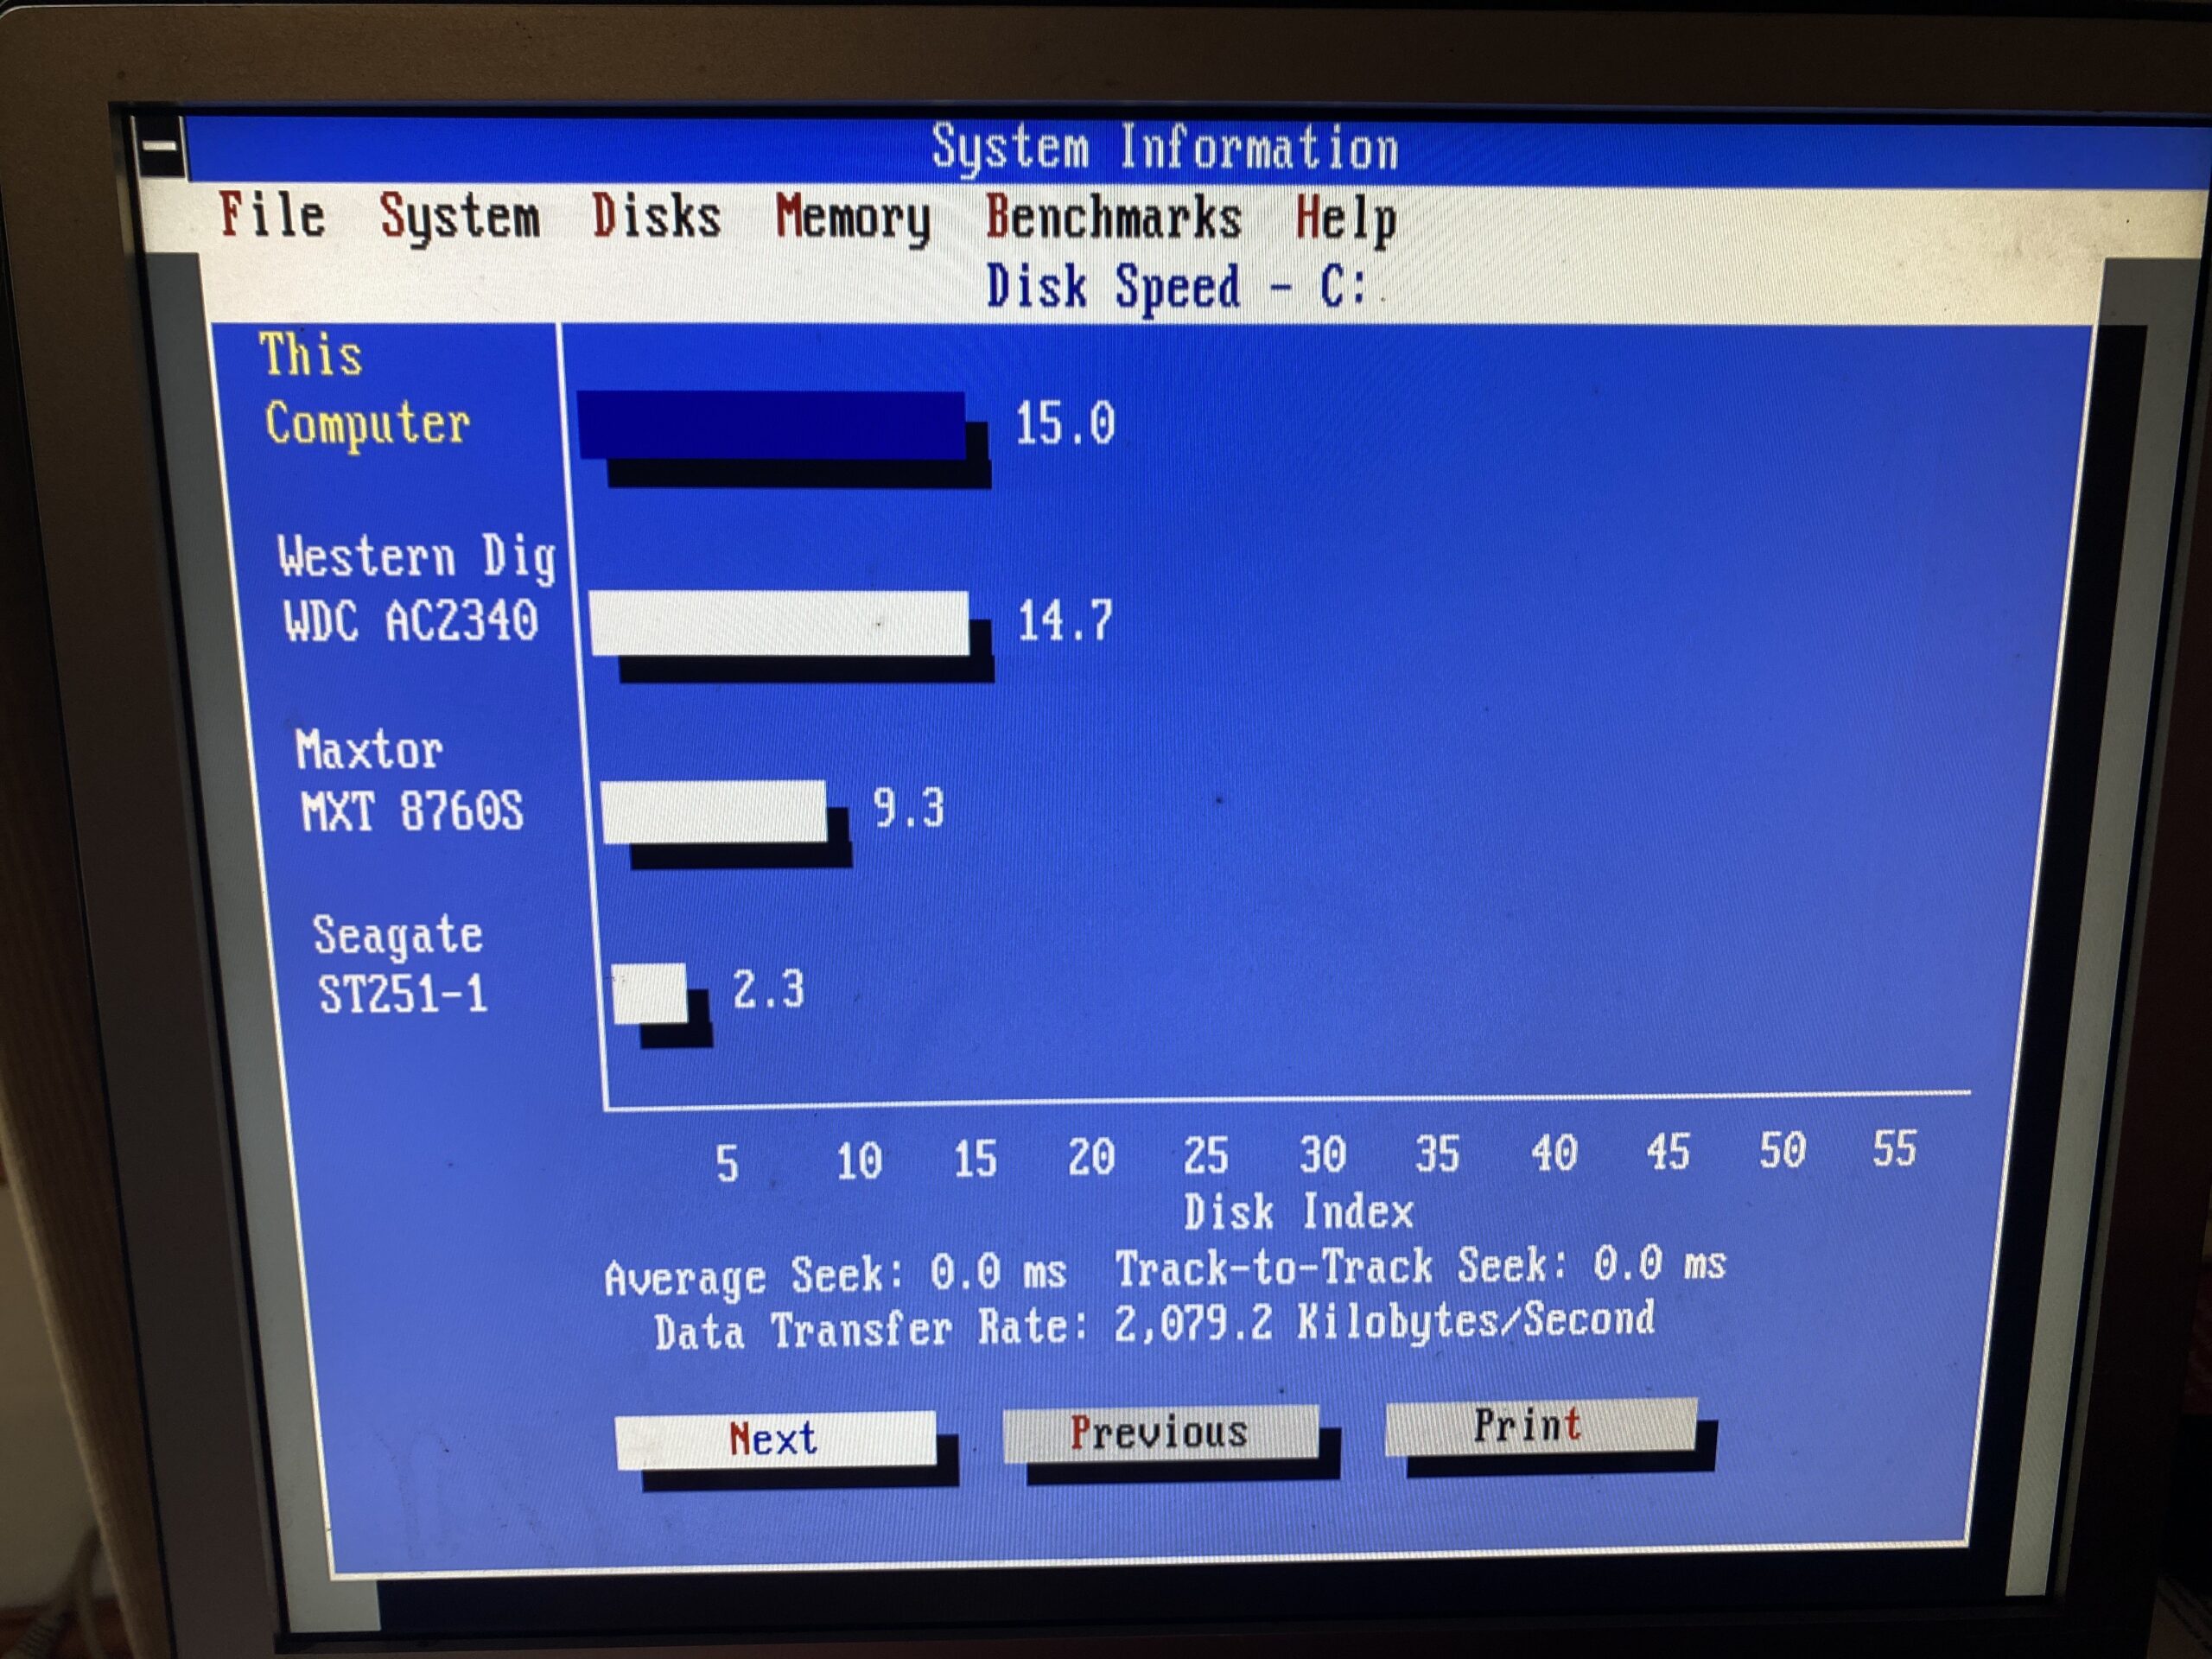
32bits of disappointment
It’s 0.3% faster.
What the actual FUCK. I mean ok BlueSCSI is great, and we’ve seen it perform faster with the ‘stupid’ card. I can’t imagine paying the $999 MSRP of this faster caching card to find out its slower. Nor the massive upgrade cost of going 32bit to find out its only slightly faster.
Wow.
Just Wow.
LANDMARK 6.00
That said, v86 mode is really cool!
My goto test for v86 is BattleTech the crescent hawk’s inception. I mean if Windows/386 can run this, everything else should be able to. And yeah, 16Mhz is almost enough to run this in a window. It screen tears like crazy and is just slow. But at least it runs!
Warning beeper music!
Although football was capable of doing this full screen in 1987, and Windows/386 could run it in a window in 1987 as well, it wasn’t until 1989/90 that OS/2 could with the much delayed 32bit version. Of course, the divorce happened after Windows 3.0 became such a massive seller, and OS/2 was delayed. again. While I had no issues under 86Box, I had plenty of weird issues on real hardware that seem to magically sort themselves out by running Infocom’s Planetfall first. I don’t know why either.
16Mhz Wing Commander
And luckily there is some difference in running at 16Mhz. Although I haven’t tried EMM386 on/off yet. The 286 had it’s excuse of copying pages in & out of protected mode, and the switch time being so horrific. But the 386 should be instant, only limited by it’s slow bus and I guess 4MB of slow RAM.
But what about DooM?
DooM v1.1 low resolution not quite postage stamp sized
Yes DooM v1.1 runs! I’ll have to try some Fast DooM later to see how much faster it can be! I’d like to think itll be faster but I am not holding out much hope.
Many of the bench stuff I had setup on the 286 to compare to the 386 sadly depend on a math processor. The problem of course is that 80287’s are very cheap for some reason. 80387’s however are not.
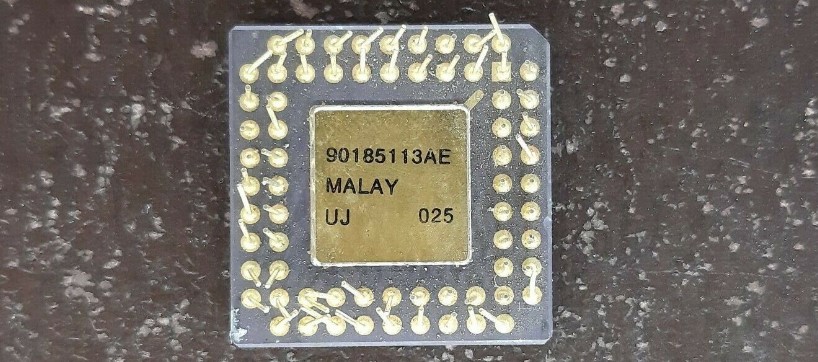
eBay special
And the majority of them look like this. I don’t know how on earth people have hundreds of 80287’s to sell at super cheap prices, but 80387’s all seem to have been trampled, or had their inner core’s turned into slag. I will keep a lookout, although knowing my luck it may be cheaper to find another motherboard with a 386/387 paring.
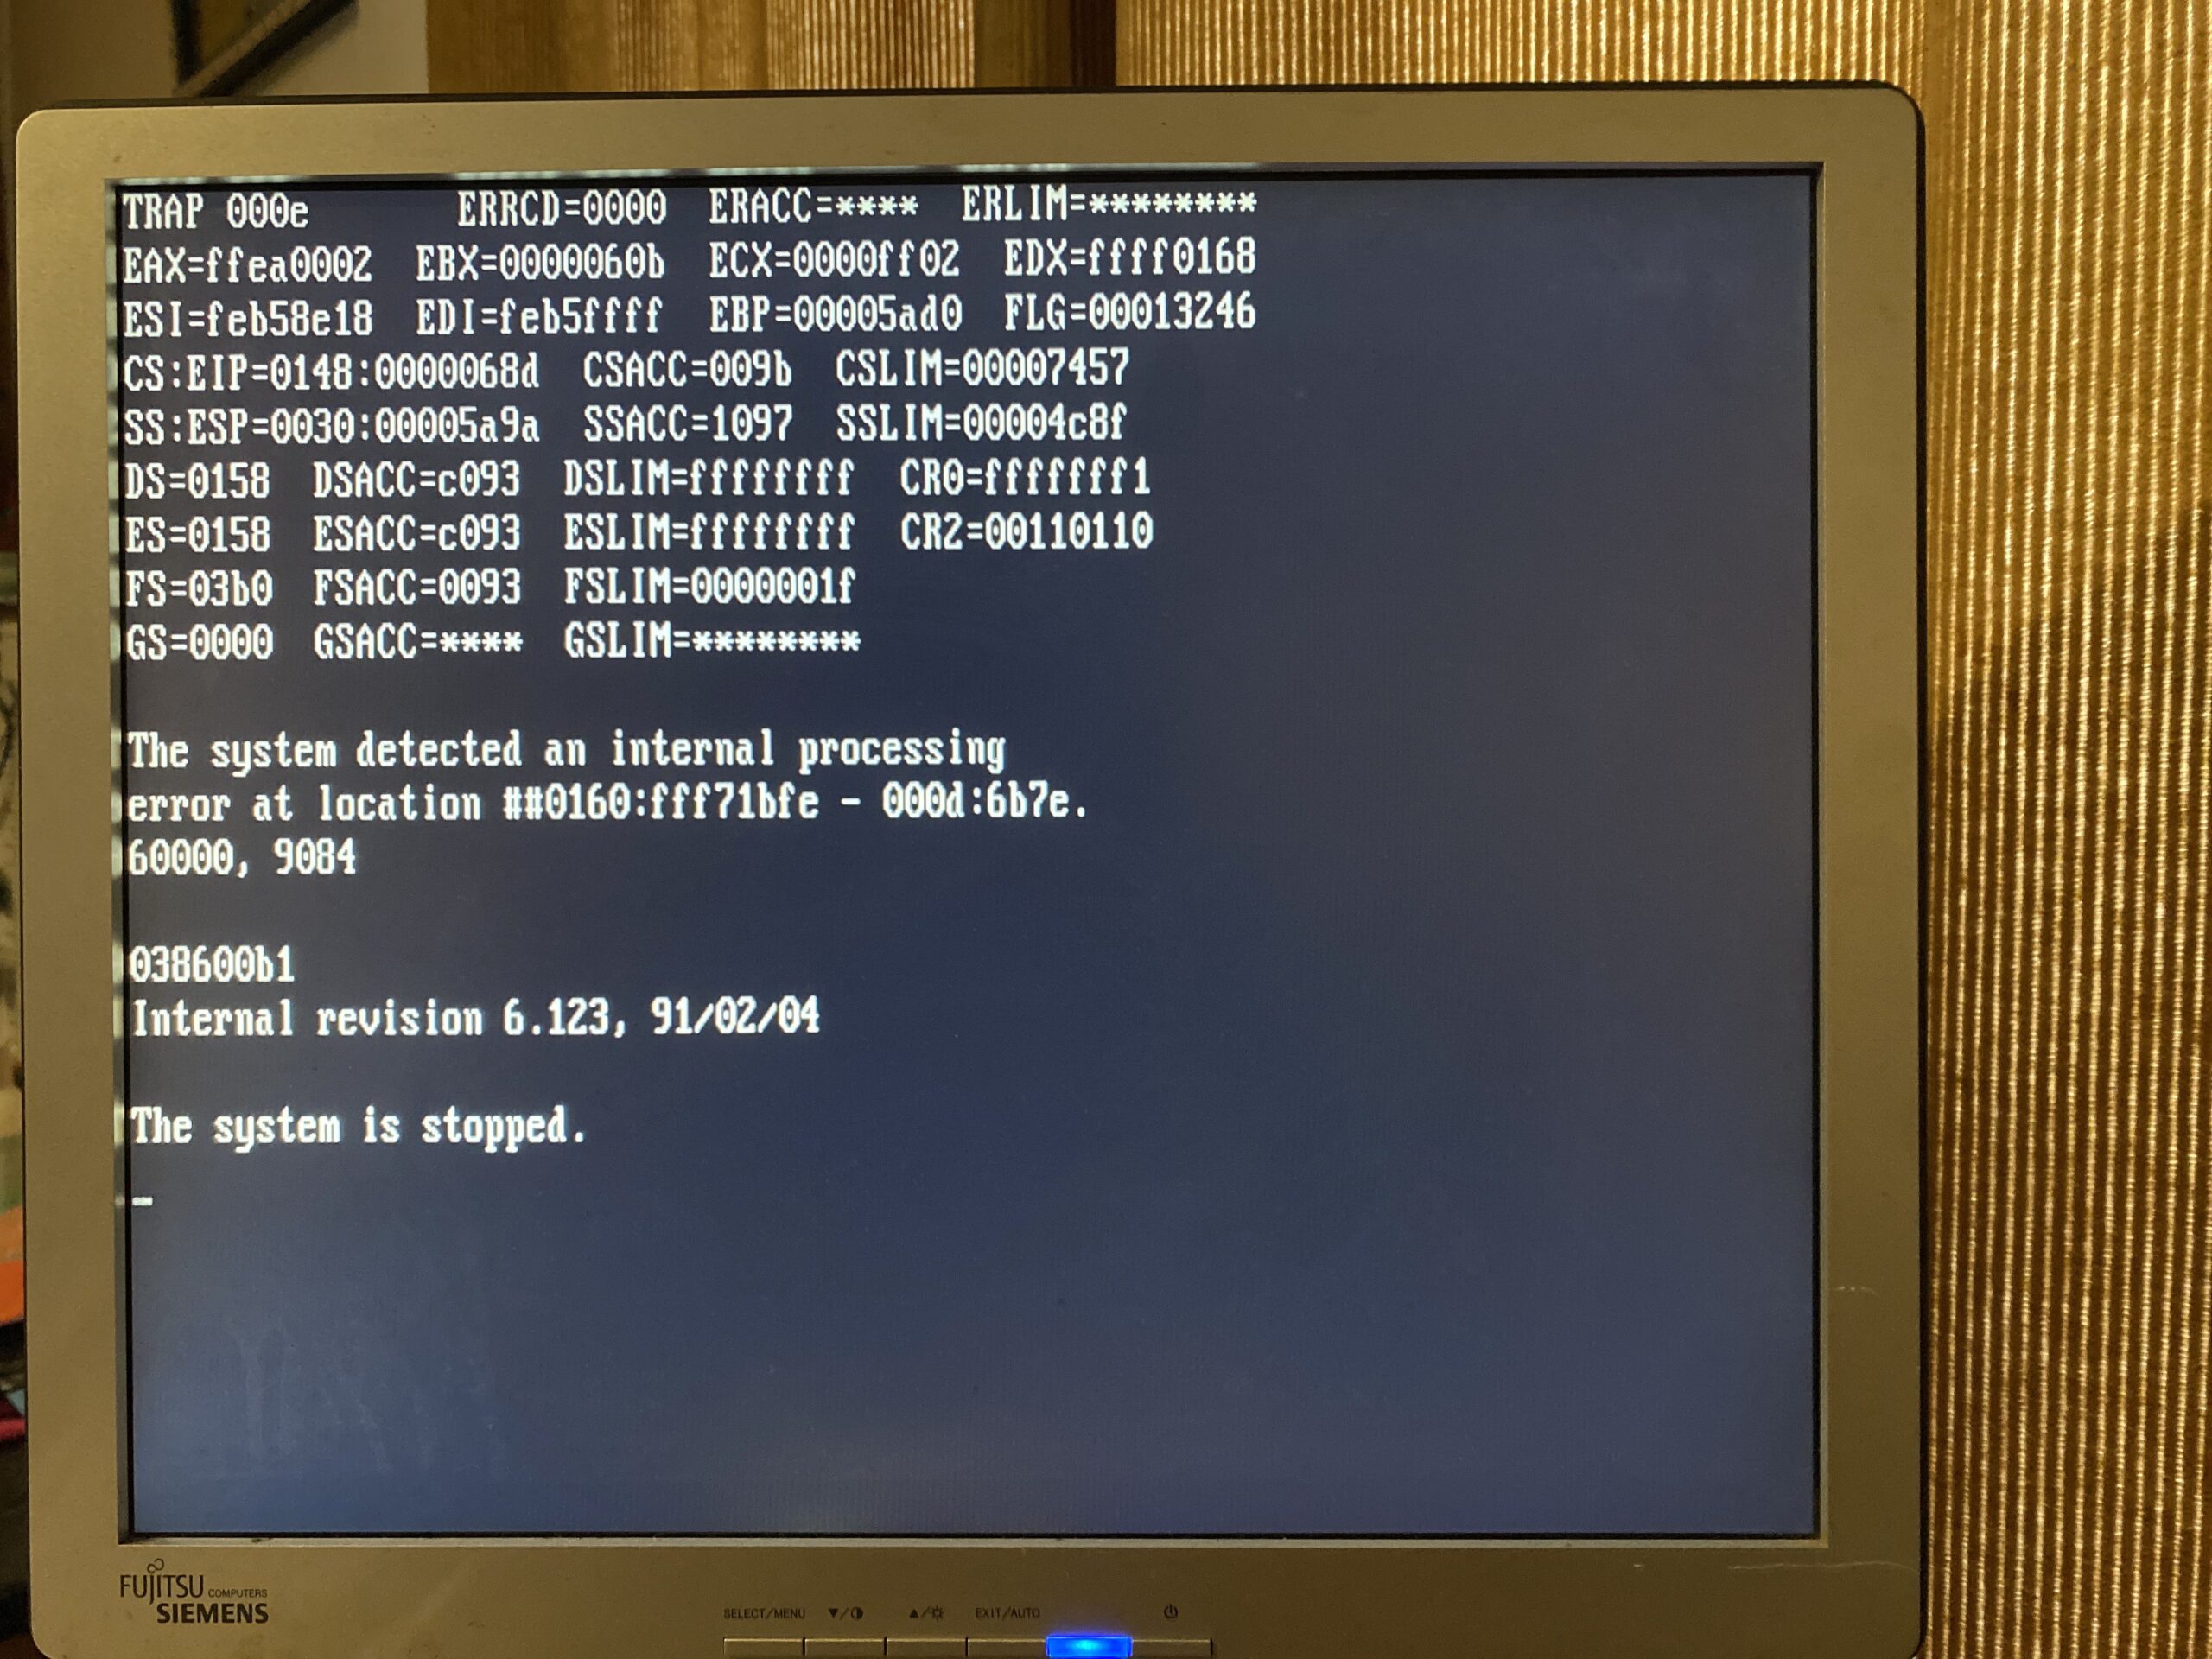
Speaking of OS/2 and weird crashes, I got this fun one from OS/2 trying to run sysinfo:
trap 000e on 038600b1
While I’d seen plenty of trapcodes in my time, but I know less than nothing about reading them. Maybe it’s burred in there somewhere. The one odd thing was the 038600b1 part… Since the 386 is a 16Mhz part, maybe it’s a crazy old version? While it does have the ΣΣ mark, maybe there is other troublesome 386’s? I really don’t know. Or maybe OS/2 is just really more sensitive to having 2MB 32bit RAM + 4MB 16bit RAM.
Way back in the old times, I had upgraded from a 12Mhz 286 to a 16Mhz 286, and life was great, although I left out of all the 32bit personal computer revolution. After a lot of hard work, I managed to secure a 386sx 16Mhz board with 4MB of RAM. It was awesome although yeah SLOW. Clock for clock, task for task the 386sx was at best the same speed. Sometimes I’d swear the 286 was faster. A few months later though I made the insane trade of some complete in box Infocom games, along with cash and was able to score a 386DX 16Mhz, along with 4MB of 32bit RAM on some massive board. Surely this was going to be great right? I found pretty much the same thing there was no perceivable difference at all. At least back then it was 1992? and the capacitor plague was still decades away, and you could just call the BBS of the motherboard vendor and download the disks if needed (I didn’t need to). It was, frankly, a big letdown after so much ’32/32 is far superior to 32/16′ and here we are again in the future and the SCSI card bears it out, that id basically didn’t matter.
I guess it really comes as no surprise that the 386 does everything the 286 can just better.
So, what have we learned? The PS/2 model 60/80 chassis is the exact same thing. The low clocked 386 chips are super unimpressive, no doubt the magic in the intel family really didn’t hit until the DX2/66 and beyond. Beta versions of software act weird, oh, and that the backup program from MS-DOS 5.00 can actually backup a dual booted OS/2 install & restore it just fine. That was a bigger surprise for me, as the great thing about the BlueSCSI i that I can have so many drives, so I made a backup of the C: OS drive and trashed it quite a bit. Not expecting anything, but yes, a restore actually worked.
As a follow up to Installing a Gotek floppy emulator, this time I’m adding something desperately needed, mass storage using a SCSI card.
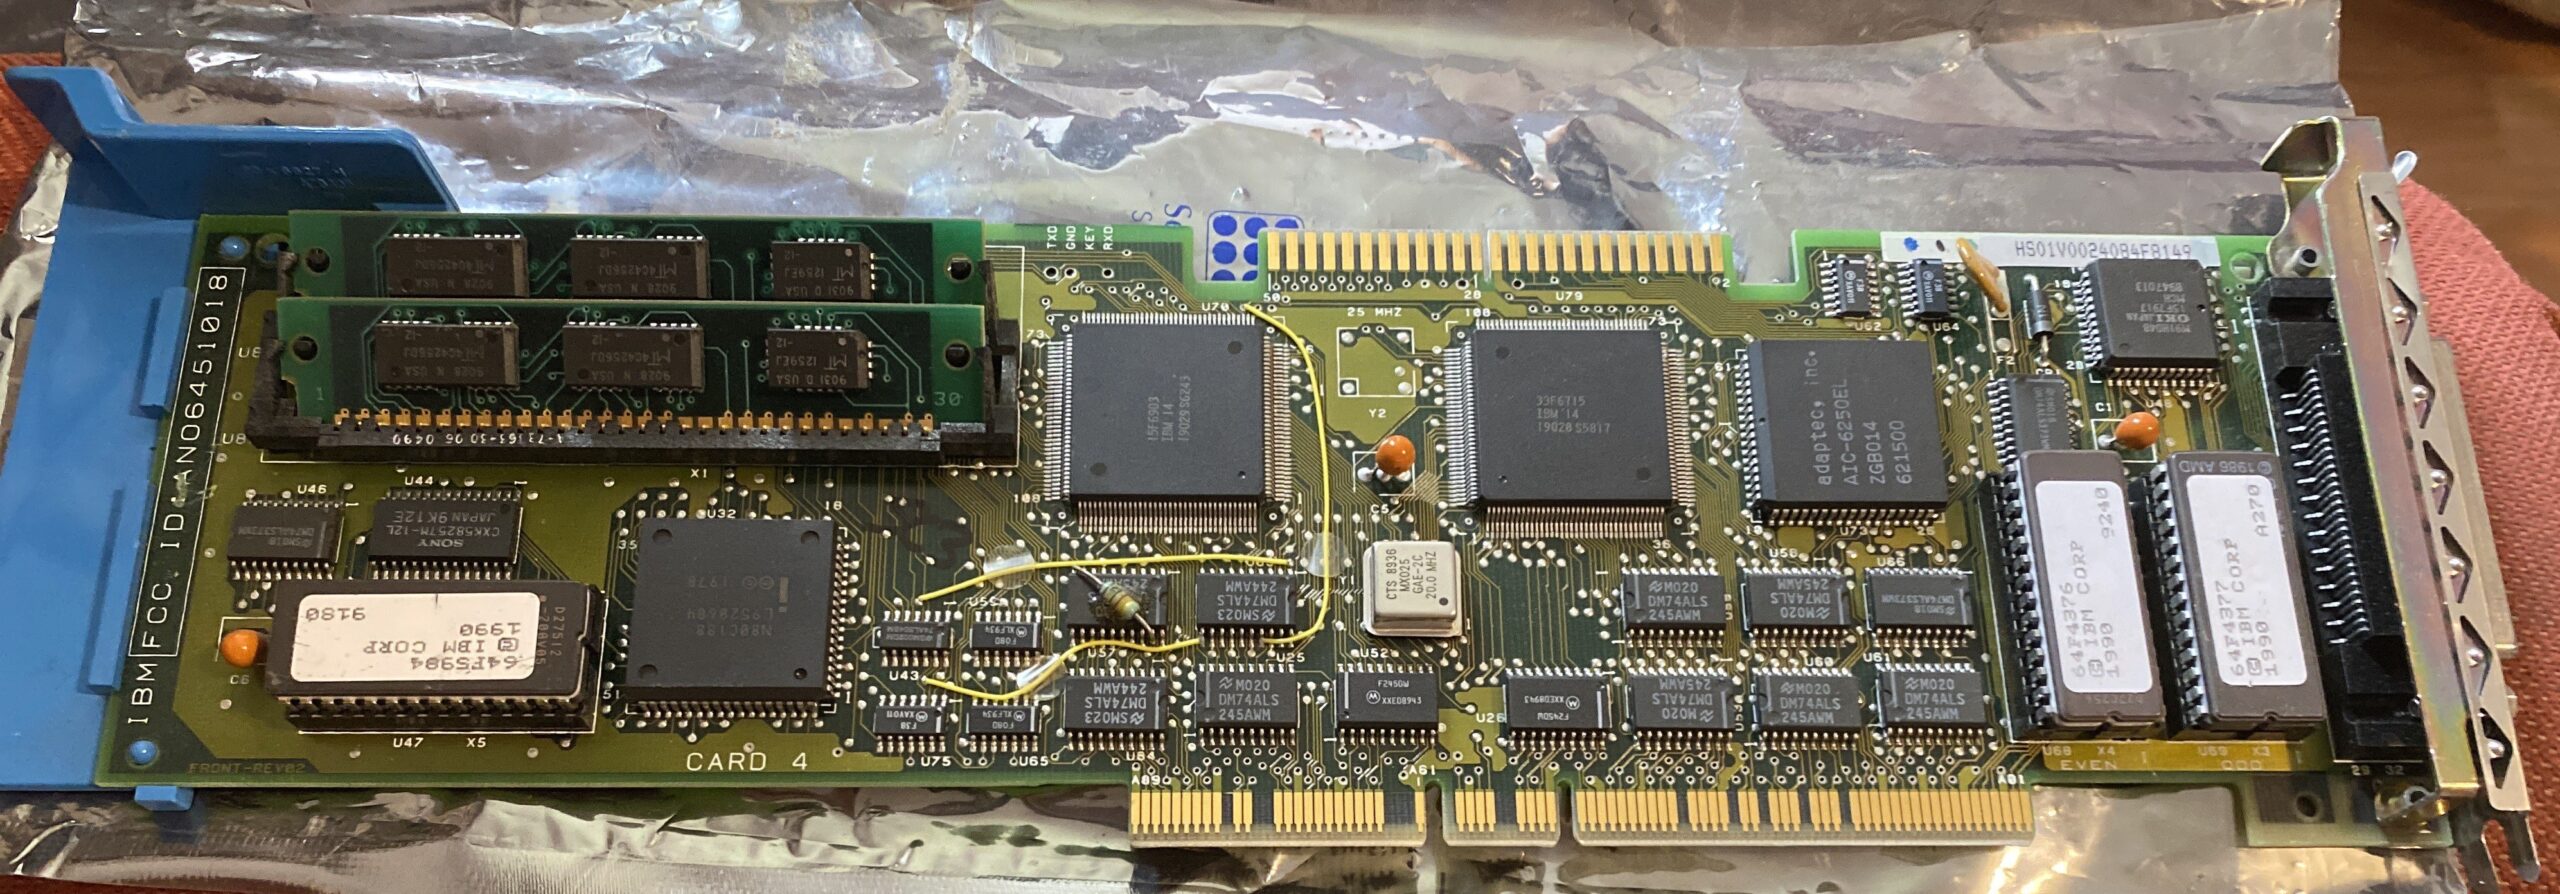
IBM SCSI / A adapter
The machine is the 40Mb MFM based model, the cheapest option of getting a PS/2 model 60 back in the day. MFM hard disks are incredibly old, and sadly the eventual end point for these old disks is death. While I had investigated a MFM disk emulator they are very costly, with prices starting at $299 USD. Ouch. However, from my Dec Alpha experiments I do have the BlueSCSI was available for a more reasonable £52. So all I would need was a SCSI adapter, and I’d be good to go, right? Mostly.
Looking at the card, you can see that it doesn’t use a standard 50 pin connector. I guess it being the 1980s and IBM trying to re-capture the PC market by going all in with proprietary connectors, they used a 50 pin IDC connector to attach the 50pin SCSI ribbon cable. This would prove to be disastrous for me later on. I initially had no luck finding an original cable, while the SCSI cards themselves seem to be plentiful on eBay. I guess me buying 2 of them has triggered a lot of movement in the market. Another source of concern is that the 286 is 16bit, and the card is advertised as being 32bit, but rest assured the notched middle part seems to indicate that the card is 32bit/16bit compatible. I can attest it works in my PS/2 just fine.
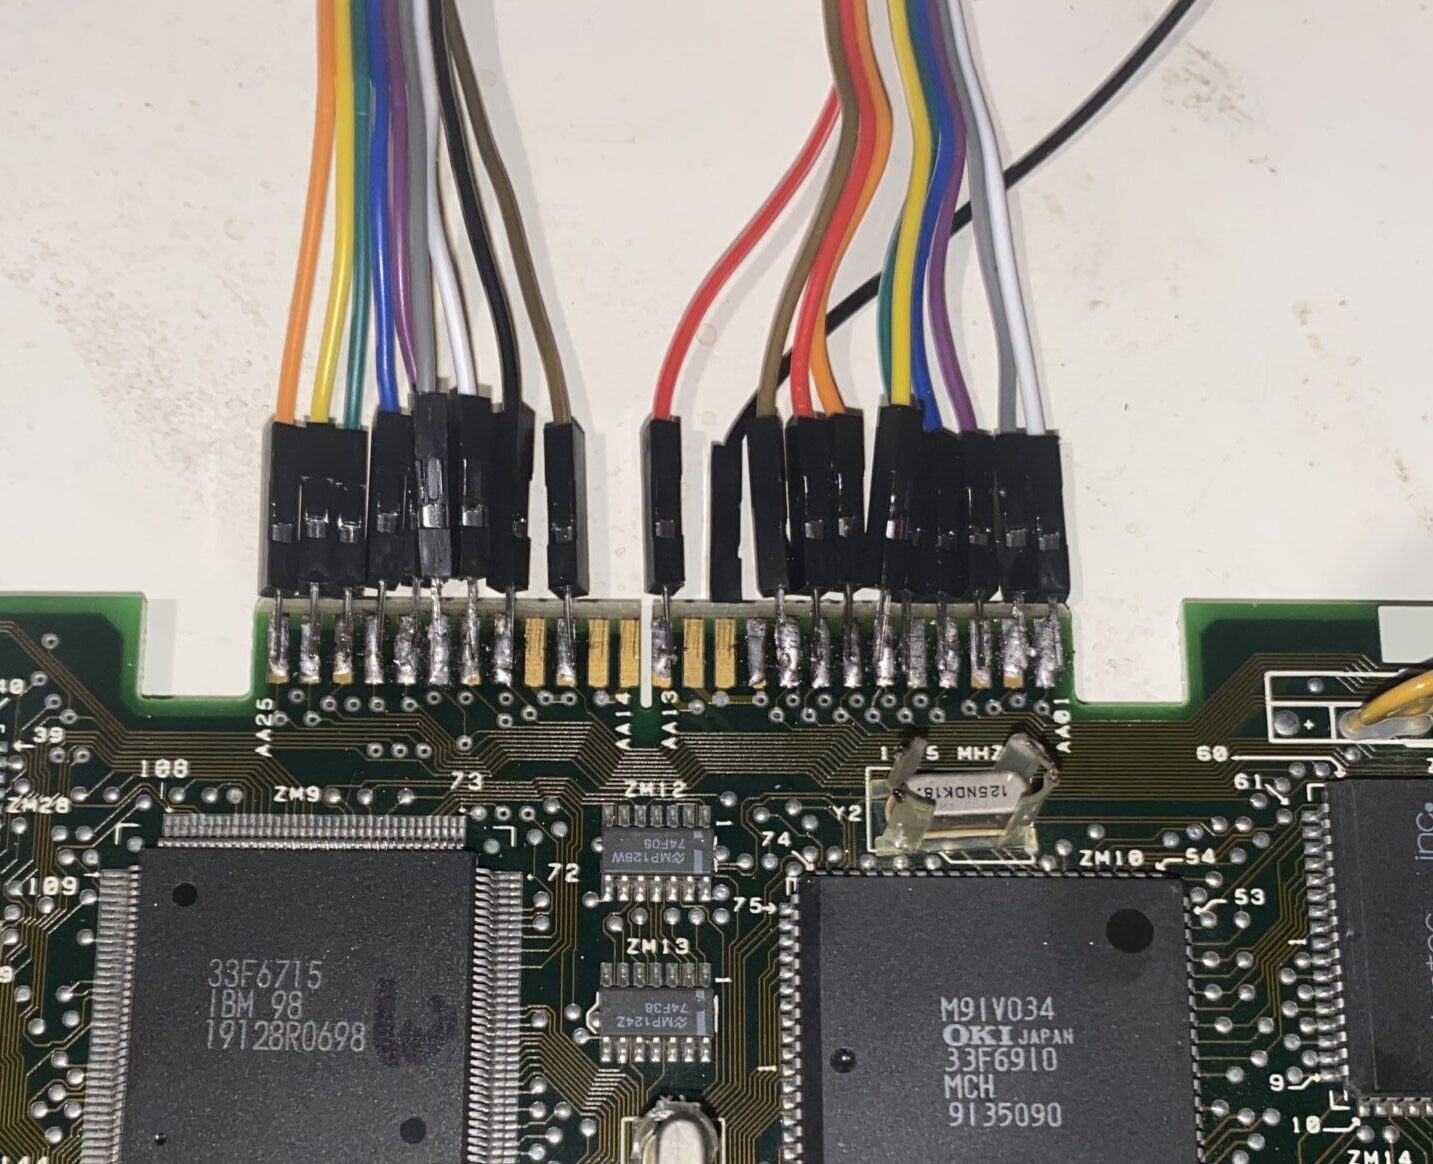
My terrible idea + terrible soldering
I had decided that since I do have a bunch of jumper cables, I could just solder them directly to the card fingers. I only have one device, so I don’t really need a ribbon cable, the BlueSCSI can emulate multiple devices, so I figured it’d be fine. Of the 50 pins in a SCSI ribbon more than half are ground, so I figured I only needed to solder up about 25 connections, just like how Apple got away with 25 pin connections. I did tone out the pins looking for the +5v power signal, along with checking the common ground, where the flip side of the SCSI card is all ground.
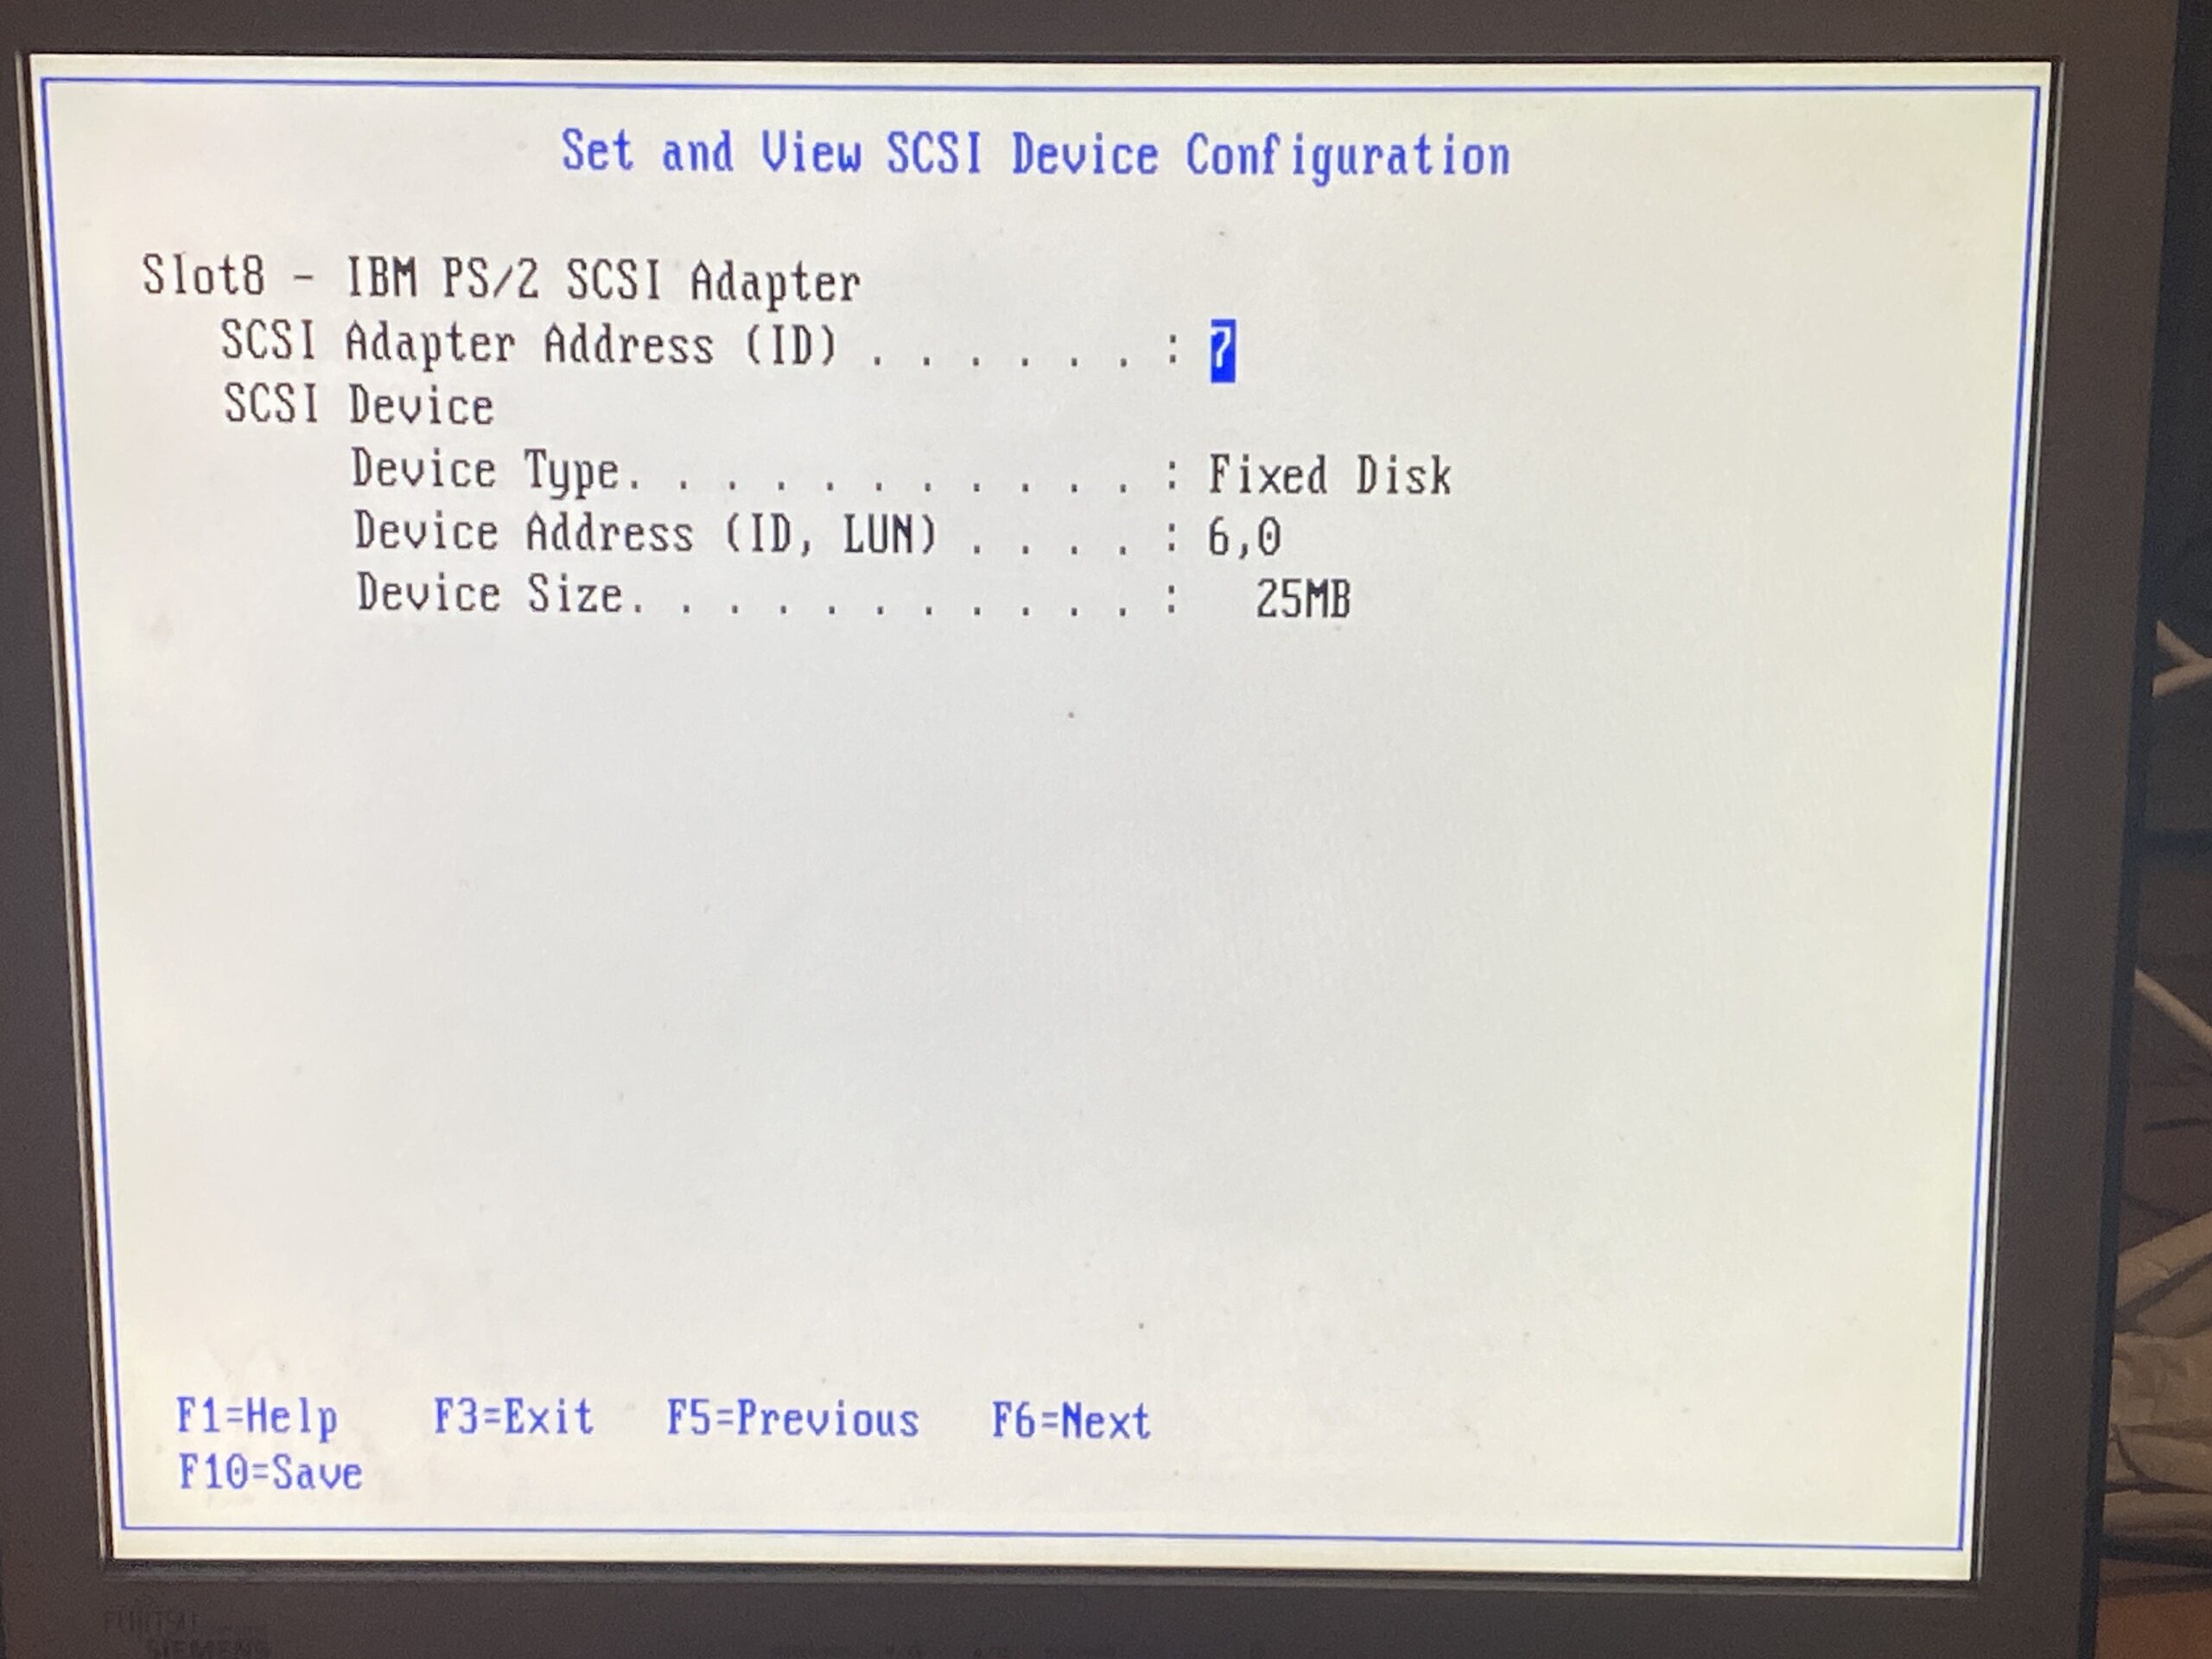
I had connected it up, and the machine saw the blue SCSI, but for some reason it was always reading 25Mb.
I was unable to figure out what was going on, so when I went to inspect my setup, I had seen one of the cables had disconnected. Uh-Oh.
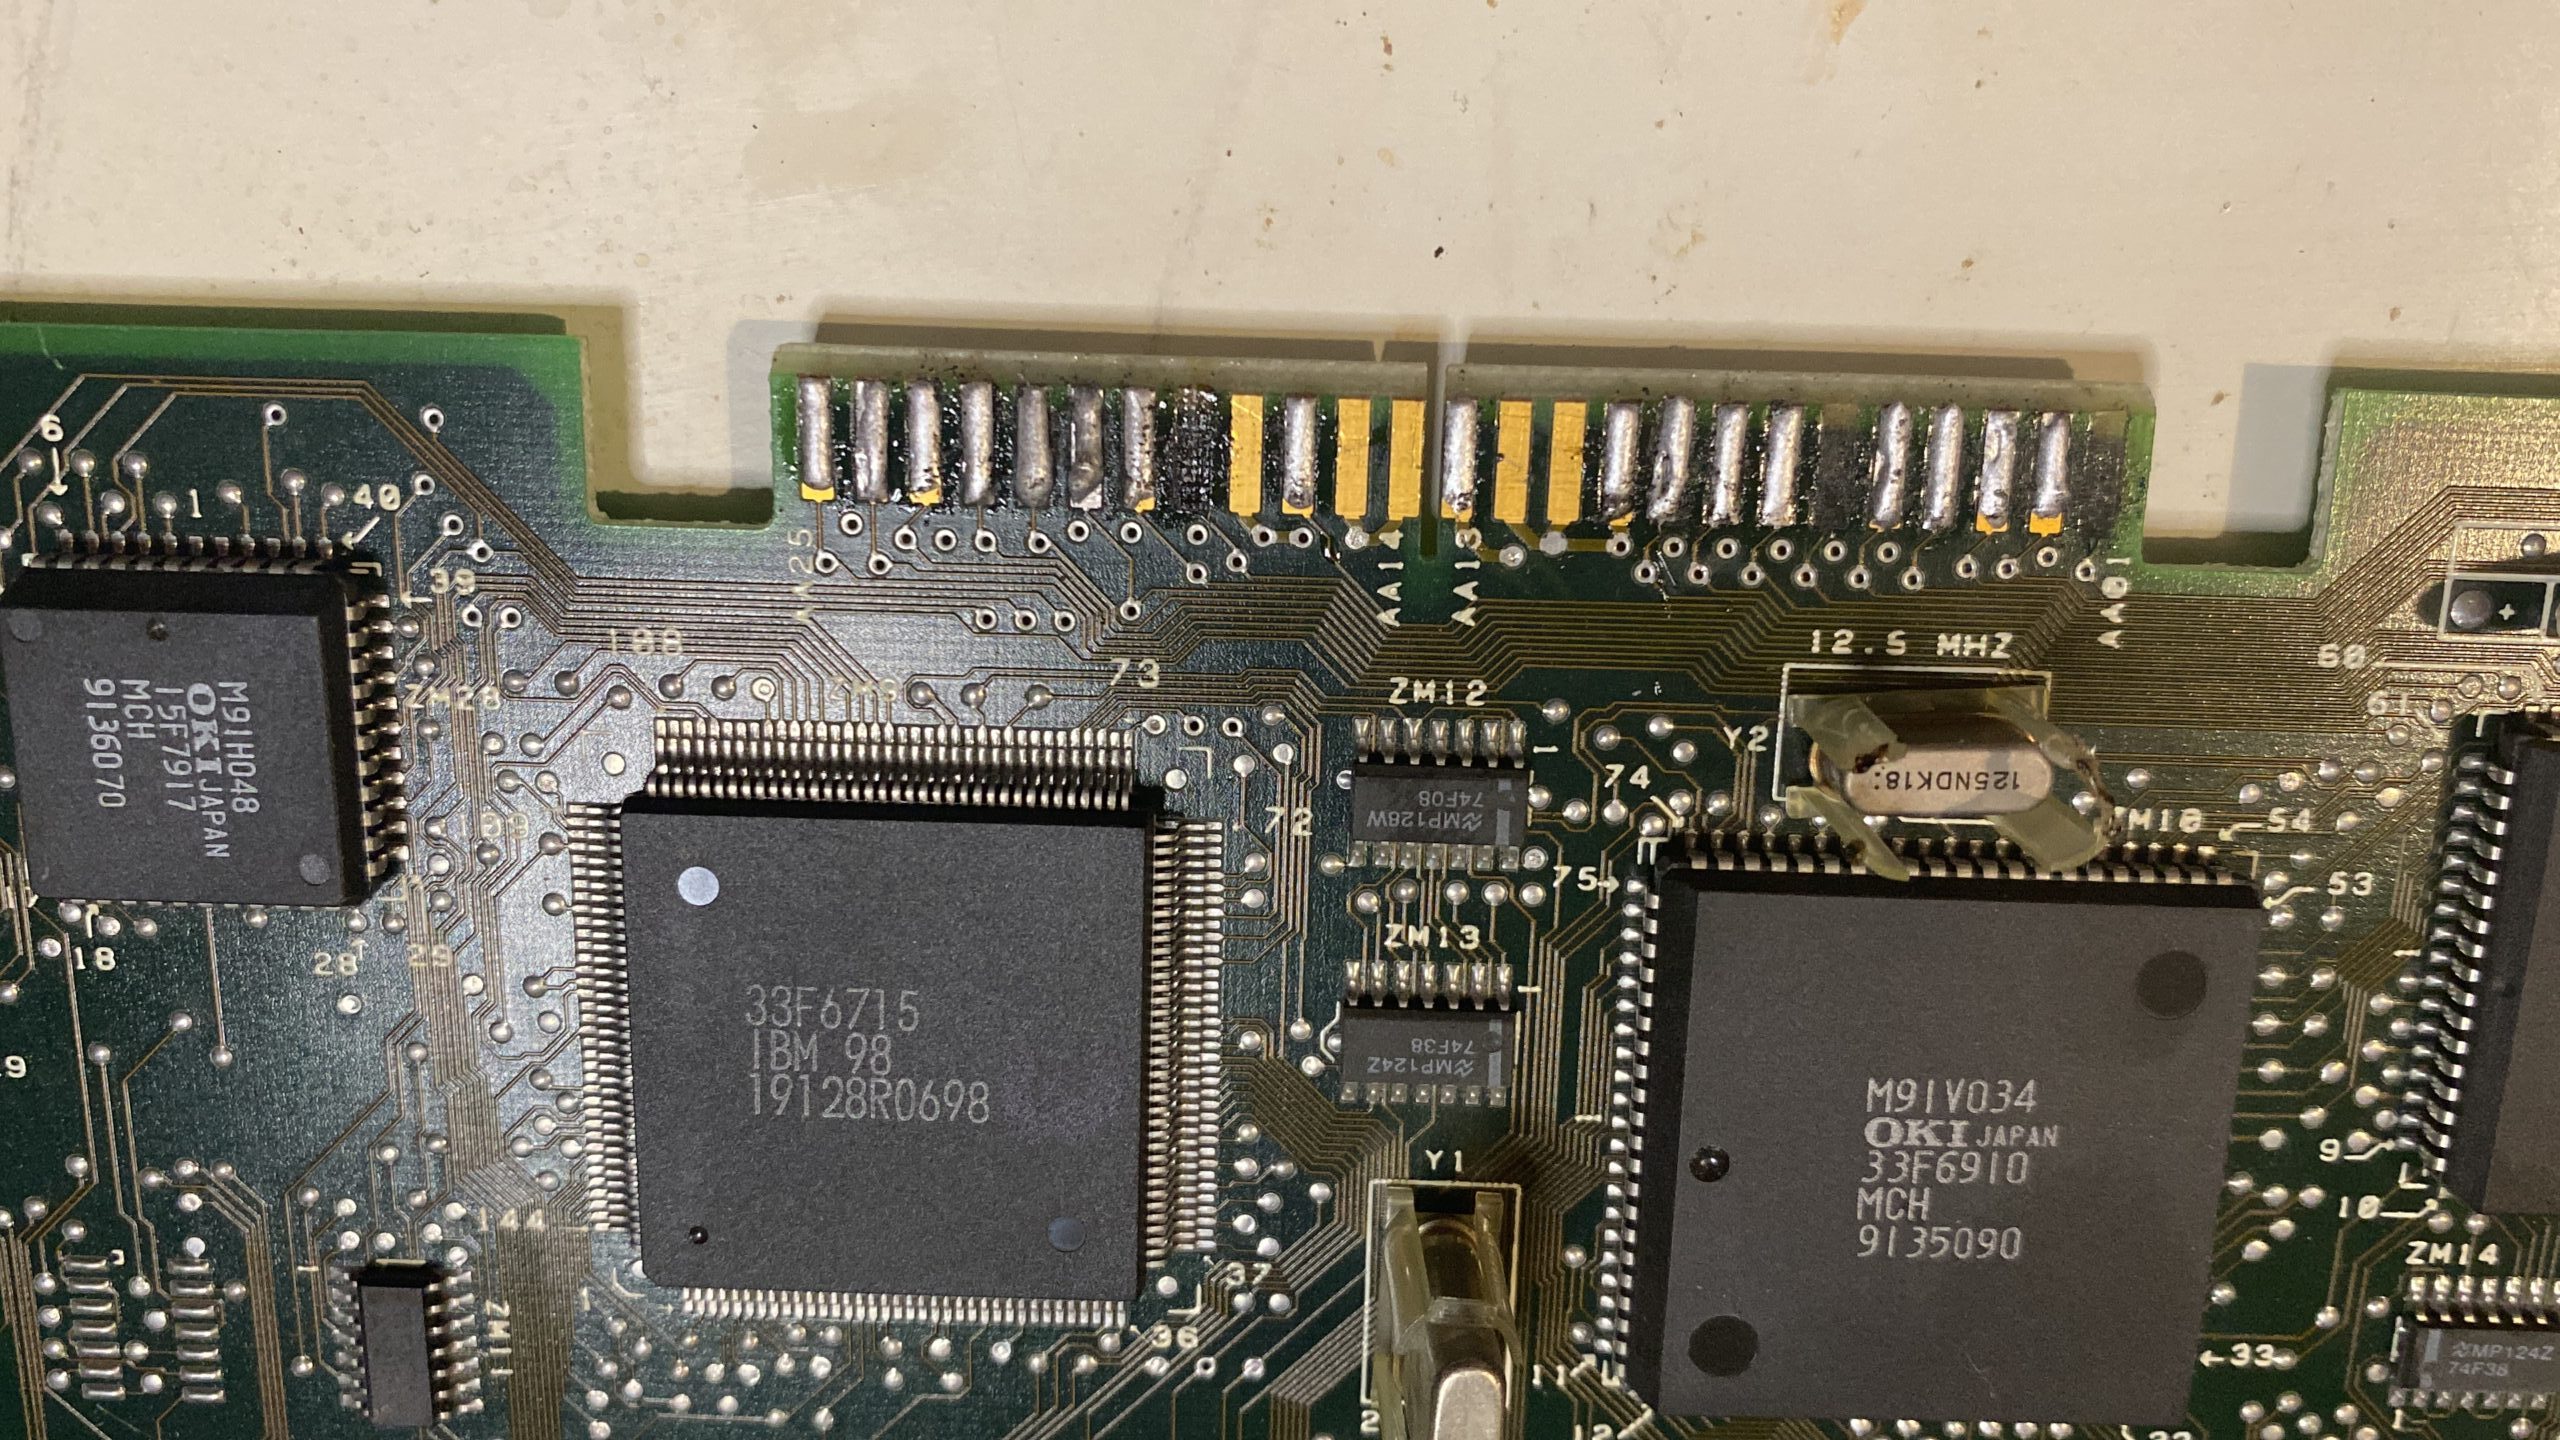
Card edge fingers torn off
As I pulled the card out of the computer, 3 more cables had popped off, revealing that the fingers were nowhere near as strong as I had thought, and the fingers had been torn off the card. Very sad. The card still ‘works’ but it’d need someone with a good eye and soldering skills to re-attach the pads, or just solder bodge wires from the test points on the card to the IDC connector.
Obviously if I’d known the fingers were so fragile, I’d have not done this. But I was impatient for the IDC connector to arrive (it took about a month), and I really thought I could get away with it. So I don’t know if it matters for anyone else, but yeah it turns out these fingers are nowhere near as strong to side to side forcers as I had thought. Also I was told “on the internet, so you know it’s true”‘ that various super glues are conductive, so test before you think about trying to do it live.
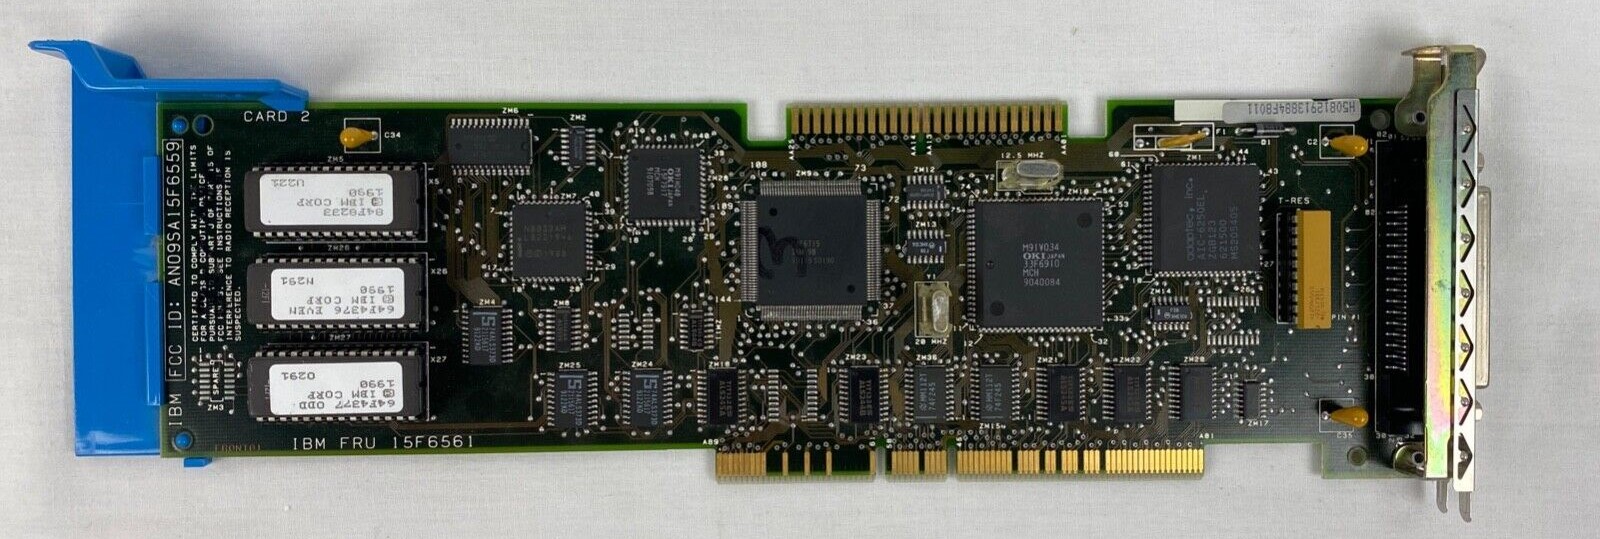
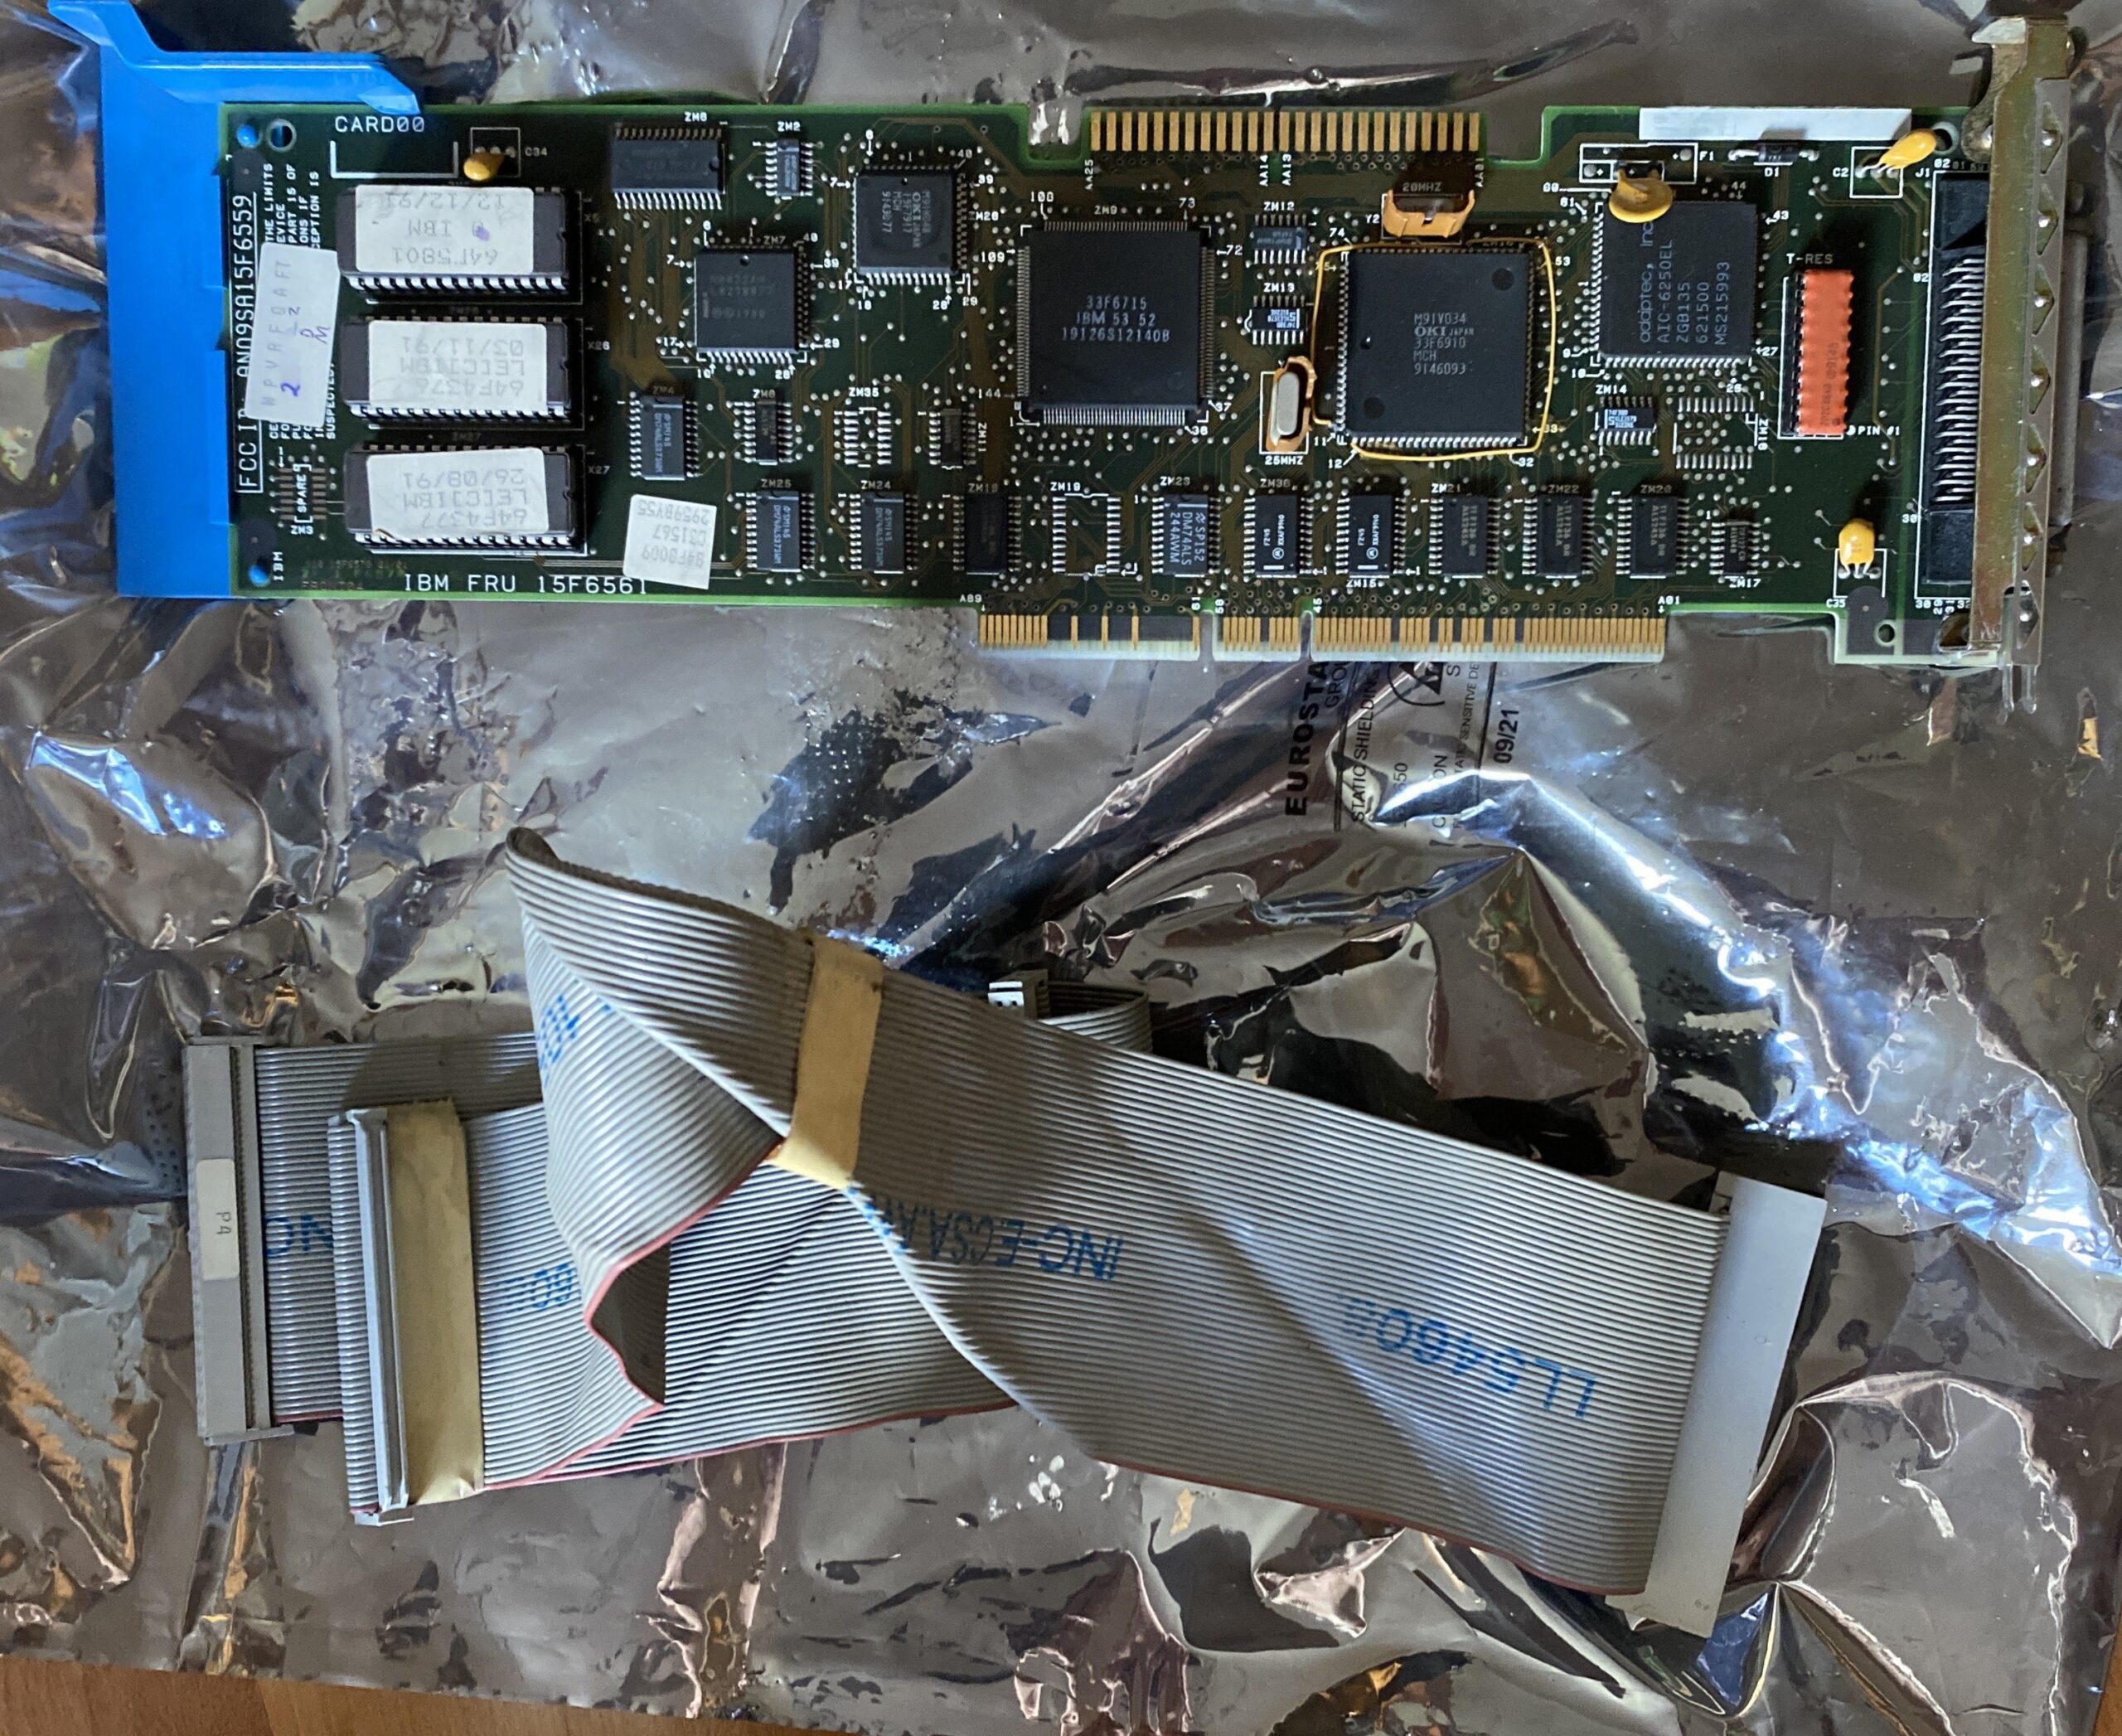
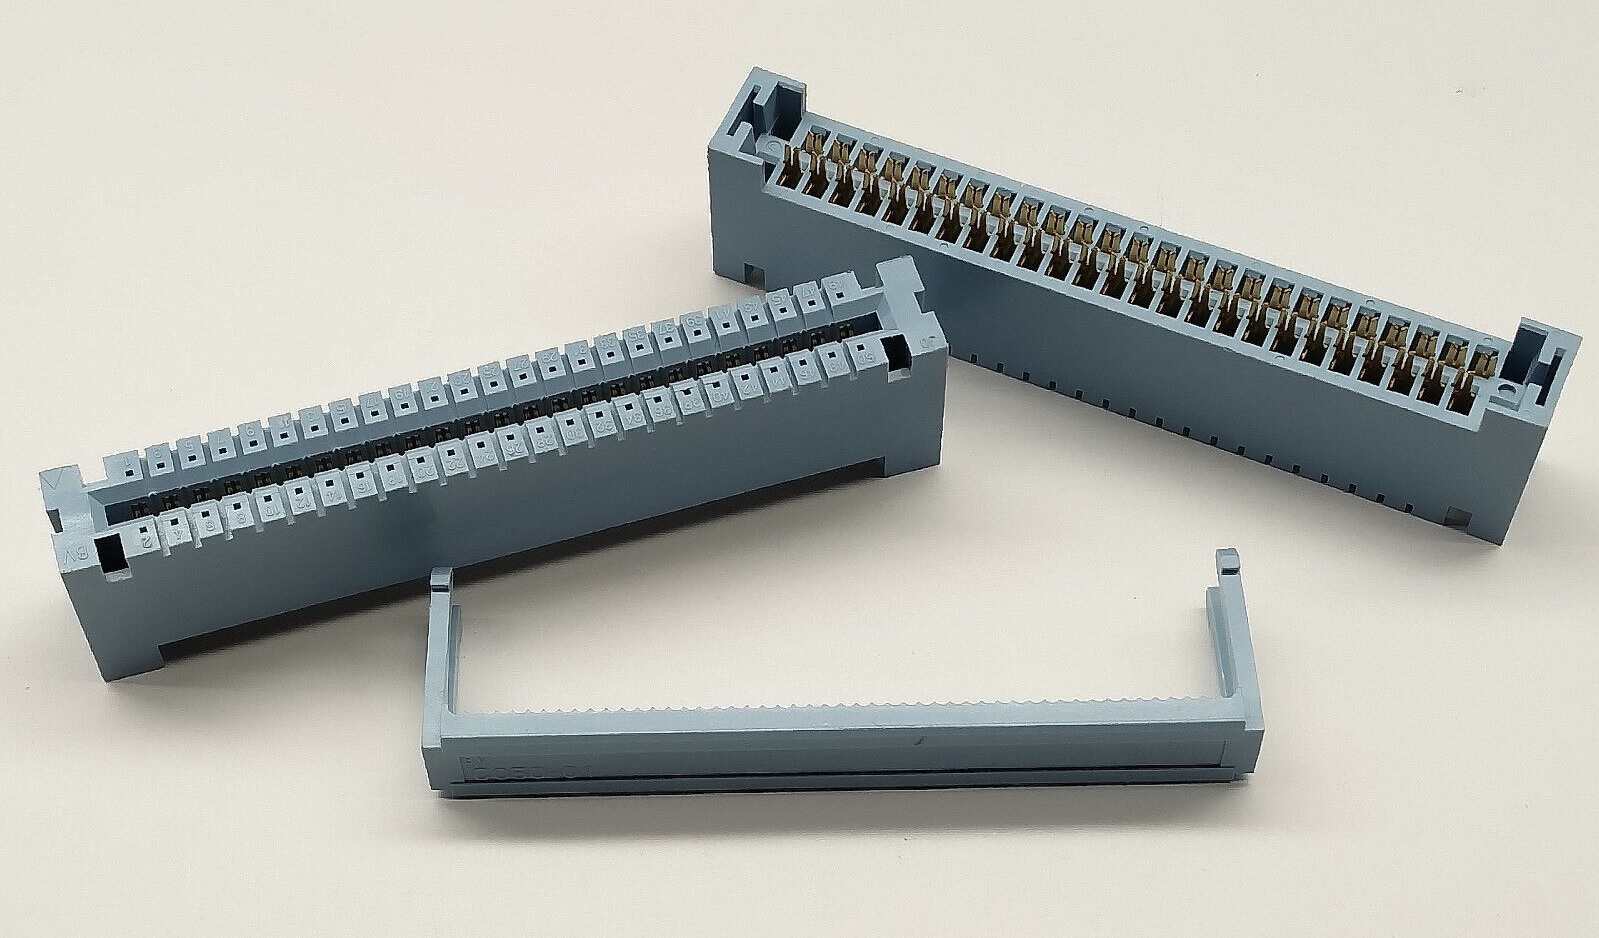
IBM SCSI Adapter FRU 15F6561 IBM MICROCHANNEL SCSI 32 bit MCA Card + Cable
And that is when this pair showed up, another SCSI card, but this time with the illusive cable. There is something weird how the universe times things.
So got this card & cable set (If it was available 3 weeks ago, obviously I would have ordered this one as it has the ribbon!).
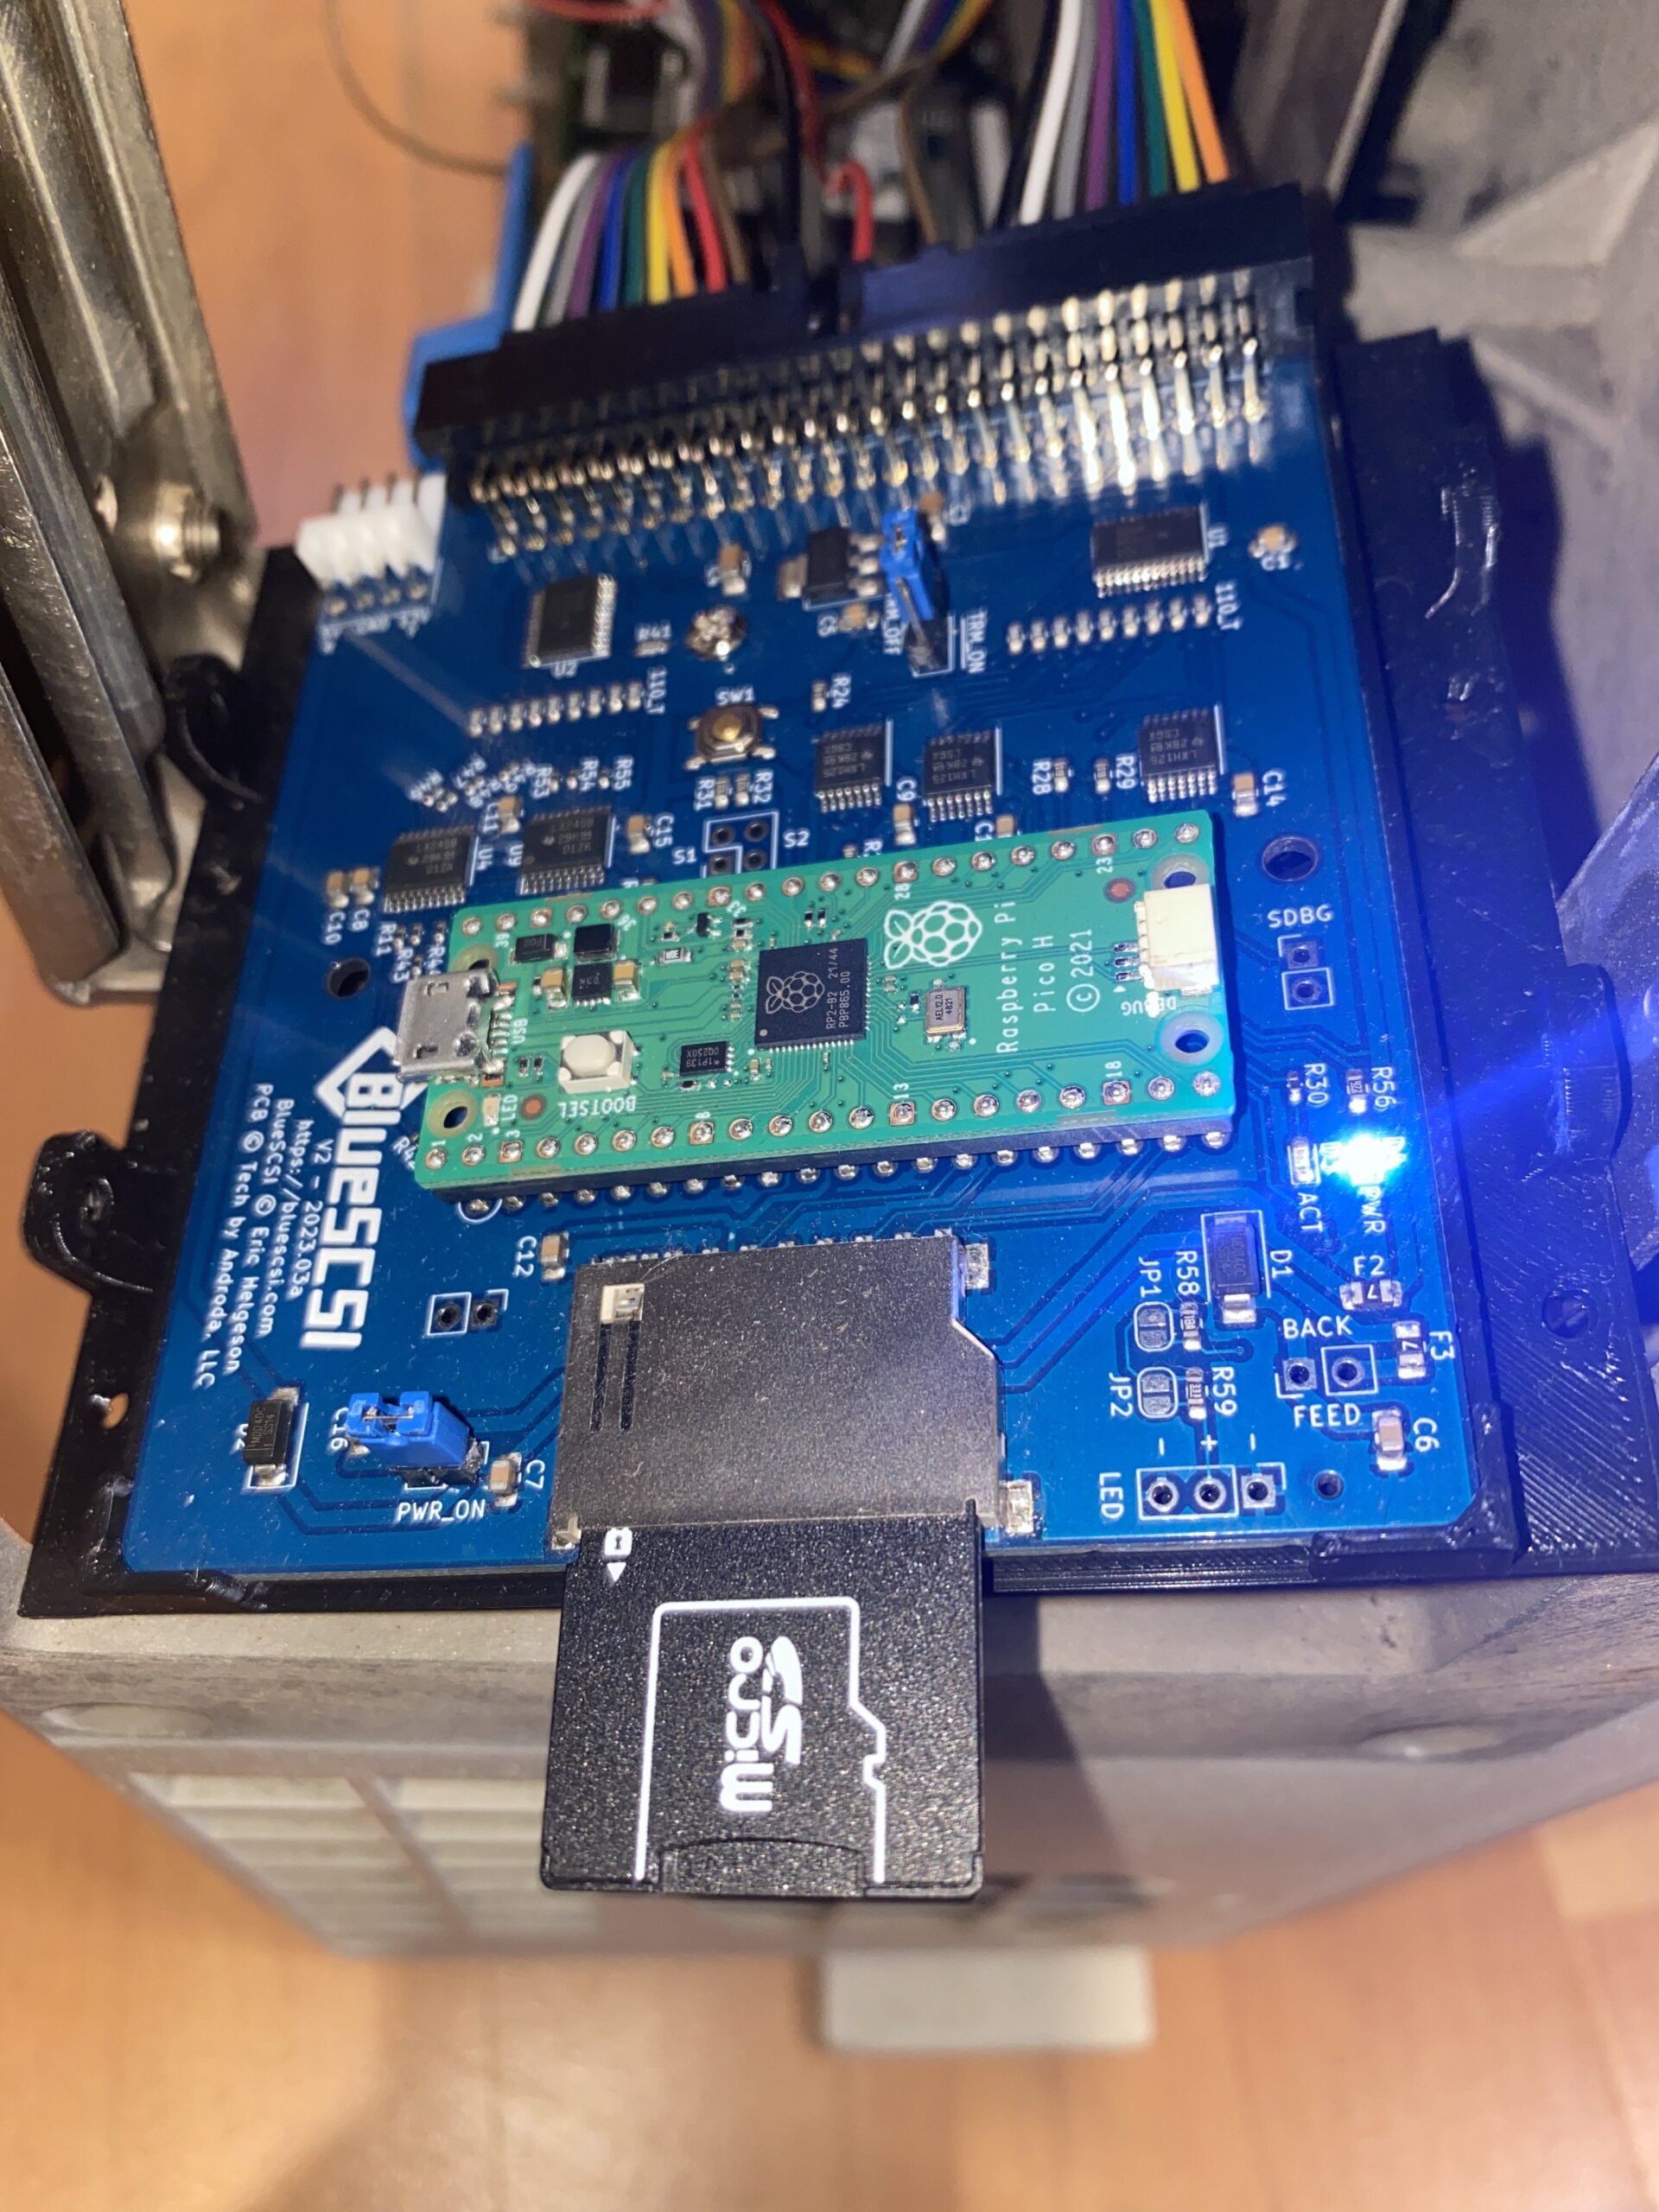
Where the magic happens, BlueSCSI!
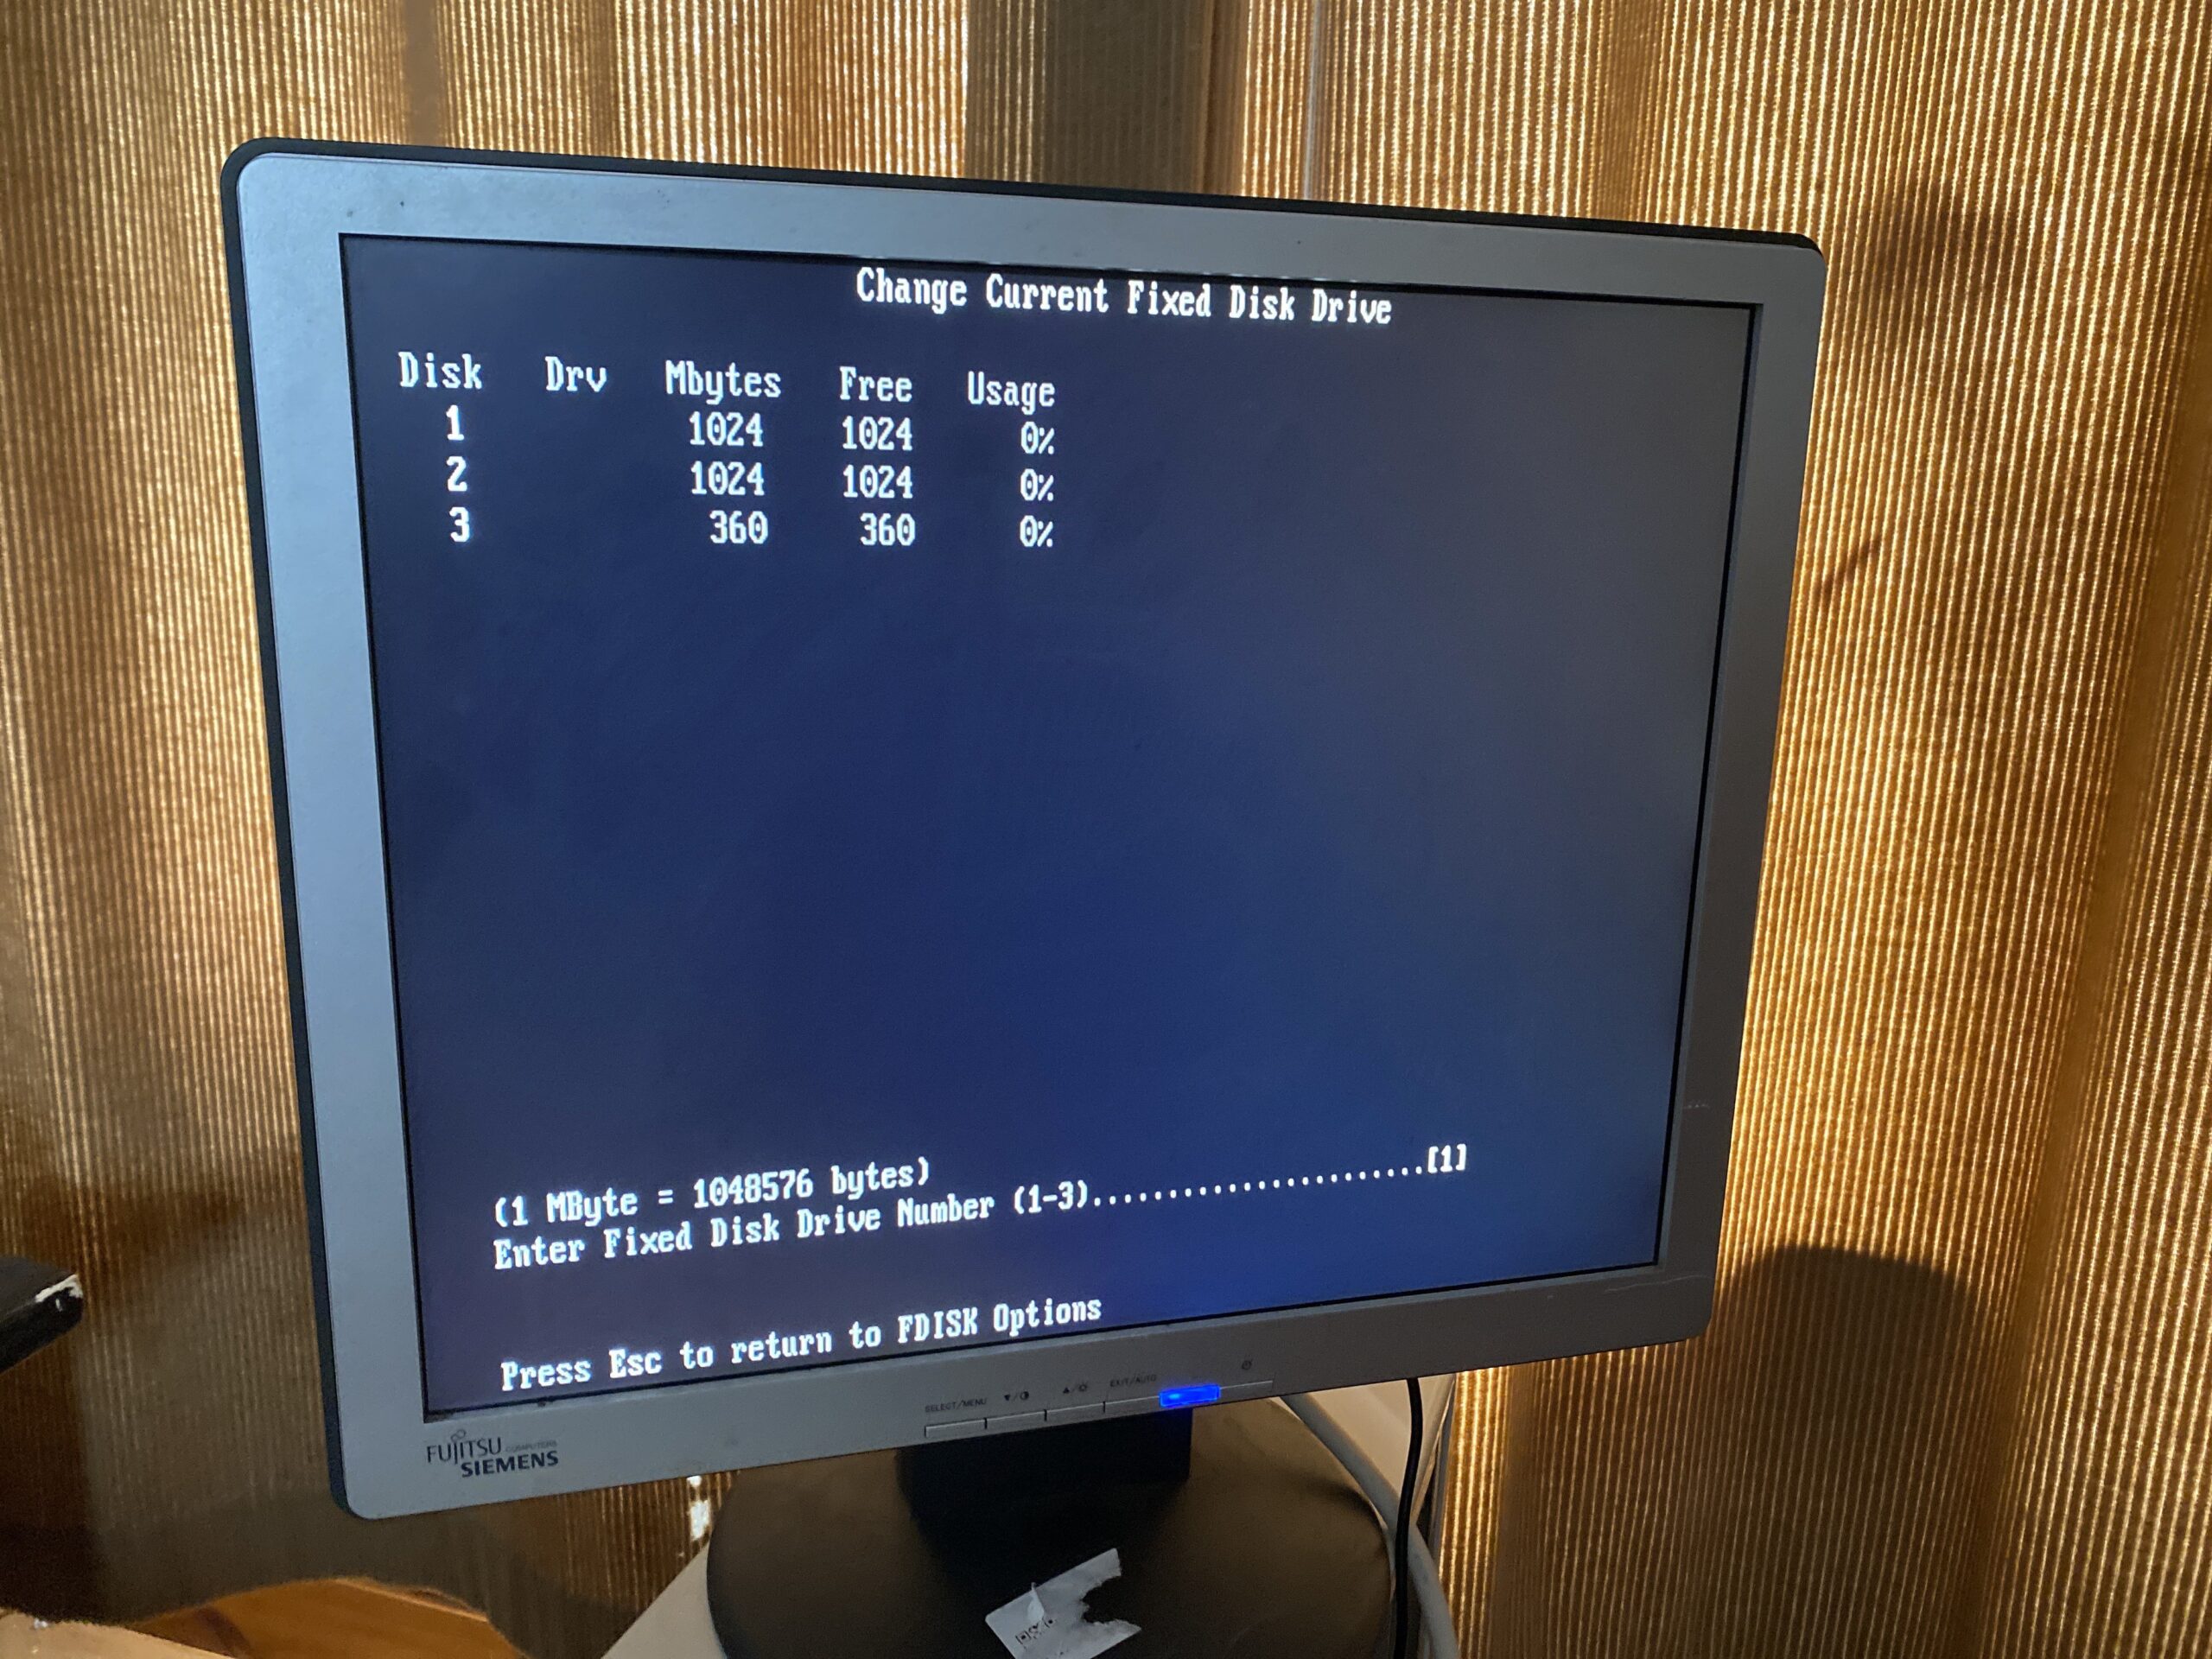
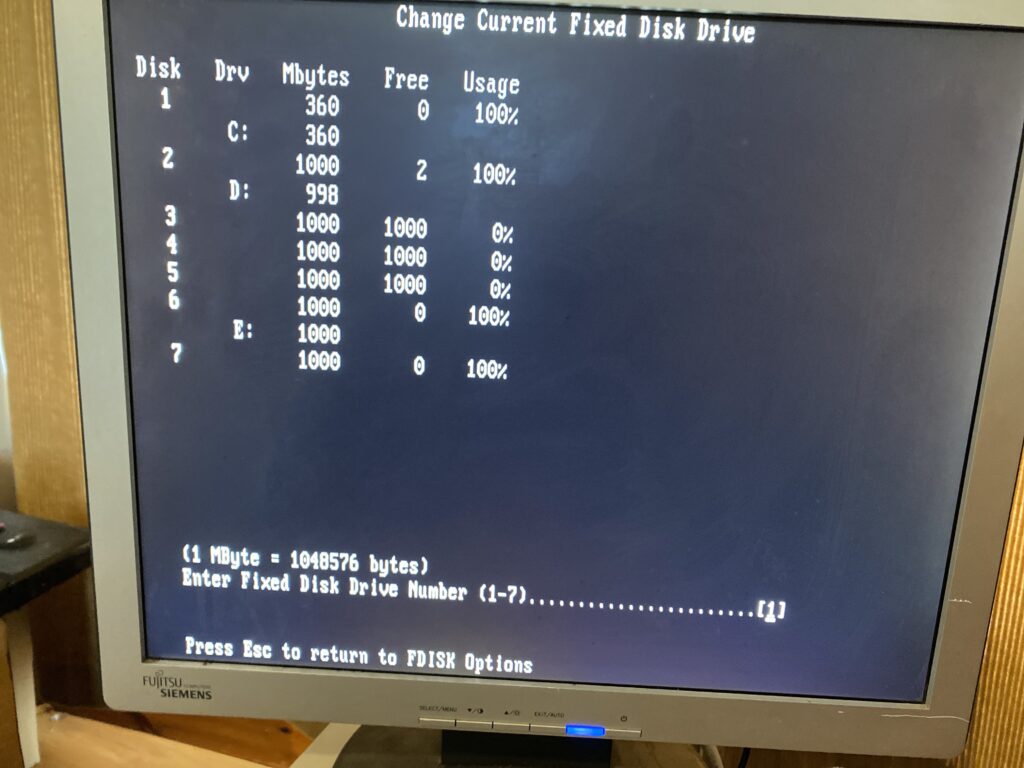
Not knowing much about the IBM PS/2 SCSI/A adapter, I went ahead in BlueSCSI, and setup a 380MB disk on SCSI ID 0, a 1GB disk on ID1, and a 2GB disk on ID2. That’s when I found out that the adapter initialises the bus backwards.
I had thought it was a weird thing in the setup utility, so I booted up MS-DOS and ran FDISK to reveal that it really does read the ID’s backwards.
Obviously with the BlueSCSI they are just files on a SD card, so it’s trivial to just rename them.
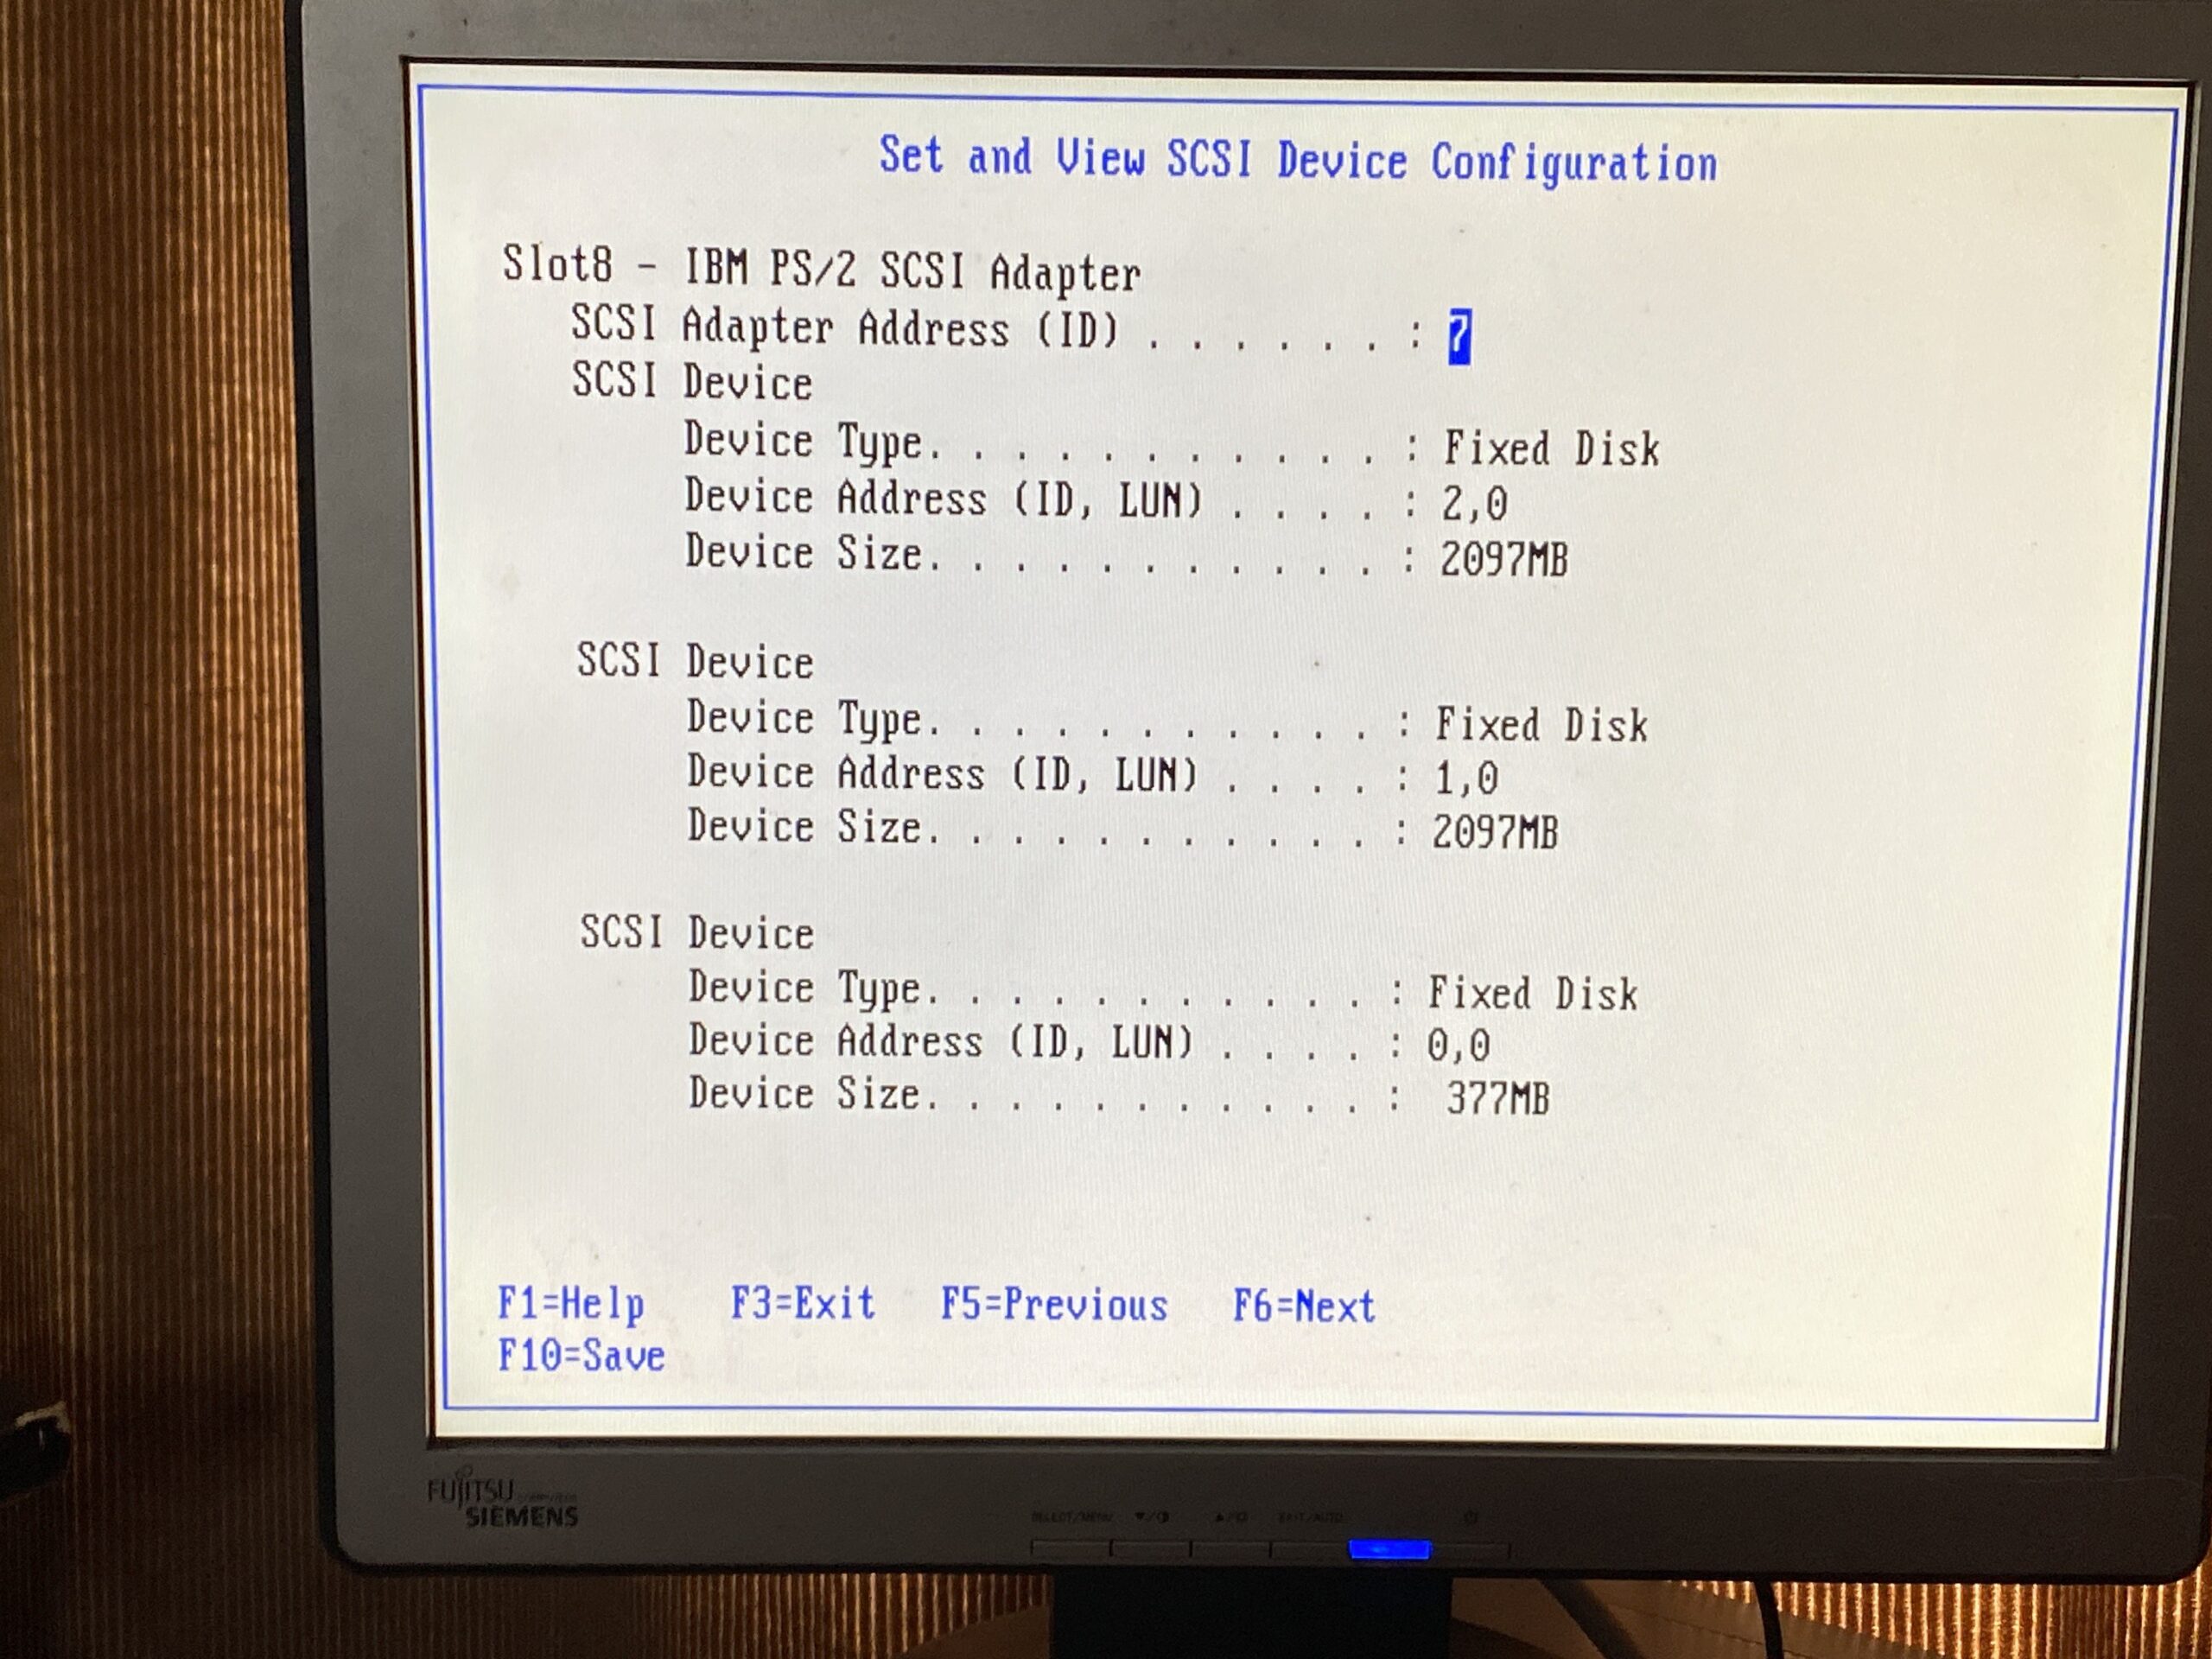
I had also thought it was weird that the reference disk reads the disks being 2GB just fine, so I double up with both data disks being 2GB.
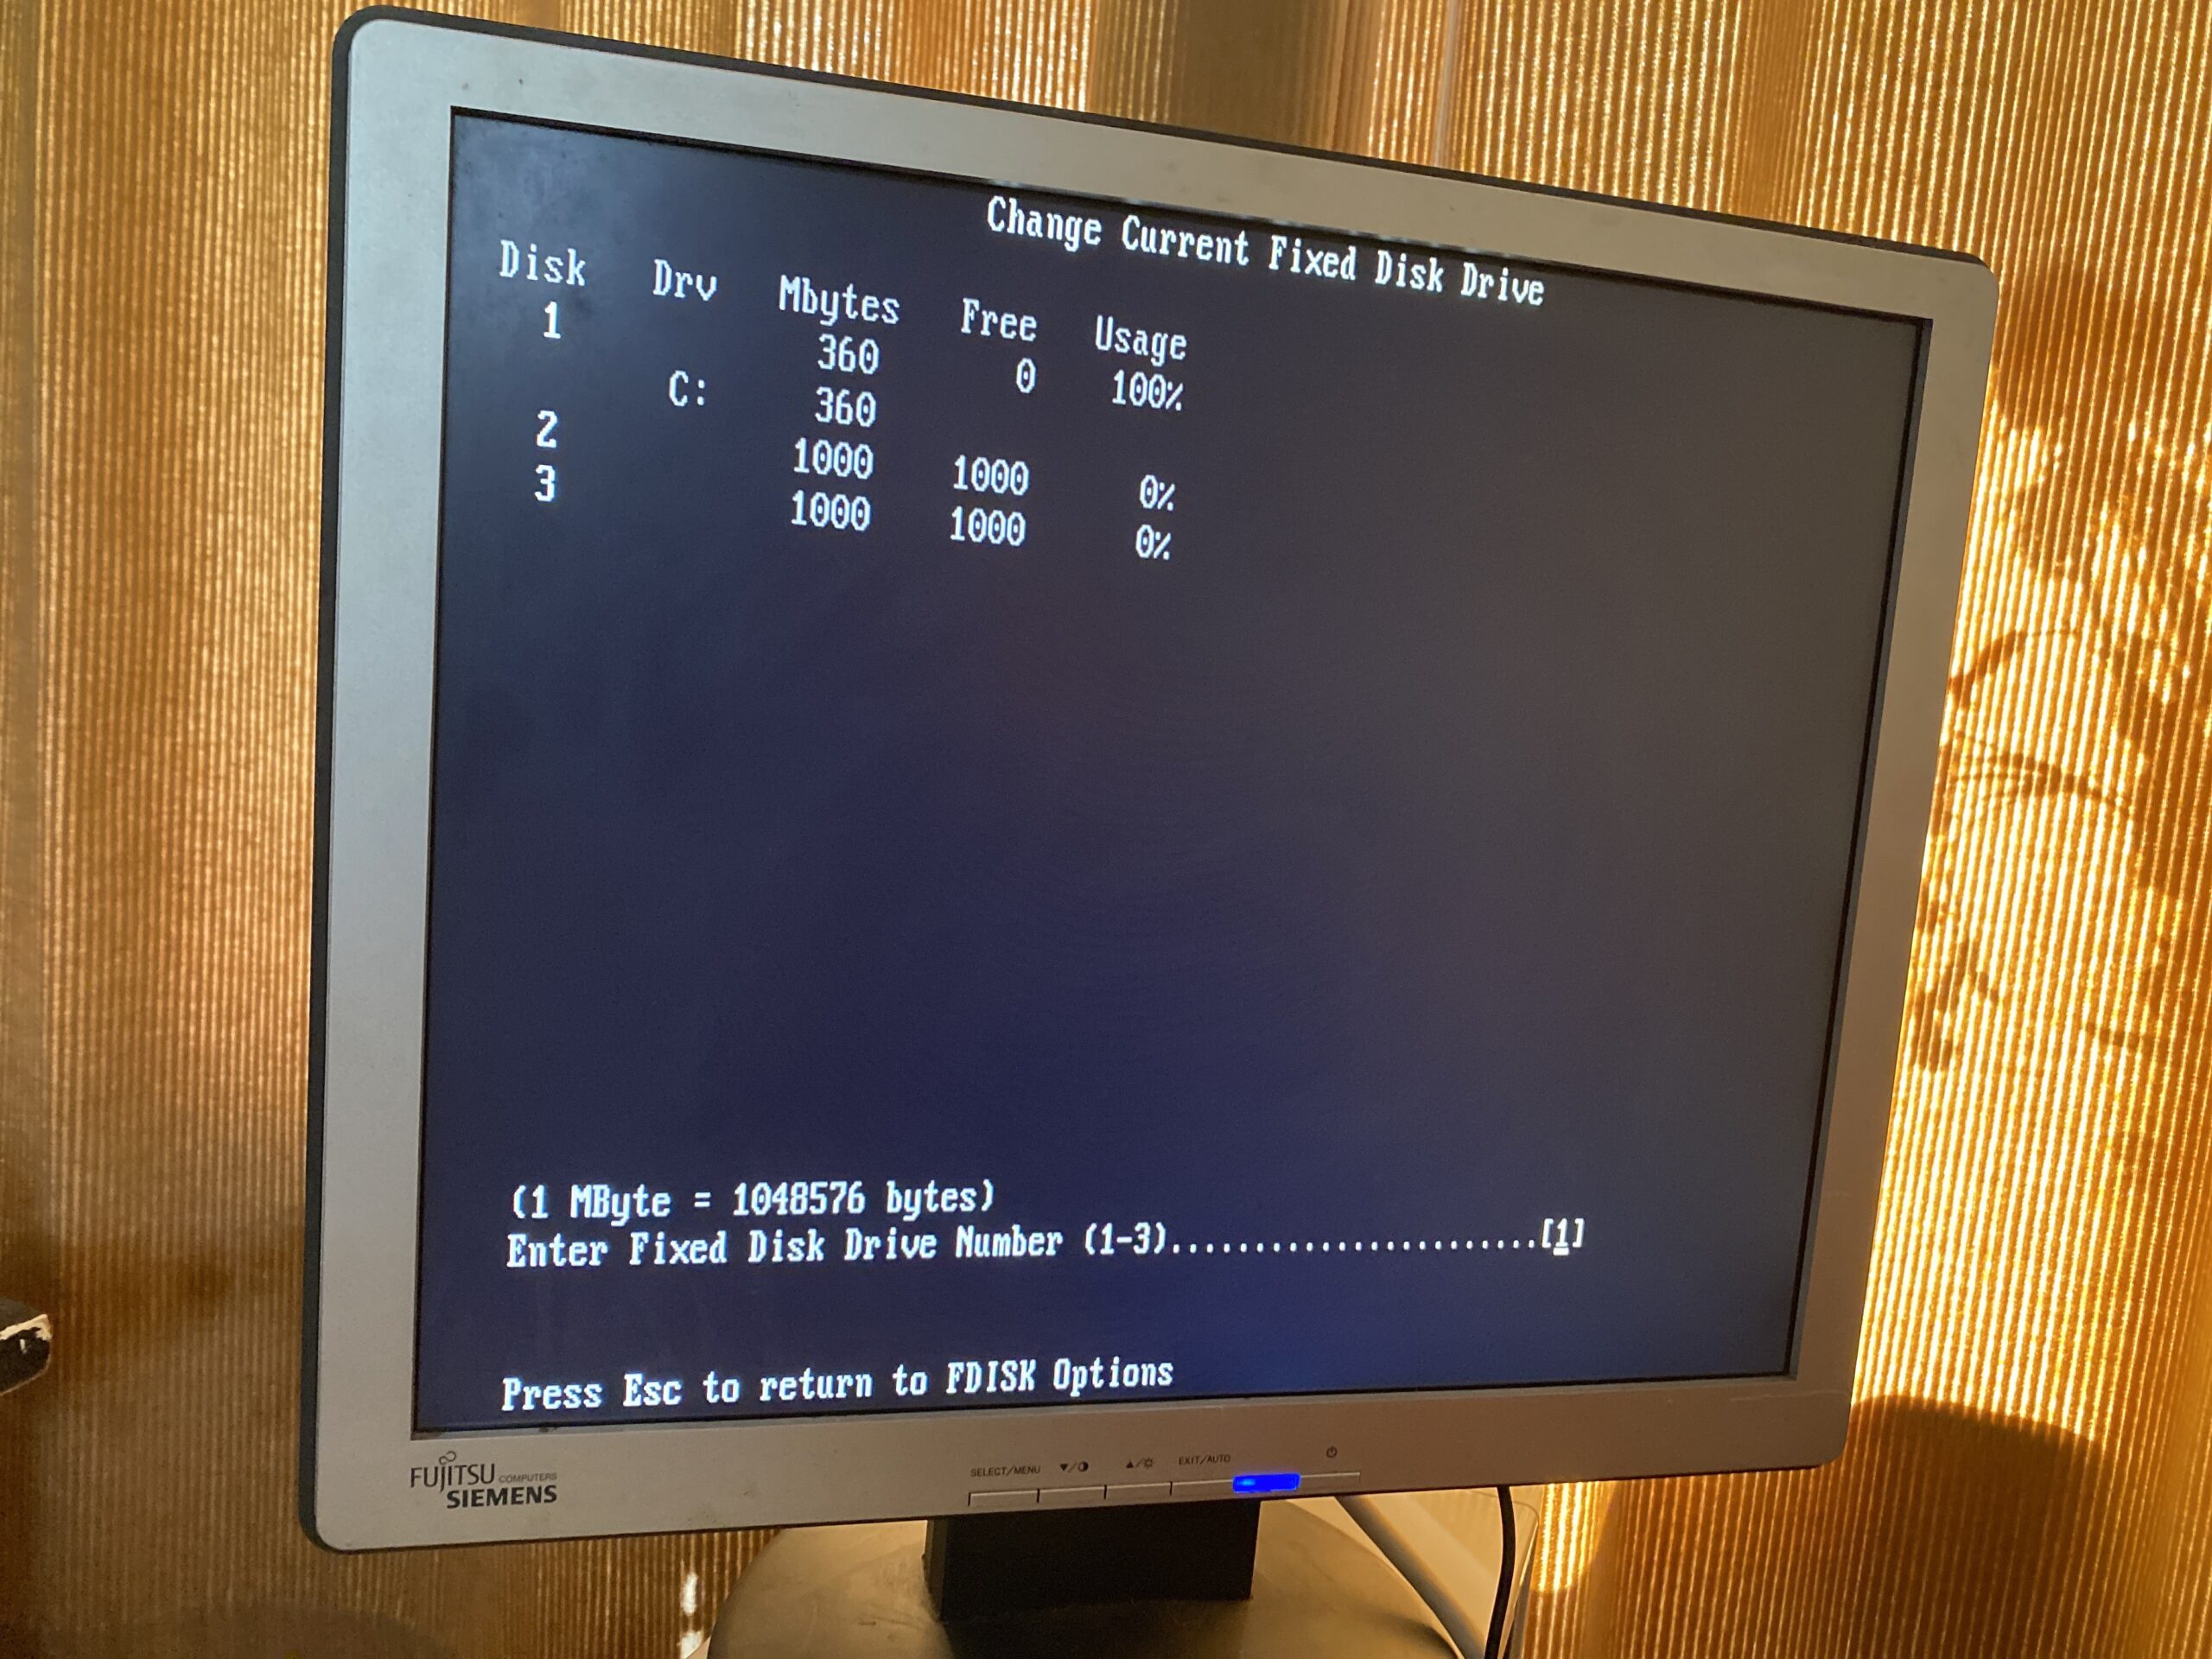
And sure enough, MS-DOS only sees 1GB per bigger disk. After search for a bit, it turns out that the 1GB limitation is a known thing and newer ROMs can work around the issue. Eagle eye’d might have noticed the first adapter had ROMs from 1990, while the second card has ROMs from 1991. But the better ROMs come from a totally different card. Normally I might have been annoyed, but since my disks are virtual I can just give myself 5x1GB data disks, along with that 360MB OS disk.
ALL THE DISKS!
This is the best part of virtual peripherals, is that you can load out what would have been super expensive, and impractical for being era correct. Instead, now it’s super easy, barely an inconvenience. I can’t imagine trying to use physical disks in 2023.
One of the reasons I kept the smaller ‘C’ drive was to make for installing OSs a bit easier, as many older things hate ‘large’ disks. But being able to connect so many gives so much flexibility.
It’s a shame the MFM hard disk emulators are a bit expensive, even with my screwup it was still cheaper to go with SCSI, and the BlueSCSI basically just works, the only weird behaviour is all on the ‘tribble’ SCSI / A adapter.
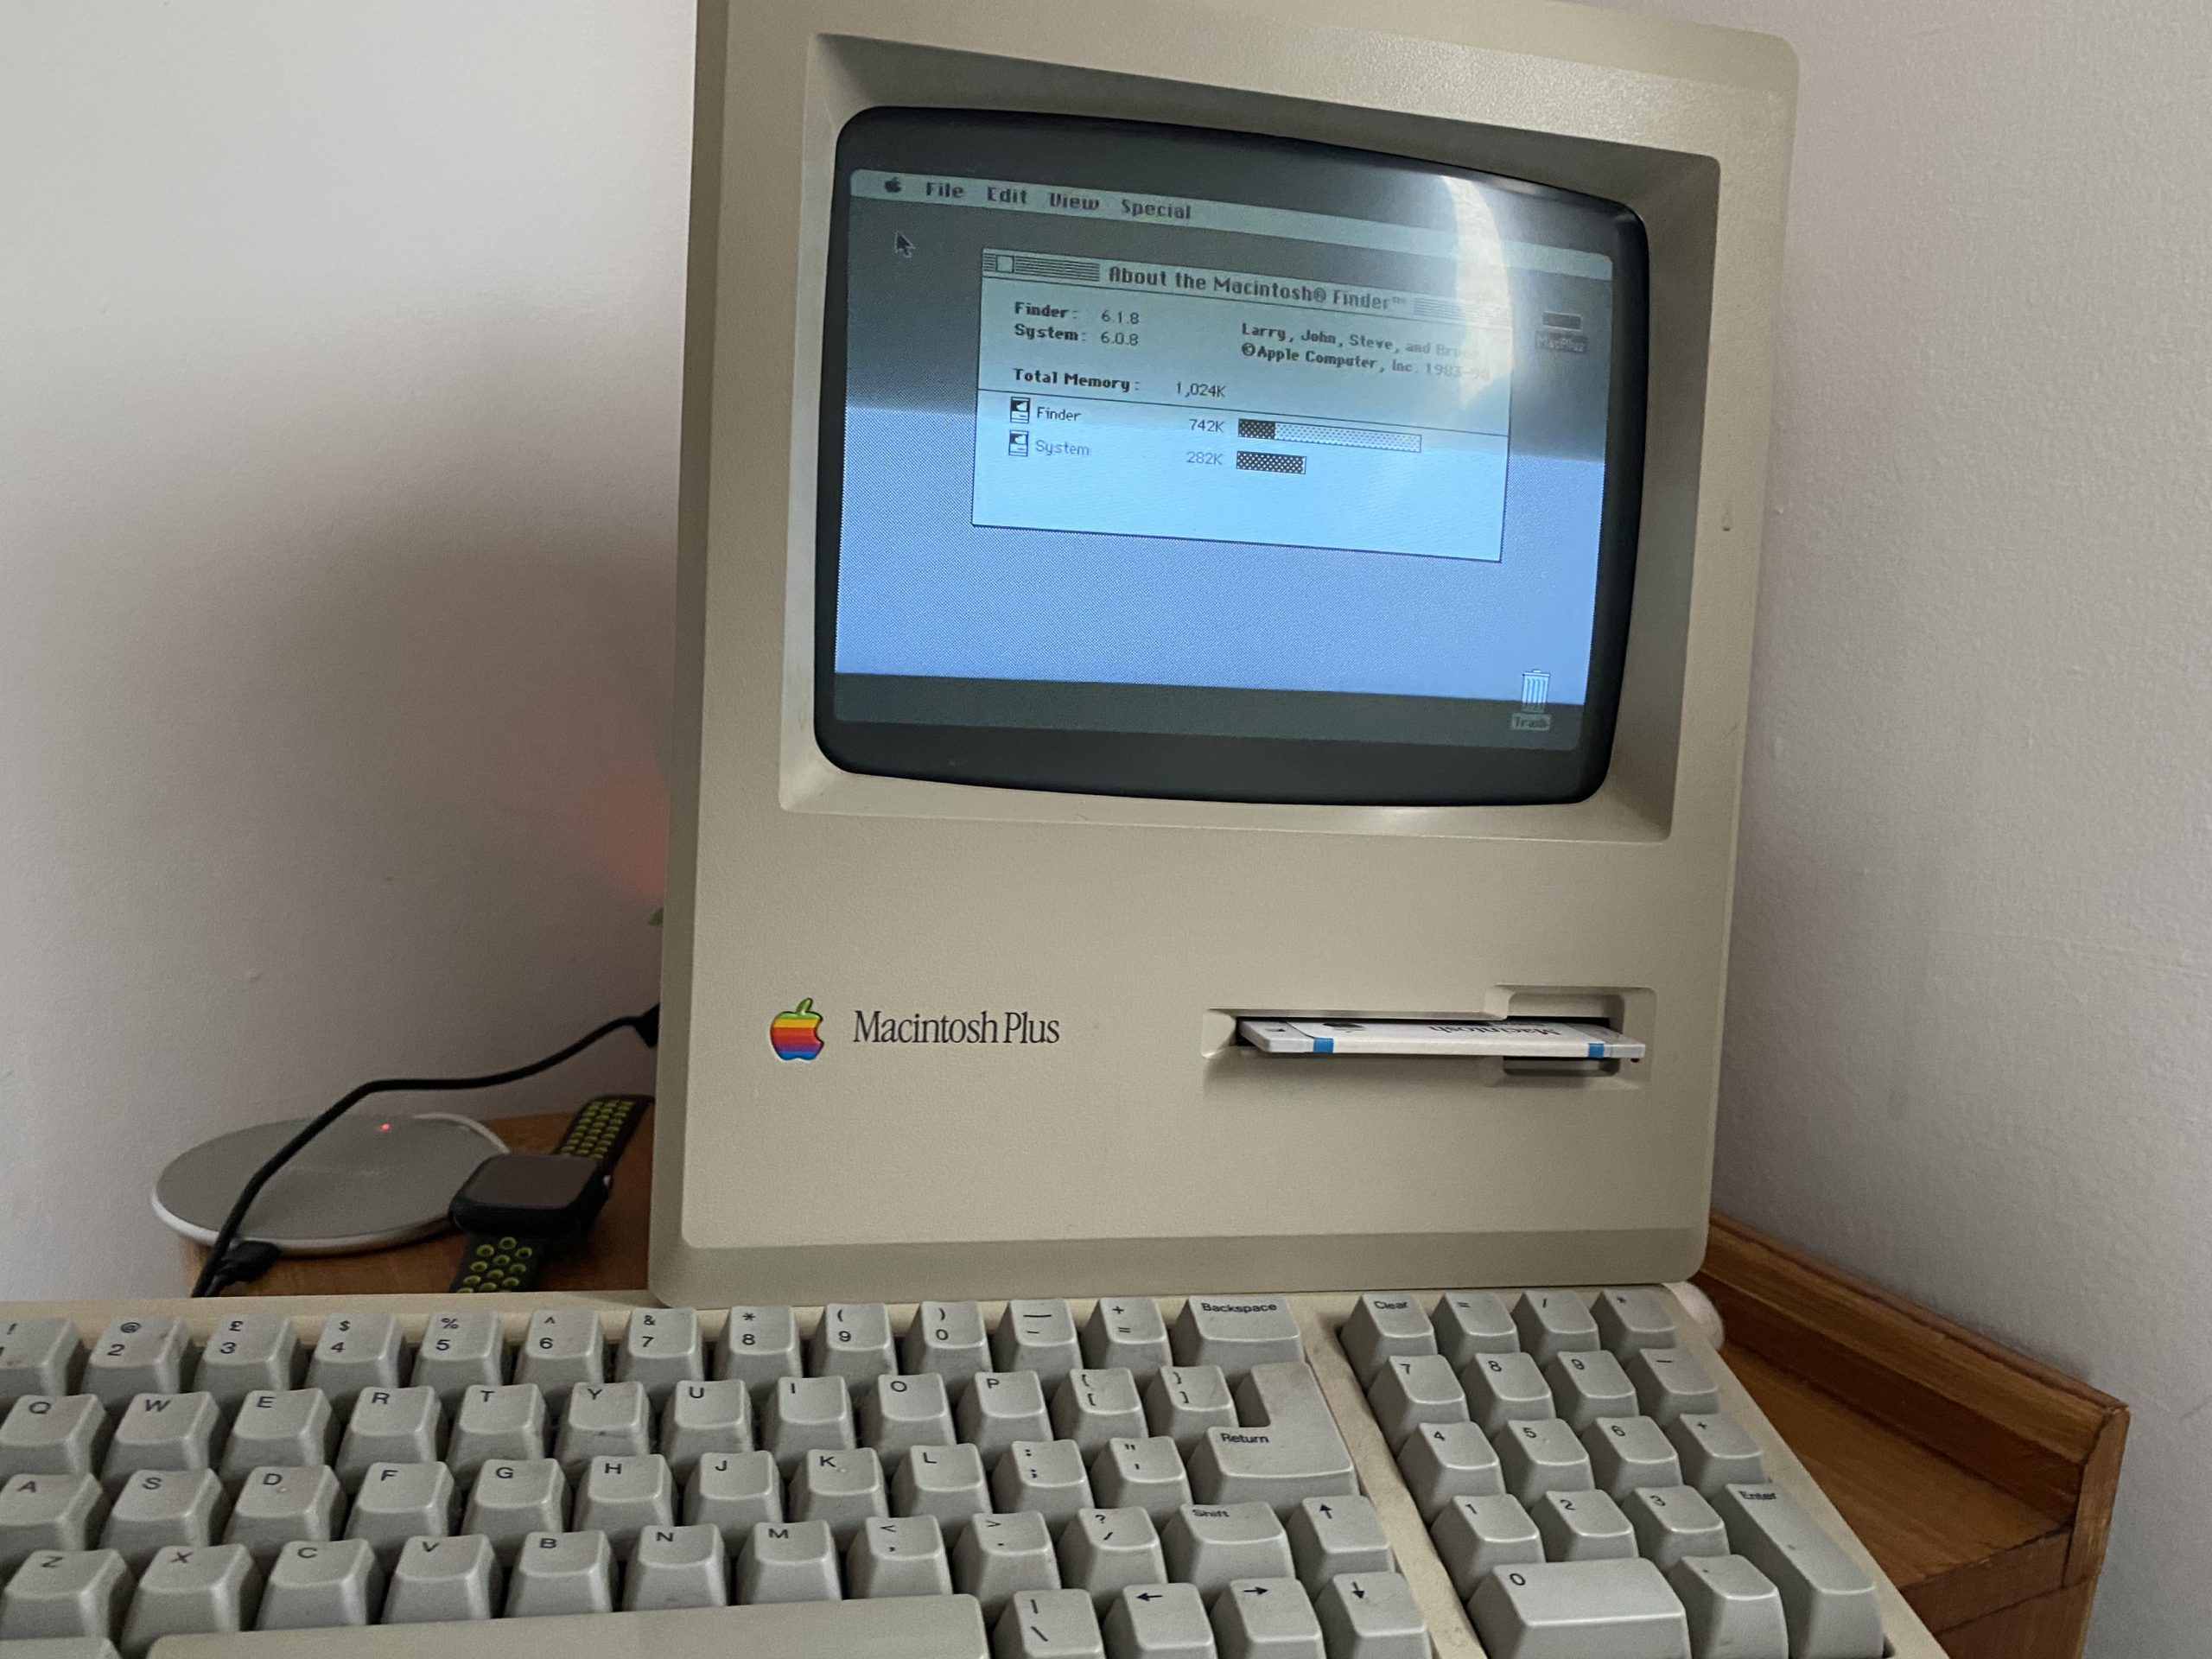
This was rather unexpected, but this auction for a loaded Macintosh Plus had shown up, and it was shipping local, and very cheap for what it was. It included the larger keyboard, original mouse, and an external 20MB hard disk.
Assembled in Scotland!
Sadly, the hard disk is dead. And not like dead dead, but dead dead dead! After I freed the disk from the external enclosure, and tried to power it on, stand alone, the PSU refused to start as the disk has a hard short in the board somewhere. And I can’t say that I’m all that surprised that a hard disk from 1989 is broken. I’m more surprised that someone was using this in 1989 and didn’t take the plunge and upgrade the machine to the full 4Mb of ram.
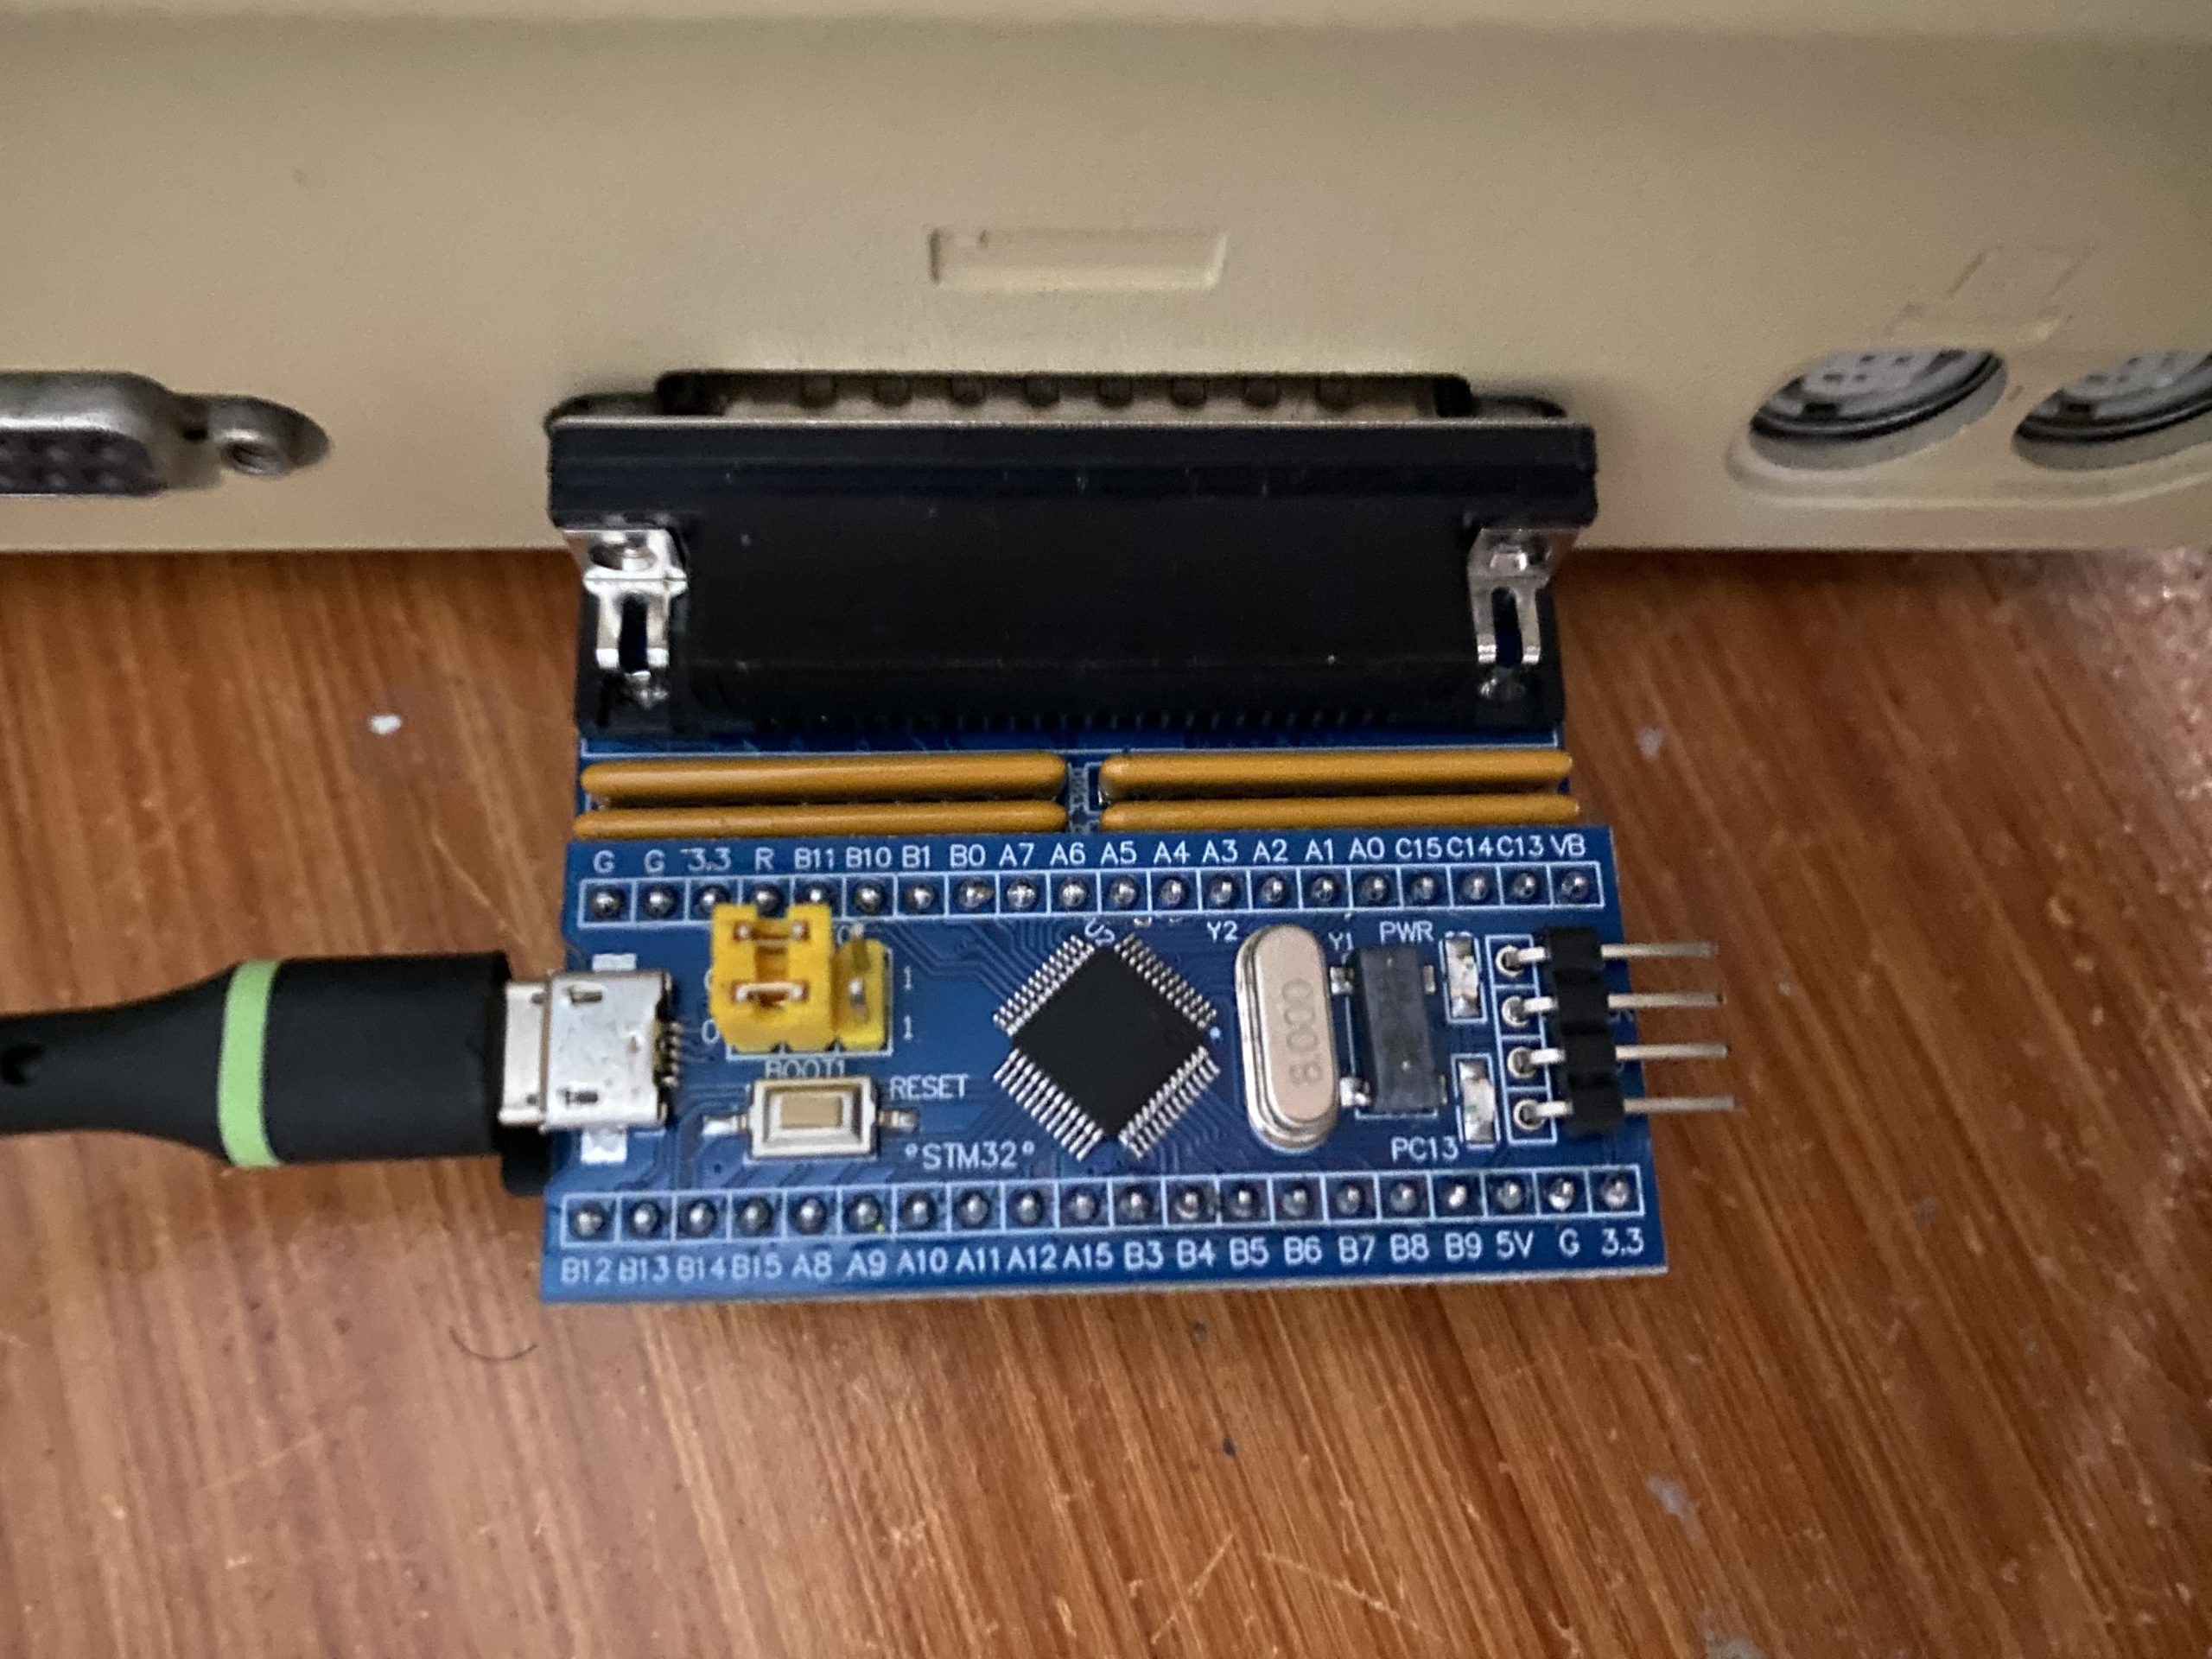
Anyways I have this chunk of plastic and glass on a desk, but I can’t do a thing with it. I’ve heard of various SCSI emulators out there, and decided to go with a bluescsi v1 with a DB25 interface as they are generally cheaper, and the Macintosh Plus isn’t exactly all that fast so the effort of the v2 is mostly lost.
Bluescsi module on the back of the Macintosh Plus
Documentation on the bluescsi is scant, but it seems that a diode needs to be soldered onto the Macintosh Plus motherboard to enable bus power, so you don’t need an external USB power source. I’m a bit worried about opening up this thing as I’ms suspecting the plastics are a log weaker than they look, so I opted for just using a USB cable to power the device.
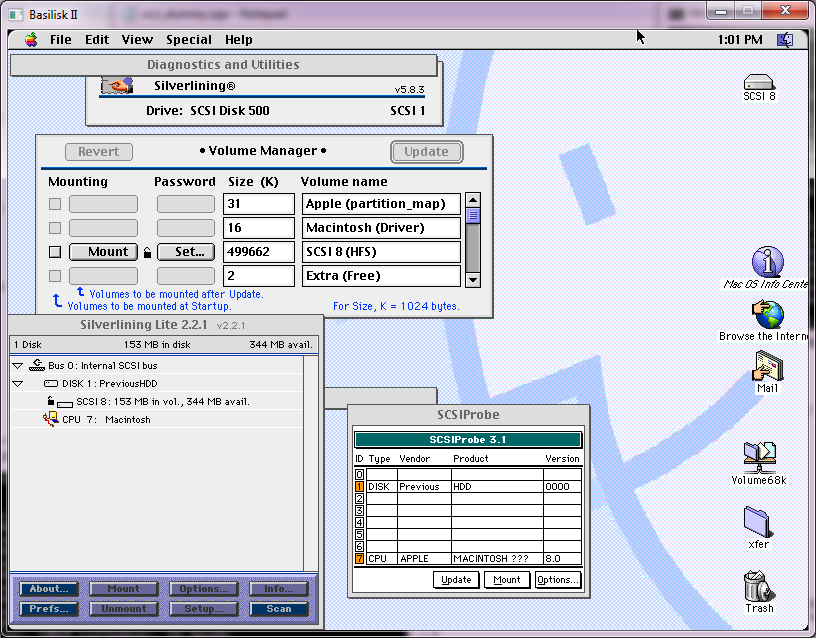
Anyways let me cut to the chase, I have an 8Gb Micro SD card that I formatted ExFAT (the documentation says Fat32 will work, but I found it might work once, but it’ll definitely never work after a reboot), with a single file emulating a 100Mb hard disk (Luxurious!). I named the file simply ‘HD10_512.hda’ which specifies it’s a hard disk, SCSI ID 1, target 0, 512 bytes/sector and it’s a ‘hda’ image. It’s what the Bluescsi want’s so don’t fight it!
To prepare the virtual hard disk, I used Cockatrice III, since the Macintosh Quadra 800 emulation includes SCSI, which let me create a raw disk image, partition it, and format it under MacOS 8.1. The real trick was installing the operating system.
I first tried MacOS 7.0.1, but it would boot up greeting me with the error that needs more than 1Mb of ram. I tried installing a MacOS 6.0.8 manually, but it crashed saying the system folder was corrupt, and then it just went empty disk mac on further boots.
I’m not sure what the problem was, it’s possible it was the filesystem on the card, or some other issued with the Macintosh, I have no idea.
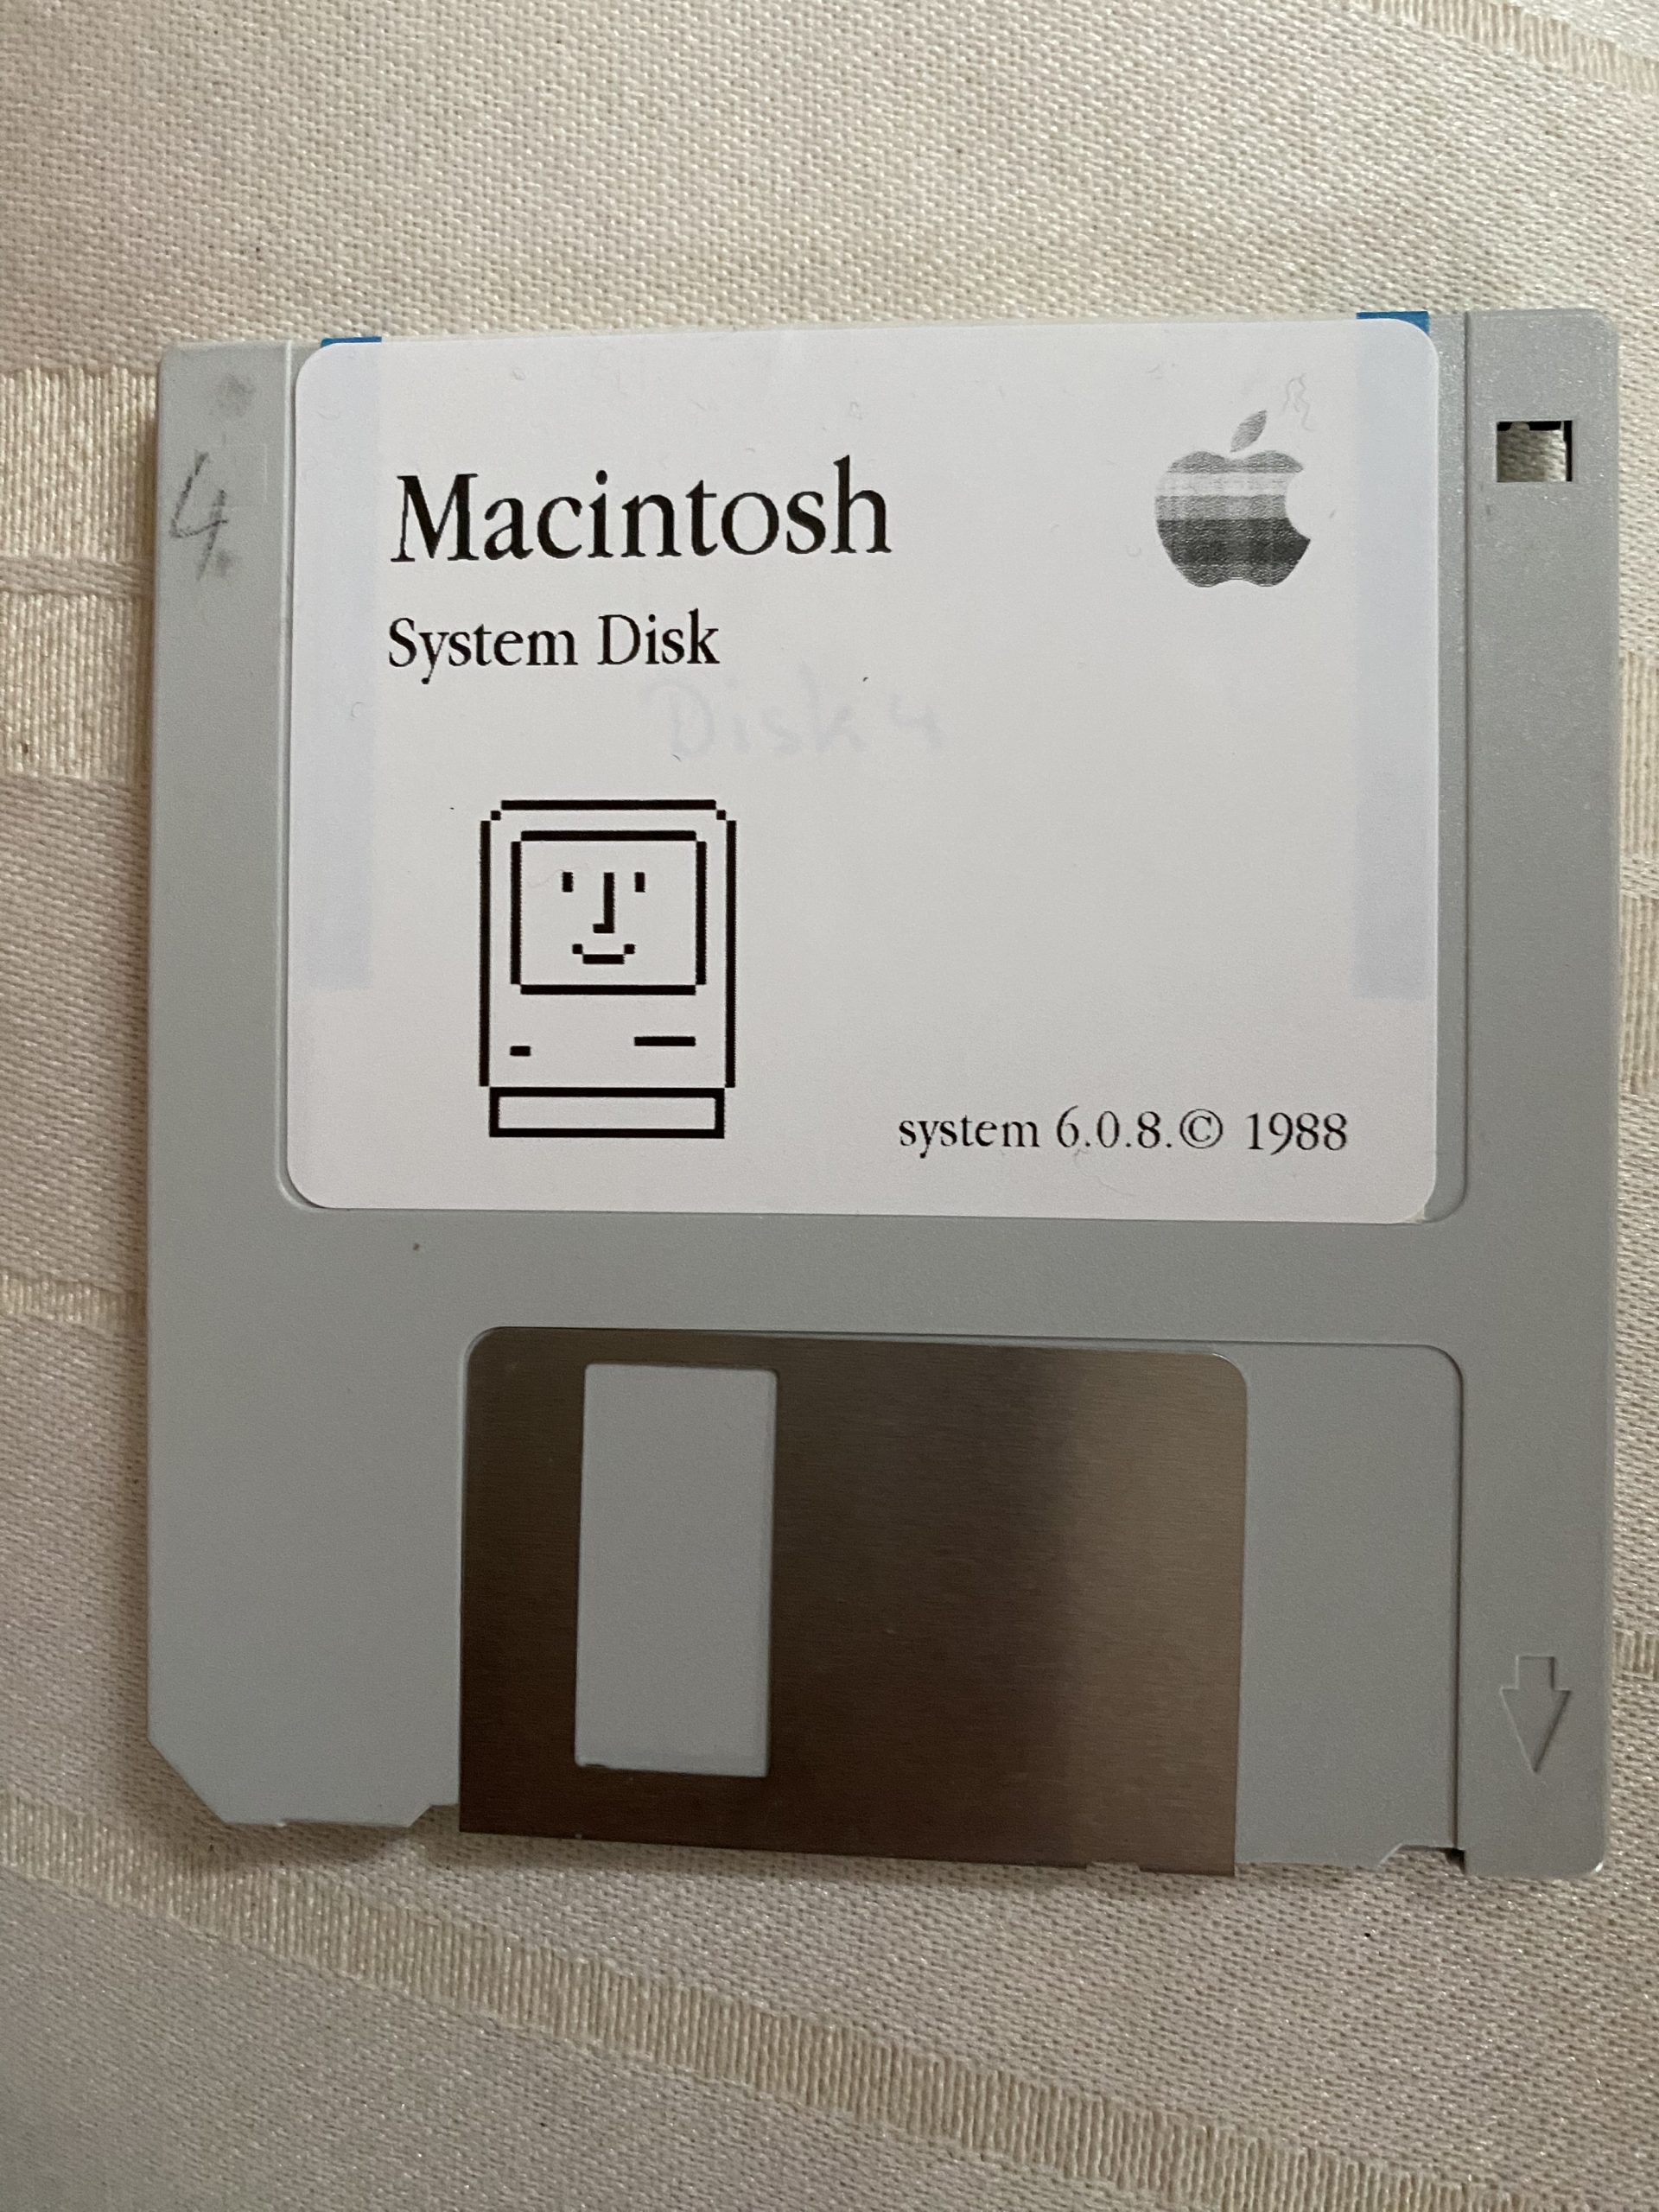
So I broke down and ordered a pre-installed diskette with MacOS 6.08.
Repurposed System 6.0.8 disk
I booted off the diskette, and amazingly the floppy drive worked! And in about a minute I had booted up, and it saw the hard disk! I dragged the System folder over the hard disk, and rebooted, and yeah it booted right up!
Obviously, the next step will be to get a proper screwdriver to open this thing, figure out how to discharge the CRT so I don’t kill myself, and add some additional RAM. I know it’ll be slow but I do want to see MacMiNT run on this thing! Maybe I’ll find/order the needed diode and make the DB25 bus powered eliminating one cable.
A long long long time ago I did own a Macintosh Plus, with 4Mb of RAM, although I mostly used it as a terminal, since it powered up quickly (it was the mid 90s!) and doesn’t take up that much space, so maybe I can slave it to an ESP32?
**UPDATE
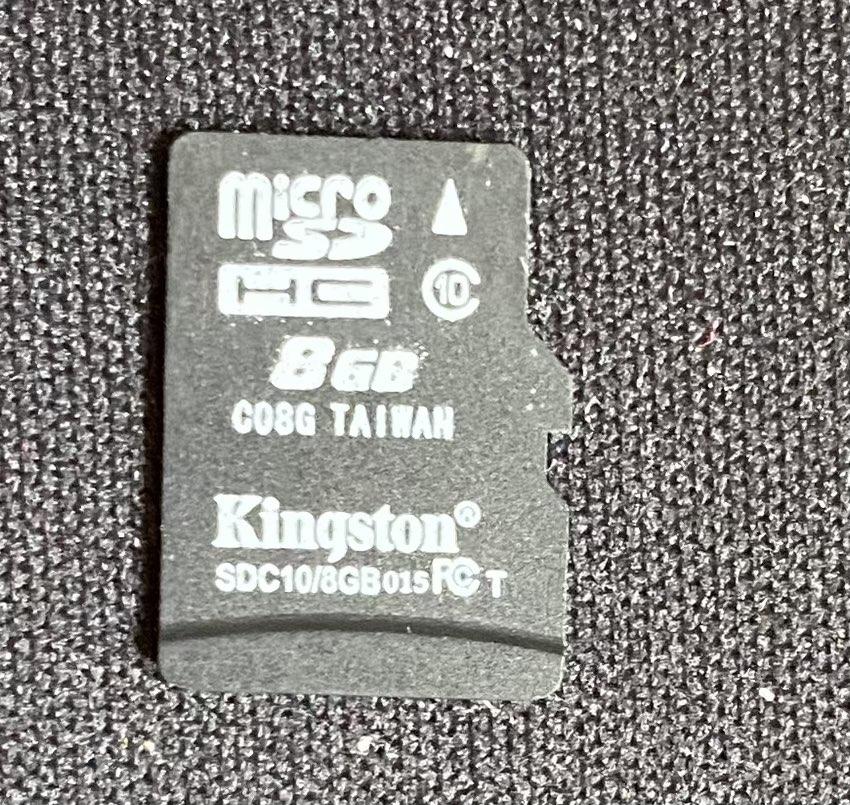
I had been using some generic 8GB microSD card on this, and while it seemed mostly fine on the Macintosh Plus, I had since managed to score a Performa 6400. I had been using this Kingston generic 8GB card, and it had frequent timeouts writing/reading on the Performa. As a matter of fact if the SD card was plugged in at powerup with an ISO image it would crash the Mac.
Kingston SDC10/8GB 015FCT C08G… no good!
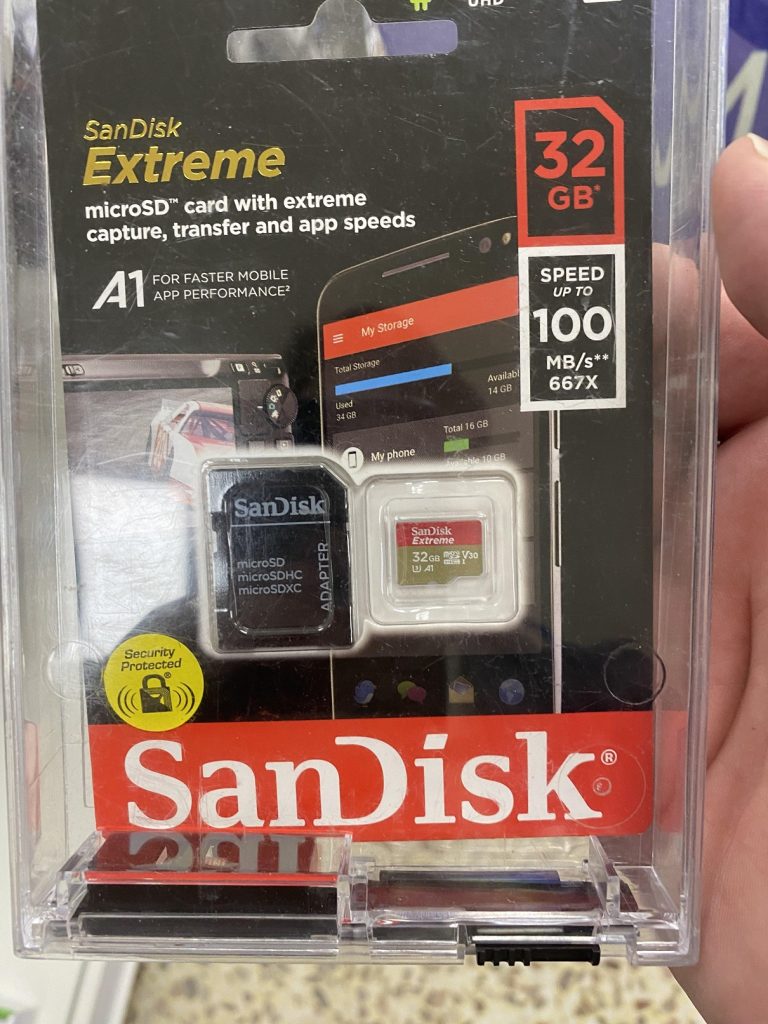
I scored this SanDisk Extreme 32GB for £15. A bit pricy but it turns out totally worth it!
£15 SanDisk Extreme!
Not only does the Performa not crash with an ISO image but it’s pretty darn quick! Well worth the purchase as all my weird issues seemingly just disappear!
The following is a guest post by PA8600/PA-RISC! Thanks for doing another great writeup on that PowerPC that was going to transform the industry!.. but didn’t.
The history of the PReP platform from IBM is quite interesting, not only because of its place in the history of Windows NT but also the history of the PowerPC architecture in general. When the PowerPC platform was new, IBM (just like a few other vendors, notably DEC) had grand plans to replace the x86 PC clone market (they helped create) with PowerPC. Of course thanks to various factors such as Apple’s refusal to play along, the launch of the Pentium Pro CPU (and the later Itanium disaster), and high cost, this plan never ended up panning out. Later IBM PReP machines were designed for AIX and Linux use only, and they were sold as regular old RS/6000 computers.
Still, Microsoft being Microsoft and willing to port their OS to literally anything hedged their bets and made MIPS, PowerPC, and Alpha ports of Windows NT (along with a PC98 release for Japan only). In the guest post about Solaris for PowerPC I made, I talked about the history of IBM’s PReP platform some more so you should go read that post if you want an initial rundown on PReP’s flaws and history. But I have learned a bit about the Windows NT port for PowerPC, and I discovered a rare version of it as well. By now everyone with a PReP machine (or PPC Thinkpad) has run Windows NT 4.0 on it, and if PReP machines are emulated it’s guaranteed this will be the second most run OS on it aside from AIX of course.
IBM also made a half-baked OS/2 port for PowerPC as well, and then there’s the previously mentioned Solaris port. All of these are rarities and it’s worth documenting. With how rare PReP machines are and their high prices on eBay when they do turn up for sale (or their tendency to be snapped up fast), I think it’s fitting to write perhaps the most in depth look at PReP hardware that anyone has seen.
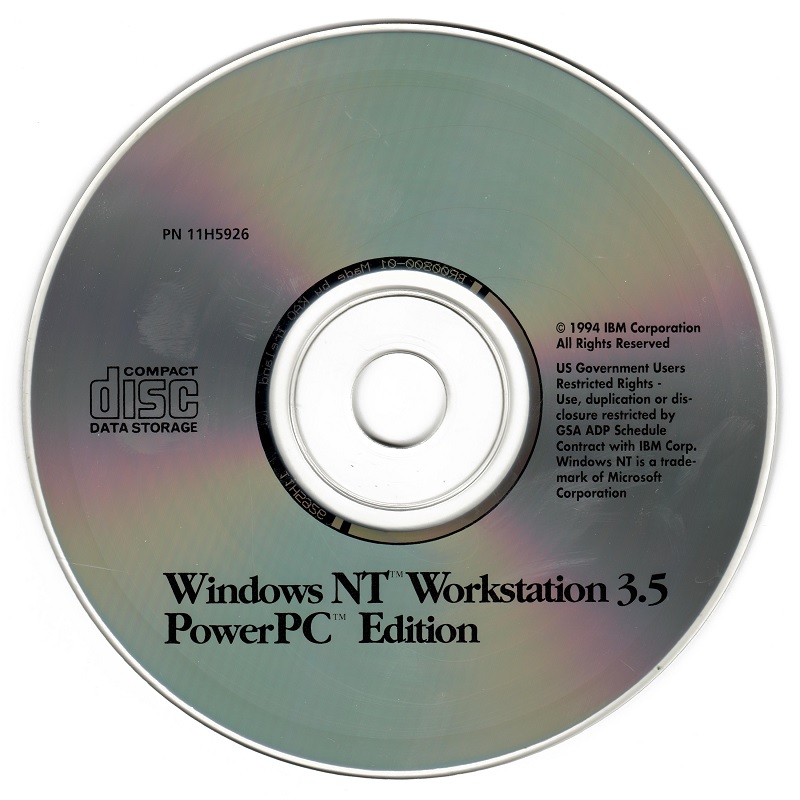
Windows NT 3.51: “The PowerPC Release”
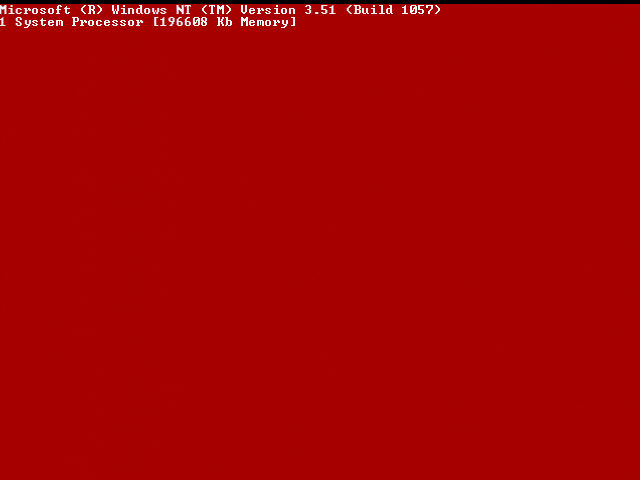
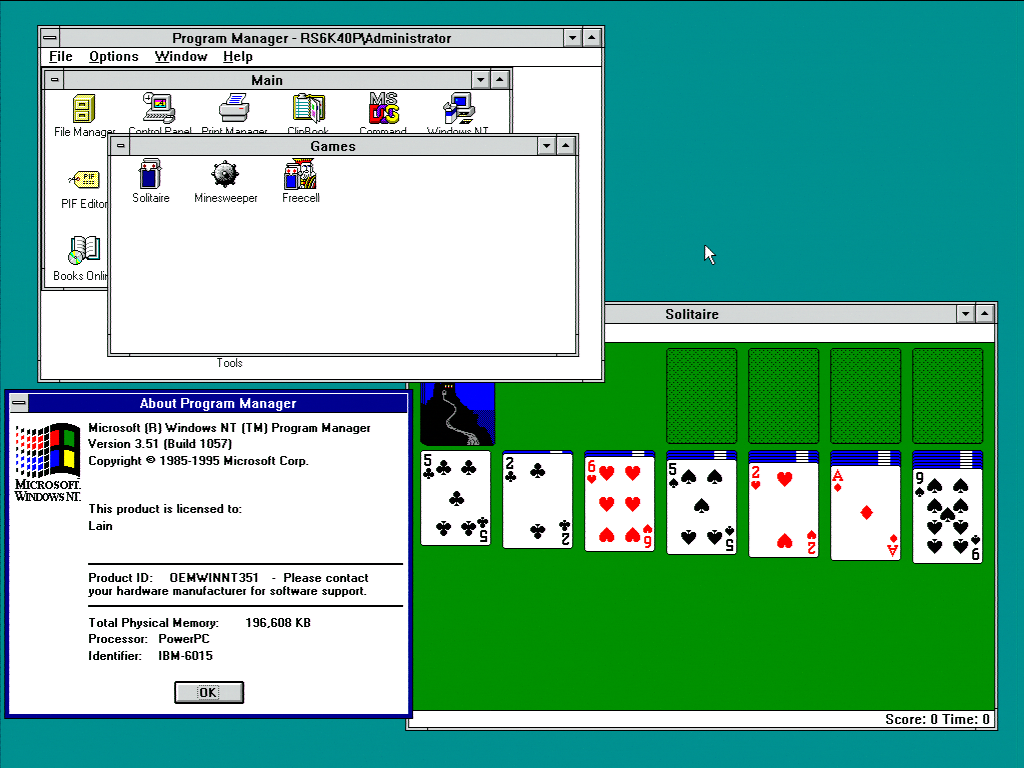
It’s commonly accepted that Windows NT 3.51 was the first release for PowerPC hardware and it was even called this within Microsoft. Featuring HALs for most of the early PReP machines including the Moto Powerstack, the rare FirePower machines built for NT (which used Open Firmware), the Power Series 6050/70 (and maybe 7248), and the unobtanium IBM 6030, it’s pretty much what you’d expect for a first release for PPC. It’s a polished, solid OS that’s arguably faster than NT4 on the same machine. Aside from the red boot screen (on my Weitek GPU), it’s pretty much Windows NT 3.51 but on the PowerPC. It’s like running NT 3.51 on MIPS or Alpha, it’s interesting but more software will likely run on 4 anyhow (especially on Alpha).
One interesting quirk of Windows NT for PowerPC is it does not report the CPU type of your machine. It simply reports “PowerPC” and what machine you’re running it on. It does not tell you that you’re running it on a 601, it tells you that it’s running on an IBM-6015.
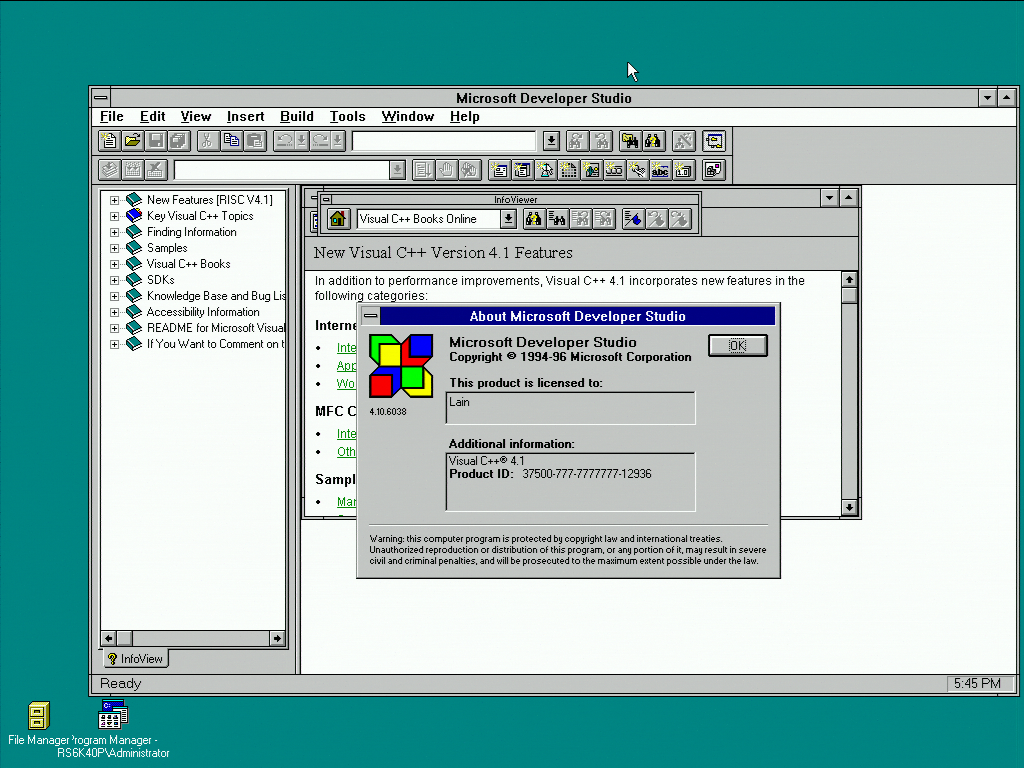
Unsurprisingly Visual C++ 4 works on PowerPC Windows NT 3.51 as well. This is no shock, Visual C++ 4 was designed to work on 3.51 as well as NT 4.0. The same goes with many of the pre compiled programs. One advantage Windows NT 3.51 offers over 4.0 is that it is simply faster than 4.0 on the PowerPC 601.
There’s not much else about Windows NT 3.51 for PowerPC quirk wise that hasn’t been said elsewhere about NT 4. It runs in little-endian mode (one of the few PPC OSes to), it has 16 bit Windows emulation that’s slow, and it needs specific PReP machines to run. One interesting series of articles about the “behind the scenes” of the port worth reading is the Raymond Chen article series, and this discusses the quirks of programming a PowerPC 60x CPU in little-endian mode as well. It can be installed with the same ARC disks NT4 uses, and of course the same SMS and firmware disks will work. In fact QEMU at one time was capable of booting the IBM firmware image from these disks.
Here’s something I’ve found out from research however. There was actually a limited release of Windows NT 3.5, it’s been dumped, and it is a real operating system. It also requires a very specific model of RS/6000 to work, and one with a interesting history giving it a unique place among the PReP machines. While I was unable to make it work in the end, I did discover and document a lot of interesting features of PReP machines.
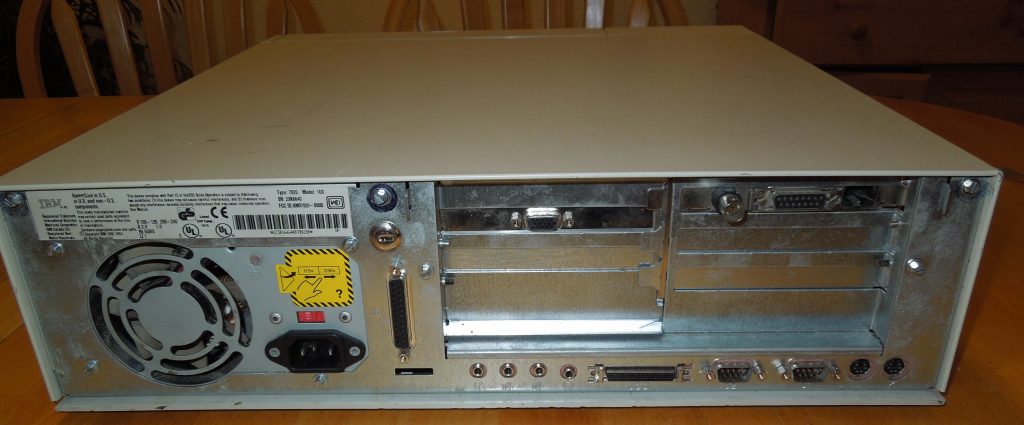
Enter Sandalfoot: The IBM 7020/6015 (and demystifying PReP machines)
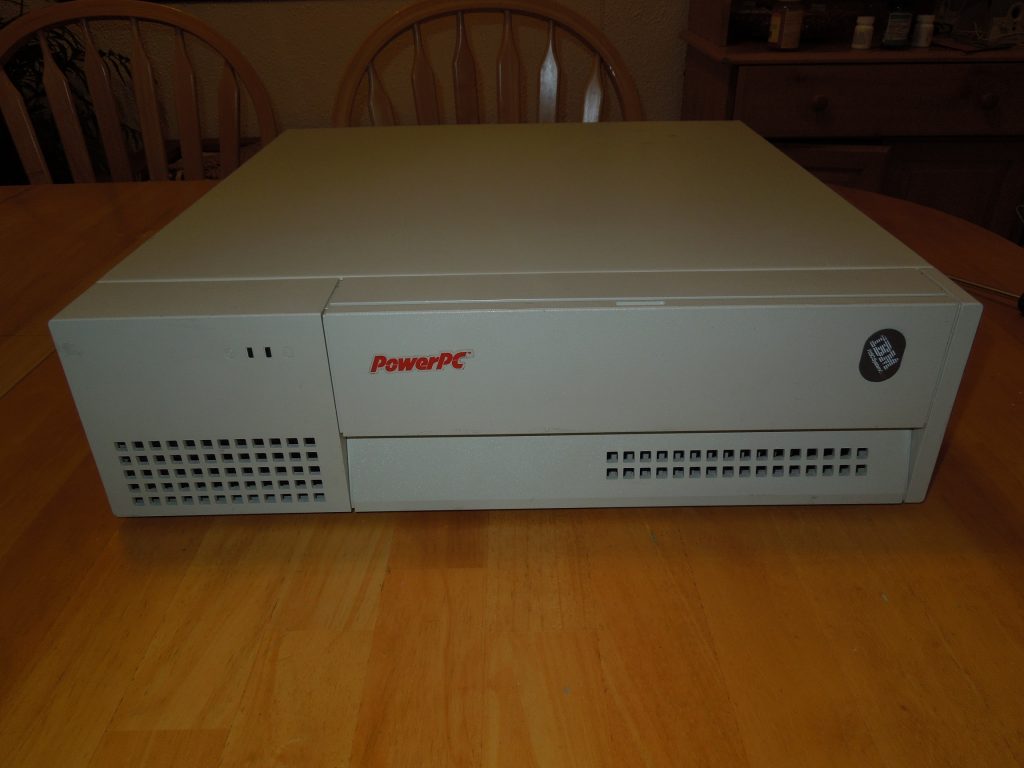
To understand the HCL and weirdness of Windows NT for PowerPC (and why it won’t run on Macs), we need to take a look at one such machine it runs on. This is my RS/6000 40p, a machine that was given several brand names by IBM and used as a development platform for PReP software and operating system ports. This is also perhaps the most historically significant RS/6000 model from the era. While it wasn’t the first PowerPC RS/6000 (that honor goes to the 250), it was the first to use the PCI and ISA busses and it was a few months ahead of both the initial PCI PowerMacs and other PReP boxes. It’s also one of the few true bi-endian machines as just like other PReP machines, the MIPS Magnum, HP’s Integrity, and modern Power8+ machines it has OSes for both endians available.
In 1994 (presumably October 28, if the planned availability date is correct), IBM released the RS/6000 40p (announcement letter here, codenamed Sandalbow) and the Power Series 440 (codenamed Sandalfoot). Both are near-identical machines with different faceplates and boot screens. The RS/6000 ranged in price from around $4,000-6,000 and was designed to be an entry-level AIX workstation, bundling a copy of AIX with each machine. As an AIX machine it’s relatively slow and fits the entry-level badge quite well, but thanks to the 601’s POWER instructions it served as a transition machine over to the later 604 AIX machines. Unlike the later PowerPC 603 and 604 machines, it featured POWER instructions allowing it to run both legacy AIX POWER software and later PowerPC software. The Power Series was presumably sold to those wanting a PReP box for Windows instead.
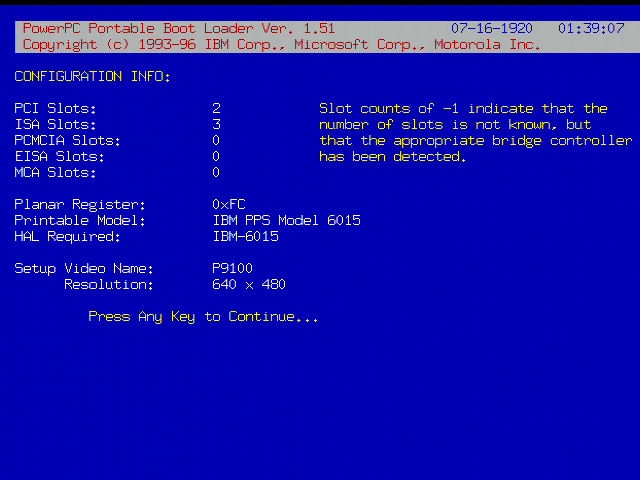
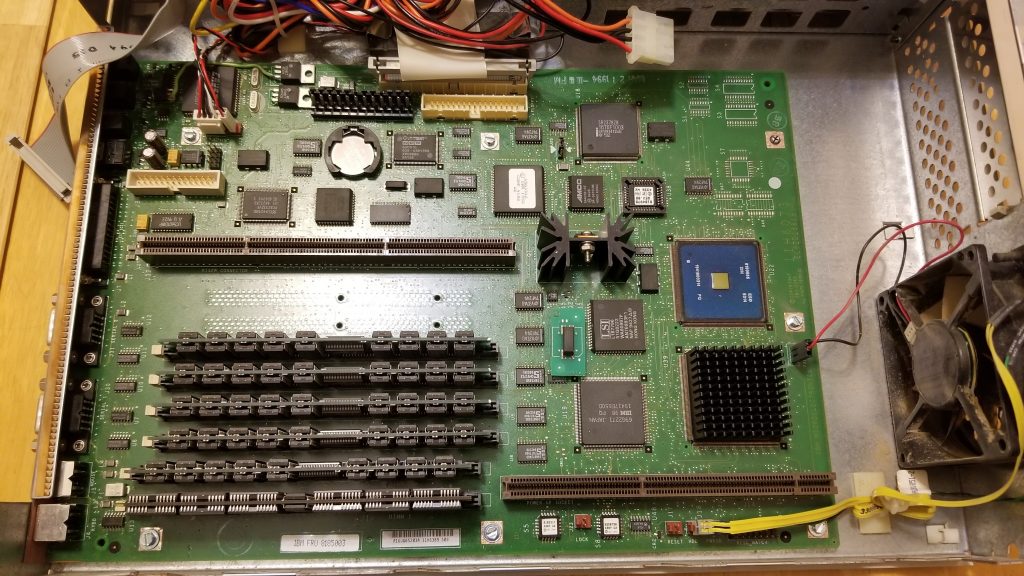
Since IBM PReP hardware is so obscure and undocumented, I’m going to document this as best as I can being the owner of an IBM Model 6015/7020. The machine features a 66mhz PowerPC 601 (similar to that of the Power Mac 6100 and RS6K 250), PCI and ISA slots, and IBM’s “Dakota” PReP firmware (more on the boot process here). It uses an off the shelf NCR 53c810 SCSI controller, Crystal CS4321 sound chip, an Intel 82378 PCI bridge, and a NIC can be inserted into the ISA slots (mine has the famous 3com Etherlink III). The Super-IO chip is also off the shelf, and is a National PC87312VF. The clock IC is a Dallas DS1385S, a close relative of the Dallas DS1387 (with internal battery). At least some of the IBM custom ICs are the chipset ICs and those are also documented. A Linux 2.4 dmesg can be found here.
Mine is also maxed out at 192mb of RAM, however there are some solder pads for more and the chipset is limited at 256mb. This makes me wonder if the system was based on a reference design of some sort. There was an ultra-rare 604 upgrade as well, but considering how there are more 7248 and 7043 machines in the wild I can assume many customers just waited for that instead due to its superior AIX performance.
If the idea sounds familiar (off the shelf chips + RISC CPU) it’s because it was the very same idea used to create the two other non-x86 Windows NT platforms. The Microsoft Jazz MIPS platform most MIPS NT boxes were influenced by was infamously based on the same idea of a “PC with a MIPS CPU”. To a lesser extent, this was also seen on the DECpc AXP 150 and other EISA/ISA/PCI based Alpha machines designed to both run Windows NT and DEC’s own OSes. Crazy undocumented custom hardware and expansion busses were thrown out the window in favor of industry standards. In fact when I posted a photo of the motherboard to a chat full of PC nerds, they stated it looked remarkably like a normal PC motherboard. The whole industry would later adopt PCI and sometimes ISA on non-x86 machines to cut costs and reuse the same expansion cards.
The main difference between the RS/6000 40p and the Power Series variant is the boot ROM logo and chime. The RS/6000 and “OEM” systems used a boot ROM that featured the PowerPC logo and just a beep, while the Power Series machines featured a logo more closely resembling the PowerPC Thinkpads complete with the chime. One can boot firmware from a floppy as well by typing in the name of the ROM image in the prompt and pressing enter, and watching as it reboots once the firmware is loaded into RAM. Here’s a video I filmed demonstrating this, along with some other quirks including there being two SMS keys: F1 for a nice flashy GUI SMS and F4 for a text based SMS, along with F2 for netbooting (with the right NIC of course).
The Sandalfoot machines were LPX form factor machines, featuring a riser card and generic sheet-metal case popular with prebuilt machines from this era. The LPX form factor was wildly popular in the mid 90s due to its versatility, seeing use by both IBM and DEC for their RISC machines, various PC builders, and even Apple for the clone program and clone based Power Macintosh 4400. The Sandalfoot machines also drove home one of the core goals of the PReP project, which was to build a PowerPC platform using as many off the shelf and PC style components as possible instead of using lots of custom ICs like Apple did. I dug out one of my cameras to take a few high-res photos of the motherboard of this computer to illustrate this. Compare this to the motherboard of the Power Macintosh 6100 or even the 601 based 7200 and notice the bigger heatsink and use of fewer custom ICs (Apple loved those).
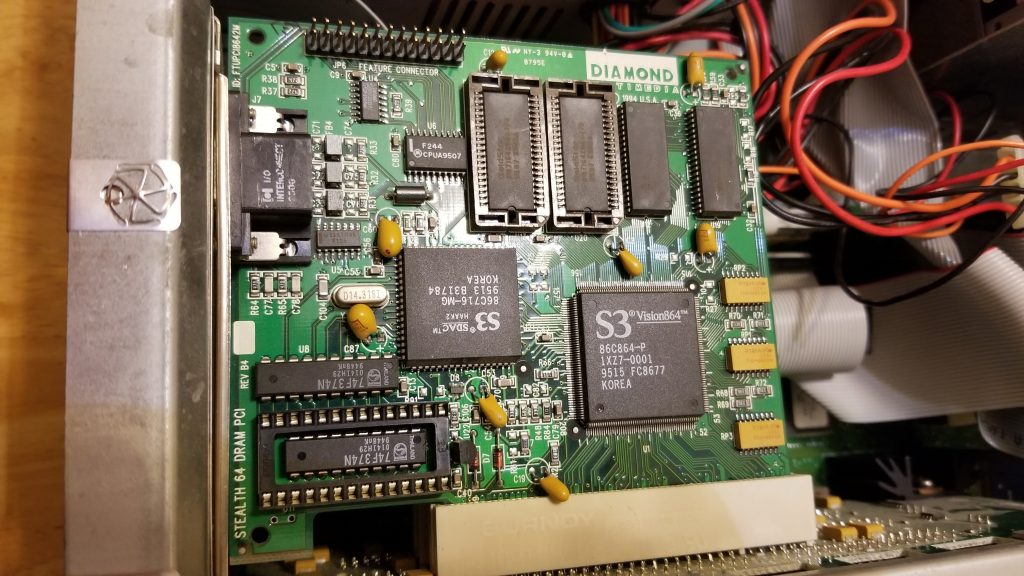
There were three main GPU options: the famous S3 Vision864, the Weitek Power 9100 (or P9100 for short) as a higher end option, and IBM’s own GXT150P. The S3 was the entry level GPU and the Weitek was a higher-end and faster GPU. The GXT150P is beyond the scope of this because it is unsupported on the other PReP OSes, only AIX. The other two video cards are essentially unmodified Diamond PC cards with the BIOS chips missing.
The Sandalfoot machines are perhaps the most important PReP machines due to their role in PReP OS development. Both OS/2 Beta 1 and Windows NT 3.5 were written for this machine in particular as it was one of the first PowerPC machines to support PReP and feature PCI/ISA slots, unlike the NuBus Macs released a few months earlier or the first PPC box: the MCA based RS/6000 Model 250. They also often shipped with the well documented and emulated S3 Vision 864 video card, a common GPU family in PCs of the time to the point where it was even included on some motherboards and emulated in too many PC emulators/virtualization programs to count (notably 86box/PCem). In fact it’s successor (the 7248) featured one soldered to the motherboard.
Windows NT 3.51 was dubbed the Power PC release, because it was designed around the Power PC version of NT, which was originally supposed to ship in version 3.5. But IBM constantly delayed the Power PC chips, necessitating a separate NT release. “NT 3.51 was a very unrewarding release,” Thompson said, contrasting it with Daytona. “After Daytona was completed, we basically sat around for 9 months fixing bugs while we waited for IBM to finish the Power PC hardware. But because of this, NT 3.51 was a solid release, and our customers loved it.” NT 3.51 eventually shipped in May 1995.
I think a more accurate thing to write is that there simply weren’t many PReP boxes out in late 1994. Windows NT 3.51 supported the Motorola PowerStack series, the IBM 6050/6070 (and maybe the 7248, which came out in July 1995), and rare FirePower machines. Windows NT only features HALs for the 6015 (Sandalfoot/Power 440/RS6K 40P), 6020 (Thinkpad 800), and the 6030 (a rare IBM machine that likely was only sent to a few developers). By 1995, there were more PReP machines on the market and this made the NT 3.51 release logical. NT4 even supported a few servers, mainly the RS6K E20, E30, and F30.
Windows NT 3.5 was most likely a limited release for testing purposes on the Sandalfoot machine as it’s HCL file declares it as “Build 807” with a date of October 18, 1994. The date seems to be around a week or two before the first 40p machines at least shipped. Some more files were modified later on and the folders were created on November 9th, 1994. Hardware support is very barren, and the readme file even has a section dedicated to quirks of the 40p along with a list of supported software for the x86 emulator. This might have been considered a beta as well, as an announcement letter for the Thinkpad 800 (6020) explicitly mentions Windows NT and that this version might be a beta for developers. It also talks about a Windows SDK for it and a Motorola compiler used to build 3.5 software.
However the real problem for me has to do with getting a video card. Windows NT 3.5 for PowerPC does not support the Weitek P9100 GPU that came with many RS/6000 branded machines, and neither does OS/2 for PowerPC. It only supports the S3 Vision 864 and 928 video cards. It’s listed in the setup options, but choosing it causes a txtsetup.sif error. I’m going to assume that the development units came with the S3 video card instead. My box contained a Weitek card which works for AIX, Solaris, and Windows NT 3.51/4. I bought a card from eBay to use with NT 3.5 and the OS/2 port.
The readme also features an ominous warning with the S3 video cards, that only revision B3 is supported and that 928 cards need 2MB of VRAM for anything above 256 colors. My revision of the card I ordered was B4, so I took the risk of seeing if it worked with my system. I also removed the ROM chip as the system initializes the video card itself and that having a ROM chip can cause the system to not complete the self-test or display video. As the IBM Weitek card lacks a BIOS, I did this.
Despite the scratches on the card from possibly coming out of an ewaste pile, the card worked fine in both a PC I inserted it in for testing purposes and the IBM system. I now had a 40p with a GPU much more well supported among non-AIX or Windows NT operating systems.
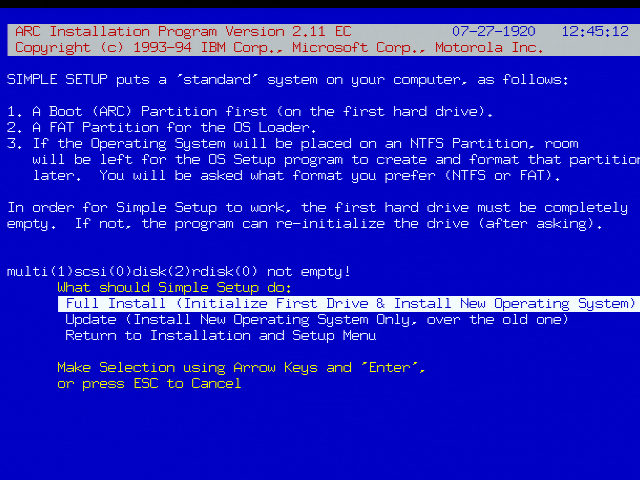
Anyhow, let’s talk about the install process in closer detail here. Windows NT for PowerPC installs in a similar manner to Solaris for PowerPC on the IBM PReP machines. First the floppy disk boots ARC, then when you choose to install it the machine copies the ARC bootloader/firmware to the hard disk so it can load it from there at each boot. The floppy disk can also be used to load ARC if the loader is damaged on the hard disk. Keep in mind, on IBM machines ARC is not stored in the ROM unlike on many other ARC capable machines so this has to be done. The Firepower machines do something very similar by using an Open Firmware shim, and unsuccessful attempts at emulating PPC NT have exploited VENEER.EXE to attempt booting instead of using the IBM firmware. It fails because they’re not emulating the hardware, just trying to find a quick way to just boot NT.
Once this is done, the installer loads up and installs just like every other NT install. It checks the HAL by reading the machine ID, what video hardware the machine has, and whatnot to prepare the installer. You need a IBM 6015, 6020, or 6030 according to the HALs it has and only the S3 video cards are on the HCL.
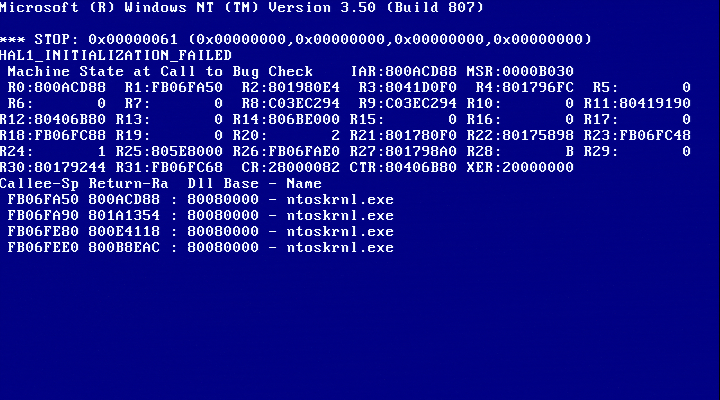
Or that’s what should happen. I first tried using ARC 1.51 as it worked for 3.51 and was greeted with a HAL error BSOD:
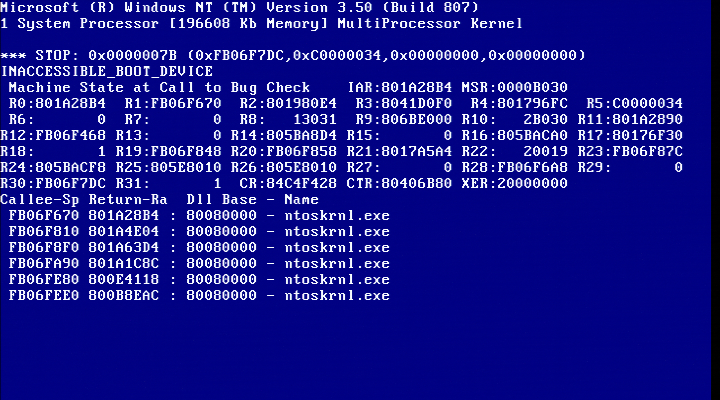
I first attempted to use older ARC boot floppies and I got somewhere, the BSOD changed to the classic 07b, and then I got nothing else. Using ARC 1.48 and 1.49 gave me this, I got some i/o error with ARC 1.46 (the first 3.51 ARC floppy), and any previous ARC floppy is most likely undumped. I’m assuming either the error is due to an ARC mismatch, a weird firmware mismatch/hardware revision mismatch, or some incorrect SCSI ID Solaris style. There might very well be some weird forgotten trick to making it work (maybe a Windows expert could dig through the files and find some weirdness), but I’m going to move onto another obscure PPC rarity:
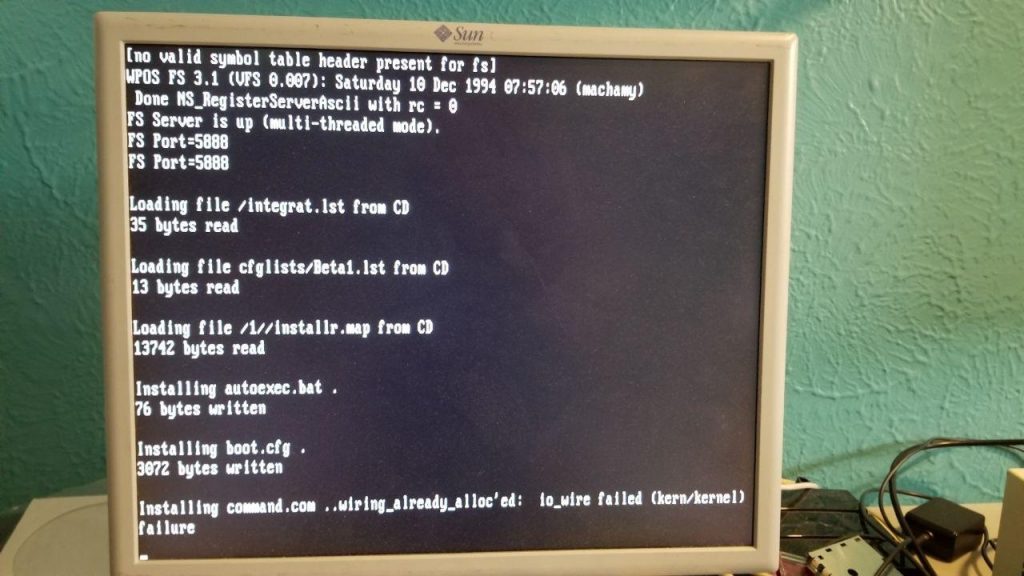
OS/2 PowerPC Boot Attempts: Beta 1 and the Final
Recently the OS/2 Museum site dumped Beta 1 for PowerPC. It’s an earlier version of OS/2 for PowerPC that insists on a Sandalfoot machine with an S3 GPU. Unlike the other OS/2 PowerPC disc, it features a verbose boot featuring the kernel it uses. If you want to really see OS/2 for PPC working, try it on a 7248 or read this post about it.
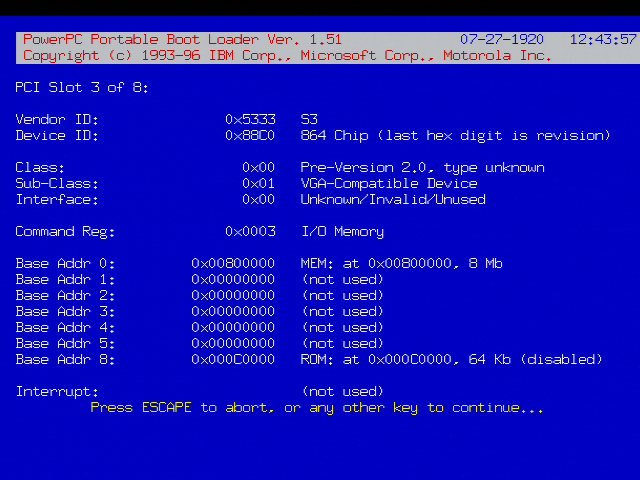
This failed to boot, throwing up an error about mounting the disk or something. I did record it doing something at least however, an improvement over the Weitek which just does nothing at the PowerPC screen. I tried several things including removing the external SCSI CD drive and that didn’t fix much. It also declares 88c05333 an unknown PCI device.
So I decided to try the “final” build. The final build requires a 6050/70, and some people did get it working on the PPC Thinkpads. I decided to see what it’d do on my machine. Unsurprisingly it did absolutely nothing but give me a blank white screen and sometimes a 00016000 error (for a trashed CMOS). If anything the 6015 loves to trash it’s CMOS contents for absolutely no reason, especially when OS/2 is involved.
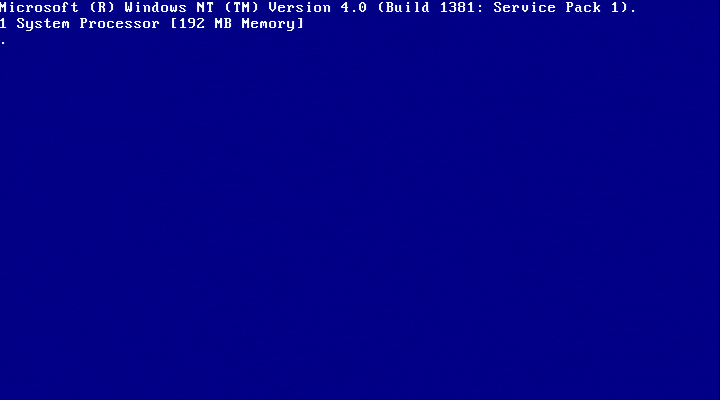
Anyhow this was very anti-climatic, as the OSes I threw at it found reasons to not work on it whatsoever. I weeded out the GPU being at fault by testing Windows NT 4.0 and finding out that it works just fine with the GPU, however I seem to have fewer resolutions available than what the Weitek card allows. It did change the boot screen font, making me wonder if the red boot screen is a GPU driver quirk.
However changing the device IDs with OS/2 PowerPC Beta 1 got me somewhere, as I now got a screen about the HDD failing to write. I formatted the HDD to FAT using the ARC diskette, then I nuked all the partitions, but not much else changed. I’m not sure what the error means, but it was a letdown.
Unless these OSes require some long lost firmware, I’m wondering if there’s else that’s causing issues with installation. Either way, it was a letdown. Nothing I tried worked and I spent hours messing with everything from SCSI IDs to using different drives.
And personally I’ve never seen the appeal for such things, but apparently for the world of emulation accessing physical media is a big deal. Of course what I didn’t think about was rescuing old machines by re-installing the OS under emulation, or copy protection.
The first thing I looked for was a GPL project that has SCSI disk support and isn’t too complicated. Â The Previous project sure fits that bill, scsi.c is not even a thousand likes, and even better it works!
The only two major hurdles I ran into is that the Mac is sending a page request of 0x30 which as far as I can find is not listed anywhere else. Â I ended up just making one up as a reply to see if it mattered.
The other is that it’s scatter/gather based, so when it’s going to read or write several contiguous sectors, it’ll blast down up to 256kb worth of data to be read or written to. Â The ability to know that a large operation was in progress was already in Previous, it just wasn’t set to loop. Â I guess the NeXT isn’t as aggressive, or it’s SG operations are better contained in the SCSI controller.
The final hurdle was in the Apple partitioning software. Â I’ve been down this road a long while ago. Â But the disktools from A/UX 3.0.1 doesn’t care about vendors and will thankfully format anything.
SCSI disk files
So not as exciting as talking to a real SCSI disk, but it’s safer.  I suspect that accessing a raw NT device name ought to work  I can test that on VMWare, but the trick is finding something that can read HFS and prove it’s a good exercise.
Another ‘feature’ I put back in is the ability to disable the math coprocessor on the 68040. Â It feels more stable to rely on Apple’s old emulation code, but maybe that’s me.
In previous posts from ASV series I have explained why I got hooked on Atari System V UNIX and what I had to do to get a decent resolution out of Atari TT. Having built the VGA monitor adapter, the next challenge was to replace the internal SCSI hard disk with a flash storage of some sort. I really don’t like spinning hard disks and especial the old ones.
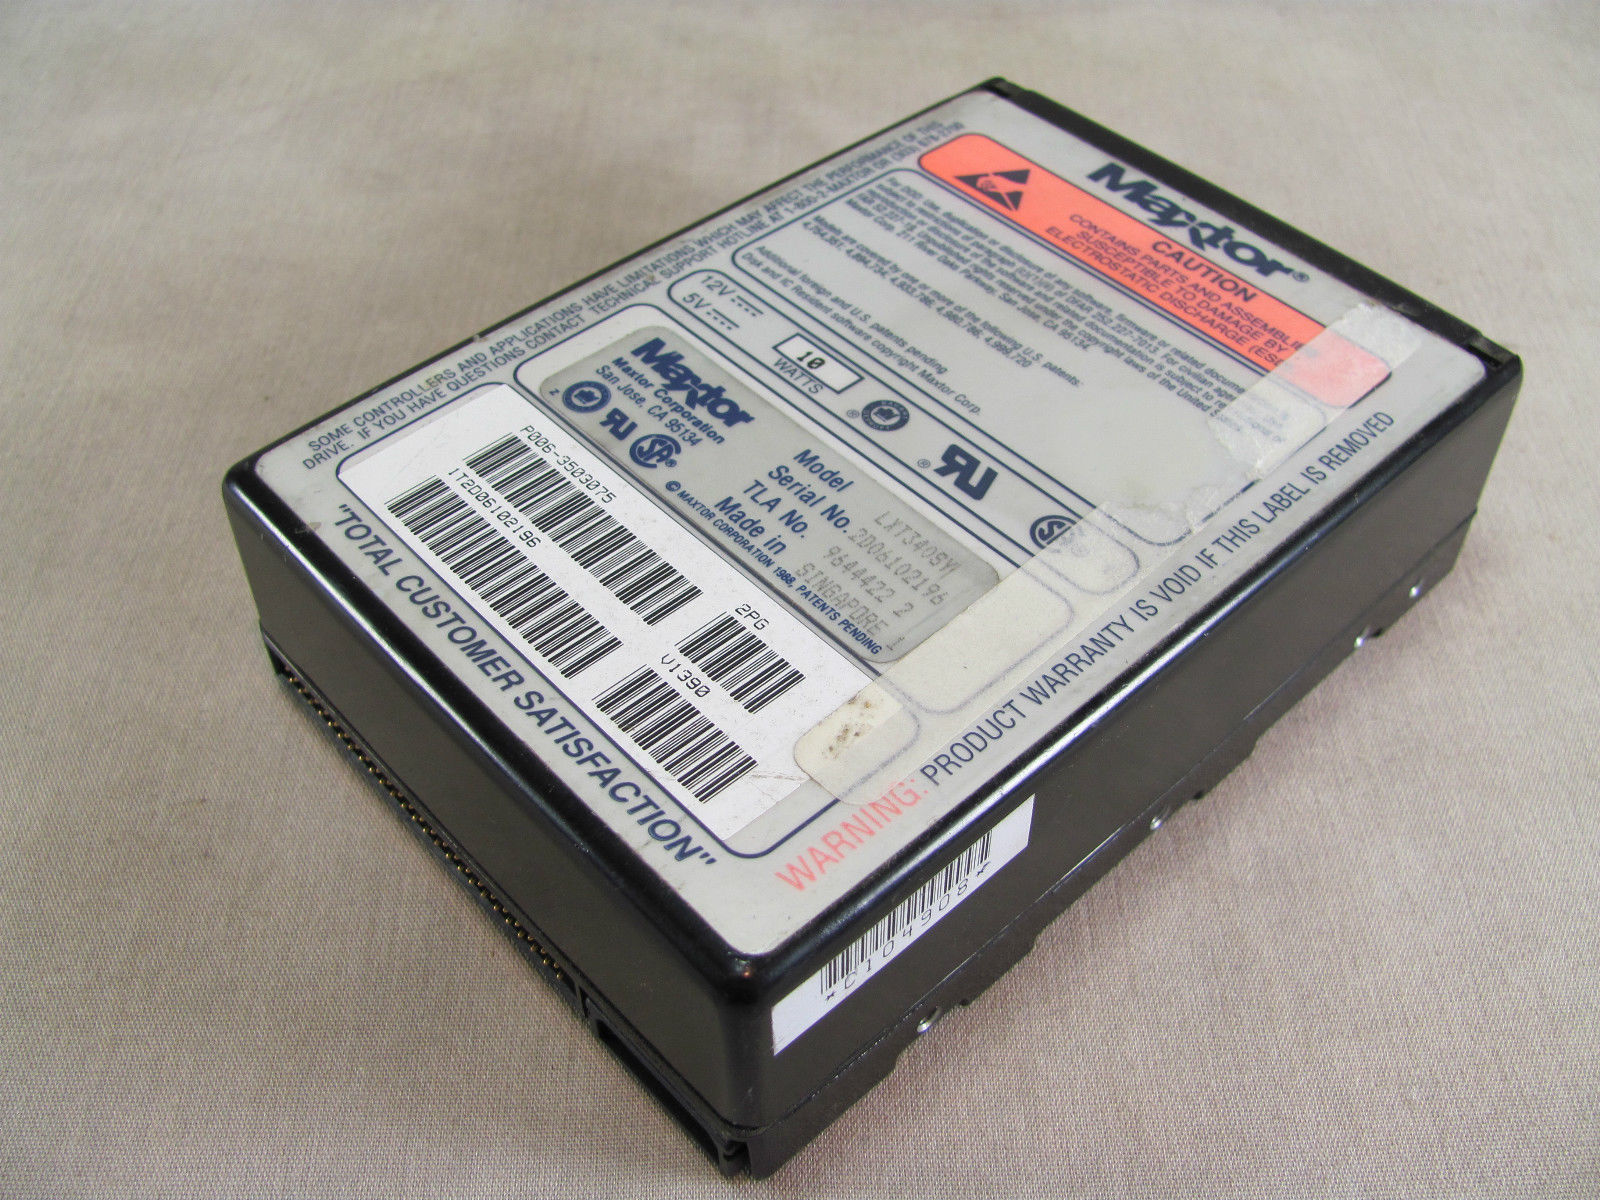
I have mentioned that there are two surviving ASV disk images. The better one was made out of a rather large old, loud and obnoxious Maxtor. I’m definitely not having this monstrosity inside of my beloved Atari!
Maxtor LXT340SY
So how can you replace an old SCSI hard disk with a modern flash device? There actually are several different ways.
If you have the money you can go industrial route, which is a SCSI disk replacement for various machinery and embedded systems produced by ReactiveData. You can buy one of these for a little over $1000 USD. The good part is that they substitute a specific real hard disk model and are exceptionally good in quality of emulation. However, spending a lot of money on my TT and TenoxVGA already, this really wasn’t an option without getting a divorce.
Another approach is to use SCSI to IDE bridge combined with IDE to CF adapter or possibly SCSI to SATA bridge and SATA SSD disk. These are widely used by Atari / Amiga / Mac 68k community. The most popular bridge come from a company called Acard. I actually had one of these at hand, AEC-7220U which I used for TOS/GEM work.
acard front
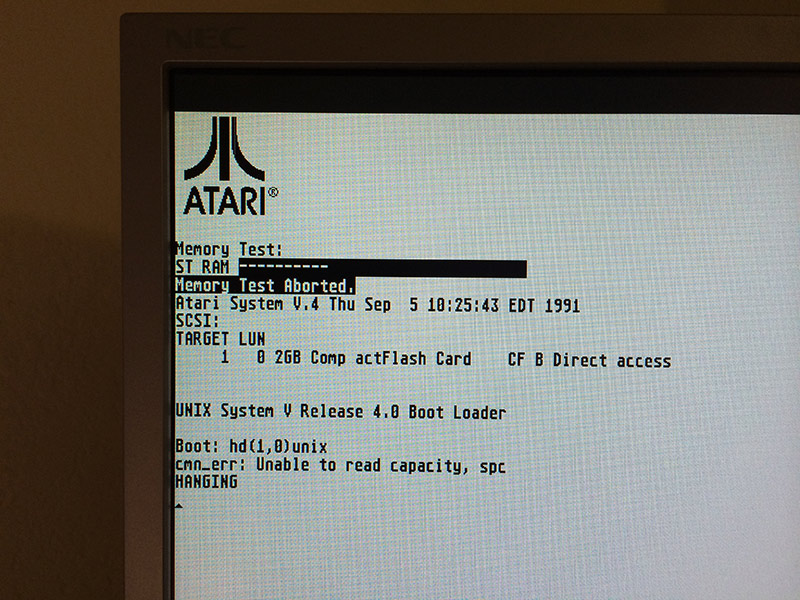
Did it work? As you can guess – of course it didn’t! The initial boot loader errors out unable to read disk capacity.
Atari SYS V failed to boot
Atari ST/TT, somewhat similarly to 68k Macs require a hard disk driver, present on the hard disk itself. There are several 3rd party implementations, some of them, like HDDRIVER maintained up to present date. Unfortunately these drivers are TOS specific and obviously don’t work with Atari Unix. The system comes with it’s own hard disk driver which seems to be obsolete and with limited hardware support.
The next step was to research and try out some other SCSI to IDE bridges in hope one would just work. And surprisingly there are several to choose from.
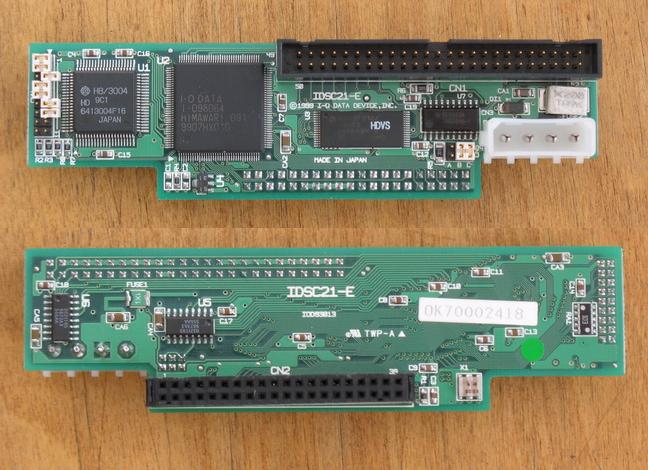
The second on the line was I-O Data R-IDSC21-E/R. No longer produced and supported, however still fairly popular. Usually regarded as the ultimate bridge with most fancy options bells and whistles. It has most jumpers and modes of all tested devices. For instance ATA PIO and DMA modes. Unfortunately this didn’t help at all and same error was observed.
idsc21e
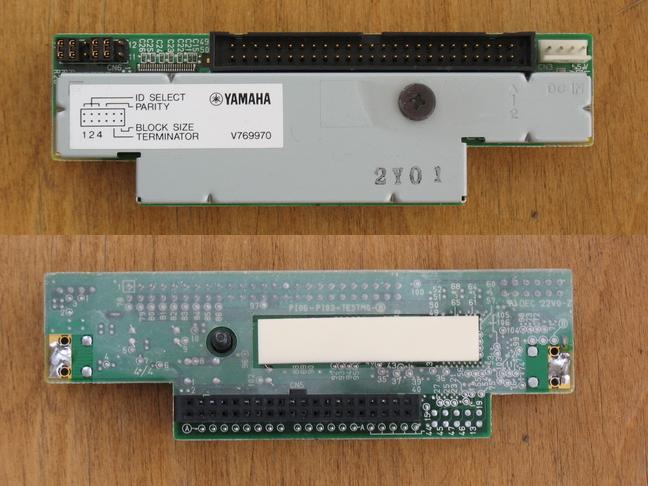
Another device tried was Yamaha v769970. This bridge was conceived to allow use IDE CDROM and Hard Disks with Yamaha samplers. No longer produced and obsolete, it’s somewhat most easy to set up, robust and stable. It’s actually my favorite bridge for day to day use, except for ASV where it just doesn’t work.
v769970
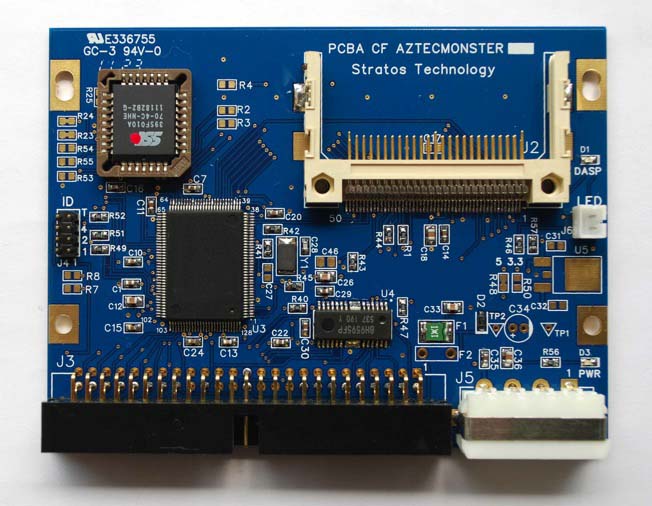
More recent kid on the block is an integrated SCSI2IDE + IDE2CF in one device called Aztec Monster. Recently designed and currently produced in Japan (you can buy one on eBay) is a fairly decent choice, which I recommend to every one. I had a lot of luck with these, except for ASV of course…
CF_AM_r1_1
I also looked in to SCSI to SATA bridges, like this one, but they have additional issues, like need to convert LVD to SE on one end and SATA to IDE to CF on the other. Little bit too complex for what I wanted.
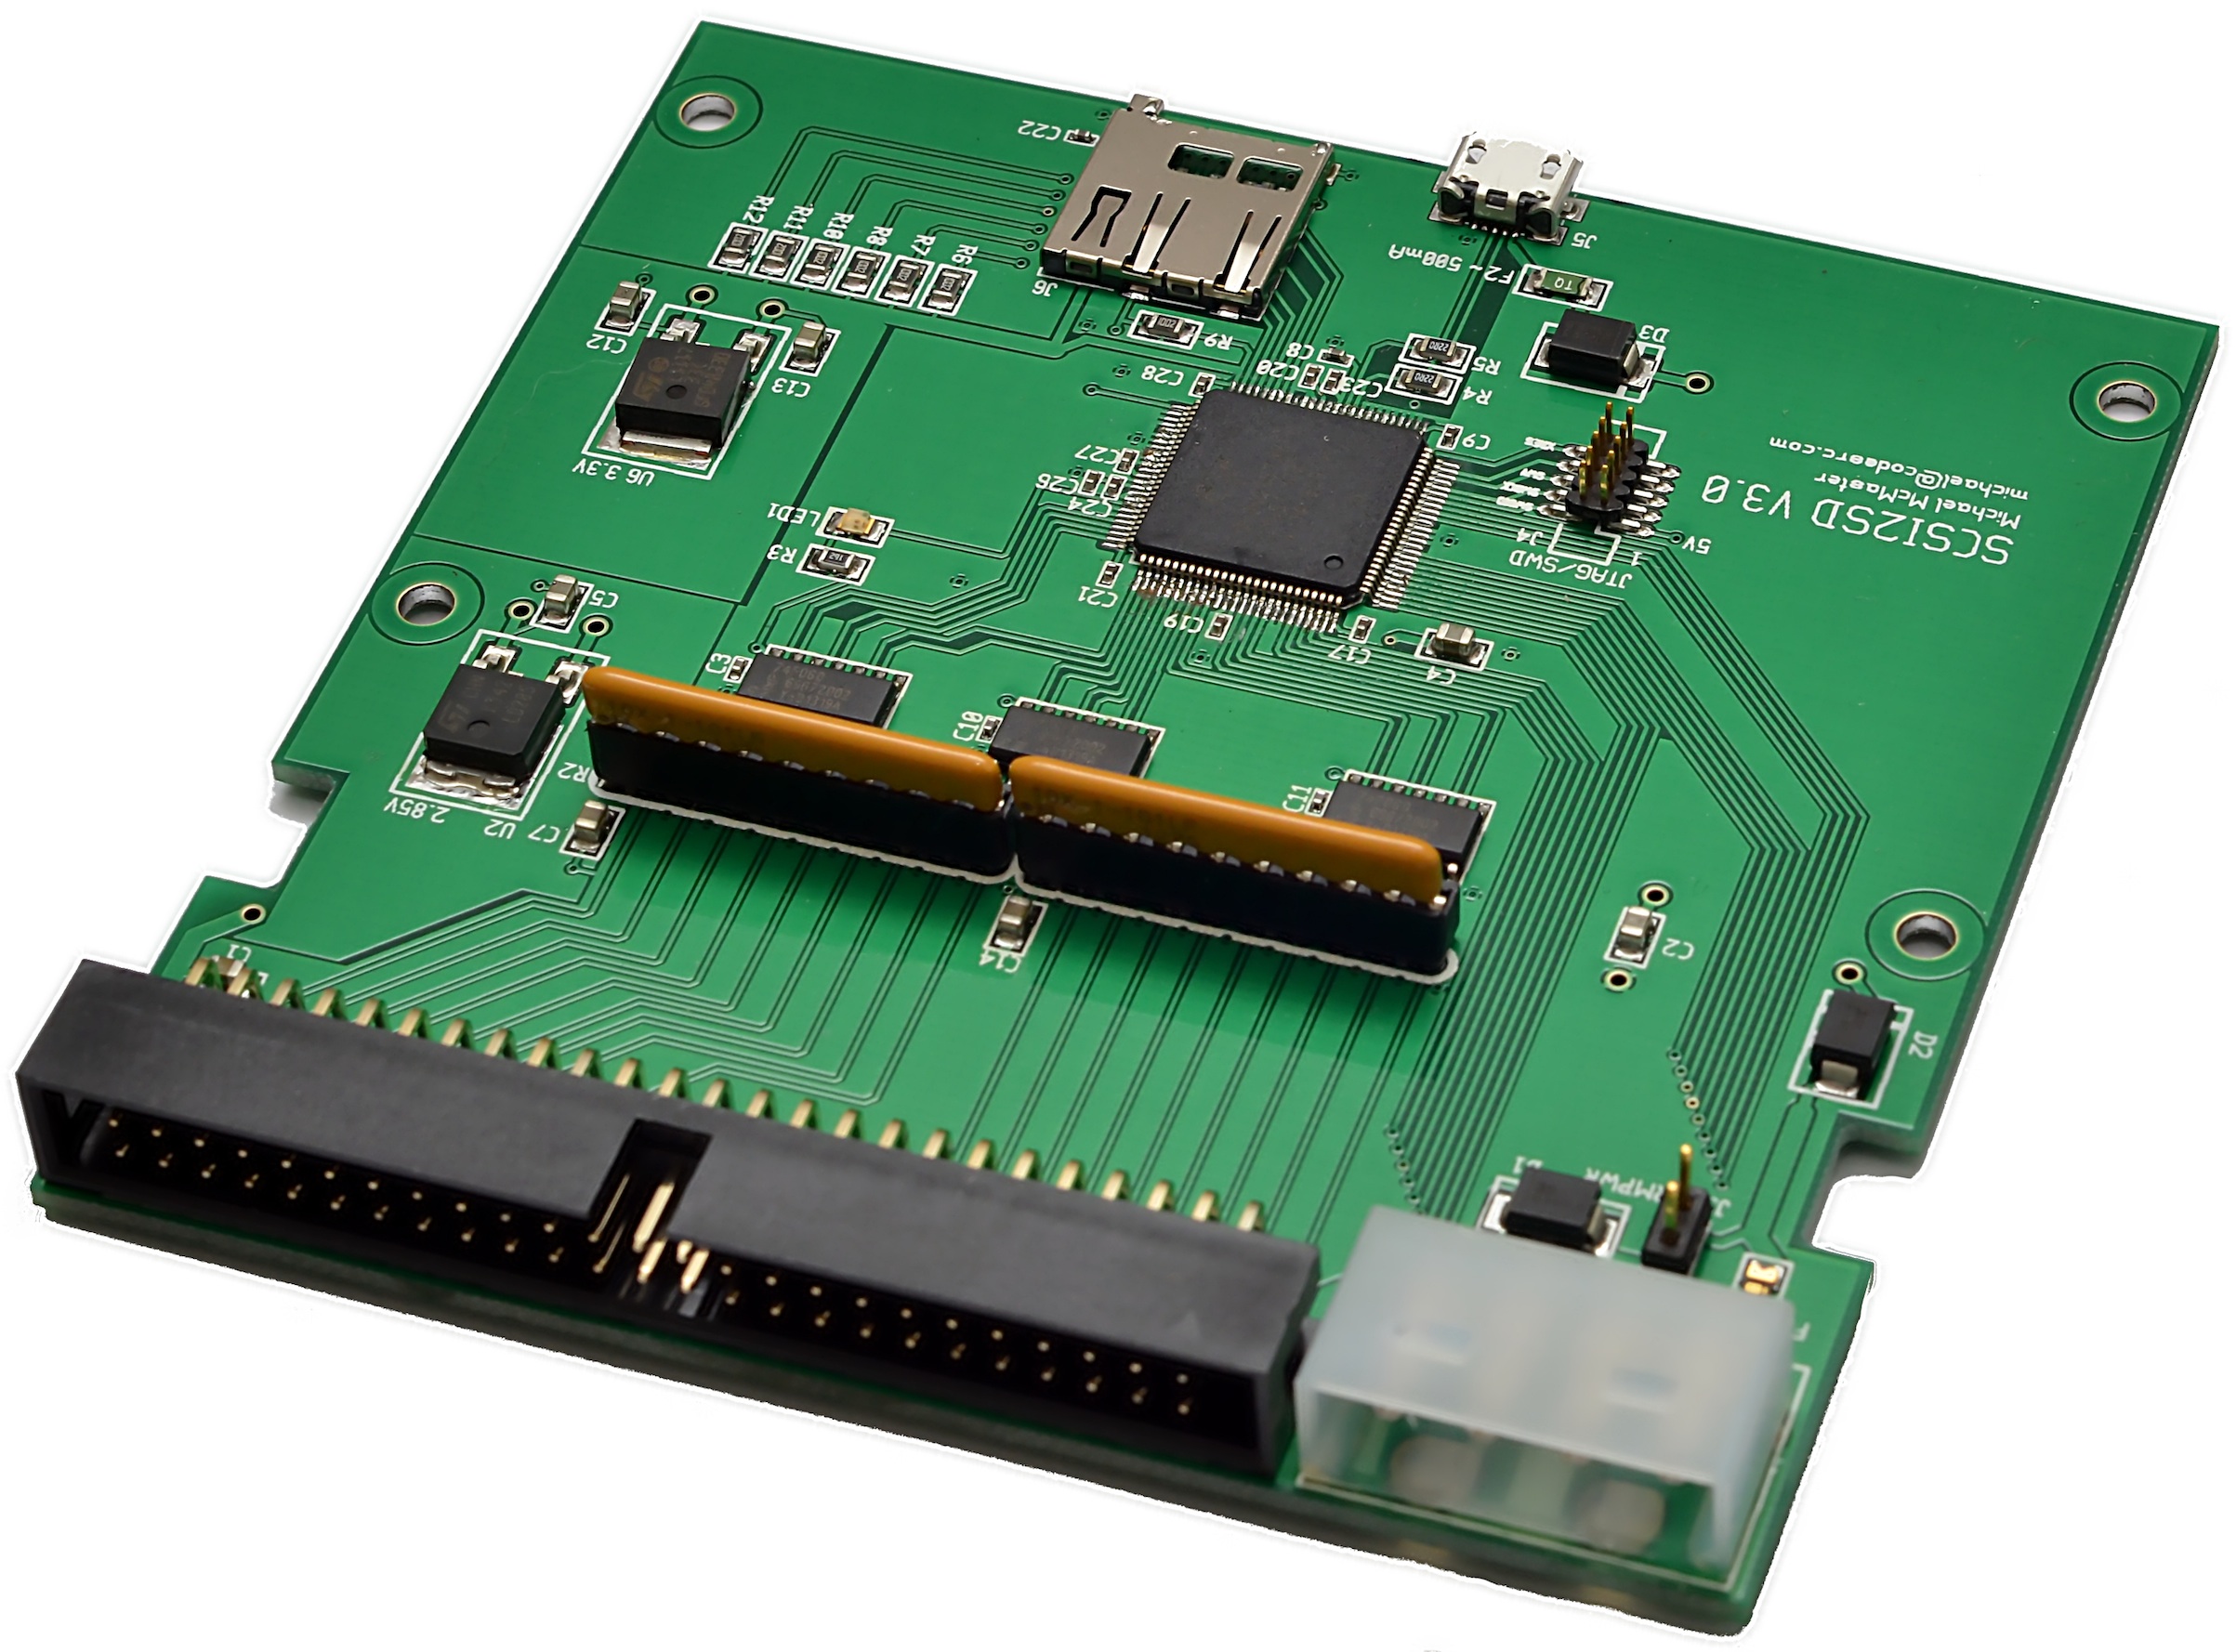
Being out of luck I started researching if it would be possible to build an open source version, which can be easily diagnosed and fixed. Doing so I found out that there in fact is one open source SCSI adapter called SCSI2SD.
SCSI2SD_V3.0_plain
I was bit skeptical in the beginning but then I though that being open source it can be debugged and fixed if it needs to be. So I immediately ordered one.
Once it arrived, I plugged it in, applied the image to the card and BAM! It worked! The system booted fully and worked flawlessly!
VMWare stores the configs, and files on the UNIX file system, which you have to edit by hand. Â You can’t do this in the UI, as VMWare tries to be SCSI only. Â But if you manually edit the files, you too can enjoy a virtual IDE disk.
You need to enable SSH access to the ESX server, or do this change on the console. Â Configs live in:
/vmfs/volumes/<storage group name>/<virtual machine>/
So for example, mine is:
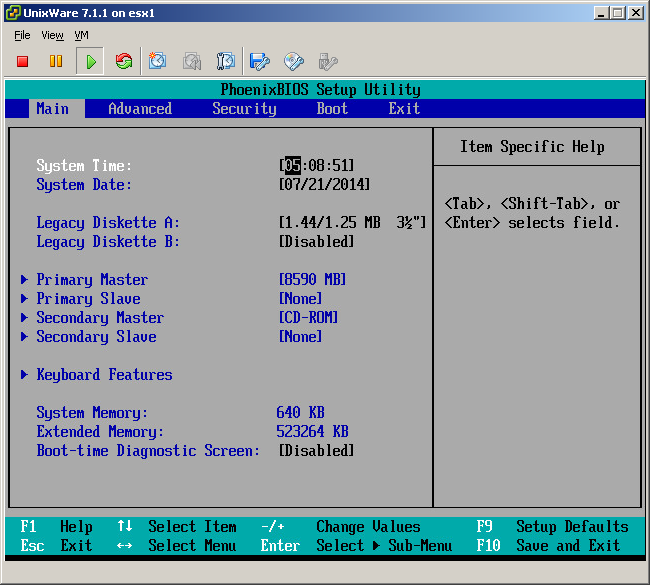
/vmfs/volumes/datastore1/UnixWare 7.1.1/
First, edit the .vmdk file. Â You are looking for the line:
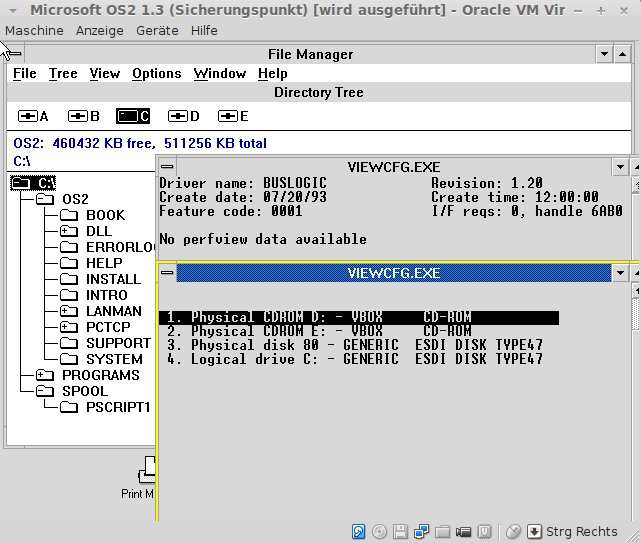
I was passed this in email, that using the BusLogic SCSI adapter, that OS/2 1.3 can use it’s CD-ROM interface for those of you who want to be able to directly mount ISO images!
So for a test I needed an email server, so I thought I’d setup an Exchange server quickly. Exchange 5.5 runs best on NT 4.0 so I’m going to install it on Qemu 0.14.0. Along the way I ran into a few little gotcha’s so I thought I’d update on how to do this.
qemu.exe -L pc-bios -cpu pentium -hda nt4-server.qcow2 -net nic,model=pcnet -net user -cdrom nt4server.iso -boot d
As you can see on NT 4.0 you now have to set the CPU level. This needs to be done going forward with NT 4.0 as again it’s too old to detect newer CPU’s and gets confused. Also I’d recommend selecting the ‘standard pc’ HAL. Oh sure it may look all nice with a MPS/Uniprocessor, but I’ve found it noticeably slower.
The default cirrus logic driver works at 16bit depths at 800×600 well enough (The hardware mouse pointer doesn’t work so you’ll need to turn on a custom pointer). Another thing is my choice of the AMD PCNet NIC, is that it’s the same that VMWare uses, so you can always run these disks under VMWare if need be (as long as VMWare has IDE disk support, and you convert the disk first!!).
Ok that basically covers an IDE install, but let’s get onto SCSI. Qemu now (it’s been in there for a while..) emulates a SCSI controller, the PCI 53c895a adapter. And I’ve found that you can get it to work with Windows NT 4.0! First you’ll need a driver diskette & BIOS both found at LSI’s webpage. The NT driver is nt896.zip if you’ve gotten the correct one.
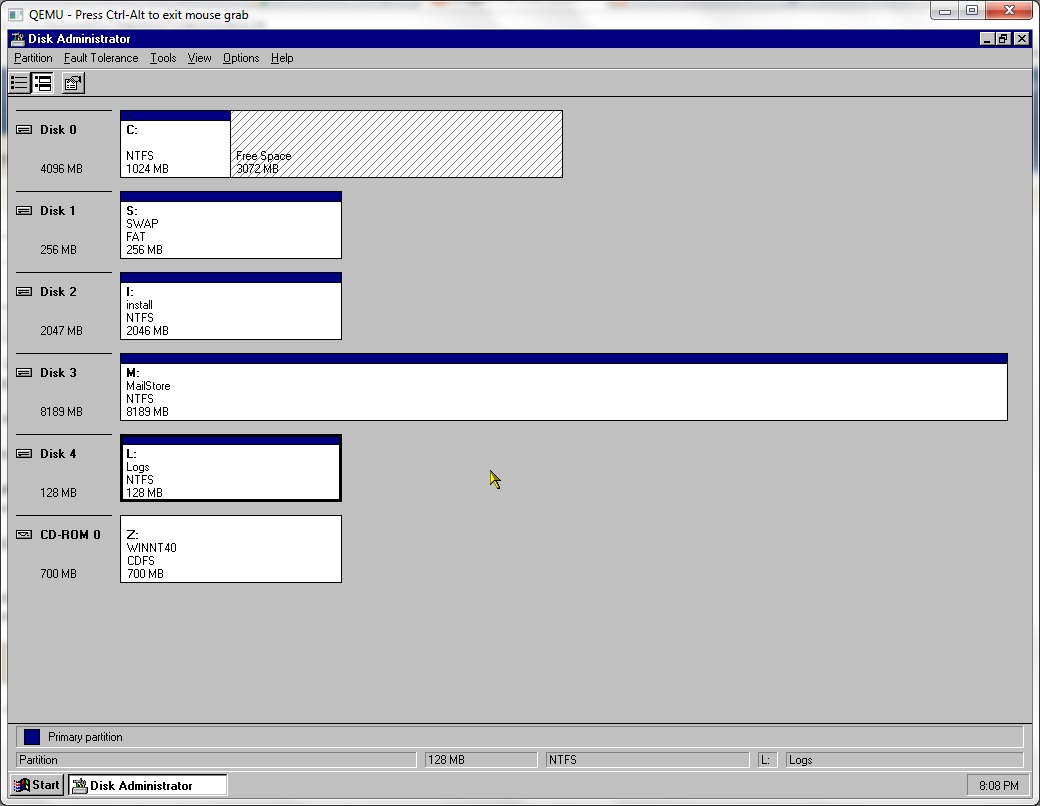
Now that I’m going to install exchange, the best practice I’ve found for NT is something like this:
OS DISK 4GB
SWAP DISK 256MB
INSTALLS 2GB
MAIL STORE 8GB
LOGS 128MB
So that’s a bunch of SCSI disks, right? I guess I could build a stripped set but that’d be kind of crazy… so here is how I’m going to do it:
And if it’s done right, you’ll notice that now the SCSI bios will be initializing as seen below with a bunch of disks…
qemu 0.14.0 scsi bios
Once your NT CD starts to boot up, you’ll see a blue screen like this. It’s important that you hit both F5 and F6 over and over to tell the setup program that you want a custom HAL, along with an install time SCSI driver.
qemu 0.14.0 nt 40 scsi hit f5/f6
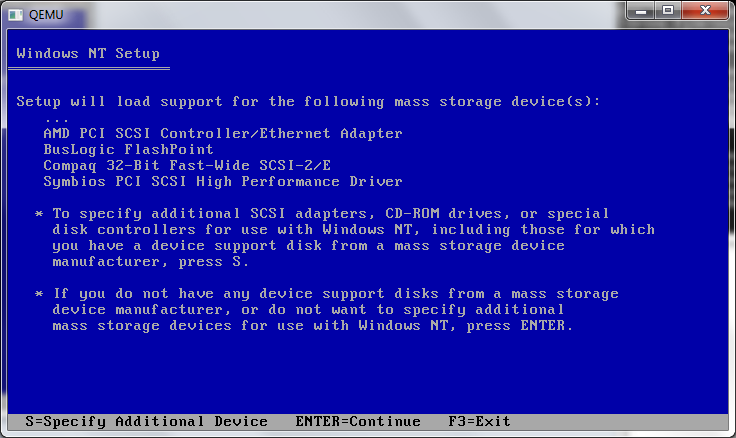
And as I did above, I’ll first select the ‘standard pc’ HAL.
qemu 0.14.0 nt 40 scsi load Symbios driver
Select the Symbios driver
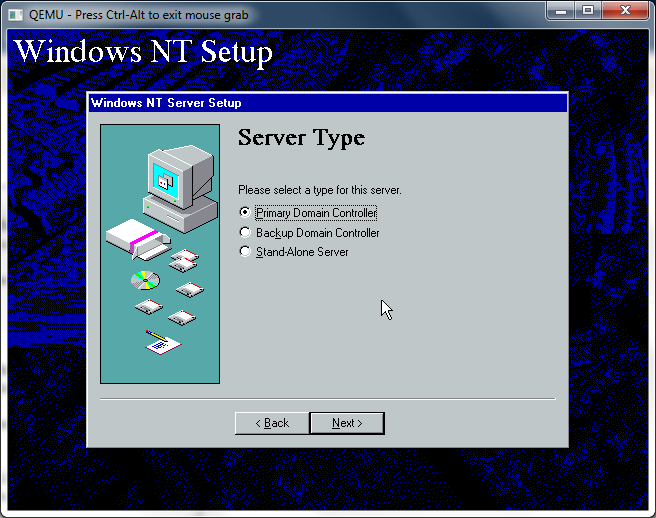
Then You can tell it to load the LSI / Symbios scsi driver, and install will roll through as normal. Since this is going to be an Exchange server, I’m also going to make it a PDC on it’s own domain, since Exchange requires DC functionality.
Make it a DC
And from there it is a somewhat normal NT install. I did leave out the messaging stuff, because it’s that ancient “Microsoft Mail” stuff, and it’s somewhat crippled at that.
For the fun of it, if you load 256 colors, you’ll wind up with this:
Windows NT 4.0 with 256 colours
And all the icons will be blank squares. Not terribly useful. Maybe for low displays the regular VGA would be best…. But again with 16bit and custom pointers (much like an old MIPS issue) it will work enough. 1024x768x16million colors at 43Hz (interlaced) works pretty good too!
Next I fired up the disktool, (diskman) and slapped down a bunch of partitions… I let the swap formatted FAT as I don’t care about it’s crash to crash integrity, but the rest can be NTFS. Also from a boot limitation the first disk is only 1GB out of it’s 4… I don’t know if that matters.
qemu 0.14.0 nt 40 partition disks
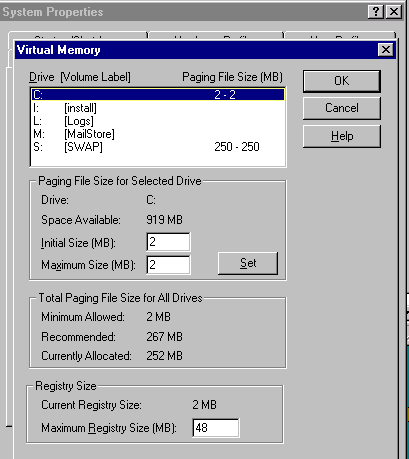
Then into the system tool to move the swap to the ‘s’ drive.
qemu 0.14.0 nt 40 scsi setup swap
I don’t know if the actual setup of Exchange is all that … interesting so I’ll just leave it to your imagination.


