(this is a guest post by Antoni Sawicki aka tenox)
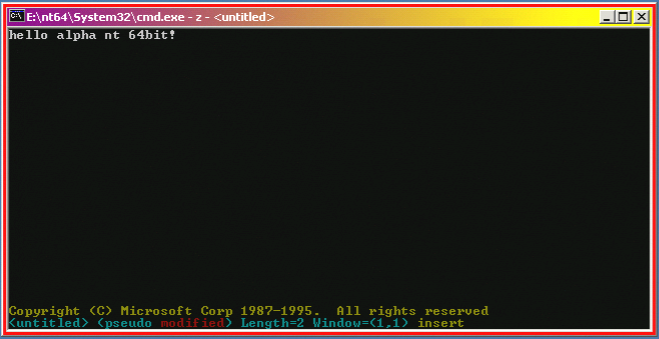
Hinted by friends on Discord, Neozeed recently “re-discovered” a Win64 compiler for AXP64 / ALPHA64. It came as part of Windows Platform SDK from 1999. Microsoft wanted developers to test-compile their code to see if it’s “64bit ready”, well ahead of the 64bit hardware even being available. However, this was just a cross-compiler and there was no way of running any of the binaries. Trying the compiler, just for fun, I built Alpha64 version of Aclock – with zero hopes of ever being able to run it.
Sadly, 64-bit Alpha AXP Windows was never released outside of Redmond. There are some known surviving machines with AXP64 stored at Microsoft Archives. In fact I saw one with my own eyes, last time I visited there some 10 years ago:

The machine in picture above was featured in a blog post by Raymond Chen, which is a must read on this topic. It will give you background info on the whole Alpha 64bit situation.
And that would be the end of the story… if not for one generous reader, who contacted Neozeed after his previous post, and shared a disk image… containing non other but a 64bit build of Windows 2000 for Alpha AXP! The reader got it from a lot of random hard disks, bought from an e-waste and completely forgot about it until they saw the blog post!
The image was previously installed on Digital Personal Workstation. Having a PWS500 with ZuluSCSI at hand, I was able to slap the image on an SD card and boot it up:
The system BSOD shortly after. Turns out, this is a checked (debug) build and requires a permanently attached kernel debugger to even boot up (yes tried /nodebug flag). Initially WinDbg and kd.exe refused to work, as the target CPU did not match the host (the exact error code is: KD Version has unknown processor architecture). After some deliberation and help from friends, I learned that alphakd.exe can be run on x86 machine to cross debug an Alpha target. Most importantly it works with AXP64! We were able to continue the boot!
Another problem was that the system came up with “Found New Hardware” wizard and there was no functioning keyboard and mouse to click through it. Yes, I tried safe mode, VGA mode, etc., but nothing worked. The system was completely stuck on this dialog:
Fortunately, the network card worked. Neozeed and I built a 64bit version of rlogin daemon and hacked it in to the registry. Then we remotely executed a VBScript that clicked through 20+ “found new hardware” and “install unsigned driver” dialogs. Eventually, a PCI to ISA bridge was found and keyboard and mouse came up!
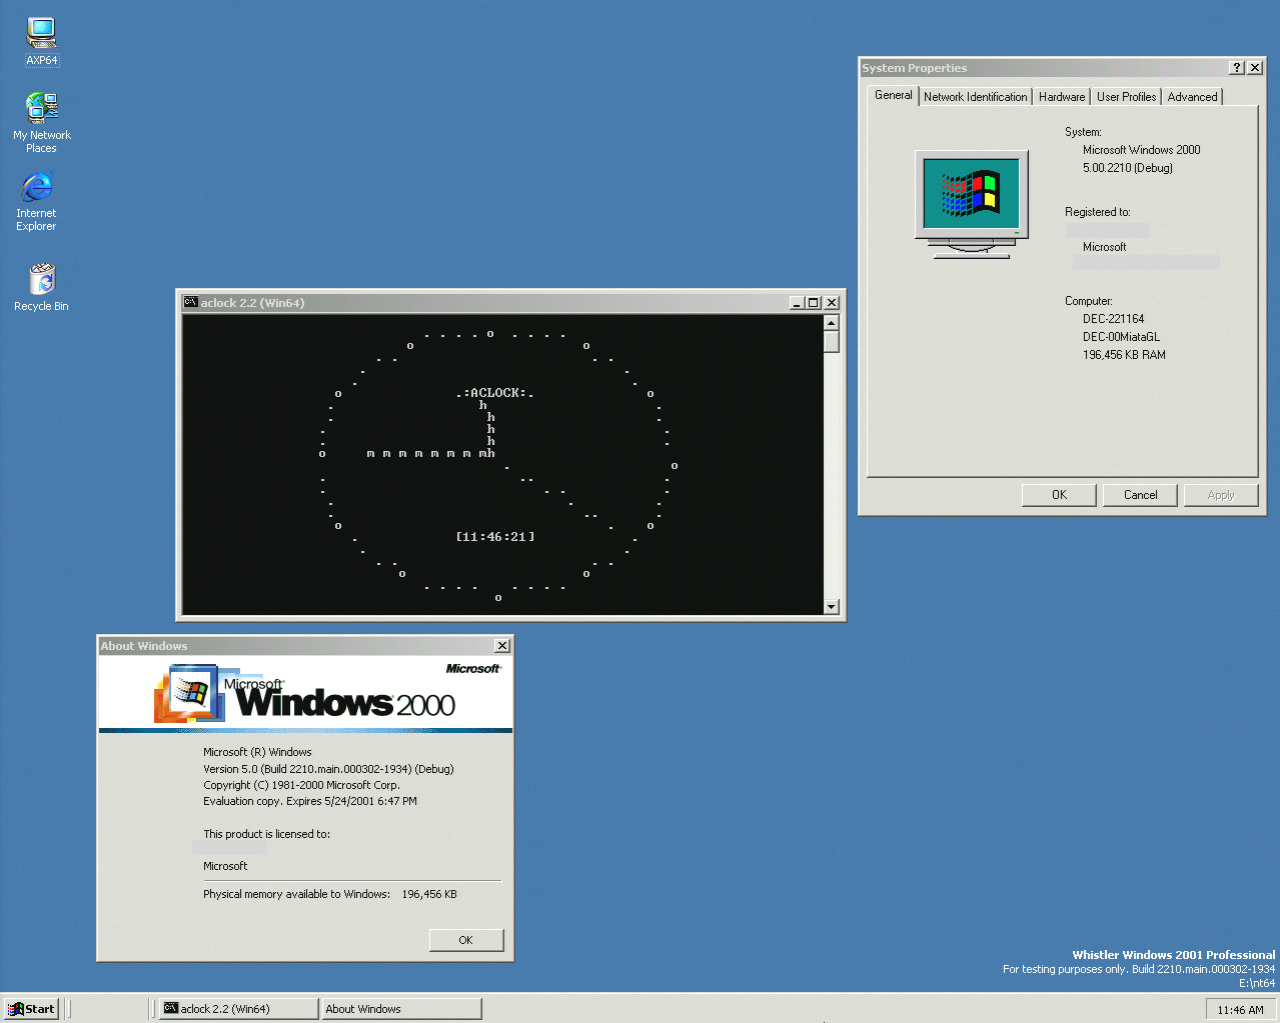
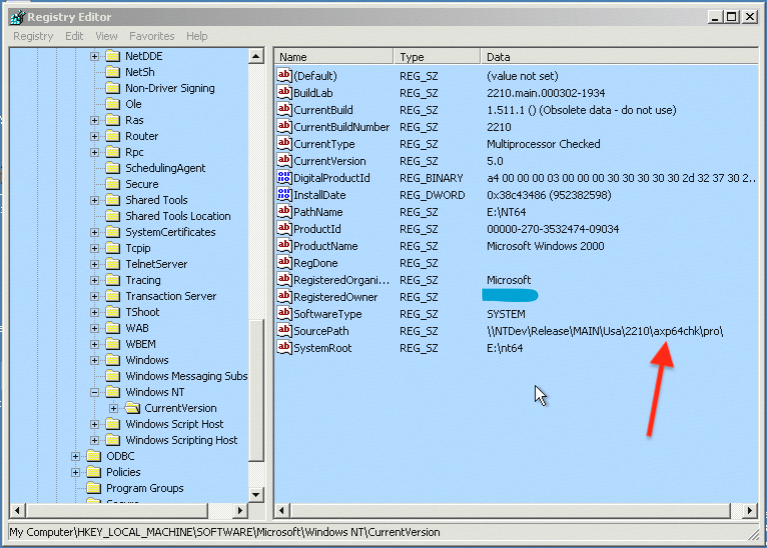
Unfortunately there are no identifying marks that would easily prove that this is a 64bit Alpha AXP build. The only way to tell is because there is no WOW, even for AXP32. You can’t run 32bit Alpha binaries. It will only run executables produced with the ALPHA64 compiler. This also means in practice there is no self hosted, native compiler. You have to cross compile on 32bit NT4 or 2KRC.
For sake of search engines the build number is 2210, the full string: 2210.main.000302-1934.
Update I have copied and ran a x86 `winmsd.exe` from Windows NT 4.0 and this came out:

How is it possible to run x86 binary? Because of Fx!32.
Update: So what else is in the image?
First of all, everyone is asking about Pinball… Yes, it’s there, but it won’t start:
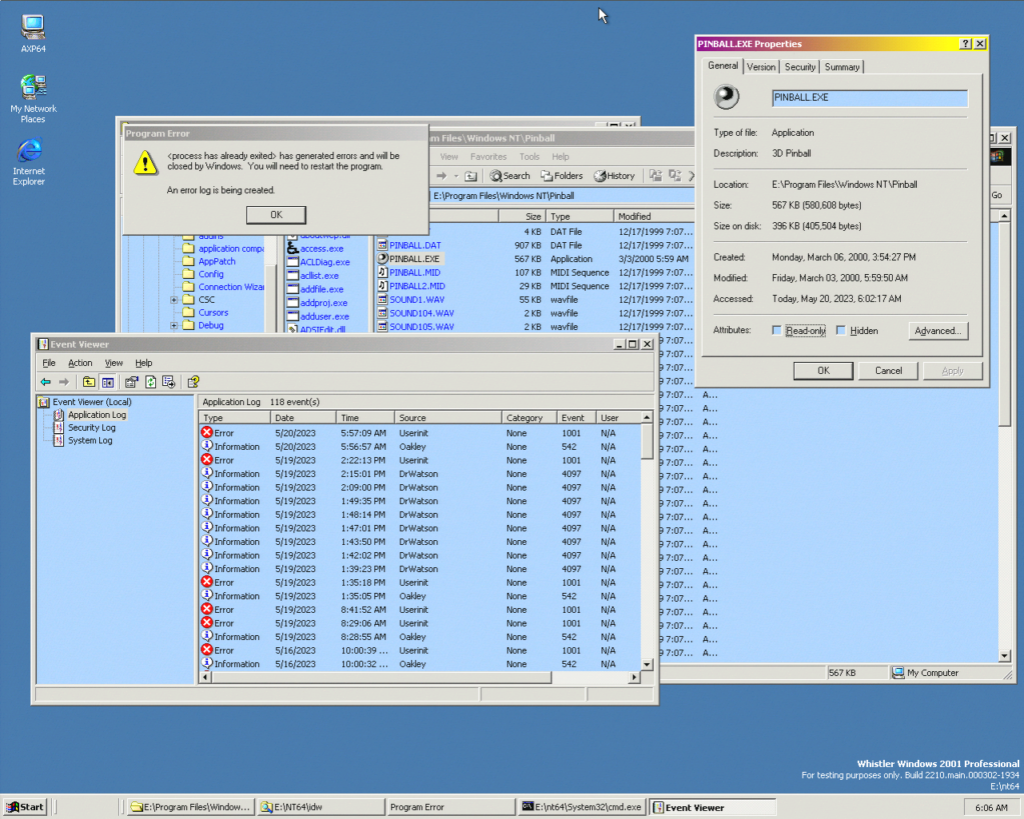
In addition, I can’t open the event details. Maybe one day we can debug it with NTSD.
Other than that, it has some basic stuff, the every other Windows would have. Internet Explorer 5.5, agent: Mozilla/4.0 (compatible; MSIE 5.5; Windows NT 5.0). Sadly msinfo32 doesn’t work, unable to connect to a service.
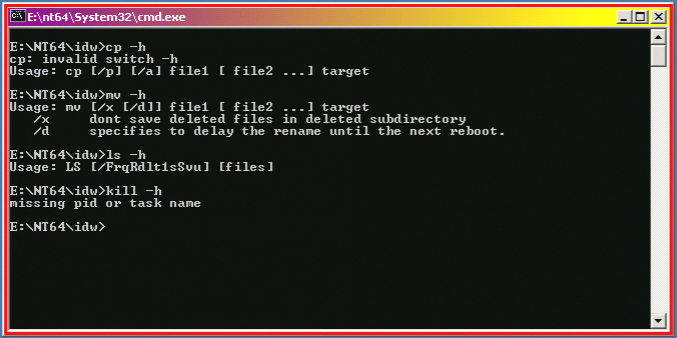
The image, similar to other private builds, comes with Internal Developer Workstation (IDW). It’s a set of developer tools, that most of (but not all) were released in Platform SDK and/or Windows Resource Kit.
There are a bunch of unix like utilities, cp, mv, ls, kill, etc.:
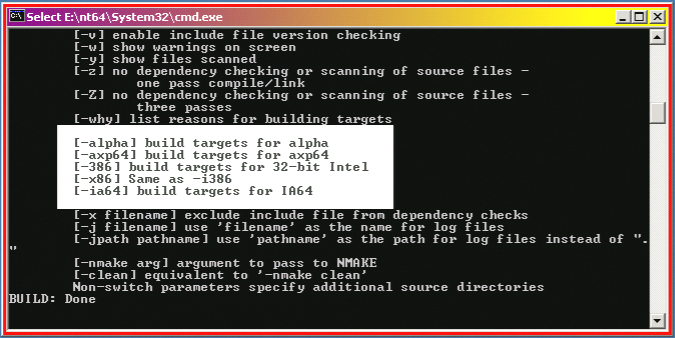
build.exe version 4.03.2209
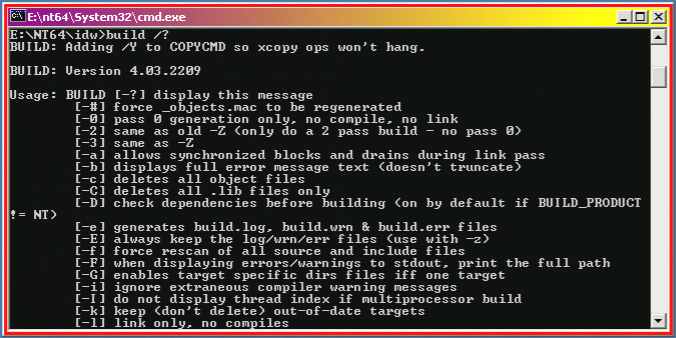
It can build for AXP32 and IA64:
There also are two famous text editors, Microsoft Editor aka MEP / Z and Stevie, VI clone:
Lastly, lets explore 64bit Alpha AXP gaming scene! While Pinball doesn’t work, IDW comes with an impressive amount of games. Microsoft engineers must have been busy playing these while waiting for builds to complete…

We have 4 different card games, FreeCell, Solitaire, Gold and Cruel. Also Taipei game, TicTactics, Reversi, Minesweeper and Snake.
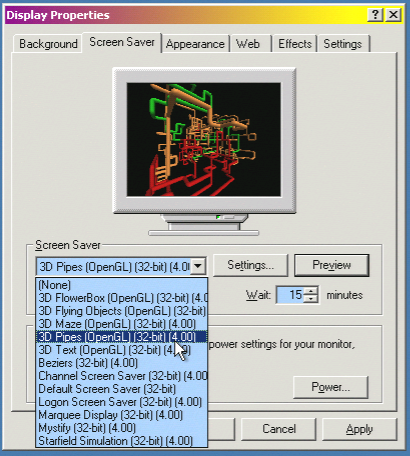
AXP64 NT also has fully working OpenGL Screensavers:
If you want to see this live in action. We going to be exhibiting on VCF West 2023 in August, alongside other NT RISC machines. Come and see us!