
Hopefully a good one!

Hopefully a good one!
(This is a guest post by Antoni Sawicki aka Tenox)
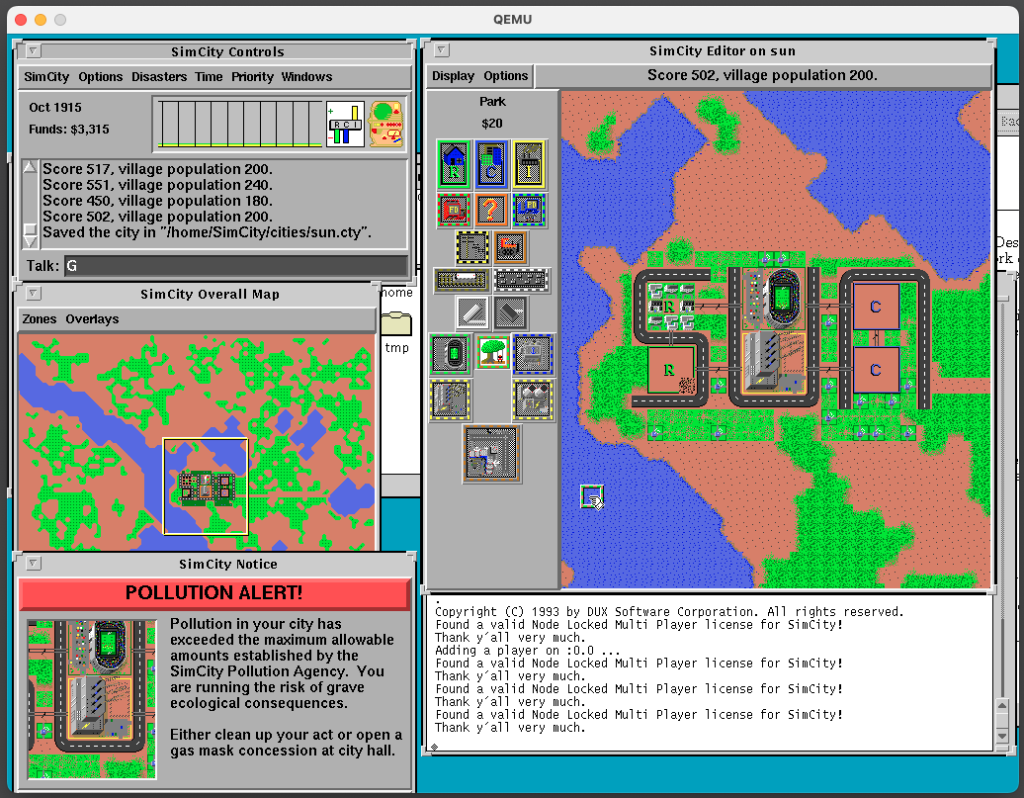
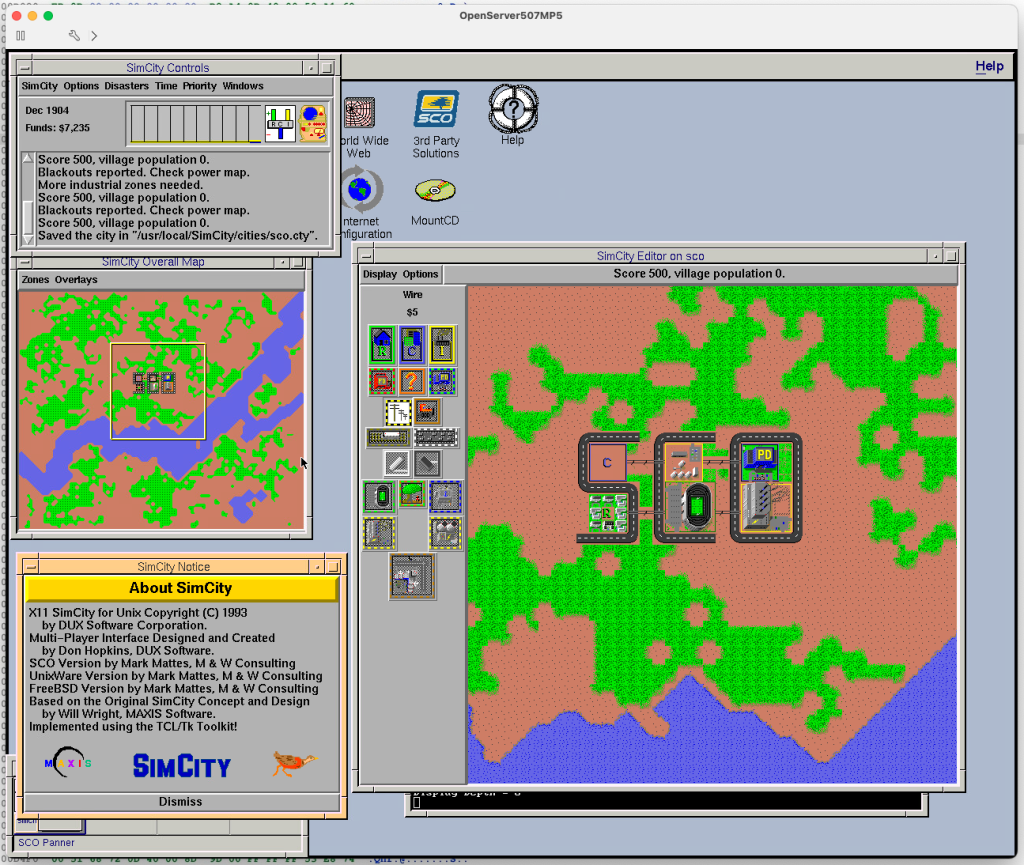
In early 90s DUX Software ported SimCity to classic UNIX. They provided downloadable demo versions for SunOS, Solaris, HP-UX, SGI IRIX, OSF/1, Digital Unix, OpenDesktop, UnixWare, Linux and BSD.
In the winter break wave of nostalgia I wanted to play SimCity on my vintage HPUX workstation. Unfortunately the 5 minute demo just wouldn’t cut it. Back in 1993 you could simply purchase a license key and unlock the demo to a full version. However even if I could find an old license code, these keys were “Host ID” locked, so you could not easily use it on a different machine anyway.
In 2008 SimCity Classic has been open sourced under a new name Micropolis for the OLPC project. This was truly epic endeavor, many thanks to everyone involved. Unfortunately for vintage computer enthusiasts, the source code been updated to compile on a modern Linux, before it was released to the public. It will no longer build on any old Unix system. Typically, when a developer decides to free up their obsolete version, they just toss out some licenses codes. Sadly this time no one ever bothered.
The only option left was to bypass the license checking code. Fortunately, modern binary analysis tools make patching old apps relatively straightforward. In just minutes I was able to get the game started in a full multiplayer mode. A few hours later I got it patched on all the vintage Unix platforms!
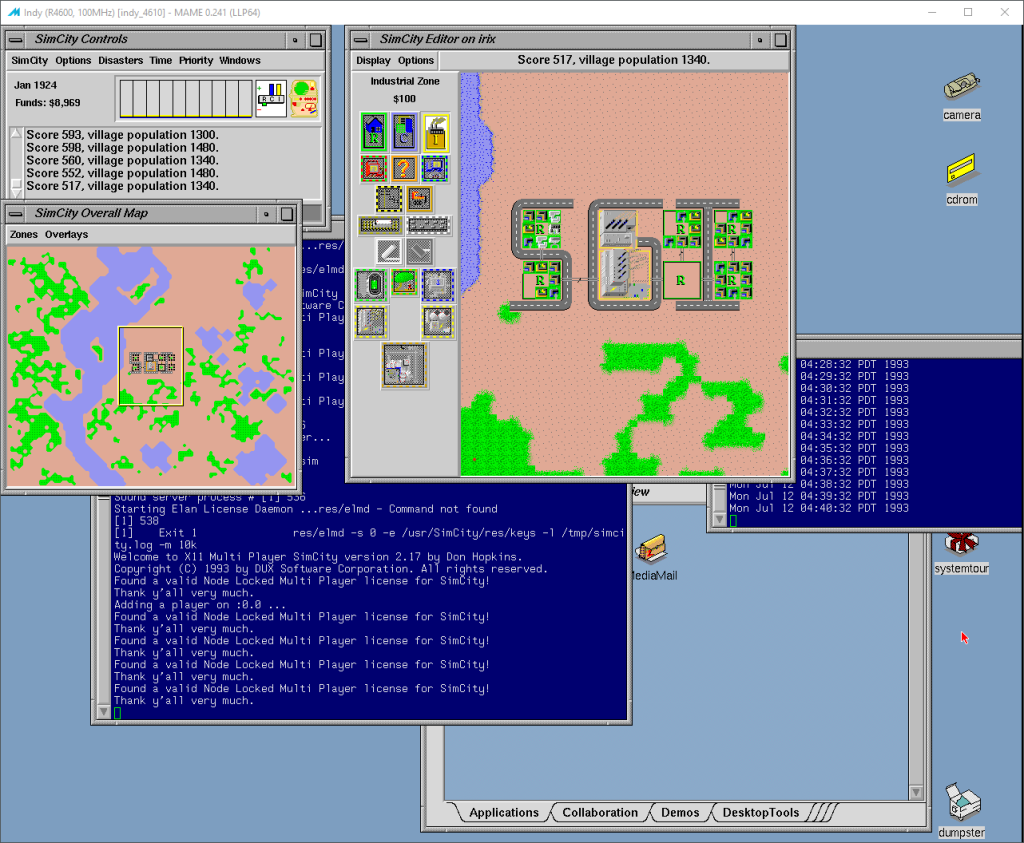
UPDATE: patched IRIX as well! Special thanks to Mr^Burns for providing a preinstalled IRIX 5.3 MAME image!
UPDATE: patched SunOS version as well. Special thanks to Daghdha for preinstalled SunOS 4.1.4 QEMU image!
UPDATE: patched SCO Unix/ODT version as well.
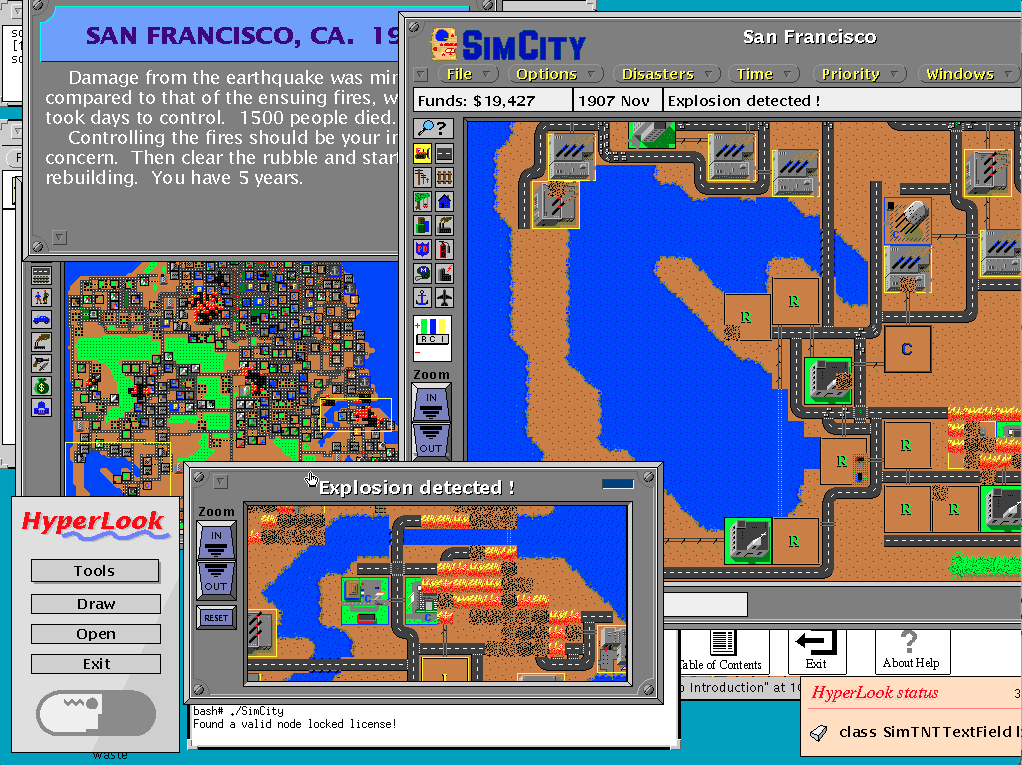
UPDATE: patched the legendary SunOS HyperLook Edition!
You can download the demo versions and patches here. Happy gaming on your vintage Unix Workstation!
If you just want to try the game without bothering with an ancient unix, you can simply sudo apt install micropolis && micropolis on a modern Linux – it’s identical except for multiplayer.
You may also be interested in a hybrid micropolis+dux build for AIX and IRIX 6.5.

I’d been working on some stuff this month, but things got a little sidelined. At the same time some fun progress had been made.
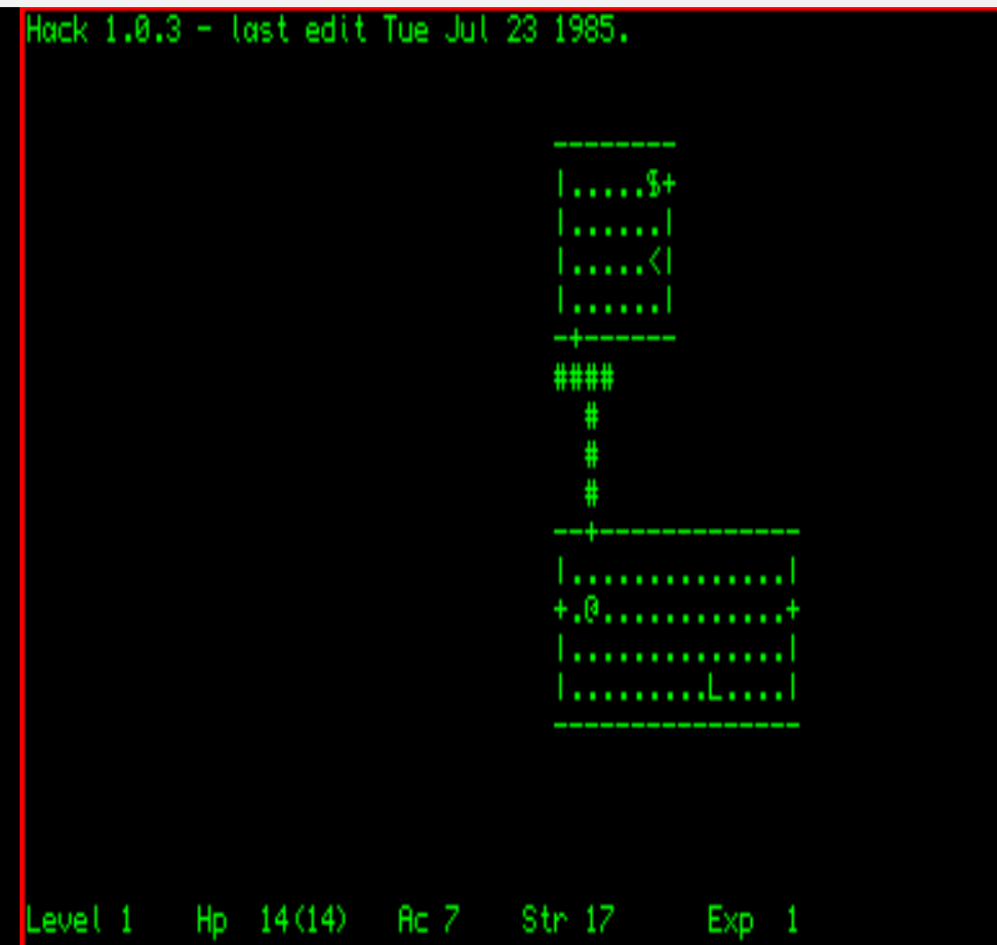
I’ve been messing with Hack, along with some progress on some ports that’d never been mainstreamed..
I’ll have some more added to that, along with a port of COM, the CP/M emulator to the QL, bridging that fatal application launch gap. Some nearly 40 years too late, but as they say, better late than never.
I’ve also been digging up some older projects and throwing them up on github, along with looking at the SLiRP updates from Debian, and 86Box, and thinking of doing an update for stuff like Cockatrice III. I’ve also started uploading more to archive.org preserving stuff like MacMiNT, that was nearly lost from my primary machine being offline. Of course, check out my favourites, maybe some of what I enjoy will be interesting for you.
So since i’ve been messing with 68k ql lately:
Maybe ill do a stream. Maybe I won’t I don’t know. Its been a rough year for me and my muse but we’ve made it this far.

The topic had come up again about running Core3 aka the Star Wars Galaxies EMUlated server at home. It’s always been a somewhat involved setup, but with the advent of the Windows Subsystem for Linux, there exists the ability to export and import filesystems as if they were containers. With that in hand I went ahead and set one up.
I initially targeted the older WSL v1, as it supports far more hardware, and I didn’t want to leave so many behind. The added benefit of targeting v1, is that the end user can upgrade the filesystem to v2 if they so choose. The only real difference in this project between v1 & v2 is that v1 cannot run the needed MySQL instance. This isn’t a showstopper however as there exists MySQL & MariaDB native versions for Windows.
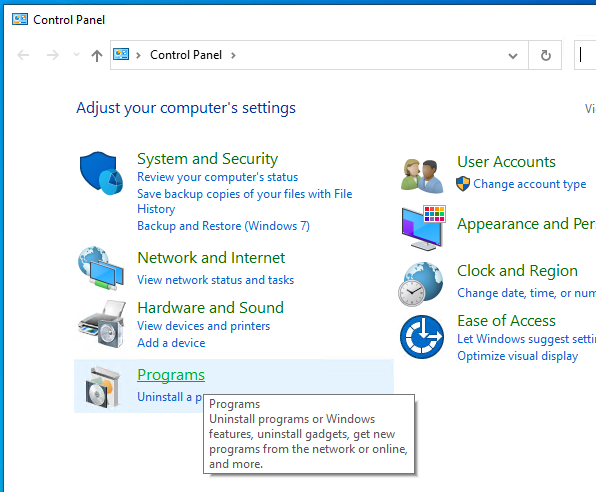
Obviously, you’ll need Windows 10 or 11 to do this. From what I can tell even the home version of Windows 10 has WSL capabilities, so this doesn’t pose any problems. Simply open the legacy control panel (Windows+R then type in ‘control’), and go to the Programs.
and then ‘Turn Windows features on or off’, scroll down and select ‘Windows Subsystem for Linux’.
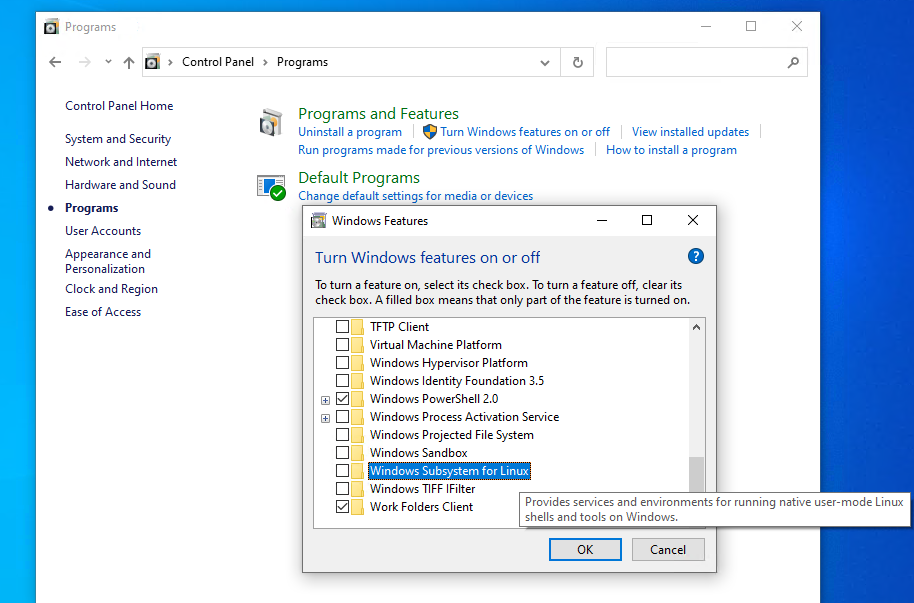
Hit OK, and it’ll download what is needed from the internet.
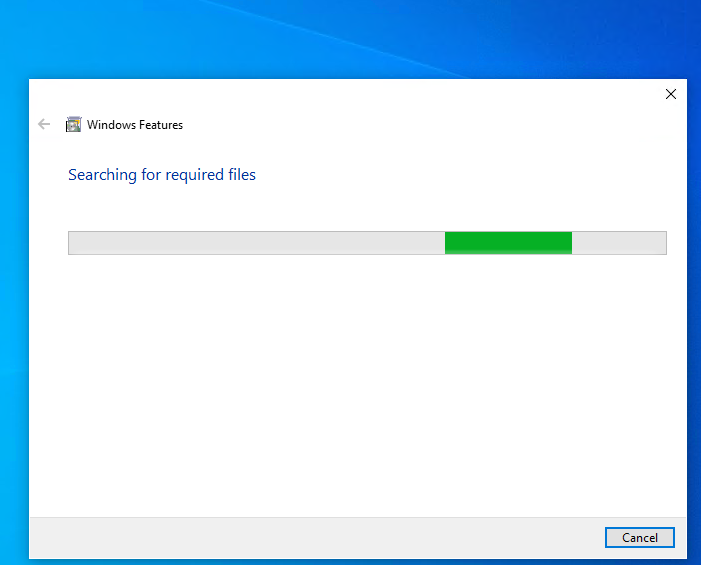
This shouldn’t take too long, then it’ll want to reboot the computer.
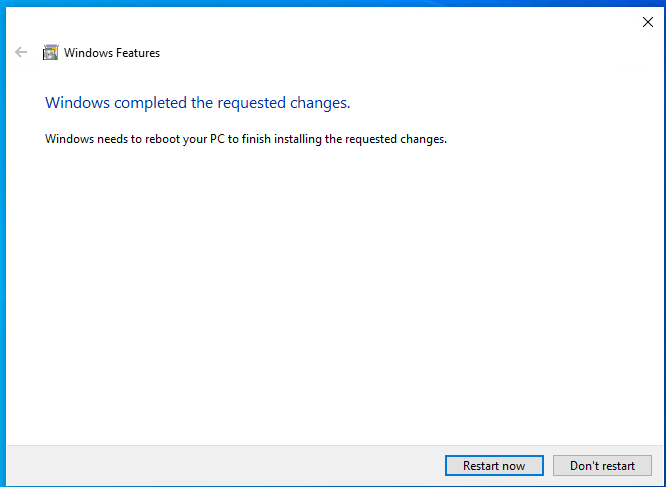
Now you just have to wait for Windows to reboot.
Now you’ll need to download the filesystem. I’ve put it on archive.org for the time being right here: wslv1-SWGEMU_Ubuntu20.22 directory listing (archive.org)
At a minimum you’ll need the files:
Keep in mind that the filesystem is 4.8GB. It will take some time to download. If the torrent servers are functioning I would highly recommend that.
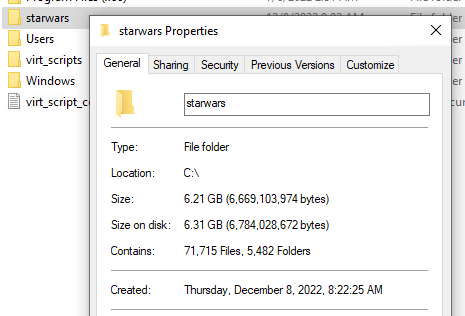
Once it’s installed and it’s generated it’s own databases it’ll need just under 7GB of disk space. So figure that you need 15GB free for this fun experiment.
The first step is to install the database server. We will need to know the settings in order to configure the swgemu server.
You can use any MySQL, but Maria is fully GPL, and small, and more importantly doesn’t involve Oracle.
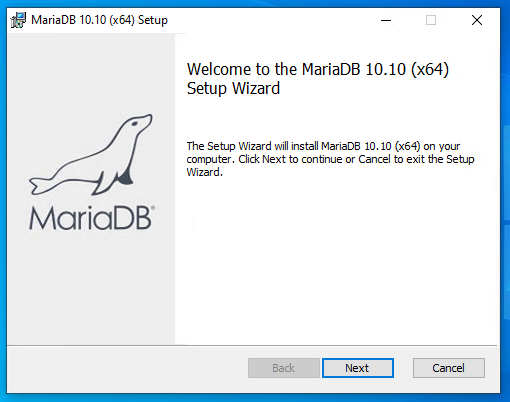
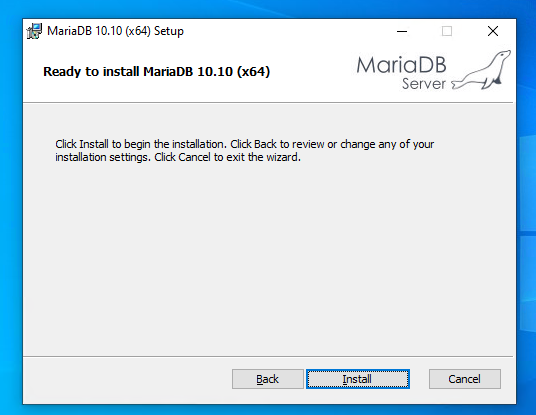
The install is pretty striaghtfoward.
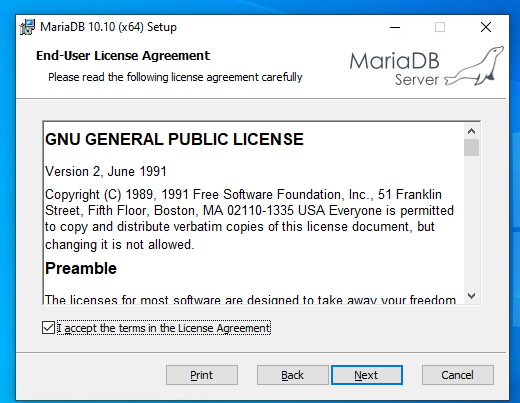
GNU software requires it reproduce the license sooo here we are.
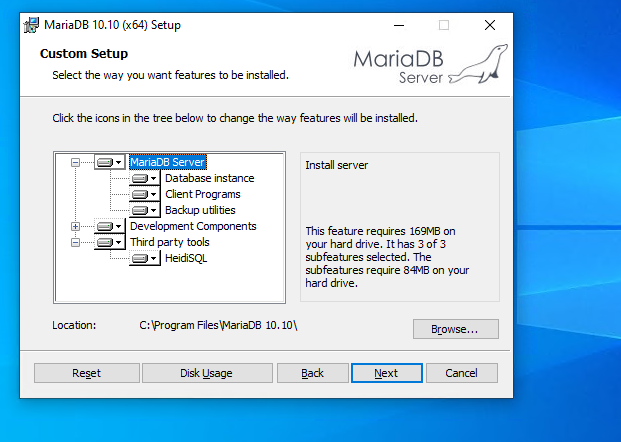
I would HIGHLY recommend use the default option of install everything.
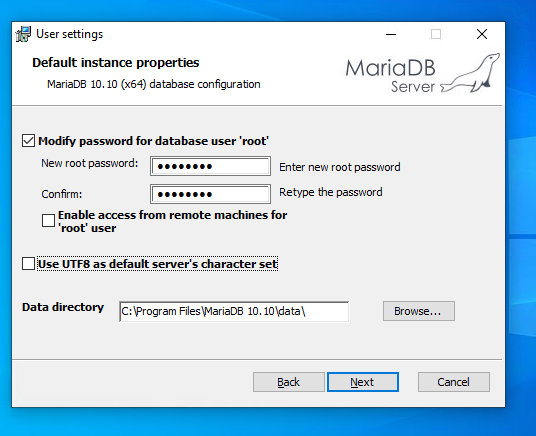
It will ask for a root password. In this example I’m using ‘password’, of course you can use anything you want, as long as you remember it. You don’t have to allow remote machine access to the database as WSLv1 runs in the same userspace on Windows, so it’ll effectively be connecting to itself.
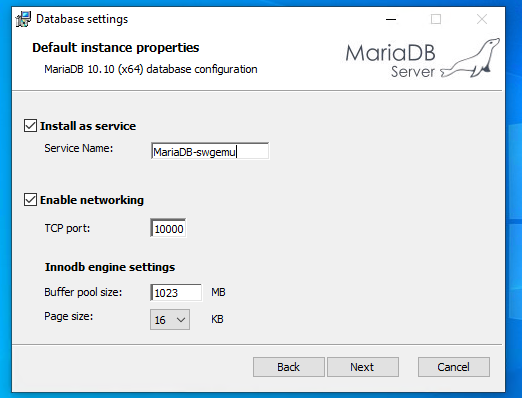
I use TCP port 10000 as I want the default port 3306 for another insance. Again it’s all up to you but you will have to remember what port you put it on. Ports below 1000 are highly NOT recommended as they need special permission. I left the buffer pool as default
With those options set we can let it do the install.
Now the database is installed, and we can go onto restoring the WSL image, and then configuring the core3 server
Firstly we need place to put it, On the machine I built it on it was the D: drive, but for this re-deploy on a new machine I’m using the C: drive. It’s all up to you but it MUST be a locally attached disk, no USB disks.
Simply create the target directory and run the import command something like this:
md c:\starwars
wsl --import swgemu c:\starwars Downloads\swgemu-ubuntu.tar.gz
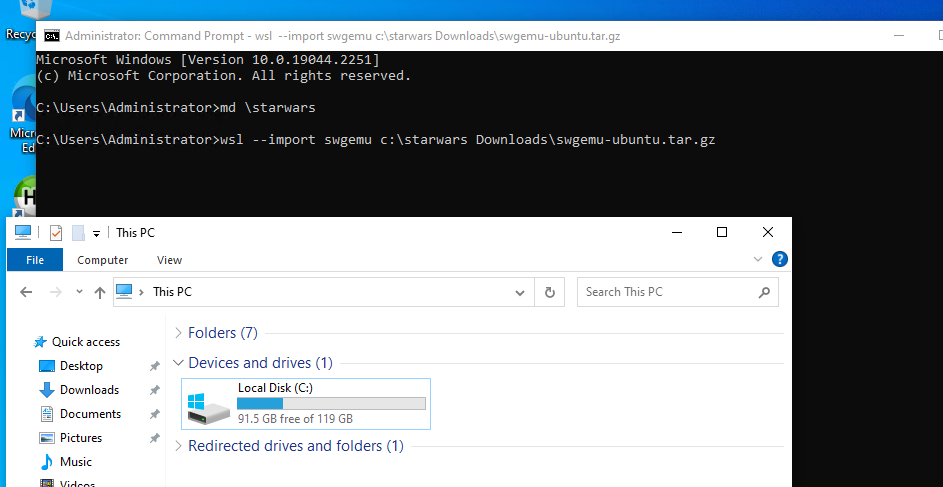
This will take a while.
Once it’s done you can check the subsystem status:
C:\Users\Administrator>wsl --list -v
  NAME      STATE           VERSION
* swgemu    Stopped         1
You may have more than one installed, so we’ll refer to this one by it’s name ‘swgemu’.
You can start the instance with wsl -d swgemu:
C:\Users\Administrator>wsl -d swgemu
Welcome to Ubuntu 22.04.1 LTS (GNU/Linux 4.4.0-19041-Microsoft x86_64)

 * Documentation:  https://help.ubuntu.com
 * Management:     https://landscape.canonical.com
 * Support:        https://ubuntu.com/advantage

  System information as of Thu Dec  8 09:02:39 EST 2022

  System load:    0.5185546875   Processes:             7
  Usage of /home: unknown        Users logged in:       0
  Memory usage:   28%            IPv4 address for eth0: 198.46.174.160
  Swap usage:     0%


0 updates can be applied immediately.


This message is shown once a day. To disable it please create the
/root/.hushlogin file.
You will need to edit the script to create the databases. I like using vi, but you may not. The easiest way is to just browse to the location and open it up in notepad. The path to browse is:
C:\starwars\rootfs\root\starwars\sql
You can drag/drop re-init.sh on notepad, or make the file association, it’s all up to you.
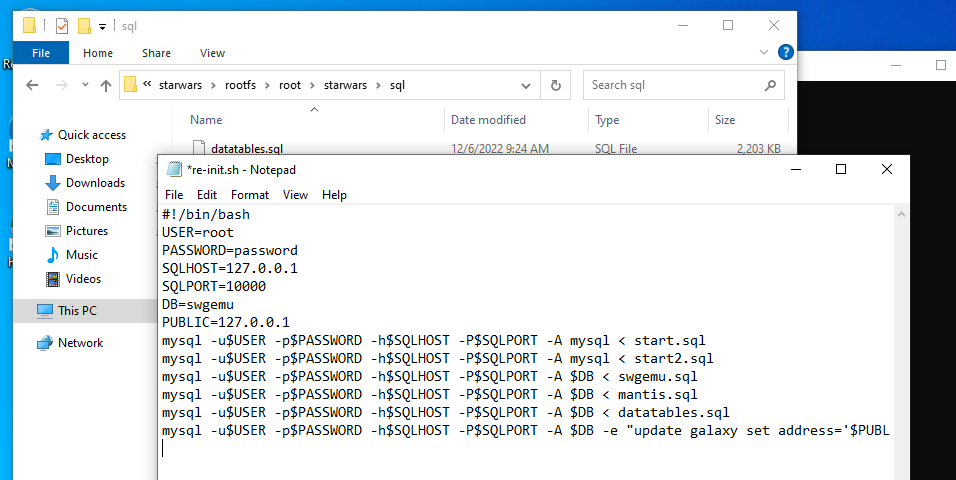
I had set the SQLHOST to the LAN IP I have, you should set it to 127.0.0.1 . The PUBLIC address is the one that you’ll be connecting to. You can set it to your LAN address, or a public one if you know it (you’ll have to setup NAT), or if you are running it all on one machine for testing, it’s fine to be 127.0.0.1.
Save the file re-init.sh and now you have to run it.
root@DESKTOP-E4F55FE:~# cd starwars/sql/
root@DESKTOP-E4F55FE:~/starwars/sql# ./re-init.sh
mysql: [Warning] Using a password on the command line interface can be insecure.
ERROR 1008 (HY000) at line 1: Can't drop database 'swgemu'; database doesn't exist
mysql: [Warning] Using a password on the command line interface can be insecure.
mysql: [Warning] Using a password on the command line interface can be insecure.
mysql: [Warning] Using a password on the command line interface can be insecure.
mysql: [Warning] Using a password on the command line interface can be insecure.
mysql: [Warning] Using a password on the command line interface can be insecure.
root@DESKTOP-E4F55FE:~/starwars/sql#
The first SQL query will attempt to drop the swgemu database. In this case it doesn’t exist, so the first error is expected. Nothing to worry about. That gives us the database, now it’s time to configure the server.
You can use explorer to browse to:
C:\starwars\rootfs\root\starwars\conf
Now open/drop on notepad the file config.lua
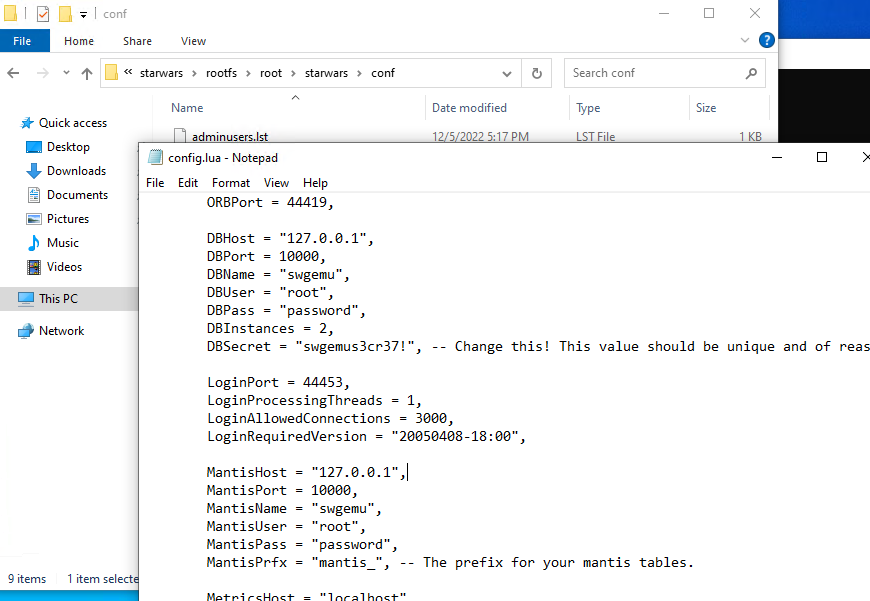
Again change the DBHost, and MantisHost to 127.0.0.1, and update the password for root, if you have changed it. You may also want to change the DBSecret, but since this is all for fun, I’m leaving it stock.
Now it’s time to run the server.
root@DESKTOP-E4F55FE:~/starwars/sql# cd ..
root@DESKTOP-E4F55FE:~/starwars# ./core3
(0 s) [Core] Server start, pid: 105, time: Thu Dec  8 09:11:54 2022
(0 s) [ConfigManager] Did not find conf/config-local.lua
(0 s) [DatabaseManager] converting database objects to new format
(0 s) [DatabaseManager] finished converting data to new format
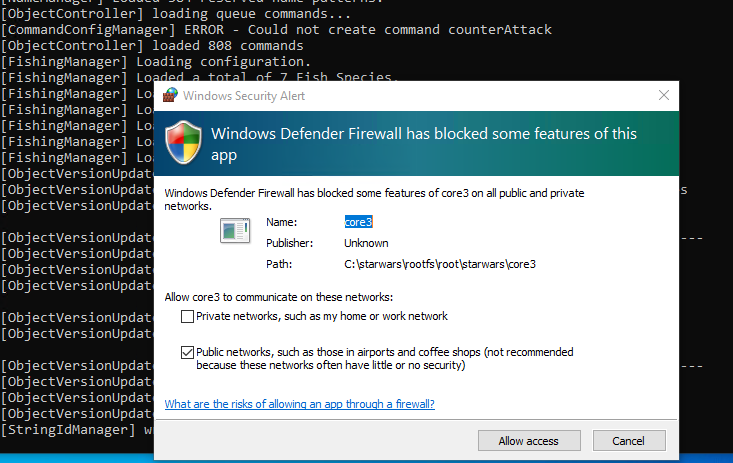
There will be a lot of messages going on, and this will take a few minutes. During the first run Windows will ask for network access permissions. Be sure to check both boxes allowing WAN and LAN access.
I have a Lenovo C20 and it takes about 2 minutes, depending on your config it may take longer or shorter.
One thing to point out is that I have configured Core3 for all the worlds, and this will need more than 8GB of ram to start up. So if you get something like this:
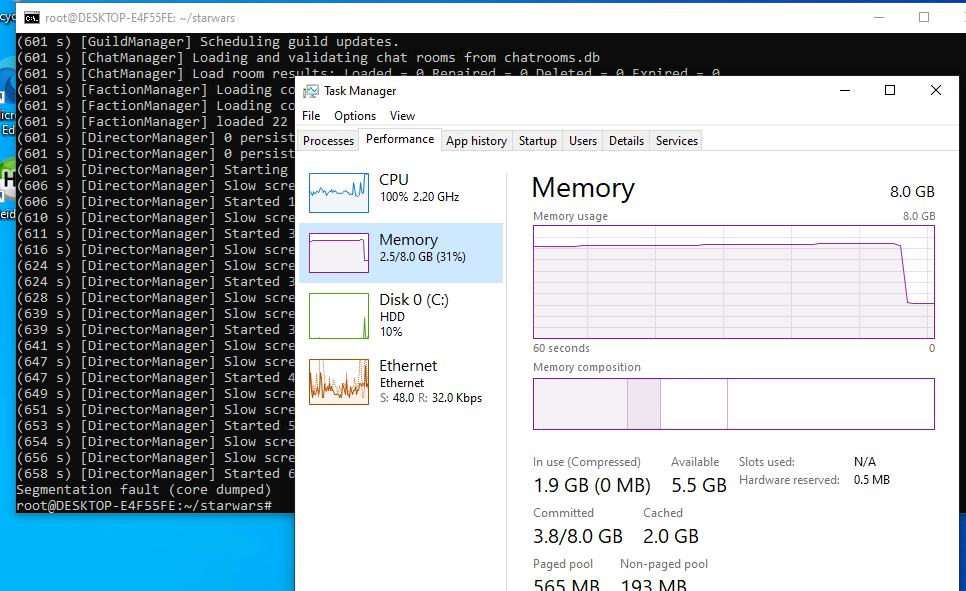
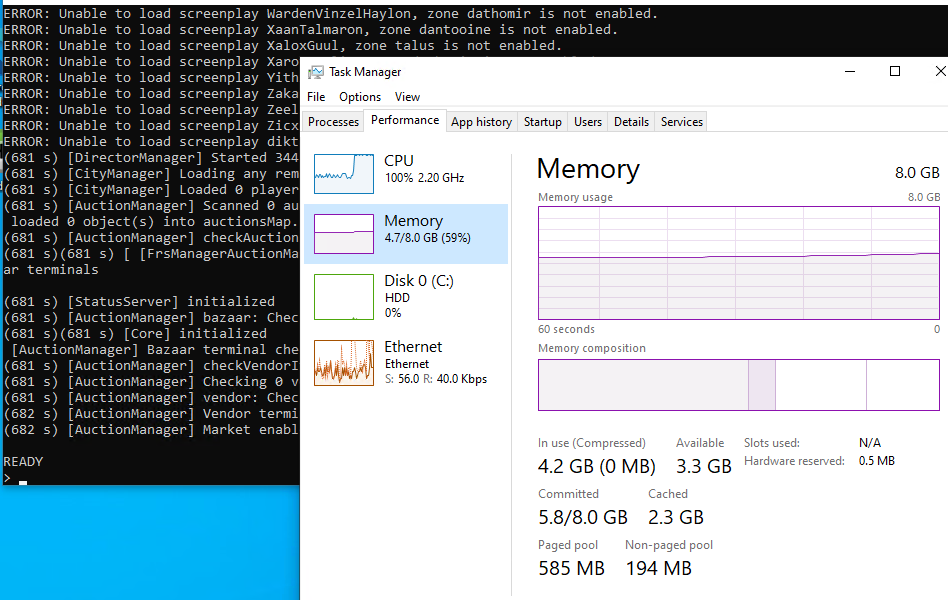
If this happens, you’ll have to try a minimal config, commenting out the areas from the config. On this test system, it only has 8GB of RAM, and that isn’t enough to have everything. However the minimal of the training & Tatooine fits no problem:

On the machine I originally set this up on, it has 32GB of RAM, so the processes needing just under 7GB of RAM wasn’t an issue. However an 8GB machine just isn’t enough as I found out the hard way re-producing my install.
Since we have previously allowed the Core3 application LAN/WAN access you should be able to connect. If you set the public address to something public, you will need to setup your firewall to forward the following ports to the machine hosting Core3
Otherwise you’ll need to open the following ports and protocols:
TCP 44419
TCP 44455
UDP 44453
UDP 44462
UDP 44463
Again making this a WSLv1 setup makes this easier as Windows runs core3 in the same memory space.
With any luck you should now be able to connect to the address you have specified as your PUBLIC address. If you want to change, you can either update the re-init.sh script and re-run it, destroying everything, or run the HeidiSQL tool, and just update it.
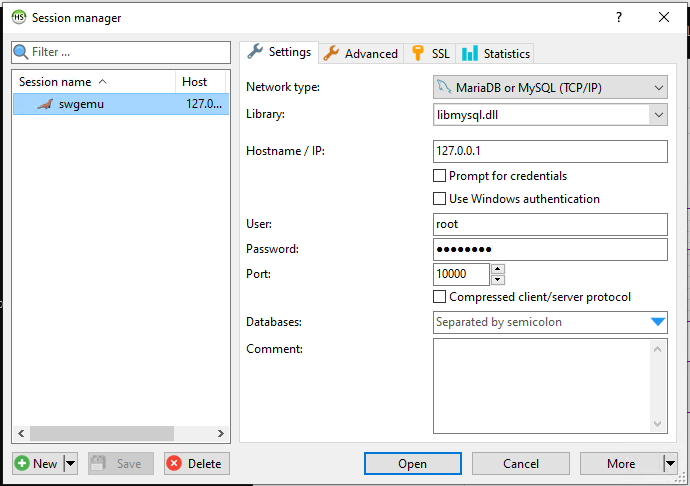
I had to set it to use libmysql.dll . As always remember your root password, and what Port you used to setup MariaDB. With the profile saved you can open it up.
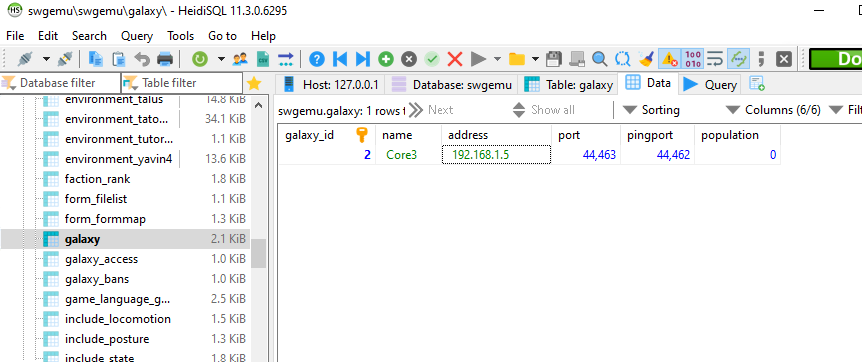
The address field tells the clients what IP address they can find the server on, so it can the the LAN if you are staying at home, or it has to be a Publicly accessible one. Another alternative is something like Hamachi, which lets you create your own virtual network of machines. It’s great, but not all that cheap, but the added benefit is that your server isn’t a public resource, so you know exactly who is connecting.

If you do change the IP you have to restart the core3 program.
Simply type in ‘exit’ at the console and it’ll start to gracefully shutdown.
Then simply start it again with a ./core3
If you want to enable the god mode, I assume you have read how what changes to make on the client side, and the table to edit is the accounts table, once you have logged in, it’ll create your record, and you can find it on HeidiSQL and change the admin_level field to 15. With this set the next character you create will be a ‘god’.
It’s worth noting that your 1st player won’t have the god mode enabled, but rather the 2nd onward will have the GOD mode flag set.
To enable the / commands (aka the whole fun of god mode!) you need to edit the swgemu.cfg file in your Star Wars Galaxies directory. You need to uncomment the following line:
# .include “user.cfg”Next you need to create a user.cfg file in that directory with the following:
[SwgClient]
allowMultipleInstances=true
[ClientGame]
0fd345d9=true
[ClientUserInterface]
debugExamine=1
Now any server you can login to you can run exciting commands like
/setspeed 10 30I’m not going to go into setting up the client, installing the SWGEMU stuff and how to add custom servers, as I assume you already know how to do so. This is more to let people run their own instances at home, or among friends.
On building core3 for yourself, be aware that by default it’ll use a ‘native’ config option that tunes the compiler to generate code as fast as possible for YOUR processor. So if you want to run it somewhere else, it has a good chance of not running. I had to edit the following files:
./CMakeLists.txt
./utils/engine3/MMOEngine/CMakeLists.txt
And change NATIVE to NO.
I also had issues with the SQL not having a default setting for timestamps, and it would fail to create accounts. Look for stuff like this:
TIMESTAMP NOT NULL,
and replace it with
TIMESTAMP NOT NULL DEFAULT CURRENT_TIMESTAMP,
And as of this current rev I had some issues with malloc hooks, which I just commented out:
$ diff -ruN AllocationHook.cpp_ utils/engine3/MMOEngine/src/system/mm/AllocationHook.cpp
--- AllocationHook.cpp_ 2022-12-06 07:59:42.160402900 +0000
+++ utils/engine3/MMOEngine/src/system/mm/AllocationHook.cpp 2022-12-06 08:00:22.510402900 +0000
@@ -50,6 +50,7 @@
        instance = this;

 #ifndef PLATFORM_MAC
+#if 0
        __saved_malloc_hook = __malloc_hook;
        __saved_free_hook = __free_hook;
        __saved_realloc_hook = __realloc_hook;
@@ -58,6 +59,7 @@
        __malloc_hook = mallocHook;
        __free_hook = freeHook;
        __realloc_hook = reallocHook;
+#endif

 #else
        malloc_zone_t *dz = malloc_default_zone();
@@ -91,9 +93,11 @@

 void AllocationHook::uninstall() {
 #ifndef PLATFORM_MAC
+#if 0
        __malloc_hook = __saved_malloc_hook;
        __free_hook = __saved_free_hook;
        __realloc_hook = __saved_realloc_hook;
+#endif
 #else
        malloc_zone_t *dz = malloc_default_zone();

$
Yes it’s terrible, but I was in a rush so.. yeah.
Also I have access to a Windows 2019 Server which is Windows 10 1809 based, and it doesn’t support the import-export of filesystems. So this won’t be a clean install, I guess it’d be easier to copy files over from Windows 10, and install Ubuntu 20.22 from the store.
Good Luck!
Okay, so it’s old news. But it was news to me!
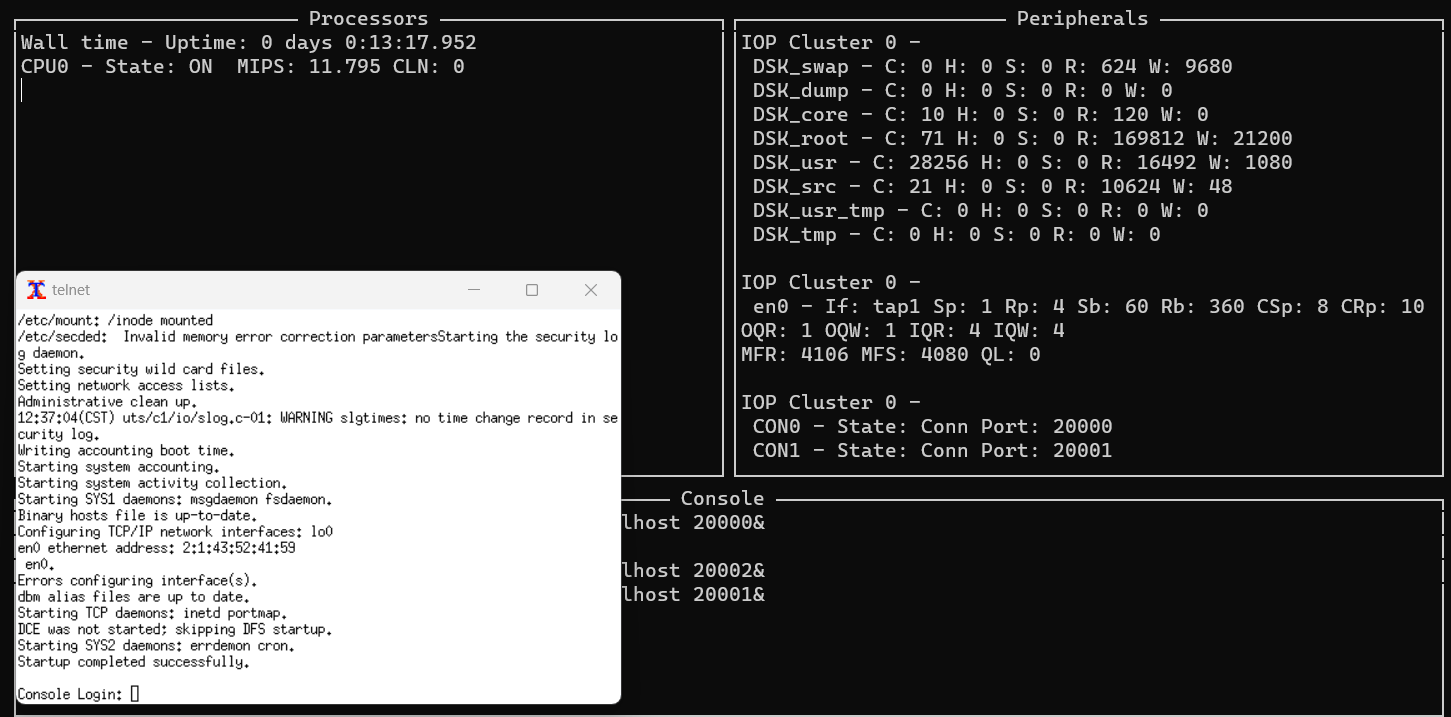
So over on Modular Circuits, Andras had posted a promising ‘UNICOS Update‘ which had detailed that 2 CD-ROM’s of Unicos had surfaced on archive.org cray-cd1 & cray-cd2. Along with posting the updated source to github, so I had no choice to replicate the experiment!
First the install is INSANELY slow. It requires you to setup a Linux (or unix) machine with rsh. Surprisingly there is a rsh-server package for Ubuntu 22.04. Basically it boils down to following the instructions. Although with WSLv2 I ended up making the bridge manually with:
brctl addbr craybr
ip tuntap add mode tap tap1
ifconfig tap1 up
brctl addif craybr tap1
ifconfig craybr 172.16.0.1 netmask 255.255.255.0
It’s coded in the example configs to use tap1, but there you go. It’s a pretty straightfoward install but the decompression on the cray side takes the installation hours. As an experiment I changed the commands from rcp to remsh to gzip -dc the files locally on my PC, which had the benefit of of being much faster, and not taking up space.
I went ahead and uploaded both of my installs for anyone wanting to play OS tourist enough to check out UNICOS but not wanting to sit through the install.
The C compiler is.. ancient. and very touchy. You’ll need to add /usr/gen/bin to the path, and explicitly add the path for the linker like this:
/usr/gen/bin/cc zap.c -L/usr/gen/lib
Although the breakage is.. pretty epic. I had pretty much no luck bringing over any of my favorites. There should be a much better / modernish C compiler and Fortran compiler, although I’m not sure if it’s on these CD-ROM’s or I’m just massively ignorant of UNICOS, because I never got a chance to be anywhere near a legit supercomputer.
So yeah, pretty exciting stuff!
(this is a guest post by Antoni Sawicki aka Tenox)
Pleased to announce WRP version 4.6! After almost two years of no updates due to dependency issues I finally resolved everything. More frequent work should resume now.
The main improvement visible to users is the new GIF encoding. I have been struggling with poor GIF performance for quite a while. This was mostly manifested on lower end machines running WRP such as Raspberry PI or these micro instances in the cloud.
Thanks to invaluable work of Hill Ma we now have blazing fast GIFs. Probably order of 100x improvements! This comes at a cost of quality, especially of color palette and dithering. However worse quality of imagery has a surprise improvement of font/text quality which is what a lot of people wanted.
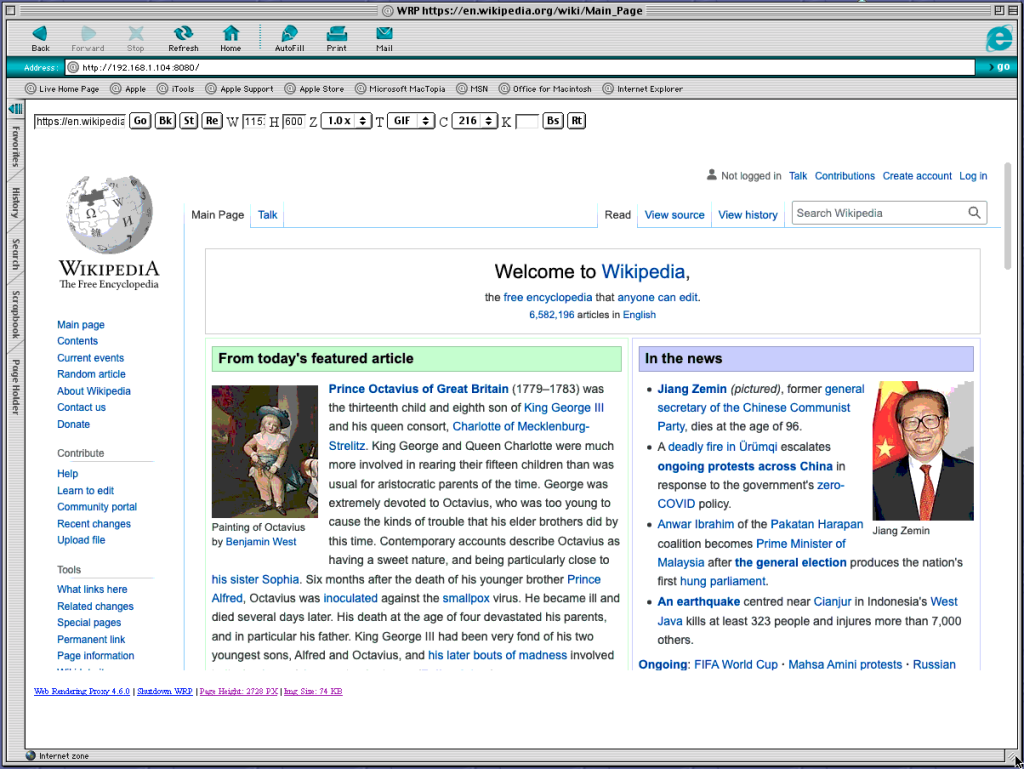
Note that by default WRP uses GIF with 216 “web safe” colors. We choose this not so much for number of colors but rather activation of the super fast GIF encoding.
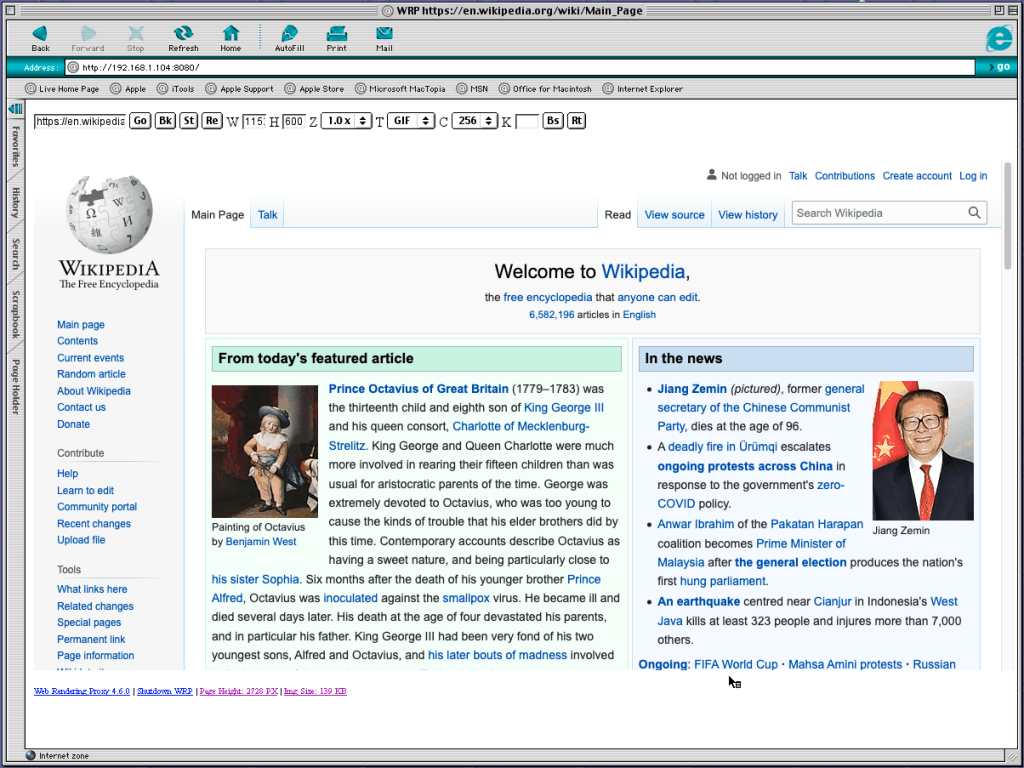
When switching to 256 color mode the image look much better, however it takes around 25x longer to encode (7ms vs 170ms).
When using PNG this is of course not a problem.
0 height mode, which renders tall images of full page length has also been improved and is now more stable. Be careful when using very old machines with little memory as the images can be pretty big.
I hope that WRP will help you use your vintage computers more 🙂
Please report bugs and issues on github!
Downloads here.

It”s that time of the year again, where if for some reason you haven’t played Portal 2, you can get everything for less than the price of Portal 2.
Other classics on sale include KOTOR (STAR WARS – Knights of the Old Republic), and KOTOR2.
Seriously its a great deal!
I don’t know how the other various linux distros handle this but I found this by accident:
Nov 17 12:04:25 ukweb pppd[4943]: Using interface ppp0
Nov 17 12:04:25 ukweb pppd[4943]: Connect: ppp0 <--> /dev/pts/0
Nov 17 12:04:25 ukweb pptpd[4942]: GRE: Bad checksum from pppd.
Nov 17 12:04:25 ukweb systemd-udevd[4944]: Using default interface naming scheme 'v249'.
Nov 17 12:04:25 ukweb pppd[4943]: peer from calling number 1.1.1.1.1 authorized
Nov 17 12:04:25 ukweb pppd[4943]: MPPE 128-bit stateless compression enabled
Nov 17 12:04:27 ukweb systemd-networkd[592]: ppp0: Link UP
Nov 17 12:04:27 ukweb systemd-networkd[592]: ppp0: Gained carrier
Nov 17 12:04:27 ukweb pppd[4943]: found interface br0 for proxy arp
Nov 17 12:04:27 ukweb pppd[4943]: local  IP address 192.168.0.1
Nov 17 12:04:27 ukweb pppd[4943]: remote IP address 192.168.23.10
Nov 17 12:05:28 ukweb systemd[1]: Stopping PoPToP Point to Point Tunneling Server...
Nov 17 12:05:28 ukweb pppd[4943]: Terminating on signal 15
Nov 17 12:05:28 ukweb pppd[4943]: Connect time 1.1 minutes.
Nov 17 12:05:28 ukweb pppd[4943]: Sent 0 bytes, received 6937 bytes.
Nov 17 12:05:28 ukweb systemd-networkd[592]: ppp0: Link DOWN
Nov 17 12:05:28 ukweb systemd-networkd[592]: ppp0: Lost carrier
With the emphasis on “local IP address 192.168.0.1”. Which is *NOT* in my config. I went as far as adding a bridge to satisfy the proxy arp! Netplan is some yaml thing and yeah not a big fan.
    ethernets:
        eth0:
            addresses:
            - PUBLICIP/24
            gateway4: GATEWAY
            match:
                macaddress: AA:BB:CC:00:00:01
            nameservers:
                addresses:
                - 1.1.1.1
                - 8.8.8.8
    bridges:
      br0:
        dhcp4: no
        addresses: [192.168.23.1/24]
    version: 2
my /etc/ppp/pptpd.conf had the options set, but no matter what it *ALWAYS* went to 192.168.0.1
option /etc/ppp/pptpd-options
logwtmp
localip 192.168.24.1
remoteip 192.168.23.30-250
And then I found it after doing what i should have done, and grep around to find out that pptpd.conf should actually live in /etc
Yeah that’s right, there is 2 of them although they should be the same. A symlink and a restart later, and now I get this:
Nov 17 12:19:56 ukweb kernel: [  112.718861] PPP MPPE Compression module registered
Nov 17 12:19:56 ukweb pppd[1002]: MPPE 128-bit stateless compression enabled
Nov 17 12:19:58 ukweb systemd-networkd[599]: ppp0: Link UP
Nov 17 12:19:58 ukweb systemd-networkd[599]: ppp0: Gained carrier
Nov 17 12:19:58 ukweb pppd[1002]: found interface br0 for proxy arp
Nov 17 12:19:58 ukweb pppd[1002]: local  IP address 192.168.23.1
Nov 17 12:19:58 ukweb pppd[1002]: remote IP address 192.168.23.10
MUCH much better. I don’t know if this is anything worth wriging about, but if I can save someone else an hour of wondering why the config isn’t working and why their pptp is always defaulting to 192.168.0.1 and why it’s wreaking havoc with any default home router, where here it is.
While trying to build some old stuff I ran into this weird issue where YYLESX is undefined:
gcc -DHAVE_CONFIG_H -I. -I. -I../../include -I../.. -I../.. -I../../include -g -O2 -Wall -c cs_grammar.c
cs_grammar.y: In function ‘cs_parse’:
cs_grammar.y:1074:58: error: ‘YYLEX’ undeclared (first use in this function)
1074 | yychar = YYLEX;
| ^~~~~
cs_grammar.y:1074:58: note: each undeclared identifier is reported only once for each function it appears in
make[3]: *** [Makefile:334: cs_grammar.o] Error 1
Notice it’s all UPPERCASE, but you can find plenty on the lowercase issue where its not being linked correctly. And yeah turns out YYFLEX should define out toe yyflex
# ifndef YYLEX
#  define YYLEX		yylex()
# endif
Add that in the top of whatever source is complaining and you’re golden.
Really.

With the collapse of my vpsland archive, Neko has become lost once more again. Thankfully I had some fragment backups so I have been able to bring Neko back from the grave. again.
First I dumped everything I had over on sourceforge. With a bit more digging I found the old RISC versions as well. I even found the Itanium version, although I lost the ARM version. Im not sure I have an 8gb pi4 anymore, but I’d like to get one when/if prices stop being insane. Anyways I also uploaded the source to github, since it’s more hip and acceptable for zoomers. I do have to say the git mirror command was everything I’d hoped it’d be.
git push --mirror https://github.com/neozeed/neko98.git
It literally was that easy.
I put a binary built with Visual C++ 2010 SP1 over there too. Although if you need Visual C++ 2010 runtimes, I put them on sourceforge.
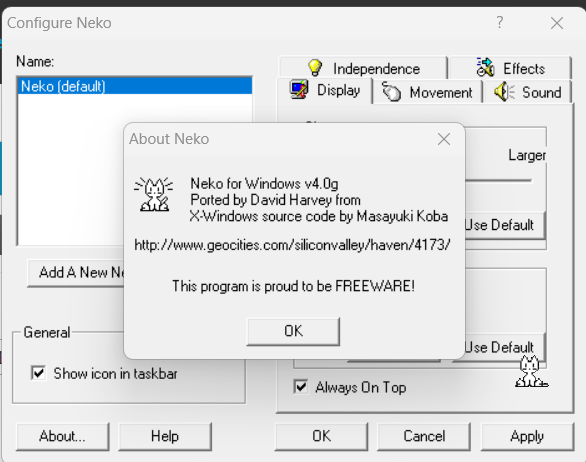
Also I should add in the settings make sure you click “Always On Top”, otherwise Neko will be hidden to the desktop surface and you won’t see him.
I hope you enjoy!