Cloud Functions Bucket File Editor

(This is a guest post by Antoni Sawicki aka Tenox)

The title is little complicated so let me explain! Ever since dawn of the web I been running some web server to host various websites. In the beginning it was a physical machine under my desk, then a colocated server, then a VPS Virtual Machine, then a container. Eventually all the websites that I look after or host for friends/family ended up in “the cloud”. Storage buckets to be precise, as they offer a super cheap and simple way of hosting static websites. I no longer have to maintain machines, look after updates, security or configuration. Just upload HTML and done.

However here lies a problem. You can’t just “edit” a file in a bucket, you can only download it, edit locally and re-upload. This typically is done via Storage Browser UI or gsutil cli utility (in case of GCP). Or some sophisticated IDE with storage API support or sometimes a FUSE client. In any case it’s hard and cumbersome. Why can’t there be a simple Edit function in the UI?

Why isn’t there a File Edit Option????

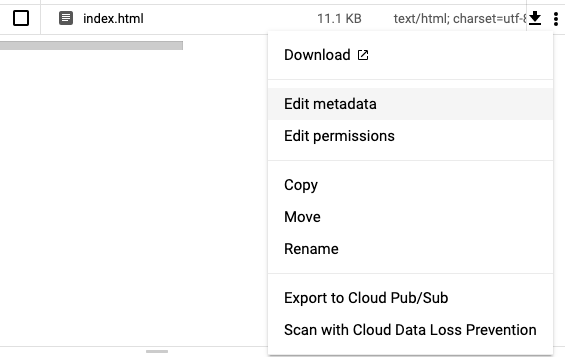
I have recently discovered that there even is a brand new Cloud Shell Editor which is a VScode instance bound to your “cloud shell instance”. It allows you to virtually edit files “in the cloud” but of course not in storage buckets! WHY NOT?

While this been bothering me for a while I also got interested in so called “cloud functions” which are small pieces of code that you can run “in the cloud” without need for a VM or even a container (although surely they run in one behind the scenes). Just paste the code and run… somewhere. Cloud Functions or AWS Lambdas have been notoriously abused by crypto miners. I wanted to play with these for legitimate reasons and finally decided to create a simple web based text editor that would allow to edit text files in storage buckets. So CFEdit was born.

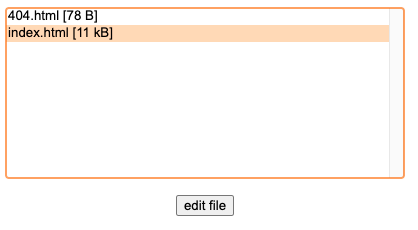
The editor is super simple, no frills, just a file selector and textarea for editing files. You deploy it by creating a new function, either via the UI or CLI. You can restrict it just to a single bucket or allow editing in any bucket within a project. It doesn’t use IAM and thus doesn’t require Google accounts. I specifically wanted to avoid complexity of that and just went with own user database and HTTP Basic Auth.

Now I can create account for family members or friends and allow them to edit their web pages via simple web based editor rather than asking for uploading files or resorting to ftp/sftp GCS gateways or stuff like that.

In future I’m planning to add other function like create blank file, directory, upload/download etc. Let me know what’s needed.

CFEdit can be downloaded from github.com/tenox/cfedit, the readme describes in steps on how to deploy it.

YouTube Monday video Extravaganza!

First up, a friend of the blog, NCommander has his 8.5 hour marathon ‘Porting 16-bit Windows 1.0 Applications to 64-Bit Windows 11

I was so tired I ended up sleeping through the whole thing. Sometimes it’s hard being on the other side of the planet. But for anyone interested in Windows programming it’ll be super interesting in how much has changed, and yet how much things haven’t changed.


Damn!

As an added bonus, 65scribe has also blessed us with not only another great retrospective on iMacs, but also our favorite museum in Ontario, but left us with a cliff hanger (minor spoiler!).

Blue and Ice

I never knew about the artic blue ice thing before. Maybe it’s a coincidence, but who knows?!

Revisiting Windows NT 4.0 MIPS on QEMU

(This is a guest post by Antoni Sawicki aka Tenox)

This was previously well covered by Gunkies and Neozeed, however as almost a decade passed, some improvements could be made and annoyances fixed.

Firstly NT MIPS now works in 1280×1024 resolution under QEMU. It previously had issues with mouse tracking, but this is now fixed. So the new image has a higher resolution.

Secondly the old images were made with FAT filesystem which I didn’t like too much. The reason for that is the infamous RISC NT osloader needs to be placed on a FAT partition. Then, if NT is installed on a second NTFS partition the default drive will be D:\, C:\ being the just the osloader drive. This was super annoying in practice. So a common procedure was to just have one FAT partition for both osloader and winnt. I have fixed it by supplying a pre-partitioned disk and specified the second partition for osloader and the first for NT.

Also I only had just a bare/vanilla image with no additional software installed. The new image includes most of the available apps, including IE3, some editors, Reskit and Visual Studio.

Lastly I wanted to figure out all the right settings and flags for qemu as they were discrepancies between different sources and nothing seem to work smoothly. The correct flags seem to be:

qemu-system-mips64el -hda nt4.qcow2 -M magnum -global ds1225y.filename=nvram -L . -rtc "base=1995-07-08T11:12:13,clock=vm" -nic user,model=dp83932

The -rtc flag is not really needed if you are ok with having the current date in the guest.

Thanks to Neozeed for figuring out the network settings! Unfortunately the old/legacy -net nic -net user is no longer working while the new -device doesn’t like dp83932. The documentation was quite helpful.

Thanks to reader Mark for pointing out the correct NVRAM settings! See comments below.

The new image with all the apps preinstalled is here and a plain “vanilla” here.

Curiously this now works right out of the box on QEMU 6.1 and is pretty smooth and stable compared to what it was before. Good job QEMU team and thank you! Just in case I still keep the old binaries for Windows made by Neozeed here.

Update: I built Yori for NT MIPS! You can download here!