This is a guest post from Yufeng Gao
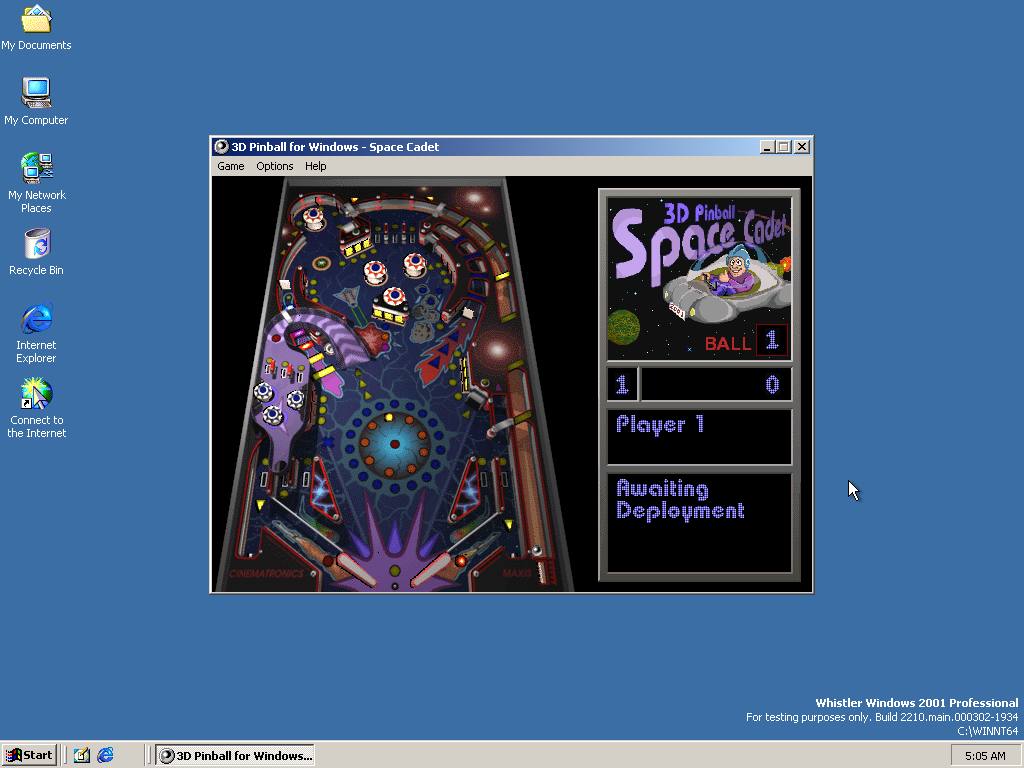
One of the most popular OS built-in games is no doubt Pinball, known by its full name 3D Pinball for Windows – Space Cadet. It started out as Full Tilt! Pinball, developed by Cinematronics and published by Maxis. It offered 3 tables, and one of them, Space Cadet, was licensed to Microsoft to be included in Microsoft Plus! 95 and, later, built into the Windows operating system.
Windows XP was the last version of Windows to include Pinball, and Raymond Chen explained why it didn’t make it to Windows Vista on his blog. The reason was it had a collision detector bug when it was compiled for 64-bit Windows, which caused the ball to pass through various objects – falling off the screen through the plunger instead of being launched, for instance. The bug rendered the game unplayable, and Raymond and his colleague were unable to find a fix in a reasonable amount of time, so he removed it. At least that’s the story we were told, for about a decade.
In 2021, NCommander launched a series of investigations to challenge that, testing Pinball on various 64-bit (IA-64 and AMD64) builds of Windows XP and pre-release Vista. He found that the 64-bit versions of Pinball were all highly playable, with only very minor glitches, and speculated that the reason for its removal was that the UI did not fit into the Windows Vista design.
Not long after NCommander published his video, Raymond followed up with a post that filled in some gaps in the story and shed more light on the bug. He said it was the 64-bit Alpha AXP version of Pinball that had the extremely bad collision detection bug. This claim had been unverifiable for the past 5 years, for the following reasons:
- No 64-bit Windows was ever released for the Alpha AXP – Compaq killed Windows NT support before NT was ported to 64-bit
- One 64-bit Alpha AXP NT build was leaked in 2023, but the included Pinball does not work, as it segfaults immediately upon running
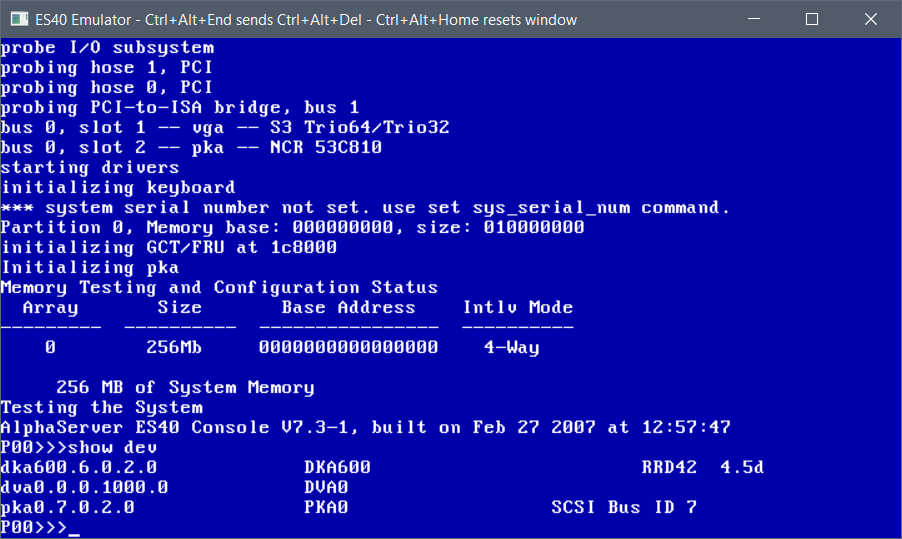
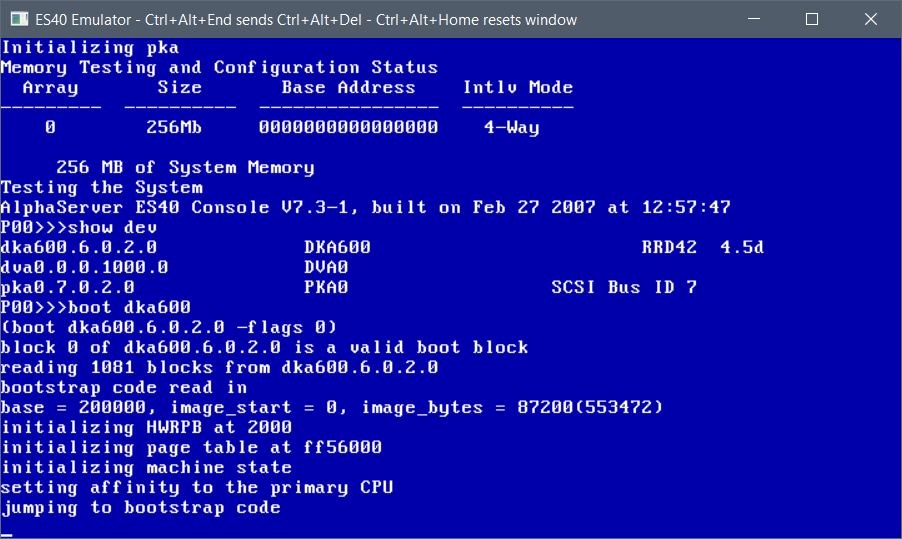
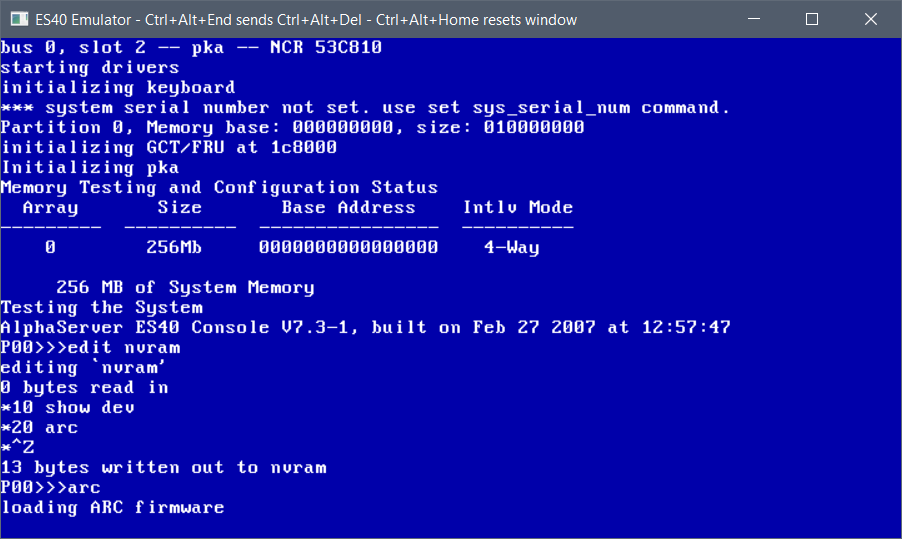
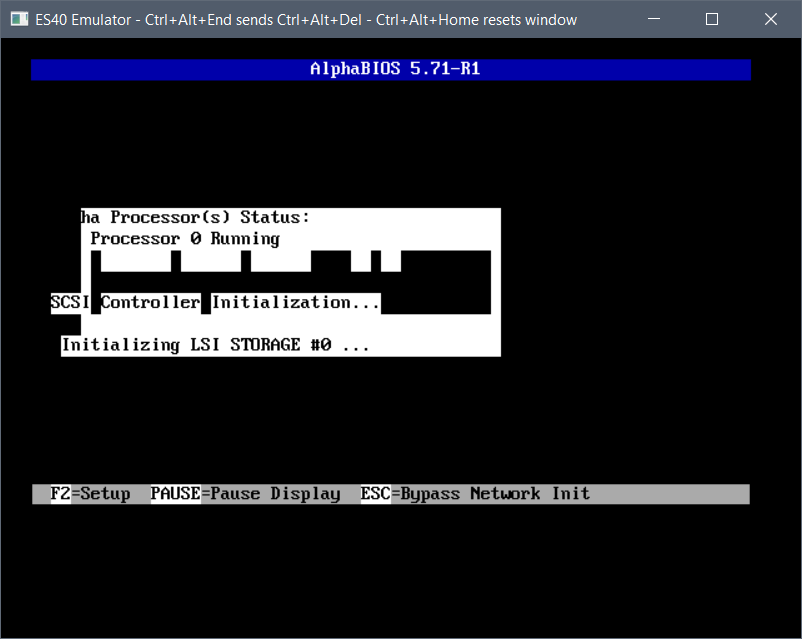
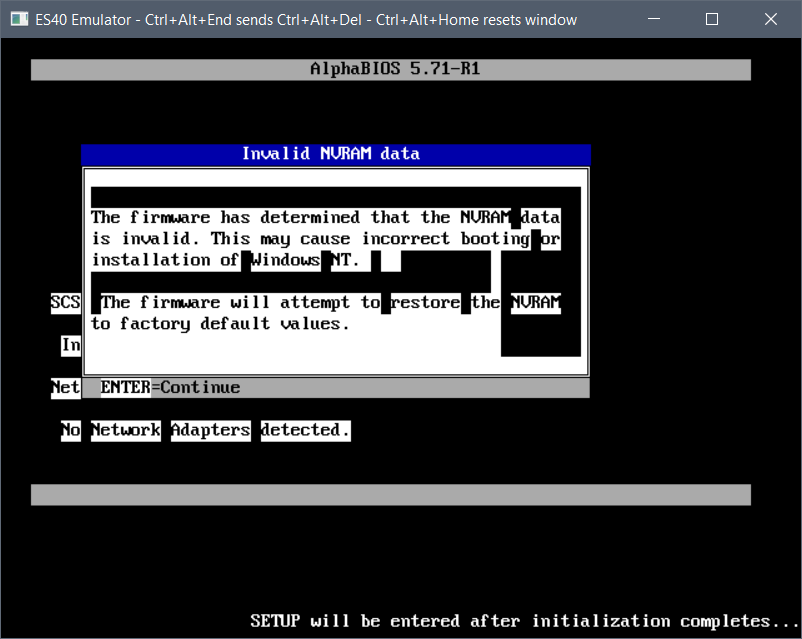
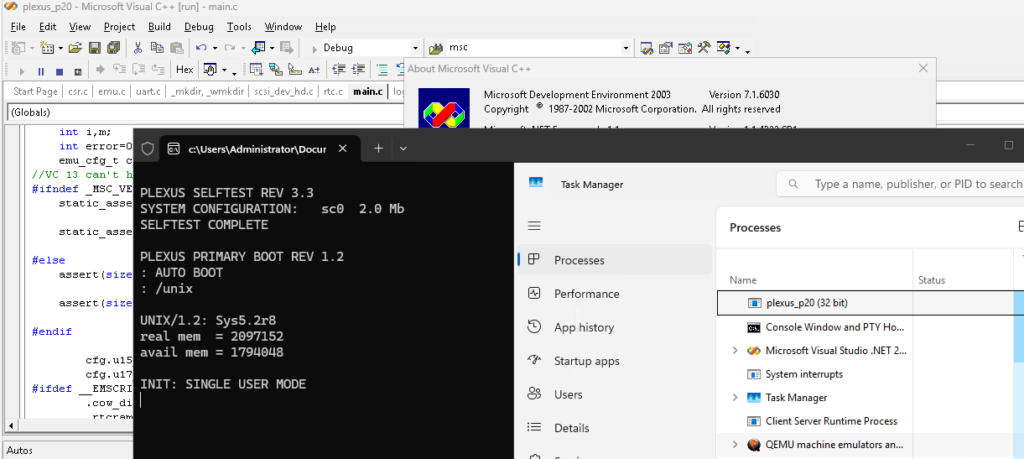
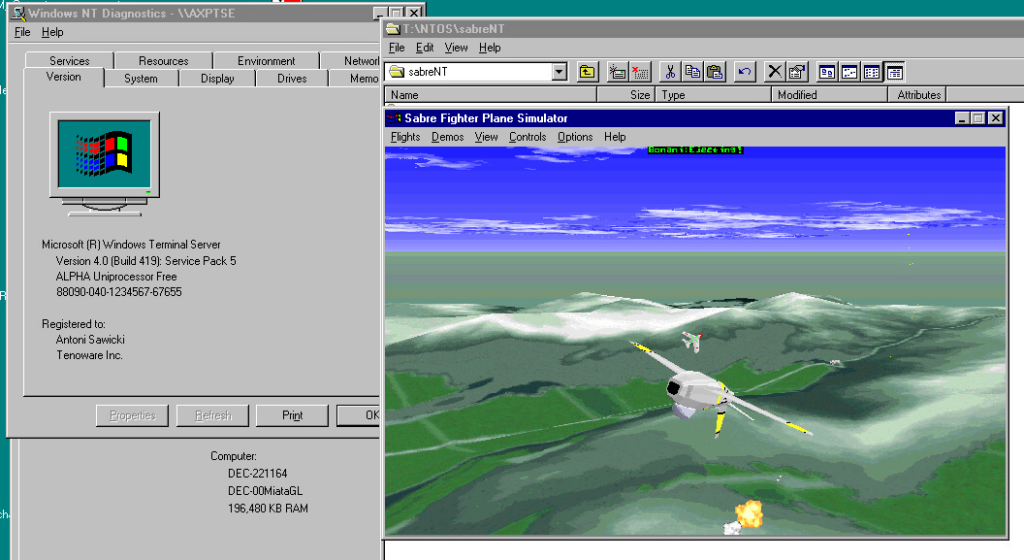
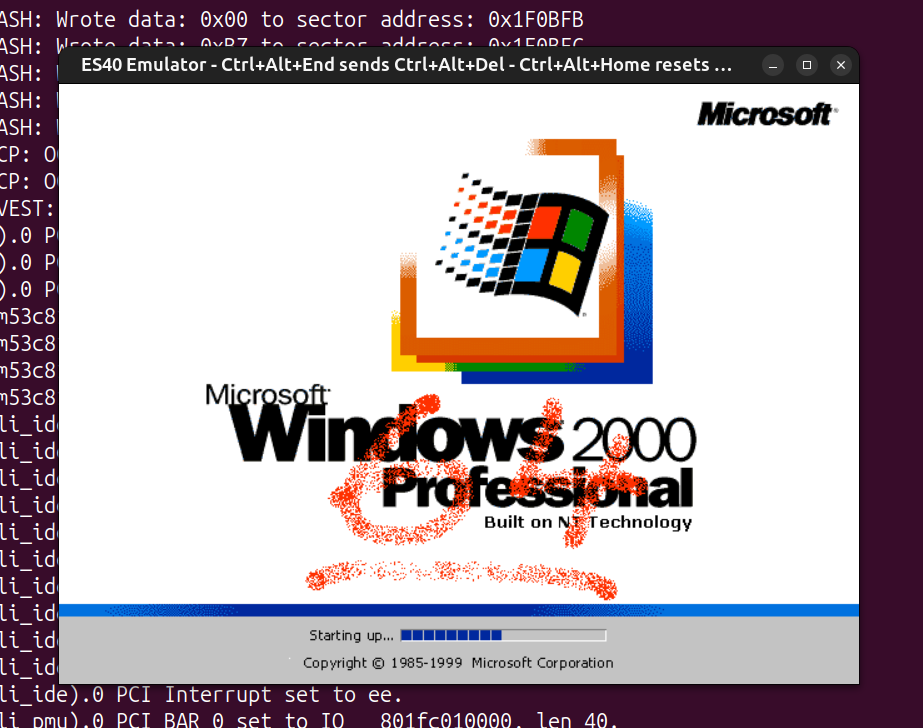
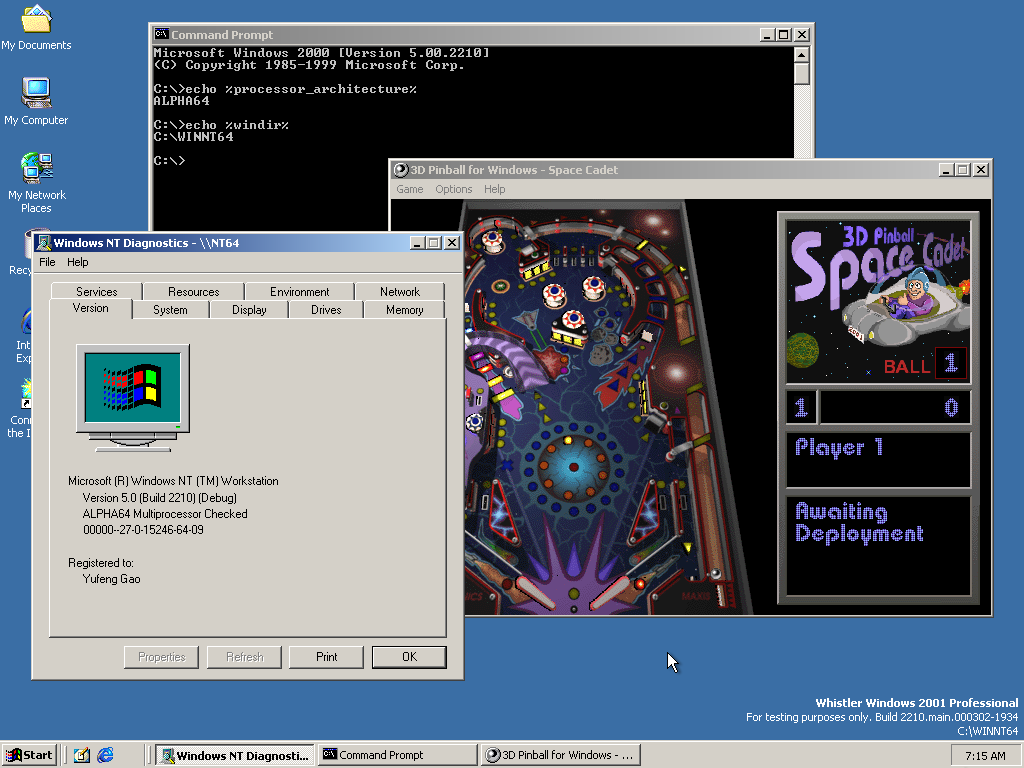
I’ve had an interest in the DEC Alpha for quite some time now, mainly out of my love for DEC architectures and my love for UNIX. VAX is the direct successor of PDP-11, and Alpha is the direct successor of VAX. Earlier, some Alpha emulation breakthroughs dropped, and I was pinged by a few friends that NT 4.0 could now run on a fork of the ES40 emulator, as well as on QEMU. I never thought Alpha NT would ever run under emulation, because unlike the familiar Tru64, Linux and the BSDs, NT uses its own custom PALcode and depends on ARC (Advanced RISC Computing) instead of SRM. Of course, people noted that the emulators couldn’t run the holy grail of Alpha NT – Windows (XP?) build 2210, because its kernel would panic with a memory management error in QEMU, or wouldn’t detect the keyboard and bug out in ES40. A few trips to hell in the symbol-less NT kernel and a few MMU emulation fixes later, I was able to patch up both QEMU and ES40 to boot that only surviving 64-bit build of Alpha NT.
After torturing my brain debugging a symbol-less NT kernel without a kernel debugger, I thought I’d give fixing Pinball a go, to make things worthwhile. One of the benefits of debugging a userland process is that, while there’s still no debugger, there is Dr. Watson, which takes core dumps and performs simple post-mortems. Something is better than nothing, as people would say.
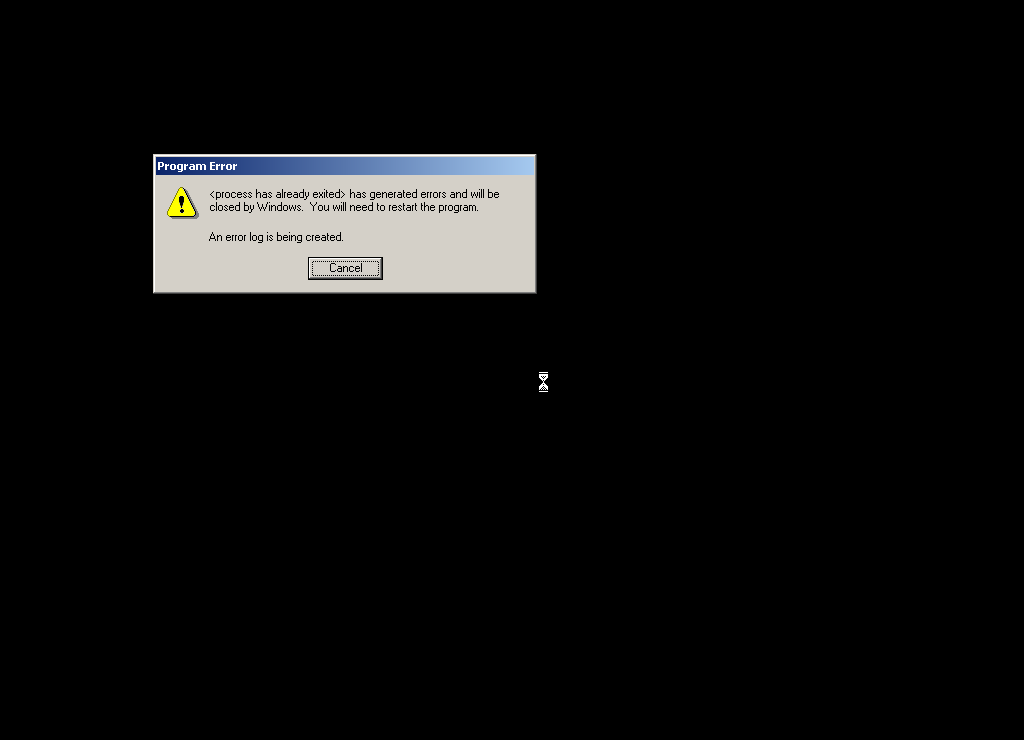
Running Pinball gives the classic crash symptom immediately, with no graphics drawn:
Dr. Watson concludes that it died of a segfault:
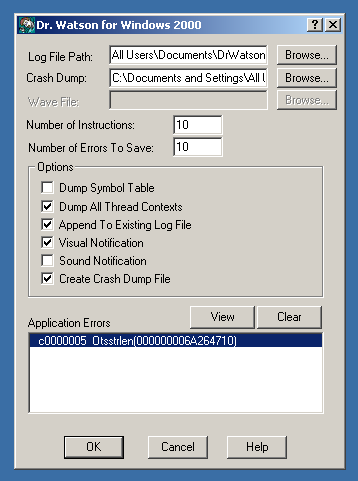
It gave a nice dump of registers at the time of the fault:
State Dump for Thread Id 0x124

  v0=01002930 00000000   t0=00000000 00360000   t1=00000000 00000001
  t2=00000000 00360000   t3=00000000 00000000   t4=00000000 00000000
  t5=00000000 0000011c   t6=000003ff fff8f868   t7=00000000 00303030
  s0=000003ff fff8fac0   s1=01002930 00000000   s2=000003ff fff8fad8
  s3=00000000 00000000   s4=00000000 0106f2a8   s5=00000000 01000000
  fp=00000000 00000010   a0=01002930 00000000   a1=00000000 00000000
  a2=000003ff fff8fad8   a3=00000000 30010000   a4=00000000 69e17610
  a5=00000000 69e0a360   t8=000003ff fff8f868   t9=00000000 00000000
 t10=00000000 00300000  t11=00000000 00000002   ra=00000000 69e9d5c0
 t12=00000000 6a264710   at=ffffffff fffffe10   gp=00000000 00000000
  sp=000003ff fff8fa50 zero=00000000 00000000 fpcr=08000000 00000000
SoftFpcr=00000000 00000000  fir=6a264710
 psr=00000003
mode=1 ie=1 irql=0
Some disassembly around the faulting instruction:
function: Otsstrlen
FAULT ->00000000'6a264710: 2f700000 ldq_u t12,0(a0)
        00000000'6a264714: 239fffff lda at,-1(zero)
        00000000'6a264718: 4b90065c mskql at,a0,at
        00000000'6a26471c: 4600f000 and a0,#7,v0
        00000000'6a264720: 477c041b bis t12,at,t12
        00000000'6a264724: 43fb01fb cmpbge zero,t12,t12
        00000000'6a264728: 43e00520 subq zero,v0,v0
        00000000'6a26472c: f7600005 bne t12,00000000'6a264744 Otsstrlen+00000034
        00000000'6a264730: 2f700008 ldq_u t12,8(a0)
        00000000'6a264734: 42011410 addq a0,#8,a0
        00000000'6a264738: 40011400 addq v0,#8,v0
        00000000'6a26473c: 43fb01fb cmpbge zero,t12,t12
And a very useful stack backtrace:
*----> Stack Back Trace <----*

FramePtr ReturnAd Param#1  Param#2  Param#3  Param#4  Function Name
000003FFFFF8FA50 0000000069E9D5BC 0100293000000000 0000000000000000 000003FFFFF8FAD8 0000000030010000 !Otsstrlen
000003FFFFF8FA50 0000000069E9DB64 0100293000000000 0000000000000000 000003FFFFF8FAD8 0000000030010000 !PostThreadMessageA
000003FFFFF8FA90 0000000069E9C000 0100293000000000 0000000000000000 000003FFFFF8FAD8 0000000030010000 !SetClassLongA
000003FFFFF8FB80 000000000100F914 000003FFFFF8FC58 0000000000000000 000003FFFFF8FAD8 0000000030010000 !RegisterClassA
000003FFFFF8FBF0 0000000001012A1C 0000000001000000 0000000001002DC8 000003FFFFF8FAD8 0000000030010000 !<nosymbols>
000003FFFFF8FCA0 0000000001064B0C 0000000001000000 0000000001002DC8 000003FFFFF8FAD8 0000000030010000 !<nosymbols>
000003FFFFF8FED0 0000000068948C50 0000000001000000 0000000001002DC8 000003FFFFF8FAD8 0000000030010000 !<nosymbols>
000003FFFFF8FFC0 0000000000000000 0000000001064800 0000000001002DC8 000003FFFFF8FAD8 0000000030010000 !BaseProcessStart
Ok, so it died inside RegisterClassA, a critical Win32 API function. That API function couldn’t have been the culprit, because if it were bugged, no GUI Win32 program would run at all. This means the only possible source of the error is its sole argument – a pointer to a WNDCLASSA struct. Needless to say, the pointer itself was valid, otherwise the API would’ve detected the invalid argument, or the segfault would’ve happened a lot sooner.
From the stack trace, the return address of RegisterClassA was 0x100F914, inside the function splash_screen. A quick disassembly of the instructions preceding that address shows a WNDCLASSA structure being built with the following layout:
00000000 u32 style         = 0
00000004 u64 lpfnWndProc   = splash_message_handler (0x100FE40)
0000000C u32 cbClsExtra    = 0
00000010 u32 cbWndExtra    = 8
00000014 u64 hInstance     = *0x106AE30
0000001C u64 hIcon         = NULL
00000024 u64 hCursor       = LoadCursorA(NULL, IDC_ARROW)
0000002C u64 hbrBackground = NULL
00000034 u64 lpszMenuName  = "" (0x1002710)
0000003C u64 lpszClassName = "3DPB_SPLASH_CLASS" (0x1002930)
Right off the bat, I noticed something wrong – the field alignment. It is a general requirement that fields be aligned to their size, as in 8-bit fields should be byte-aligned, 16-bit fields should be 16-bit (2-byte) aligned, 32-bit fields should be 32-bit (4-byte) aligned, and 64-bit fields should be 64-bit (8-byte) aligned. If you look at the offsets of the fields above, the 32-bit ones are indeed 4-byte aligned, but the 64-bit ones are not. At the start, we have a 32-bit style field followed by a 64-bit lpfnWndProc, and to satisfy the alignment requirements, a 4-byte padding should be inserted between style and lpfnWndProc to ensure that lpfnWndProc starts on an 8-byte boundary. RegisterClassA was expecting this padding, but Pinball lacked it, so it read data from the wrong offset and crashed.
To fix this, I simply bumped the offset of each field after style up by 4 bytes.
 00000000 u32 style         = 0
-00000004 u64 lpfnWndProc   = splash_message_handler (0x100FE40)
+00000008 u64 lpfnWndProc   = splash_message_handler (0x100FE40)
-0000000C u32 cbClsExtra    = 0
+00000010 u32 cbClsExtra    = 0
-00000010 u32 cbWndExtra    = 8
+00000014 u32 cbWndExtra    = 8
-00000014 u64 hInstance     = *0x106AE30
+00000018 u64 hInstance     = *0x106AE30
-0000001C u64 hIcon         = NULL
+00000020 u64 hIcon         = NULL
-00000024 u64 hCursor       = LoadCursorA(NULL, IDC_ARROW)
+00000028 u64 hCursor       = LoadCursorA(NULL, IDC_ARROW)
-0000002C u64 hbrBackground = NULL
+00000030 u64 hbrBackground = NULL
-00000034 u64 lpszMenuName  = "" (0x1002710)
+00000038 u64 lpszMenuName  = "" (0x1002710)
-0000003C u64 lpszClassName = "3DPB_SPLASH_CLASS" (0x1002930)
+00000040 u64 lpszClassName = "3DPB_SPLASH_CLASS" (0x1002930)
But that was not sufficient – Pinball calls RegisterClassA in 4 different places – Sound_Init, splash_screen, WinMain and WaveMixStartup. I’d already patched the one in splash_screen, so I started going through the rest one by one.
The ones in Sound_Init and WinMain were identical to the one in splash_screen, but for some strange reason the one in WaveMixStartup already had the correct alignment:
00000000 u32 style         = 0
00000004 u32 <unused>      = <undefined>
00000008 u64 lpfnWndProc   = WndProc (0x105CFA0)
00000010 u32 cbClsExtra    = 0
00000014 u32 cbWndExtra    = 0
00000018 u64 hInstance     = *0x106B818
00000020 u64 hIcon         = NULL
00000028 u64 hCursor       = LoadCursorA(NULL, IDC_ARROW)
00000030 u64 hbrBackground = GetStockObject(LTGRAY_BRUSH)
00000038 u64 lpszMenuName  = NULL
00000040 u64 lpszClassName = "WavMix32" (0x10050B0)
I can’t think of why the same struct would be aligned differently within the same binary, unless they came from different objects compiled with different flags or something.
Anyway, with the WNDCLASSA struct alignment fixed in 3 of the 4 places, I ran Pinball again. This time it created the fullscreen window and attempted to draw the splash screen before dying of another segfault:
Crash log shows that the segfault happened deep in the Win32 audio system, while calling auxSetVolume:
*----> Stack Back Trace <----*

FramePtr ReturnAd Param#1  Param#2  Param#3  Param#4  Function Name
000003FFFFF8E9C0 0000000050306E84 00000000FFE5D420 0000000000000000 000003FFFFE5D420 0000000000000000 !<nosymbols>
000003FFFFF8E9E0 00000000503034B8 00000000FFE5D420 0000000000000000 000003FFFFE5D420 0000000000000000 !<nosymbols>
000003FFFFF8EA10 0000000050304B60 00000000FFE5D420 0000000000000000 000003FFFFE5D420 0000000000000000 !<nosymbols>
000003FFFFF8EA90 0000000050305B8C 00000000FFE5D420 0000000000000000 000003FFFFE5D420 0000000000000000 !<nosymbols>
000003FFFFF8EB20 000000000001AF78 00000000FFE5D420 0000000000000000 000003FFFFE5D420 0000000000000000 !<nosymbols>
000003FFFFF8EB60 0000000000025AFC 00000000FFE5D420 0000000000000000 000003FFFFE5D420 0000000000000000 !auxSetVolume
000003FFFFF8EBD0 0000000000025F98 00000000FFE5D420 0000000000000000 000003FFFFE5D420 0000000000000000 !mixerSetControlDetails
000003FFFFF8EC80 0000000000027214 00000000FFE5D420 0000000000000000 000003FFFFE5D420 0000000000000000 !mixerSetControlDetails
000003FFFFF8ED30 0000000000030644 00000000FFE5D420 0000000000000000 000003FFFFE5D420 0000000000000000 !mciSendCommandW
[...]
000003FFFFF8FC60 0000000001012AB4 0000000000000000 000003FFFFE5DE00 000003FFFFE5D420 0000000000000000 !CreateWindowExA
000003FFFFF8FCA0 0000000001064B0C 0000000000000000 000003FFFFE5DE00 000003FFFFE5D420 0000000000000000 !<nosymbols>
000003FFFFF8FED0 0000000068948C50 0000000000000000 000003FFFFE5DE00 000003FFFFE5D420 0000000000000000 !<nosymbols>
000003FFFFF8FFC0 0000000000000000 0000000001064800 000003FFFFE5DE00 000003FFFFE5D420 0000000000000000 !BaseProcessStart
The fault happened while trying to dereference a pointer in the register a0 (r16):
function: <nosymbols>
        00000000'50305658: 00000000 halt
        00000000'5030565c: 00000000 halt
        00000000'50305660: 23deffe0 lda sp,-20(sp)
        00000000'50305664: b53e0000 stq s0,0(sp)
        00000000'50305668: b55e0008 stq s1,8(sp)
        00000000'5030566c: b57e0010 stq s2,10(sp)
        00000000'50305670: b75e0018 stq ra,18(sp)
        00000000'50305674: 47f00409 bis zero,a0,s0
        00000000'50305678: 47f1040a bis zero,a1,s1
        00000000'5030567c: 47ff040b bis zero,zero,s2
FAULT ->00000000'50305680: a2100128 ldl a0,128(a0)
        00000000'50305684: 20500001 lda t1,1(a0)
        00000000'50305688: e440001b beq t1,00000000'503056f8 00000000'503056f8
        00000000'5030568c: d35ff6f8 bsr ra,00000000'50303270 00000000'50303270
        00000000'50305690: e4000019 beq v0,00000000'503056f8 00000000'503056f8
        00000000'50305694: 47e00411 bis zero,v0,a1
        00000000'50305698: 454b0801 xor s1,s2,t0
        00000000'5030569c: e4200005 beq t0,00000000'503056b4 00000000'503056b4
        00000000'503056a0: a2090128 ldl a0,128(s0)
        00000000'503056a4: d35ff722 bsr ra,00000000'50303330 00000000'50303330
        00000000'503056a8: 4160300b addl s2,#1,s2
        00000000'503056ac: 47e00411 bis zero,v0,a1
The register dump shows the value of a0 at the time of the crash:
State Dump for Thread Id 0x150

  v0=000003ff ffe5de00   t0=00000000 00000000   t1=00000000 00000058
  t2=00000000 50306150   t3=00000000 0000015e   t4=00000000 00000001
  t5=00000000 00000001   t6=00000000 50300000   t7=00000000 00ed39fb
  s0=00000000 ffe5d420   s1=00000000 00000000   s2=00000000 00000000
  s3=00000000 00000000   s4=00000000 00000001   s5=00000000 50305a10
  fp=00000000 000123b8   a0=00000000 ffe5d420   a1=00000000 00000000
  a2=000003ff ffe5d420   a3=00000000 00000000   a4=00000000 00000000
  a5=00000000 cc5a4dbc   t8=00000001 00000000   t9=00000000 00000612
 t10=d1b71758 e219652c  t11=00000000 00000612   ra=00000000 50306e88
 t12=00000000 00000000   at=00000000 00010000   gp=00000000 00000000
  sp=000003ff fff8e9c0 zero=00000000 00000000 fpcr=89000000 00000000
SoftFpcr=00000000 00000000  fir=50305680
 psr=00000003
mode=1 ie=1 irql=0
Indeed, it was an invalid pointer! As you can see, it’s identical to the pointer in a2, but with the entire top 32 bits zeroed. It must’ve been truncated by a bug somewhere, either in the audio subsystem or in Pinball itself.
I spent some time and pinned down the DLL responsible for the fault – mciseq.dll, and did some tracing. The truncation of a0 happened when a2 was moved into a0:
50306150 ZAPNOT a2,#15,a0ZAPNOT is an interesting instruction – it takes a source register, a bitmask and a destination register, and it “zaps” (zeros) the bytes whose corresponding bit in the bitmask is 0. In this case, the bitmask is 15, which is 00001111 in binary. From this we can work out that the ZAPNOT instruction at 0x50306150 zeros the upper 4 bytes of a2, when it is copied into a0. This perfectly explains why, at the time of the fault, a0 contained a truncated version of the pointer in a2.
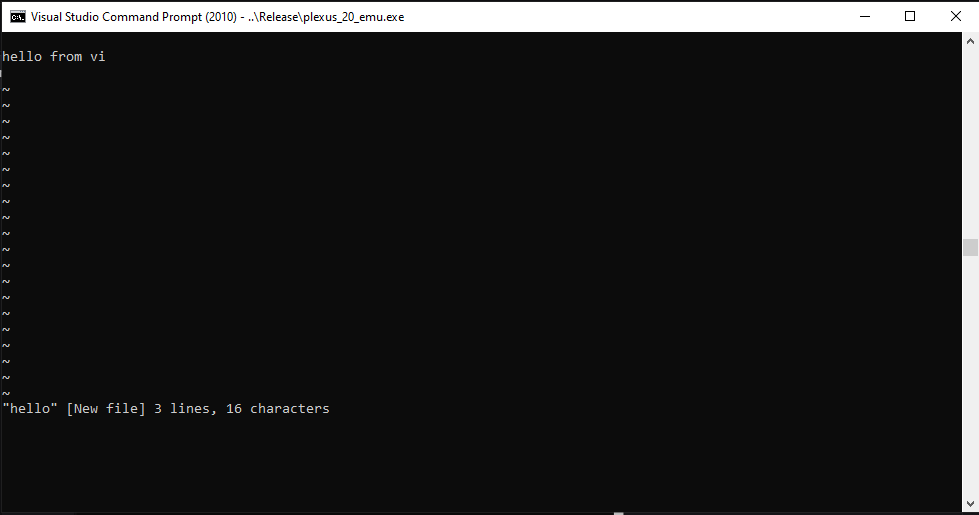
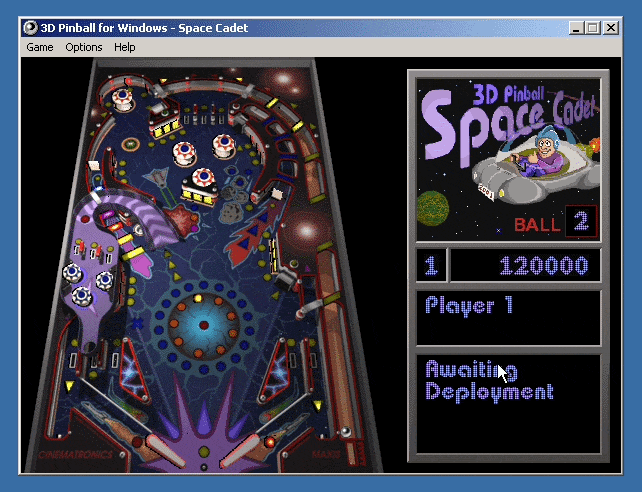
Of course, 0x50306150 was not the only place where it truncated 64-bit pointers, I found 6 truncations of the exact same type in mciseq.dll. I have not the slightest clue why it decided to truncate pointers. If I had to guess, maybe they had pointer → integer → pointer casts for whatever reason, and that integer type was 32-bit. With all 6 truncations patched out, we have some Pinball for ourselves:
Here’s proof that Pinball is indeed running on a 64-bit build of Alpha NT:
To make Pinball work on your NT build 2210 install, replace %ProgramFiles%\Windows NT\Pinball\pinball.exe and %windir%\system32\mciseq.dll with the following:
- Patched
pinball.exe - Patched
mciseq.dll
You could also patch the installation files and burn them to a new CD if you want Pinball to work out of the box on fresh installs – simply copy these files to the AXP64 directory of the install disc:
- Patched
PINBALL.EX_ - Patched
MCISEQ.DL_
The Bug
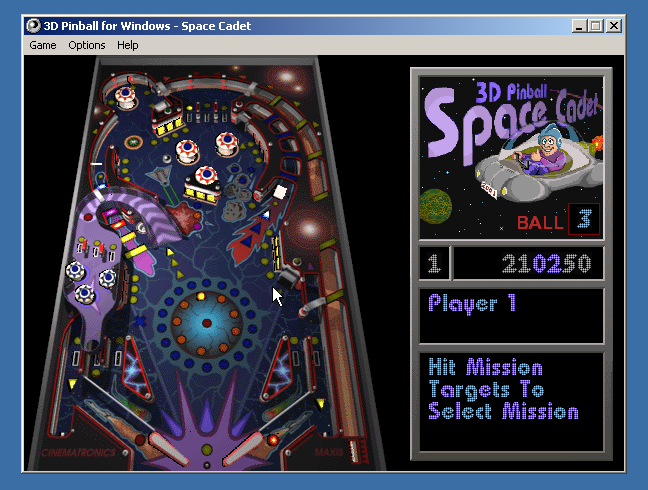
Now I’m going to disappoint you with the fact that I did not find the collision detector bug Raymond talked about. With the struct alignment and pointer truncation issues patched, the game now works flawlessly. Ok, I’m not sure if it’s actually flawless, but I never saw any glitches in the few games I played. At the very least, the ball does not fall through the plunger, can be launched and bounces around the table just fine.
Below are the 2 reasons I could think of for not seeing the collision detector bug:
- The bug was introduced after build 2210. Build 2210 has Pinball installed by default and predates Windows XP by almost a year and a half, so it almost certainly predates Raymond removing it. In this build, Pinball doesn’t even run by default, so there’s no way they could’ve tested it and seen the bug. They probably only started testing Pinball later, after they fixed the struct alignment and pointer truncation issues.
- The bug only manifests in free/release builds, not in checked/debug builds. Maybe it only shows up when the code is compiled with the more aggressive optimisation used by release builds – something that happens quite often when code has undefined behaviour or the compiler has bugs. This is less plausible, however, as I’m sure Raymond would’ve used debug builds when he attempted to debug it, and discovered any differences between debug and retail builds.
Of course, only Raymond himself could shed more light on this topic. It was fun (read: painful) debugging Pinball, as well as the NT kernel to fix the emulators – too much fun (read: pain) that I will never do it again.
Some trivia about me and pinball:
I spent a fair chunk of my kindergarten and pre-school days playing the various games my dad installed on our Windows XP home computer, however, there was one game that I never quite figured out how to play – Pinball. It came bundled with the OS, and the splash screen scared me every time I tried to open it up.
The flipper looked like a pistol to my 3-year-old self, and the overall darkness of the splash screen just injected fear into me. I would open the game, close my eyes, count to 20, then open my eyes again, to skip past the splash screen.
The first time I actually played a full game of pinball was on the first day of this year, when a friend of mine took me to an arcade. After playing pinball in real life, the Pinball game finally started to make sense.