Sysadmin Key Ring

(Note: this is a guest post by Tenox)

I have accumulated a bunch of loose pen drives with different OS installers, imaging and rescue tools. I could never find them when I needed so I have decided to put an order to it. A System Administrator’s Key Ring was born!

sysadmin_keyring

This one is Windows centric, however doesn’t have Windows 8 and 2012 yet. I’m now working on Linux key ring with various distributions I use.

Note that I actually do have valid licenses for all the software.

If you want to make your own here is how to make it:

  • Windows media are easiest. Diskpart clean and create an active Fat32 partition. Extract DVD to the USB key.
  • Linux media similar but apart from diskpart and extracting media you need to use Syslinux to create the MBR.
  • For bootable floppies use DiskImager to write the image directly to pen drive.

Somewhere over China while I was ignoring the world

things happened. Anyways I built out the qemu 1.4.1 and it is horribly SLOW. I don’t know why I haven’t even begun to think about gprof or what is up with GCC 4.7.2 trying to build GLIB2 as I’m having zero luck of building out a clean version.

It takes about as long as an XT to boot MS-DOS 5, so I really don’t see this as being terribly useful to anyone.

Qemu 1.4.1 released

The source code is here.

For those wondering, I have a win32 build of 1.4.0 but it is on a hard disk that I can’t use now as I’m currently living on a boat.  Which has been fun, but the only catch is the cheap power supply is 220v and the boat is 110v.  Plus I don’t have a monitor.  I should be leaving for Japan in a few weeks, so I can get a new power supply and monitor there as I plan on spending two months.

I haven’t forgotten or moved on, I’m just still on my big vacation thing.

Hong Kong has really been great, I’ve met some fabulous people out here.  If I could get a job here I’d move here in 5 minutes (well I’d just find an apartment as I’m already here…) The place is awesome, I’d recommend anyone to check it out.  But I don’t speak Mandarin or Canto so that won’t be happening.  🙁

I’ll try to do a small best of photos out here, but sadly the weather hasn’t been cooperating too well, and pollution has been off the chart… but really its a great place! .. !

In other news, I’m sure you’ve all read about the internet archive having a massive collection of software.?  Really good news as so much old stuff, besides the shovel ware gets disappeared.

So yes, I’m still alive, just .. been somewhat unavailable.

The blue one!

The blue one!

pop open the hatch so my AC can dehumidify..

pop open the hatch so my AC can dehumidify..

pic of the middle of the boat

pic of the middle of the boat

cruising on the sampan

cruising on the sampan

another pic of the boat

another pic of the boat

Fish Heads!

Fish Heads!

Caldera Open Linux

(note this is a guest post from Antoni Sawicki aka Tenox)

I have been working with Linux since around 1992, both at home and at work. I have probably seen it all with exception of item in the title. Lurking around my files, I found screenshot of a beta version of Caldera Linux. For some odd reason I somehow managed to never actually see it with my own eyes back in the day. The supreme Linux desktop was always matter of just myths and legends.

caldera

Recently I came across install media for the Caldera Open Linux 1.3 and decided to take it for spin and see how it really measures to it’s hype. The system installed just fine with dialog based setup steps. However as I wanted to see the GUI in action there was a problem – 640×480 VGA mode, or rather lack of better video mode to work with.

Unfortunately neither VMware nor VirtualBox do not support anything better than the crippled VGA mode. They do it for all other devices, like network card, mouse, ide and atapi cdrom. But somehow not for graphics. Fortunately the other virtualization engines are bit better. QEMU supports Cirrus Logic and Virtual PC supports S3 Trio.

I have spent several hours trying to convince the ancient Xfree86 to work with QEMU, to no avail. All I managed t o get was this:


Out of options I have decided to try Virtual PC. Unfortunately the system would not install due to disk errors. Upon some research I’ve found the issue was IO-APIC which I promptly disabled in the kernel (noacpi). It did not help the install much, but allowed me to run a qemu-installed and converted disk image.  This is a bit of shame that the best virtualization engine to run ancient Linux was Microsoft VPC. Anyway to my amusement I’ve got this:

cal-vpc1

And I was able to explore the GUI a little bit more:

cal-vpc2

cal-vpc3

Wait a second, these icons remind me of something! Apparently Visix Looking Glass became Caldera Desktop… I will need to dig in deeper in to this eventually.

Apart from that Caldera is loaded with tons of ancient software. Pretty much everything there was available on Linux these days and all working out of the box. Neozeed will be happy to see Neko in action (see the last screenshot)!

cal-vpc4

You can download install media and ready virtualized images here.

Update:
Michal Necasek of OS2 Museum has fixed XF86_SVGA so that it works correctly with Virtual Box in higher resolutions as well. “You’ll have to set up the X so that it uses the XF86_SVGA server and tell it to automatically detect the graphics hardware. Then it should be just a question of selecting some sensible monitor and creating a few modes. If things are configured properly, you’ll see something like “SVGA: chipset: boxv” in the X server output.“. Download it here. (It’s binary only, no source). 

Caldera Linux 1.3

Above screenshot is Caldera 1.3 under Virtual Box with SVGA driver from Michal Necasek. Network also work with PCnet III adapter in bridged mode. The IP address is hardcoded for 192.168.1.111. You can download OVA here.

Update: Recently I have installed Caldera 1.3 on 86box. Unlike most hypervisors, this provides excellent emulation of various video and network cards. I have picked S3 and NE2000. Everything installed and worked out of the box. While emulation is generally slower it provides accelerated video making everything working smoothly including games.

A pre-installed Caldera 1.3 for 86box is available here. Login with root/root.

Also check out WABI running on Caldera.

QNX Windows – First Look

qnx-windows2

OLWM info:

qnx-olwm1

qnx-olwm2

Also managed to get 800×600 resolution under QEMU. To do so run with -vga cirrus and run the QW video driver with qw.vga_bios video7,1

800x600-2

Unfortunately the mouse doesn’t work under QEMU. Either in PS/2 or serial mode the cursor randomly jumps around with a tendency to hang around top line of the screen.

This is running under QNX 2.2. All files are here: http://osarchive.org/os/qnx/qnx2

Virtualizing QNX 2.15

(Note this is a guest post by Antoni Sawicki aka Tenox)

Enter 1988… around that time Microsoft just released MS-DOS 4.01 and IBM shipped OS/2 1.1. Compare to the other two, this QNX was years ahead of its time. Pretty much on every aspect. Now, some 25 years later QNX2 is still found running industrial machinery, clean rooms, avionics and military hardware. Some people report systems up and running non-stop for 15 years and longer!

It took me similar amount of time to acquire usable media set. QNX is an embedded system and never really seen life on a desktop machine, so finding these floppies was rather hard and expensive adventure. Fortunately I can finally let it see some daylight. Let’s examine how the system will install on a modern hardware under VMware Workstation.

qnx2-disks

The install is rather straight forward. Floppy boot comes with a login prompt.

qnx2-vmware-floppyboot

After you log in as qnx you need to swap the floppy disk to Boot Utilities and run install. The script guides you through setup steps.

qnx2-vmware-install

First you need to select the disk controller. For compatibility mode QNX 2 provides access via int 13 (real mode).

qnx2-vmware-disk
qnx2-vmware-part

Then you partition the disk. QNX partition type is either 7, 8 or 9. You will be asked to mark it bootable later on.

qnx2-vmware-kernel

Then you have to select the kernel. QNX can operate in real mode and protected mode on AT286. 

The install script copies all the data from distribution floppy disks, asks about boot loader and active partition. Finally you get to choose some video options.

qnx2-vmware-video

The system also asks about networking options. Unfortunately it only works with custom Arcnet cards so I skipped this. Once complete you are asked to remove the boot floppy disk and reboot the machine. This is what comes up after first hard disk boot.

qnx2-vmware-firstboot

I guess what is in the system will be the a topic of another post.

QNX 2.x files are here, a ready to run VMware image is here. Virtual Box here.

Updates:
You may also be be interested in QNX Windows and Fun with QNX 4 Networking posts.

European MS-DOS 4.00 aka multitasking DOS

DOS 4.00M

DOS 4.00M


So this gem popped into my mailbox as everyone over at os2museum was whipped into a frenzy over the apparence of the predecessor to OS/2 making a showing!

So what is this, where did it come from?

To quote the excellent book, Inside OS/2 here is what this version is all about:

Microsoft started work on a multitasking version of MS-DOS in January 1983. At the time, it was internally called MS-DOS version 3.0. When a new version of the single-tasking MS-DOS was shipped under the name MS-DOS version 3.0, the multitasking version was renamed, internally, to MS-DOS version 4.0. A version of this product–a multitasking, real-mode only MS- DOS–was shipped as MS-DOS version 4.0. Because MS-DOS version 4.0 runs only in real mode, it can run on 8088 and 8086 machines as well as on 80286 machines. The limitations of the real mode environment make MS-DOS version 4.0 a specialized product. Although MS-DOS version 4.0 supports full preemptive multitasking, system memory is limited to the 640 KB available in real mode, with no swapping.

It is not feasible to support general purpose swapping without memory management hardware that is unavailable in 8086 real mode. This means that all processes have to fit into the single 640 KB memory area. Only one MS-DOS version 3.x compatible real mode application can be run; the other processes must be special MS-DOS version 4.0 processes that understand their environment and cooperate with the operating system to coexist peacefully with the single MS-DOS version 3.x real mode application.

Because of these restrictions, MS-DOS version 4.0 was not intended for general release, but as a platform for specific OEMs to support extended PC architectures. For example, a powerful telephone management system could be built into a PC by using special MS-DOS version 4.0 background processes to control the telephone equipment. The resulting machine could then be marketed as a “compatible MS-DOS 3 PC with a built-in superphone.”

Although MS-DOS version 4.0 was released as a special OEM product, the project–now called MS-DOS version 5.0–continued. The goal was to take advantage of the protected mode of the 80286 to provide full general purpose multitasking without the limitations–as seen in MS-DOS version 4.0–of a real-mode only environment. Soon, Microsoft and IBM signed a Joint Development Agreement that provided for the design and development of MS-DOS version 5.0 (now called CP/DOS). The agreement is complex, but it basically provides for joint development and then subsequent joint ownership, with both companies holding full rights to the resulting product.

As the project neared completion, the marketing staffs looked at CP/DOS, nee DOS 5, nee DOS 4, nee DOS 3, and decided that it needed…you guessed it…a name change. As a result, the remainder of this book will discuss the design and function of an operating system called OS/2.

So there you have it, OS/2 started out as a multitasking version of MS-DOS, one can even tell from some of the information on LINK4, that its architecture was also contributed to Windows, and much of how the original Windows 1.x and 2.x ‘wanted to be run from 286 protected mode, well I’d venture a guess that as OS/2 was being ‘born’ there were a lot of plans for this common architecture.  Of course I have no proof but it would seem to fit.. From Saving Windows from the OS/2 Bulldozer:

Thanks to Steve Wood’s original memory-allocation design, many of the changes involved bypassing real-mode code that served only to emulate the protected mode of the 286.

It would make sense at the time both multitasking DOS, being used for parts of early Windows, as both would be fighting the same problems regarding trying to live in the 640kb dos memory area.  While going with a protected mode in OS/2 there would be no need to maintain this, and they could start with a new memory model, Windows 3.0 went with an in house DOS Extender, and fleshed out more of its memory handling to be more 286 native.

Its a shame they didn’t go straight to 32bit stuff on the 386, bypassing the 286 but IBM was the proverbial elephant demanding 286 support.

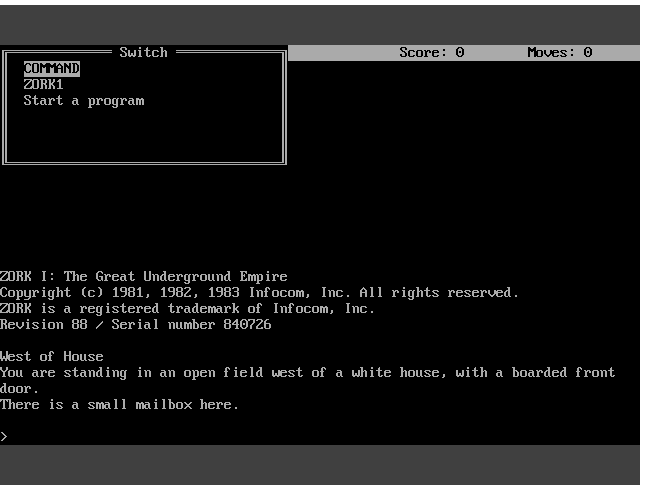
For anyone wanting to try out this ancient OS, I was able to find out that it does run on DOSBox! So that means if you have a java capable machine you can quickly boot it up! The left alt key brings up the task switcher, and you can use the arrow keys to navigate.

DOOM runs.  I’m really still amazed at this, but it does crash on exit.  I think it was more so geared to small text mode stuff, much like what Windows 1.x or 2.x is capable of on a 286.


EEVblog Vintage Teardown Tuesday, the Commodore Amiga 500!

I’m still a bit amazed the disks still work!  A nice, if not long teardown video, showing some of the mechanical problems with old Commodore kit, where connectors aren’t well connected to the PCB all too well.  I’ve only seen this pop up on G+, but I thought I’d pass it along.

There is more information on the eevblog here:

Forum Topic: http://www.eevblog.com/forum/blog/eev…

EEVblog Main Web Site:
http://www.eevblog.com
EEVblog Amazon Store:
http://astore.amazon.com/eevblogstore-20
Donations:
http://www.eevblog.com/donations/
Projects:
http://www.eevblog.com/projects/
Electronics Info Wiki:
http://www.eevblog.com/wiki/