
(This is a guest post by Antoni Sawicki aka Tenox)
Over the years I have heard a lot of fairy tale stories about the awesome networking capabilities of QNX. There is this particular one about dragging windows across virtual desktop created out of multiple networked PCs. Unfortunately I’ve never got a chance to see it with my own eyes, so I finally decided to take things in to my own hands. I want to see it!
Interestingly QNX 4.25 released in 2011 includes VMware drivers, so the choice of virtualization engine was obvious. You can download QNX4 Product Suite 2011 here
I have created a standard 32bit virtual machine in VMware and booted with QNX4CD.110614.iso. The installation is straight forward, it detects VMware network and graphics cards with no problem. The setup will actually ask you for a QNX Node ID, this will be needed later to create the network. You can simply install few VMs with different Node ID at this point. I wanted to use linked clones so I opted Node ID 1 and changed that later. I’ve enabled to run Photon at boot and went with TCPIP v5.
For simplicity I’m going to run the nodes as DHCP clients. To enable that after first boot:
- edit /etc/config/bin/tcpip.1 and add /usr/ucb/dhcp.client en1 after ifconfig, before inetd,
remove node$NODE from the ifconfig en1 line. - add /usr/ucb/hostname node$NODE.
- edit /etc/config/sysinit.1 and remove extra parameters from line with /bin/Net.ether2100 so it only has the & sign.
- reboot, check the nameserver in /etc/resolv.conf,
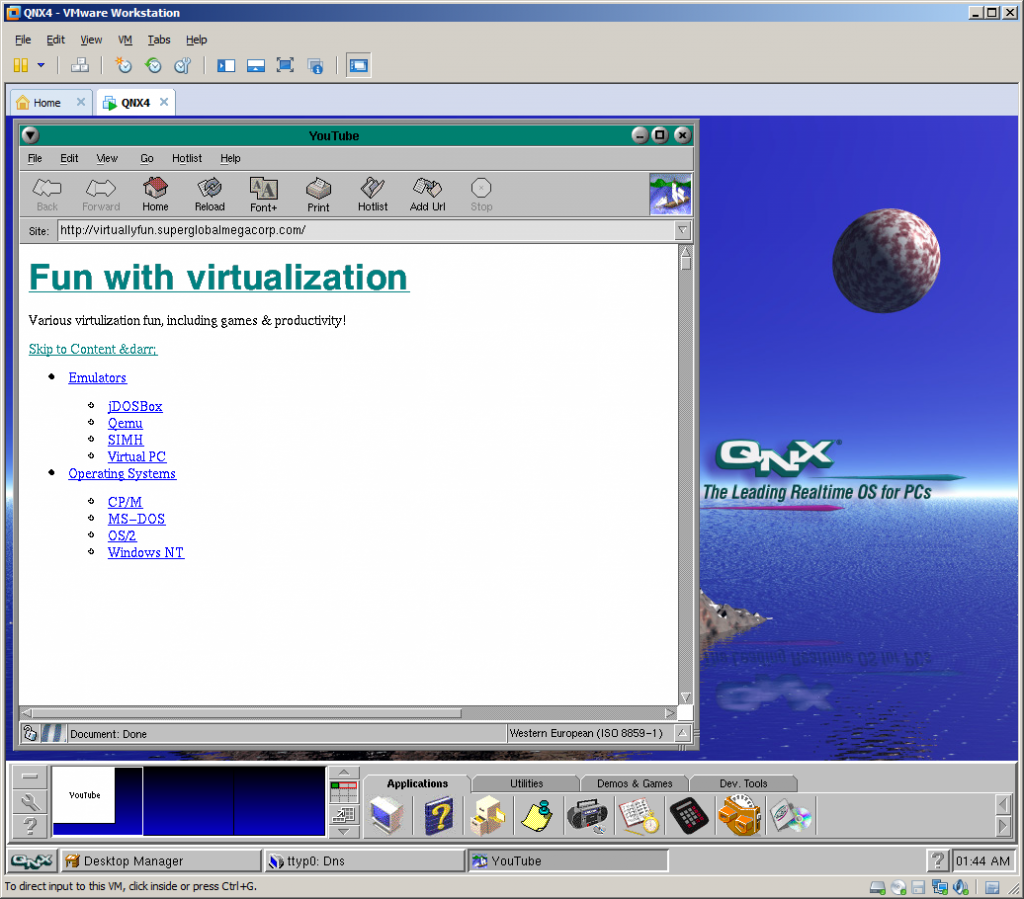
After that I was able to browse web with Voyager. The little OS is pretty fantastic, but as I’m interested in dragging windows, and the OS is covered nicely elsewhere I’m not going to go through all cool features of a single node. Let’s build a network!
I have shut down the virtual machine and created two linked clones. Powered them up. The two clones were able to ping each other over the virtual LAN. I’ve grabbed MAC addresses of both nodes and created a file /etc/config/netmap with entries for both nodes where one is marked with ID 1 and one with ID 2. The file should be identical on both nodes. You can use telnet or ftp to copy it across. Use netmap -f to reload the file.
In the next step I went to work #2 clone exclusively as I needed to change Node ID. Briefly following steps are required:
- cp /.boot /.altboot
- cd /boot
- cp build/install.1 build/install.2
- edit build/install.2 and change $ /boot/sys/Proc32 -l 1 to -l 2 – this is the Node ID.
- make b=install.2
- cp images/install.2 /.boot
- cp /etc/config/sysinit.1 /etc/config/sysinit.2
- cd /etc/config/bin
- copy each of .1 files to .2 as above
- shutdown -f
The configuration steps are documented in more details in this howto.
Also going back to the .iso install you can just specify the Node ID during setup. Much easier.
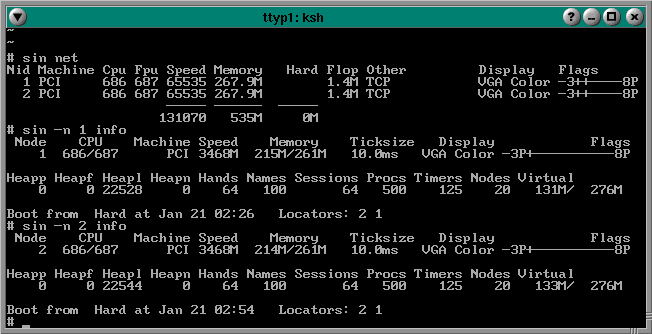
Type sin net to display list of nodes and their capabilities. If you issue sin info command you should see Node = 2. If you issue sin -n 1 info you should see Node 1 as the sin command was executed remotely on node 1.
You can list remote file systems like this: ls //<nodeid>/Â for example:Â ls //2/. You can execute remote commands using on -n <nodeid> command, for instance on -n 2 who. Impressive, but still not what I wanted to see.
Let’s have look have look at a feature called Jump Gate. Sounds like Stargate and actually works pretty similar. Jump Gates, Ditto and other features are documented pretty well here.
Note the videos are best viewed in 1080p or “original” quality, full screen.
Impressive, but still not what I wanted to see…
This document sheds a little bit of light how you can extend desktop using phditto. After some experimentation, assuming my screen resolution is 1024×768 I figured this, on node 2 run: phditto -n 1 -x 1024 -w 1024 -h 768 -k. The parameter -x is the horizontal screen extension at offset x, –k is kiosk mode aka full screen. You can enter and exit from kiosk by pressing Ctrl+Alt+K. Here are the results:
(Note that these are two separate VMs talking to each other over the network)
Now this is exactly what I wanted to see! Show me another OS that can do that… Note that not all of the nodes have to be QNX OS. You can extend display by using Phwindows for Microsoft Windows or X11 as well!
Update:Â 4 node network!
Strange… The link you posted takes me to the general download portal. And even there I can only find the “QNX 4 Product Suite June 2008 QNX 4”. Nothing about 2011.
Anyway: A great article. I like your articles a lot!
Cheers,
-joe
I think this may depend on the user account type with QNX.
Thanks 🙂
you can register a free account, and download the .iso afterwards. i suppose it’s some kind of trial, but it’s still downloading, so i’ll have to check later. anyway, i’m off to do the ‘homework’ if i can. : )
Just upload a video of 4 nodes running 😉
I always wondered if mosix enabled linux could do this? It can move processes between nodes (before multicore, this would be the way to get hundreds of people on a cluster…) and im sure each node could run an X instance… maybe?
I need to investigate Mosix then. I think it just allowed for processes to be executed remotely, I’m not sure if it has any extensions for X to drag windows across machines. I’m also thinking that this may be possible with some combination of VNC. But I would need to research further.
I did the same, but I can’t get Voyager working with internet, though wget/nslookup/ping/etc. works.
http://www.openqnx.com/phpbbforum/viewtopic.php?f=6&t=13511
I would try tracelogger and traceprinter and see if they show it failing some syscall.
I got:
Run fault 982 000B 000D //1/usr/tcprt/5.10/usr/ucb/Dns
Last run fault at 00E3:00000A6A
can you copy and paste your resolv.conf file?
nameserver 10.127.48.25
nameserver 10.127.48.20
Host: VMWare Player 5.0.1, XP SP3, bridged
and same DNS setting in the host which works as usual.
try to put a single entry for:
nameserver 8.8.8.8
and see if it helps, I sometimes have mixed results with DNS under VMware
Same result, only Voyager fails.
I thought the latest version was QNX 6? I was trying that Live CD in 2010.
How do I connect to QNX 4.25 using PuTTY on Windows?
How to configure Putty to connect via LAN?
Thank you.
This depends whether you actually want to use SSH or Telnet. If you switch Putty in to Telnet mode (see connection type in session screen) then you don’t have to do anything. It should connect to QNX 4.25 provided that TCP/IP was enabled and configured correctly on QNX.
thank foupr your information. I can’t see movie in YouTube site. where can I see your node talk clip?
I don’t know, the video is unavailable for me too…..
Where did the videos go??? 🙁
They are all gone.
I dont know..
HI,
I need to configure QNX4.25 under VMware. As of now, i have done following things
1. Installed VMware player
2. Have QNX4.25 2011 ISO file
3. Installed QNX4.25 2011 OS in VMware with tcpip, watcom compilers, few other packages but not all
Now i want to configure this for QNX networking, so that i can connect to outside computers via telnet or ftp or drive mapping with static IP.
I want to understand as what files i need to modify to bring network up.
Please suggest me how to configure and get it running.
Its URGENT
Thanks in advance
Regards,
Sandeep
Does anyone have slow mouse tracking issues running under VMWARE?
I think that may be with VMware and high DPI displays in general
Any ideas how to fix it?
I think dropping your resolution to anything under 1280×1024 or so gets it back into alignment. It’s weird some things have no issues at all, and others it totally goes bonkers. And VMWare being one of them.
^_^
Good idea, Mr. Tenox.
Anybody help me I found a computer with QNX 4.25 when power on after boot
on the terminal, I found welcome to QNX 4.25
copyright (c) QNX software systems Ltd.1982,1998
login: I don’t have any user name and pass is there any possibility to run this computer I am not very good at computer please help me
First of all try just entering / (slash) and enter and see if you login as root. If not maybe “root” as username. If that doesnt work you may need to boot from 4.25 cdrom or floppy and change the password.