This is a guest post by Friggigatto
In the previous post we saw how to install SCO Unix 4.2 and SCO ODT on a virtual machine. Sadly, both distributions lack the development system, making them a very limited toy.
At some point I noticed that the filesize of the ISO of SCO ODT 3.0 branded by Compaq (found again on the Internet Archive or WinWorld) is way larger than the other available distributions: could it be that it includes the Development System as well? I decided to find out.
Inside the ISO we can find a N1.IMG file, and we can start the installation by booting from that.
At the serial request I discovered that this version is not the same as regular ODT, and thus the serials I had did not work. I tried extracting a to-be-serialized file from inside the CD.IMG file found on the ISO by opening it with a hex editor (the file is not in ISO9660 format; it’s specific to SCO and somewhat emulates a tape drive, with multiple tar files in it. Opening it with a hex editor, it’s easy to see where one of these tar files starts and ends), extracting it with tar, and running it through brandy to generate a new serial.
Brandy, however, generated the same serials/activation I had already, indicating that the validation mechanism used by the installer in this release is different. I was afraid it would be a Compaq-specific addition, thus almost unrecoverable, but after searching Usenet I found this post (mirror) which suggests that different versions of ODT have different generation mechanisms; in any case, the keys provided in the “OSE” (Open Server Enterprise) column work.
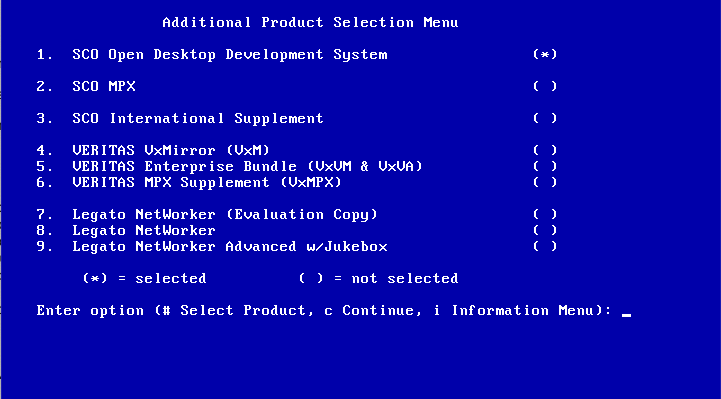
Anyway, after inserting the serial the installation proceeds smoothly, and we can even select to install the Development System:

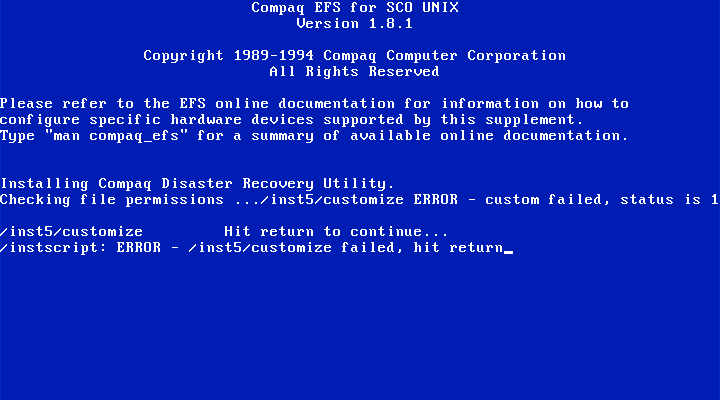
The DevSys also requires a serial, and for that I used one found on the archive of Tenox. The installation started with the incredibly slow process of badtracking the hard disk (and I had selected the “quick” check!) and proceeded smoothly, until it tried to install the “Compaq EFS for SCO Unix”:
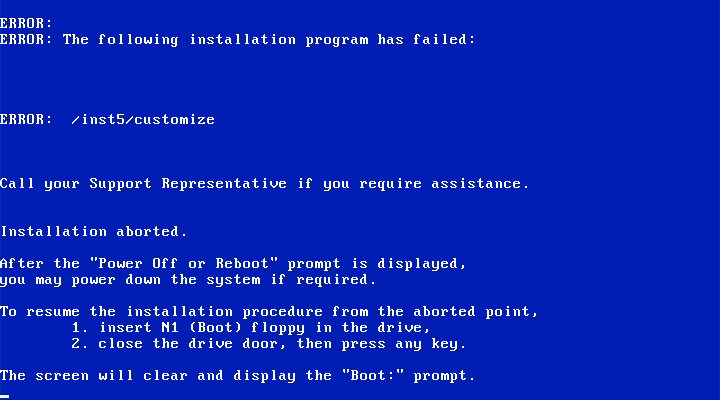
The error interrupts the installation scripts and leaves the system in a half-baked state: we can reboot from the HD and load the kernel, but instead of getting to a terminal or login prompt we are dropped in a broken installation script that won’t proceed.
To fix the issue, I opened up again the ISO with a hex editor and looked at the install script (/inst5/customize). The fix is easy: search for the string “cleanup $FAIL” inside the CD (line 238 of the customize script), and replace the initial “c” with a “#” to comment out the line entirely (a neater solution would be to change the script so that it won’t install the Compaq EFS in the first place; I tried to do that as well, but it didn’t work).
Since we are at it, we can also modify the params.stz file in the ISO and disable badtracking completely (search for badtrk_none) and speed up the next installation considerably.
Restarting the installation once again with the same settings will still give the error, but this time it won’t kill the installation script and it should now complete successfully (with some warning messages since it’s not an EISA machine).
After the reboot, we should be finally welcomed into “SCO Open Server (From Compaq) Enterprise System Release 3.0”.
We can now remove the whole Compaq EFS using custom, or just the UPS drivers /etc/rc.0d/*ups and /etc/rc2.d/*ups, in addition to /usr/bin/compaq. We can also apply the patch to the disk driver to run on faster machines, as mentioned in the previous post. Finally, we can install SCO supplements from SCO’s FTP, and in particular:
- uod426d – Y2k fix;
- uod374a – better CD support (you can run programs from ISO-9660 CDs, for example from early SCO Skunkware releases; you can also mount CDs forcing each name to lowercase, instead of the annoying default where everything is in uppercase);
- net382e – better TCP/IP support.
Now we have a working SCO Unix 4.2 system with the development system! The good thing about SCO Unix is that the C compiler is more modern than the one provided by SCO Xenix, but can still target Xenix (with the -l2.3 directive). This means we can compile slightly more recent software for both systems, for example bash 1.13.5 and bzip2 0.1pl2.


I tried installing it and ran into the same problem. Tried editing the ISO using two different Hex editors but neither of them displays a row number. Found the string /inst5/customize but there were more than 3 or 4 other instances of “clean $FAIL”. Replaced the “c” with “#” on the the first instance that I encountered but it still didn’t fix the problem. The number of rows also varies with of the number bytes/row that you want to display i.e. 16, 32 etc. Any suggestions that might help or a particular hex editor that shows row numbers. TIA.
tar blocks are 512 bytes (200 hex). Look for the tar record for the pathname (in other words ./inst5/customize starting at a tar block aligned boundary) and then look at the file contents starting in the block immediately after that. Note that the “clean $FAIL” at line ~238 is the second “clean $FAIL” in the file.
The second one in inst5/customize I mean, not the second one in the whole disk
I’ll try your tip. Thanks.
“The DevSys also requires a serial, and for that I used one found on the archive of Tenox.”
I am sorry, but could you elaborate? What is this “archive of Tenox”?
I hope that I’m not being annoying 🙂 I also believe that other users may find the answer of this question useful.
I believe it was this one: http://tenox.pdp-11.ru/os/sco/lice/OpenServer_Development_System.pdf