Windows 95
It’s hard to believe that it has been 20 years since the release of Windows 95. But here we are.
Windows 95 started its life as a 32bit upgrade from Windows 3.1 code named ‘Chicago’ to compete with the 32bit version of OS/2 for the desktop. Chicago is more famous for it’s incredible delays as the project suffered from feature creep, along with a complete UI redesign. It’s also worth noting that even back as far as October of 1992, just after the release of Windows 3.1 Microsoft was already hard at work on Win32s, the Win32 subset and compatibility layer for Windows 3.1 to run Windows NT Win32 applications.
Windows 1.x didn’t make much splash on the market. Windows 2.x added much needed features like overlapping windows, and of course the 386 version included a 386 v86 mode hypervisor.
In my opinion, Windows 3.0 was the most significant piece of software that Microsoft has ever shipped. This was the point where they broke away from IBM and went their own way. And it showed that they were capable of launching a major environment without the support of their biggest partner. Although sadly, OS/2 paid the price.
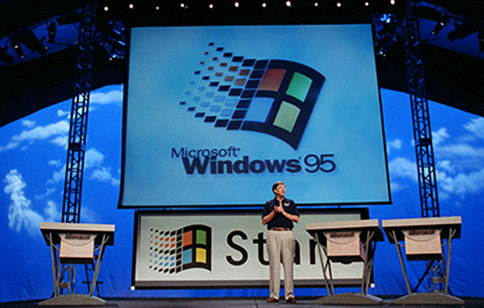
95 launch
Windows 95 would be a close second as to what would be Microsoft’s most significant software, as it brought 32bit computing to the masses, along with a completely different user interface, one that remains popular to this day with the start button. Even the marketing used to Rolling Stones song ‘Start me up’. Windows 95 is also the first time (and last) that I can ever recall there being a Microsoft release party where actual users showed up, but were enthused. Back when OS X shipped on physical media, you would see Apple fans camping out for the latest release, but for Microsoft this was the one time where the next release was going to be so significant with a whole new generation of applications like Office 95, and a much more easier to use interface people really were excited about it. As much as Windows 10 is a great improvement on Windows 8, I don’t see anywhere near this kind of enthusiasm compared to Windows 95.
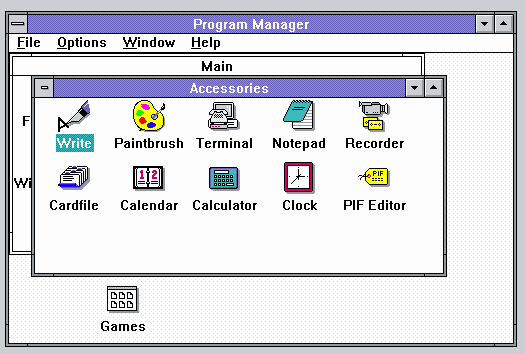
Program Manager
Before Windows 95 people had to fight the Program Manager, which was a MDI application which means it has windows inside of windows. And it’s easy to obscure and lose place of programs. I’ve seen users re-install applications because ‘they lost them’ not realizing the program group was hiding behind another window. To many average users Program Manager was a nightmare to work with on a daily basis.
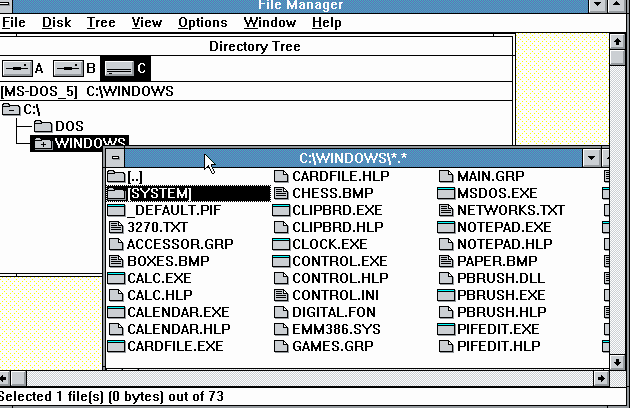
File Manager
And to say that its complimentary program, File manager was also a MDI nightmare to work with was an understatement. Again windows get hidden behind windows, it is all inside of another window so it can be confusing moving things around, and trying to get a good view. To an average user, it’s tedious to work with and to get two full screen views of files, requires two copies of the application to run, which in the days of 4MB of ram or less was a luxury when you figure they were running an application as well. Not to mention since there is no task bar, it was also common for people to launch multiple copies of an application since it would be hiding behind a window they didn’t know about.
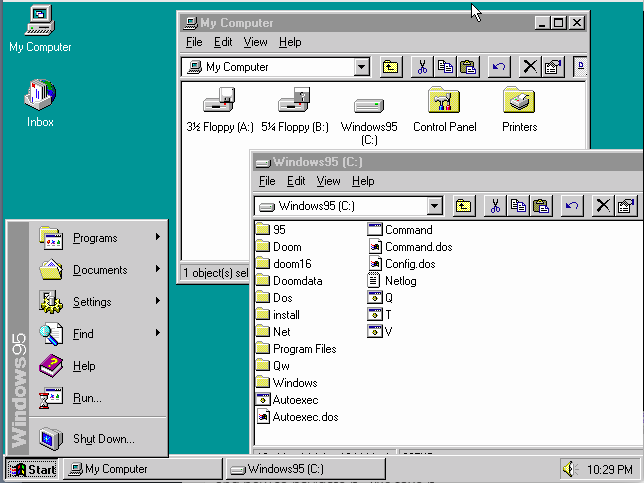
Windows 95 Desktop
The Windows 95 UI solved all of these problems by showing us what is running, and by unifying Program Manager, and File Manager into one. Now we can see what is running, we have a desktop to move things around, and we can open up multiple file windows and move them around at will. Even in this simple screen shot with multiple applications running, it’s trivial to see what is going on, and how to navigate it. We take it for granted today, but compared to the old Program Manager, File Manager paradigm this was simply an upgrade to get enthusiastic about!
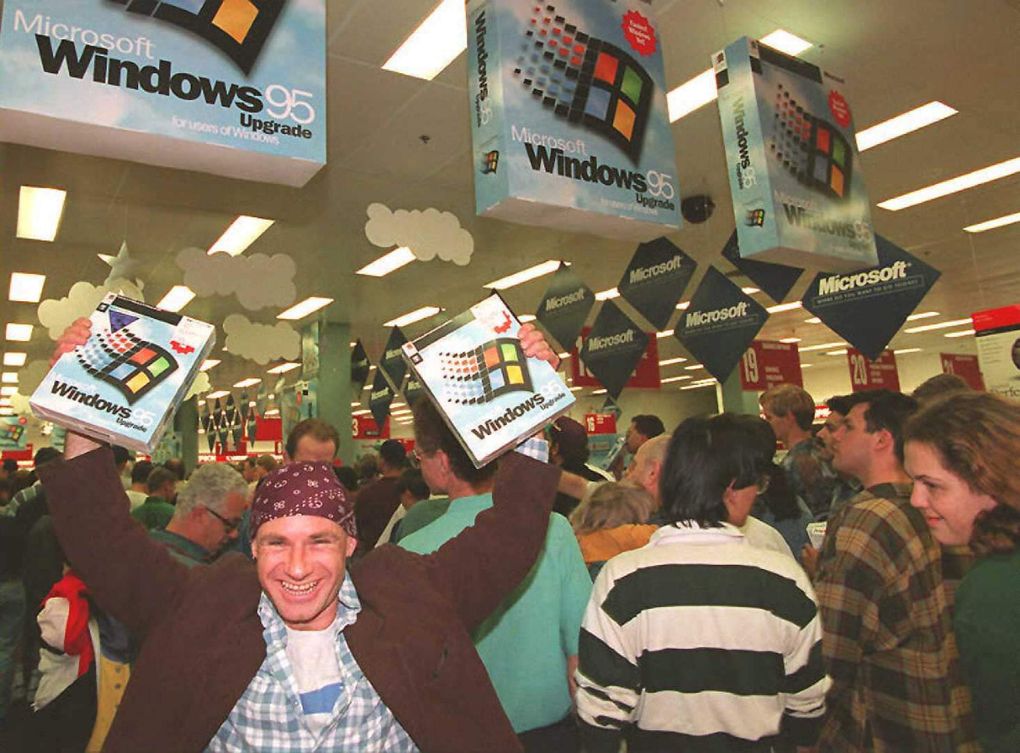
Mikol Furneaux proudly shows off his Windows 95
And just look at this picture, isn’t this the look of excitement? Over a piece of software? From Microsoft? The transition from 16bit to 32bit was so great, I really wonder if they ever again will have this kind of appeal. Going from 32bit to 64bit has been so seamless I suspect many 64bit users don’t even know they are.
32bit applications promised (and delivered) on greater stability, and of course being able to actually use RAM that people had bought. It was the end of segmented 64kb segments, and the use of 32bit flat memory models, that even in the game industry everyone had been flocking to 32bit MS-DOS extenders. Now 32bit was going mainstream on the desktop. Even though Borland had captured so much of the developer mindshare on MS-DOS, they just couldn’t achieve the same success level on Windows, and especially with Windows 95, it started the rise of Visual C++ and Visual Basic everywhere.
Networking was another strong point of Windows 95, as it included not only LAN support for TCP/IP, IPX and NetBEUI out of the box, but it also included dialup PPP support for all three protocols. This is basically where other consumer OS really blew it, and why Microsoft not only ended up owning the desktop, but also the server space in corporations. It was a common practise to sell the networking stack, and applications separately making a networked machine quite expensive. SCO Xenix charged for the OS, Streams, and TCP/IP. IBM charged separately for their TCP/IP as well. By 1994 IBM started to see this as a mistake and included DIALUP ONLY networking for Warp. This stop gap measure was barely acceptable for 1994, but as the PC world got more and more connected this meant LAN connections along with wide area which IBM dropped the ball by charging yet even more for Warp Connect. Where Windows for workgroups, Windows 95, and Windows NT included all of this, and multi-protocol support.
Microsoft also was busy creating their own online service, MSN, a competitor to AOL, CompuServe, Prodigy et al. There is a better writeup on winsupersite than I could do, since I never did use it. But the upshoot is that Microsoft was late to the internet party, and did not include any browser with the first retail version of Windows 95. Later versions of course did include Internet Explorer.
The most significant early version of Internet Explorer has to be version 3, which is when Microsoft finally started to take it seriously, and included things like SMTP/POP3 and USENET clients. Back then, USENET was actually big. This is before the rise of every website being a forum, instead we had a global distributed database that everyone could post onto. It wasn’t instant though, so it could take days for a reply. The kind of thing we take for granted now with many AJAX enabled websites able to alert you right away, or you can check the status with a simple refresh.
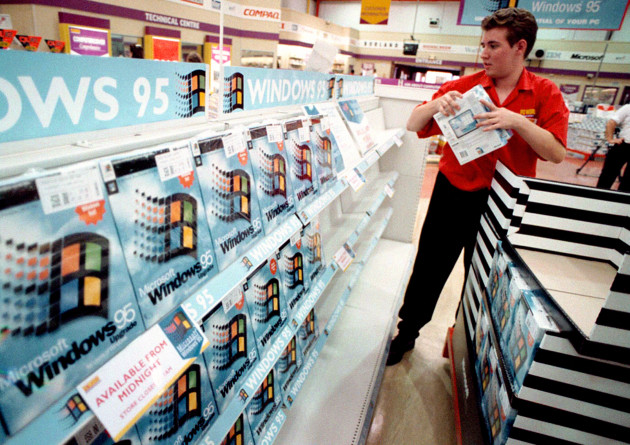
A worker packs the shelves of PC World, Croydon, with copies of the Microsoft Windows 95 upgrade computer package. The package will go on sale at midnight across the country.
I may have to touch on the rise and fall of Internet explorer at a later date, but check out the exciting back of the Windows 95 box that included Internet Explorer:
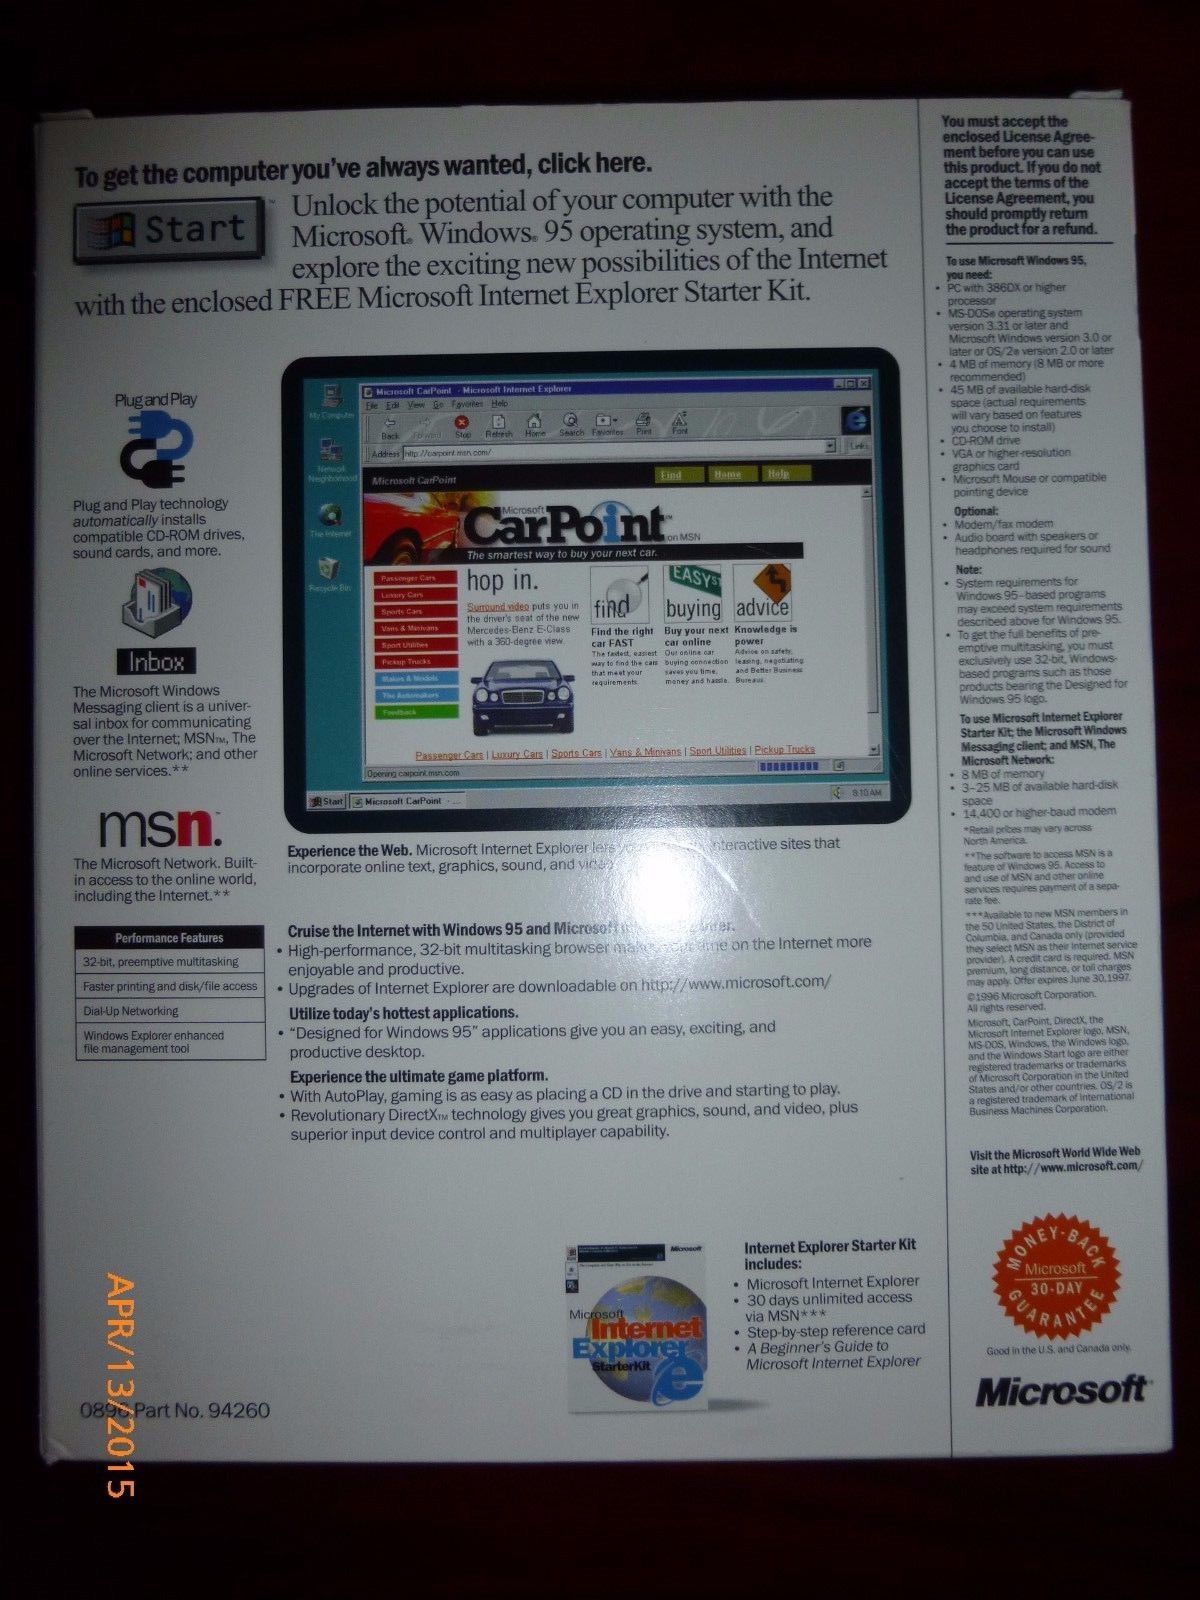
Windows 95 box SE, back
For those who want to remember, the Windows 95 start sound!
And speaking of which next year will be 20 years of Windows NT 4.0, and how it utterly changed the server market forever.