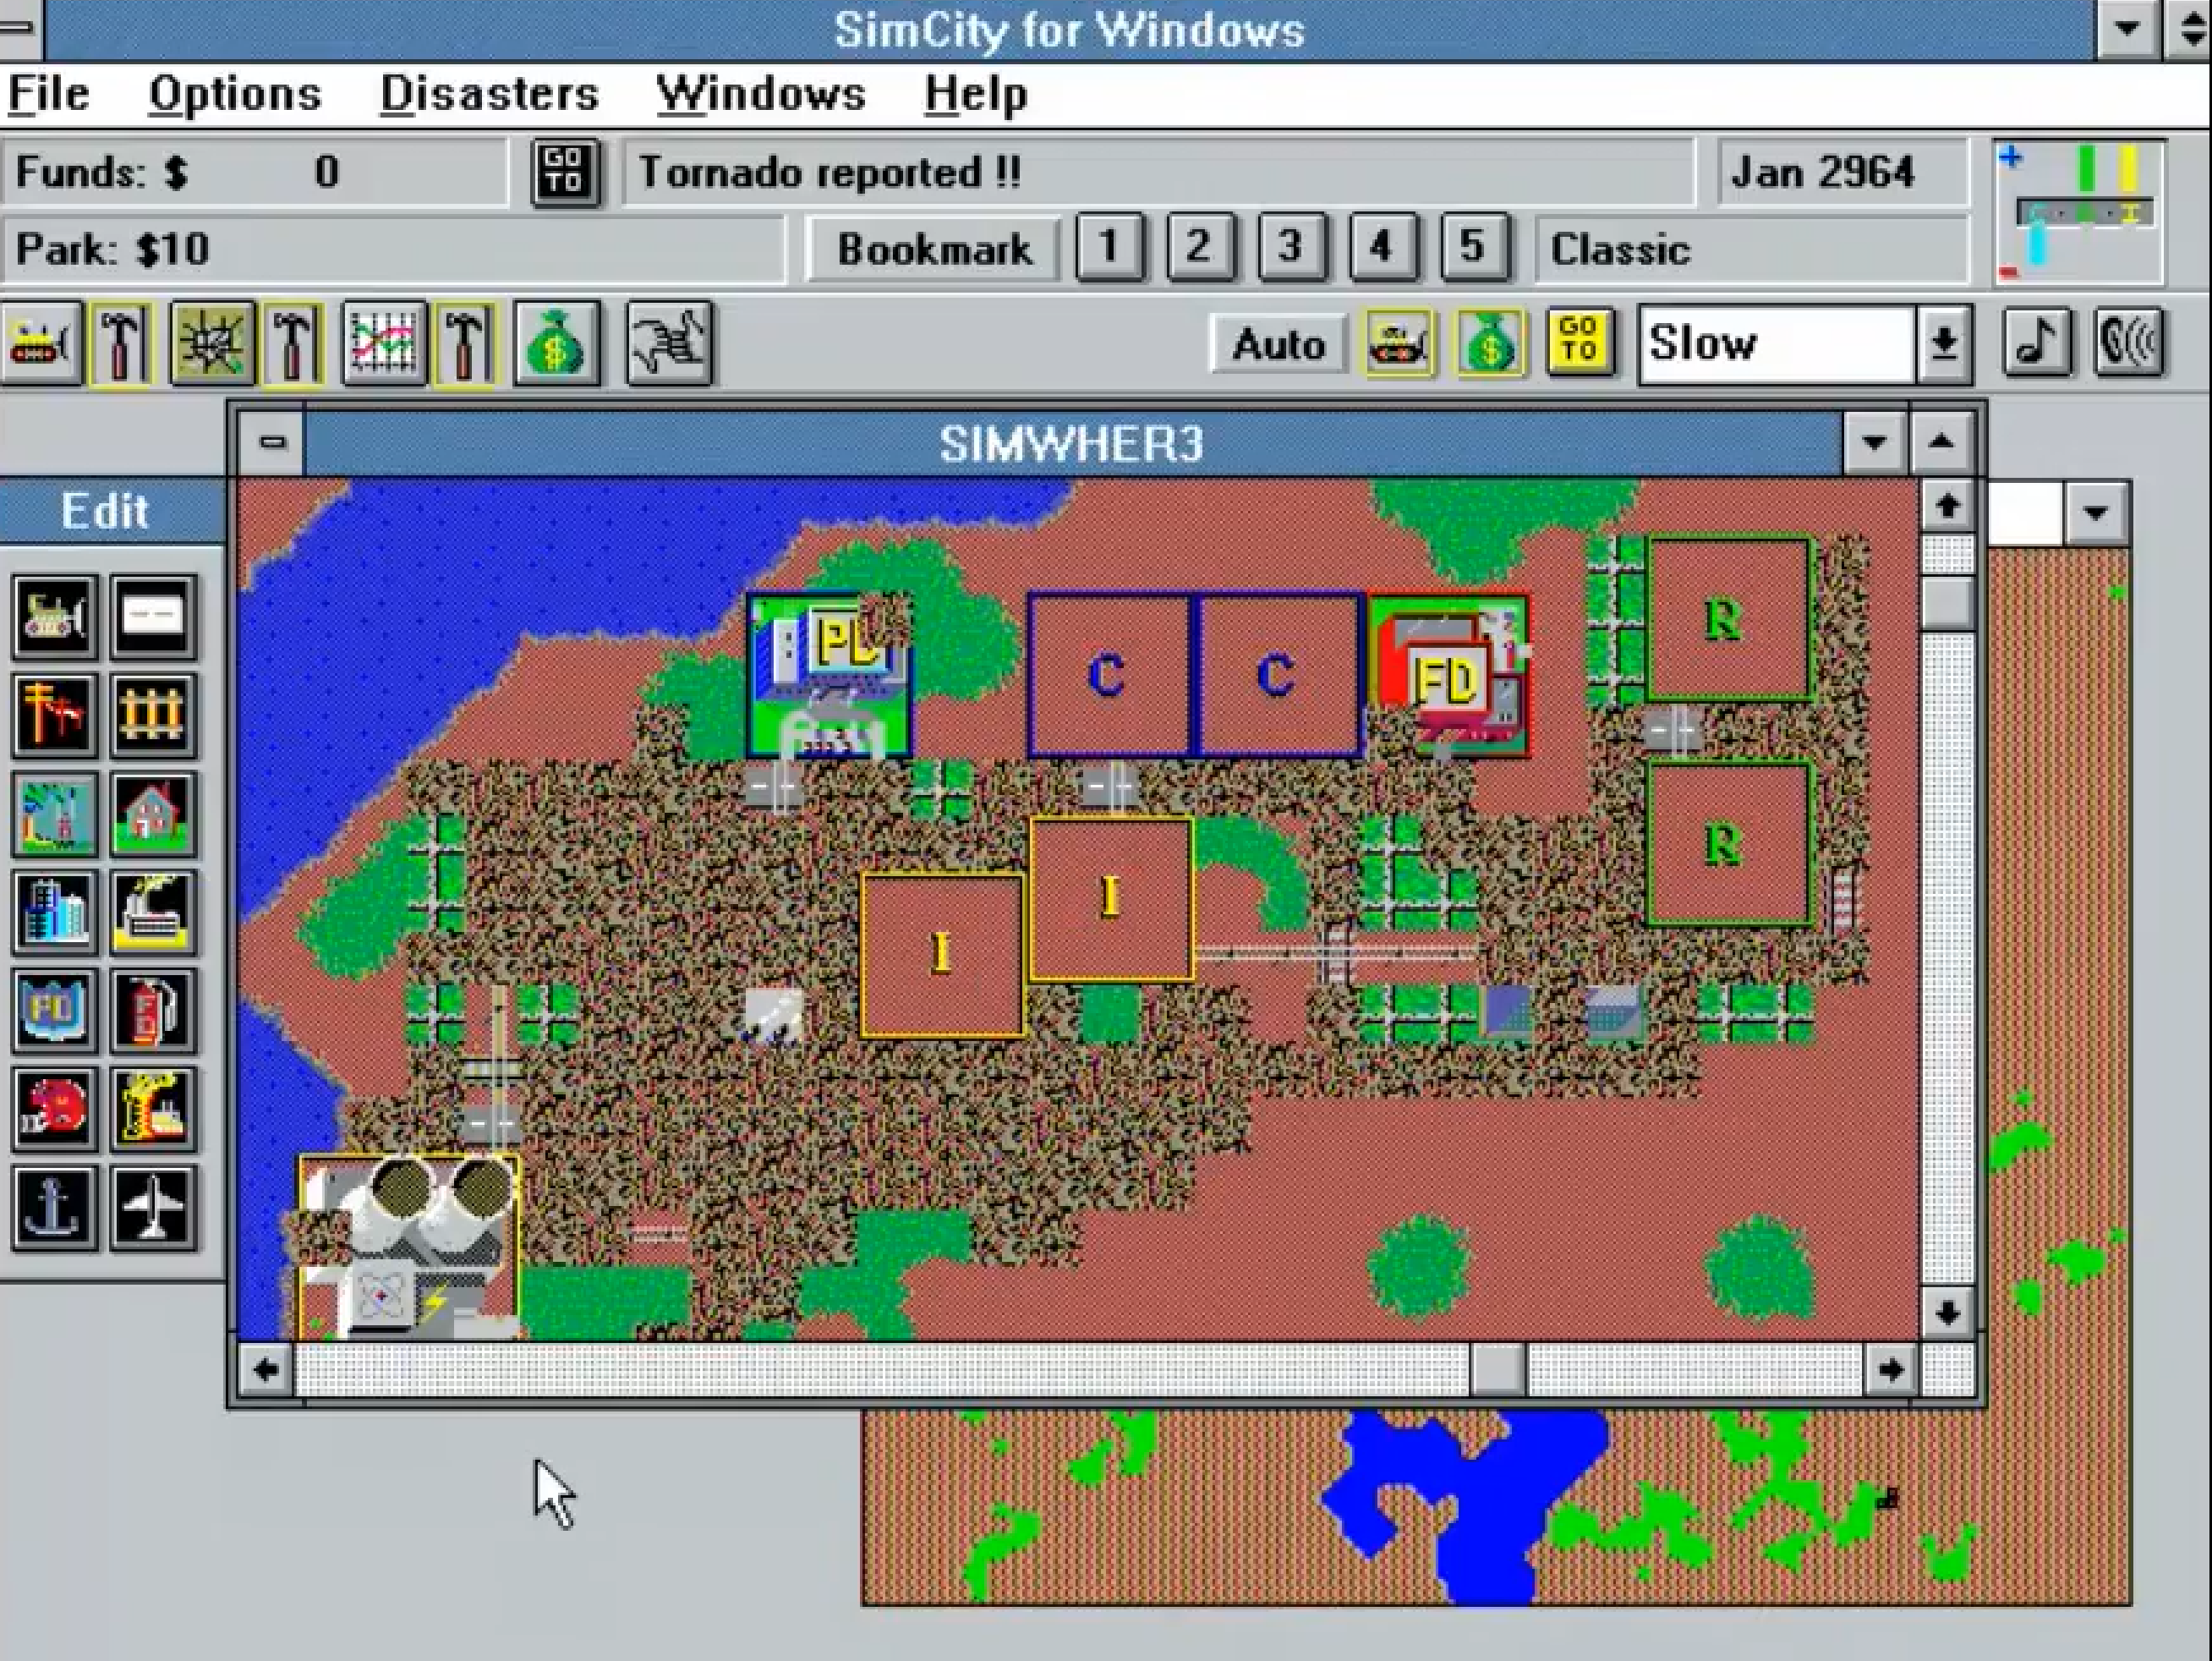
I know it’s about as interesting as watching security footage, but I was testing if I could actually ‘broadcast’ an application. In this case, SimCity for Windows 3.0 on Citrix 2.0 in PCem. I’ll have to mess with Virtual Audio Cables, to rig something to get audio working.
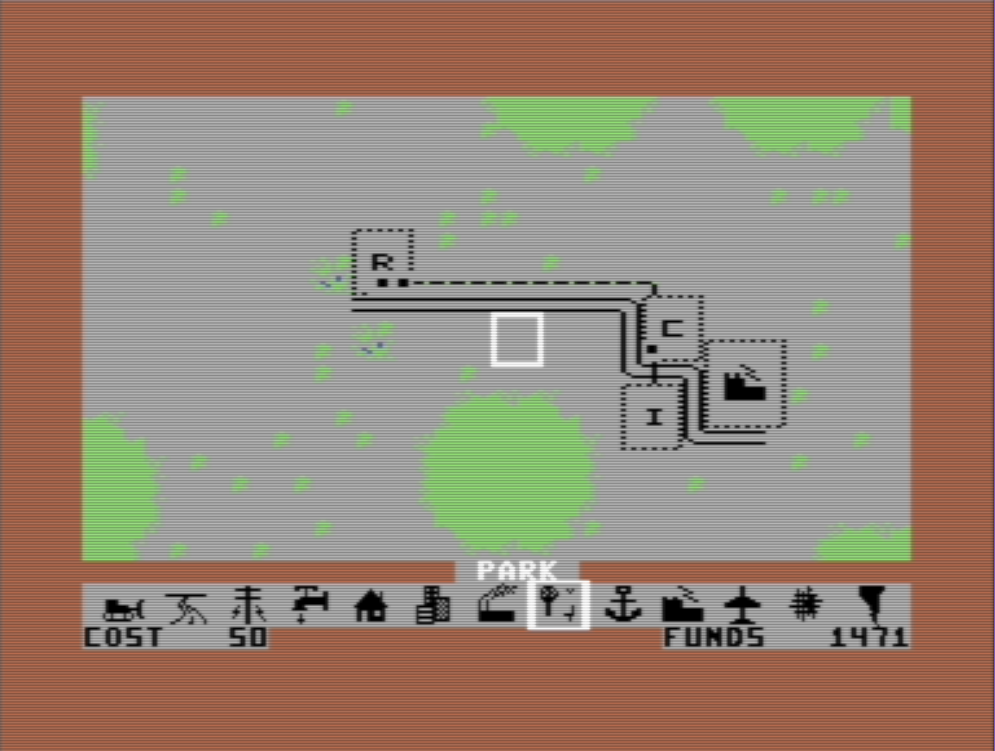
In this case, I’m looking at the ultra-popular Sim series, and their Windows releases. While I was a big fan of SimCity, especially having played it on an Amiga, when I found out that there was a Commodore 64 version, I had bought it immediately as I wanted to play it at home. And let me tell you, it was a severely underwhelming experience.
SimCIty C64
From the logo it’s all down hill. I know that SimCity is actually from 1985, and as the first version, the Commodore 64 version is basically the prototype.
SimCity C64
Which was just graphically underwhelming, but I still played the hell out of it. And then I saw the Spectrum 48k version. Yes, the blocks are ‘buildings’ as the units fill up, they will turn into black with only the letter remaining. Despite the ultra-minimal graphics, the game play is there. And once you get used to the bizarre combination keyboard+joystick controls it is addictive. I mean it is SimCity!
SimCity Spectrum 48k
But going to the PC, I kind of grew out of SimCity. DooM was the hot game, and the whole immersive 3d thing. And of course during that era being on the PC I only knew of the MS-DOS version. While there was a version for OS/2 Warp released much much later, and by then if I felt the urge there was SimCity 2000 for Windows.
But after getting the kick for SimEarth, and finding the Windows 3.0 version, I was much surprised to find out that there was a version of SimCity of Windows 3.0 as well!
And I can see why I never had seen this for retail, or knew anyone who had it.
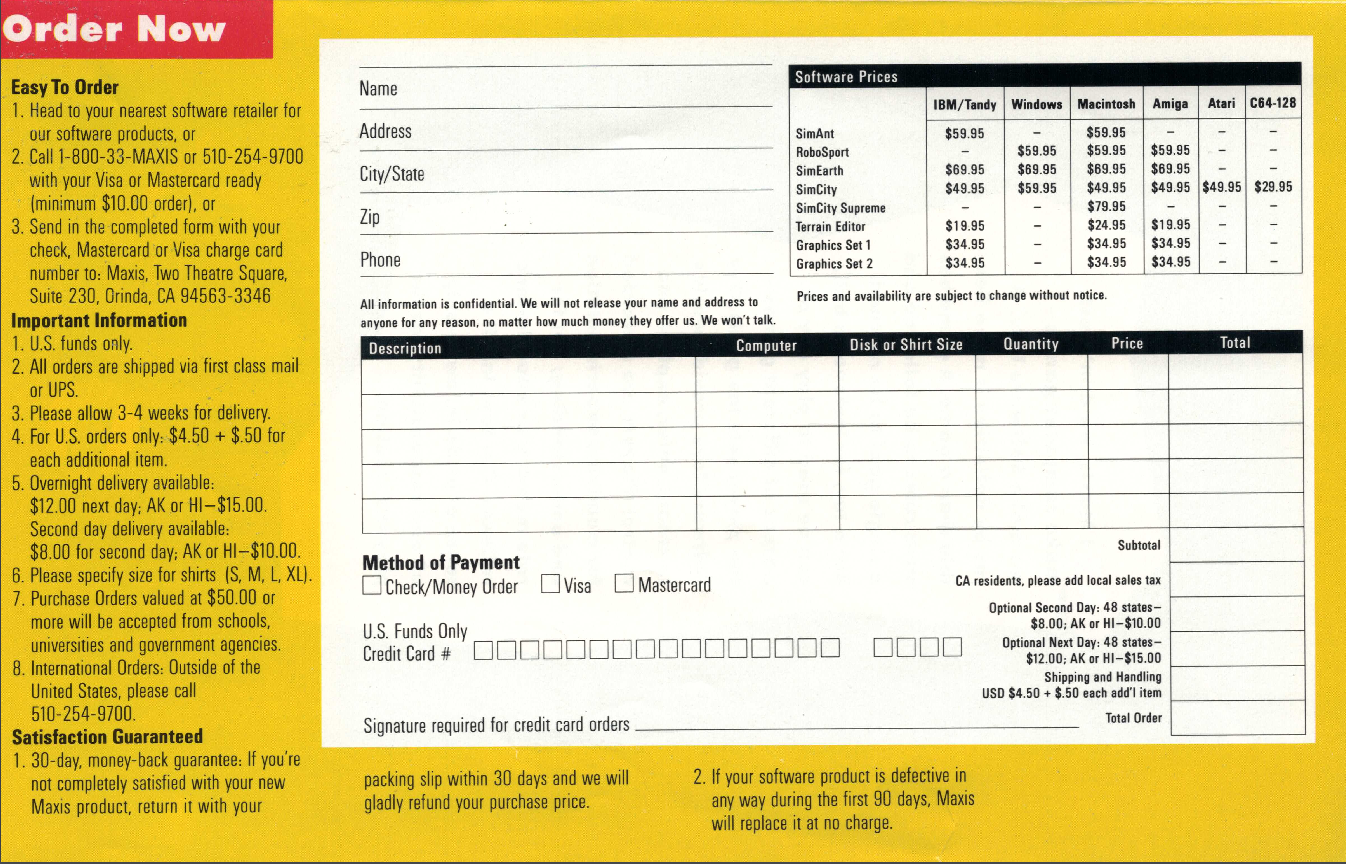
Maxis Order Form
That’s right in the included form, the price was $59.95. And SimEarth was $69.95! To put that in perspective that would be now $107.17, and $125.04 respectively. And people think $60 for a game today is expensive!
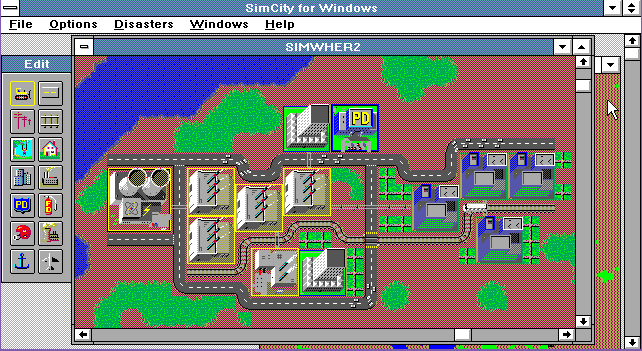
To get the full experience I went ahead and loaded up PCem, with a 386 and EGA graphics to get that original feel.
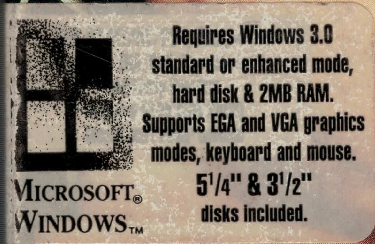
Since this requires Windows 3.0, with either EGA or VGA graphics, and 2MB of RAM, I figured I would go with a ‘top of the line’ souped up 386DX. I tried to load it up with the Wyse700 driver, and the game fails to load resources. I don’t know if its even possible to make black and white or four colour resources, as I live in the future, and I have millions of colours!
That said, I tested and it has no issues with 8bit depths either.
Installation is pretty smooth, the game is shipped on either two 360k 5 1/4″ diskettes, or a single 720kb diskette. While modern games have so much more, there is many things this game is lacking. But Maxine isn’t one of them.
Maxine the cow
No really, she is listed as a feature.
The music is through the PC speaker. Just like the sound effects. Multimedia integration with Windows that we take for granted today just wasn’t a thing back then. The version I have is 1.0, Although a pirated version 1.1 that was sent in actually includes WAV sound effects, and a single midi track. However it doesn’t run on Windows 3.0. So lucky me!
Unrecoverable Application Error
Ah the UAE, the bane of Windows 3.0. They were so unpopular that Microsoft had to rename the dialog.
SimCity on EGA
Living in the constraints of EGA feel absolutely claustrophobic in today’s world. 640×350 just isn’t enough screen rel estate. Even 640×480 is far far too small. And that lead to one issue I found
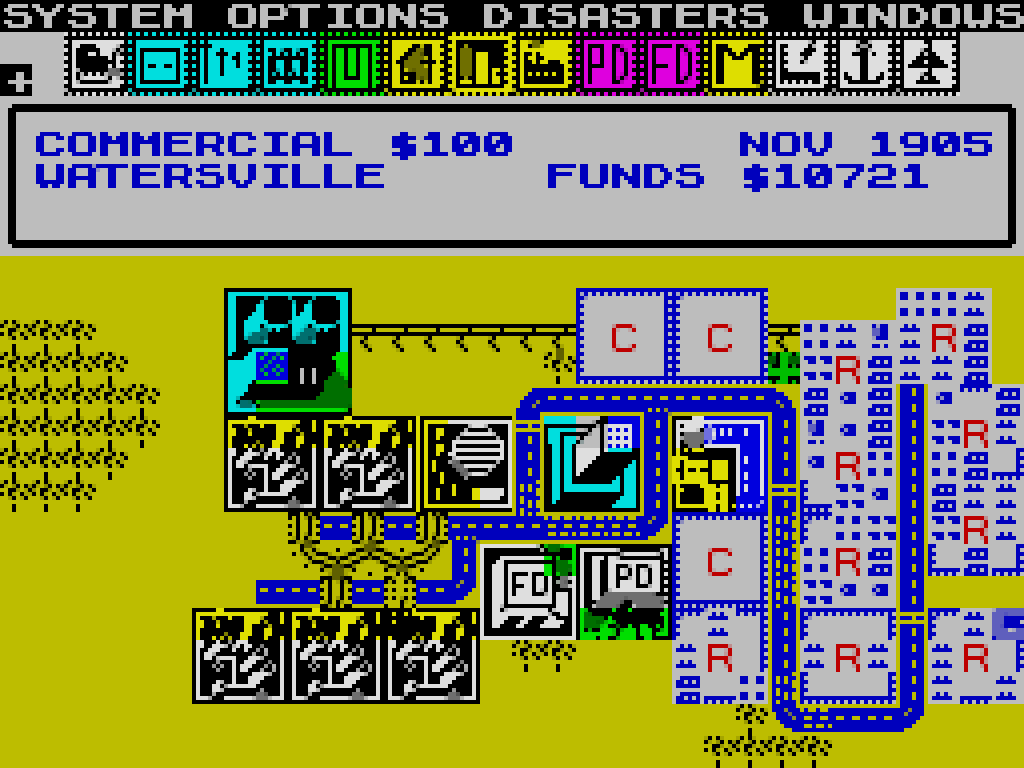
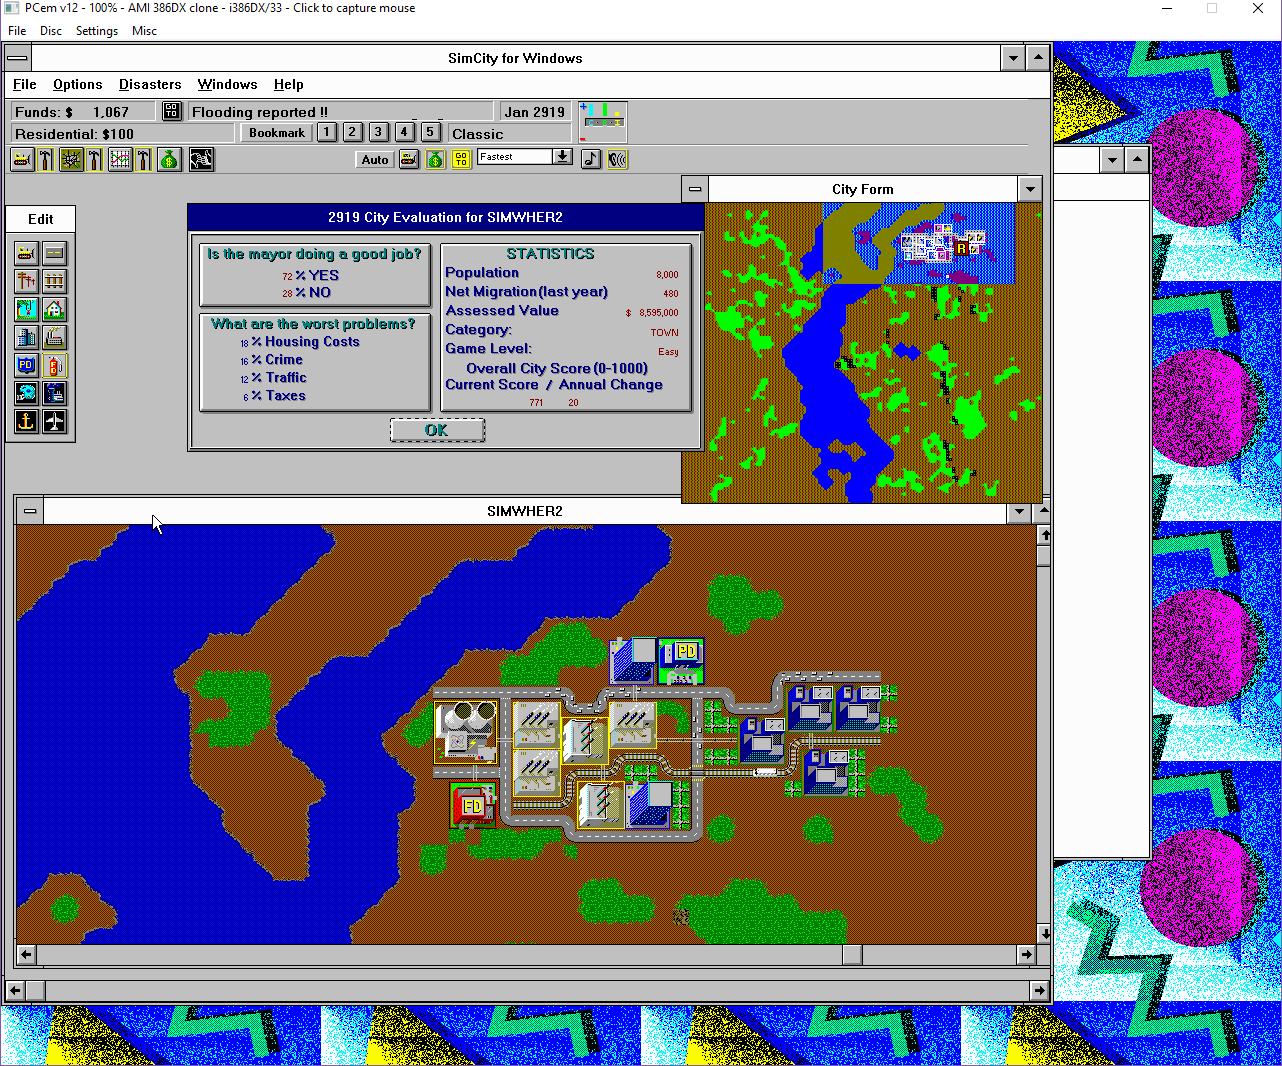
SimCity SVGA
While using a SVGA driver so I can get that impossible to afford experience of 1280×1024 in 256 colours, but the application was never meant to run in something that wide. You can easily put child windows ‘behind’ the dead space, and you can never recover them. You have to save and re-launch. bummer.
If any application failed to run on Windows 95, I took it as a personal failure. I spent many sleepless nights fixing bugs in third-party programs just so they could keep running on Windows 95. (Games were the worst. Often the game vendor didn’t even care that their program didn’t run on Windows 95!)
Yes, they basically knew it had problems. In the box they even had this cute flyer:
I sure hope Raymond got something for his efforts!
And yes, rest assured it actually does work. It even works on Windows 3.00a under Citrix MULTIUSER 2.0 Pointless as there is no way to have remote graphical displays but nice to see it work.
So what went wrong? Where was all the follow up games for Windows? Obviously, the hardware needed was incredibly expensive. A 386 or even a 286 with a few megabytes of RAM was expensive. VGA or EGA monitors were also very expensive. Even mice were expensive! Putting together a low end PC basically barred you from this high end premier experience. I can’t imagine that Maxis sold many copies of this. As mentioned above I’m pretty sure there is a reason why I never saw this in the wild.
Awesome Windows 386/486 machine prices February 1992
Spending $3000 in early 1992, which is $5197.95 in today’s money. I can’t even begin to imagine spending over $5,000 to play a game. It’s no wonder when older machines show up on eBay people want far too much for them.
In a strange way I like to watch SimCity animate in the background. It’s like a fish tank or staring out into a busy street. With the advantage that I can summon a giant lizard to destroy it at my whim.
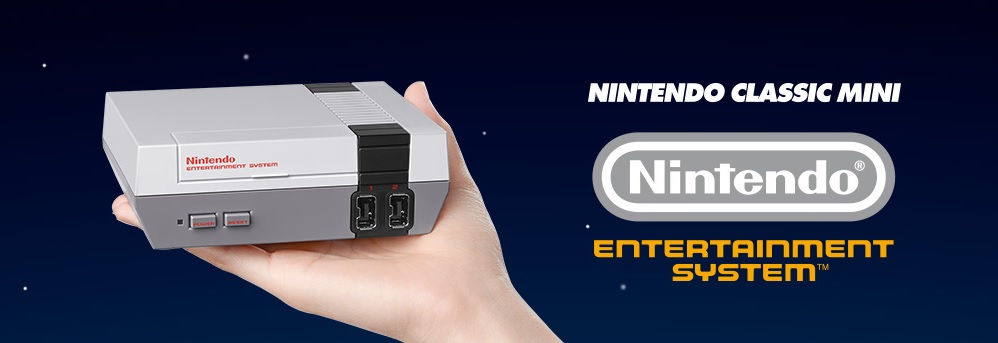
Just saw mention of this, the Nintendo Classic Mini
It includes a USB controller, HDMI, and you have to bring your own USB +5v power supply. It’ll come with 30 pack in games, but no mention of any additional games.
The only thing that stuck out to me is that Mike Tyson’s Punch-Out!!,  is reverted back to the original Japanese Mr Dream.  Kind of lame, but I guess that is licensing for you.
There is more information at the Nintendo page, with a shipping date of November 11th, 2016 for the UK.
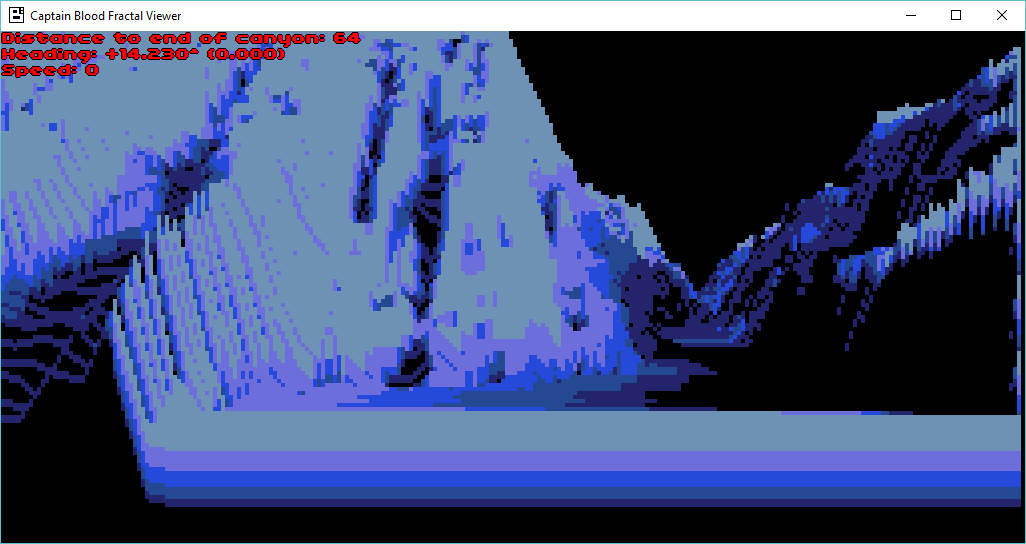
The procedural terrain generator uses 1D fractional brownian motion (fBm) with random mid-point displacement. Up to 10 curves are displayed on screen.
When a new curve appears at the horizon, 7 vertices are computed. Then mid-point displacement with fBm are applied to thes 7 initial points. This results in a discrete curve of 512 samples.
The random number generator and the fBm Hurst parameter H are adapted according to the current terrain type (flat, canyon…). This gives very different visual landscapes (plains, moutains, desert…).
No more fractal computation is done on the discrete curve. When a curve is drawn, only 256 of the 512 samples are used (according to the position of the Oorxx).
The view is 256 pixels wide, so if the visible part of the curve is larger than the 256 samples, the curve will be drawn zoomed with pixels linearly interpolated between the samples. Otherwise the curve will be drawn shrinked without any interpolation and using only some of the 256 samples.
The raytraced fractal landscape is computed from these 10 curves.
It’s pretty amazing to think that there was that much behind the game.
I played this back in 1988 on the lowly Commodore 64, but the Amiga version was simply amazing. Â Such was technology back then.
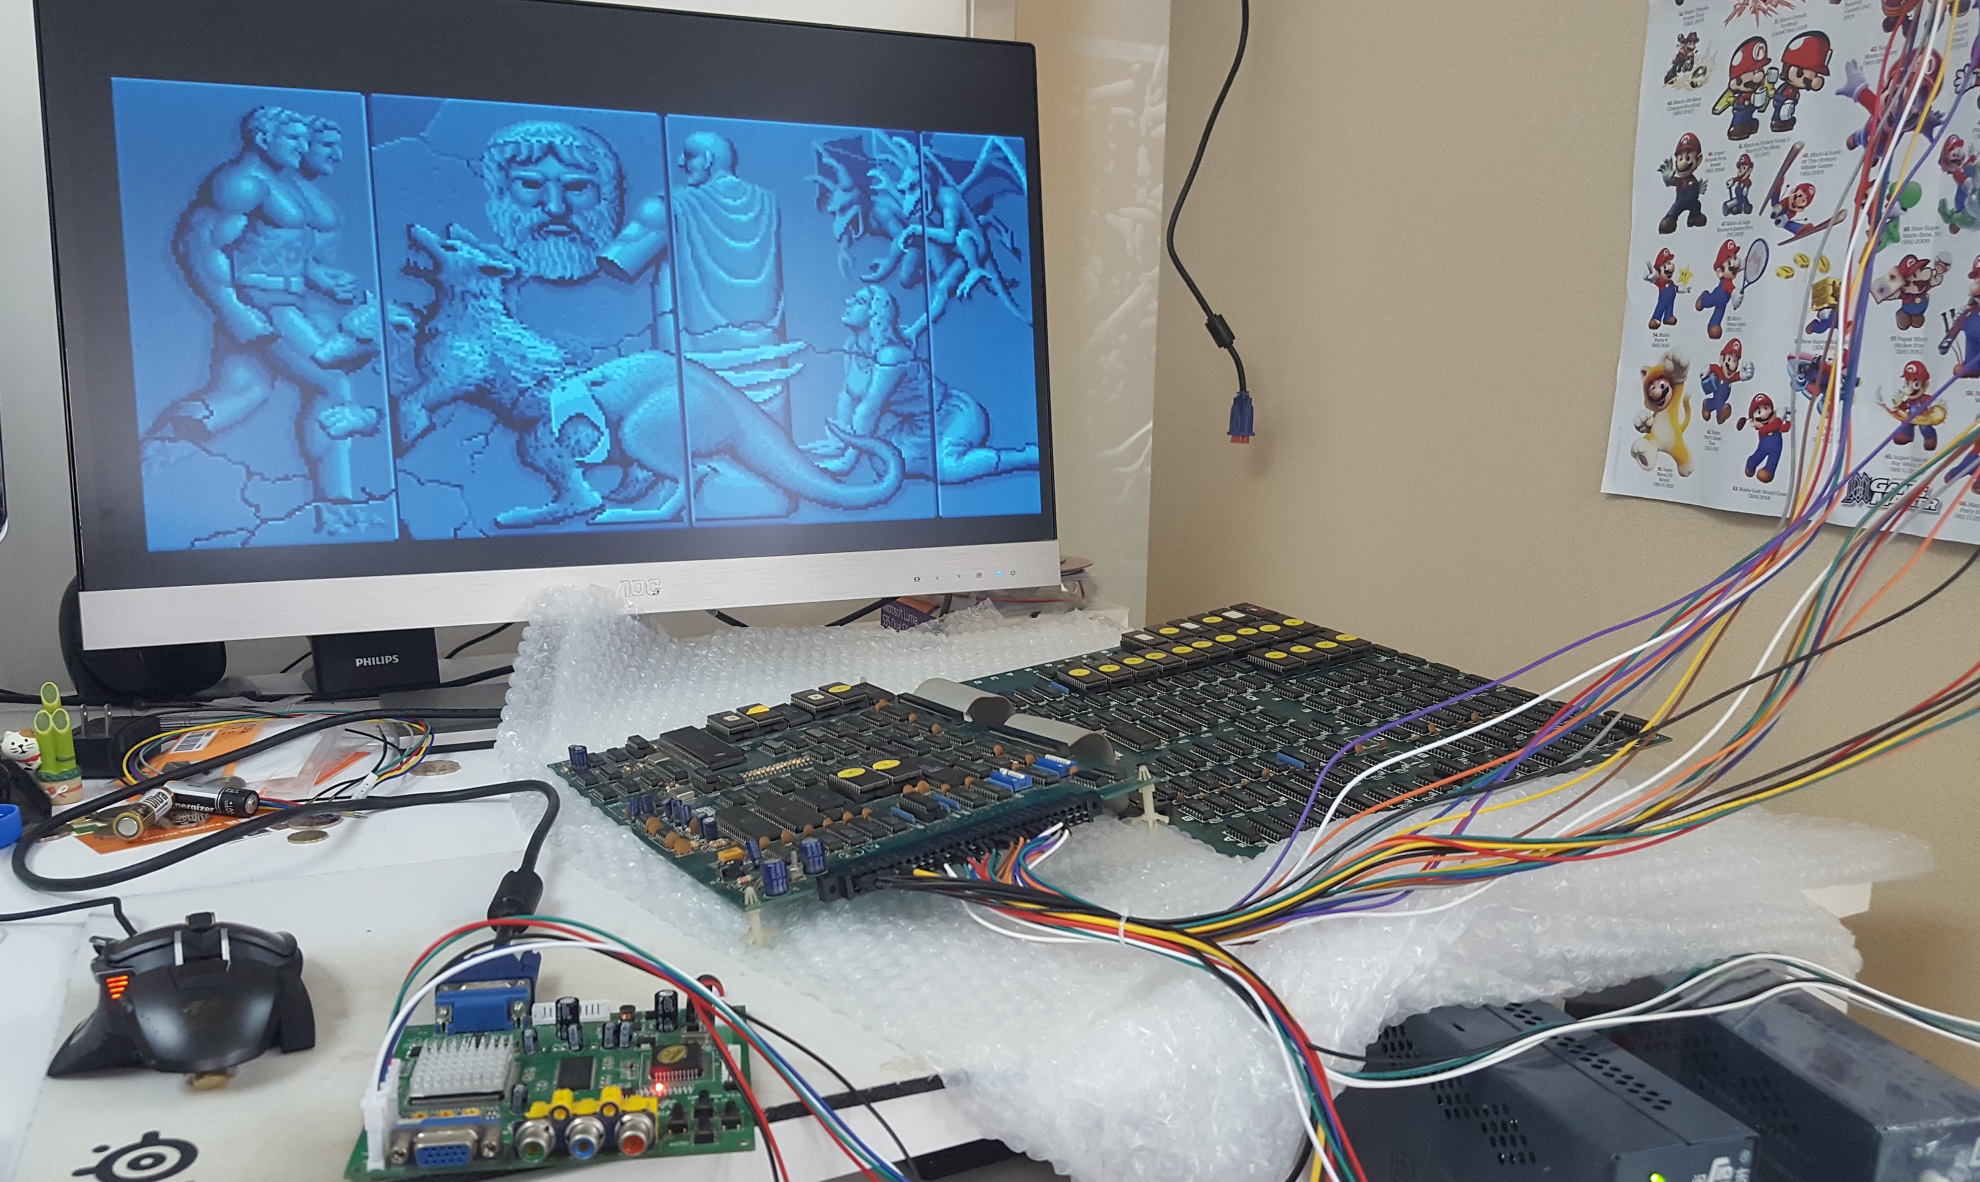
So, Ive been playing around with emulators, and for some reason I think it’d be awesome to have a real one. Â So I check ebay, and yeah there is a few, Altered Beast, Shinobi, and even an Outrun, and a couple of Hang Ons! Â Wow this is so cool, then I check the prices, and shipping and yeah it’s REAL expensive, REAL quick. Â And even back when I did own an Altered Beast board, I never got it hooked up as it was ‘too hard’.
So, I’m about to give up on the whole thing, then I spot this Altered Beast board, for sale for a mere €50!  And the shipping isn’t too insane either!  But looking at the PCB board in the picture, and I can tell something is not quite right:
€50 board!
Now for those who don’t know, this clearly is not a System16 board. Â However it certainly does have a 68000, and z80 processor! Â Could this be some 2nd tier manufacturing job? Or perhaps it’s one of these infamous bootleg boards?
For comparison, here is a real SEGA System16 board
A real System16 board
As you can see, they really look nothing alike.  Also the other give away is that the far cheaper €50 board is JAMMA compatible.  All the old SEGA boards are not.
What the heck is JAMMA anyways? Â You see that edge connector? Â That is where you would plug in the power, coin catchers, the player buttons, and the speakers to. Â Even in the old days, recycling cabinets was a thing, and having modular boards was a ‘good thing’. Â But SEGA didn’t want you to swap out their boards with anyone elses, so they used their own system. Â But it’s just a wiring thing, there is nothing digitial locked down, no encryption either (look at HDMI!). Â So you can use an adapter, to interface from SEGA to JAMMA.
Anyways, I went ahead and placed the order.
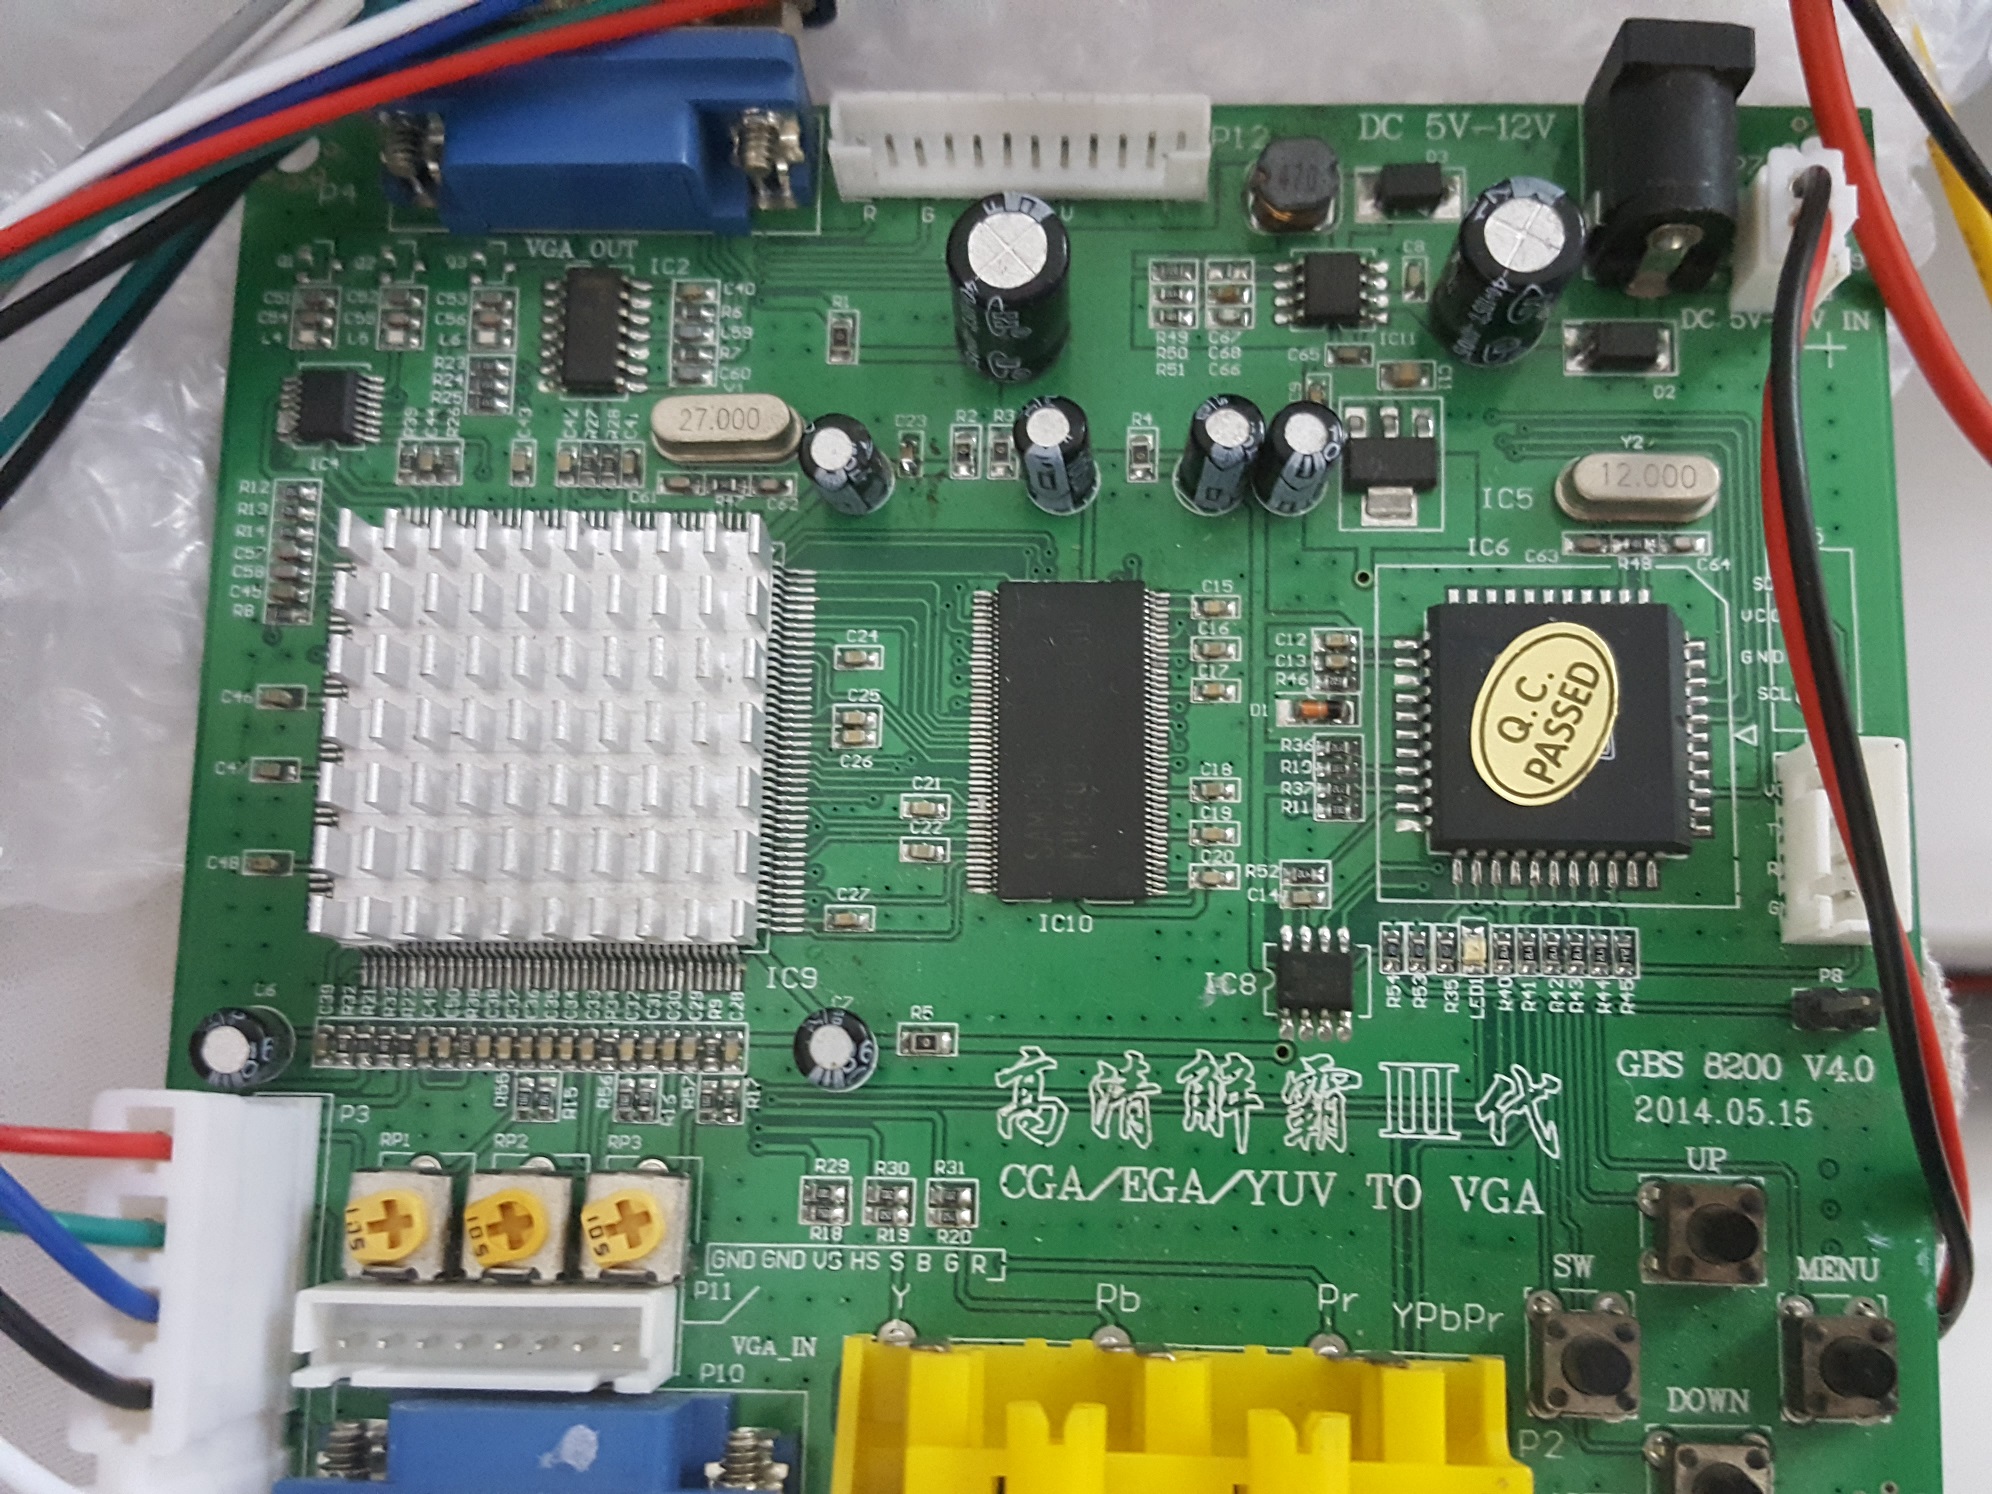
Now doing some more research, and the monitors used in 1980’s arcades were RGB+Sync driven.  Which are ancient, and of course, HEAVY. But a little bit of searching led me to the to the GBS 8200 v4.0.
GBS 8200 v4.0
AKA known as the “GBS8200 CGA/EGA/YUV/RGB To VGA Arcade Game Video Converter”. Â Well this certainly looks perfect! Â I mean from the description alone, it’ll do what I want. Â Even better they make them a few KM from here, and I could get one for ~ $20 USD. Â Perfect.
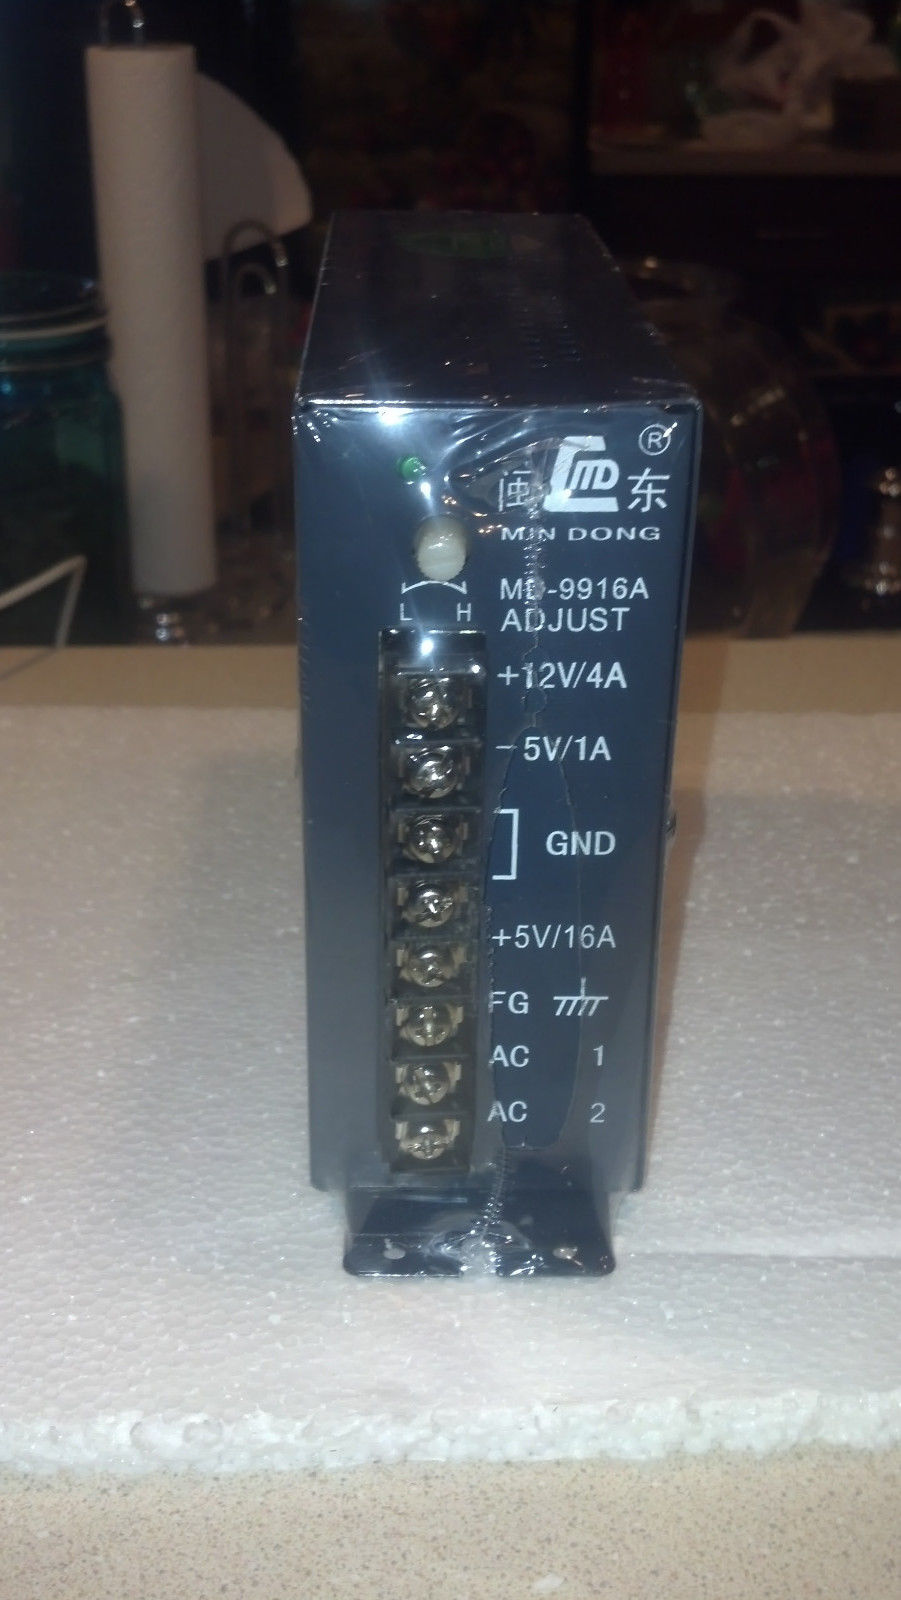
Next up is the power, I decided to get a “JAMMA” power supply. Â A bunch of searching, and this one was the cheapest one I could find, and again shipping wasn’t too bad, but not great either. Â The supply was again around $20 USD, but shipping was $15. OUCH.
MD-9916A JAMMA switching power supply
I figured having the ability to screw in would be a ‘good thing’.
Naturally, I need the cables to wire this mess together, so I ordered a “JAMMA Cabinet Wire Wiring Harness Loom” for about $15 USD. Â Naturally mine is all in Chinese since I went cheap. Â But it’s OK, I have a multi meter so I can test continuity.
Finally I saw a QANBA N1 arcade style joystick in a local mall for $230 HKD.  That is less than HALF the price of the ones I see online in the USA, Europe, or Canada.  So at least that is nice.  Now with all the parts, I just have to wait for the board to arrive.  And wait, and wait.  Nothing updated on ebay, then suddenly I check a few days later, as it’s been two weeks by this point, and it turns out that it’s been sitting in the post office in Hong Kong for a week!  If only they let me know…  SF Express, and FedEx have come without issues.  Oh well, now I have the board!
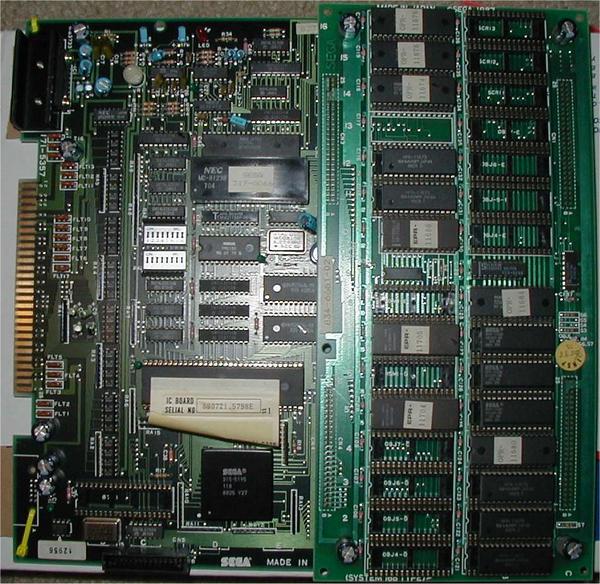
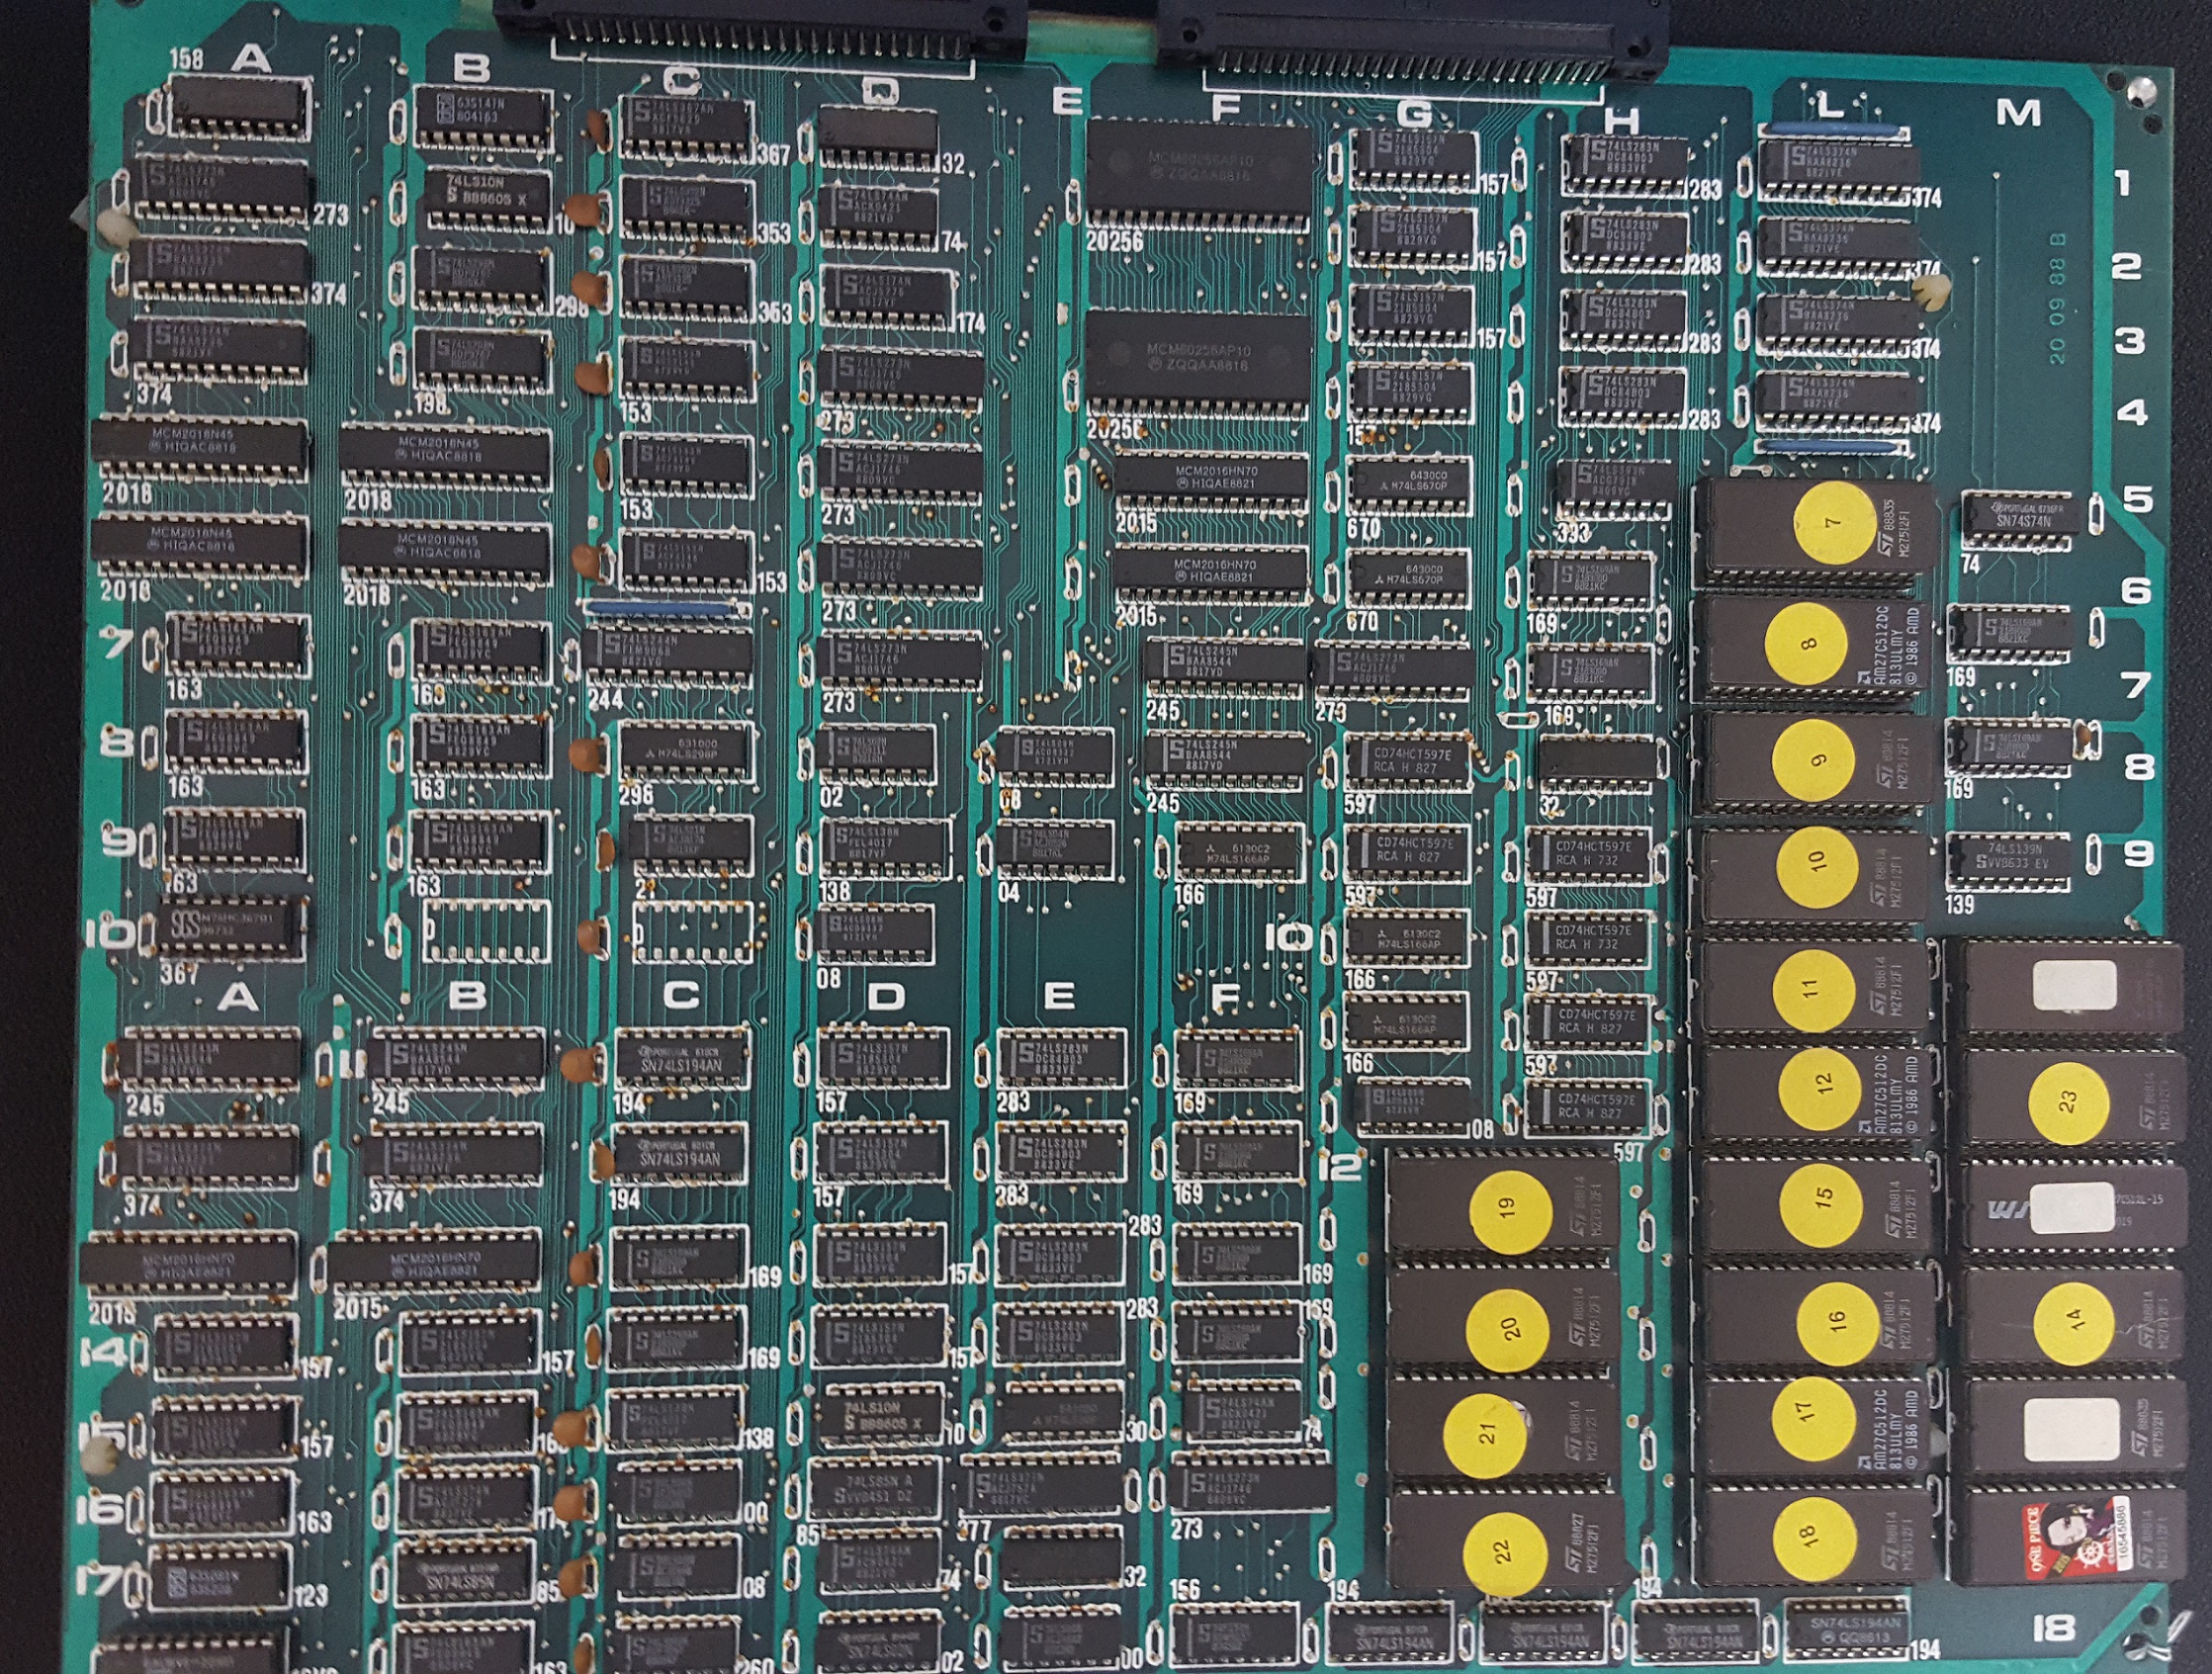
I can now finally flip it over to reveal:
Graphics board
It’s all 74L TTL logic chips, EEPROMS, and some PALs as well. Â There are NO custom SEGA chips at all. Â If anything this is what is inside of the SEGA ASIC’s on the System16 board. Â Whoa.
Ok, so this is certainly a bootleg board. Â A quick search of MAME shows that they have a Datsu ROMset, so maybe this is one? Â Nothing on the boards say Datsu, however it does say ALTER/S, and it shows being QA’d on 11/11/88.
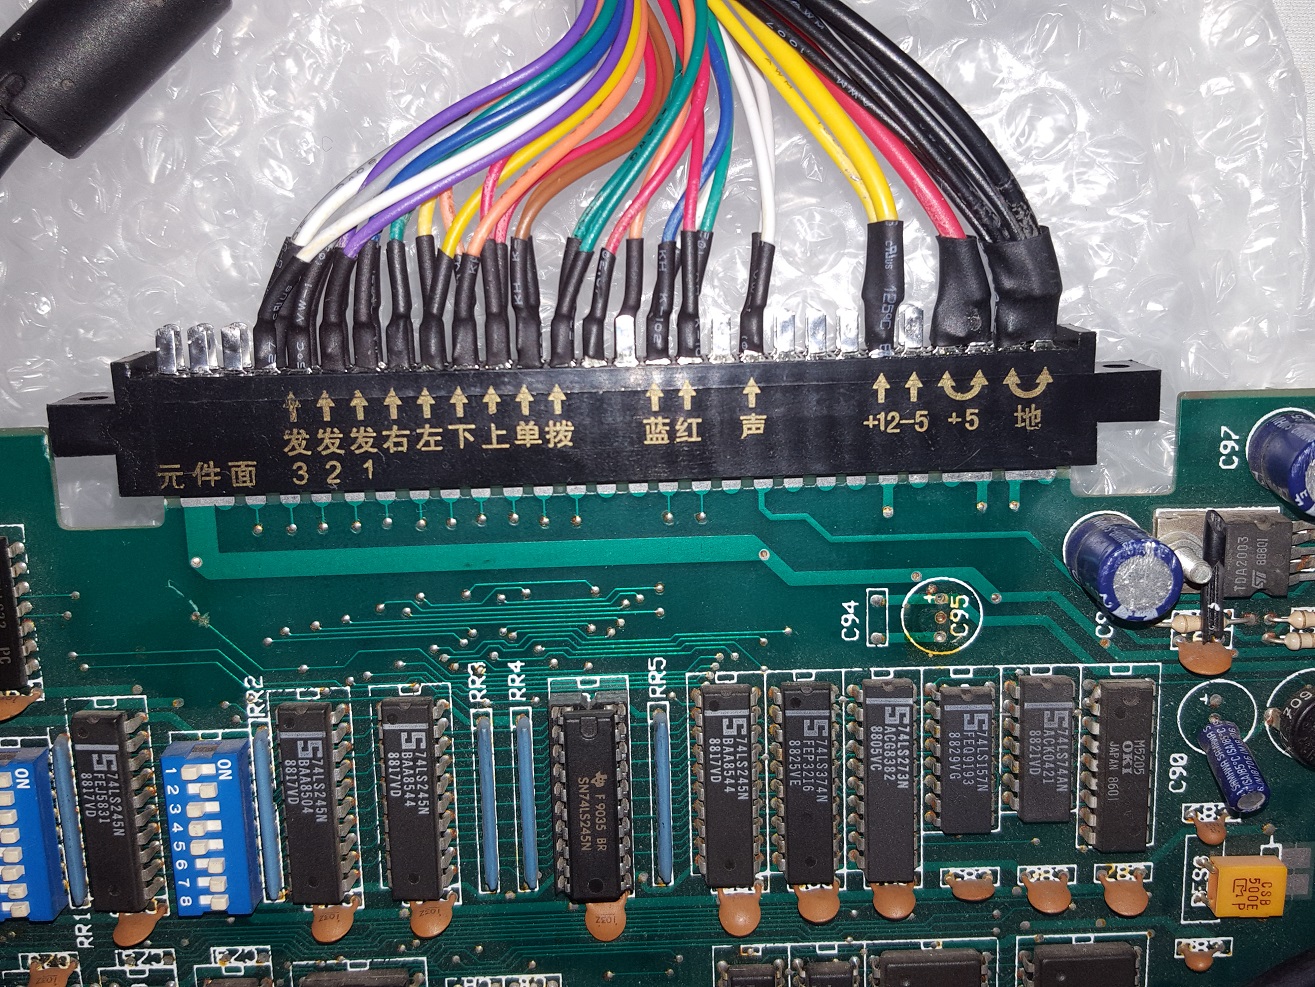
Now it’s time to cable this thing up!
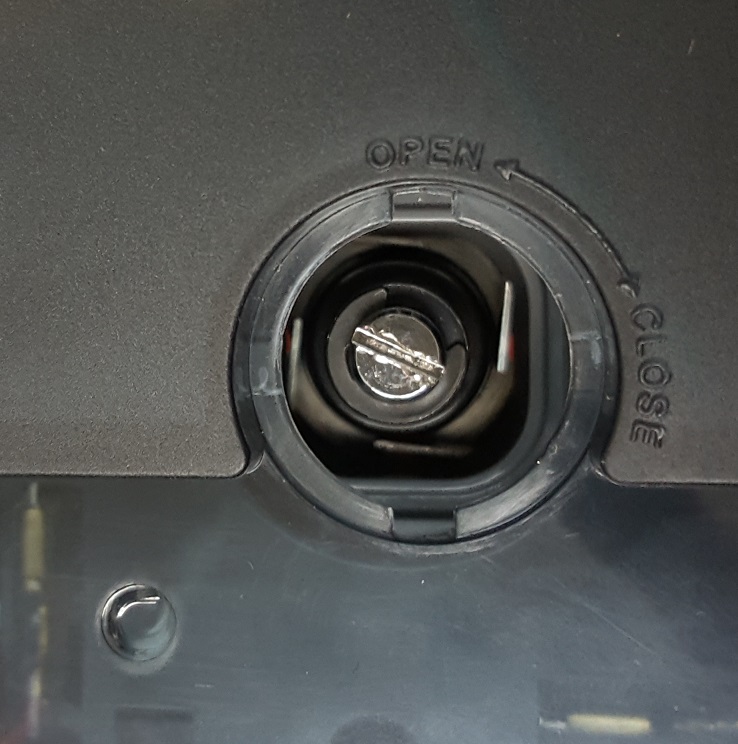
But first JAMMA boards are typically key’d so you cant put the adapter in backwards. Â There is no key on this board, so I need to check the voltages to make sure I don’t flip it backwards.
JAMMA Standard Pinout
**
Solder Side
Parts Side
**
GND
A
1
GND
GND
B
2
GND
+5v
C
3
+5v
+5v
D
4
+5v
-5v
E
5
-5v
+12v
F
6
+12v
Key, No Pin
H
7
Key, No Pin
Coin Counter 2
J
8
Coin Counter 1
Coin Lockout
K
9
Coin Lockout
Speaker (-)
L
10
Speaker (+)
NC
M
11
NC
Video Analog Green
N
12
Video Analog Red
Video Composite Sync
P
13
Video Analog Blue
Service Switch
R
14
Video Ground
Tilt/Slam
S
15
Test
Coin B
T
16
Coin A
Player 2 Start
U
17
Player 1 Start
Player 2 X-Dir
Player 2 Up
V
18
Player 1 Up
Player 1 X-Dir
Player 2 Y-Dir
Player 2 Down
W
19
Player 1 Down
Player 1 Y-Dir
Player 2 X-Clk
Player 2 Left
X
20
Player 1 Left
Player 1 X-Clk
Player 2 Y-Clk
Player 2 Right
Y
21
Player 1 Right
Player 1 Y-Clk
Player 2 Button 1
Z
22
Player 1 Button 1
Player 2 Button 2
a
23
Player 1 Button 2
Player 2 Button 3
b
24
Player 1 Button 3
1 Player 2 Button 4
NC
c
25
NC
Player 1 Button 4 1
1 Player 2 Button 5
NC
d
26
NC
Player 1 Button 5 1
2 Player 2 Button 6
GND
e
27
GND
Player 1 Button 6 2
GND
f
28
GND
This is the standard pinnout of a JAMMA harness. Importantly you can see it’s Ground than +5v. Â So looking at the 68000 processor to check it’s pinnout:
D4
1
64
D5
D3
2
63
D6
D2
3
62
D7
D1
4
61
D8
D0
5
60
D9
AS
6
59
D10
UDS
7
58
D11
LDS
8
57
D12
R/W
9
56
D13
DTACK
10
55
D14
BG
11
54
D15
BGACK
12
53
GND
BR
13
52
A23
VCC
14
51
A22
CLK
15
50
A21
GND
16
49
VCC
HALT
17
48
A20
Reset
18
47
A19
VMA
19
46
A18
E
20
45
A17
VPA
21
44
A16
BERR
22
43
A15
IPL2
23
42
A14
IPL1
24
41
A13
IPL0
25
40
A12
FC2
26
39
A11
FC1
27
38
A10
FC0
28
37
A9
A1
29
36
A8
A2
30
35
A7
A3
31
34
A6
A4
32
33
A5
 You can see it’s power input is on pin 14.  Likewise, the ground is on pin 53.  Also looking at the edge connector, you can see the two pairs of pins, which correspond to the double ground, and double +5v.
Connecting the harness
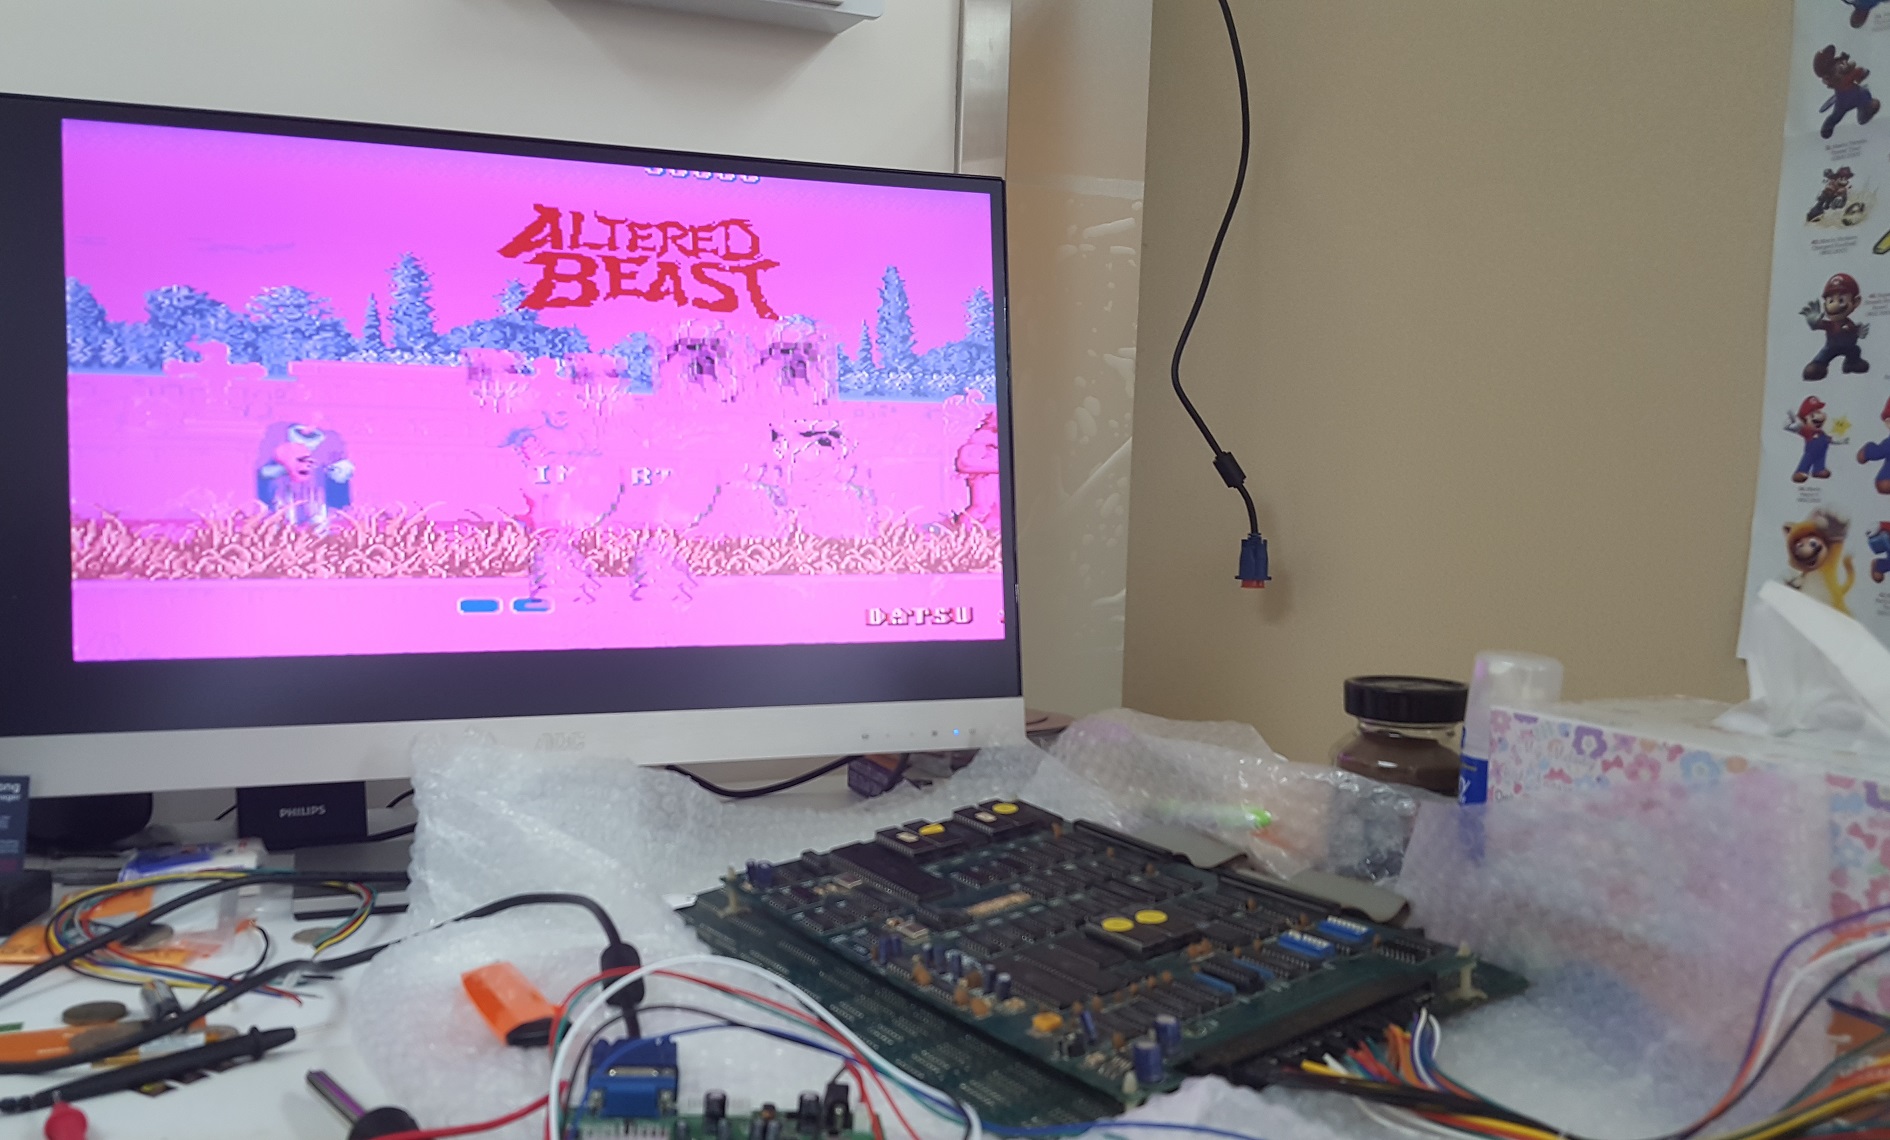
From there, it was a matter of connecting up the power supply, adding in the power to the video board, connecting the RGBS connector, and powering it up. Â It was very cool to get a glimpse of Altered Beast!
Something is wrong
And hello, it is a Datsu board.  I’ve tried to google about these boards, and all that I could find out is that they seemed to be popular in Italy.  They may have been made in Korea.  There was another variation called ‘Mutant Warrior/Super Warrior‘.  There was some posts about it in an Italian game forum mameitalia.net, and arcadeitalia.net . Google translate works fine enough to read, but they were in smaller places that couldn’t afford mainstream games, so enter the bootlegs.  And this makes sense, as the board I got was from rural France.
I maybe had a picture for 20 seconds, it was frozen, then the screen went black. Â I power cycled, to nothing. Â I tried it again to a green screen. Â And again to a green screen. Â At this point I think it’s died. Â I let it rest for a few minutes, and try again. Â Nothing. Â I leave it powered up, and feel the processor, and it’s warm. Â It’s doing something, so I think. Â So I start to play with the video board, and as I change resolutions, I get an image!.. then it disappears. Â Power cycling, and changing resolutions occasionally gives me an image. Â I look more closely at the CPU board, and notice that it has 4 standoffs placed on each corner. Â There is nothing in the middle, and over the past 28 years the board is sagging.
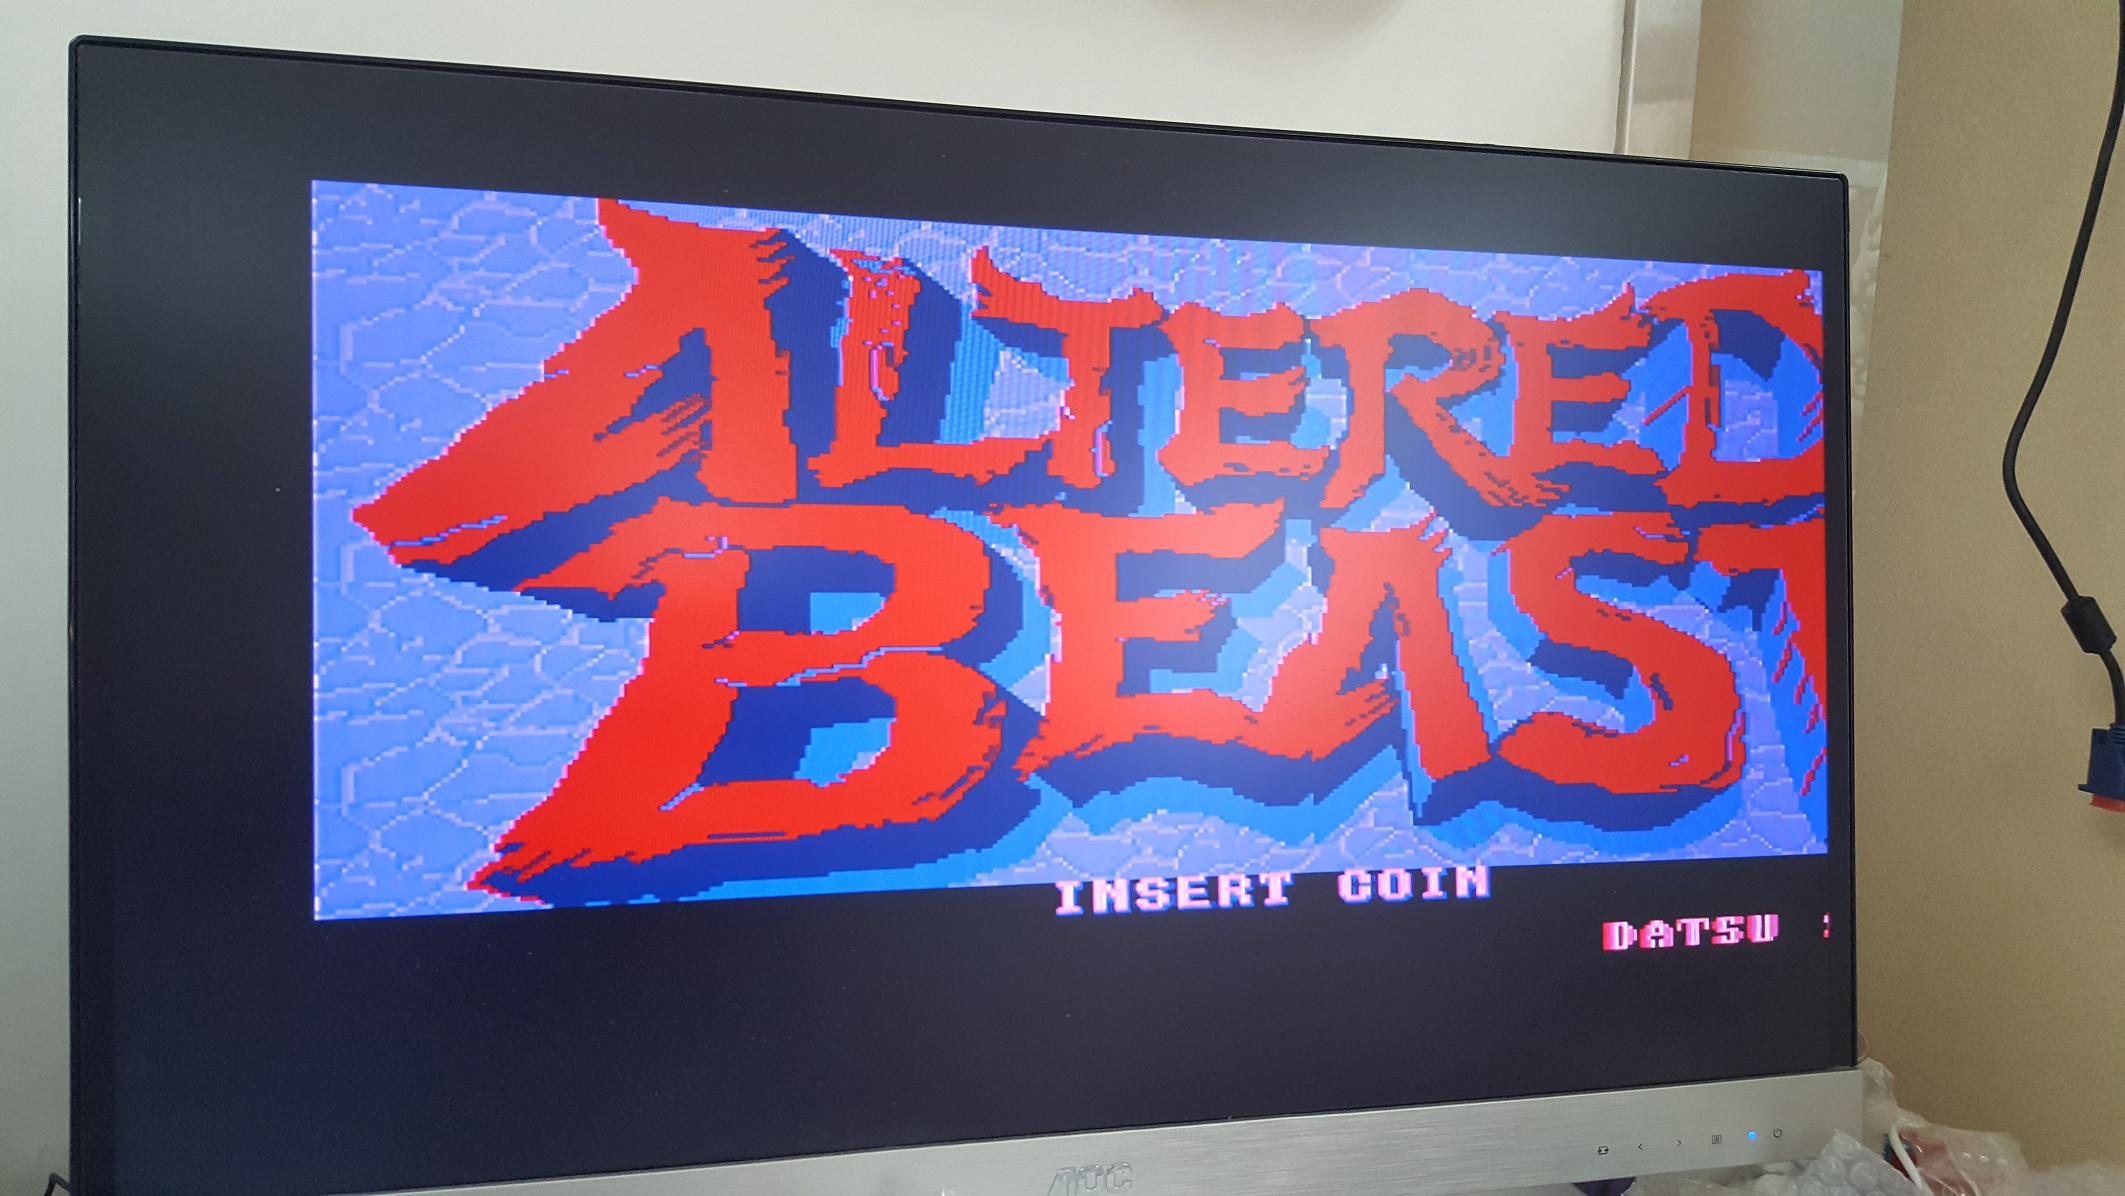
In order to fix the sag, I decouple the two boards, and spread them out. Â I try it again, and it doesn’t show me anything. Eventually I play with all the video board settings, and manually set it to the RGBS input, and then the image stays! Â The board is running. Â I tweek some of the settings, and the pink goes away, and now it looks correct!
LOGO
And even the intro animation is OK
Looks good
OK, now it’s time to turn it off, and wire up the joystick.
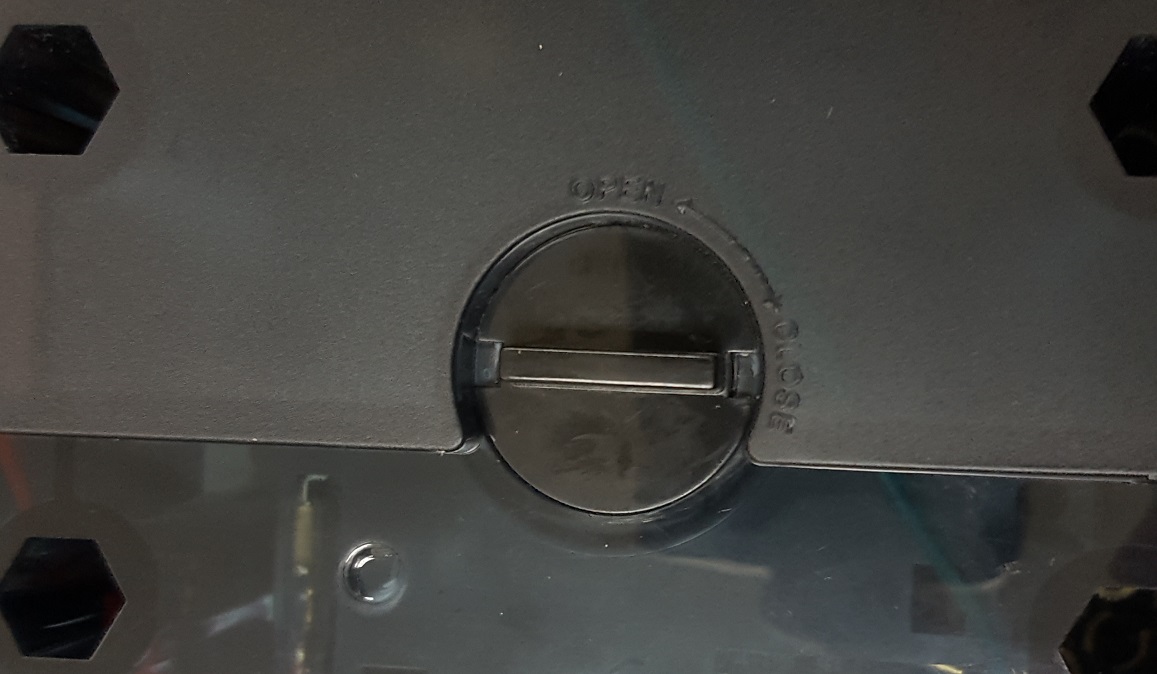
The first step is to remove the joystick ball, and on the QANBA N1 you first flip it upside down, and remove the little cover.
Remove the cover
to reveal the screwdriver slot to let you hold the stick in place as you unscrew the ball.
slot
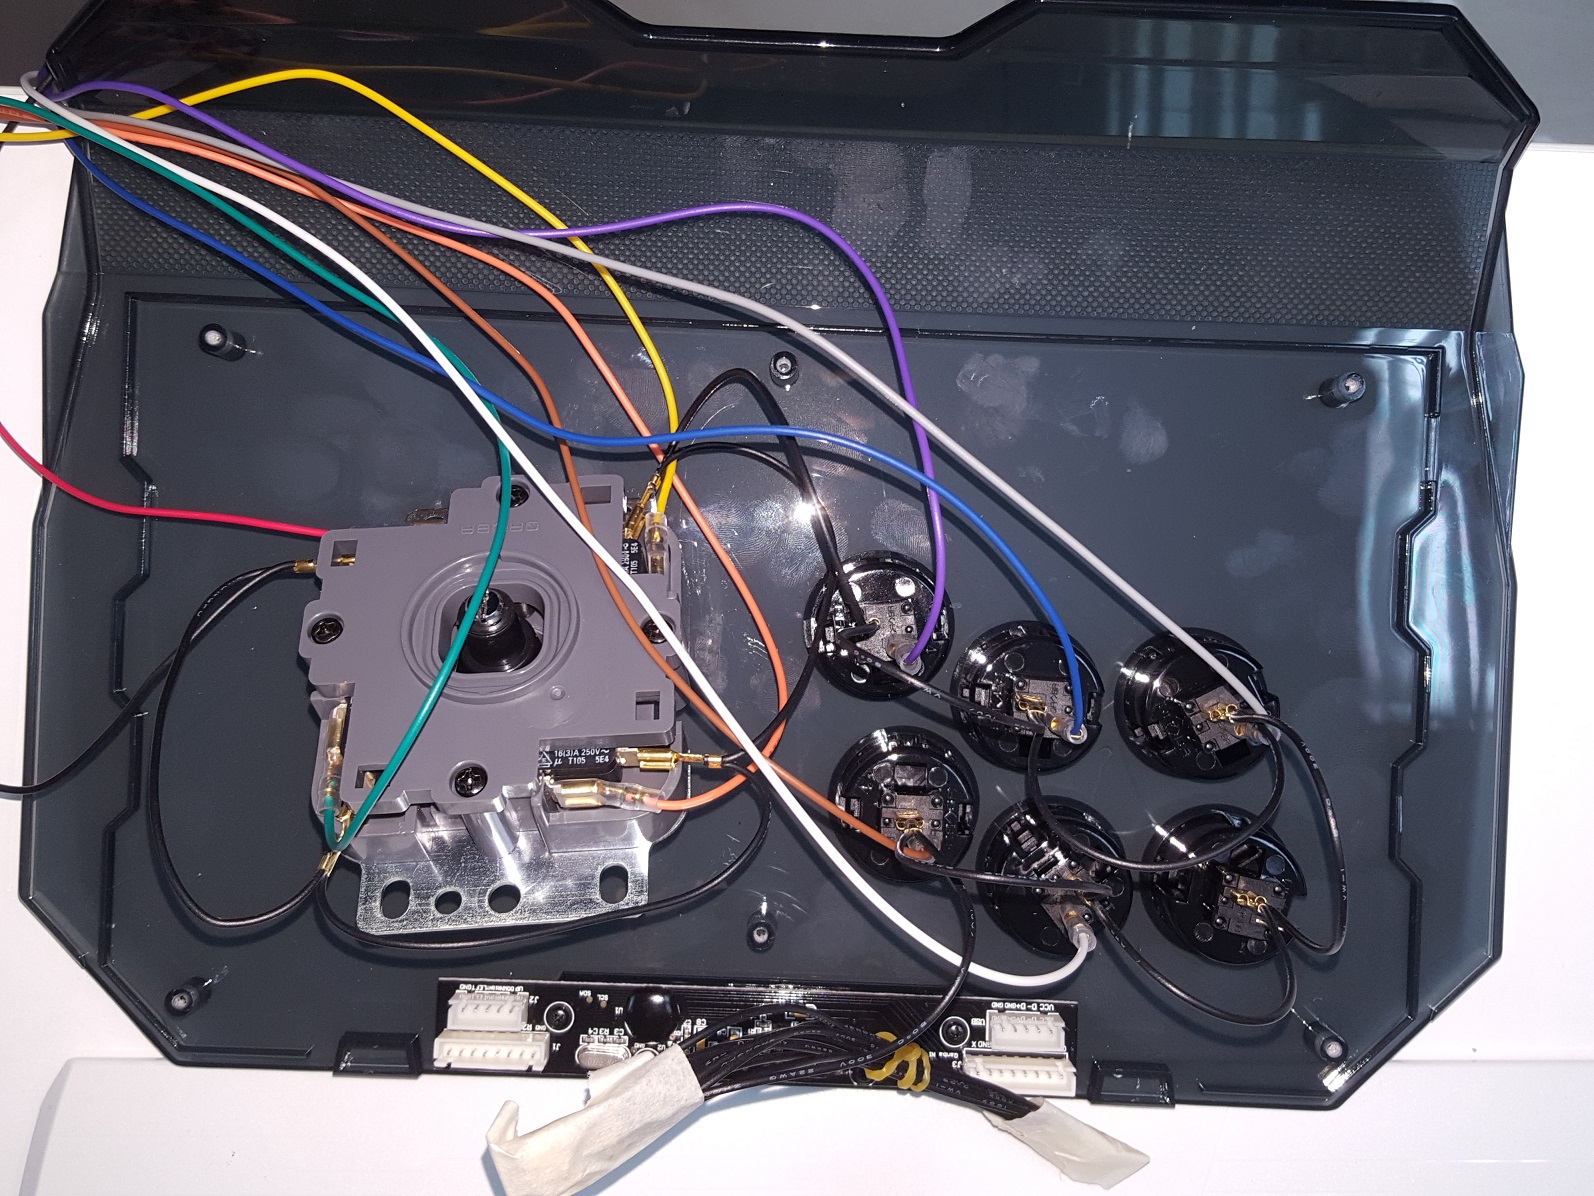
Now it pops off, and it’s really easy to remove the USB interface cables, and drag in the JAMMA cables. Â Again use a tester to tone out what goes where. DO NOT FOLLOW MY COLORING GUIDE. Â I’m pretty sure there is no colour standard, so just because mine is like this, yours will 99.9999% not be. Â The only common thing is that each of these buttons needs a ground.
Joystick wired up
My harness has a common ground for P1 and P2, so I just tapped up the end and tucked it in the joystick body. Â Now with wired up, I can put the joystick back together, and play!
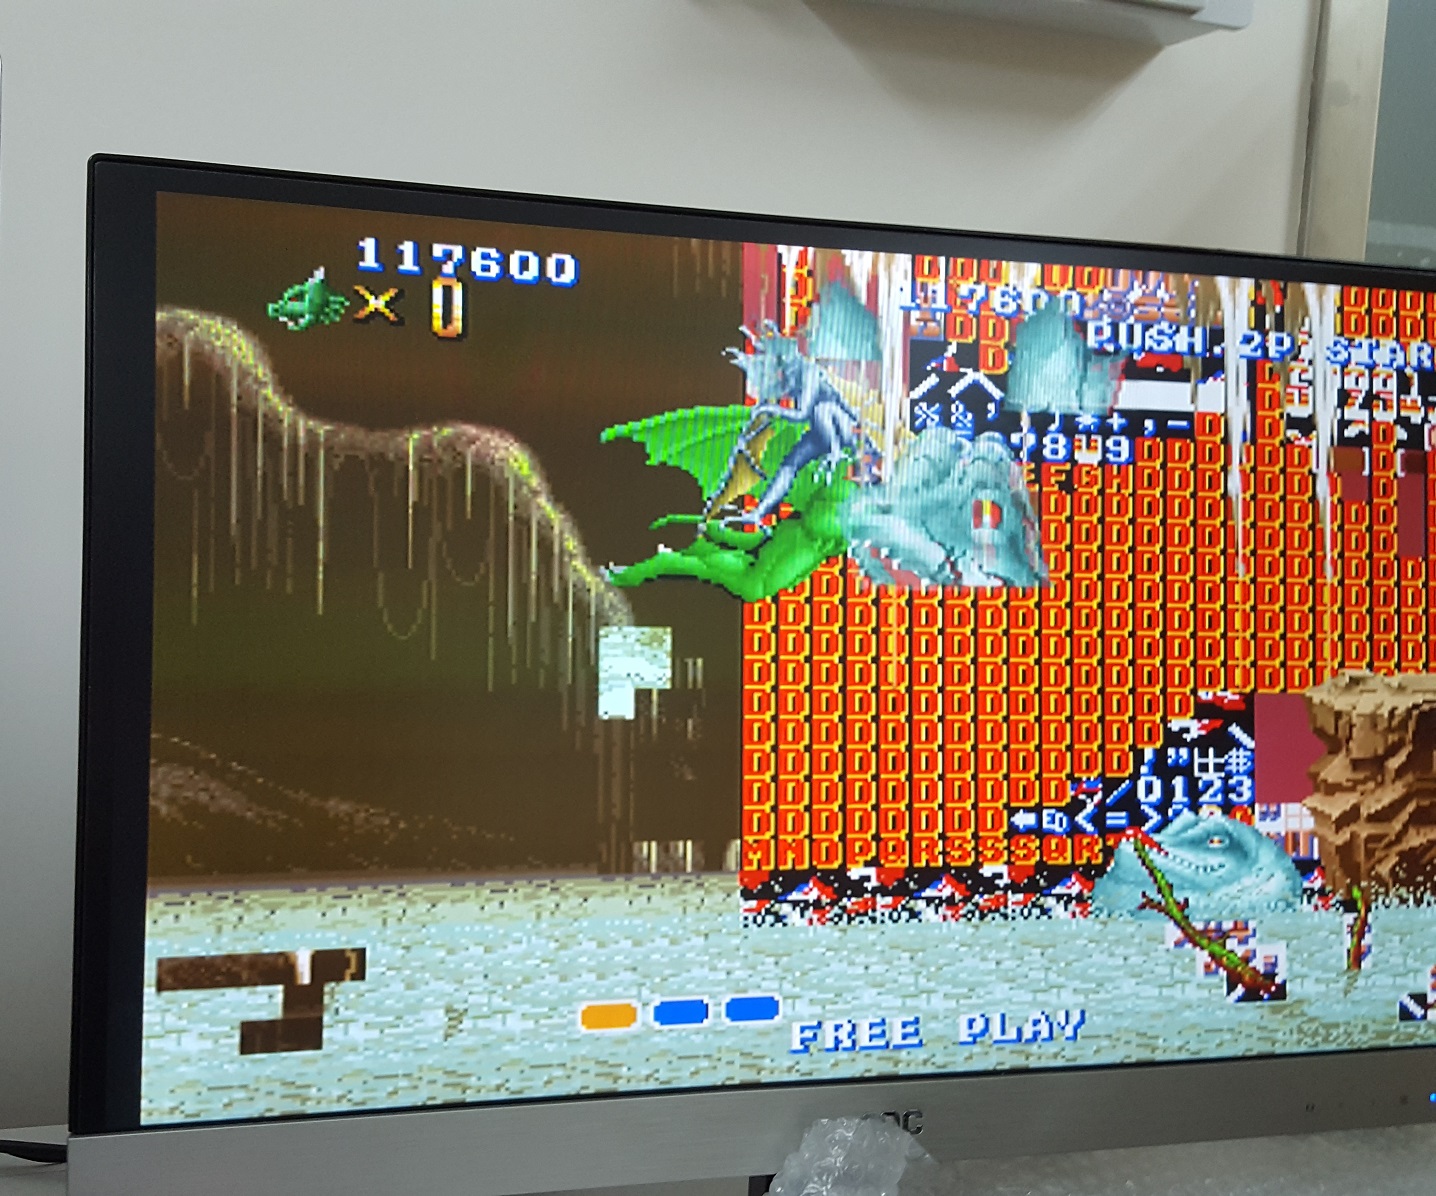
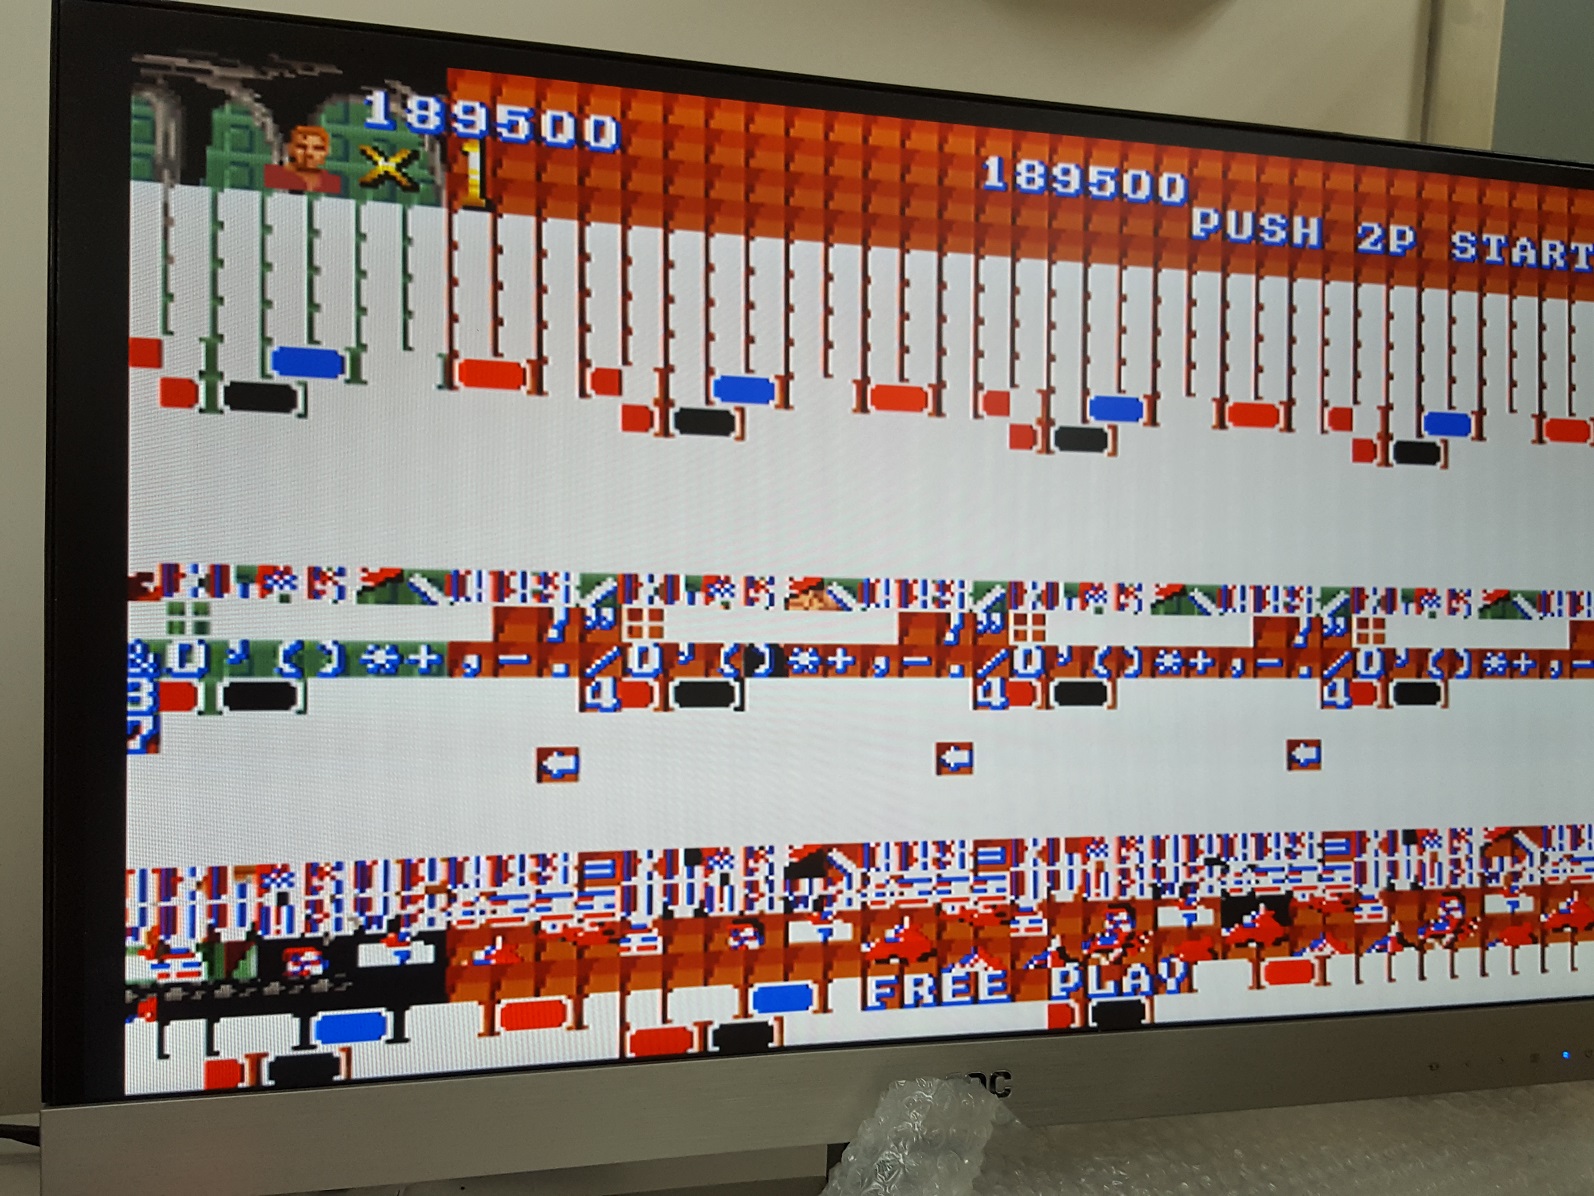
And that is when I could finally see that something was wrong. Â I was doing pretty well, then in the 2nd level I saw this weird thing:
An actual wall of text
The sprites are working fine, and the gameplay continues. Â But eventually the wall of text effect went from the background to the foreground obscuring game play.
foreground tile corruption
So no doubt something is bad on the board. Â I need to get it looked at, and see about first dumping and checking the EEPROMS. Â Next the RAM on the graphics board, may be suspect as well. Â I think the CPU is fine since it runs OK, I’m just unable to really see pass the wall.
For the heck of it, I went and got some powered speakers, and hooked them up:
And it sounds so different from the SEGA version. Â An inspection of the board shows that there is no YM2151, but rather a pair of YM2203’s and an OKI M5205 for the speech synths.
In retrospect, I probably should have gone with something like the arcade supergun. Â I didn’t know it was a thing unfortunately. Â My solution is more “traditional” , but it works.
The first thing you’ll notice if you try to compile it, is that now it’s a single source file, that includes all the other modules. Â And it compiles FAST, for me 1 second fast.
From the changes:
Compiles with OpenWatcom v2.
Keys (for Run, Shot…) are shown.
Hang with optimization is fixed.
Missing Spear of Destiny SignonScreen added.
Inter-procedural optimization (unity build).
External assembler routines re-implemented in C.
Better interrupt enablement /disablement.
Dead Code removed or #ifdefined.
So, if you want to Wolf3d, or SPOD, I’d check out Tobias’s Wolf4GW if you have a 32bit capable machine. Â The maps load instantly, and it just feels all around much more smoother than the old 8086 code.
Since the last update we got some help in a few fields that have really fleshed out this ‘experimental’ port into a full-fledged port. First RayerR helped us with the fun of getting us onto the latest deployment of DJGPP, 2.05 (rc1). It’s always nice to be in the latest available release. Next in a passing comment, Ruslan Starodubov had mentioned that he had gotten a much older build of our QDOS to support the Intel HDA sound chipset via the MPXPlay sound library. I wrote to the author of MPXPlay, Pádár Attila asking for us to distribute his source in our project, and he granted permission.
So, at this point things were looking good. The only ‘feature’ that modern OS’s really held over us was the ability to dynamically load and unload game modules on the fly. I had tried to use DLM, but it stripped the DPMI functionality out of the MS-DOS Extender making the port really useless. I tried to build the newer DXE3 support but had no luck. I suspect now my native tool chain was interfering with the build process. But Maraakate managed to get it to not only build, but to run!
Adding in DX3 support was relatively painless. I first looked at DJGPP’s FAQ and downloaded the example code. In the example code there was small helper functions to make unions and check the symbols. If they didn’t exist a printf was spit out to alert you about it. To resolve the issue, you simply just add DXE_EXPORT to the other list of missing exports.
Compiling the game code was easy, again referring to the example I saw that basically they compiled it the same, but at link time you use DX3GEN and -U flag to ignore unresolved symbols.
The biggest head scratcher was the Sys_GetGameAPI failing to find GetGameAPI from the DX3. After some piddling around I noticed that it listed GetGameAPI as _GetGameAPI inside the DX3 itself. I added the underscore and it worked!
Other things that were relatively to easy to import was R1Q2’s HTTP downloading code. Compiling CURL was kind of tricky because of the linking order, but thankfully neozeed figured it out quickly.
All of Yamagi’s Quake 2 updated game DLLs were all diff’d by hand using BeyondCompare to make sure I didn’t clash using some newer functions that weren’t available in DJGPP. I also merged their Zaero code with their baseq2 code by comparing Zaeros code to the Quake 2 SDK, marking everything that was changed. The result is a really stable Zaero game code If you haven’t played Zaero check it out. I think it’s a lot better than Rogue, but Xatrix is probably my favourite (even over stock Q2).
Other cool things I’m glad to get into the code was the GameSpy Browser. It took me quite a bit of work to get it where it is, but it’s really nice to just be able to ping to a master server (a custom GameSpy emulator I wrote specifically for Q2DOS. Source is not finalized yet, but will be available soon for those curious), pick a server and go! All in DOS!
So here we are at the end of the journey. Or at least safe enough for a 1.0 release.
To recap, we have:
* VGA
* SVGA (LFB modes only)
* Mouse
* Keyboard
* SoundBlaster and Gravis UltraSound Family
* CD-ROM music
* OGG music
* Networking (You need a packet driver)
* Loading/unloading game DLLs in DX3 format.
* Intel HDA support -hda
* Mouse wheel support with -mwheel
Well, it mostly works now. But did we ever have the biggest fun with the sound and SVGA.
So [HCI]Mara’akate integrated all the Q1 sound code, got it to compile, but nothing not a peep from the sound card. While I was busy trashing the video code, he spent way too much time on the audio, and then for the heck of it I thought I’d look at the code, although I’m really stabbing in the dark when it comes to audio. Imagine my surprise when I compiled the code and ran it and got the sound blasting at full volume! It turns out that I had my audio set to ‘high quality’ in the client, while he had his set to ‘low quality’. What it does is govern the frequency between 11Khz and 22Khz. And if you get this wrong you get *NO* audio. OOPS. At least it was one of those feeling vindicated moments that his efforts for sound really did work.
Now with audio, it was my time to hurry up and get the video going. I had basic VGA working so I figured I didn’t want to spend a lot of time on this, so I was going to go with the VESA 2.0 linear frame buffer. Well, this once more again proved to be a bit more involved as the only way I really have to test is emulation via DOSBox and Qemu. And naturally both of them worked fine, but when [HCI]Mara’akate ran it on his real DOS Box (with GUS of course) it crashed wonderfully.
Now I had taken the VESA init code from Quake 1 to build a table of what 8bit modes are supported, and used the VESA code to switch, along with drawing to the buffer with a simple memcpy. And we got nothing but crashes.
After looking more around, I found that you had to add 0x4000 to the VESA mode you want if you wanted to access it’s LFB. Did that work? No still crashed.
Later in the adventure we noticed to get proper access you had enable ‘near pointer acess’ with a call to :
__djgpp_nearptr_enable();
So naturally I would disable it when I’m done, making the call look like this:
WRONG. Oh so WRONG. Well OK technically it did work, but if sound is enabled (and why wouldn’t it be?) it would immediately crash with an error in the DMA code. We ended up wasting over a day trying to figure this one out until I just said screw it, let’s never dsiable the nearpointer, leave it unprotected. Naturally that actually worked. The hint is in map_in_conventional_memory, where __djgpp_nearptr_enable(); is called, but of course there is no calls to __djgpp_nearptr_disable(); I’ve thought about going back through the source to ‘clean’ it up to make it lock and unlock memory as needed, but this is 2015 not 1997 so good enough is well, good enough.
So now with VESA and Sound, I thought this would be a great time to tackle the dynamic loading of gamex86. We will have to re-compile whatever gamex86 DLLs are out there as of course DOS is DOS. The HX DOS guy Japheth seems to have died, as his site and all the info on that extender seems to have mostly vanished. I have an old copy, but I never could make it call DOS stuff if you had WIN32 stuff going on. And if he’s really dead it’s too late to ask him.
Ages ago I remembered this DLL support for DJGPP called DLM, so I thought I’d give that a try. I was able to take our ‘null’ version of Quake II, and get it to where it can load and unload the gamex86.dlm at will. So, I figured this was going to be an easy win, right?
Wrong again. Once I started to put in the MS-DOS specific code I got this fun crash:
DLM -> Exiting due to signal SIGSEGV at
0x0014f59d SYM: _dos_lockmem+0x9 DLM: q2.exe [0xf5000]
possibly because of undefined reference to symbol ‘___djgpp_base_address’
So apparently it doesn’t export (or import) DJGPP stuff like the base address calculations so we can’t do direct memory access, which means no video and no sound. Ouch. I’ll have to hit the lists to see about support. I don’t like the DXE’s because they cannot be unloaded, so that isn’t much good. And of course things like the JVM inside of gamex86.dll is right out as JAVA inside of MS-DOS? in 64MB of RAM? Dream on.
So, for now, the gamex86.dll is statically linked into the executable. You are restricted to vanilla gameplay for now.
As an added bonus, I used Rufus 2.2, to setup a bootable MS-DOS USB stick, slapped everything onto there, and booted up on my Xeon, and it works!
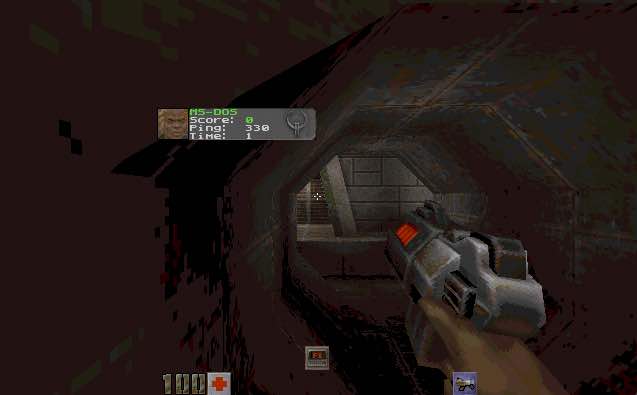
Quake II running on MS-DOS
Now as a super bonus, [HCI]Mara’akate went above and beyond by adding in a bunch of fixes, and updates from 3.24 and various stuff from Knightmare. And then the best part is integrating libogg, so it can now play the ogg sound track! Really, just place the ogg files in the baseq2\music directory and away you go!
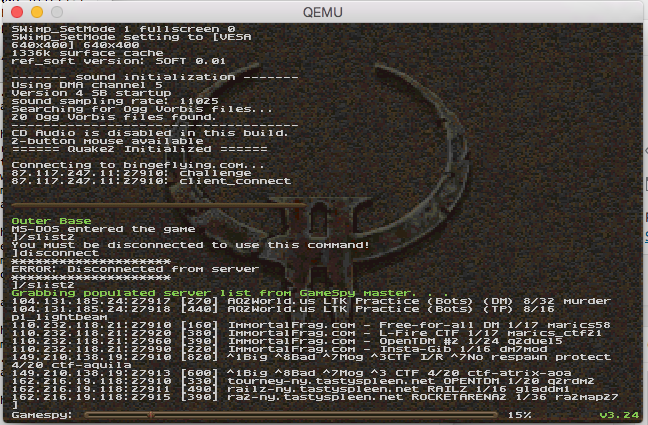
For anyone who is interested, I’ve updated the binaries, to include the latest version with built in quakespy technology! Run an /slist2 and get a list of servers!
/slist2 in action!
For the more adventurous trying to build from source, we are using GCC 2.95.3 and DJGPP 2.04. All of the sub libraries that you need to build are already pre-compiled in source drop.
At this point the ‘alpha 2’ version contains:
VGA
SVGA
Mouse
Keyboard
SoundBlaster and Gravis UltraSound Family
CD-ROM music
OGG music
Networking (You need a packet driver)
Installing the packet driver will require a driver from the crynwr project. You can find a description of some of the drivers here. Sadly, for new cards I think we are left in the dark.
I’ve also compiled a ‘server’ for Linux based on the code, and put it online @ 87.117.247.11:27910