Hosting Minecraft as an experiment

So in the latest gamer news, everyone is freaking out about Valve allowing mod developers charge.  It’s amazing how quickly it’s fragmented the community in what was at 2 days before a Valve/GabeN worshiping reddit. (here/here/here/here and a rebuttal)

In the middle of all of this I saw this comment in passing:

Remember how that made me leave Mojang?

Remember how that made me leave Mojang?

So yeah, I never followed the whole Minecraft community thing, but apparently people were hosting servers, then asking users to pay for using mods, and even for using basic items.  And since most people who love Minecraft out there are kids, they were paying with their parents credit cards all over the place for server time, and server mods and whatnot, the parents would find out, and them blame Mojang over the entire thing.  So they banned paying servers (at least from what I understood).

So out of curiosity, since I’ve only really played single player, I thought I’d see how hard it is to run a Minecraft server.

First I’m going to create a Debian 7 VM on my ESXi server.  Nothing too fancy, I have an 8 core box with 8GB of ram, so I was thinking 2 vCPU’s and 384MB of ram, and a 4GB disk.  I mean it’s a simple game, how much can it need, right?

Turns out, it wants a LOT more.

So the install of the OS went pretty smooth, then I have to install Java, which is pretty simple:

apt-get install default-jdk

With that done, the next thing to do is download the server jar file from the download site, or for the purpose of my test, I’m using version 1.8.4.

When I went to run it however, I saw the recommended flags:

java -Xmx1024M -Xms1024M -jar minecraft_server.jar nogui

Ouch.  Yes this thing does expect 1GB of ram.  Ok, so I have to RAM and CPU to spare, so I went ahead and gave it 2GB (since I installed the x86 version of Debian..) and 4 vCPUs.

The next thing for me to do was to set it up on the internet, since I’m not in the office.  I have a VM out on the internet, with an OpenVPN back to my ESXi box for my email.  So without trashing my nat I could get xinetd do the dirty work with this simple entry:


root@VPS:/etc/xinetd.d# cat minecraft 
service minecraft
{
    disable         = no
    type            = UNLISTED
    socket_type     = stream
    protocol        = tcp
    user            = nobody
    wait            = no
    redirect        = 192.168.1.139 25565
    port            = 25565
}

Then restart xinetd like this:

 /etc/init.d/xinetd restart

Now with Minecraft running on my ESXi server, and my VPS now configured to forward traffic to the ESXi box over the OpenVPN connection I was all set to go!

And I was able to connect, and all was ‘good’.  But then checking the server…

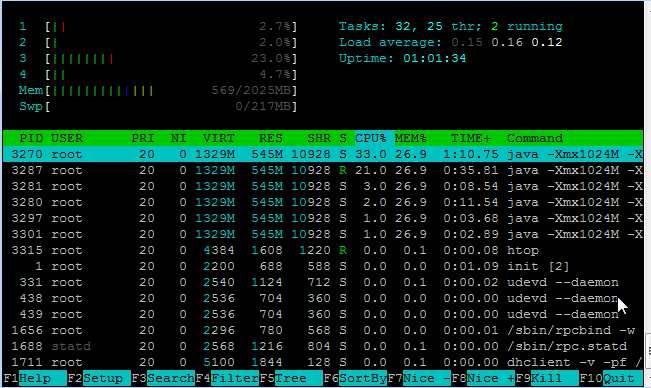
htop on my Minecraft server

htop on my Minecraft server

545Mb of RAM!  And this is with one user!  And look @ the CPU.  Wow no kidding!

And then I noticed something else, the email performance went from OK to horrible.  I spent a lot of time playing with MTU’s receive and send buffers, and other ‘magic’ trying to get something working.  Since my ESXi server doesn’t have a direct internet connection (yuck) I’m in a shared office so it’s not only behind NAT, but I have a DLINK that I use behind their NAT.  And while the UDP protocol ‘works’, changing it to TCP gave me a 5x speed increase.

Very unexpected.

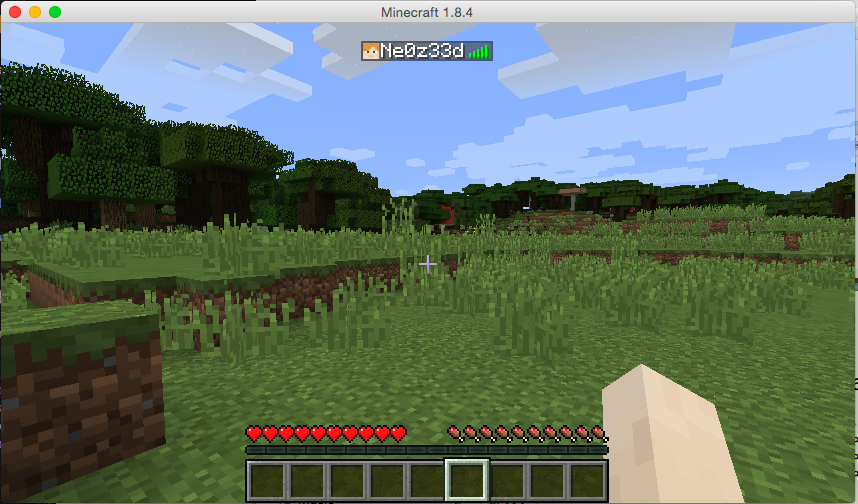
My own world..

My own world..

And not to forget, some helpful stuff for the server:

How do you shut down safely, from the console?

stop

What is the best way to run the server?

Probably behind screen. I started it from /etc/rc.local like this:

/usr/bin/screen -dmS minecraft /usr/local/minecraft/start.sh

start.sh is simply:

#!/bin/sh
cd /usr/local/minecraft/
java -Xmx1024M -Xms1024M -jar minecraft_server.jar nogui

How do I connect to the console?

screen -r minecraft

Remember in this case we gave the screen session a name so it’s easy to find.

How do I disconnect from the console

CONTROL+A+D

Why am I doing this?

I have no idea why. Honestly I find crafting in a game kind of tedious, but setting up a VPN, server and whatnot is more fun to me.

How about network performance?  Since it’s just me, I thought I should look inside the tunnel for a minute and see how big the capture file is:

# tcpdump -s 1520 -w 1.cap -n -i tun0 port 25565 & sleep 60;kill %1

This will run tcpdump for a minute on the default minecraft port, then after 60 seconds end the capture.

# ls -alh *.cap
-rw-r--r-- 1 root root 1.6M Apr 26 16:00 1.cap

Wow that was bigger than I thought. No wonder Minecraft people are always crying about latency! That translates to 213,33 Kbps or 0.21 Mbps.

Can it be compressed?

# gzip 1.cap
# ls -alh *.cap.gz
-rw-r--r-- 1 root root 680K Apr 26 16:00 1.cap.gz

Which then translates into 91,11 Kbps or 0.09 Mbps. Why people don’t compress their network stuff is beyond me, but then again what do I know?

I guess the next step would be to combine this with stunnel, which not only can encrypt the traffic, but compress it as well.

Stupid error building binutils

So I’m starting a new VM, and after installing Debian, and the important packages, build-essential and the Linux headers…

#  apt-get install build-essential linux-headers-$(uname -r)

I got this fine error trying to build binutils:

gcc -g -O2 -o sysinfo sysinfo.o syslex.o
syslex.o: In function `main’:
/usr/src/binutils-build/syslex.c:1: multiple definition of `main’
sysinfo.o:/usr/src/binutils-2.22-human68k/sysinfo.c:1: first defined here
collect2: ld returned 1 exit status

Turns out I didn’t have bison/flex installed.  Oops!

Oh well easy enough to solve.

#apt-get install bison flex

Otherwise, remember to build binutils/gcc in it’s own directory or that’ll cause other fun down the line.

Don’t forget you need GMP 4.2+, MPFR 2.3.1+ and MPC 0.8.0+ to build GCC…

#  apt-get install libgmp-dev libmpfr-dev libmpc-dev

Cross compiling to i386 Linux ELF from OS X

This isn’t terribly useful for 99.9% of the people out there but I needed to do something creative on an F5.  Luckily they run a somewhat sane version of Linux.

Unfortunately I am stuck on Windows 10 right now, so installing a matching Linux distro is out of the question.  So on my OS X box, I thought I’d just build a cross compiler.  Going back to my DJGPP cross compiler, I thought I’d stick with binutils 2.9.1 and gcc 2.95.3, since they worked so well before.

Plus to flesh it out, you’ll want libc, libg++, and the appropriate Linux includes.  I took all of these from Slackware 3.3 since it’s from around that era.

So on the plus side this cross compiler + library set , will crank out static ELF executables, which makes running things on alien platforms all the better.

On the realistic side, I doubt anyone will need it, but here it is.

Clang didn’t want to build anything this old, but luckily that backported GCC-4.2 has no issues.

Slackware 14.1 is released!

A good friend mentioned that Slackware 14.1 was just released.

So I thought I’d take this time to instead install SLS 0.98-1 on Qemu.

Now this was the first version of Linux that I actually started to use.  The 0.11 stuff was really a pain to install Minix then copy over enough linux to get it working.  Instead SLS gave us a more usable distro to be installed on a machine with nothing.  And thanks to cd.textfiles.com locating a download set was trivial.

Back in late 1992 I downloaded the zip files from CCUG at a blistering 2400 baud.  I remember it took a week to get the A, B and C series.  And I had to get a new box of 5 1/4″ High Density diskettes for the install (and another two for my MS-DOS / Windows 3.1 backup).

And just as back then, these zip files are missing files.  INSTALL.END is missing from the A & B sets, which confuses the installer.  The kernel source is linked to /usr1 which by default doesn’t exist and will cause that part to fail unless you use a virtual terminal (alt+f2) to remove /root/usr/src/linux so the installer will create the path itself after the installation of the A set.

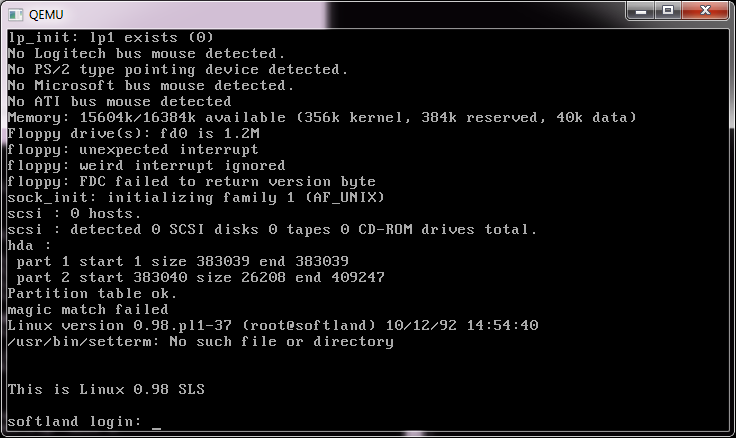
SLS 0.98-1

SLS 0.98-1

Once it’s installed, it is pretty bare.  vi, more, less, grep, and make are not in the install set, so it’s kind of difficult to move around.  Emacs is there if you want it.  As ultra primitive as this set is, it does install on an empty machine, which for the time was a big accomplishment.

One cool feature of this installset is that you aren’t tied to Minix’s filesystem, but you can use the new and exciting extfs, or Extended File system.

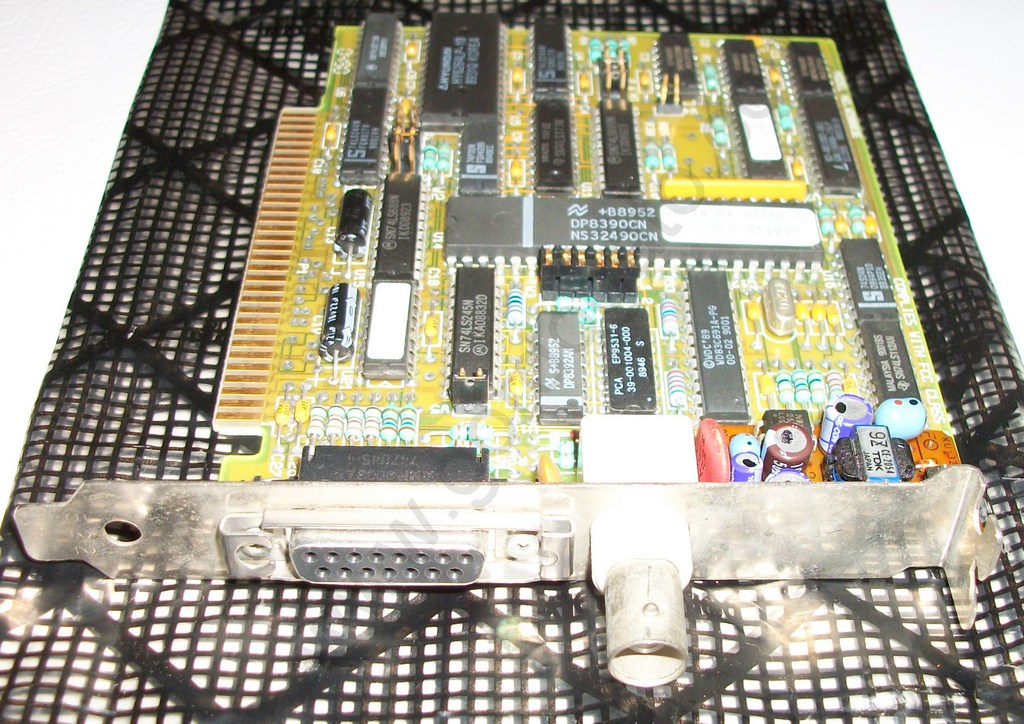
While the default kernel doesn’t see my emulated ne2000, as at this point the only supported NIC is the Western Digital 8003.

wd8003

wd8003

As mentioned in we.c it was heavily based on the 386bsd code, although Linux used it’s own TCP/IP implementation, and not importing the Net/1 code.

I would imagine there are patches out there that’ll  no doubt add in NE2000 support.

Also included was a very primative dosemu version 0.3, that can sort of run some MS-DOS programs.

dosemu on linux

DOSEMU 0.3

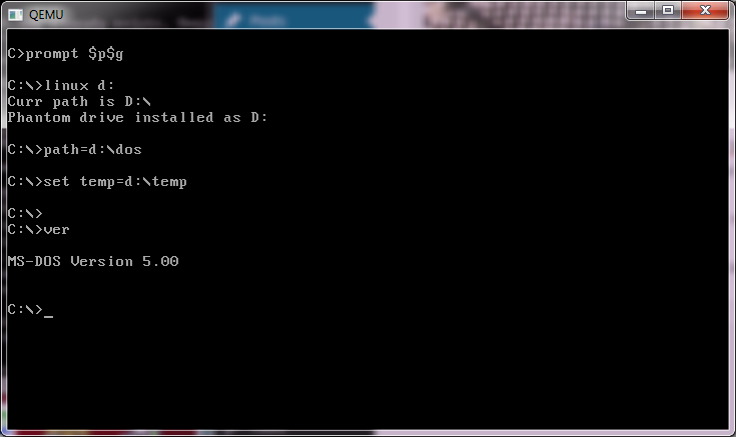
More complicated stuff like Qbasic will crash it out.  Although with a bit of work I did get MS-DOS 5 to boot from it’s “virtual hard disk”.  It really is more so amazing it works as well as it does at this point.

For anyone feeling crazy, here is my installed disk image, and here is the ‘fixed’ install diskettes.

Now this reminds me of “turning the engine off and then back on again at 55 mph.”

the v86-64 patch, Allows you to enter v86 mode from long mode on a 64bit linux kernel.

Basically it works just like an old school DOS Extender, where it’ll switch from long mode, to 32bit compatible mode, then enter v86 mode run some code, then re-enter 32bit mode, to jump back into 64bit long mode.

From an old mailing list:

PERFORMANCE
This 64-bit DOSEMU compile runs substantially slower than the 32-bit compile
that I used previously on this computer.  I have several rather large
PowerBASIC/DOS programs that are, in fact, the main reason why I use DOSEMU.

Up until a couple of days ago, I had Fedora 7/i386 on this computer.  I just
happen to still have the numbers when compiling one of those programs with
PowerBASIC/DOS under DOSEMU:

With F7/i386:  1686600 lines per minute -- total time to compile the program:
0.2 seconds

With F8/x86_64:  230400 lines per minute -- total time to compile the program:
1.6 seconds.

The F8/x86_64 DOSEMU is running approximately 13 times slower.

Which I bet runs a bit faster than an old 386.

Alpha Linux on Qemu

I got sent a quick heads up about a post on firstwork systems, where the author details the steps needed to install, and boot up the installer, and then get the rest of it running.

Very cool stuff!

I pulled down debian-5010-alpha-netinst.iso, and extracted /boot/vmlinuz & /boot/initrd.gz .. Decompressed vmlinuz, and booted away!  For anyone who want’s it, my minimal install is here.  All things considered, it works well!

$ ./qemu-system-alpha -hda alpha.disk -kernel vmlinux -append ‘console=ttyS0’ -initrd initrd.gz -L pc-bios/ -nographic -net nic -net user -drive file=debian-5010-alpha-netinst.iso,if=ide,media=cdrom
PCI: 00:00:0 class 0300 id 1013:00b8
PCI: region 0: 10000000
PCI: region 1: 12000000
PCI: 00:01:0 class 0200 id 8086:100e
PCI: region 0: 12020000
PCI: region 1: 0000c000
PCI: 00:02:0 class 0101 id 1095:0646
PCI: region 0: 0000c040
PCI: region 1: 0000c048
PCI: region 3: 0000c04c
[ 0.000000] Initializing cgroup subsys cpu
[ 0.000000] Linux version 2.6.26-2-alpha-generic (Debian 2.6.26-29) ([email protected]) (gcc version 4.1.3 20080704 (prerelease) (Debian 4.1.2-25)) #1 Sun Mar 4 21:08:03 UTC 2012
[ 0.000000] Booting GENERIC on Tsunami variation Clipper using machine vector Clipper from SRM
[ 0.000000] Major Options: MAGIC_SYSRQ
[ 0.000000] Command line: console=ttyS0
[ 0.000000] memcluster 0, usage 1, start 0, end 11
[ 0.000000] memcluster 1, usage 0, start 11, end 16384
[ 0.000000] freeing pages 11:2048
[ 0.000000] freeing pages 2987:16384
[ 0.000000] reserving pages 2987:2988
[ 0.000000] Initial ramdisk at: 0xfffffc0007b28000 (5076756 bytes)
[ 0.000000] Built 1 zonelists in Zone order, mobility grouping on. Total pages: 16272
[ 0.000000] Kernel command line: console=ttyS0
[ 0.000000] PID hash table entries: 512 (order: 9, 4096 bytes)
[ 0.000000] HWRPB cycle frequency bogus, and unable to estimate a proper value!
[ 0.000000] Using epoch = 2000
[ 0.000000] Turning on RTC interrupts.
[4194001.858529] Console: colour VGA+ 80×25
[4194001.860482] console [ttyS0] enabled
[4194001.865365] Dentry cache hash table entries: 16384 (order: 4, 131072 bytes)
[4194001.865365] Inode-cache hash table entries: 8192 (order: 3, 65536 bytes)
[4194001.871224] Memory: 117120k/131072k available (2162k kernel code, 13728k reserved, 3314k data, 304k init)
[4194001.899544] Security Framework initialized
[4194001.900521] Capability LSM initialized
[4194001.900521] Mount-cache hash table entries: 512
[4194001.905404] Initializing cgroup subsys ns
[4194001.907357] Initializing cgroup subsys cpuacct
[4194001.907357] Initializing cgroup subsys devices
[4194001.918099] net_namespace: 1208 bytes
[4194001.920052] NET: Registered protocol family 16
[4194001.926888] EISA bus registered
[4194001.928841] pci: enabling save/restore of SRM state
[4194001.939583] Linux Plug and Play Support v0.97 (c) Adam Belay
[4194001.953255] NET: Registered protocol family 2
[4194001.964974] IP route cache hash table entries: 1024 (order: 0, 8192 bytes)
[4194001.967904] TCP established hash table entries: 4096 (order: 3, 65536 bytes)
[4194001.967904] TCP bind hash table entries: 4096 (order: 2, 32768 bytes)
[4194001.968880] TCP: Hash tables configured (established 4096 bind 4096)
[4194001.968880] TCP reno registered
[4194001.972787] NET: Registered protocol family 1
[4194001.975716] checking if image is initramfs… it is
[4194003.320442] Freeing initrd memory: 4957k freed
[4194003.323372] VFS: Disk quotas dquot_6.5.1
[4194003.323372] Dquot-cache hash table entries: 1024 (order 0, 8192 bytes)
[4194003.325325] msgmni has been set to 238
[4194003.327278] Block layer SCSI generic (bsg) driver version 0.4 loaded (major 253)
[4194003.327278] io scheduler noop registered
[4194003.327278] io scheduler anticipatory registered
[4194003.329231] io scheduler deadline registered
[4194003.329231] io scheduler cfq registered (default)
[4194003.330208] isapnp: Scanning for PnP cards…
[4194003.750129] isapnp: No Plug & Play device found
[4194003.767708] Serial: 8250/16550 driver $Revision: 1.90 $ 4 ports, IRQ sharing enabled
[4194003.769661] serial8250: ttyS0 at I/O 0x3f8 (irq = 4) is a 16550A
[4194003.782356] brd: module loaded
[4194003.784309] serio: i8042 KBD port at 0x60,0x64 irq 1
[4194003.784309] serio: i8042 AUX port at 0x60,0x64 irq 12
[4194003.787239] mice: PS/2 mouse device common for all mice
[4194003.792122] TCP cubic registered
[4194003.792122] NET: Registered protocol family 17
[4194003.793098] registered taskstats version 1
[4194003.793098] drivers/rtc/hctosys.c: unable to open rtc device (rtc0)
[4194003.795051] Freeing unused kernel memory: 304k freed
[4194003.889778] input: AT Translated Set 2 keyboard as /class/input/input0
[4194011.195438] Uniform Multi-Platform E-IDE driver
[4194011.195438] ide: Assuming 33MHz system bus speed for PIO modes; override with idebus=xx
[4194011.204227] CMD646: IDE controller (0x1095:0x0646 rev 0x07) at PCI slot 0000:00:02.0
[4194011.204227] CMD646: UltraDMA capable
[4194011.205204] CMD646: 100% native mode on irq 28
[4194011.205204] CMD646: IDE port disabled
[4194011.206180] PCI: Setting latency timer of device 0000:00:02.0 to 64
[4194011.206180] ide0: BM-DMA at 0x8040-0x8047
[4194011.596805] hda: QEMU HARDDISK, ATA DISK drive
[4194012.325320] hdb: QEMU DVD-ROM, ATAPI CD/DVD-ROM drive
[4194012.378055] hda: UDMA/33 mode selected
[4194012.378055] hdb: UDMA/33 mode selected
[4194012.379031] ide0 at 0x8050-0x8057,0x8062 on irq 28
[4194012.554812] hda: max request size: 512KiB
[4194012.556766] hda: 4194304 sectors (2147 MB) w/256KiB Cache, CHS=4161/255/63
[4194012.558719] hda: cache flushes supported
[4194012.559695] hda: unknown partition table
[4194012.663211] hdb: ATAPI 4X DVD-ROM drive, 512kB Cache
[4194012.665164] Uniform CD-ROM driver Revision: 3.20
Starting system log daemon: syslogd, klogd.


Linux on the VAX

I don’t know how I missed this thing!

$ cat lvax
load -r ka655.bin
set rq0 ra92
att rq0 /tmp/vmlinux.dsk
att xq dummy0
boot cpu
$ ./vax lvax

MicroVAX 3900 simulator V4.0-0 Beta git commit id: 55c5d205

KA655-B V5.3, VMB 2.7
Performing normal system tests.
40..39..38..37..36..35..34..33..32..31..30..29..28..27..26..25..
24..23..22..21..20..19..18..17..16..15..14..13..12..11..10..09..
08..07..06..05..04..03..
Tests completed.
>>>show dev
UQSSP Disk Controller 0 (772150)
-DUA0 (RA92)
-DUA1 (RD54)
-DUA2 (RD54)
-DUA3 (RX50)

UQSSP Tape Controller 0 (774500)
-MUA0 (TK50)
-MUA1 (TK50)
-MUA2 (TK50)
-MUA3 (TK50)

RLV12 Controller 0 (774400)
-DLA0 (RL01)
-DLA1 (RL01)
-DLA2 (RL01)
-DLA3 (RL01)

Ethernet Adapter 0 (774440)
-XQA0 (08-00-2B-AA-BB-CC)
>>>boot dua0:
(BOOT/R5:0 DUA0

2..
-DUA0
1..0..

CPU type:
80004A04KA650
Boot Head.S loaded at address 00004A00
rpb/bootr5/ap/sp 00000000 00000000 00000344 00004800
relocated at phys address 00100307
CPU type: 0A000006 sidex: 01530302

Starting VM
Linux/VAX ([email protected])
KA650 sidex = 01530302
RPB info: l_pfncnt: 00007f98, .l_vmb_version: 0a000207 .l_badpgs: 00000000
Physical memory: 00007f98 HW pagelets, 00000ff3 pages (16332KB)
CPU type: KA650, SID: 00000000
VM: mapped physical from 80000000 to 80ff3000, iomap from 80ff3000
VM: vmalloc from 810f3000 to 814f3000
VM: ptemap from 814f4000 to 837f4000 for 64 processes
calling start_kernel…

Linux version 2.4.16 ([email protected]) (gcc version 2.95.2-linuxvax-dynamic-dev (CVS)) #28 Wed Feb 12 09:55:28 GMT 2003
kernel_cmd_line 80004a04
root=/dev/nfs ip=192.168.5.240:192.168.5.67:::vaxemu:eth0:none nfsroot=/mnt/redhat/vax_emu/vaxroot rw debug init=/bin/sh
VAXMM: Initialising mm layer for 64 tasks of size 64MB
VAXMM: system page table base 8020b800, length (bytes) 6fe80 length (ptes) 1bfa0
bootmap size = 00000200
calling free_bootmem(start=00001000, len=000ff000)
calling free_bootmem(start=0027c000, len=00d77000)
On node 0 totalpages: 4083
zone(0): 4083 pages.
zone(1): 0 pages.
zone(2): 0 pages.
Kernel command line: root=/dev/nfs ip=192.168.5.240:192.168.5.67:::vaxemu:eth0:none nfsroot=/mnt/redhat/vax_emu/vaxroot rw debug init=/bin/sh
Calibrating delay loop… 23.29 BogoMIPS
Memory: 14556k/16332k available
Dentry-cache hash table entries: 2048 (order: 2, 16384 bytes)
Inode-cache hash table entries: 1024 (order: 1, 8192 bytes)
Mount-cache hash table entries: 512 (order: 0, 4096 bytes)
Buffer-cache hash table entries: 1024 (order: 0, 4096 bytes)
Page-cache hash table entries: 4096 (order: 2, 16384 bytes)
POSIX conformance testing by UNIFIX
Linux NET4.0 for Linux 2.4
Based upon Swansea University Computer Society NET3.039
Starting kswapd
pty: 256 Unix98 ptys configured
Serial driver version 5.05c (2001-07-08) with no serial options enabled
block: 64 slots per queue, batch=16
RAMDISK driver initialized: 16 RAM disks of 4096K size 1024 blocksize
IO mapped phys addr 0x20088000, 0x0008 pages at virt 0x80ff3000 (IOMAP PTE index 0x0000)
ttyS0: Internal processor register console
IO mapped phys addr 0x20001000, 0x0001 pages at virt 0x80ffb000 (IOMAP PTE index 0x0008)
delqa qbus vector: 4 (0004, 0x0004)
Ethernet address in ROM: 08:00:2b:aa:bb:cc
NET4: Linux TCP/IP 1.0 for NET4.0
IP Protocols: ICMP, UDP, TCP
IP: routing cache hash table of 512 buckets, 4Kbytes
TCP: Hash tables configured (established 512 bind 512)
eth0: resetting DELQA… done
IP-Config: Guessing netmask 255.255.255.0
IP-Config: Complete:
device=eth0, addr=192.168.5.240, mask=255.255.255.0, gw=255.255.255.255,
host=vaxemu, domain=, nis-domain=(none),
bootserver=192.168.5.67, rootserver=192.168.5.67, rootpath=
NET4: Unix domain sockets 1.0/SMP for Linux NET4.0.
Looking up port of RPC 100003/2 on 192.168.5.67

I’m amazed that it runs this far under SIMH.  Sadly though disks are not supported on any of the SIMH models, as Linux relies on certain CPU models:

  • VAXstation 3100m76 (KA43 CPU)
  • VAXstation 3100m38 (KA42 CPU)

The project has moved from sourceforge, to a dedicated server.  Sadly it seems that it has been a few years between updates, but I guess someone could carry the torch….

Upgrading Debian Squeeze to Wheezy

These are just my notes on what I had to do, while upgrading my VPS from Debian Squeeze (6.0.7) to Debian Wheezy (7.1)

Just to verify what version I’m running:

# lsb_release -a
No LSB modules are available.
Distributor ID:	Debian
Description:	Debian GNU/Linux 6.0.7 (squeeze)
Release:	6.0.7
Codename:	squeeze

First edit the /etc/apt/sources.list to include ONLY

deb http://ftp.de.debian.org/debian/ squeeze main contrib non-free
deb-src http://ftp.de.debian.org/debian/ squeeze main contrib non-free

deb http://security.debian.org/ squeeze/updates main contrib non-free
deb-src http://security.debian.org/ squeeze/updates main contrib non-free

# squeeze-updates, previously known as 'volatile'
deb http://ftp.de.debian.org/debian/ squeeze-updates main contrib non-free
deb-src http://ftp.de.debian.org/debian/ squeeze-updates main contrib non-free

Next we walk apt through an update/upgrade phase to make sure everything is current before we do the actual upgrade

apt-get update
apt-get upgrade
apt-get dist-upgrade

Now we have to make sure no packages are being held from being upgraded:

dpkg --audit
dpkg --get-selections | grep hold

Then we run ‘aptitude’ and press ‘g’ hoping to get the message:

No packages are scheduled to be installed, removed or upgraded

Which means we are ready to proceed with the upgrade!

Now edit /etc/apt/sources.list to ONLY include:

deb http://ftp.de.debian.org/debian wheezy main contrib non-free
deb-src http://ftp.de.debian.org/debian wheezy main contrib non-free
deb http://ftp.de.debian.org/debian wheezy-updates main contrib non-free
deb http://ftp.de.debian.org/debian-security wheezy/updates main contrib non-free

Now we are ready to pull the trigger!

apt-get update
apt-get upgrade
apt-get dist-upgrade

Provided that went well, we can now reboot into the new system!

# lsb_release -a
No LSB modules are available.
Distributor ID: Debian
Description: Debian GNU/Linux 7.1 (wheezy)
Release: 7.1
Codename: wheezy

Caveats!

First thing I had an issue with, was re-running apt-get update/apt-get upgrade I got the following errors:

The following packages have been kept back:

db4.8-util ia32-libs

So let’s fix the ia32-libs issue first.  For those who don’t know, ia32-libs lets x86_64 systems run old i386 32bit binaries.  Trying a simple ‘fix’ of installing the libraries got me this:

# apt-get install ia32-libs
Reading package lists... Done
Building dependency tree       
Reading state information... Done
Some packages could not be installed. This may mean that you have
requested an impossible situation or if you are using the unstable
distribution that some required packages have not yet been created
or been moved out of Incoming.
The following information may help to resolve the situation:

The following packages have unmet dependencies:
 ia32-libs : Depends: ia32-libs-i386 but it is not installable
E: Unable to correct problems, you have held broken packages.
#

Luckily the fix is rather simple, we need to add the i386 architecture, like this:

# dpkg --add-architecture i386

Then re-run an apt-get udate/apt-get upgrade, followed by the installation of the ia32 libraries:

#apt-get install ia32-libs

And that settled that out.

The db4.8-util thing was somewhat easier:


# apt-get install   db4.8-util
Reading package lists... Done
Building dependency tree       
Reading state information... Done
The following packages were automatically installed and are no longer required:
  lib32asound2 lib32bz2-1.0 lib32gcc1 lib32ncurses5 lib32stdc++6 lib32tinfo5
  lib32v4l-0 lib32z1 libc6-i386 libio-stringy-perl libjpeg62
  libmono-corlib2.0-cil libmono-i18n-west2.0-cil libmono-posix2.0-cil
  libmono-security2.0-cil libmono-system2.0-cil libmysqlclient16 libsox1b
  libt1-5 mono-2.0-gac
Use 'apt-get autoremove' to remove them.
The following packages will be REMOVED:
  libdb4.8
The following packages will be upgraded:
  db4.8-util
1 upgraded, 0 newly installed, 1 to remove and 0 not upgraded.
Need to get 829 kB of archives.
After this operation, 121 kB disk space will be freed.
Do you want to continue [Y/n]? y

Which seemed to be fixing things, but it was an out of date mono installation on my part. So I had to re-add the location where I got my mono:

deb http://debian.meebey.net/pkg-mono ./

Then remove it

apt-get update
apt-get upgrade
apt-get remove mono-2.0

Then remove the mono line from the /etc/apt/sources.list

apt-get update
apt-get upgrade
apt-get install mono-2.0

Another error message I saw in my apache error log was this:

Error: PHP Startup: Unable to load dynamic library '/usr/lib/php5/20100525/suhosin.so' -
/usr/lib/php5/20100525/suhosin.so: cannot open shared object file: No such file or directory in Unknown, line 0

Which can be traced to a no longer supported extension suhosin. So I just purged it from the system:

aptitude purge php5-suhosin

Another problem that has cropped up is the following when adding or removing packages:

dpkg: warning: files list file for package ‘libc6:i386’ missing; assuming package has no files currently installed
dpkg: warning: files list file for package ‘libtinfo5:i386’ missing; assuming package has no files currently installed
dpkg: warning: files list file for package ‘liblzma5:i386’ missing; assuming package has no files currently installed
dpkg: warning: files list file for package ‘libavahi-common-data:i386’ missing; assuming package has no files currently installed

I’m not sure why this suddenly happened.  However the fix is simple enough, we just have to regenerate the lists, something like this for libc:

dpkg-deb -c /var/cache/apt/archives/libc6_2.13-37_i386.deb | awk {‘print $6’} | cut -f2- -d. | sed ‘s|^/$|/.|’ | sed ‘s|/$||’ > /var/lib/dpkg/info/libc6:i386.list

And that seems to be it so far.

Caldera Open Linux

(note this is a guest post from Antoni Sawicki aka Tenox)

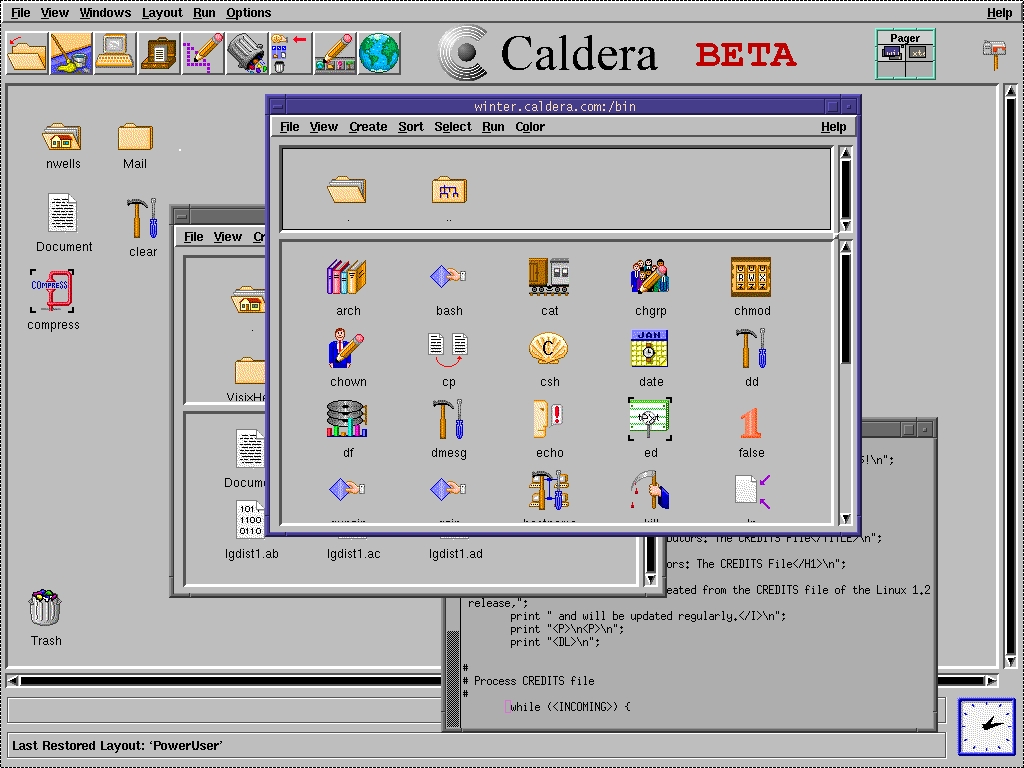
I have been working with Linux since around 1992, both at home and at work. I have probably seen it all with exception of item in the title. Lurking around my files, I found screenshot of a beta version of Caldera Linux. For some odd reason I somehow managed to never actually see it with my own eyes back in the day. The supreme Linux desktop was always matter of just myths and legends.

caldera

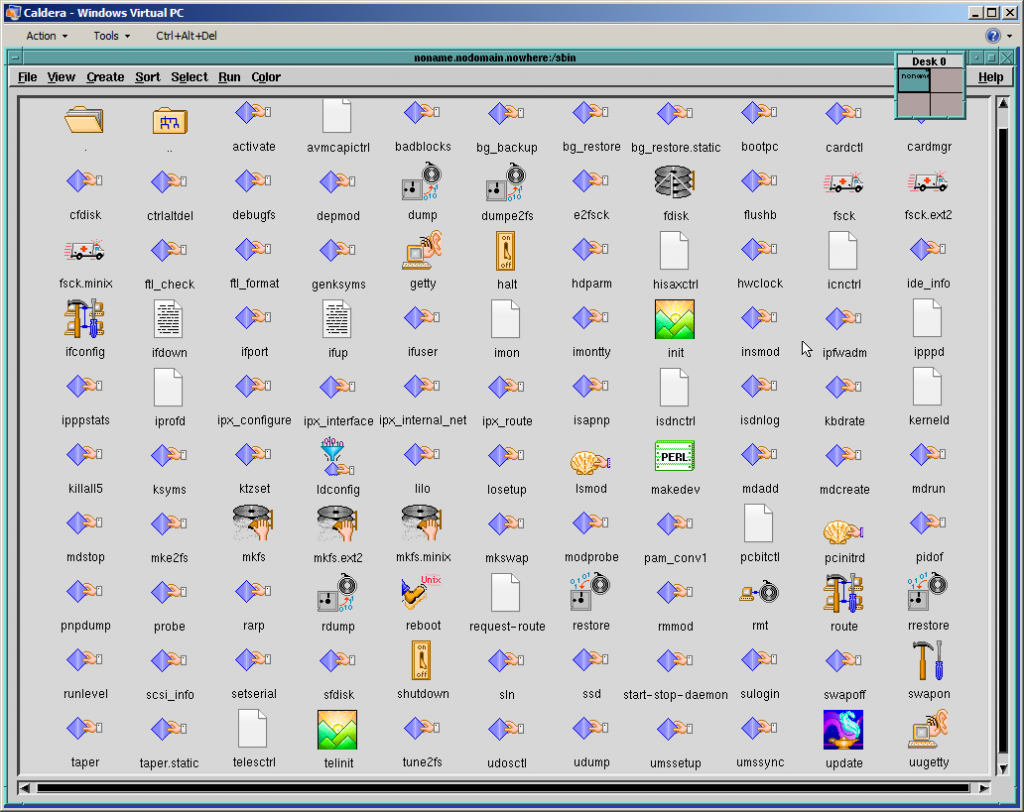
Recently I came across install media for the Caldera Open Linux 1.3 and decided to take it for spin and see how it really measures to it’s hype. The system installed just fine with dialog based setup steps. However as I wanted to see the GUI in action there was a problem – 640×480 VGA mode, or rather lack of better video mode to work with.

Unfortunately neither VMware nor VirtualBox do not support anything better than the crippled VGA mode. They do it for all other devices, like network card, mouse, ide and atapi cdrom. But somehow not for graphics. Fortunately the other virtualization engines are bit better. QEMU supports Cirrus Logic and Virtual PC supports S3 Trio.

I have spent several hours trying to convince the ancient Xfree86 to work with QEMU, to no avail. All I managed t o get was this:


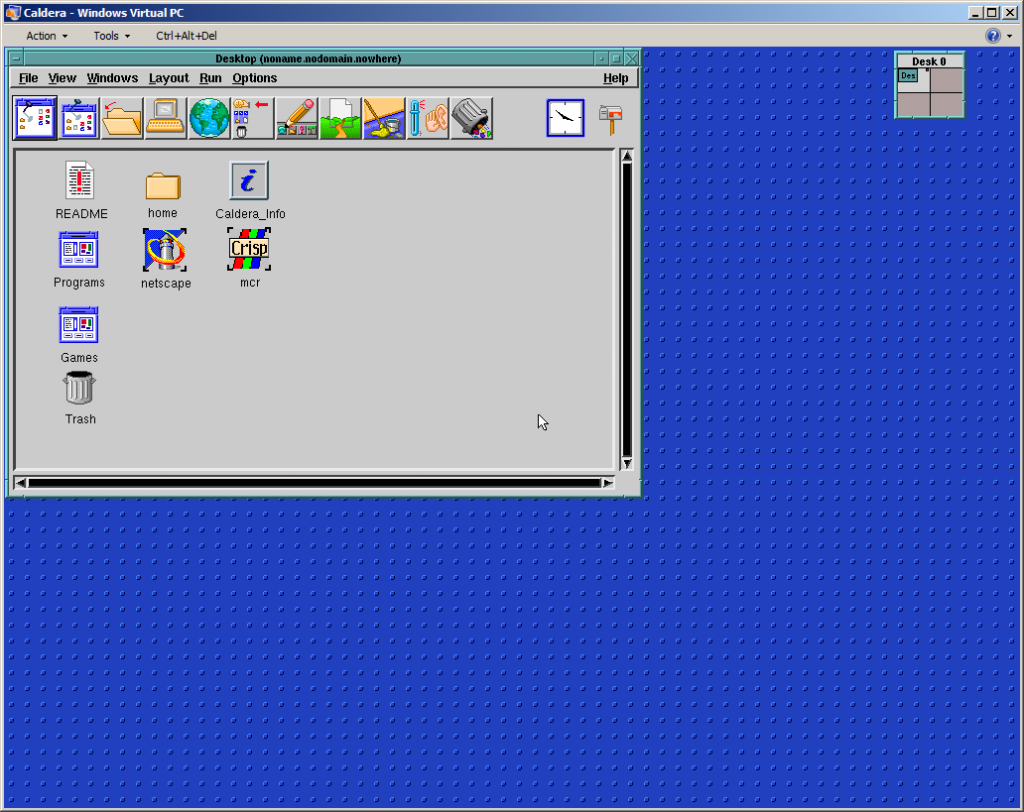
Out of options I have decided to try Virtual PC. Unfortunately the system would not install due to disk errors. Upon some research I’ve found the issue was IO-APIC which I promptly disabled in the kernel (noacpi). It did not help the install much, but allowed me to run a qemu-installed and converted disk image.  This is a bit of shame that the best virtualization engine to run ancient Linux was Microsoft VPC. Anyway to my amusement I’ve got this:

cal-vpc1

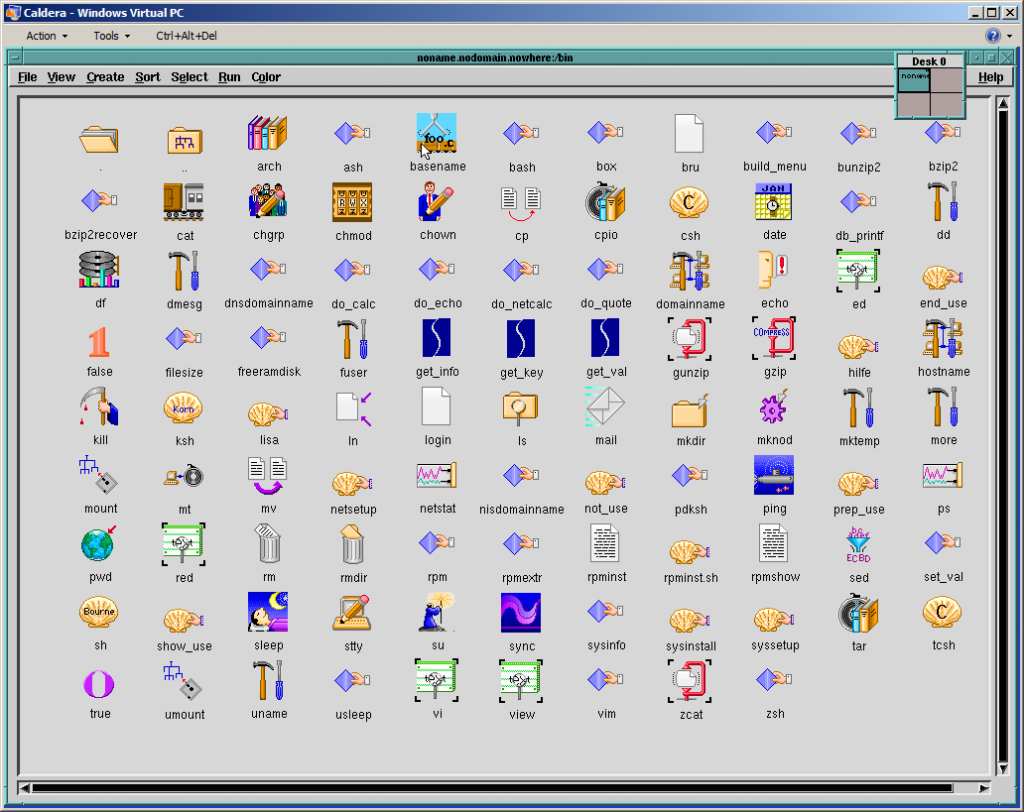
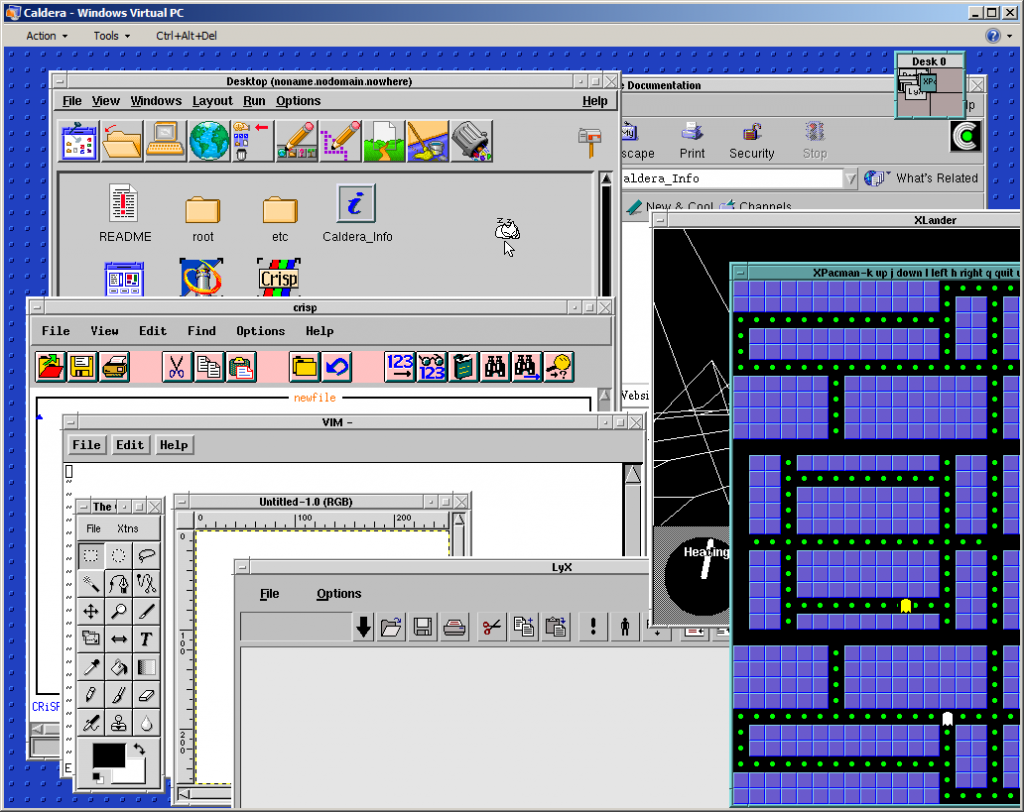
And I was able to explore the GUI a little bit more:

cal-vpc2

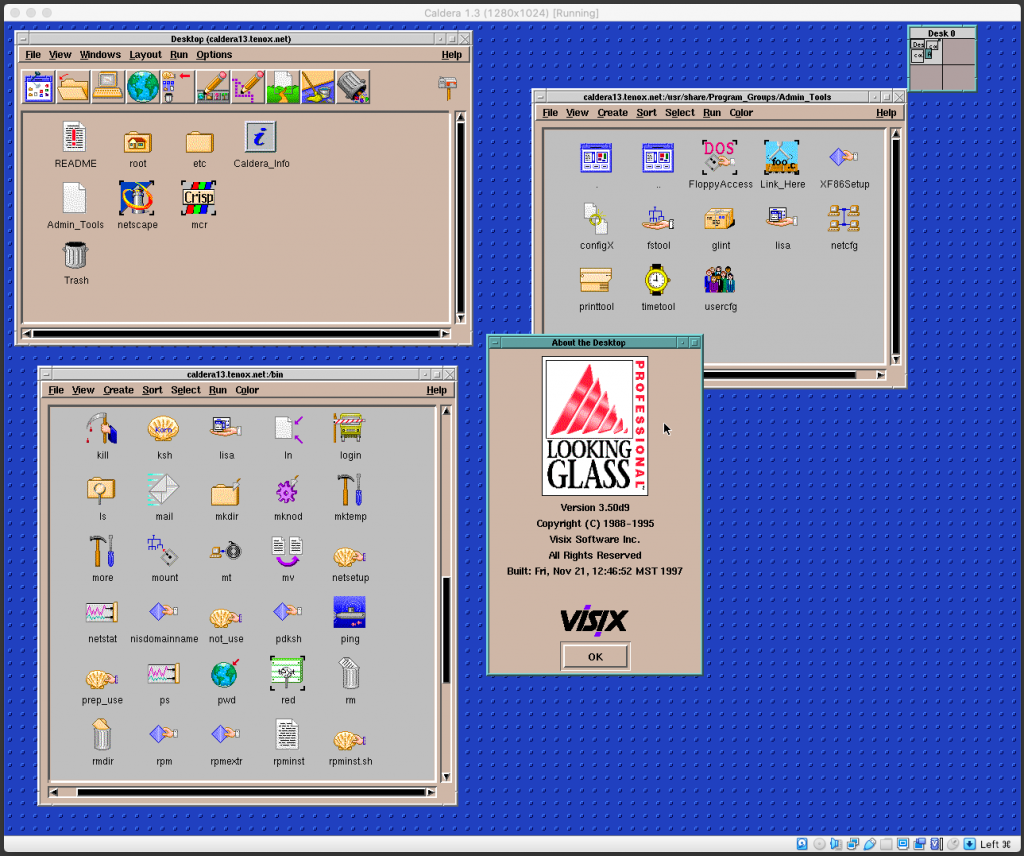
cal-vpc3

Wait a second, these icons remind me of something! Apparently Visix Looking Glass became Caldera Desktop… I will need to dig in deeper in to this eventually.

Apart from that Caldera is loaded with tons of ancient software. Pretty much everything there was available on Linux these days and all working out of the box. Neozeed will be happy to see Neko in action (see the last screenshot)!

cal-vpc4

You can download install media and ready virtualized images here.

Update:
Michal Necasek of OS2 Museum has fixed XF86_SVGA so that it works correctly with Virtual Box in higher resolutions as well. “You’ll have to set up the X so that it uses the XF86_SVGA server and tell it to automatically detect the graphics hardware. Then it should be just a question of selecting some sensible monitor and creating a few modes. If things are configured properly, you’ll see something like “SVGA: chipset: boxv” in the X server output.“. Download it here. (It’s binary only, no source). 

Caldera Linux 1.3

Above screenshot is Caldera 1.3 under Virtual Box with SVGA driver from Michal Necasek. Network also work with PCnet III adapter in bridged mode. The IP address is hardcoded for 192.168.1.111. You can download OVA here.

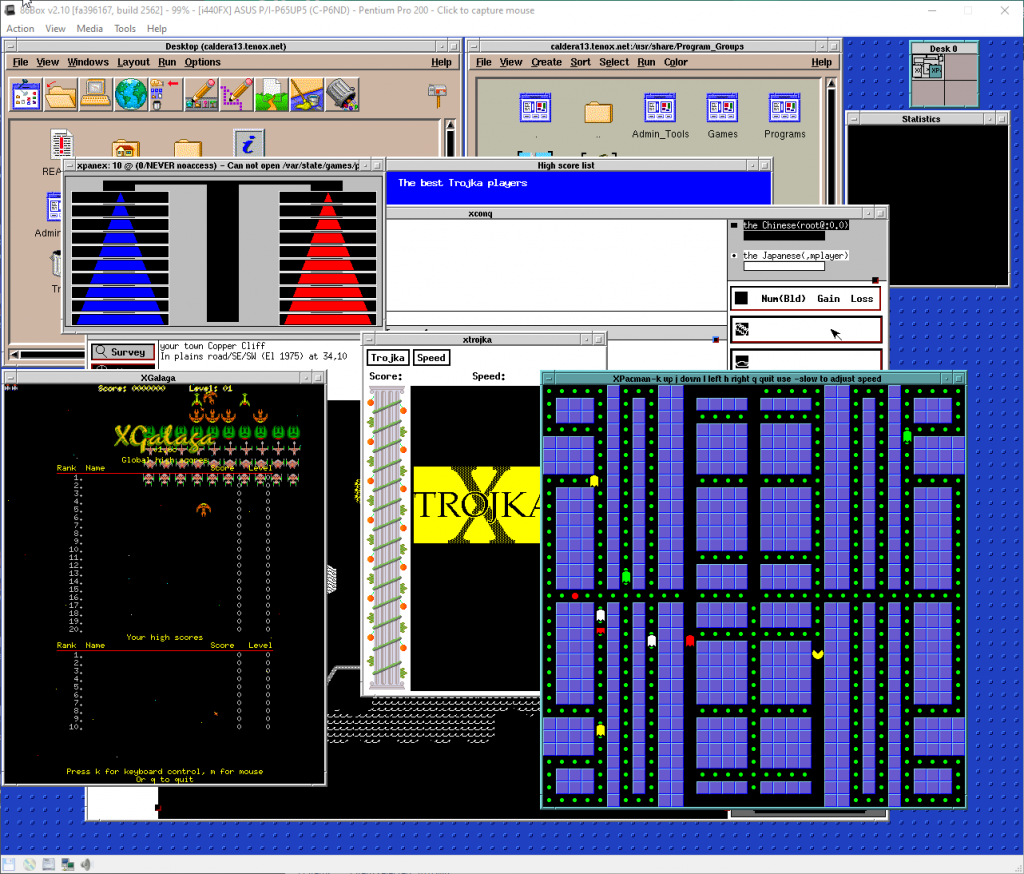
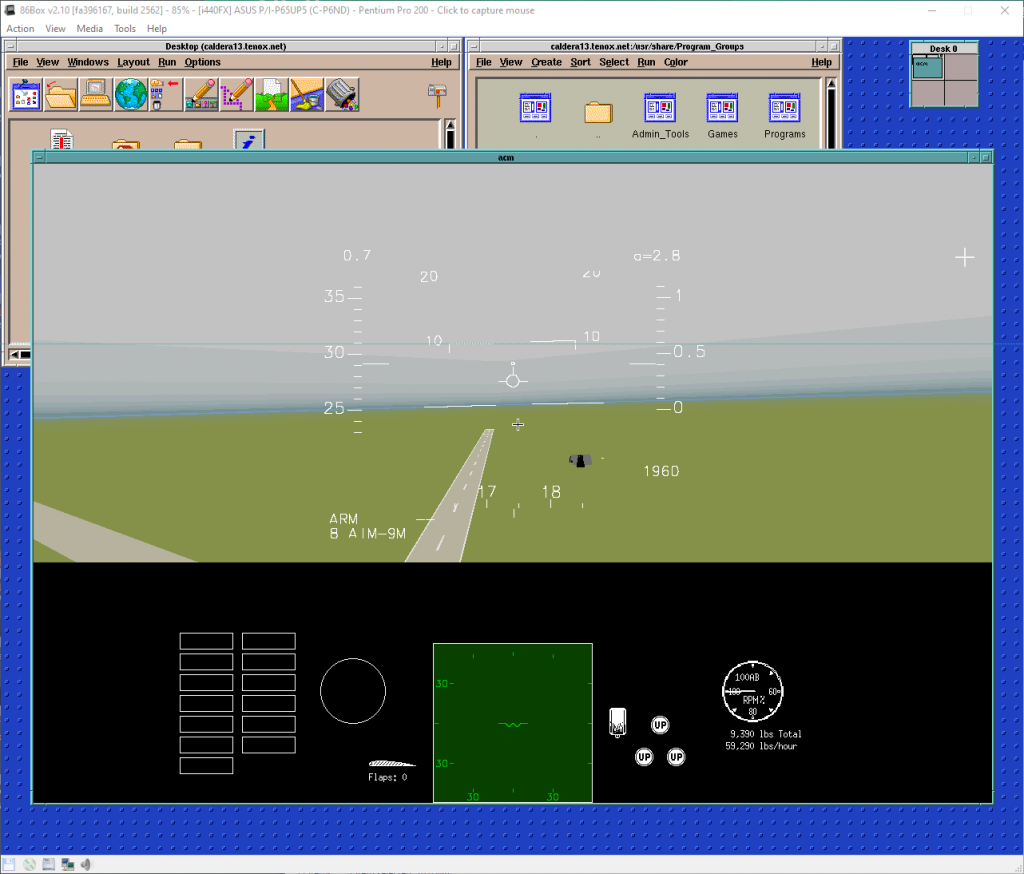
Update: Recently I have installed Caldera 1.3 on 86box. Unlike most hypervisors, this provides excellent emulation of various video and network cards. I have picked S3 and NE2000. Everything installed and worked out of the box. While emulation is generally slower it provides accelerated video making everything working smoothly including games.

A pre-installed Caldera 1.3 for 86box is available here. Login with root/root.

Also check out WABI running on Caldera.

Ancient Amiga Linux

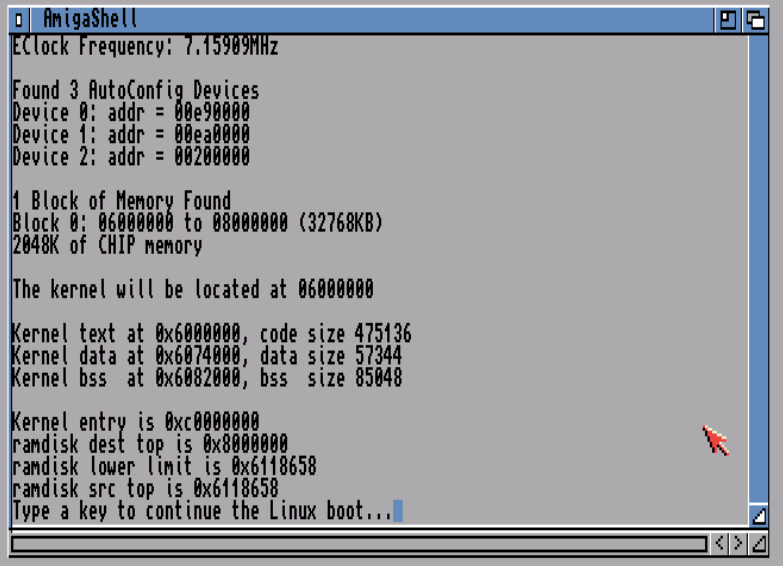
So for some reason I though I would have luck with this super old m68k port of Linux running on UAE, now that it can run AMIX.  Sadly it cannot.

From what I can tell the 0.06 strain was the first to boot and do something, so this archive that includes 0.7 along with 0.08 & 0.09 is a good find.  While it may not seem that immediately obvious, the m68k port to the Atari ST & Commodore Amiga were the first community port of Linux to a different processor.  At the time Linus was working on a Dec Alpha port from what I recall.

For what it is worth.

For what it is worth.