
Back in the old old..
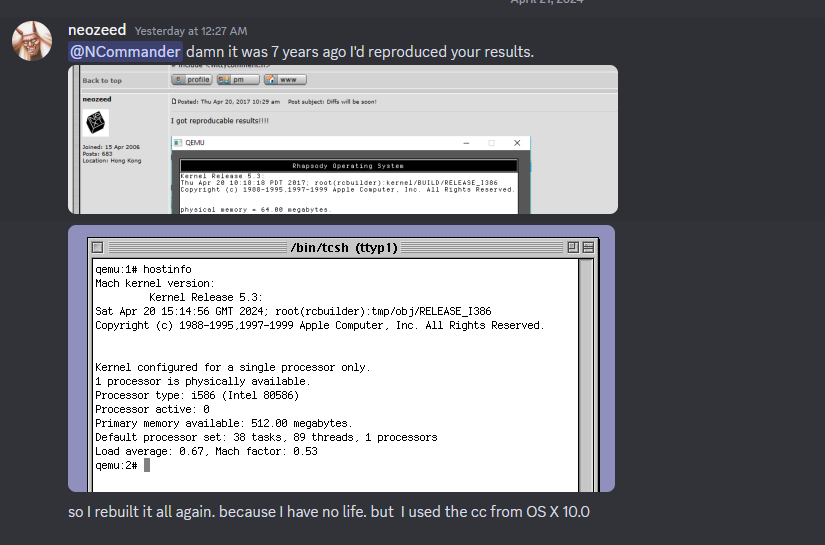
It’s hard to believe it’s been 7 years ago since I reproduced Ncommander‘s adventure in building the Mach kernel from Darwin 0.1 sources that had been found years ago. At one point we’d managed to build enough of Darwin to do a dump/restore onto a new disk image, and have a mostly built Darwin system save for a hand full of files.
Time goes on by, and memories fade, and I thought it’d be worth going over the adventure, yet again. Just as it was true back then, I thought I’d reproduce the same setup that I’d been using back then. Qemu was a new and exciting thing back then, and
the Disk driver is VERY picky and honestly ancient Qemu is a pretty solid option to emulate NeXTSTEP/OPENSTEP/Rhapsody with some patches to both 0.8 & 0.9 by Michael Engel, which change a nested interrupt and add support for a busmouse, as the PS/2 mouse doesn’t work for some unknown reason. I know many are scared of old Qemu, but the disk support is pretty solid and the CPU recompilation is very fast, so having to rely on MinGW v3 isn’t so terrible.
While I had hid away a lot of these resources on archive.org, I thought it was best to just go back to the oldest post I had where I had painfully documented how to compile Qemu and get it working with NeXTSTEP, back on BSDnexus. I’m so glad I took the time so long ago to not only write it down, and add screenshots, but also tag the version numbers. Software drift, especially free software can be so difficult to pin down, and it’s nice to be able to return to a known good value. I went ahead and placed the recreated toolchain over on archive.org.
Rhapsody is a weird OS, in that NeXT had kind of given up on the OS market after their NeXT RISC Workstation had basically died with the 88k, and even their early abandoned PowerPC 601 aka MC98000/98601 port. Apple had left a few of the changelogs, in the source code. It’s very interesting stuff! I guess to go off on my own tangent NeXT was just too early, the cube with it’s Unix & magnetic optical media and great audio DSP capabilities was just too ahead of the curve. What the cube couldn’t pull off in 1988, the iMac and OS X sure did in 2001.
I also added UDP support to this Qemu so I could use the HecnetNT bridge trick giving me the ability to telnet/ftp into the VM greatly reducing my pain. Back in the day I had used NFS and the network slirp redirection. But I like having direct access so much more!
Rhapsody throws up yet another fun ‘road block’ in that the mouse buttons map backwards for some reason. It’s a trivial fix in the source code, but I made it a runtime option in case I needed or wanted to run NeXTSTEP. And it was a good thing, as I did need to find the NXLock.h file for building one part of Darwin.
When building Darwin, I started with the last x86 version of NeXTSTEP that was available, and that was Apple ”Rhapsody” / Titan1U x86 Developer Release 2. My thinking at the time and still is that the closer you can get your build to whatever they were using as ‘current’ the easier this will be.
Rhapsody can support an 8GB disk, so let’s go with that. This always has an issue with people that try much larger, and just fail, so for my sake and yours let’s just go with 8.
qemu-img.exe create -f vmdk rhapsody.vmdk 8GAnd to simply start off the installer:
qemu -L pc-bios -m 128 ^
-k en-us ^
-rhapsodymouse ^
-hda rhapsody.vmdk ^
-cdrom rhapsody_dr2_x86.iso ^
-fda rhapsody_dr2_x86_InstallationFloppy.img ^
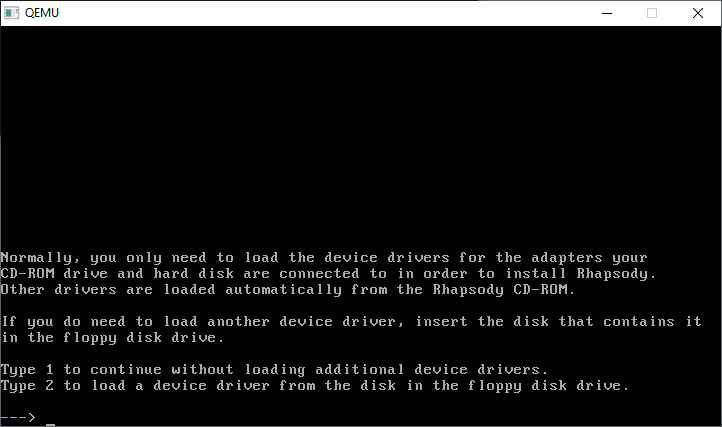
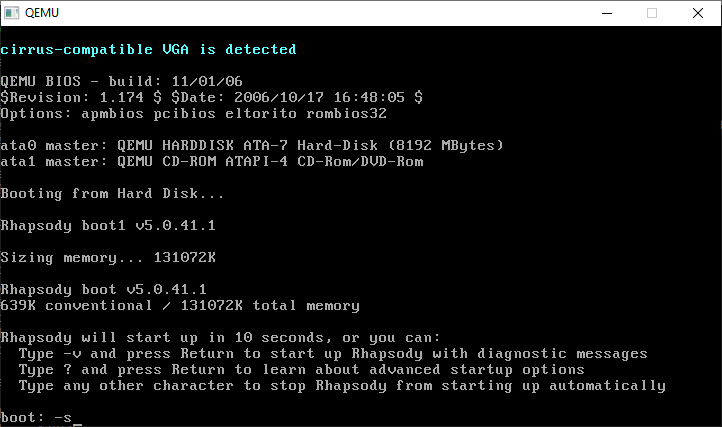
-boot aYou may be wondering, why only use 128MB of RAM? Well there is a bug in the shipping Rhapsody kernel that prevents booting on machines with more than 192? MB of RAM. Naturally, once we are to the point of building our own kernels this won’t be a problem but for now we are limited.
The bootloader will give us a few seconds to do anything fancy, I just hit -v so I always have the verbose boot.

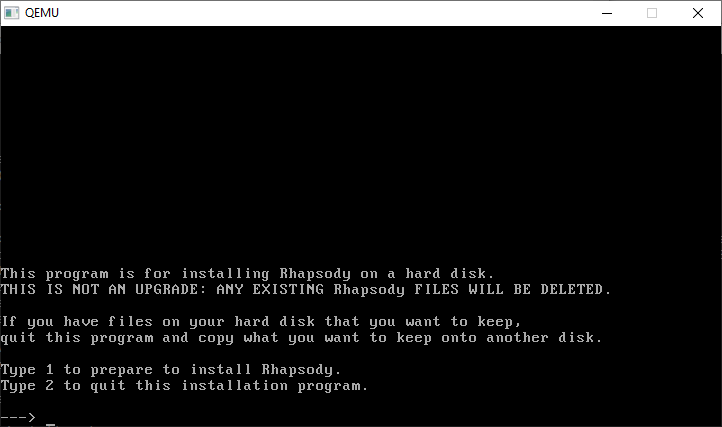
From here it’s just a few options to go thru the installer
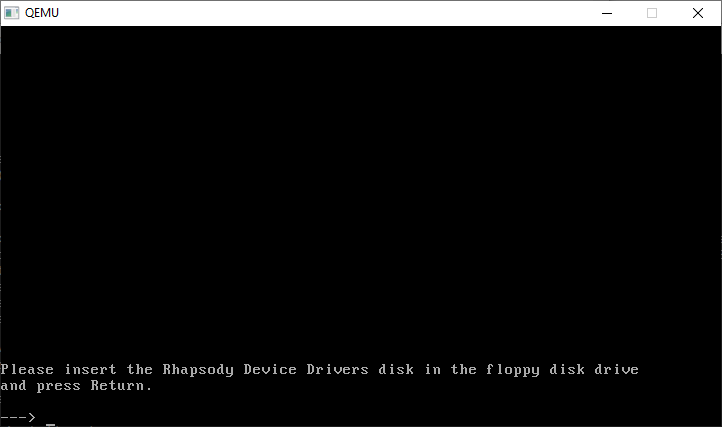
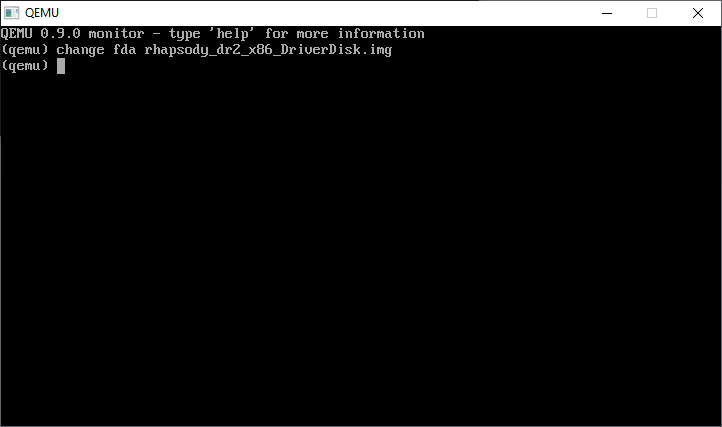
And a disk change is required
CONTROL+ALT+2 will bring up the monitor prompt, where we can change the disk
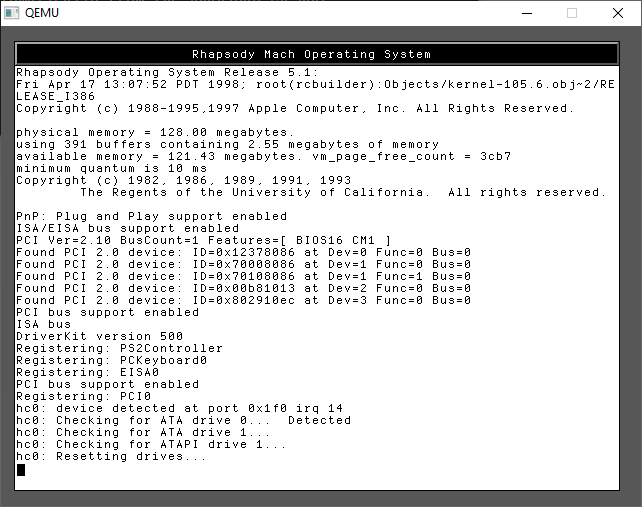
CONTROL+ALT+1 will return us to the console. Now we have to go through all the SCSI cards, and kind of compatible IDE cards
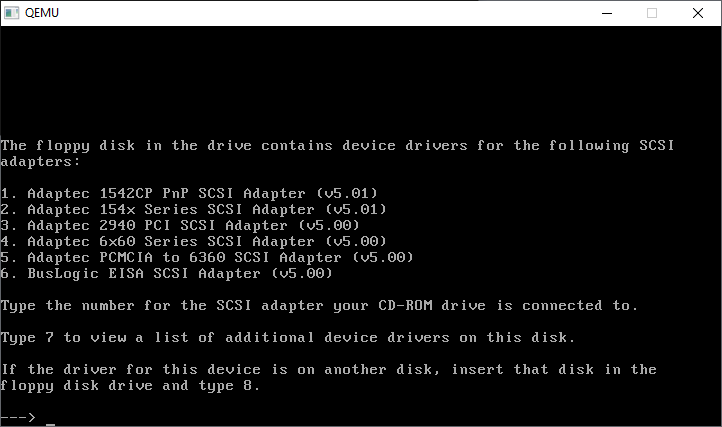
Further..
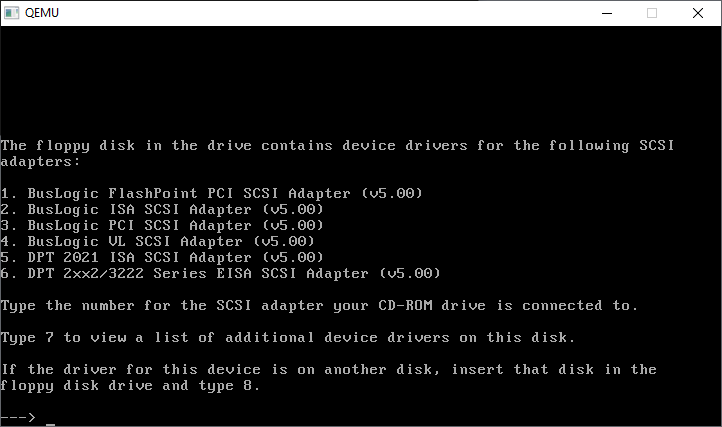
Further still…
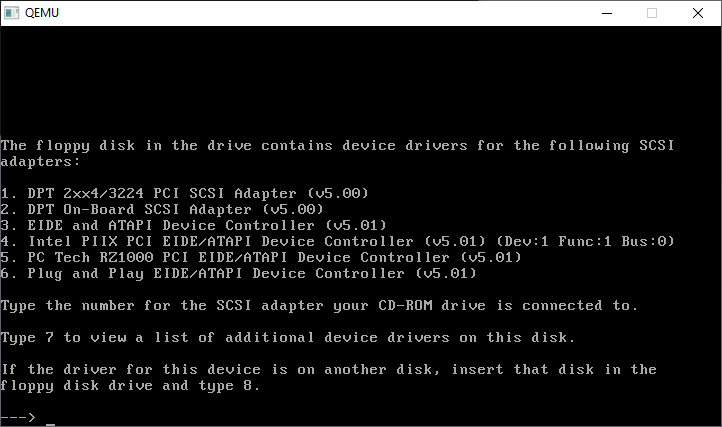
And how select the Primary/Secondary(DUAL) EIDE/ATAPI Device Controller (v5.01)
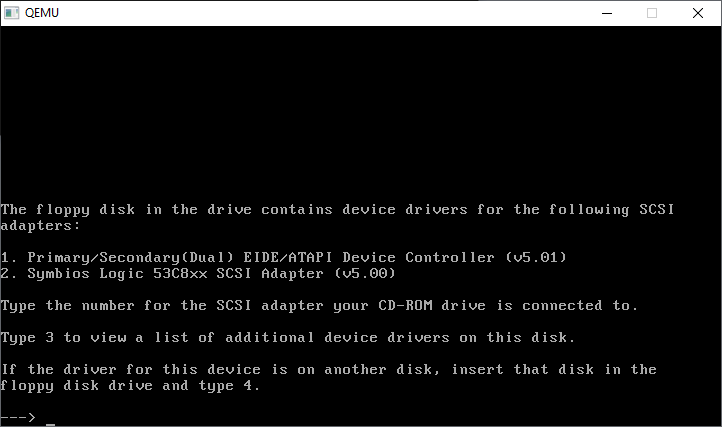
We only need the one driver, so we’re good to go!
Continuing onwards will now start the kernel, along with a change to graphical mode. Just like a NeXT!
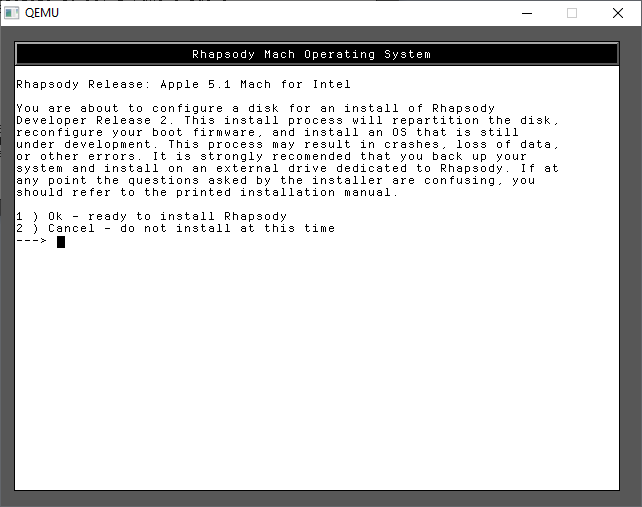
Now we can confirm again we want to install
As you can see there is our hard disk!
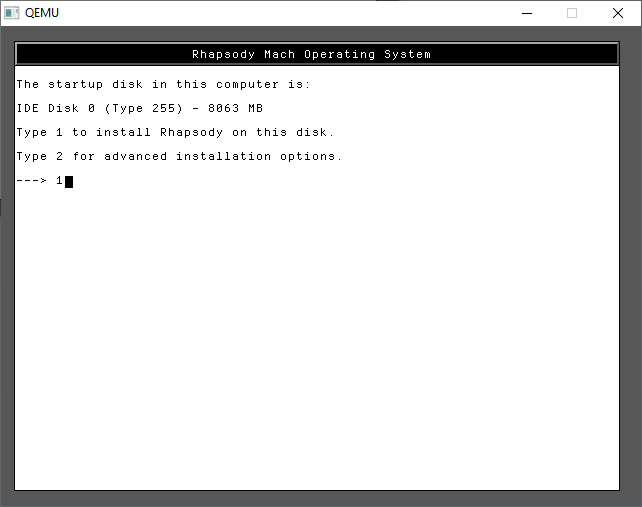
In the future we don’t need to dual boot so, just give it the entire disk.
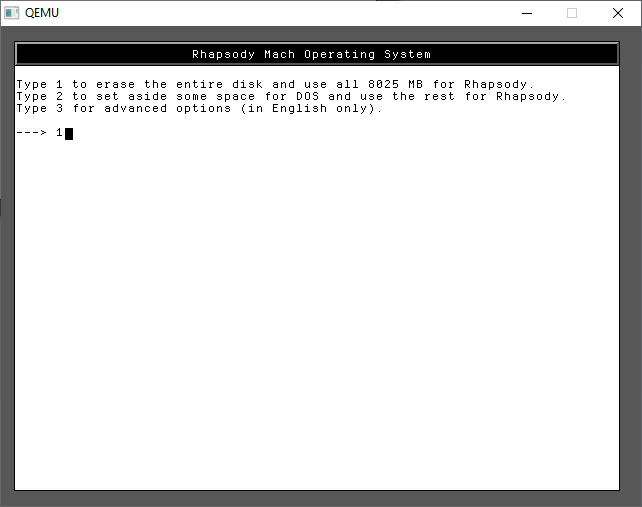
A few more 1’s and we are finally installing!

Trust me it’s fast on Qemu!
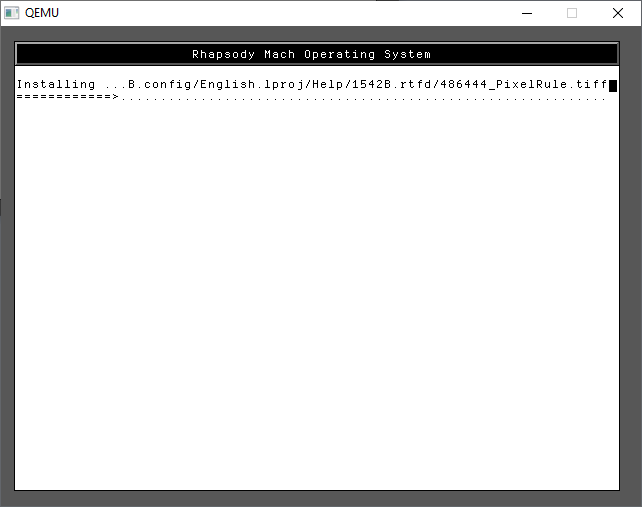
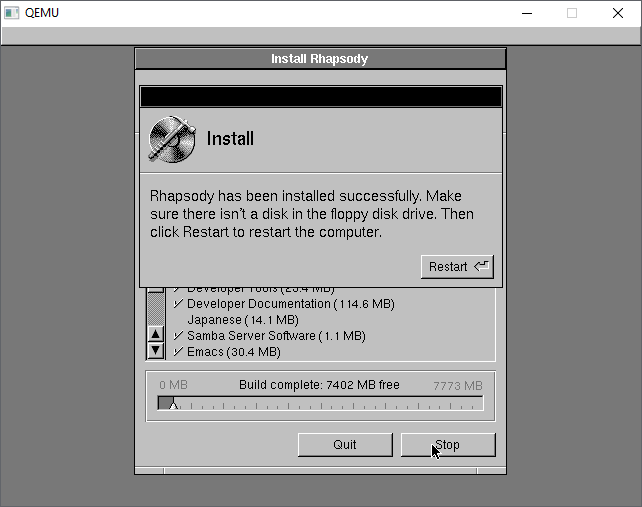
And just like that, we’ve completed the first part of the install.
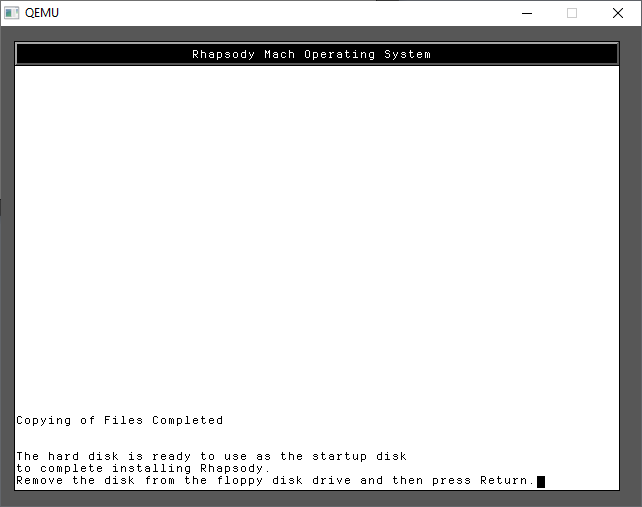
You can use CONTROL+ALT+2 to toggle back to the monitor and type in
eject fda
to eject the floppy, then it’s CONTROL+ALT+1 to return to the display and have it reboot. Qemu won’t try to boot to the hard disk, and with no disk in the drive, it’ll hang at the BIOS. Now is a good time to close Qemu and backup the hard disk. Mostly because I hate repeating this stuff.
To try to make this a bit easier, I’ve made a floppy disk with the NE2000 driver and updated kernel in one place where they can be injected via single user mode. A simple enough config file:
qemu -L pc-bios -m 128 ^
-k en-us ^
-rhapsodymouse ^
-hda rhapsody.vmdk ^
-cdrom rhapsody_dr2_x86.iso ^
-fda nic.flp ^
-boot c
Type in -s for SINGLE USER MODE. This is where a lot of Unix problems got solved in the old days
It’s a little tricky as this does involve typing. As instructed we need to check the hard disk prior to mounting it read/write
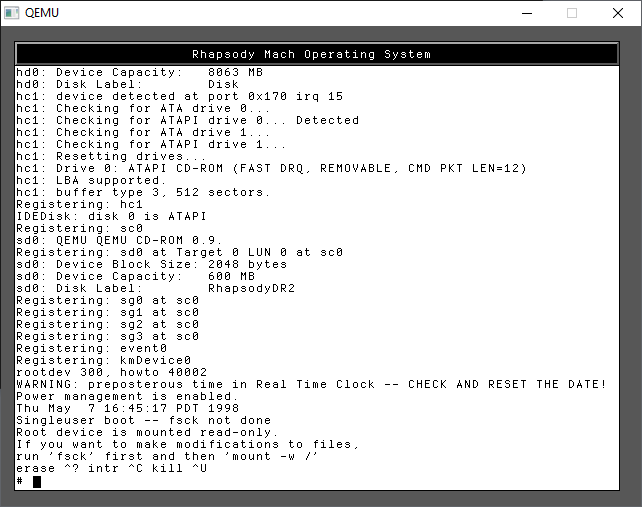
run the commands:
fsck -y /dev/rhd0a
mount -w /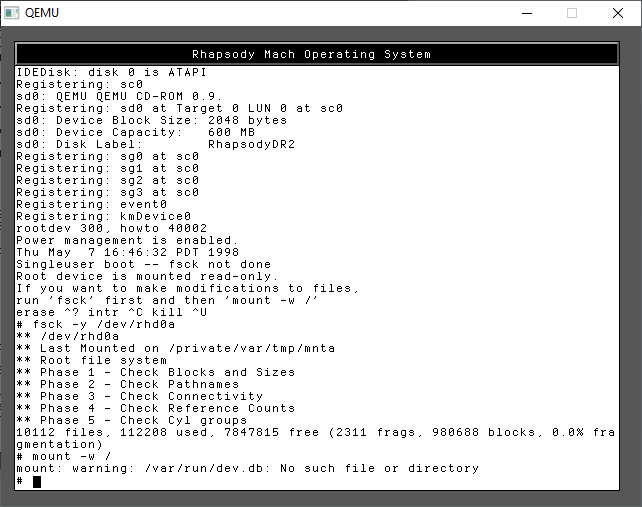
Now we can mount the floppy disk
mkdir /mnt
mount /dev/fd0a /mnt
ls /mnt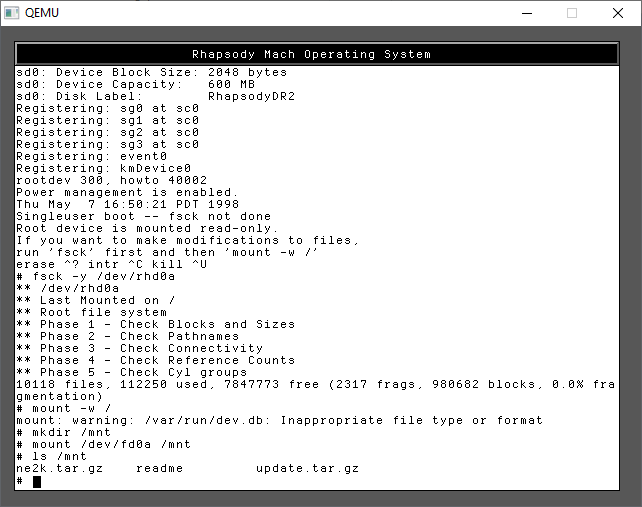
I’ve included both the kernel & NE2000 driver in one file, and JUST the NE2000 driver in the other. For my sake I use the first one, update.tar.gz as I wanted to use the newer kernel ASAP. tar -zxvf didn’t want to run, so I did a rather awkward version to achieve the same thing.
cat /mnt/update.tar.gz | gzip -dc | tar -xvf -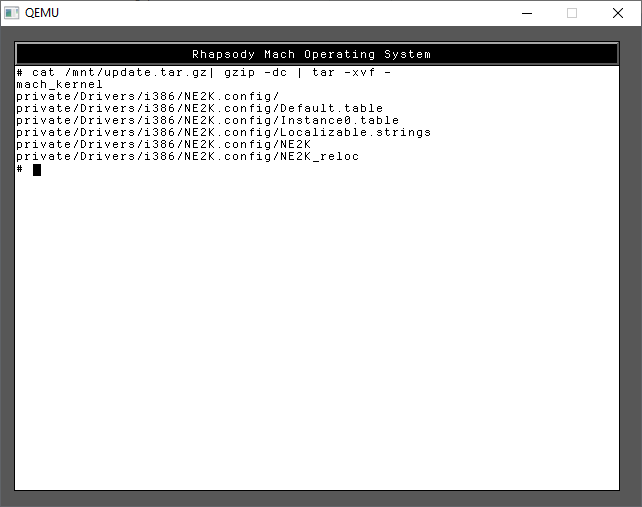
With the files in place, you can now shut down the system with a simple
shutdown -h now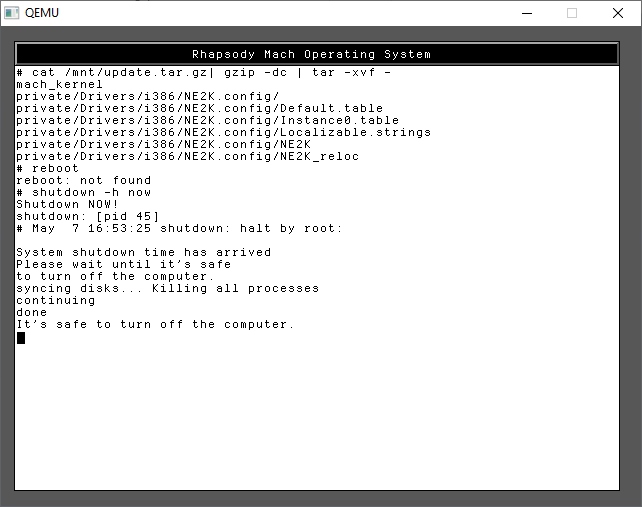
Once more again, I’d shut down the emulator, and backup the hard disk. If anything goes wrong you can restore your backups at any phase, at least saving some time!
Next is the graphical install. In this case I use the hecnet bridge to give full access, you can setup with the slirp driver with a simple “-net user” but it doesn’t matter at the moment Since I opted for the newer kernel, I can take advantage of the 512MB RAM.
qemu -L pc-bios -m 512 ^
-k en-us ^
-rhapsodymouse ^
-hda rhapsody.vmdk ^
-cdrom rhapsody_dr2_x86.iso ^
-fda rhapsody_dr2_x86_InstallationFloppy.img ^
-net nic,model=ne2k_pci,vlan=5 ^
-net socket,udp=0.0.0.0:5001,remote=127.0.0.1:5000 ^
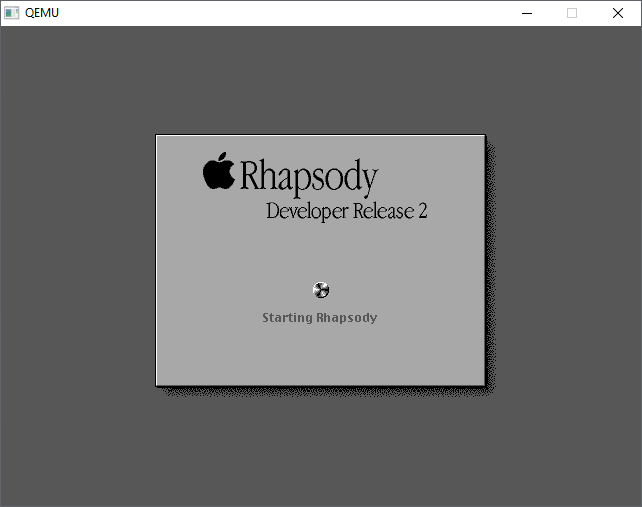
-boot c ^Booting Rhapsody
Now we have to setup the hardware. It should be somewhat straight forward, first we start with the monitor. The mouse should be working although I find that I have to move slowly. Sorry it tracks weird on real hardware too.

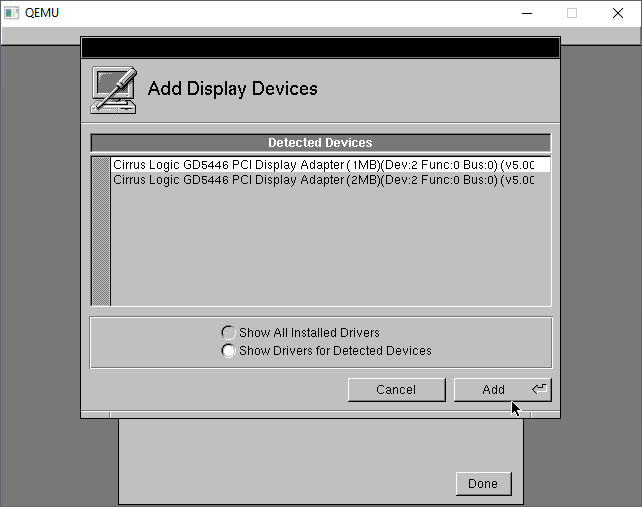
The Cirrus Logic GD5446 should be detected automatically, I just go with the default 1MB
Next under the mice, select the PS/2 mouse and remove it
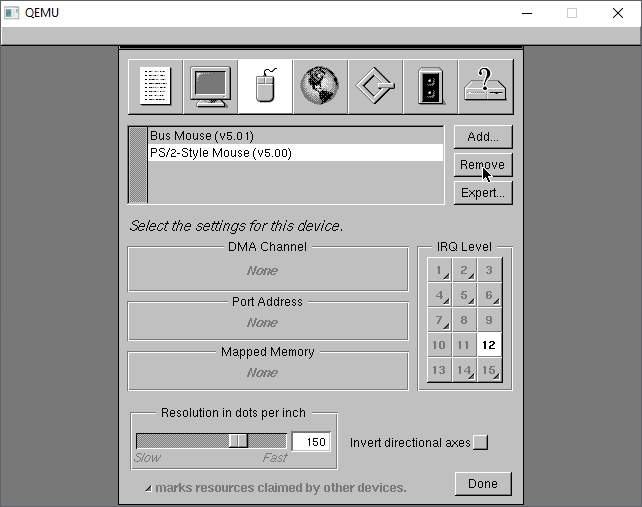
This leaves us with the Bus Mouse driver.
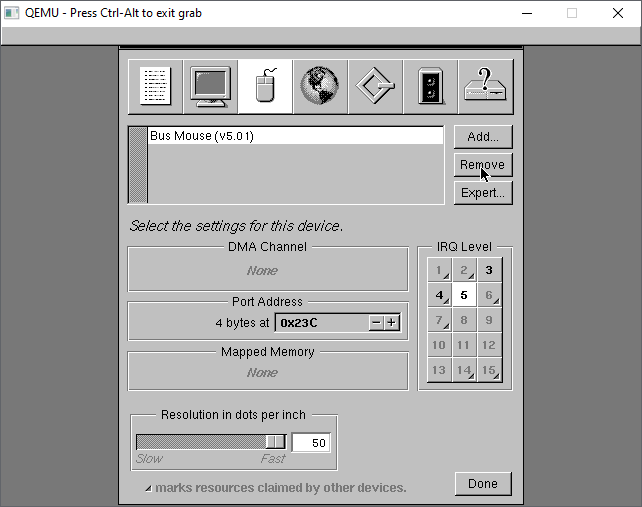
Under the network tab, the NE2000 should be automatically detected.

On the last tab, I make a habit of removing the Parallel port freeing IRQ 7, in case I wanted it for something else.
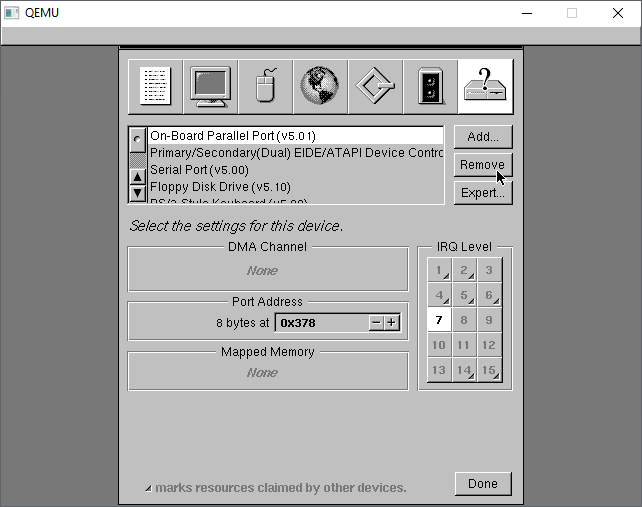
Back to the summary, we now have Cirrus Logic video, NE2k networking, with no SCSI, no Audio.
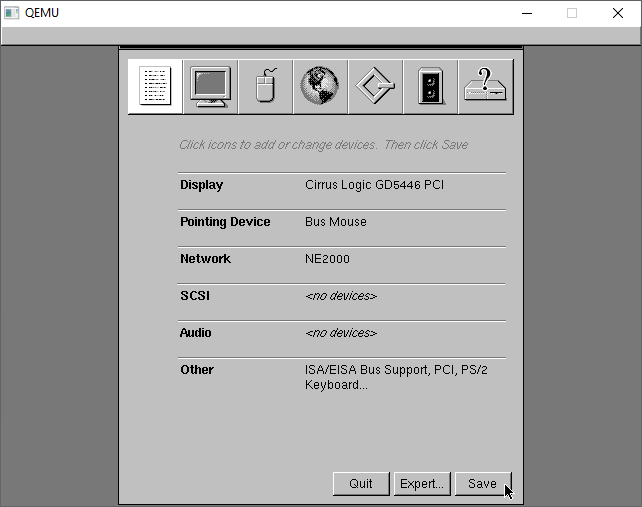
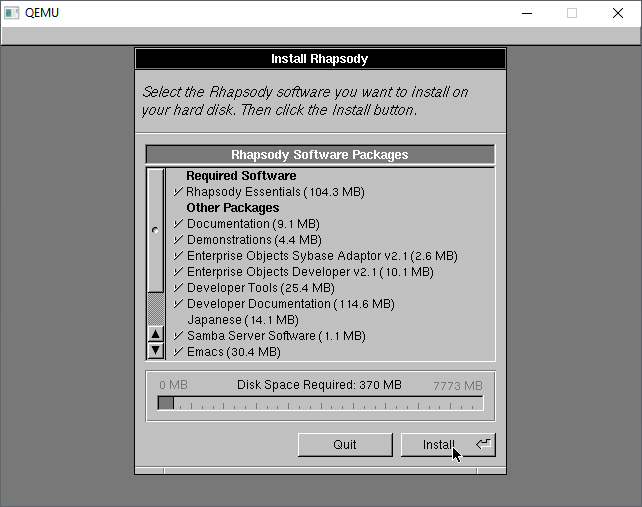
With the config saved, now we can just install as is. I un-installed Japanese, but it doesn’t matter. You absolutely need the Development Tools, so may as well go with eveything.
The installation only takes a few minutes and we are ready to reboot
The kernel will now shut down.

Once more again this is a great time to make another backup of the hard disk. At this point this is a great backup to save, as we’ve installed the OS, and selected drivers, in the next reboot we’ll be personalizing the operating system.
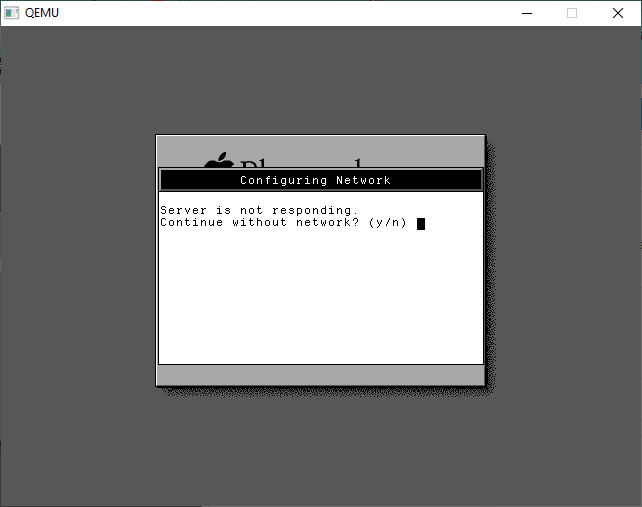
We can re-run the last config once the disk has been saved. We’ll be greeted with a message that the Server isn’t responding. Answer YES to continue without networking.
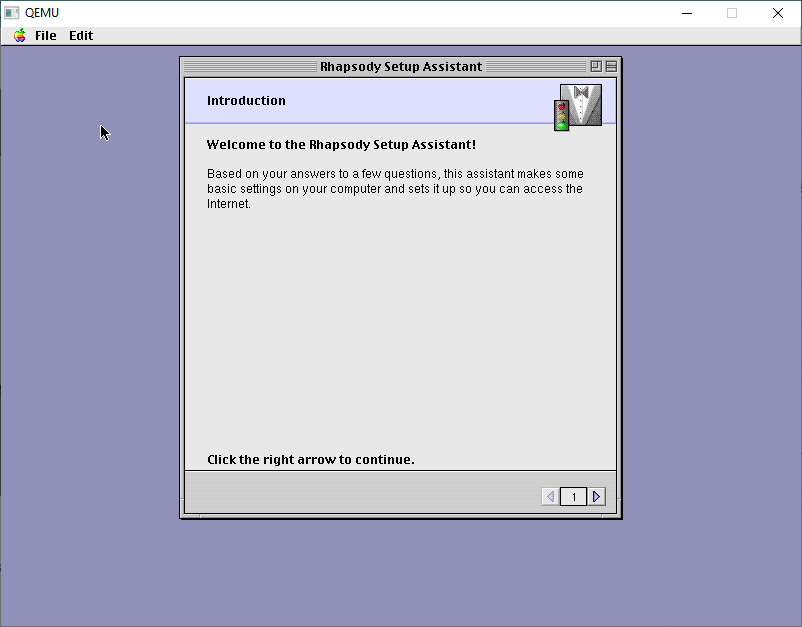
From here we are in the Setup Assistant, taking a nod from MacOS 8
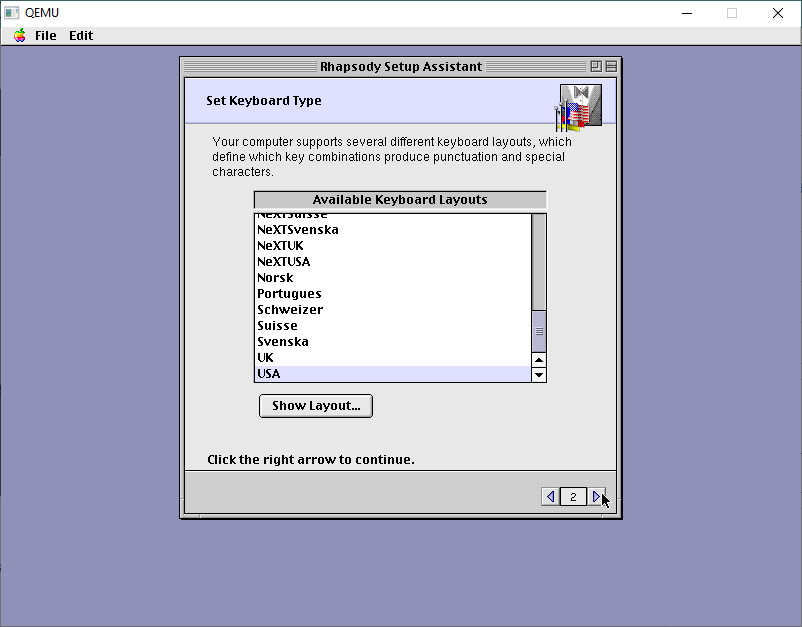
I use USA keyboards. The best keyboards! I touch type so I don’t have to deal with weird layouts.
Specify for a LAN connection
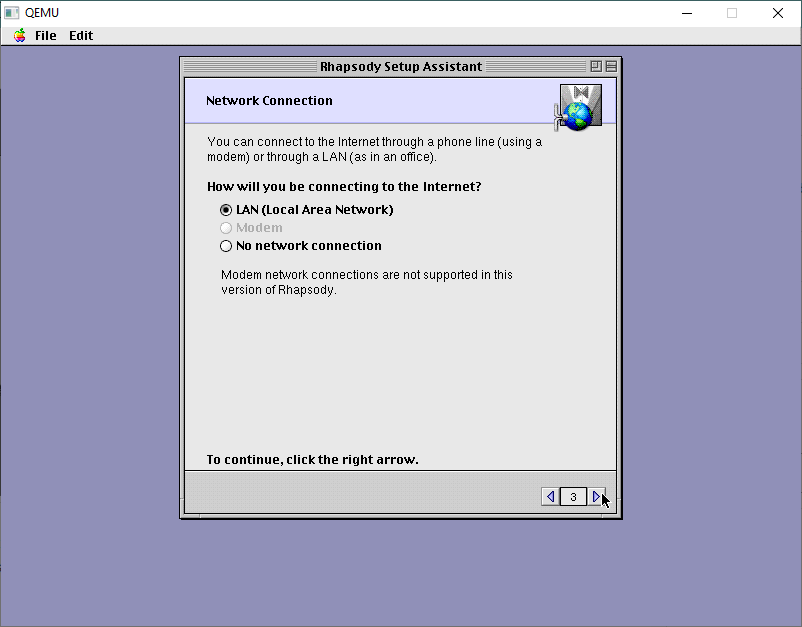
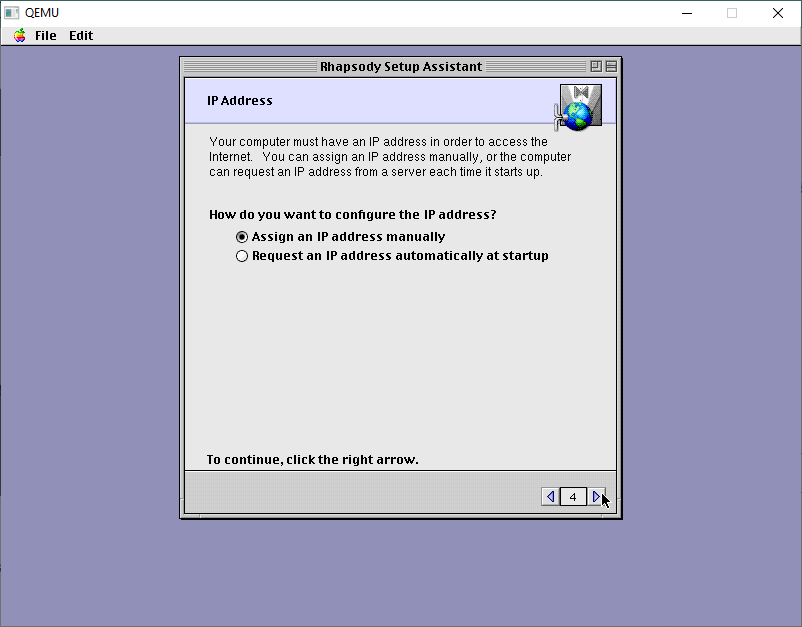
There is no DHCP support so specify a manual IP address.
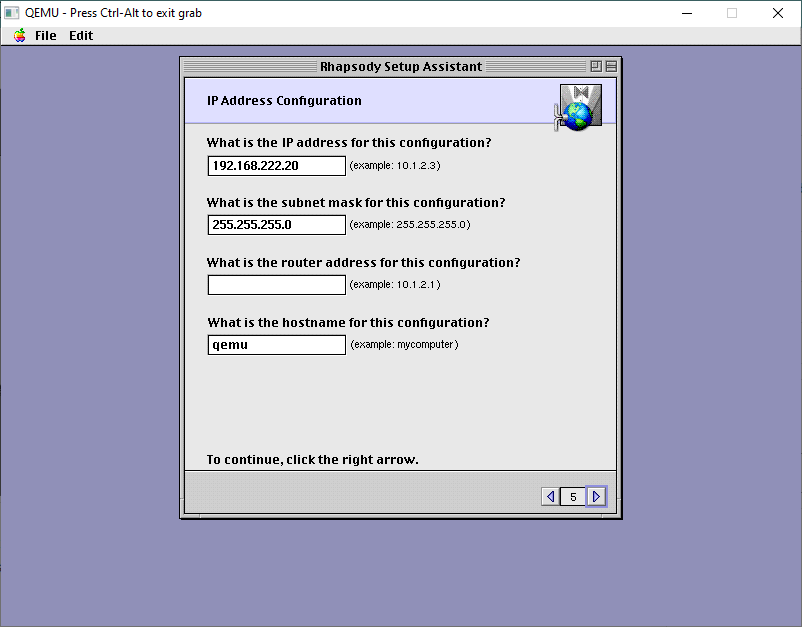
The default stuff is just wrong.
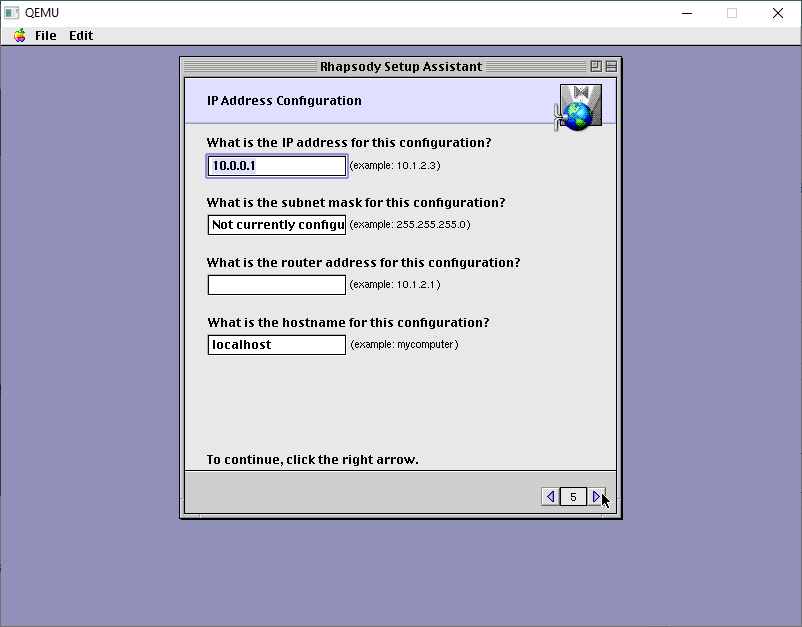
On my LAN this is good enough. DONT add a router. It’ll just confuse it.
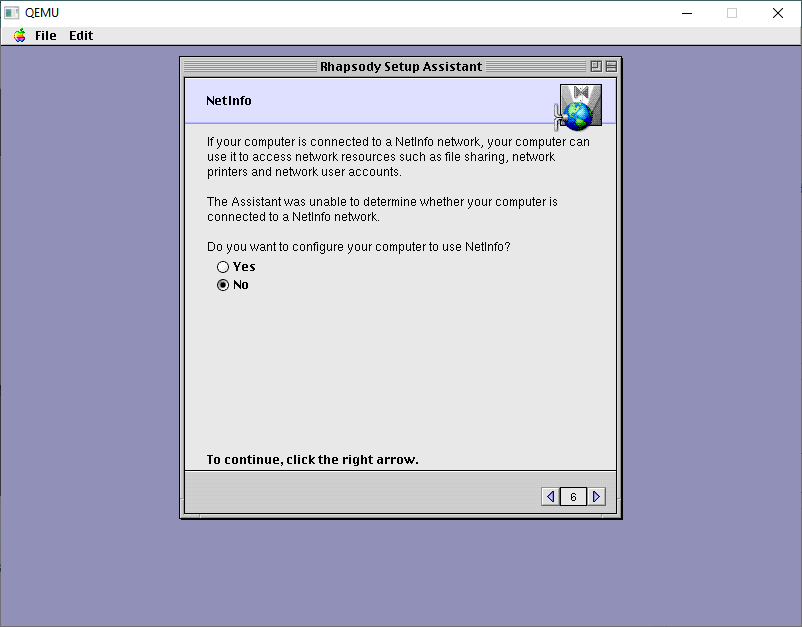
We don’t have or want NetInfo. This would be the server to give out IP addresses, and authentication. We don’t need it!
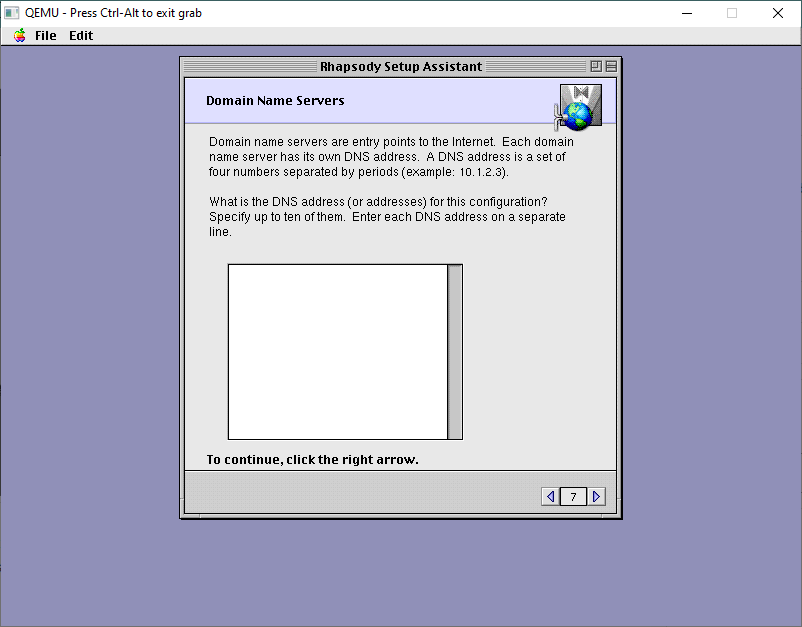
Leave the DNS servers blank
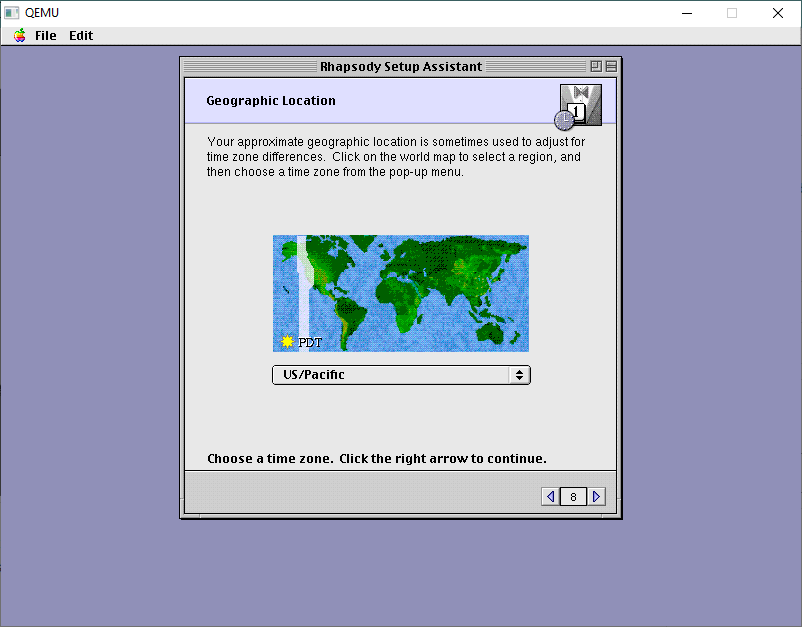
You can setup any location, it doesn’t matter.
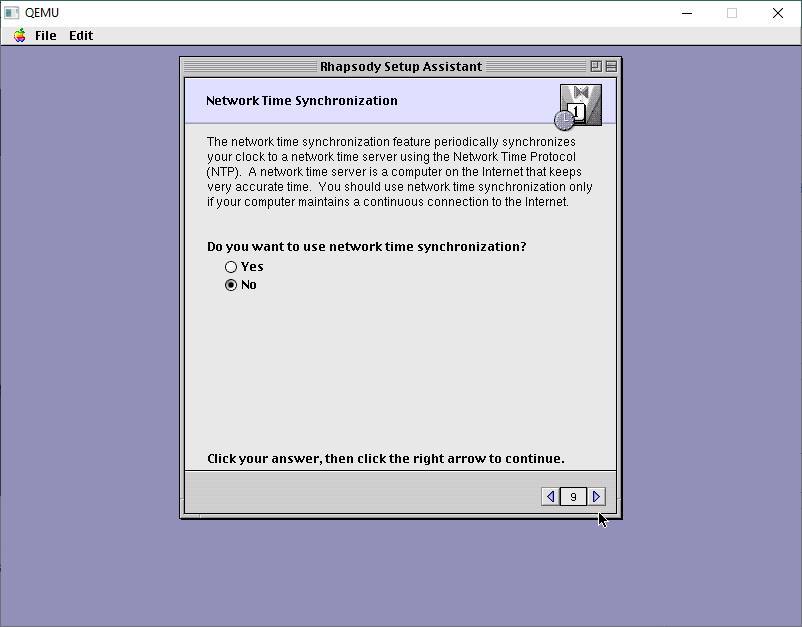
Likewise, with NTP, turn it off.
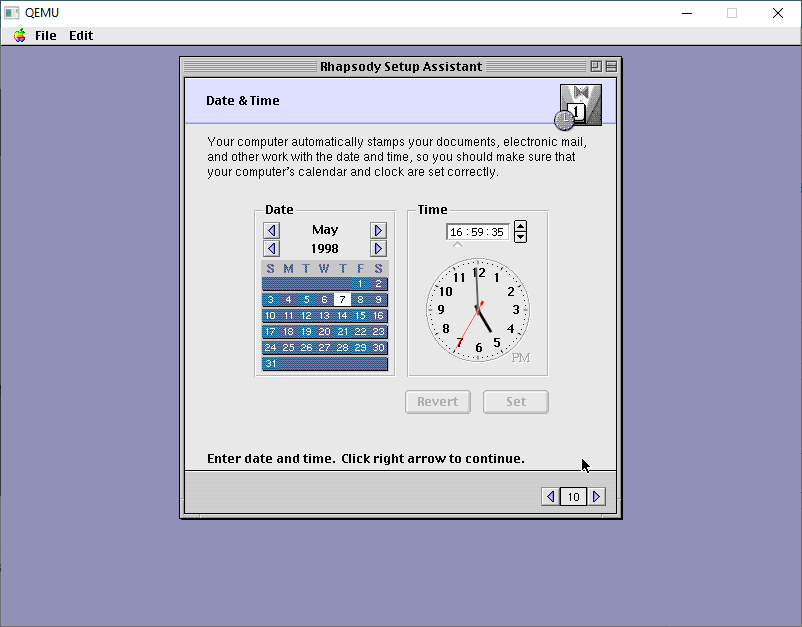
We will then get the option to set the date/time manually. The default time is far too old and it’ll break stuff.
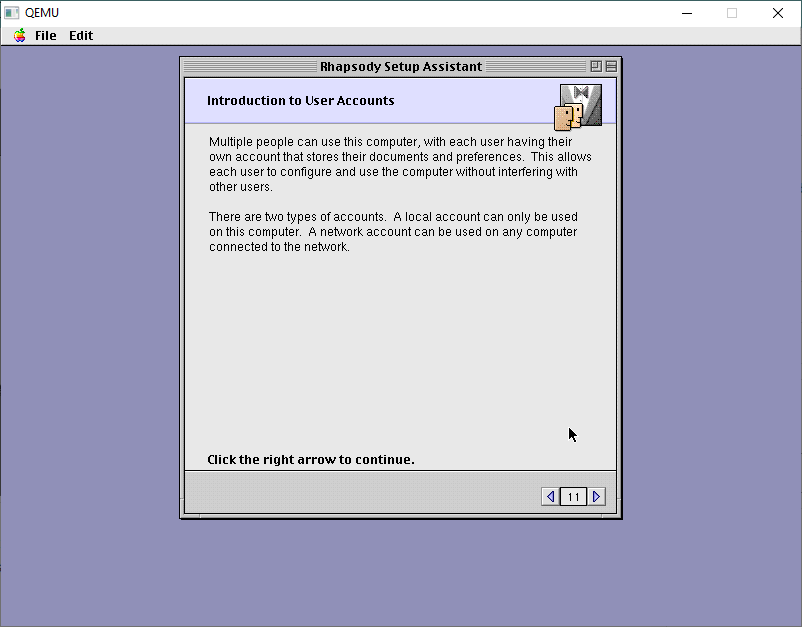
Next up is user accounts.
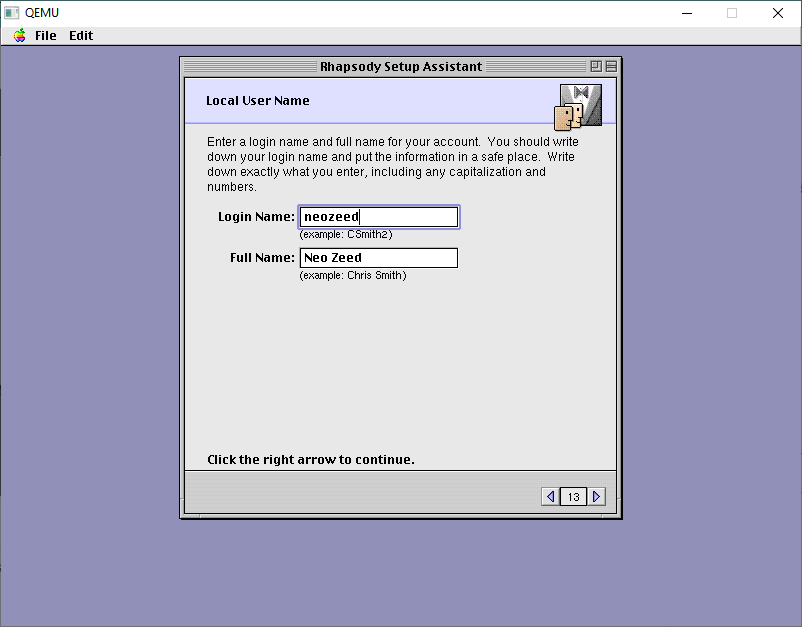
I always make local accounts.

Come up with some creative name
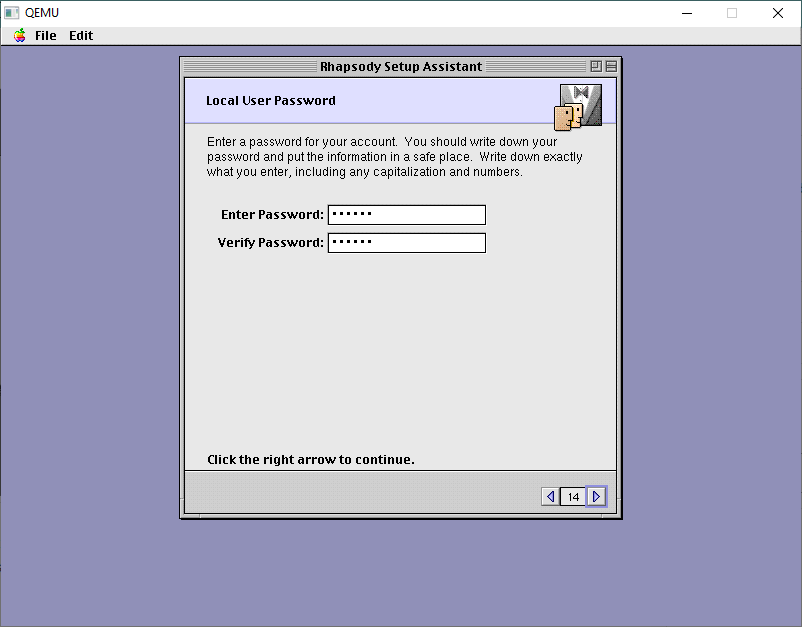
and a password
I don’t have it doing any automatic login. You can if you want, it’s all up to you, this one doesn’t matter.
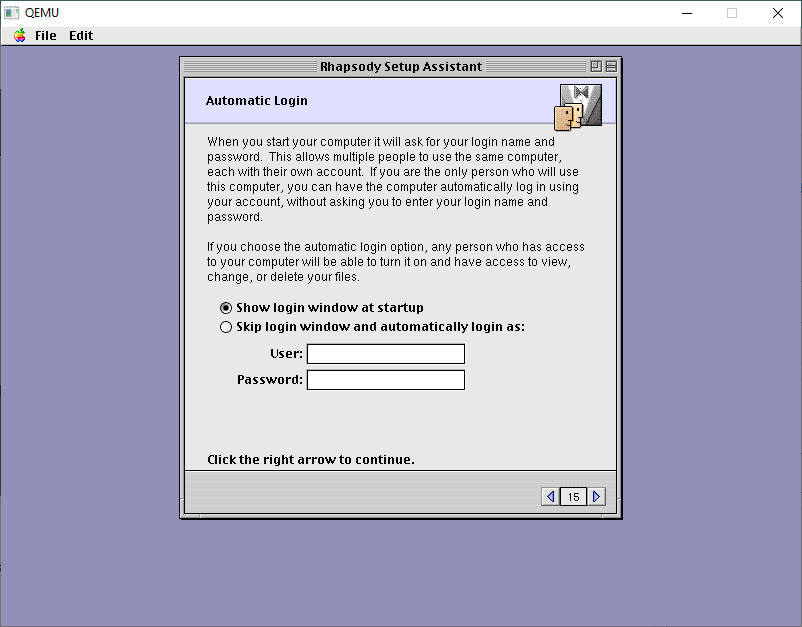
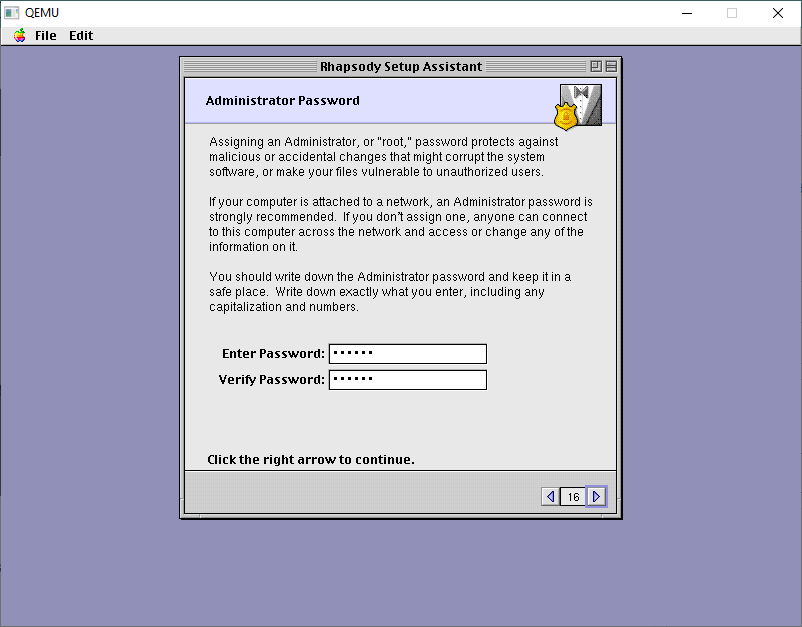
Next is an Administrator password
And now we can apply our changes.
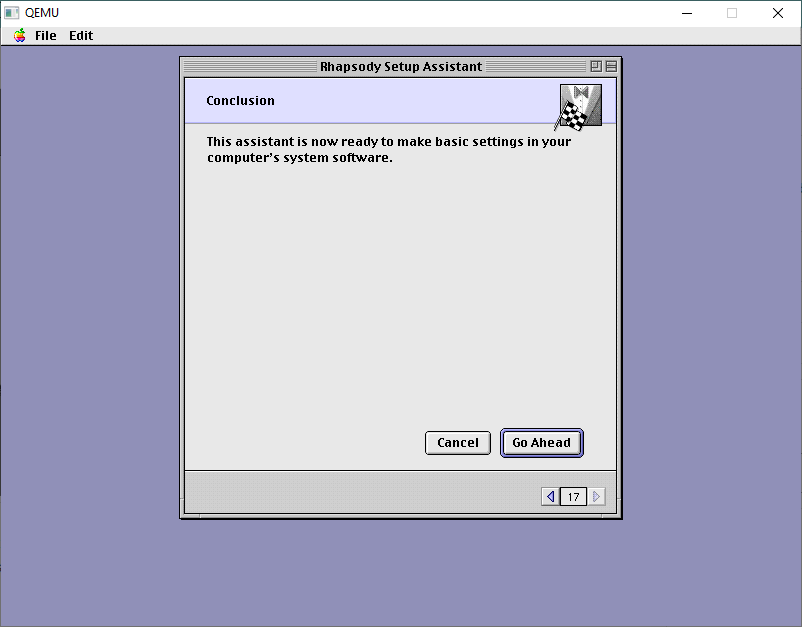
It takes seconds!
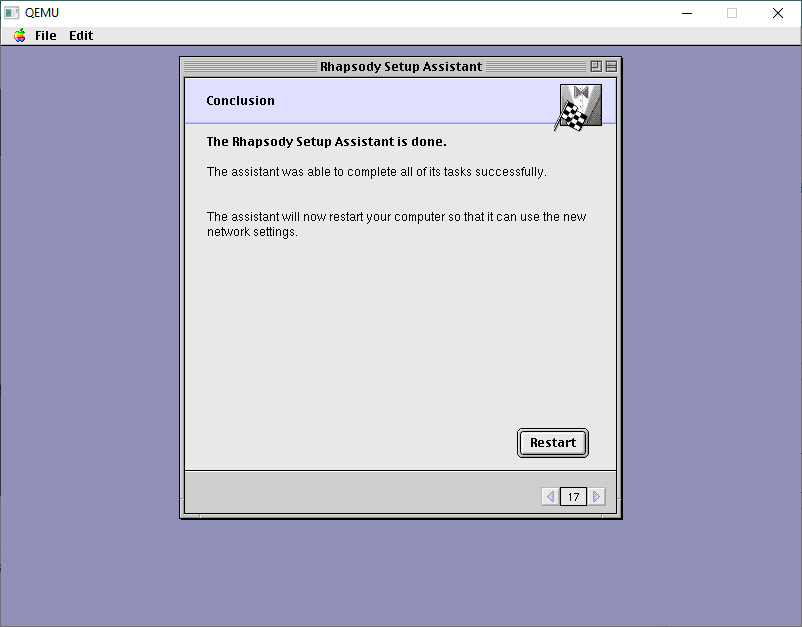
And now we’ere done. You may want yet another backup as this is tedious!
With the final configured backup in hand, now we can boot back one more time, and now we’re in SVGA mode!
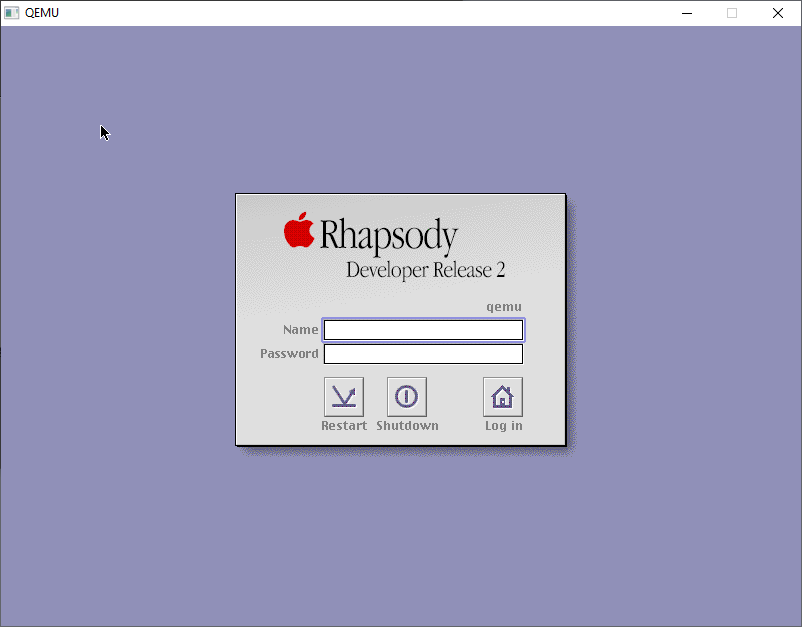
Logging in as root will give me the desktop
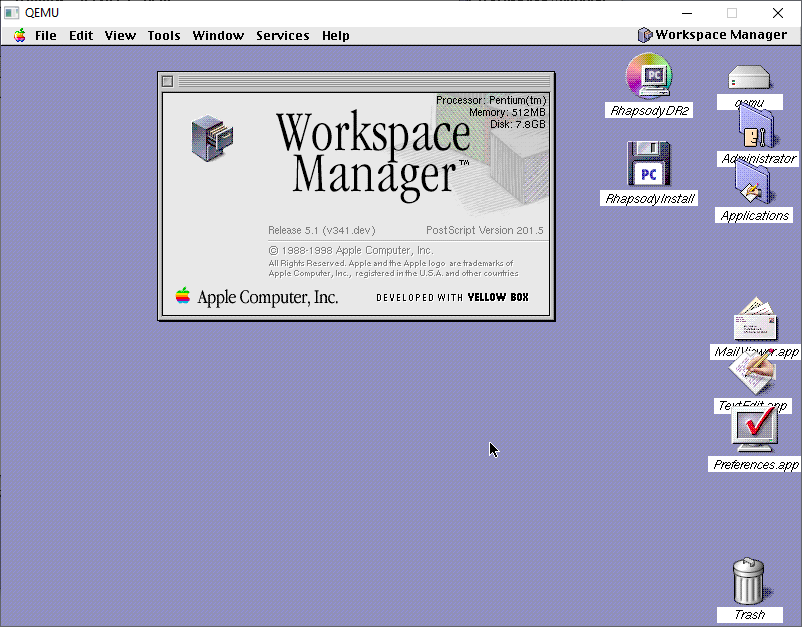
And there we are, all installed.
For anyone brave enough to have read all of this, but wants the quick and easy version, it’s up on archive.org!
In part two I’ll pick up with the source CD-ROM I’ve prepared, so we can start compiling Darwin!
Just wow.
I’ve begun reading your blog back in 2007 with an article about how to run Rhapsody and NextStep.
I’m wondering how deep your knowledge is!
Could I ask question here (could not find your email)
Hello, I am mastering my Palm m515 and Tungsten E2 (when they were, I couldn’t buy them, but now I got them from previous owner).
And I see that it is possible to write in Java for them!
And of course, there is a way to install J2ME where everything is harmful. And I also want to go through it.
But there are articles when KVM (this is JRE) has just appeared. And there were such articles
https://web.archive.org/web/20010424192713/http://www.jera.com/solitaire/
Where files are mentioned, quickly disappearing from public access.
“j2me_cldc-1_0_2-fcs-winunix.zip” and “j2me_cldc-1_0_2-fcs-kjava_overlay.zip”.
Do you or your acquaintances happen to have them, or is it inappropriate to ask?
This is around 1999)
Thank you and sorry for the inconvenience.
Great post!
I’ve begun reading your blog back in the 2007 with running Rhapsody and NextStep with quemu.
And now you build this from source!
I’d like to ask for help, but probably my comment was removed due to the link it contains. Could I write you an email?
yeah sure ill email ya!
it got held in moderation, not sure why, but I was sleeping, I just got up so I’ve unblocked them.