and for the fun of it.
I’ve been playing with the latest release of dynamips (0.2.10), and very excitingly it can build for x86_64 OS X! Â So I thought I’d build up a good sized network, much like what I first was exposed to when I started doing cisco networking back in the 1990’s.
Sadly I didn’t hold onto any IOS from back then, so I’m using something much newer, 12.2. Â Back then I actually had some IGS stuff with version 9, and bunch of stuff on version 10 & 11. Â For the most part I was lucky to use a 7513 as my wan core router, a 7200 for an access router, and 5500’s as my core route/switch fabric with ATM. Â It was … very complicated for the day.
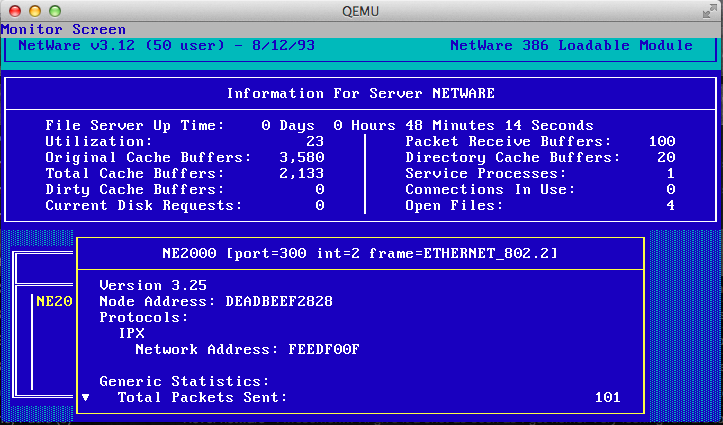
To get the ball rolling, I thought I would build out a core site, with a user & server VLAN (voip was a dream back then), and two sites connected via frame relay. Â The protocols I most care about will be IPX/SPX and TCP/IP. Â I was thinking of porting back the UDP patches for Qemu to version 0.90 so I could run Netware 3.12 in the mix, but honestly it is just easier to use the Netware file & print services for NT 4.0.
So along with the dynamips program, I’m using the obsolete (and easier to configure IMHO) dynagen program.
I’ve fed it a configuration like this:
autostart = False
[localhost]
[[7200]]
image = C7200-JS.BIN
npe = npe-400
ram = 160
idlepc = 0x60529c84
disk0 = 0
mmap = False
ghostios = True
[[ROUTER corertr1]]
model = 7200
slot1 = PA-8E
F0/0 = coresw1 1
E1/0 = coresw1 3
E1/1 = coresw1 8
[[ROUTER corewan1]]
model = 7200
slot1 = PA-8T
F0/0 = coresw1 2
s1/0 = F1 1
configuration = ”
[[ROUTER nycrtr1]]
model = 7200
slot1 = PA-4T+
f0/0 = nycsw1 1
s1/0 = F1 2
configuration = ”
[[ROUTER hkgrtr1]]
model = 7200
slot1 = PA-4T+
f0/0 = hkgsw1 1
s1/0 = F1 3
configuration = ”
#Frame relay switch
[[FRSW F1]]
1:102 = 2:201
1:103 = 3:301
#Core ethernet
#vlan 5 WAN
#vlan 6 server
# 4 FPNW-DC 138.1.1.10
#vlan 7 workstation
[[ethsw coresw1]]
1 = access 5
2 = access 5
3 = access 6
4 = access 6 NIO_udp:41300:127.0.0.1:51300
5 = access 6 NIO_udp:41301:127.0.0.1:51301
6 = access 6 NIO_udp:41302:127.0.0.1:51302
7 = access 6 NIO_udp:41303:127.0.0.1:51303
8 = access 7
9 = access 7 NIO_udp:41304:127.0.0.1:51304
[[ethsw nycsw1]]
1 = access 1
2 = access 1 NIO_udp:41305:127.0.0.1:51305
[[ethsw hkgsw1]]
1 = access 1
2 = access 1 NIO_udp:41306:127.0.0.1:51306
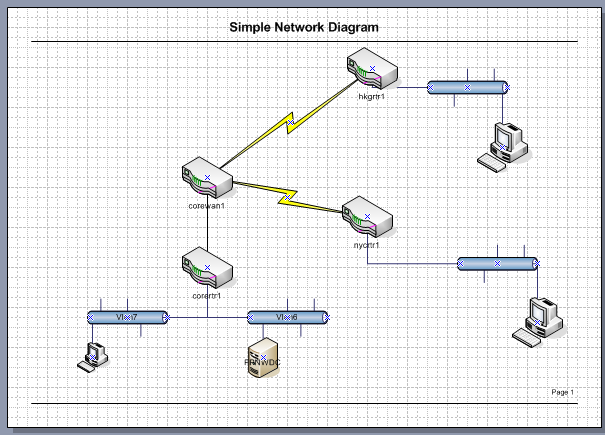
Or something like this
Ok, now this may look complicated, but in all reality it really isn’t. Â It is always a good thing to keep track of what network addresses you are going to use, so here is my chart:
|
Description |
IPX |
IP |
Mask |
| CORE |
|
|
|
|
| FA0/0 |
Wan Interconnect |
C0000001 |
138.1.0.5 |
255.255.255.0 |
| Eth1/0 |
Server |
C0010001 |
138.1.1.1 |
255.255.255.0 |
| Eth1/1 |
User |
C0010002 |
138.1.10.1 |
255.255.255.0 |
|
|
|
|
|
| WAN |
|
|
|
|
| Fa0/0 |
Wan Interconnect |
C0000001 |
138.1.0.6 |
255.255.255.0 |
| S1/0.102 |
New York PVC |
A0000001 |
135.0.0.5 |
255.255.255.252 |
| S1/0.103 |
Hong Kong PVC |
A0000002 |
135.0.0.1 |
255.255.255.252 |
|
|
|
|
|
| New York |
|
|
|
|
| Fa0/0 |
User |
C10000001 |
136.2.0.1 |
255.255.255.0 |
| S1/0.201 |
Core PVC 201 |
A0000001 |
135.0.0.6 |
255.255.255.252 |
|
|
|
|
|
| Hong Kong |
|
|
|
|
| Fa0/0 |
User |
C20000001 |
136.1.0.1 |
255.255.255.0 |
| S1/0.301 |
Core PVC 301 |
A0000002 |
135.0.0.2 |
255.255.255.252 |
For simplicities sake for the routers & IOS I’m using 7200’s everywhere. Â The 7200 is a good router with plenty of slots, so it fits my needs just fine. Â I suppose I could track down a 2600 or 1700 IOS image, and use them for the access sites, but for now it doesn’t matter. Â Mostly because of the ghostios image option where the same memory map can be shared between routers, and of course my Mac Pro has 16GB of RAM.
Now the exciting part of this configuration is that I can easily connect in Qemu 1.6.0 processes to this configuration, allowing me to test the network out in its entirety. Â Even better thanks to it being UDP, I can reboot and restart the Qemu or router processes at will.
Naturally like any test scenario, I should spell out some goals, along with some applications that I hope to be able to run. Â So to start, a simple setup with an NT 4.0 server with the FPNW services setup. Â To run Qemu to attach to the first port on the server VLAN in the core switch I start Qemu like this:
./qemu/qemu-system-i386 -cpu pentium -L ./qemu/pc-bios/ -m 64 -hda FPNW-DC.vmdk -net nic,model=pcnet -net nic,model=ne2k_isa -net socket,udp=localhost:41300,localaddr=0.0.0.0:51300
And from there by changing the UDP numbers I can easily jump VLANs. Â Fun. Â The major thing is that each additional instance of Qemu will need a unique MAC address, so additional instances should be run like this…
./qemu/qemu-system-i386 -L ./qemu/pc-bios/ -m 16 -net nic,model=pcnet,macaddr=00:11:22:33:44:55 -net socket,udp=localhost:41304,localaddr=0.0.0.0:51304 Â -fda nwclient-pcnet.vfd
So maybe I should launch into some big diatribe on cisco routers, networking and the rest of the fun stuff. Â And maybe I will.
I think the next article will be an anchor page for various topics of what I’m going to get into, and from there evolve my network from the mid 90’s before the internet craze into something far more modern. Â And of course a page going over the scope of what I hope to create.

