Reading .toast image files

Well I put out a cry for help all over the place, looking for Darwin 0.3

And much to my amazement, when I woke up, I not only got a reply but a link to a toast image.  Great, what is toast?  Well simply put toast is a format made popular by then Adaptec Toast.  Obviously the sane thing to do is to find Toast, install it, and mount the disk image inside of a Macintosh.

Adaptec toast 4.0

But, honestly, where is the fun in that?

Instead let’s have Cockatrice III do it!  Now I never did get around to writing proper CD-ROM emulation, nor integrating it, but that doesn’t matter!  Instead I’m going to rely on Daemon tools Lite, to do all the heavy lifting.  DTL will create a virtual SCSI adapter, add in a SCSI CD-ROM device, and mount the image.  Needless to say, I’m on Windows and that is where that part of the adventure ends, as Windows 10 cannot read HFS.

Now back to Cockatrice!

All I had to do was assign the SCSI 6 position to the mounted drive letter, and I’m set!  Just add this to the CockatriceIII_Prefs file:

scsi6 \\.\e:

And now I can mount the image from within Cockatrice III

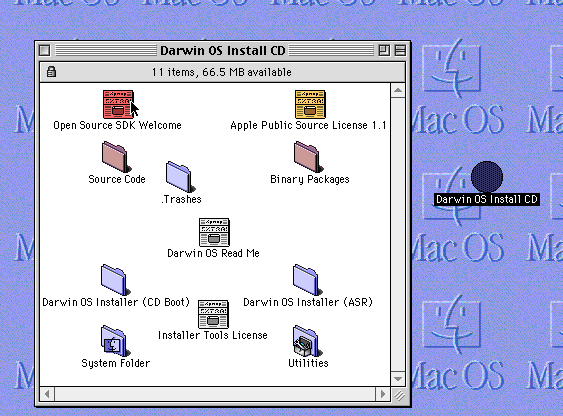
Darwin 0.3 toast mounted

And there we go, now I can copy the files of just like having a real Mac.


Adding virtual disks to User Mode Linux

Running out of disk space

Well, my good ‘friend’ with their inappropriately provisioned Linux VPS that runs UML (User Mode Linux) inside of it, ran into an issue where he needed to add a second virtual disk device.

Creating the disk file is no big issue, adding a whopping 1GB is pretty simple!

Using the ‘dd’ command it is trivial to make a 1GB file like this:

dd if=/dev/zero of=node1_swap.ubda bs=1M count=1024

And then just append it to the script that they are using to run the UML:

/virtual/kernel ubda=/virtual/node1.ubda mem=384M eth0=slirp,,/virtual/sl1.sh

to this:

/virtual/kernel ubda=/virtual/node1.ubda ubdb=/virtual/node1_swap.ubda mem=384M eth0=slirp,,/virtual/sl1.sh

Of course the real fun comes from trying to find the devices.  Having to dig around I found that the device major is 98 for the UBD’s and that they increment by 16, so that the first 3 devices are as follows:

mknod /dev/ubda b 98 0
mknod /dev/ubdb b 98 16
mknod /dev/ubdc b 98 32

Adding to that, you can partition them, and then they break out like this:

mknod /dev/ubda1 b 98 1
mknod /dev/ubda2 b 98 2
mknod /dev/ubda3 b 98 3
mknod /dev/ubdb1 b 98 17
mknod /dev/ubdb2 b 98 18

You get the idea.

With the disk added you can partition the ubd like a normal disk

node1:~# fdisk /dev/ubdb

Command (m for help): p

Disk /dev/ubdb: 1073 MB, 1073741824 bytes
128 heads, 32 sectors/track, 512 cylinders
Units = cylinders of 4096 * 512 = 2097152 bytes

Device Boot Start End Blocks Id System
/dev/ubdb1 1 245 501744 83 Linux
/dev/ubdb2 246 512 546816 82 Linux swap / Solaris

etc etc.  And yes, you can then format, mount and all that.

First let’s setup the swap:

mkswap /dev/ubdb2
swapon /dev/ubdb2

Now let’s format the additional /tmp partition

node1:~# mke2fs /dev/ubdb1
mke2fs 1.40-WIP (14-Nov-2006)
Filesystem label=
OS type: Linux
Block size=1024 (log=0)
Fragment size=1024 (log=0)
125488 inodes, 501744 blocks
25087 blocks (5.00%) reserved for the super user
First data block=1
Maximum filesystem blocks=67633152
62 block groups
8192 blocks per group, 8192 fragments per group
2024 inodes per group
Superblock backups stored on blocks:
8193, 24577, 40961, 57345, 73729, 204801, 221185, 401409

Writing inode tables: done
Writing superblocks and filesystem accounting information: done

This filesystem will be automatically checked every 24 mounts or
180 days, whichever comes first. Use tune2fs -c or -i to override.

Now adding the following to the /etc/fstab so it’ll automatically mount the /tmp directory and add the swap:

/dev/ubdb1 /tmp ext2 defaults 0 0
/dev/ubdb2 none swap defaults 0 0

Now he’s got a dedicated swap partition, and a separate /tmp filesystem.
DAEMON Tools Lite is on sale…

$5.99

$5.99

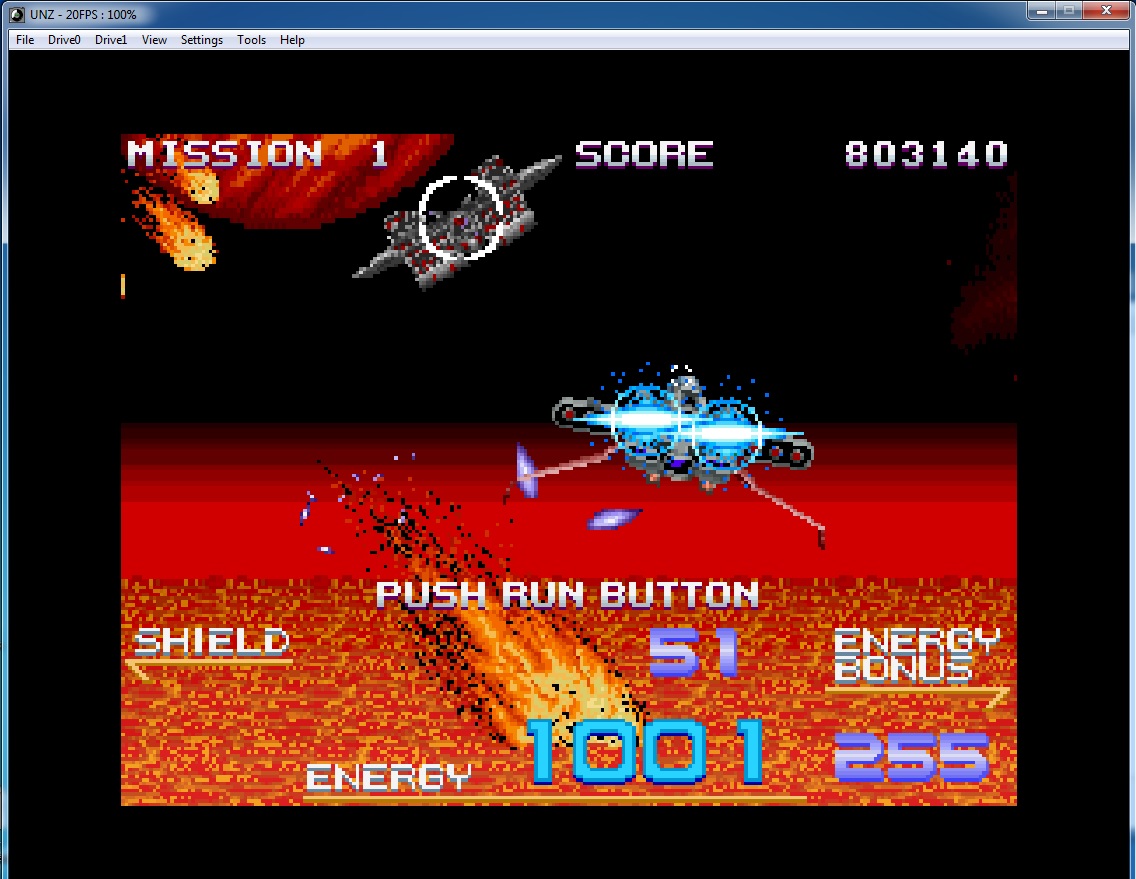
I went all crazy, and loaded up with all the options, but I’ve been wanting a virtual CD burner for a while, and I like being able to mount cue/bin files and not only being able to access the data but playing music.  It’s really cool to mount up a virtual disk, and then assign it out to a VM, so you can launch an older and more temperamental emulator…

UNZ in VMWare

UNZ in VMWare

Anyways, I don’t work for them, I have no affiliate, no ads etc, but I think this is interesting enough to pass on.

So I started to look at the SCSI passthru on Basilisk

And personally I’ve never seen the appeal for such things, but apparently for the world of emulation accessing physical media is a big deal. Of course what I didn’t think about was rescuing old machines by re-installing the OS under emulation, or copy protection.

The first thing I looked for was a GPL project that has SCSI disk support and isn’t too complicated.  The Previous project sure fits that bill, scsi.c is not even a thousand likes, and even better it works!

The only two major hurdles I ran into is that the Mac is sending a page request of 0x30 which as far as I can find is not listed anywhere else.  I ended up just making one up as a reply to see if it mattered.

The other is that it’s scatter/gather based, so when it’s going to read or write several contiguous sectors, it’ll blast down up to 256kb worth of data to be read or written to.  The ability to know that a large operation was in progress was already in Previous, it just wasn’t set to loop.  I guess the NeXT isn’t as aggressive, or it’s SG operations are better contained in the SCSI controller.

The final hurdle was in the Apple partitioning software.  I’ve been down this road a long while ago.  But the disktools from A/UX 3.0.1 doesn’t care about vendors and will thankfully format anything.

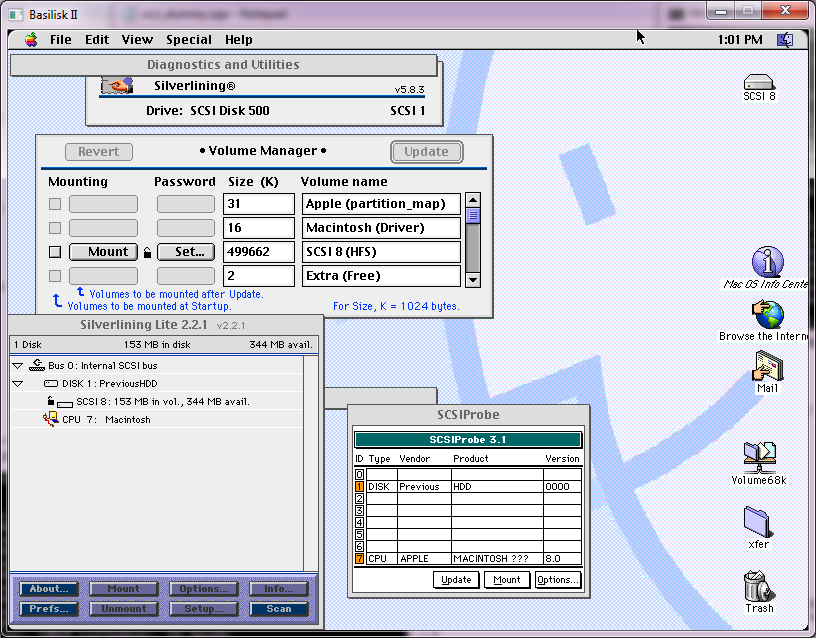
SCSI disk files

SCSI disk files

So not as exciting as talking to a real SCSI disk, but it’s safer.  I suspect that accessing a raw NT device name ought to work  I can test that on VMWare, but the trick is finding something that can read HFS and prove it’s a good exercise.

Another ‘feature’ I put back in is the ability to disable the math coprocessor on the 68040.  It feels more stable to rely on Apple’s old emulation code, but maybe that’s me.

As always files for this are on sourceforge.

Dealing with CopyQM file format

CopyQM

CopyQM

So I had a few disk images in the CopyQM format, and trying to get an emulator to output them back to a disk image is well.. really trying.  Then as luck would have it, I stumbled onto the program read_cqm.c and it does exactly what it says it’ll do which is read the CopyQM disk images, and then output them into a raw format.

DMSDos

While trying to see if STAC ever went into the disk compression busness again, I ran across this interesting bit of software, DMSDOS, which is a kernel module for versions 2.0.36 and 2.2.3 of the Linux kernel support read/write access to STACKER version 3 and 4 containers.  It also support’s MS-DOS’s drive space, and doublespace!

The latest version dmsdos-0.9.2.3-pre2-alt2.tar.gz even runs on modern x86_64 and i386 boxes!  Although in library mode.

# ./mcdmsdos list /tmp/STACVOL.000
mcdmsdos version 0.2.0 (for libdmsdos 0.9.x and newer)
libdmsdos: DMSDOS library version 0.9.2pl3-pre2(alpha test) compiled Jun 12 2014 17:14:06 with options: read-write, doublespace/drivespace(<3), drivespace 3, stacker 3, stacker 4
libdmsdos: mounting CVF on device 0x3 read-write…
libdmsdos: CVF end padding 1 sectors.
libdmsdos: CVF is in stacker 4 format.
-rwxr-xr-x 1 0 0 10396254 Dec 16 1993 13:35 doom.wad
-rwxr-xr-x 1 0 0 68923 Dec 15 1993 01:01 setup.exe
-rwxr-xr-x 1 0 0 20850 Dec 15 1993 01:01 readme.exe
-rwxr-xr-x 1 0 0 627155 Dec 16 1993 13:53 u1_94.exe
-rwxr-xr-x 1 0 0 579187 Dec 16 1993 13:47 doom.exe
-rwxr-xr-x 1 0 0 439 Dec 15 1993 01:01 file_id.diz
-rwxr-xr-x 1 0 0 190 Dec 15 1993 01:01 use1_95.bat
-rwxr-xr-x 1 0 0 218 Dec 15 1993 01:01 use1_94.bat
-rwxr-xr-x 1 0 0 7527 Dec 15 1993 01:01 license.doc

How cool?

Even better it can extract files from the stacker volume!

# ./mcdmsdos copyout /tmp/STACVOL.000 /doom.wad doom.wad
mcdmsdos version 0.2.0 (for libdmsdos 0.9.x and newer)
libdmsdos: DMSDOS library version 0.9.2pl3-pre2(alpha test) compiled Jun 12 2014 17:14:06 with options: read-write, doublespace/drivespace(<3), drivespace 3, stacker 3, stacker 4
libdmsdos: mounting CVF on device 0x3 read-write…
libdmsdos: CVF end padding 1 sectors.
libdmsdos: CVF is in stacker 4 format.
# md5sum doom.wad 981b03e6d1dc033301aa3095acc437ce doom.wad
#

And if you google ‘981b03e6d1dc033301aa3095acc437ce’ you’ll know it’s the registered DOOM version 1.1 data file!

The author tired to get it to work with Microsoft Visual C, and it does not.  It also doesn’t work with MinGW or Cygwin, and the reason is once more again the way GCC handles it’s structures on Linux vs Windows.  Sadly there is no silverbullet fix for this, the structures oddly enough are too small on Windows, and too big for what they should be on Linux.

But at any rate, I though it was cool.  For anyone interested all versions that I’ve found I put online on my cvs server, unix.superglobalmegacorp.com.

SAGE CP/M disk fun

Wow this was without a doubt one of the more confusing things I’ve ever done.

So here is the problem. I want to delete some files from an IMD disk image, and then copy some new ones in.  Easy right? .. maybe.

Ok first up the easiest tool I’ve found to manipulate CP/M disk images is cpmtools.  Even better their pre-compiled binary is for Win32, so I’ll run it with Wine on OS X.  which works fine. Â Although there is one slight problem, cpmtools doesn’t read the IMD disk format.  So you will have to download imd118.zip from a backup of the late author’s computer.

Now using IMD you need to convert the OS disk into a ‘raw’ or ‘binary’ file.  Naturally IMD is a MS-DOS program so firing up DOSBox, I ran:

Screen Shot 2013-12-05 at 8.35.58 PM

Uncompressing, so easy!

IMDU CPM68K12.IMD CPM.RAW /B

And a few seconds later I had my raw file.  Now the next thing was to manipulate the image in cpmtools.  cpmtools has a database of disk drive types, and naturally there is no definition for the SAGE2.  However thanks to a friend of mine (hi Lorenzo!) I took a look at 22disk, and found their demo version did in-fact have a definition for the SAGE:

BEGIN SAG2 Sage IV – DSDD 96 tpi 5.25″
DENSITY MFM,LOW
CYLINDERS 80
SIDES 2
SECTORS 8,512
SIDE1 0 1,2,3,4,5,6,7,8
SIDE2 1 1,2,3,4,5,6,7,8
ORDER SIDES
BSH 4 BLM 15 EXM 0 DSM 315 DRM 63 AL0 080H AL1 0 OFS 2
END

Which is great, however it took a bit of experimenting to work out how to format this information for cpmtools.  I compared a bunch of known formats, and then managed to work this out:

diskdef sage2
seclen 512
tracks 160
sectrk 8
blocksize 2048
maxdir 128
skew 1
boottrk 2
os 2.2
end

And now I can look at the image file!

$ wine cpmls -f sage2 CPM68K12.RAW
0:
ar68.68k
armath.sub
as.sub
as68.68k
as68symb.dat
asgo.sub
brwnies.txt
copy.68k
core.sub
cpm.sys
ddt.68k
ddt68000.68k
dump.68k
e.sub
find.68k
halt.68k
init.68k
linkcore.sub
lnk.sub
lo68.68k
m.sub
mcc.sub
mince.68k
mince.swp
mind.sub
orbit.sub
p.sub
pe.sub
pip.68k
print.68k
red.sub
redasm.sub
sage4utl.68k
sagebios.sys
screen.68k
setenv.68k
setprntr.68k
sig.txt
space.sub
spacem.sub
startup.sub
stat.68k
tlnk.sub

So, I tidy up the image and copy it back to the IMD program for compressing.  And this was, without a doubt the most difficult to figure out, until after a bunch of searching, and Lorenzo once more again pointed me in the direction of bin2imd

not intuitive!

not intuitive!

So yeah.

BIN2IMD X.RAW X.IMD DM=2 N=80 SS=512 SM=1-8 /2

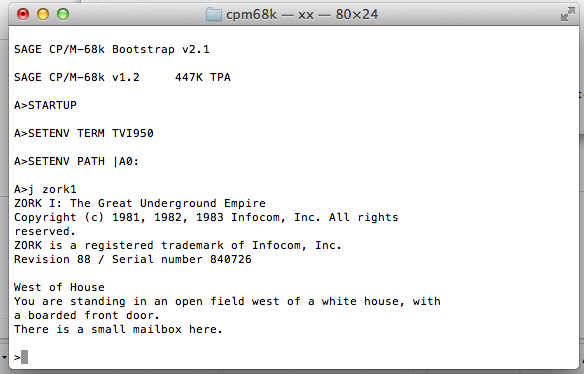
And the best part is that it worked!  So now I was able to transfer over a binary version of com.68k, com2.68k, along with Zork, and fire it up!

8080 Zork on 68k CP/M

8080 Zork on 68k CP/M

Unfortunately, the interpreter doesn’t work right.  It could be the disk transfers fault, maybe the SIMH SAGE emulator, or even the 8080 emulator.  But it worked this far.

Floppy emulation on the Commodore Amiga

Well for some unknown reason the floppy drive in my Amiga just stopped working.  I managed to find a drive out of an Amiga 500, but it too didn’t work.. I really don’t know if it is the controller or if it is the drives.  And I’m hesitant to sink £100 into a machine that for all I know could have a dead controller.

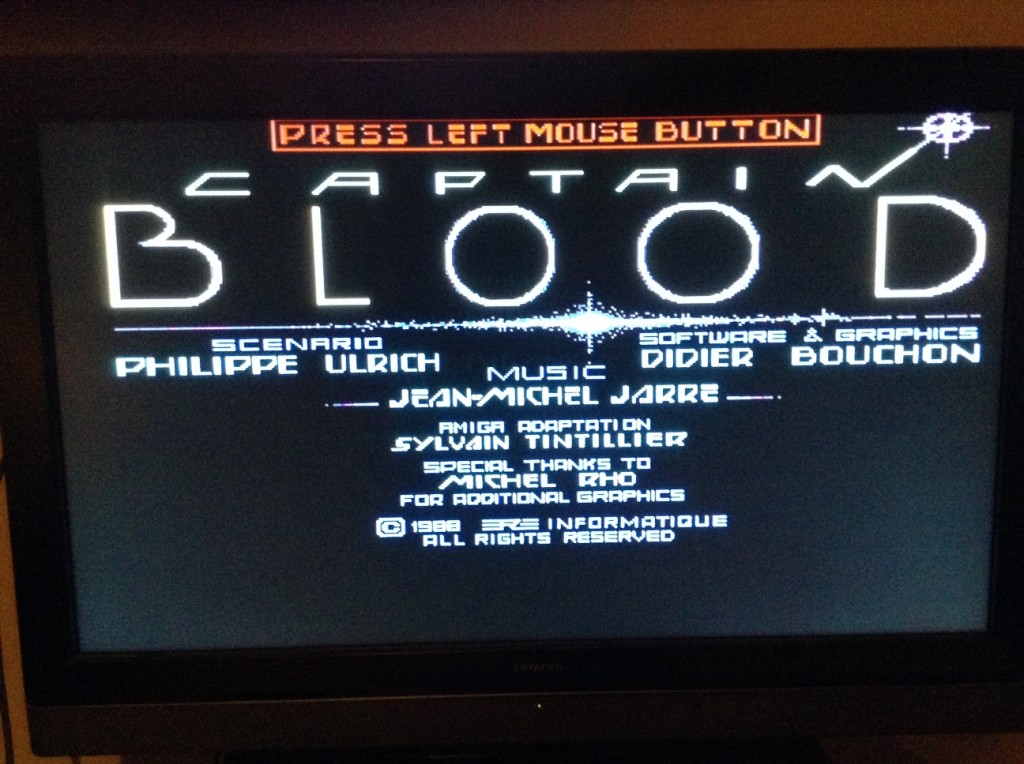
So this means while I do have the Compact Flash working as a hard disk, I am unable to load an old favourite Captain Blood.  Maybe I am more of a sucker for the Jean-Michael Jarre resampled soundtrack ethnicolor. Or maybe there is just something redeeming about blowing up random planets.

Then while digging around DICE, I looked at its examples, and one of them was the exec_dev one, FMS a floppy emulator!  I built the example installed the driver, and using it resulted in a nice crash in both AmigaDOS 2.04 and 2.1 .. I had to wonder if this was more so geared to AmigaDOS 1.3 ..?  A bit of googling around and I found an updated version, fms_20.lha.  Installation is a little cumbersome as you have to manually copy in the device driver, and then setup a mountlist describing the devices in question, which really reminded me the “fun” of 4.3 BSD’s disktab.

Another weird thing is that AmigaDOS 2.1 has the FastFileSystem driver built in, so I had to remove those lines…

Using an ADF I found (since there is no way I can read the physical disk now..) I was able to use DMS to make an image on an emulator, copy it onto the flash, then re-DMS it out on the emulated floppy diskette.  Thankfully this game doesn’t use any weird custom filesystem so it was easy enough to mount the disk, and run the game from the emulated floppy.. Or at least launch it.  Trying to use it however resulted in the game just crashing.

Some more digging with a hex editor showed that the string “DF0:” was strewn all through the executable, so a few minutes, and I changed them all to “FF7” and now the game plays properly.

Captain Blood on my Amiga 600

Captain Blood on my Amiga 600

I wonder if it is possible to load the bootblock from one of these custom filesystems then use a virtual void pointer in DICE C, and execute the bootblock directly?  I’ll have to experiment.

Virtual Floppy Drive – Part III – Fun with HxC

(note this is a guest post from Tenox)

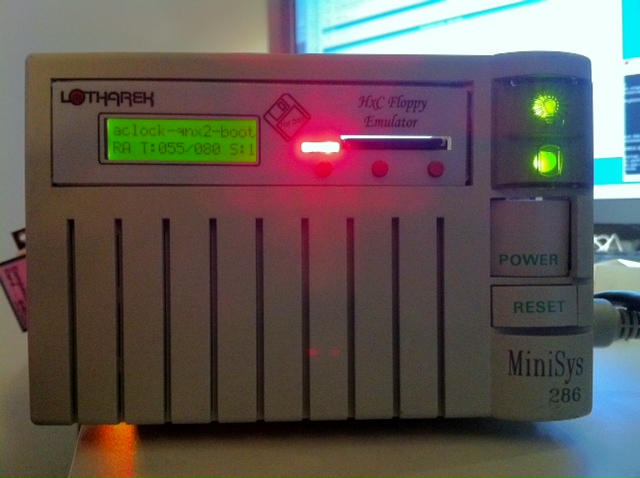
As promised in a post about Floppy Disk Emulators, here is a review of HxC Floppy Disk Emulator. I ordered it from Lotharek via eBay. Initially stuck in Polish post made it just before the weekend! This made my Christmas gift as I had a lot of fun playing with it. The unit comes with two front panel stickers, one grey and one black to match your equipment type. Quite nice touch. I choose grey as most of my units are of this color. I have to say the LCD screen makes a modern touch to an old 286 machine!

hxc286

286 machine with HxC installed in 3.5″ floppy bay.

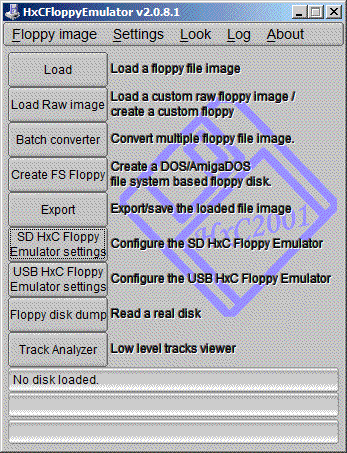
Initially I have stumbled upon a lot of issues. Floppy disks are not easy as it seems. No wonder I had so much trouble with the real ones. I spent a lot of time experimenting with ID jumpers and correct BIOS settings. The unit only worked on ID3A but I can probably attribute it to a weird machine. Then I had problems converting my raw images to HFE format. The main project developer helped me a lot on their forums.

HxC Software. The latest version includes Track Analyzer!

HxC Software used to load and convert disk images. The latest beta version includes a Track Analyzer!

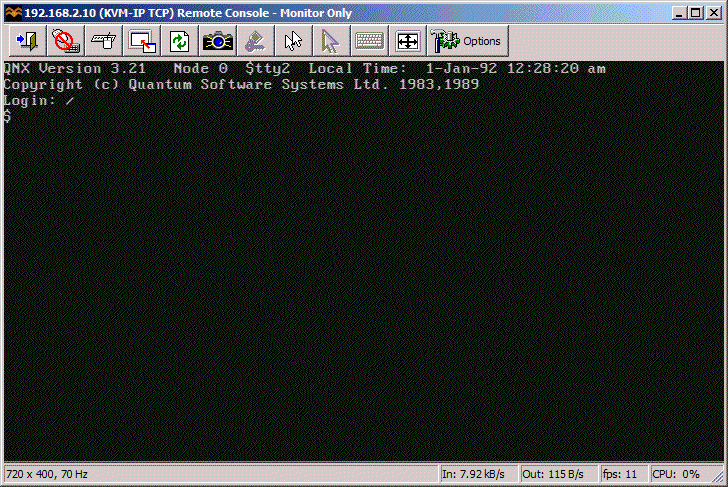
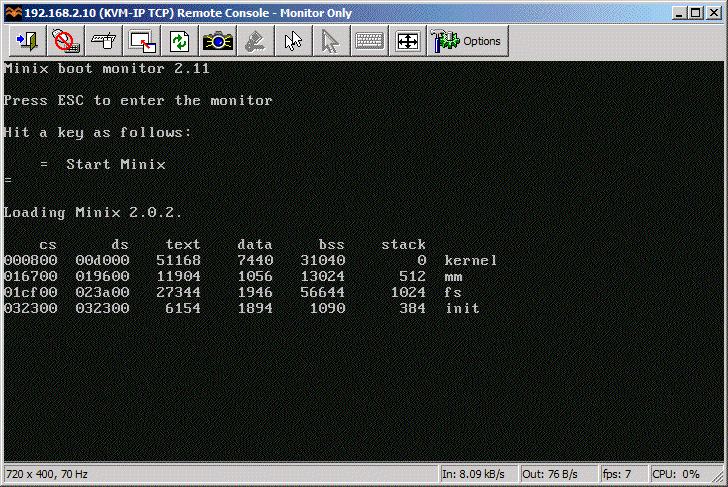
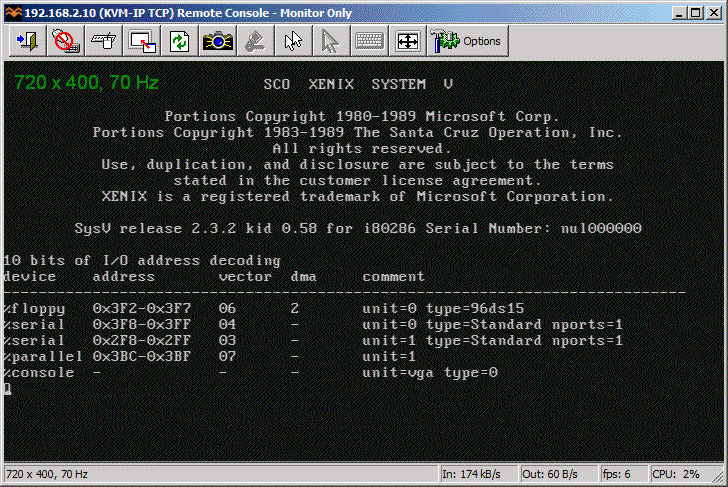
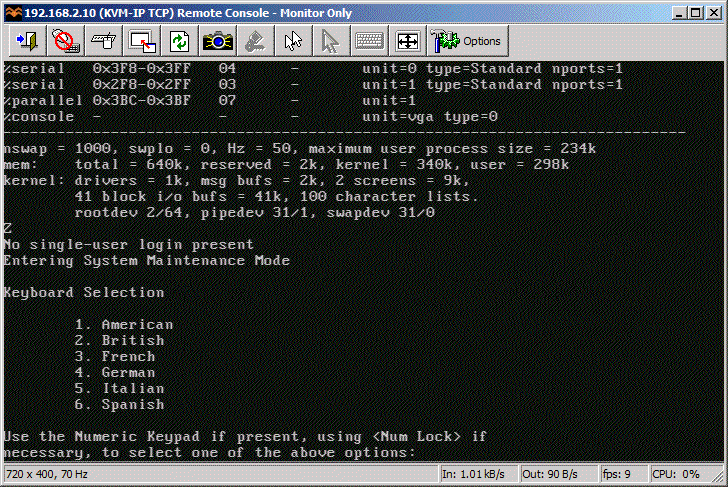
Once I got a grip how to do it semi correctly I was able to torture the machine with bunch of operating systems it has never seen before.  Let’s go directly to the screenshots!


QNX 2 worked just fine!

QNX 2 worked just fine!

Minix 2.0 also loaded without problems.

Minix 2.0 also loaded without problems.

So did Xenix 2.3

So did SCO Xenix 2.3

Xenix 2.3 boot complete.

SCO Xenix 2.3 boot complete.

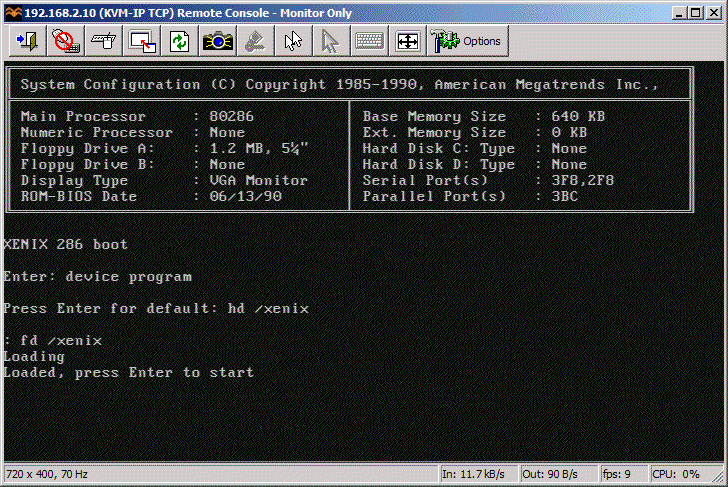
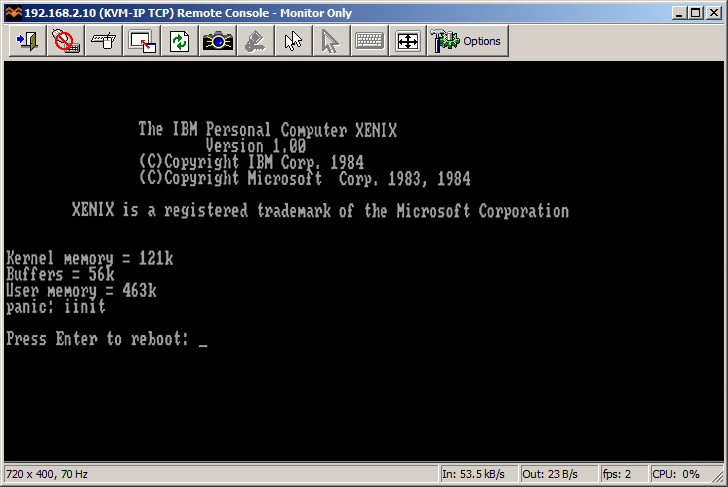
Microsoft Xenix also saw daylight.

Microsoft Xenix also briefly saw daylight.

Xenix switched to CGA mode and died.

MS Xenix switched to CGA mode and died.

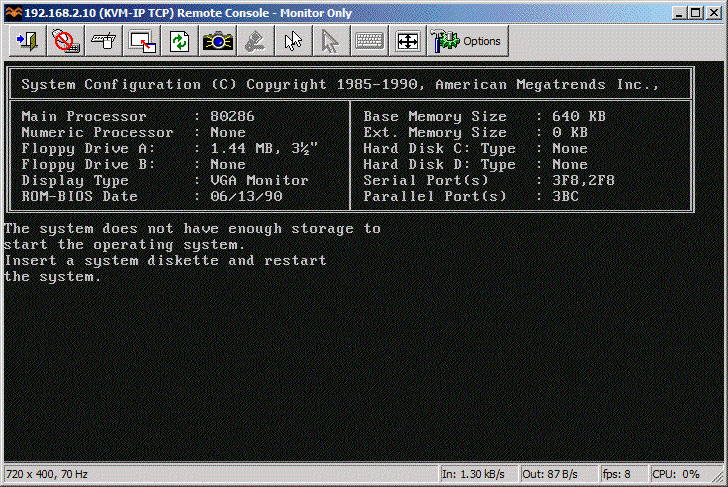
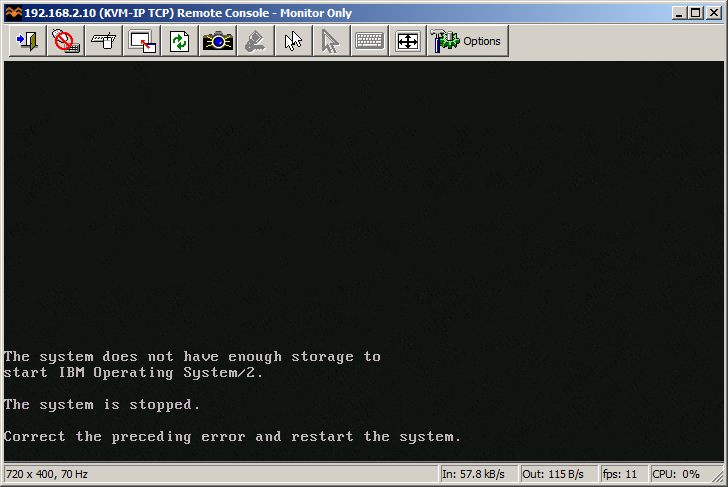
OS/2 1.3 did boot but my machine did not have enough memory to continue.

Guess which operating system is this?

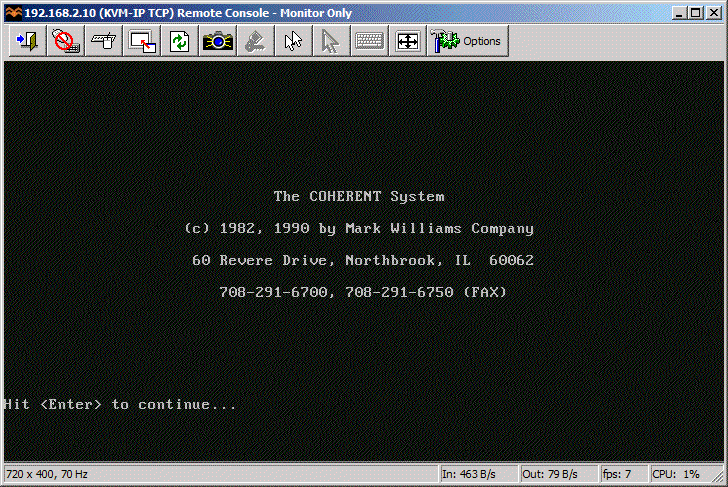
Coherent 3.10 boots correctly as well.

Coherent 3.10 boots correctly as well.

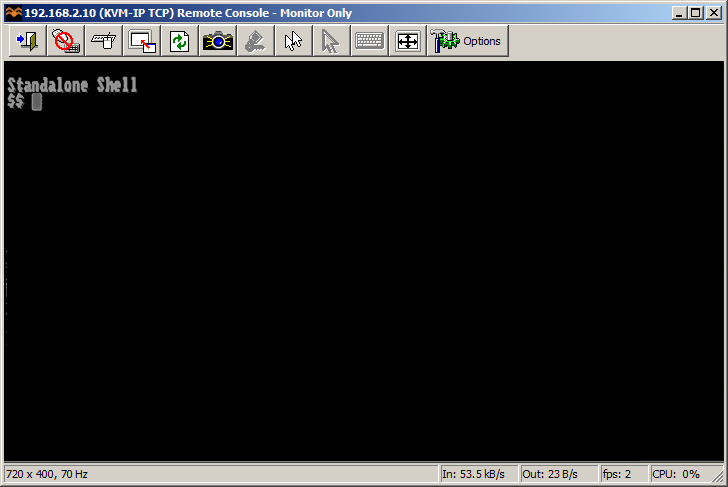
PC/IX booted to Stand Alone Shell. I don't know what to do next.

PC/IX booted to Stand Alone Shell.

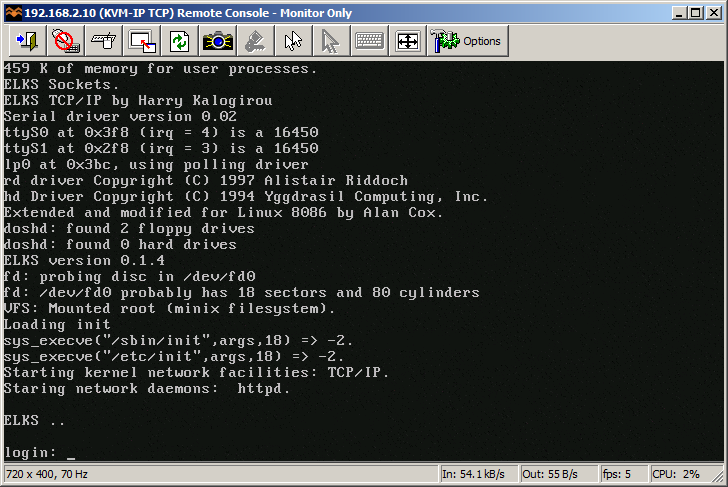
ELKS

ELKS

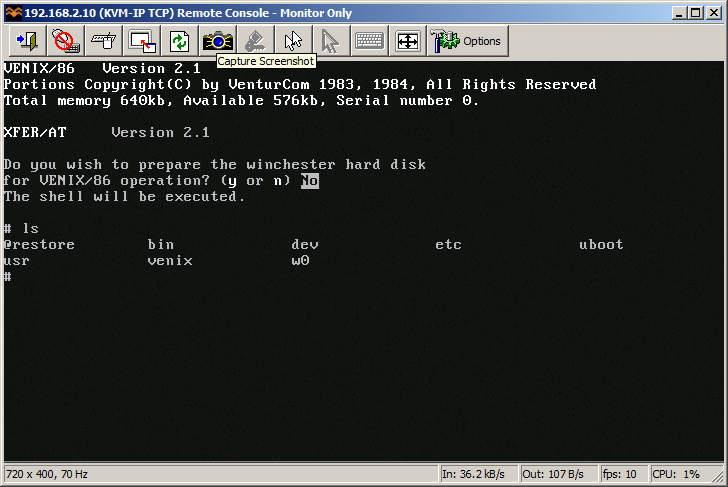
VenturCom Venix/x86

VenturCom VENIX/86

os2-2

I guess 640 KB is NOT enough for everybody.


This pretty much concludes operating systems for 286. If you have more let me know! I will try 386/486 operating systems in a separate post.

So how does HxC works for an end user? You store floppy disk images in a special format called HFE as files on an SD card. HFE files can be made by a virtual floppy disk emulator + rawrite, reading and imaging in an existing floppy, or converting existing floppy images. The list of supported disk images is quite impressive. The conversion however sometimes fails. It detects a wrong format and you have to change file extension or it completely screws things up making 64 “sides” to a floppy disk. Most if not all these have been fixed in the latest beta version of software, but you need to know about it.

When you insert the SD card to the emulator it will read the file list and allow you to switch between different floppy drives on the fly. Interestingly you can mix and match different floppy disk types on the same SD card. So you can have bunch of 3.5″ or 5.25″ disk in different files. Each HFE file contains specific settings for the emulator including the floppy interface type. The operating systems I’ve tried above ranged from 360k, 720k, 1.2MB and 1.44MB images stored on the same SD card. However changing floppy disk type in the BIOS was necessary for the images of different format to load correctly.

One extremely interesting feature is a host control software, that let’s you manage the floppy disks from inside the machine where HxC is attached. Sort of like VMware tools. The software is available for Atari, Amiga and Amstrad CPC. Unfortunately not for PC so I could not test at this time.

Because of the pain with formats, errors in conversions and confusion about some settings I can only give it 8 out of 10 for ease of use. So let’s conclude:

  • Packaging: excellent
  • Quality of hardware: excellent, LCD panel with menu is invaluable!
  • Software: OK with improving tendency in the beta version
  • User manual: OK but could be better
  • Compatibility: excellent! (see above)
  • Ease of use: excellent once you get grip on things
  • Value for money: excellent!
  • Total: very very good!

If you have a large collection of floppy disk images or you maintain a bunch of old machines that rely on floppy disks to work – get HxC quickly. It may save your life.

Updates: Venix/86 and ELKS, Tried OS/2 V1.0 and 640 KB RAM was not enough to boot.

Still missing: Microport SYSV/AT

Other floppy disk emulators.

Review of Gotek emulator.


Virtualizing Floppy Disk Drive – Part 1

(this is a guest post from Tenox)

I had a really bad weekend associated with floppy drive failures. Either all my floppy disks or all my drives decided to jump the ship. Nothing worked! Worse, I could not buy any “new” floppy disk anywhere. Office Depot still stocks floppies but not in stores and you have to order online and wait. Neither Halted nor Weirdstuff had them as well. Seriously?

A major disaster! Something had to be done to make it future proof. So I went to research floppy drive replacement solutions. And this is what I found. There are several Floppy Disk Emulators on the market.

Here is the list and a little bit of research on every one of them. They do have major differences to be aware of.

  • EMUFDD – The first one I found. Italian made, intended to be used in industrial machinery. The device is extremely compatible, customizable, feature rich and according to the company, individually installed in each deployment. I bears a lot of interesting features such as Network option. Apart from the high price the device is not intended to be used by hobbyists.

emufdd

  • Gotek – This one is by an Indian company. Very cheap and you can find it everywhere. It costs about $25 on eBay including shipment. However a major warning: they work by dividing the SD card in to 100 partitions, each size of a single floppy disk and multiplexing them to emulate a floppy disk. Because the partitions are formated with FAT12 the device is not usable for anything else than MS-DOS and Windows. Apparently revision F is capable of storing a single “bootable” or non-MS-DOS disk image. Also they have separate models for 720k, 1.2MB and 1.44MB.  There is a whole army of Gotek clones.

  • IPCAS – This is another clone of Gotek, however worth separate mention and a warning, it costs $300 – ouch!

ipcas

  • HxC – this one was found by claunia. As with most French stuff bit confusing because it has several web sites (one two three). The devices are manufactured in Poland by Lotharek. The price is around $150 and you can buy it on eBay. Feature wise may be the best of all, it definitely supports all the non-PC platforms and even very weird formats. The software naively supports conversion from the notorious IMD and TD0. For some people it will be appealing the HxC is an open source project and you can build it yourself. Certainly it helps to ensure longevity in case of the vendor going out of business. Definitely a winner here.

  • HxC USB Version – This is interesting variant that instead of SD card uses a wired USB connection to a host machine.  The main drawback is that it is read only. However you can’t beat it’s $70 price. For this I could probably refit few of my machines and use it for boot only.

hxcusbonly


  • FlexiDrive – Made in Argentina. The manufacturer claims to support all floppy disk formats including 8″ disks. SD card or USB based. They are made for industrial machinery and customized firmware for different applications. Cost $385.

FlexiDriveMV-SD


  • DTX200 – from Datex a French company. These are also made for industrial machinery. They maintain a large database of emulated floppy drive types. Interestingly they have video of MicroVAX using their emulator, certainly interesting from retrocomputing point of view! They also make MFM 2 CF hard disk emulator. The price is $495.

dtx200


I have ordered two units for testing: HxC, SD revision F from eBay and Gotek Rev F from the manufacturer. I guess testing of the units will be subject of part 2 of this post. I’m planning to try to install some of the weirdest operating systems with wildest disk formats.

Also as a final note, for more modern computers with USB support there are some more mainstream options. I have used following two professionally:

  • Floppy Emulator in Pendrive / USB Stick. The best success I had so far was zMate pen drive from DaneElec which registers as a floppy drive with the system in addition to regular removable disks. I used it several times for booting, loading Windows storage drivers or saving BIOS diagnostic logs from servers without FDD.
  • Lantronix Spider, which allows you to mount a virtual floppy disk or cdrom image from the viewer machine or SMB share, just as you would using VMware or VirtualBox. Pretty cool.

Updates:

  • Mac Floppy Emu – is specifically designed for Macintosh. However currently it only support 800K. Very promising project and once they add 1.44MB support I will want to retrofit my Macs with this.
  • 1541 Ultimate – Floppy disk emulator for Commodore C64.