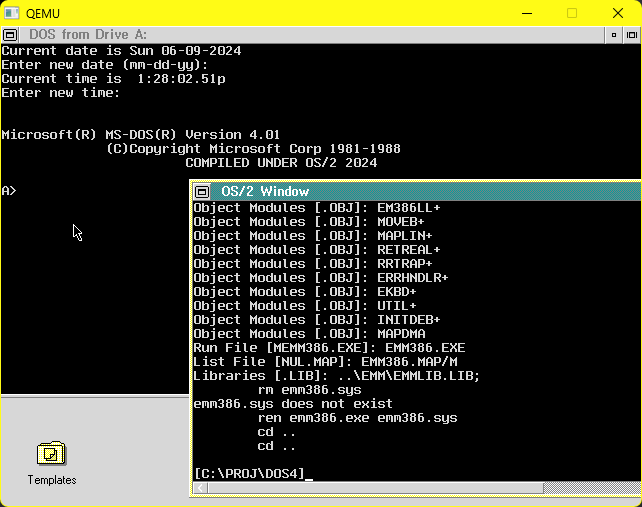
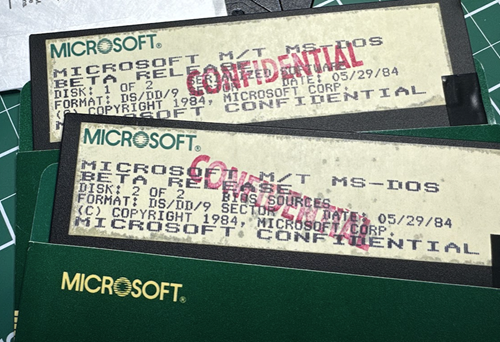
Now that we’ve moved beyond the initial shockwave of the MS-DOS 4.00 source code dump, I thought it was time to try to pull off the ultimate trick of the time, building under OS/2 and using the exciting feature of the time “DOS from Drive A:” Long before VMware / Virtual PC for the PC OS/2 took Intel’s 80386’s hardware virtualization mode, “v86 mode” to the logical conclusion allowing you to boot native MS-DOS under OS/2. Sadly, the old 1989-1991 OS/2 betas do not include this feature. Although I have to wonder if it did exist and just wasn’t publicly available.
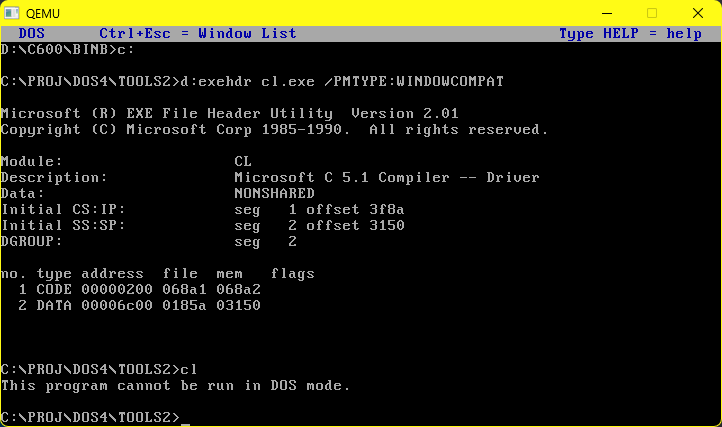
Many of the programs used to build MS-DOS are off the shelf, the MASM assembler, Microsoft C 5.1, and its associated tools are just retail versions. To change things up, I did use the 386MASM assembler just to see if it maintained MASM 5.1 compatibility. And it does. The only gotcha is that all the tools are *NOT* marked Presentation Manager compatible, so launching them from a window opens a full screen session. Very annoying!
exehdr
I’m guessing the fix is in a toolkit? Either way, in Microsoft C 6.0, the utility exehdr lets us modify an OS/2 executable so it’ll now be WINDOWCOMPAT. So at least it ‘feels’ better now.
One thing is for sure, building DOS under OS/2 is a lot more enjoyable than doing a native build as you can minimize the build task, although the MS-DOS only programs do pop up when it generates text indexes & tables. But you do retain some control of your machine during the build, which is great! Although E is a terrible editor for source code, and the one in 6.78 has a nasty bug where it’ll truncate large files. Were people really using text mode editors for everything back then? I guess i like the fonts of the GUI, despite having used machines of the era.
Otherwise, the end result is the same, you get a build of DOS 4.
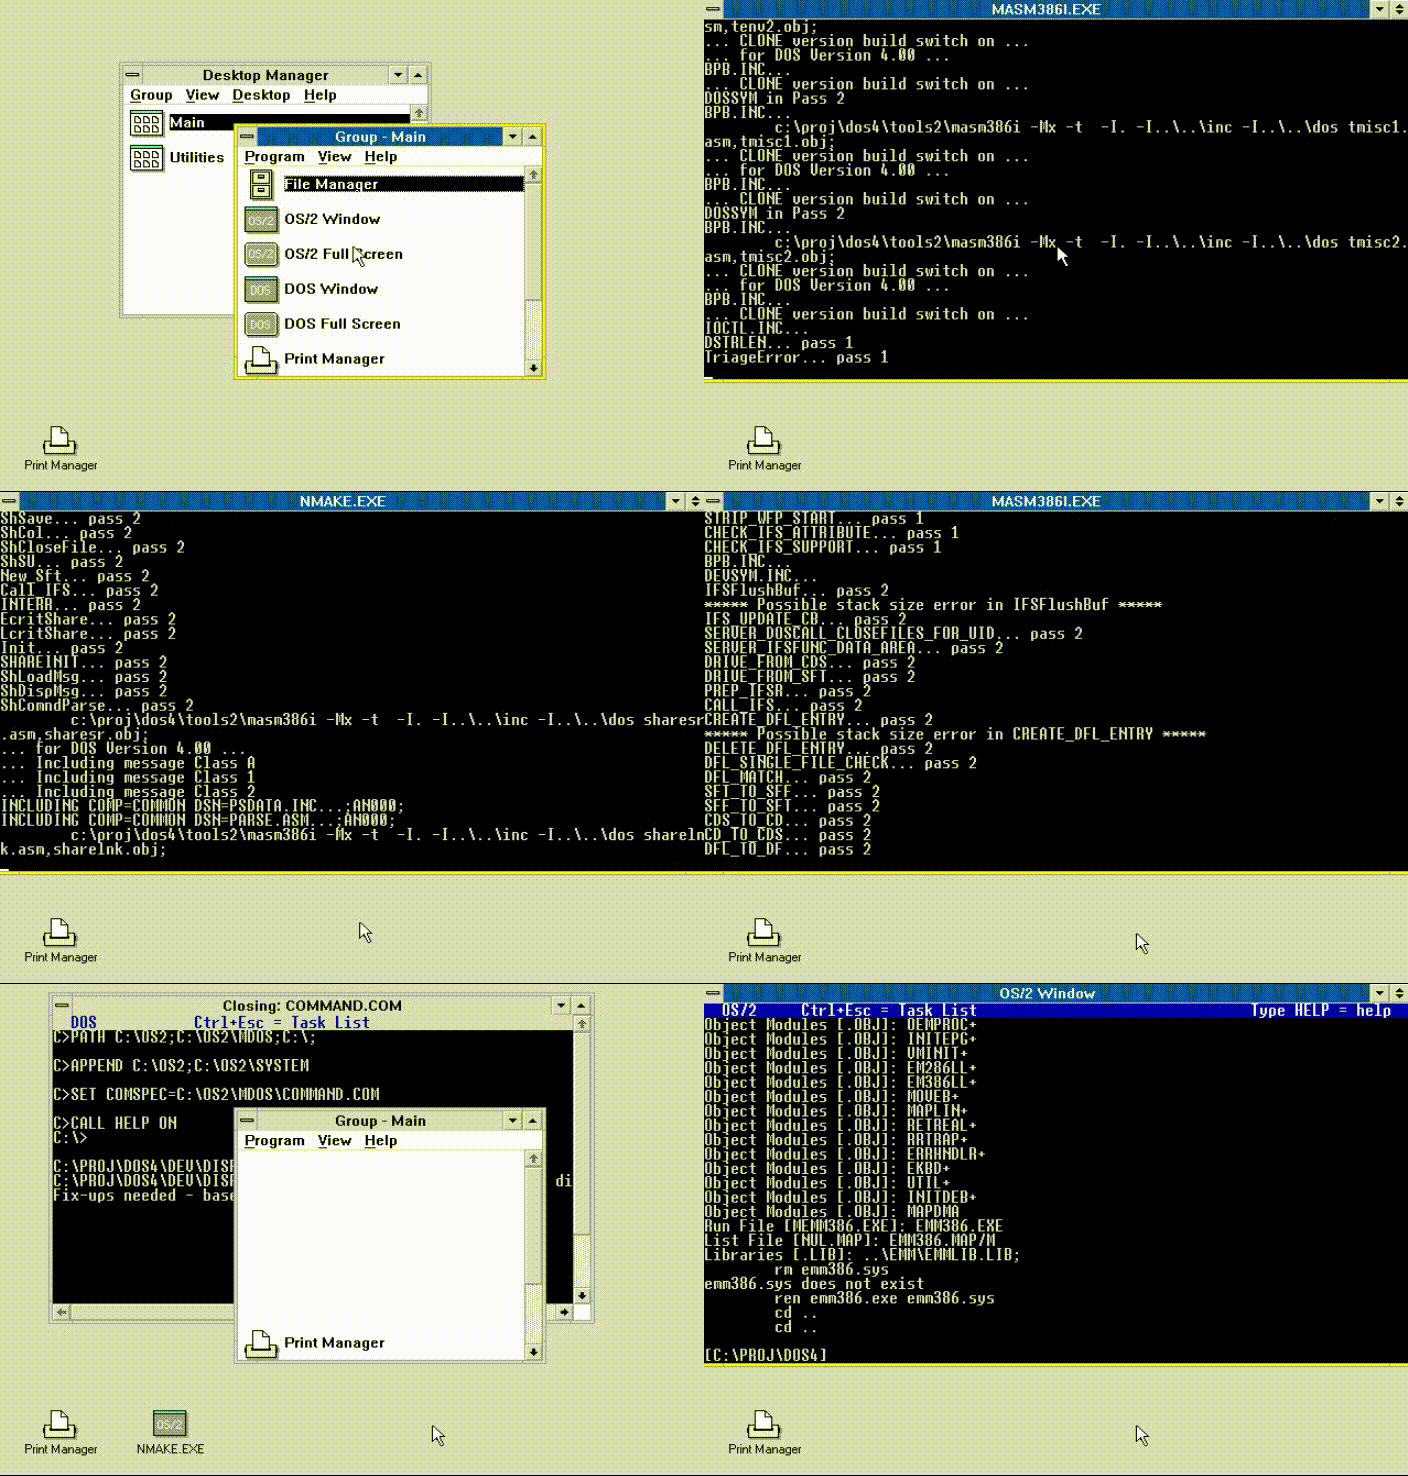
I went ahead and tried to build using 6.78 and no doubt compiling DOS is an absolute torture test. So far, the DOS Box has locked OS/2 once, and PM Shell has crashed once as well.
I altered the Makefiles to use ‘rm’ instead of the built in ‘del’ command, because if you try to delete a file that doesn’t exist, del returns an error, which then triggers an end to the NMAKE process. Very annoying! However, the ‘rm’ included in Microsoft C 5.1 doesn’t suffer the same defect. Using 86Box with an 83Mhz Pentium OverDrive it took about 18 minutes to build DOS-4.
Building DOS 4 on OS/2 6.78
I did capture the video and converted it to a GIF so you can quickly see the reboot & the UI crashing. FUN!
Compiled under OS/2
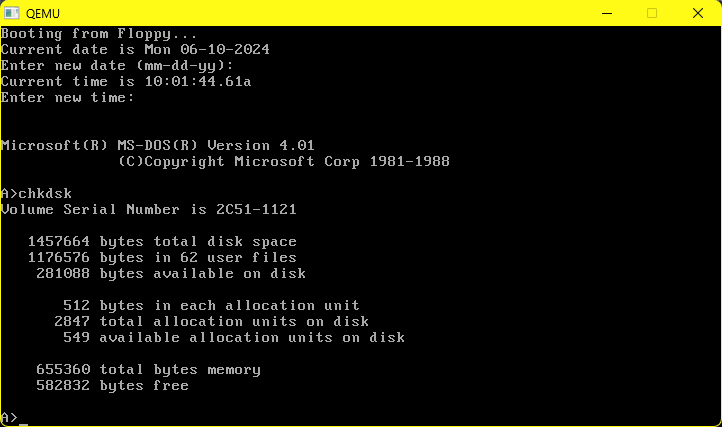
And it even boots!
For anyone interested I’ve put zips on archive.org that can be extracted under OS/2. I also made a pkzip disk set incase loading a 6MB zip file is an issue.
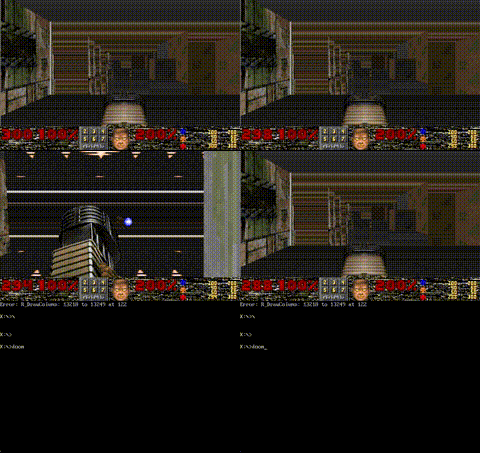
One of the things that always annoyed me about DooM is the fixed point math. It relies on a 64bit data type, which many 32bit platform just lack. Namely the FixedMul & FixedDiv.
fixed_t FixedMul
( fixed_t a,
fixed_t b )
{
return ((long long) a * (long long) b) >> FRACBITS;
}
They are generally re-written into assembly, at least for the i386 getting around the whole 64bit on a 32bit platform.
So that’d always been the ‘catch’ when porting Doom is that you either need a ‘long long’ data type, or the custom assembly or you basically are out of luck.
I know I’m a weird person, but I do like going backwards in terms of software, while most people want latest GCC 14 targeting old machines or some other hack, I prefer the opposite, trying to get the oldest stuff running on something new(er). In this case, it’s GCC 1.27.
While much of the old GCC history is lost, I did my best to collect as many versions as I could find here, along with doing patches in reverse to ‘reconstruct’ many old versions. The results are on archive.org. And what is significant from this, is the first version of GCC with i386 support appears in version 1.27.
From the internals-1 file we can find out that we all have William Schelter to thank for doing the bulk of the 386 port of GCC.
William Schelter did most of the work on the Intel 80386 support.
Internals-1 – gcc 1.27
With the first commit being on May 29th, 1988:
Sun May 29 00:20:23 1988 Richard Stallman (rms at sugar-bombs.ai.mit.edu)
...
	* tm-att386.h: New file.
GCC 1.25
The first GCC with i386 parts is 1.25, however it tends to emit the instruction movsbl, which GAS doesn’t like. Comparing the output to GCC 1.40 reveals this:
-	movsbl -12(%ebp),%ax
+	movsbw -12(%ebp),%ax
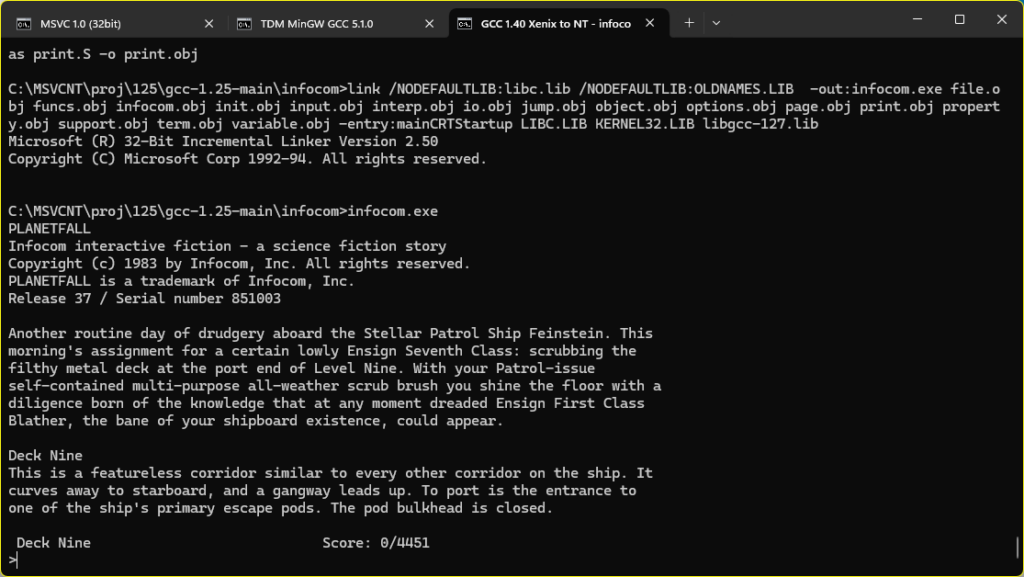
It’s trivial enough to change to a movsbw, but there are some other issues going on, and even the Infocom ’87 interpreter won’t fully build & run. The files input.c & print.c have to be built with a later version of GCC, in this case I used GCC 1.40.
8&% compiled with GCC 1.25!
However when using the old XenixNT build thing I did, I do get a runnable EXE!
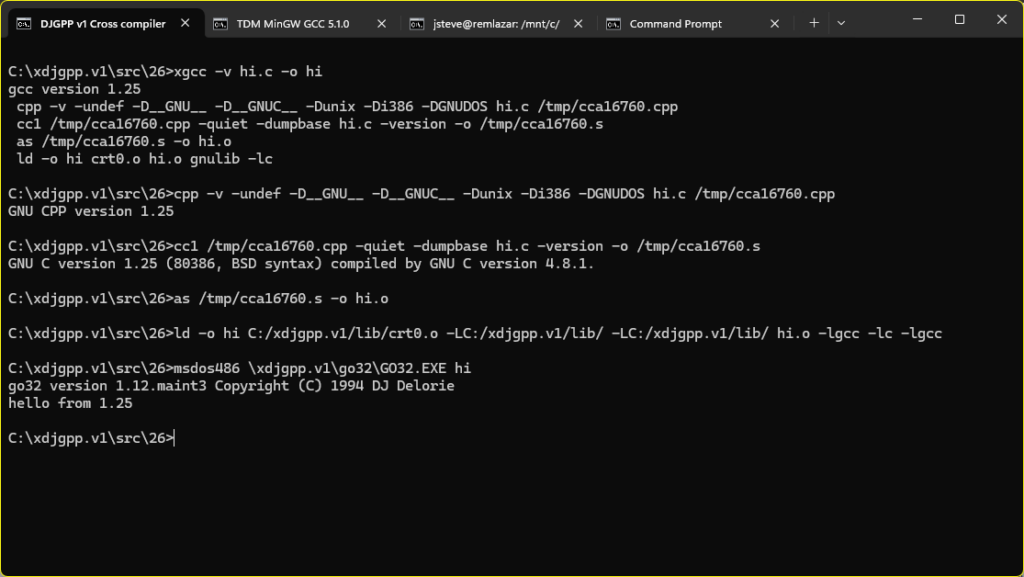
GCC 1.25 targeting DJGPP v1
I added the BSD targeting files from 1.27 allowing it to generate the needed underscores in the right places, as 1.25 by default only supports AT&T syntax. I guess the best way to illustrate it is to compile the compiler twice, once as the AT&T compiler, and the next being the BSD compiler, and compare their output:
cc1-att.exe hi.cpp -quiet -dumpbase hi.c -version -o hi-att.s
GNU C version 1.25 (80386, ATT syntax) compiled by GNU C version 4.8.1.

.text
.LC0:
        .byte 0x31,0x2e,0x32,0x35,0x0
.LC1:
        .byte 0x68,0x65,0x6c,0x6c,0x6f,0x20,0x66,0x72,0x6f,0x6d
        .byte 0x20,0x25,0x73,0xa,0x0
        .align 2
.globl main
main:
        pushl %ebp
        movl %esp,%ebp
        pushl $.LC0
        pushl $.LC1
        call printf
.L1:
        leave
        ret
And then looking at the BSD syntax:
cc1-bsd.exe hi.cpp -quiet -dumpbase hi.c -version -o hi-bsd.s
GNU C version 1.25 (80386, BSD syntax) compiled by GNU C version 4.8.1.

        .file   "hi.c"
.text
LC0:
        .byte 0x31,0x2e,0x32,0x35,0x0
LC1:
        .byte 0x68,0x65,0x6c,0x6c,0x6f,0x20,0x66,0x72,0x6f,0x6d
        .byte 0x20,0x25,0x73,0xa,0x0
        .align 1
.globl _main
_main:
        pushl %ebp
        movl %esp,%ebp
        pushl $LC0
        pushl $LC1
        call _printf
L1:
        leave
        ret
As you can see main: becomes _main:, just as labels (LC0/LC1) have a prepended, while in BSD they do not. There are no doubt countless other nuanced differences, but for the assembler & operating system to match you want these to align. Thankfully calling conventions are mostly the same per processor so you can add the underscores to the AT&T target and get something that’ll run, not only on DJGPP but also Win32, as MinGW32 uses BSD syntax at its heart!
C:\xdjgpp.v1\src\26>gcc hi-bsd.s -o hi.exe

C:\xdjgpp.v1\src\26>wsl file hi.exe
hi.exe: PE32 executable (console) Intel 80386, for MS Windows

C:\xdjgpp.v1\src\26>hi
hello from 1.25
Not that we really need to go all the way and have GCC 1.25 running on anything much, although at the same time it’s kind of fun!
Reaching out for help
The oldest & most robust GCC is 1.27, and I’d been able to use that to build DooM before, but the caveat is of course the fixed point math. I’d asked smarter people than I years ago about this problem, and basically was told to figure it out for myself. After all its ‘trivial’. But alas, I’m not smart. What I would do is build the fixed point math with GCC and try to re-work that into other compilers, although again for platforms without GCC or the target CPU lacking the 64bit data type is well.. fatal.
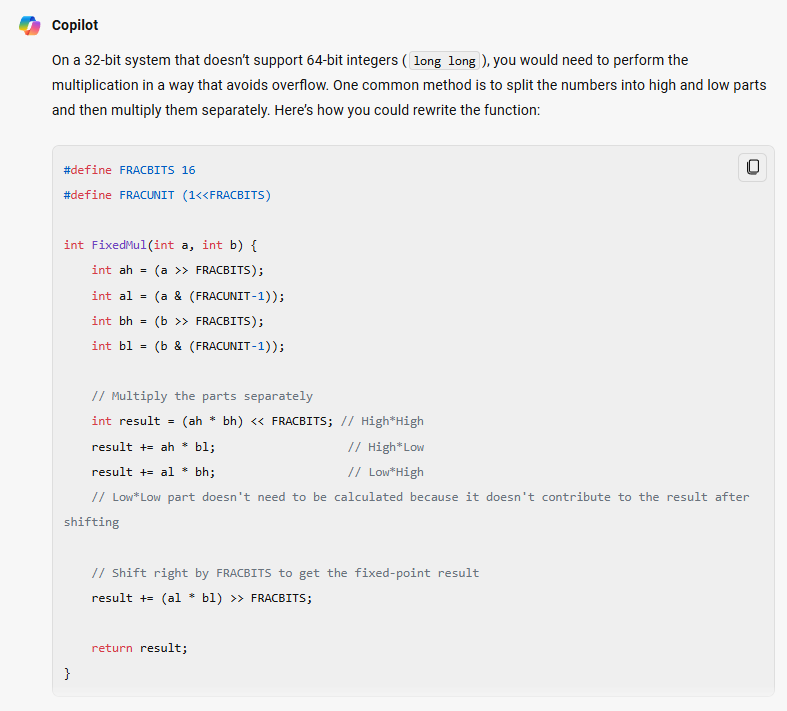
But AI, sadly for it, is compelled to help. So I just went ahead and asked and got a surprising result!
Sydney strikes back!
It’s very C++ like but it’s trivial enough to make it into old C.
Sydney’s fixed-point guess
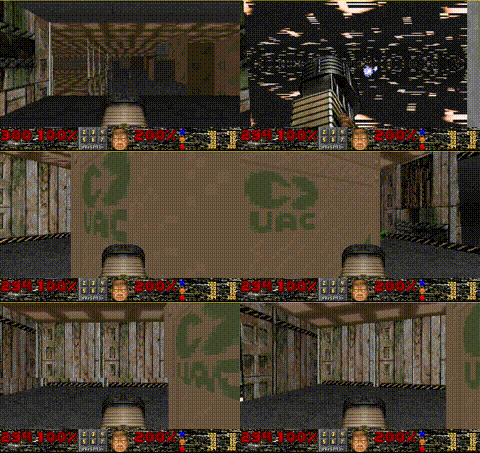
Well on the one hand it does actually load up and play. But the controls go wild and I’m pulled into the intersection of these boxes, and unable to move. And as I rotate the floor and walls clip in and out. It’s very weird.
Not knowing anything about anything, I saw this ‘guard’ on the fixed division and tried to add that to the multiply:
After thinking about it on and off, asking for more help and going nowhere, I just gave up. It’s something beyond my skill, and apparently the AI as well. Until I had one of those moments in a dream where I had somehow told myself I bet the integers are not unsigned, and obviously fixed-point math needs all the bits, and it’s such a trivial fix, that even I should have figured it out.
I woke up at 4am and fired up the computer to see if it did anything. I was surprised to see that yes, in fact the integers were signed. I added the one key word, and recompiled using GCC 2.2:
Now with unsigned integers
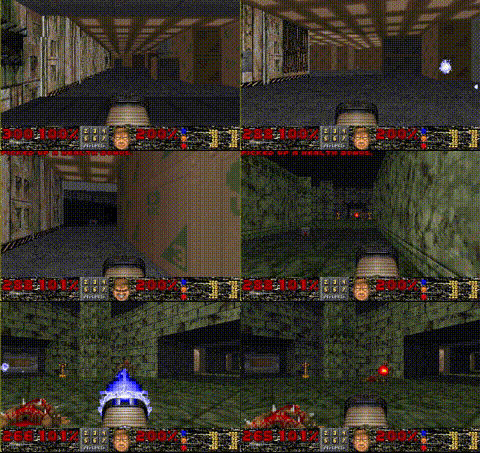
And it RAN! I tried GCC 1.39, and too ran! I then made sure there was no assembly modules being called accidentally, and then re-built with GCC 1.27, and yeah, it runs!
Armed with a simple port of DooM to Win32, I went ahead and put in the fixed-point solution, and used Visual C++ 1.10 aka Microsoft C/C++ 8.0 to build DooM, and yes it works there too!
In the end I guarded it around a long long type, as I’m sure it’s much more faster, but for those without the types or any assembly skill, here is the solution:
/* Fixme. __USE_C_FIXED__ or something. */
fixed_t
FixedMul
( fixed_t a,
fixed_t b )
{
#ifdef HAVE_LONG_LONG
return ((long long) a * (long long) b) >> FRACBITS;
#else
unsigned int ah,al,bh,bl,result;
ah = (a >> FRACBITS);
al = (a & (FRACUNIT-1));
bh = (b >> FRACBITS);
bl = (b & (FRACUNIT-1));
/* Multiply the parts separately */
result = (ah * bh) << FRACBITS; /* High*High */
result += ah * bl; /* High*Low */
result += al * bh; /* Low*High */
/* Low*Low part doesn't need to be calculated because it doesn't contribute to the result after shifting
// Shift right by FRACBITS to get the fixed-point result */
result += (al * bl) >> FRACBITS;
return (fixed_t)result;
#endif
}
/* */
/* FixedDiv, C version. */
/* */
fixed_t
FixedDiv2
( fixed_t a,
fixed_t b )
{
#ifdef HAVE_LONG_LONG
long long c;
c = ((long long)a<<16) / ((long long)b);
return (fixed_t) c;
#else
double c;
c = ((double)a) / ((double)b) * FRACUNIT;
if (c >= 2147483648.0 || c < -2147483648.0)
I_Error("FixedDiv: divide by zero");
return (fixed_t) c;
#endif
}
fixed_t
FixedDiv
( fixed_t a,
fixed_t b )
{
	if ( (abs(a)>>14) >= abs(b))
		return (a^b)<0 ? MININT : MAXINT;
return FixedDiv2 (a,b);
}
I haven’t tested it on Big Endian machines yet. I’ve updated my terrible DooM engine port, along with Doom-New for DOS. Additionally, I’ve been able to confirm it works with Watcom 9-OpenWatcom 2. It might even work with 7 & 8 but I haven’t tried.
There are a few reasons to get an M2 Mac Pro and although many will say the Studio is a better buy for value: that’s only true if you’re not after these important considerations:
The ability to install your own *bootable* SSD: nearly every major Mac reviewer ignored this insanely important feature.
The ability to install internal storage (and go beyond 8 TB), period: do we really want a cocktail of external HDDs attached? I don’t!
The ability to install an internal USB A licensing dongle: unless you’re sharing your dongle over the network with 3rd party software from an RPi hiding in a closet (you should try VirtualHere if you want cross-platform dongle sharing it’s great), you don’t want to accidentally shear it off costing thousands of dollars of lost licensing.
The Magic Keyboard and (black) Magic Mouse are bundled (this is not the case with the Mac Studio or the MacBook Pro adding a substanstial cost. However, since the AppleCare+ is more expensive for the Mac Pro over the Mac Studio you could argue these costs cancel themselves out… unless you’re Icarus with a wax wallet instead of wax wings and never purchase AppleCare+).
Recently ‘GoFetch’ made the headlines, but it’s irrelevant for a variety of reasons in my opinion: 1) you won’t have WAN-exploitable instances of GoFetch in the real world, 2) it does indeed affect some Intel processors and probably others. The way all processors are designed now with speculative execution, CVE-after-CVE is unavoidable so the sensationalization has worn out its appeal. Even the once-ironclad AMD processors are afflicted with a bunch of nasty CVEs now too. \rant
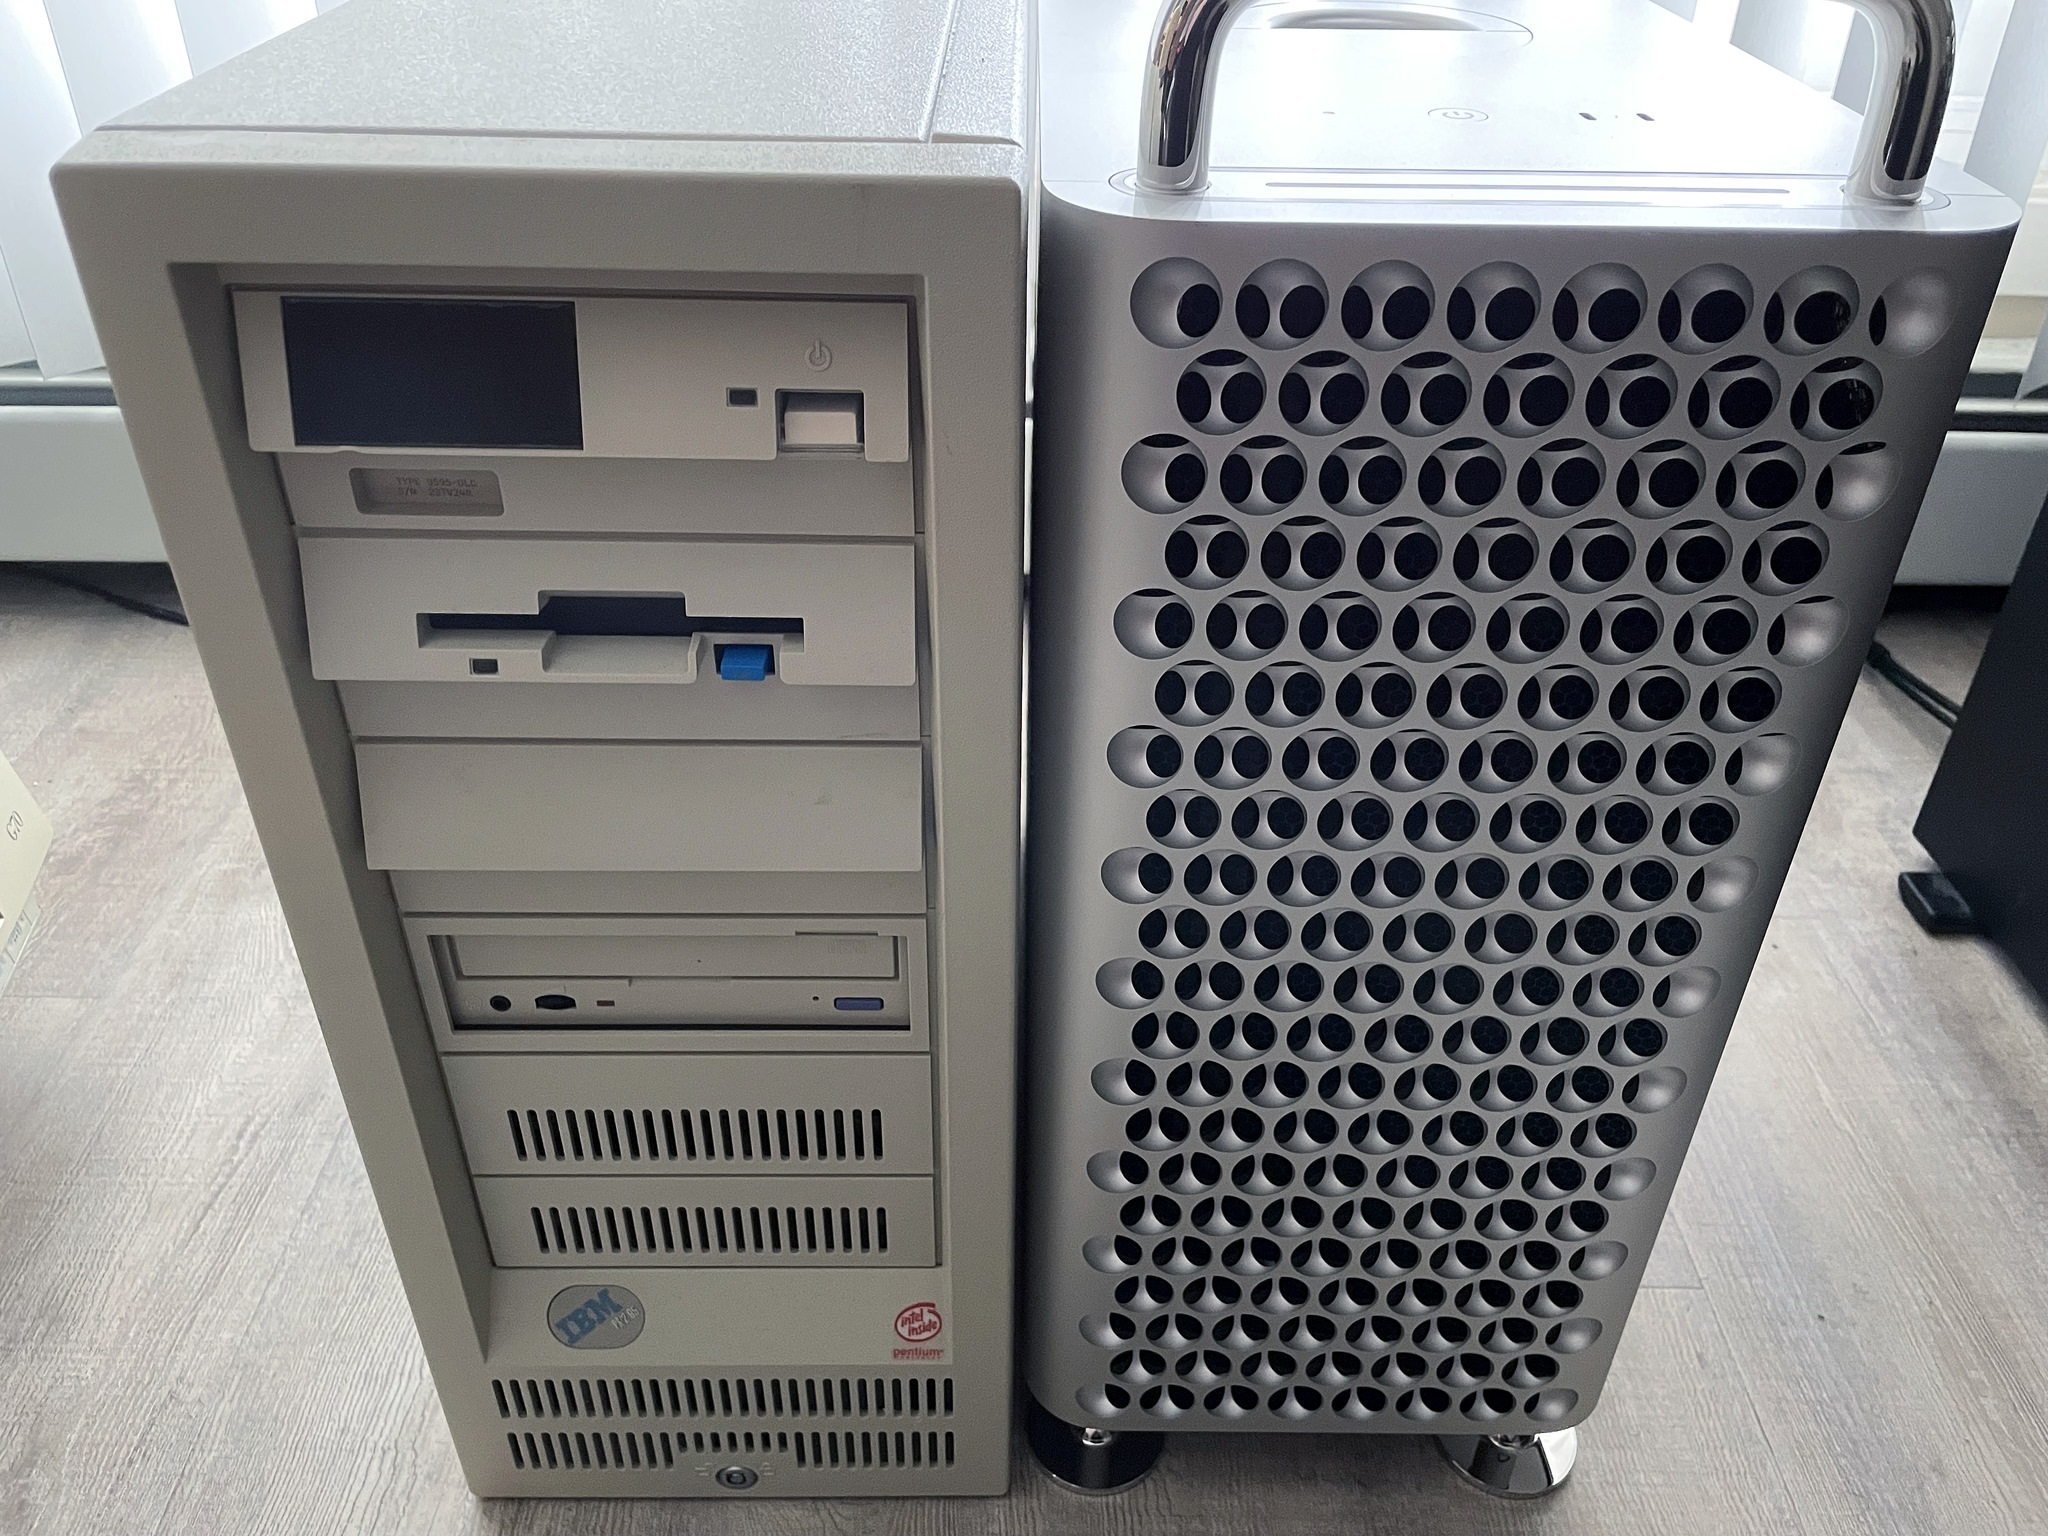
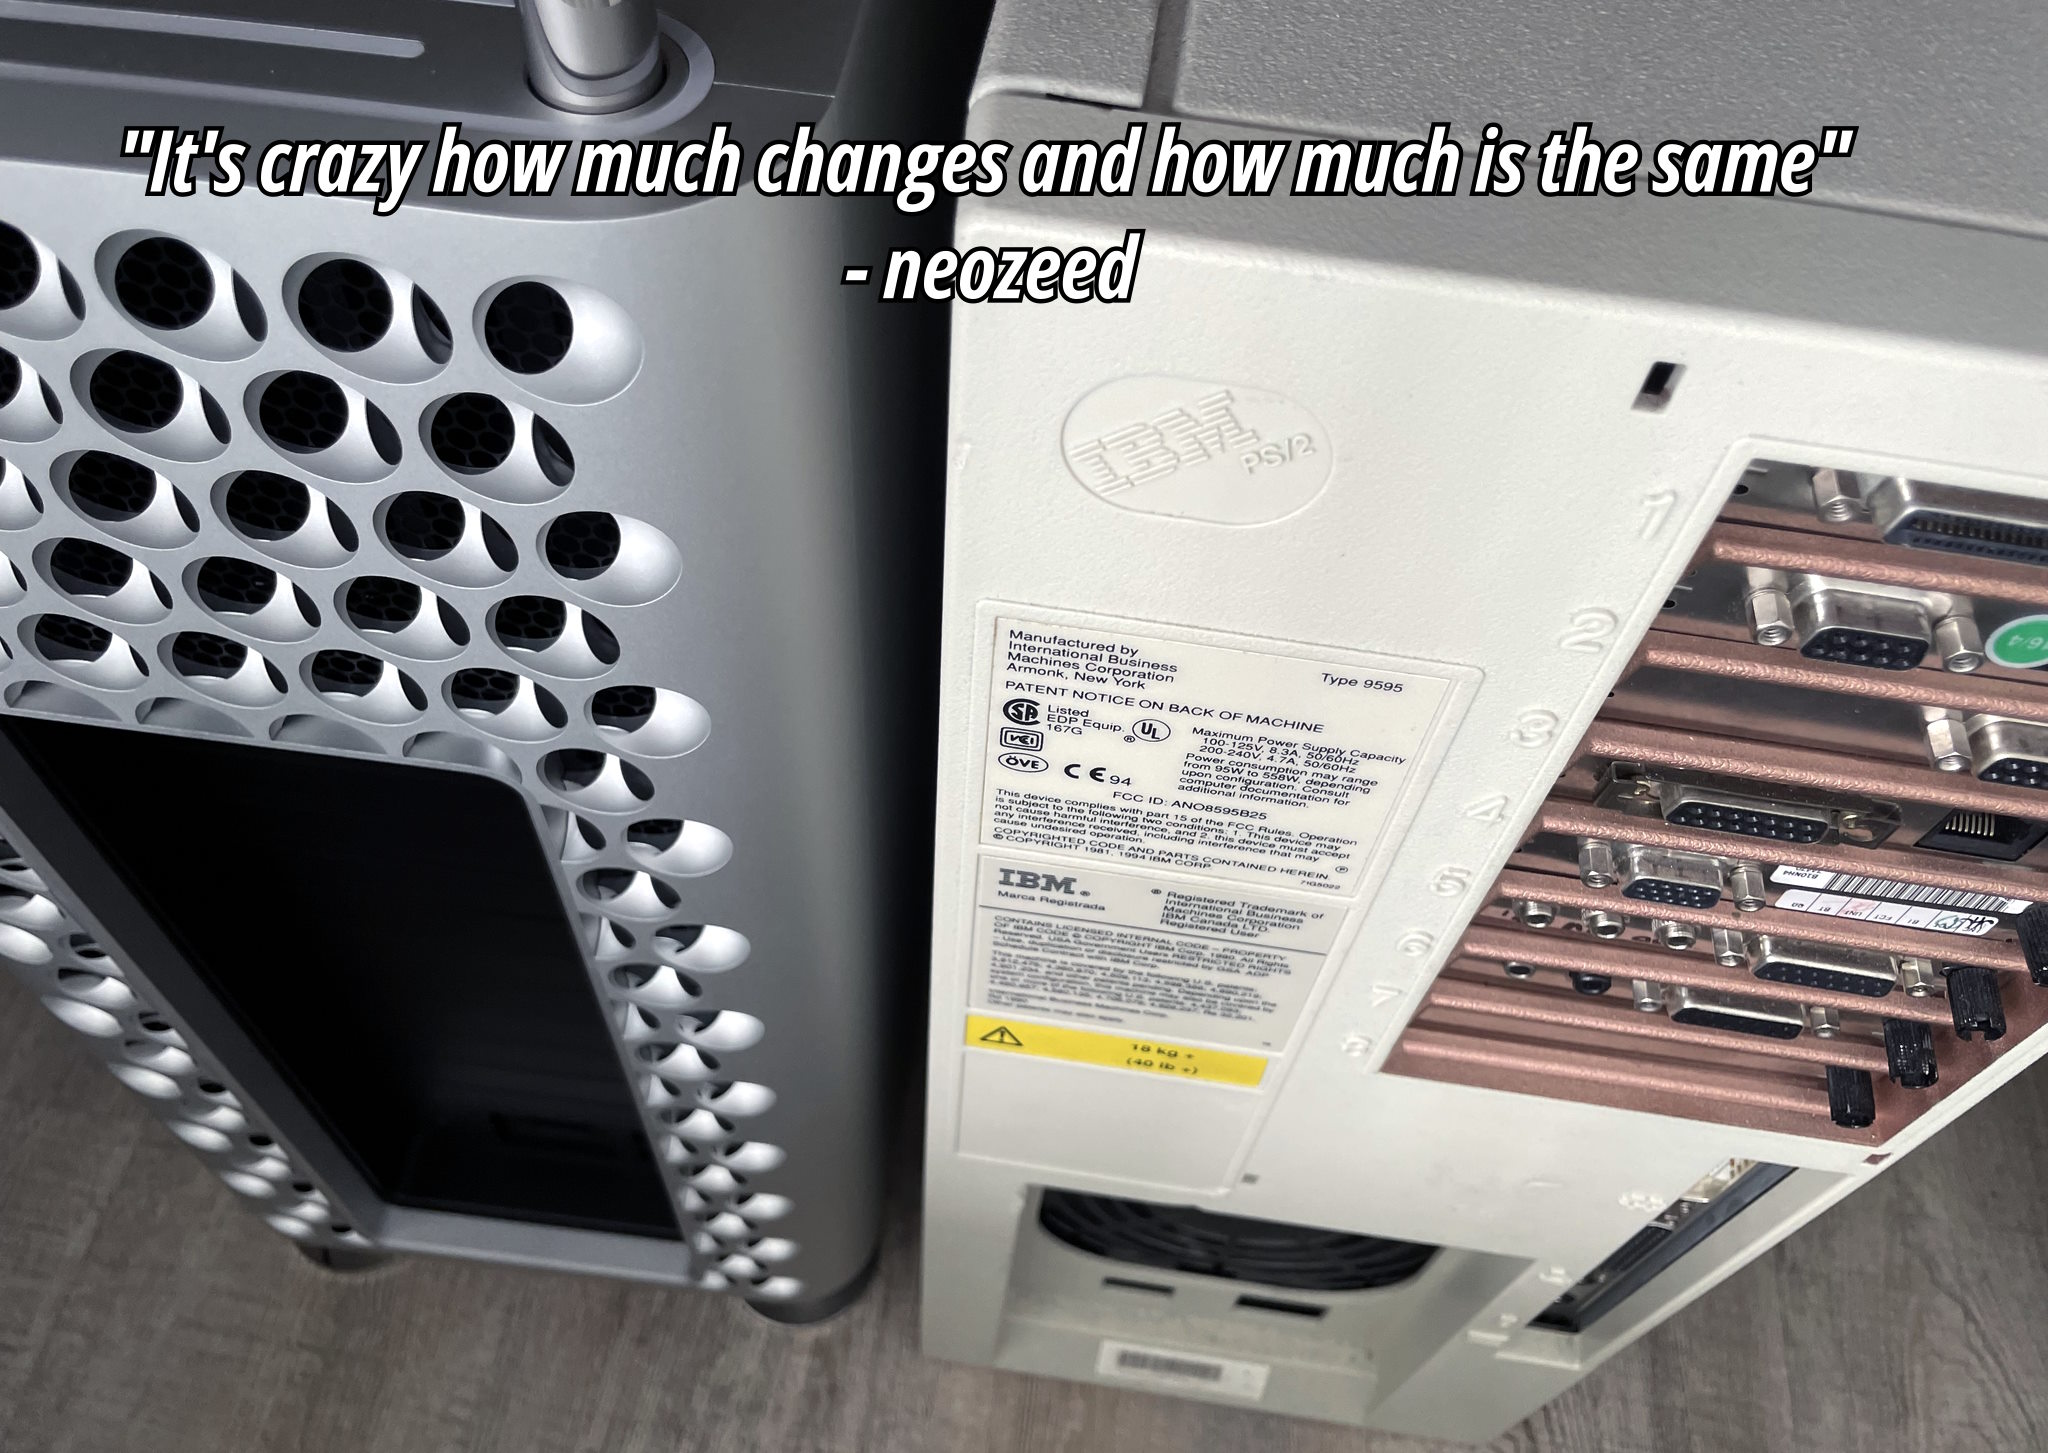
Mac Pro vs PS/2 Model 95
After an eye-watering $8000: refurbished base model with AppleCare+ 🤮💸💸, we’re greeted with our new friend. The Cheese Grater (2023 Mac Pro) has befriended the Ardent Tool of Capitalism (PS/2 Model 95)! It’s odd how both share silly nicknames and a very similar height sans handles. Both systems symbolize the same sentiment that Louis Ohland shared many years ago: “Think of a business computer being used for purely personal reasons. Fist pump at the man! Isn’t using a corporate tool because you can an expression of free will?”*
*Louis Ohland is the guy who nicknamed the PS/2 Model 95, the Ardent Tool of Capitalism.
Q&A
Q: will I grate cheese on both of them?

A: only if you clean up the cheese residue for me. Are Personal System/2s even food-safe???
Storage
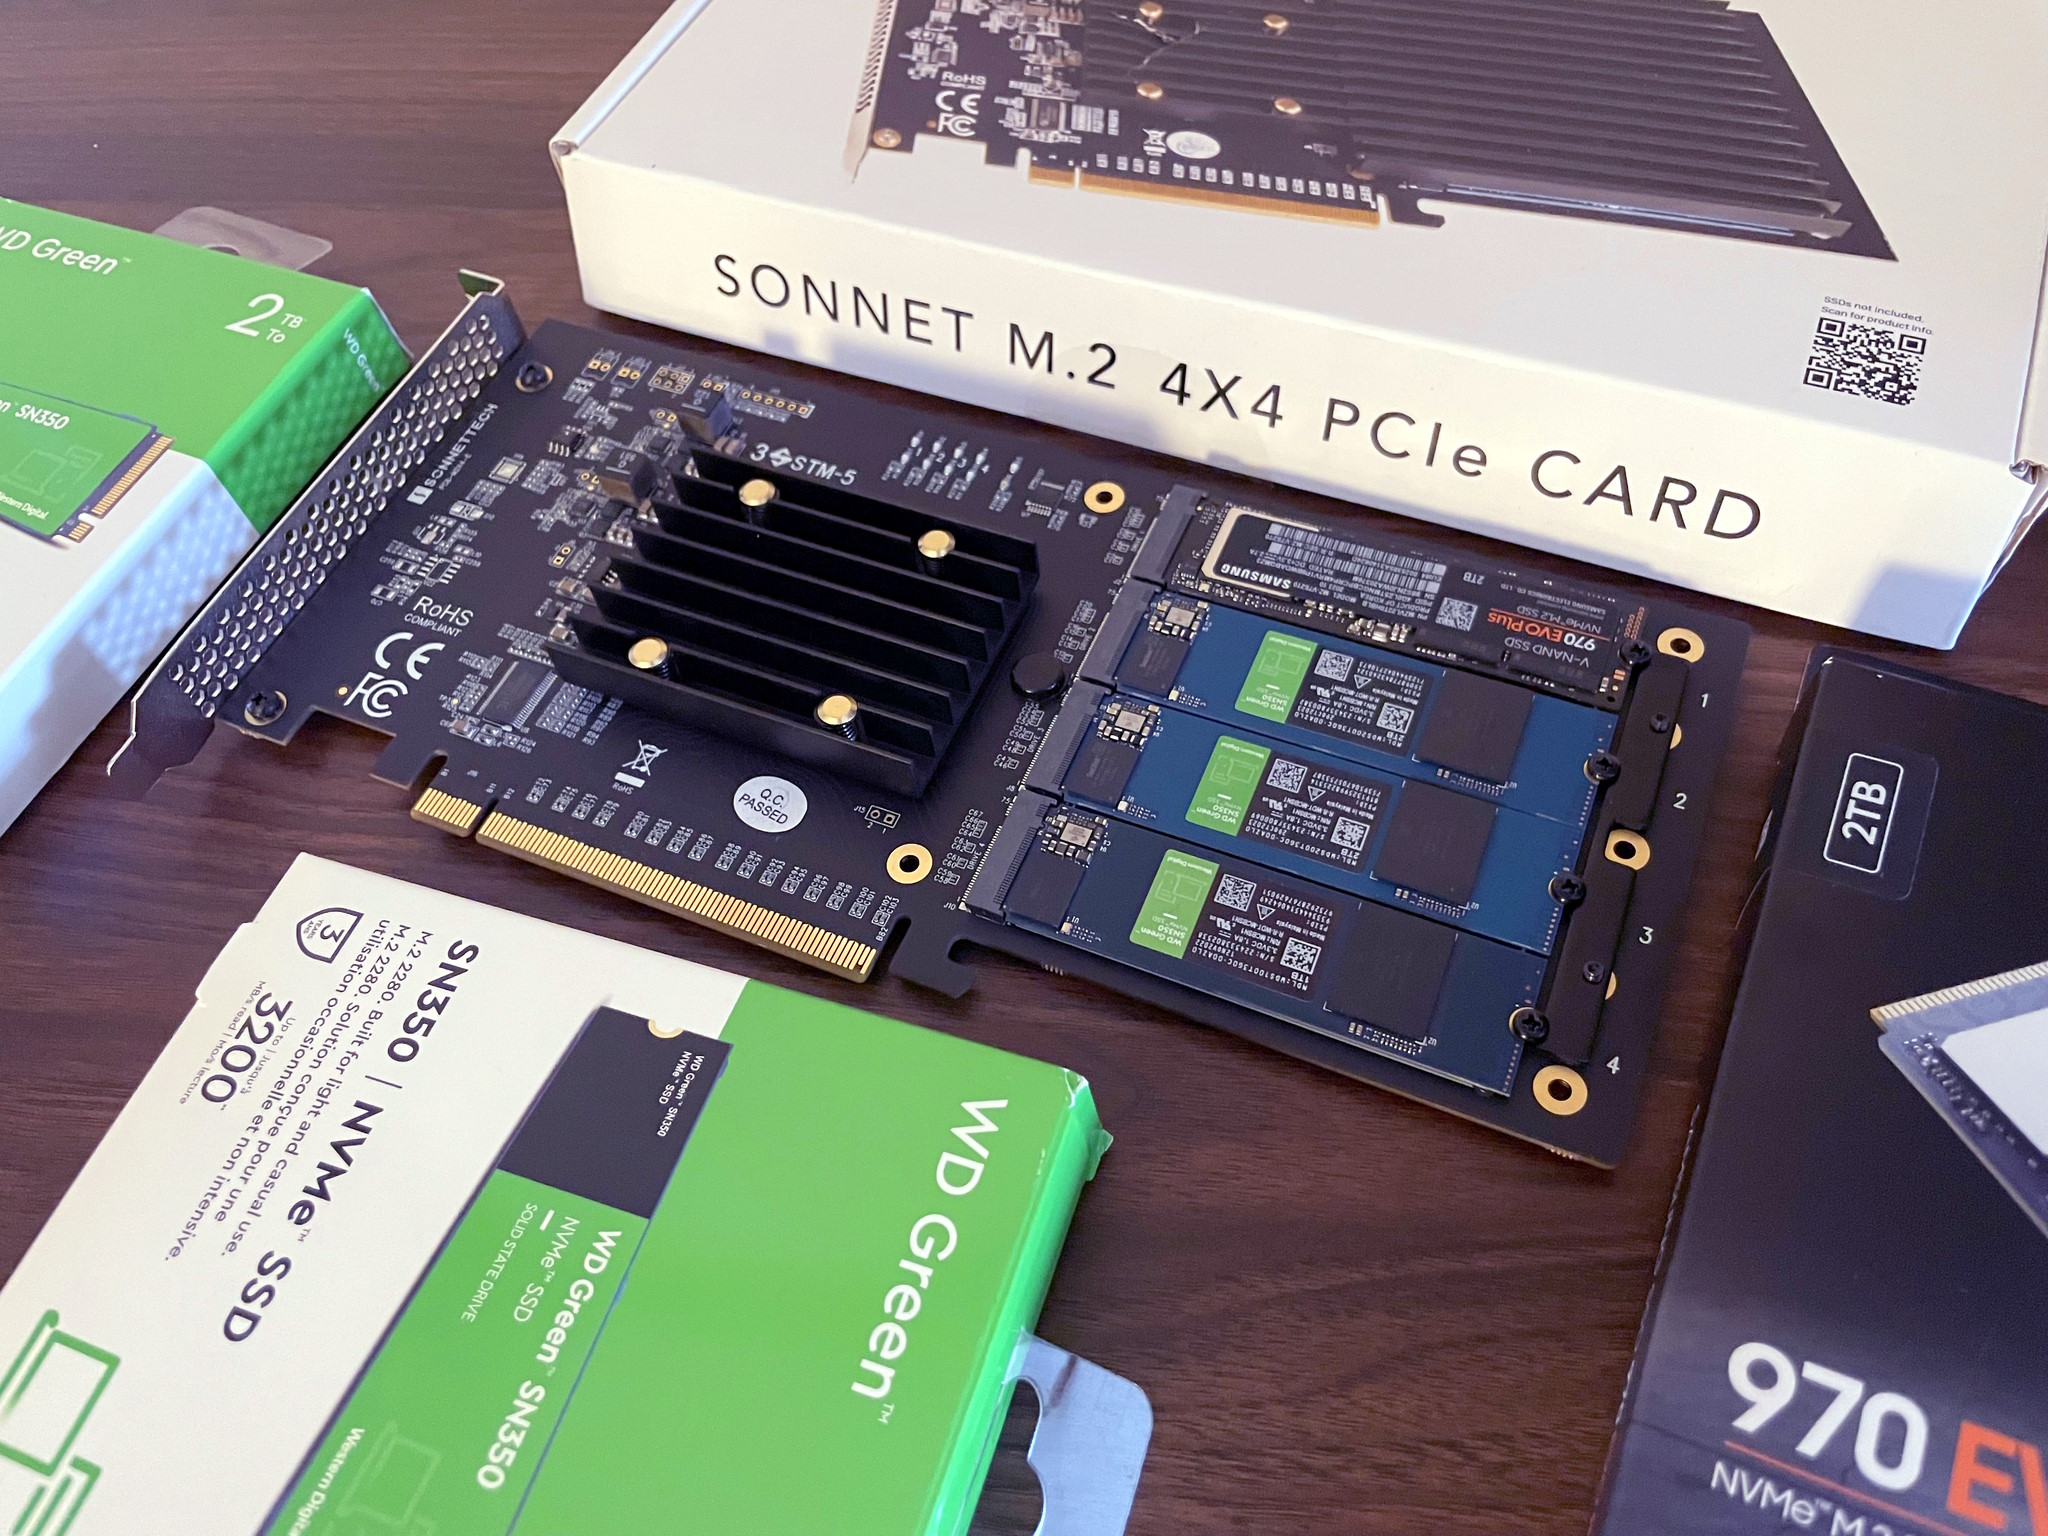
Sonnet M.2 4×4 NVMe PCI-e
The first thing we’ll need to do is install an NVMe PCI-e card. I’m going with the overly-priced “Sonnet M.2 4×4”, because the 2×4 card is nearly the same price making it a horribly valued product and we may as well expand this thing with four NVMes to get our money’s worth. It’s not really clear if the Sonnet M.2 4×4’s controller outperforms the Sonnet M.2 2×4 (they don’t use the same one), but both operate on gen 3 and the NVMes themselves are gen 3 so none of it really matters. There are much cheaper NVMe PCI-e cards but most are not compatible with Macs, you’re paying the tax for the fancy firmware… otherwise buy a much cheaper card if you’re on Windows or Linux. The card only came in a pink ‘static suppressant bag’ instead of a true antistatic bag which is laughable at how much sonnet is charging, and Amazon appears to have taken a bite out of the box.
For the primary boot NVMe we’re going with a 2TB 970 EVO Plus. I know Louis Rossmann decried them as being unreliable after he torched a bunch in some custom gaming rigs with sketchy PSUs, but they’re good drives if you don’t kill them with dirty PSU voltage rails. Always use quality PSUs folks. This is why many Maxtors failed due to the ST SMOOTH chips receiving power from PSUs outputting higher than 12v, and not the drives themselves… same thing applies today when you eclipse 12v on your power rails. I’ve also been running one in a ThinkPad for more than a year and it’s been fine.
For the remaining tertiary storage we’re going with some WD Green SN350s: solely because they’re compatible with macOS — the macOS compatibility with NVMes is very specific unfortunately. Otherwise I would have went with more TeamGroup 4TB drives as they’re one of the best value for money (particularly the TM8FP4004T0C101, it uses better NANDs than the more expensive and inferior 4TB offerings from Crucial and WD). Yeah… the cost of NVMe disks isn’t absolute, sometimes cheaper ones use better NANDs and you can be fleeced by brand recognition and false-positive specs on gen4 which I imagine is what Crucial capitalizes on.
[If you don’t know what I’m talking about: the Crucial and Western Digital NVMe drives always cheap out and use QLC NANDs instead of proper TLC NANDs as TeamGroup and Samsung do; and obviously they’re not going to advertise they’re cheating you and will price their products the same as the competition. Very similar to the whole SMR/CMR debacle, why would Western Digital tell you you’re buying something cheaper at a premium cost??? Caching is an entirely different thing separate to this and usually only the Samsung drives have ‘true’ dedicated cache logic, which is why I’m using the 970 EVO Plus as a boot/OS NVMe]
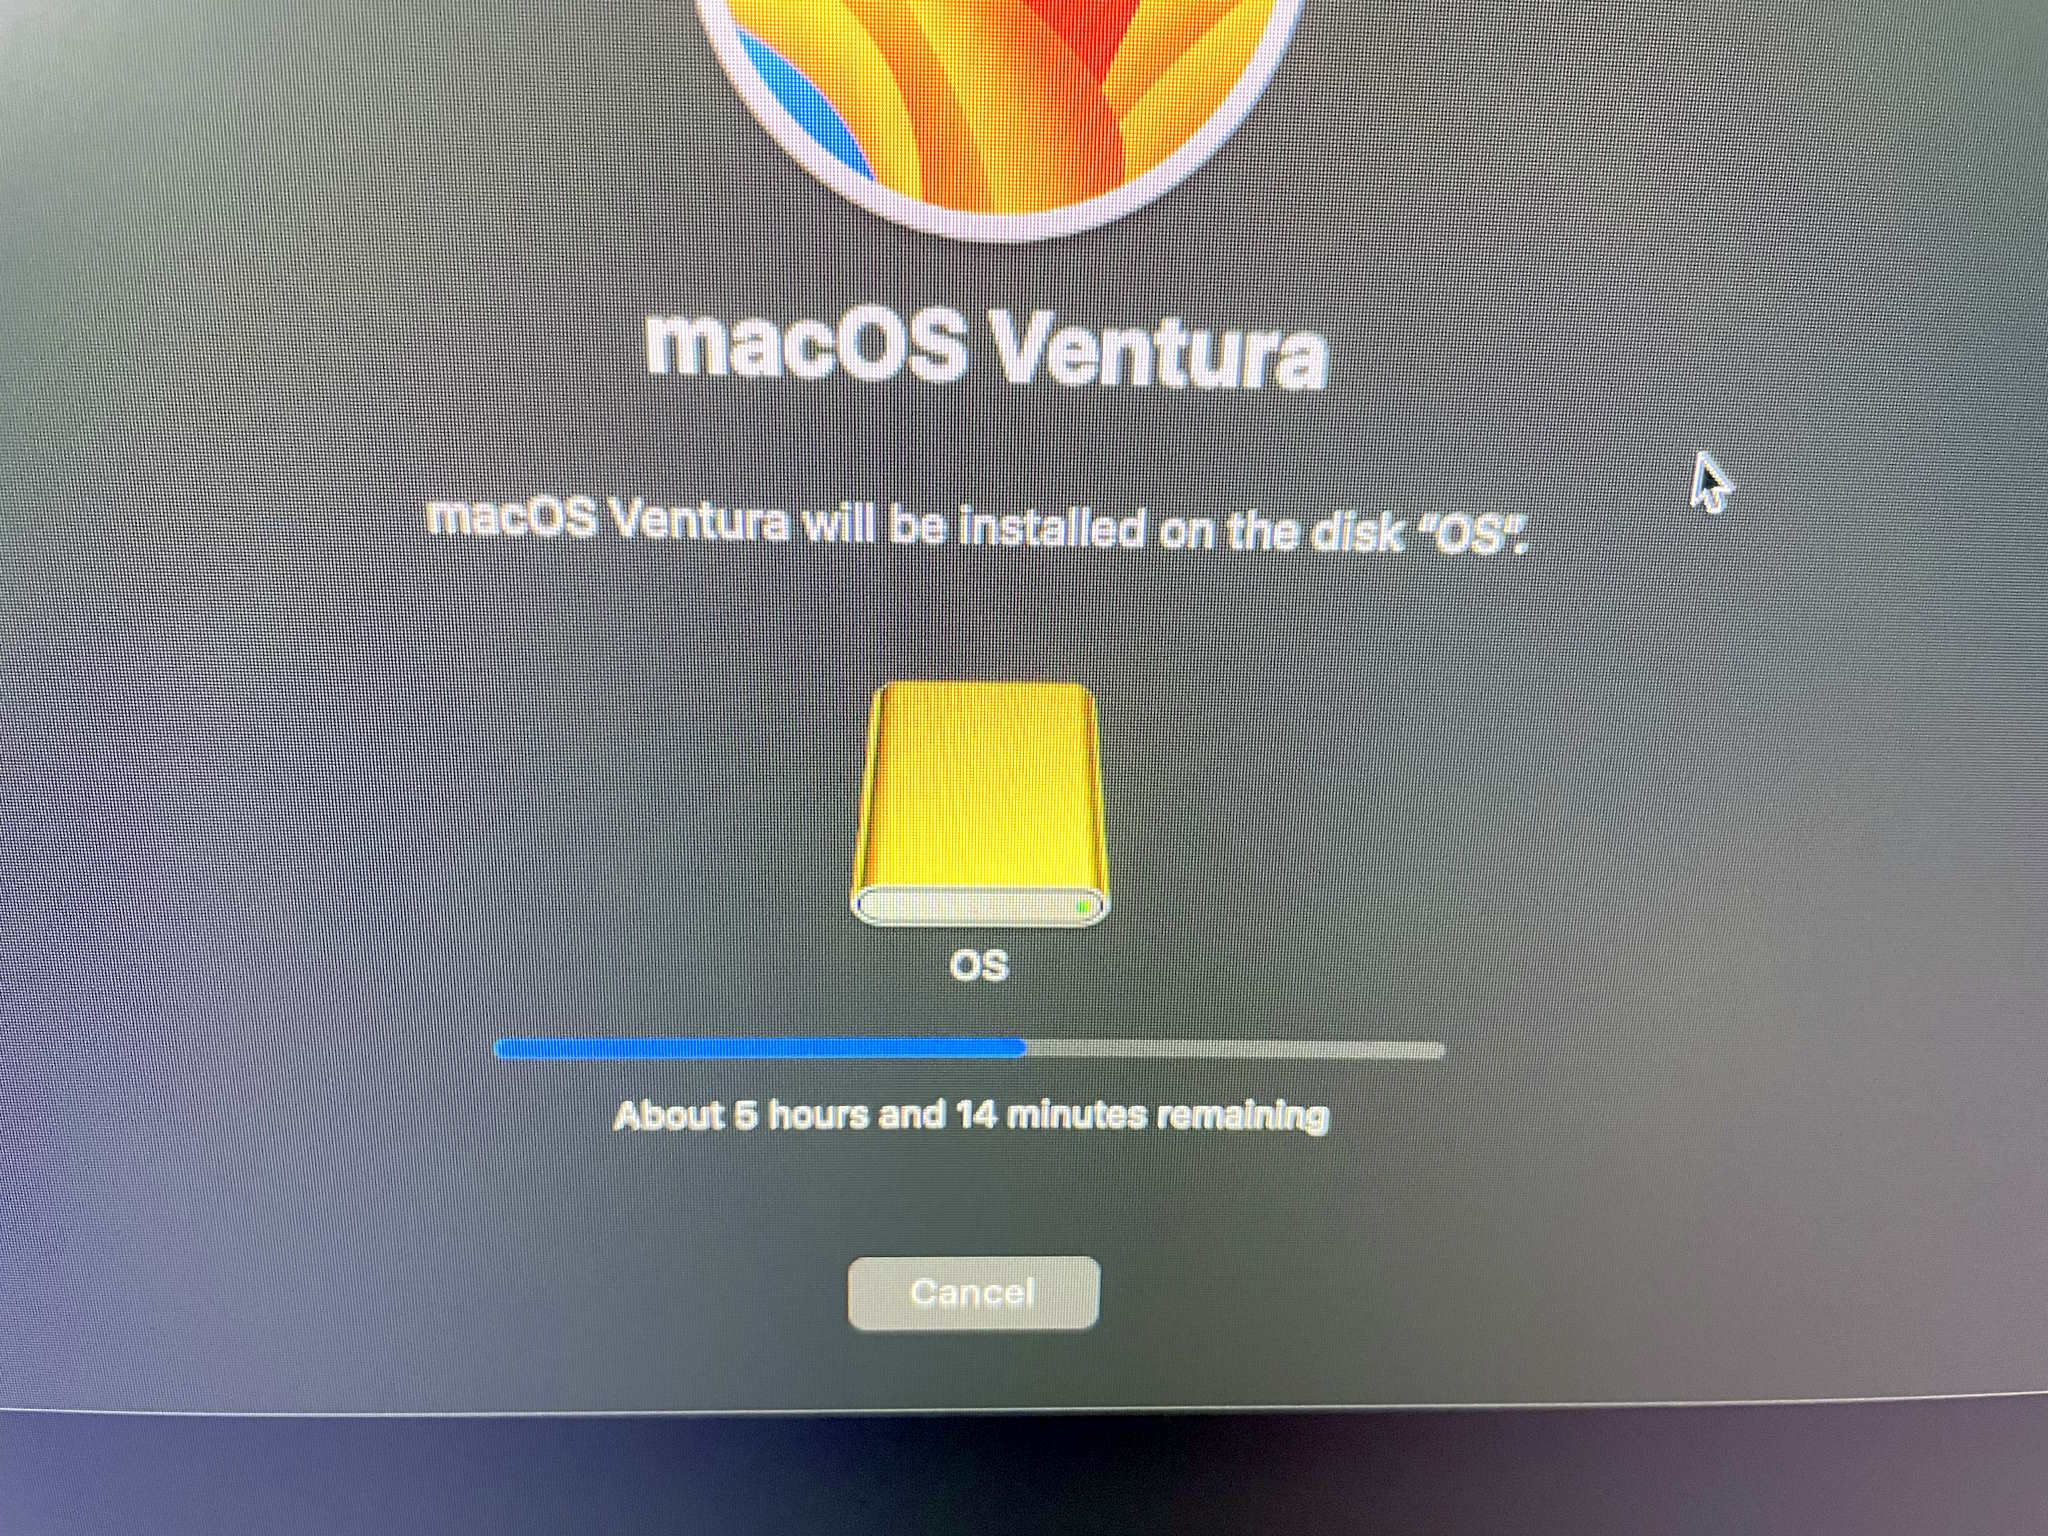
reinstalling MacOS
Fortunately we don’t need a second mac to perform OS reinstallation so the ‘Apple Configurator’ is not needed. The procedure is as simple as this: Press & hold power button until the recovery menu pops up, choose ‘continue’, choose reinstall OS, choose the new drive (in this case the Samsung drive I just formatted as “OS”). I know a lot of people raise an eyebrow requiring a second mac for when the system does actually need to be completely restored if it can’t boot into the internal recovery mode; just when you haven’t paid Apple enough you also need a second Mac to perform recovery and restoration. Even neozeed himself encountered this problem and with a heavy sigh (a very heavy sigh) and mild disbelief, set up a macOS VM for restoration since he only owns one. 😂
Once this is completed we’ll no longer be using the proprietary SSD that’s present on the Mac Pro. It DOES still need to be present in the system for the computer to POST (Apple marries it against the security IC so it’s intrinsic and serialized to the computer based on configured storage), but presumably as it won’t be written to anymore it’ll never become exhausted from write cycles… and even if it did fail over time, as a result of ordering the bottom-of-the-barrel 1TB model I could just buy another ‘cheap’ 1TB card which would allow the system to resume POSTing once again. If the soldered-in RAM or CPU fails then it’s game over; as much micro-soldering as I do, I refuse to purchase even more tools to swap out underfilled BGA ICs… and then of course you have to hope employees at Foxconn actually managed to sneak out unused genuine ones to be resold on AliExpress or eBay. *sigh*
With us now being able to use our own bootable SSD, the primary failure and annoyance of ARM-based Macs is now mitigated. For the Mac Studio you could buy backup replacement SSDs to constantly replace as they wear out (they would have to match what storage size the system was preconfigured with), but keep in mind I can add 8TB cheaply and have my own bootable SSD. And in the event you need to do data recovery or read the drive on another system, anything — even your grandma’s phonograph — can read NVMes so it’s much less of a hassle. As much as I hate to say it I think the Mac Studio makes less sense over the Mac Pro BECAUSE of the storage… you’re already buying an overpriced computer, may as well go the full distance for proper storage? Everyone’s living in the honeymoon phase right now while all of the NANDs are under warranty and still functioning… but once they start failing it’ll be a nasty money pit at best, or unfixable at worst. And do you know how many people make one computer their whole life and allow it to spontaneously fail with no backups?
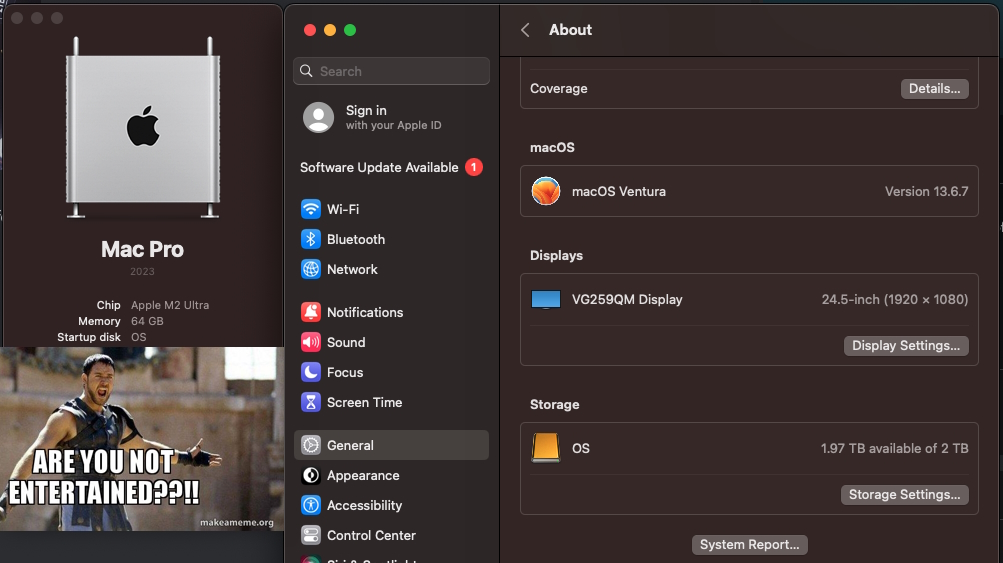
ARE YOU NOT ENTERTAINED?
An ARM-based Mac using internal NVMes, is that not a nice thing? ARE YOU NOT ENTERTAINED? And no need to pay ~$2000 for 8TB. I did have to shell out $400 for the stupid SoNNeT card and $400 for the SSDs… buuut if I paid $2000 worth of SSDs I would far eclipse 8TB. In this screenshot you can also see the ‘OS’ Samsung SSD now the primary ‘Startup disk’. Fortunately, Apple’s utility automatically switched it over after I reinstalled the OS to this drive shockingly enough, so nothing more needed even on that.
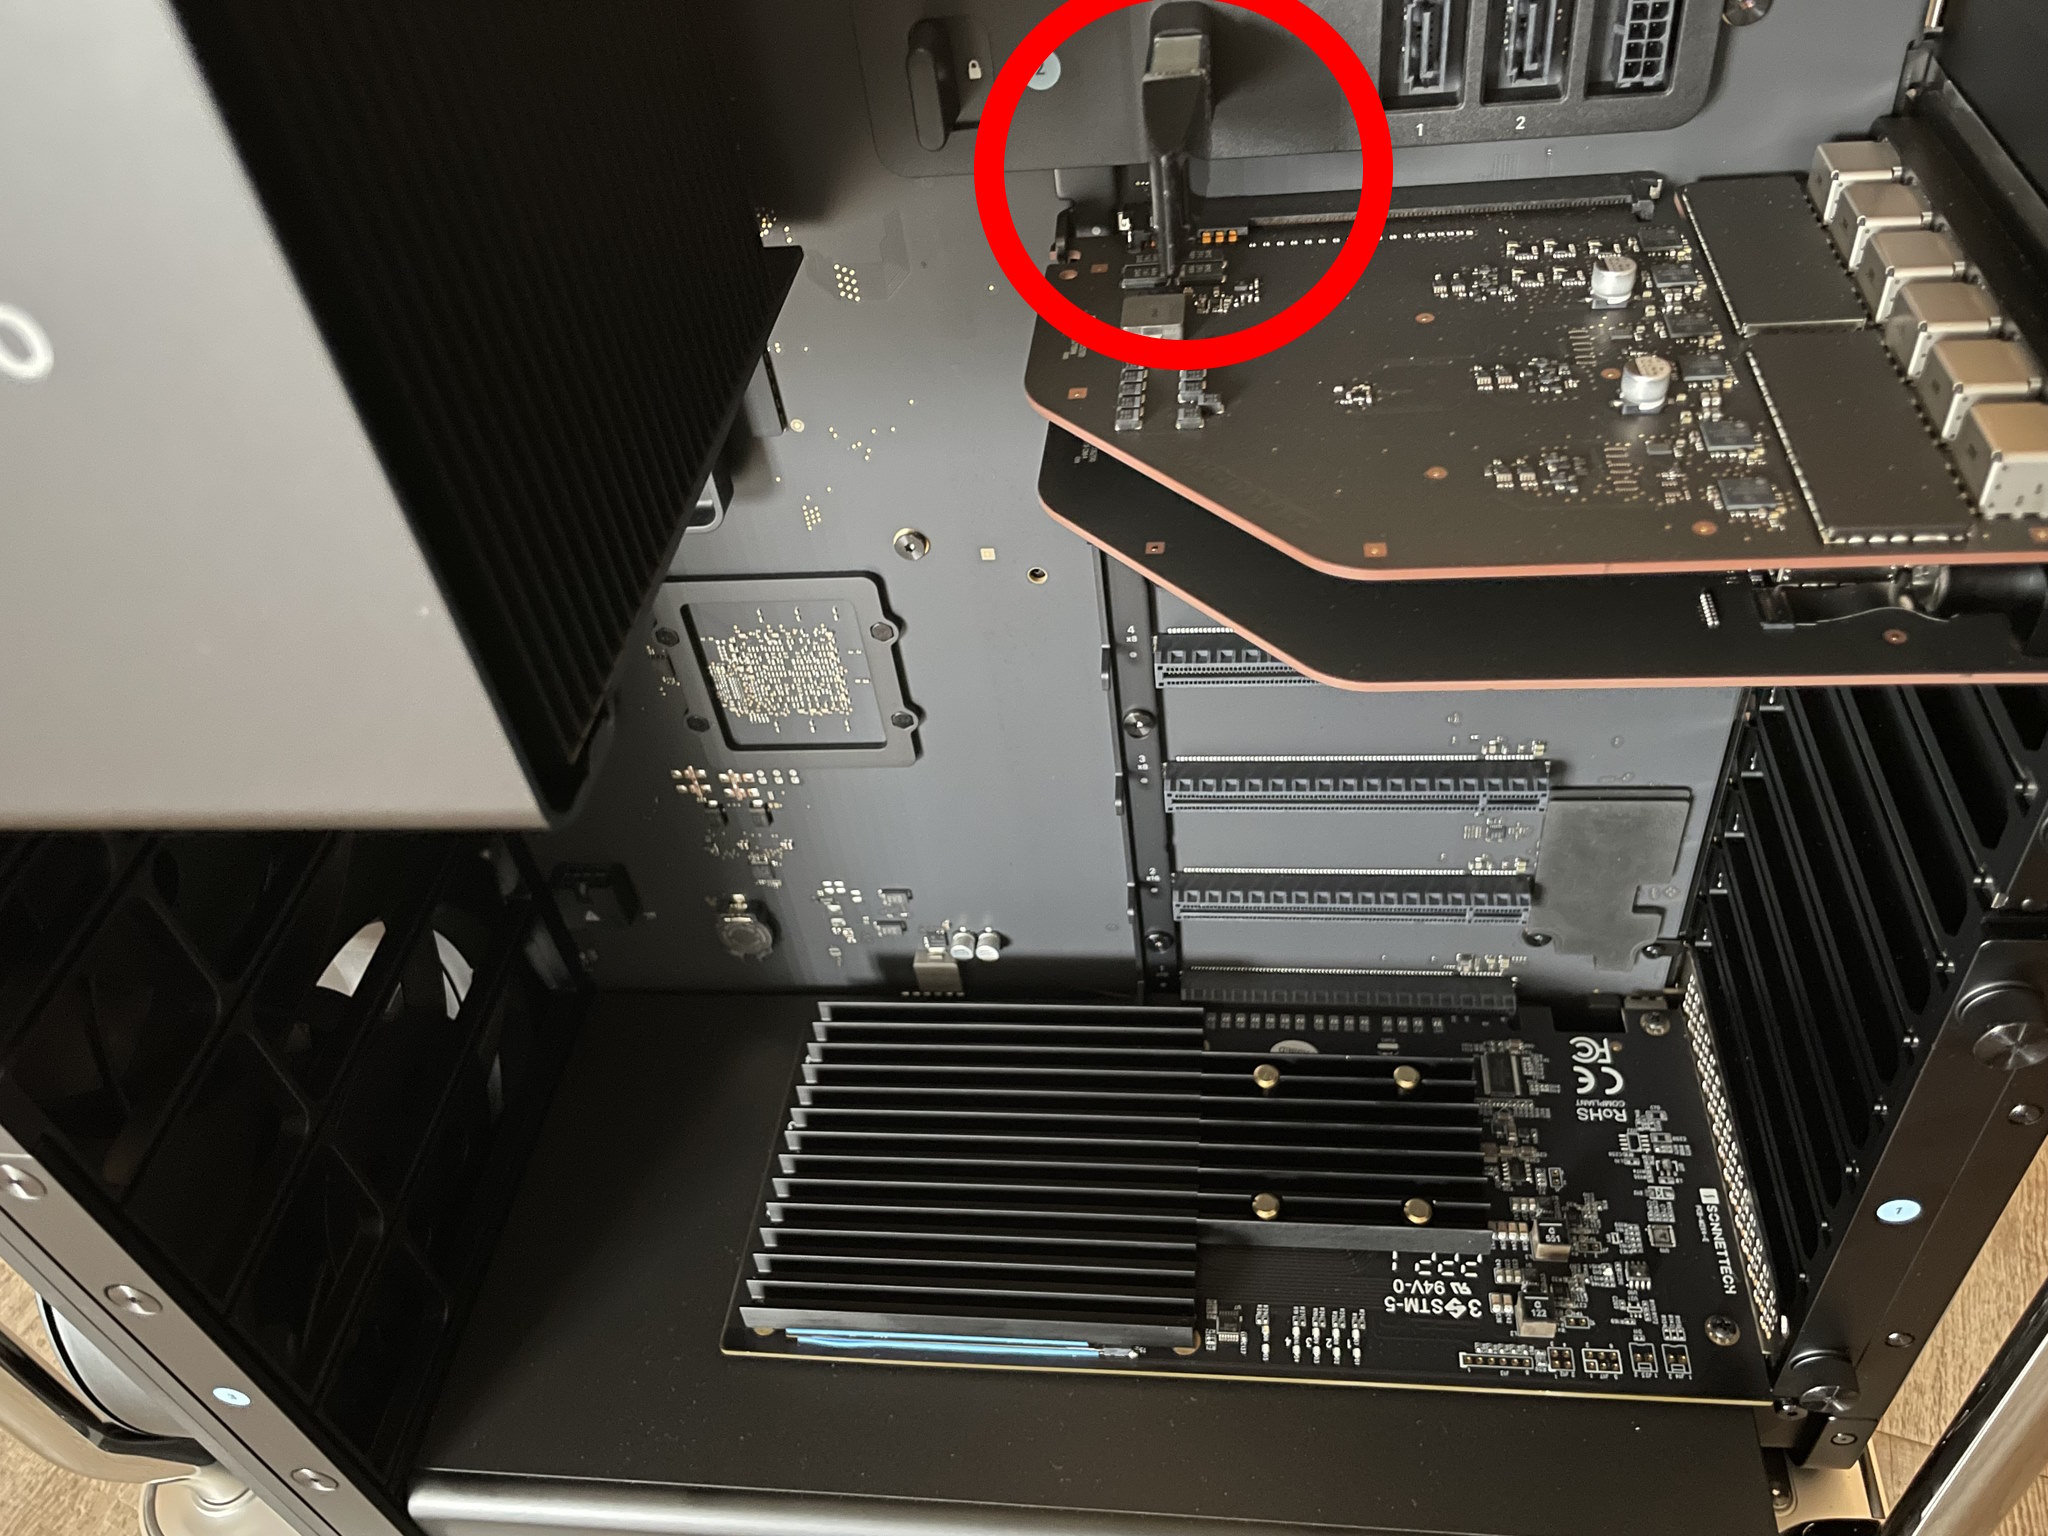
Internal USB, perfect for Dongles:
Installing the iLok dongle
The iLok licensing dongle installs nicely inside the internal USB A port. Kind of reminds me of those internal VMware USB A ports meant for the ESX installation… and then you know they’d eventually go bad or corrupt themselves and the internal IT of that company never makes a backup so then you need to reconfigure ESX from scratch… good times. What? I’m not salty, not salty at all. The Sonnet NVMe card being installed on the first slot (bottom) does seem to bring more attention to the fact there’s so many unpopulated PCI-e slots.
What should be used as the display option?
1. The Dell UltraSharp U3224KB 6K actually has a few potential compatibility problems with macOS or the hardware (it’s not really well-known as Dell support gave up troubleshooting it), so you’ll get various screen distortions. It’s also possibly one of the most UGLY products I’ve ever seen in my life… the web camera looks like a malignancy, and I absolutely can’t stand silver-painted plastic. Complain about Apple’s prices all you want, at least they use nice materials.
2. The Pro Display XDR is just a little bit too much for my taste and sometimes temperamental as it’s such a complicated display (contrary to popular mythology it does not use OLED technology so it shouldn’t burn out over time). I honestly don’t think I would encounter any problems if I bought a Pro Display XDR but the cost is too much.
It’s Free Real Estate –
3. That basically leaves us with the Studio Display. A lot of the 3rd party Samsung/ASUS/LG 4K or 5K offerings have dramatically inferior colour or a larger pixel size… and there’s still the potential aspect of compatibility since non-Apple hardware sometimes doesn’t play nicely. While the Studio Display is much-maligned with its high cost and strangely attached power plug, its DPI is the same as the Pro Display XDR you just get less screen real-estate and inferior contrast which I don’t care too much about. It will still look much better than your garden variety LG 27” 4K UHD Ultrafine because the colour is calibrated very well and it gets decently bright… again… I wish YouTube reviewers would point some of these things out instead assume that every display is equivalent to Apple’s offerings when they’re not. And in the event, you do find the 5K 27″ displays from other manufacturers they’re still at 60Hz. The refurbished Studio Display I had my eye on from Apple is no longer available, so I’ll be waiting for a bit until they stock another one… or maybe they’ll get a heavily marked down Pro Display XDR…. in the meantime, I’m stuck using one of my gaming monitors which has 240Hz and strobing to reduce ghosting, which does work on macOS!.. and makes macOS look so different since I’m used to how it looks with all of the ghosting all the time.
Another little something that’s rarely discussed: the nano-texture glass option causes a slight ‘frosting’ which is especially noticeable on text… it’s only meant as a compromise if you’re working in a literal sun room, sometimes more expensive does not mean better. This is exemplified with the M2 MacBook Air situation: if you opted for the superior GPU it ended up running more slowly because of the thermal throttling so the lower-end GPU option is more performant, lol. Of course Apple doesn’t always disclose these caveats or finer details, but their divisions responsible for publishing the products may not be privy to them.
Peripherals:
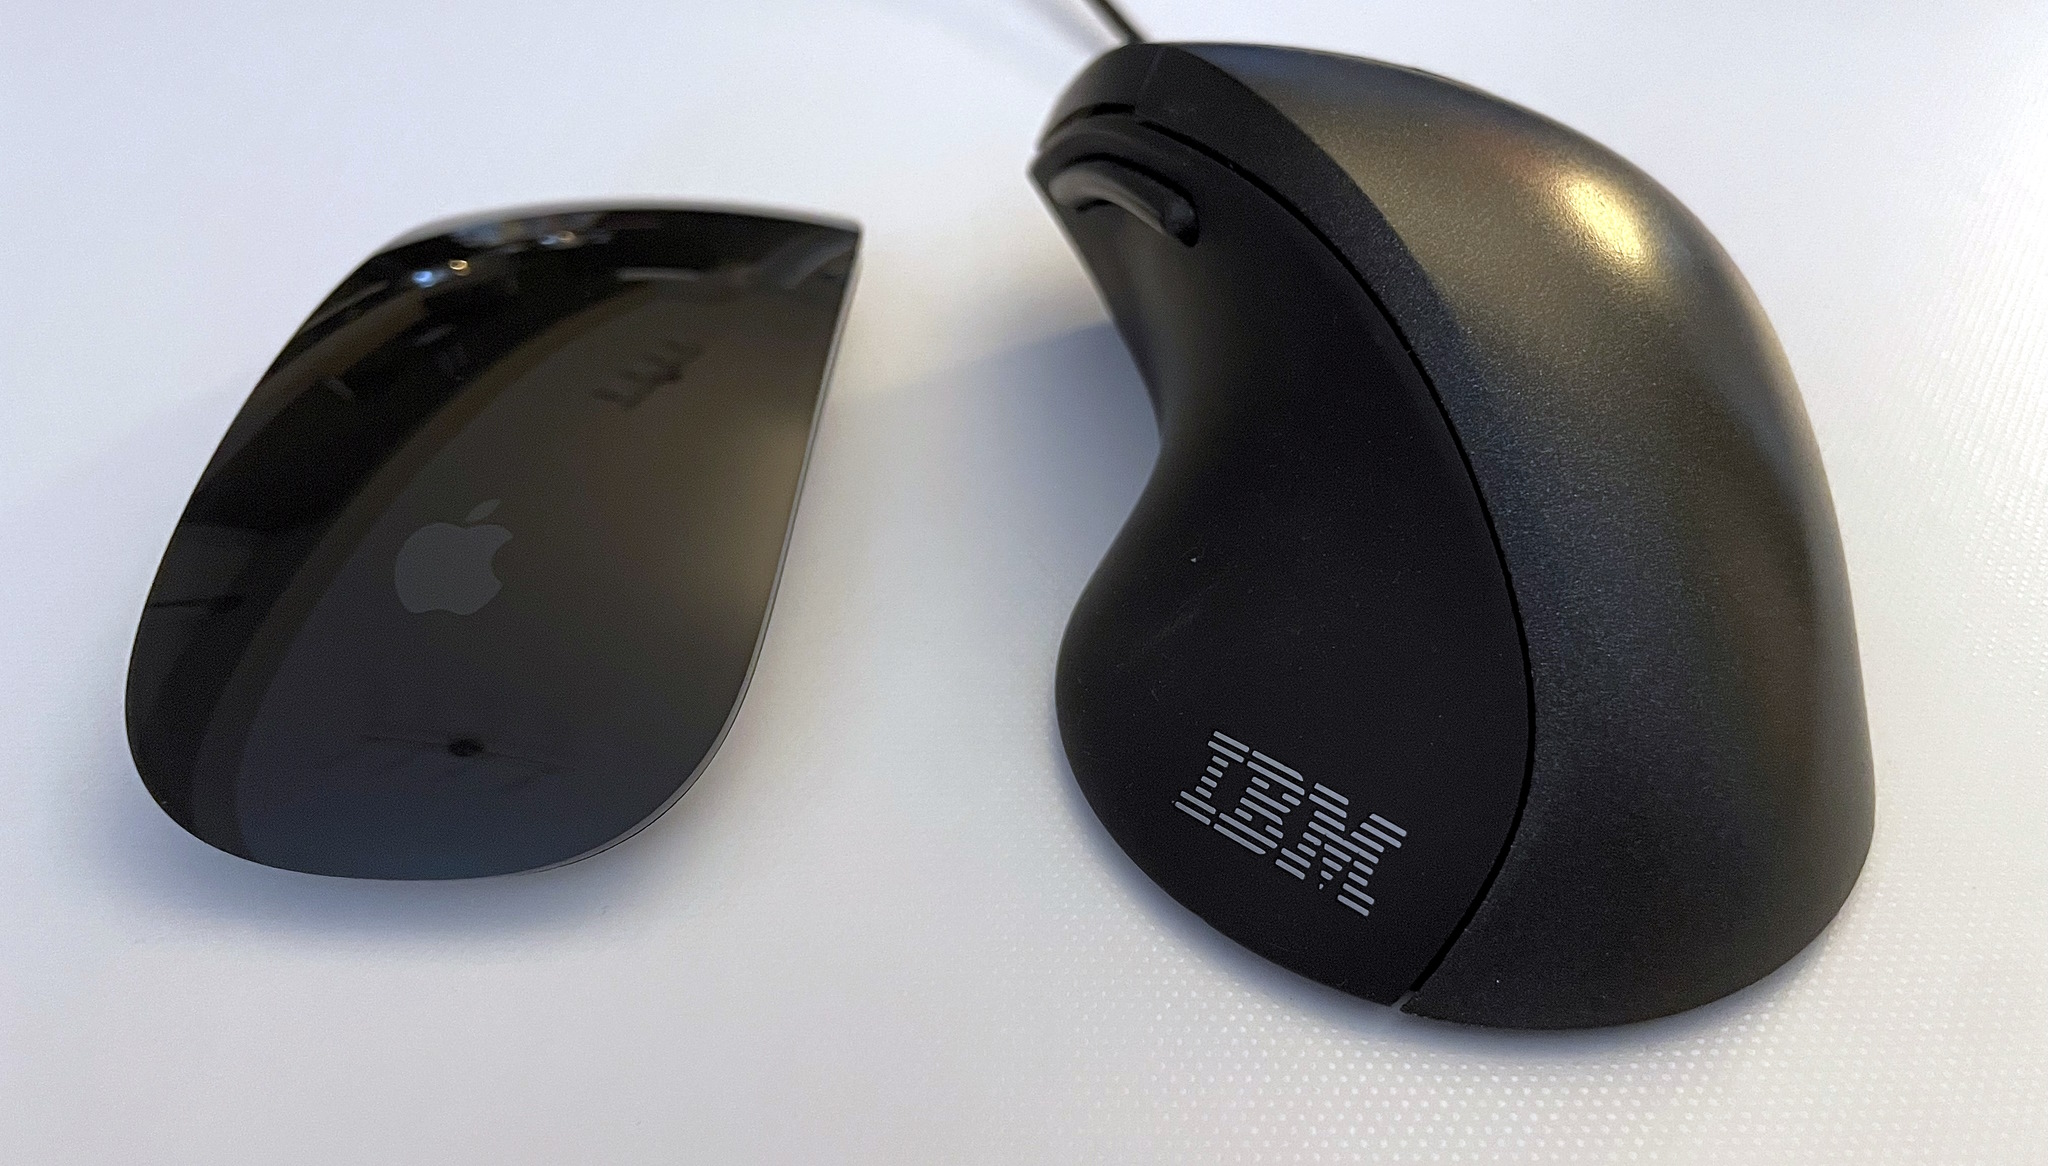
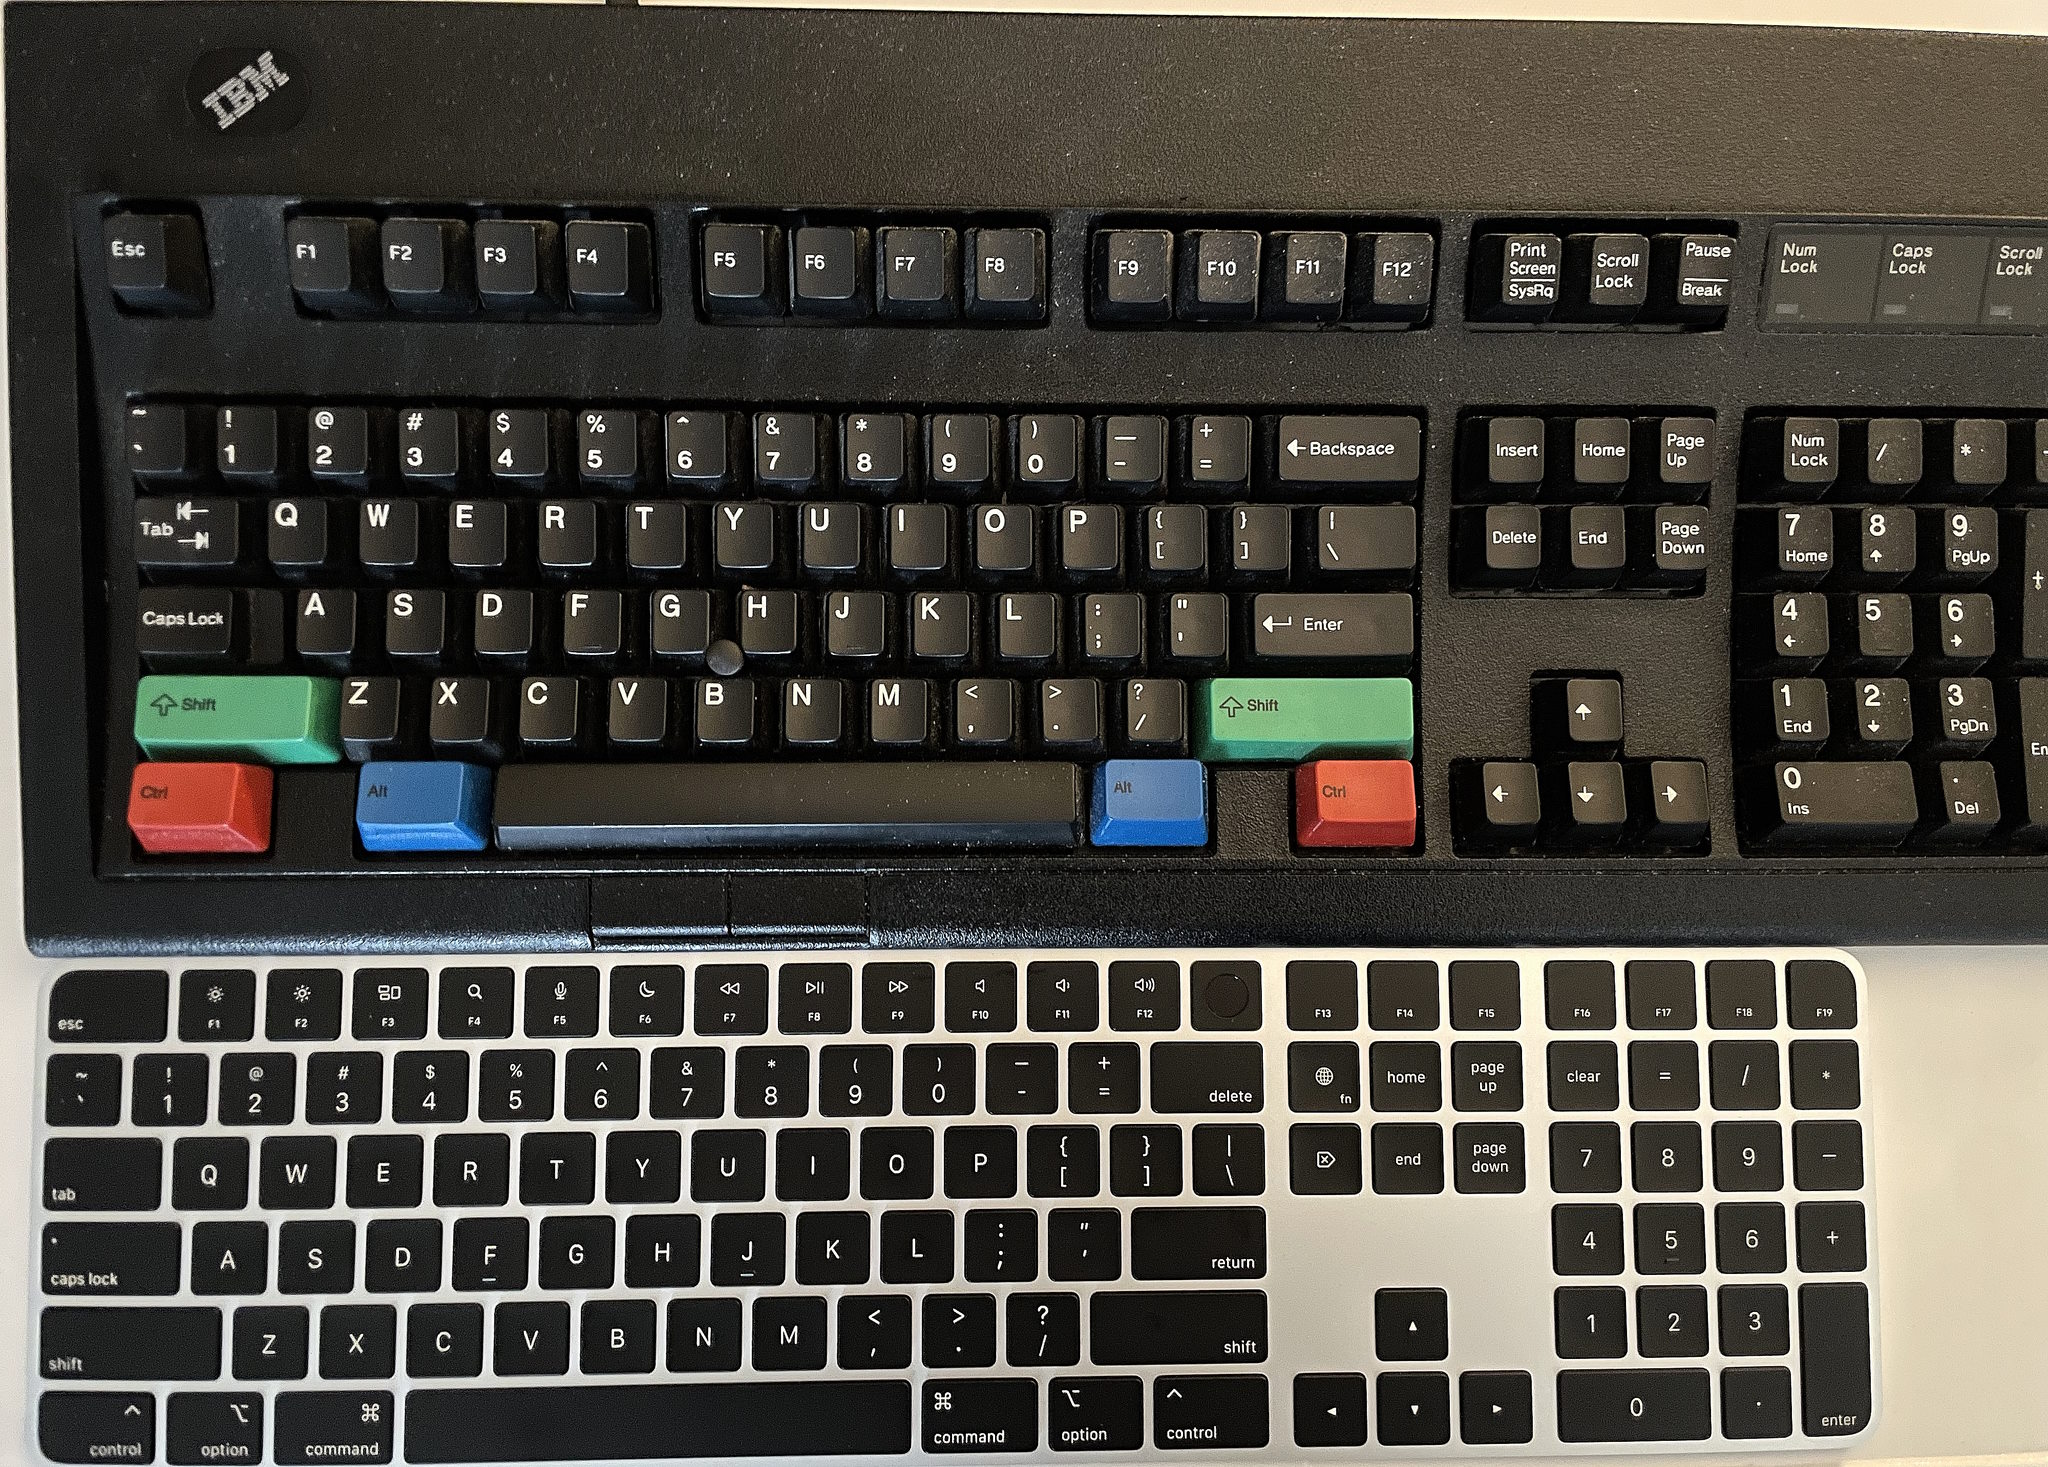
Onto the peripherals: I will indeed be using the Magic Mouse… before your jaw drops and you grab some tomatoes while calling me a heretic, let me explain. The Magic Mouse is one of the few peripherals with velocity sensitive 360º scrolling AND fully integrated in the UI of the operating system. This is extraordinarily similar and analogous to IBM’s ScrollPoint which also offered dynamic 360º scrolling and to a lesser extent the TrackPoint scrolling but which only offers vertical and horizontal. Needless to say 360º scrolling and horizontal scrolling is something I use all the time and cannot fathom why we still even have (notched!) mouse wheels. It’s bizarrely a mouse Apple seemingly designed specifically for me and nobody else, I imagine average or larger hands would be extremely uncomfortable with it and Apple really should offer a larger version to encompass a better demographic.
Men & Mice
The Magic Mouse and ScrollPoint Pro share very similar design philosophies in the way we scroll. I also made another strange discovery when I was looking for some more flat slick mousepads since the Magic Mice don’t work well on cloth ones at all, and that are these 3M ‘Precise’ mouse pads: AMAZON LINK.
Apparently the 3M mouse pads have a reflective material which allows the lasers to use less strength and thus supposedly saves 50% battery life, some Magic Mouse users affirmed this, so we’ll see how this goes down. It’s kind of surprising I’ve never heard of any tech reviewers mention these because saving 50% of battery life on a wireless mouse is huge.
Keyboards..
There’s a lot of good reasons to NOT use Bluetooth keyboards due to wireless keylogging, there’s not going to be anyone with that talent in rural Canada so I’m in the clear. You could buy a Matias keyboard but they’re actually worse in many aspects than the 1st party Apple keyboards: the legend printing is of dramatically worse quality, the surface of the keycaps don’t have that special velvety texture, and the snappiness of the scissor switches is probably worse. While I have many mechanical keyboards, I don’t care so much about it anymore. The Apple Magic Keyboard is just a little bit too flat for my tastes today so I ordered a “ESC Flip PRO Computer Keyboard Stand”, which can stick on the back and give you different height adjustments if needed.
onboard LEDs everywhere.
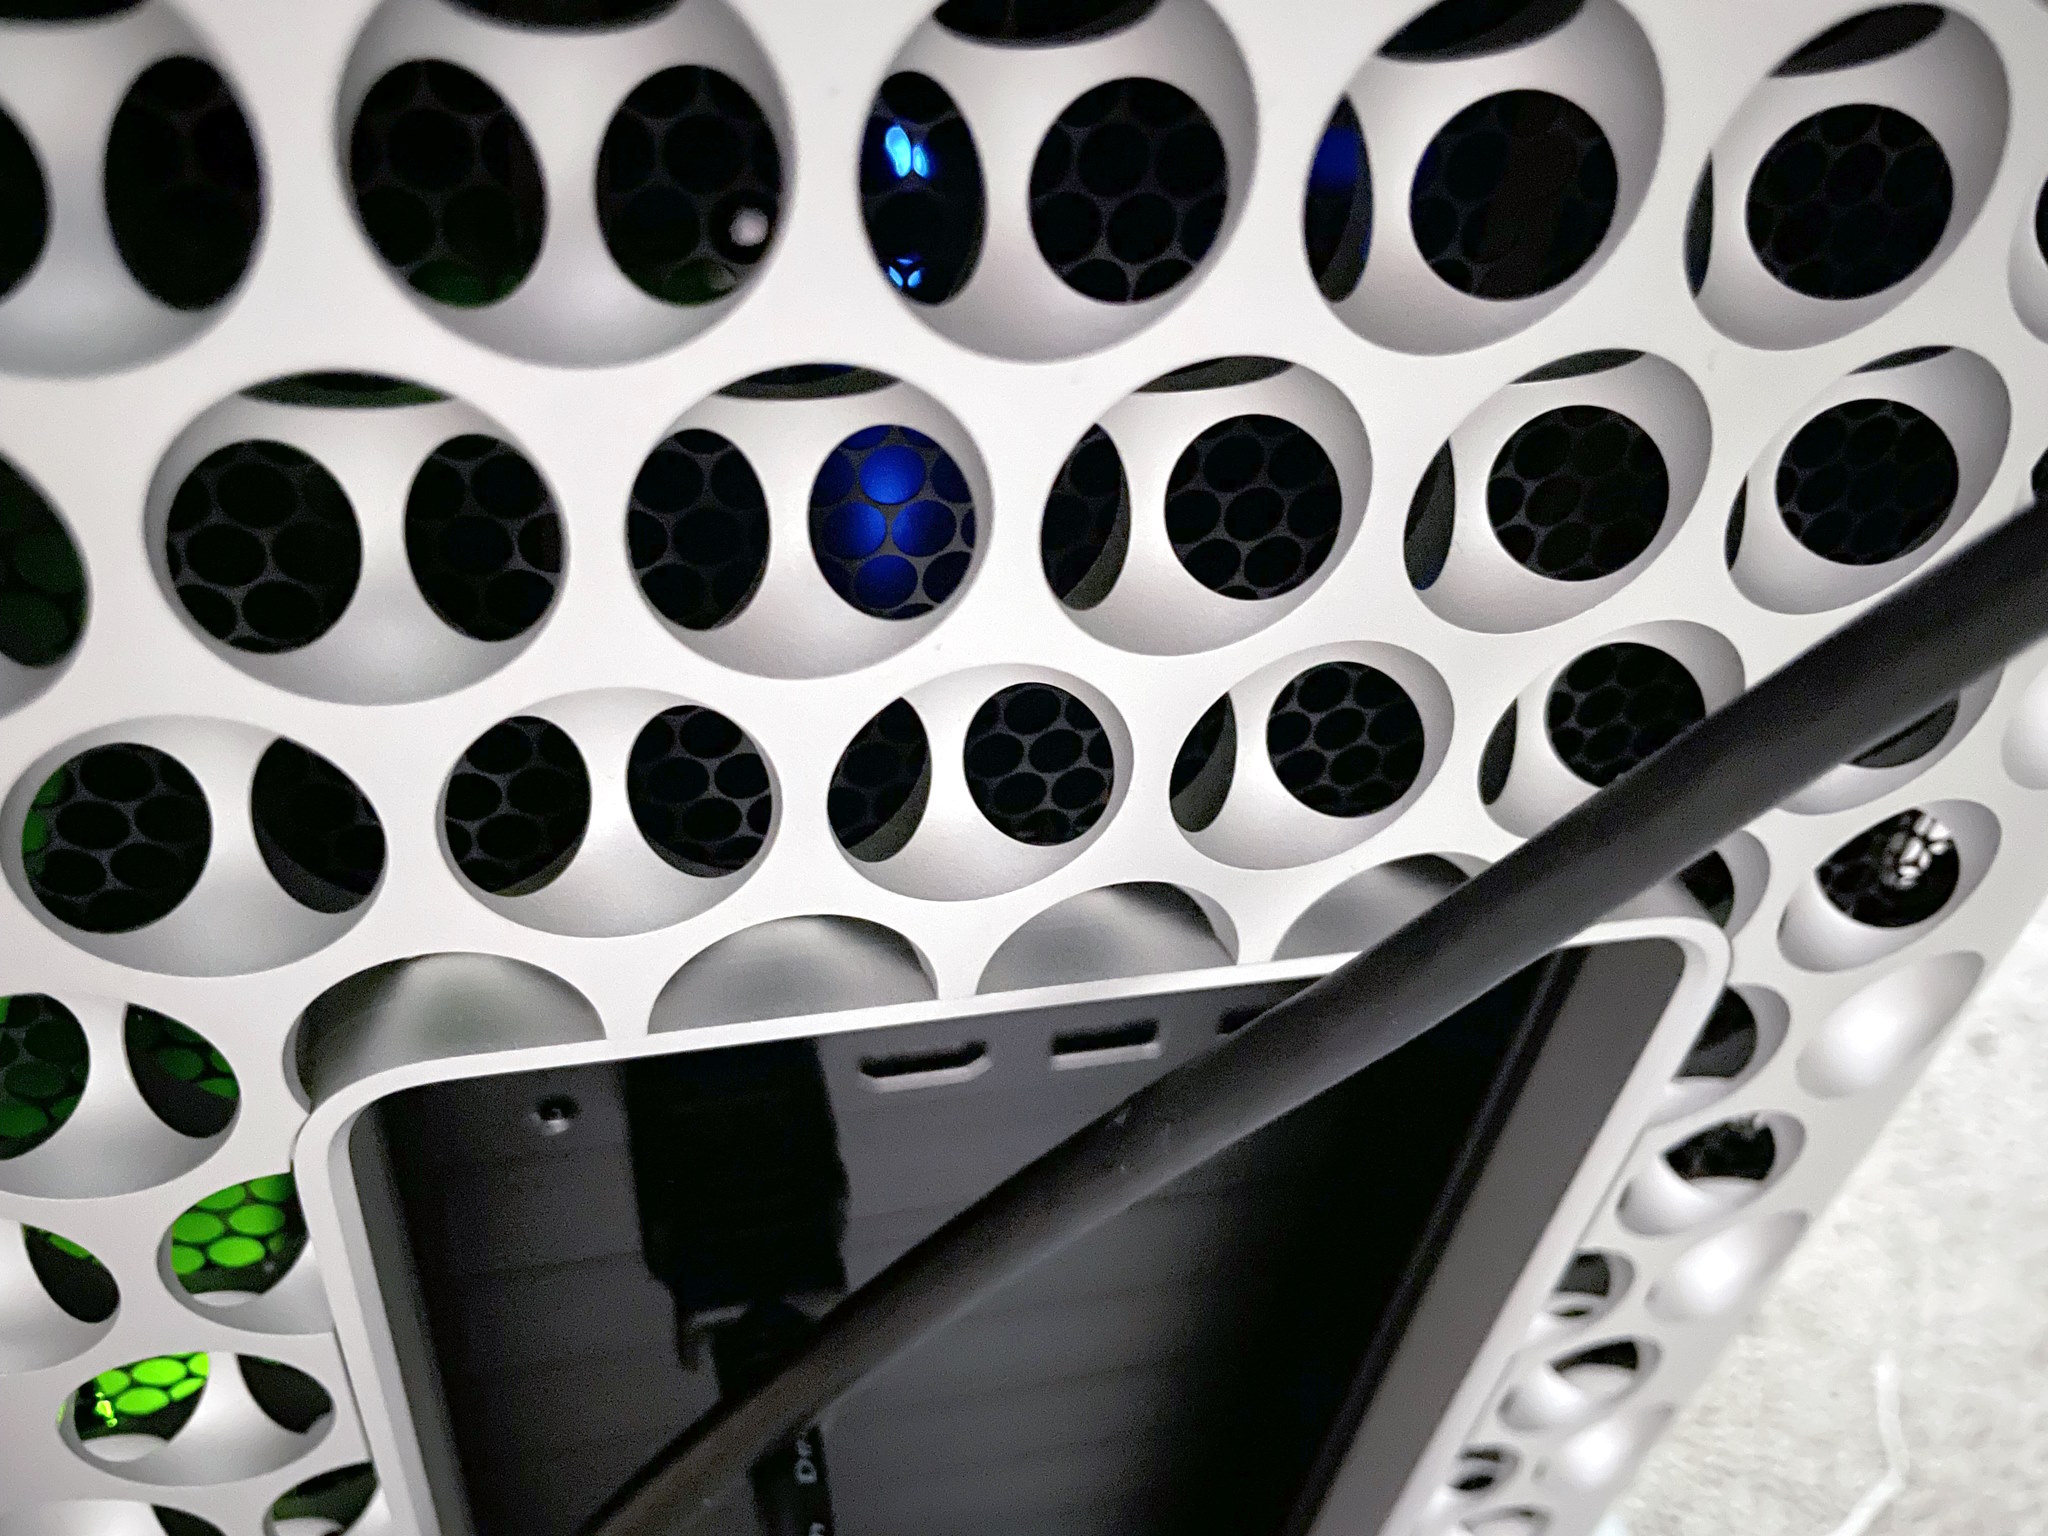
Both the iLok and Sonnet NVMe card have so many LEDs on them you can see the lightshow through the rear of the ‘grater’ now.
Now my plans are to use this thing for at least a decade to get my money’s worth: will 64GB of RAM be enough? To that I say: 64GB ought to be enough for anybody. The only major hindrance will be the forced software obsolescence when the Apple overlords declare it will not be receiving anymore updates… and then you know things like the Roland Cloud and other major vendor software will cease to get updates and functionally work. It’s appalling at how all software is heavily DRMed and requires a live account to work against. At the very least when WWIII breaks out I’ll have plenty of premium aluminum to donate to the state, forged by Tim Apple himself!
For the record I was never really an ‘Apple person’, but they’ve finally fixed all of the problems (mice have two buttons and the keyboard layout is restored to be more IBM-like) and made a product that fulfills everything I’ve ever wanted… AND forced developers to program for ARM: so now my Stallman-not-approved-absolutely-proprietary audio software runs incredibly well on a non-x86 platform. Astounding. Yeah there were some 3rd party mice that had two buttons for Macs ‘back in the day’ but a good portion of the *software* and games weren’t programmed for a real right click rendering it useless. I remember watching a ‘making-of’ video of the Myst developers pushing down Ctrl with the mouse to right click EVERY SINGLE TIME in their 3D modelling software and nearly fell off my chair… it’s quite jarring when you need to press a button on the keyboard at the same time with clicking the mouse so I’ve no idea how they tolerated that. Maybe they loved doing it? Who knows.
It’s crazy how much changes, and how much is the same
On the plus side this makes things like adding VMnetworks and configuring them all possible for lowly end user people like me, and makes stuff like SNA networking a bit more easier.
But what is the catch?
There is always a catch!
I have a feeling this is just like when Java became ‘free’. And then followed the audits and lawsuits. Most of this legal strong arming is all under NDAs so don’t expect to find much but ask anyone who’d used Oracle, and balked at some terms, and found themselves under a JDK download audit.
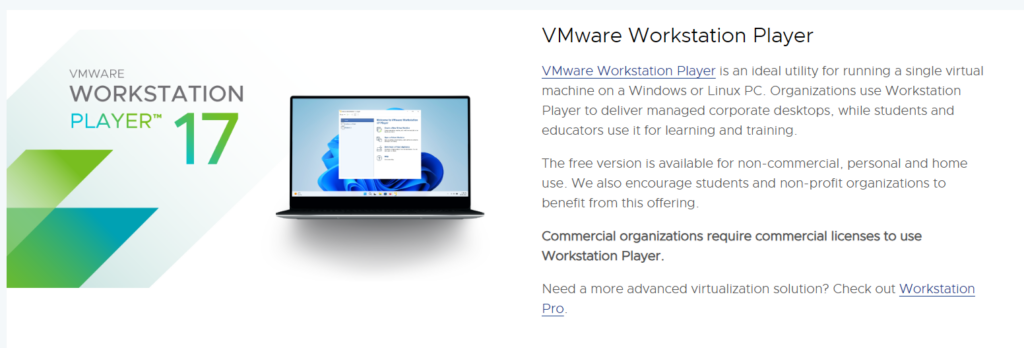
The free version is available for non-commercial, personal and home use. We also encourage students and non-profit organizations to benefit from this offering.
Commercial organizations require commercial licenses to use Workstation Player.
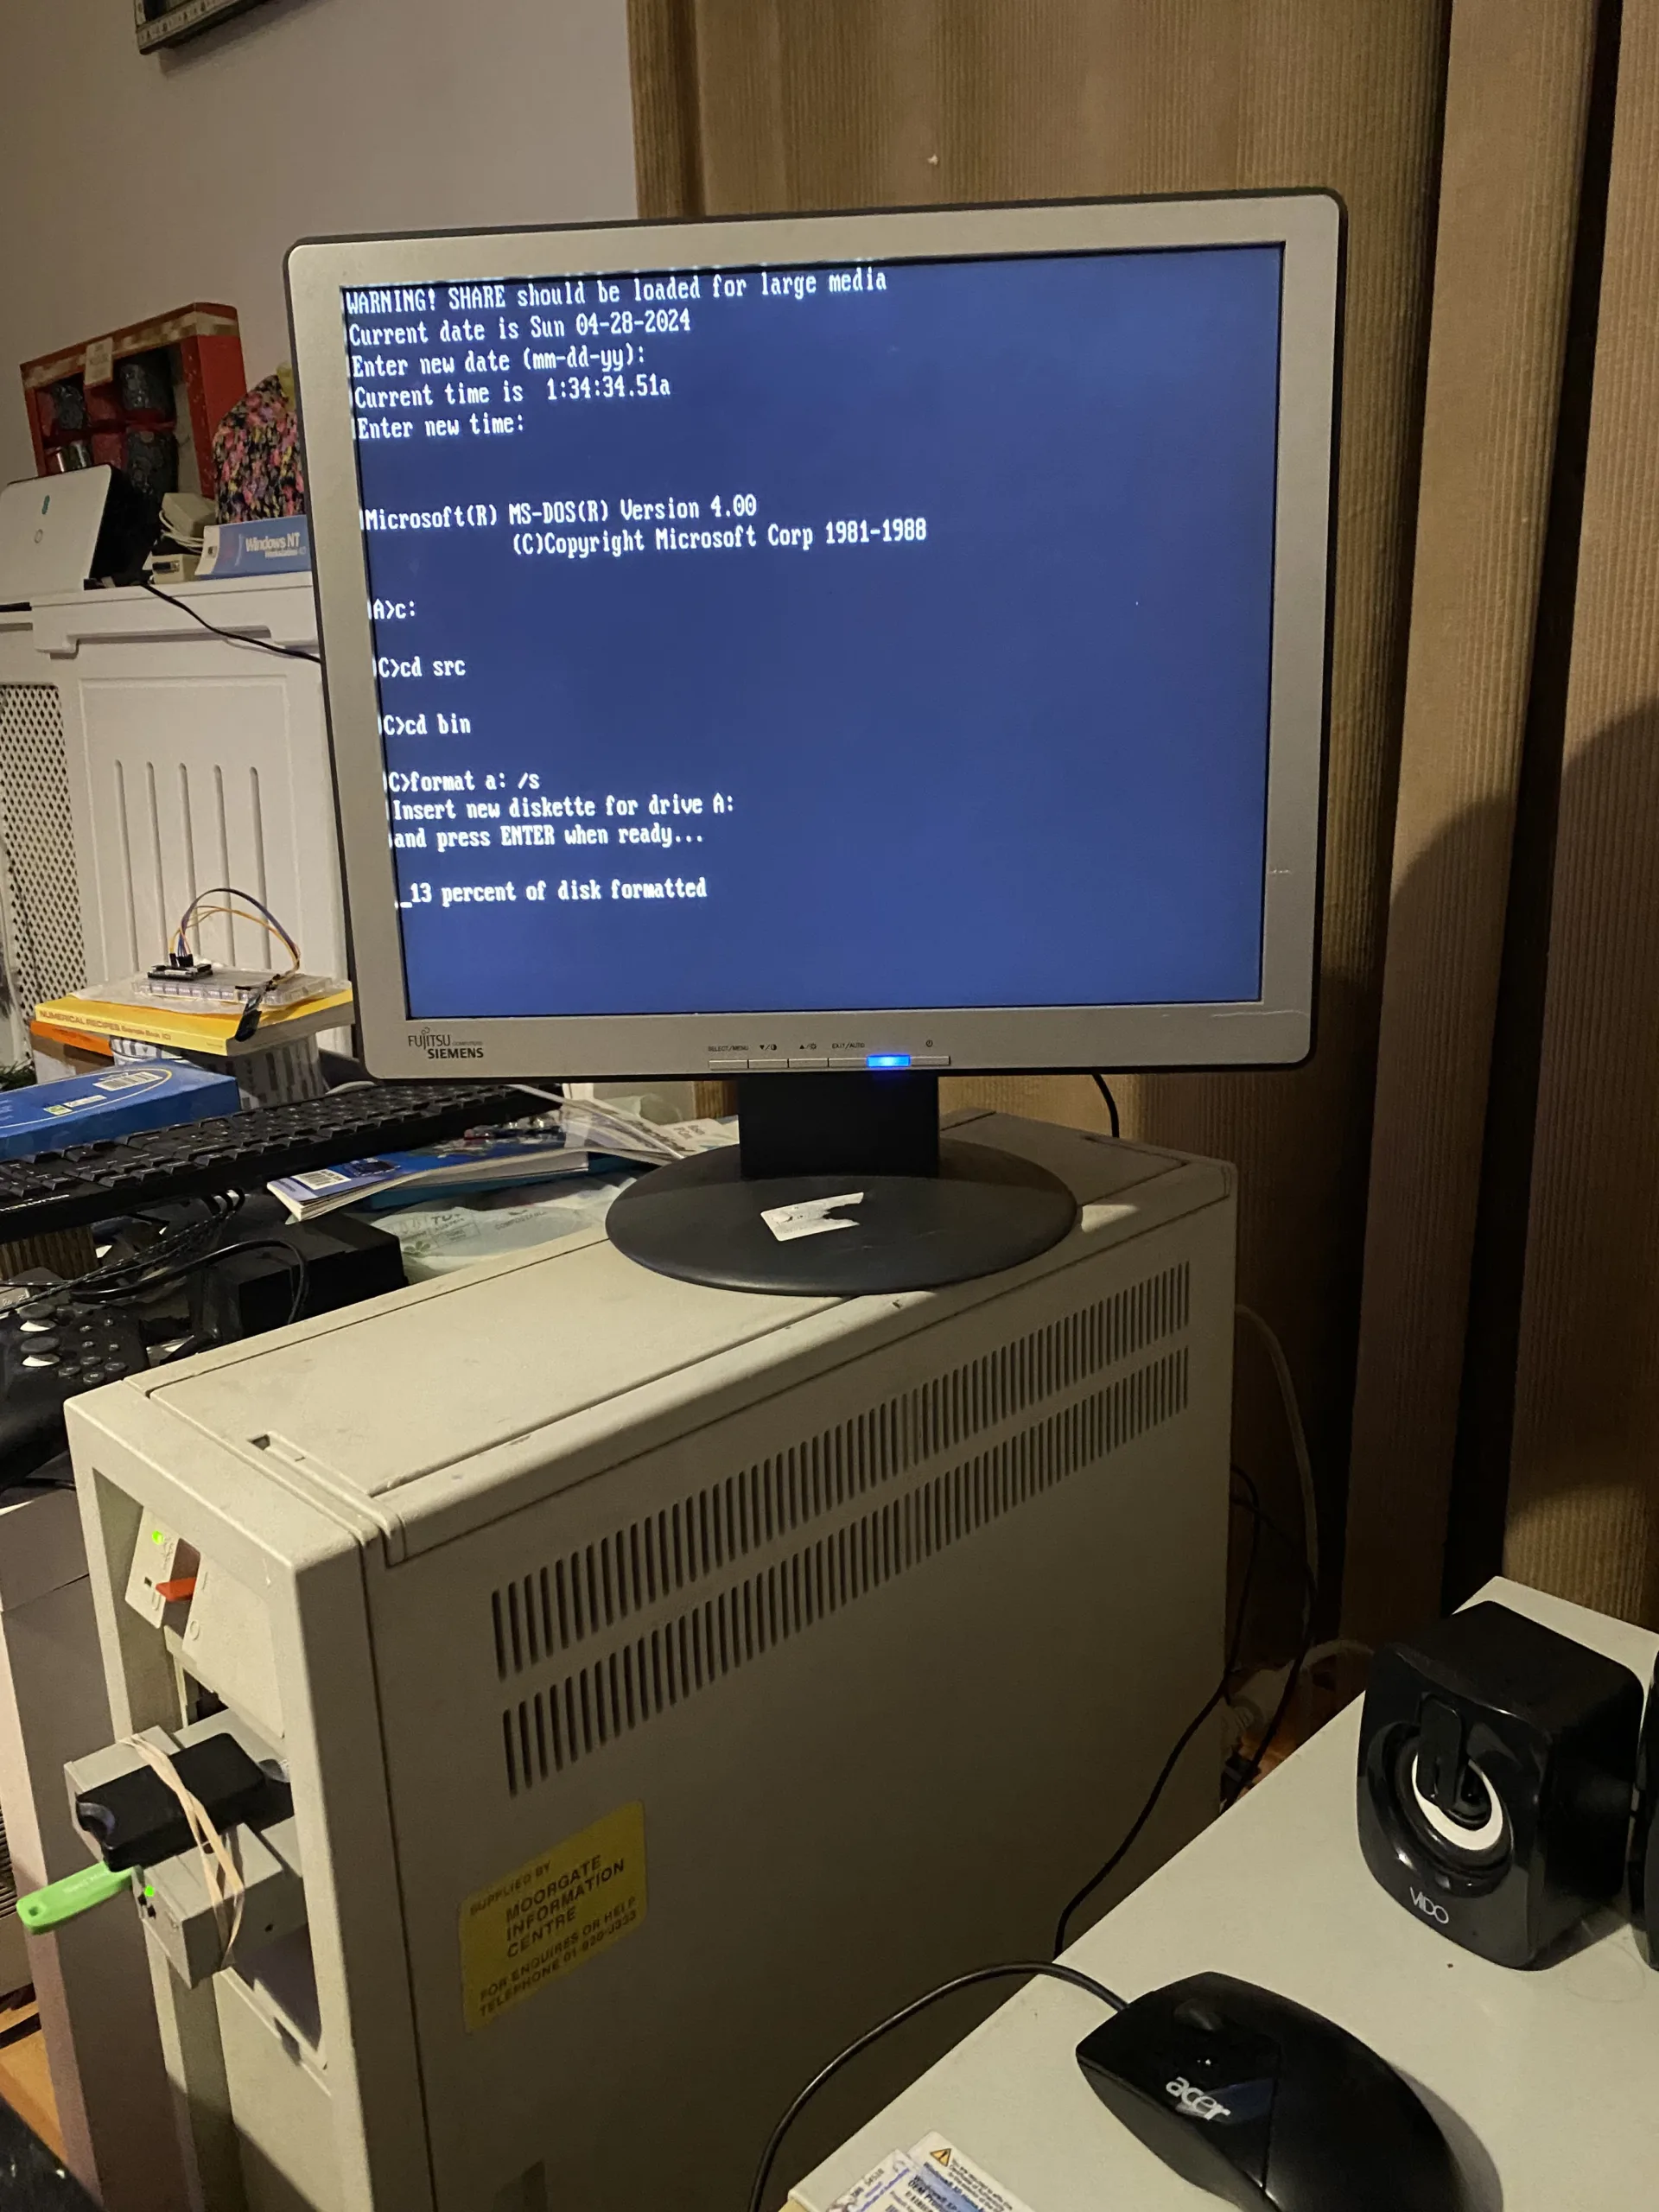
With a 16Mhz 80386 it took 70 minutes. I just formatted a blank image on the gotek, copied IO.SYS, MSDOS.SYS and COMMAND.COM, then rebooted. went back to the compiled DOS 4, and re-formatted the floppy as a system disk so the attributes are set. (DOS 5 lets you change system files), and yeah. It can be done!
Let me spell out the steps, in this case I’m going to use Windows 10. I use the git from the WSL (Windows subsystem for Linux) I have DOSBox mount c:\dos as my c: drive . ZIP/UNZIP are Info-ZIP versions, you MUST have the Win32 native version!
- md \dos
- md \dos\temp
- wsl git clone https://github.com/microsoft/MS-DOS
- cd MS-DOS\v4.0
- zip -r \dos\temp\src.zip src\*.*
- cd \dos
- unzip -a -LL temp\src.zip
- start dosbox
- cd \src
- edit setenv.bat to reflect the paths:
  set BAKROOT=c:
  set LIB=%BAKROOT%\src\tools\bld\lib
  set INCLUDE=%BAKROOT%\src\tools\bld\inc
  set PATH=%PATH%;%BAKROOT%\src\tools
- setenv
- nmake
it will then fail in mapper on getmsg.asm change the 3 chars to a '-'
- nmake
- cd ..
- nmake
continuing from dosbox, you need a 1.44mb fat formatted disk image somedos144.img . I used a dos 6.22 diskette, it needs the bootsector already in place to load io.sys/msdos.sys
- cd \src
- md bin
- cpy bin
- imgmount a somedos144.img -t floppy
- a:
- del *.*
- copy c:\src\bin\io.sys
- copy c:\src\bin\msdos.sys
- copy c:\src\bin\http://command.com
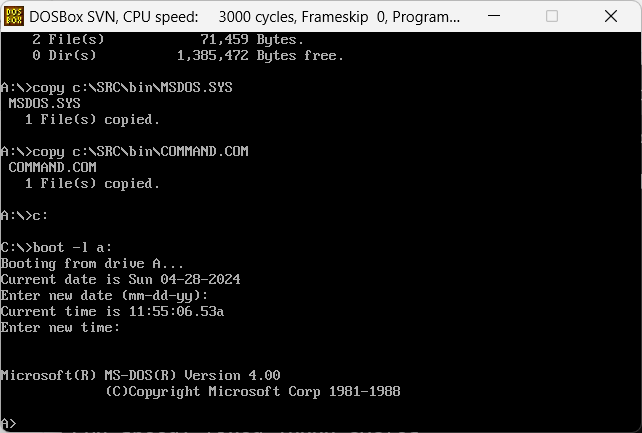
- boot -l a:
And now I’ve booted MS-DOS 4.00 from within DOBOX!
Also as interest to most people there is a bug in msload.asm, where DOS 4.0 won’t boot on a lot of machines, from VMware, Qemu and even my PS/2. It’s a small fix to the IO.SYS initial stack being too small. Props to Michal Necasek for the fix!
For further guidance here is a video spelling it all out:
I’ts MS-DOS 4.0 Internal Work #2.06 – May 23, 1984, with copyrights from both IBM & Microsoft.
I don’t have time to make any comment much further other than having had been listing to people in on making this happen, and it’s been a long struggle to make this all happen, and it’s so amazing to see their hard work make it out into the wild!
DOS 4 is the basis of what would eventually become OS/2, just as I’m sure that it’s use of NE executables will reveal a far tighter integration with Windows, giving hints of the future that should have been!
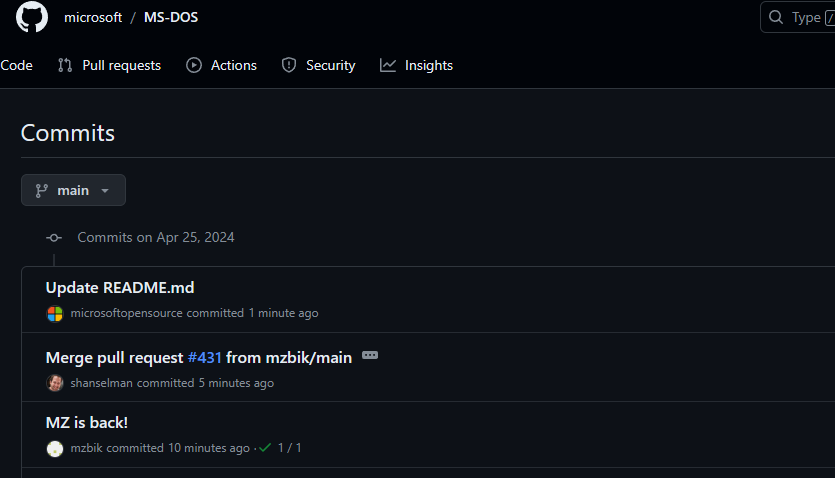
** EDIT So it’s just DOS 4.00, with a lot of information on EU/MT DOS4. There is now a blog post over on Scott Hanselman – Scott Hanselman’s Blog‘s talking about the details of this release!
Credit goes to starfrost, this was nearly a year in the works!
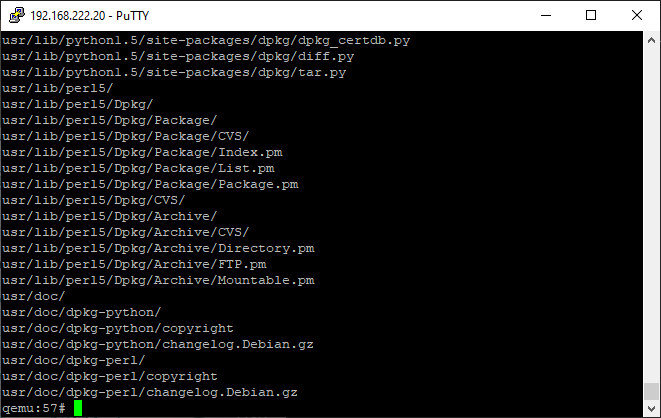
In the previous posts, we’ve gone through the excruciating fun of installing Rhapsody DR2, and of course built the Rhapsody kernel from source. But now it’s time to build the software that can build software.
Enter the apt*
Of course we can’t just start building apt, rather we need to start at the 1990’s super star scripting language that revolutionized massive, shared code libraries, accelerating web development, and building the modern web, of course I’m talking about PERL.
Even back in the original effort building Perl was a slog. Even with temporary wins with miniperl it quickly fell apart from missing symbols. When it comes to the system libraries Darwin is not complete, rather it’s a lot of amputations from OPENSTEP. Which of course, itself was amputated from NeXTSTEP. I’m not sure what held back NeXTSTEP from being ‘open’ back when ‘open’ meant published specifications, not open source, or open in any other sense of the way, like The Open Group being a gatekeeping organization that is NOT open at all.
Anyways, Perl from the Darwin 0.1 downloads & the 0.3 CD-ROM don’t build. I gave up and moved to the OS X Server version and that one did build! As much as I could diff them out and find the breaking difference, honestly, it’s just easier to stick with what works.
/pub/Darwin/PublicSource/Darwin
I should point out that the source to Darwin was preserved on this now defunct site “next.68k.org”, which in turn was also preserved on the defunct site “nextftp.onionmixer.net“. Amazing how mirrors go. Other fun things on the ftp site include MacOSX-Server public sources, which did include the Perl that we built.
Darwin 0.3
Darwin 0.3 however was pressed onto CD-ROM, and distributed out to the masses. It took me a short while to get a tip to a hidden server that had a copy, which really was a massive breakthrough as it had a far more complete set of files than the 0.1 ftp dump. However at the same time there are files in the 0.1 dump that are not in the 0.3. Was there ever a 0.2? I have no idea, the mailing lists don’t seem to have been preserved so I really don’t know. Does anyone have any other ftp site archives? Not to my knowledge but I’d be more than happy to be wrong.
With a working Perl the next thing to do is to patch the buildtools & dpkg to not be PowerPC centric. It’s no secret that all the official effort going on was to get OpenSTEP up and running on Apple PowerPC’s and to transition away from OPENSTEP to Rhapsody, the MacOS 8 Platinum feeling type OS, where everyone was going to love the ‘Coca’ API, and dump the old MacOS stuff or be forced to run it in the ‘BlueBox’ MacOS 8 emulator. Obviously this future didn’t happen as developers were not interested in rewriting for Steve’s decade+ fever dream of a Unix for the ‘rest of us’, instead they wanted their existing software to ‘just work’ and the Carbon API had to be created, along with a drastically different and modern looking OS X.
Frequently in the build tools it’s a matter of looking for ppc/powerpc and replacing them with i386. It’s really no surprise that Darwin always built on intel, and it had to, as it’s life depended on it. Back when NeXT hit their first real big stumbling blocks of being a vertical platform is that they just couldn’t compete in the hardware space. But dumping the 68k based black boxes, they could now take their software and port it to the much more coveted RISC platforms, and shipping with NeXTSTEP 3.3 they supported both SPARC & HPPA. There had always been talks of further platforms like MIPS or DEC Alpha, but these never materialized, much like the i860 which had been relegated to a simple Postscript co-processor.
Anyways.. Keeping with yesterday’s setup, and of course the .darwin-builder-04-23-2024.iso CD-ROM with all the stuff we need, let’s DOIT!
phase 2 completed
With phase 3 completed we are now ready to build the rest of the system. I hope you are excited! As I’m sure hoping you kept the original disk layout from the prior setup, or I’ve totally trashed your system by now.
I should say that deb files are just specially tagged ‘ar’ archives, that contain a data & control files telling apt how to process them. In this case I’ve taken the cc_783.1-1_i386-apple-darwin.deb file and modified it to contain the OS X 10.0 modified CC compiler. Apt had stumbled on building it, and I’m not interested into troubleshooting why or how. Basically, use ar to extract the contents of the deb, then tar to expand the data, replace the files, tar to put the files back into the data tar file, and ar to rebuild the archive.
ar r cc_783.1-1_i386-apple-darwin.deb debian-binary control.tar.gz data.tar.gz
In this case, debian-binary is a text file that simply contains ‘2.0’. Amazing!
The first thing to do is build a manifest of what needs to be built. I just simply extract all the ‘fixed’ source that I’d used last time to build Darwin, apply patches were needed, and then kick off the process with a darwin-buildall.
In this case I skip building the C compiler, as it takes too long, and I’ve already done it. If you really want to do it, you can do so at your own leisure. GDB has issues building, and I haven’t even begun to tackle them. As you can guess the format of the manifest is pretty simple:
dir /usr/src/CoreOSMakefiles-1/ all
dir /usr/src/Csu-1/ all
dir /usr/src/Libc-1/ all
dir /usr/src/LibcAT-1/ all
Debian uses deb’s to populate a fake root directory in order to cross compile the packages. This is like installing multiple copies of the operating system, and that is why we use a separate scratch disk. This can consume several gigabytes when it’s done.
Also this presented the chicken/egg problem with how do you make debs from a system that needs debs? Thankfully NCommander had done extensive work with Debian / Canonical and was able to fake enough of a ‘build-base’ fakery that satisfied the build system just enough to start building stuff. In this weird way all roads lead back to the first build-base. Thankfully we live in the future where VMs are fast, and virtual disks are cheap.
I then create the /built directory, where the compiled deb’s will be populated, and copy in my modified compiler Debian into the built directory so that it’s used in all the compiling. On the CD-ROM I have 2 selections of deb files, the ‘deb’ directory from when I’d originally done this back in 2017, and the ‘fresh’ directory that I’ve just built. You can always manually source where the debs some come.
Re-creating the steps from 7 years ago the first phase was to build the Darwin kernel. Like everything else, once you know what is involved, it’s not all that difficult. But as always finding out the steps to get there is half the fun!
I’m going to assume if you want to follow along, that you’ve completed the first part of this exercise, and you have a Rhapsody DR 2 system up and running. Due to some issues I’ve had with creating a lot of files & filesystem corruption, we are going to create and add two more disks to the system. On Qemu we need to add them via the CLI:
Step one is to boot into single user mode. As we need to prep & format the disks under Darwin before the system starts up.
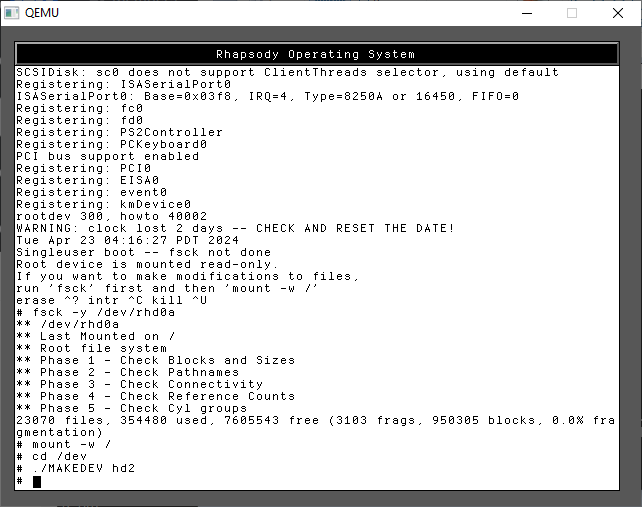
We need to check the hard disk, and then create the device names for the third hard disk.
fsck -y /dev/rhd0a
mount -w /
cd /dev
./MAKEDEV hd2
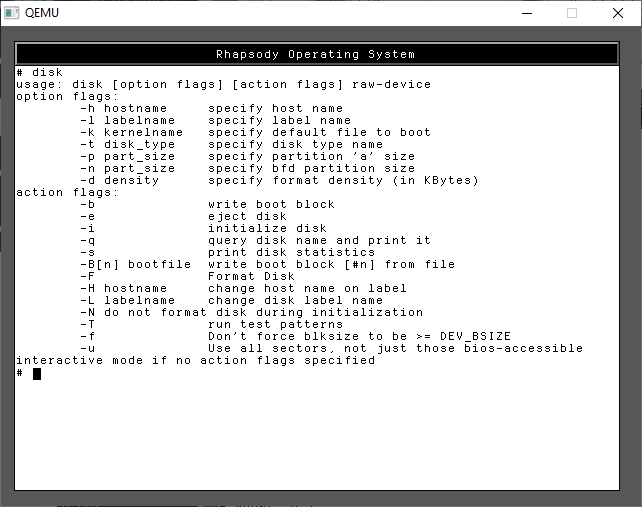
Now we need to run the ‘disk’ command which will abstract the whole volume creation. There are numerous flags, but we don’t need all that many.
disk -i -l 'src' /dev/rhd1a
disk -i -l 'scratch' /dev/rhd2a
The output scrolls off the screen, so I didn’t capture it, but you’ll see all the inodes being created, it’s a lot of output!
With the disks created, we can now shut down the VM
shutdown -h now
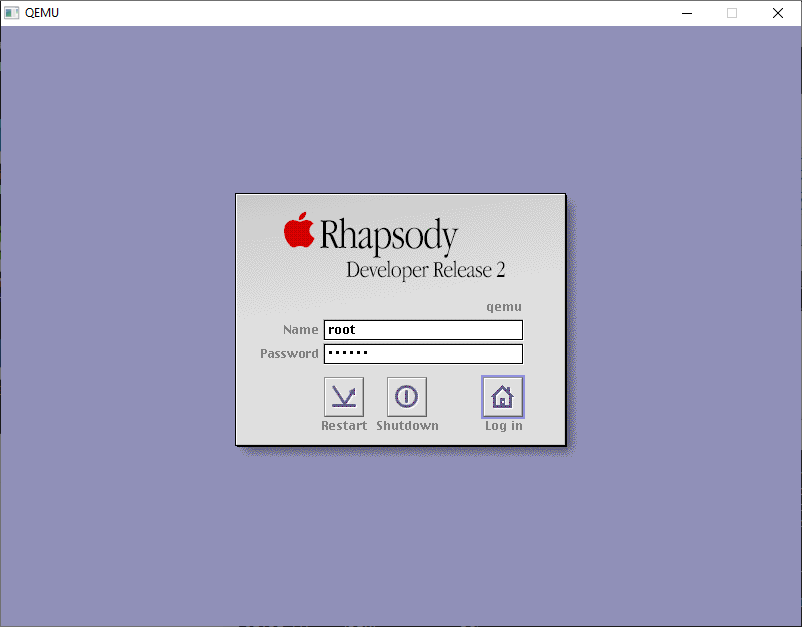
and then restart Qemu, and let it boot up normally. We’ll get to the login screen, login as the root user.
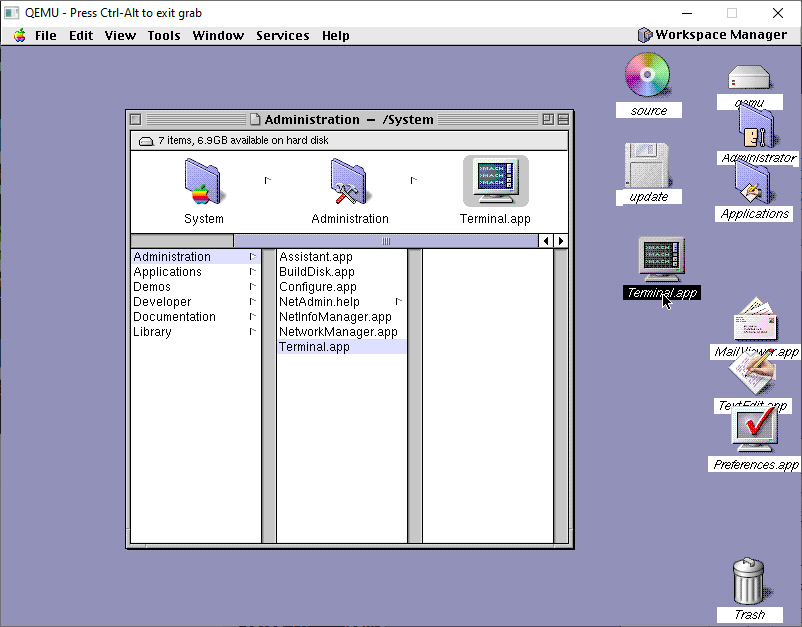
The first thing I’d recommend is to drag the Terminal.app from /System/Administration to the desktop to make it easier to get to. Rhapsody, unlike NeXTSTEP & OPENSTEP doesn’t have any dock, as the goal back then was to make Rhapsody look and feel more like Platinum MacOS.
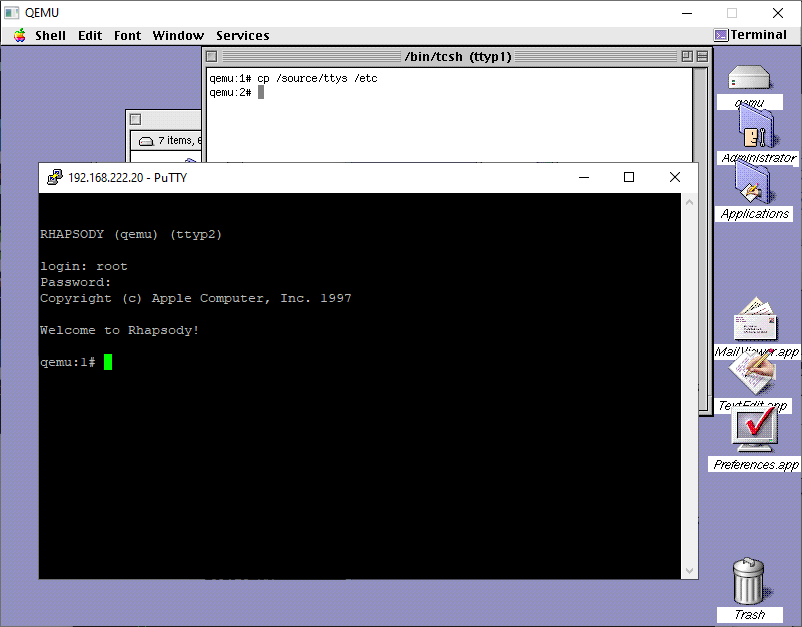
The next thing to do is to make the system very insecure by allowing remote root logins. It’s just easier to deal with. You could use sed or just copy the one I provided from the CD-ROM.
cp /source/ttys /etc
And with that in place, its easy enough to telnet into the VM so you can copy/paste stuff in and out with ease!
You should now be able to verify that all 3 disks are mounted:
# mount | grep hd.a
/dev/hd0a on / (local)
/dev/hd1a on /src (local)
/dev/hd2a on /scratch (local)
From here it should be very simple to kick off the build process:
/source/phase1.sh
And this will kick off the build, recreating all the fun steps I’d gone through so many years ago. These projects now are building in the following order:
kernel-1
driverkit-139.1-1
cc-798
bootstrap_cmds-1
objc-1
The first phase of the script will unpack both the kernel & driverkit and install their respective header files into the OS. NeXT a bunch of symlinks are created to link the system to the driverkit. Next I decided to build the ObjectiveC compiler from 10.0, hoping it’s more bugfixed and slightly more optimized than what was available back in 1999. Building the compiler is a little involved, as a good GCC tradition is to be cross compiled first, then re-compile itself with itself, then do that again and verify that the 3rd recompile outputs the same as the second one. Yes it’s a thing. Yes it’s slow. Yes you are lucky to live in the future, this was really painful back in the day.
With the kernel compiled, we can then compile the bootstrap commands, and the objectiveC runtime that is used by the kernel. Nothing too exciting here.
DriverKit however….
The PCMCIA code was not included in any of the 0.x Darwins, so for laptop enthusiasts you are basically SOL. As a matter of fact, a lot of weird stuff was pruned out, that either could be ‘touched’ or borrowed from the PowerPC port and massaged into place. Luckily I had at least figured out a simple fix for PCIKernBus.h so at least PCI works.
Likewise for the kernel, there was some guessing on the EISA config, which also overlaps ISA, along with having to remove the PCMCIA cardbus .. bus.
APM crash
I had issues with the APM (Advanced Power Management), another laptopisim I suspect. I had to amputate that.
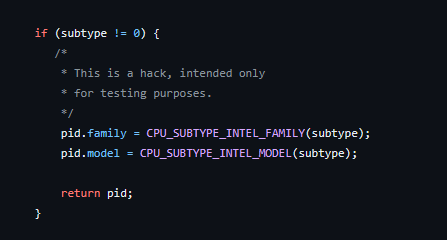
for testing purposes
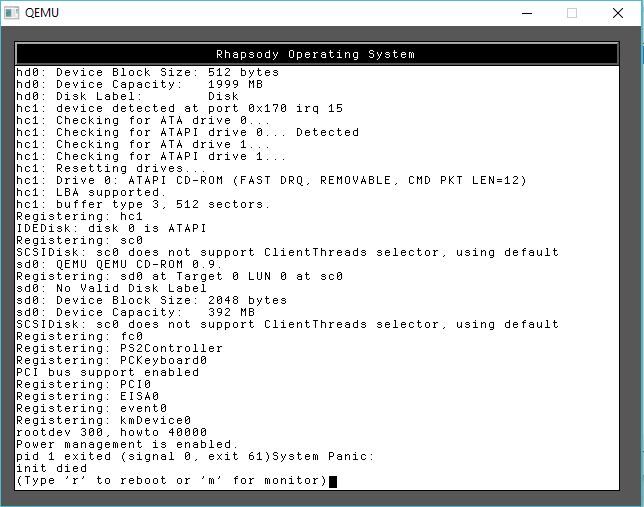
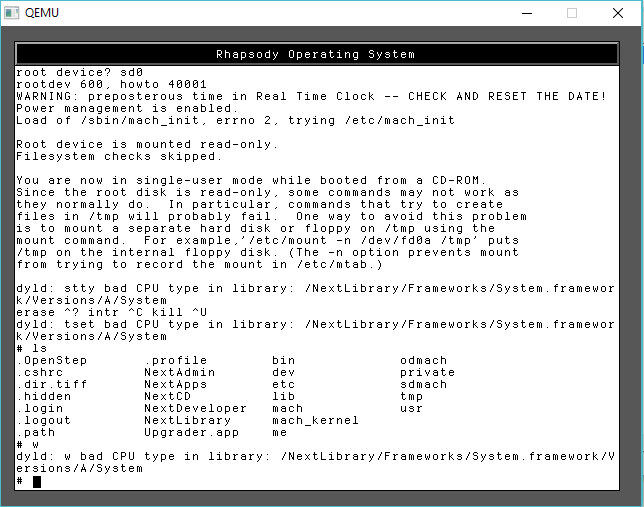
Naturally the cpuid code is broken much like early NT (I wonder if both were contributed by intel?), so it doesn’t detect any half way modern Pentium processors correctly which causes it to fall all the way back to the i386, which unfortunately, Rhapsody is compiled as 486 (remember NeXTSTEP had fat binaries allowing you to recompile for different processors and ship a single binary that can be ‘lipo’d into the appropriate one for the host). So being degraded to a 386 means nothing works.
bad CPU type in library!
yay.
Luckily patching the cpuid was pretty simple just force it always to be a Pentium. It is 1999 afterall.
I’ve done my best to make this a single script to run, and all being well you’ll get something that looks like errors, but it should be fine?!
System/Library/Frameworks/System.framework/Versions/B/Headers/bsd/i386/table.h
System/Library/Frameworks/System.framework/Versions/B/Headers/bsd/i386/types.h
System/Library/Frameworks/System.framework/Versions/B/Headers/bsd/i386/user.h
System/Library/Frameworks/System.framework/Versions/B/Headers/bsd/i386/vmparam.h
private/
private/dev/
private/dev/MAKEDEV
private/tftpboot/
private/tftpboot/mach_kernel
mach_kernel
tar: private/dev: Could not change access and modification times: Permission denied
tar: private/dev: Cannot change mode to 0755: Permission denied
tar: private/dev: Cannot chown to uid 0 gid 0: Permission denied
tar: Error exit delayed from previous errors
A quick look around shows that there is tgz files indicating that things have been compiled. I did backup the old original kernel as “rhapsody-gcc.tgz” in case you ever need it. Can’t imagine why but who knows?
You should now be able to reboot into the kernel that you’d compiled!
Next up is Phase 2, where we compile the tools to enter the dark magic that is the Debian build system. Yes, you read that right, Apple/NeXT was all in on Debian.
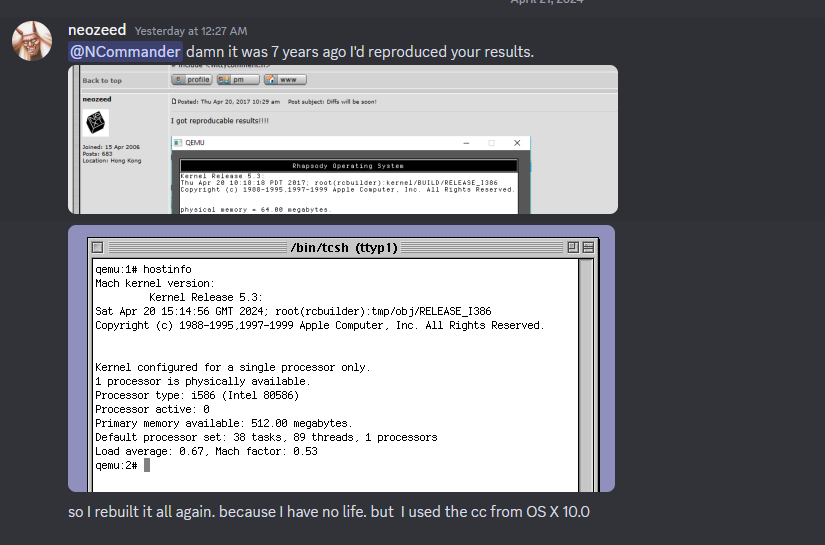
It’s hard to believe it’s been 7 years ago since I reproduced Ncommander‘s adventure in building the Mach kernel from Darwin 0.1 sources that had been found years ago. At one point we’d managed to build enough of Darwin to do a dump/restore onto a new disk image, and have a mostly built Darwin system save for a hand full of files.
Time goes on by, and memories fade, and I thought it’d be worth going over the adventure, yet again. Just as it was true back then, I thought I’d reproduce the same setup that I’d been using back then. Qemu was a new and exciting thing back then, and
the Disk driver is VERY picky and honestly ancient Qemu is a pretty solid option to emulate NeXTSTEP/OPENSTEP/Rhapsody with some patches to both 0.8 & 0.9 by Michael Engel, which change a nested interrupt and add support for a busmouse, as the PS/2 mouse doesn’t work for some unknown reason. I know many are scared of old Qemu, but the disk support is pretty solid and the CPU recompilation is very fast, so having to rely on MinGW v3 isn’t so terrible.
While I had hid away a lot of these resources on archive.org, I thought it was best to just go back to the oldest post I had where I had painfully documented how to compile Qemu and get it working with NeXTSTEP, back on BSDnexus. I’m so glad I took the time so long ago to not only write it down, and add screenshots, but also tag the version numbers. Software drift, especially free software can be so difficult to pin down, and it’s nice to be able to return to a known good value. I went ahead and placed the recreated toolchain over on archive.org.
Rhapsody is a weird OS, in that NeXT had kind of given up on the OS market after their NeXT RISC Workstation had basically died with the 88k, and even their early abandoned PowerPC 601 aka MC98000/98601 port. Apple had left a few of the changelogs, in the source code. It’s very interesting stuff! I guess to go off on my own tangent NeXT was just too early, the cube with it’s Unix & magnetic optical media and great audio DSP capabilities was just too ahead of the curve. What the cube couldn’t pull off in 1988, the iMac and OS X sure did in 2001.
I also added UDP support to this Qemu so I could use the HecnetNT bridge trick giving me the ability to telnet/ftp into the VM greatly reducing my pain. Back in the day I had used NFS and the network slirp redirection. But I like having direct access so much more!
Rhapsody throws up yet another fun ‘road block’ in that the mouse buttons map backwards for some reason. It’s a trivial fix in the source code, but I made it a runtime option in case I needed or wanted to run NeXTSTEP. And it was a good thing, as I did need to find the NXLock.h file for building one part of Darwin.
When building Darwin, I started with the last x86 version of NeXTSTEP that was available, and that was Apple ”Rhapsody” / Titan1U x86 Developer Release 2. My thinking at the time and still is that the closer you can get your build to whatever they were using as ‘current’ the easier this will be.
Rhapsody can support an 8GB disk, so let’s go with that. This always has an issue with people that try much larger, and just fail, so for my sake and yours let’s just go with 8.
You may be wondering, why only use 128MB of RAM? Well there is a bug in the shipping Rhapsody kernel that prevents booting on machines with more than 192? MB of RAM. Naturally, once we are to the point of building our own kernels this won’t be a problem but for now we are limited.
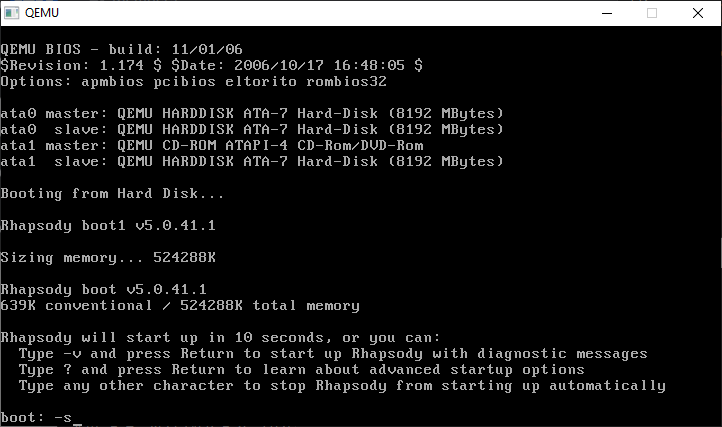
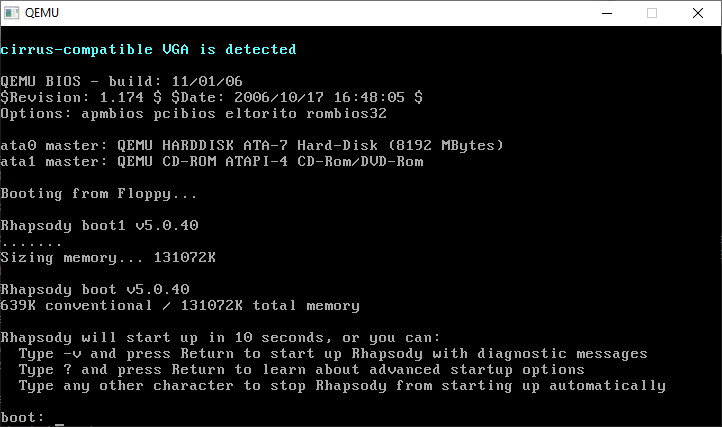
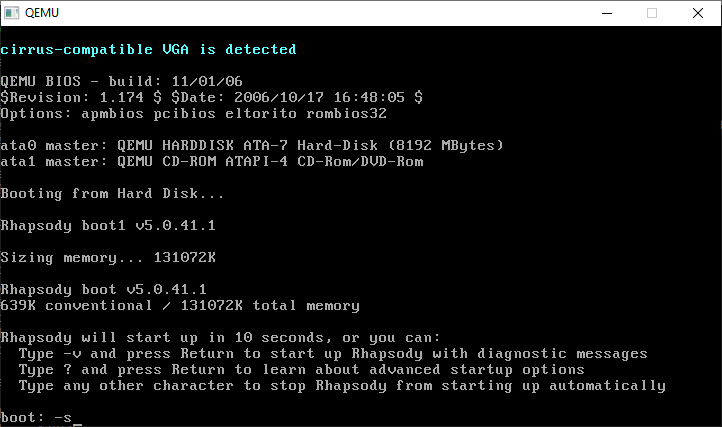
The bootloader will give us a few seconds to do anything fancy, I just hit -v so I always have the verbose boot.
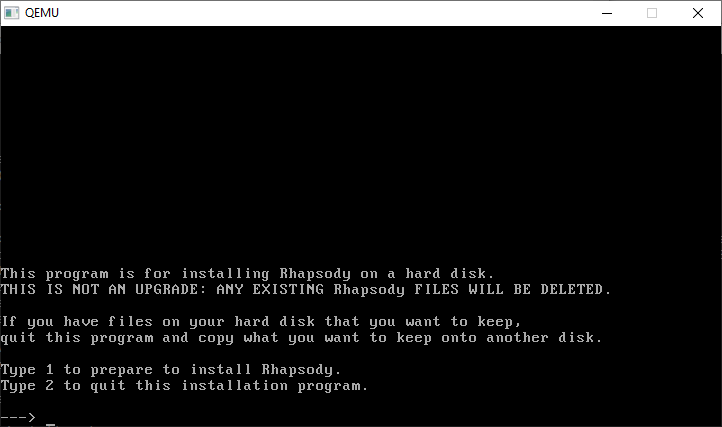
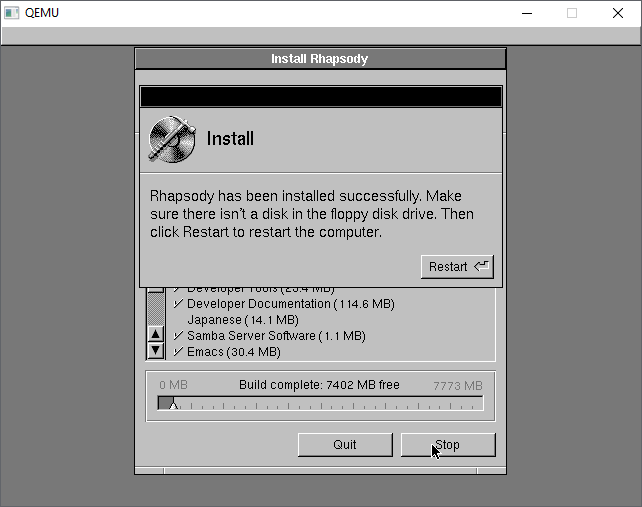
From here it’s just a few options to go thru the installer
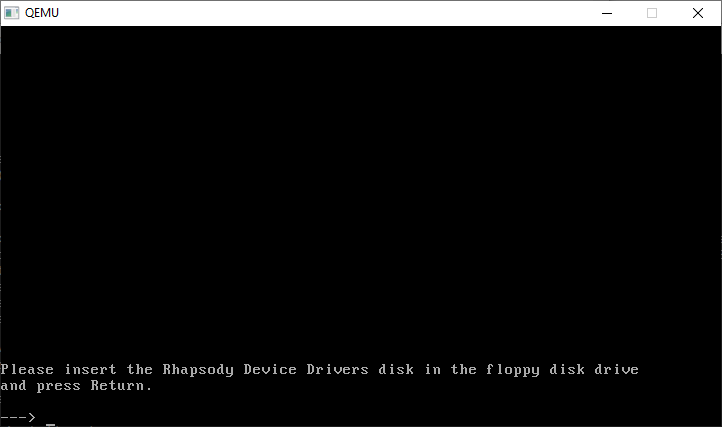
And a disk change is required
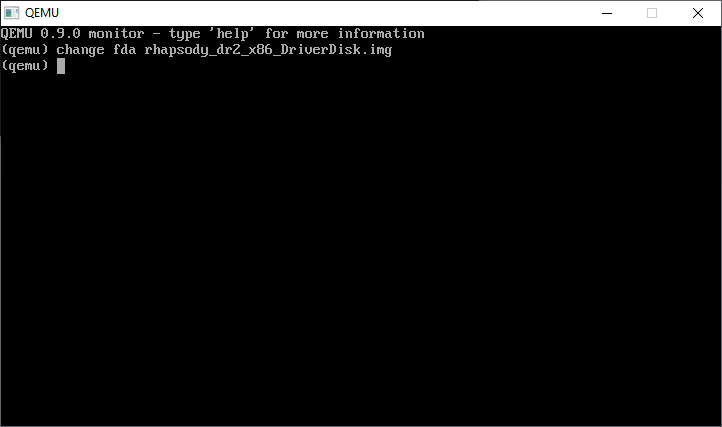
CONTROL+ALT+2 will bring up the monitor prompt, where we can change the disk
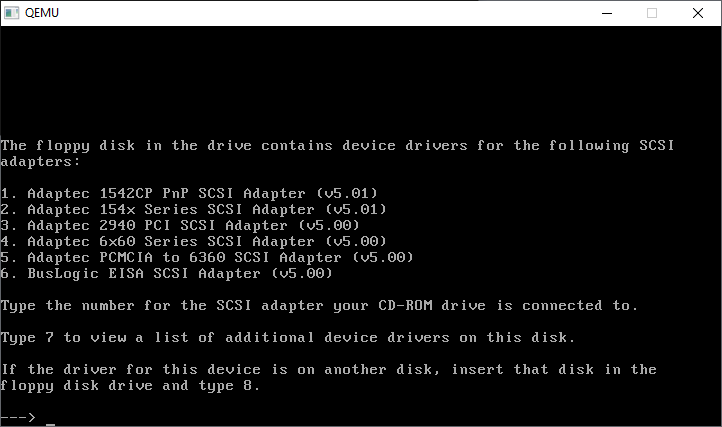
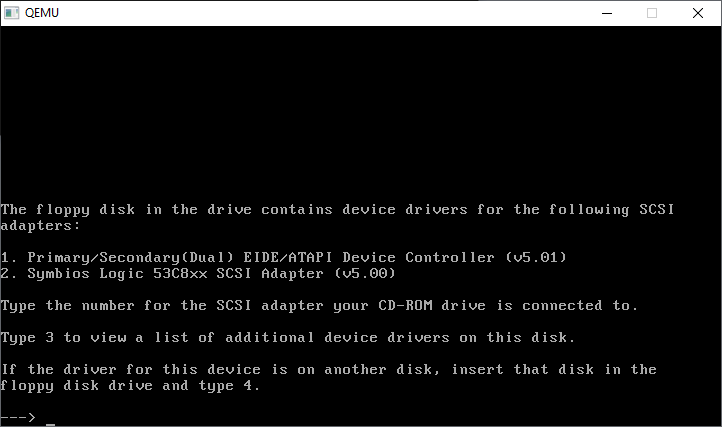
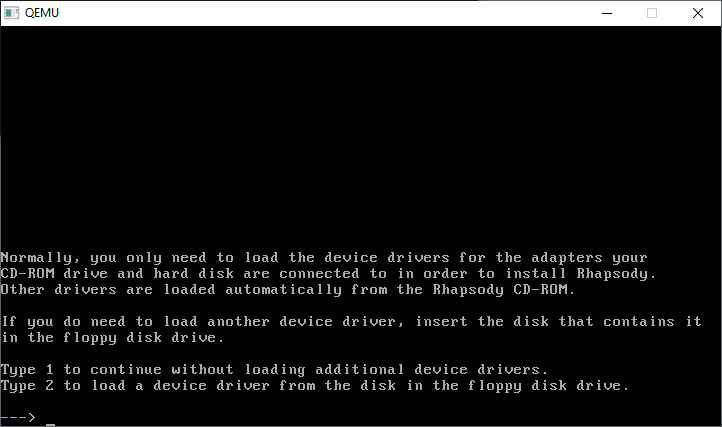
CONTROL+ALT+1 will return us to the console. Now we have to go through all the SCSI cards, and kind of compatible IDE cards
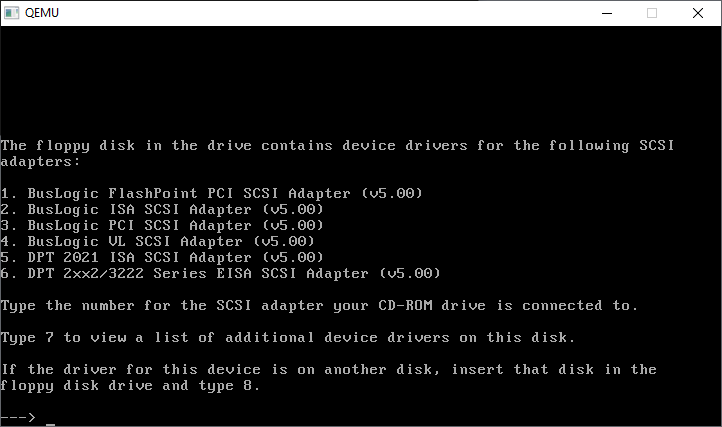
Further..
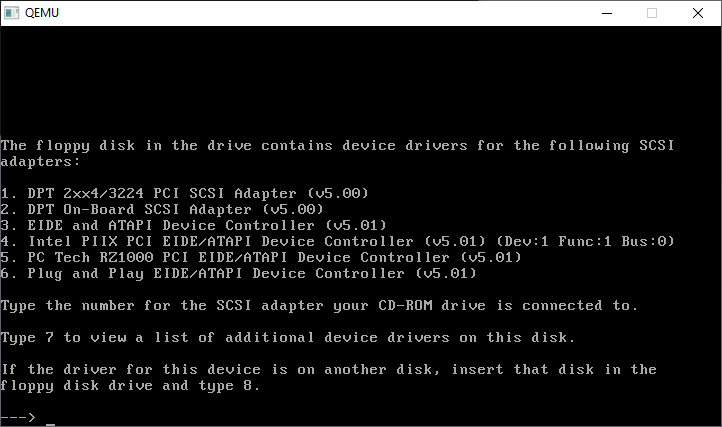
Further still…
And how select the Primary/Secondary(DUAL) EIDE/ATAPI Device Controller (v5.01)
We only need the one driver, so we’re good to go!
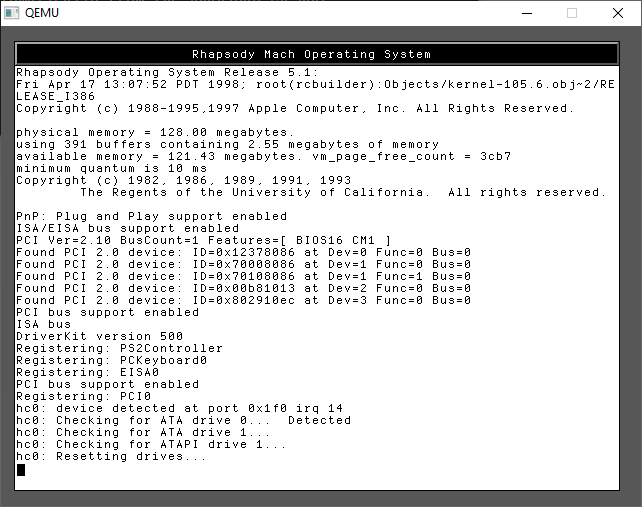
Continuing onwards will now start the kernel, along with a change to graphical mode. Just like a NeXT!
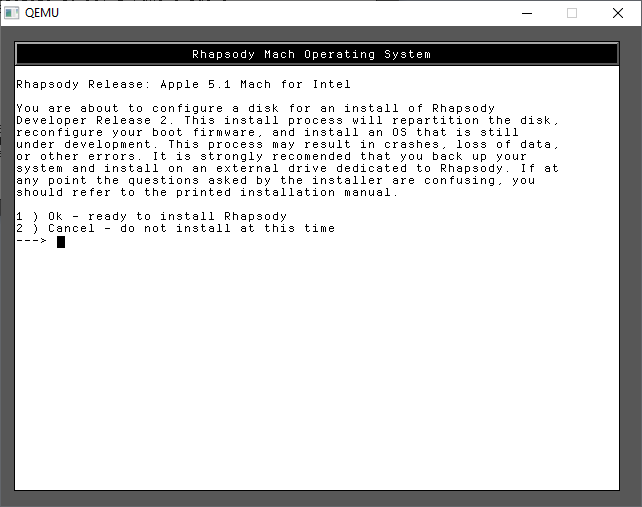
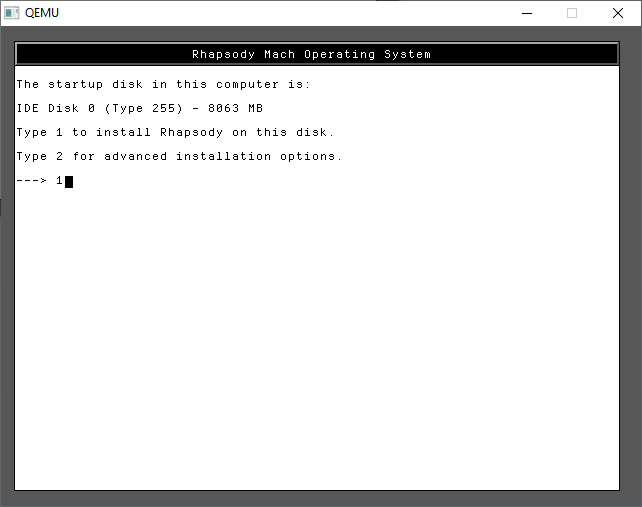
Now we can confirm again we want to install
As you can see there is our hard disk!
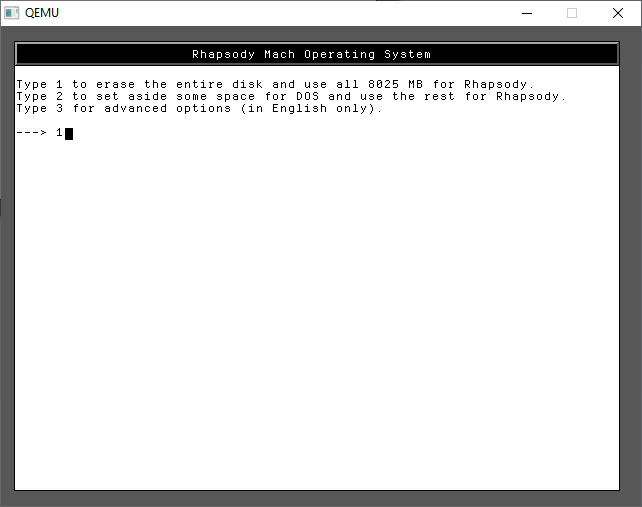
In the future we don’t need to dual boot so, just give it the entire disk.
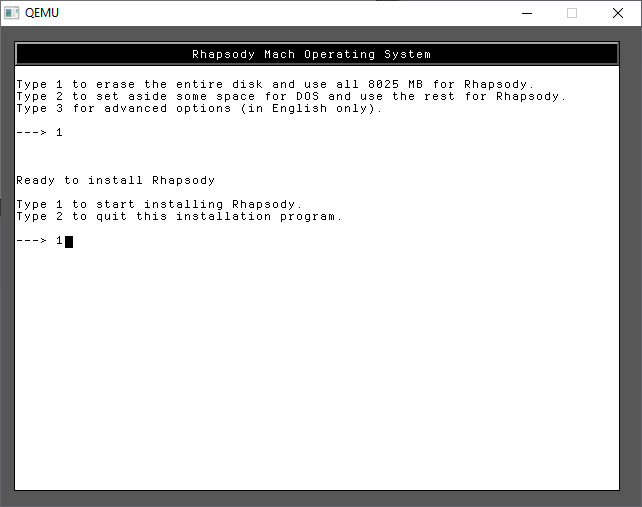
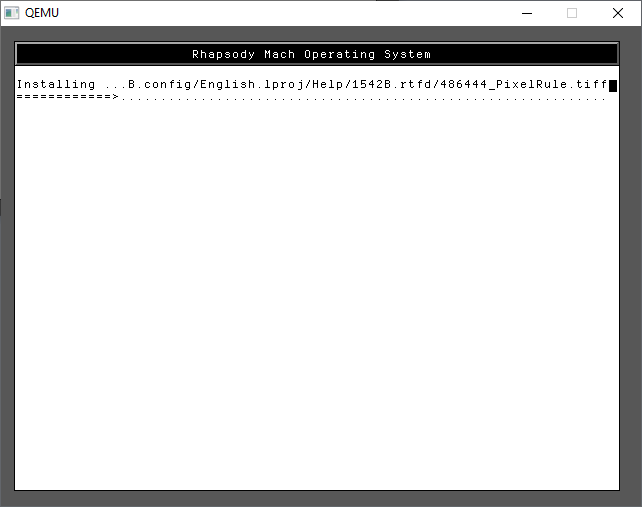
A few more 1’s and we are finally installing!
Trust me it’s fast on Qemu!
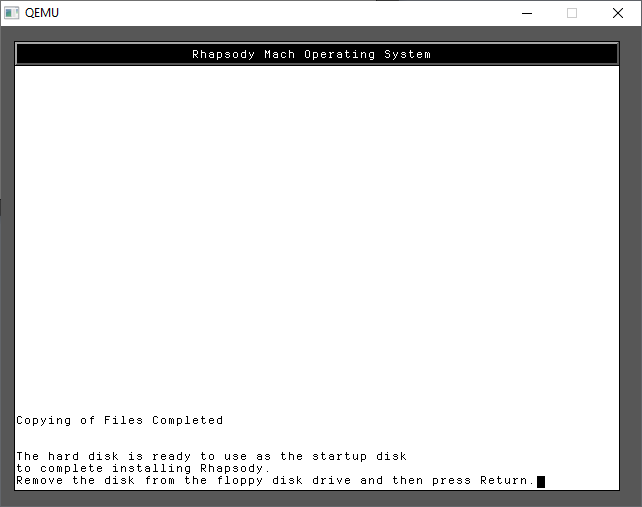
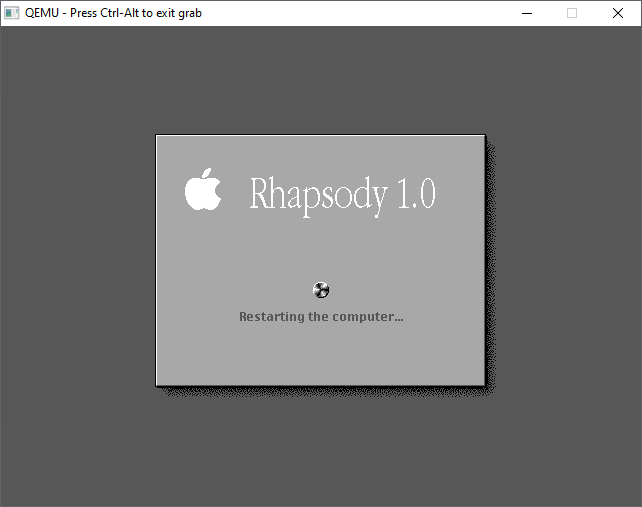
And just like that, we’ve completed the first part of the install.
You can use CONTROL+ALT+2 to toggle back to the monitor and type in
eject fda
to eject the floppy, then it’s CONTROL+ALT+1 to return to the display and have it reboot. Qemu won’t try to boot to the hard disk, and with no disk in the drive, it’ll hang at the BIOS. Now is a good time to close Qemu and backup the hard disk. Mostly because I hate repeating this stuff.
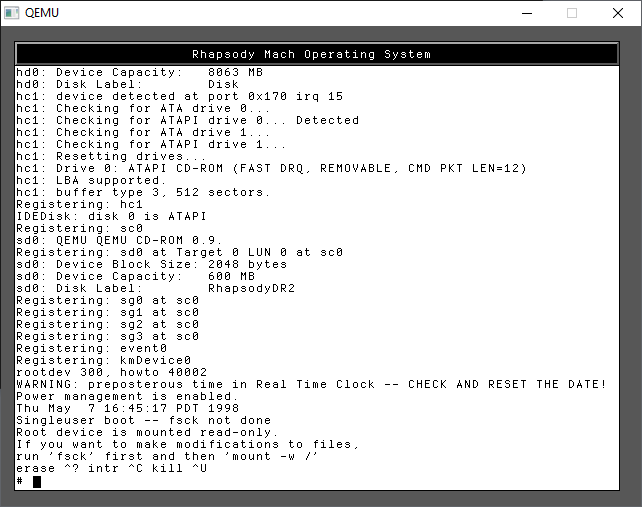
Type in -s for SINGLE USER MODE. This is where a lot of Unix problems got solved in the old days
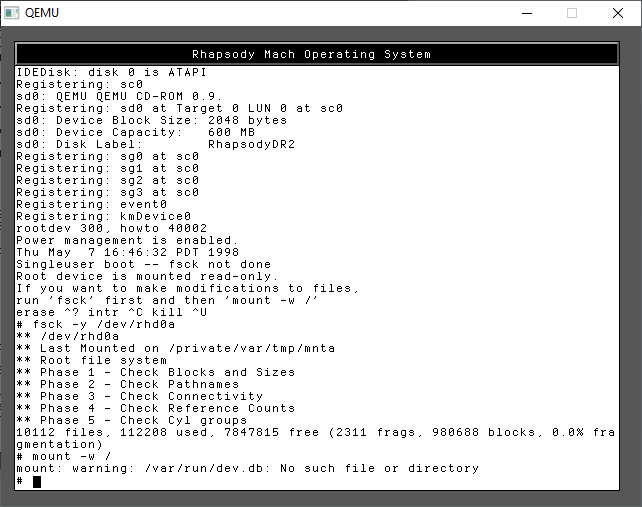
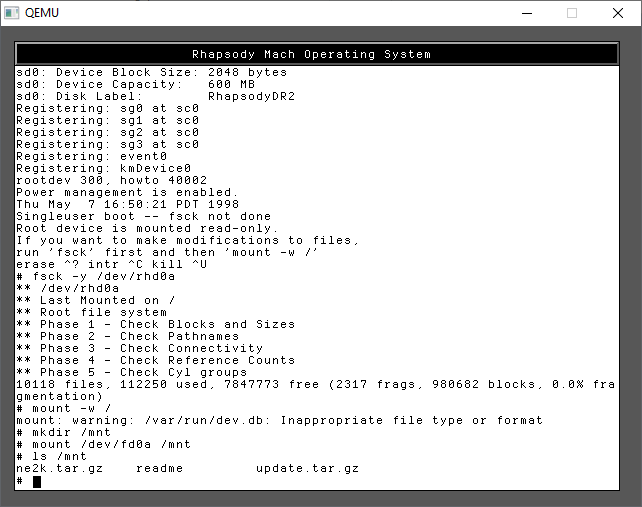
It’s a little tricky as this does involve typing. As instructed we need to check the hard disk prior to mounting it read/write
run the commands:
fsck -y /dev/rhd0a
mount -w /
Now we can mount the floppy disk
mkdir /mnt
mount /dev/fd0a /mnt
ls /mnt
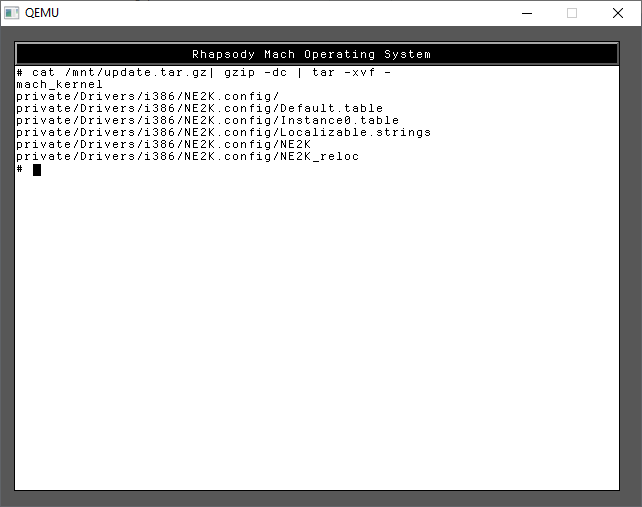
I’ve included both the kernel & NE2000 driver in one file, and JUST the NE2000 driver in the other. For my sake I use the first one, update.tar.gz as I wanted to use the newer kernel ASAP. tar -zxvf didn’t want to run, so I did a rather awkward version to achieve the same thing.
cat /mnt/update.tar.gz | gzip -dc | tar -xvf -
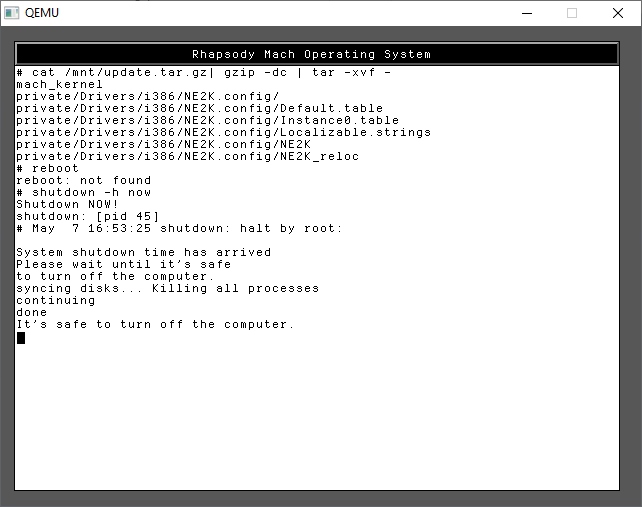
With the files in place, you can now shut down the system with a simple
shutdown -h now
Once more again, I’d shut down the emulator, and backup the hard disk. If anything goes wrong you can restore your backups at any phase, at least saving some time!
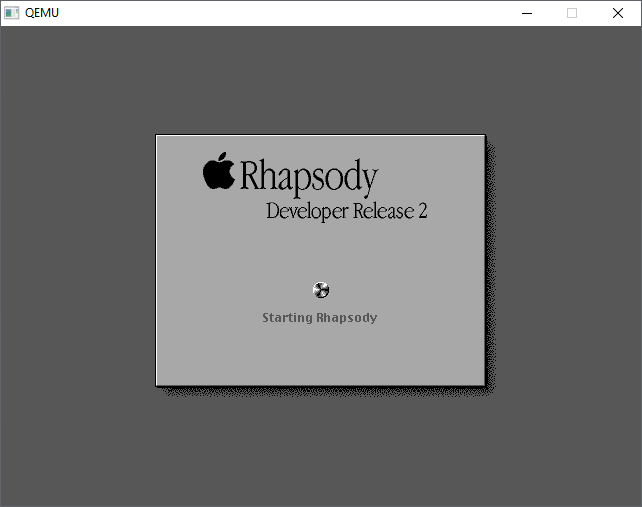
Next is the graphical install. In this case I use the hecnet bridge to give full access, you can setup with the slirp driver with a simple “-net user” but it doesn’t matter at the moment Since I opted for the newer kernel, I can take advantage of the 512MB RAM.
Now we have to setup the hardware. It should be somewhat straight forward, first we start with the monitor. The mouse should be working although I find that I have to move slowly. Sorry it tracks weird on real hardware too.
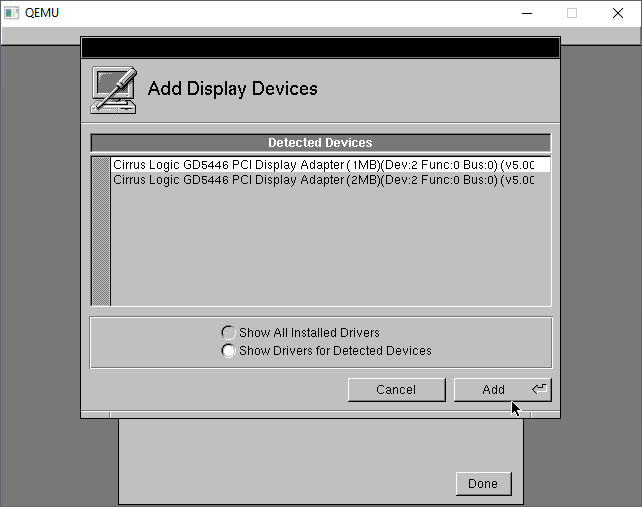
The Cirrus Logic GD5446 should be detected automatically, I just go with the default 1MB
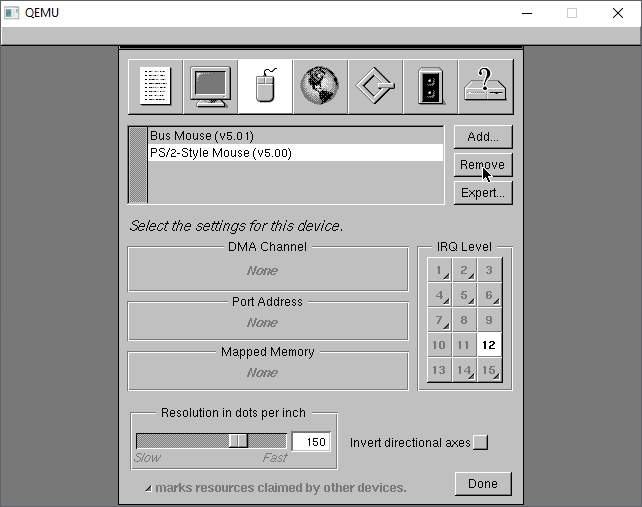
Next under the mice, select the PS/2 mouse and remove it
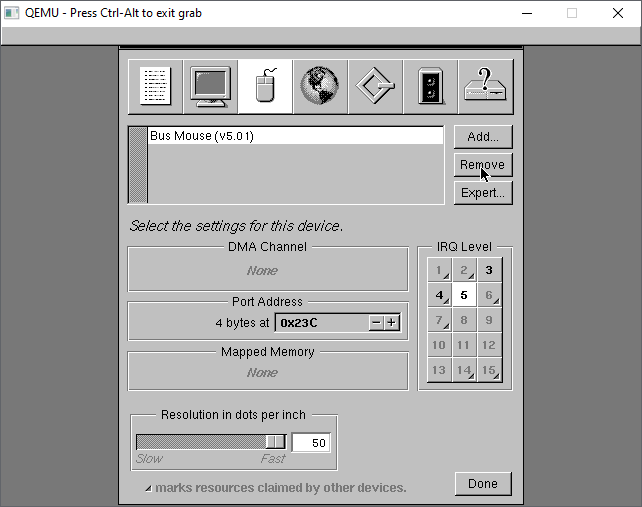
This leaves us with the Bus Mouse driver.
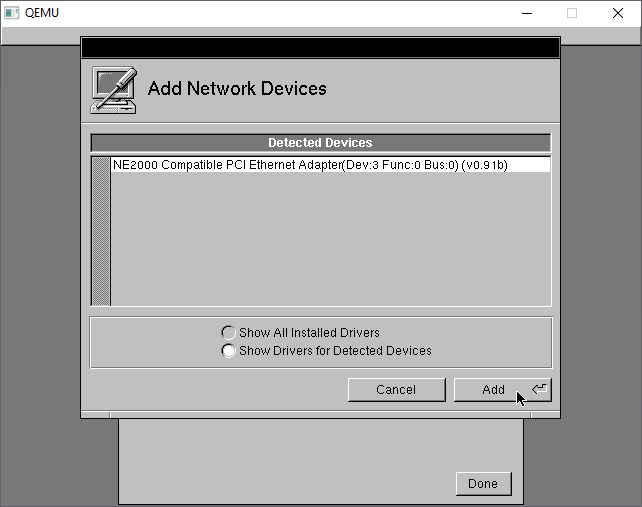
Under the network tab, the NE2000 should be automatically detected.
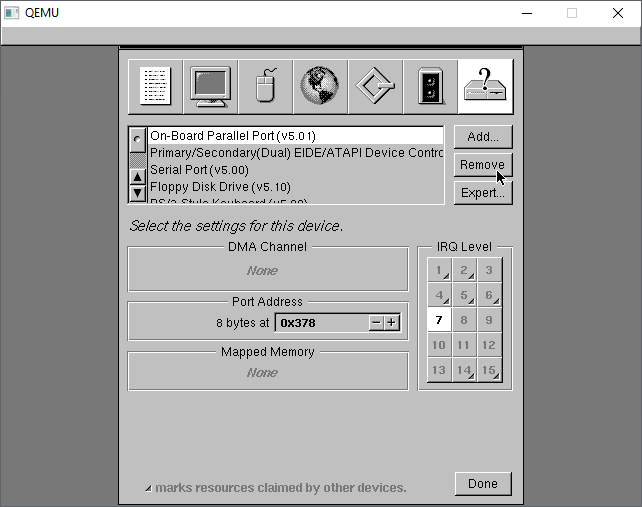
On the last tab, I make a habit of removing the Parallel port freeing IRQ 7, in case I wanted it for something else.
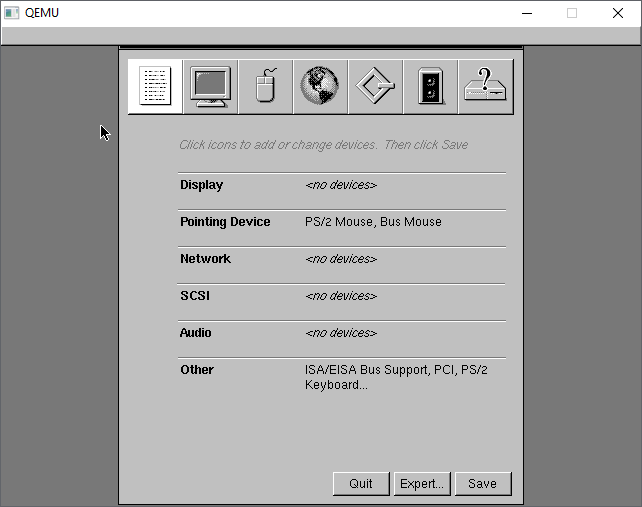
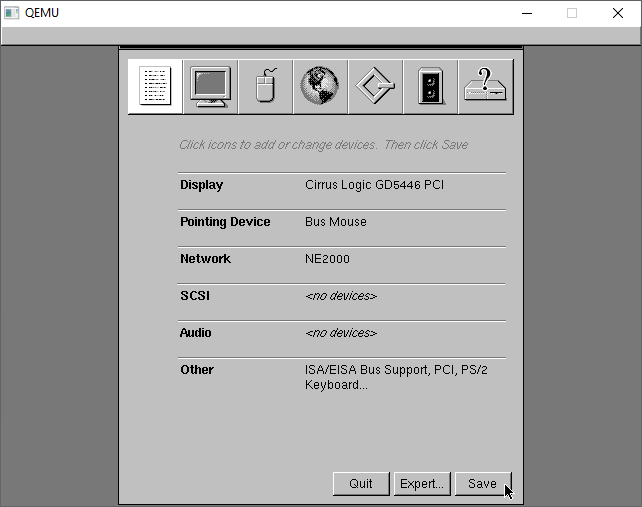
Back to the summary, we now have Cirrus Logic video, NE2k networking, with no SCSI, no Audio.
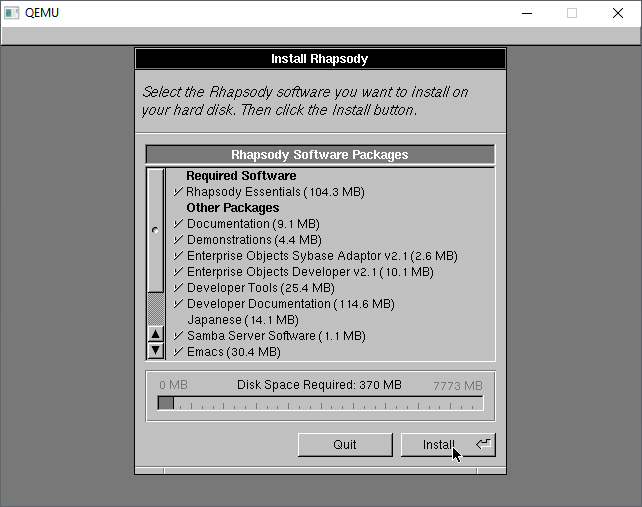
With the config saved, now we can just install as is. I un-installed Japanese, but it doesn’t matter. You absolutely need the Development Tools, so may as well go with eveything.
The installation only takes a few minutes and we are ready to reboot
The kernel will now shut down.
Once more again this is a great time to make another backup of the hard disk. At this point this is a great backup to save, as we’ve installed the OS, and selected drivers, in the next reboot we’ll be personalizing the operating system.
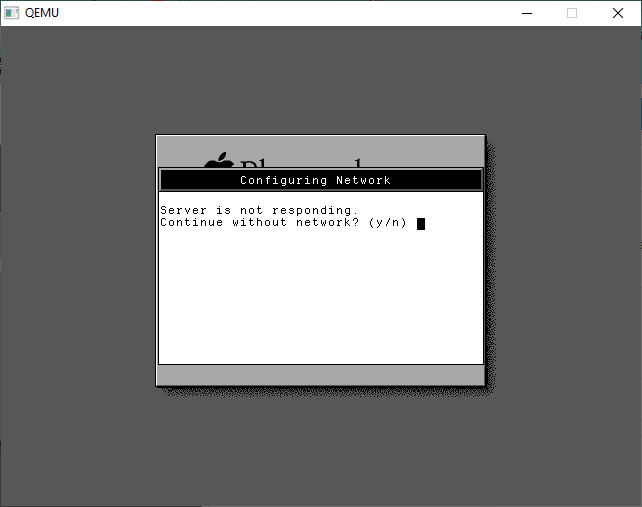
We can re-run the last config once the disk has been saved. We’ll be greeted with a message that the Server isn’t responding. Answer YES to continue without networking.
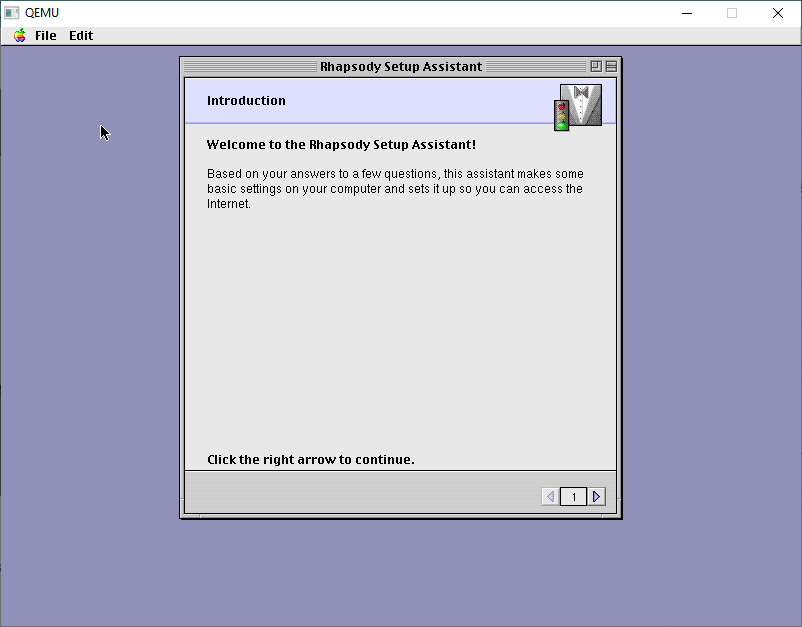
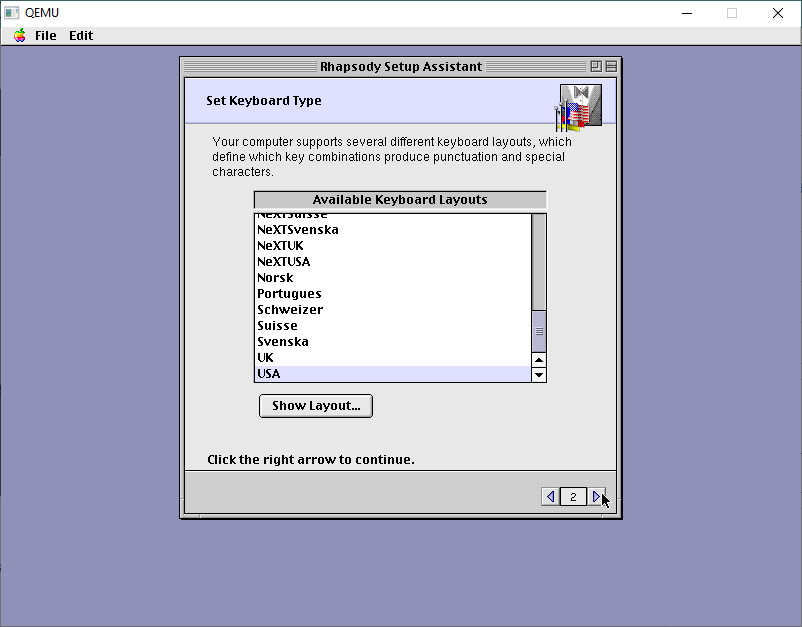
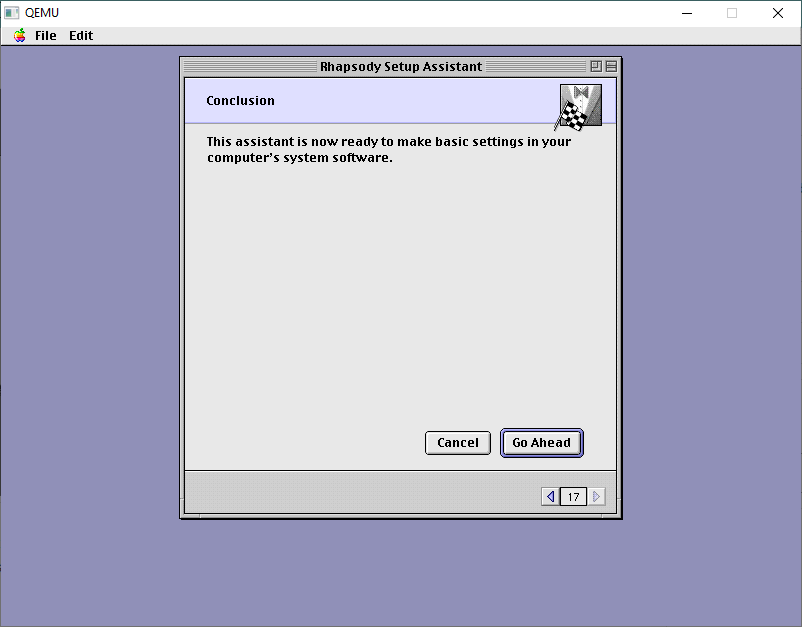
From here we are in the Setup Assistant, taking a nod from MacOS 8
I use USA keyboards. The best keyboards! I touch type so I don’t have to deal with weird layouts.
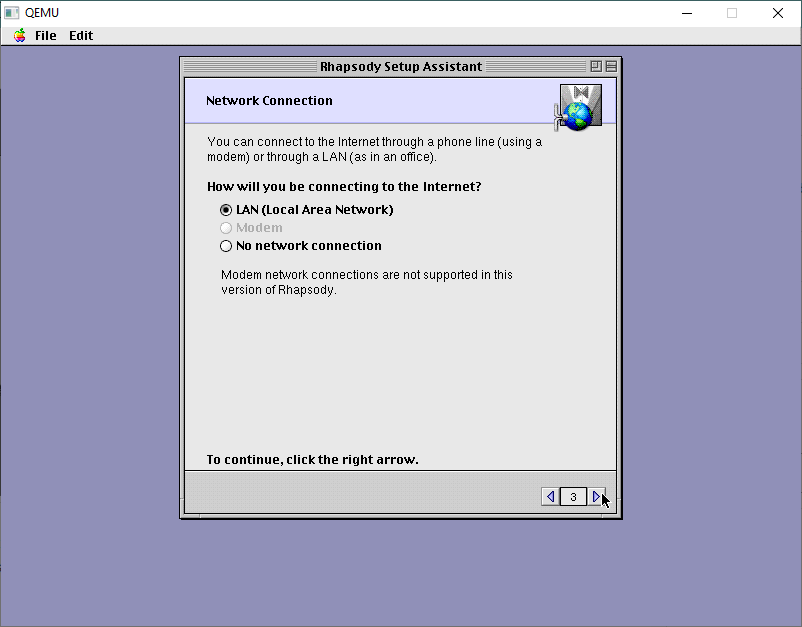
Specify for a LAN connection
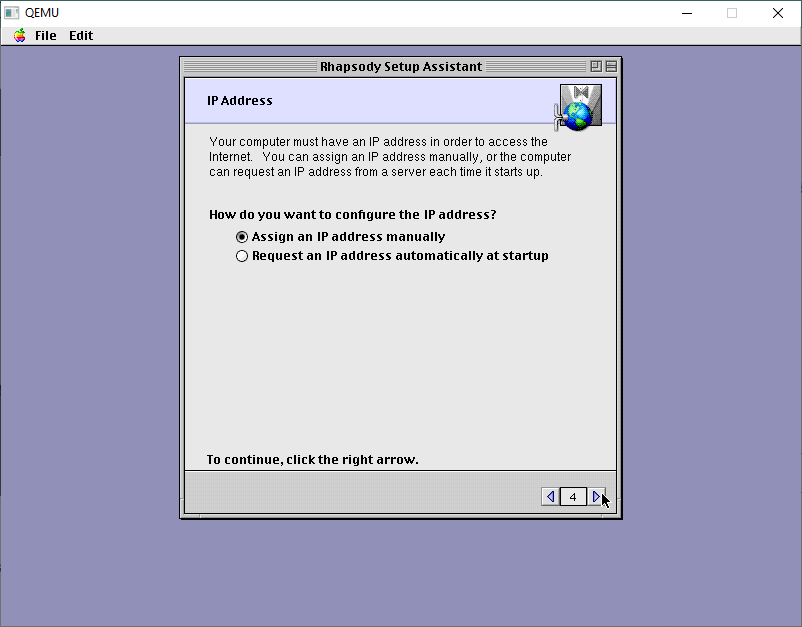
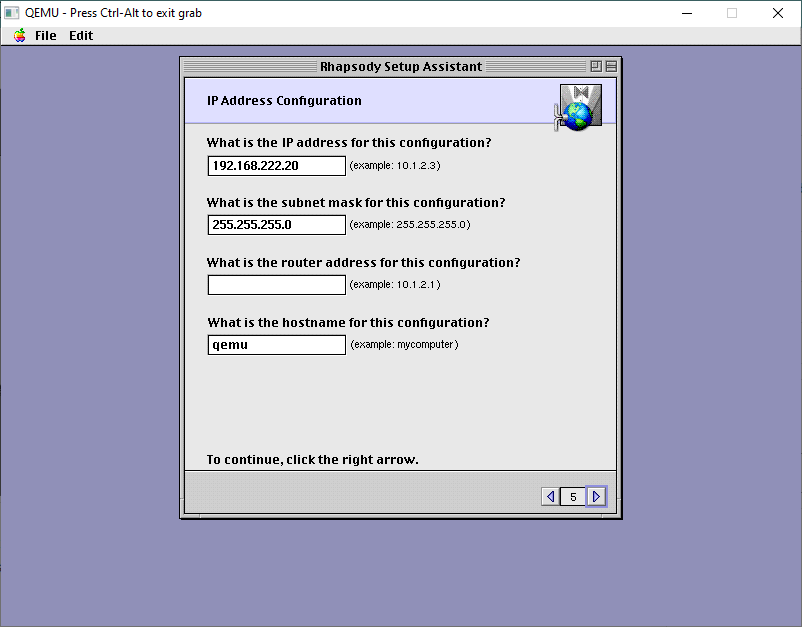
There is no DHCP support so specify a manual IP address.
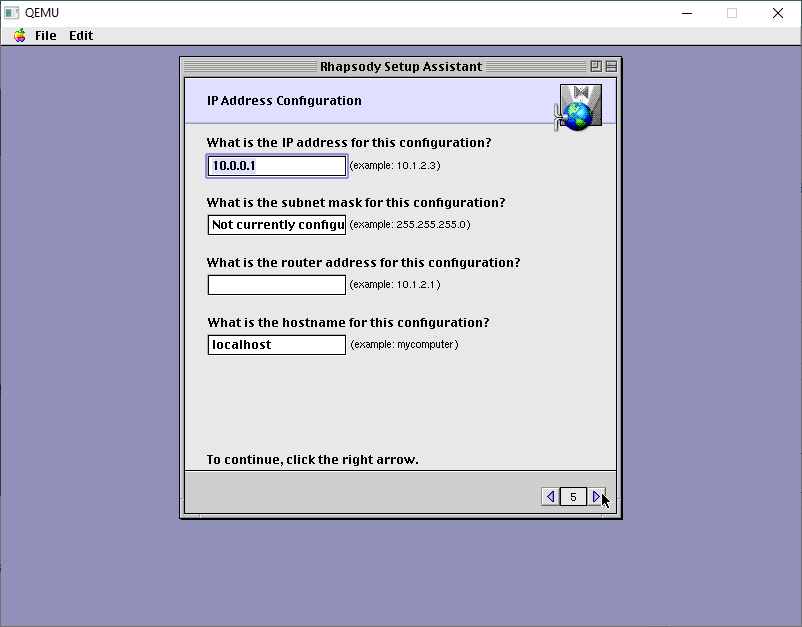
The default stuff is just wrong.
On my LAN this is good enough. DONT add a router. It’ll just confuse it.
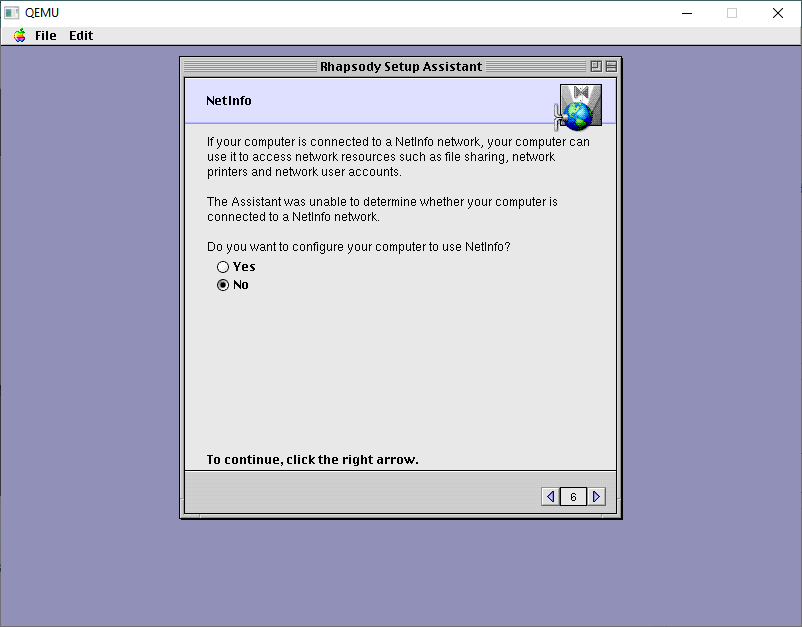
We don’t have or want NetInfo. This would be the server to give out IP addresses, and authentication. We don’t need it!
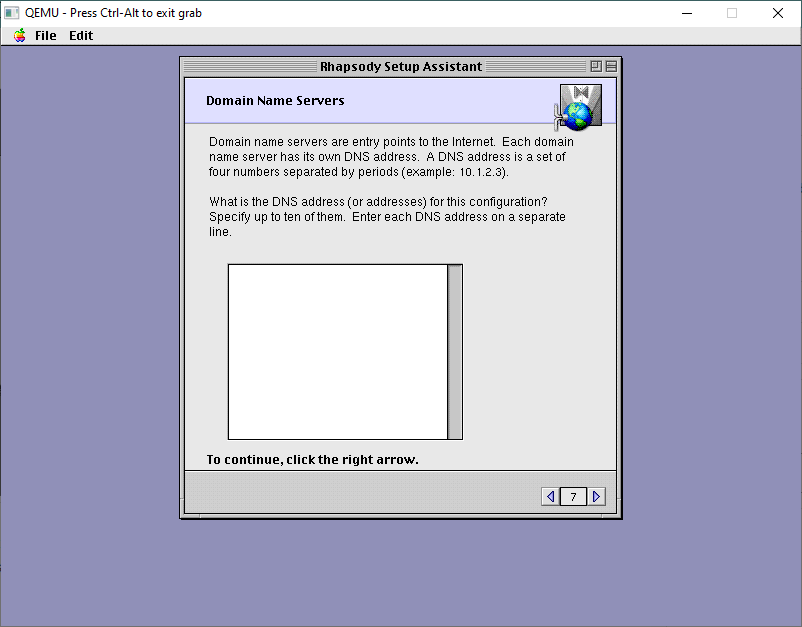
Leave the DNS servers blank
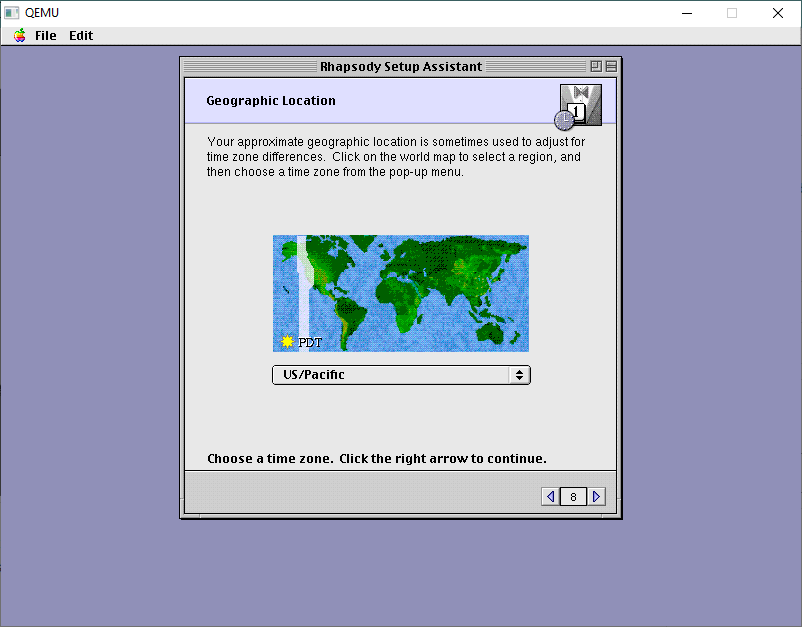
You can setup any location, it doesn’t matter.
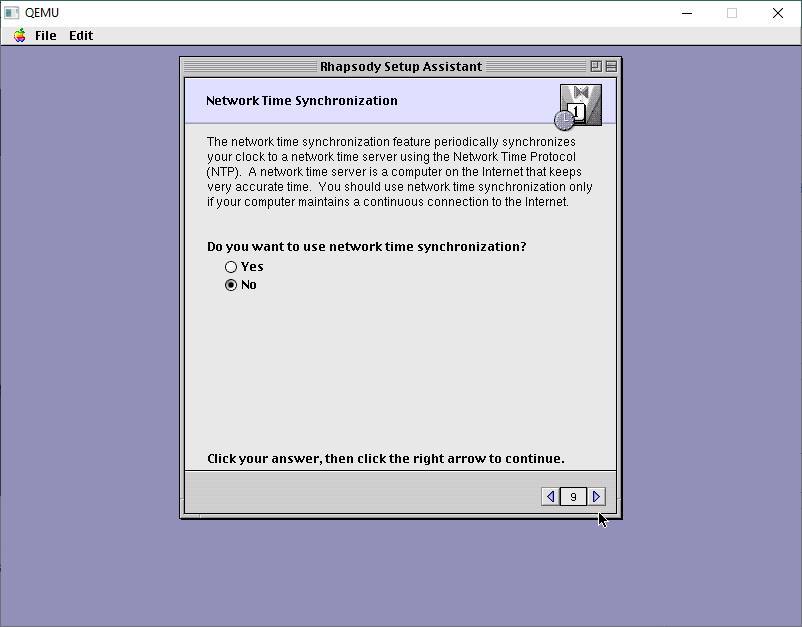
Likewise, with NTP, turn it off.
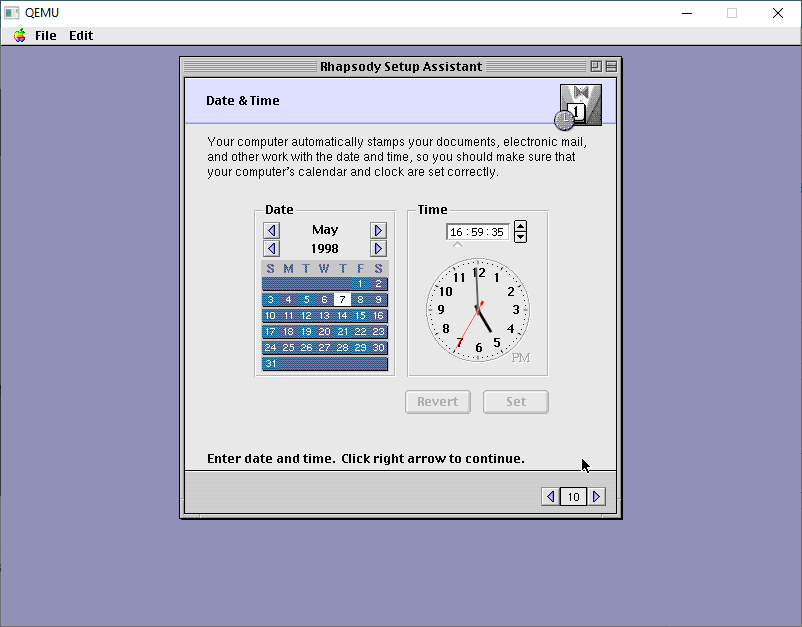
We will then get the option to set the date/time manually. The default time is far too old and it’ll break stuff.
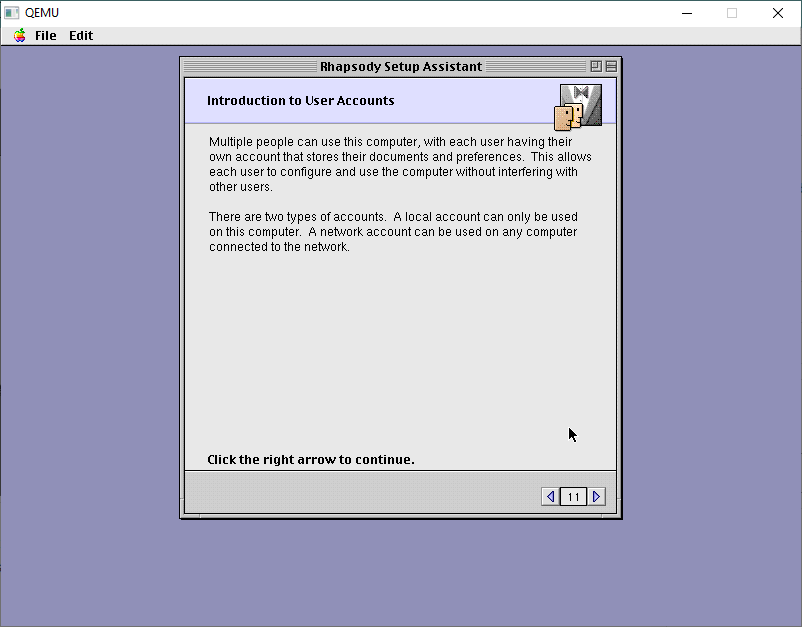
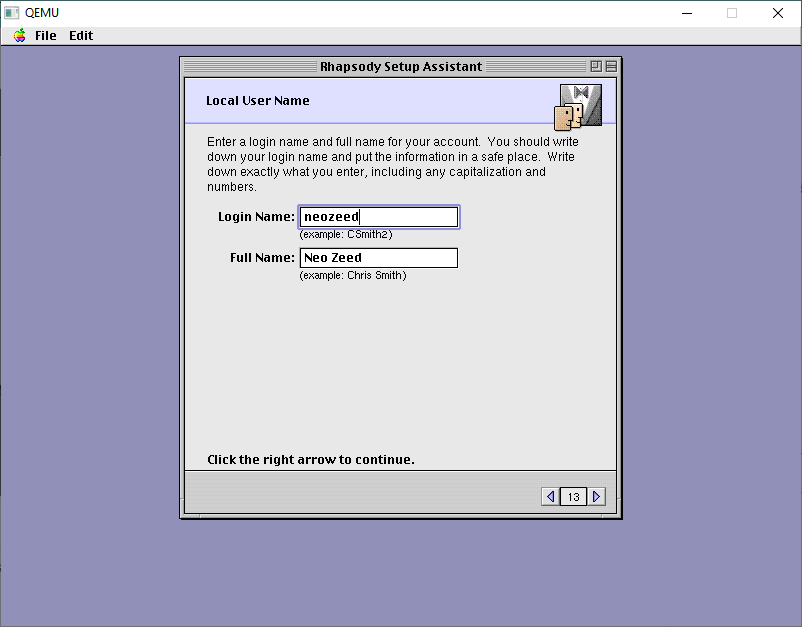
Next up is user accounts.
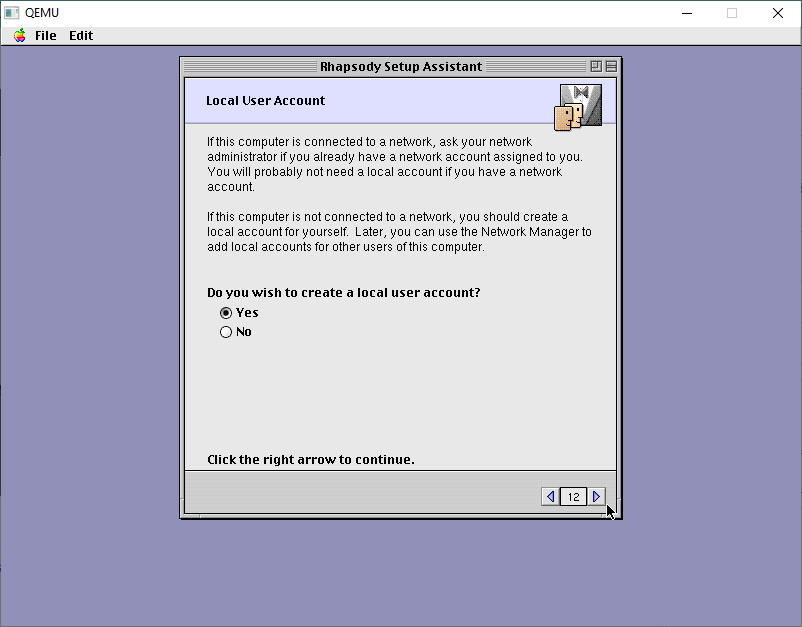
I always make local accounts.
Come up with some creative name
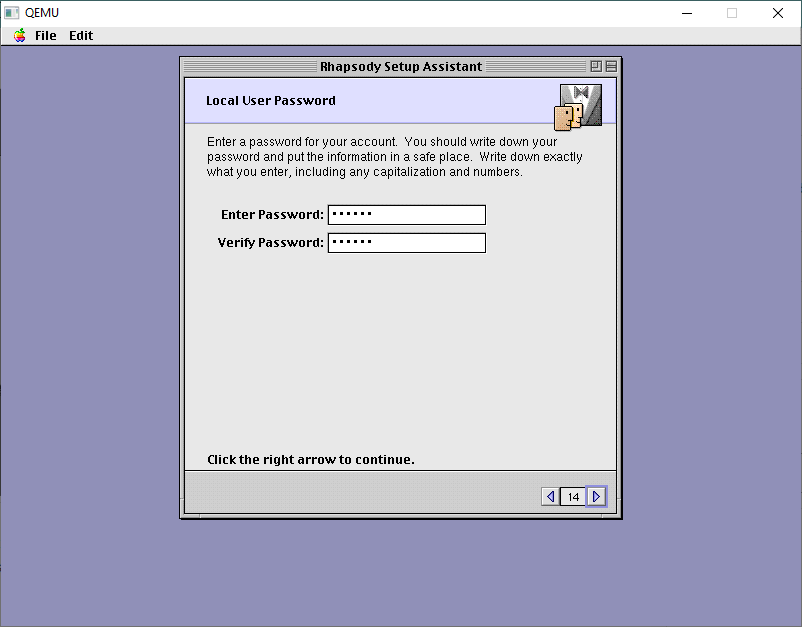
and a password
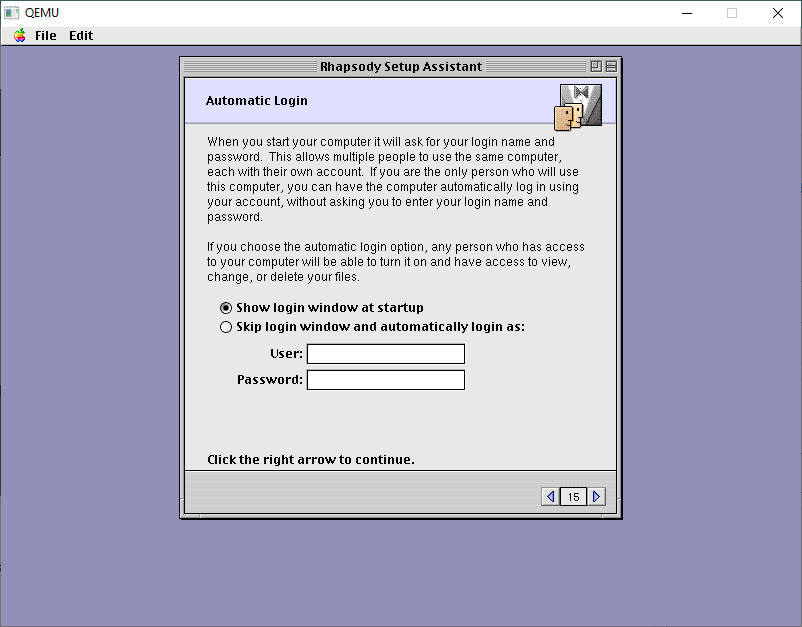
I don’t have it doing any automatic login. You can if you want, it’s all up to you, this one doesn’t matter.
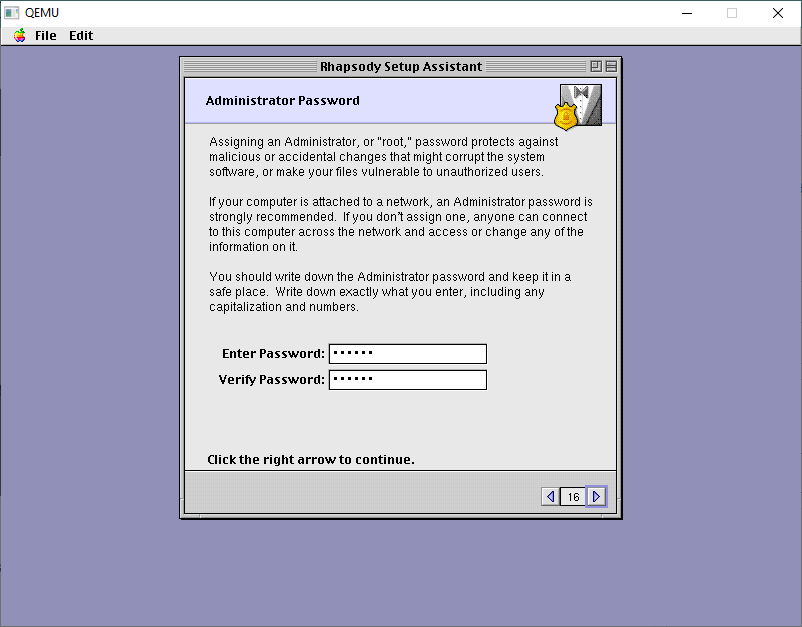
Next is an Administrator password
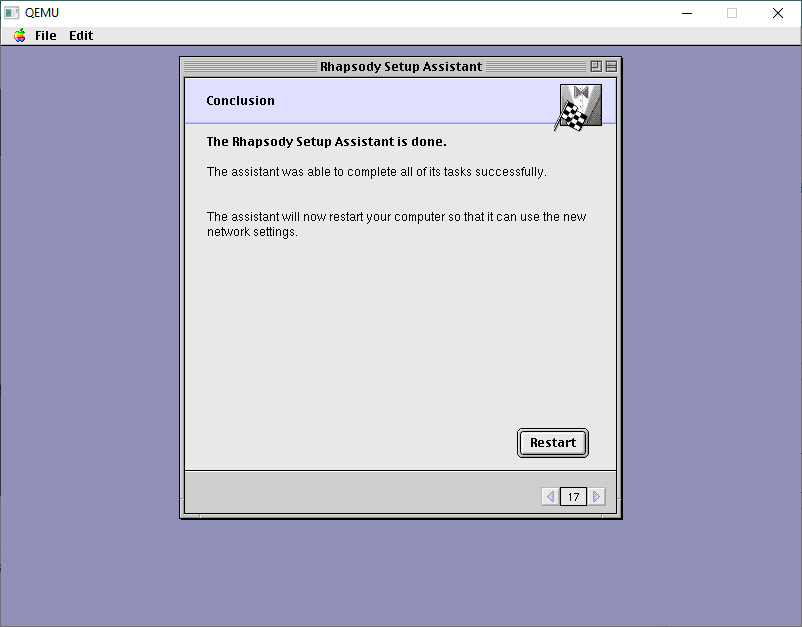
And now we can apply our changes.
It takes seconds!
And now we’ere done. You may want yet another backup as this is tedious!
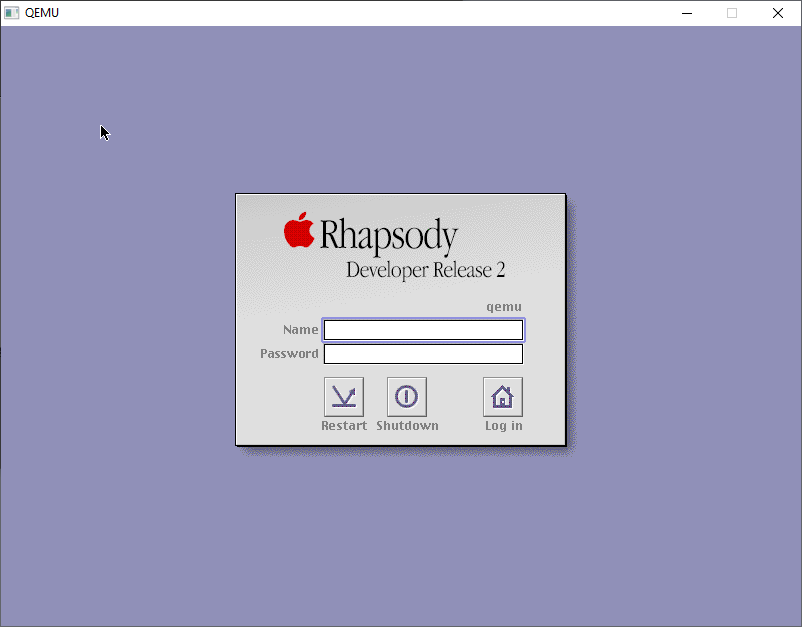
With the final configured backup in hand, now we can boot back one more time, and now we’re in SVGA mode!
Rhapsody DR2 Login Screen
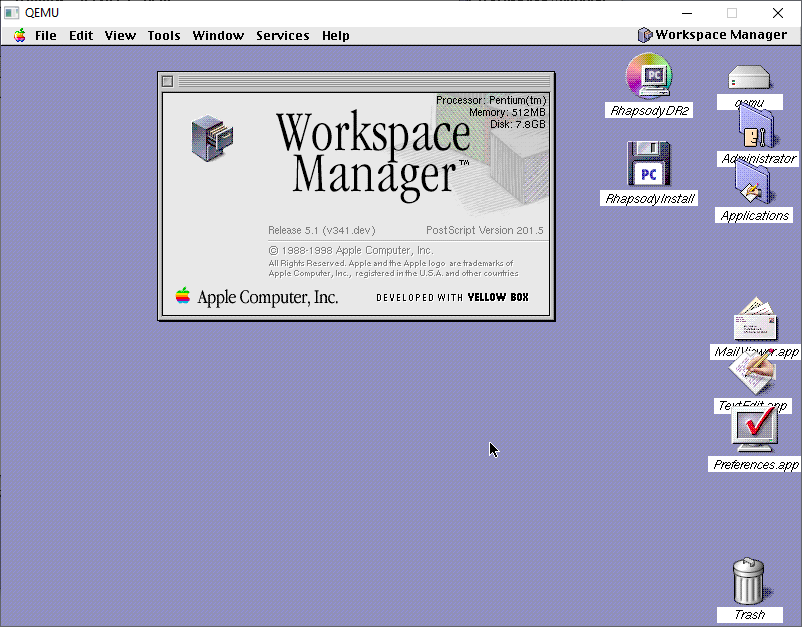
Logging in as root will give me the desktop
Desktop
And there we are, all installed.
For anyone brave enough to have read all of this, but wants the quick and easy version, it’s up on archive.org!
In part two I’ll pick up with the source CD-ROM I’ve prepared, so we can start compiling Darwin!