EtherDFS

I saw this the other day, although haven’t had a chance to write about it.

EtherDFS just needs a packet driver on MS-DOS, and it implements it’s own re-director to communicate with a Linux file-server, using it’s own raw protocol.

It certainly looks cool, and looking at how it works, it should be possible to write other drivers to read/write other filesystems for MS-DOS.  It’d be more interesting (to me anyways) if you can write an INT 14 re-director using a 32bit DOS extender to make things easier regarding filesystem ports.

When I get back home, I’ll have to test this on my retro machine, as the idea of just needing a packet driver + TSR sure sounds like a LOT less memory than the Microsoft re-director.

How do you know someone is in MENSA?

Ugh, they’ll tell you.

So I was going through this used book store, Volume One Books, and they have an interesting selection of the older ‘golden age of scifi’ pulp novels.  I found this great old Clarke:

Against the fall of night

Cool, right?  Sure it’s the 70’s reprint, but I figured it’d be cheaper than the 1963 reprint, right?  Well sure, but then I saw this on the inside:

Obviously *NOT* a genius.

And someone had to deface the book to prove to the world that it had passed through the hands of a narcissist.

It’s embarrassing to even think I’d want to read the same thing that had been touched by some vapid twonk.

Sigh.

So I went ahead and got the much older version, that was free of such insane defacement.

Boeing 777-300 vs Apple charger

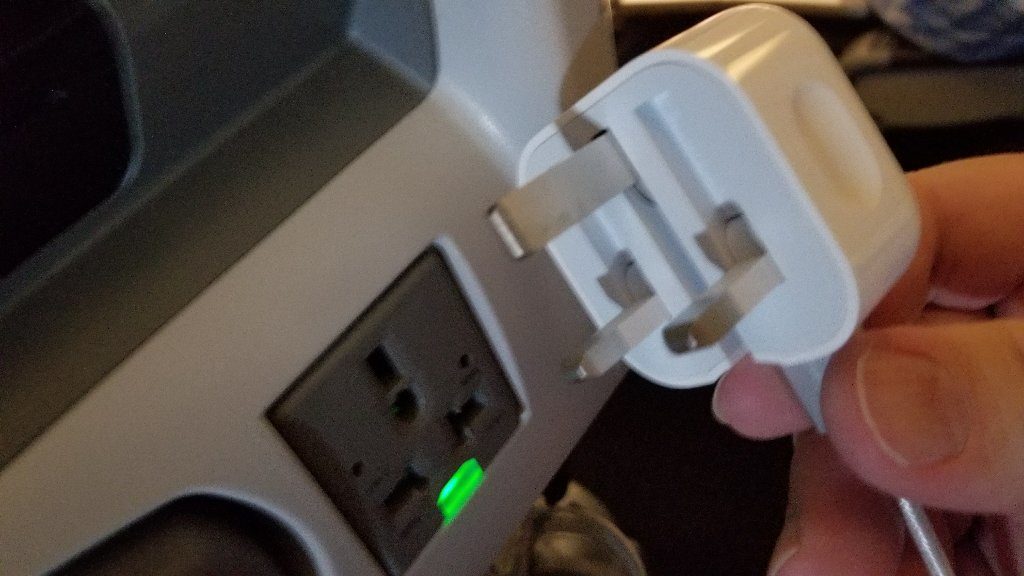
So here I am, flying at 27,000 feet over Japan on the way to the United States of America for work, and I log on to the Panasonic in flight WiFi and thought I could charge my phone and catch up on emails.

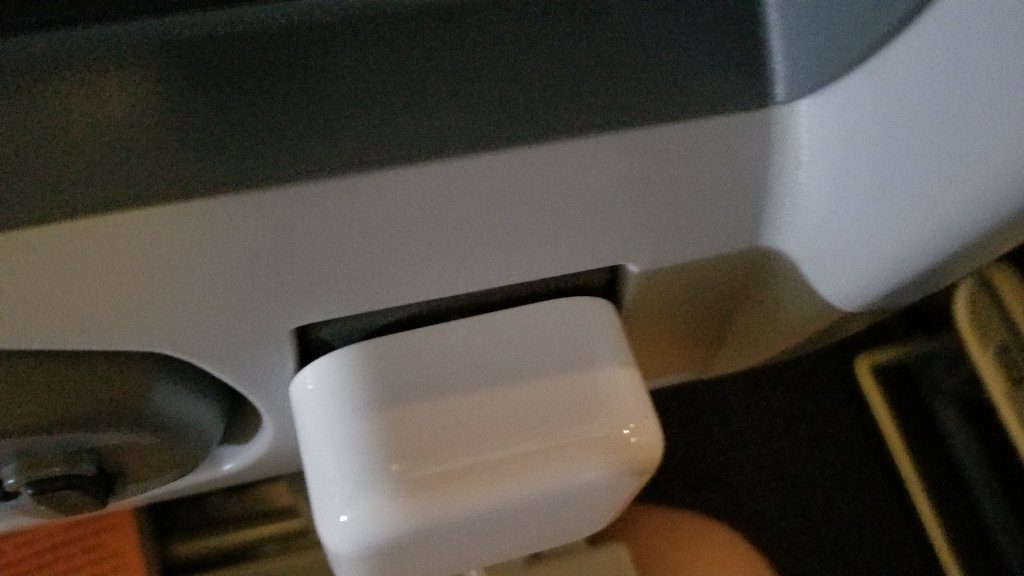
Buy guess what? The most popular single oem charger sold in 220v regions doesn’t fit the power socket. Sigh. This is the kind of crap why I have to travel with a bag of cables, adapters and batteries.
Don’t get me wrong, it’s amazing to be able to do this kind of crap on a plane, but.. damn as always it’s the last mile where tech always falls down.
Just like RIM couldn’t grasp that the biggest market for phones with keyboards was teenage girls, you need to test your damn stuff on popular uses, edge cases are just that.

BoxedWine

Not this kind!

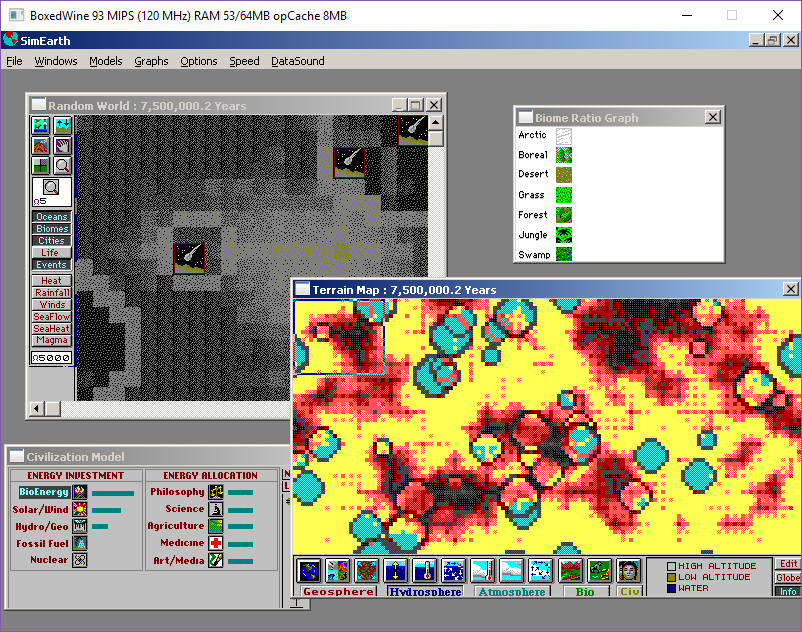
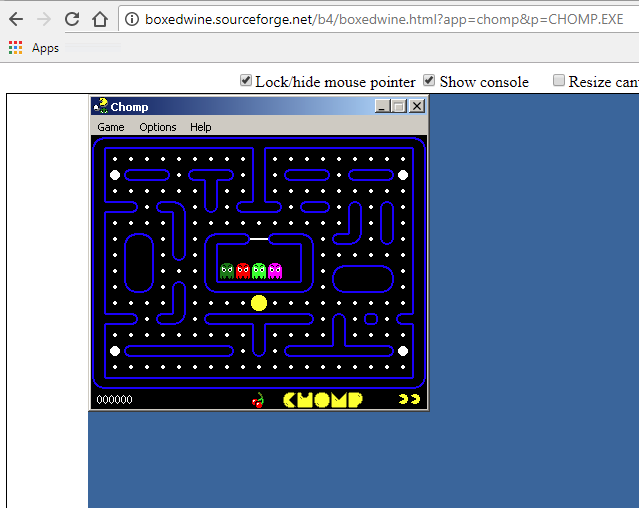
I got a tip in another post about this fantastical project, boxedwine!  It’s Wine + a 386 processor emulator, and it’s been targeted to SDL.  What does this mean? Wine on Windows!

Sim Earth for Windows 3.0

I went ahead with one of the oldest Windows games I have around, SimEarth, for Windows 3.0.  I don’t have Balance of Power, although I guess I may procure a copy one day.  Anyways it’s Windows in it’s 1990 glory 16bit, 286 protected mode, and sure as heck won’t run on Win64.  Oh sure you can run this on MS-DOS + Windows, but where is the fun in that?

Now that’s all good fun, sure Wine can run stuff, sure, but it’s still wine.  Well remember all that noise about android running Wine?  Yeah, well here we go.

Wine + x86 emulation +SDL in javascript!

Here we go.  Games, and the BoxedWine project page.   And yes, it can run stuff like Quake 2, and other far more intense applications.  Just like Wine.  It’s really great stuff, check it out, if only in a browser.

If you want to run ancient Win16 stuff in a pinch, it may actually run.  I had issues with win87em.dll stuff, but just like Wine it’s a moving window of compatibility.

Microsoft C KnowledgeBase articles online

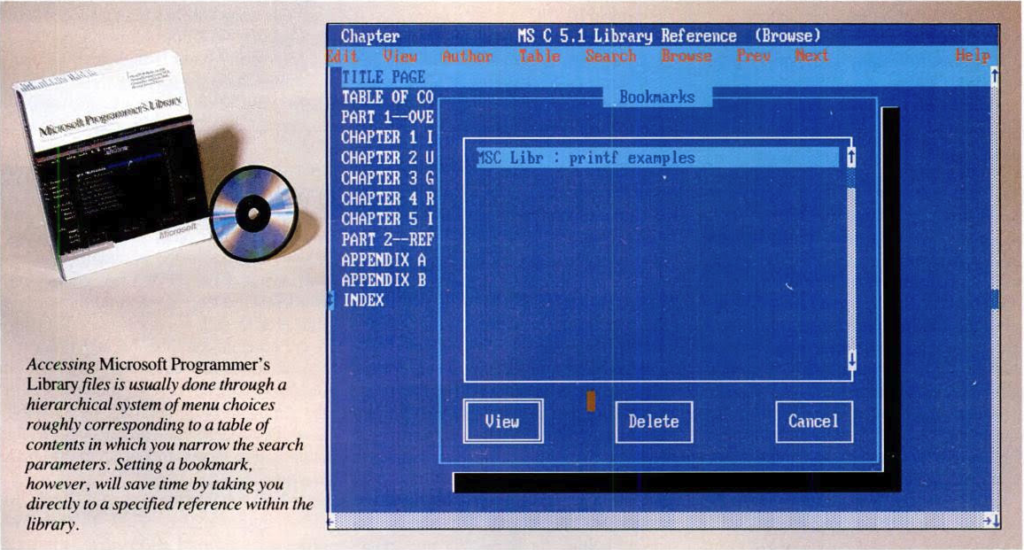
PC Mag, January 1989

It’s weird I was discussing putting this online in a more human readable format, and then  Jeff Parsons over at the incredible full system emulation in javascript site, pcjs.org just did it.

As you may or not be aware of, Microsoft hit it big as a computer languages company, before they added operating systems into it’s portfolio.  And for some weird reason after the whole OS/2 divorce thing, someone decided that everything that had been painfully learned in the earlier eras should just be expunged from history.  Which is a real shame to anyone interested in Basic, Fortran, Pascal, C and MASM.  Years ago I had gone through the steps of extracting the text the only way I could figure out easily, by writing a simple TSR that would dump the contents of the text video buffer, and write it to a file, then press the page down key, and keep repeating the process. The end result being that I had then dumped the MSPL aka the Microsoft Programmer’s Library.  I had put the text into an archive, aptly named Microsoft_Programmers_Library.7z, and pretty much used grep whenever I wanted any information, and left it at that..

It’s really cool to see it slowly transitioning to more useful information.  You can read Jeff’s article Corporations Are Crappy Archivists about his quest for seemingly simple information about ancient Microsoft mice, and the archive of KB’s for Microsoft C.

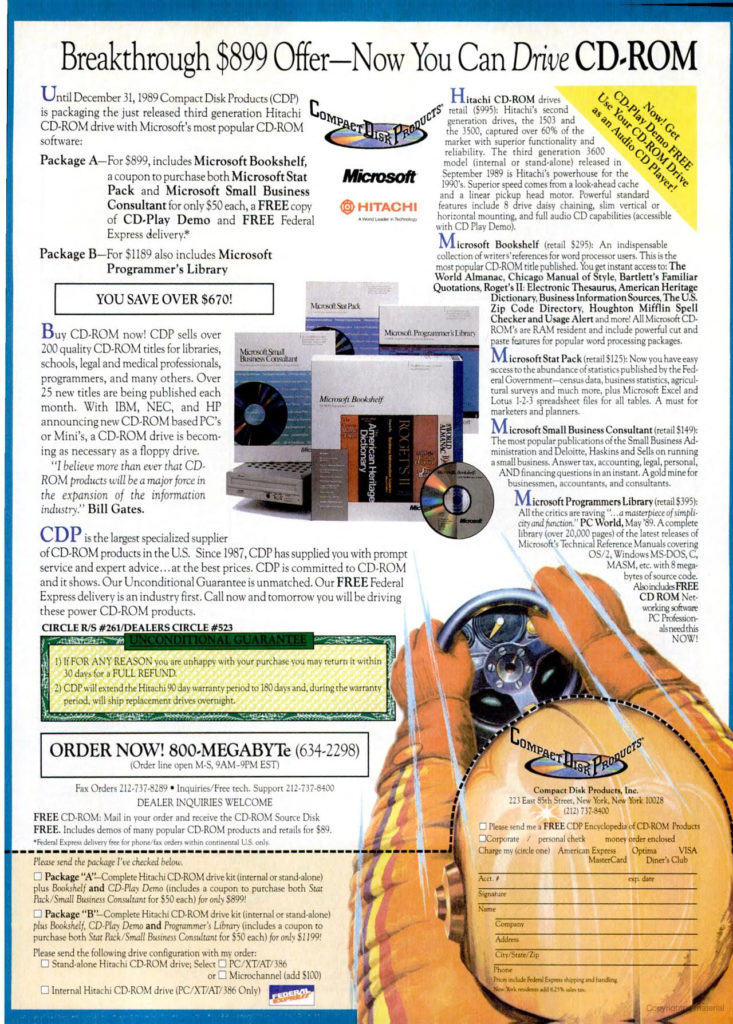
One thing that is annoying is that information on CD from the late 1980’s seems to be darned near impossible to find.  I know that each generation of machines until about 2005 was exponentially larger than the previous one (post 2007 we hit the iThing world, along with most machines being ‘good enough’ for day to day usage).  I know this ad may seem insane, but Microsoft really was trying to push people to CD distributions.  As we all know that internet thing didn’t quite tickle their fancy.    Did they ever put resources like this online?  Like on BIX or Compuserve?  It seems like an ideal resource.  But I was a kid, and didn’t have that kind of money.

Awesome CD-ROM collection and drive, starting at a mere $899!

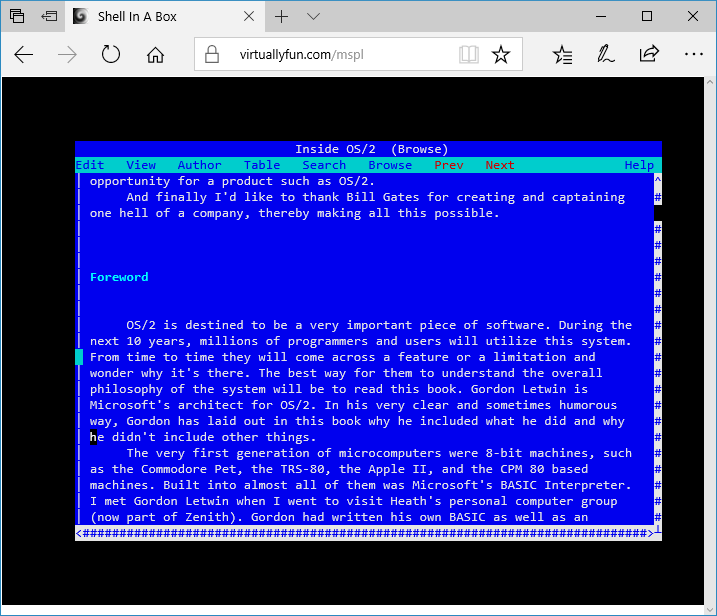
So in the interest of a bad idea, here is MSPL, aka qemu/curses in action.

Oh my god, what I have I done!?

Well as an addendum I thought it’d be cool to put MSPL online, via shellinabox.  First off I needed a 5MB MS-DOS disk, basically enough MS-DOS too boot up, run smartdrive, idle and the CD-ROM driver, along with the minimal MSPL install.  And to button it up, I added a reboot.com from the autoexec, so when you exit it’ll reboot the VM.  Great.

The reboot command was input via debug, as it’ll let you assemble code directly.  Although it isn’t a MACRO assembler, so you have to know exactly what you are doing.

DEBUG RESET.COM
A
XOR AX, AX
NOT AX
PUSH AX
NOT AX
PUSH AX
RETF
(return on a line by itself)
RCX
9
W
Q

And with that saved, now I have to setup Qemu.  Since I’m taking the shellinabox approach that means I need something text mode, and I was thinking this was light weight. Qemu has a curses output so that’ll work.  I set it up to use qcow2 and a backing store image so that way every forked user doesn’t eat 5MB of disk space, it’s more like 100kb.

#!/bin/sh
set -m
PID=$$
mkdir /tmp/$PID
cd /tmp/$PID
qemu-img create -f qcow2 -b /usr/local/mspl/MSPL.qcow2 MSPL.qcow2
qemu-system-i386 -m 4 -cpu 486 -hda MSPL.qcow2 -cdrom /usr/local/mspl/Microsoft-Programers-Library-v1.3.iso -curses -no-reboot
cd /tmp
rm -rf /tmp/$PID

Then to tie it into shell in a box, it’ll just need the flag:

-s /mspl:nobody:nogroup:/:/usr/local/bin/mspl.sh

and this will run it as nobody, and kick off the above bash script.  Now that’s great and all, but what about stale/abandoned sessions?  I wrote this quick script to clean them up.

#!/bin/bash

FIND=”find /tmp -type d -regextype sed -regex ‘.*/[0-9]*’ -mmin +30 | sed ‘s/\/tmp\///’>/tmp/kill_out.txt”
eval $FIND
while read process; do

KILL=”kill -9 ${process}”
eval $KILL
RMDIR=”rm -rf /tmp/${process}”
eval $RMDIR

done < /tmp/kill_out.txt
rm -rf /tmp/kill_out.txt

So it’ll find numerical directories that are at least 30 minutes old, kill them and remove their directory.  Probably very dangerous to run, but it’s isolated so Im not too worried.  Then just have root add that script to it’s crontab, and run it every minute, and it’ll kill the old stuff hanging around.

I’ll add a video later on how to use MSPL via this setup.  And maybe I’ll rig something to have RDP access as well, depending on how I’m feeling.

8 bit boy & JS-DOS

A long while ago I had combined both 8bit boy & a JAVA port of DOSBox for a run in your browser extravaganza featuring a Russian version of Windows/386 and tetris (along with other Russian adapted games).  But time moves on, and flash apps fall out of favor, and well Oracle did their thing and Java is basically dead in the browser.  I had been trying to go with a javascript solution for a while, but js-dos looks better than the last few iterations.

However I haven’t figured out how to boot into a disk image, and attempting to loop to loop causes it to hang.  So I’m stuck with a simple zip of tetris and using the newer 8bit boy javascript port to hammer out some MOD’s of various theme music.  It’s not perfect but it’s better than being dead, which is where it was before this.

You can see it here.

I though this same tech would be a great way to take my GCC 1.27 build of DooM, and shove it in DOSBox and get it out into the world.  Although its far too slow for me, but it could be this crap laptop.  (my new one should be here in 7 days, but I have to travel again in 5…..).  I had also updated my DJGPP cross project to include 1.27, and rename the v1 as gcc_v139 to at least reflect what it is.

You can check out this super early GCC compiled version of DooM here.

I’ll have to try to convert over all I can.  I hated having all this stuff basically configured, but then thanks to SUN going bust, and Oracle being Oracle it all got screwed over.


What is a VLAN (part 6)

WIth Windows NT installed, it’s time to look at it on the network side.
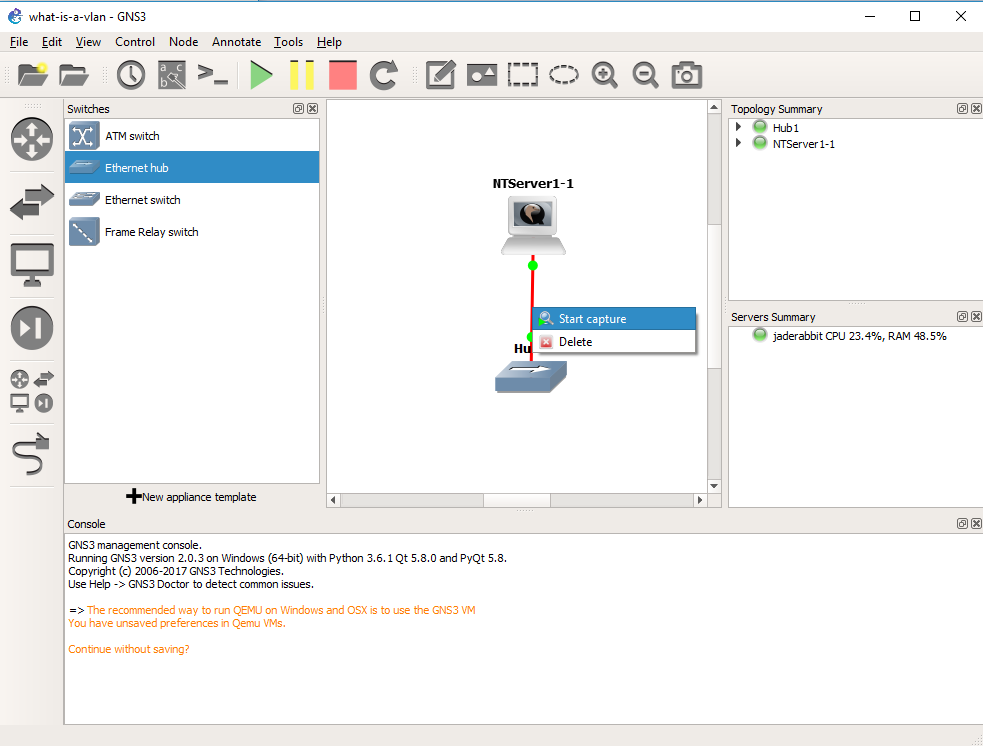
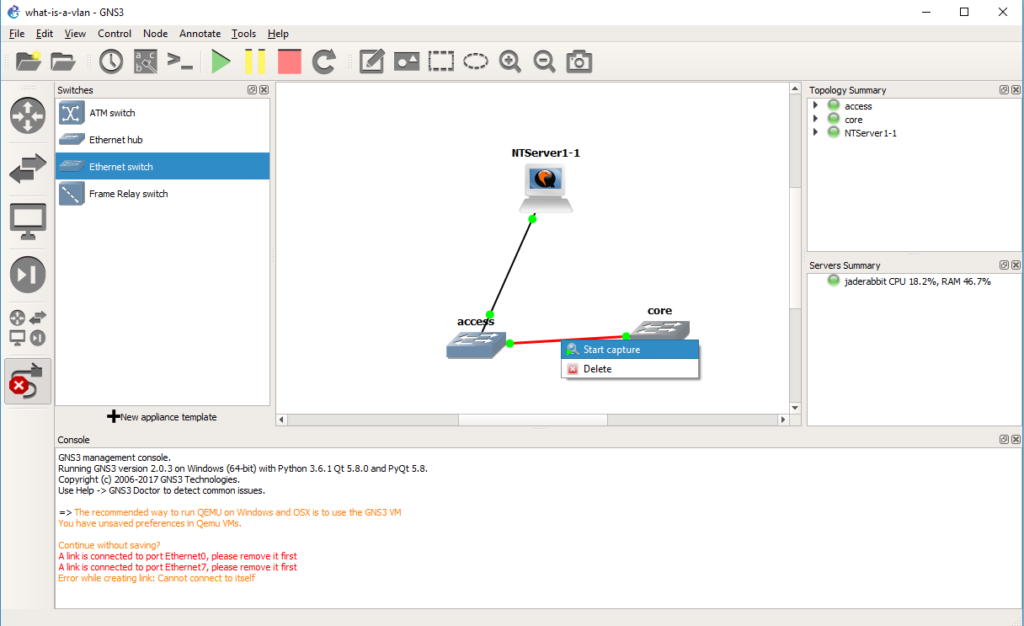
The killer feature of GNS3 is that we can inspect traffic everywhere we draw a connection.  So simply right click on the connection from the Qemu VM to the Hub, and you can start a packet capture.
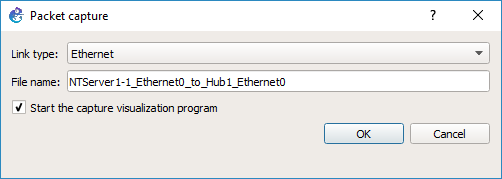
GNS3 will then prompt what the link type media is, in this case it’s Ethernet, and what the link name is.  After hitting OK, it’ll then start WireShark on the virtual link.
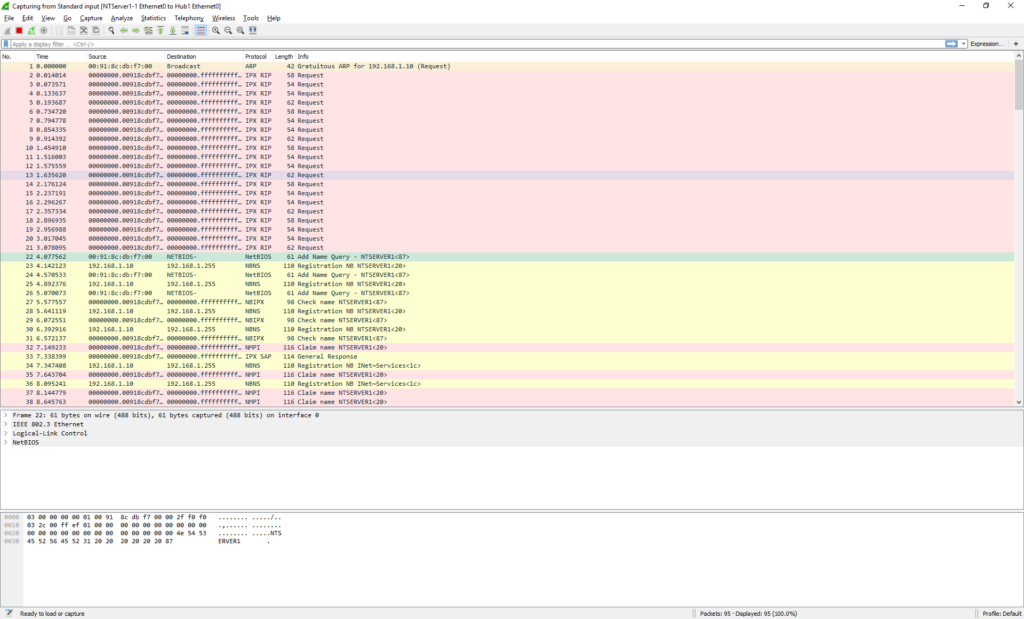
And in no time we can see the NT machine broadcasting on the network.  OK everything is looking fine.

As you can see our packet is an 802.3 Ethernet packet, with a LLC header, and a NetBIOS packet.  This is what we are expecting as the connection to the hub is ‘raw’.

Now that we have verified that we can connect to the network and capture, we can close Wireshark.

We then should right click on the link, and tell it to stop capturing.

OK, now what about VLANs?  Let’s start with a simple lab.  We are going to get rid of the Hub for now, and add in two switches.  One switch will be our ‘core’ switch, the other will be our access switch.  We will then put our PC onto the access switch, and then setup an 802.1q trunk between the two switches, and then observer the NT broadcase traffic in the trunk so we can see the VLAN tag in action.
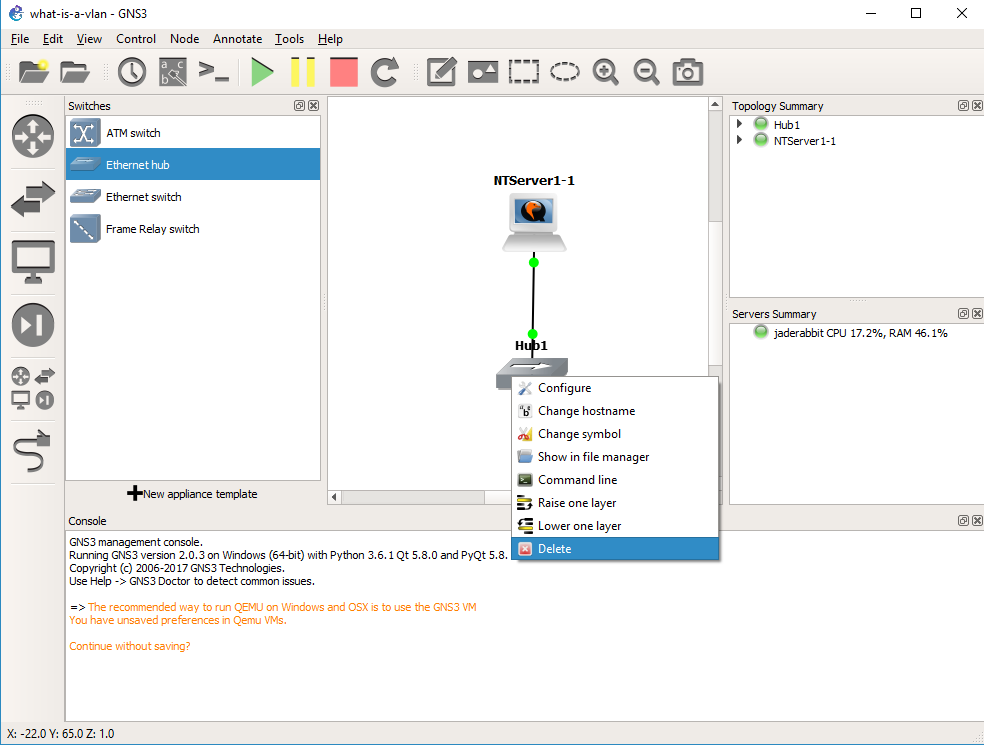
Right click on the hub, and delete it.
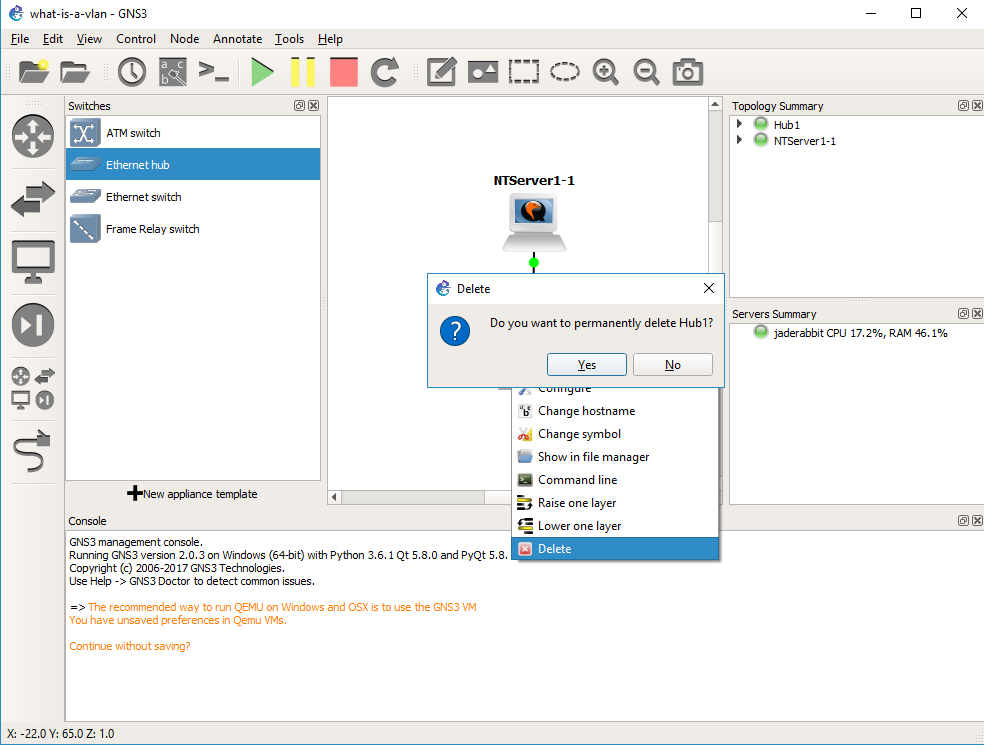
Yes we do want to delete it

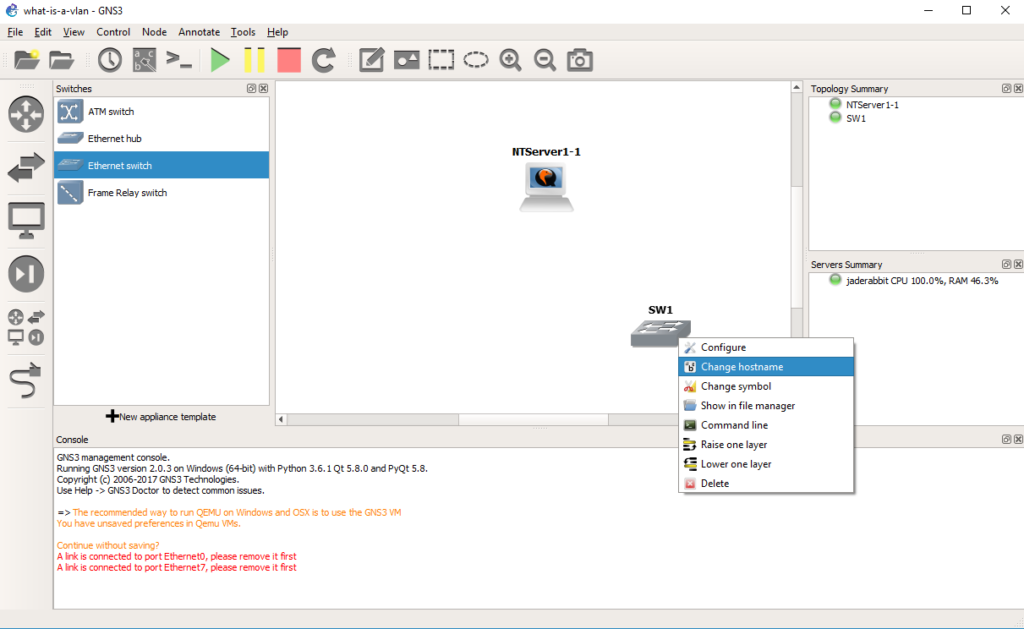
Drag out a switch, and then right click and rename it to core.
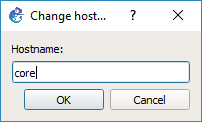
Now we are going to configure the core switch.
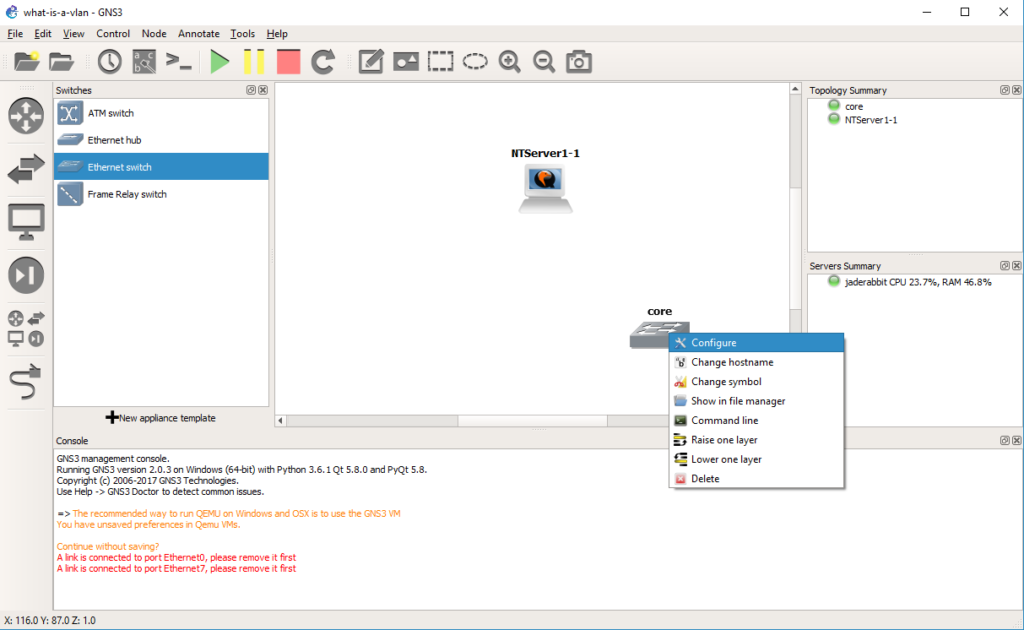
Right click on the core switch, and choose configure.
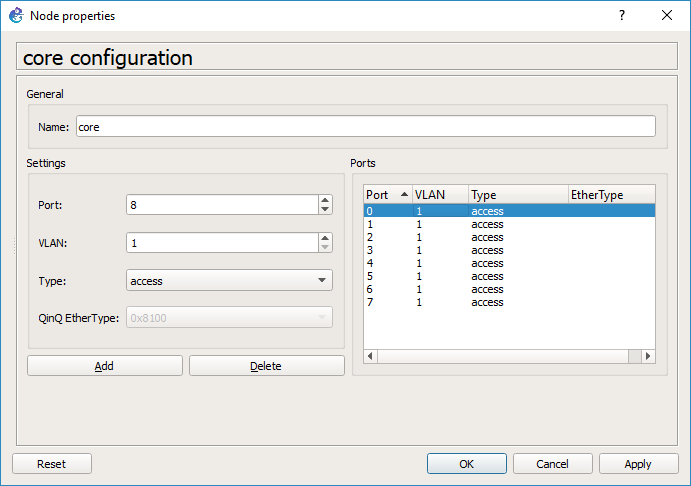
By default every port is on VLAN 1, and is a port type of ‘access’.  You would typically connect end devices like servers to access ports.  I probably should have deleted them all, but since we are going from my session I deleted ports 0 & 1.
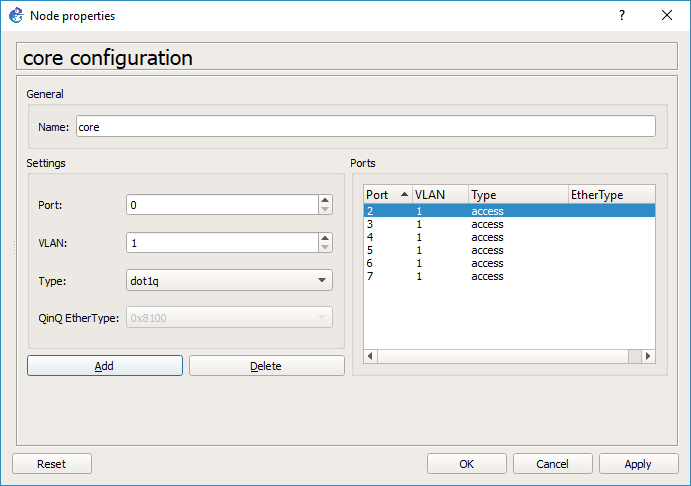
Now I’m going to add port 0 with a native VLAN of 1, but a type of dot1q. This port will be used to connect to the access switch.
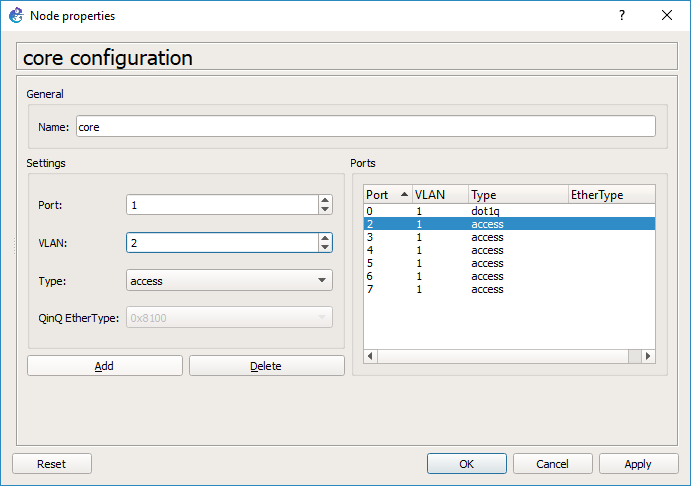
And then port 1 will be an access port on VLAN 2.  Hit OK and it’ll close the window.
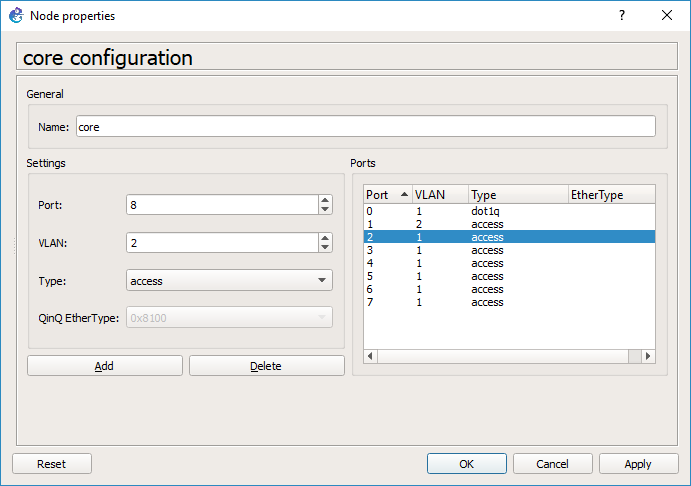
And we are good to go.

*HOWEVER* this is a source of some confusion at least for me.  Go back and right click on the core switch, and look at the ports.  GNS3 for me changed the port numbers so it did not preserve my port choices, however there is still an access port on VLAN 2, and an 802.1q port.
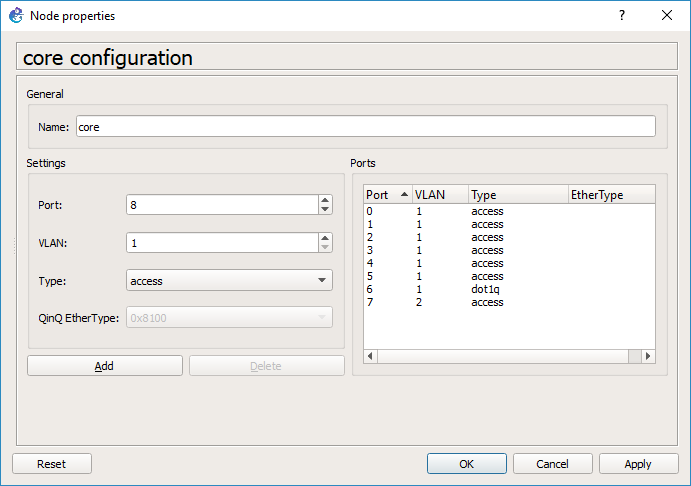
As you can see on the core switch, port 6 is now the dot1q trunk port, and port 7 is the VLAN 2 access port.
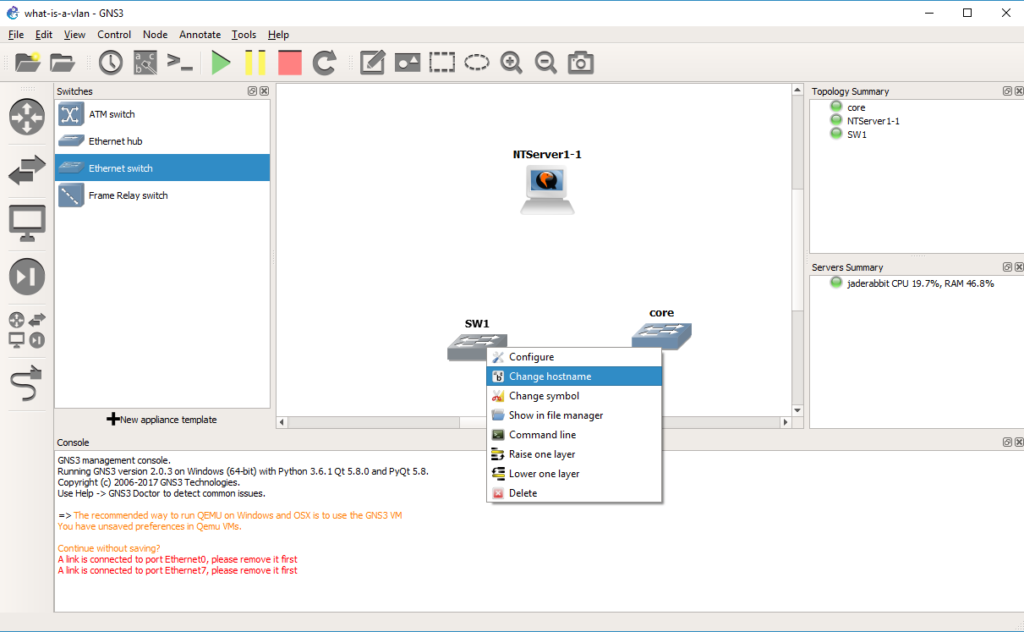
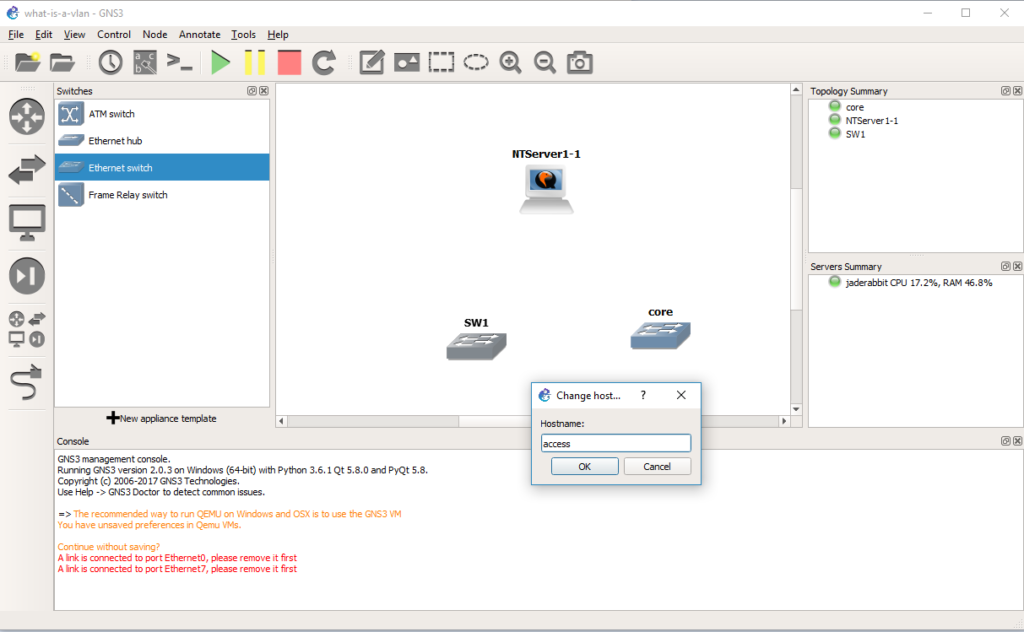
Add in a second switch, and change it’s hostname to access
Now let’s configure this switch the same way we configured the core.
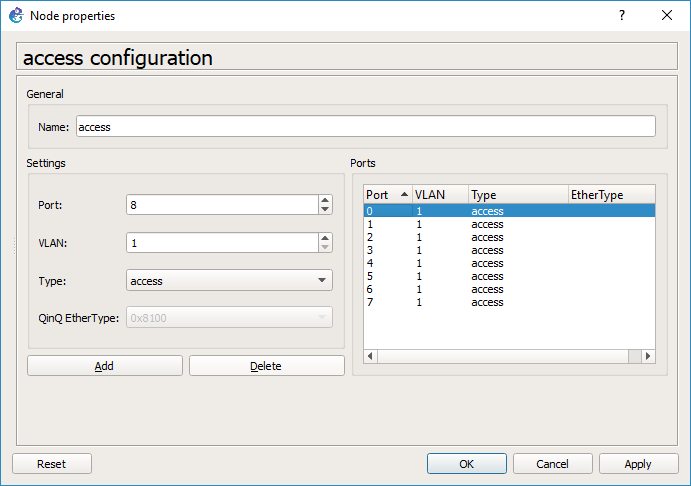
Same steps, in that we delete some ports first
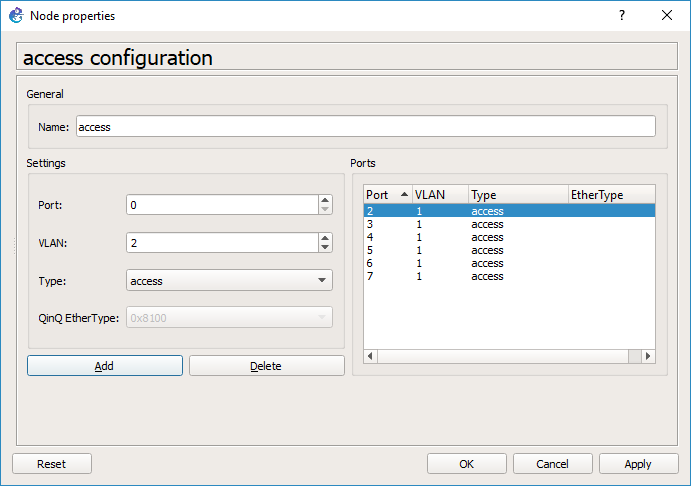
Add in an access port for the Qemu PC on VLAN 2
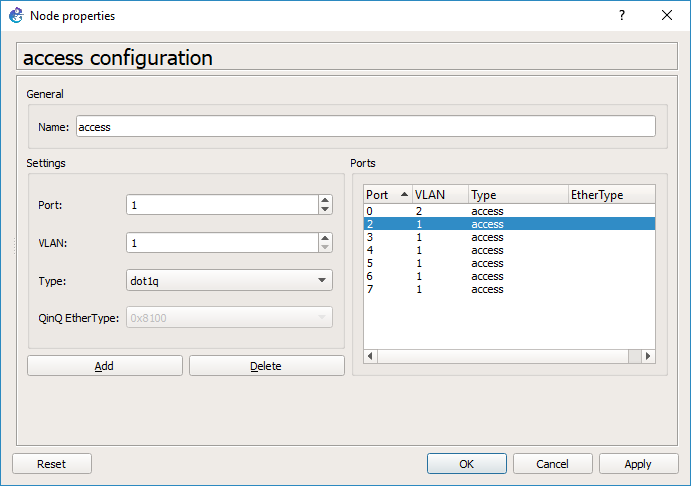
And then add in a port with a type of dot1q, and a native VLAN of VLAN 1.

And our access switch is configured, so you can hit OK.
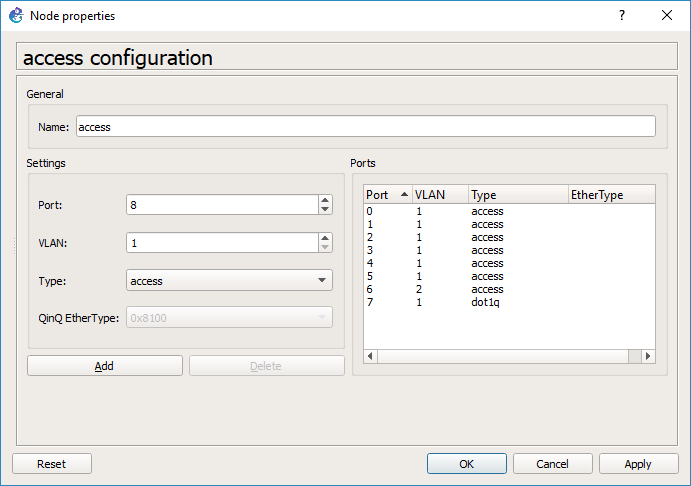
As you can see GNS3 has changed our trunk port to port 7, and our Qemu access port is now port 6.  This should be a bug…
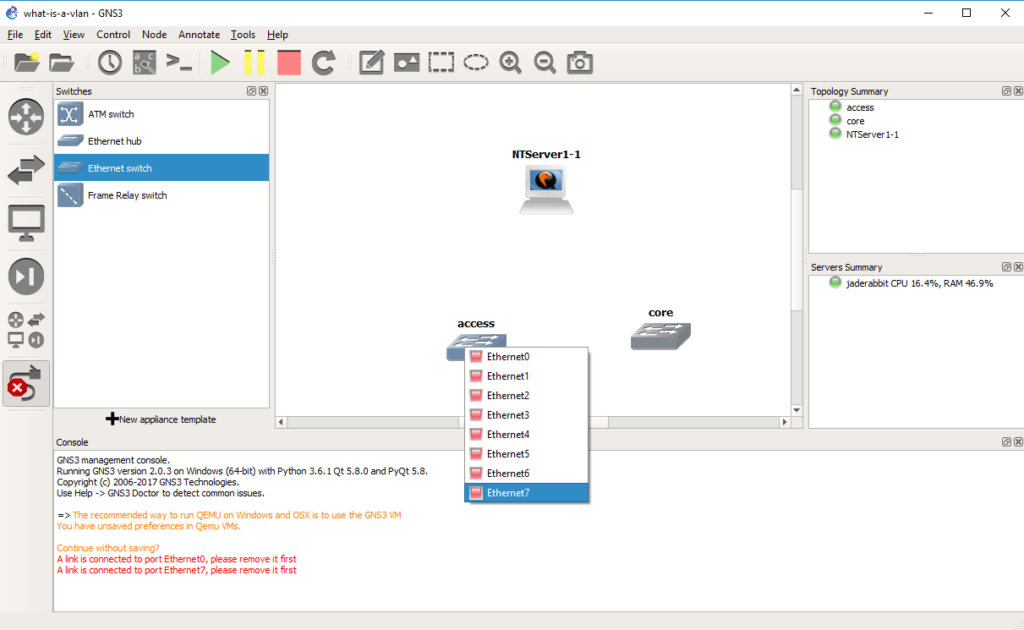
So with this confusion in mind we connect port 7 of the access switch to port 6 of the core switch, by selecting the cable tool, and the appropriate ports.
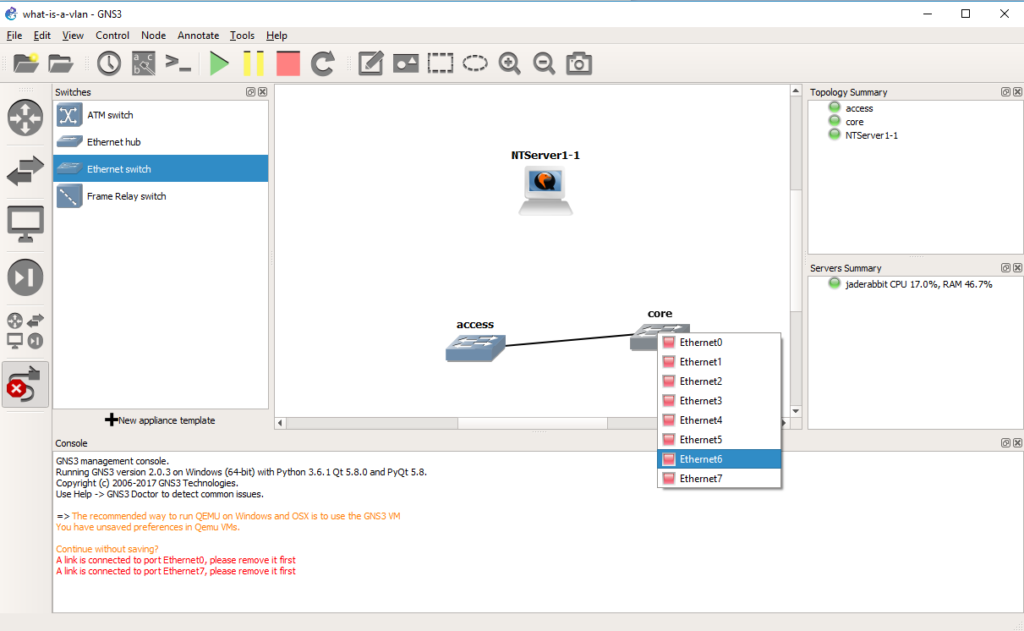
And we will now have connected the two switches.  Now to connect the Qemu PC.
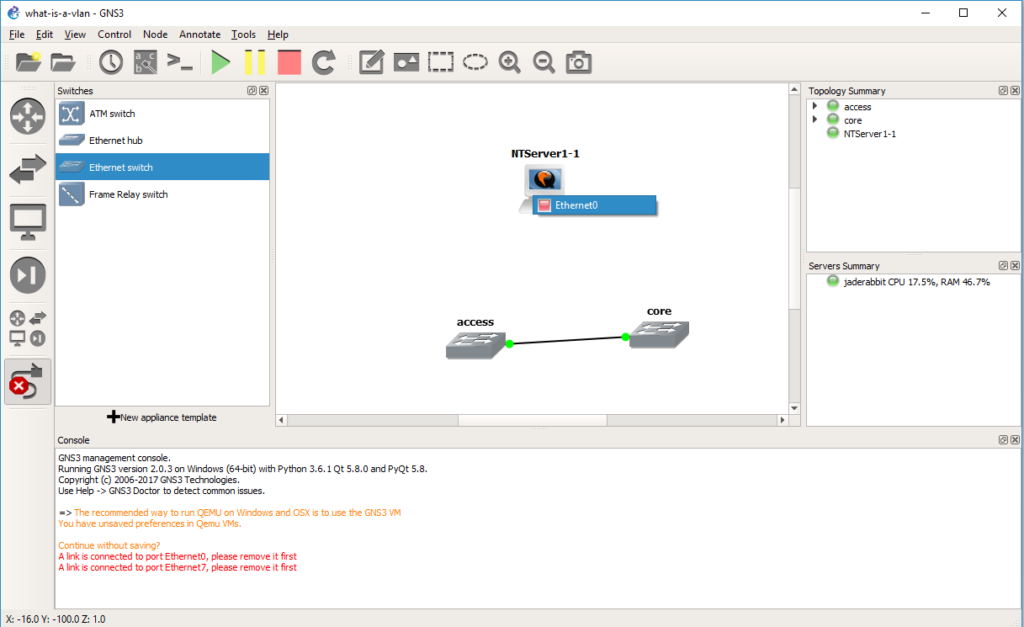
Again using the cable tool, it’s the only port on the Qemu VM
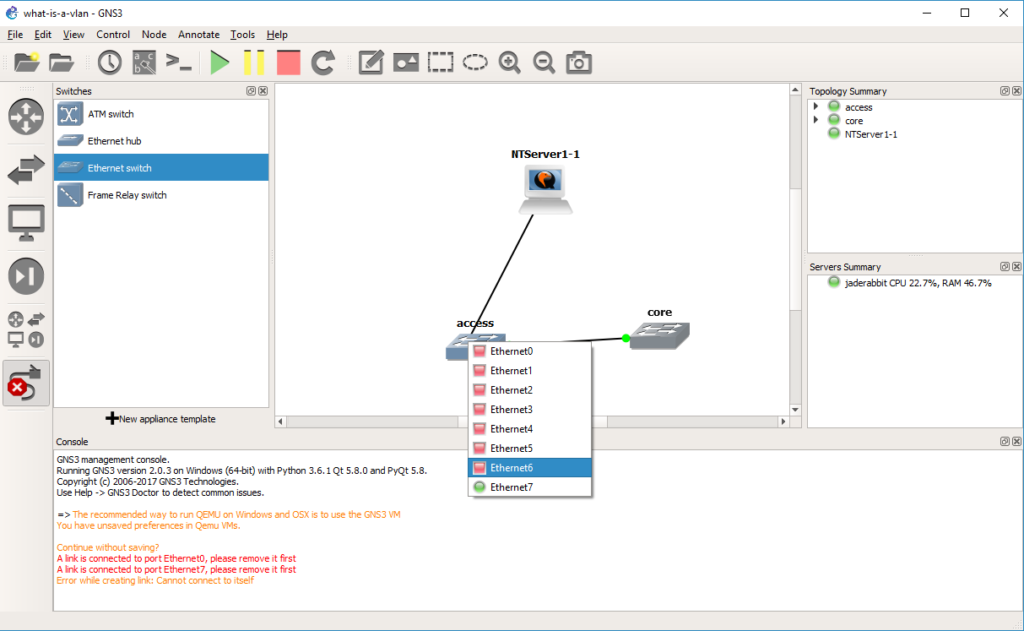
And to port 6 of the access switch.

Now we can start a capture on the connection between the two switches.  Right click on the link and start the capture.  It’ll be the same as last time, the default options are fine, and it’ll start Wireshark.

Now when the NT server sends a packet on the network, the access port is in VLAN 2.  Broadcast packets will be sent to all the other member ports on the network, in this case we do have an access port on the core switch in VLAN 2.  But while the packet is going between switches it needs a way to identify what VLAN the traffic came from, so as you can see from the capture There is now another protocol layer going on.  In this case we have an Ethernet II packet, but now the next layer is the 802.1Q frame, that gives the priority level, along with the VLAN number.  Then the NetBIOS packet is under that.  As you can see it is *NOT* TCP/IP only, but rather any Ethernet frame can be encapsulated in a VLAN, and then across 802.1q links they can be transmitted by encapsulating the packet in an 802.1q header to keep track of which VLAN the traffic was bound to.

But how about data egressing on the other side?
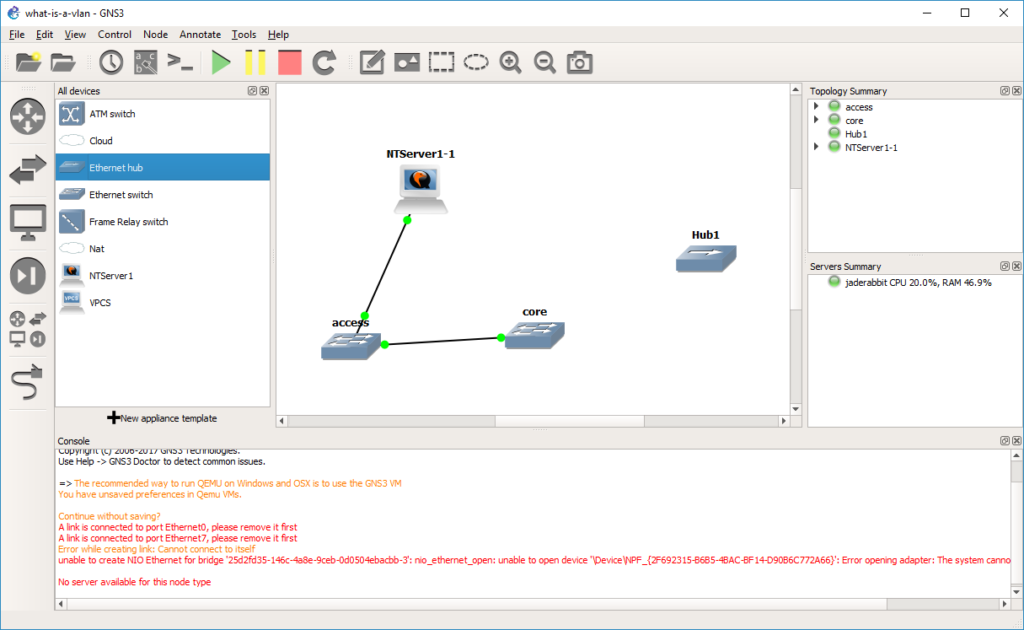
Let’s take a HUB and drag it out to the infrastructure pane.
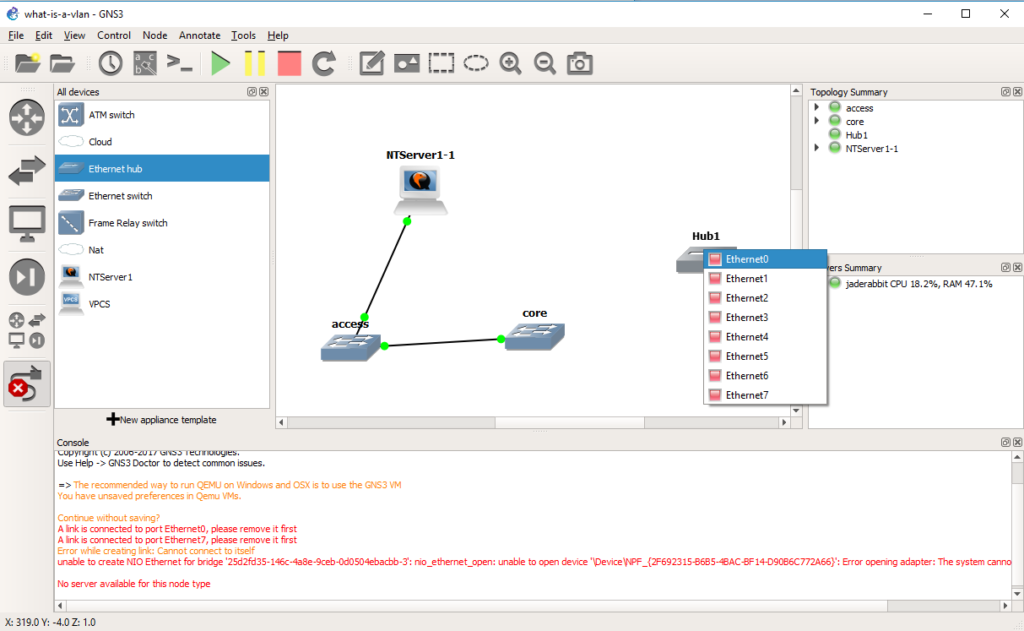
Now we are going to connect that hub on any port to the core switch.
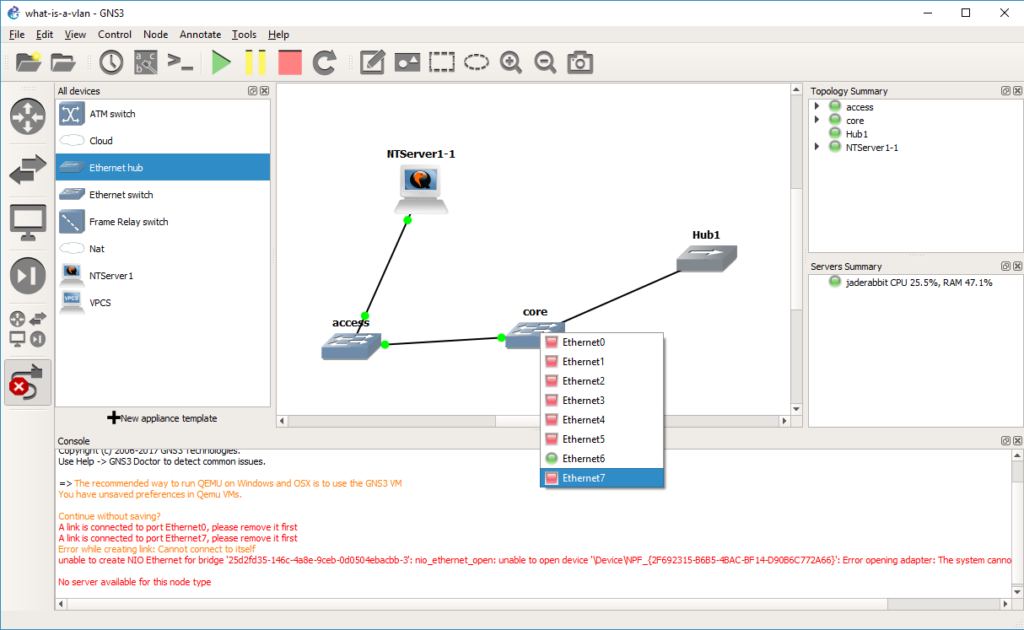
In this case, port 7 was our access port on VLAN 2.
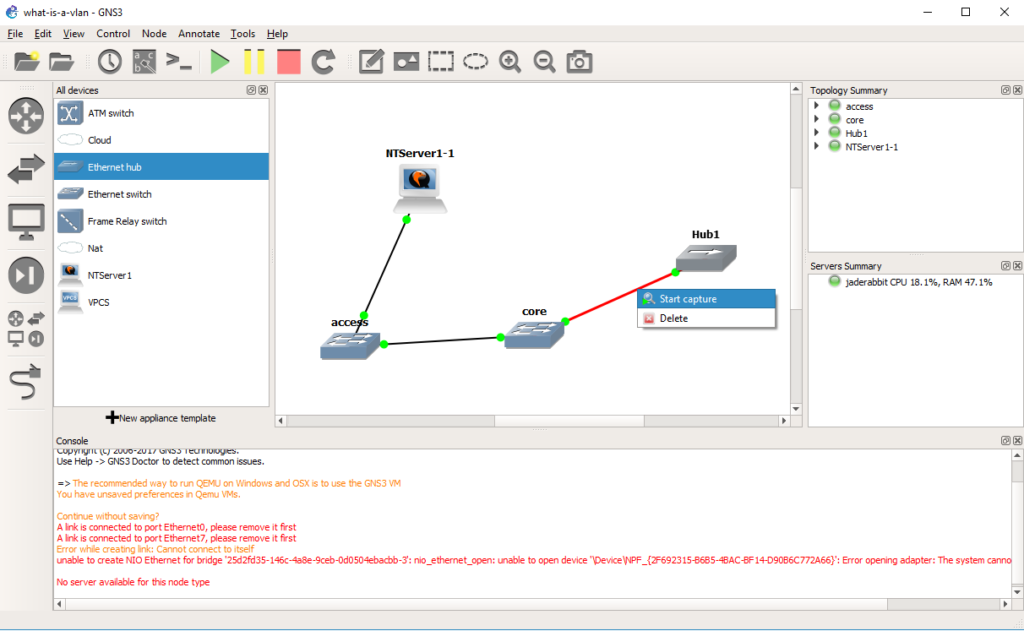
And now we can start a capture on the connection from the core switch to the hub.

And as you can see the NetBIOS arrives on the other side without any 802.1q header, and any machine on the other side wouldn’t even know it’s been through an 802.1q trunk, or that it’s even on a VLAN.

So why use VLANs?  Isn’t it easy enough to add infrastructure for every network as needed?  Sure you *could* but it becomes very costly.  And you end up supporting quite a number of devices.  Then it never fails that you have one user or device in part of the network that doesn’t warrent a good network connection, but when it breaks, like it always does they generate a lot of heat about it.  Just as LAN segmentation is a popular way corporations restrict internal access as they can have firewalls to control traffic entering and leaving each network.  But doing this the old way means that every tiny move add and change will require someone to do something physically making it very expensive to maintain.  VLANS solve these issues by letting you deploy good infrastructure everywhere that everyone can benefit from as they can share the hardware, however with things like QOS, you can ensure that they do not stomp on each-other for the uplinks, but they are isolated in their own VLANs.

And what is the big deal with 802.1q?  Well going back to our VLANs vs using physical switches, if we had 1,000 VLANS on a switch, and we wanted to connect 300 of those VLANs to a single server without 802.1q you would need 300 network cards.  Just as adding another switch would require you to use 1,000 ports to carry all those VLANs from one switch to another.  By using 802.1q to tag each VLAN through the trunk port it lets you use a single physical connection, and appear on each network.

Hopefully this is enough to get you started, both in terms of how to set things up, but what to look for.

What is a VLAN (part 5)

With the textmode setup complete, it’s time to do the graphical setup of Windows NT 4.0

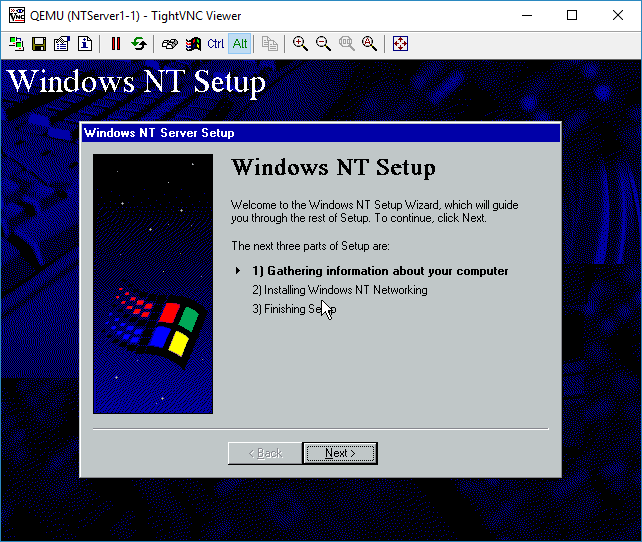
Next

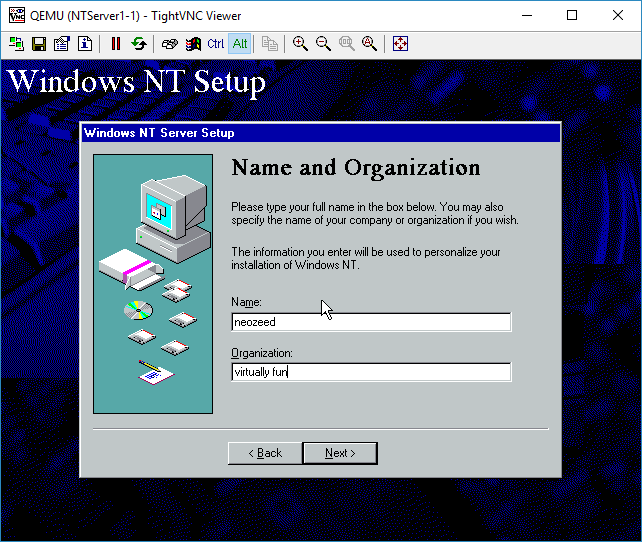
You can use any name/org

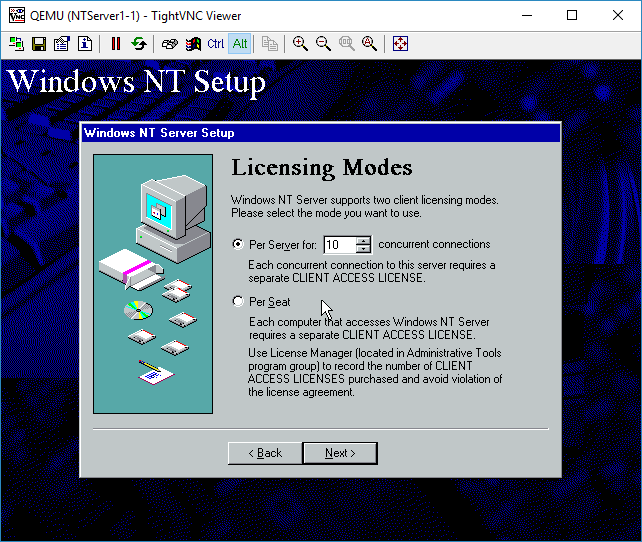
Select how many licenses you have for your NT Server.
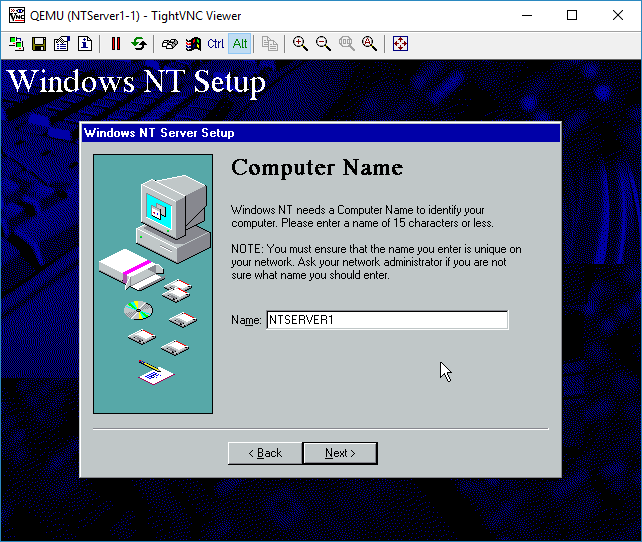
Give the server a name

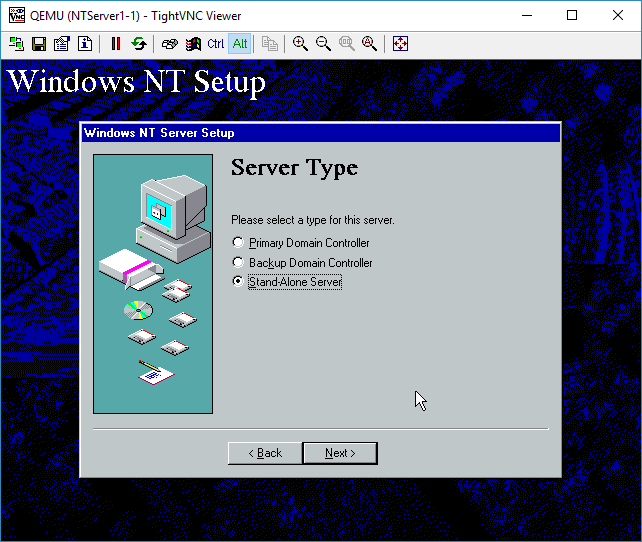
I’m not going to build a domain, so a stand alone server is fine.

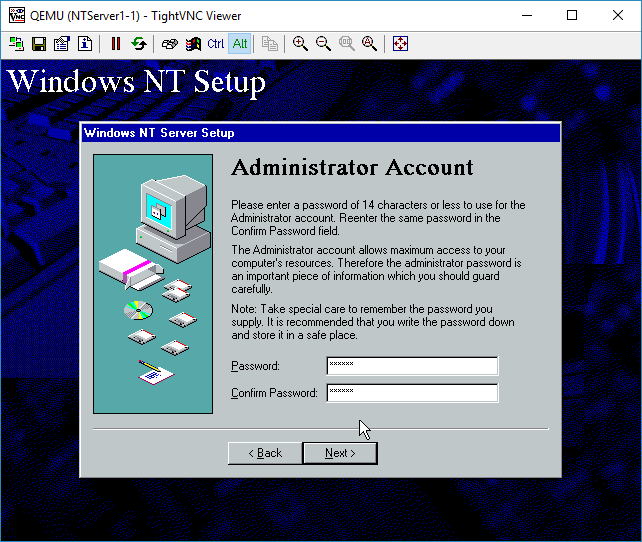
You can give the Administrator account a password if you so desire.

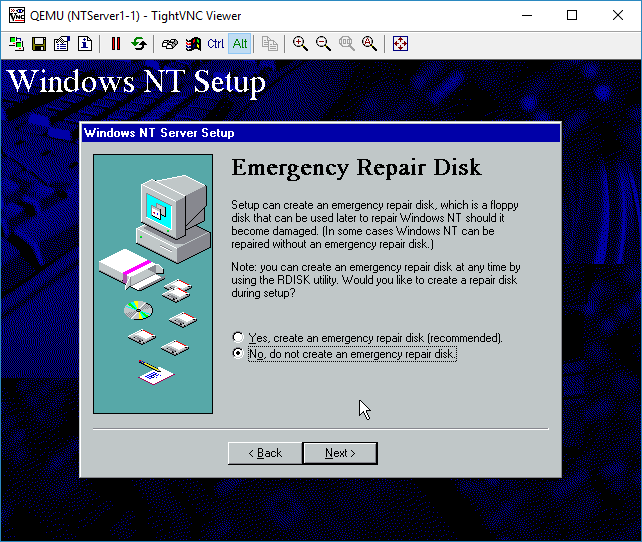
I don’t need any emergency repair disk, as this server is the epitome of disposable.

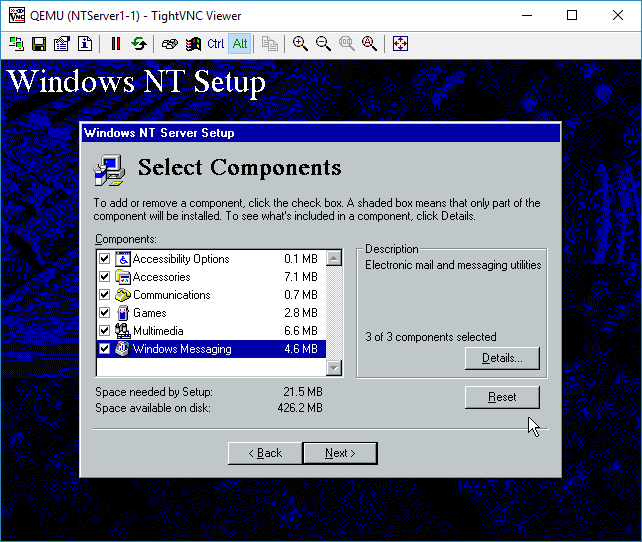
I added all the components.  Again for this test it really doesn’t matter.
Configure the networking

Now for the fun part, we are going to configure the networking.
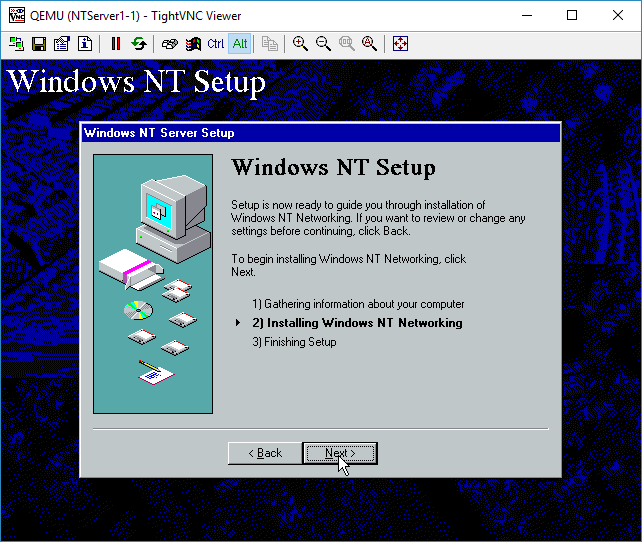
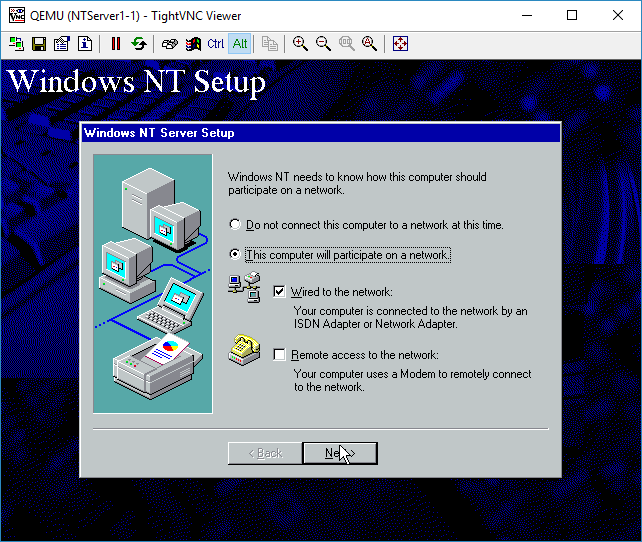
I’m sticking to ‘wired’ networking.  I’ll save RAS for another lifetime.

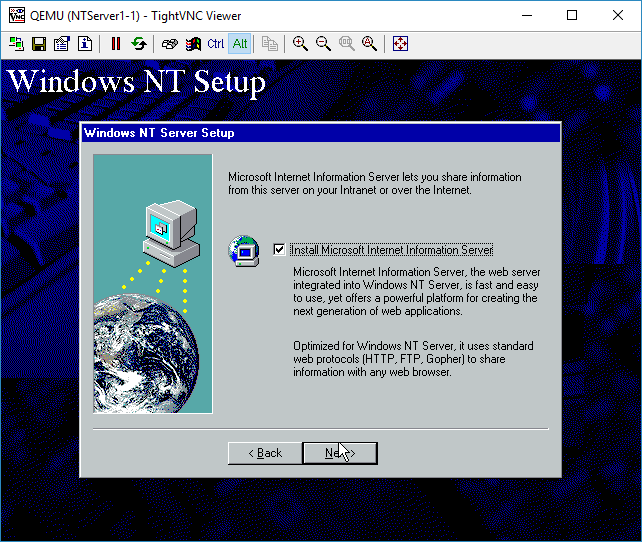
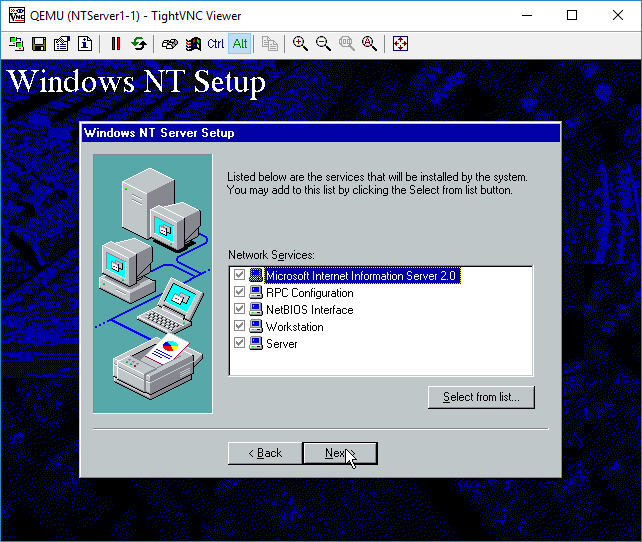
Everyone wants to be a webserver.  Sure why not.

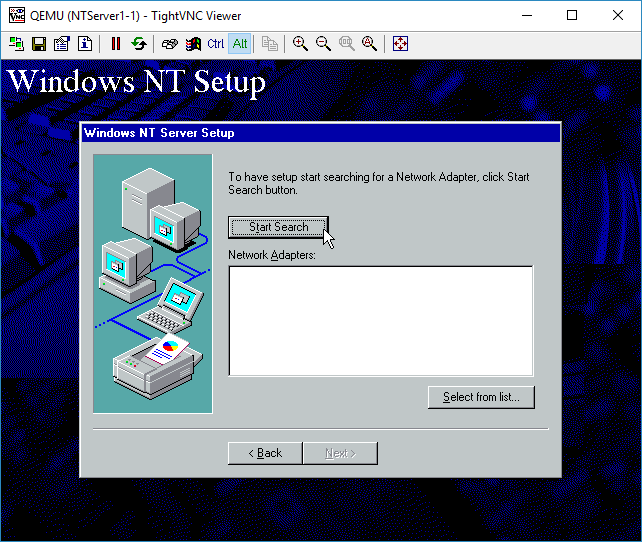
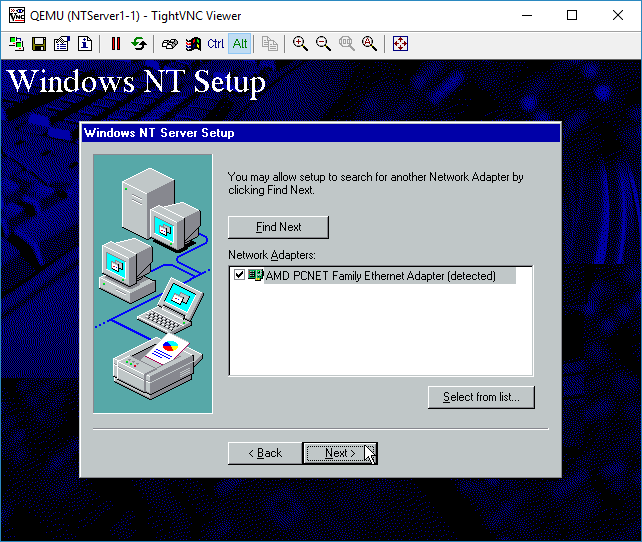
You can either manually select a NIC, or just let it auto-detect.  We are going to auto-detect it though.

And it’ll correctly identify the AMD PCNet card.

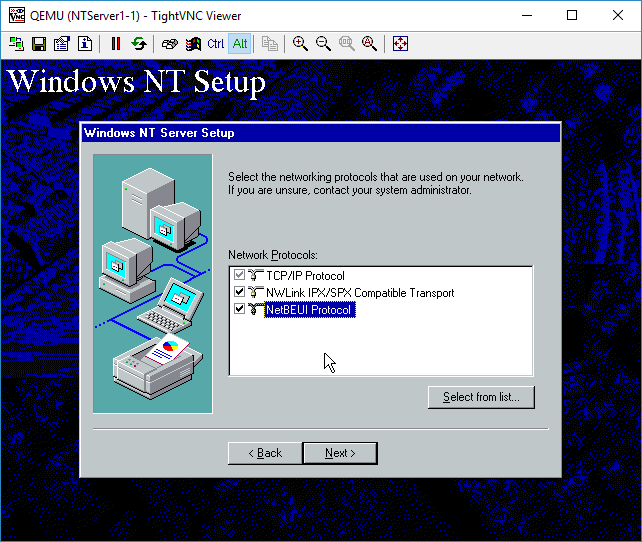
I selected all the protocols available.  I didn’t bother adding other ones like AppleTalk.

Next..

Next

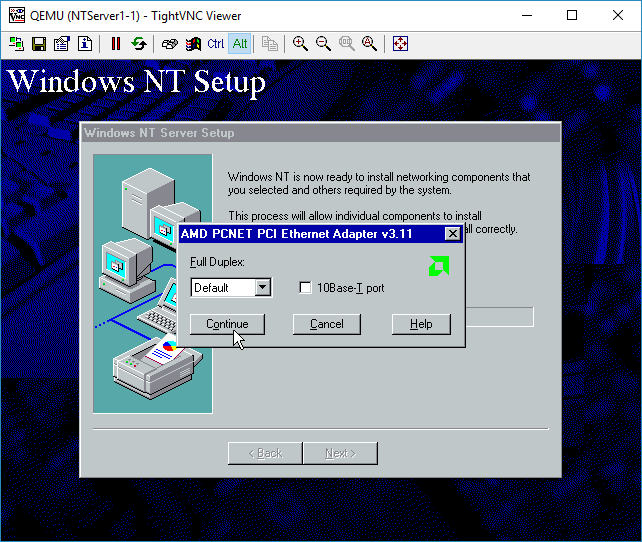
It’ll prompt for the media type and duplex.  The card isn’t real and it’ll work fine no matter what.  I just leave the options alone.

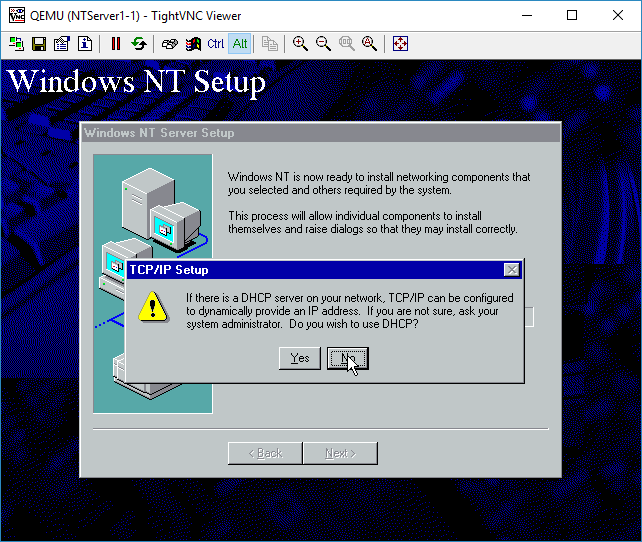
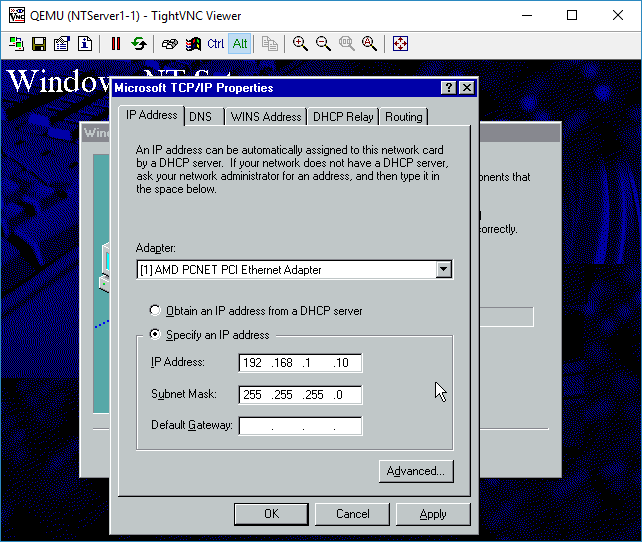
Our network doesn’t have any DHCP server.  Since we are plugged into a simple hub.  DHCP requests will fail.  Let’s give it a static address.  For Advanced people, yes you could wireshark on the wire to observe the DHCP.  We will touch on how to do that later, as I just want to get NT installed .

There is no need for a gateway.

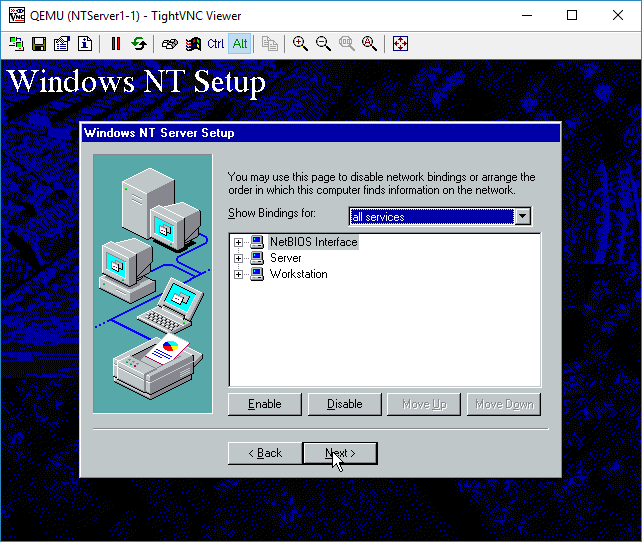
We don’t have any bindings that need adjusting, so you can just hit Next

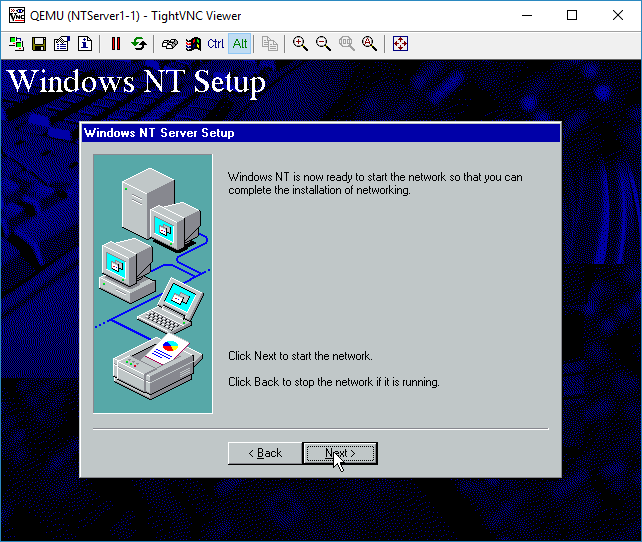
And Next again

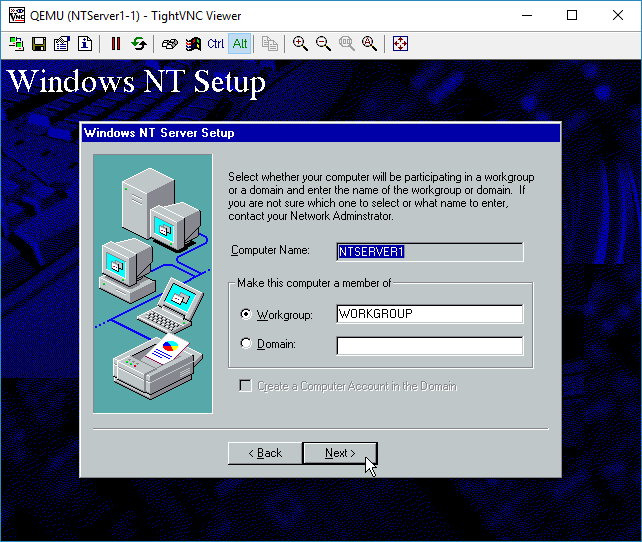
Again, no domain, so run in workgroup mode.

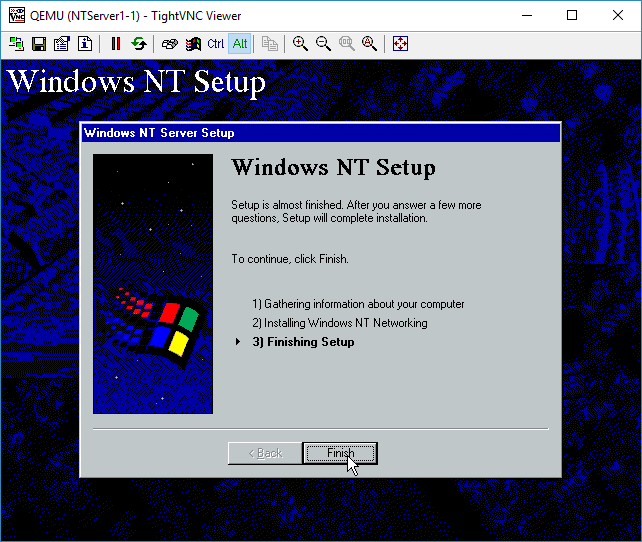
Finish, although it’s far from over.

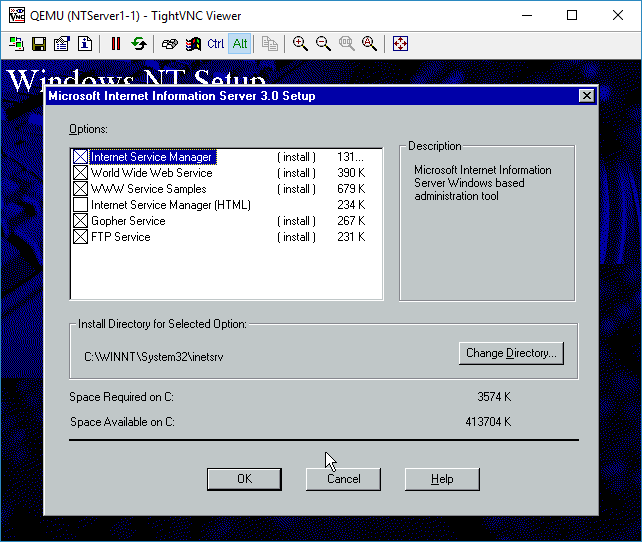
IIS components to install.  I just hit OK for the defaults.

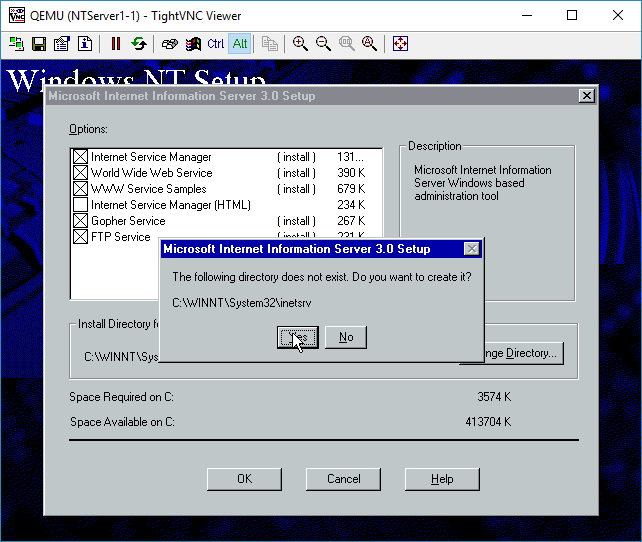
Confirm the creation of the directory

And the child directories

And creating the IIS child directories

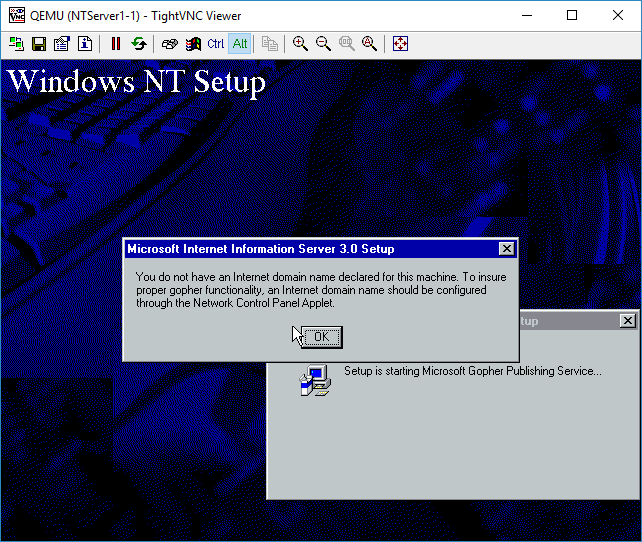
Gopher isn’t happy without a domain name, but I don’t care.

Select your timezone.  Or don’t.  This is from 1996, so many of the timezones are no-longer correct.  Just as DST has changed so many times.  But it really doesn’t matter yet again.

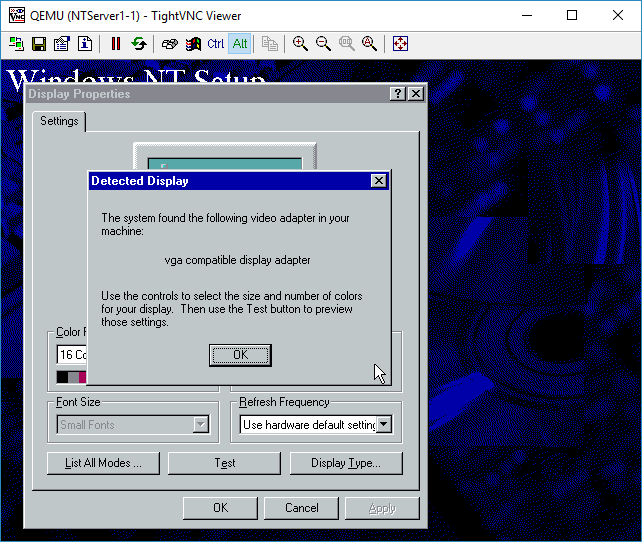
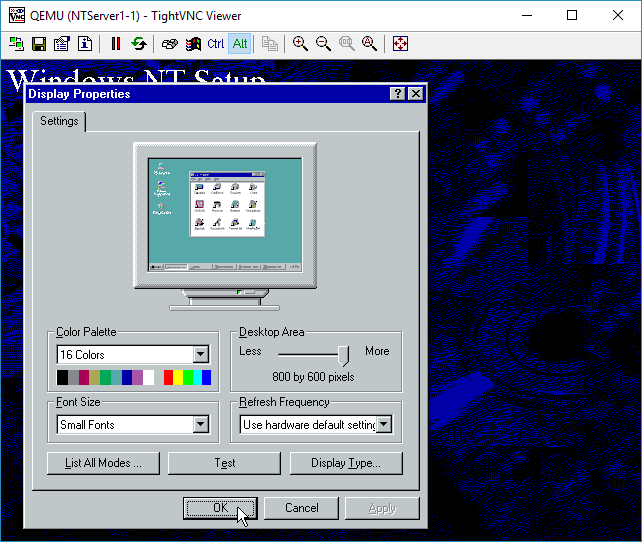
The display adapter is SVGA compatible.

Move the resolution slider to 800×600

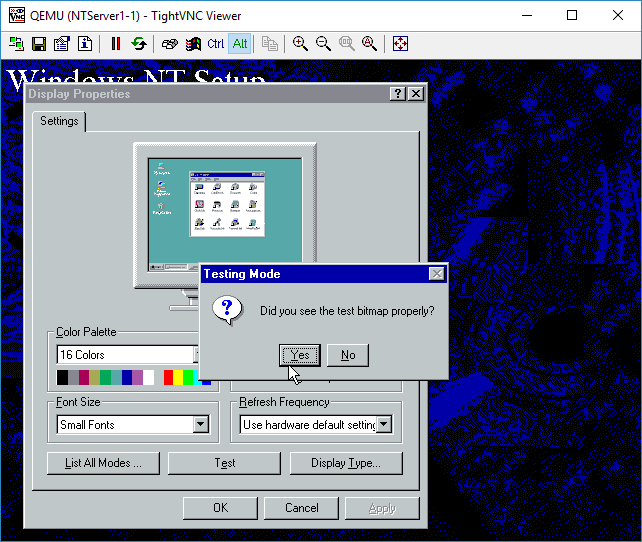
Then hit OK.  It’ll want to test the resolution

Everything looks good

YES I saw the bitmap

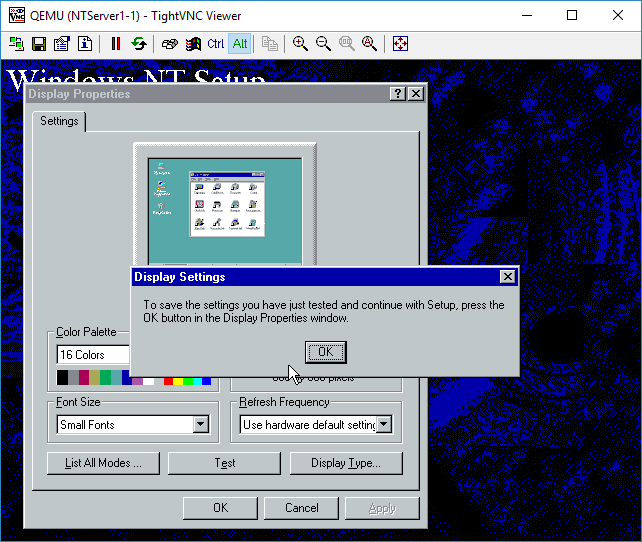
OK

OK to accept the display at 800×600

Files will finally start to copy

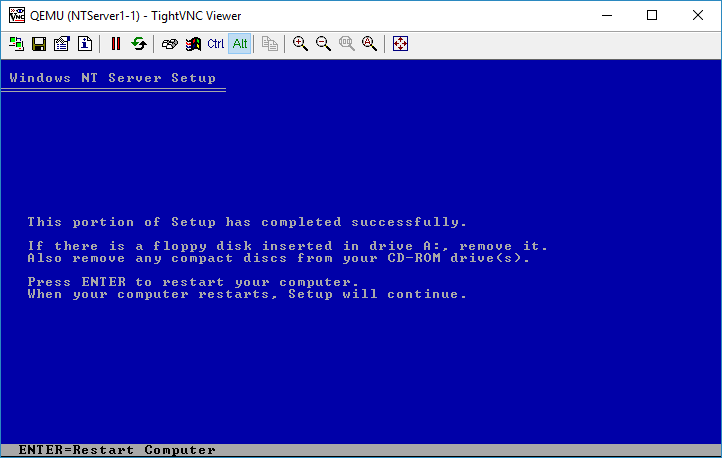
And now we can finally restart are computer.

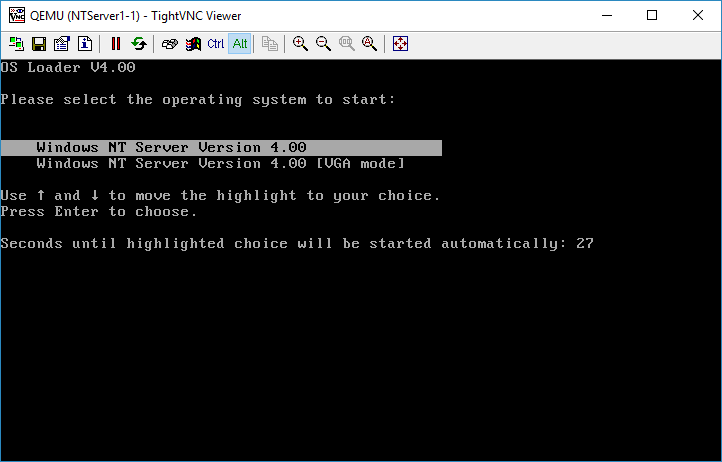
By default the NT Loader will wait for 30 seconds.  You can hit enter to get it to load right away or wait.

But we have now completed installing Windows NT, so we can now move on to capturing some traffic, aka part 6..

What is a VLAN (part 4)

In this post we are going to install Windows NT 4.0 Server into our VM.

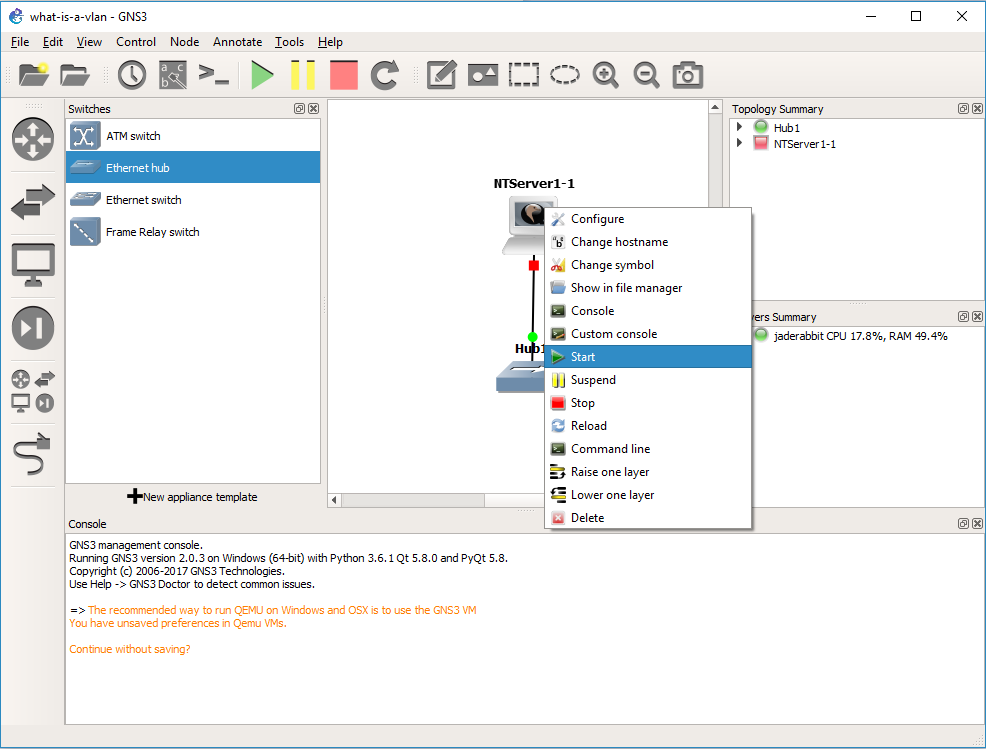
The first step is to turn the VM on.  Simply right click on the VM, and choose Start. The red dot will then turn green.  Although it may appear that nothing is happening we just can’t see it yet.

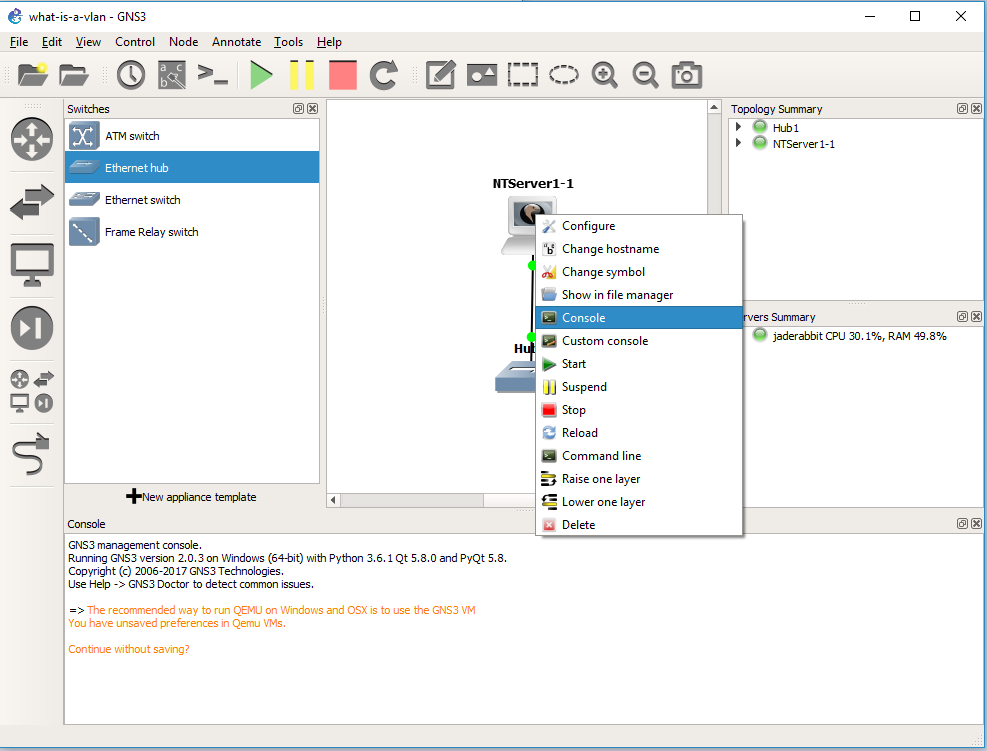
Right click again, and choose the console, and VNC will then connect to the Qemu VM, and we can now interact with it.

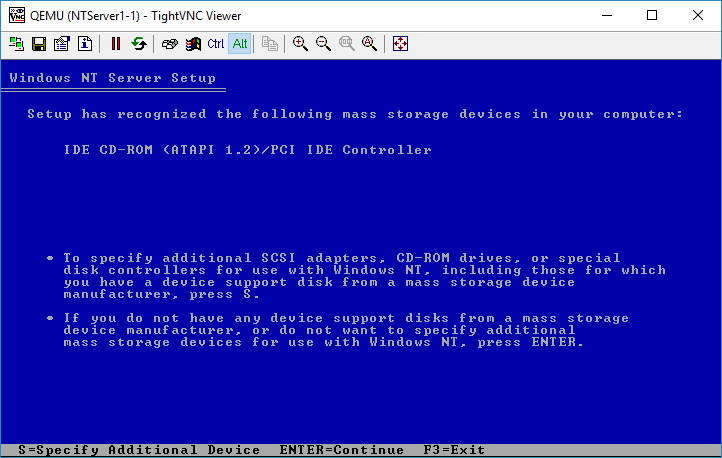
And here is where we start installing Windows NT 4.0.  I’ll just put the keys in parenthesis of what I’m doing. In this case just hit:

(enter)

(enter)

(c)

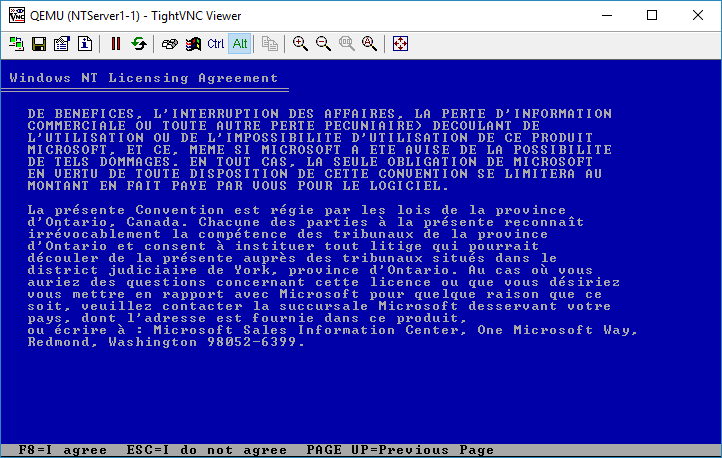
(page down) until you get to the end, then hit (f8) to agree to the license

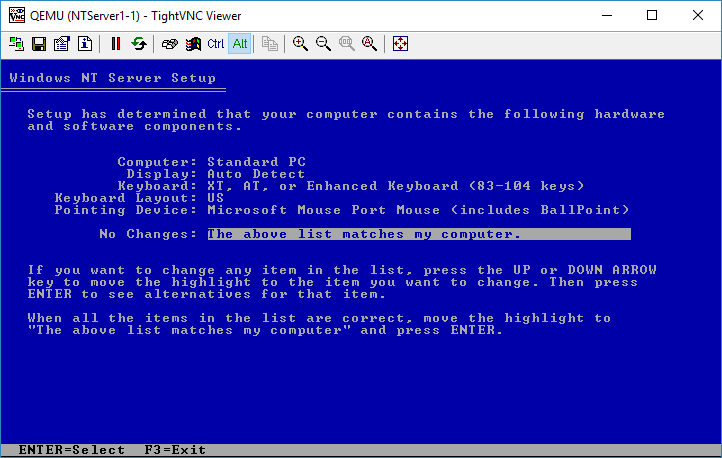
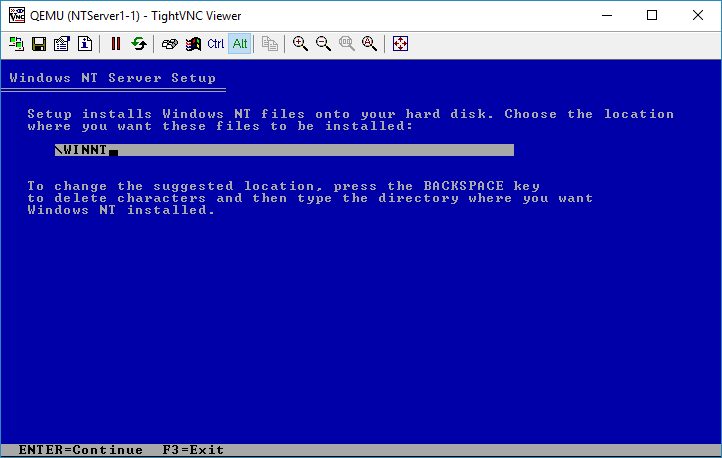
The default options are OK.  (enter)

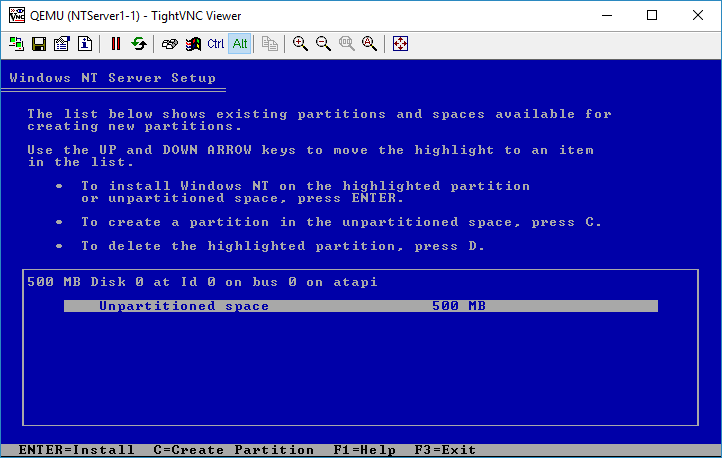
(c)

(enter)

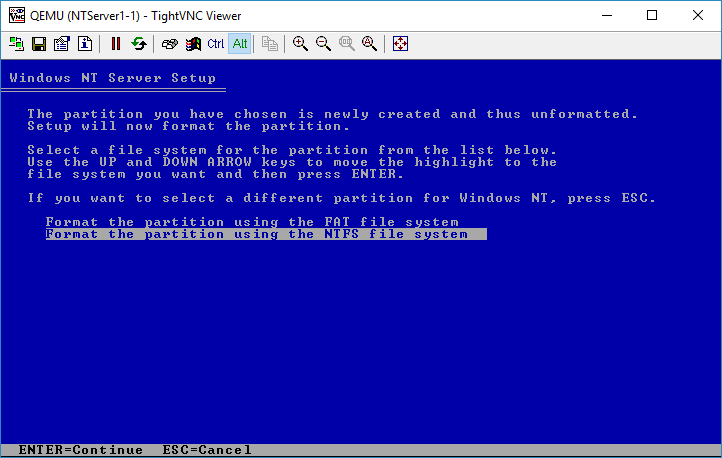
I chose NTFS for my server.  Although I’m not interested in creating a domain, so FAT will work too.  It really doesn’t matter.

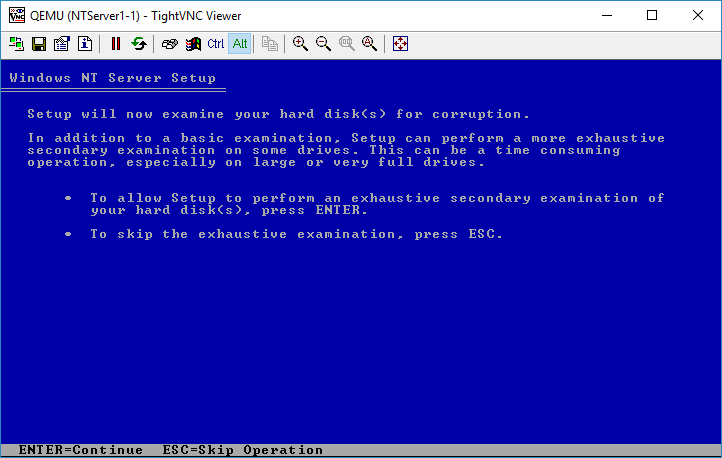
(enter)

(enter)

(enter)

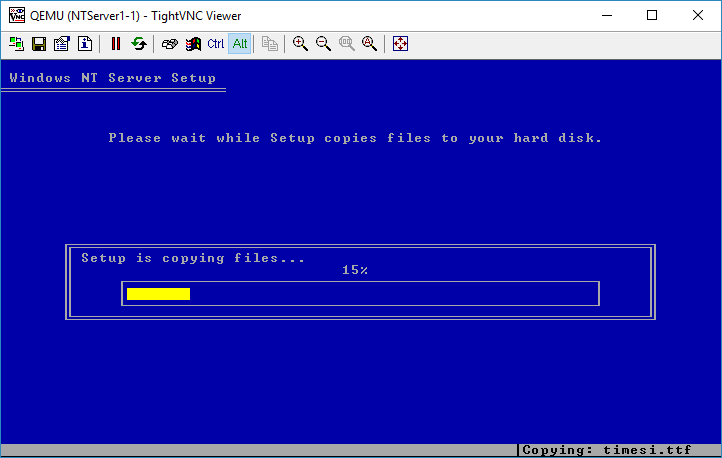
Waiting for the files to copy

(enter)

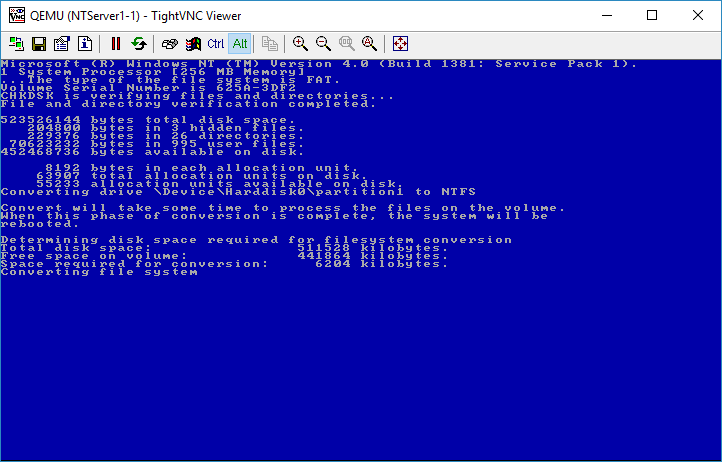
On reboot if you have selected NTFS it’ll convert the filesystem like this:

converting FAT to NTFS

After the conversion, NT will reboot again, then it’ll continue the setup process.

Otherwise you’ll just reboot directly into the graphical setup of Windows NT, and we can continue in part 5.

What is a VLAN (part 3)

In our previous post, we configured a Qemu template for Windows NT.

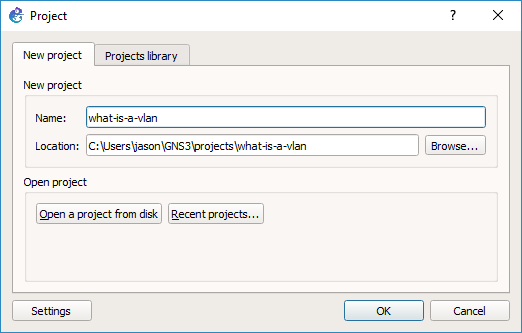
With the NT template ready we will be prompted to give this project a name.

So I called this one ‘what-is-a-vlan’ sticking with the theme.

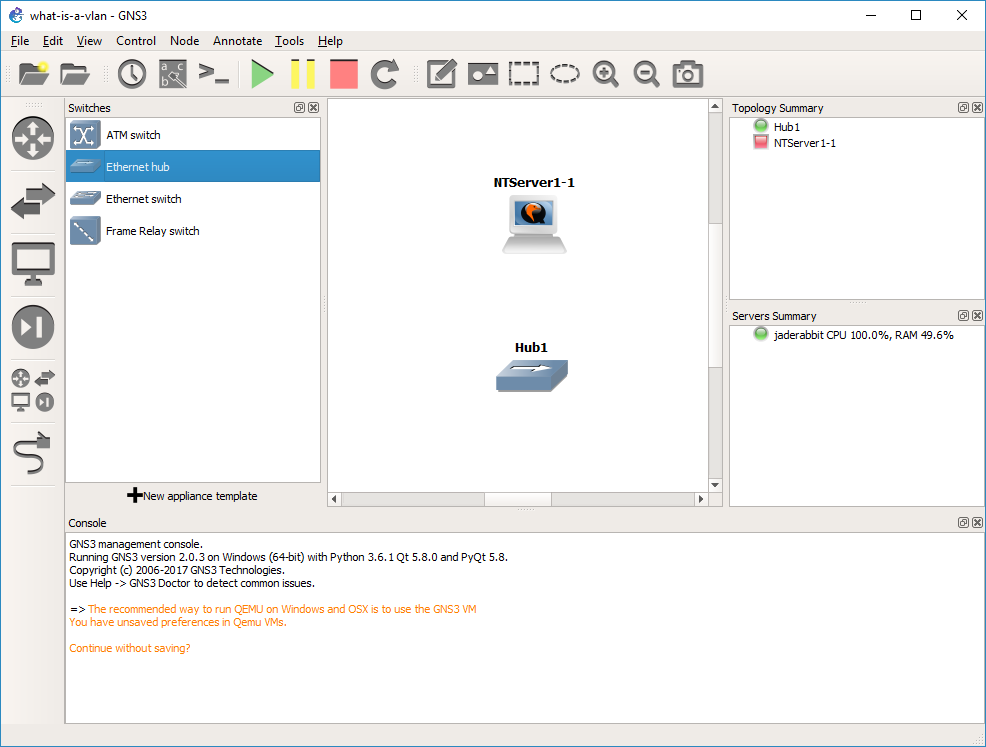
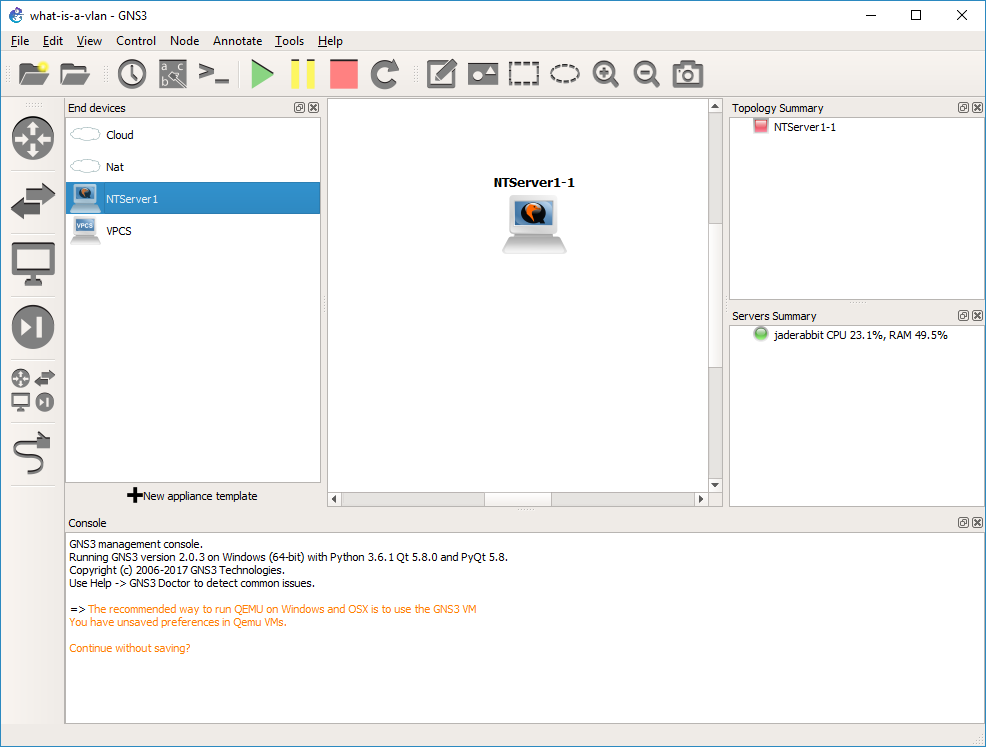
Now we can drag components out.  I selected the NT template that I’ve created, and dragged it out to the design pane.  Now we have a computer!

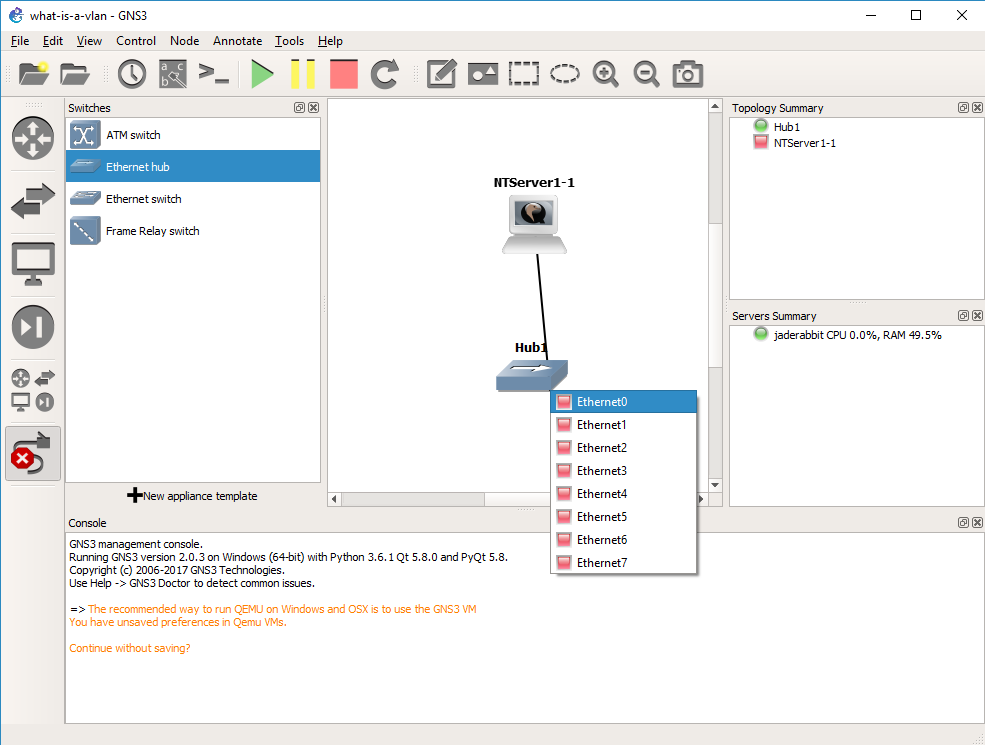
I then selected a simple Ethernet hub, to begin verifying that our configuration is working.  Just drag it out to the toplogy pane.

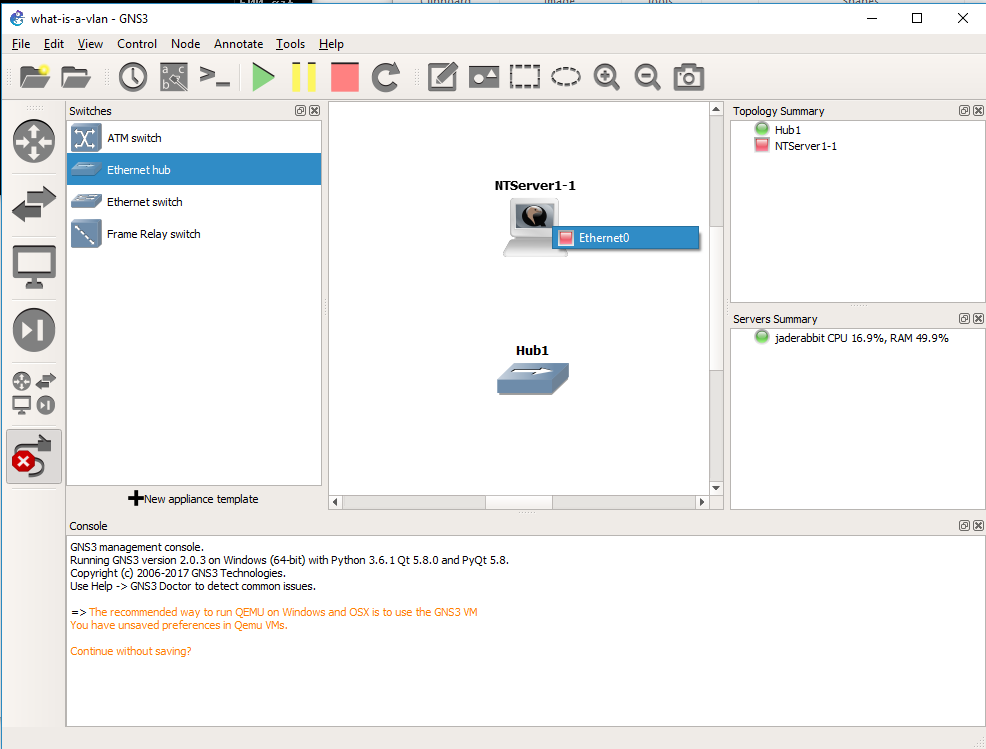
Now for the fun part, we are going to connect the Windows NT VM to the Hub.  Right click on the Qemu VM, and it’s available Ethernet interfaces will pop up.  It only has one, so select Ethernet 0.

Now you can select the Hub to complete the connection.  Hubs repeat every packet they receive, and don’t change anything.  They offer zero intelligence, and have no way to save you from yourself, if you do anything stupid (see creating a loop).  Every packet that comes into a hub is sent to every port going out.  They don’t care about protocols, or anything they just simply repeat.


So this will be our simple network.  The next thing to do is to turn on our PC, and install Windows NT 4.0.  I’ll save that for the next step which you can follow here.  If you don’t care about installing Windows, then you can skip to the following step where we will do a simple packet capture of the NT machine connected to the hub so we can observe how it’s packets look.