More thoughts on Minecraft, compression and encryption

So earlier, I had touched on Minecraft, and lamented on how it doesn’t compress its network data very well.  Well, it turns out that yes, in the server.properties file, there is an option network-compression-threshold, which by default is set to 256, meaning packets larger than 256bytes are compressed

network-compression-threshold=256

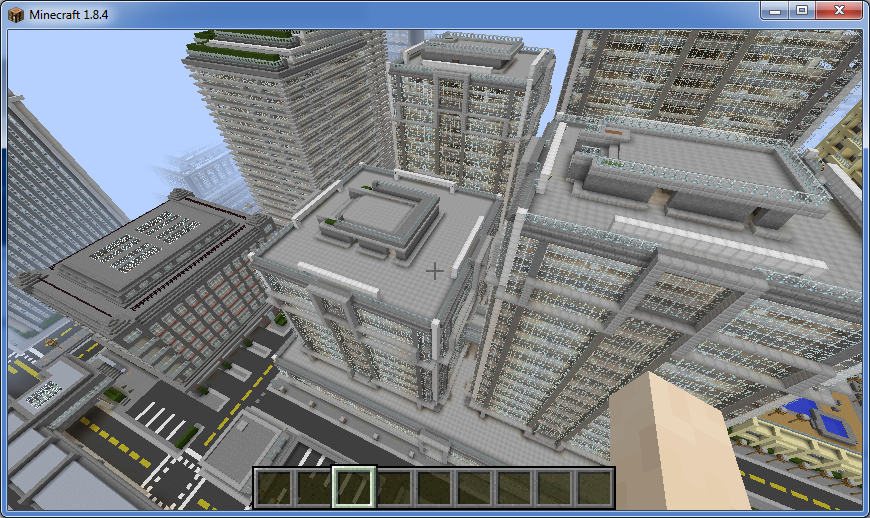
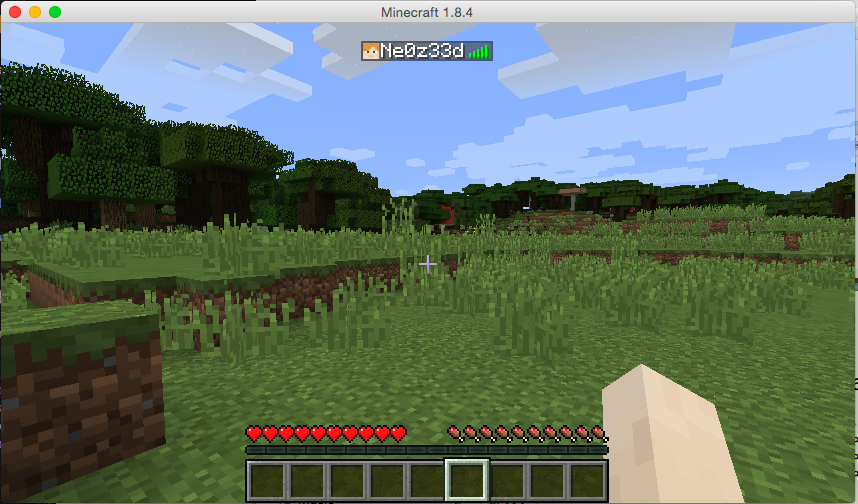
Using this quick stunnel guide, I thought I’d try a quick experiment.  So, I loaded up Titan City, and ran some connection experiments:

First, the Minecraft server with a setting of 256000000 which I would imagine effectively turns off compression.  I’m capturing one minutes worth of game play as it tries to render the spawn point.  Then again with the threshold set to 256:

12M 28 Apr 13:44 minecraft-nocompression.cap
1.6M 28 Apr 13:46 minecraft-256compression.cap

So, uncompressed it’s 12MB worth of data!  While with the Minecraft compression on, it’s 1.6 MB worth of data.

And now with stunnel using zlib compression, we get the following results:

2.1M 28 Apr 13:42 stunnel-nocompressioninserver.cap
1.5M 28 Apr 13:48 stunnel-256compression.cap

2.1MB worth of traffic relying on zlib in this case to do all the compression, and 1.5MB with zlib compressing the Minecraft compression.  And for the heck of it, why not compress the data again?
964K 28 Apr 13:46 minecraft-256compression.cap.gz
993K 28 Apr 13:44 minecraft-nocompression.cap.gz
938K 28 Apr 13:48 stunnel-256compression.cap.gz
1.5M 28 Apr 13:42 stunnel-nocompressioninserver.cap.gz

Well, now that is strange, why is the stunnel traffic even compressible, after it’s been encrypted?  Kind of weird to me. At any rate, here is some more data thanks to the capinfos program:
# capinfos *cap
File name: minecraft-nocompression.cap
File type: Wireshark/tcpdump/… – pcap
File encapsulation: Ethernet
Packet size limit: file hdr: 1520 bytes
Number of packets: 14 k
File size: 12 MB
Data size: 12 MB
Capture duration: 59 seconds
Start time: Tue Apr 28 13:43:30 2015
End time: Tue Apr 28 13:44:29 2015
Data byte rate: 211 kBps
Data bit rate: 1,689 kbps
Average packet size: 844.05 bytes
Average packet rate: 250 packets/sec
SHA1: ffb5542c47da69ddc93da902136e1173d76b56e0
RIPEMD160: bc2102185a924096a8cf145c54375a05ab90e3c6
MD5: ba0e1addfcb36e7db6314764941fa6af
Strict time order: True

File name: minecraft-256compression.cap
File type: Wireshark/tcpdump/… – pcap
File encapsulation: Ethernet
Packet size limit: file hdr: 1520 bytes
Number of packets: 10 k
File size: 1,686 kB
Data size: 1,524 kB
Capture duration: 54 seconds
Start time: Tue Apr 28 13:45:28 2015
End time: Tue Apr 28 13:46:22 2015
Data byte rate: 28 kBps
Data bit rate: 226 kbps
Average packet size: 150.91 bytes
Average packet rate: 187 packets/sec
SHA1: 5b5e51f53f0716fd84a39120afd68eadbfaf9816
RIPEMD160: f2bf3839c084b1d7b31fce0a8a8ce959316643a7
MD5: dc6f56a5a1c10e642548e0eeb979629b
Strict time order: True

And now let’s look at the stunnel captures:

File name: stunnel-nocompressioninserver.cap
File type: Wireshark/tcpdump/… – pcap
File encapsulation: Ethernet
Packet size limit: file hdr: 1520 bytes
Number of packets: 9,949
File size: 2,159 kB
Data size: 1,999 kB
Capture duration: 59 seconds
Start time: Tue Apr 28 13:41:13 2015
End time: Tue Apr 28 13:42:12 2015
Data byte rate: 33 kBps
Data bit rate: 270 kbps
Average packet size: 201.02 bytes
Average packet rate: 168 packets/sec
SHA1: 418cc249c3393d85e6e59a6e02c02060b7b7ce4f
RIPEMD160: bf7f56af412734260e0e96d1a0c7d2f28be3ba95
MD5: 1b96fce1db9d38d8dbbecf9bb2278079
Strict time order: True

File name: stunnel-256compression.cap
File type: Wireshark/tcpdump/… – pcap
File encapsulation: Ethernet
Packet size limit: file hdr: 1520 bytes
Number of packets: 9,585
File size: 1,554 kB
Data size: 1,401 kB
Capture duration: 59 seconds
Start time: Tue Apr 28 13:47:35 2015
End time: Tue Apr 28 13:48:34 2015
Data byte rate: 23 kBps
Data bit rate: 189 kbps
Average packet size: 146.21 bytes
Average packet rate: 162 packets/sec
SHA1: 19b2bbfff8cd9c5c0e460d64ad0f4b966cf3a141
RIPEMD160: e31c226101daea9327a8b13a4a1012a24bea11c1
MD5: a7b4b0d5ecf3e6a472255cff13466b51
Strict time order: True

Well for me this is still interesting.  The stunnel connection sent less packets, and smaller.  I know that this is horrible to ‘measure’ like this, and yes none of the datasets are the same, making this kind of bogus. However, honestly compressing with stunnel does feel faster.

So, want to try?  I guess I can let people try if they want, but you’ll need stunnel.  I’ve read horror stories on griefers and I figure if i raise the bar to connect it’ll be somewhat distractionless.

So here is my stunnel.conf I’m using on the client side.

client = yes
compression = zlib
foreground = yes
debug = 6

[minecraft]
accept = 127.0.0.1:25565
connect = virtuallyfun.com:25566
cert = minecraft.pem

And of course, you need my certificate pair, so here is minecraft.pem:

-----BEGIN RSA PRIVATE KEY-----
MIIEpAIBAAKCAQEArvdyw5UGic3wCDowzGM/ZVdaCrnDFeo8SmkP1jJGIhsAzzMV
+56Ctd98raKPnw5nnEtrmV7yImBiF/A32SPbYF6nqBhNKPbrUg4u4dsr9uyo7/F4
00VMcXbcgwc+pDOU5uUCg7hZcmCGolVs+7GxC3R1m8SbPZYvlgcHHJXdnEKL8RG8
z54B2L1Ai76CYlD6Q94QnQxiJricy8DJJP6/ZuqkGg01AcoaCaTOa8mvZMLkBFkj
Ase0aX0nSDRxNkBBe/hgwkRuFWaMI1iGgTCX9J1rogLg2WfZoGIFtuYp8jnwiNQQ
dEM6TTGURm9iqb78pBd6PwWsFBqOa0GLOEzLzwIDAQABAoIBAAz8/373VBnsuLHT
qAW0JGOgfWWobov07G7Vp8BN0Rj9Ci1XbH1WQfvAUGAPXjv/dL+MdbtX6f+VShLe
2TZ8S++2dxmqXCf7VHKt7NsFSxk0bkIJmd+NGGSf3zS21/aWgao2O96NU86CzdvF
Hab9hNgF2CktCh0jRfsMIIIFugK8amQGxpKrseSXuuyWGHNW2a6TIHBJRD1L2DQA
GMVgmpb43aYQHYqeQLmgP40PkJgByazQRV40zqsap1DBxNi2TnDjLUWufKACDM64
RPltM8lZm3H2yqVQEQ2yGbzoEuwVysG5+AlDOCVcbDtQqcj5sV/gzL8X+e6DgV+0
o46pZgkCgYEA5QGN+73cApm1OkjsV1OW7RR22EmGWT9HeFFGReWSBsVoDh/dFjIJ
/KtE7PbafvMcV8JMTzbSxBElc+nPFsRk8J4W+JD3Bluw0MfU1K+AUEmPsj5bX6O6
9Mv8/n8HVhpUusIFvO7K7HutdxxNOis510AtRL8oA6NFkiUBot5KGUMCgYEAw5c1
UVT+N9nciFKopgJlzfcb60SKy60vtWd3eQOuLuRd+1QhF3VpUzTAvwbLARuYdlYM
gIaKcOb7A2+ZNKNCccwP6lTIDEwQuQ3lDyG3KXzHfHocZV4n5uT2SpKLv5NzZlF5
4ealpD5pPwN2c4zpvRDeweWznNahUVngYxma5IUCgYEAvac68eg7g3/OYZWw/WVB
kdgn0FmbxN+uDcupWguUkrz7vu7OhyorsTAZ5fFN5GLr7xX/Yn7xr+TPUp6onZ9K
RSd3uKU9nutilJVaAkXSCyvQsHoJ7DvJgiBJxm5nIfyufPhgDibosU5/yywKHQld
XpFMrClvNwwJes3g/AQB88cCgYEAvOfQ7jG5qrW3Ys765gOQ0gHlrDAyIY+ucXVy
FaYxWEbmYnSZ1W9n/54GvzlPXk2JzllDj+rh0TO1olbp0MYRyZj+kiO6Zu4chK7f
2eKFZgOHJDlILbtnrIDdQ58QbEJ8hYkRv9Yli2FgAyVUBTxHEH03uGwjMsq1Wb4F
k5FKYYUCgYBSe0wqziRUNjxhig/3g5qG6iGt0jnbHN5eTsNiEqe3QxDLKNERGTS4
pjpS0LV52bEdpX7imsIskmt81ed/cPUEKd6nbYyrLT67fUCeLuQ07Zlebc/PI8AD
ZoRiyx8x8k55z143XCIdzIyZTriQ5SkUV33wbzPRF8upD0xaygf2Tw==
-----END RSA PRIVATE KEY-----
-----BEGIN CERTIFICATE-----
MIIEOTCCAyGgAwIBAgIJAIOpvPCh+v5fMA0GCSqGSIb3DQEBBQUAMIGyMQswCQYD
VQQGEwJVUzERMA8GA1UECAwISWxsaW5vaXMxEDAOBgNVBAcMB0NoaWNhZ28xHDAa
BgNVBAoME1N1cGVyZ2xvYmFsbWVnYWNvcnAxFjAUBgNVBAsMDVZpcnR1YWxseSBG
dW4xGTAXBgNVBAMMEHZpcnR1YWxseWZ1bi5jb20xLTArBgkqhkiG9w0BCQEWHmpz
dGV2ZUBzdXBlcmdsb2JhbG1lZ2Fjb3JwLmNvbTAeFw0xNTA0MjgwMjU1MzJaFw0y
MDEyMDUwMjU1MzJaMIGyMQswCQYDVQQGEwJVUzERMA8GA1UECAwISWxsaW5vaXMx
EDAOBgNVBAcMB0NoaWNhZ28xHDAaBgNVBAoME1N1cGVyZ2xvYmFsbWVnYWNvcnAx
FjAUBgNVBAsMDVZpcnR1YWxseSBGdW4xGTAXBgNVBAMMEHZpcnR1YWxseWZ1bi5j
b20xLTArBgkqhkiG9w0BCQEWHmpzdGV2ZUBzdXBlcmdsb2JhbG1lZ2Fjb3JwLmNv
bTCCASIwDQYJKoZIhvcNAQEBBQADggEPADCCAQoCggEBAK73csOVBonN8Ag6MMxj
P2VXWgq5wxXqPEppD9YyRiIbAM8zFfuegrXffK2ij58OZ5xLa5le8iJgYhfwN9kj
22Bep6gYTSj261IOLuHbK/bsqO/xeNNFTHF23IMHPqQzlOblAoO4WXJghqJVbPux
sQt0dZvEmz2WL5YHBxyV3ZxCi/ERvM+eAdi9QIu+gmJQ+kPeEJ0MYia4nMvAyST+
v2bqpBoNNQHKGgmkzmvJr2TC5ARZIwLHtGl9J0g0cTZAQXv4YMJEbhVmjCNYhoEw
l/Sda6IC4Nln2aBiBbbmKfI58IjUEHRDOk0xlEZvYqm+/KQXej8FrBQajmtBizhM
y88CAwEAAaNQME4wHQYDVR0OBBYEFJcb/w/SowAjTa/hvtim9oWYSarZMB8GA1Ud
IwQYMBaAFJcb/w/SowAjTa/hvtim9oWYSarZMAwGA1UdEwQFMAMBAf8wDQYJKoZI
hvcNAQEFBQADggEBAIISqlsBZKh67of21sJhsavDB4T7xrd/qC5zTUeUioScXr+j
n2aziysr+HazliIpVNa5QjicYTniG7urAZdL/zhegSyxEq6r1/BVAks0ooYxJT/f
G5EIhQurv3wQcGKSEXx6IA7+kheqYX++XcM6lAz5jPPIXsRV4NDsE7T68vVuQrr/
RYMHkbCXMqCbUq8x8k65KNN3EPJ66lH83kXuQJRazeurJmcquhmWqApjkORS17kq
+g2xRlnEolvS7umkGz9cbGP7SAWY+ySVIulKSKUKzji8qK8T/hW0dYWUPTZ6+LZx
hHnFJXiaGbnd1sEEB6uVV17XipnE15TGJ8NPT2s=
-----END CERTIFICATE-----

And I run it something like this from the client side…

# stunnel mine.conf
2015.04.28 14:25:23 LOG5[ui]: stunnel 5.16 on x86_64-apple-darwin14.3.0 platform
2015.04.28 14:25:23 LOG5[ui]: Compiled/running with OpenSSL 0.9.8zd 8 Jan 2015
2015.04.28 14:25:23 LOG5[ui]: Threading:PTHREAD Sockets:SELECT,IPv6 TLS:ENGINE,OCSP
2015.04.28 14:25:23 LOG5[ui]: Reading configuration from file mine.conf
2015.04.28 14:25:23 LOG5[ui]: UTF-8 byte order mark not detected
2015.04.28 14:25:23 LOG6[ui]: Compression enabled: 1 method(s)
2015.04.28 14:25:23 LOG6[ui]: Initializing service [minecraft]
2015.04.28 14:25:23 LOG6[ui]: Loading certificate from file: mine.pem
2015.04.28 14:25:23 LOG6[ui]: Loading key from file: mine.pem
2015.04.28 14:25:23 LOG4[ui]: Insecure file permissions on mine.pem
2015.04.28 14:25:23 LOG5[ui]: Configuration successful

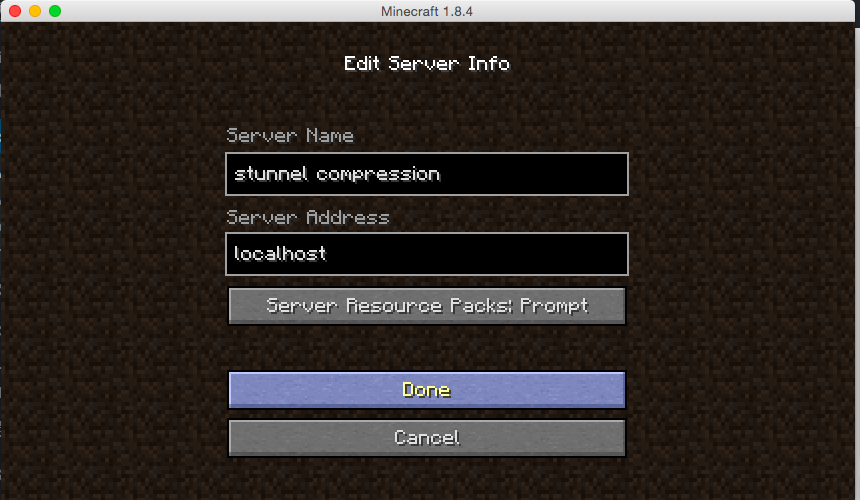
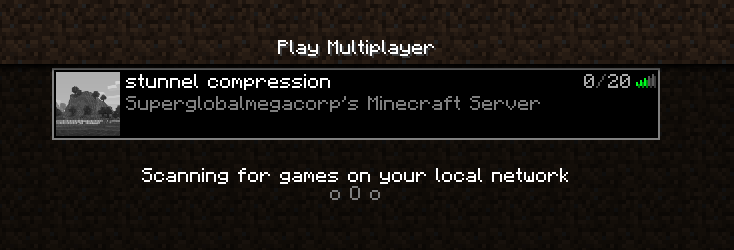
Now with stunnel connected, you just have to add a server, but you connect to ‘localhost’. This will have you talking to the stunnel program which then talks to my server, which then redirects to the VM running Minecraft.

aa

Setup a server to ‘localhost’ to access stunnel

bb

Now you can connect to the stunnel server

No promises on how long it’ll be up though.

Titan City!

Titan City!

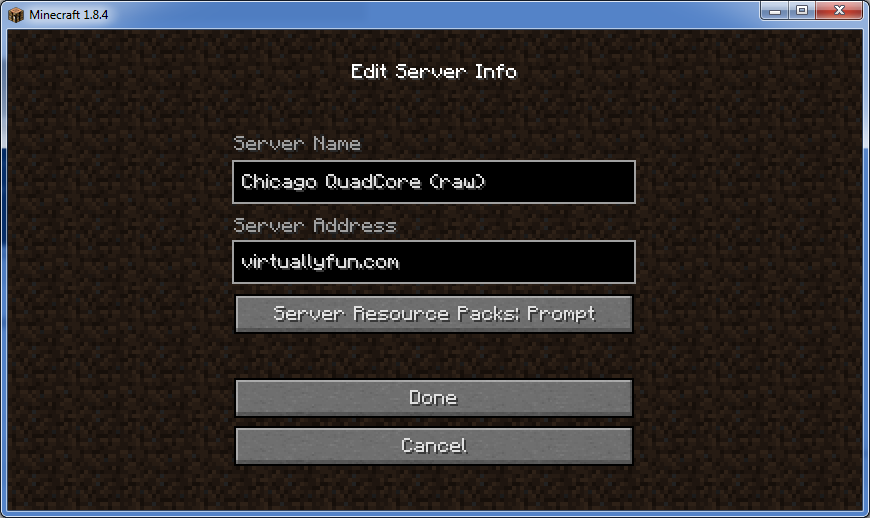
For normal clients... (shhhh!)

For normal clients… (shhhh!)

Installing Debian 7 in KVM via the CLI (text mode)

So with my new disk, and my server back online, I went ahead and re-installed my web server VM, and the newer install from the netcd is graphical of all things.

xx

Debian’s graphical installer

Ugh.

If anyone cares, here is how I do this, the old cli way. I don’t like weird manager things, I’m capable of hitting flags myself:

kvm -m 640 -nographic -curses -hda blog.vmdk -cdrom /install/debian-7.8.0-i386-netinst.iso -boot d -vnc 10.12.0.1:23 -net nic,vlan=0,macaddr=52:54:00:11:11:23 -net tap,vlan=0,ifname=tap0,script=/etc/qemu-ifup

very simple, right?

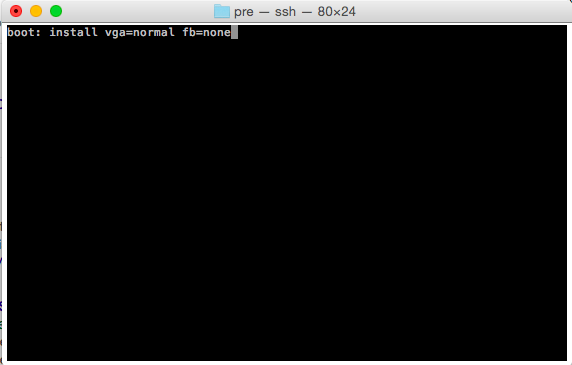
So the ‘solution’ to this is quite simple hit escape a few times, and the screen will repaint, and you should get the grub boot prompt

gr

The text mode grub loader

So simply type in:

install vga=normal fb=none

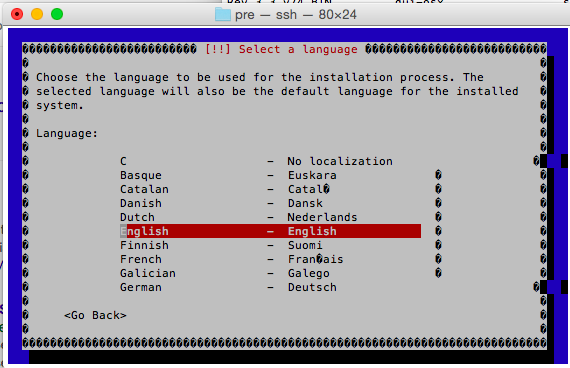
And hit enter, and you should now be good to go!

Debian text mode installer

Debian text mode installer

I guess I can go over some quick guide to setting up the tun/tap bridging.  This section is to be added to /etc/network/interfaces

iface br0 inet static
address 10.12.0.1
netmask 255.255.255.0
network 10.12.0.0
broadcase 10.12.0.255
bridge_fd 9
bridge_hello 2
bridge_maxage 12
bridge_stp off
pre-up brctl addbr br0
post-down brctl delbr br0

And the qemu-ifup script:

# cat /etc/qemu-ifup
#!/bin/sh

echo “Executing /etc/qemu-ifup”
echo “Bringing up $1 for bridged mode…”
sudo /sbin/ifconfig $1 0.0.0.0 promisc up
echo “Adding $1 to br0…”
sudo /sbin/brctl addif br0 $1
sleep 2

thats about it.  Debian 8, was just released, and I suspect all of this will have changed.

Hosting Minecraft as an experiment

In the latest gamer news, everyone is freaking out about Valve allowing mod developers charge.  It’s amazing how quickly it’s fragmented the community in what was at 2 days before a Valve/GabeN worshiping reddit. (here/here/here/here and a rebuttal)

In the middle of all of this I saw this comment in passing:

Remember how that made me leave Mojang?

Remember how that made me leave Mojang?

So yeah, I never followed the whole Minecraft community thing, but apparently people were hosting servers, then asking users to pay for using mods, and even for using basic items.  And since most people who love Minecraft out there are kids, they were paying with their parents credit cards all over the place for server time, and server mods and whatnot, the parents would find out, and them blame Mojang over the entire thing.  So they banned paying servers (at least from what I understood).

So out of curiosity, since I’ve only really played single player, I thought I’d see how hard it is to run a Minecraft server.

First, I’m going to create a Debian 7 VM on my ESXi server.  Nothing too fancy, I have an 8 core box with 8GB of ram, so I was thinking 2 vCPU’s and 384MB of ram, and a 4GB disk.  I mean it’s a simple game, how much can it need, right?

Turns out, it wants a LOT more.

So the install of the OS went pretty smooth, then I have to install Java, which is pretty simple:

apt-get install default-jdk

With that done, the next thing to do is download the server jar file from the download site, or for the purpose of my test, I’m using version 1.8.4.

When I went to run it however, I saw the recommended flags:

java -Xmx1024M -Xms1024M -jar minecraft_server.jar nogui

Ouch.  Yes this thing does expect 1GB of ram.  Ok, so I have to RAM and CPU to spare, so I went ahead and gave it 2GB (since I installed the x86 version of Debian..) and 4 vCPUs.

The next thing for me to do was to set it up on the internet, since I’m not in the office.  I have a VM out on the internet, with an OpenVPN back to my ESXi box for my email.  So without trashing my nat I could get xinetd do the dirty work with this simple entry:

root@VPS:/etc/xinetd.d# cat minecraft 
service minecraft
{
    disable         = no
    type            = UNLISTED
    socket_type     = stream
    protocol        = tcp
    user            = nobody
    wait            = no
    redirect        = 192.168.1.139 25565
    port            = 25565
}

Then restart xinetd like this:

 /etc/init.d/xinetd restart

Now with Minecraft running on my ESXi server, and my VPS now configured to forward traffic to the ESXi box over the OpenVPN connection I was all set to go!

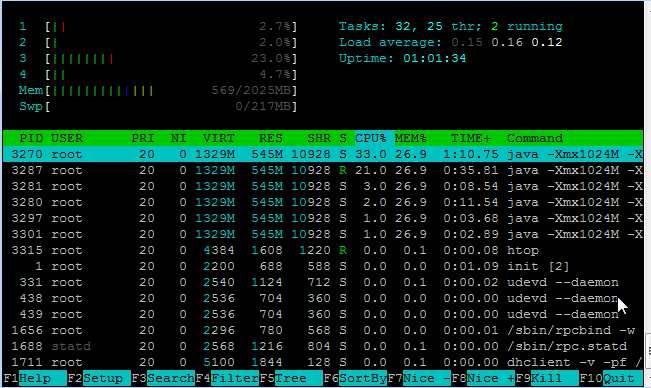
And I was able to connect, and all was ‘good’.  But then checking the server…

htop on my Minecraft server

htop on my Minecraft server

545Mb of RAM!  And this is with one user!  And look @ the CPU.  Wow no kidding!

And then I noticed something else, the email performance went from OK to horrible.  I spent a lot of time playing with MTU’s receive and send buffers, and other ‘magic’ trying to get something working.  Since my ESXi server doesn’t have a direct internet connection (yuck) I’m in a shared office so it’s not only behind NAT, but I have a DLINK that I use behind their NAT.  And while the UDP protocol ‘works’, changing it to TCP gave me a 5x speed increase.

Very unexpected.

My own world..

My own world..

And not to forget, some helpful stuff for the server:

How do you shut down safely, from the console?

stop

What is the best way to run the server?

Probably behind screen. I started it from /etc/rc.local like this:

/usr/bin/screen -dmS minecraft /usr/local/minecraft/start.sh

start.sh is simply:

#!/bin/sh
cd /usr/local/minecraft/
java -Xmx1024M -Xms1024M -jar minecraft_server.jar nogui

How do I connect to the console?

screen -r minecraft

Remember in this case we gave the screen session a name so it’s easy to find.

How do I disconnect from the console

CONTROL+A+D

Why am I doing this?

I have no idea why. Honestly, I find crafting in a game kind of tedious, but setting up a VPN, server and whatnot is more fun to me.

How about network performance?  Since it’s just me, I thought I should look inside the tunnel for a minute and see how big the capture file is:

# tcpdump -s 1520 -w 1.cap -n -i tun0 port 25565 & sleep 60;kill %1

This will run tcpdump for a minute on the default minecraft port, then after 60 seconds end the capture.

# ls -alh *.cap
-rw-r--r-- 1 root root 1.6M Apr 26 16:00 1.cap

Wow that was bigger than I thought. No wonder Minecraft people are always crying about latency! That translates to 213,33 Kbps or 0.21 Mbps.

Can it be compressed?

# gzip 1.cap
# ls -alh *.cap.gz
-rw-r--r-- 1 root root 680K Apr 26 16:00 1.cap.gz

Which then translates into 91,11 Kbps or 0.09 Mbps. Why people don’t compress their network stuff is beyond me, but then again what do I know?

I guess the next step would be to combine this with stunnel, which not only can encrypt the traffic, but compress it as well.

It’s late but I think I’m back up

some things are still broken, and yeah… it’s been fun.

So, the disk in my colo el-cheapo box died. No problem, I have a backup right? After the last great disaster.  Well that disk DIED TOO.

Un-real.

So here we are running on some half baked incremental backup.  At least I did have this much here we are.

it’s late, I have updates, but I’m tired.

Previous 0.52 (trunk 391) + slirp

I got this request to add in some SLiRP to Previous, the NeXT computer emulator.  Sadly work got in the way, and I trashed my windows dev machine.  To make it worse I also trashed my MacBook Air, but with a bit of screwing around I got X-code removed, and re-installed.

So here is my wonderful work, some 50 lines of code + the SLiRP from Cockatrice all hacked up.

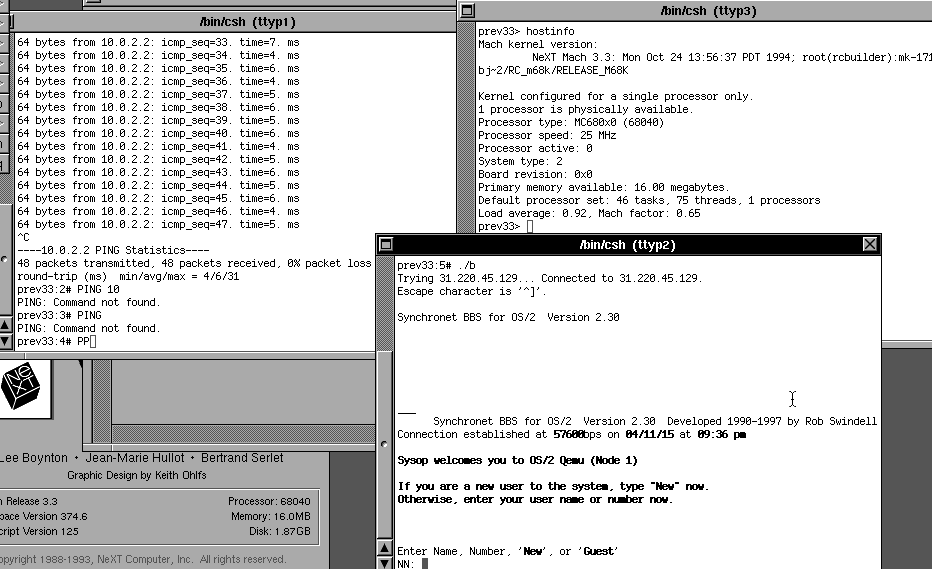
ICMP to 10.0.2.2 seems to work fine, UDP seems to not work, so no DNS.  I don’t know why either.  I can telnet to my BBS just fine, which is about all the testing I’ve done.

Previous to the BBS

Previous to the BBS

Inbound TCP seems to be broken too, but I could be initializing slirp_redirect incorrectly too.

In case you want to follow up on this the NeXT computer forums is the place to be.  Networking with NeXTSTEP is involved.

And for anyone who want’s my files, the source is here, and an OS X 10.10.3 binary is here.  Be sure to install the SDL2 framework ahead of time!

Windows 3.0 Debug Release 1.14

Well from popular request I finally got around to loading this up.  I went ahead with my favourite retro emulator, PCem for this, as it can nicely emulate an EGA display, unlike most emulators which do VGA, however when it comes to older versions of Microsoft products they really can detect the difference between EGA and VGA.

So, to start off, I downloaded from the project page, this version of PCem, compiled it, and installed MS-DOS 4.01 , from April of 1989.  The Windows 3.0 Debug Release 1.14 itself is dated from February 22nd, 1989.  Which I figured is close enough to the time period.  I’m using the 486SX2/50 because I’m too impatient for the 386 speeds, but it does work fine on 386 or higher emulators.  It does NOT work with any 286 emulation. I’m also using the HIMEM.SYS from MS-DOS 4.01 vs the one with the Windows 3.0 (Alpha? Beta? Technical Preview?) since it is slightly newer.

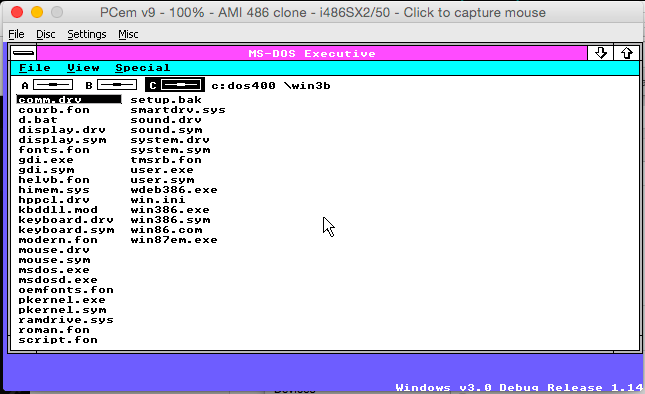
There is no setup program per say, rather it just xcopies all the files to a directory, and from there you run ‘d.bat’ and away you go.  This version is hard coded to an EGA display, which again is the reason I went with PCem.  Once you start it up, you are greeted with:

Win

Windows v3.0 Debug Release 1.14

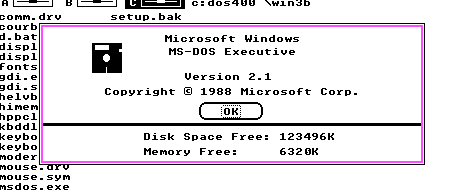
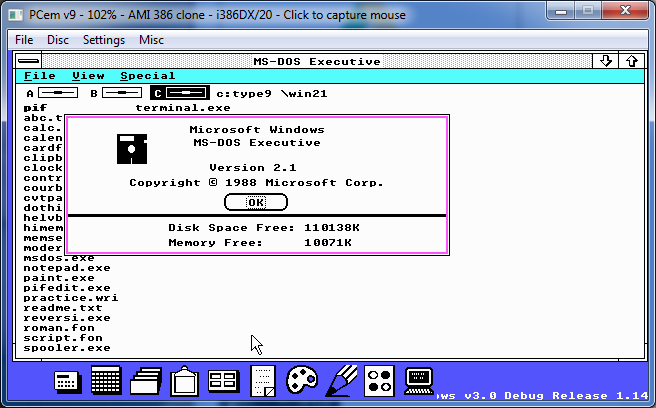
And it identifies itself as Windows Version 2.1

w

Look at all the memory!

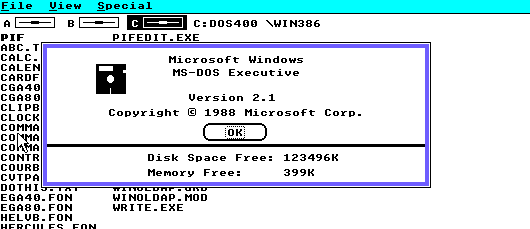
And first thing to notice is that on my setup with 8MB of ram, I have over 6MB of RAM free.  Compare this to regular Windows 2.1 which gives me 399Kb of ram in my current setup.

Windows 2.1 running in real mode

Windows 2.1 running in real mode

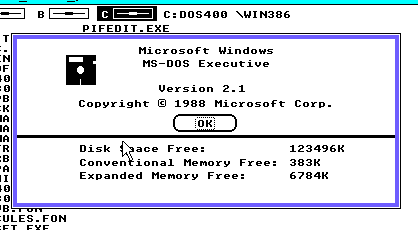
And with Windows/386 Version 2.1 it provides 383Kb of real memory, along with 6.7MB of EMS memory, as the Windows/386 Hypervisor includes EMS emulation.

Windows/386 memory

Windows/386 memory

Of course the major limitation of Windows 2 is that it runs in real mode, or in the case of Windows/386 an 8086VM.  As I mentioned a while back in a post about Windows 3.0, This was game changing.

As now with Windows running in protected mode, all the memory in my PC is available to Windows, and I am using MS-DOS, with nothing special.

Besides the limitation of being EGA only, the Debug version of 3.0 is that there is no support for MS-DOS applications, as WINOLDAP.MOD is missing.

NO MS-DOS for you!

NO MS-DOS for you!

This is clearly an interim build of Windows 3.0 as mentioned in Murray Sargent’s MSDN blog Saving Windows from the OS/2 Bulldozer.  As mentioned from the article they began their work in the summer of 1988, so considering this is early 1989 it shows just how much progress they had made in getting Windows 2 to run in protected mode.  Along with Larry Osterman’s MSDN blog post Farewell to one of the great ones, which details how the Windows 3.0 skunkworks project was writing the new improved 386 hypervisor, and how Windows 3.0 got the green light, and changed the direction of not only Microsoft but the entire software industry.

I’ve been able to run most of the Windows 2.1 applets, however I’ve not been able to run Excel 2, or Word 1.  I suspect at this point that  only small memory model stuff from Windows 1 or 2 is capable of running.  Although at the same time, when 3.0 did ship, you really needed updated versions of Word 2 and Excel 3 to operate correctly.

Windows 3.0 Debug Release 1.14

Windows 3.0 Debug Release 1.14 on a 12MB system

The applets from Windows 2.1 seem to work a LOT better than the one from Windows/386 2.1 if that helps any.

This is an interesting peek at an exceptionally early build of Microsoft Windows.