(This is a guest post by Antoni Sawicki aka Tenox)
A couple of months ago we hosted VIrtualization Challenge for QNX v1.2. I expected that the hard part would be to circumvent the copy protection and the rest would be easy. It turned out to be quite the opposite! The copy protection was worked around in no time by several people independently. What turned out to be impossible is to install the OS on a hard disk.
QNX 1.2 does have several drivers for different hdd controllers including BIOS mode. It has fdisk, can create partitions, install MBR, format fs, mount hard disk volumes… but it cannot install boot code. Apparently this functionality has been added only in QNX 2.x. After a long debate we settled for a solution where you boot kernel from a floppy disk and use the rest of the os from a hard disk. This was implemented by Forty who won the challenge which was outlined in this post.
In a rather unexpected turn of events Dan Dodge, co-creator and CEO of QNX Software Systems himself reached out to us and offered to extend the contest to finish the process properly. Dan is offering $2000 prize for making QNX 1.2 boot from hard disk without use of the boot floppy disk. I have confirmed the details in an email exchange.
Rules: As always the winner will be the first person who provides a working image in the comments. Any emulator/hypervisor is allowed. You can use boot loader from QNX 2.x, or write your own or anything else you come up with. There are some tips in Dan’s comment. Ask away for more details. The QNX repository is here. Good luck! 🙂
Update: The challenge has been completed! The winner is Mihai Gaitos and this is the winning entry also a post on this blog. I will work with Mihai to get a more detailed blog post of what has been done and Dan to hand out the $2000 prize. Congratulations!!!
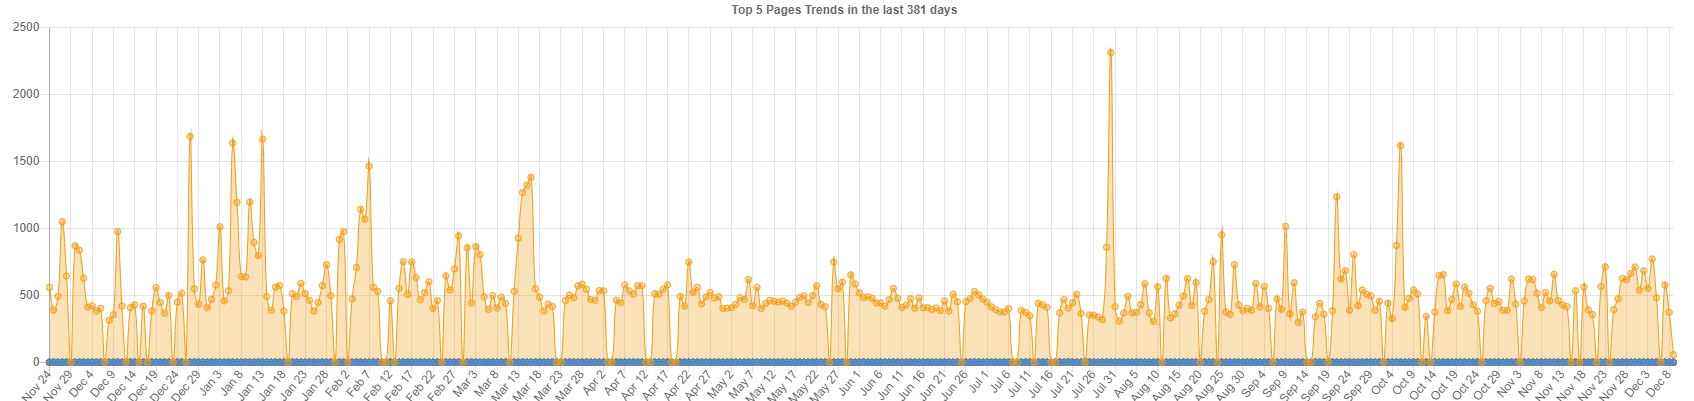
Every time the yellow touches bottom it’s an outage
You’ve probably seen it, lots of outages lots of delay and well not a lot from me.
life has been incredibly busy as I thought I was out of the IT rat race, but things happened, and I’ve ended up staying in.
Failure is arriving!
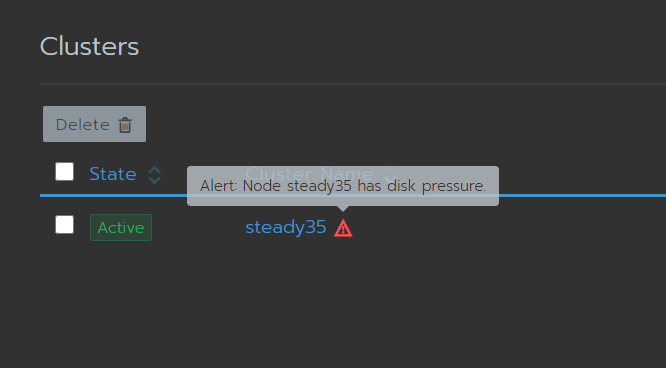
so yes, once more again “docker” and k8 make everything easy to deploy but maintain and work, well that is another story. It turns out that Rancher OS k8’s will shut down once the disk hits 85% capacity.
Under pressure!
ok that sounds like a lot but on a 1tb volume that is 125GB?!!! No warning no, no nothing just ‘disk pressure’ on the console and that is it.
root@steady35:/opt/local-path-provisioner# df -h .
Filesystem Size Used Avail Use% Mounted on
/dev/sda1 873G 712G 115G 87% /opt
honestly WTF!
I like the ability to publish secrets and import and export settings between containers, but the incredible lack of logging is unreal. The k8 manifest for MySQL kept on failing on my server. I have no idea why.
zero logging info
I deploy the docker version directly, and if you can read this it’s working.
clearly I’m the old man out of touch.
but for a single node, UML is the way to go.
plus, you can use your entire disk.
so yeah, trying something new although I don’t think it’ll last all that long.
(This is a guest post by Antoni Sawicki aka Tenox)
I certainly can’t claim to be the first as this has already been done by our friends at OS/2 Museum. However with low vanilla VGA resolution and no networking the results were unsatisfactory. Having so much success with 86Box I decided to try to do a little better.
I bought my UnixWare 1.0 media kit years ago on eBay. Unlike the tape set owned by OS/2 Museum mine had CDROM as install media. Unfortunately despite many many tries with different types of cdrom/bus/ide/scsi card I could never get the OS to see it. The cdrom/iso image is just a typical set of sysv packages. As such I wanted to see if it would be possible to convert it to a set of floppy disk images and install this way. Attached the iso image in UnixWare 7.1.4 VM and did a pkgtrans like so:
pkgtrans -s cdrom1 diskette1
From there I created a bunch of floppy disk images, which I later used for installation. Thanks to Plamen I was also able to get TCP/IP disks which I added to the install set.
Update: thanks to ArtiomWin I also got a BusLogic HBA driver disk, which allowed me to see the cdrom attached over SCSI. As such I decided to remaster the original iso image with added TCP/IP set, Update package and bash+gzip. The iso image is here.
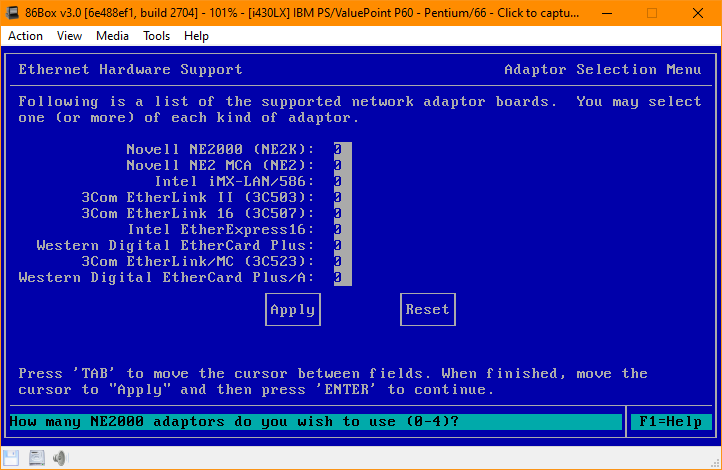
Upon first boot after install from CDROM you get prompted to choose a NIC driver:
Unfortunately none of them really worked in 86Box for some reason. They get detected and you can see the MAC Address but not much after that. 3C503 and NE2K freeze the system, WD works bit better but you can’t really communicate with anything. Maybe it’s just my PCap configuration.
After installation I mounted the cdrom again and added TCP/IP set:
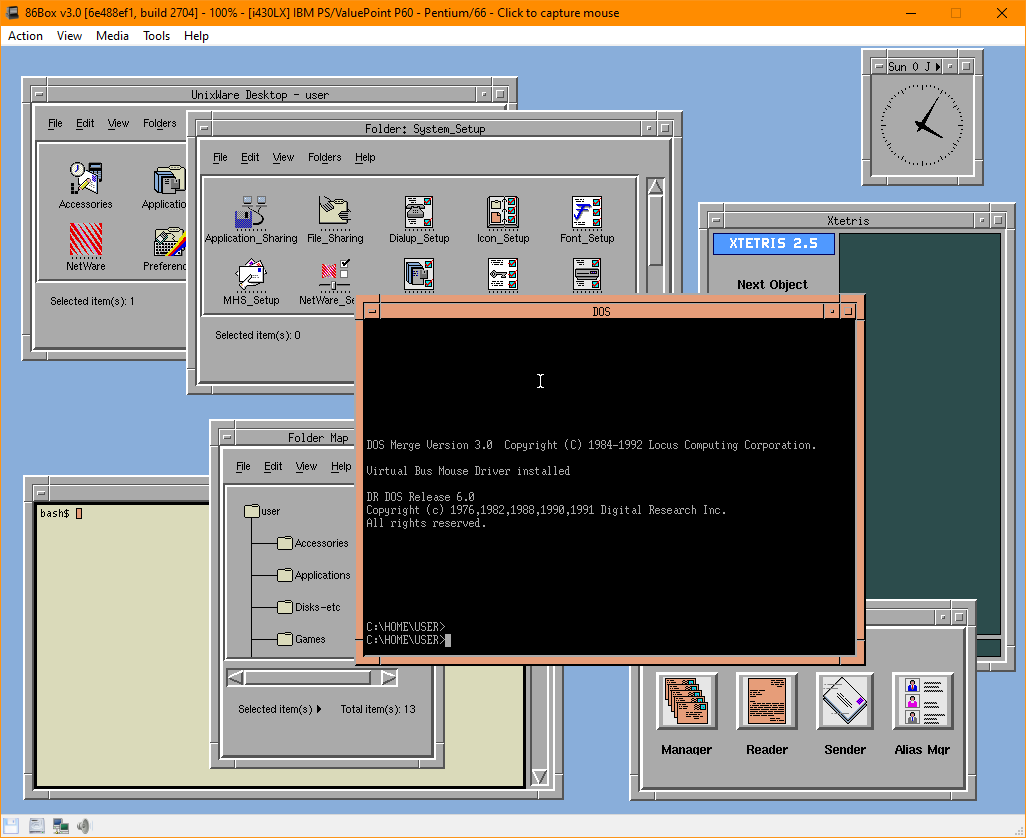
One of main issues bugging me was lack of proper resolution. UnixWare 1.0 has a high resolution mode for Tseng ET4000 card which is supported in 86Box. You can change the resolution using /usr/X/adm/setvgamode as root. It worked perfectly, except for fonts, which required some surgery in /usr/X/defaults/Xwinfont (remove everything after 75dpi font path). This is how it looks like fixed up:
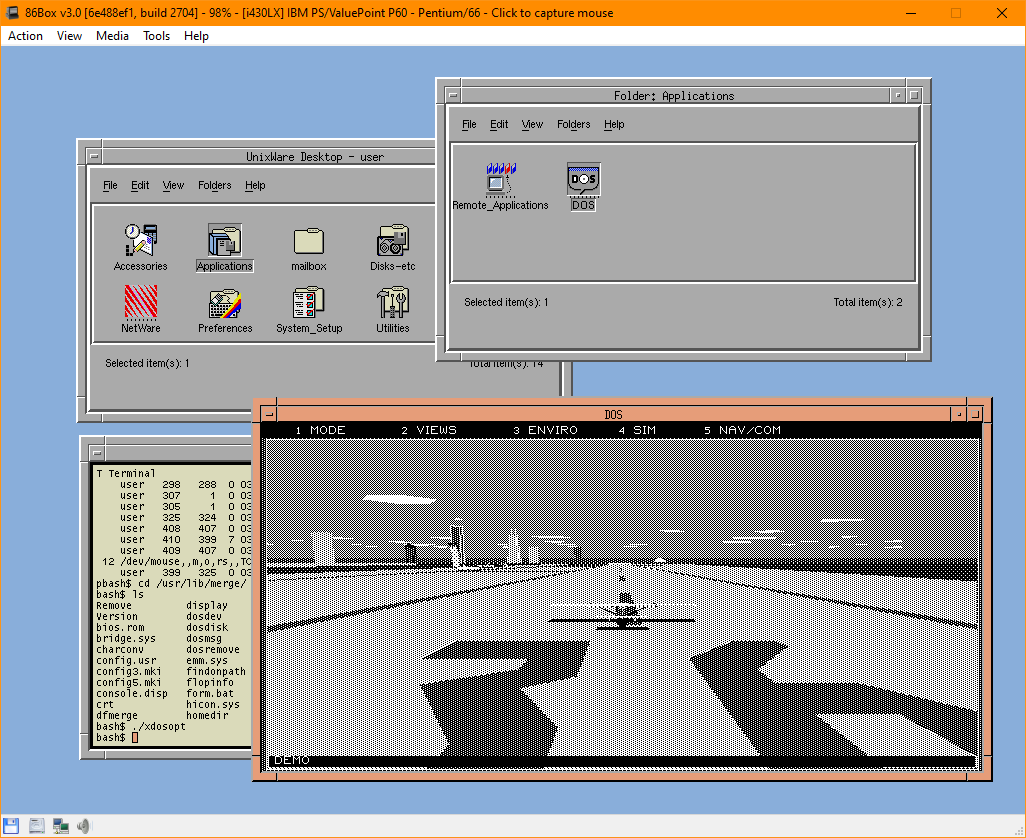
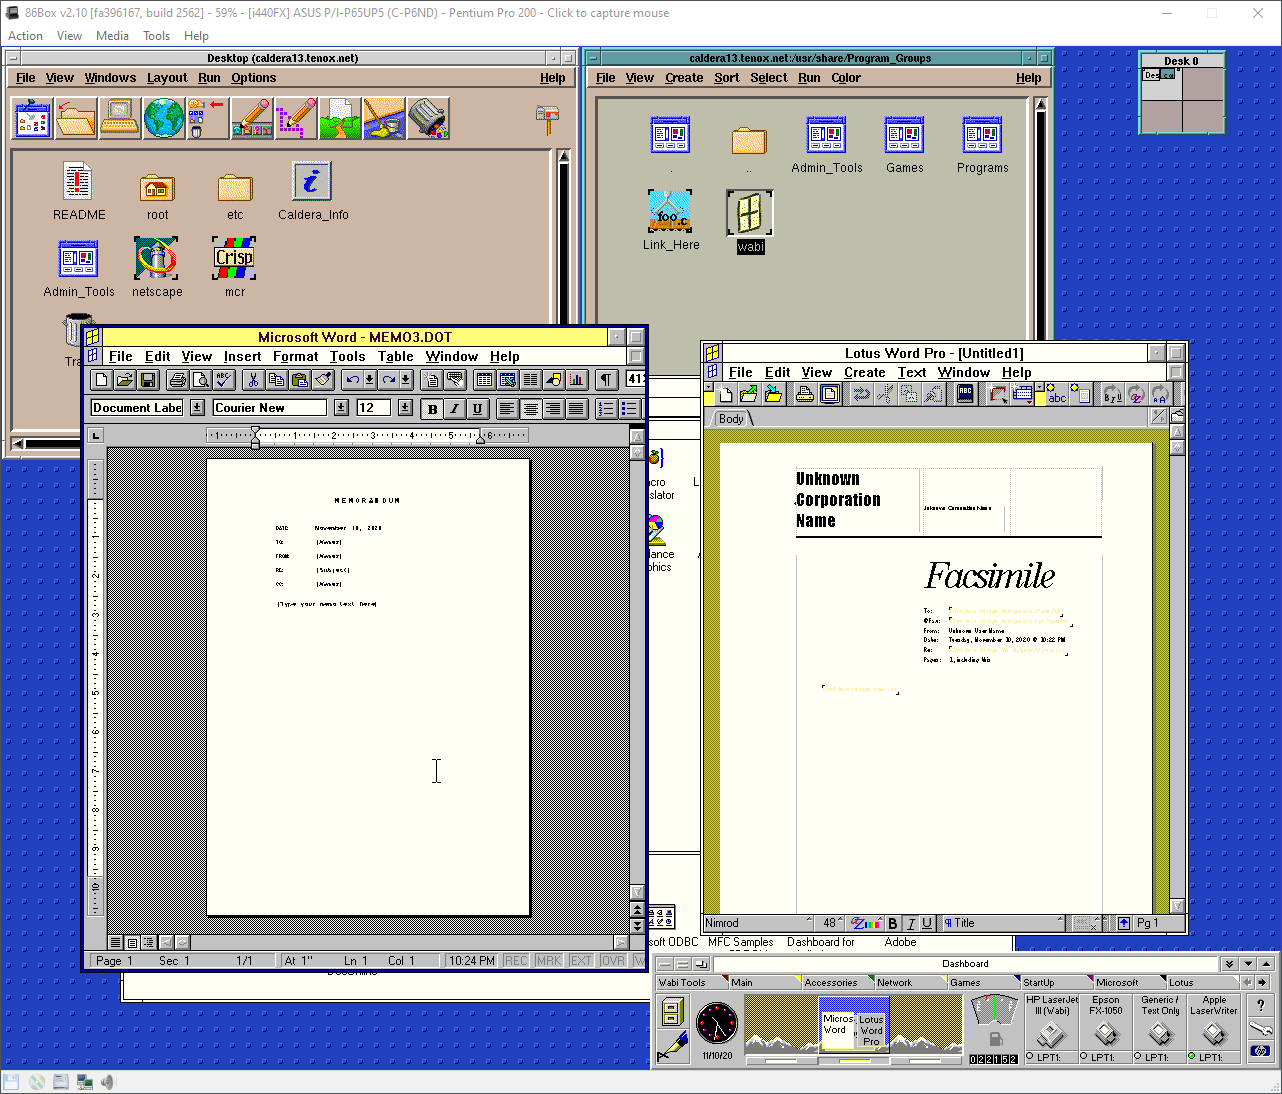
UnixWare comes with Merge DOS emulator. It can even run graphical applications in windowed mode for CGA and HGC. VGA is only possible in full screen mode.
All this cool stuff before Linux was even born!
DOS Menu is invoked by Scroll Lock. You can switch consoles between text and X11 by pressing CTRL+ALT+SYSRQ and ‘p’. I have also added bash and gzip binaries.
The ready to run 86Box image is here. Virtual Box OVA here. Install media here. Login with user/user, root/root.
Technically the competition has been won by Crazyc who was the first to submit disk images with copy protection worked around. He however waived his monetary prize and did not do any further work on making whole system bootable from hard disk.
While the copy protection turned out to be quite easy to circumvent and several people did it independently, installation on a hard disk proved to be quite impossible. You can fdisk, create partitions, lay out file system, mount and copy files to hard disk. However there is no way to install a boot loader and the kernel. QNX 2.x and above provide a way of doing it but unfortunately not version 1.x. Many people including various QNX gurus looked at it and we all gave up at this point.
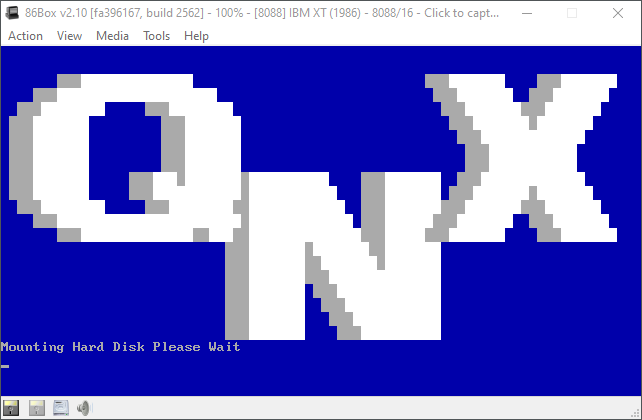
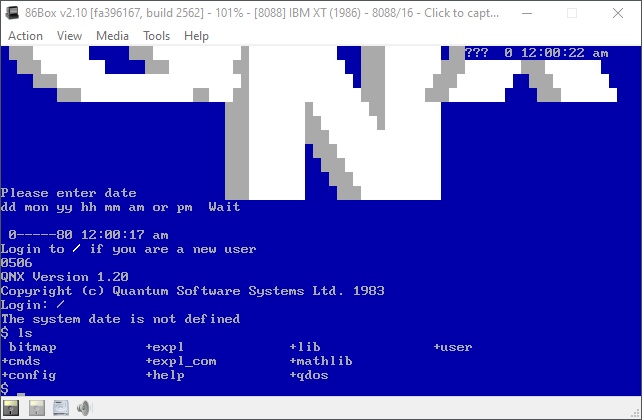
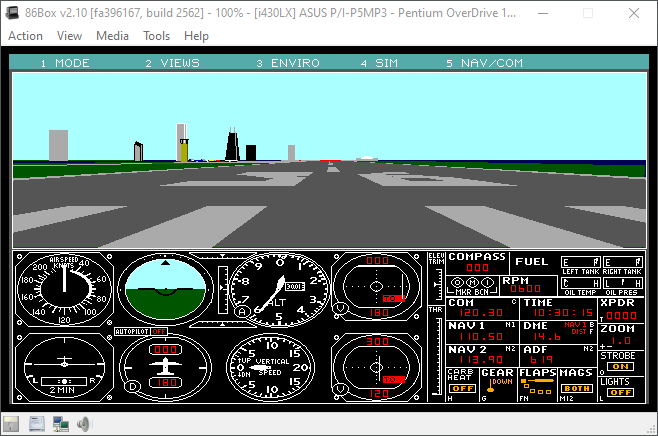
Probably the only reasonable way of using hard disk with QNX 1.x is to copy all files from all the floppies to the hdd. Then use the boot floppy disk for booting and the rest from hard disk. This is likely why the disk set came with a backup copy of boot disk. This is what Forty eventually did in effect winning the competition. Forty supplied a 86Boxready to run configuration with patched and modified boot floppy to mount and use the hard disk image. I have buffed it up a bit to a faster XT and EGA video for better resolution. This is how it looks like during boot:
You can safely ignore date/time prompt with enter. To login to the system just enter slash ‘/‘ as the user name:
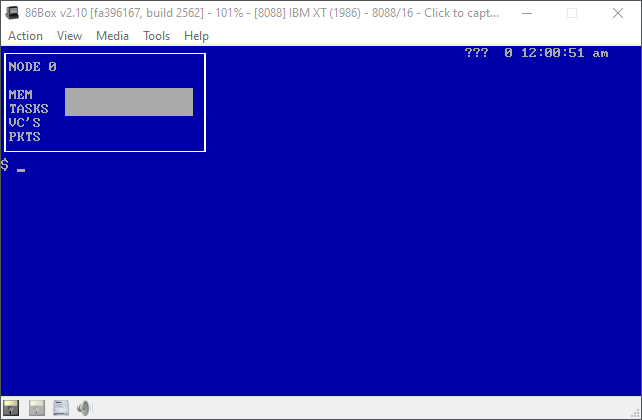
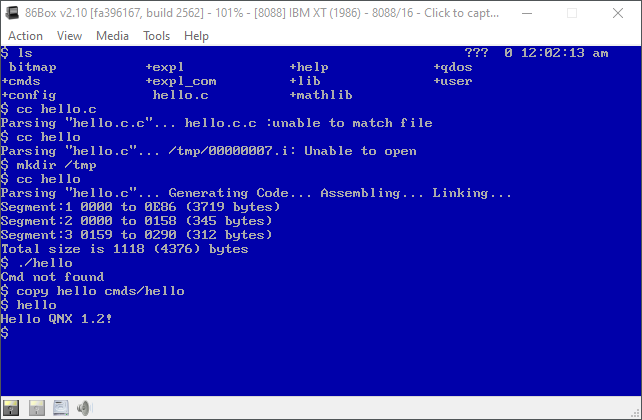
You can find all the binaries in /cmds directory. The system does have some sort of networking facility but I have not figured it out yet. Probably a good candidate to explore in another post.
QNX has a super cool editor which is basically ed on steroids. Documentation for it can be found in 2.x manuals.
Also working C compiler:
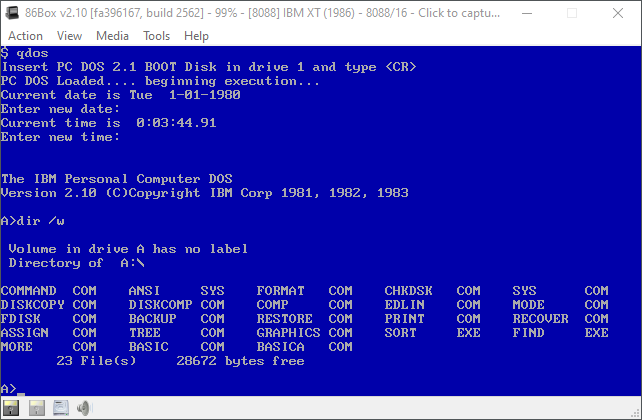
Finally QNX has some sort of a DOS emulator or hypervisor called QDOS:
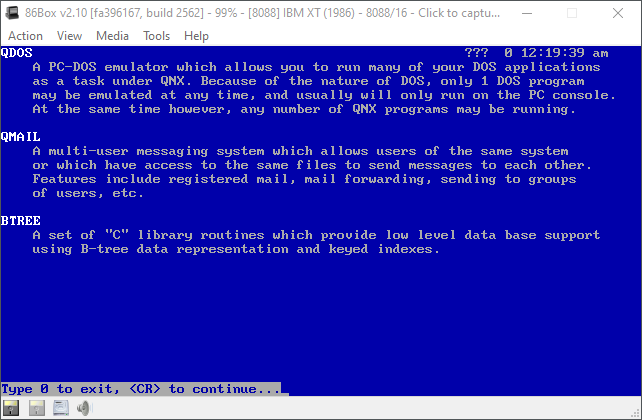
Unfortunately I don’t know how to exit that. There is a little bit information about QDOX in expl inform section about other QNX products:
Congratulations to Forty for winning the competition and gettin $100 via PayPal. Thanks to his time and work you can boot and play the system yourself. 86Box files are here.
(This is a guest post by Antoni Sawicki aka Tenox)
In a recent few virtualization projects, such as QNX 1.2 (and demo disk), Interactive Unix (also older post) and Caldera (and older post), I have tried the 86Box emulator. Unlike typical hypervisors, 86Box emulates a wide variety of video and network cards. Everything I tried simply worked out of the box, so instantly fell in love. 86Box is now my daily drive for running old PC operating systems. I have decided to revisit some of previously half assed virtualization attempts with the awesome new emulator.
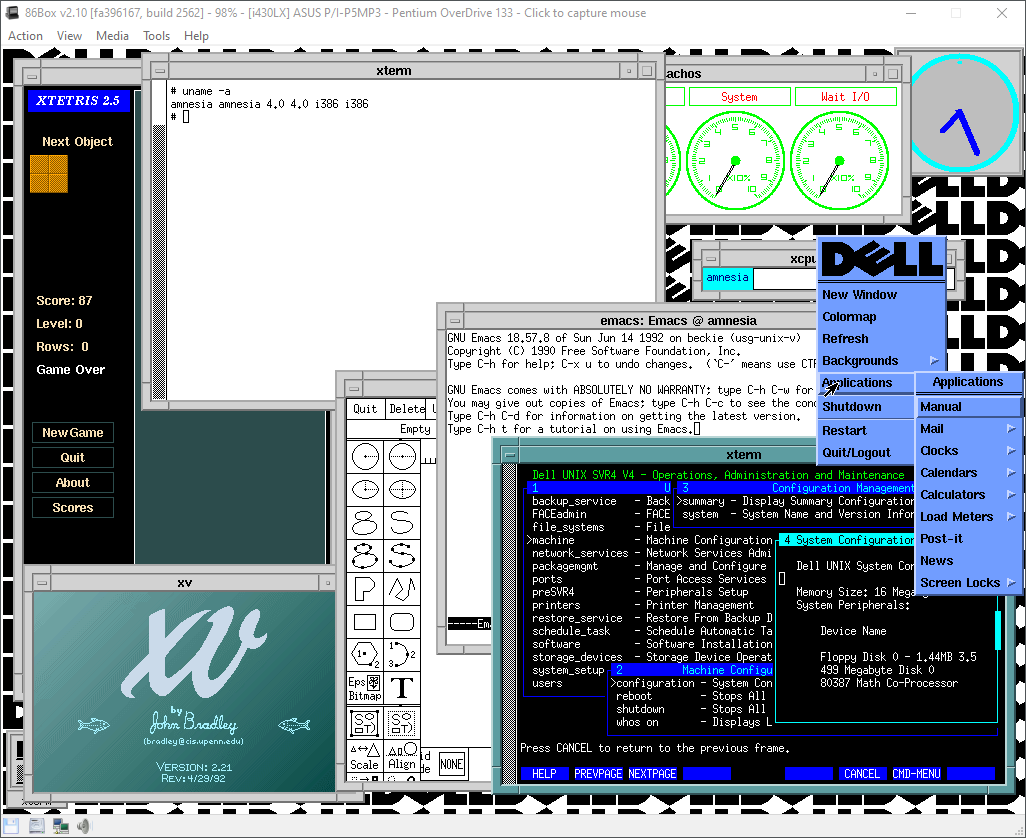
I have virtualized Dell Unix back in 2012 using Bochs and QEMU. Even with the community support, we have struggled to get a decent video resolution and had to resort to use of SLIP for networking. Today let me reintroduce Dell Unix more properly! With 1024×768, 256 colors video and proper networking using emula NIC.
The journey started with allsoft.img which is an image of the OS and all packages installed from a tape on Bochs. I have disabled a few services in /etc/rc2.d namely mouse daemon (mse), sendmail, uucp, lp, etc.
For X Window I have edited /usr/lib/X11/Xconfig, enabled serial mouse (Microsoft) and 1024×768 mode. I have used Tseng ET4000AX VGA which is recognized by Xmach server. This allowed X / xinit to run correctly. However for startx to work you also need to edit /usr/lib/X11/xinit/xserverrc, as it seems to be using slightly different configuration. For graphical login you can add something like x:3:respawn:/usr/bin/X11/xdm -nodaemon to /etc/inittab. However I have noticed that when ran from init, xdm seem not to pick up the Dell customized config files. Perhaps rc startup script should be created instead.
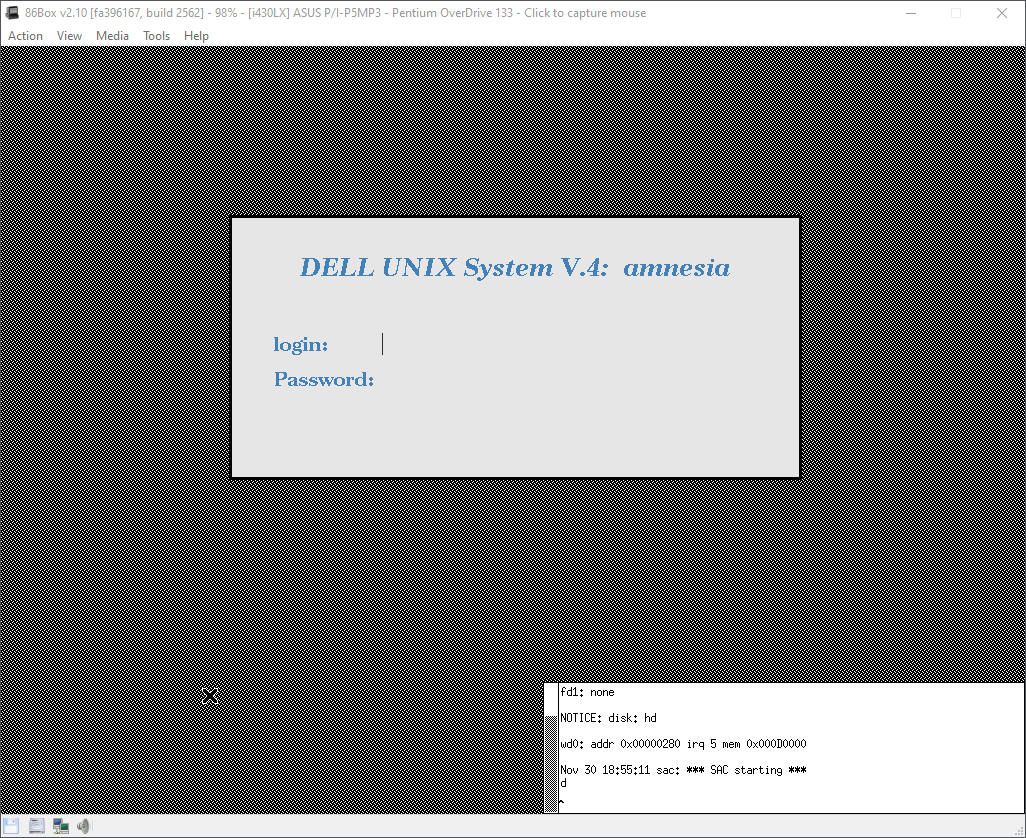
As a final note on X, the system has virtual consoles. Like other SVR4 you access them by pressing SYSRQ and F keys. F1 is a text mode console, F2 is Xserver. This is my Dell Unix hero shot:
Dell Unix running under 86Box
Networking was even easier. Dell Unix supports WD8003 and 3C503 NICs. Firstly I wanted to try the WD. In /etc/conf/pack.d/wdn/space.c you can find the predefined hardware probes. I have picked one of supported modes and the card was detected on subsequent reboot. That’s it. No need for kernel rebuild or any configuration. I have not tried 3C503 yet, but if you want the driver for it is named ie6. For TCP/IP configuration you set your IP address in /etc/hosts and gateway in /etc/inet/rc.inet file.
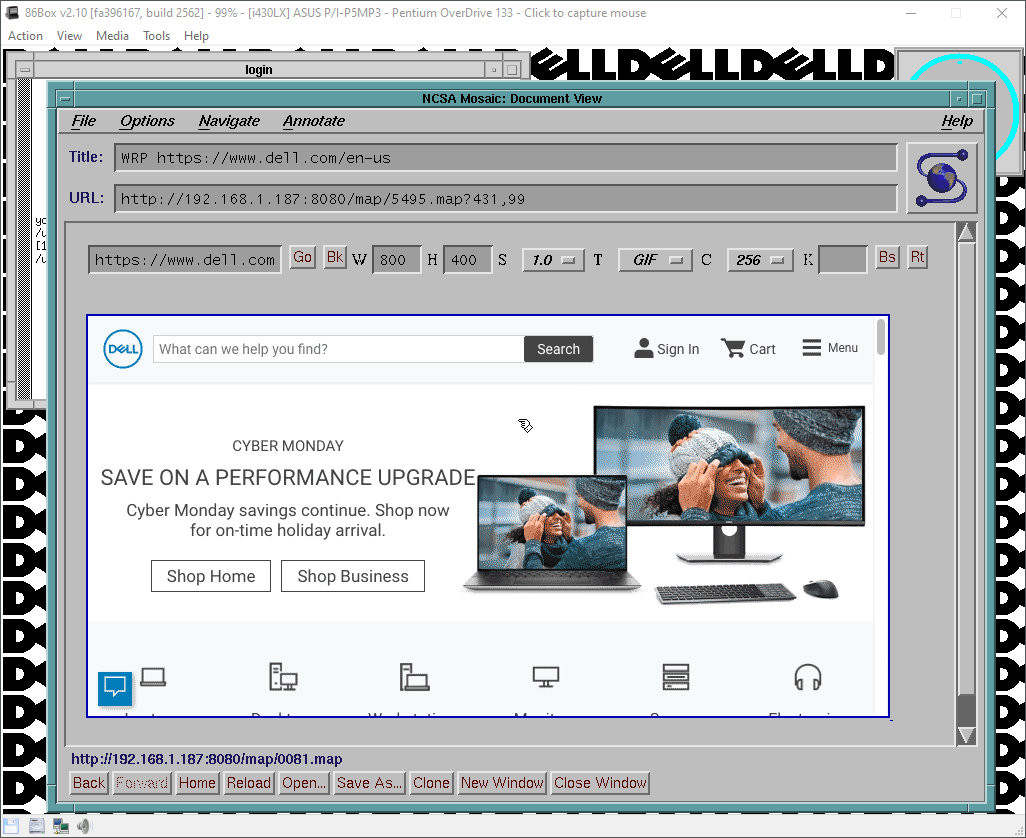
I was able to quickly compile Mosaic, which curiously had Makefile settings for Dell Unix. Took it for a spin on the web with help of WRP:
One could probably want to compile more recent version of Mosaic with PNG support or maybe some more recent browser all together.
The system comes with a bunch of open source software in /usr/dell, however suprisingly there is no bash or even gzip. I have compiled some essentials. They are available here and as a /usr/local tarball.
For the lazy, as usual you can get a complete os image for 86Box here. Make sure to attach pcap to your local network interface and set IP address / gateway / dns server accordingly.
If you port some cool software or find any interesting gems in Dell Unix please comment!
Have fun with virtualization!
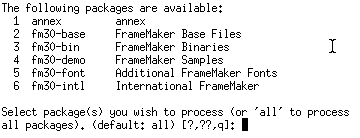
Update: I been looking at contents of various distribution media for Dell Unix that have surfaced here and there. On a DAT tape I bought on eBay a few years back I found this file:
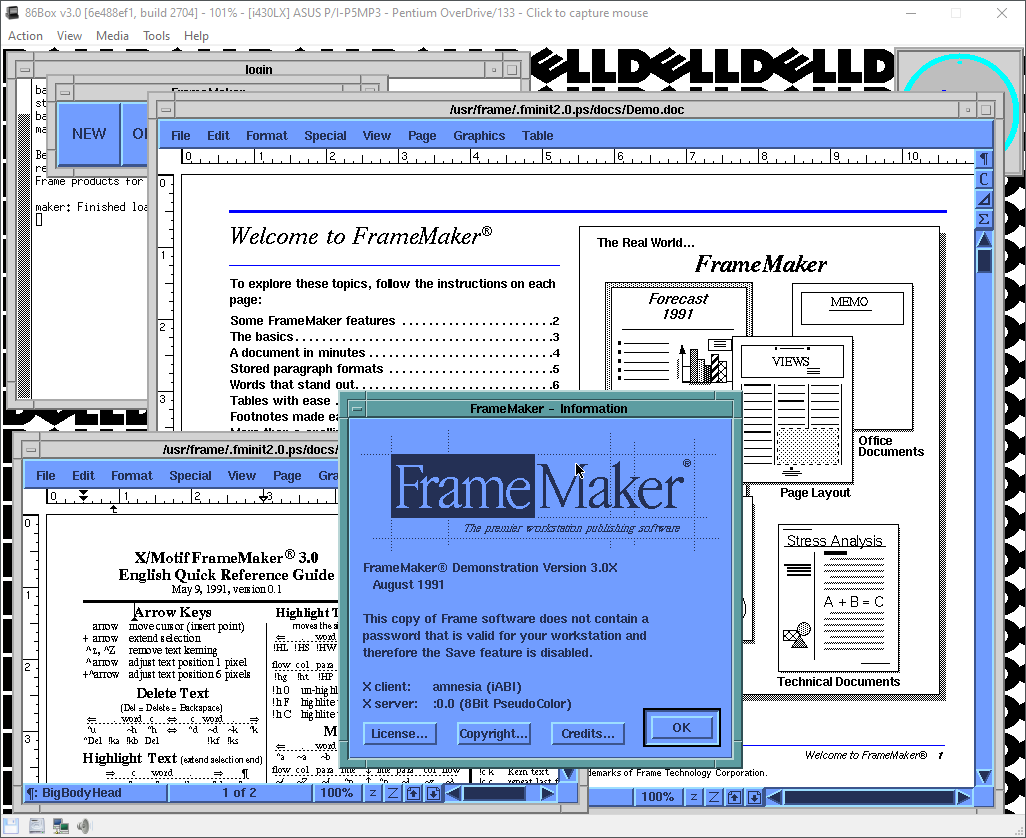
Whoa! Of course I want to install all of it! This is how FrameMaker 3.0 looks on Dell Unix:
I have updated the disk image for 86Box to have this included. You can run demo mode of FrameMaker by executing /usr/frame/bin/demomaker. I also imagine that this can be installed on pretty much any x86 SVR4 and above, maybe even Linux. If anyone has a license code / serial number please let me know!
(This is a guest post by Antoni Sawicki aka Tenox)
This is a continuation of the vintage DOS/Windows hypervisors and emulators for Unix series. So far I have covered things like Merge, MergePro and Wabi. This time I’m taking a closer look at VP/ix. This early DOS hypervisor was developed by Interactive Systems Incorporated (ISC). Initially released and included with their INTERACTIVE UNIX System V/386 operating system it was also available for SCO Xenix 386, Sun 386i, AT&T WGS as Simul-Task 386. The last two versions were significantly enhanced to allow DOS/Windows graphical apps run in windowed mode, which unfortunately is not the case with IX and Xenix, where graphical apps can only run on the console. VP/ix was released around the same time as Merge in 1987 and it was its main competitor. Both products are early hypervisors, they use Virtual 8086 mode and require 386+ to run on. This is in contrast to SoftPC which is a full x86 emulator that can run on different CPU/architecture hosts.
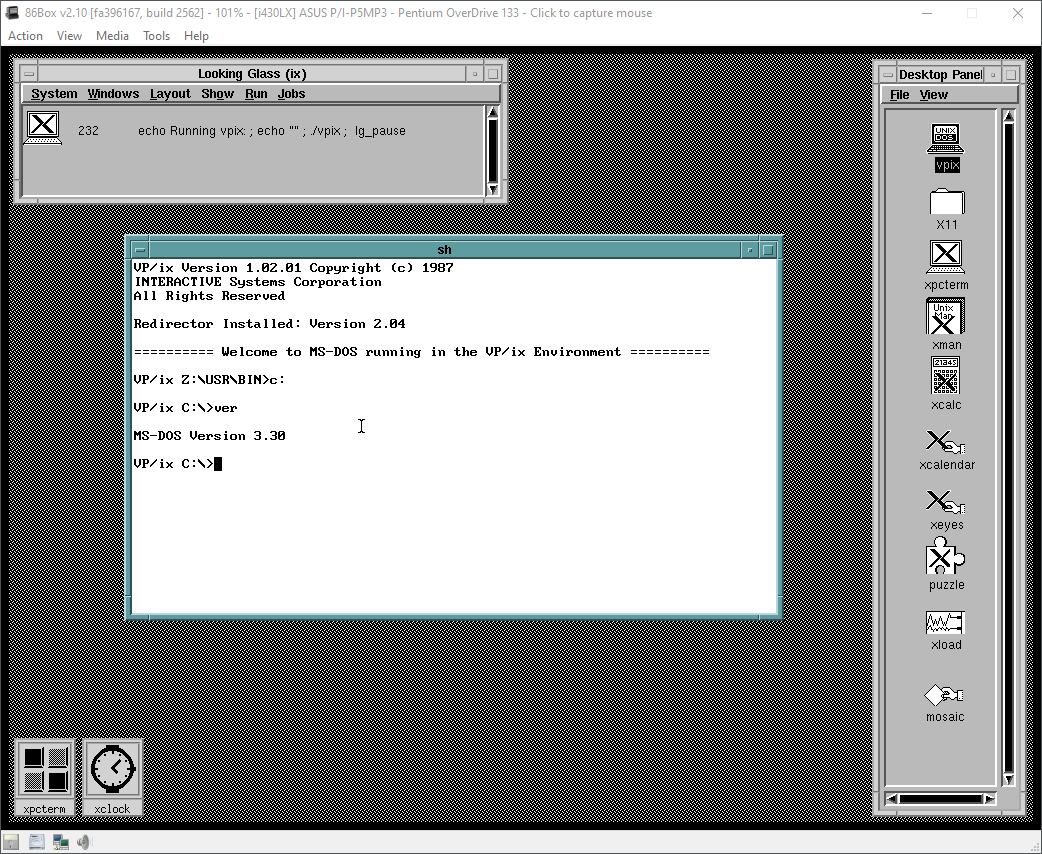
VP/ix comes with ISC INTERACTIVE UNIX that is covered in my previous article. The product was installed as part of the 50 floppy disk set. You run it with an icon in Looking Glass environment or invoke from terminal or console via “vpix” command.
VP/ix comes with it’s own custom version of MS-DOS 3.30. It allows a variety of cross unix/dos enhancements such as shared disks, automatic dos/unix file format conversion, listing unix attributes from dos as well as running unix commands from dos and vice versa. One of super cool features is that you can pipe output of DOS commands to Unix command, for example:
C:\> dir | wc -l
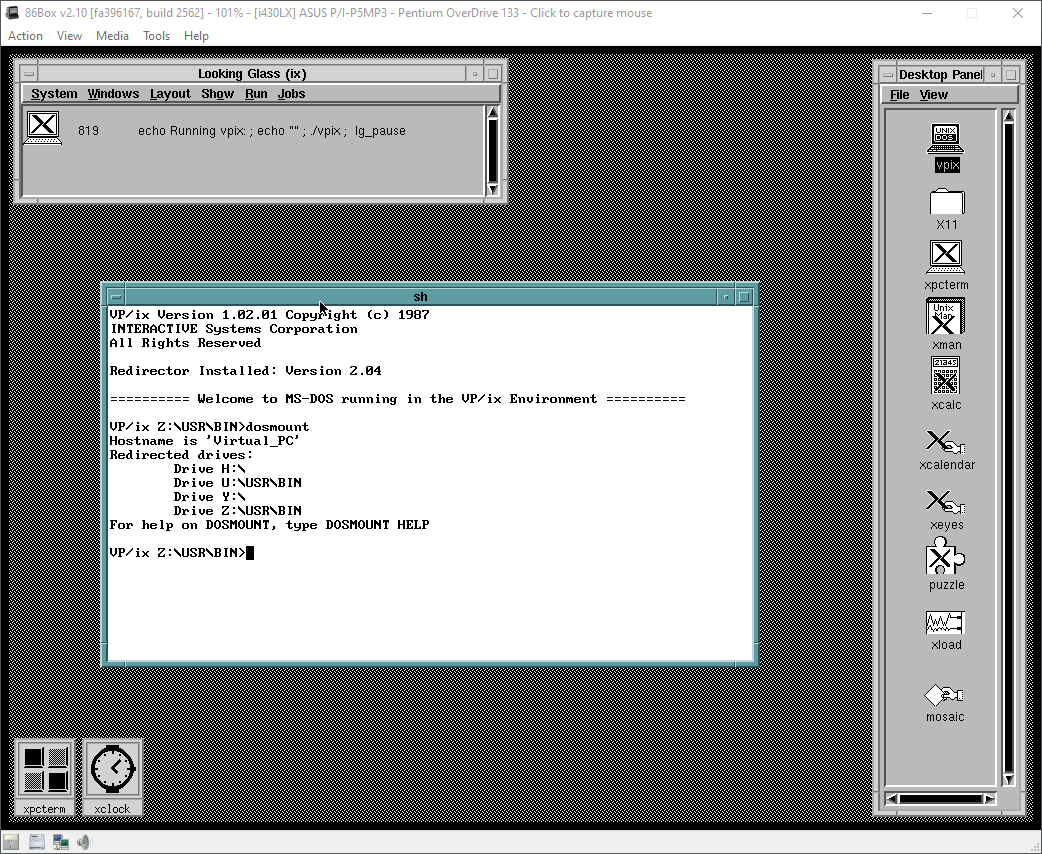
…will do a DOS dir and pipe it to Unix wc command. You can map Unix paths to DOS drives:
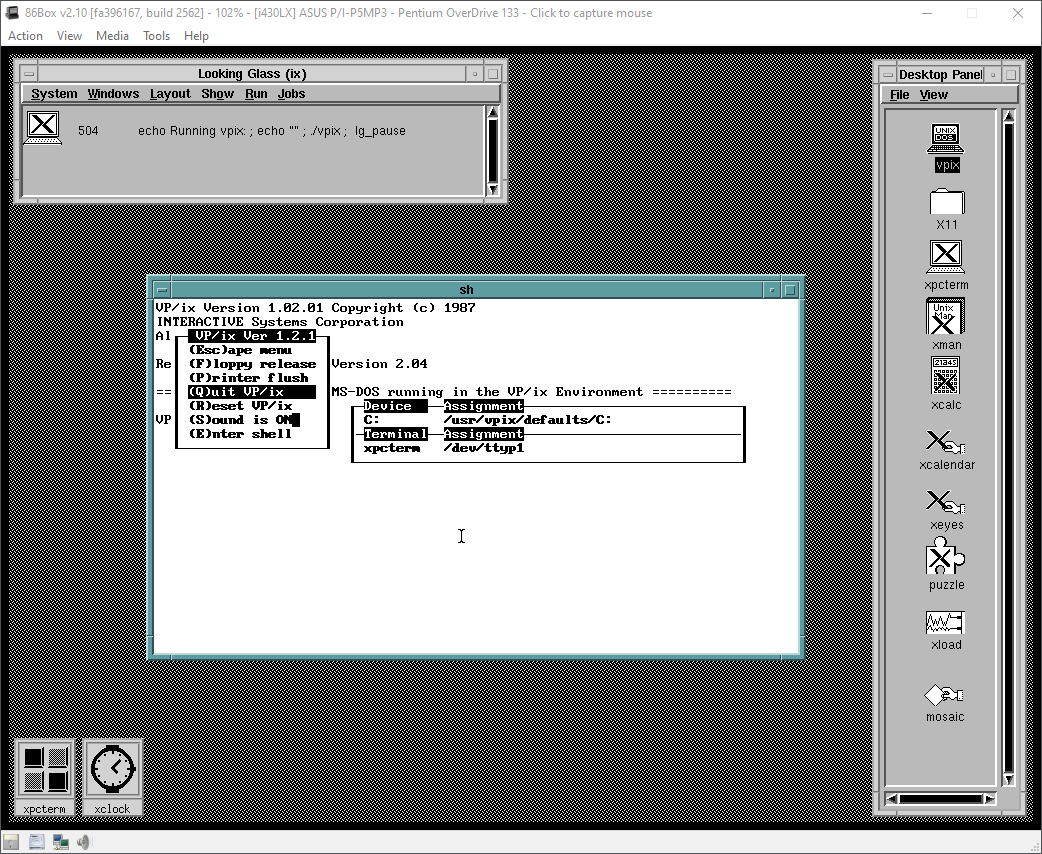
VP/ix has an interactive Menu invoked by SYSRQ + ‘m’ key:
You can load floppy disks, turn sound on/off, restart/quit or run unix shell.
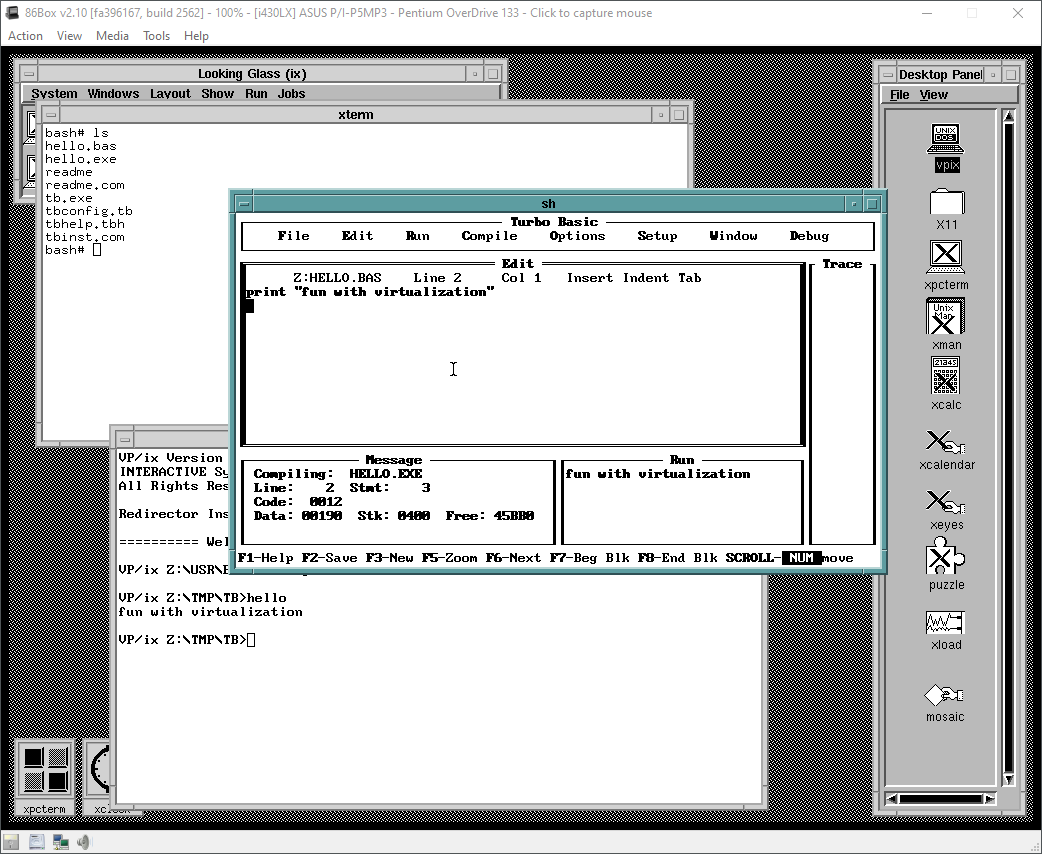
As for running normal text mode apps it’s business as usual:
Multiple instances of DOS can be launched and files shared between them. Also if you are a different user on different terminal or connected remotely. Remote terminal also supports mapping dos line characters to ASCII.
The same however cannot be said about graphical DOS or Windows apps. Under INTERACTIVE UNIX and Xenix you need to run them from the text mode console:
One day I will probably want to look at VP/ix on Sun 386i or AT&T WGS as they solved this problem. Newer versions of Interactive Unix (4.x) and VP/IX also need to be investigated.
According to the documentation, you can run Windows 3.x in real mode using win /r however I did not have patience to install this.
INTERACTIVE UNIX 3.0 with VP/ix preinstalled can be downloaded here for 86Box or VBox OVA, however the later does not have networking and resolution is only 800×600. Login as root/root. When importing OVA in Vbox you may need to disable import as VDI. For 86Box version please read readme on how to circumvent licensing error.
(This is a guest post by Antoni Sawicki aka Tenox)
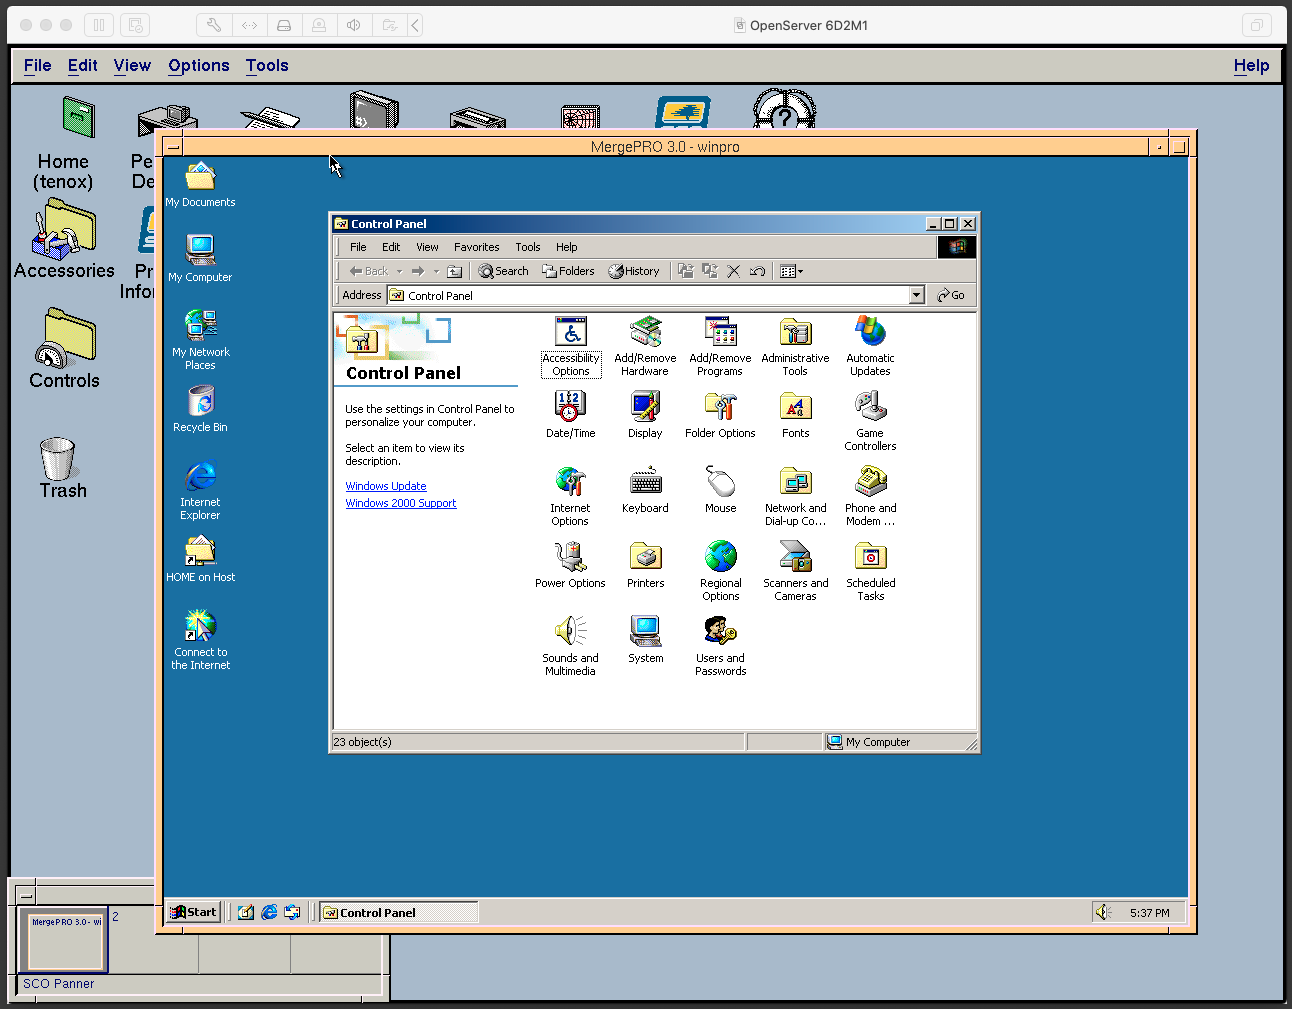
In a recent post about OpenServer and Merge I covered OpenServer 5 and Merge 5.3. Thanks to a comment from Uli I have learned about MergePro which looks like is a rebranded Win4Lin. Intrigued I wanted to try it especially that you can download it from SCO ftp server as Uli pointed.
I’m going to be using VMware Fusion on Mac, which is now free for personal use. They call it Fusion Player, however unlike Workstation and Player, it has exactly same features as non-free Fusion version. For the OS I’m going to use Xinuos OpenServer 6 Definitive, however you can easily download OpenServer 6.0.0Ni from the ftp. I also have copies in my archive.
Installation is straightforward. You can skip licensing and use evaluation license, however for convenience you can use following keys:
If you are installing 6.0.0Ni you will also need MP4 update. 6D2M1 is already patched.
To install MergePro you need to copy this package to the host os and install like so:
# pkgadd -d /tmp/MergePro-6.3.0-04f_pkgadd.stream
In the following step, mount Windows 2000 or XP SP1 or SP2 ISO and run:
# loadwinproCD
Once Windows is loaded you need to install it as a non-root user using:
$ installwinpro
After it’s installed, to run you type:
$ winpro
Unfortunately I have failed to install Windows XP with variety of errors and blue screens. Windows 2000 works fine, however it feels bit sluggish and mouse click doesn’t always register. It looks like there are some sort of Windows Guest Additions being injected in to the OS so one would expect this to work just fine.
During startup I have noticed that MergePro installs and uses KQEMU kernel module. Also this screen looks suspiciously familiar… where did I see this before?
The BIOS and VGABios look definitely stolen from Bochs. HDD controllers look like Win4Lin. I’m not going to go in to deeper analysis of what MergePro is made of at this time. Looks like a topic for another article or even better – your comments 🙂
Also if you want to license the copy of Merge use following key:
MergePro 6.3.0f: SCO138318 / bhtecusg
Finally for the lazy here is fully installed OVA, password is root/root and tenox/tenox for the regular user.
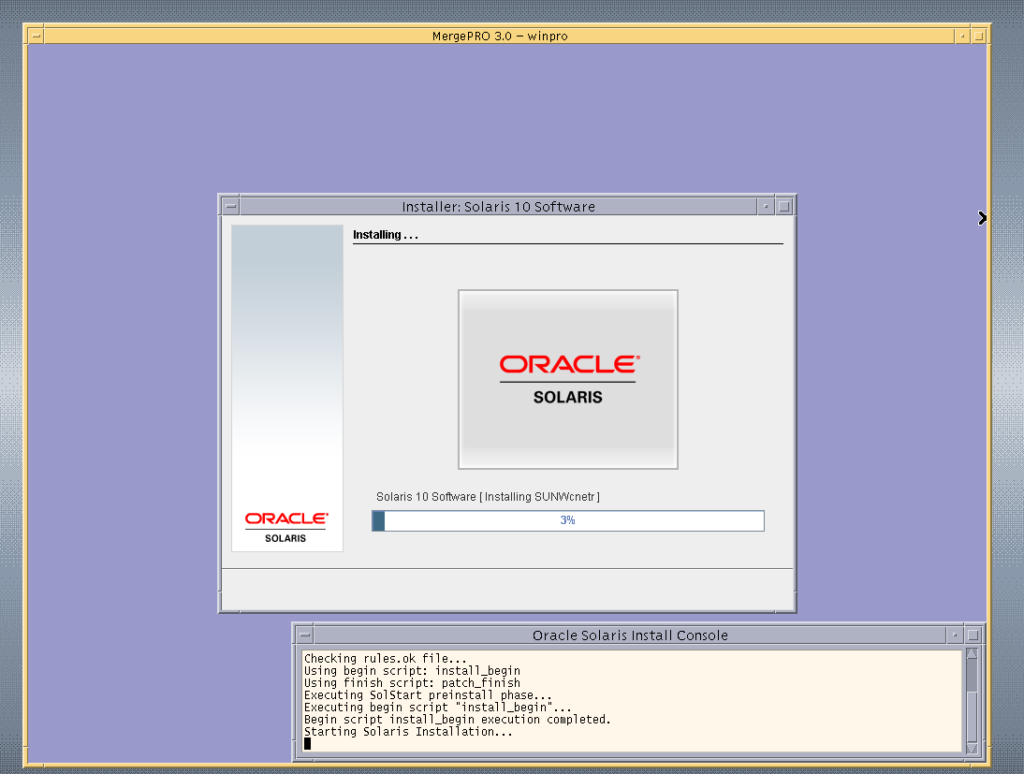
UPDATE: Thanks to reader Larbob we now know that you can install any guest OS, on MergePro not only Windows! Use installwinpro -c /dev/cdrom/cdrom1 -w winxppro to boot the cdrom without checking what OS is actually on it. Here is a screenshot of Solaris x86 being installed on MergePro on UnixWare:
So.. you could install UnixWare as a guest VM under OpenServer or vice versa??
I got a question the other day about how to easily move files in and out of Cockatrice III, especially since as part of my ‘try to make it stable by cutting features out’ approach I removed the ability to mount foreign directories under Basilisk II.
For my personal use, I have an AppleTalk LAN, and I just use a Windows NT 4.0 server with AppleTalk, as a file server/proxy and that works pretty good for me, so much so that I didn’t even think of any other way of doing this.
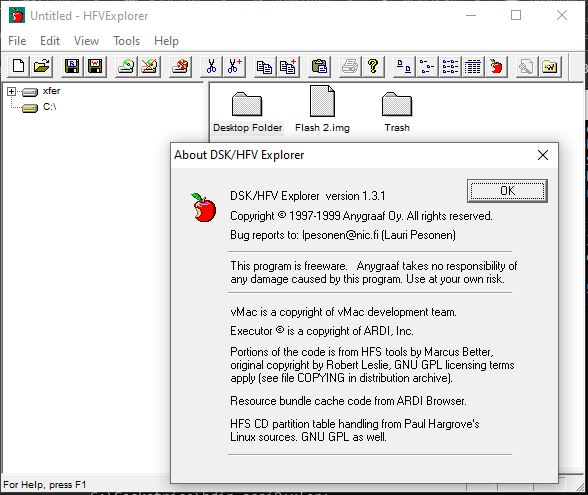
HFV Explorer 1.3.1
One of the quickest and easiest is HFV Explorer, however the ‘catch’ being it doesn’t read SCSI disk images (aka things with partition maps). But for the ‘massive floppy’ images it’s more than fine.
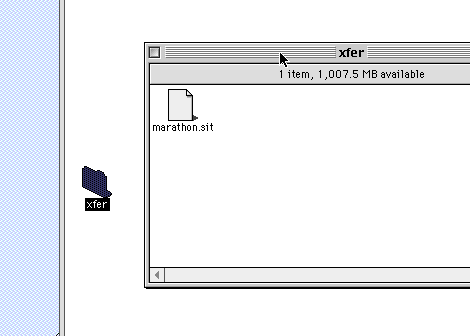
HFSUtils is another approach, it’s like the old ‘MS-DOS utils’ of ancient Unix days, allowing you to ‘mount’ a disk image, and copy files in and out. I thought I’d give this a spin to copy Marathon into my virtual OS 8.1 image. It’s pretty straight forward first ‘mount’ the disk image:
C:\Cockatrice>hmount.exe scsi0.dsk
C:\Cockatrice/scsi0.dsk: contains 1 HFS partition
Volume name is "SCSI0"
Volume was created on Sat May 19 14:04:04 2018
Volume was last modified on Mon Nov 16 14:59:02 2020
Volume has 1056545280 bytes free
Now make a directory:
C:\Cockatrice>hmkdir scsi0:xfer:
And then copy in the file:
C:\Cockatrice>hcopy marathon.sit scsi0:xfer:

C:\Cockatrice>hdir scsi0:xfer:
f  ????/UNIX         0   5627676 Nov 16 15:34 scsi0:xfer:

C:\Cockatrice>
And just like that it’s there!
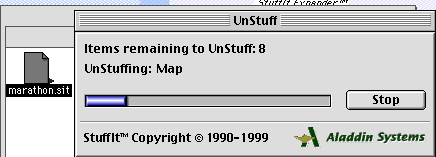
And yes it unstuffs!
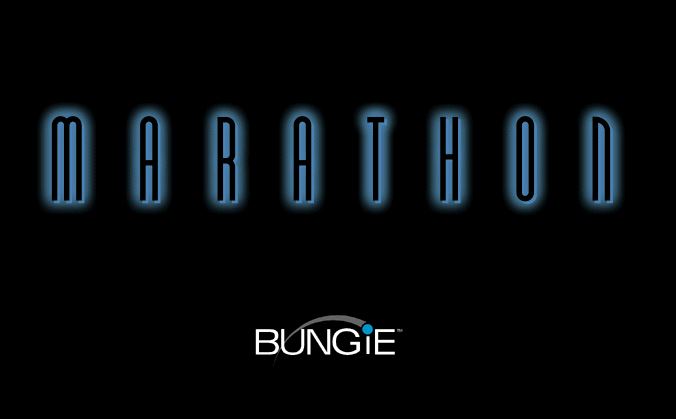
And just like that we have downloaded a game from the garden, copied it into a virtual SCSI disk, and gotten it to run, from the painful CLI.
In the previous post about SCO Merge I briefly mentioned WABI, which is a Windows ABI emulator for Unix. Initially released by Sun Microsystems, it’s believed that it came with acquisition of Interactive Systems Corp (ISC) and Interactive UNIX. It was available for SPARC, x86 and PowerPC Solaris as well as IBM AIX. Around 1997 it was released for x86 Linux by Caldera. This article will focus on Caldera’s version specifically.
Although entirely possible to install WABI on another RPM based distribution such as Red Hat, I’m a purist and wanted to try it on Caldera Open Linux. The install is pretty straightforward you mount the iso file and run install script. In a next step you need to install an update to version 2.2D. This is done by replacing /opt/wabi/bin/wabiprog with extracted version of this file. Thanks to readers of this blog post for sharing these.
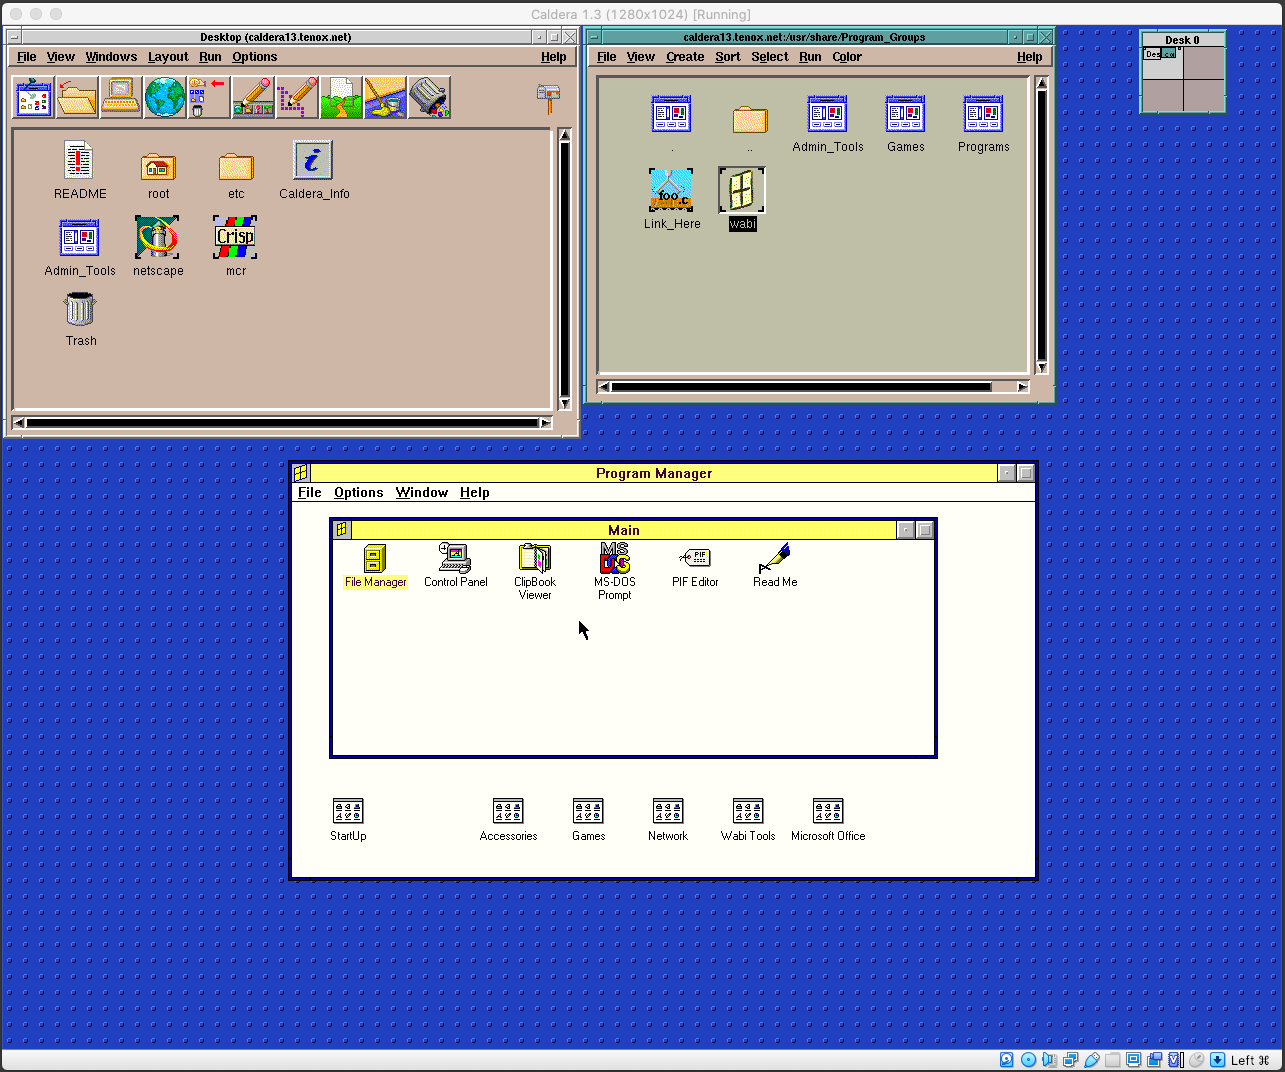
When launched for the first time, you will be prompted to provide copy of Windows 3.1. This the main difference with WINE which specifically does not require copy of windows to run apps. I have noticed that WABI is rather picky about lower vs uppercase when installing software. There is an utility called wabimakelower to help there. You can also add an icon to one of Caldera Linux / Looking Glass program groups.
Once you run it, it’s Windows 3.1 as usual:
WABI was designed for running productivity apps such as Office:
You can even run Visual Studio:
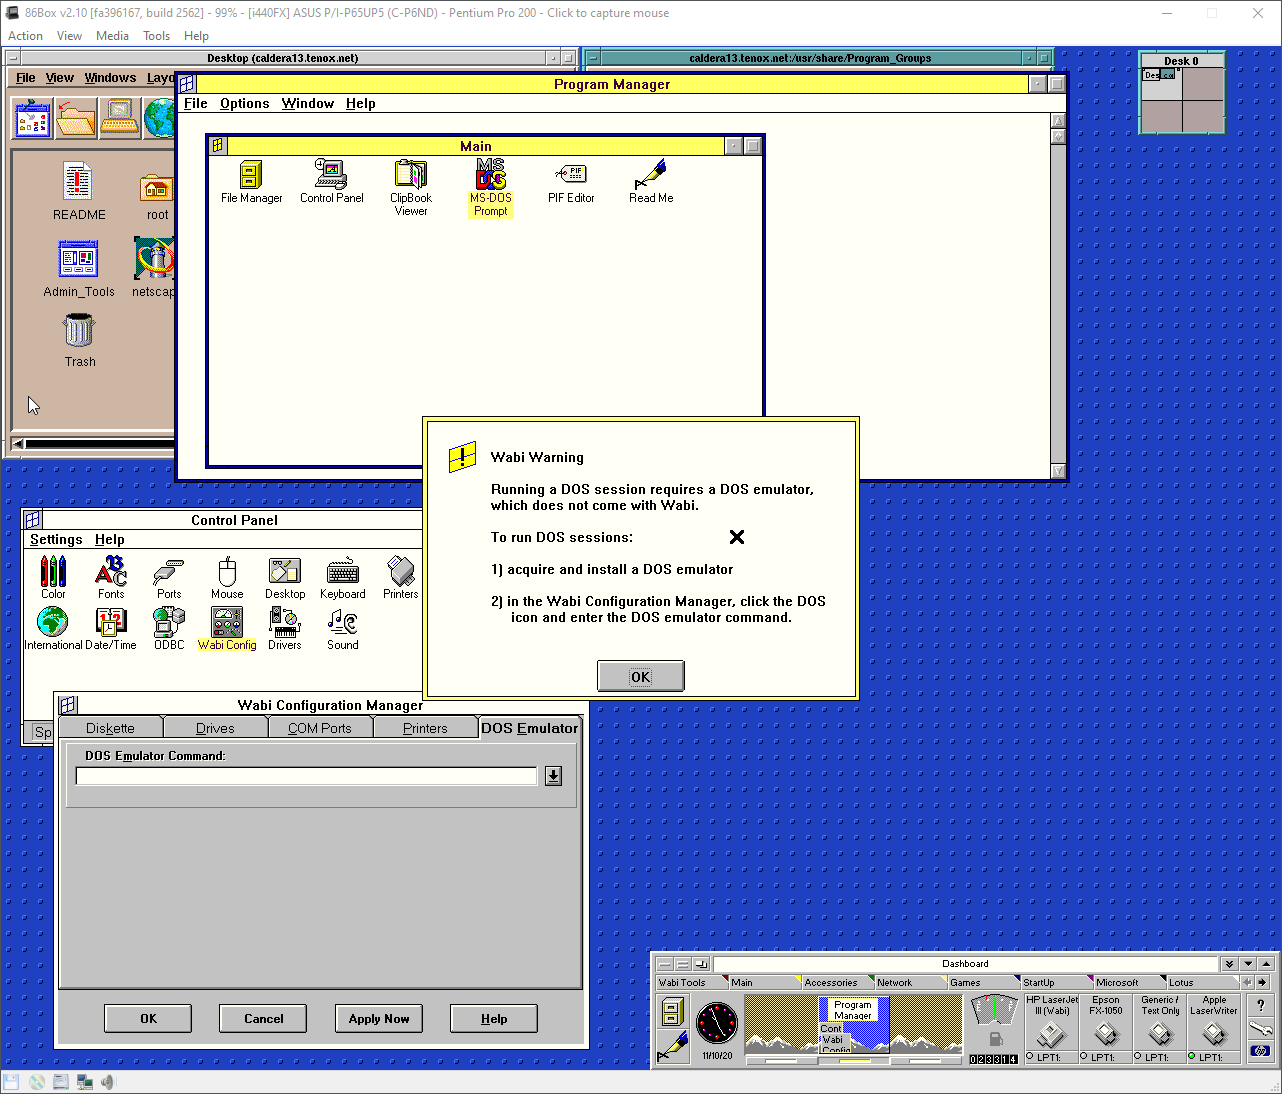
Curiously WABI is not a MS-DOS emulator. In order to run DOS apps you need to install such and configure it in WABI Control Panel:
For the lazy, a readily preinstalled version is available as OVA and 86box. Root password is “caldera”.
(This is a guest post by Antoni Sawicki aka Tenox)
A friend and I were recently discussing differences between WABI, WINE, WISE, Merge, VP/IX, FX!32 and SoftWindows. This article covers Merge specifically which is a DOS/Windows emulator initially built for AT&T 6300 Plus computer. Later ported to UnixWare, OpenServer and eventually served as basis for Win4Lin. Later versions of Merge were build using Microsoft WISE SDK which allowed to run apps without full copy of Windows kind of like WINE. I will be running it on OpenServer 5 using VirtualBox. However one could get it going on UnixWre and under any other hypervisor same as easy.
For Vbox/OSR5, when creating a VM, make it other/other type, give 256MB to 1GB RAM and 4GB HDD. Once VM is created go to Settings and change network adapter to Intel PRO/1000 MT Desktop and Attachment to Bridge mode. For some reason I could not get DHCP working out of the box. Also under Display change graphics controller to VM SVGA.
One can get the last “real” OSR5 from this link. There also are never Xuinos versions and specifically targeted for VMware, for example this one.
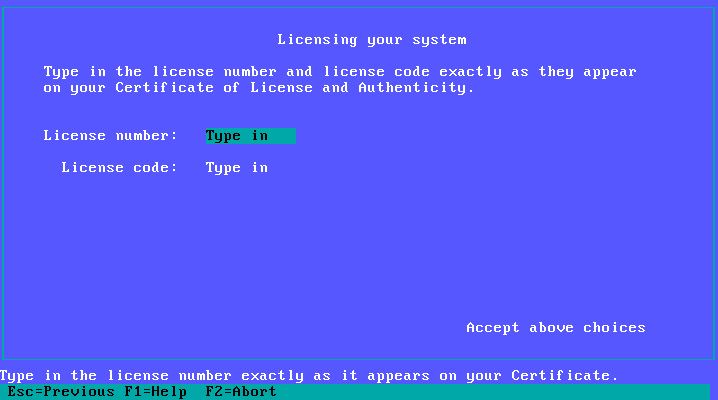
Boot and go through the prompts as normal. At some point you will be stopped by a lovely prompt for license number and code:
Enter SCO043568 / pnhohvqm to get past this.
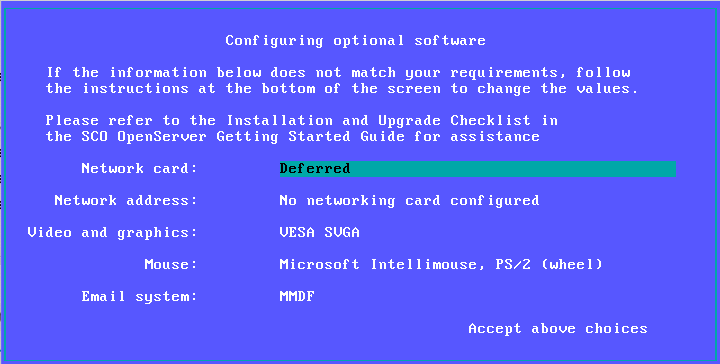
Watch out for this screen:
Don’t worry about not being able to get the NIC detected at this point. Leave it as Deferred for now. You need to install MP5 update and a driver update for this to work. This will be covered later.
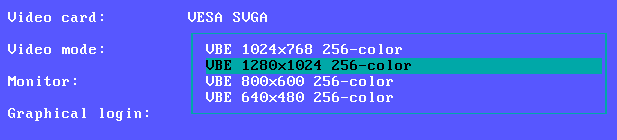
Select some decent resolution for VESA SVGA:
Also select PS/2 Mouse:
The rest should just fly through on autopilot. Once system boots login as root with the password you set.
First thing you will need to install MP5 update. Download the ISO file from this link and attach to your hypervisor. Open the terminal and type “custom” to install software. Or double click that fancy “Software Manager” icon on the desktop. Under Software click Install New… and select this host. Select your attached cdrom.
You will need to install Maintenance Pack 5 and GFX / NIC Drivers:
Make sure to hit install twice one for each of these items as they cannot be selected together. Once complete you will need to reboot of course.
After reboot you should be able to add and configure the NIC. You will need to either run “scoadmin” or go to System Administration – Networks – Network Configuration Manager. Add a new LAN adapter. The Intel PRO/1000 should be detected automatically. I could never get DHCP to work and just used static IP config there. Make sure to ok re-link the kernel and reboot.
Installation of merge is a little bit more complicated. The latest version can be downloaded from here. If you are installing under UnixWare then this is your folder. Transfer it to your OSR5 VM via browser, ftp, samba, iso file or however you like. Open a terminal and go to the directory with the cpio file file and run:
cpio -icv -I osr5_merge5323a_vol.cpio
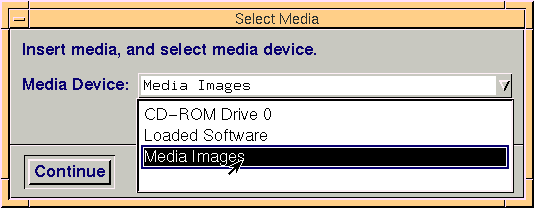
This will produce a bunch of VOL* files. These are installed with “custom” as well. However instead of cdrom you select Media Images and point to the directory with extracted VOL files:
There should be an option to install Merge.
You will be also prompted by a lovely license code prompt. Enter SCO837369 / bhtepkxy to get through. You will need to reboot again.
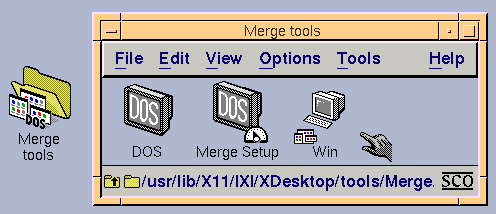
After login there will be a new folder on the desktop with Merge tools:
Root is not allowed to run it, but you can pre-install Windows as root. To do so go to Merge Setup and open System Wide Administration. You will find a button to Load Windows CD. You can just mount any bootable Windows 9x cdrom to your hypervisor and Merge will copy it for you.
There will be a prompt for network configuration. I opted for WinSock option which is user mode emulation, it’s enough to get a web browser going. If you need to use SMB/CIFS, open network shares, etc you will need the bridged mode with extra IP address for the guest.
Finally you will need to create and login as a different user to get this thing running.
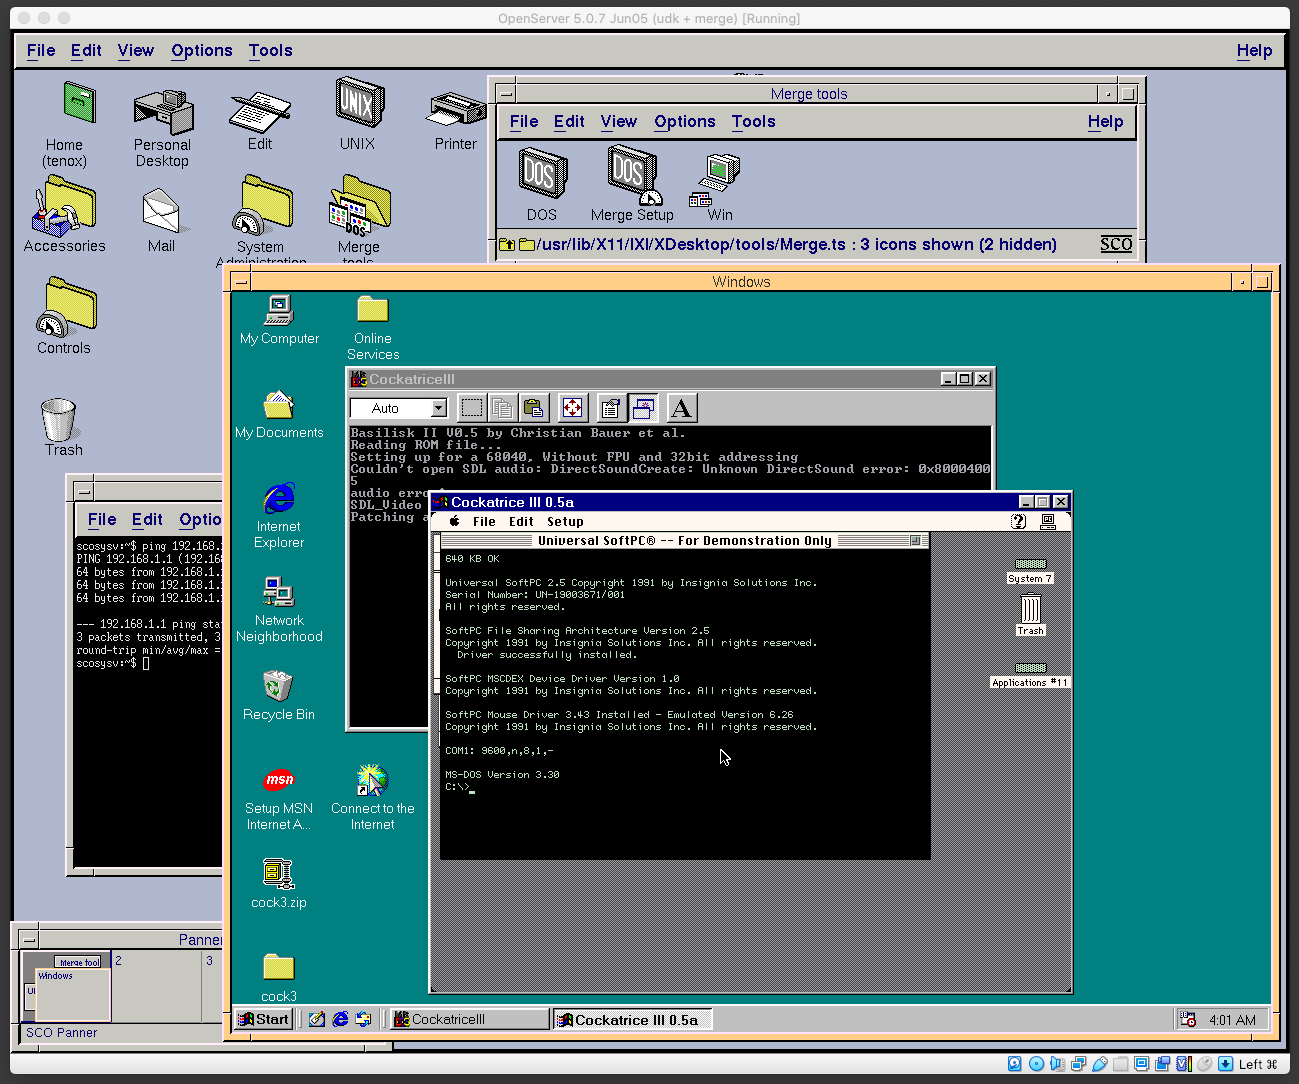
This is the final product, with 4 level inception:
For the lazy of course provided is a fully installed OVA, one with VBox NIC and one with VMware NIC. Passwords are root/root and tenox/tenox. Note that this image has a static IP address of 192.168.1.111.