So the source code to the Macintosh port of System Shock was just released

It’s the ‘classic’ MacOS. And it requires Code Warrior 10 to build. Apparently, its for the PowerPC only, although I haven’t tried to compile it yet, as I foolishly just upgraded to 10.5 on my PowerPC, which of course has no classic support.

Source code is on github, here.

It’s a nice present from Night Dive studios.  I know that many people are mad at their reboot being consumed by feature bloat, but at least they aren’t going down into obscurity.

As always, enjoy!

Anyone in need of bash?

I found this post the other day, and thought it was interesting.

Date: 13 Apr 91 18:17:44 GMT
Organization: University of Helsinki
Lines: 18

I've recently ported bash to minix-386 (nice, but takes about 300kB of
RAM). It's been "tested" by me using it all the time (good editing and
history - couldn't live without it any more), but I won't make any
guarantees. If anybody is interested in cdiffs against bash-1.05, please
mail me (I'll post if there is enough interest).

The port definitely needs GCC, and 386-minix. ST-minix will probably
work as well (I've sent it to one ST-minixer), after changeing a #define
LITTLE_ENDIAN to BIG_ENDIAN. If the port already has been done by
someone else - just ignore this message.

		Linus Torvalds		[email protected]

PS. I've hacked the kernel to accept gcc-compiled programs directly
without going through gcc2minix, but I haven't tested it very much yet
(bash works though, so most things probably will). Changes are trivial,
mail me if interested. (And yes - it accepts old minix format too - you
don't have to recompile everything :-)

Naturally it’s about the impending birth of Linux.  First he needed to get GCC running under Minix 386, but I didn’t know at the time that he had patches floating around to allow Minix to directly run the GCC A.OUT format executables.

Scary to think that if Minix had allowed submissions and ‘bloat’ that Linux would have never been.

On the other hand, much like 386BSD the backpressure of having some kind of free BSD/UNIX system which did take in submissions was overwhelming, with the false start of 386BSD going the route of Minix and in that first critical year not pulling in any of the additional patches, while Linux grew by leaps and bounds.  By the time the AT&T vs BSDi lawsuit hit, well the game was already in Linux’s favour, even with it’s already fragmented distro base.

1.1.1.1

So cloudflare decided to launch their own DNS, on 1.1.1.1 and 1.0.0.1 .  Apparently in a bid to fix global censorship.  I’m on the road, out of China right now, so I can’t test at the moment, but later in the week I’ll be back, and check out how the Great Firewall handles it.

I’m guessing this is another bid to increase their case for being a content neutral safe harbour, although their CEO personally screwed that up last year showing that they can and will police content when it suits them….  Talk about oops.

As always that is the consequence of speech, some people are really secret assholes.  Although by teyitr to go all cultural revolution on them, you end up not only making them maryters, but also prove that they cannot be countered with words, but only through censorship.

This to me is the scary consequence of everything being commercial, and the right of free association.  Even some moron who thinks the moon is made of cheese can still get mail delivery, but will they be able to work, open a bank account, get internet, or even get food?

I other news, dumping Facebook drops cortisol levels after 5 days.  Turns out that hippy paradise of everyone being able to instantly communicate and share is actually a living hell.

Dump Facebook, hit the gym, get a life.

Life moves pretty fast. If you don’t stop and look around once in a while, you could miss it.” — Ferris

Happy April fool’s day.

Update, turns out the DNS works from China.  Naturally none of the sites load.

 
$ nslookup
> www.google.com
Server: 1.1.1.1
Address: 1.1.1.1#53

Non-authoritative answer:
Name: www.google.com
Address: 69.63.180.173
> youtube.com
Server: 1.1.1.1
Address: 1.1.1.1#53

Non-authoritative answer:
Name: youtube.com
Address: 203.98.7.65
>

Re-building old GCC distribution tars AKA patching backwards

AKA for everyone but me, who never read the readme.  For some reason I got pointed back to my old GCC 1.27 on MS-DOS article, and wanted to see when the 386 really did first appear, and after a bunch of messing around it was shipped in GCC 1.25

Sat Jul 16 14:18:00 1988 Richard Stallman (rms at sugar-bombs.ai.mit.edu)

* *386*: New files.

So there we are, July 16th 1988!

But looking a the ‘old-releases/gcc-1‘ directory there is no gcc-1.25.tar file! So how to get there from here?  Well the simple answer is to take gcc-1.27, and reverse patch it down using the patches in the patches directory.  The only catch of course is to read prior patches to the reverse to see if any files need to be renamed, otherwise there will be failures… specifically in the file gcc.diff-1.25-1.26

So normally I’ve always patched going up, but with the magical -R flag, you can go backwards!  So taking 1.27 you can go to 1.26 by running

patch -p1 -R < ../gcc.diff-1.26-1.27

And this will take 1.27 and downgrade it to 1.26.  As mentioned above the renames for going from 1.26 to 1.25 needs to be done in reverse:

Before installing these diffs, rename files as follows:

mv typecheck.c c-typeck.c
mv decl.c c-decl.c
mv parse.y c-parse.y
mv parse.h c-parse.h

so do the opposite, and then you can reverse diff.

For anyone who cares I put up the tar files on sourceforge here.

Fun with Empire EFI & OS X 10.6 on Intel

Who needs one, when you can have two?

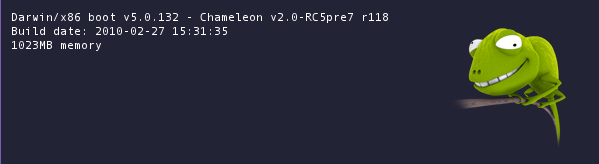
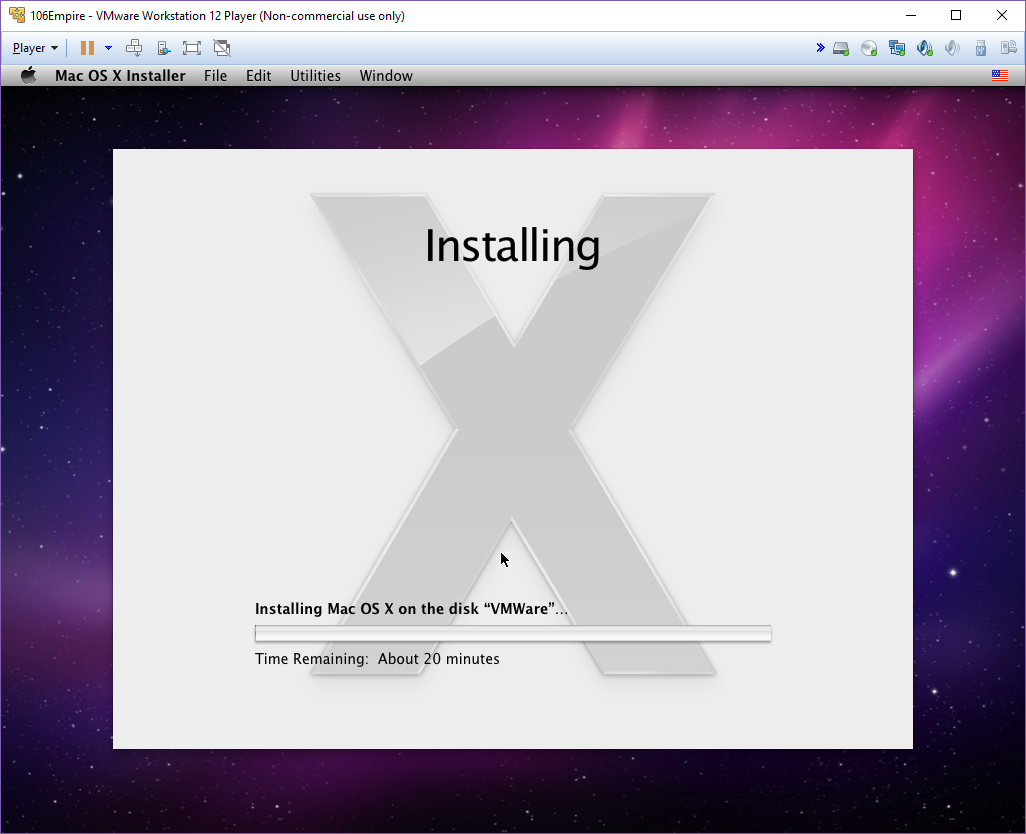
So I wanted to get 10.6.3 running after I somehow ended up with not just one, but two retail copies on my last trip to America… So I’m using the positively ancient Chameleon boot loader, 2.0-RC5 .  I used to use the trendy Empire EFI boot loader, but it’s not working for me anymore with modern CPU setups.

I setup VMWare to use a Windows 10 x64 profile, but removed the hard disk, and re-add it as a SATA drive.  The default SCSI hard disk won’t work at all, but the available SATA works just fine.

Chameleon v2.0-RC5pre7

Boot up the Chameleon boot loader, and then drop to the text prompt (F5/tab) and then put in the following string to the boot loader.

platform=x86pc cpus=1 busratio=7 -v

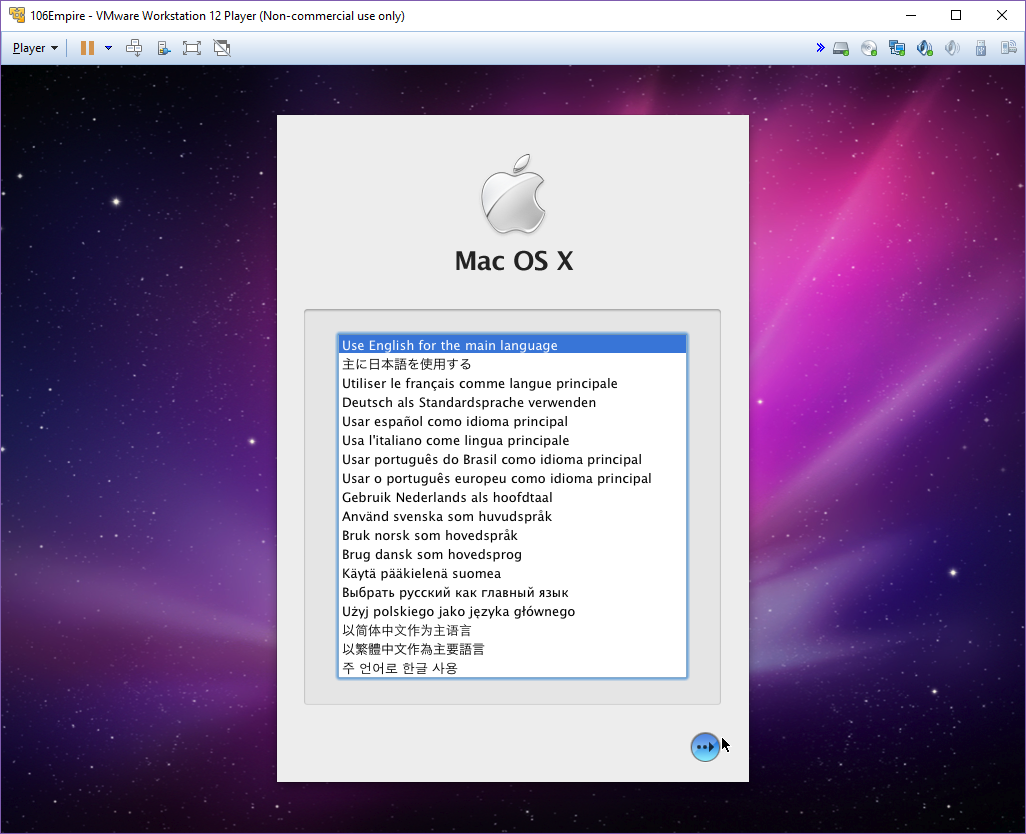
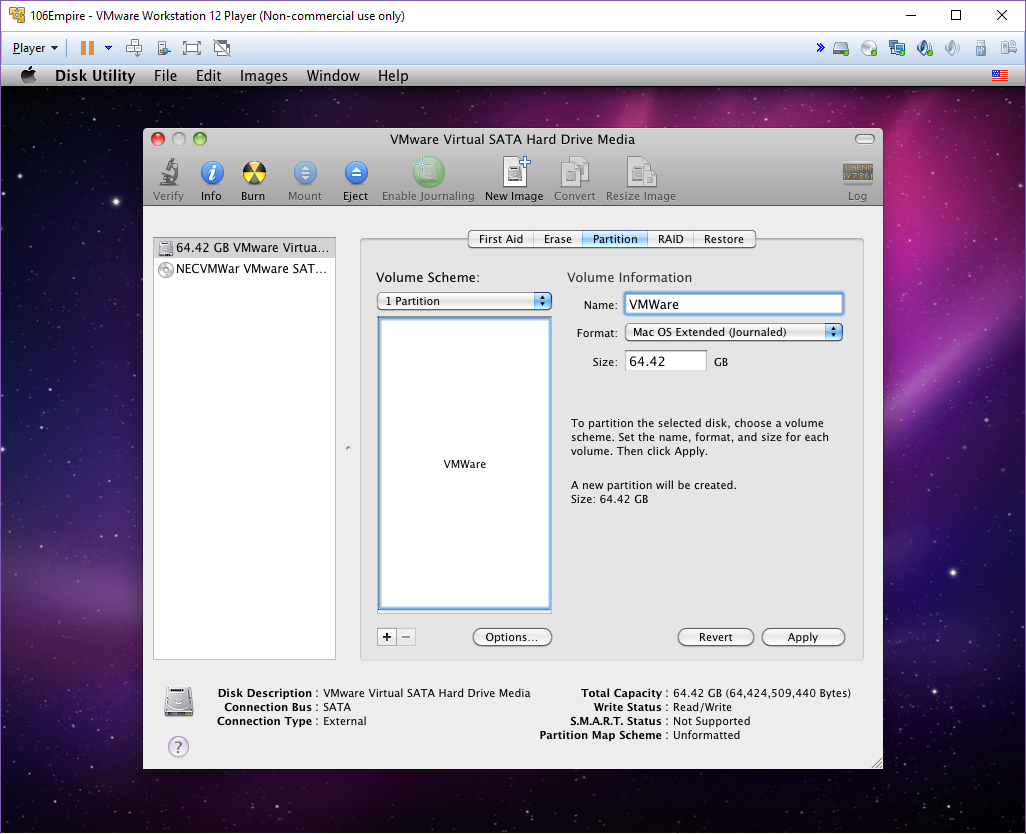
After a minute or so it’ll boot up, and prompt for a language, afterwards the apple menu will appear, letting us select the disk took, where we can partition & format the disk.

After that it’s just as simple as choosing your options, accepting the license, and then you are off to the install part.

And just like that you are teleported to the magical world of OS X on VMWare.

Personally I like 10.6 as it’s the last version that supported Rosetta, although I guess if you want to run old stuff, you may as well just run 10.4.x in a VM now.  With a copy of Darwin 8.0.1 & 3 disks you can even boot up the deadmoo image, make an image of another deadmoo disk to yet another one, then install Darwin in a much larger disk, then boot back to deadmoo, and restore your 10.4.1 back onto the larger disk, fix permissions, and boot into a larger disk.

phew.

One thing is for sure, it’s a lot of work to get some kind of development machine to mess with WebObjects.  It’s probably easier than buying a G5, but I found yet another one in the States (hence the physical copies of 10.6) and lugged it onto the airplane.  Sigh the suitcase I bought for the trip broke, with one of the wheels coming off the suitcase, and as my G5 was over the 50lb weight limit, I had to pay a $100 USD fee to American Airlines to get my G5 home to Hong Kong.  I packed my “new” Studio Display incorrectly, so the 3rd ‘resting’ leg snapped. Sigh.

Computer Show – Printers

Oh sure, it's shameless marketing at it's finest, but wow, it's hitting the 80's vibe pretty hard.

RIP Gary.

Fun with Docker

Well it’s not really all that fun.

SO… in the start of the year I had decided I didn’t want to play site admin all day, and went to a hosted platform.  Things went well for a few months, then things didnt go well with constant database issues.

Then we went down hard for over 24 hours.  I was going to move back, but then everything started to work again.  But things had been spiraling down to unusability again.

So instead of just making a big VM like I had done before , I thought I’d try using Docker to host my website, with a few containers, namely each tier separate.

And oh boy does everyone love edge case docker stuff, but when it comes to actually moving something *INTO* docker, its basically you are on your own.

So yes, the http-https redirect is broken.  My categories are all missing. lots of stuff is busted.  And the supergloblamegacorp.com redirect stuff is missing. I’ll have to re-create that one after I get more stuff sorted out.

I haven’t given up yet…

Half of the fun was setting up the haproxy container, which in itself wasn’t so bad, although some times it wouldn’t pick up any config file changes, so I had to destroy it a few times, but naturally once I ask someone to look, and it’s working fine now.

So for the hell of it, here is my haproxy.cfg


global
maxconn 256
defaults
mode http
timeout connect 5000ms
timeout client 50000ms
timeout server 50000ms

frontend http-in
bind *:80
bind *:443 ssl crt /etc/haproxy/haproxy.pem
http-request set-header Host virtuallyfun.com if { hdr(host) -i virtuallyfun.superglobalmegacorp.com }
http-request set-header Host virtuallyfun.com if { hdr(host) -i superglobalmegacorp.com }
redirect scheme https code 301 if !{ ssl_fc }
mode http
acl host_virtuallyfun hdr(host) -i virtuallyfun.com
acl host_virtuallyfun hdr(host) -i virtuallyfun.superglobalmegacorp.com
acl host_virtuallyfun hdr(host) -i superglobalmegacorp.com
use_backend virtuallyfun if host_virtuallyfun

backend virtuallyfun
balance leastconn
option httpclose
option forwardfor
reqadd X-Forwarded-Proto:\ https
server node1 172.17.0.3:80

I wanted to use Let’s Encrypt to ‘secure’ access to the domains I have, and running the certbot manually…. in a ‘dry run’ I always got this fun and informative error:

NewIdentifier : ACMESharp.AcmeClient+AcmeWebException: Unexpected error
+Response from server:
+ Code: BadRequest
+ Content: {
“type”: “urn:acme:error:malformed”,
“detail”: “Error creating new authz :: DNS name does not have enough labels”,
“status”: 400
}

Which of course got me absolutely nowhere searching.  I thought it may be docker screwing things up, so I shut it down, and fire up an old fashioned standalone copy of Apache, and run the following:

certbot certonly –dry-run –non-interactive –register-unsafely-without-email –agree-tos –expand –webroot –webroot-path /docker/wordpress/html –domain virtuallyfun.com –domain virtuallyfun.superglobalmegacorp.com –domain superglobalmegacorp.com

And get the same result.

I get to the point of absolute frustration, and just decide to forget the dry run all together, as I know I can run it at least 5 times a day before I get banned, for a while, but maybe I’ll get something more useful.

# certbot certonly –non-interactive –register-unsafely-without-email –agree-tos –expand –webroot –webroot-path /var/www/html –domain virtuallyfun.com –domain virtuallyfun.superglobalmegacorp.com –domain superglobalmegacorp.com
Saving debug log to /var/log/letsencrypt/letsencrypt.log
Obtaining a new certificate
Performing the following challenges:
http-01 challenge for virtuallyfun.com
http-01 challenge for virtuallyfun.superglobalmegacorp.com
http-01 challenge for superglobalmegacorp.com
Using the webroot path /var/www/html for all unmatched domains.
Waiting for verification…
Cleaning up challenges
Generating key (2048 bits): /etc/letsencrypt/keys/0000_key-certbot.pem
Creating CSR: /etc/letsencrypt/csr/0000_csr-certbot.pem

IMPORTANT NOTES:
– Congratulations! Your certificate and chain have been saved at
/etc/letsencrypt/live/virtuallyfun.com/fullchain.pem. Your cert
will expire on 2018-06-26. To obtain a new or tweaked version of
this certificate in the future, simply run certbot again. To
non-interactively renew *all* of your certificates, run “certbot
renew”
– If you like Certbot, please consider supporting our work by:

Donating to ISRG / Let’s Encrypt: https://letsencrypt.org/donate
Donating to EFF: https://eff.org/donate-le

Except it actually worked.

Creating the needed haproxy.pem is simple as:

cd /etc/letsencrypt/live/virtuallyfun.com/
cat fullchain.pem privkey.pem > /docker/haproxy.pem

To put the needed key along with the certs.  Naturally when this expires I’ll have to scramble to figure out how I did this.

Managing docker is fun as well. I went ahead and tried out portainer.io, which  naturally deploys as a container.  And it can manage remote servers, which I though was a plus as that means I could deploy it in my office, then simply connect to my server.  But that is where I found out that the config files for Debian are hard coded to always listen on a local socket, which breaks setting the proper JSON file to tell it to listen on a socket, and TCP/IP.  So just edit /etc/systemd/system/docker.service.d/docker.conf and either hard code it all there, or remove it from there and place it in /etc/docker/daemon.json

As always documentation is conflicting and all over the place.

My current feelings about docker…

Windows 10 ARM64 on QEMU

(This is a guest post by Antoni Sawicki aka Tenox)

Microsoft is releasing Windows 10 for ARM64 CPUs and this time, unlike Windows RT fiasco, there will be a full desktop app support including a dynamic binary translator to allow running existing x86 apps on ARM CPU, much like FX!32 on Alpha NT or Rosetta on Mac OS X.

Latest Visual Studio updates now bring official ARM/ARM64 support for Desktop Apps, little hidden, but here is how to enable it.

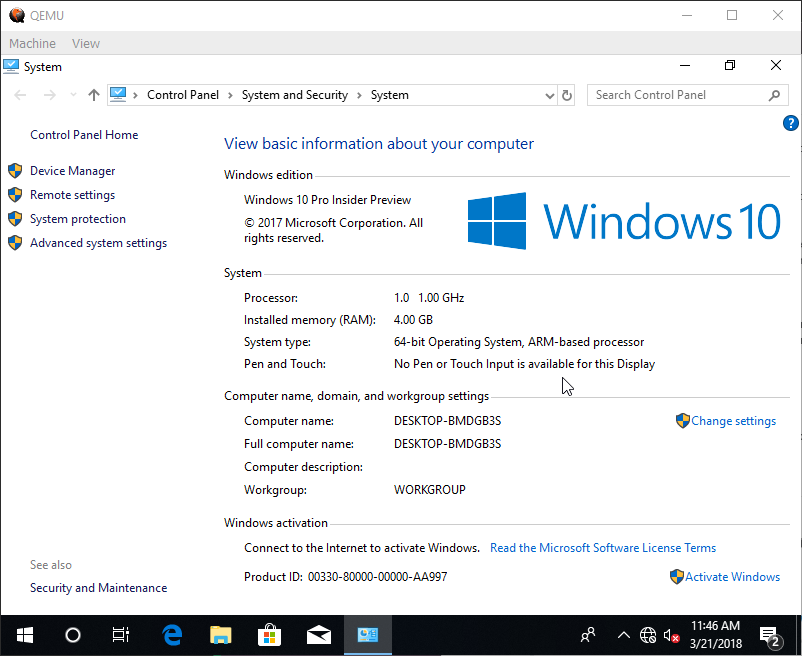
Being able to compile Windows ARM apps, I wanted to try to actually run them, but … on what exactly? There are some developer evaluation boards. Apparently someone managed to run it on Raspberry PI. Most importantly however you can run Windows 10 ARM64 on QEMU. This is some serious Fun With Virtualization!

Windows 10 ARM64 running on QEMU

I’m not claiming to be the first. Clever people have already done it. I just wanted to make it little easier for the lazier of us. Here is how.

Follow the link above but skip the shady UUP business in step #3 and download ready made iso instead. You can google the iso image from windows.cmd and it will take you to this link. You need the rest of the files like UEFI firmware and virtio drivers.

For the even more impatient here is a ready to run image with Windows pre-installed. Because QEMU now comes with DLL HELL I’m not including it in the archive. You will have to install it separately.

If you want to transfer files in/out of the image a tip from Pete Batard of Rufus:

Create a folder named say “transfer” and add the following option to the launch script:
-hdb fat:rw:transfer

This will create a second FAT32 formatted disk, that maps your transfer\
directory to the QEMU virtual machine. In our case, Windows 10 will see it
and make it automatically accessible as “QEMU VVFAT (D:)”. You can even
use this to write file from the VM to the host (though, depending on how
fast Windows flushes its disk cache, they may take a while to appear).

Go have fun and port some apps to ARM64 with free community edition of Visual Studio. I’m going to start with Aclock 🙂

Microsoft Editor

(This is a guest post by Antoni Sawicki aka Tenox)

In a recent blog post Wanted: Console Text Editor for Windows I lamented about lack of a good console/cmd/PowerShell text editor for Windows. When researching for the article I made rather interesting discovery. There in a fact has been a native Windows, 32bit, console based text editor. It was available since earliest days of NT or even before. But let’s start from…

…in the beginning there was Z editor. Developed by Steve Wood for TOPS-20 operating system in 1981. Some time after that, Steve sold the source code to Microsoft, which was then ported to MS-DOS by Mark Zbikowski (aka the MZ guy) to become the M editor.

M editor

The DOS-based M editor was included and sold as part of Microsoft C 5.1 (March 1988), together with the OS/2 variant, the MEP editor (perhaps M Editor Protected-mode). The official name of M/MEP was simply Microsoft Editor. The same editor was also available earlier (mid-1987) as part of the MS OS/2 SDK under a different name: SDKED. Note that normally SDKED insists in operating in full screen mode. Michal Necasek generously spent his time and patched it up so that it can be run in windowed mode for your viewing pleasure.

SDKED on OS/2

However my primary interest lies with Windows NT. The NT Design Workbook mentions that in the early days a self-hosting developer workstation included compiler, some command line tools and a text editor – MEP. Leaked Windows NT builds sometimes include IDW, Internal Development Workstation, which also seem to contain a variant of the same editor. In fact some these tools including MEP.EXE can be found on Windows NT pre-release CD-ROMs (late 1991) under MSTOOLS. It was available for both MIPS and 386 as a Win32 native console based application.

MEP on Windows NT Pre-Release

The editor was later also available for Alpha, i386, MIPS, and PowerPC processors on various official Windows NT SDKs from 3.1 to 4.0. It survived up to July 2000 to be last included in Windows 2000 Platform SDK.

M editor
M editor from NT SDK 3.1 running on Alpha AXP
MEP from NT SDK on Windows NT 4.0

The Win32 version of MEP also comes with an icon and a file description which calls it M Editor in NT 3.1 SDK and later Microsoft Extensible Editor.

From time perspective, it was rather unfortunate that this gem was buried in the SDK rather than being included on Windows NT release media. However I can understand that the editor wasn’t very user friendly or intuitive, compared to say edit.com from MS-DOS. It came from a different era and similar to VI or Emacs, didn’t have “PC user friendly” key bindings or menus.

But that’s not the end of the story. The editor of many names survives to this day, at least unofficially. If you dig hard enough you can find it on OpenNT 4.5 build. For convenience, this and other builds including DOS M, OS/2 MEP and SDKED, NT SDK MEP can be downloaded here.

Digging through the archive I found not one but two copies of the editor code, lurking in the source tree. One under the name MEP inside \private\utils\mep\ folder and a second copy under name Z (which was the original editor for TOPS) in \private\sdktools\z folder. MEP was included in Platform SDK, while Z was only available as part of IDW.

Doing a few diffs I was able to get some insight on the differences. Looks like MEP was initially ported from OS/2 to NT and bears some signs of being an OS/2 app. The Z editor on the other hand is a few years newer and has many improvements and bug fixes over MEP. It also uses some specific NT only features.

Sadly the internal Z editor was never released anywhere outside of Redmond. All the versions outlined so far had copyrights only up to 1990, while Z clearly has copyright from 1995. Being a few years newer and more native to NT I wanted to see if a build could be made. With some effort I was able to separate it from the original source tree and compile stand alone. Being a pretty clean source code I was able to compile it for all NT hardware platforms, including x64, which runs comfortably on Windows 10. You can download Z editor for Windows here.

Z editor on flashy Windows 7 x64

But how do you even use this thing?

Platform SDK contains pretty solid documentation in tools.chm.

Here is a handy cheat sheet:

Last but not least there is a modern open source re-implementation of Z editor named K editor. It’s written from scratch in C++ and LUA and has nothing to do with the original MEP source code. K is built only for x64 using Mingw. There are no ready to run binaries so I made a fork and build.

K editor on Windows 10 x64

The author Kevin Goodwin has kindly included copies of original documentation if you actually want to learn how to use this editor.

Building MAME 0.1 for MS-DOS / DJGPP

So as promised, a while back I had built a GCC 2.7.2.3 / Binutils 2.8.1 cross compiler toolchain suitable for building old Allegro based programs, such as MAME.  Of course the #1 reason why I’d want such a thing is that being able to do native builds on modern machines means that things compile in seconds, rather than an hour + compiling inside of DOSBox.

Why not use a more up to date version of both GCC/Binutils?  Well the problem is that the pre EGCS tools ended up with macro and inline assembly directives that were dumped along the way so that later versions simply will not assemble any of the later video code in Allegro, and a lot of the C needs updating too.  And it was easier to just get the older tool chain working.

It took a bit of messing around building certain portions inside of each step of the tools, but after a while I had a satisfactory chain capable of building what I had needed.

So for our fun, we will need my cross DJGPP v2 tool chain for win32, MAME 0.1, Allegro 3.12 and Synthetic Audio Library (SEAL) Development Kit 1.0.7 .

Lib Allegro is already pre-built in my cross compiler tool chain, all that I needed to add was SEAL, with only one change, 1.0.7 is expecting an EGCS compiler, which this is not, so the -mpentium flag won’t work, however -m486 will work fine.

Otherwise, in MAME all I did was alter some include paths to pickup both Allegro and SEAL, and in no time I had an executable.  And the best part is checking via DOSBox, it runs, with sound!

MAME 0.1 on DOSBox PACMAN hiding

Thankfully MAME has been really good about preserving prior releases, along with their source tree, and it’s pretty cool to be able to rebuild this using the era correct vintage tools, and I can’t stress how much more tolerable it is to build on faster equipment.