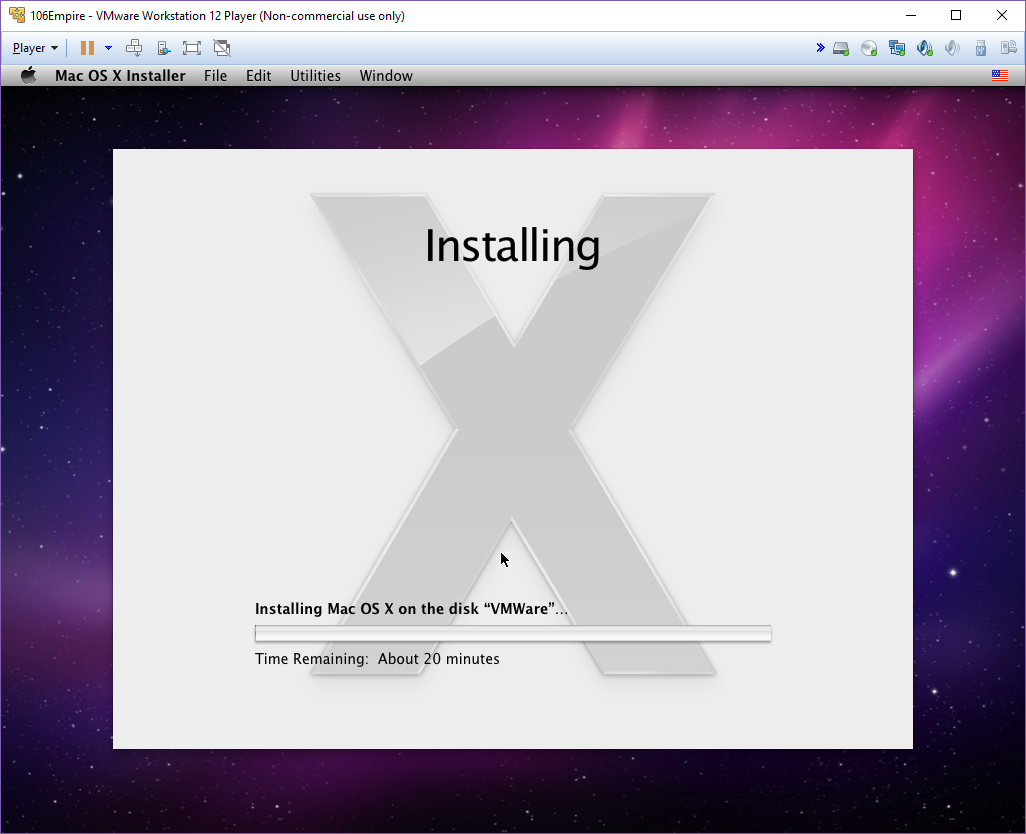
VMWare Player is too small on Windows 10! Also what is 1036521??
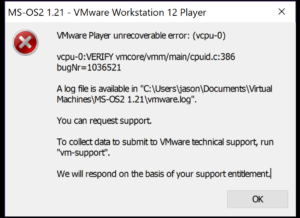
So I have to setup a new machine for someone, and going the VMWare route for some essential bits (Running ESXi) it turns out that every VM I try to run gives me this fun error 1036521.

Great

VMware Workstation unrecoverable error: (vcpu-0). vcpu-0:VERIFY vmcore/vmm/main/cpuid.c:382 bugNr=1036521

What the heck is this?  It sure could have been made a little more legible but it means that your BIOS needs to have the hardware assist turned on for virtualization.  This kind of thing just reminds me so much of OS/2 and it’s SYSXXXX errors from back in the day.

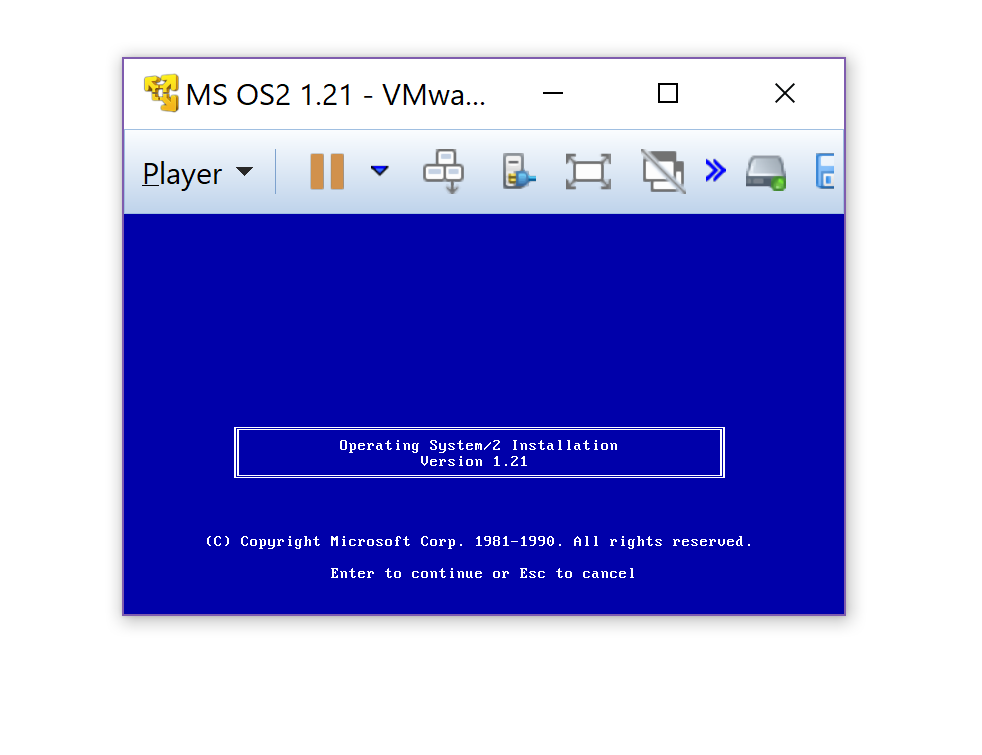
Speaking of, once VMWare was running the display was incredibly tiny.  This image really doesn’t do it justice, but it’s frankly impossible to read.

What is this? An emulator for ants?

There isn’t much in the way of help for VMWare Player (aka freeloader) version users, however some playing around and I found an acceptable solution.

All too easy, of course once you know where to look

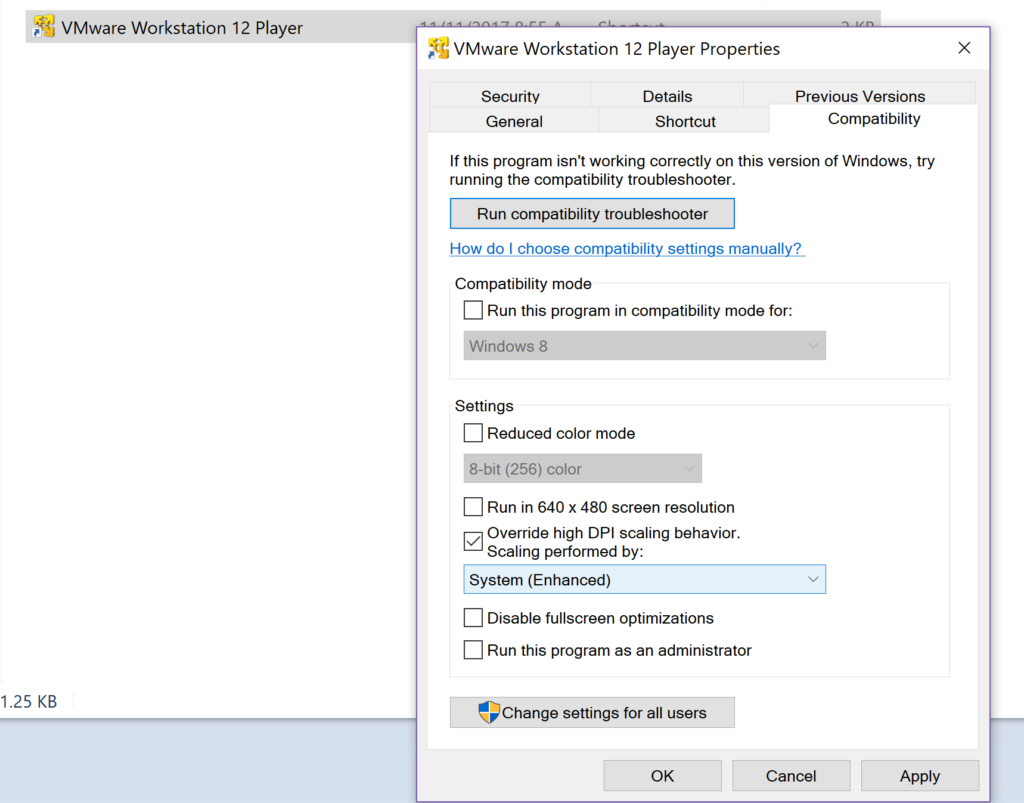
Simply find the shortcut’s location and jump to the compatibility tab, and set the “Override high DPI scaling to “System (Enhanced)”, hit OK and you are now good to go!

VMWare for humans

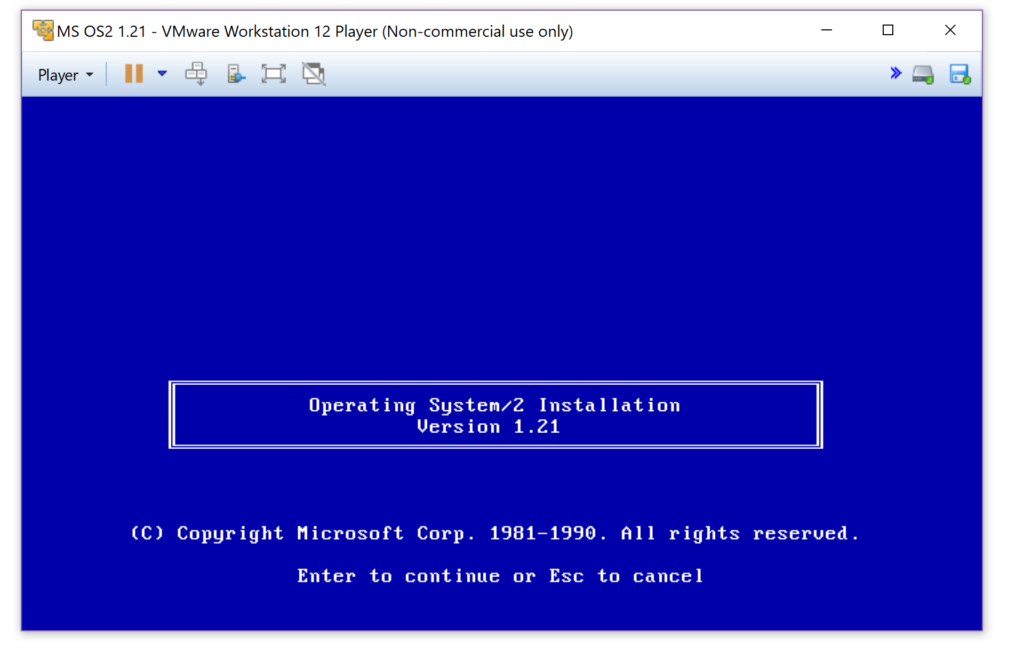
Now you can actually read what is going on.  Also for anyone who cares, MS OS/2 1.21 really should be on a 100MB disk or so.. large disks & VMWare’s IDE don’t play along so well.

Installing VMware ESXi 5.5.0 Update 3 on KVM

Well I had no luck with the boot process hanging during initialization.  I searched a little, and came across this thread, stating :

The line that says “Running inside a VM; adjusting spinout timeout to 180 seconds” would suggest that KVM implements enough of our backdoor interface to make it look like we’re running under a VMware hypervisor.  When we’re running in this environment, we use the backdoor to get the host TSC frequency.  I suspect that KVM doesn’t implement the “GETMHZ” backdoor call, so we are confused about the TSC frequency.  The 30ms delay turns into … 30 hours?  30 years?

So they had a source code change for QEMU 1.7.0, however it obviously doesn’t work in 2.x.  It was rolled up stream, and then made into a switch to disable with a simple flag to add into the command line.

-machine vmport=off

So with that set I ran the following:

kvm -vnc 0.0.0.0:1 -cpu host \
-machine vmport=off \
-m 4096M \
-smp cpus=2 \
-drive file=esx-1.qcow2,if=ide,index=0,media=disk \
-serial telnet:127.0.0.1:5001,server,nowait \
-monitor tcp:127.0.0.1:6001,server,nowait \
-cdrom /root/VMware-VMvisor-Installer-5.5.0.update03-3116895.x86_64.iso -boot d \
-net none \
-device vmxnet3,mac=00:2e:3c:92:26:00,netdev=esx-0 \
-device vmxnet3,mac=00:2e:3c:92:26:01,netdev=esx-1 \
-device e1000,mac=00:2e:3c:92:26:02,netdev=esx-2 \
-device e1000,mac=00:2e:3c:92:26:03,netdev=esx-3 \
-netdev socket,id=esx-0,udp=127.0.0.1:10000,localaddr=127.0.0.1:20000 \
-netdev socket,id=esx-1,udp=127.0.0.1:10001,localaddr=127.0.0.1:20001 \
-netdev socket,id=esx-2,udp=127.0.0.1:10002,localaddr=127.0.0.1:20002 \
-netdev socket,id=esx-3,udp=127.0.0.1:10003,localaddr=127.0.0.1:20003

And now I can boot up, and install VMWare!

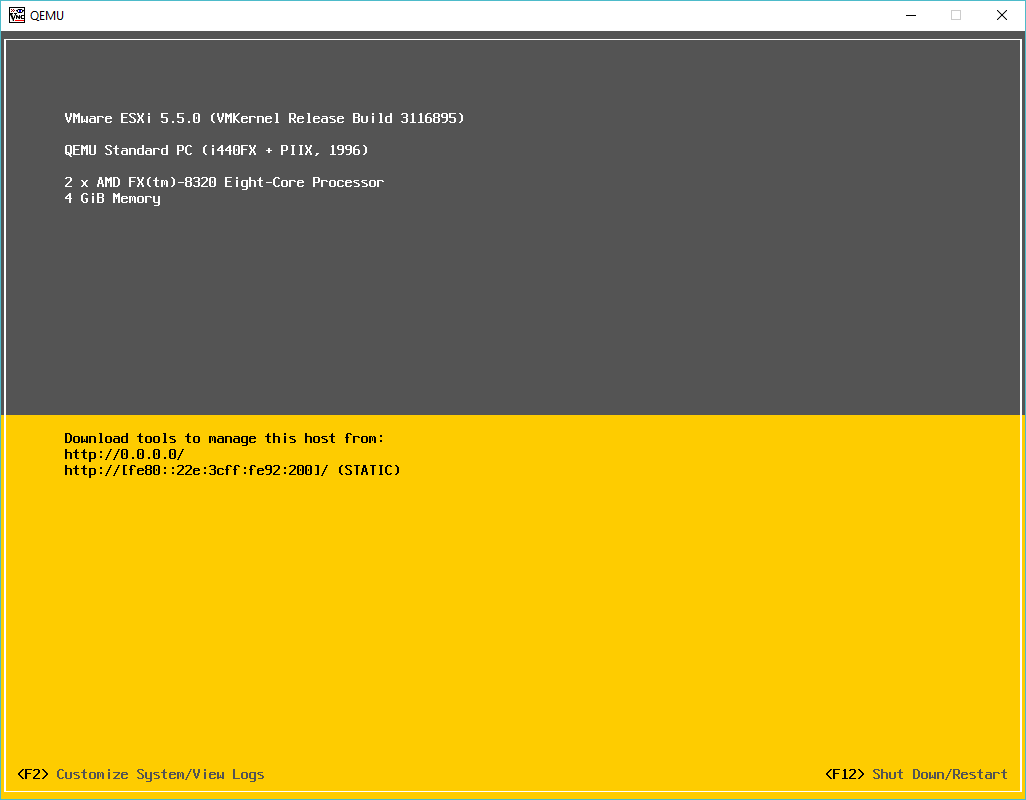
ESXi 5.5.0 on Qemu KVM

By default you will not be permitted to start any virtual machine.  To get around this you have to enable VMWare to run nested.
Add the following to /etc/vmware/config under ESX:

vmx.allowNested=TRUE

And then you are good to go!

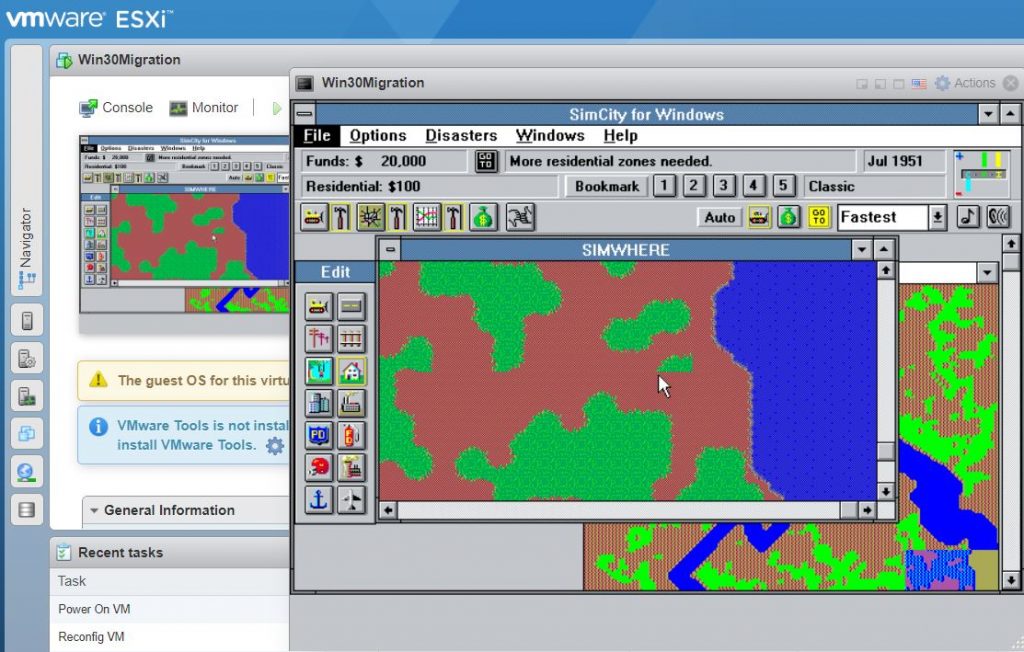
VM running on nested ESXi 5.5.0

Running VMWare ESXi 6.5 under Linux/KVM!

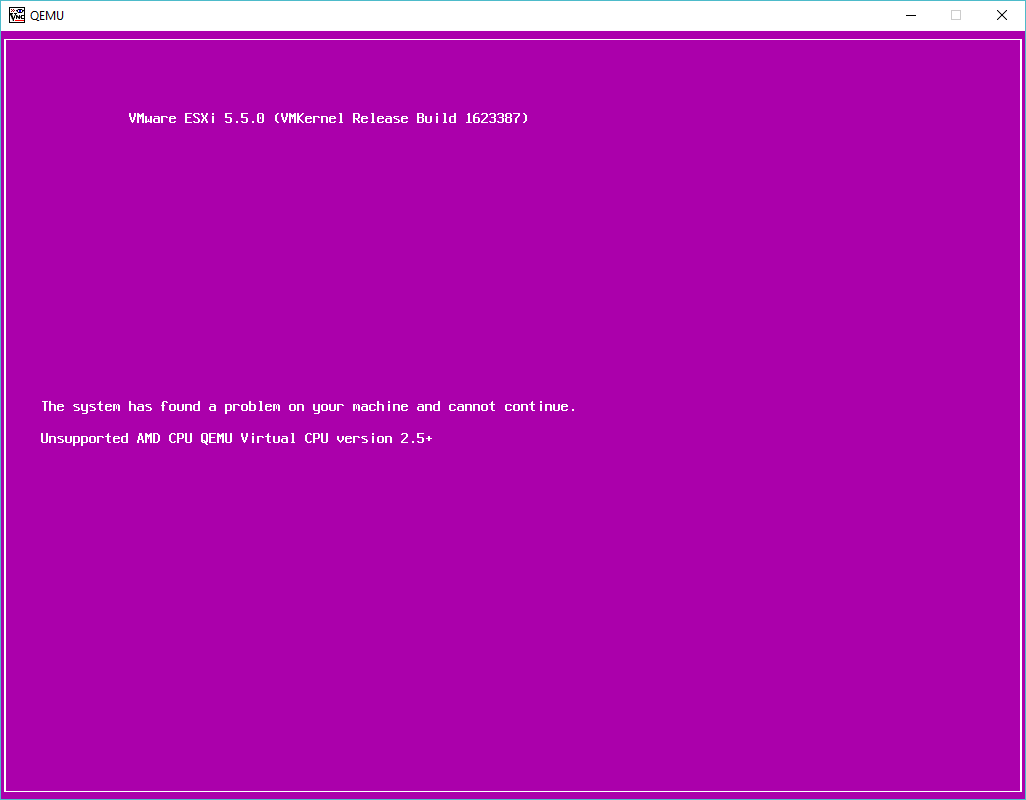
So with VIRL in hand, the next thing I wanted to do was play with some LACP, and VMWare ESX.  Of course the best way to do this is under KVM as you can use UDP to bounce packets around between virtual machines, like the VIRL L2 switch.  I went ahead and fired up 5.5 and got this nice purple screen of death.

Purple screen of death!

So naturally I need to force the processor type.  Also after reading a few sites, I needed to turn on a nested & ignore_msrs settings:

root@ubuntu:/etc/modprobe.d# cat qemu-system-x86.conf

options kvm_amd nested=1
options kvm ignore_msrs=1

Naturally if you are using an Intel processor the statements need to reflect that.  All being well you will see something like this in your log file:

Mar 7 11:34:38 ubuntu kernel: [ 14.802132] kvm: Nested Virtualization enabled
Mar 7 11:34:38 ubuntu kernel: [ 14.802134] kvm: Nested Paging enabled

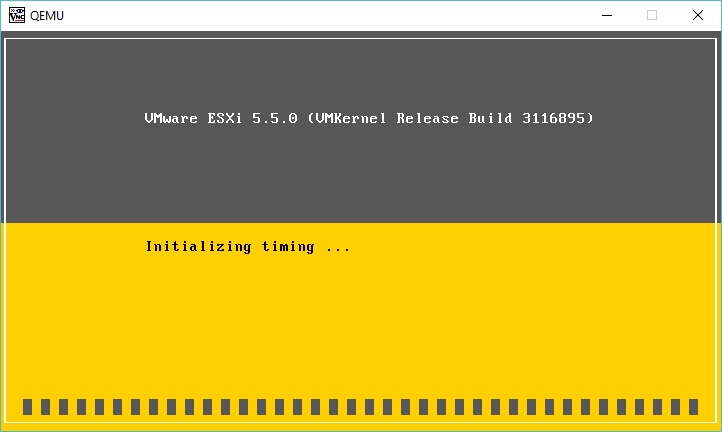
I got a little further trying to install VMWare ESXi 5.5 update 3, however it just hangs on Intitializing timing…

vMWare 5.5.0 update 3 hanging

(I did later solve the 5.5 problem in a follow up here!)

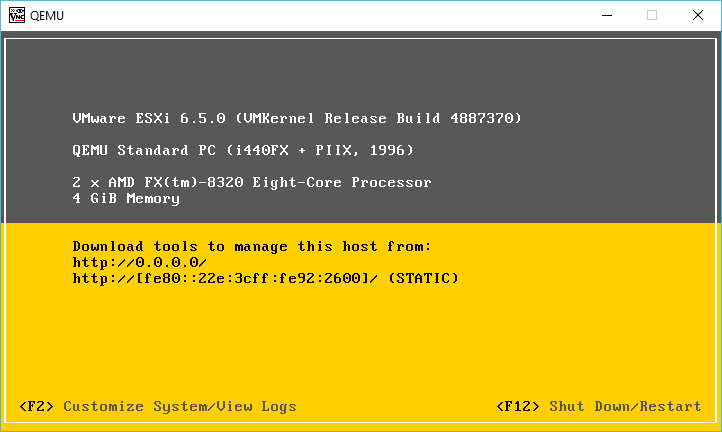
After going nowhere with that, I went ahead and downloaded VMWare ESXi 6.5 which as of today is the latest version, and that installed just fine!

ESXi 6.5.0 running under KVM

For anyone brave or crazy enough to think about reproducing this, here is my install command line (yes Im doing this old school way on purpose)

kvm -vnc 0.0.0.0:1 -cpu host \
-machine pc-i440fx-2.1 \
-m 4096M \
-smp cpus=2 \
-boot order=d \
-drive file=esx-1.qcow2,if=ide,index=0,media=disk \
-serial telnet:127.0.0.1:5001,server,nowait \
-monitor tcp:127.0.0.1:6001,server,nowait \
-net none \
-device vmxnet3,mac=00:2e:3c:92:26:00,netdev=esx-0 \
-device vmxnet3,mac=00:2e:3c:92:26:01,netdev=esx-1 \
-device vmxnet3,mac=00:2e:3c:92:26:02,netdev=esx-2 \
-device vmxnet3,mac=00:2e:3c:92:26:03,netdev=esx-3 \
-netdev socket,id=esx-0,udp=127.0.0.1:10000,localaddr=127.0.0.1:20000 \
-netdev socket,id=esx-1,udp=127.0.0.1:10001,localaddr=127.0.0.1:20001 \
-netdev socket,id=esx-2,udp=127.0.0.1:10002,localaddr=127.0.0.1:20002 \
-netdev socket,id=esx-3,udp=127.0.0.1:10003,localaddr=127.0.0.1:20003 \
-cdrom VMware-VMvisor-Installer-5.5.0.update03-3116895.x86_64.iso \
-boot d

As you can see it really isn’t that involved, well once you get the formatting to make some sense.  And to run it normally I run it something like this:

kvm -vnc 0.0.0.0:1 -cpu host \
-machine pc-i440fx-2.1 \
-m 4096M \
-smp cpus=2 \
-drive file=esx-1.qcow2,if=ide,index=0,media=disk \
-serial telnet:127.0.0.1:5001,server,nowait \
-monitor tcp:127.0.0.1:6001,server,nowait \
-net none \
-device vmxnet3,mac=00:2e:3c:92:26:00,netdev=esx-0 \
-device vmxnet3,mac=00:2e:3c:92:26:01,netdev=esx-1 \
-device vmxnet3,mac=00:2e:3c:92:26:02,netdev=esx-2 \
-device vmxnet3,mac=00:2e:3c:92:26:03,netdev=esx-3 \
-netdev socket,id=esx-0,udp=127.0.0.1:10000,localaddr=127.0.0.1:20000 \
-netdev socket,id=esx-1,udp=127.0.0.1:10001,localaddr=127.0.0.1:20001 \
-netdev socket,id=esx-2,udp=127.0.0.1:10002,localaddr=127.0.0.1:20002 \
-netdev socket,id=esx-3,udp=127.0.0.1:10003,localaddr=127.0.0.1:20003

So it’s basically the same, just no mounted CD-ROM image.  Now this is all fun, but what about networking?  As I had mentioned before, I bought a VIRL license, which includes a l2 Catalyst image, so why not use that, instad of a ‘traditional’ Linux bridge?  Sure!  In this example I’m going to connect the 4 ethernet ports from the ESXi into the first 4 ports on the cisco switch, with the last port connecting to a Linux bridge, that I then route to, as I wanted all my lab crap on a seperate network.  To start the switch I use this script:

kvm \
-m 768M \
-smp cpus=1 \
-boot order=c \
-drive file=vios_l2-adventerprisek9-m.vmdk.SSA.152-4.0.55.E.qcow2,if=ide,index=0,media=disk \
-serial telnet:127.0.0.1:5000,server,nowait \
-monitor tcp:127.0.0.1:51492,server,nowait \
-net none \
-device e1000,mac=00:2e:3c:92:26:00,netdev=gns3-0 \
-device e1000,mac=00:2e:3c:92:26:01,netdev=gns3-1 \
-device e1000,mac=00:2e:3c:92:26:02,netdev=gns3-2 \
-device e1000,mac=00:2e:3c:92:26:03,netdev=gns3-3 \
-device e1000,mac=00:2e:3c:92:26:04 \
-device e1000,mac=00:2e:3c:92:26:05 \
-device e1000,mac=00:2e:3c:92:26:06 \
-device e1000,mac=00:2e:3c:92:26:07 \
-device e1000,mac=00:2e:3c:92:26:08 \
-device e1000,mac=00:2e:3c:92:26:09 \
-device e1000,mac=00:2e:3c:92:26:0a \
-device e1000,mac=00:2e:3c:92:26:0b,netdev=gns3-tap \
-netdev socket,id=gns3-0,udp=127.0.0.1:20000,localaddr=127.0.0.1:10000 \
-netdev socket,id=gns3-1,udp=127.0.0.1:20001,localaddr=127.0.0.1:10001 \
-netdev socket,id=gns3-2,udp=127.0.0.1:20002,localaddr=127.0.0.1:10002 \
-netdev socket,id=gns3-3,udp=127.0.0.1:20003,localaddr=127.0.0.1:10003 \
-netdev tap,id=gns3-tap,ifname=tap0,script=/etc/qemu-ifup \
-nographic

Now as you can see the udp sockets are inverse of eachother, meaning that the ESX listens on 10000 and sends to 127.0.0.1 on port 20000, while the switch listesns on 20000, and sends packets to 10000 for the first ethernet interface pair.

By default VMware only assigns the first NIC into the first virtual switch, so after enabling CDP, we can see we have basic connecitivity:

AMD-kvm#sho run int gig0/1
Building configuration…

Current configuration : 99 bytes
!
interface GigabitEthernet0/1
media-type rj45
speed 1000
duplex full
no negotiation auto
end

AMD-kvm#show cdp neigh
Capability Codes: R – Router, T – Trans Bridge, B – Source Route Bridge
S – Switch, H – Host, I – IGMP, r – Repeater, P – Phone,
D – Remote, C – CVTA, M – Two-port Mac Relay

Device ID Local Intrfce Holdtme Capability Platform Port ID
KVMESX-1 Gig 0/0 155 S VMware ES vmnic0

Total cdp entries displayed : 1

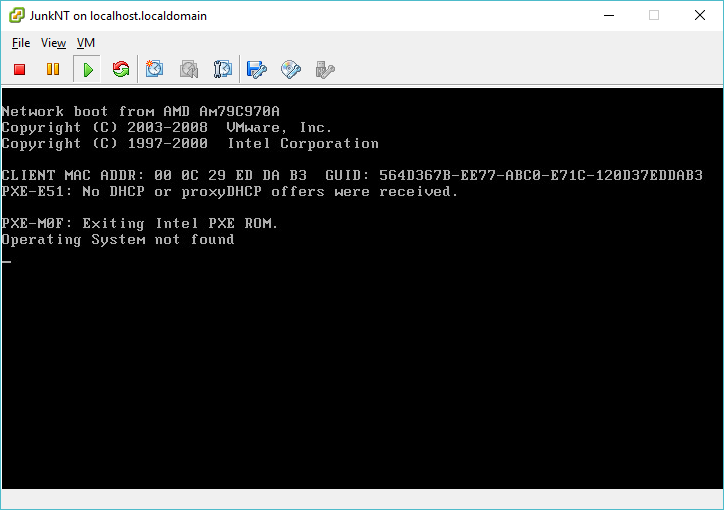
And of course the networking actually does work… I created a quick VM, and yep, It’s online!

AMD-kvm#show mac address-table
Mac Address Table
——————————————-

Vlan Mac Address Type Ports
—- ———– ——– —–
1 000c.2962.09e5 DYNAMIC Gi0/0
1 002e.3c92.2600 DYNAMIC Gi0/0
1 76b0.3336.34b3 DYNAMIC Gi2/3
Total Mac Addresses for this criterion: 3

And of course some obliguttory pictures:

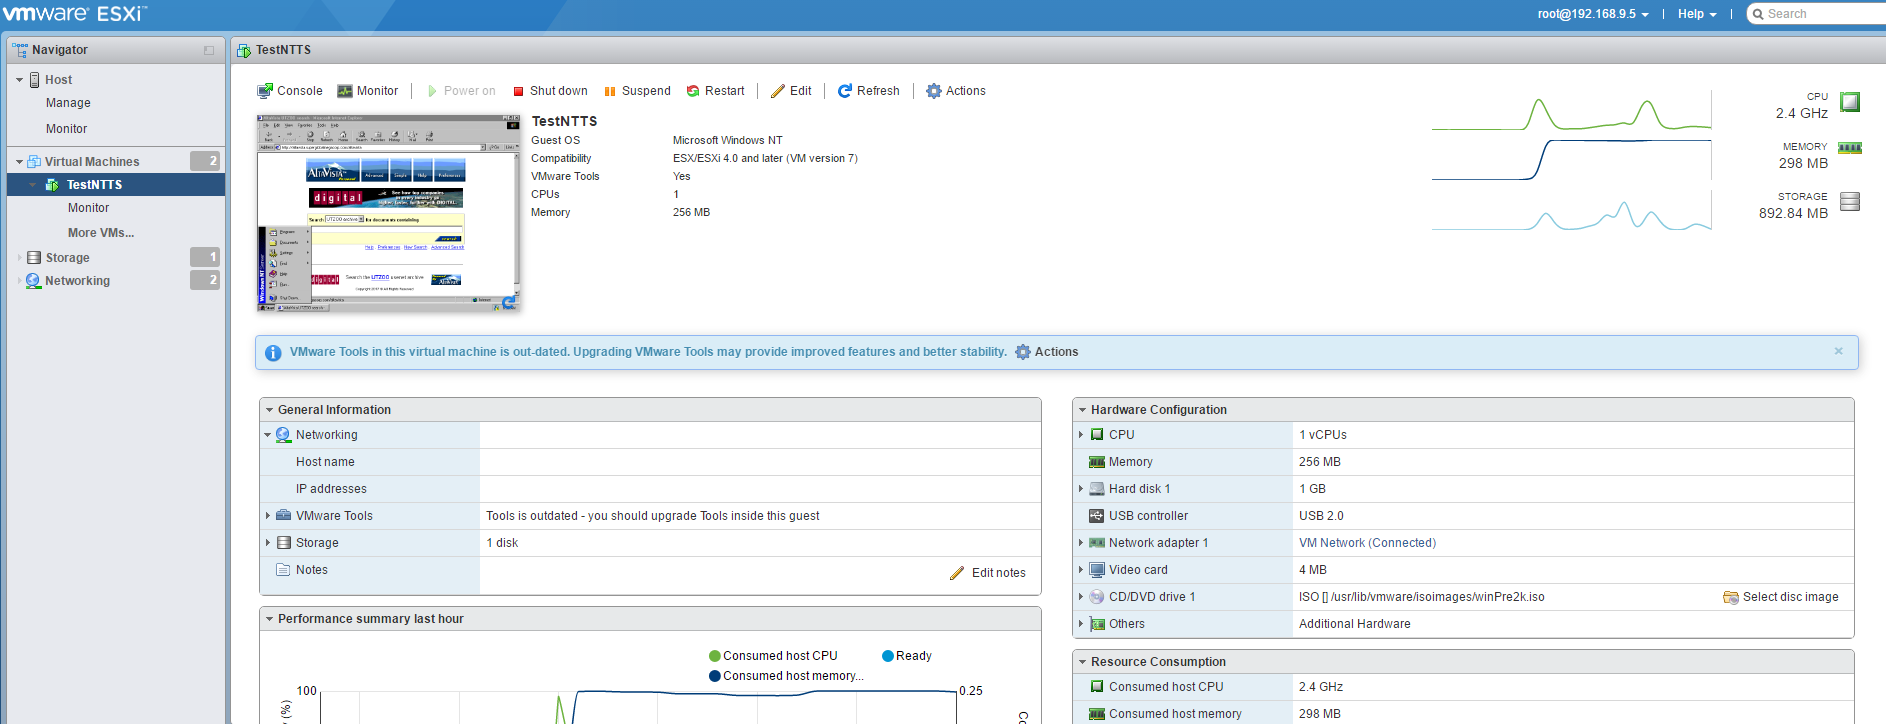
Nested ESXi running a simple NT 4.0 server

And:

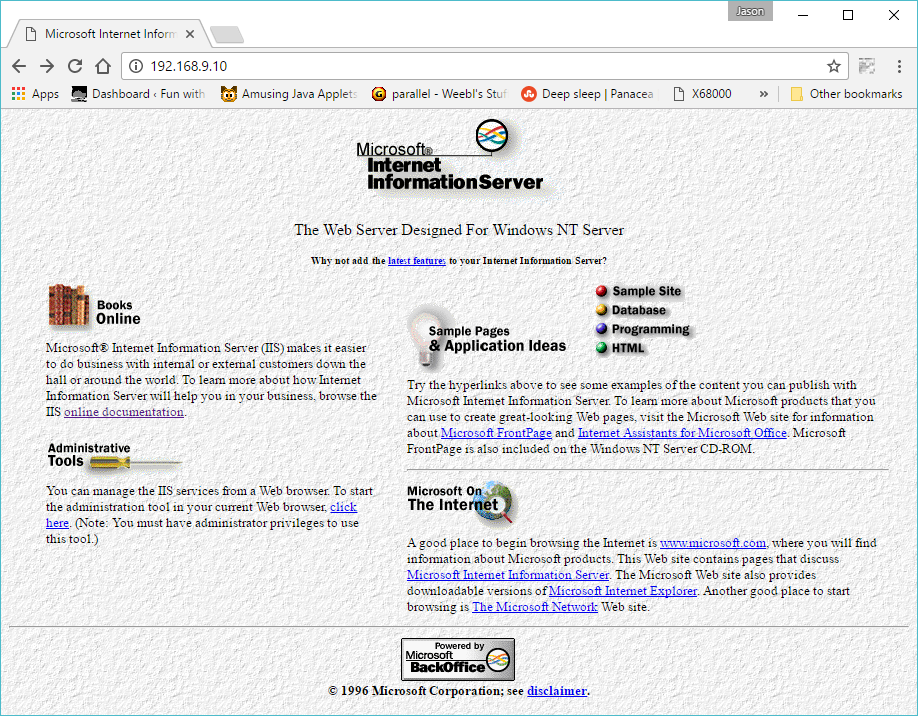
Welcome to IIS 2.0

With ip forwarding turned on my Ubuntu server, and an ip address assigned to my bridge interface, I can then access the NT 4.0 VM from my laptop directly.

Nex’t time to make the L2 more complicated, and add in some L3 insanity…

Nested VMWare ESXi

Virtual datacenter

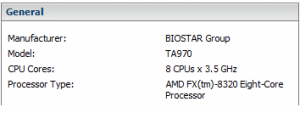
My physical ESXi box, a lowly AMD FX 8320

One of the more cooler features of VMWare 5 is that it is capable of running itself.  While it

may seem silly at first, this is a great way to build a virtual environment where you can test scripts for provisioning (and destroying) stuff, along with testing API level calls without having to worry about screwing up production, begging for a ‘lab’ environment, or even better snapshotting the whole thing so you can revert whatever it is you are doing at a block level.  In short virtual datacenters really rock, especially for people like me who like to play in a really destructive manner.

So the first thing is that for this test I’m going to use a ‘freebie’ ESXi that I’ve been using for quite some time.  Naturally this should work for version 6, but since the stuff that I’m testing is all in 5.0 and 5.5 (the majority being 5.5) I wan to build a 5.5 environment.  In my insane scenario I have deployment access to a 2003 R2 x64 server with .net 2.0, and the majority of the environment I care about is VMWare ESX 5.5 along with vCenter. 5.5 on Windows 2008 servers.  So trying to mirror this a bit, that means that I’m going to skip the new fangled appliance, I don’t know if it really matters for what I want, but for the sake of trying to keep things the same I’m going to match what I can.

Creating the VMWare ESXi VM

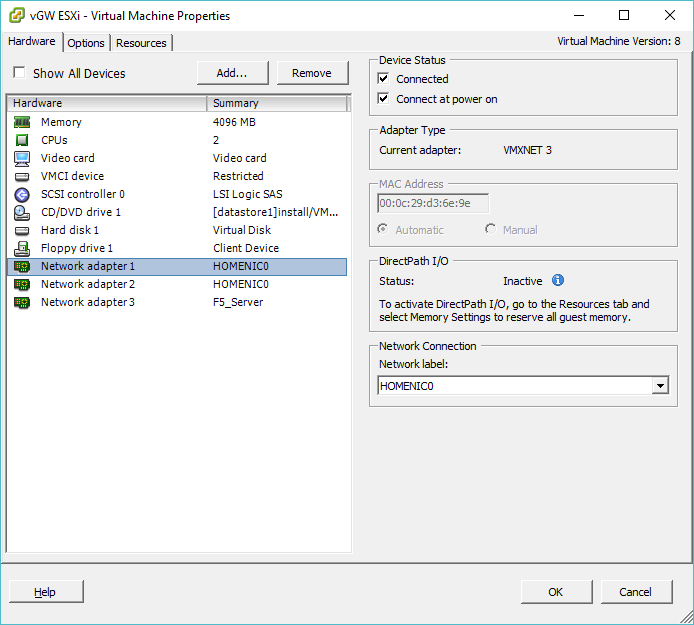
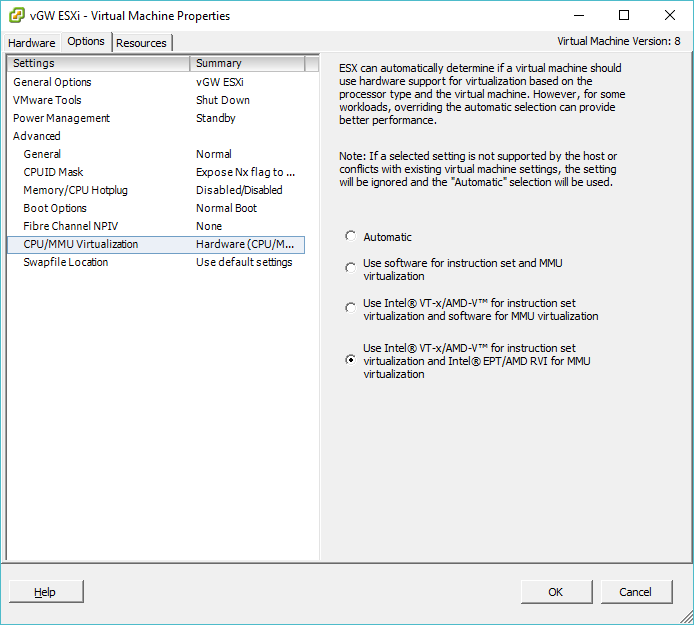
I setup a generic ‘Other 2.6.x Linux (64-bit)’ VM, with a single socket, dual core processor, 4GB of RAM, a LSI SAS controller, with a 32GB disk, and 3 NIC’s with the VMXNET3 driver.  For some reason I had to change the CPU to explicitly allow for hardware MMU emulation.

Hardware MMU emulation

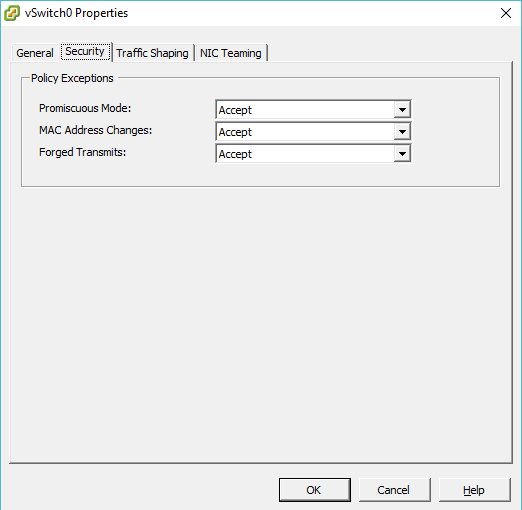
It’s also worth mentioning that when you are going to run ESXi on ESXi that any physical adapters that you want your virtual ESXi host to be able to lauch VMs and have them communicate onto you will need to enable the ‘Forged Transmits’ setting in the vSwitch properties.

vSwitch properties

With that in place, I was able to use my ESXi 5.5 ISO, and install into the VM.  There isn’t much to really say the installer will install ESXi, and reboot and you get the console.

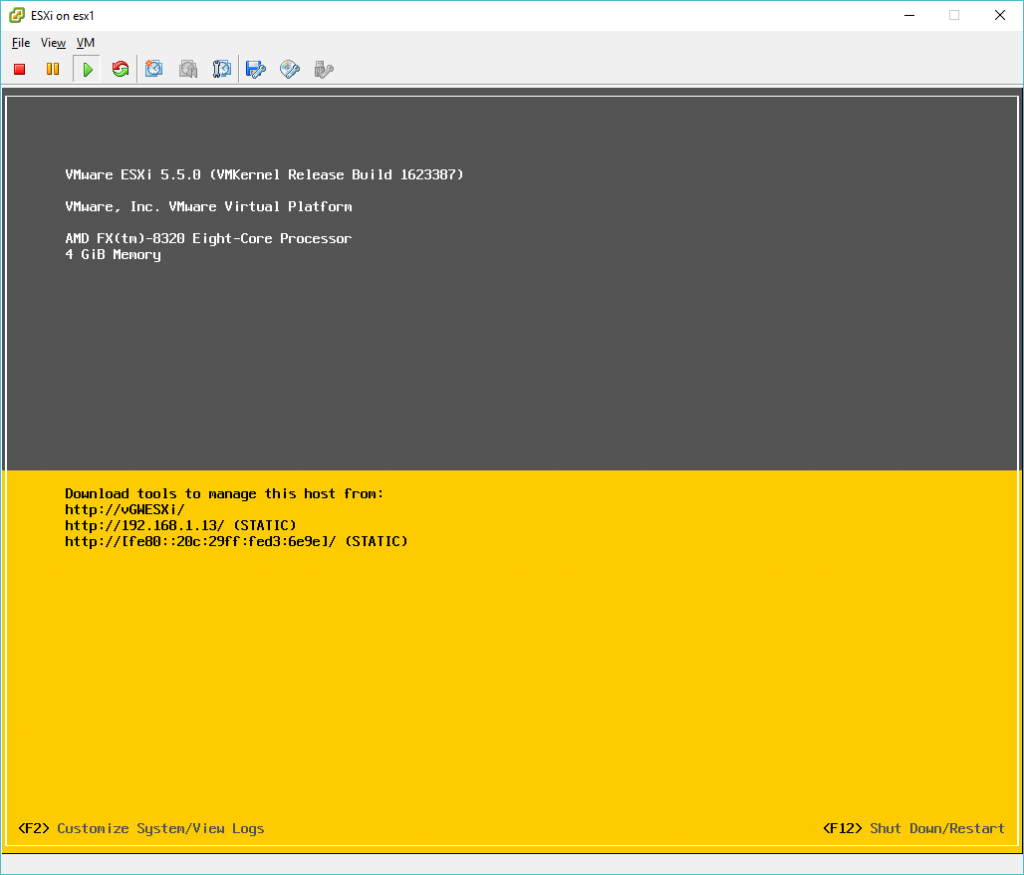
ESXi running on ESXi

I went ahead and gave this ESXi server a static address, and that was pretty much it for the server.

Installing vCenter

I went ahead and used an eval copy of 2008 R2 that is available at Microsoft here.  The installation is really simple, not much to say but for my needs I gave the VM a static address, HOWEVER I did NOT install Active Directory as you cannot install vCenter onto a DC, and I really was not in the mood to have a DC along with a vCenter 2008 VMs as I’m only interested in doing API testing I don’t care about authentication plugins I’m only concerned with other aspects.  Obviously if you do care, then you’ll want to install 2 2008 servers.  I gave my 2008 server a static address of 192.168.1.12 so that I could easily find it on the network post-install.

Since I have no imagination, I renamed the server “vcenter” which of course will factor into the login credentials later on.

My ‘client’ gave me the ISO for vCenter “VMware-VIMSetup-all-5.5.0-3254792-20151201-update03.iso” which of course needs to be installed onto the 2008 server.

install vSphere vCenter

I did the easy install, as again I’m not building a real enterprise.  However I should point out that the easy install has a habit of popping alerts and prompts UNDER the current window so you could be waiting for quite a long long time for this to install when it really shouldn’t take all that long.  I also kept the option for the 2008 Express edition as I’m not going to try to stress the count of VMs 50 is far more than I require as again I’m only interested in limited stuff at this point.

vCenter ‘simple install’ ports

Again I just selected the defaults for the install as I’m not all that worried.  Phew with all of that done, it’s now ready to use!

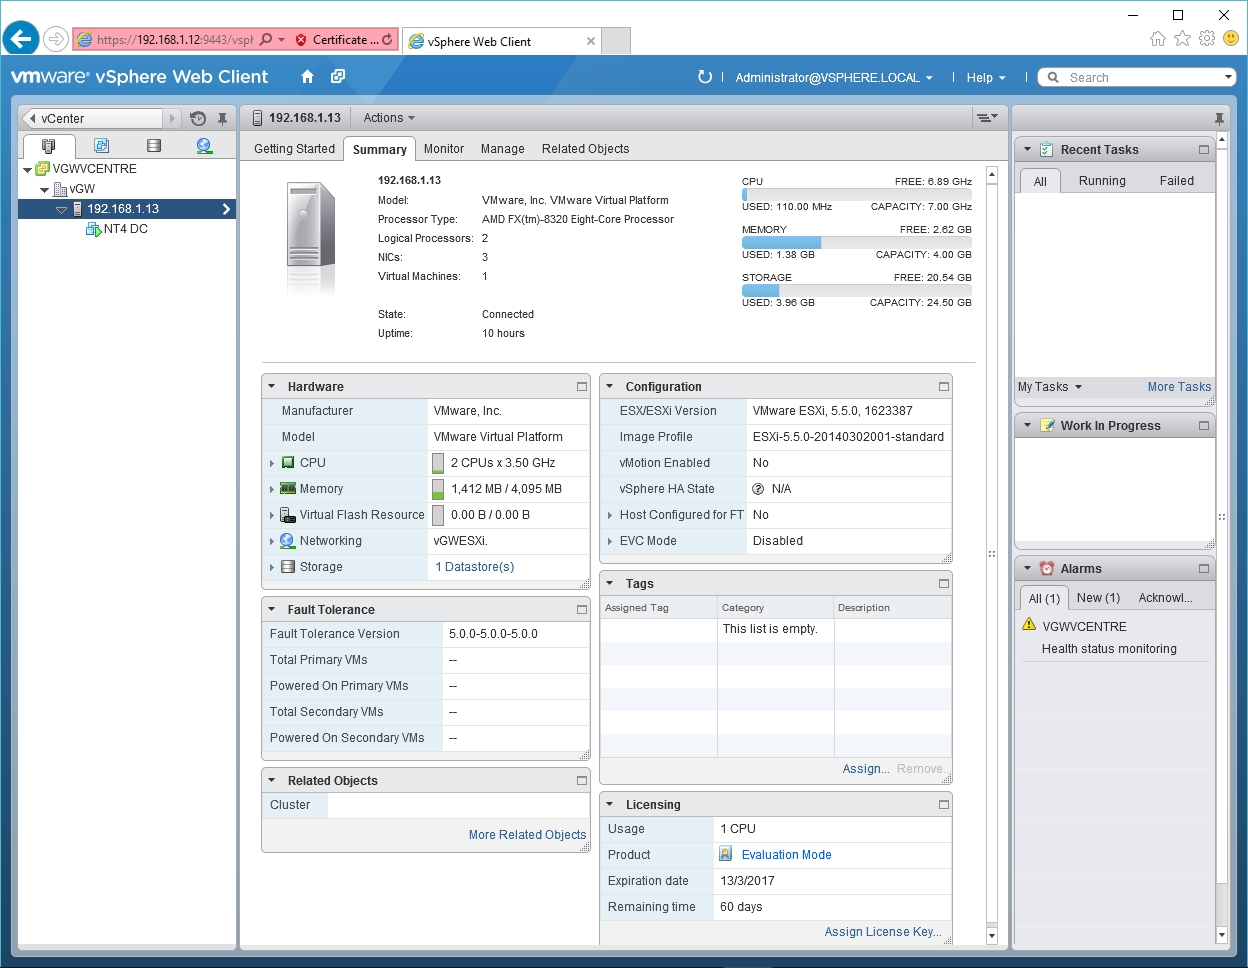
Logging in

Now I went ahead and hit the following site:

https://192.168.1.12:9443/vsphere-client/#

I went ahead and installed the pluggin for a more ‘full’ experience with the web client.  The link is on the bottom of the page.

download this!

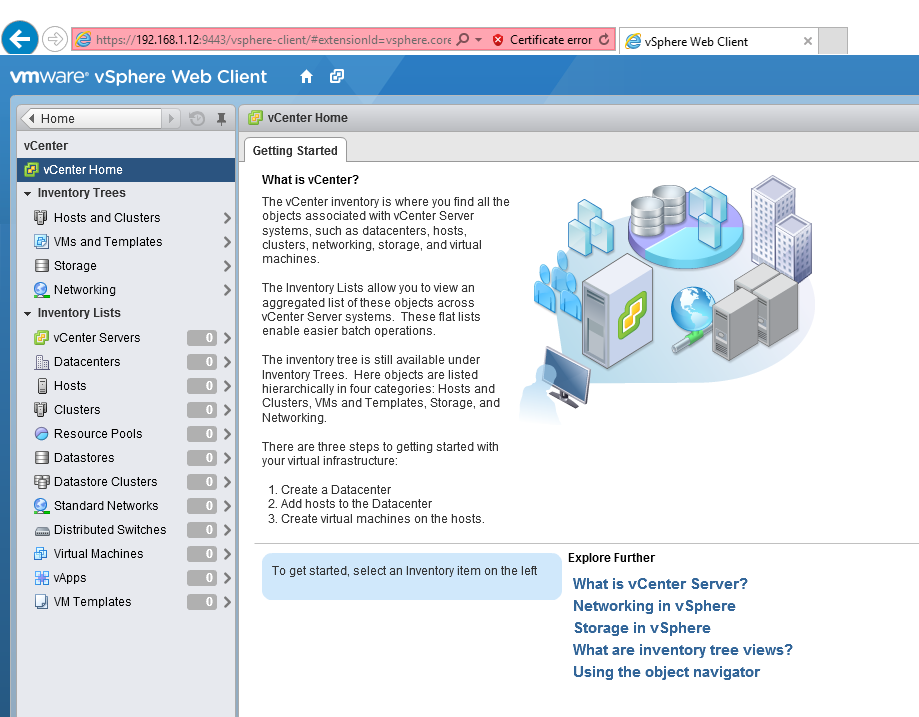
With all of that in place, I finally could use the web/flash site to login, using the local administrator account.  However upon logging in the domain was barren, no vcenters no data centers, nothing.

Empty data-center!

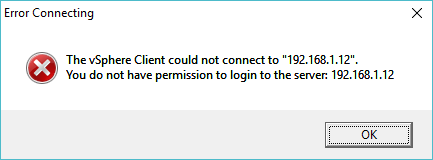
Obviously I must have screwed something up!  Even worse using the ‘fat’ C#/J# client (that I still love…) I would simply get this fun error:

You do not have permission to login to the server!

What? I don’t have permission?

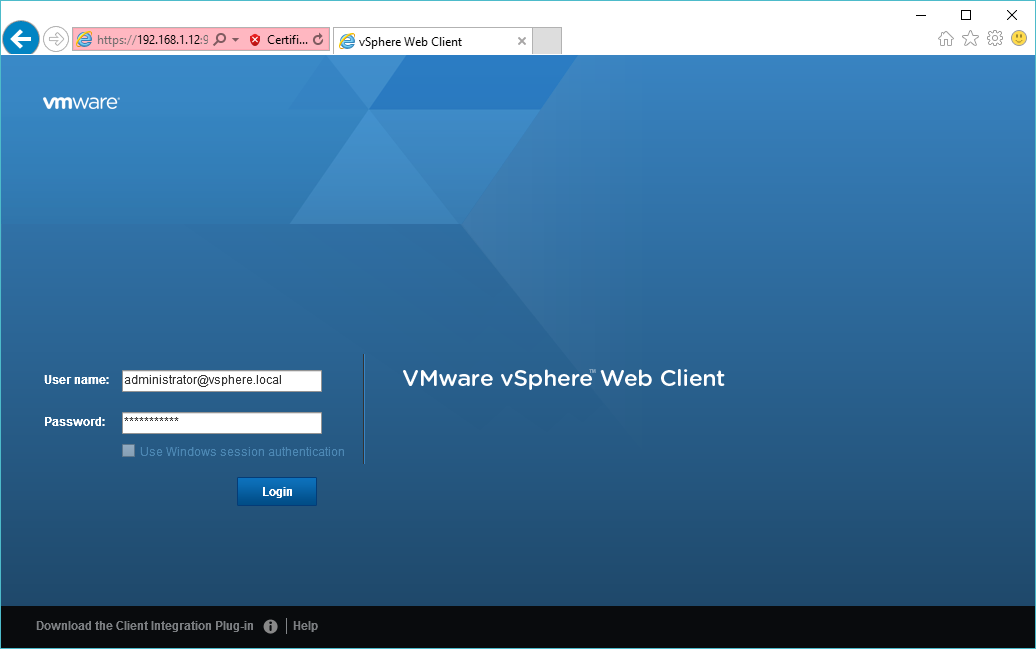
A little digging around, and I found out of course, that it is because I don’t have an Active Directory, and that for ‘workgroup’ installs like this, you need to simply login as [email protected] or ‘[email protected]’ in my case, using the password that had to be set during the SSO installation.

Login

And now I was prompted to create my data-center, and add in the ESXi server into the virtual data-center.

vCenter is now operational

So now I have a virtual vCenter, along with an ESXi host to deploy stuff onto, and destroy all I want.  Even better VMWare Player & VMWare Fusion can also run ESXi nested, so you can take your virtual data-center with you on a laptop!  You can boot 2008 with vCenter in 2GB of RAM, although it really should have 4GB if not more, and with 4GB for an ESXi server that would be 8GB+ on any laptop or desktop.  However I’m lucky my ESXi server has 32GB of RAM, and my laptop has 16.  So it’s also a great excuse to upgrade!

End of the line for VMware Player, Workstation and Fusion?

It looks like in the wake of a declining stock price EMC/VMware is already laying off divisions, to ‘cut costs’ and I just received word from a friend that the “Hosted UI” group responsible for all these great products, and the former VMware Server/GSX products were all let go.

A Tribute to VMware Workstation, Fusion, and Hosted UI

Which to me is kind of crazy as this eliminates the only desktop product that could run VMware ESX on the desk for building virtual clusters.  I further guess it means that for what I like to do, I’ll eventually have to find one of those super expensive video cards that works with ESX to passthrough.  Or just drop any and all VMware stuff, and head straight into KVM territory and just get used to OpenStack being a fragmented disaster.

In addition they also closed the Burlington tech support centre.

Oh well, nothing lasts forever.

Getting dot1q to work between VMware and GNS3

So I had this fun episode where I was using Qemu to emulate an ASA, and it worked OK but it was incredibly slow, and I couldn’t put in multiple gigabytes of RAM.  So I thought I’d just dump Qemu and load it up on VMWare.

Well simple ethernet connections work just fine, but the dot1q interface (as this setup has about 50 different connections) doesn’t work at all.

The closest thing I could find was this interesting post, which states:

As I have attached previously there are 802.1q packets leaving the GNS emulated 7200 router but they are not being interpreted by the HOST-ONLY Adapter that is installed with workstation 11 nor does the HOST-ONLY adapter then TAG the l2 frames with the 802.1q ID.

So the host only adapters that I’m creating to give VMWare interfaces that GNS3 can latch onto, strip dot1q!

Well this is no good!

So I thought I’d try the older standby solution, which is the MS Loopback adapter, and try it that way.

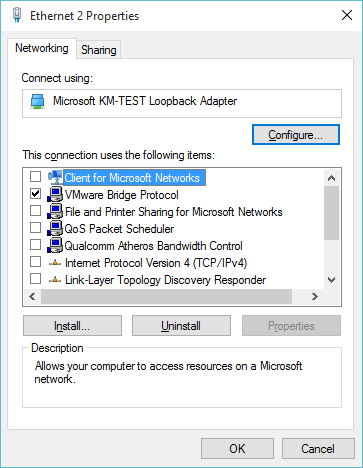
Adding the adapter wasn’t too hard in 10, but they renamed it to the KM-TEST Loopback Adapter for some reason.  Anyways with the adapter installed, I removed all the bindings other than the VMware Bridge Protocol.

bindings for the loopback

bindings for the loopback

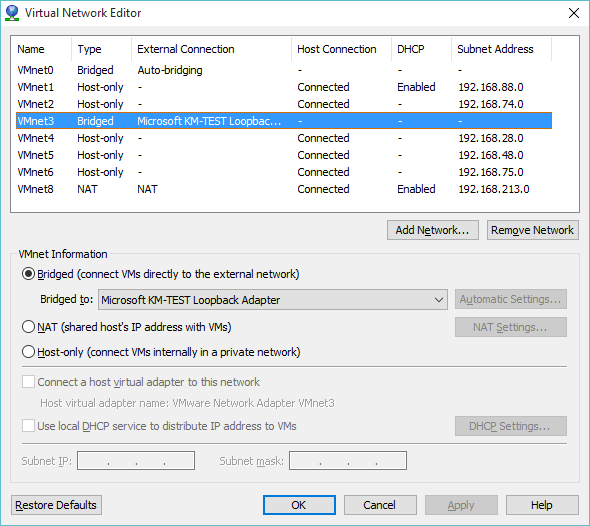
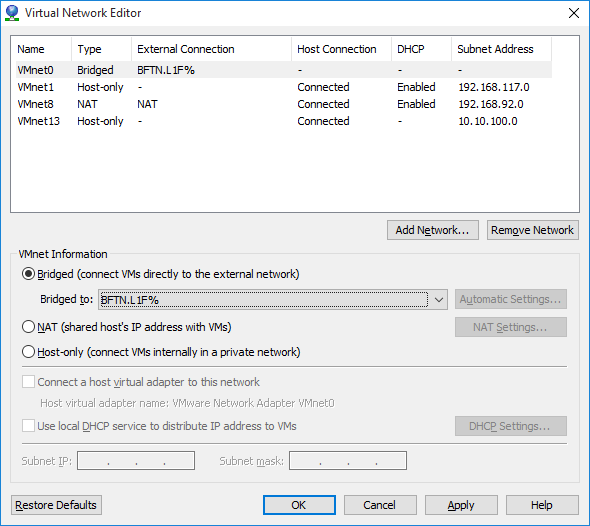
With that done, the next thing to do was run vmnetcfg, and bind the tunnel interface to a VMnet interface but not in the Host-only connection but bridged directly to the loopback adapter.

vmnetcfg

vmnetcfg

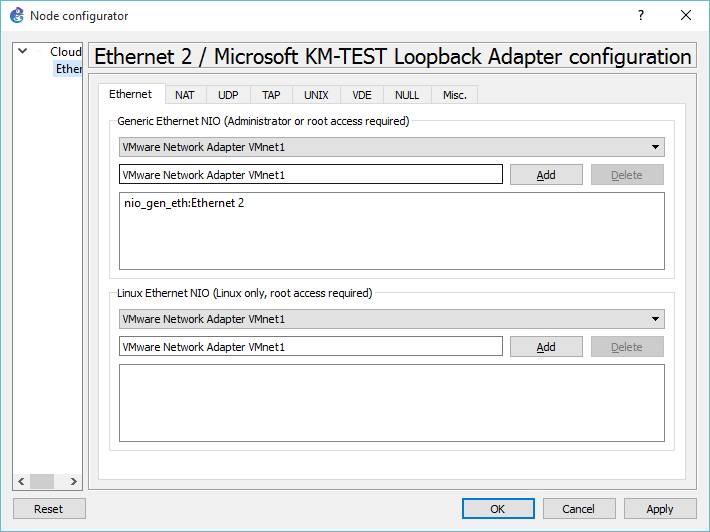
Now with the VMware part configured, it’s a matter of configuring a Cloud object in GNS3, and binding it to the loopback adapter, which in my case has the great name of ‘Ethernet 2’.

vmnetcfg

GNS3 bindings

From there I just attach the cloud to a dot1q ‘trunk’ interface on a GNS3 virtual ethernet switch.

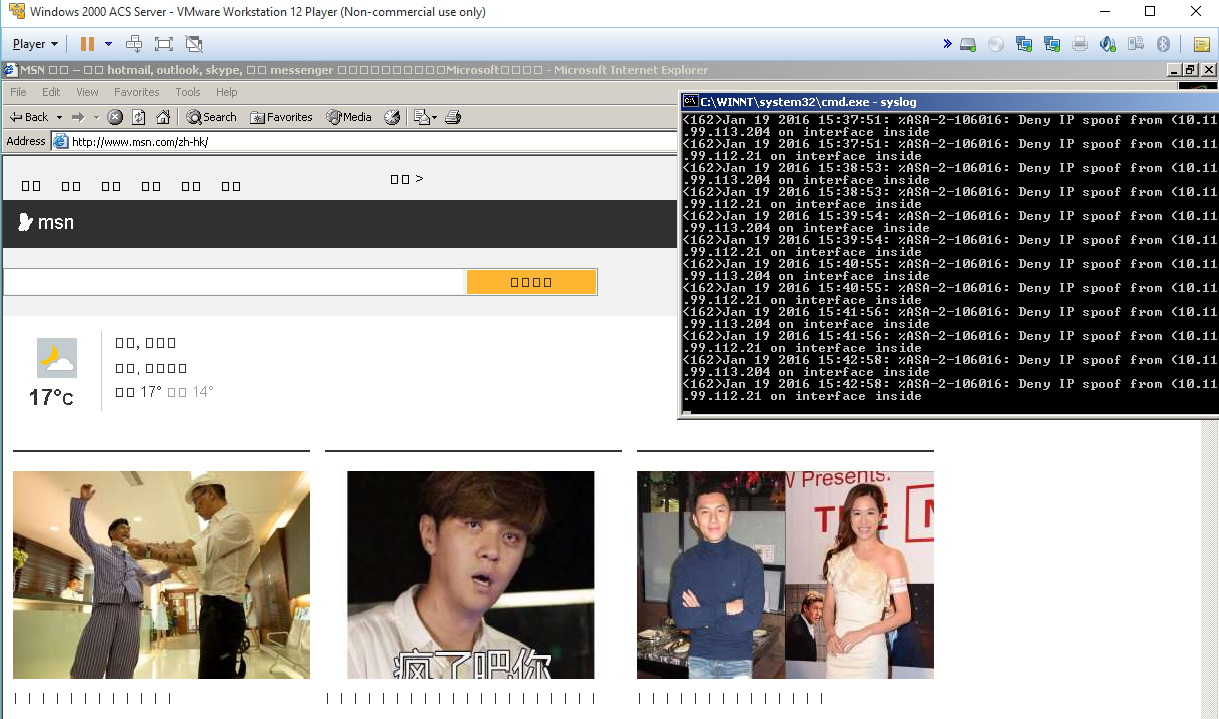
With this proverbial house of cards built up, I can fire-up another VMware machine, in this case a Windows 2000 computer that is bound to a ‘normal’ VMnet adapter, with no fancy dot1a and..

It works!

It works!

I can get IE6 and all it’s glory on the internet.

Update to Windows 10

x

Get ready!

I know I’m crazy, but for some reason the update didn’t kick off automagically on my 7 box, so I fished around and found the direct download here.

From what I’ve read VMware Player 7 updates should work with 10.

Time to see what breaks, and what works!

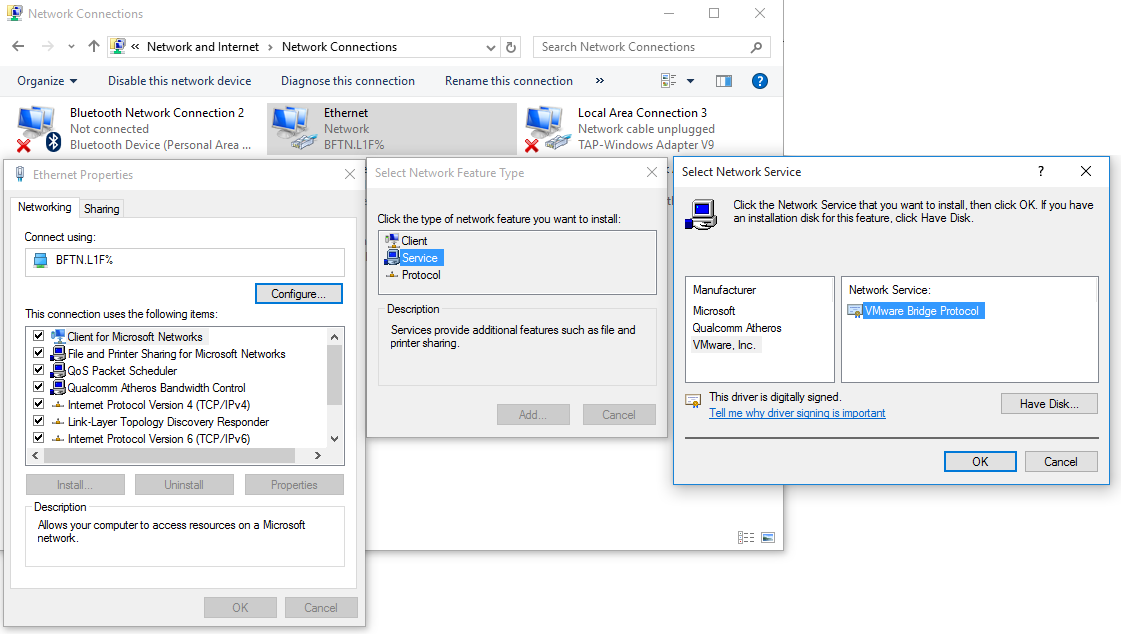
The first issue I had is that after the upgrade, VMware Player couldn’t connect to the bridge adapters.  Luckily the fix is really easy.

Bring up your network connections, go to your physical Ethernet adapter, bring up it’s properties, and add in a ‘service’.

add

Restoring the VMware Bridge service

Then select the VMware Inc, vendor and the VMware Bridge Protocol.  Now with that done, all I had to do is then bind the bridge to the Ethernet adapter.

x

Configuring the Bridged virtual interface

And now my VM’s can talk to my network without any of that NAT nonsense.  And I didn’t have to re-install VMware Player to fix this either!

Some real fun came from upgrading my wife to 2015.  She uses Outlook 2013 to talk to an IMAP server.  No big deal right?  Well after upgrading when she tried to send an email she would get the ever so helpful error 0x800CCC13 .  So her server is setup to use SSL to talk to the outbound SMTP server.  It even has a valid certificate!  The best part is that verifying her account and IT WILL SEND THE TEST EMAIL.  Yes, that is right, Outlook 2013 cannot send to SMTP servers, but the test and diagnostics work.  And in the age of multigigabyte installations all the user is left with is a hexidecimal error code of 0x800CCC13.  Frankly this is totally inexcusable in 2015, let alone in the 1990s.  Hell even OS/2 had a system to look up cryptic error messages.  I guess that was an IBM thing.

So anyways, the best part is the ‘fix’.  Apparently according to here, the upgrade to Windows 10 corrupts some DLL’s that are a part of Outlook 2013, and they need to be repaired.  Simply run the following command as administrator:

sfc /scannow

It can take upwards of 10 minutes to complete.  After we ran this, we re-ran Outlook 2013, and all of our dozens of attempted test messages sent.

Another possible problem is that the Exchange server pluggin is interfering with the IMAP/SMTP plugins, and it needs to be disabled/deleted.  I haven’t had to go there since she can send emails now.

Nothing worse than a firewall crash

So for my email setup I use an OpenBSD firewall behind a hardware firewall (provided by the telecom), and from there I use OpenVPN to connect up to the VPS that in turn forwards email to my Exchange server.

It works great.

Except that the OpenBSD VM just crashed.  And to top it off I had no other way of accessing inwards except for some test machine that luckily was still on, and I had SSH enabled, along with port redirection.

So a few seconds with putty and you can redirect a local port on your computer to connect to a port on the remote network.  Dangerous as hell but, it certainly can save the day! (Yes you can even SSH to a machine, and then OpenVPN to it….)

Checking VMware KB 1012382 details a list of what ports are needed by which versions of their products to do what.

[table]
Product,Port,Protocol,Source,Target,Purpose
ESXi 5.x,443,TCP,VI / vSphere Client, ESXi/ESX Host, VI / vSphere Client to ESXi/ESX Host management connection
ESXi 5.x,902,TCP,vSphere Client, ESXi 5.x vSphere, Client access to virtual machine consoles (MKS)
[/table]


Putty port redirection

Putty port redirection

These are the two ports needed for basic checking in on the status of a standalone ESXi machine. So in this case I can point the VMware fat client to attach to 127.0.0.1, and add in redirects for TCP ports 443 & 902, which let me login, and start a remote console to see how the VMs are doing.

In later versions, you need to use a proper host name.  To set this up edit your %windir%\system32\drivers\etc\hosts file, and make sure you have something like this:

127.0.0.1       localhost esxiloop

And then point the client to esxiloop, and it ought to connect.