get it while it’s HOT.
And again for those win32 users out there, here is an i386 only version, and the full kit.
I’ll have to test SunOS later on today.
Also I see there is a s390 BIOS in there now…… It’d be cool to have a Qemu mainframe… 😀

get it while it’s HOT.
And again for those win32 users out there, here is an i386 only version, and the full kit.
I’ll have to test SunOS later on today.
Also I see there is a s390 BIOS in there now…… It’d be cool to have a Qemu mainframe… 😀
While checking out oldlinux.org, I came across two things that are somewhat exciting.
The first, is Linux 0.00 The first ever known version of Linux. It’s only two assembly files, an 8086 booter, and the 80386 kernel that sets up protected mode, and two hard coded tasks, then runs the two tasks. It’s very exciting. There is even some commented source available on the oldlinux forum here.
For those who want to check it out, I’ve padded it out onto a diskette image on sourceforge here.
Don’t expect too much, it just prints “AAAA” and “BBBB” over and over, but it’s the first booting version of Linux.
The next thing I found was a BOCHS archive with Linux 0.11 installed, along with GCC 1.40 and a few other programs. This image can even build Linux 0.00 and a slightly modified version of 0.11 that can run bash. I’ve found BOCHS somewhat difficult to configure, and since Qemu is faster, I’ve converted the disk image into a ‘qcow2’, then got it running on Qemu 0.12.5. Just unzip the archive here, and you can be running some really ancient Linux.

Linux 0.00 in action.
Remember that Linux 0.11 is OLD. At this point it didn’t support multiple users, nor did it even have a shutdown or reboot command. Instead we all ran ‘sync’ a dozen times, then pulled the plug. Also it was VERY unstable, and quite prone to panics and crashes.. Although I think a majority of them back then were due to file system corruption from pulling the plug at the wrong time… 🙂

Linux 0.11 on Qemu 0.12.5
Linux also had no support for things like TCP/IP, UUCP, shared libraries, etc… although I’m pretty sure it had working serial port support.. In many ways it feels like 32v, although more primitive. This disk image also has the ability to re-build the patched kernel, and even Linux-0.00. What is also cool is the ‘shoelace’ loader which can boot the Linux kernel, so you don’t have to suffer the boot/root disks of the time, and the fun of hex editing stuff.
For people that love ancient stuff from 1991 this will be great fun indeed!
***UPDATE
For people who are interested in ancient Linux on Windows, I did get the toolchain to build with MinGW, and it seems to work ok! Â I have a post about it here. Â I have also been able to get the 32bit portion of the Linux kernel to cross compile on Windows as well! Â That adventure is here.
I came across this site, old linux.org That has a bunch of resources for ancient Linux.
They even have a version of Linux 0.11 that can run in VMWare!
However Qemu won’t boot it, because of some issue with the IDE controller…
HD-controller reset failed: 00
Kernel panic: HD controller not ready
I’ve tried a bunch of versions of Qemu to no avail.. It may just be easier to modify the source to Linux, although that’ll require some kind of build environment capable of building early Linux… I don’t know if I’ll do it, as it’d be modifying the old software which clearly worked back in the day, but at the same point it’s behavior that is consistent with a *LOT* of versions of Qemu.
I’ll have to see, but it’d be cool to get 0.11 running under free emulators, and possibly regress back further. I see MINIX is also available on the site so it may be even possible to get 0.01 running…!
Well as the maintainer of the SIMH binaries on sourceforge, I end up needing access to a bunch of different platforms to build some prebuilt binaries for non win32 people out there.
As a direct result, I end up emulating many of the platforms, but for OS X, I have an old PowerPC mac mini that I used to build stuff, but I gave it away last year. Anyways after digging around on various networks, I came across this file, “tiger-x86.tar.bz2” So after copying it to my pc, and doing the bzip2/tar decompress shuffle, I had what looked like a VMWare config for OSX on intel.
So I figured this was as good as any test for the latest build of Qemu. After a bunch of experimenting I worked out this was the best way to start it:
qemu.exe -L pc-bios -m 512 -hda tiger-x86-flat.img -net nic,model=rtl8139 -net user -no-acpi -no-reboot -k en-us
Then when the bootloader comes up, I just typed in:
platform=x86pc
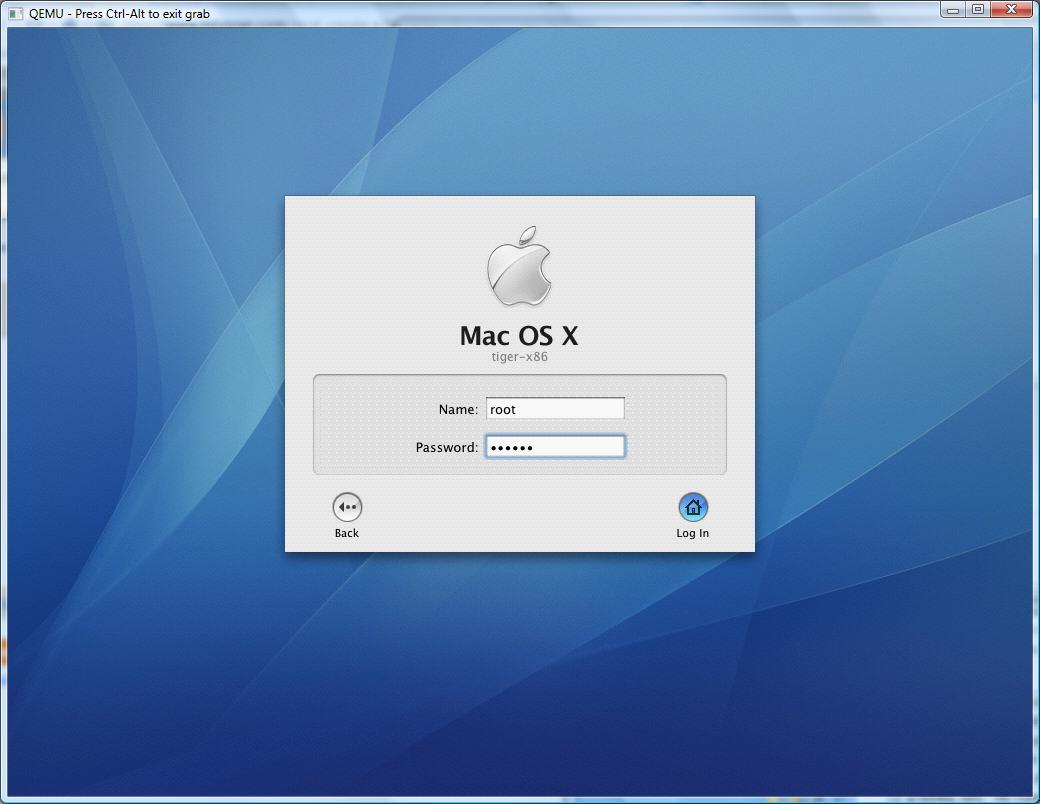
OS X’s logon screen
And away it went!
Now sure it works, but it’s SLOW. VERY Slow. You can remove some TPM extension, and it’ll speed up somewhat, and at least idle like a normal process. After all, I only wanted this setup to build some binaries, not run this like a desktop OS.
To make the bootstring permanent, you just have to open up a termianal window, and edit the file:
/Library/Preferences/SystemConfiguration/com.apple.Boot.plist
<?xml version="1.0" encoding="UTF-8"?>
<!DOCTYPE plist PUBLIC “-//Apple Computer//DTD PLIST 1.0//EN” “http://www.apple.com/DTDs/PropertyList-1.0.dtd”>
<plist version=”1.0″>
<dict>
<key>Kernel</key>
<string>mach_kernel</string>
<key>Kernel Flags</key>
<string>platform=x86pc</string>
<key>Boot Graphics</key>
<string>Yes</string>
</dict>
</plist>
Save it, and you’ll be good to go!
For me it was nice that the networking works, so I had an easy way to get source code into the VM, and executables out of the VM. One cool thing about this VM image is that it contains the compiler! I just wonder since it’s super old will it’s exe’s I make run on modern machines…? I don’t have any way to tell, so it may all be in vain.

Even the PPC version of IE works!
As a test for the heck of it, I downloaded Internet Explorer 5.2 for the PPC version of OSX, and it runs.. It’s too slow to actually use it, although I’ve run it on real intel macs at the apple store, and it FLIES… It’s too bad they killed it IMHO I kind of liked it.
I’m not trying to advocate piracy and all that, but rather show how Qemu can help you run some VMWare disk images, and just how flexible it is.
This are pretty basic x86 win32 binaries…. I haven’t added anything so they are pretty stock.
The FULL package is here, while a smaller download for people only interested in the x86/x64 emulators is available here.
I’ve only tested Windows NT 4.0/MIPS and MS-DOS but everything seemed to work ok.
Other then that, the move continues….
I’m cooking up some exe’s more on that later…
I’m just busy today, moving yet again… 😐
For those with compilers, download Qemu-0.12.5
I found this link where someone had implemented a virtual NE2000 for DosBOX, allowing you to run among other things DOOM!
This reminded me of my own work to add pcap into Qemu back in the 0.9.0 days… SO I figured I’d try to build the thing out and see how they interact!
So the first thing to do was build DosBOX, and add the patch. I found that 0.73 worked pretty well for this!
So after some hammering around, I got it to build, and launched it on two separate machines (one over terminal server) on my lan, and launched the oldest network doom version I could find to get things going.
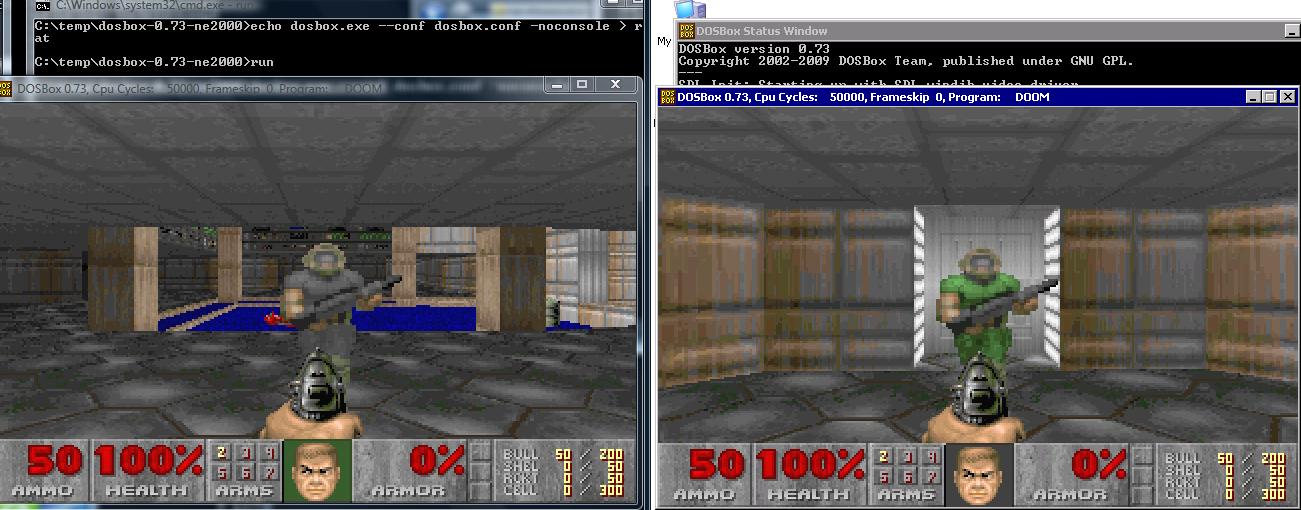
Doom multiplayer IPX-SPX
And there we go. Now in the dosbox.conf you have to make sure that they have unique MAC addresses, and of course, that they are bound to the correct physical nic. in the config file, there is a list option that will print out the possible choices then you can just put the number, or the full name into the right spot on the ini file. I’ve build a prebuilt win32 version of this with all the DLL’s and the gravis ultrasound enabled… You can download it here.
The next thing I did was search high & lo for my patches to Qemu, and thankfully I’d emailed them to myself as it seems all the other places are dead… So with a little playing with Qemu 0.90 to enable the adlib, and remove some logging messages, I’d built a client machine again with Doom. Naturally I had the DosBOX & Qemu face each-other off.. Sadly this is a little SLOW.
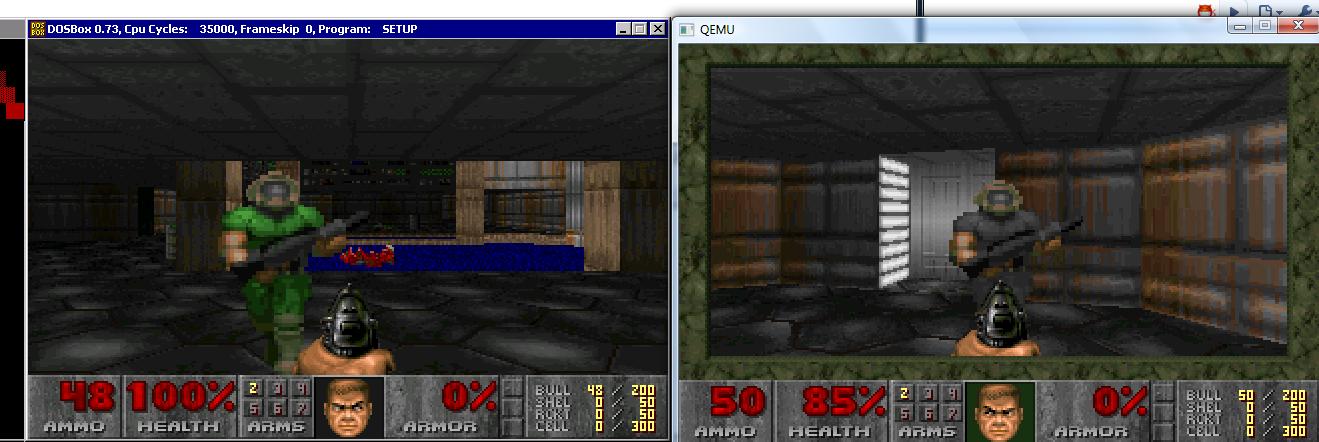
DOSBox and qemu IPXSPX Doom
For those that wish to download, you can find the Qemu client & server files.
Now for Qemu, you’ll need to get that full NIC name… Dosbox provides a great way to see what it is, just paste it into the batch files, and you’ll be good to go.
And remember you’ll need WinPcap installed!!!!!!
The picture says it all…

Its alive!
I took the unix timer code, and got that working (not surprising, NeXTSTEP still is 4.3 BSD at heart), and I fixed enough of the key bindings so it’s getting playable. In addition I went back through the WinQuake source and pulled out the BSD networking and that works great. There was a sound driver in there for the next, but it lacks the output functions…. So it would seem that’s the last thing to hack through for a more ‘complete’ Quake experience.. well that & the mouse.
I’ll probably dig around to find out how to make one of those nifty NeXT packages, and release a test version since it’s playable ‘enough’…
In other news, Qemu 0.12.4 has been released! I haven’t even tried it yet, but on my page “MIPS blast from the past” it’s said to be usable…
A friend of mine was having a hard time trying to configure XF86 from the old Slackware 3.5 days… 1998.
Wow time sure has flown!
Anyways I kind of liked Linux back then as a lot of distros had OpenLook, which made my Linux box feel like a way cheaper SUN box.
While Slackware 3.5 installs great on Virtual PC, the networking just crashes out… So I thought I’d just fire it up on Qemu.
qemu.exe -net nic,model=ne2k_pci -net user -hda Slackware 3.5 Hard Disk.vhd” -L pc-bios -redir tcp:58080::80
And with a bit of tweaking I managed to get it running!
Although with normal VGA there is some weird issues with the cursor…
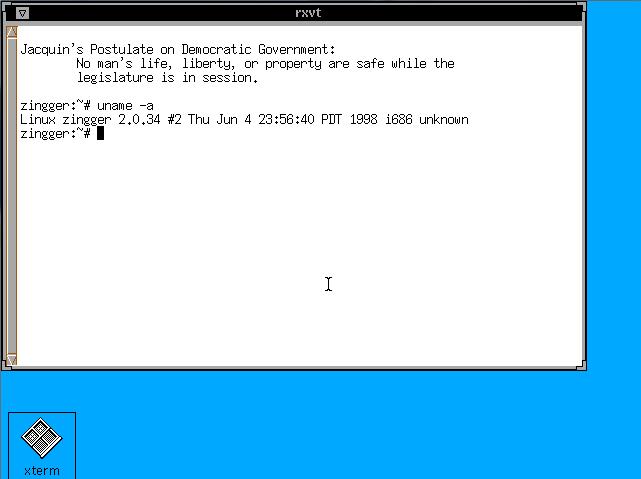
Slackware 3.5 running openlook
It was about as hard as I remember for the xf86config days… you kind of had to mash a few together to get it working…
And if it saves anyone the hassle, here is the XF86Config. (gzipped!)
This is basically regular VGA with a PS/2 mouse… It works on Qemu & Virtual PC, so I’m sure your favorite emulator ought to work as well.
Wow, so I was about to post this when I check to see how many posts I’ve done, and this will put me at 200.
It’s hard to believe it all started out on running Netware 3.12 on Qemu 0.9.0.
Ok, now let’s get on with today’s fun.
I’ve recently managed to get Solaris 2.4 running on Qemu, and it’s been all great, but I’d love to build some programs for it! Now there are binary builds of GCC for Solaris 2.4, but they are about 17MB compressed, and I think it was about 80 uncompressed!
Well that sounds great, except for 2 major limitations:
1. For some reason Solaris doesn’t want to mount any ISO I give it… I’m still kind of lost there.
2. The only networking I can get working is the usermode NAT, and Solaris 2.4’s ftp client/server is just too old for passive mode.
So what the heck can I do?
Well back in college we had this RS/6000 that was cool, *BUT* for some reason I don’t recall it couldn’t build and use mtools (among other things) but from what we had heard is that if we had gcc, it’d run fine. Except without a working C compiler, how does one get GCC running on a RISC machine?
Well, thanks to the fine people that maintain GNAT, the GNU ADA translator, they provide some ready to run versions of GCC. Well not to complain but as the years drag on, lots of mirrors are gone, and there are only a handful of copies left, but they currently have:
*Dec Alpha OSF4
*HP HPPA HPUX 10.20
*i386 Solaris 2.6
*SUN Sparc Solaris 2.5.1
*IBM PowerPC AIX 4.1
And let me tell you, if you were ever given any of the above machines, you’ll be so grateful for this massive leg-up! Now these are *NOT* full development systems, as they are geared towards translation, they are lacking the libc/include files. You’ll have to source those from somewhere, but thankfully as part of the Solaris install there is an option for headers and libraries.
So, while this is all very good, how do you get this stuff to run on your SPARC?
Well.. It’s tedious! but this method is what I used to get gcc running on the RS/6000 years ago, and on the sparc. Unpack that GNAT distribution, then use uuencode/uudecode on the minimal files.. Then paste them into a console window and be sure to have turned messages off!… It’s not “sexy” but it works!
Naturally since there is no gzip for Solaris (you’d have to send one over first!) don’t bother compressing anything with gzip/bzip2… although you could us the old unix compress command, which is what I ended up doing.
So at a minimum the following files are needed to build some programs…
cc1 crt1.o crtend.o crtn.o libgcc.a
cpp crtbegin.o crti.o gcc
Yes, really!
# cat one.c
#include <stdio.h>
void main(void)
{
printf(“hi\n”);
}
# gcc -v one.c -o one
Using builtin specs.
gcc version 2.8.1
cpp -lang-c -v -undef -D__GNUC__=2 -D__GNUC_MINOR__=8 -Dsparc -Dsun -Dunix -D__svr4__ -D__SVR4 -D__sparc__ -D__sun__ -D__unix__ -D__svr4__ -D__SVR4 -D__sparc -D__sun -D__unix -Asystem(unix) -Asystem(svr4) -D__GCC_NEW_VARARGS__ -Acpu(sparc)
-Amachine(sparc) one.c /var/tmp/cca000KP.i
GNU CPP version 2.8.1 (sparc)
#include “…” search starts here:
#include <s…> search starts here:
/usr/include
End of search list.
cc1 /var/tmp/cca000KP.i -quiet -dumpbase one.c -version -o /var/tmp/cca000KP.s
GNU C version 2.8.1 (sparc-sun-solaris2.5.1) compiled by GNU C version 2.8.1.
one.c: In function `main’:
one.c:4: warning: return type of `main’ is not `int’
/usr/ccs/bin/as -V -Qy -s -o /var/tmp/cca000KP1.o /var/tmp/cca000KP.s
/usr/ccs/bin/as: SC3.1 dev 09 May 1994
/usr/ccs/bin/ld -V -Y P,/usr/ccs/lib:/usr/lib -Qy -o one /lib/crt1.o /lib/crti.o /usr/ccs/lib/values-Xa.o /lib/crtbegin.o -L/usr/ccs/bin -L/usr/ccs/lib /var/tmp/cca000KP1.o -lgcc -lc -lgcc /lib/crtend.o /lib/crtn.o
ld: Software Generation Utilities (SGU) SunOS/ELF (LK-1.4 (S/I))
# ./one
hi
#
After an hour of struggling with uuencode, and pasting the results with putty into Qemu running Solaris 2.4 I’ve managed to cook up the following programs:
gzip-1.24
httpd-0.5
ircII-4.4
lynx-2.8.2
make-3.75
unzip-5.52
And I’ve got to admit, that using lynx to download new stuff is a VAST improvement! So for the hell of it, I went ahead and built my favorite f2c/libf2c & dungeon-2.5.6!
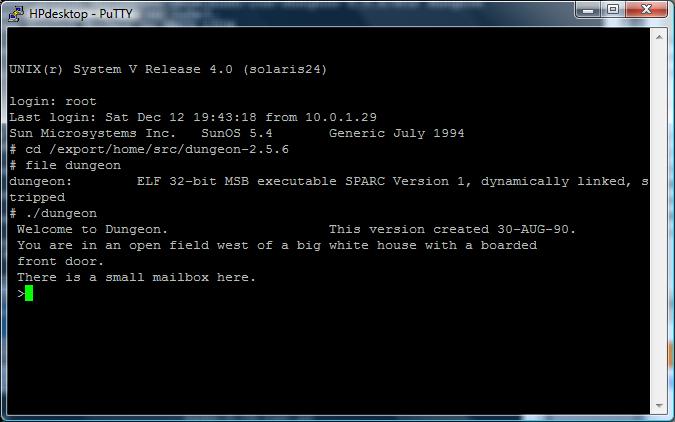
So there it is, Dungeon in all of its “glory”.
Now one important ‘tip’ to share, is that if you follow this path, it’s possible to run into some weird vararg issues… The problem is that gcc works better with it’s own headers for varargs, not any OS version… Everyone recommends you build GCC on your machine yourself to get all the headers in place. The GNAT packages do include the needed vararg stuff, you can simply change the lines that use something like this:
#include <varargs.h>
to
#include “/tmp/gnu/varargs.h”
And life will be good.. That’s basically what I was needing to get lynx to run.
Well, that’s the end of this adventure, hope to post at least another 200 more!