Terminator Rampage
Back in October of 1993, this cool looking game, The Terminator Rampage was released.
But sadly I had a lowly 4MB 386sx-16 with CGA, so things like this game with it’s awesome VGA graphics were an impossibility.
Even more sad at the time was that ‘primitive’ 3d games like wolfenstein 3d also required VGA.
But as we all know a few short months later, DOOM was released, and then Terminator Rampage was quickly swept off the face of the earth.
I recently came across this page, Â and I thought I’d give it a shot. Â The requirements are pretty ‘minimal’:
- Minimal 386DX-25 with 4MB of Ram, VGA & 18MB of disk space
- Â Recommended 386DX-33 or 486DX-33
So I was thinking Qemu could easily run this game. Â Long story short, it doesn’t work. Â Turns out Rampage needs EMS. Â And for whatever reasons, running emm386.exe on Qemu (I tried a handful of versions) just crash on Qemu after initialization. Â Failing with stock Microsoft EMM386, I tried JEMM, which loaded, and ran it’s built in EMS diagnostics OK, but trying to run Rampage resulted in a nice crash.
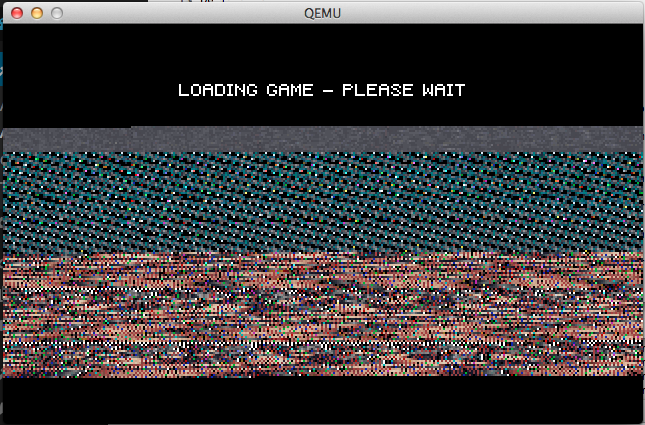
Qemu crash
So giving up on Qemu, I tried it on DOSBox. Â It runs but it is incredibly jerky. Â So I thought I’d try PCem, and see how it runs there.
So the plus side is that PCem, is able to run MS-DOS & EMM386.EXE without issues. Â It only took a few minutes to install MS-DOS 5.0 and Rampage on my ‘virtual’ 486DX2/66 with 8MB, of ram, and load up Rampage to be greeted with it’s jerky motion.
Thinking its something with emulation in general I fire up Norton SI to get some PCem scores how it benches against known good samples.
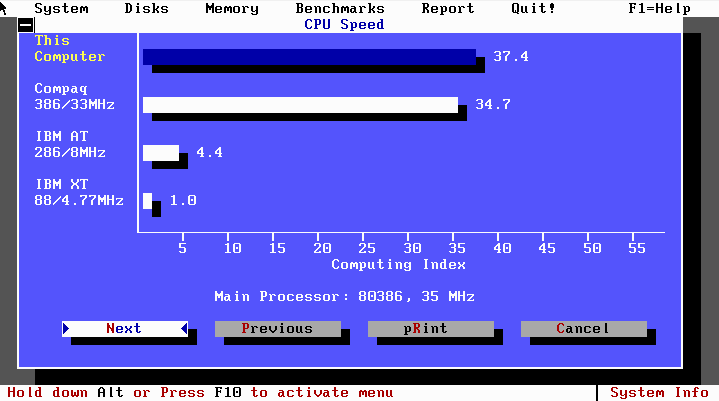
386DX-33Mhz 37.4
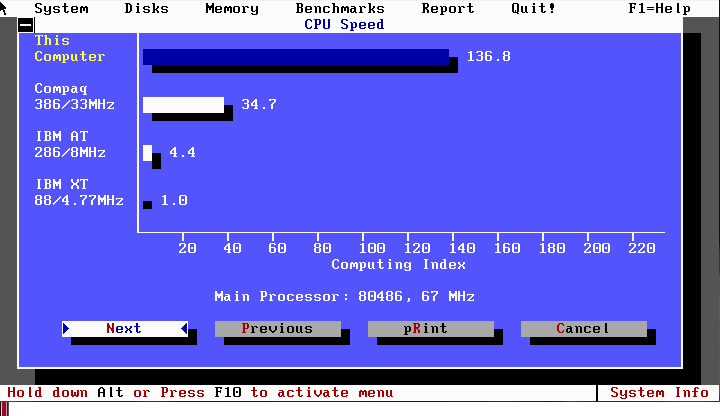
486DX/2-66Mhz 136.8
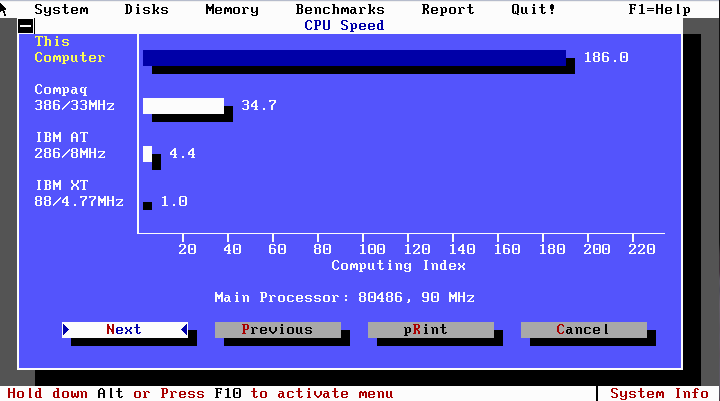
WinChip-90 186
Then comparing the scores to this handy (if not ancient) Norton Si benchmark spread we see:
Pentium 60mhz
=============
IBM Clone        P5/60        256k        187.2
w/ Premiere MB
486 DX2/66mhz
=============
Elitegroup (ECS)    iDX2/66       256k        147.3
SA486P AIO-II
INTEL CDC,SIO&DPU
386 DX 33mhz
=============
Forex 36C100 iDX/33 128k 35.9
Well now that interesting, so at a ‘raw’ CPU level, PCem is delivering on what would be classical performance. Â So for the heck of it, I load up DOOM, and it runs a bit choppy on the 386, but flies on the 486 & Winchip emulation. Â Now that is strange. Â And just to confirm…
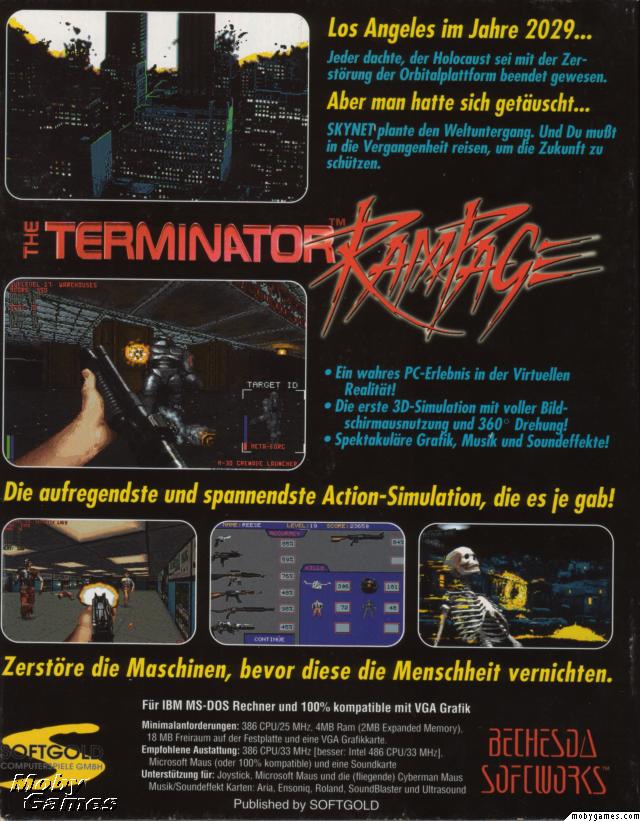
Terminator Rampage Box (back)
They really thought this would be playable on a 486 @ 33Mhz.
So how does it choke? Â While going straight is ‘ok’ turning around is so utterly sluggish that there is no feeling of immersion. Â It feels like you are driving an incredibly slow tank. Â At the same time, the more realistic sprites, and textures serve to make it look even more unrealistic.
So what am I talking about?
Well here is a screenshot of Wolfenstein 3d on the 386DX-33 (and more than playable).
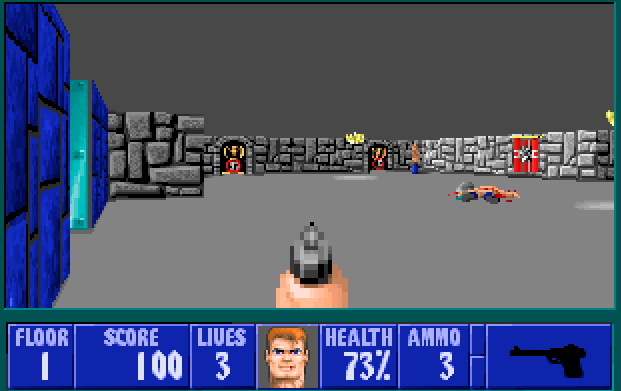
Wolfenstein 3d
As you can see, there is no ceiling, and no floor textures. Â The walls are all uniform height, and the textures were clearly drawn by hand, giving it a very fake and ’16bit’ feeling. Â I should also add on a capable 286, this game is playable.
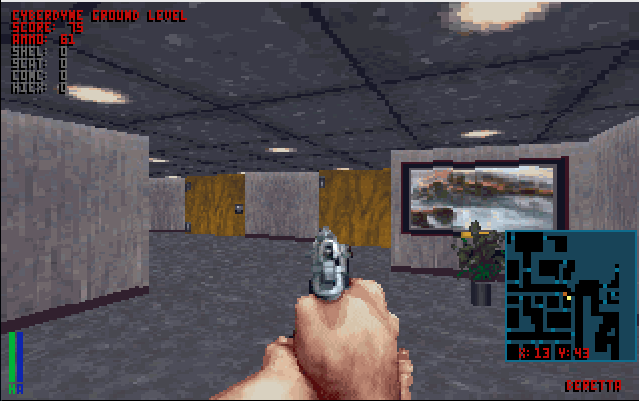
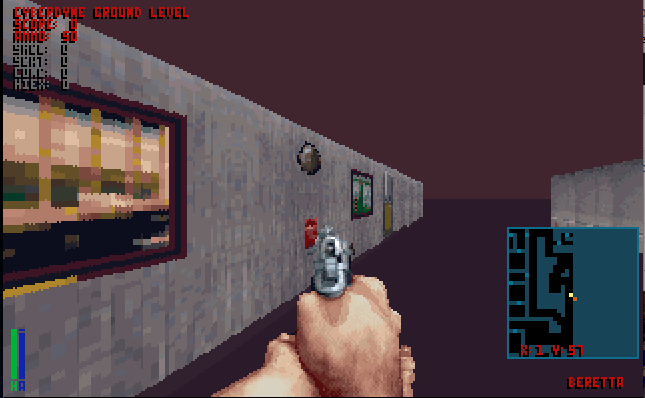
Terminator Rampage
Now at first it looks like it has a lot in common with the soon to be release DOOM, with textured ceilings and floors.
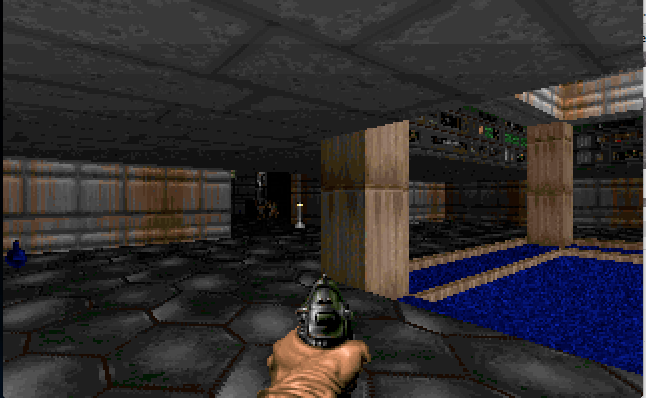
Doom
Now as you can see the difference in DOOM is the 2.5D effect of there being lower areas so you can go up and down stairs (while you cannot go under them). Â Also Doom introduces dynamic lighting, and better sound rendering.
While I do like Rampage’s upfront map, as you can see thought, it is very square. In a small effort to ‘speed’ up Rampage you can turn off the ceilings and floors revealing a very Wolf3d like environment.  Unfortunately the more they tried to give the world  detail, the more it well just looks flat.
No ceilings, No floors.
Which kind of kills the whole thing. Â Maybe they should have left out things like water fountains.
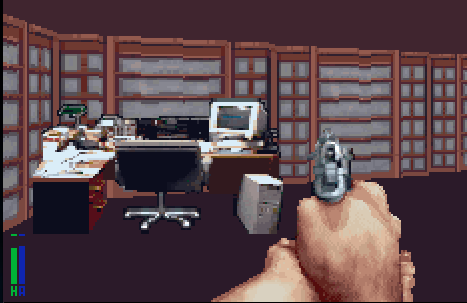
High detail sprites
Then you get things like this computer setup (one of the programmers? The accountant’s lamp is a nice touch) but it’s a sprite, so as you rotate around it, you always see the same face.
Ironically it’s these high resolution background sprites that make the environment feel less real, as they make the rooms feel too open, and too sparse.
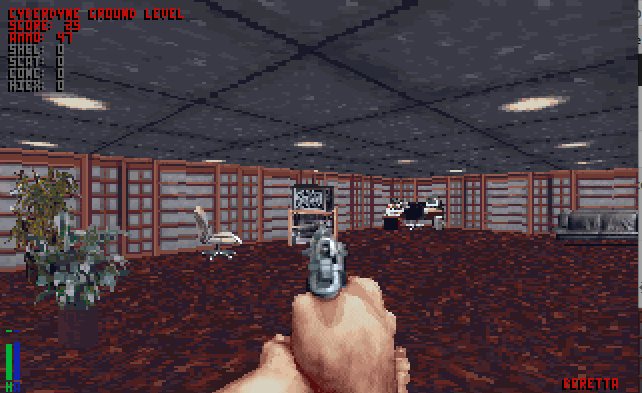
Too open, and yet too sparse
It is the real paradox that in a good shooter you have lots of room, and things to duck behind, but the rooms feel too large, and look bizarre with the massive open spaces. Â But it is more so a limitation of the time, with the engine being more of an improved Wolf3d engine, than taking a larger leap into being something more 2.5d or 3d like Doom (or the distant Quake).
Another thing that really bugged me was the doors.
Doom door
In doom, the doors felt more ‘natural’ in that they weren’t super wide.

Generic office door in Rampage
But in rampage they are stretched wide giving the impression of why you can’t turn is you are incredibly wide..

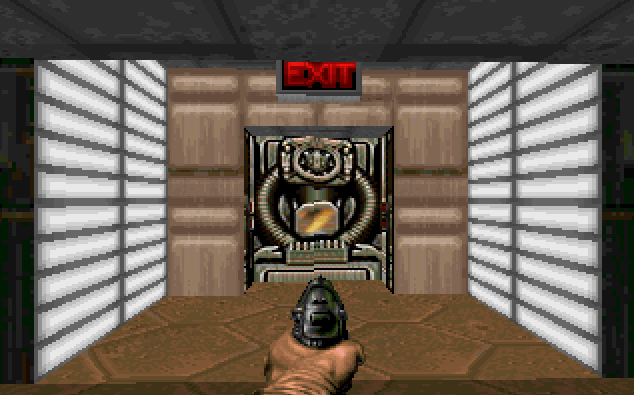
Rampage ‘exit’ door
Even the ‘exit’ door texture still feels too wide.
I could probably get by the empty spaces, but it takes so long to turn around, and the controls feel so unnatural (they don’t even try to be a Wolf3d control-a-like) that it really feels klunky. Â No matter what speed you play it at.
It really was an exercise in frustration.