Stuck on boot, but it’s progress…
1

(Note this is a guest post from Tenox)
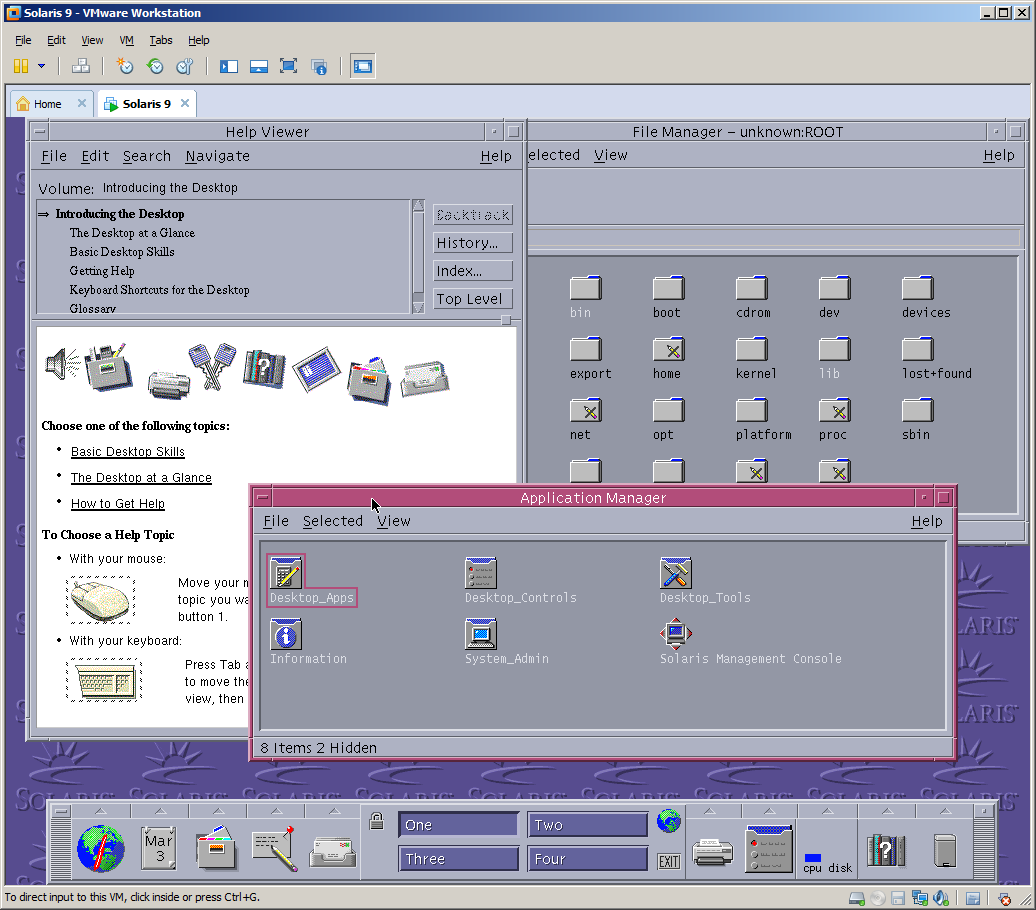
Despite having an unofficial and experimental support for some time now I was not able to install Solaris 9 on VMware Workstation. I have recently upgraded to Workstation 9.0 and Lorenzo Gatti send me a link to complete Solaris 9 x86 u5 media kit so I had an excuse to retry.
After several tries I have determined that the easiest route is to boot and install from cd1 instead of the install disk. Also make sure to select VESA driver instead of standard VGA to get a decent resolution. VMware tools won’t install but it’s not a big deal. Apart from that everything else including networking works out of the box.
Just as a final note Solaris 9 is now 10 years old, time flies fast!
Update:
I have also installed Solaris 8 in a similar manner. Unfortunately it doesn’t have VESA drivers so all I could get is 640×480.

(this is a guest post from Antoni Sawicki aka Tenox)
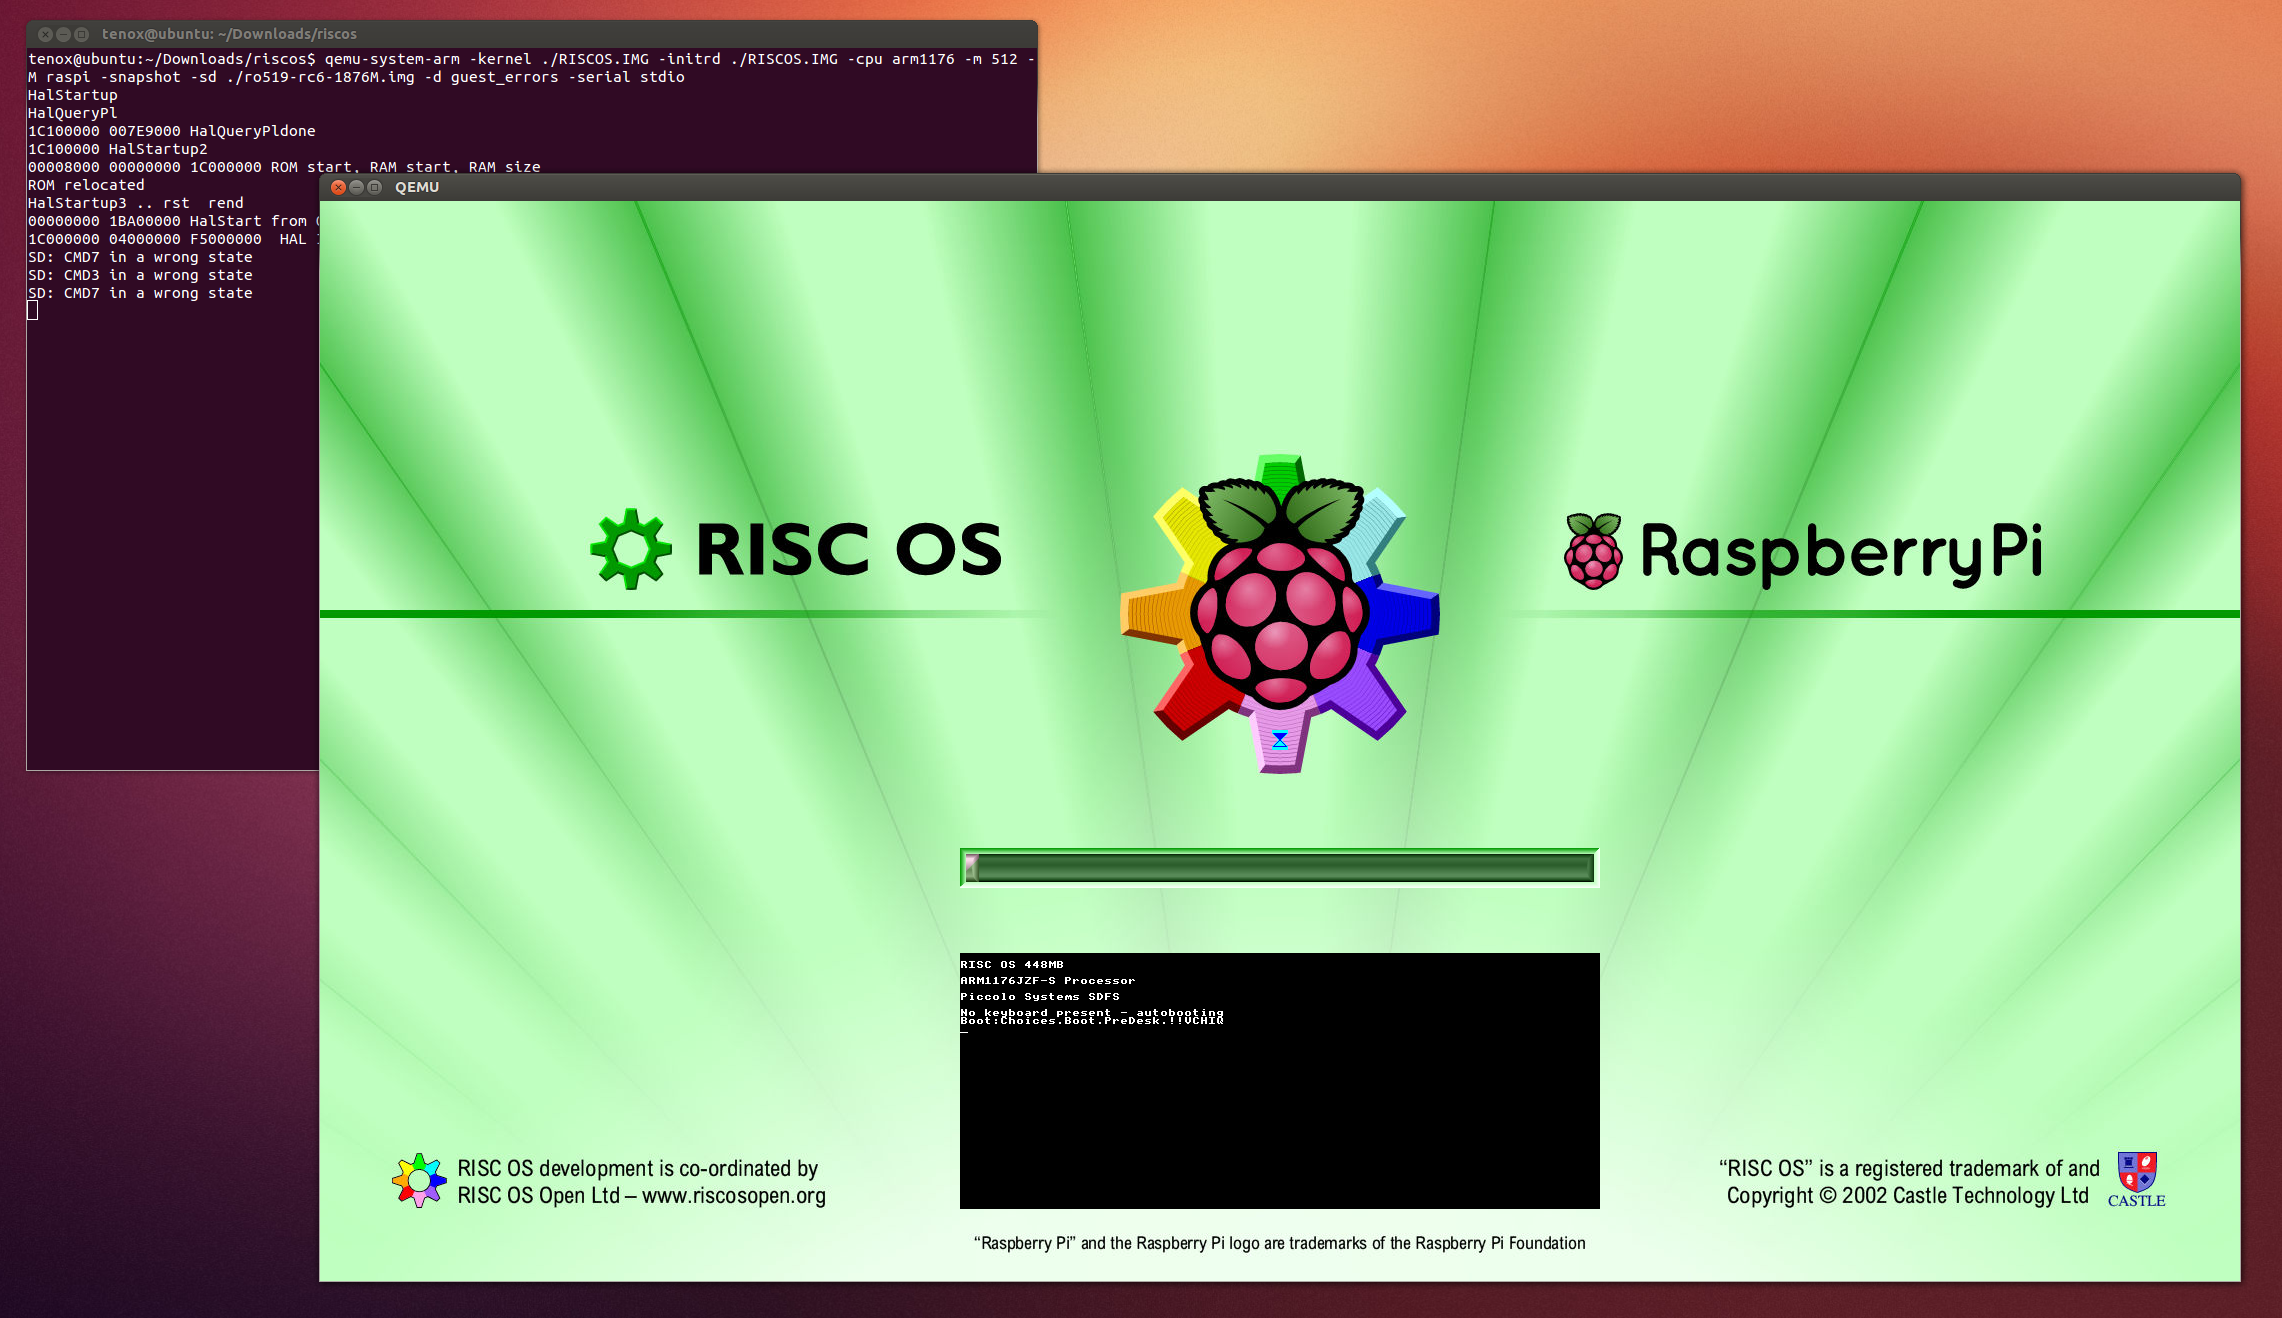
VirtualRPC-SA let’s you run virtual RISC OS on a Windows or Mac OS X host similarly to VMware, VirtualBox or Qemu. The company page features this picture:
 … in reality you you probably don’t want to do that!
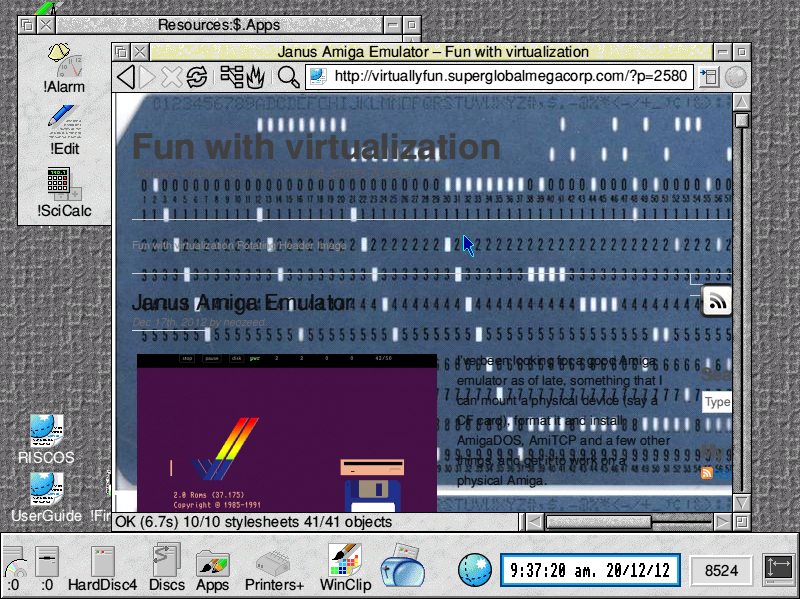
As of time of writing of this article there is a sale going on! You can buy VirtualRPC-SA for only about $100. My primary reason for getting it was porting aclock to RISC OS. In addition to the VM I also purchased the original compiler and developer tools (DDE). It allows to target the funky 26 bit CPU. Otherwise GCC is available for free. VirtualRPC comes “pre-installed” with the RISC OS in a virtual ROM image. The OS at first glance is quite nice looking and seems fun in to explore and play around. You can browse the web and use a bunch of weird applications from alien world. You can find a lot of software apps here and here and here. However I personally could not use this for anything more serious.
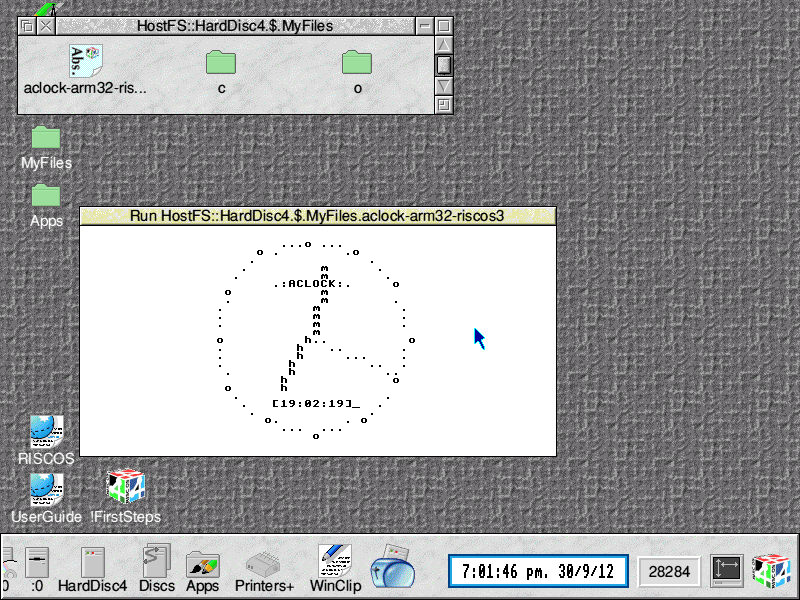
 Porting of aclock to RISC OS was by far one of most difficult ones if not the most difficult. To display text on the screen you need to use system calls directly, for which you use a special function called _swi() or _swix(). There is no concept of sleep() so I had to improvise an empty loop. Fortunately there are screen codes that allow to position the cursor, clear screen etc.
void cls(void) {
     (void) _swix(OS_WriteI + 12, 0);
}
The result is far from pretty but it will do for v1:
 Some funnies, which actually weren’t that funny at the time:
A directory separator in RISC OS is “.” (yes a dot) for example: root.folder.subfolder.file. The C compiler expects .c as a file extension as it would on any normal OS. The problem is that naming file aclock.c would make a directory aclock with c file in it. Fortunately, or maybe not, extensions in RISC OS are prefixing, not postfixing a file. So you have c.aclock or o.aclock. Except, as previously explained c and o are directories. You can see c and o folders in the screenshot above. Are you confused yet?
Interestingly RISC OS does have concept of a command line interface and a terminal window. However try to figure out the commands!
 There is more, so I encourage you to try yourself just for the fun!
(This is a guest post by Antoni Sawicki aka Tenox)
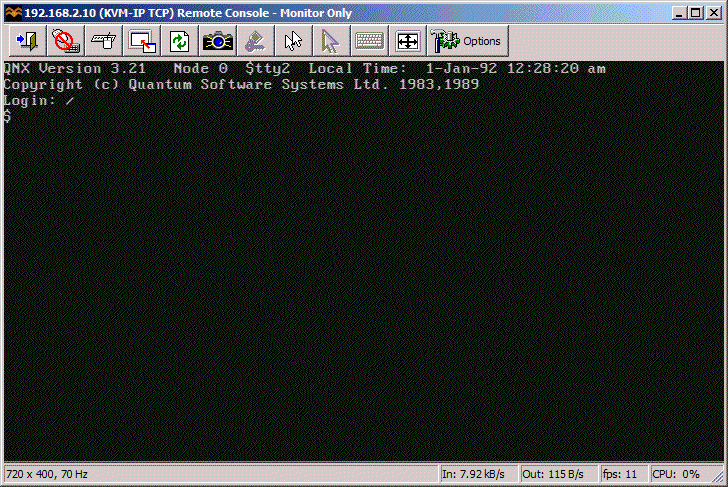
Over the years I have heard a lot of fairy tale stories about the awesome networking capabilities of QNX. There is this particular one about dragging windows across virtual desktop created out of multiple networked PCs. Unfortunately I’ve never got a chance to see it with my own eyes, so I finally decided to take things in to my own hands. I want to see it!
Interestingly QNX 4.25 released in 2011 includes VMware drivers, so the choice of virtualization engine was obvious. You can download QNX4 Product Suite 2011 here
I have created a standard 32bit virtual machine in VMware and booted with QNX4CD.110614.iso. The installation is straight forward, it detects VMware network and graphics cards with no problem. The setup will actually ask you for a QNX Node ID, this will be needed later to create the network. You can simply install few VMs with different Node ID at this point. I wanted to use linked clones so I opted Node ID 1 and changed that later. I’ve enabled to run Photon at boot and went with TCPIP v5.
For simplicity I’m going to run the nodes as DHCP clients. To enable that after first boot:
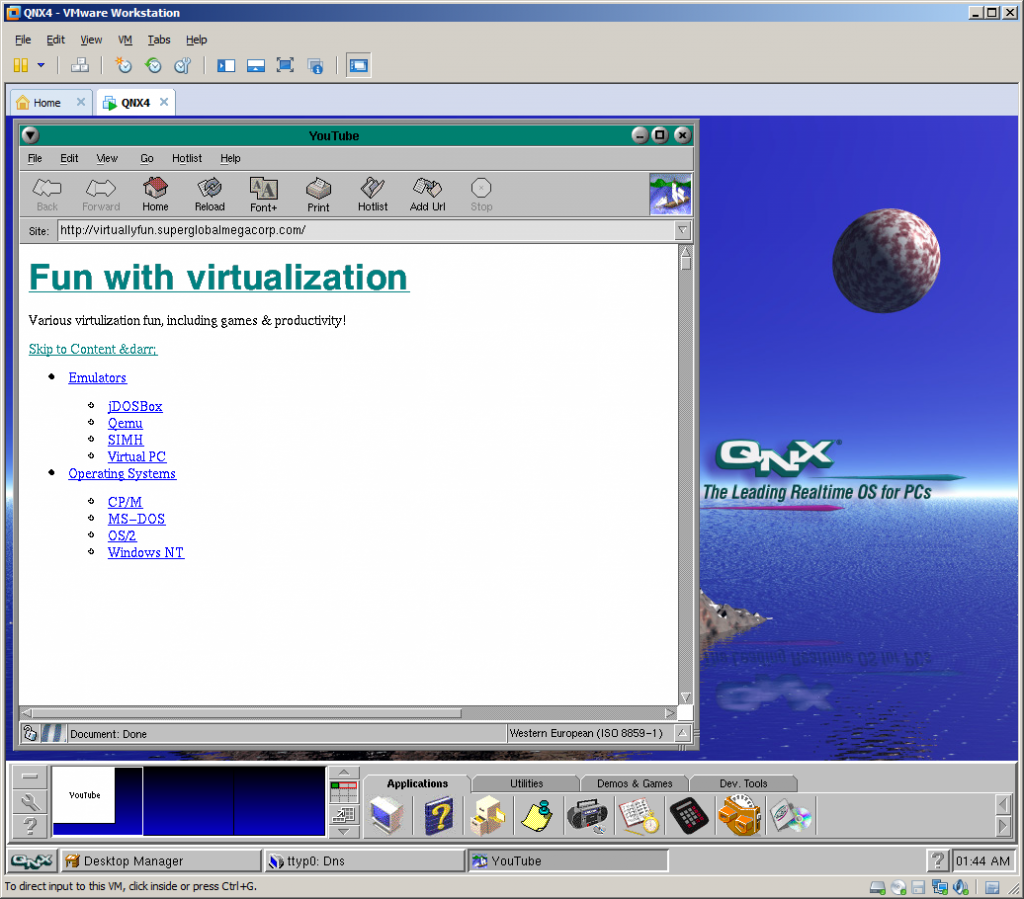
After that I was able to browse web with Voyager. The little OS is pretty fantastic, but as I’m interested in dragging windows, and the OS is covered nicely elsewhere I’m not going to go through all cool features of a single node. Let’s build a network!
I have shut down the virtual machine and created two linked clones. Powered them up. The two clones were able to ping each other over the virtual LAN. I’ve grabbed MAC addresses of both nodes and created a file /etc/config/netmap with entries for both nodes where one is marked with ID 1 and one with ID 2. The file should be identical on both nodes. You can use telnet or ftp to copy it across. Use netmap -f to reload the file.
In the next step I went to work #2 clone exclusively as I needed to change Node ID. Briefly following steps are required:
The configuration steps are documented in more details in this howto.
Also going back to the .iso install you can just specify the Node ID during setup. Much easier.
Type sin net to display list of nodes and their capabilities. If you issue sin info command you should see Node = 2. If you issue sin -n 1 info you should see Node 1 as the sin command was executed remotely on node 1.
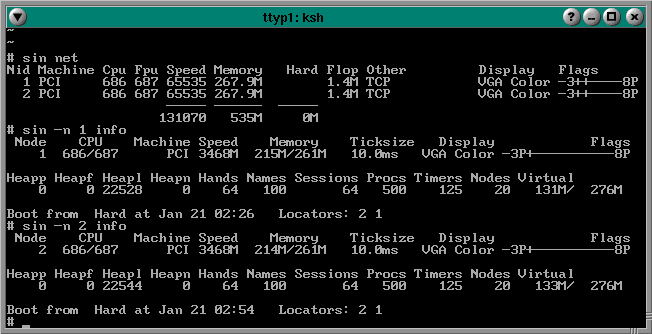
You can list remote file systems like this: ls //<nodeid>/Â for example:Â ls //2/. You can execute remote commands using on -n <nodeid> command, for instance on -n 2 who. Impressive, but still not what I wanted to see.
Let’s have look have look at a feature called Jump Gate. Sounds like Stargate and actually works pretty similar. Jump Gates, Ditto and other features are documented pretty well here.
Note the videos are best viewed in 1080p or “original” quality, full screen.
Impressive, but still not what I wanted to see…
This document sheds a little bit of light how you can extend desktop using phditto. After some experimentation, assuming my screen resolution is 1024×768 I figured this, on node 2 run: phditto -n 1 -x 1024 -w 1024 -h 768 -k. The parameter -x is the horizontal screen extension at offset x, –k is kiosk mode aka full screen. You can enter and exit from kiosk by pressing Ctrl+Alt+K. Here are the results:
(Note that these are two separate VMs talking to each other over the network)
Now this is exactly what I wanted to see! Show me another OS that can do that… Note that not all of the nodes have to be QNX OS. You can extend display by using Phwindows for Microsoft Windows or X11 as well!
Update:Â 4 node network!
(note this is a guest post from Tenox)
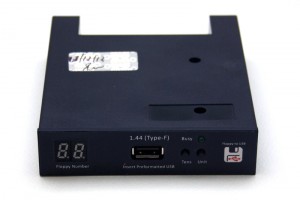
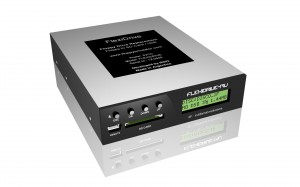
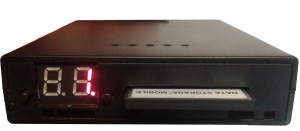
As promised in a post about Floppy Disk Emulators, here is a review of HxC Floppy Disk Emulator. I ordered it from Lotharek via eBay. Initially stuck in Polish post made it just before the weekend! This made my Christmas gift as I had a lot of fun playing with it. The unit comes with two front panel stickers, one grey and one black to match your equipment type. Quite nice touch. I choose grey as most of my units are of this color. I have to say the LCD screen makes a modern touch to an old 286 machine!
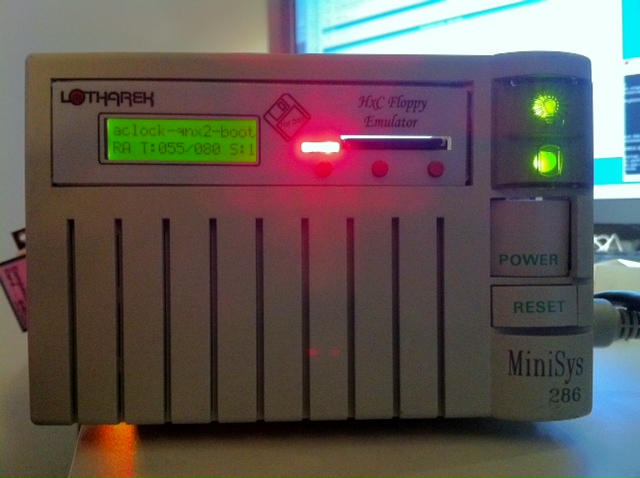
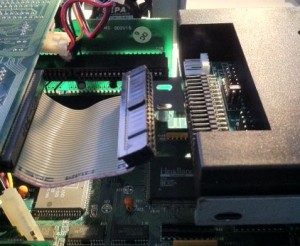
286 machine with HxC installed in 3.5″ floppy bay.
Initially I have stumbled upon a lot of issues. Floppy disks are not easy as it seems. No wonder I had so much trouble with the real ones. I spent a lot of time experimenting with ID jumpers and correct BIOS settings. The unit only worked on ID3A but I can probably attribute it to a weird machine. Then I had problems converting my raw images to HFE format. The main project developer helped me a lot on their forums.
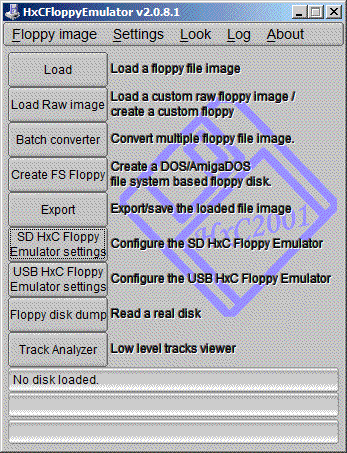
HxC Software used to load and convert disk images. The latest beta version includes a Track Analyzer!
Once I got a grip how to do it semi correctly I was able to torture the machine with bunch of operating systems it has never seen before. Â Let’s go directly to the screenshots!
QNX 2 worked just fine!

Minix 2.0 also loaded without problems.
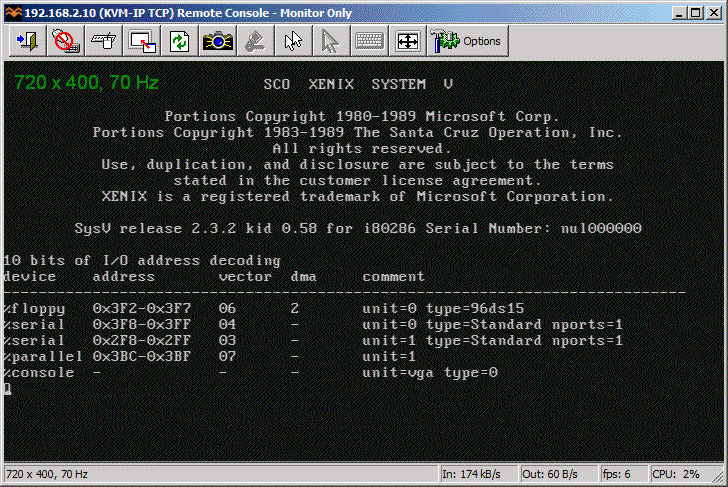
So did SCO Xenix 2.3
SCO Xenix 2.3 boot complete.
Microsoft Xenix also briefly saw daylight.

MS Xenix switched to CGA mode and died.
Guess which operating system is this?
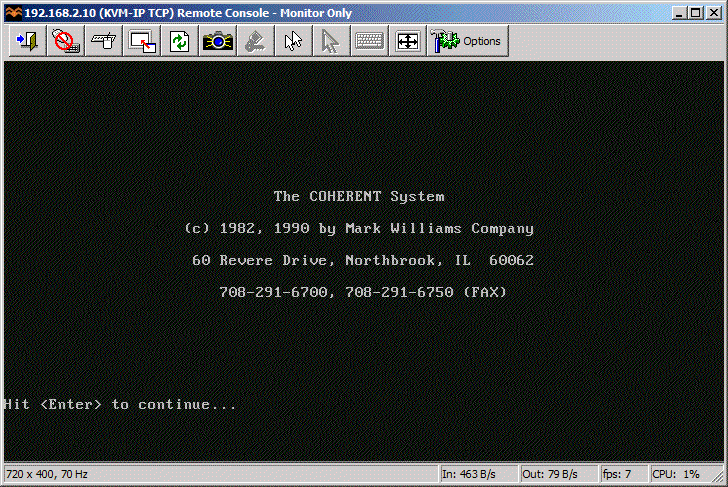
Coherent 3.10 boots correctly as well.
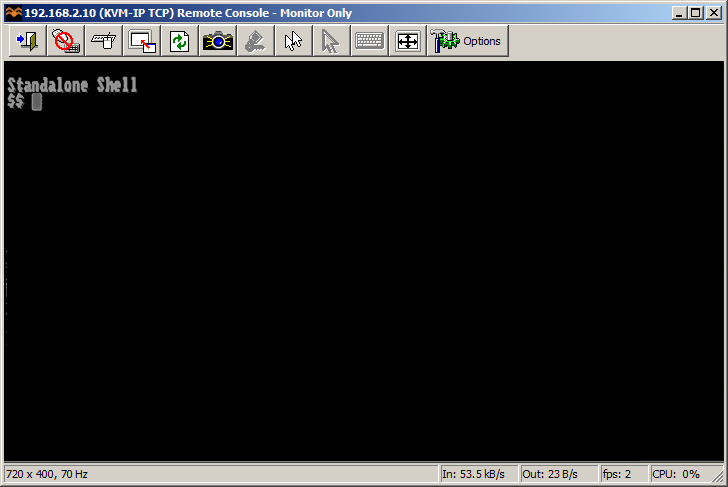
PC/IX booted to Stand Alone Shell.
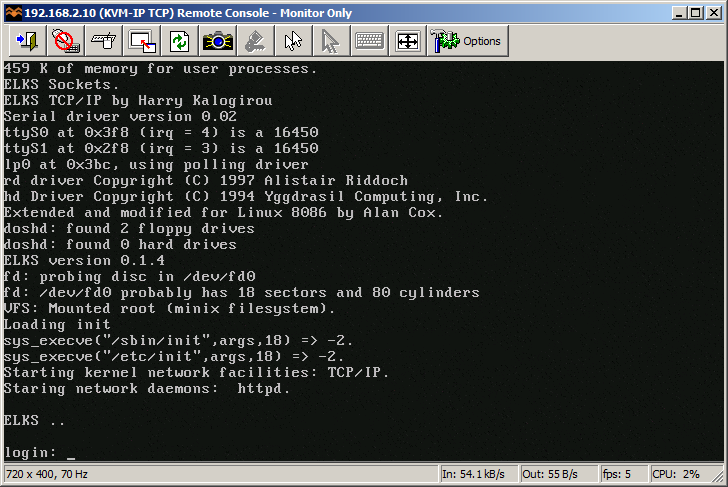
ELKS
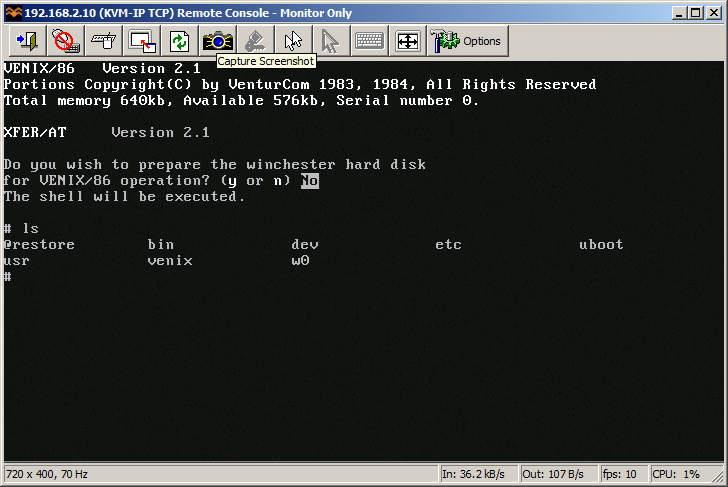
VenturCom VENIX/86
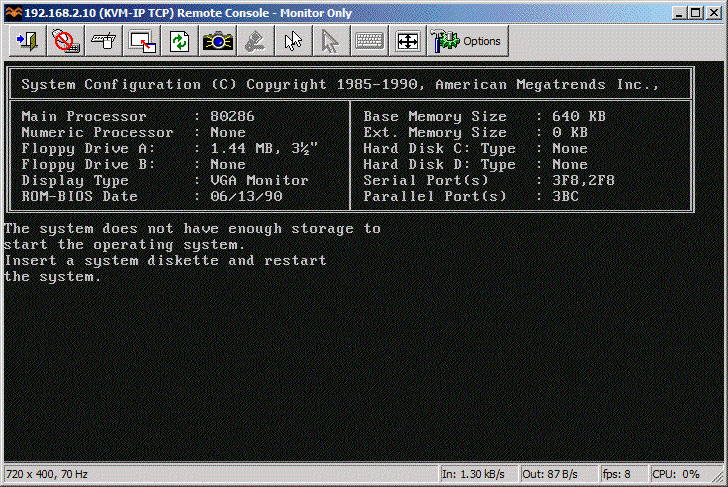
I guess 640 KB is NOT enough for everybody.
This pretty much concludes operating systems for 286. If you have more let me know! I will try 386/486 operating systems in a separate post.
So how does HxC works for an end user? You store floppy disk images in a special format called HFE as files on an SD card. HFE files can be made by a virtual floppy disk emulator + rawrite, reading and imaging in an existing floppy, or converting existing floppy images. The list of supported disk images is quite impressive. The conversion however sometimes fails. It detects a wrong format and you have to change file extension or it completely screws things up making 64 “sides” to a floppy disk. Most if not all these have been fixed in the latest beta version of software, but you need to know about it.
When you insert the SD card to the emulator it will read the file list and allow you to switch between different floppy drives on the fly. Interestingly you can mix and match different floppy disk types on the same SD card. So you can have bunch of 3.5″ or 5.25″ disk in different files. Each HFE file contains specific settings for the emulator including the floppy interface type. The operating systems I’ve tried above ranged from 360k, 720k, 1.2MB and 1.44MB images stored on the same SD card. However changing floppy disk type in the BIOS was necessary for the images of different format to load correctly.
One extremely interesting feature is a host control software, that let’s you manage the floppy disks from inside the machine where HxC is attached. Sort of like VMware tools. The software is available for Atari, Amiga and Amstrad CPC. Unfortunately not for PC so I could not test at this time.
Because of the pain with formats, errors in conversions and confusion about some settings I can only give it 8 out of 10 for ease of use. So let’s conclude:
If you have a large collection of floppy disk images or you maintain a bunch of old machines that rely on floppy disks to work – get HxC quickly. It may save your life.
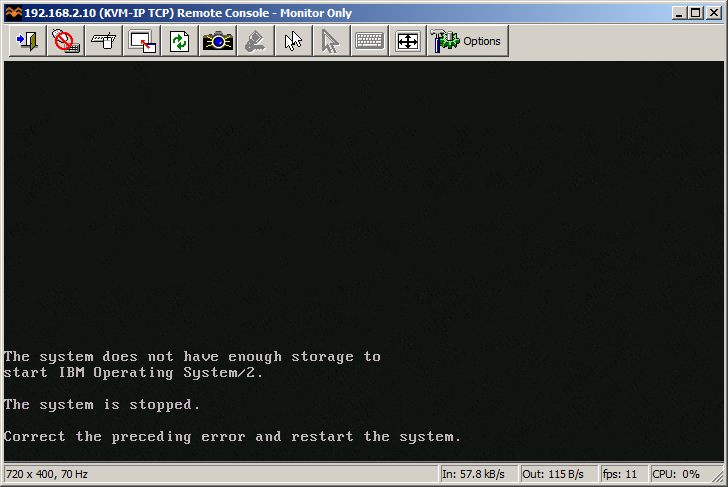
Updates: Venix/86 and ELKS, Tried OS/2 V1.0 and 640 KB RAM was not enough to boot.
Still missing: Microport SYSV/AT
(this is a guest post from Tenox)
This is a continuation of my another post where I do a high level overview of different Floppy Disk Emulators. Gotek is one of them but from various research I have done before buying it I antcipated it will be the worst. Unfortunately the claims turned to be true.
The emulator arrived by FedEx earlier on today. It only took two days since the order, which is excellent, but unfortunately this was the only good thing about Gotek.
The FedEx bag looked like it has been used by at least 5 previous shipments and has already circled the globe few times. The inner package was even worse, a bit of old bubble wrap taped together with the unit and unpacked cdrom. Disgusting!
The unit itself looks rather good, they have made a better looking self adhesive front panel label.
I went to replace my original 1.44MB floppy drive with Gotek. First roadblock that I encountered was the fact that the emulator is about an inch shorter and the original floppy cable did not reach so I had to improvise. The unit powered on so I went on to the documentation and software.
Documentation is absolutely horrible. Written in Engrish is rather hard to understand, however invaluable because without it you will not be able to figure out how to use the software. Looks like they are aware of the software limitations because the documentation is full of workarounds and troubleshooting.
The software is even worse. It only works on Windows XP / 2000, so I had to run it inside VMware Workstation with USB pass-through It actually did work but usability is similar to RiscOS or Plan 9. Here is a photo from one of the manual pages that illustrates both the documentation and the application itself.
So how does it actually work? Here is a small excerpt from the user manual: “We will divide a pen drive into 100 partitions of 1.44 mb capacity each.” – err what? That’s right, this is what they are doing. Dividing a pen drive to small partitions and multiplexing them so that you see one at a time. You select the partition using the buttons on the front panel or from the software. When you switch the floppy drive will be mapped to another partition. On the host computer you can see it as a removable drive in Windows Explorer.

Gotek has promised me that the Type-F will support non-FAT and bootable floppy disks. So I started testing with writing QNX2 aclock demo floppy disk using ntrawrite.
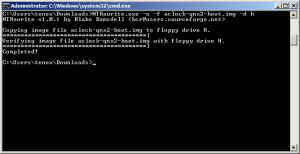
The system has completely freaked out and went to an error mode. Fortunately described in the troubleshooting guide, however requires full reformatting. Now imagine rewriting 100 floppy disks stored on the unit… I spent hours trying to figure what is going in. What I think is that the non-FAT bootable disk can only be used in “singular mode” where you store just a single floppy disk image on the pen drive. What a waste, but it did work and in the end I did boot QNX2 on my 286 from a pen drive.
The next test was trying to boot Xenix from emulated 1.2MB 5.25″ drive. I have re formatted the singular drive to 1.2MB and switched it in the bios. However the system never actually loaded.
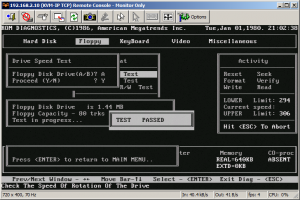
When it comes to FAT compatible operating systems like MS-DOS or OS/2, you can actually boot and use multiplexed floppies. You can install MS-DOS 6.22 by flipping the selector to change disks. Pretty cool. I was also able to run BIOS built in floppy disk diagnostics.
So the device sort of works. I was able to boot a non-DOS operating system and for DOS based floppies I was able to hold more than one disk per USB key. However the whole experience was rather horrible. The verdict:
So in short do not waste your time with this. Do not buy Gotek unless you absolutely have to.
I’m still awaiting for arrival of HxC, however it appears to be stuck in Polish Post Office, probably due to the holiday season.
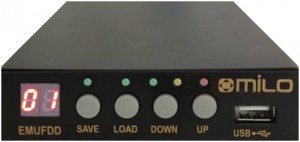
Update: EMUFDD has provided me with a link to their page that lists all Gotek-like cheap Chinese and Indian made devices – with a warning how bad they are. They are claiming that German Ipcas also sells Gotek like devices, so I will be updating my previous post.
(note this is a guest post from Tenox)
Jason’s note on hybrid bootable ISO reminded me of a recent discovery. I have a bootable USB pen drive that I wanted to boot in VMware Workstation. Normally impossible, but there always is a work around! Turns out the problem is with the VMware built-in BIOS and more specifically lack of USB boot support. All you have to do is get a bootable media, floppy or CDROM with a boot loader that can redirect you to the USB device. I’m using Plop. Important thing to remember is to connect the USB pen drive to the virtual machine in a pass through mode. Also it’s very very slow.
I was waiting for this for a long time. Recently I came in to possession of a box of 5.25″ floppy disks, among them following find:

Thanks to efforts of Al Kossow of bitsavers.org and Michal Necasek of OS/2 Museum we got the system to boot on VirtualBox!

Unfortunately we are missing the rest of the system which was distributed either on 15 floppy disks or a tape. If anyone has it, please let me know…
Little bits of information I have found on the web about Wyse Unix:
Interestingly Wyse Unix is a supported os emulation for iBCS.
Update: A full install tape has been found and the system has been fully installed
(this is a guest post from Tenox)
I had a really bad weekend associated with floppy drive failures. Either all my floppy disks or all my drives decided to jump the ship. Nothing worked! Worse, I could not buy any “new” floppy disk anywhere. Office Depot still stocks floppies but not in stores and you have to order online and wait. Neither Halted nor Weirdstuff had them as well. Seriously?
A major disaster! Something had to be done to make it future proof. So I went to research floppy drive replacement solutions. And this is what I found. There are several Floppy Disk Emulators on the market.
Here is the list and a little bit of research on every one of them. They do have major differences to be aware of.


I have ordered two units for testing: HxC, SD revision F from eBay and Gotek Rev F from the manufacturer. I guess testing of the units will be subject of part 2 of this post. I’m planning to try to install some of the weirdest operating systems with wildest disk formats.
Also as a final note, for more modern computers with USB support there are some more mainstream options. I have used following two professionally:

Updates:
(This is a guest post by Antoni Sawicki aka Tenox)
Do you remember the famous Windows NT Blue Screen Of Death? For years it was a source of jokes and bad reputation of Windows reliability.
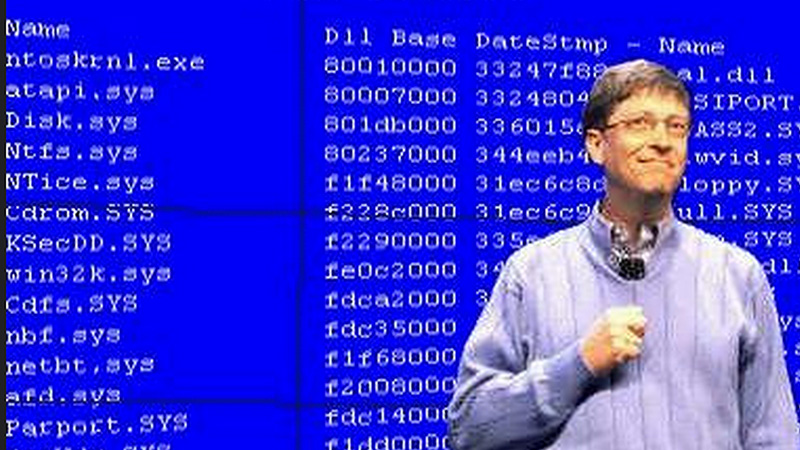
There even was a Blue Screen Saver. Today we fortunately see much less of it, but it still is there, reminding us that Windows NT internally is in fact a text mode operating system. The 1989 NT Design Workbook tells us that in the early days of development, before OS/2, Win32 subsystems or any GUI were developed, there was an ANSI console and bunch of command line utilities running in the text mode. Sadly all were removed in the retail version. The only true text mode application left around was autochk. Since the day Aclock was conceived I always wanted to run it on the NT text mode boot screen. In it’s twisted logic it actually makes a perfect sense.
So how do you actually output to the BSOD screen? Initially there was a lot hope in Windows NT Native Application, which can use NtDisplayString() function to display text before GUI takes over. Mark Russinovitch has written a sample Native Application with source code. Unfortunately I soon realized that NtDisplayString()Â does not allow for any control characters that would let me position the cursor or clear the screen. It doesn’t let much more than to display “Hello World” during Windows boot. This unfortunately wasn’t what I was hoping for. Out of lack of further ideas the project was shelved for nearly 10 years until I recently got some help from a real windows insider.
The new hope came from a HalDisplayString() and it’s helper functions HalQueryDisplayParameters() and HalSetDisplayParameters()which return screen resolution in characters and allow to position the text cursor. Exactly what I needed! Unfortunately these functions are part of the NT Kernel and there was absolutely no hope of calling them from user mode, even a Native application.
So a device driver version of Aclock was conceived. Err WHAT? Yes! A Windows Kernel Mode Device Driver version of Aclock. It sounds like craziest idea and most ridiculous waste of time ever. Worse than that, it definitely is! Despite that, development of the driver was actually surprisingly straight forward and the most difficulties I had was to do with setting up the right environment. It required Windows NT 4.0 SP6, an old version of NTDDK, SDK and Visual Studio. Once I had the project set up correctly, the only thing left to do was to figure out the kernel mode equivalents of some of the things I was getting for granted, for instance sleep(). My last surprise was rather unexpectedly difficult access to floating point in the driver. I was advised to avoid, so I have generated a pre computed tables of sin and cos values for every minute on the clock dial.

Aclock running on Windows NT BSOD in Kernel Mode
I must say that VMware Workstation Snapshots came very handy for launching and testing of the driver. It spared me from constant rebooting and re-launching the whole environment. I could load aclock and literarily click “back” like in a web browser.
Links:
Since running the driver on your own system will render it unbootable (you can always do a snapshot or use last known good configuration) I have built a minimal Windows NT Embedded (NTe) image that loads the driver on startup. It’s available as OVA image.

Windows NT Embedded project
The next steps may involve porting AA-Lib to NTHAL. From there the possibilities are unlimited aalib-quake? 😉
Update:Â Video