Running TME on Linux Subsystem for Windows (v1?)

I know in all the trade news everyone is excited that the newest Linux Subsystem for Windows will provide a native kernel. I would imagine it’s going to run along the lines of containers which means using the Hyper-V stuff. So good bye VMWare?

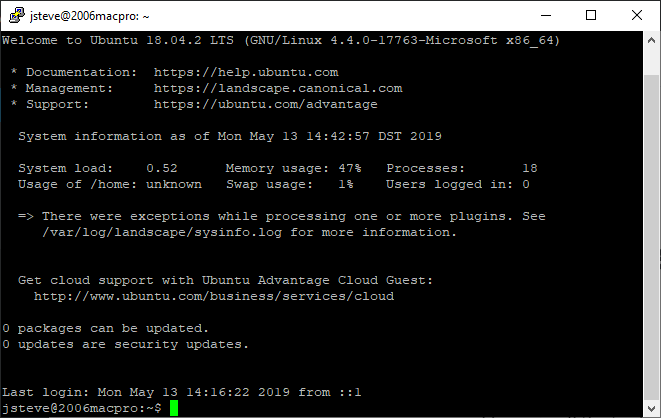
Anyways I want to run SunOS 2.0 which means no graphics are needed, but what I do need is a pty. I’m a n00b so I don’t know how to generate them myself, but I did see that I can piggyback on a ssh session. So first you need to enable & run sshd, which instructions are here, Although with Ubuntu 18.02 LTS there is further steps listed here. If everything is okay, you can SSH into your Windows machine, getting the Linux subsystem.

Some notes on building:

First let’s get the emulator and patches for SunOS 2

wget http://people.csail.mit.edu/fredette/tme/tme-0.8.tar.gz tar -zxvf tme-0.8.tar.gz wget http://www.heeltoe.com/download/sun2/diffs-20111125 cd tme-0.8 patch -p1 < ../diffs-20111125

Using GCC 5 or 7 (probably everything post version 3, the -Werror will cause building TME to error out.

I just removed the following block from configure

if test "x$enable_warnings" = "xyes" -a "x$GCC" = "xyes"; then CFLAGS="${CFLAGS-} -Wundef -Wall -Werror" CXXFLAGS="${CXXFLAGS-} -W" fi

Now you can run configure & make. I follow the general wisdom, which involves disabling shared libraries. Otherwise you can play with the dynamic linker. Yuck.

sh configure --disable-shared make

It doesn't like to build in parallel, so be prepared to wait.

And yes, building fb-xlat-auto.c & fb.c does take a long while. Also make sure to have bison & flex installed.

Using Debian 9/GCC 6.3.0 I do get a bomb compiling module.c

module.c: In function 'tme_module_init': module.c:93:3: error: 'lt_preloaded_symbols' undeclared (first use in this function) LTDL_SET_PRELOADED_SYMBOLS();

In this case I just copy the definition from libltdl/ltdl.h and put it into module.c It'll complain about it being a duplicate, but it'll compile. I don't understand that either.

Now we need to set the variable LTDL_LIBRARY_PATH to pickup the config for each hardware component.

export LTDL_LIBRARY_PATH=$HOME/tme-0.8

Ok and now let's get ready to install SunOS 2.0

$ mkdir sunos2 cd cd sunos2/ wget https://web.archive.org/web/20060720001131/http://www.soupwizard.com/sun2/sunos/sunos_2.0_sun2.tar.gz tar -zxvf sunos_2.0_sun2.tar.gz mv sunos-2.0-sun2/tape1 . wget http://people.csail.mit.edu/fredette/tme/sun2-multi-rev-R.bin perl $HOME/tme-0.8/machine/sun/tme-sun-idprom 2/120 8:0:20:02:02:02 > my-sun2-idprom.bin

Now we can configure the emulator. One thing to take note of is what pts device has been created once you SSH'd into Windows.

$ ls -l /dev/pts/ total 0 crw--w---- 1 jsteve tty 136, 0 May 13 15:08 0 c--------- 1 root root 5, 2 May 13 10:47 ptmx

So in this case it's /dev/pts/0 for me, as I'm the first (and only) thing connected.

Now you need to edit the config. This is the one that I'm using:

mainbus0: tme/machine/sun2 multibus my-sun2-idprom.bin cpu0 at mainbus0: tme/ic/m68010 obio0 at mainbus0 obio: tme/generic/bus size 8MB obmem0 at mainbus0 obmem: tme/generic/bus size 16MB ram0 at obmem0 addr 0x0: tme/host/posix/memory ram 4MB rom0 at obmem0 addr 0xef0000: tme/host/posix/memory rom sun2-multi-rev-R.bin rom0 at obmem0 addr 0xef8000 clock0 at obio0 addr 0x2800: tme/machine/sun2/clock tod0 at obio0 addr 0x3800: tme/machine/sun2/tod zs0 at obio0 addr 0x2000 ipl 6: tme/machine/sun2/zs mbio0 at mainbus0 mbio: tme/generic/bus size 8MB mbmem0: tme/generic/bus size 8MB mainbus0 mbmem at mbmem0 addr 0x00000 sc0 at mbmem0 addr 0x80000 ipl 2: tme/bus/multibus/sun-sc scsibus0 at sc0: tme/scsi/bus console0 at zs0 channel A: tme/host/posix/serial device /dev/pts/0 break-carats sd0 at scsibus0: tme/scsi/disk id 0 type acb4000 disk0 at sd0: tme/host/posix/disk file my-sun2-disk.img st0 at scsibus0: tme/scsi/tape id 4 type emulex-mt02 tape0 at st0: tme/host/posix/tape command tape0 load tape1/01 tape1/02 tape1/03 tape1/04 tape1/05 tape1/06 tape1/07 tape1/08 tape1/09 tape1/10 command mainbus0 power up

Now we are almost ready! Create a 1GB disk image with dd:

dd if=/dev/zero of=my-sun2-disk.img bs=1M count=1024

Now we are ready to go. From the ssh connection just type in 'cat > /dev/pts/0' and now everything we type in will be on the console. Now from a normal bash session type in '$HOME/tme-0.8/tmesh/tmesh SUN2-MULTIBUS' If everything goes well the bootpromp text will pop up on your SSH session.

SUN-2/120 on Windows!

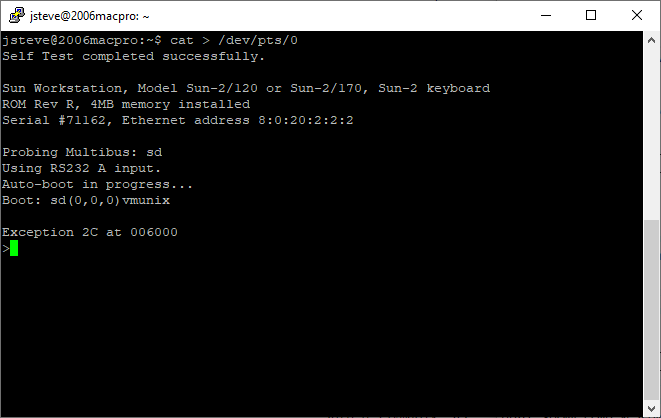
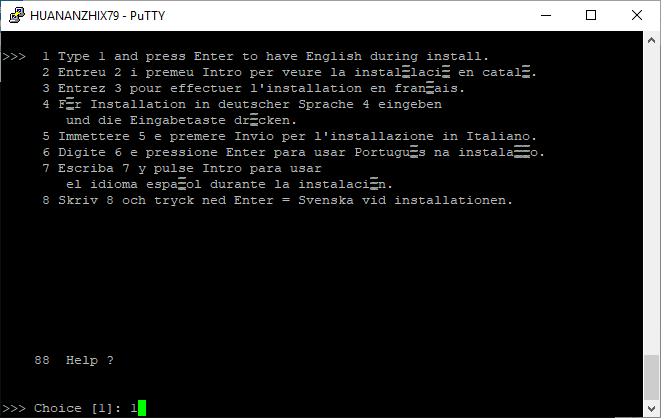
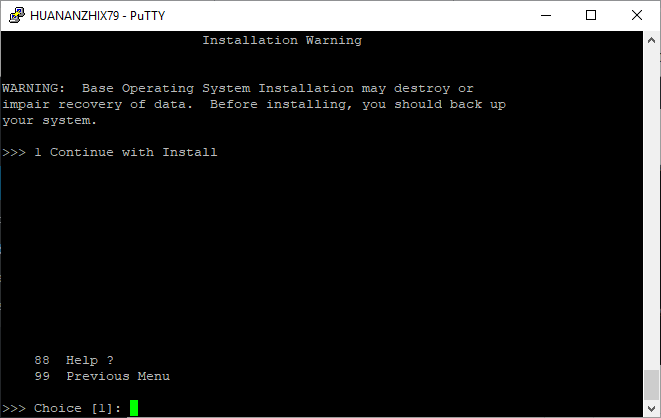
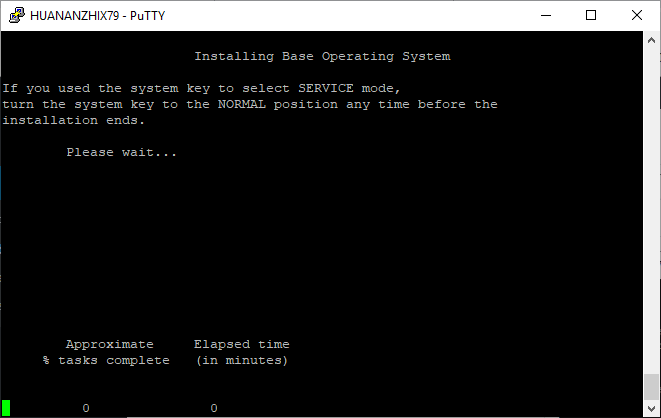
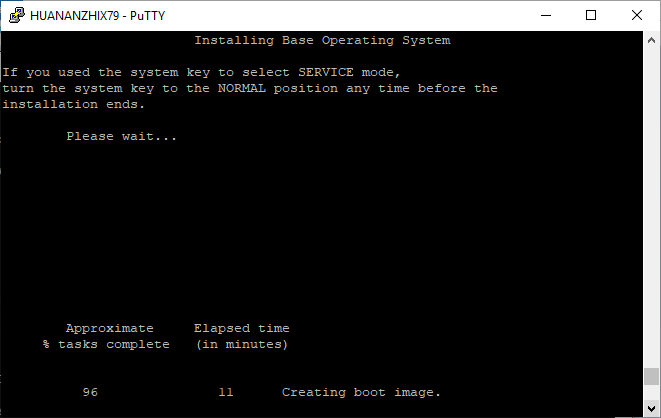
And if everything has gone right, we are now at the firmware prompt, ready to install SunOS 2.0!

Instructions from retrocomputinggeek.com gives a pretty good walk through of configuring a 1GB disk, and the installation. Although as a hint use the -as flags when booting SunOS for the install. And after booting the miniroot, follow the instructions on heeltoe regarding doing the 1st tape of the install.

>b st() Boot: st(0,0,0) Boot: sd(0,0,1)vmunix -as Size: 368640+57344+66652 bytes 
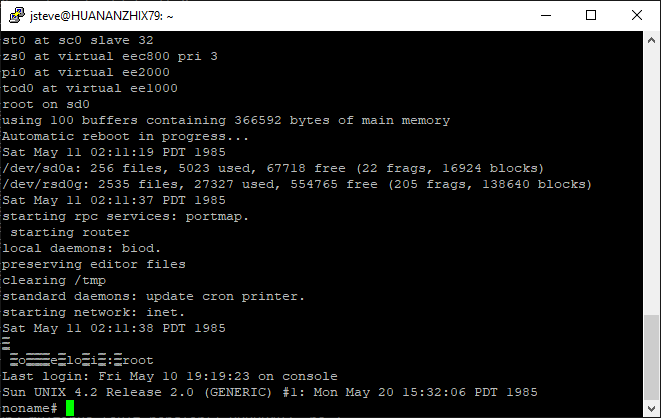
Sun UNIX 4.2 Release 2.0 (GENERIC) #1: Mon May 20 15:32:06 PDT 1985 Copyright (c) 1985 by Sun Microsystems, Inc. mem = 4096K (0x400000) avail mem = 3575808 Ethernet address = 8:0:20:2:2:2 sc0 at mbmem 80000 pri 2 sd0 at sc0 slave 0 sd0: sd1 at sc0 slave 1 st0 at sc0 slave 32 zs0 at virtual eec800 pri 3 pi0 at virtual ee2000 root device? sd0* using 100 buffers containing 366592 bytes of main memory #

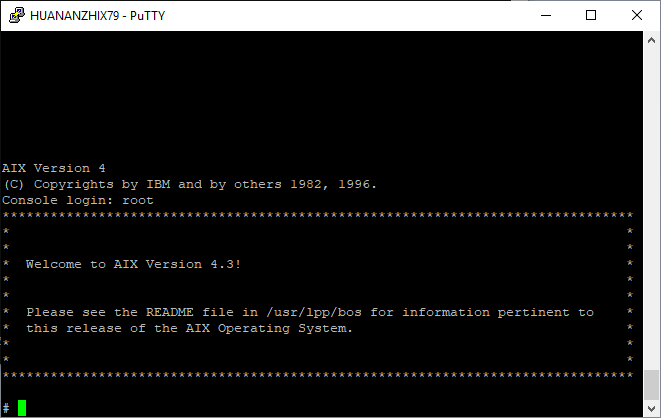
After that it's a matter of working out which tar file goes where. Is there even an install process? I just untarred the rest of the tapes in the /usr directory.

For the impatient, tme-0.8-linux-x86_64_bin.tar.gz and
tme-0.8-SunOS-2.0.tar.gz. As always read the 404 page.

Go fly a kite!

Hello Kitty!

Sometimes it’s just worth taking a day off and getting out.

While out, I found this kite lying by the garbage in a bag. Fully assembled, and with a fresh spool. It seemed like a sad loss of a kite. It was a cloudy day, but nice high winds. So I took it out to fly.

This picture is where it just got to the point where it was high enough to get enough lift to fly on it’s own. The winds were so good, that I was able to unspool the kite, and get it high enough that you barely could see it.

Much like retro-computing there can always be senseless fun in other people’s garbage.

Just picked up a sealed copy of Captain Blood!

31 years old!

It’s from Italy, and apparently was originally boxed for the Amiga, and then re-purposed for the Commodore 64. Compared to American ‘big box’ releases of the era, it’s a tiny box. A few of my SIM games are behind, it along with some DVD cases I picked up in China.

29,900 Lira?

I guess the price makes sense if the final exchange rate of the Lira was
1,276:1 USD
back in the winter of 1988, making this copy $23 USD. Although I’m pretty sure when I bought mine I had to pay some $40 CAD. Yay.

I don’t think Captain blood really made it to tape, so it’s really not all that surprising then that this disk version has sat in it’s box for so long. Every time I’d seen anything Commodore in Italy or even the EU it was always tape. Such a shame too, as that means no Infocom.

Normally I wouldn’t even bother with something like this, as I have images for every release there was, but this is a sealed copy. Apparently there is a poster inside of many of the European releases. Although I’m unsure if this one does. It’s been sealed for some 31 years so far. Although it’d make a great poster to frame.

I’ve been trying to clean up the Mega ST I have, but it appears to be dead. Nothing seems to be on the video out, and it’s not lighting up or spinning the disk. I guess this means I’ll need some kind of logic probe. Well after I find my volt meter to see if I’m getting the correct voltage. The Atari doesn’t seem so complicated so I guess an ATX power supply can be rigged to output the 5/12v.

After tracking down the library source, I’ve focused my GCC stuff on version 1.30 as it’s the same base version that was used in the x68000 port, and didn’t suffer from any struct packing that I remember. And of course the never ending stress of day jobs.

I think I’m chasing a struct packing issue

i386 breaking on the AASTINKY texture

On the i386 a texture info lump loads up just fine. However on a big endian G5…

OS X 10.2.8 on the G5 on the same AASTINKY

…It clearly has problems. Although notice that the positions and sizes are the same, as they ought to be.

Notice how originx is 24, which should be the width. This code was running with GCC 1.30/1.40 hammered x68000 GCC. Although I have been unable to get the much vaulted gcc-1.30.atari.tar.bz2 to do anything useful, well until tonight, when I found this file: GNU_HEAD.ARC.

That’s right, it’s the gcc-1.23 release headers for GCC on the Atari ST. Now I know other places people have been saying I should use MINT or some GCC8 port. And I wanted something to run on bare TOS, and I cross compiled the simple Infocom interpreter but it just crashes out after a few commands. It’s hardly stable.

3 bombs and an exit under GCC 8.0

Which is just a damned shame, as it was easier to just download someone else’s work.

Anyways, I now can build the old gcc-1.30 libc however… the linker that I’m using that works for GCC 2 links away and it looks like a working program but it doesn’t do anything. I have a feeling the linker drifted in those years between GCC-1.30 and GCC-2.something when it was adapted. Certainly by the time of 2.5.8. So yet more endian ghosts to chase down if I try to adapt that linker.

Cross compiling to the Atari ST

This was a lot harder than it should have been. And not because of gcc or surprisingly ancient binutils.

I didn’t have much to go on, as ancient threads like this, or this end up unanswered or without any good conclusion. I guess it’s not surprising that all the attention is to MiNT & MINIX rather than the native platform. But I was not deterred.

The reason why this was so freaking hard was how so much of key parts of gcc for the ST have been purged and what remains being scattered to the winds. Amazingly the hardest thing to source is the include files. There is a GCC 1.30 file on all the usual GNU mirrors but to save a few kb it has no headers, instead it wants you to reuse the ones from the 1.25 binary distribution. Which is gone. There survives a pl95 binary and source package, but again no includes. Instead I got lucky with all three for pl98. Which has a lot of GCC2 hooks so I cheated on getting the 1.30 hello world by using the 2.5.8 pre-processor.

It’s kind of annoying how all these seemingly tiny files get purged to save a few kb. Just as I can’t for the life of me find the old original GNU libc.

Speaking of files, ZOO has to be the worst compressor ever. Not only is it just overall worse than ZIP, but there are 2 incompatible compression methods, like the introduction of LZD, which any of the good versions of UNZOO can’t deal with. And sure there is zoo210.tar.Z but despite being able to build it on multiple platforms it never does anything useful. All these ancient fileformats sure don’t help anything. And sure there is a MS-DOS version that the MS-DOS Player can run, but get ready for 8.3 filename renaming.

The one good thing that came out of this experience is that since I am building form i386 to 68000 I found that this setup uses the G++ linker which has endian swapping. So maybe I can complete the chain for Mint and MachTen.

I even got the 1987 Infocom interpreter running. Although I don’t know what the deal is, it seems the larger the GCC based program is the higher chance it’ll just crash on exit or force the next program to crash. Building anything native under emulation was an impossibility.

In the same effort, I’ve had the same luck with sozobon. It took way too long to find a working dlibs. I don’t know why people couldn’t either package them together or at least in the same directory. It took far longer just to find the libs… But it was still fun to get that one running as well.

It’s a far more manual process to compile as I have to invoke each stage manually, but at least I’m finally able to get things going.

One of the bigger issues is that I would always find libraries in this olb file format, that the linker from Sozobon wouldn’t recognize. And almost every attempt of trying to build the G++ linker would also fail on. It wasn’t until I was able to get the pl98 include files that I could finally get a linker to actually recognize this … seemingly different for no apparent reason format to actually link. After then I managed to finally find a build of this dlibs that would actually link with Sozobon, which naturally didn’t use olb at all.

So yeah that was an adventure.

I haven’t cleaned it up at all, and really wouldn’t expect anyone else to care, but all my mashed together work (source & binaries!) is here: MinGW-AtariTOS.7z

UPDATE

I started browsing more cd.textfiles.com and amazingly found a ‘home made CD-ROM set’ of Atari software, and buried in the gigabytes of stuff was 4 of the 5 disks of the original GCC-1.23! Namely the source & includes to the first GCC library. I didn’t think this article was going to get any traction, let alone downloads. So many people downloaded the above download.

Anyways I started to put together a better package on sourceforge since it’ll do the multiple GIT’s and nicer downloads.

Download crossAtariST

The default download set is for GCC-1.30, with the headers & lib, along with source. It’s crazy small which just goes for how this old stuff is, and how impact full for losing a few kb.

Also the shell that you use apparently makes a BIG difference. The shell that I was using EmuCON doesn’t show any output from the GCC 1.x libs. However other shells most certainly do. I’ll have to do another update regarding shells/emulation.

Installing AIX on Qemu!

YES it’s real!

I’m using the Linux subystem on Windows, as it’s easier to build this Qemu tree from source. I’m using Debian, but these steps will work on other systems that use Debian as a base.

First thing first, you need to get your system with the needed pre-requisites to compile:

apt-get update;apt-get upgrade apt-get install build-essential pkg-config libz-dev libglib2.0-dev libpixman-1-dev libfdt-dev

Great with those in place, now clone Artyom Tarasenko’s source repository

git clone --branch 40p-20190406-aix-boots --single-branch https://github.com/artyom-tarasenko/qemu.git

*NOTE from the future (2022) you may want to jump here: to check out building on newer systems. Also don’t forget about networking!

Since the frame buffer apparently isn’t quite working just yet, I configure for something more like a text mode build.

././configure --target-list=ppc-softmmu --disable-sdl --disable-vnc --disable-gtk --disable-gnutls --disable-nettle --disable-gcrypt --disable-spice --disable-numa --disable-libxml2 --disable-werror

Now for me, GCC 7 didn’t build the source cleanly. I had to make a change to the file config-host.mak and remove all references to -Werror. Also I removed the sound hooks, as we won’t need them. remove the following lines:

CONFIG_AUDIO_DRIVERS=oss CONFIG_AUDIO_OSS=m

Now you can build Qemu. it’ll happily build in parallel so feel free to build using the -j parameter with how many cores you have. I have 32, so I use

make -j32

Okay, all being well you now have a Qemu. Now following the steps from
Artyom Tarasenko’s blog post, we can get started on the install!

First we create a 8GB disk

qemu-img create -f qcow2 aix-hdd.qcow2 8G

Next we need the custom BIOS with serial as the console.

wget https://github.com/artyom-tarasenko/openfirmware/releases/download/40p-20190413/q40pofw-serial.rom

You’ll need some AIX. I tried a 3.2.5 CD-ROM and it didn’t pick up, but AIX 4.3.3 did.

Now with all those bits in place, it’s time to run Qemu.

./ppc-softmmu/qemu-system-ppc -M 40p -bios q40pofw-serial.rom -serial telnet::4441,server -hda aix-hdd.qcow2 -vga none -nographic -net none -cdrom Volume_1.iso

Now telnet to your localhost on port 4441 and you will see the console doing it’s BIOS initialize and eventually drop to the OK prompt.

One trick I’ve found is that from the Open Firmware prompt you can find out what partitions are recognized from the firmware. If it see’s partitions then there is some hope that the image you have is valid enough to boot. In the last few days I’ve found quite a few AIX images, which are lacking the partition table, and unable to boot.

.partitions cdrom

simply type in boot cdrom:2 to kick off the installer. It may take a minute or so for the installer to kick off.

If all goes well, you’ll see the BIOS reload itself, then after a minute you’ll be prompted to press 1 to select the console

It doesn’t echo, don’t panic!

Next select your language. I’m doing English.

Next it’ll ask about installation type. Default ought to be fine.

Because this will destroy the contents of the disk (which doesn’t matter as it’s blank) it’ll prompt for confirmation.

After this it’ll begin the installation. Depending on how fast your disk & CPU is this will take a while.


For me, the installation took about 11 minutes. This is using my Xeon E5-2667 v2. It took 17 minutes on my 2006 Mac Pro, with X5365’s it .

After it’s done, right around the 96% time it’ll reboot back to the BIOS

Once you are back at the OK prompt, you can now boot disk:

it’ll look like it’s hung for a minute, then it’ll start booting from disk!

Once the OS is booted up, you select the terminal type. I’m using putty but I’ll select the vt100. Of note the function keys are selected by hitting escape and then the number key. So F3 is ESC 3.

I’m just going to finish the install, as we can always run smitty to mess with the system more, but right now I’m just interested in a base install of the BOS (Base Operating System, and IBM ISM).

A few moments later, you’ll get dumped to the login prompt.

By default there is no password, so just login as root, and there you go, your very own virtual AIX 4.3 system.

# uname -a AIX localhost 3 4 000000004C00

So there you go! All thanks to Artyom’s hard work!