Web Rendering Proxy – Overdue Status Update

(This is a guest post from Antoni Sawicki aka Tenox)

There hasn’t been a major update to WRP (Web Rendering Proxy) in 5 years or so. Some new features have been added thanks to efforts of Claunia but the whole project was mostly impeded with mass migration of the whole Internet to SSL/TLS/https. It does semi work somehow thanks to sslstrip but the whole stack is an unmaintainable pile of crap which I’m not going to update any more.

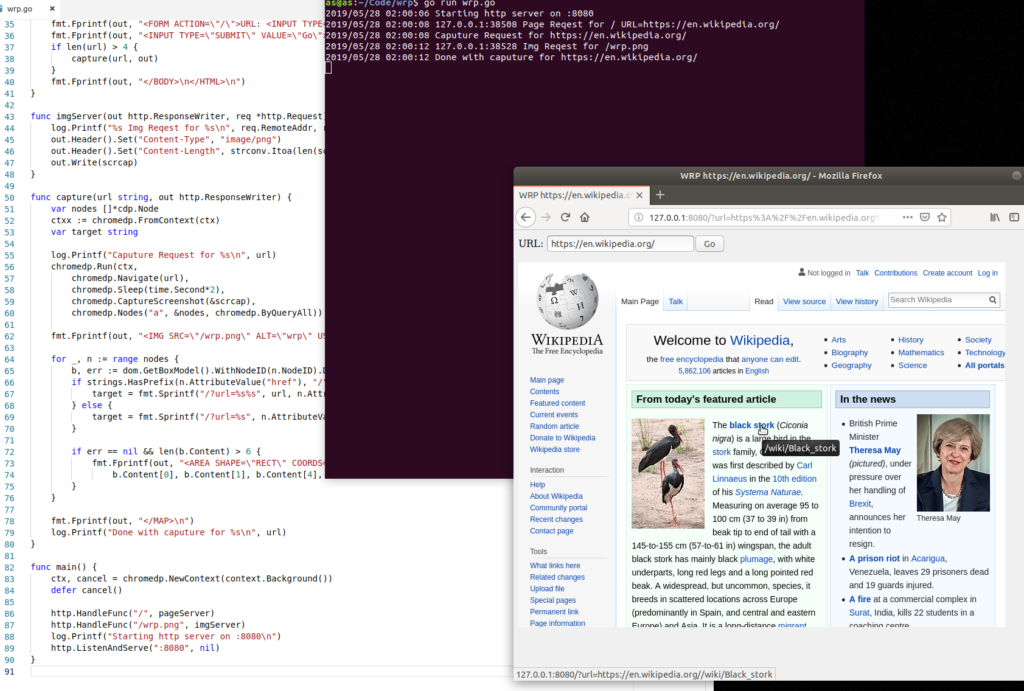
A new rewrite from scratch is well under way. This time written in GoLang and using Chrome DevTools Protocol. Things should be much more stable and future proof.

Far from complete but I have a fully functional prototype now working in just under 100 lines of code:

UPDATE 1: You can play with it if you want. Please do not submit any bug reports just yet, as this is just a development version. Note that WRP is currently not a true HTTP proxy but rather browser-in-browser. Proxy may be supported later.

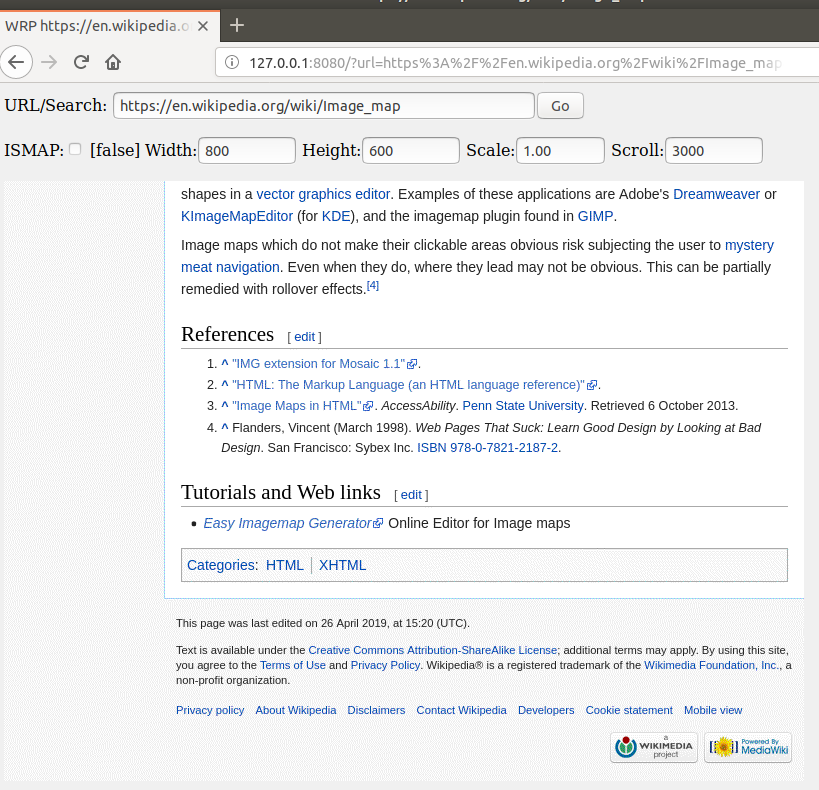
UPDATE 2: As of today online setting of size, scaling and scrolling is supported. I’m specifically happy about the scrolling feature albeit it probably needs a better user input, like prev/next page.

Windows version still doesn’t work due to an upstream bug, which is probably easy to fix.

ISMAP is currently in development.

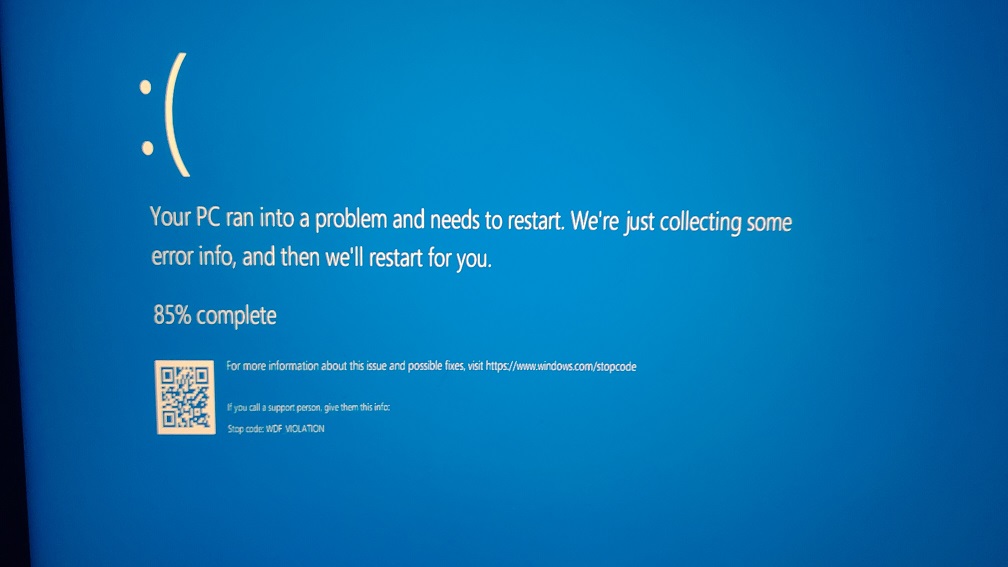
WDF_VIOLATION on Apple Macintosh

So I bit the bullet and updated to Windows 10 build 1903. And then the fun started on my glorious 2006 MacPro. It finished the update, and on reboot I get the login screen, and then almost immediately a blue screen.

Naturally the QR code is useless as it doesn’t specify any stop codes, and the minidump… Well that requires gigabytes and gigabytes of crap to download to get a tool to read it. (I still haven’t finished that rabbit hole, like COME ON! why isn’t it included?!).

However after hitting F8 a million times, I found that safe mode & networking work just great. Searching online was basically useless as there was no specific stop code to go with this WDF_VIOLATION. Further looking around I did notice one thing, and that it was all Macintosh machines that crash out to this WDF_VIOLATION error. It must be something specific to the Apple hardware running Windows 10!?

Armed with this (dis)information, I went ahead and disabled all the Apple specific drivers & startup items.

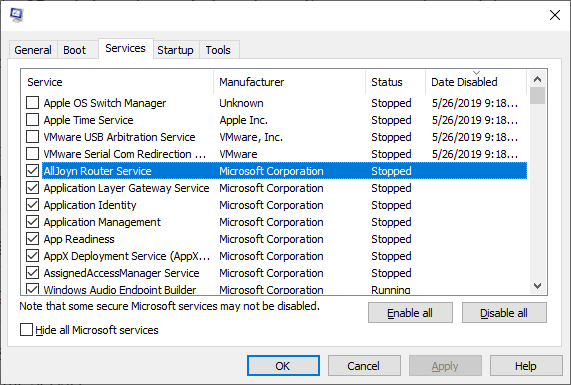
From msconfig.exe:

From MSCONFIG.EXE I disabled the following services:

  • Apple OS Switch Manager
  • Apple Time Service

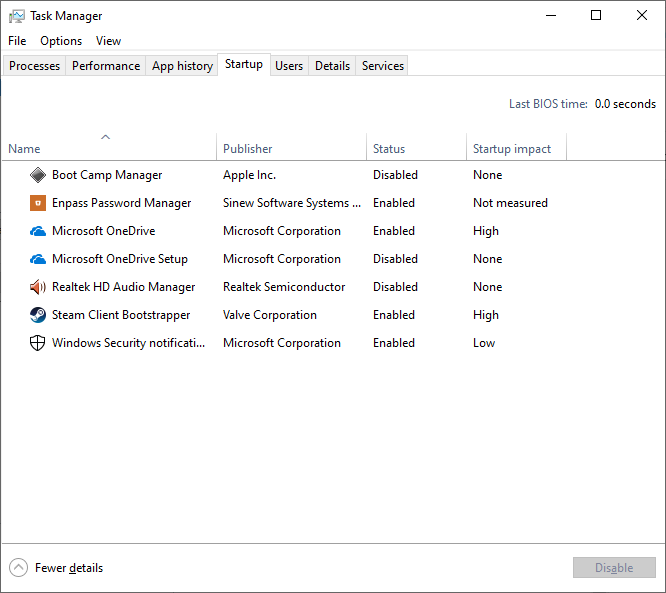
And in the task manager, I disabled the following startup items:

  • Realtek HD Audio Manager
  • Boot Camp Manager

I had the other VMWare serial & USB hook previously disabled, as I just don’t want them at all on my setup. The big upshot is that after rebooting out of safe mode, I’m now up and running on Windows build 1903.

Considering the BootCamp stuff was so woefully out of date, don’t expect Apple to fix this anytime soon. And since I’m on a MacPro 2006, I certainly won’t be getting any updates from Apple. But at least I can struggle to keep this thing up to date otherwise.

Now I can enjoy that ‘new command prompt’ everyone keeps telling me about.

***UPDATE***

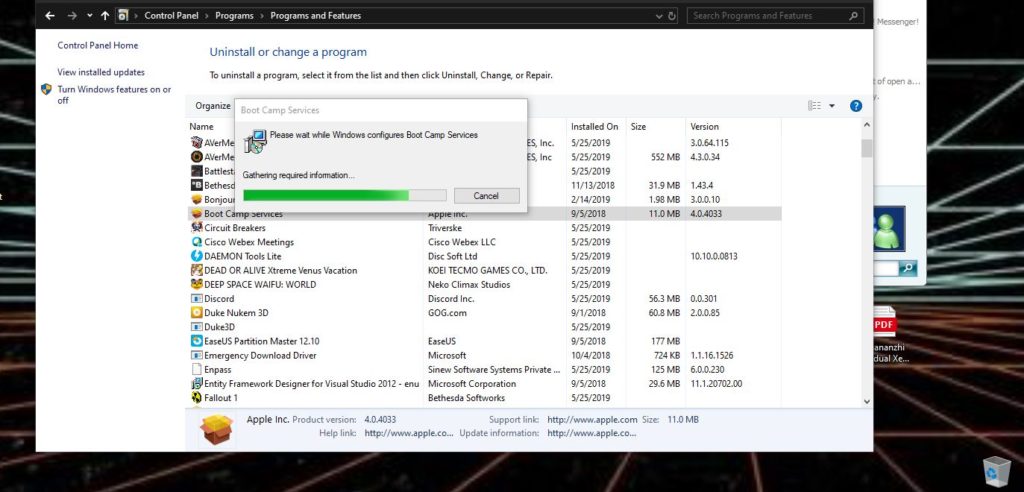
I went through this on another Bootcamp Mac, and what I had to do was uninstall the “Boot Camp Services”. It’s startup component triggers the bluescreen as it’s doing some nonsensical inventory, banging around on the drivers in a not friendly way. I had version 4.0.4033 of the Boot Camp Services installed.

Uninstall Boot Camp Services version 4.0.4033

Removing this kept all the old drivers, which continue to work just fine.

Using BCP to export data from SQL Server 2016 to SQL Server 4.21

Once more again I’m confronted with a situation where I needed a SQL, but I don’t have direct access to the data. The machine I’m able to run some stuff on is not only insanely out of date (yay!) but doesn’t have enough disk space for even something like SQL Server 2000.

Enter SQL 4.21a

I “installed” 4.21a on this 32bit 2003 server in much the same way I transplanted 4.21a onto Windows 10. However I did use the srvany utility to load up the SQL Server service, much like how I used it to run an instance of Qemu in the background elsewhere. Now I have my intermediary SQL Server running like a normal service, and set a password for the SA user.

Now for the fun.

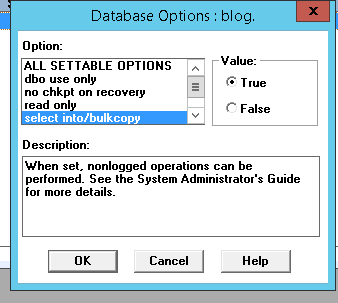
First be sure to set your target database for ‘bulk/load’ and I’d also set it for ‘truncate log on checkpoint’. If you don’t set the bulk/load then you cannot BCP data into the database.

Using the SQL Explorer tool I could view the tables I wanted, and export them as ‘SQL CREATE’ giving me the table layout. I then quickly converted them into something acceptable for 4.21a. Now it’s a matter of establishing a connection to the old server from the new.

First I tested with the ISQL command. I needed to copy the DLLs DBMSSOCN.DLL & NTWDBLIB.DLL into the directory to get the command to fire up. Since my strategy here is to do a BCP dump/BCP load the first thing I need to do is purge the data.

isql -Usa -PPASSWORD -S192.168.1.42 -Q"delete network.dbo.firewall_mapping"

This of course assumes that the server address is 192.168.1.42 and that in this case I’m deleting the firewall_mapping table from the network database. If you’ve made it this far that means we are 1/4th of the way there!

I found this ‘one trick’ to get the BCP command from the SQL 4.21a tools to connect to the 2016 server and dump the table as a trusted connection. I’m not sure how much longer this kind of thing will work, but I was pretty amazed it did. I didn’t even bother trying to see if the 4.21a BCP tool could read a 2016 BCP dump. Maybe it would if you keep the formatting the same, but I find ‘like to like’ much easier. I renamed the old BCP.EXE to BCP42.EXE so that they won’t collide in any way causing weirdness. At the same time I run them from a directory that is NOT in the system path.

bcp42 "[Network Database].[dbo].[firewall_rules]" out c:\temp\1.csv -t, -r= -P

The notation looks weird, as my source database name has a space in it. This initially caused endless frustration, but it was just a matter of using the fully qualified name, which is in quotes

"[database].[role].[table]"

I set the field delimiter as a comma, and the row terminator as an equal sign. I tried not setting it but I was getting ‘spiraling data’ as it was not picking up the end of row correctly at first.

The first time you run the BCP without a format file it’ll walk you through the specifics of the fields. I just blindly accepted the defaults, and saved the file as firewall_rules.fmt . Now on subsequent runs, I can run the export like this, which uses the saved formatting:

bcp42 "[Network Database].[dbo].[firewall_rules]" out c:\temp\1.csv -t, -r= -P -ffirewall_rules.fmt

Great so if everything is going well, we have no exported our data! Now the next step is to import the data into our old server. Since we have that format file, this “should” go pretty smoothly. Notice the server is an IP address which implicitly has it connecting by TCP sockets, not named pipes. As such there is no implicit ‘Trusted connection” as there was when talking to the local 2016 server.

bcp42 network.dbo.firewall_rules in c:\temp\1.csv -Usa -PPASSWORD -S192.168.1.42 -t, -r= -ffirewall_rules.fmt

Naturally change PASSWORD to whatever password you have for the SA user.

Starting copy...
1000 rows sent to SQL Server.

1892 rows copied.
Network packet size (bytes): 512
Clock Time (ms.): total =   2216 Avg =      1 (853.79 rows per sec.)

And there you have it, all being well you’ll see the program update every 1,000 rows as it inserts data.

Originally I wanted to use the data transformation wizard thing (whatever they renamed DTS to) however the ODBC is limited to the newer .NET 4 stuff, which won’t use the old SQL Server 6.5 ODBC drivers. I really didn’t think the SQL Server 4.21a BCP command to work on a modern server against a new(ish) version of SQL Server, but it did!

I guess you could neaten it up with a command file to drop tables/re-create if you wanted, or at the least delete data/checkpoint and set the load options, dump/load data, and then turn off the load state for the database. I’m not doing reports or anything fancy, just visualizing data as they say.

Although things like ODBC have drifted out, it’s still kind of interesting that ancient BCP can still communicate over named pipes as an implicit trust.
PCem v15 released!

The new dynamic recompiler appears to be much more faster, although if you want maximum performance, make sure to set your video card to the fastest possible performance.

I was doing my typical DooM thing, and the performance was abysmal. But I did have an 8bit VGA card selected, so what would I really expect? Interestingly enough in ‘low resolution’ mode it performed quite well, but setting it to the artificial ‘fastest PCI/VLB’ speed it was performing just great.

PCem v15 released. Changes from v14 :

  • New machines added – Zenith Data SupersPort, Bull Micral 45, Tulip AT Compact, Amstrad PPC512/640, Packard Bell PB410A, ASUS P/I-P55TVP4, ASUS P/I-P55T2P4, Epox P55-VA, FIC VA-503+
  • New graphics cards added – Image Manager 1024, Sigma Designs Color 400, Trigem Korean VGA
  • Added emulation of AMD K6 family and IDT Winchip 2
  • New CPU recompiler. This provides several optimisations, and the new design allows for greater portability and more scope for optimisation in the future
  • Experimental ARM and ARM64 host support
  • Read-only cassette emulation for IBM PC and PCjr
  • Numerous bug fixes

Thanks to dns2kv2, Greatpsycho, Greg V, John Elliott, Koutakun, leilei, Martin_Riarte, rene, Tale and Tux for contributions towards this release.

As always PCem can be downloaded here:

An un-edited view of Saturn

Something that is kind of annoying about NASA photos is that they end up so touched up, and so many liberties taken with them that they become creatures of their own.

Enter these old CD-ROMs

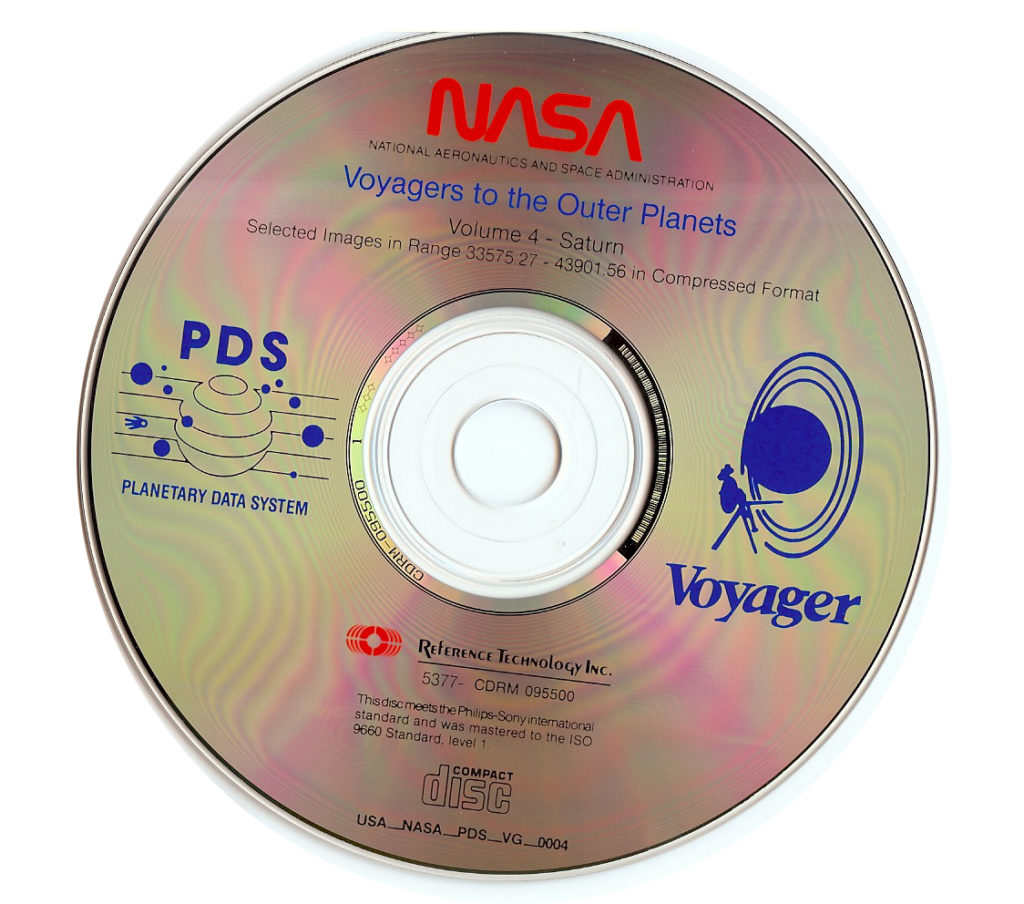
So I was happy to find this CD-ROM, NASA: Voyagers to the Outer Planets Volume 4: Saturn. It’s great that these are on archive.org, but like all old CD-ROM’s they are not quite ‘ISO CD9660’ enough so they don’t mount on Windows 10, or OS X. So once more again I used Qemu & a raw disk image, xcopying the CD to the disk and using 7zip to extract the disk onto the native filesystem.

Seeing that Voyager 2 was launched in 1977, and didn’t rendezvous with Saturn until 1981, it’s safe to say that the images are not in TIFF, GIF, or anything that modern machines will read. Instead they are compressed with Kris Becker’s implementation of Huffman encoding. Thankfully the source to the compression, and various manipulation tools are included in both C & Fortran. It was not to much work to get the C version to build, and have it detecting a 32bit LittleEndian machine. The program was meant to be run interactively however, so a few small changes had it running command line to let me script decompress the entire image set.

The image formats that it can output to are:

  • SFDU/PDS format.
  • FITS format.
  • VICAR format.
  • Unlabelled binary array.

Which make it sound even less than useful. However ImageMagick does understand the FITS format, so running this at home on a 3Ghz 2006 MacPro took about 10 minutes to decompress and re-encode the images from the CD. Obviously doing this at work on 32cores will be much more faster than 8 cores, although I guess back in ’88 using a VAX-11/780 felt pretty awesome still.

As for the images, they are at surprisingly high resolution 800×800. What struck me about many of the images, is how they show a greater detail in things like the shadows of the rings on Saturn, or even an almost TV like quality to various moon flybys.

And the unexpected over exposures and flares.

But I thought it was an interesting glimpse into these images.

Also these CD-ROMs comprise a highlight selection. Which means for someone more intrepiding than me, there is far more of these raw vintage images out there.

Not having fun with Python/Debian 9.1

Well after my last Star Wars Galaxies adventure, where I tried to run MySQL on Linux Subsystem for Windows v1, I got some weird shared memory error, and it wouldn’t run. Even the old BSDDB engine was bombing out trying to create files. So fine, whatever I thought I could move on, and that is when I found out that somehow OpenSSL & Python had utterly collided.

Python 1.13 (default, Sep 26 2018, 18:42:22) [GCC 6.3.0 20170516] on linux2 Type "help", "copyright", "credits" or "license" for more information. >>> import ssl Traceback (most recent call last): File "", line 1, in File "/usr/lib/python2.7/ssl.py", line 98, in import _ssl # if we can't import it, let the error propagate ImportError: /usr/lib/x86_64-linux-gnu/libcrypto.so.1.1: version `OPENSSL_1_1_0' not found (required by /usr/lib/python2.7/lib-dynload/_ssl.x86_64-linux-gnu.so) >>>

Well isn’t that great. I tried un-installing & re-installing Python over and over, along with trying to force re-install OpenSSL. No dice.

So what finally got it working for me was to purge OpenSSL.

apt-get purge libssl1.1

And after that it pulled out everything that was using it, well over 500MB of stuff I’d installed. And for good measure I followed up with the autoremove for an additional 384MB of stuff to remove. And then for the final step, of just installing Python:

root@HUANANZHIX79:~# apt-get install python2.7 Reading package lists... Done Building dependency tree Reading state information... Done The following additional packages will be installed: libpython2.7-stdlib libssl1.1 Suggested packages: python2.7-doc The following NEW packages will be installed: libpython2.7-stdlib libssl1.1 python2.7 0 upgraded, 3 newly installed, 0 to remove and 0 not upgraded. Need to get 3,537 kB of archives. After this operation, 12.8 MB of additional disk space will be used. Do you want to continue? [Y/n] y Get:1 http://deb.debian.org/debian stretch/main amd64 libssl1.1 amd64 1.1.0j-1~deb9u1 [1,354 kB] Get:2 http://deb.debian.org/debian stretch/main amd64 libpython2.7-stdlib amd64 2.7.13-2+deb9u3 [1,897 kB] Get:3 http://deb.debian.org/debian stretch/main amd64 python2.7 amd64 2.7.13-2+deb9u3 [285 kB] Fetched 3,537 kB in 0s (13.2 MB/s) Preconfiguring packages ... Selecting previously unselected package libssl1.1:amd64. (Reading database ... 27441 files and directories currently installed.) Preparing to unpack .../libssl1.1_1.1.0j-1~deb9u1_amd64.deb ... Unpacking libssl1.1:amd64 (1.1.0j-1~deb9u1) ... Selecting previously unselected package libpython2.7-stdlib:amd64. Preparing to unpack .../libpython2.7-stdlib_2.7.13-2+deb9u3_amd64.deb ... Unpacking libpython2.7-stdlib:amd64 (2.7.13-2+deb9u3) ... Selecting previously unselected package python2.7. Preparing to unpack .../python2.7_2.7.13-2+deb9u3_amd64.deb ... Unpacking python2.7 (2.7.13-2+deb9u3) ... Processing triggers for mime-support (3.60) ... Processing triggers for libc-bin (2.24-11+deb9u4) ... Setting up libssl1.1:amd64 (1.1.0j-1~deb9u1) ... Processing triggers for man-db (2.7.6.1-2) ... Setting up libpython2.7-stdlib:amd64 (2.7.13-2+deb9u3) ... Setting up python2.7 (2.7.13-2+deb9u3) ... Processing triggers for libc-bin (2.24-11+deb9u4) ...

So now you think its going to be broken right? It’s the same libssl package! I didn’t even run an ‘apt-get update’. And guess what?! You would be wrong.

root@HUANANZHIX79:~# python Python 2.7.13 (default, Sep 26 2018, 18:42:22) [GCC 6.3.0 20170516] on linux2 Type "help", "copyright", "credits" or "license" for more information. >>> import ssl >>>

That’s right, it’s now working.

Speaking of Picard, I hear there will be a new series, inspiringly named ‘Picard’. Apparently it’s going down the same path as STD, complete with a lack of backers, and merch. I’m hoping it’ll be something watchable, although they certainly cannot afford any of the TNG cast as they apparently have zero budget. Maybe it’ll end up as another ‘Jake Skywalker’ or ‘Not my Picard’. But the bad reboot 25% contractual difference could be the difference between something new, or something so divergent that there was no point in even attempting to be a Trek.

Welcome to 2001: The year the internet was IE 6

The year that the internet stagnated as everything was Internet Explorer 6.

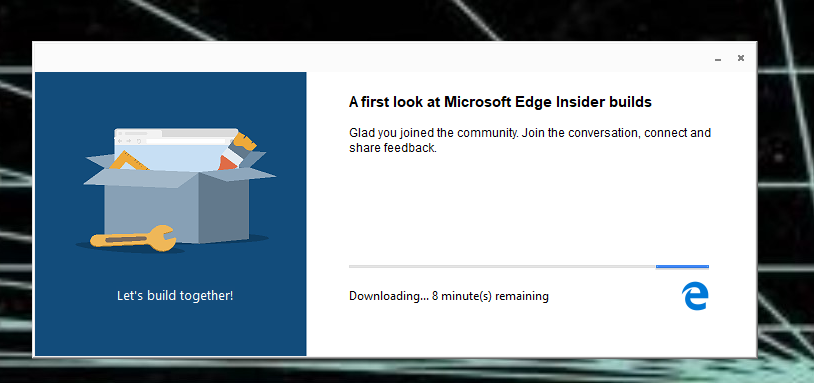
So I went ahead and did it, installed the new version of Edge that uses chronium. Firefox slit it’s own throat trying desperately to suppress Gab’s dissenter plugin, just as Google has done it’s best to prevent ad blockers like AdNauseam.

It’s kind of funny, but Edge doesn’t complain about loading extensions. It isn’t trying to control anything, it ‘just works’. Maybe it’s a side effect of Microsoft playing catch up, and too busy to start policing extensions, and user expandability. I’ve read so many things online about how Word is going to police English grammar into being more PC, so I guess it’s only a matter of time until they decide that user’s can just load whatever 3rd party software they want. There is just too many of these crap walled gardens.

I kind of liked it when there was a more ‘open’ internet, but with the shuttering of YTMND.com, the old internet is gone. Facebook is absolute cancer, and the long reach of Google is just beyond creepy.

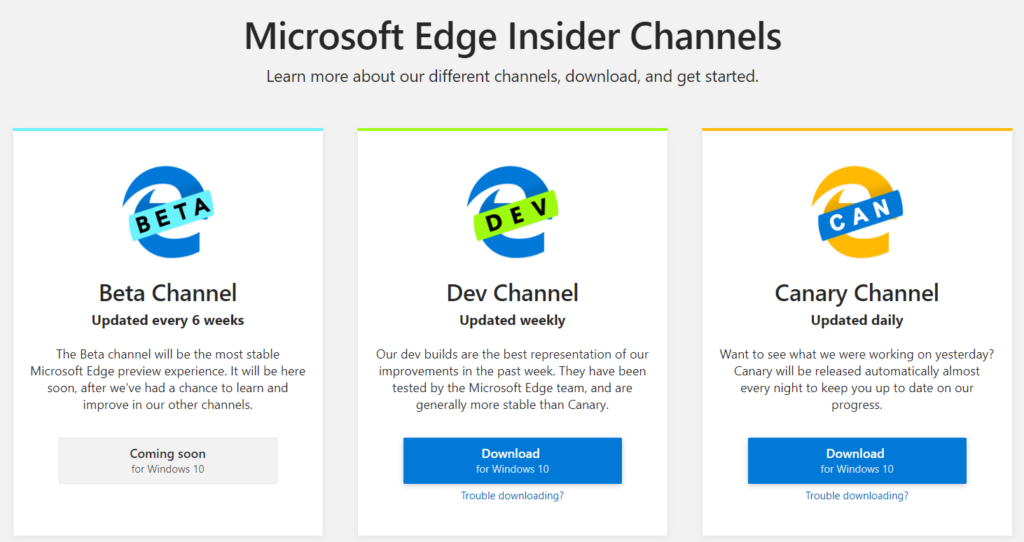
I couldn’t imagine using Canary, but Dev seems fine. I guess it’s not old enough for the official Beta yet.

If you feel crazy enough, you can download it here:

https://www.microsoftedgeinsider.com/en-us/download/

Running SWGEmu Core3

You probably don’t want to do this. Unless you enjoy giant empty islands. Maybe you just want to play it on an inaccessible network. Maybe your social anxiety is so bad that you like the idea of playing a MMO alone. It’s probably not a good idea to do this, in that at the end you’ll get bored quickly, but here we go!

Using Ubuntu 16.04 the steps on github.com/TheAnswer/Core3 got me running quick enough. It is rather intense to built, and for the most part it’s pretty easy, although running documentation seems to be … elsewhere. I’m sure it is somewhere, but I have no idea where.

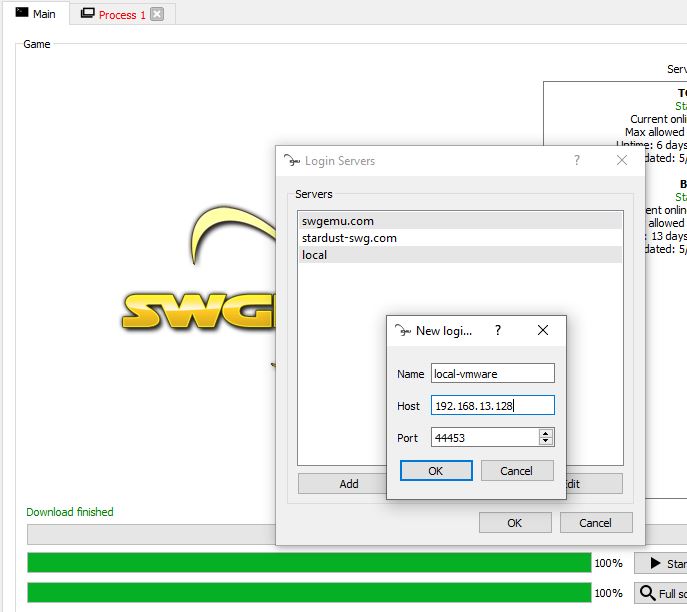
The big thing to do is update the galaxy binding in the mysql database to reflect either the LAN address for local play, or the WAN address if you are natting/hosting on the internet.

mysql -uswgemu -p123456 swgemu -e “update galaxy set address=’192.168.13.128′ where galaxy_id=2;”

And for the heck of it, I thought I’d build swgemu for both 16 (swgemu-binary-Ubuntu_16.04.6_LTS_x86_64.tar.gz) & 18 (swgemu-binary-Ubuntu_18.04.2_LTS_x86_64.tar.gz). Keeping in mind for 18, that mysql was dumped for mariadb, so you need different packages. For a fresh 16 server, it’d go something like this:

apt-get install openssh-server
mkdir /tre
chown swgemu:swgemu /tre
(from a client machine)
pscp *tre [email protected]:/tre
apt-get install mysql-server screen libatomic1 libmysqlclient20 liblua5.3-0
tar -zxf swgemu-binary-Ubuntu_16.04.6_LTS_x86_64.tar.gz
cd swgemu
./sqlstuff.sh
mysql -uswgemu -p123456 swgemu -e "update galaxy set address='192.168.13.128' where galaxy_id=2;"

For version Ubuntu 18, you want the package mariadb-server & libmariadbclient18 instead of the mysql versions.

Make sure to set the TrePath!!!
vi conf/config.lua

Run the server, either under screen (./run.sh) or directly ./core3 if everything is going well, the [Core] will come up initialized..

(27 s) [AuctionManager] bazaar Checked 0 auction item(s) and updated 0 item(s)
(27 s) [AuctionManager] Bazaar terminal checks completed in 0ms
(27 s) [AuctionManager] Checking 0 vendor terminals
(27 s) [AuctionManager] vendor Checked 0 auction item(s) and updated 0 item(s)
(27 s) [AuctionManager] Vendor terminal checks completed in 0ms
(27 s) [AuctionManager] loaded auctionsMap of size: 0
(27 s) [FrsManager] ERROR - Unable to initialize frs manager, yavin4 disabled.
(27 s) [StatusServer] initialized
(27 s) [Core] initialized

After that, you can add the new server as a login server from the swgemu launcher, and start it up. By default it will allow anyone to create a user with any password.

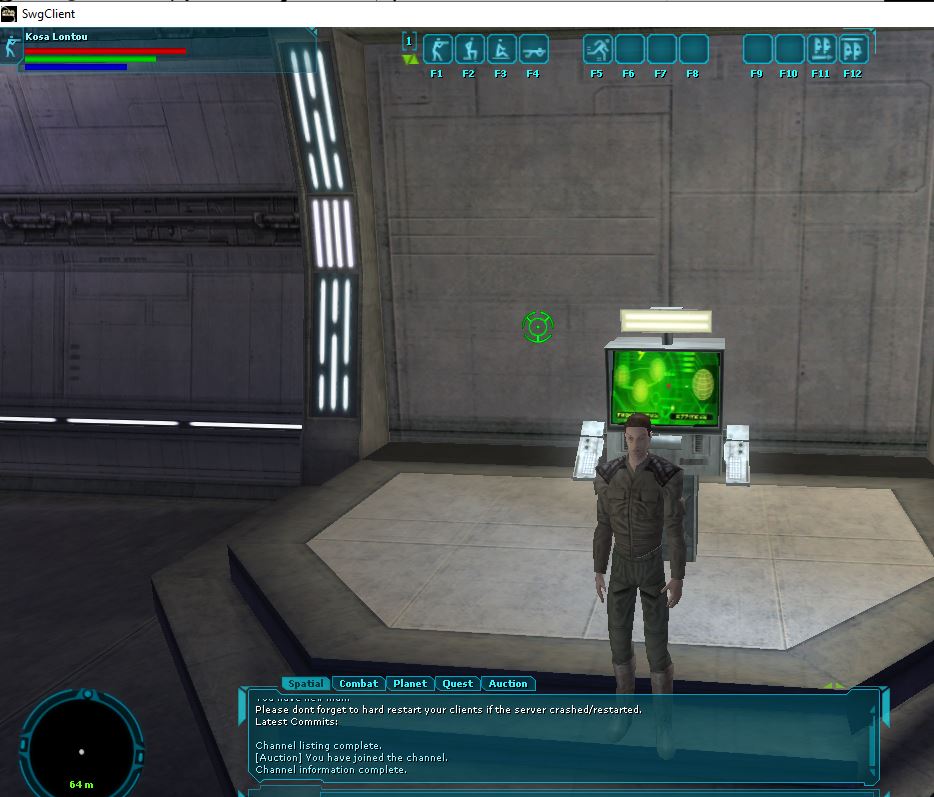
self hosted swgemu!

And here we are, all alone.

Running TME on Linux Subsystem for Windows (v1?)

I know in all the trade news everyone is excited that the newest Linux Subsystem for Windows will provide a native kernel. I would imagine it’s going to run along the lines of containers which means using the Hyper-V stuff. So good bye VMWare?

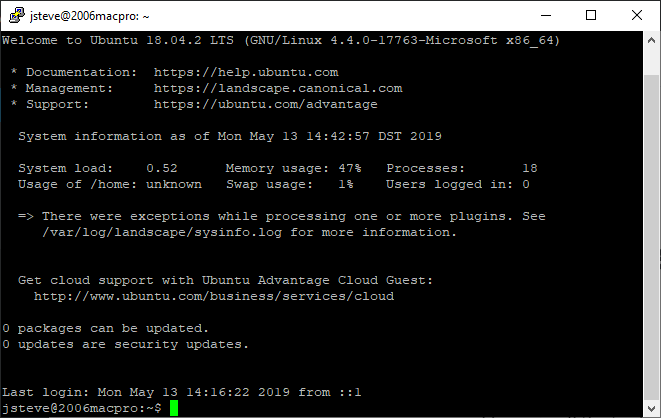
Anyways I want to run SunOS 2.0 which means no graphics are needed, but what I do need is a pty. I’m a n00b so I don’t know how to generate them myself, but I did see that I can piggyback on a ssh session. So first you need to enable & run sshd, which instructions are here, Although with Ubuntu 18.02 LTS there is further steps listed here. If everything is okay, you can SSH into your Windows machine, getting the Linux subsystem.

Some notes on building:

First let’s get the emulator and patches for SunOS 2

wget http://people.csail.mit.edu/fredette/tme/tme-0.8.tar.gz tar -zxvf tme-0.8.tar.gz wget http://www.heeltoe.com/download/sun2/diffs-20111125 cd tme-0.8 patch -p1 < ../diffs-20111125

Using GCC 5 or 7 (probably everything post version 3, the -Werror will cause building TME to error out.

I just removed the following block from configure

if test "x$enable_warnings" = "xyes" -a "x$GCC" = "xyes"; then CFLAGS="${CFLAGS-} -Wundef -Wall -Werror" CXXFLAGS="${CXXFLAGS-} -W" fi

Now you can run configure & make. I follow the general wisdom, which involves disabling shared libraries. Otherwise you can play with the dynamic linker. Yuck.

sh configure --disable-shared make

It doesn't like to build in parallel, so be prepared to wait.

And yes, building fb-xlat-auto.c & fb.c does take a long while. Also make sure to have bison & flex installed.

Using Debian 9/GCC 6.3.0 I do get a bomb compiling module.c

module.c: In function 'tme_module_init': module.c:93:3: error: 'lt_preloaded_symbols' undeclared (first use in this function) LTDL_SET_PRELOADED_SYMBOLS();

In this case I just copy the definition from libltdl/ltdl.h and put it into module.c It'll complain about it being a duplicate, but it'll compile. I don't understand that either.

Now we need to set the variable LTDL_LIBRARY_PATH to pickup the config for each hardware component.

export LTDL_LIBRARY_PATH=$HOME/tme-0.8

Ok and now let's get ready to install SunOS 2.0

$ mkdir sunos2 cd cd sunos2/ wget https://web.archive.org/web/20060720001131/http://www.soupwizard.com/sun2/sunos/sunos_2.0_sun2.tar.gz tar -zxvf sunos_2.0_sun2.tar.gz mv sunos-2.0-sun2/tape1 . wget http://people.csail.mit.edu/fredette/tme/sun2-multi-rev-R.bin perl $HOME/tme-0.8/machine/sun/tme-sun-idprom 2/120 8:0:20:02:02:02 > my-sun2-idprom.bin

Now we can configure the emulator. One thing to take note of is what pts device has been created once you SSH'd into Windows.

$ ls -l /dev/pts/ total 0 crw--w---- 1 jsteve tty 136, 0 May 13 15:08 0 c--------- 1 root root 5, 2 May 13 10:47 ptmx

So in this case it's /dev/pts/0 for me, as I'm the first (and only) thing connected.

Now you need to edit the config. This is the one that I'm using:

mainbus0: tme/machine/sun2 multibus my-sun2-idprom.bin cpu0 at mainbus0: tme/ic/m68010 obio0 at mainbus0 obio: tme/generic/bus size 8MB obmem0 at mainbus0 obmem: tme/generic/bus size 16MB ram0 at obmem0 addr 0x0: tme/host/posix/memory ram 4MB rom0 at obmem0 addr 0xef0000: tme/host/posix/memory rom sun2-multi-rev-R.bin rom0 at obmem0 addr 0xef8000 clock0 at obio0 addr 0x2800: tme/machine/sun2/clock tod0 at obio0 addr 0x3800: tme/machine/sun2/tod zs0 at obio0 addr 0x2000 ipl 6: tme/machine/sun2/zs mbio0 at mainbus0 mbio: tme/generic/bus size 8MB mbmem0: tme/generic/bus size 8MB mainbus0 mbmem at mbmem0 addr 0x00000 sc0 at mbmem0 addr 0x80000 ipl 2: tme/bus/multibus/sun-sc scsibus0 at sc0: tme/scsi/bus console0 at zs0 channel A: tme/host/posix/serial device /dev/pts/0 break-carats sd0 at scsibus0: tme/scsi/disk id 0 type acb4000 disk0 at sd0: tme/host/posix/disk file my-sun2-disk.img st0 at scsibus0: tme/scsi/tape id 4 type emulex-mt02 tape0 at st0: tme/host/posix/tape command tape0 load tape1/01 tape1/02 tape1/03 tape1/04 tape1/05 tape1/06 tape1/07 tape1/08 tape1/09 tape1/10 command mainbus0 power up

Now we are almost ready! Create a 1GB disk image with dd:

dd if=/dev/zero of=my-sun2-disk.img bs=1M count=1024

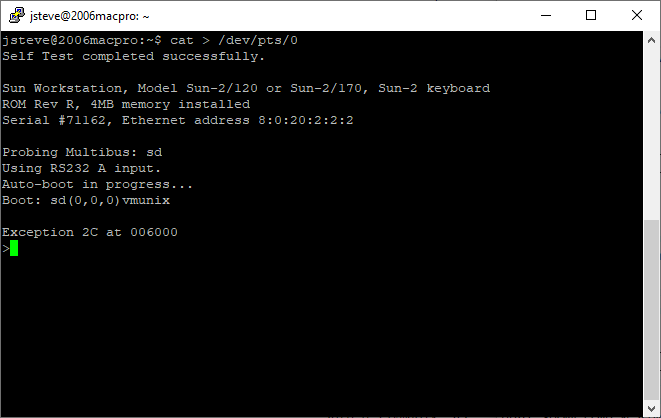
Now we are ready to go. From the ssh connection just type in 'cat > /dev/pts/0' and now everything we type in will be on the console. Now from a normal bash session type in '$HOME/tme-0.8/tmesh/tmesh SUN2-MULTIBUS' If everything goes well the bootpromp text will pop up on your SSH session.

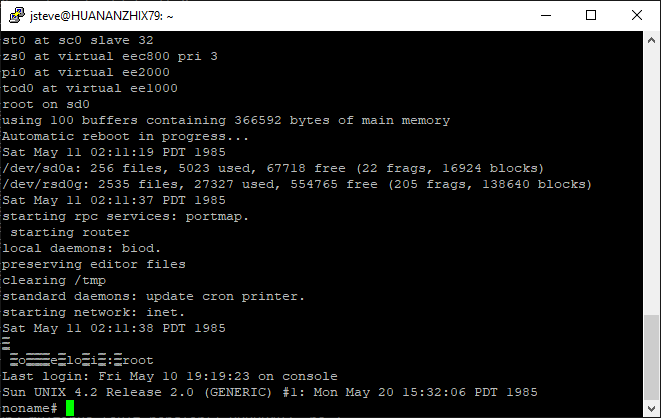
SUN-2/120 on Windows!

And if everything has gone right, we are now at the firmware prompt, ready to install SunOS 2.0!

Instructions from retrocomputinggeek.com gives a pretty good walk through of configuring a 1GB disk, and the installation. Although as a hint use the -as flags when booting SunOS for the install. And after booting the miniroot, follow the instructions on heeltoe regarding doing the 1st tape of the install.

>b st() Boot: st(0,0,0) Boot: sd(0,0,1)vmunix -as Size: 368640+57344+66652 bytes Sun UNIX 4.2 Release 2.0 (GENERIC) #1: Mon May 20 15:32:06 PDT 1985 Copyright (c) 1985 by Sun Microsystems, Inc. mem = 4096K (0x400000) avail mem = 3575808 Ethernet address = 8:0:20:2:2:2 sc0 at mbmem 80000 pri 2 sd0 at sc0 slave 0 sd0: sd1 at sc0 slave 1 st0 at sc0 slave 32 zs0 at virtual eec800 pri 3 pi0 at virtual ee2000 root device? sd0* using 100 buffers containing 366592 bytes of main memory #

After that it's a matter of working out which tar file goes where. Is there even an install process? I just untarred the rest of the tapes in the /usr directory.

For the impatient, tme-0.8-linux-x86_64_bin.tar.gz and
tme-0.8-SunOS-2.0.tar.gz. As always read the 404 page.