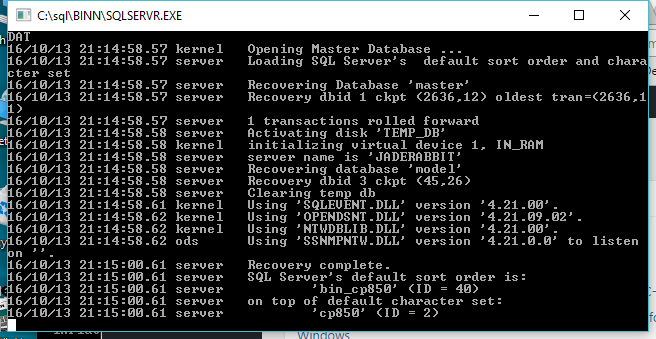
It’s been 7 YEARS, since I last took the SQL Server 4.21a plunge by getting it running on Windows Vista. Â I was thinking with all this Windows NT 3.1 fun, I should get SQL Server 4.21a up and running on my current Windows 10 machine. Â However this proved more involved.
Unlike Windows Vista, the setupdll.dll from Windows NT 4.0 will not work. Â I used the one from Windows NT 3.1, and it will run the setup program fine, but the file copy bombs out. Â I went crazy and modified the setup.inf to not actually copy files, take an xcopy of the raw files from an old install, and it won’t even try to install the service, it just builds a master database, and exits.
Trying to run the SQL Server directly, and you get this fun error:
16/10/13 21:19:08.40 kernel  Unable to start due to invalid serial number.
Well isn’t that great. Â So naturally you either have to install it, or just import an existing registry key setup like this SQL.REG file.
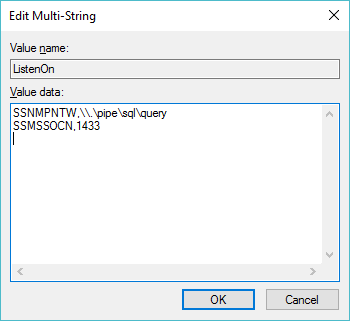
If you are so inclined, you can even remove named pipe support, and have it listen only on TCP/IP. Â Or the other way around. Â Or even change the TCP port.
In the HKEY_LOCAL_MACHINE\SOFTWARE\Microsoft\SQLServer\Server key there should be a Multi-String key called ListenOn … and it’s just the network transport DLL, and how they listen. Â As you can see SSNMPNTW is the named pipe transport, and SSMSSOCN is the TCP/IP transport.
SQL Server really wants to load the TCP/IP trasnport DLL from the Windows\System32 directory. On 64bit versions of Windows, however that means copying the SSMSSOCN.DLL file to the SysWOW64 directory, in order to have TCP/IP networking.
SQL server is not terribly useful in it’s current state as it turns out that master database is actually empty. Â So without stored procedures or much of anything you really can’t do anything with it. Â However looking at the install directory there is a bunch of SQL scripts. Â Even better on the VM where I’ve installed it, there is some output files, that by their date & time tell me in what order to run them!
First things first, I copy the following files from the C:\SQL\DLL diredctory to the C:\SQL\BINN directory so I don’t have to mess with paths:
NTWDBLIB.DLL
OPENDSNT.DLL
SQLEVENT.DLL
SQLTL32.DLL
SSNMPNTW.DLL
SSMSSOCN.DLL
Now I can run the SQL server from the C:\SQL\BINN directory
START SQLSERVR.EXE
And now it’s running.  If there is any issues, or your master database is either damaged, or just plain doesn’t exist, you can create one with the BLDMASTR.EXE program.
C:\sql\BINN>BLDMASTR.EXE
Buildmaster 4.20a NT : Wed Jan 26 12:37:00 1994
Master disk name? (default is master.dat) :
Master disk size (in 2k blocks)? (default is 6144) :
Configuration only? (default is N) (y or n) : n
Databases only? (default is N) (y or n) : n
Master device: master.dat
writing configuration area
writing the MASTER database
writing the MODEL database
writing allocation pages for remaining 7 MB, (3584 pages)
7 MB
Buildmaster complete
It’s that simple! Â Move the master.dat file into the C:\SQL\DATA directory and if the server doesn’t find it by itself, you can just tell it where it’s located:
START SQLSERVR.EXE -d ..\DATA\master.dat
And it should start.
Now the file CONFIG.SQL needs to be modifed (if you have a prior config) or created.
The two key lines are:
update master.dbo.sysdevices set phyname=’C:\SQL\DATA\MASTER.DAT’ where name = ‘master’
sp_addserver YOURMACHINE,local
Which as you can imagine simply sets where the master database lives, and what the machine name is, as SQL server LOVES to know the correct machine name. Â With that done, here is my simple script for populating the master database:
CHARSET.EXE /S . CP437\noaccent.437
isql -Usa -P < ..\INSTALL\INSTMSTR.SQL
isql -Usa -P < ..\INSTALL\INSTNT.SQL
isql -Usa -P < ..\INSTALL\INSTMODL.SQL
isql -Usa -P < ..\INSTALL\INSTCAT.SQL
isql -Usa -P < ..\INSTALL\CONFIG.SQL
isql -Usa -P < ..\INSTALL\INSTPUBS.SQL
isql -Usa -P < ..\INSTALL\ADMIN2.SQL
isql -Usa -P < ..\INSTALL\OBJECT2.SQL
isql -Usa -P < ..\INSTALL\HELPSQL.SQL
And once this has finished it will have populated all the tables in your master database. Â Hit CTRL+C in the SQL Server window, and it’ll shut down. Re-launch it, and it’ll be initialized.
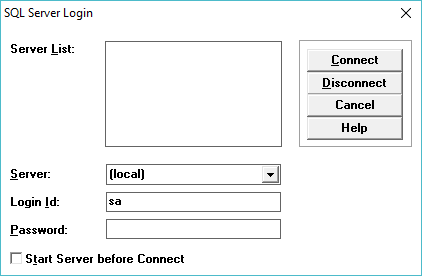
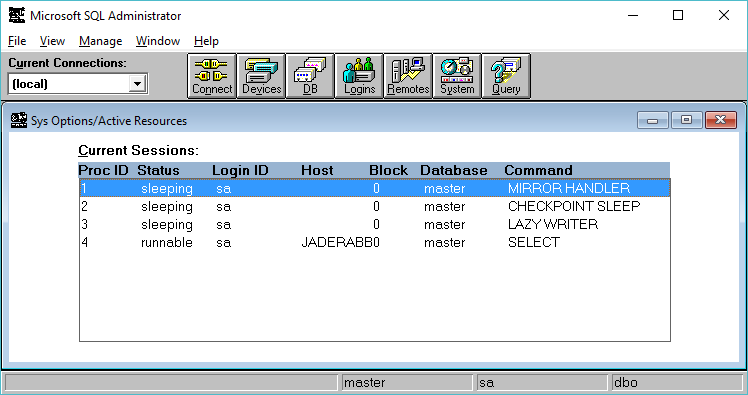
Assuming this all went according to plan, you can now launch SQLADMIN, the SQL Administrator, and then you can get a connect screen like this (I only got it running with the named pipes transport…)
Remember by default the sa user has no password!
And we are good to go! Â Feel free to grab SP4, and apply it by unzipping, and copying the files & dll’s to their respective places. Â So there we go, from January of 1994, to October of 2016, SQL Server still running!
As a follow up, check out Loading the MS SQL 6.5 drivers on Windows 10, for enabling ODBC access on newer versions of Windows.


