As far as computers go, Raspberry Pi’s are cheap. The latest (and vastly incompatible) Pi4 is no real exception. Now you’d think Microsoft would want to get WoA (Windows on ARM) into as many hands as possible to get people to port apps to the new cpu architecture. But that is not the case.
As of this moment there is no real desktop machines, the only route to go is with the laptops, which are the few models from Lenovo, HP, Acer and Microsoft themselves. Brand new these things are not cheap, and of course people find out quickly enough that the emulation just isn’t quite there (not all that surprising) and of course the lack of native apps doesn’t help. It’s that chicken/egg problem that can only be solved by getting hardware into people’s hands.
Developers!
So getting back to to the Pi, on ETA Prime’s channel I saw this video, which quickly went over how to get Windows 10 up and running in no time flat.
Pi4 (4GB/8GB it doesn’t matter thanks to a DMA bug you can only use 3GB)
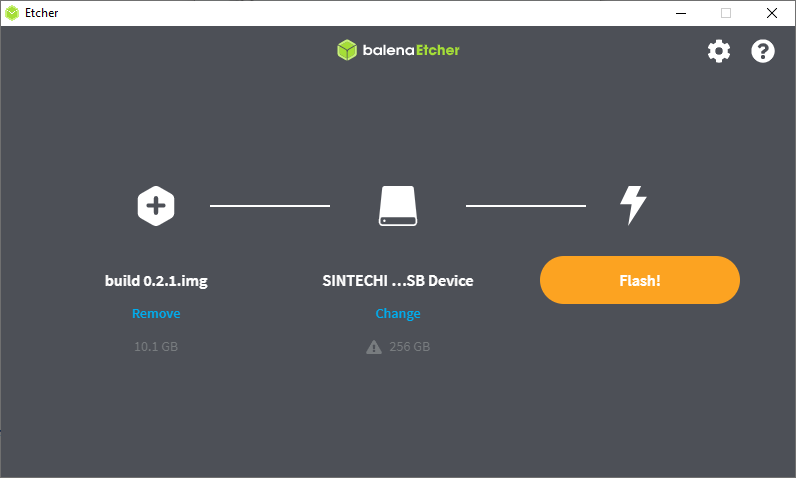
On the Discord look for the #download-links and look for build 0.2.1 After you extract it, the image should be about 10GB
10,100,932,608 build 0.2.1.img
With a MD5 checksum of: aad51a0e02ba947d24d543ff8ed612b0
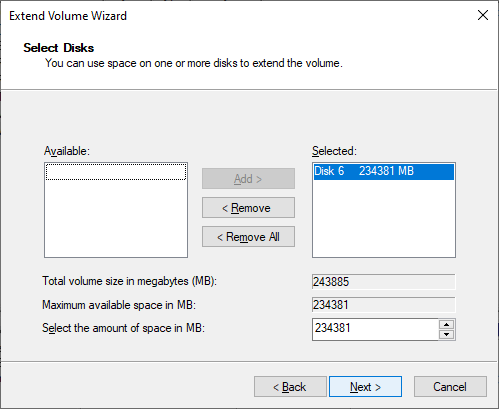
Use etcher to write the image to the SD. It took me about 5 minutes to do so. No bigge. I unplugged the SD/IDE/USB adapter thing I’m using, plugged it back in, and used Windows disk manager to expand the partition to take up the rest of the disk. It’s not terribly complicated to setup.
SSD FlashedRight click and select ExtendThe default option will consume the entire disk
After that slap in the SD to your Pi4 and away you go. Or so I first thought.
Realistically you also need:
A USB Hub
A USB Ethernet adapter (I have some cheapo no name realtek)
A USB audio card
A mini HDMI to regular human sized HDMI cables/adapters
a 5Amp USB charger for extra power!
As I found out rather quickly that the only peripherals that are working is the USB ports. However the USB controller has some DMA bug where it can’t xfer higher than 3GB which caps the current memory ceiling to 3GB.
Otherwise the Pi will think and reboot a few times, and about 15-30 minutes later (I didn’t time it, I walked out) you’ll be up and running Windows 10 on ARM!
It’s heavily customized in that when Windows boots up it is only consuming about 1GB of RAM. So that gives us just under 2GB for user programs. GREAT! Included is the setup program for the latest beta of Microsoft Edge (with the chromium engine) so at least you can actually hit web sites. However Google doesn’t like it, so if you are going to try to watch anything with DRM it will not work.
While many people complain about STEAM, game compatibility, really what on earth were you expecting? Naturally people will want to know how fast it is, and well… It’s not. Although it does have 4 cores, running at 1.5Ghz, there is barely any cache (well compared to an i7/Xeon), and it’s clearly not a power house of a box. The only real test of a machine like this is going to be native stuff. And speaking of, it’s nice that my previous builds for ARM still work! The sales guy that borrwed the ASUS should be back soon so I can do some side by side comparisons of how slow they are.
In addition to DOSBox, Neko98, and frontvm, I managed to get MAME 0.36 cross compiled and I had to disable the DirectX input and output, as although they do compile they have issues on the Pi4. So it’s GDI all the way. That said, it does run:
This isn’t the port you want, or the platform to play it on. I’m using the command line Visual C++ tools to build this, and MAME 0.37 drifted to being more of a MinGW thing, and I just don’t feel like fighting the build process.
Another point of fun, is that this processor & OS does have x86 compatibility you can take things to the extreme with OTVDM, and run Win16 based programs on Windows 10 for ARM! Not that I would know why you want Excel 3.0, but rest assured, it works fine.
The platform supports WSL, so I went ahead and installed Ubuntu 18 & 20… and both have one apparently known catastrophic failure on the Pi’s. When trying to update packages the updater crashes. The fault is apparently in dirmngr, or the usual Linux bandaid of switching distros. There doesn’t appear to be any ‘fix’ to this, so if anyone knows what to do, I’m all ears. Also don’t enable WSL2, it’ll hang at the bootloader. I ended up having to reflash the disk.
In my quick conclusion, is this the RISC Windows workstation of the future? No, not really. It’s more the $50(+peripherals) tyre kicker edition. It’s a cheap way into the platform, to see what the fuss is all about. This machine feels like a low end i3, the CPU just isn’t there, it’s only a BCM2711 Cortex-A72, so there isn’t all that much to be expected. On the other hand it’s FAR FAR FAR cheaper than something like the Surface X. If you have the hardware it’s worth checking out if you are interested in non x86 Windows. Otherwise you aren’t going to miss much.
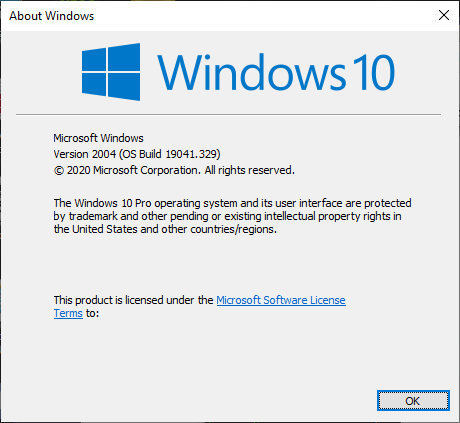
I finally got the update to version 2004 of Windows 10 (OS Build 19041.329) which now includes support for running a Linux kernel inside a VM, using paravirtual drivers letting it hook into Windows 10. It reminds me of WinOS/2 where, OS/2 would run Windows 3.1 in a virtual machine, but using special drivers it could redirect it on the native filesystem, and paint the windows on the OS/2 desktop.
So the first thing is make sure you have 2004, winver should look like this:
You will need to go to the old control panel, and enable the Virtual Machine Platform. For those of you using VMware, you’ll need at least version 15.5.5 (15.5.6 is current as of the time of me writing this). I’d suggest you do that before turning on this, but some people like to live dangerously. Also fully shut down all your VM’s otherwise things will end up giving you errors (as you’ll see later).
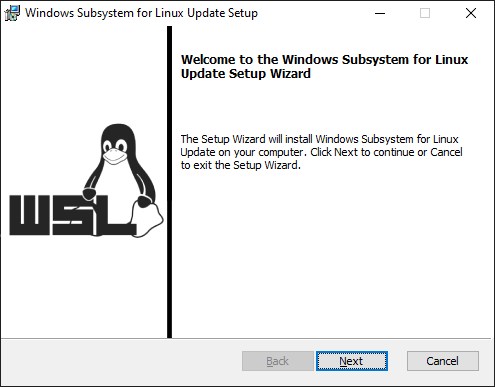
After the Virtual Machine Platform is installed, your machine will need to reboot. After a reboot, you’ll need to download the Linux Update to the system, available at:
It’s a simple install, and only takes a few seconds. I didn’t have to reboot.
now for the fun parts, you’ll need to list and shut down (terminate) your running WSL’s if you have any running.
C:\Users\neozeed>wsl --list --verbose
NAME STATE VERSION
Debian Running 1
As you can see I only have one, and it’s called Debian, and it is currently running something. Let’s kill it!
C:\Users\neozeed>wsl -t Debian
C:\Users\neozeed>wsl --list --verbose
NAME STATE VERSION
Debian Stopped 1
And now it’s stopped. The command to upgrade is pretty simple:
C:\Users\neozeed>wsl --set-version Debian 2
Conversion in progress, this may take a few minutes…
For information on key differences with WSL 2 please visit https://aka.ms/wsl2
And yes, you can also stop the WSL instance, and move it back to version 1, if you find 2 not doing what you want. However on first impressions, WSL2 is significantly faster.
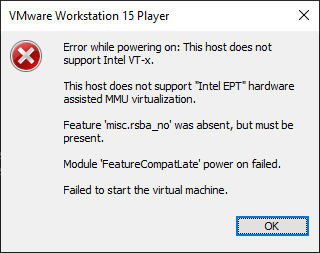
If you are running VMware, and you didn’t shut down your VM’s you’ll get this lovely message when you try to resume:
The save state will be deleted, but rest assured it’ll launch okay (at least mine did!)
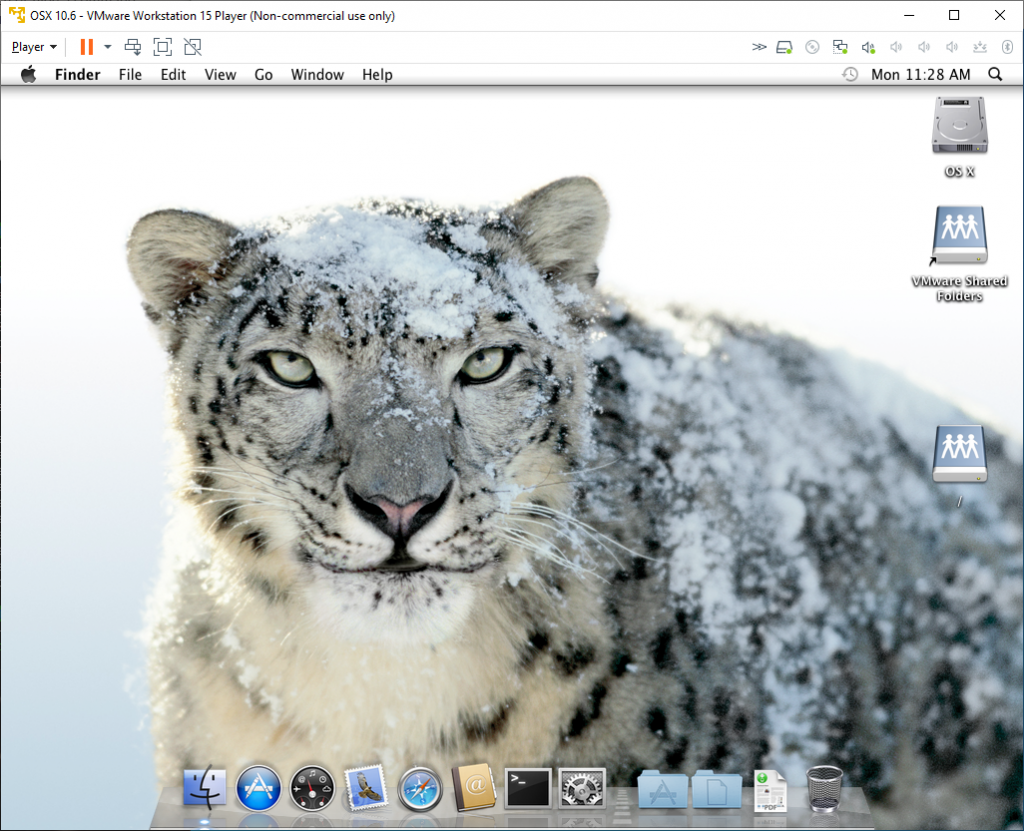
10.6 the last great OS X
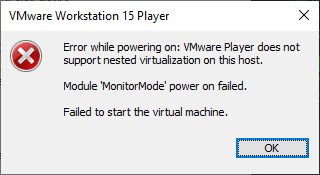
One sad consequence of using the Microsoft Virtual Machine framework is that nesting is no longer available.
which is kind of a bummer, as that was the killer feature.
I’ve been using Sandboxie for a long while to run all those questionable downloads on Windows. It’s a great light weight sandbox (as the name implies) for running random downloads, or even going to questionable websites as Sandboxie does a great job of isolating processes, and their filesystem access.
It’s not been all that cheap, but I felt it was worth it. I went to check to see how much it is as the conversation had come up on discord, and it turns out that Sophos had bought Sandboxie, and opened up the source code!
The downside is that there will be no further official development of the product. So I guess at some point I’ll have to break down and get a signing cert and re-build it if I want to keep using it.
Last version is locally mirrored here, as I understand it’ll be deleted soon enough.
The following is a guest post by NCommander of SoylentNews fame!
For those who’ve been long-time readers of SoylentNews, it’s not exactly a secret that I have a personal interest in retro computing and documenting the history and evolution of the Personal Computer. About three years ago, I ran a series of articles about restoring Xenix 2.2.3c, and I’m far overdue on writing a new one. For those who do programming work of any sort, you’ll also be familiar with “Hello World”, the first program most, if not all, programmers write in their careers.
A sample hello world program might look like the following:
#include <stdio.h>


int main() {
 printf("Hello world\n");
 return 0;
}
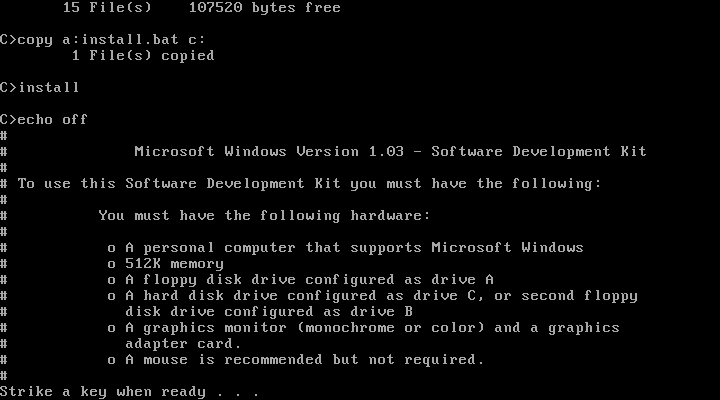
Recently, I was inspired to investigate the original HELLO.C for Windows 1.0, a 125 line behemoth that was talked about in hush tones. To that end, I recorded a video on YouTube that provides a look into the world of programming for Windows 1.0, and then testing the backward compatibility of Windows through to Windows 10.
Before we even get into the topic of HELLO.C though, there’s a fair bit to be said about these ancient versions of Windows. Windows 1.0, like all pre-95 versions, required DOS to be pre-installed. One quirk however with this specific version of Windows is that it blows up when run on anything later than DOS 3.3. Part of this is due to an internal version check which can be worked around with SETVER. However, even if this version check is bypassed, there are supposedly known issues with running COMMAND.COM. To reduce the number of potential headaches, I decided to simply install PC-DOS 3.3, and give Windows what it wants.
You might notice I didn’t say Microsoft DOS 3.3. The reason is that DOS didn’t exist as a standalone product at the time. Instead, system builders would license the DOS OEM Adaptation Kit and create their own DOS such as Compaq DOS 3.3. Given that PC-DOS was built for IBM’s own line of PCs, it’s generally considered the most “generic” version of the pre-DOS 5.0 versions, and this version was chosen for our base. However, due to its age, it has some quirks that would disappear with the later and more common DOS versions.
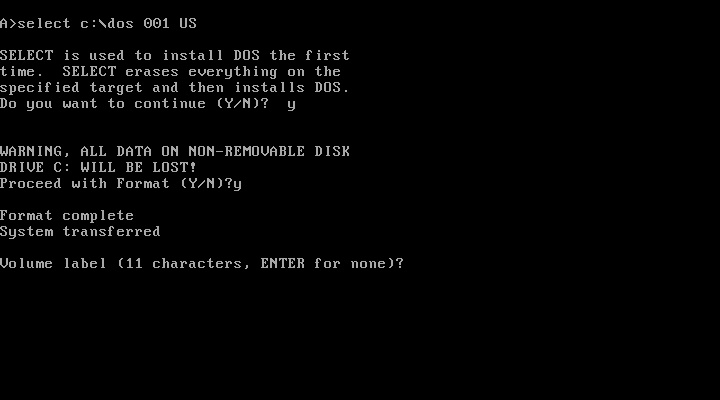
PC DOS 3.3 loaded just fine in VirtualBox and — with the single 720 KiB floppy being bootable — immediately dropped me to a command prompt. Likewise, FDISK and FORMAT were available to partition the hard drive for installation. Each individual partition is limited, however, to 32 MiB. Even at the time, this was somewhat constrained and Compaq DOS was the first (to the best of my knowledge) to remove this limitation. Running FORMAT C: /S created a bootable drive, but something oft-forgotten was that IBM actually provided an installation utility known as SELECT.
SELECT’s obscurity primarily lies in its non-obvious name or usage, nor the fact that it’s actually needed to install DOS; it’s sufficient to simply copy the files to the hard disk. However, SELECT does create CONFIG.SYS and AUTOEXEC.BAT so it’s handy to use. Compared to the later DOS setup, SELECT requires a relatively arcane invocation with the target installation folder, keyboard layout, and country-code entered as arguments and simply errors out if these are incorrect. Once the correct runes are typed, SELECT formats the target drive, copies DOS, and finishes installation.
Without much fanfare, the first hurdle was crossed, and we’re off to installing Windows.
Windows 1.0 Installation/Mouse Woes
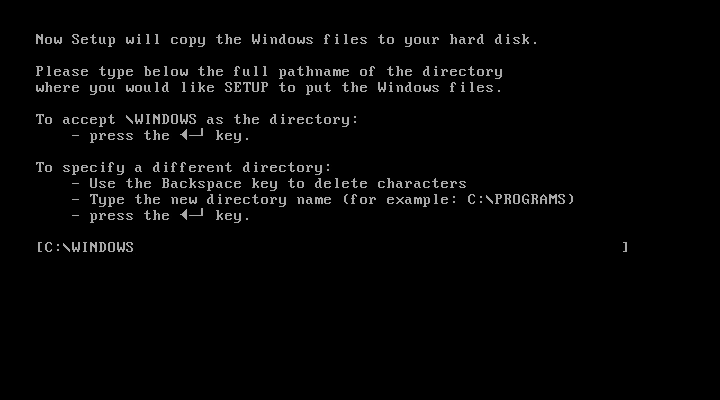
With DOS installed, it was on to Windows. Compared to the minimalist SELECT command, Windows 1.0 comes with a dedicated installer and a simple text-based interface. This bit of polish was likely due to the fact that most users would be expected to install Windows themselves instead of having it pre-installed.
Another interesting quirk was that Windows could be installed to a second floppy disk due to the rarity of hard drives of the era, something that we would see later with Microsoft C 4.0. Installation went (mostly) smoothly, although it took me two tries to get a working install due to a typo. Typing WIN brought me to the rather spartan interface of Windows 1.0.
Although functional, what was missing was mouse support. Due to its age, Windows predates the mouse as a standard piece of equipment and predates the PS/2 mouse protocol; only serial and bus mice were supported out of the box. There are two ways to solve this problem:
The first, which is what I used, involves copying MOUSE.DRV from Windows 2.0 to the Windows 1.0 installation media, and then reinstalling, selecting the “Microsoft Mouse” option from the menu. Re-installation is required because WIN.COM is statically linked as part of installation with only the necessary drivers included; there is no option to change settings afterward. The SDK documentation details the static linking process, and how to run Windows in “slow mode” for driver development, but the end result is the same. If you want to reconfigure, you need to re-install.
The second option, which I was unaware of until after producing my video is to use the PS/2 release of Windows 1.0. Like DOS of the era, Windows was licensed to OEMs who could adapt it to their individual hardware. IBM did in fact do so for their then-new PS/2 line of computers, adding in PS/2 mouse support at the time. Despite being for the PS/2 line, this version of Windows is known to run on AT-compatible machines.
Regardless, the second hurdle had been passed, and I had a working mouse. This made exploring Windows 1.0 much easier.
The Windows 1.0 Experience
If you’re interested in trying Windows 1.0, I’d recommend heading over to PCjs.org and using their browser-based emulator to play with it as it already has working mouse support and doesn’t require acquiring 35 year old software. Likewise, there are numerous write-ups about this version, but I’d be remiss if I didn’t spend at least a little time talking about it, at least from a technical level.
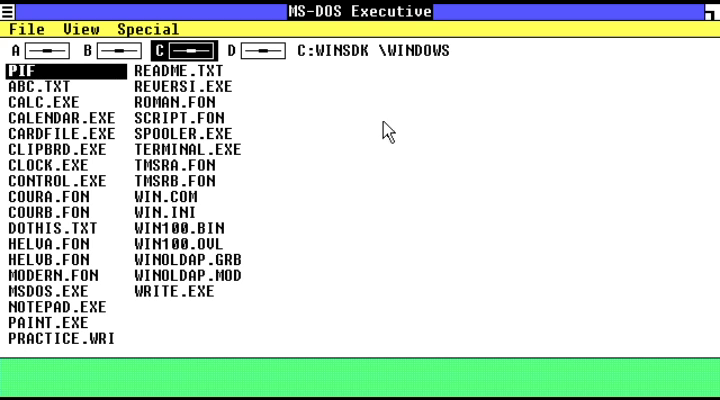
Compared to even the slightly later Windows 2.0, Windows 1.0 is much closer to DOSSHELL than any other version of Windows, and is essentially a graphical bolt-on to DOS although through deep magic, it is capable of cooperative multitasking. This was done entirely with software trickery as Windows pre-dates the 80286, and ran on the original 8086. COMMAND.COM could be run as a text-based application, however, most DOS applications would launch a full-screen session and take control of the UI.
This is likely why Windows 1.0 has issues on later versions of DOS as it’s likely taking control of internal structures within DOS to perform borderline magic on a processor that had no concept of memory protection.
Another oddity is that this version of Windows doesn’t actually have “windows” per say. Instead applications are tiled, with only dialogue boxes appearing as free-floating Windows. Overlapping Windows would appear in 2.0, but it’s clear from the API that they were at least planned for at some point. Most notable, the CreateWindow() function call has arguments for x and y coordinates.
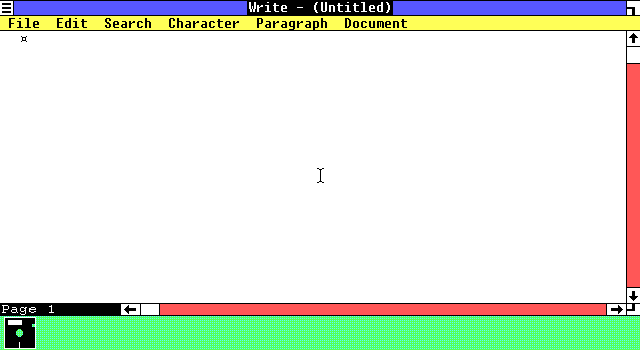
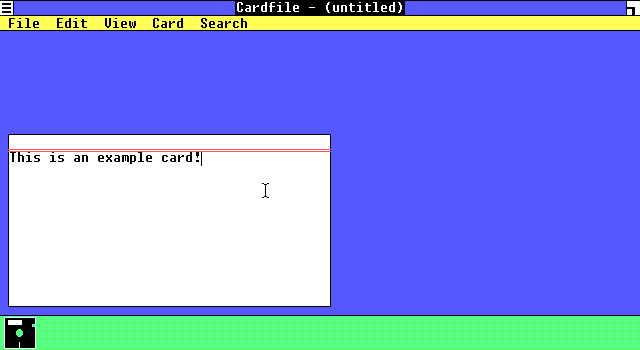
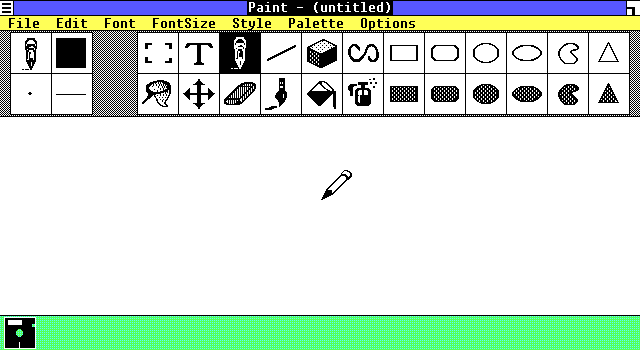
My best guess is Microsoft wished to avoid the wrath of Apple who had gone on a legal warpath of any company that too-closely copied the UI of the then-new Apple Macintosh. Compared to later versions, there are also almost no included applications. The most notable applications that were included are: NOTEPAD, PAINT, WRITE, and CARDFILE.
While NOTEPAD is essentially unchanged from its modern version, Write could be best considered a stripped-down version of Word, and would remain a mainstay until Windows 95 where it was replaced with Wordpad. CARDFILE likewise was a digital Rolodex. CARDFILE remained part of the default install until Windows 3.1, and remained on the CD-ROM for 95, 98, and ME before disappearing entirely.
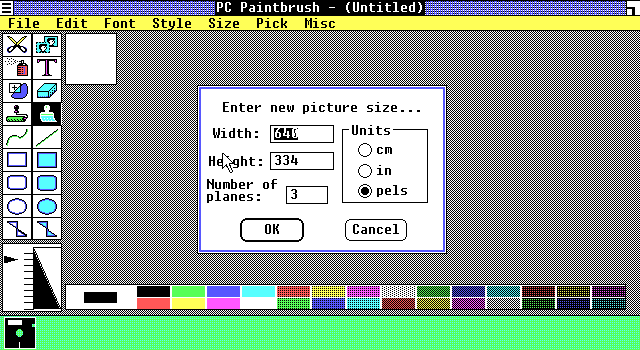
PAINT, on the other hand, is entirely different from the Paintbrush application that would become a mainstay. Specifically, it’s limited to monochrome graphics, and files are saved in MSP format. Part of this is due to limitations of the Windows API of the era: for drawing bitmaps to the screen, Windows provided Display Independent Bitmaps or DIBs. These had no concept of a palette and were limited to the 8 colors that Windows uses as part of the EGA palette. Color support appears to have been a late addition to Windows, and seemingly wasn’t fully realized until Windows 3.0.
Paintbrush (and the later and confusingly-named Paint) was actually a third party application created by ZSoft which had DOS and Windows 1.0 versions. ZSoft Paintbrush was very similar to what shipped in Windows 3.0 and used a bit of technical trickery to take advantage of the full EGA palette.
With that quick look completed, let’s go back to actually getting to HELLO.C, and that involved getting the SDK installed.
The Windows SDK and Microsoft C 4.0
Getting the Windows SDK setup is something of an experience. Most of Microsoft’s documentation for this era has been lost, but the OS/2 Museum has scanned copies of some of the reference binders, and the second disk in the SDK has both a README file and an installation batch file that managed to have most of the necessary information needed.
Unlike later SDK versions, it was the responsibility of the programmer to provide a compiler. Officially, Microsoft supported the following tools:
Microsoft Macro Assembler (MASM) 4
Microsoft C 4.0 (not to be confused with MSC++4, or Visual C++)
Microsoft Pascal 3.3
Unofficially (and unconfirmed), there were versions of Borland C that could also be used, although this was untested, and appeared to not have been documented beyond some notes on USENET. More interestingly, all the above tools were compilers for DOS, and didn’t have any specific support for Windows. Instead, a replacement linker was shipped in the SDK that could create Windows 1.0 “NE” New Executables, an executable format that would also be used on early OS/2 before being replaced by Portable (PE) and Linear Executables (LX) respectively.
For the purposes of compiling HELLO.C, Microsoft C 4.0 was installed. Like Windows, MSC could be run from floppy disk, albeit it with a lot of disk swapping. No installer is provided, instead, the surviving PDFs have several pages of COPY commands combined with edits to AUTOEXEC.BAT and CONFIG.SYS for hard drive installation. It was also at this point I installed SLED, a full screen editor as DOS 3.3 only shipped with EDLIN. EDIT wouldn’t appear until DOS 5.0
After much disk feeding and some troubleshooting, I managed to compile a quick and dirty Hello World program for DOS. One other interesting quirk of MSC 4.0 was it did not include a standalone assembler; MASM was a separate retail product at the time. With the compiler sorted, it was time for the SDK.
Fortunately, an installation script is provided. Like SELECT, it required listing out a bunch of folders, but otherwise was simple enough to use. For reasons that probably only made sense in 1985, both the script and the README file was on Disk 2, and not Disk 1. This was confirmed not to be a labeling error as the script immediately asks for Disk 1 to be inserted.
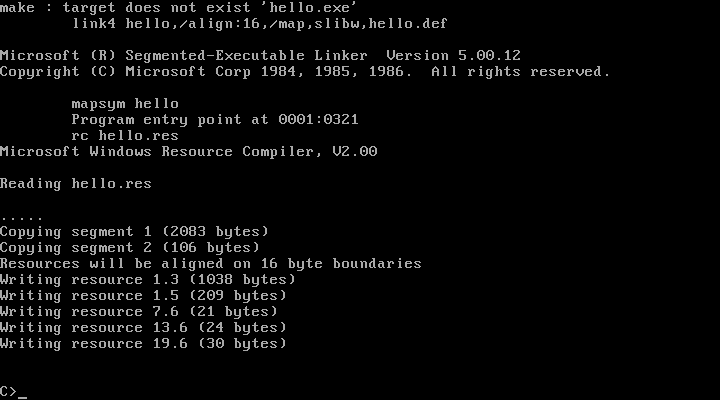
The install script copies files from four of the seven disks before returning to a command line. Disk 5 contains the debug build of Windows, which are roughly equivalent to checked builds of modern Windows. Disk 6 and 7 have sample code, including HELLO.C.
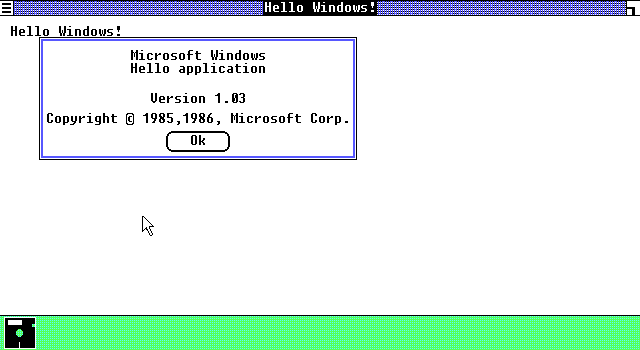
With the final hurdle passed, it wasn’t too hard to get to compiled HELLO.EXE.
Dissecting HELLO.C
I’m going to go through these at a high level, my annotated hello.c goes into much more detail on all these points.
General Notes
Now that we can build it, it’s time to take a look at what actually makes up the nuts and bolts of a 16-bit Windows application. The first major difference, simply due to age is that HELLO.C uses K&R C simply on the basis of pre-dating the ANSI C function. It’s also clear that certain conventions weren’t commonplace yet: for example, windows.h lacks inclusion guards.
NEAR and FAR pointers
long FAR PASCAL HelloWndProc(HWND, unsigned, WORD, LONG);
Oh boy, the bane of anyone coding in real mode, near and far pointers are a “feature” that many would simply like to forget. The difference is seemingly simple, a near pointer is nearly identical to a standard pointer in C, except it refers to memory within a known segment, and a far pointer is a pointer that includes the segment selector. Clear right?
Yeah, I didn’t think so. To actually understand what these are, we need to segue into the 8086’s 20-bit memory map. Internally, the 8086 was a 16-bit processor, and thus could directly address 2^16 bits of memory at a time, or 64 kilobytes in total. Various tricks were done to break the 16-bit memory barrier such as bank switching, or in the case of the 8086, segmentation.
Instead of making all 20-bits directly accessible, memory pointers are divided into a selector which forms the base of a given pointer, and an offset from that base, allowing the full address space to be mapped. In effect, the 8086 gave four independent windows into system memory through the use of the Code Segment (CS), Data Segment (DS), Stack Segment (SS), and the Extra Segment (ES).
Near pointers thus are used in cases where data or a function call is in the same segment and only contain the offset; they’re functionally identical to normal C pointers within a given segment. Far pointers include both segment and offset, and the 8086 had special opcodes for using these. Of note is the far call, which automatically pushed and popped the code segment for jumping between locations in memory. This will be relevant later.
HelloWndProc is a forward declaration for the Hello Window callback, a standard feature of Windows programming. Callback functions always had to be declared FAR as Windows would need to load the correct segment when jumping into application code from the task manager. Hence the far declaration. Windows 1.0 and 2.0, in addition, had other rules we’ll look at below.
WinMain Decleration:
int PASCAL WinMain( hInstance, hPrevInstance, lpszCmdLine, cmdShow )
HANDLE hInstance, hPrevInstance;
LPSTR lpszCmdLine;
int cmdShow;
PASCAL Calling Convention
Windows API functions are all declared as PASCAL calling convention, also known as STDCALL on modern Windows. Under normal circumstances, the C programming language has a nominal calling convention (known as CDECL) which primarily relates to how the stack is cleaned up after a function call. In CDECL-declared functions, its the responsibility of the calling function to clean the stack. This is necessary for vardiac functions (aka, functions that take a variable number of arguments) to work as the callee won’t know how many were pushed onto the stack.
The downside to CDECL is that it requires additional prologue and epilogue instructions for each and every function call, thereby slowing down execution speed and increasing disk space requirements. Conversely, PASCAL calling convention left cleanup to be performed by the called function and usually only needed a single opcode to clean the stack at function end. It was likely due to execution and disk space concerns that Windows standardized on this convention (and in fact still uses it on 32-bit Windows.
hPrevInstance
if (!hPrevInstance) {
/* Call initialization procedure if this is the first instance */
if (!HelloInit( hInstance ))
return FALSE;
} else {
/* Copy data from previous instance */
GetInstanceData( hPrevInstance, (PSTR)szAppName, 10 );
GetInstanceData( hPrevInstance, (PSTR)szAbout, 10 );
GetInstanceData( hPrevInstance, (PSTR)szMessage, 15 );
GetInstanceData( hPrevInstance, (PSTR)&MessageLength, sizeof(int) );
}
hPrevInstance has been a vestigial organ in modern Windows for decades. It’s set to NULL on program start, and has no purpose in Win32. Of course, that doesn’t mean it was always meaningless. Applications on 16-bit Windows existed in a general soup of shared address space. Furthermore, Windows didn’t immediately reclaim memory that was marked unused. Applications thus could have pieces of themselves remain resident beyond the lifespan of the application.
hPrevInstance was a pointer to these previous instances. If an application still happened to have its resources registered to the Windows Resource Manager, it could reclaim them instead of having to load them fresh from disk. hPrevInstance was set to NULL if no previous instance was loaded, thereby instructing the application to reload everything it needs. Resources are registered with a global key so trying to register the same resource twice would lead to an initialization failure.
I’ve also gotten the impression that resources could be shared across applications although I haven’t explicitly confirmed this.
Local/Global Memory Allocations
NOTE: Mostly cribbled off Raymond Chen’s blog, a great read for why Windows works the way it does.
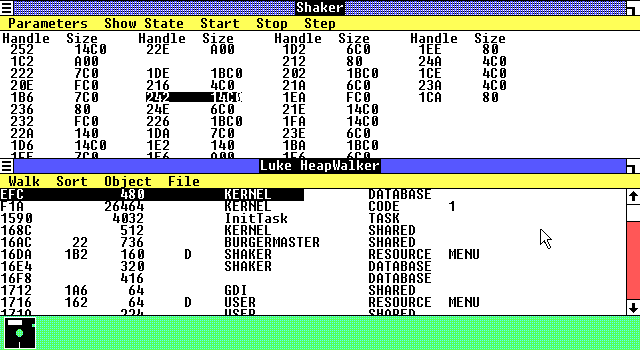
Another concept that’s essentially gone is that memory allocations were classified as either local to an application or global. Due to the segmented architecture, applications have multiple heaps: a local heap that is initialized with the program and exists in the local data segment, and a global heap which requires a far pointer to make access to and from.
Every executable and DLL got their own local heaps, but global heaps could be shared across process boundaries, and as best I can tell, weren’t automatically deallocated when a process ended. HEAPWALK could be used to see who allocated what and find leaks in the address space. It could also be combined with SHAKER which rearranged blocks of memories in an attempt to shake loose bugs. This is similar to more modern-day tools like valgrind on Linux, or Microsoft’s Application Testing tools.
Oh boy, this is a real stinker and an entirely unnecessary one at that. MakeProcInstance didn’t even make it to Windows 3.1 and its entire existence is because Microsoft forgot details of their own operating environment. To explain, we’re going to need to dig a bit deeper into segmented mode programming.
MakeProcInstance’s purpose was to register a function suitable as a callback. Only functions that have been marked with MPI or declared as an EXPORT in the module file can be safely called across process boundaries. The reason for this is that Windows needs to register the Code Segment and Data Segment to a global store to make function calls safely. Remember, each application had its own local heap which lived in its own selector in DS.
In real mode, doing a CALL FAR to jump to a far pointer automatically push and popped the code segment as needed, but the data segment was left unchanged. As such, a mechanism was required to store the additional information needed to find the local heap. So far, this is sounding relatively reasonable.
The problem is that 16-bit Windows has this as an invariant: DS = SS …
If you’re a real mode programmer, that might make it clear where I’m going with this. The Stack Segment selector is used to denote where in memory the stack is living. SS also got pushed to the stack during a function call across process boundaries along with the previous SP. You might begin to see why MakeProcInstance becomes entirely unnecessary.
Instead of needing a global registration system for function calls, an application could just look at the stack base pointer (bp) and retrieve the previous SS from there. Since SS = DS, the previous data segment was in fact saved and no registration is required, just a change to how Windows handles function epilogs and prologs. This was actually found by a third party, and a tool FixDS was released by Michael Geary that rewrote function code to do what I just described. Microsoft eventually incorporated his fix directly into Windows, and MakeProcInstance disappeared as a necessity.
Other Oddities
From Raymond Chen’s blog and other sources, one interesting aspect of 16-bit Windows was it was actually designed with the possibility that applications would have their own address space, and there was talk that Windows would be ported to run on top of XENIX, Microsoft’s UNIX-based operating system. It’s unclear if OS/2’s Presentation Manager shared code with 16-bit Windows although several design aspects and API names were closely linked together.
From the design of 16-bit Windows and playing with it, what’s clear is this was actually future-proofing for Protected Mode on the 80286, sometimes known as segmented protection mode. On 286’s Protected Mode, while the processor was 32-bit, the memory address space was still segmented into 64-kilobyte windows. The primary difference was that the segment selectors became logical instead of physical addresses.
Had the 80286 actually succeeded, 32-bit Windows would have been essentially identical to 16-bit Windows due to how this processor worked. In truth, separate address spaces would have to wait for the 80386 and Windows NT to see the light of day, and this potential ability was never used. The 80386 both removed the 64-kilobyte limit and introduced a flat address space through paging which brought the x86 processor more inline with other architectures.
Backwards Compatibility on Windows 3.1
While Microsoft’s backward compatibility is a thing of legend, in truth, it didn’t actually start existing until Windows 3.1 and later. Since Windows 1.0 and 2.0 applications ran in real mode, they could directly manipulate the hardware and perform operations that would crash under Protected Mode.
Microsoft originally released Windows 286, and 386 to add support for the 80286 and 80386, functionality that would be merged together in Windows 3.0 as Standard Mode, and 386 Enhanced Mode along with legacy “Real Mode” support. Due to running parts of the operating system in Protected Mode, many of the tricks applications could perform would cause a General Protection Fault and simply fail. This wasn’t seen as a problem as early versions of Windows were not popular, and Microsoft actually dropped support for 1.x and 2.x applications in Windows 95.
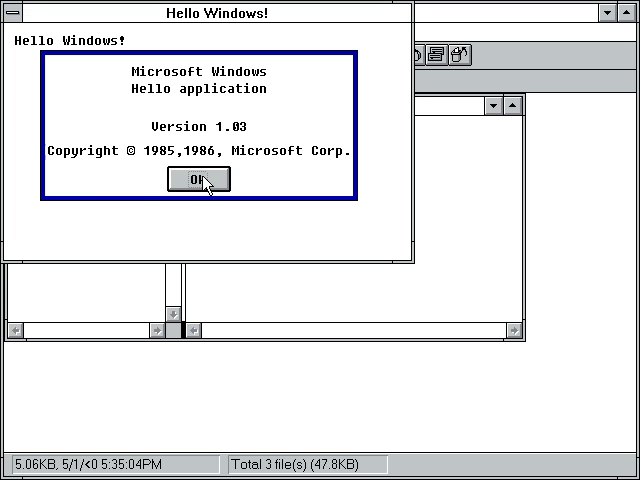
Windows for Workgroups was installed in a fresh virtual machine, and HELLO.EXE, plus two more example applications, CARDFILE and FONTTEST were copied with it. Upon loading, Windows did not disappoint throwing up a compatibility warning right at the get-go.
Accepting the warning showing that all three applications ran fine, albeit it with a broken resolution due to 0,0 being passed into CreateWindow().
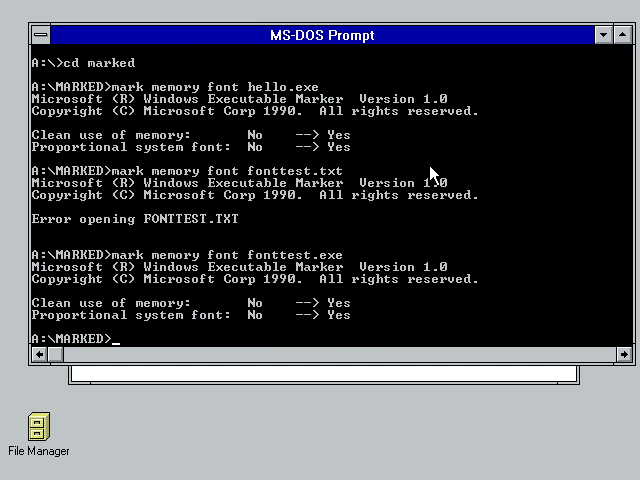
However, there’s a bit more to explore here. The Windows 3.1 SDK included a utility known as MARK. MARK was used, as the name suggests, to mark legacy applications as being OK to run under Protected Mode. It also could enable the use of TrueType fonts, a feature introduced back in Windows 3.0.
The effect is clear, HELLO.EXE now renders in TrueType fonts. The reason TrueType fonts are not immediately enabled can be see in FONTTEST, where the system typeface now overruns several dialog fields.
The question now was, can we go further?
35 Years Later …
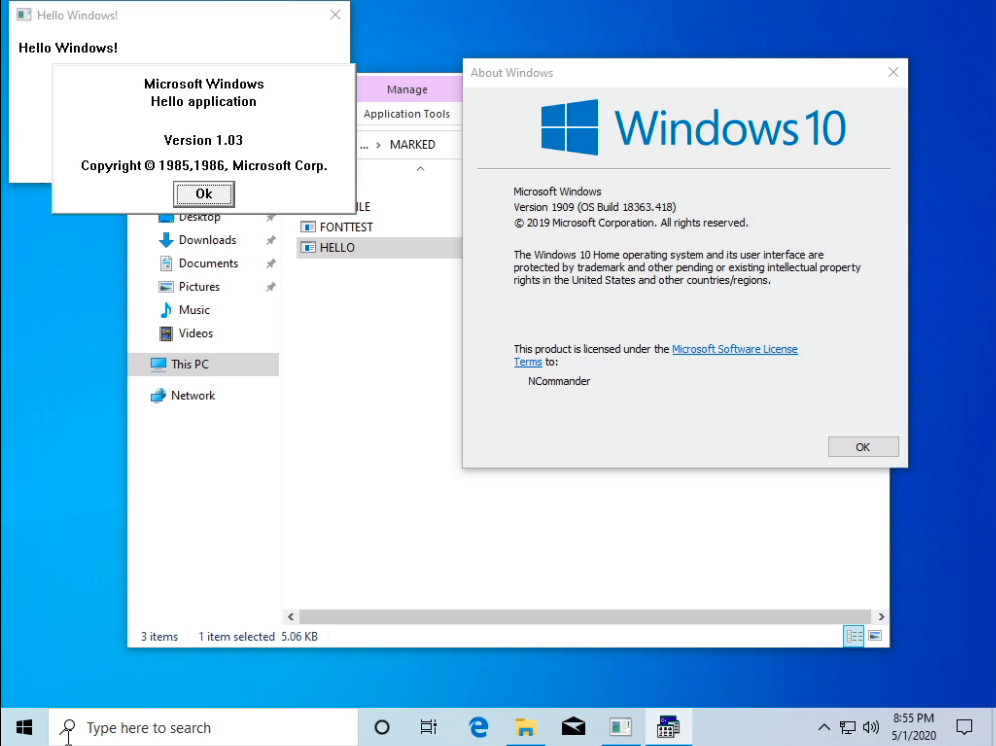
As previously noted, Windows 95 dropped support for 1.x and 2.x binaries. The same however was not true for Windows NT, which modern versions of Windows are based upon. However, running 16-bit applications is complicated by the fact that NTVDM is not available on 64-bit installations. As such, a fresh copy of Windows 10 32-bit was installed.
Some pain was suffered convincing Windows that I didn’t want to use a Microsoft account to sign in. Inserting the same floppy disk as used in the previous test, I double-clicked HELLO and Feature Installer popped up asking to install NTVDM. After letting NTVDM install, a second attempt shows, yes, it is possible to run Windows 1.x applications on Windows 10.
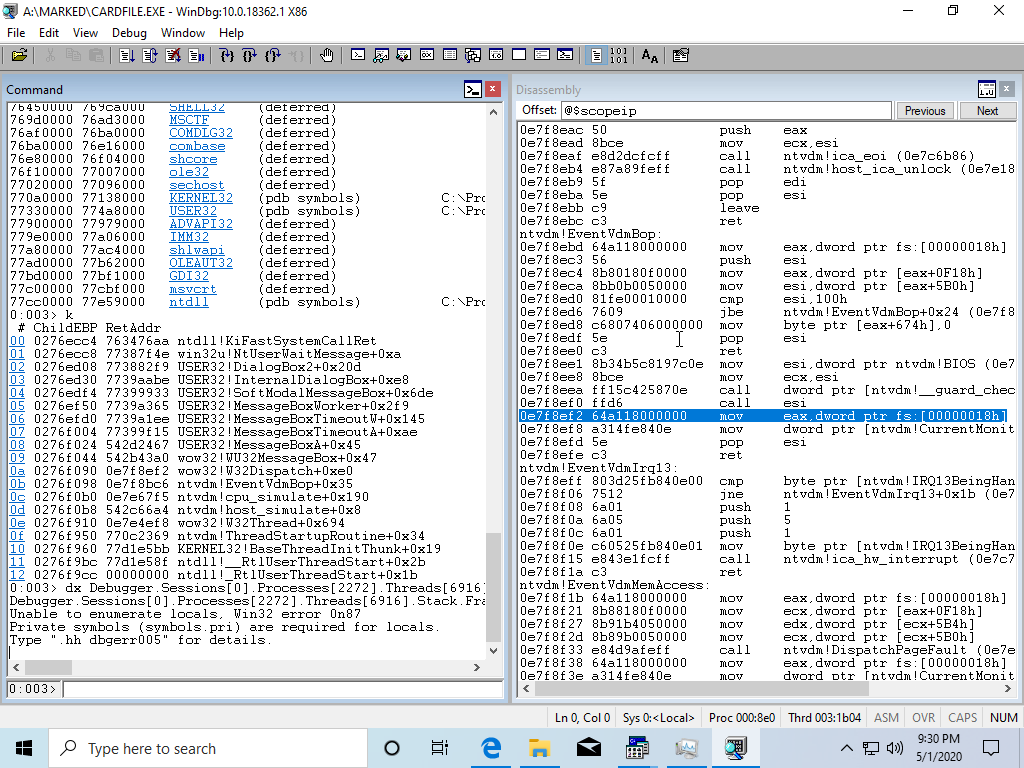
FONTTEST also worked without issue, although the TrueType fonts from Windows 3.1 had disappeared. CARDFILE loaded but immediately died with an initialization error. I did try debugging the issue and found WinDbg at least has partial support for working with these ancient binaries, although the story of why CARDFILE dies will have to wait for another day.
In Closing …
I do hope you enjoyed this look at ancient Windows and HELLO.C. I’m happy to answer questions, and the next topic I’m likely going to cover is a more in-depth look at the differences between Windows 3.1 and Windows for Workgroups combined with demonstrating how networking worked in those versions.
Any feedback on either the article, or the video is welcome to help me improve my content in the future.
Well it’s not really airgapped, but more so many policies, and selective firewalling to make Windows 10 useless.
I was given a ‘new machine’ in some deep data centre, but it’s pretty barren. No Microsoft Office (LOL USE GOOGLE stuff? NO ODBC?!!! WTF!!!!?), and worse, no Linux Subsystem, no ‘Windows Store’ and no Microsoft.Net
Well to add .NET it turns out that, it’s on the installation media. Which I was oddly able to download, using the ‘Windows Media Creation Tool‘, and have the installation tool create an ISO. Then simply mount the ISO as my ‘D’ drive and run:
If you can’t get the store running (it also can fail for various services not running like Storage Service), you can download the Linux Userland directly, after enabling the Linux Subsystem.
Ugh, nothing like having to uncrippled something deliberately crippled to waste your time.
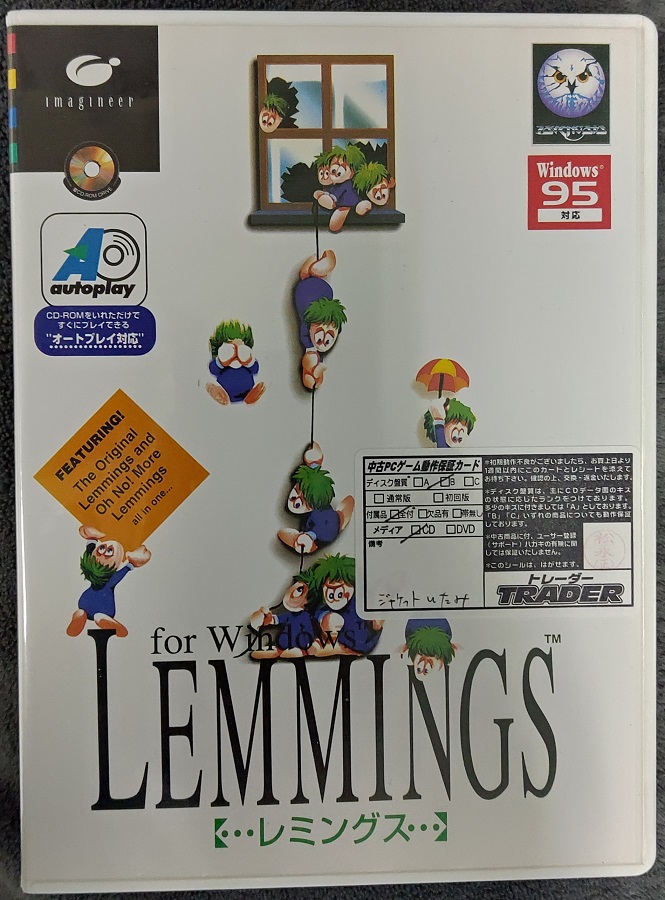
On one of my later trips I picked up this fun title, Lemmings!
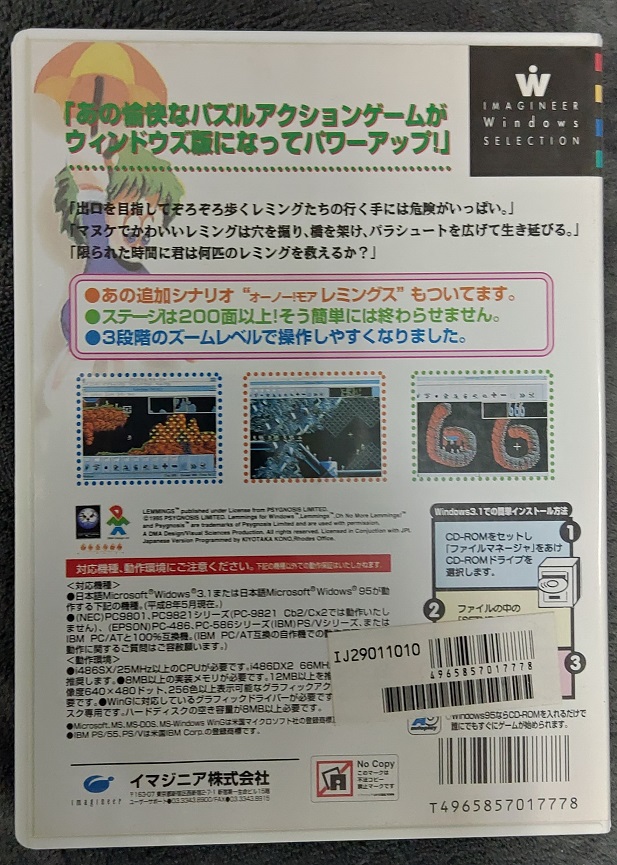
And looking at the back of the box, what fun it contains!
Support PC-98, Epsons, IBM’s, IBM PC/AT.. Probably FM Towns as well
One interesting thing about 1995, is that with the rise of Windows 95, this marked the end of the specialized PC market in Japan. Just as WING/Direct X basically killed off the DIY driver/extender environment on MS-DOS, by being able to abstract the hardware it removed any meaningful difference between an EPSON PC vs a PC-98, FM Towns, or even the lowly IBM AT/386.
This being a Win32 includes both WING & Win32s. A perfect snapshot of an early Win32 commercial game circa 1995, as you needed to cater to that massive Windows 3.1 install base, although so many were rushing to Windows 95. Naturally this also means that the setup program is a Win16 app, once more again to preserve that bridge of the Windows 3.1 & Windows 95 world.
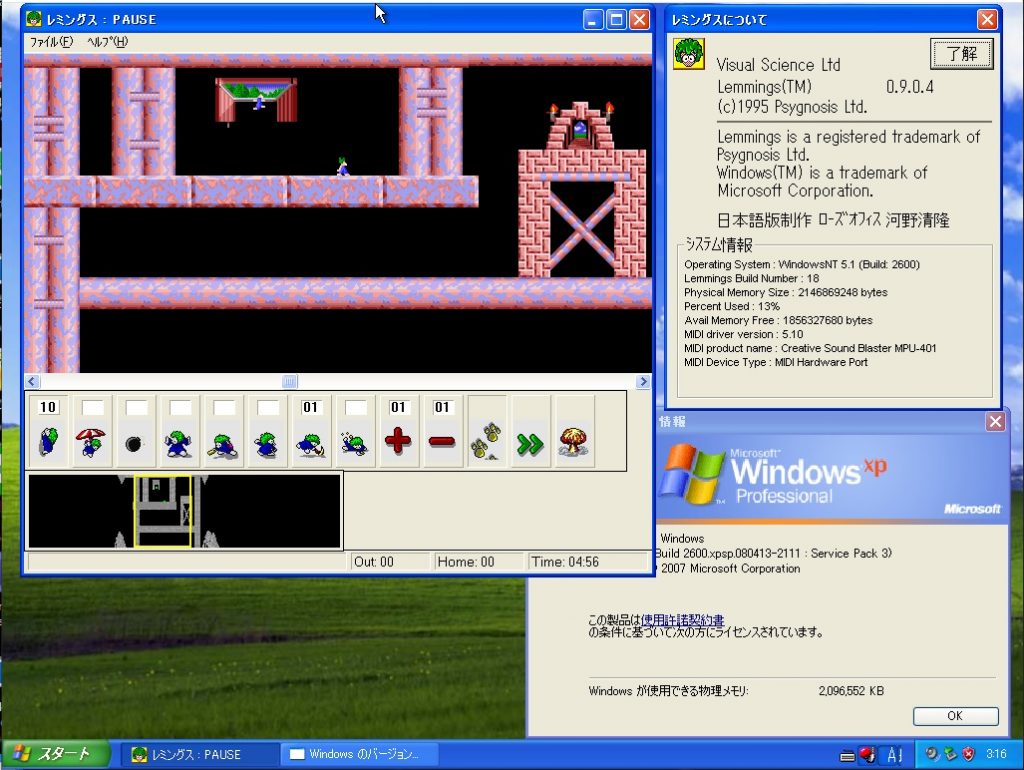
Well the obvious thing to do is just install it on a legacy 32bit OS, and what better than Windows XP?
Lemmings happily running under Windows XP via VMWare.
Now to run it on something like Windows 10, it’s just a matter of copying the WINLEMM.INI into %sysroot%, along with placing a copy of WING32.DLL into the %sysroot%\SysWOW64 directory and you are good to go!
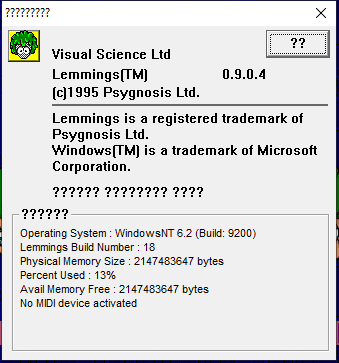
Japanese Lemmings on English Windows 10
Sadly the character encoding in Windows is still really lacking and doesn’t render all that great. However that had me thinking as almost a decade ago I did find a demo of Lemmings for Windows. Could it be possible to just overlay the executables & DLL’s to produce an English commercial version?
Surprisingly the answer is yes. I wasn’t sure what to expect, but it’s as simple as that!
The game is mostly playable, some parts are just coded to run as fast as possible, as no doubt nobody was imagining 1+ Ghz machines. So the intro, warp & suicide are almost instant.
It’s something to keep the kids entertained for a day in recent events. It’s been a LONG CNY.
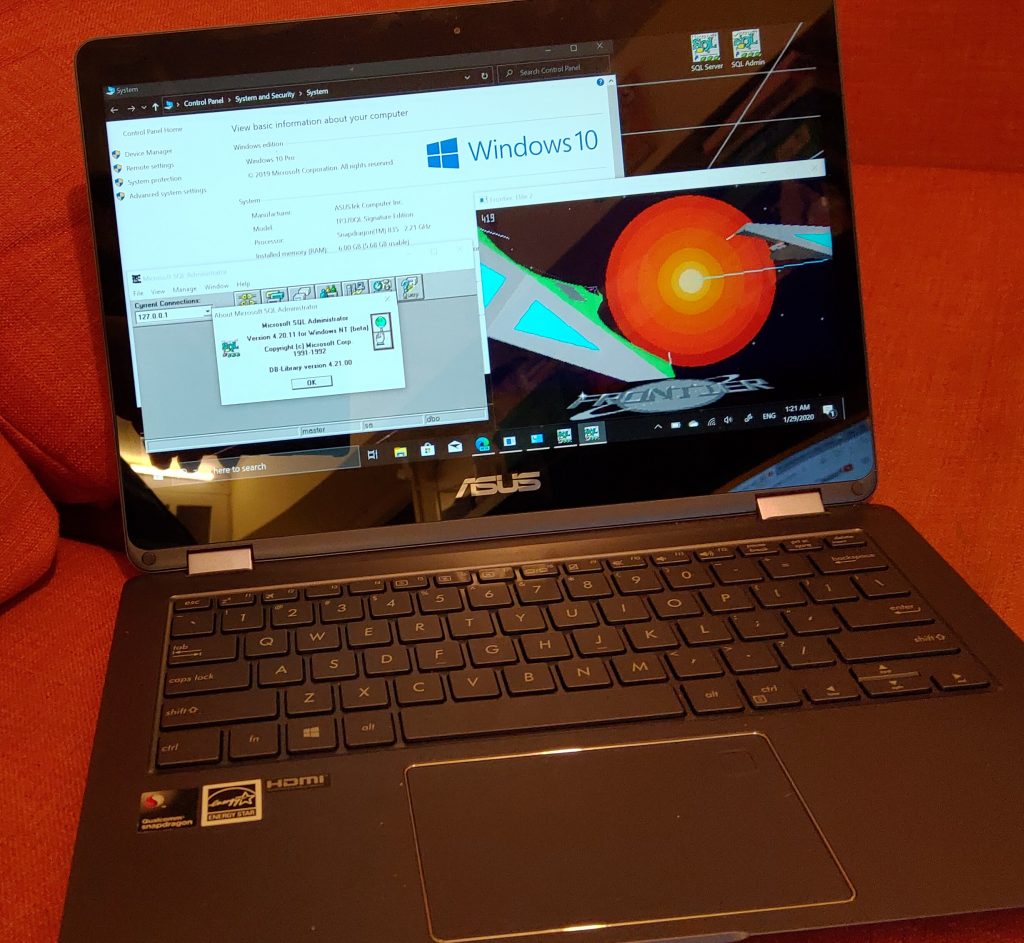
So after the crazed purchase I made a few weeks ago, I returned from Japan, and was able to unbox and use the machine I’d been wanting for a while, a non x86 Windows laptop!
The NovaGo has a Snapdragon 835, and my phone, the ASUS ROG phone has the 845. Yes for this week, my cellphone actually has the stronger processor than my computer. Honestly this is almost an unthinkable situation! Although I haven’t been using my phone as a desktop substitute this week. It’s amazing how MS screwed up 10 on the phones, and Continium.
By default it comes crippled with this ‘S’ mode Windows, which hearkens back to the Windows RT launch, with the difference that it’s a quick trip to the application store to unlock Windows 10 Professional. It’s a free download as it should be, and it doesn’t even require a reboot!
Build quality isn’t so bad, the screen folds all the way back to make the machine into a ‘tablet’ although I don’t like that mode so much, it just feels wrong to wrap a keyboard around a monitor. However if you have rambunctious young kids, it’s great as when someone went running by me flailing their arms around like a while animal, when they struck the laptop the screen could easily fold back 180 degrees. Yay.
My first thing to do after setting up Office and VMWare VDI was to install the Linux subsystem, and Ubuntu. it’s exactly the same as it is on x86_64, which is great. And this let’s me have the best of both worlds, just like x86_64. As much as I dislike stumbling around with that aborted child of Pascal & Fortran (Python) at least I can run it under (mostly) Linux to get something close to like the production environment.
The C/C++ compiler is actually all cross tools. I wanted CLI only stuff because I like torturing myself, and it required a few GB of downloads. The good news is that the latest Windows 10 SDK does support GDI/CLI apps, so no crazy SDK hacking required, unlike back in the Windows RT days. Oddly enough the Taskforce 87 interpreter runs fine, but nothing else does.
I did a horrible job at hacking up SDL 1.2 to at least run (kind of, the audio doesn’t work, and it’s all WinDB*EDIT I got it fixed!!!) I got a few things up and running, including DOSBox and FrontVM. One thing that greatly helps is that i386 binaries ‘just work’. Honestly you wouldn’t even know you are running them when you are. Which made hunting down the ARM64 version of Chromium Edge kind of difficult to find. There really needs to be a more apparent way to tell them apart, if anything for battery efficiency.
Again the audio in my crap SDL build doesn’t work, so DOSBox is silent, and without Direct X, the text mode is tiny. Oh also, there is no OpenGL in this version of Windows dev kit for some reason. Running ssystem is ungodly slow. Also the default optimizations seems to be Os, optimize for space, and on this ASUS I have to say /Ox is way way faster. DooM is quite playable on DOSBox when build with /Ox, unlike /Os.
For me, I spend most of my day to day in Office, and VMWare VDI, connecting to secure networks. So I’m just one step above a terminal. Which I guess is kind of sad, but this machine more than fills that roll for me. The 120GB of storage is tight. This isn’t a development machine persay, nor is it something to download tonnes of data to, it’s a lightweight machine where it’s strength is the built in 4G modem, and when running ARM software the longer battery life. To me the biggest drawback is that the keyboard isn’t backlit. Even though I touch type, I didn’t realize how much I’d grown used to it for casual use.
I guess it’s a hard toss up from this and a PINEBOOK Pro, I think most readers here would prefer the Pinebook, for all it’s openness, although I still like the idea of being able to copy over the Win32s version of Lemmings, and it just running. For me I kind of like this thing, although once I switch back to an x86_64 with more memory, better GPU and disk options, maybe this just feels like some kids toy.
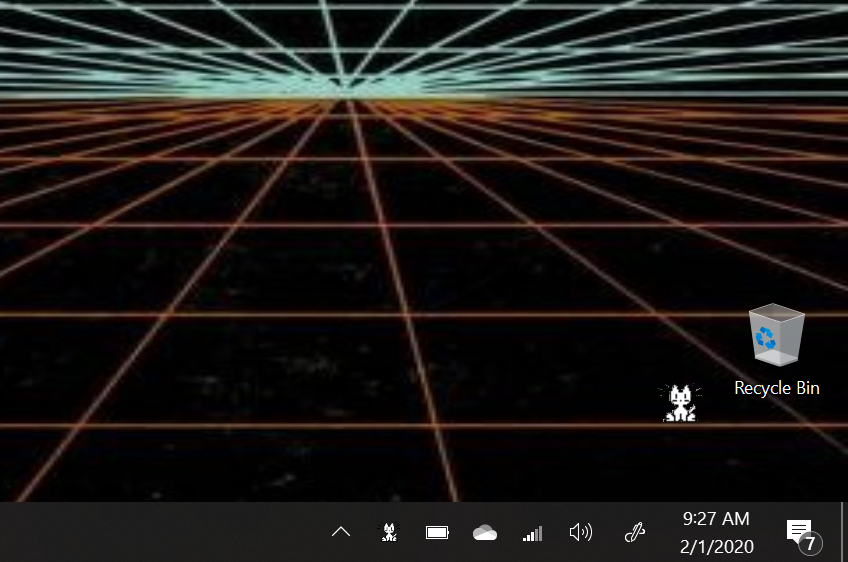
Neko98 ARM!
I don’t know how I didn’t think of this, but I also ported Neko98! Although the STL is having an issue with the ‘control panel’ so Neko is on autopilot.
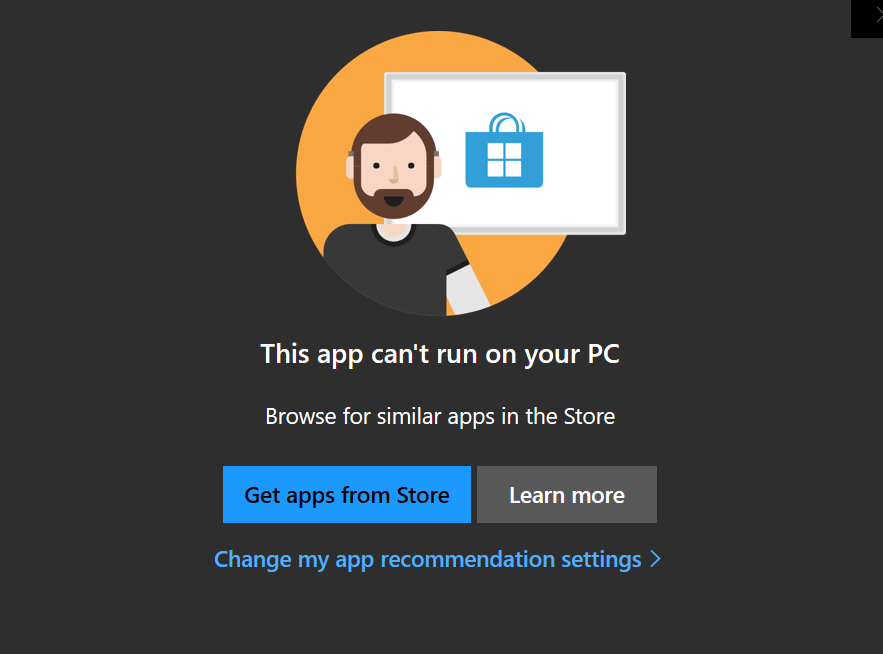
This app can’t run on your PC
As for the emulation, it is 32bit only, so expect to see this stupid message quite a bit. The neckbeard is a nice touch though.
Also built into the thing is a cell modem. I guess it’s really not a surprise as the 835 really is a cellphone SOC. I have a ‘wifi egg’ as they are called here, a WiFi hotspot with unlimited internet from CLS, which is on the old 4G network. I popped the SIM in, and it picked up the APN settings on it’s own and I was connected in under a minute. I have to say that it’s about time that SIM cards have this stuff programmed into them for a plug & play experience. And thankfully the ASUS is unlocked, although from what I understand these were sold in the USA bundled with some cell service plans.
For anyone with one of these rare machines that cares to play along you can find my built stuff on my ‘vpsland’ archive:
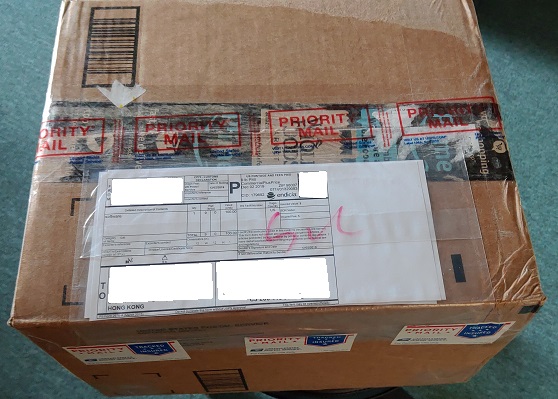
Iv’e been in Japan the last 10 days, but upon my return to Hong Kong this little 9kg box was eagerly awaiting me!
I know that ‘unboxing’ donation videos are quite popular, but I thought I’d do the blog equivalent. I don’t want to ‘out’ the sender, although I did email them back a big THANKS, although I didn’t get a reply. Maybe it’s an email thing but I wanted to tell them THANKS again!
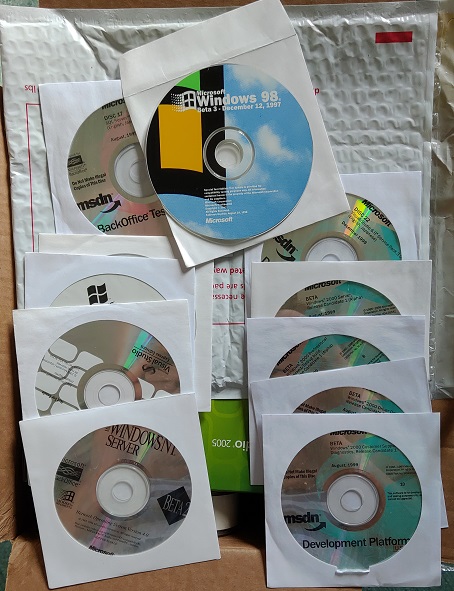
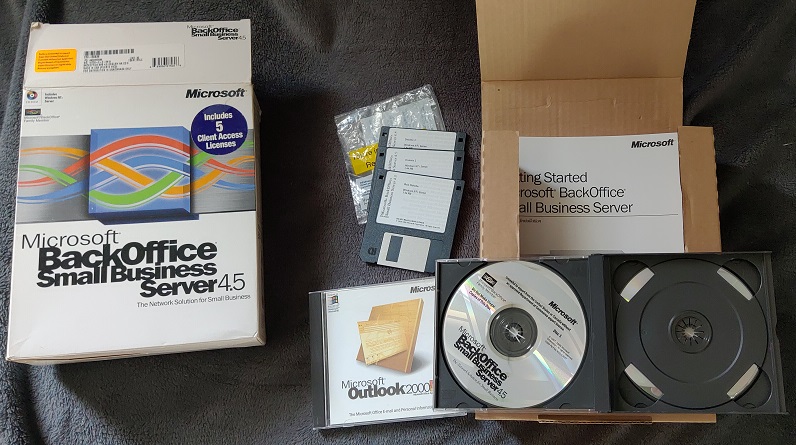
To start is a bunch of loose CD’s including old SDK’s, and the infamous Windows 2000 RC1 set including Dec Alpha builds of workstation & server. Also in there is Beta 3 of Windows 98! Cool!
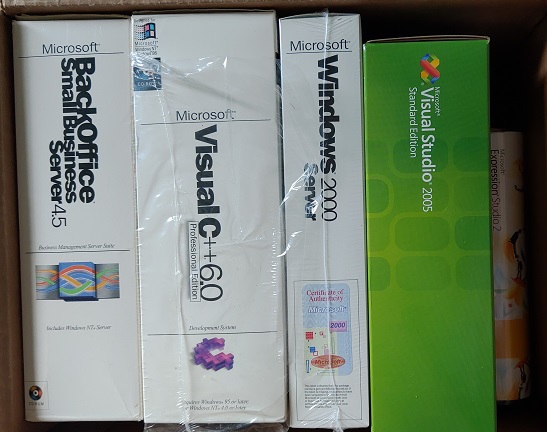
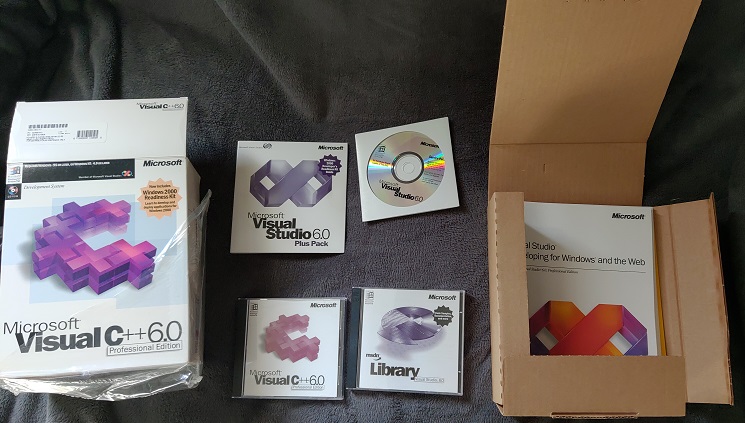
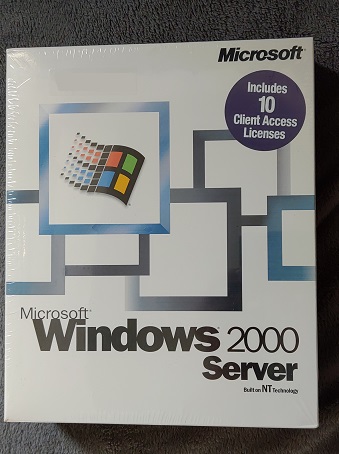
In the box was also Back Office 45, Visual C++ 6.0, a sealed copy of Windows 2000 Server, Visual Studio 2005 Standard and Expression Studio 2.
I’ve always loved this, it’s NT 4.0 and all the good bits of 1997, like Exchange 5.5 & IIS 4.0! Also in there is a copy of Outlook 2000, so this is a much later build/packaging of Back Office 4.5 . I’ve always wondered how many if any Back Office purchasers ever used SNA Server. I’ve seen it something exclusively used in real enterprises that have site licenses anyways.
Visual C 6.0 is the last x86 compiler that was ‘pure’ before the .NET invasion. Although you can with a bit of work get 2003 and onward to build for strict Win32, but who wants to work? This is getting increasingly hard to find, and getting far more expensive. But it’s great to have this in retail in the box again! (I used to have this and Visual Studio 97/6.0).
It almost feels wrong to break the seal on this, although I’ll probably do an active directory deployment eventually now that I have machines running in the USA, Hong Kong, and Japan.
I’m super thankful for all of this, and if anyone else wants to send me their ‘old / obsolete junk’ drop me a line!
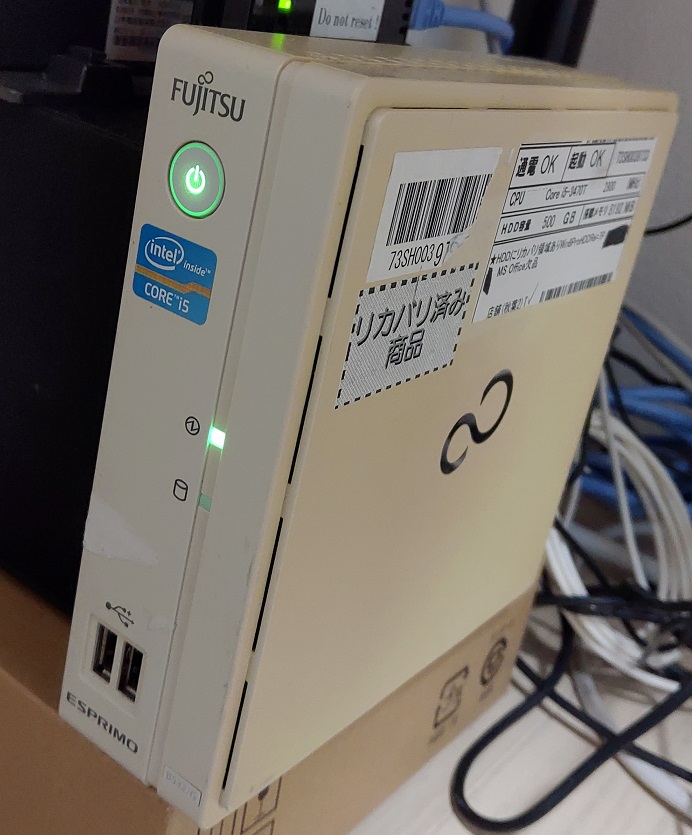
So while I’m in Japan, I bought this tiny and borderline useless Fujitsu Esprimo B532, powered by an i5, and not very much else. I upped it to 8GB of RAM, and put in a SSD and upgraded to Windows 10 to make it slightly tolerable.
i5-3470T
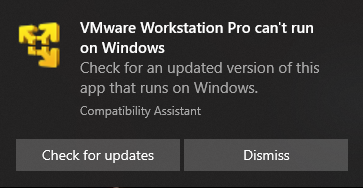
The i5-3470T is ancient! And so old that newer versions of VMware and Hyper-V won’t run on it. The old solution was simply to use an older version of VMware. In my case the highest version that’ll run is 12.5.9, however when trying to launch it I got this fun message:
VMware Workstation Pro can’t run on Windows!
Well wasn’t that a big bust.
I guess there is something hidden somewhere, but I just renamed the executable, and set it to Windows 8.0 compatibility mode, and wow it works!
Windows NT 3.1 October 1991 pre-release
And there we go! Now the latest version of NT can run the first public pre-release of Windows NT. YAY.
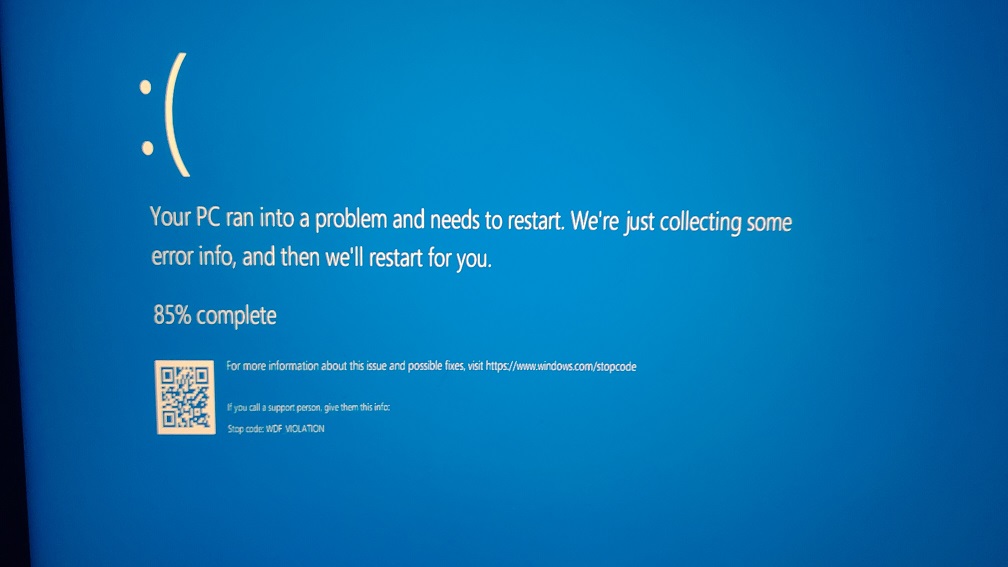
So I bit the bullet and updated to Windows 10 build 1903. And then the fun started on my glorious 2006 MacPro. It finished the update, and on reboot I get the login screen, and then almost immediately a blue screen.
Naturally the QR code is useless as it doesn’t specify any stop codes, and the minidump… Well that requires gigabytes and gigabytes of crap to download to get a tool to read it. (I still haven’t finished that rabbit hole, like COME ON! why isn’t it included?!).
However after hitting F8 a million times, I found that safe mode & networking work just great. Searching online was basically useless as there was no specific stop code to go with this WDF_VIOLATION. Further looking around I did notice one thing, and that it was all Macintosh machines that crash out to this WDF_VIOLATION error. It must be something specific to the Apple hardware running Windows 10!?
Armed with this (dis)information, I went ahead and disabled all the Apple specific drivers & startup items.
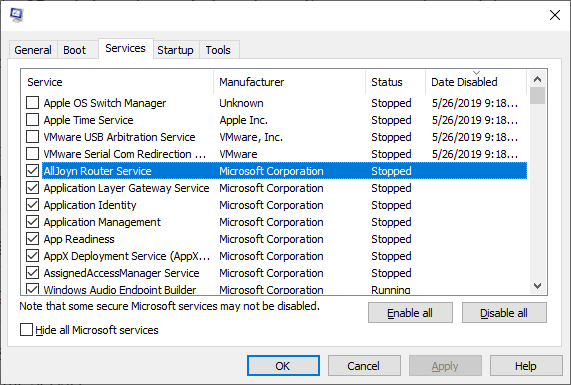
From msconfig.exe:
From MSCONFIG.EXE I disabled the following services:
Apple OS Switch Manager
Apple Time Service
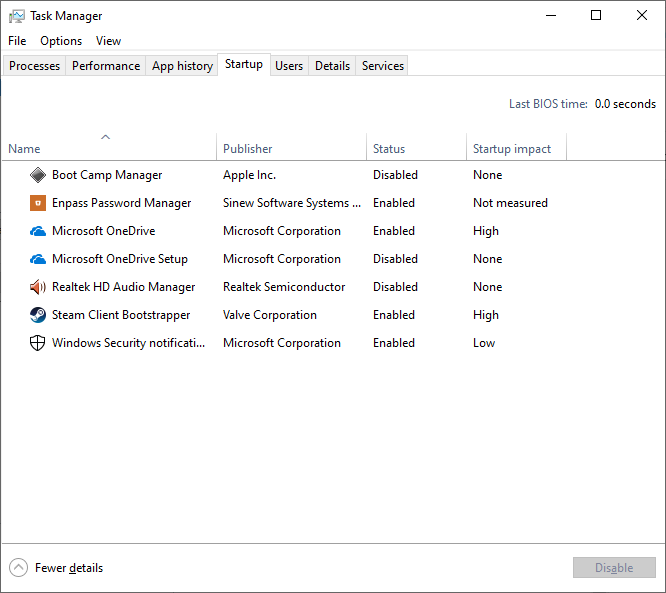
And in the task manager, I disabled the following startup items:
Realtek HD Audio Manager
Boot Camp Manager
I had the other VMWare serial & USB hook previously disabled, as I just don’t want them at all on my setup. The big upshot is that after rebooting out of safe mode, I’m now up and running on Windows build 1903.
Considering the BootCamp stuff was so woefully out of date, don’t expect Apple to fix this anytime soon. And since I’m on a MacPro 2006, I certainly won’t be getting any updates from Apple. But at least I can struggle to keep this thing up to date otherwise.
Now I can enjoy that ‘new command prompt’ everyone keeps telling me about.
***UPDATE***
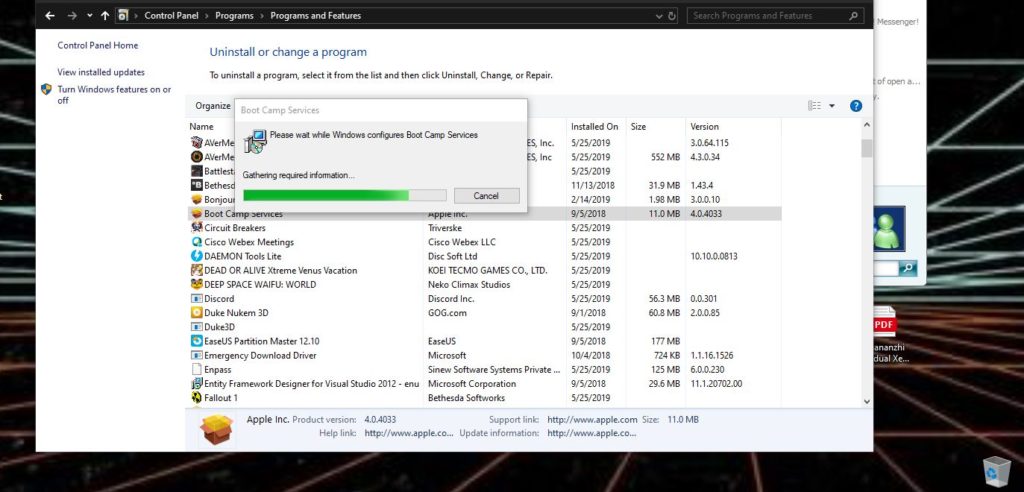
I went through this on another Bootcamp Mac, and what I had to do was uninstall the “Boot Camp Services”. It’s startup component triggers the bluescreen as it’s doing some nonsensical inventory, banging around on the drivers in a not friendly way. I had version 4.0.4033 of the Boot Camp Services installed.
Uninstall Boot Camp Services version 4.0.4033
Removing this kept all the old drivers, which continue to work just fine.
Manage Consent
To provide the best experiences, we use technologies like cookies to store and/or access device information. Consenting to these technologies will allow us to process data such as browsing behavior or unique IDs on this site. Not consenting or withdrawing consent, may adversely affect certain features and functions.
Functional
Always active
The technical storage or access is strictly necessary for the legitimate purpose of enabling the use of a specific service explicitly requested by the subscriber or user, or for the sole purpose of carrying out the transmission of a communication over an electronic communications network.
Preferences
The technical storage or access is necessary for the legitimate purpose of storing preferences that are not requested by the subscriber or user.
Statistics
The technical storage or access that is used exclusively for statistical purposes.The technical storage or access that is used exclusively for anonymous statistical purposes. Without a subpoena, voluntary compliance on the part of your Internet Service Provider, or additional records from a third party, information stored or retrieved for this purpose alone cannot usually be used to identify you.
Marketing
The technical storage or access is required to create user profiles to send advertising, or to track the user on a website or across several websites for similar marketing purposes.