HFS Utillities

I got a question the other day about how to easily move files in and out of Cockatrice III, especially since as part of my ‘try to make it stable by cutting features out’ approach I removed the ability to mount foreign directories under Basilisk II.

For my personal use, I have an AppleTalk LAN, and I just use a Windows NT 4.0 server with AppleTalk, as a file server/proxy and that works pretty good for me, so much so that I didn’t even think of any other way of doing this.

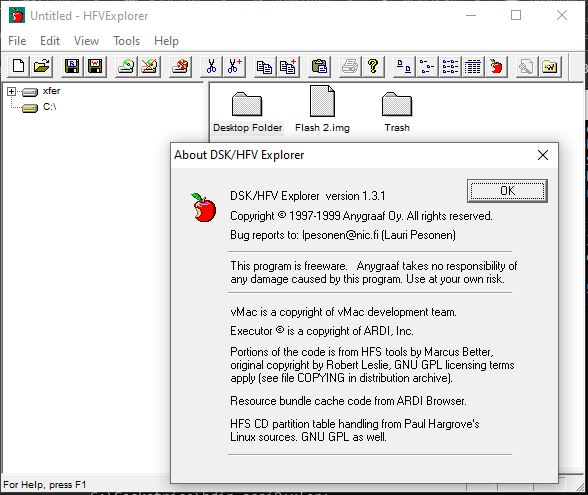
HFV Explorer 1.3.1

One of the quickest and easiest is HFV Explorer, however the ‘catch’ being it doesn’t read SCSI disk images (aka things with partition maps). But for the ‘massive floppy’ images it’s more than fine.

HFSUtils is another approach, it’s like the old ‘MS-DOS utils’ of ancient Unix days, allowing you to ‘mount’ a disk image, and copy files in and out. I thought I’d give this a spin to copy Marathon into my virtual OS 8.1 image. It’s pretty straight forward first ‘mount’ the disk image:

C:\Cockatrice>hmount.exe scsi0.dsk
C:\Cockatrice/scsi0.dsk: contains 1 HFS partition
Volume name is "SCSI0"
Volume was created on Sat May 19 14:04:04 2018
Volume was last modified on Mon Nov 16 14:59:02 2020
Volume has 1056545280 bytes free

Now make a directory:

C:\Cockatrice>hmkdir scsi0:xfer:

And then copy in the file:

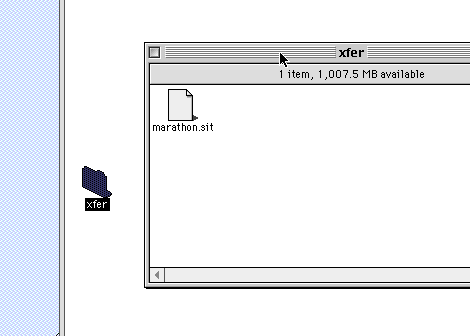
C:\Cockatrice>hcopy marathon.sit scsi0:xfer:

C:\Cockatrice>hdir scsi0:xfer:
f  ????/UNIX         0   5627676 Nov 16 15:34 scsi0:xfer:

C:\Cockatrice>

And just like that it’s there!

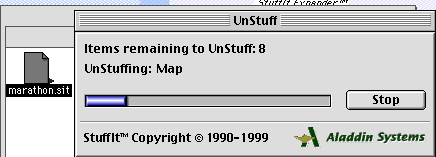
And yes it unstuffs!

And just like that we have downloaded a game from the garden, copied it into a virtual SCSI disk, and gotten it to run, from the painful CLI.

Wasn’t that great!?

Fun with Caldera WABI

(This is a guest post by Antoni Sawicki / Tenox)

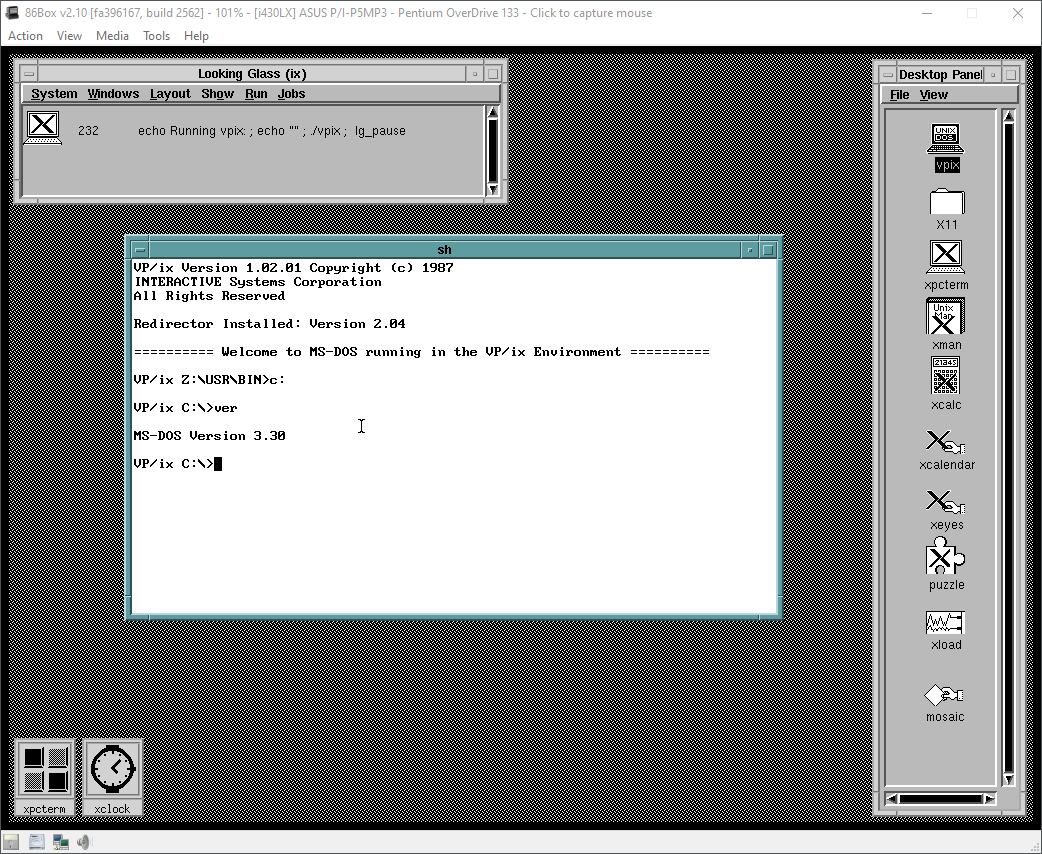
In the previous post about SCO Merge I briefly mentioned WABI, which is a Windows ABI emulator for Unix. Initially released by Sun Microsystems, it’s believed that it came with acquisition of Interactive Systems Corp (ISC) and Interactive UNIX. It was available for SPARC, x86 and PowerPC Solaris as well as IBM AIX. Around 1997 it was released for x86 Linux by Caldera. This article will focus on Caldera’s version specifically.

Although entirely possible to install WABI on another RPM based distribution such as Red Hat, I’m a purist and wanted to try it on Caldera Open Linux. The install is pretty straightforward you mount the iso file and run install script. In a next step you need to install an update to version 2.2D. This is done by replacing /opt/wabi/bin/wabiprog with extracted version of this file. Thanks to readers of this blog post for sharing these.

When launched for the first time, you will be prompted to provide copy of Windows 3.1. This the main difference with WINE which specifically does not require copy of windows to run apps. I have noticed that WABI is rather picky about lower vs uppercase when installing software. There is an utility called wabimakelower to help there. You can also add an icon to one of Caldera Linux / Looking Glass program groups.

Once you run it, it’s Windows 3.1 as usual:

WABI was designed for running productivity apps such as Office:

You can even run Visual Studio:

Curiously WABI is not a MS-DOS emulator. In order to run DOS apps you need to install such and configure it in WABI Control Panel:

For the lazy, a readily preinstalled version is available as OVA and 86box. Root password is “caldera”.

There also is a User Guide in PDF.

Have Fun with Virtualization!

Fun with OpenServer and Merge

(This is a guest post by Antoni Sawicki aka Tenox)

A friend and I were recently discussing differences between WABI, WINE, WISE, Merge, VP/IX, FX!32 and SoftWindows. This article covers Merge specifically which is a DOS/Windows emulator initially built for AT&T 6300 Plus computer. Later ported to UnixWare, OpenServer and eventually served as basis for Win4Lin. Later versions of Merge were build using Microsoft WISE SDK which allowed to run apps without full copy of Windows kind of like WINE. I will be running it on OpenServer 5 using VirtualBox. However one could get it going on UnixWre and under any other hypervisor same as easy.

For Vbox/OSR5, when creating a VM, make it other/other type, give 256MB to 1GB RAM and 4GB HDD. Once VM is created go to Settings and change network adapter to Intel PRO/1000 MT Desktop and Attachment to Bridge mode. For some reason I could not get DHCP working out of the box. Also under Display change graphics controller to VM SVGA.

One can get the last “real” OSR5 from this link. There also are never Xuinos versions and specifically targeted for VMware, for example this one.

Boot and go through the prompts as normal. At some point you will be stopped by a lovely prompt for license number and code:

Enter SCO043568 / pnhohvqm to get past this.

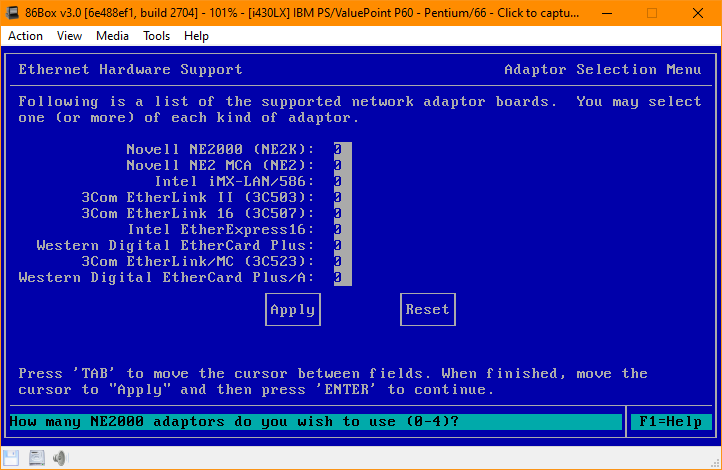
Watch out for this screen:

Don’t worry about not being able to get the NIC detected at this point. Leave it as Deferred for now. You need to install MP5 update and a driver update for this to work. This will be covered later.

Select some decent resolution for VESA SVGA:

Also select PS/2 Mouse:

The rest should just fly through on autopilot. Once system boots login as root with the password you set.

First thing you will need to install MP5 update. Download the ISO file from this link and attach to your hypervisor. Open the terminal and type “custom” to install software. Or double click that fancy “Software Manager” icon on the desktop. Under Software click Install New… and select this host. Select your attached cdrom.

You will need to install Maintenance Pack 5 and GFX / NIC Drivers:

Make sure to hit install twice one for each of these items as they cannot be selected together. Once complete you will need to reboot of course.

After reboot you should be able to add and configure the NIC. You will need to either run “scoadmin” or go to System Administration – Networks – Network Configuration Manager. Add a new LAN adapter. The Intel PRO/1000 should be detected automatically. I could never get DHCP to work and just used static IP config there. Make sure to ok re-link the kernel and reboot.

Installation of merge is a little bit more complicated. The latest version can be downloaded from here. If you are installing under UnixWare then this is your folder. Transfer it to your OSR5 VM via browser, ftp, samba, iso file or however you like. Open a terminal and go to the directory with the cpio file file and run:

cpio -icv -I osr5_merge5323a_vol.cpio

This will produce a bunch of VOL* files. These are installed with “custom” as well. However instead of cdrom you select Media Images and point to the directory with extracted VOL files:

There should be an option to install Merge.

You will be also prompted by a lovely license code prompt. Enter SCO837369 / bhtepkxy to get through. You will need to reboot again.

After login there will be a new folder on the desktop with Merge tools:

Root is not allowed to run it, but you can pre-install Windows as root. To do so go to Merge Setup and open System Wide Administration. You will find a button to Load Windows CD. You can just mount any bootable Windows 9x cdrom to your hypervisor and Merge will copy it for you.

There will be a prompt for network configuration. I opted for WinSock option which is user mode emulation, it’s enough to get a web browser going. If you need to use SMB/CIFS, open network shares, etc you will need the bridged mode with extra IP address for the guest.

Finally you will need to create and login as a different user to get this thing running.

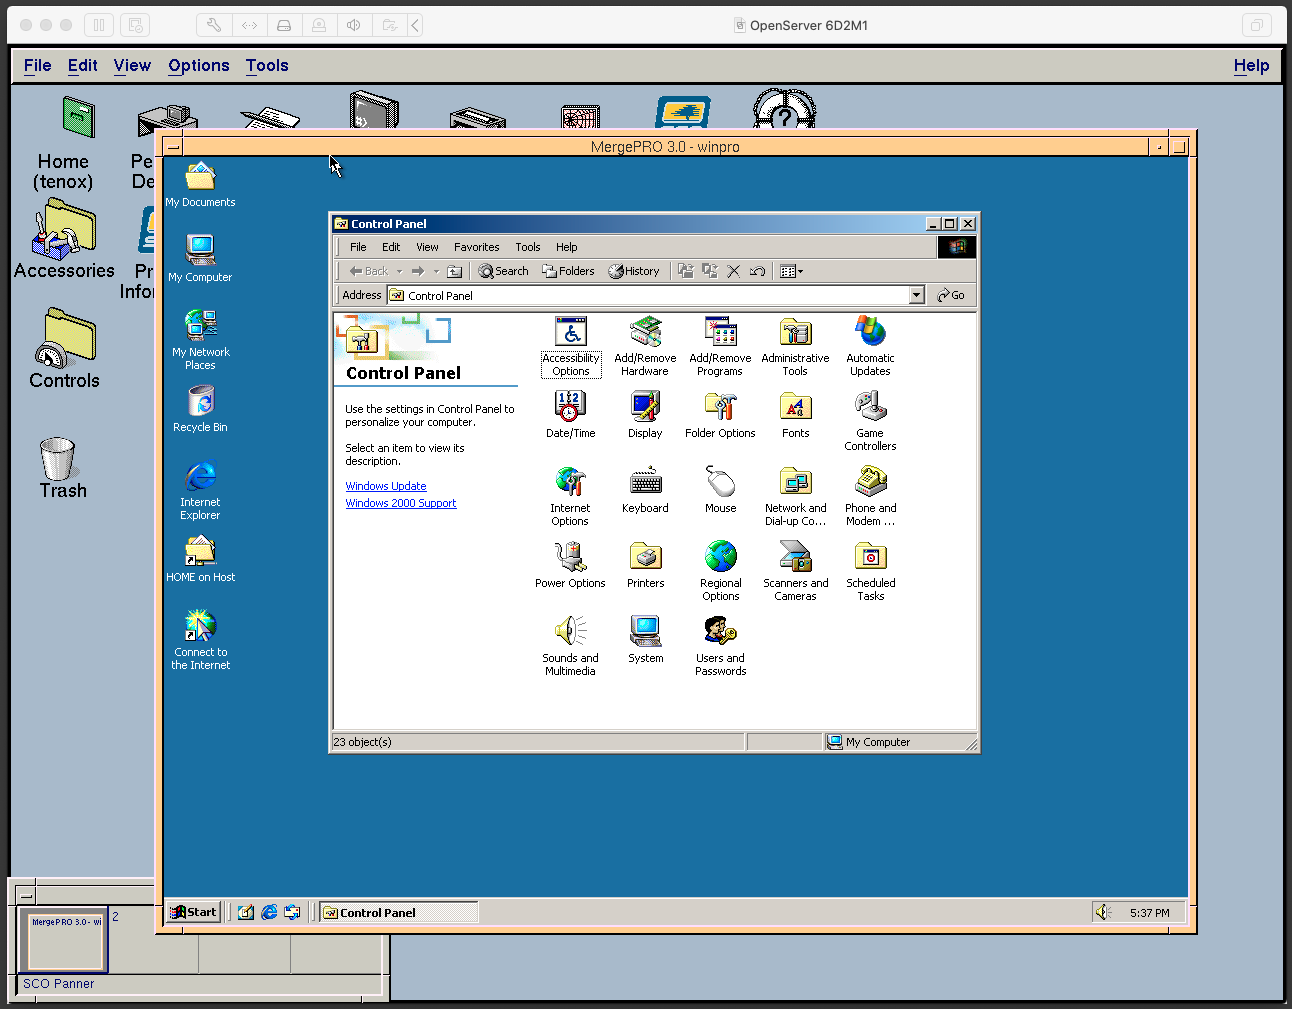
This is the final product, with 4 level inception:

For the lazy of course provided is a fully installed OVA, one with VBox NIC and one with VMware NIC. Passwords are root/root and tenox/tenox. Note that this image has a static IP address of 192.168.1.111.

Have fun with virtualization!

Update: Article about OpenServer 6 and MergePro

Cockatrice III 0.5a update

Here’s to US!

Well this is a ‘small’ update, but with a big change, the audio is for the most part working great now thanks to this fix from rakslice. Namely changing SDL to MSB:

desired.format = AUDIO_S16MSB;

And another MinGW tweak, and yeah it’s GREAT!

Even stuff like RealAudio work now! I’ll add some self hosted video later as it’d just get struck from anything public.

Also since the RealAudio player is timebombed for installing, I added some lazy offset to remove however many billions of ticks from the clock letting you jump in some random point in the past when it won’t care.

I guess the final if any justification for a bump would be rebuilding with GCC 8.1.0 on MinGW. I somehow butchered the slirp.h to make it too MinGW’ish so it won’t clean build on Linux or OS X, but I have re-butchered a private branch and it works.. I just need to merge and clean but I’m not in the mood at the moment.

I could be crazy but it “feels” faster.

At any rate, I found that System 7 is more agreeable to running Return to Zork, just use some toast image mounter from within MacOS, and it’ll run!

Also there is some ULONGLONG weirdness going on, so I had to backout Peter’s changes for larger disks. No doubt some standard type thing change in GCC 8.

You can download binaries/source from Sourceforge.

Download Cockatrice III

Virtualization Challenge IV – QNX 1.2

(This is a guest post by Antoni Sawicki aka Tenox)

This is a Virtualization Challenge. A competition to virtualize an OS inside emulator/hypervisor. (Previously 1 / 2 / 3)

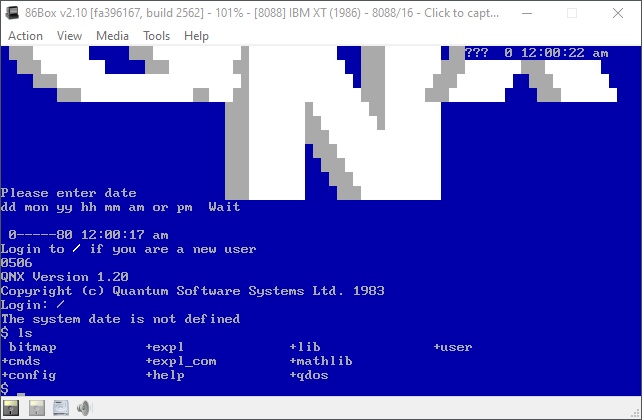
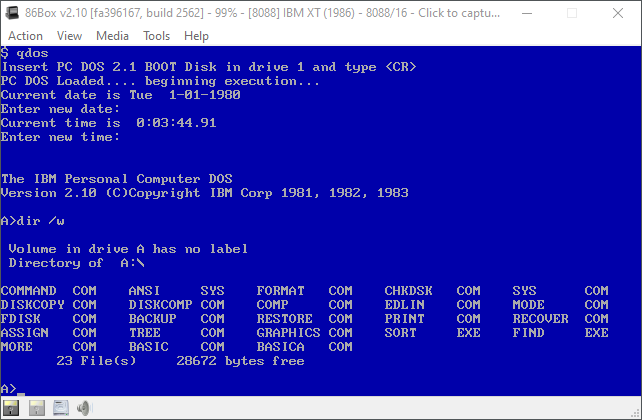
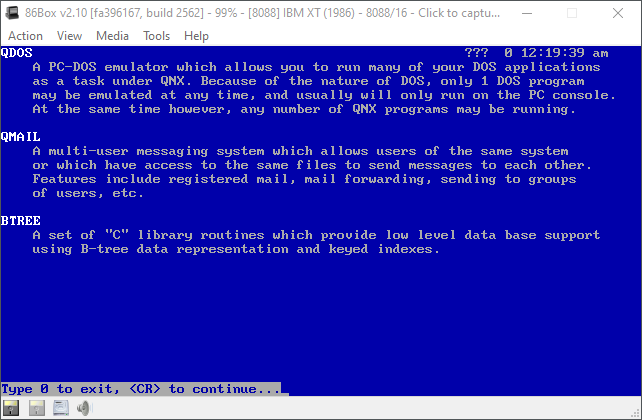
This time the object of the competition is QNX version 1.2. A demo disk is covered here. This is the set of floppy disks:

As you can see the boot disk is copy-protected. As such I have imaged these disks using both KryoFlux and SuperCard Pro. The magnetic flux stream images are available here. For verification I have converted the raw stream of the demo disk in to a sector image using HFE tool. The converted disk boots and works correctly in an emulator. The demo disk can also help with analyzing the boot process since it’s known to work.

The contest is to virtualize the OS, install it and provide a fully working hard disk image with the OS installed. Any emulator of your choice or method is acceptable as long as anyone can download and run it. The prize is $100 via PayPal and of course the fame! ๐Ÿ™‚ The winner will be whoever comments the article first with a verifiable working solution.

A bonus $50 prize will be awarded if you can patch the boot floppy disk so that it can be installed as if the copy protection was never there.

Good luck!!!

UPDATE: The competition has ben won: QNX 1.2 Virtualized

UPDATE 2 : QNX 1.2 challenge Act II – HDD Boot

UPDATE 3: Reverse-engineering QNX 1.2 to boot from HDD

QNX 1.1 Demo Disk

(This is a guest post by Antoni Sawicki aka Tenox)

Fresh from the oven, or rather Kryoflux dump – a QNX version 1.1 Demo Disk:

QNX 1.1 Demo Disk

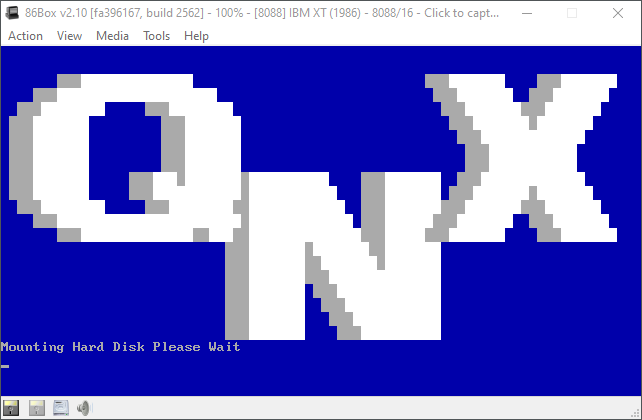
I managed to boot it on 86Box:

QNX 1.1 booted on 86Box Emulator

For the readers with more curiosity and time at their hands please could you try it on different emulators and comment what works and what doesn’t.

For the less curious this how the demo actually looks like once you log in as demo user:

QNX 1.1 Demo Menu

As the authors demand to make as many copies of this disk as possible here it is. Please download and spread!

I also managed to dump the rest of QNX 1.2 including boot disk, utils and even c compiler. Unfortunately the boot disk is copy protected:

I have raw stream dump made with Kryoflux as well as regular disk images. If you are interested in circumventing checking the copy protection so the system could be run in an emulator let me know in a comment. Perhaps time for another Virtualization Challenge?

Previously:

Virtualizing QNX 2

QNX Windows รขโ‚ฌโ€œ First Look

QNX 2.21 Arrived Today

Minecraft on the loongson-3A4000 / Lemote A1901

It runs!

This was a bit more work than I had anticipated. However flygoat had done much of the legwork for me. The first thing to get is flygoat’s mc-loongson.zip. I made a local download as I suspect many will not have QQ or WeChat (Or don’t want to admit to the government that you are downloading this…).

I’m not sure if it’s a MIPS thing or a UOS thing, but it had Java 11.0.4 in by default, which is CRAZY slow

$ /usr/lib/jvm/java-1.11.0-openjdk-mips64el/bin/java -version
openjdk version "11.0.4" 2019-07-16
OpenJDK Runtime Environment (build 11.0.4+11-post-Debian-1deb10u1)
OpenJDK 64-Bit Zero VM (build 11.0.4+11-post-Debian-1deb10u1, interpreted mode)

I installed version 8, but they are ‘in parallel’ in different directories… I guess it’s the .net hell drift all over again. Although to be fair I’ve only dealt with vendor installed java on Linux where it’s all fixed to single versions.

/usr/lib/jvm/java-1.11.0-openjdk-mips64el/bin/java --module-path /usr/share/openjfx/lib --add-modules=javafx.controls,javafx.fxml,javafx.base,javafx.media,javafx.web,javafx.swing -jar HMCL-3.2.139.jar

One annoying thing is that it cannot find JavaFX over and over despite it being installed, so I had to manually add the ‘module-path’. This is the syntax for version 11, I’m not all that sure on the version 8 syntax.

$ /usr/lib/jvm/java-8-openjdk-mips64el/bin/java -version
openjdk version "1.8.0"
OpenJDK Runtime Environment (Loongson 8.1.3-mips64r2-uos) (build 1.8.0-1.8.0.212-2deepin-b00)
OpenJDK 64-Bit Server VM (build 25.71-b00, mixed mode)

I changed the /etc/alternatives/java to point to version 8, which although causes the launcher to crash launching the actual exe, it’s trivial enough to change it to version 8. Although the command is… unwieldy but save it to a shell script.

I’m sure it won’t paste well, but here we go.. and it’s in my homedir sooo here we go!

/usr/lib/jvm/java-8-openjdk-mips64el/bin/java “-Dminecraft.client.jar=.minecraft/versions/1.15.2/1.15.2.jar” “-Duser.home=null” -XX:+UnlockExperimentalVMOptions -XX:+UseG1GC “-XX:G1NewSizePercent=20” “-XX:G1ReservePercent=20” “-XX:MaxGCPauseMillis=50” “-XX:G1HeapRegionSize=16M” -XX:-UseAdaptiveSizePolicy -XX:-OmitStackTraceInFastThrow -Xmn128m -Xmx7936m “-Dfml.ignoreInvalidMinecraftCertificates=true” “-Dfml.ignorePatchDiscrepancies=true” “-Djava.library.path=/home/neozeed/mc-loongson/.minecraft/versions/1.15.2/1.15.2-natives” “-Dminecraft.launcher.brand=HMCL” “-Dminecraft.launcher.version=3.2.139” -cp /home/neozeed/mc-loongson/.minecraft/libraries/com/mojang/patchy/1.1/patchy-1.1.jar:/home/neozeed/mc-loongson/.minecraft/libraries/oshi-project/oshi-core/1.1/oshi-core-1.1.jar:/home/neozeed/mc-loongson/.minecraft/libraries/net/java/dev/jna/jna/4.4.0/jna-4.4.0.jar:/home/neozeed/mc-loongson/.minecraft/libraries/net/java/dev/jna/platform/3.4.0/platform-3.4.0.jar:/home/neozeed/mc-loongson/.minecraft/libraries/com/ibm/icu/icu4j/66.1/icu4j-66.1.jar:/home/neozeed/mc-loongson/.minecraft/libraries/com/mojang/javabridge/1.0.22/javabridge-1.0.22.jar:/home/neozeed/mc-loongson/.minecraft/libraries/net/sf/jopt-simple/jopt-simple/5.0.3/jopt-simple-5.0.3.jar:/home/neozeed/mc-loongson/.minecraft/libraries/io/netty/netty-all/4.1.25.Final/netty-all-4.1.25.Final.jar:/home/neozeed/mc-loongson/.minecraft/libraries/com/google/guava/guava/21.0/guava-21.0.jar:/home/neozeed/mc-loongson/.minecraft/libraries/org/apache/commons/commons-lang3/3.5/commons-lang3-3.5.jar:/home/neozeed/mc-loongson/.minecraft/libraries/commons-io/commons-io/2.5/commons-io-2.5.jar:/home/neozeed/mc-loongson/.minecraft/libraries/commons-codec/commons-codec/1.10/commons-codec-1.10.jar:/home/neozeed/mc-loongson/.minecraft/libraries/net/java/jinput/jinput/2.0.5/jinput-2.0.5.jar:/home/neozeed/mc-loongson/.minecraft/libraries/net/java/jutils/jutils/1.0.0/jutils-1.0.0.jar:/home/neozeed/mc-loongson/.minecraft/libraries/com/mojang/brigadier/1.0.17/brigadier-1.0.17.jar:/home/neozeed/mc-loongson/.minecraft/libraries/com/mojang/datafixerupper/4.0.26/datafixerupper-4.0.26.jar:/home/neozeed/mc-loongson/.minecraft/libraries/com/google/code/gson/gson/2.8.0/gson-2.8.0.jar:/home/neozeed/mc-loongson/.minecraft/libraries/com/mojang/authlib/1.6.25/authlib-1.6.25.jar:/home/neozeed/mc-loongson/.minecraft/libraries/org/apache/commons/commons-compress/1.8.1/commons-compress-1.8.1.jar:/home/neozeed/mc-loongson/.minecraft/libraries/org/apache/httpcomponents/httpclient/4.3.3/httpclient-4.3.3.jar:/home/neozeed/mc-loongson/.minecraft/libraries/commons-logging/commons-logging/1.1.3/commons-logging-1.1.3.jar:/home/neozeed/mc-loongson/.minecraft/libraries/org/apache/httpcomponents/httpcore/4.3.2/httpcore-4.3.2.jar:/home/neozeed/mc-loongson/.minecraft/libraries/it/unimi/dsi/fastutil/8.2.1/fastutil-8.2.1.jar:/home/neozeed/mc-loongson/.minecraft/libraries/org/apache/logging/log4j/log4j-api/2.8.1/log4j-api-2.8.1.jar:/home/neozeed/mc-loongson/.minecraft/libraries/org/apache/logging/log4j/log4j-core/2.8.1/log4j-core-2.8.1.jar:/home/neozeed/mc-loongson/.minecraft/libraries/org/lwjgl/lwjgl/3.2.2/lwjgl-3.2.2.jar:/home/neozeed/mc-loongson/.minecraft/libraries/org/lwjgl/lwjgl-jemalloc/3.2.2/lwjgl-jemalloc-3.2.2.jar:/home/neozeed/mc-loongson/.minecraft/libraries/org/lwjgl/lwjgl-openal/3.2.2/lwjgl-openal-3.2.2.jar:/home/neozeed/mc-loongson/.minecraft/libraries/org/lwjgl/lwjgl-opengl/3.2.2/lwjgl-opengl-3.2.2.jar:/home/neozeed/mc-loongson/.minecraft/libraries/org/lwjgl/lwjgl-glfw/3.2.2/lwjgl-glfw-3.2.2.jar:/home/neozeed/mc-loongson/.minecraft/libraries/org/lwjgl/lwjgl-stb/3.2.2/lwjgl-stb-3.2.2.jar:/home/neozeed/mc-loongson/.minecraft/libraries/org/lwjgl/lwjgl-tinyfd/3.2.2/lwjgl-tinyfd-3.2.2.jar:/home/neozeed/mc-loongson/.minecraft/libraries/com/mojang/text2speech/1.11.3/text2speech-1.11.3.jar:/home/neozeed/mc-loongson/.minecraft/libraries/com/ibm/icu/icu4j-core-mojang/51.2/icu4j-core-mojang-51.2.jar:/home/neozeed/mc-loongson/.minecraft/libraries/org/lwjgl/lwjgl/3.2.2/lwjgl-3.2.2.jar:/home/neozeed/mc-loongson/.minecraft/libraries/org/lwjgl/lwjgl-jemalloc/3.2.2/lwjgl-jemalloc-3.2.2.jar:/home/neozeed/mc-loongson/.minecraft/libraries/org/lwjgl/lwjgl-openal/3.2.2/lwjgl-openal-3.2.2.jar:/home/neozeed/mc-loongson/.minecraft/libraries/org/lwjgl/lwjgl-opengl/3.2.2/lwjgl-opengl-3.2.2.jar:/home/neozeed/mc-loongson/.minecraft/libraries/org/lwjgl/lwjgl-glfw/3.2.2/lwjgl-glfw-3.2.2.jar:/home/neozeed/mc-loongson/.minecraft/libraries/org/lwjgl/lwjgl-stb/3.2.2/lwjgl-stb-3.2.2.jar:/home/neozeed/mc-loongson/.minecraft/libraries/org/lwjgl/lwjgl-tinyfd/3.2.2/lwjgl-tinyfd-3.2.2.jar:/home/neozeed/mc-loongson/.minecraft/versions/1.15.2/1.15.2.jar “-Djava.library.path=/home/neozeed/mc-loongson/.minecraft/versions/1.15.2/1.15.2-natives” “-Dminecraft.launcher.brand=HMCL” “-Dminecraft.launcher.version=3.2.139” -cp /home/neozeed/mc-loongson/.minecraft/libraries/com/mojang/patchy/1.1/patchy-1.1.jar:/home/neozeed/mc-loongson/.minecraft/libraries/oshi-project/oshi-core/1.1/oshi-core-1.1.jar:/home/neozeed/mc-loongson/.minecraft/libraries/net/java/dev/jna/jna/4.4.0/jna-4.4.0.jar:/home/neozeed/mc-loongson/.minecraft/libraries/net/java/dev/jna/platform/3.4.0/platform-3.4.0.jar:/home/neozeed/mc-loongson/.minecraft/libraries/com/ibm/icu/icu4j/66.1/icu4j-66.1.jar:/home/neozeed/mc-loongson/.minecraft/libraries/com/mojang/javabridge/1.0.22/javabridge-1.0.22.jar:/home/neozeed/mc-loongson/.minecraft/libraries/net/sf/jopt-simple/jopt-simple/5.0.3/jopt-simple-5.0.3.jar:/home/neozeed/mc-loongson/.minecraft/libraries/io/netty/netty-all/4.1.25.Final/netty-all-4.1.25.Final.jar:/home/neozeed/mc-loongson/.minecraft/libraries/com/google/guava/guava/21.0/guava-21.0.jar:/home/neozeed/mc-loongson/.minecraft/libraries/org/apache/commons/commons-lang3/3.5/commons-lang3-3.5.jar:/home/neozeed/mc-loongson/.minecraft/libraries/commons-io/commons-io/2.5/commons-io-2.5.jar:/home/neozeed/mc-loongson/.minecraft/libraries/commons-codec/commons-codec/1.10/commons-codec-1.10.jar:/home/neozeed/mc-loongson/.minecraft/libraries/net/java/jinput/jinput/2.0.5/jinput-2.0.5.jar:/home/neozeed/mc-loongson/.minecraft/libraries/net/java/jutils/jutils/1.0.0/jutils-1.0.0.jar:/home/neozeed/mc-loongson/.minecraft/libraries/com/mojang/brigadier/1.0.17/brigadier-1.0.17.jar:/home/neozeed/mc-loongson/.minecraft/libraries/com/mojang/datafixerupper/4.0.26/datafixerupper-4.0.26.jar:/home/neozeed/mc-loongson/.minecraft/libraries/com/google/code/gson/gson/2.8.0/gson-2.8.0.jar:/home/neozeed/mc-loongson/.minecraft/libraries/com/mojang/authlib/1.6.25/authlib-1.6.25.jar:/home/neozeed/mc-loongson/.minecraft/libraries/org/apache/commons/commons-compress/1.8.1/commons-compress-1.8.1.jar:/home/neozeed/mc-loongson/.minecraft/libraries/org/apache/httpcomponents/httpclient/4.3.3/httpclient-4.3.3.jar:/home/neozeed/mc-loongson/.minecraft/libraries/commons-logging/commons-logging/1.1.3/commons-logging-1.1.3.jar:/home/neozeed/mc-loongson/.minecraft/libraries/org/apache/httpcomponents/httpcore/4.3.2/httpcore-4.3.2.jar:/home/neozeed/mc-loongson/.minecraft/libraries/it/unimi/dsi/fastutil/8.2.1/fastutil-8.2.1.jar:/home/neozeed/mc-loongson/.minecraft/libraries/org/apache/logging/log4j/log4j-api/2.8.1/log4j-api-2.8.1.jar:/home/neozeed/mc-loongson/.minecraft/libraries/org/apache/logging/log4j/log4j-core/2.8.1/log4j-core-2.8.1.jar:/home/neozeed/mc-loongson/.minecraft/libraries/org/lwjgl/lwjgl/3.2.2/lwjgl-3.2.2.jar:/home/neozeed/mc-loongson/.minecraft/libraries/org/lwjgl/lwjgl-jemalloc/3.2.2/lwjgl-jemalloc-3.2.2.jar:/home/neozeed/mc-loongson/.minecraft/libraries/org/lwjgl/lwjgl-openal/3.2.2/lwjgl-openal-3.2.2.jar:/home/neozeed/mc-loongson/.minecraft/libraries/org/lwjgl/lwjgl-opengl/3.2.2/lwjgl-opengl-3.2.2.jar:/home/neozeed/mc-loongson/.minecraft/libraries/org/lwjgl/lwjgl-glfw/3.2.2/lwjgl-glfw-3.2.2.jar:/home/neozeed/mc-loongson/.minecraft/libraries/org/lwjgl/lwjgl-stb/3.2.2/lwjgl-stb-3.2.2.jar:/home/neozeed/mc-loongson/.minecraft/libraries/org/lwjgl/lwjgl-tinyfd/3.2.2/lwjgl-tinyfd-3.2.2.jar:/home/neozeed/mc-loongson/.minecraft/libraries/com/mojang/text2speech/1.11.3/text2speech-1.11.3.jar:/home/neozeed/mc-loongson/.minecraft/libraries/com/ibm/icu/icu4j-core-mojang/51.2/icu4j-core-mojang-51.2.jar:/home/neozeed/mc-loongson/.minecraft/libraries/org/lwjgl/lwjgl/3.2.2/lwjgl-3.2.2.jar:/home/neozeed/mc-loongson/.minecraft/libraries/org/lwjgl/lwjgl-jemalloc/3.2.2/lwjgl-jemalloc-3.2.2.jar:/home/neozeed/mc-loongson/.minecraft/libraries/org/lwjgl/lwjgl-openal/3.2.2/lwjgl-openal-3.2.2.jar:/home/neozeed/mc-loongson/.minecraft/libraries/org/lwjgl/lwjgl-opengl/3.2.2/lwjgl-opengl-3.2.2.jar:/home/neozeed/mc-loongson/.minecraft/libraries/org/lwjgl/lwjgl-glfw/3.2.2/lwjgl-glfw-3.2.2.jar:/home/neozeed/mc-loongson/.minecraft/libraries/org/lwjgl/lwjgl-stb/3.2.2/lwjgl-stb-3.2.2.jar:/home/neozeed/mc-loongson/.minecraft/libraries/org/lwjgl/lwjgl-tinyfd/3.2.2/lwjgl-tinyfd-3.2.2.jar:/home/neozeed/mc-loongson/.minecraft/versions/1.15.2/1.15.2.jar net.minecraft.client.main.Main –username USERNAME –version “HMCL 3.2.139” –gameDir /home/neozeed/mc-loongson/.minecraft –assetsDir /home/neozeed/mc-loongson/.minecraft/assets –assetIndex 1.16 –uuid UUID –accessToken TOOOOKENNNNNN –userType mojang –versionType “HMCL 3.2.139” –width 854 –height 480

Naturally you’ll need your own username, token, uuid..

One thing is for sure, setting the graphics to higher details gives better performance. I suspect that it’s a matter of pushing more of the rendering to hardware, out of software mode.

I have it set to Fabulous! graphics, render distance of 25 chunks, no vysnc, clouds fast, mipmap level 2.

While it does take a while to load up, join the server, and do the initial world loading, you can watch all 4 cores run at 100%, but once it’s loaded in, it’s down to a single core at 100%, and the other 3 are hovering around 10-25%. So once jit’d and loaded in it seems to run okay.

They are jackhammering downstairs and I could make this 1 minute clip in a brief moment of peace. This is before I figured out that the more acceleration you give Minecraft, the faster it runs with the GPU doing the heavy lifting (I think).

Is this the machine for the Minecraft enthusiast? Hardly, but Minecraft is the Java success story, where a platform like this, a fringe non mainstream platform will run a commercial app. This is where the real portability of binutils/gcc/libc and Linux prove to be the winning platform.

Adding a Radeon RX 570

I saw this card while I was out, and I’ve seen mention of some Radeon’s working on the Lemote A1901 board, although it didn’t like my Asus Radeon R9 380 Strix, I’m guessing it’s too old? I can’t find it now, but there was some mention somewhere of someone using a 500 series card (I don’t understand the AMD number schema), so I figured I’d get the 570 as it was just over $100 USD, and it has 8GB of VRAM, so it ought to be somewhat usable if I guessed wrong on the compatibility.

But I did get lucky! The card not only was able to initialize, but UOS came up to the desktop!

glxinfo -B gave the following output:

name of display: :0
display: :0 screen: 0
direct rendering: Yes
Extended renderer info (GLX_MESA_query_renderer):
Vendor: X.Org (0x1002)
Device: Radeon RX 570 Series (POLARIS10, DRM 3.27.0, 4.19.0-loongson-3-desktop, LLVM 7.0.1) (0x67df)
Version: 18.3.6
Accelerated: yes
Video memory: 8192MB
Unified memory: no
Preferred profile: core (0x1)
Max core profile version: 4.5
Max compat profile version: 4.5
Max GLES1 profile version: 1.1
Max GLES[23] profile version: 3.2

So there we go, 8GB of memory, and ‘Accelerated: yes’. It’s also FPS locked to the screen refresh so it’s running a steady 60fps for the display I’m using. I need to build some later games that use GL to really push the machine.

The one big ‘negative’ is that the video card sits over the SATA ports, so I need to get an L connector SATA cable, as now I can’t use my 2TB spinning rust disk with the fancy GPU in place. And it makes my 800 watt PSU all the more justified.

I’m just glad that the portable drivers, well are portable!

Adding a 32bit runtime to UOS

AKA what happens when your OS is from one Debian like distribution and lags behind the rest of the world, but you want to run a parallel infastructure. Obviously for people who have sane setups their stuff is in sync and this doesn’t apply.

HOWEVER for people who use USO they will find out quickly that it’s a Debian derived MIPS64EL based distribution, but they don’t keep any MIPSEL (32bit) binaries. So I was thinking add in the dpkg arch, and some deb sources and I’d be good to go, right? Except the stuff is out of step so what happens is that UOS decides it wants to replace the OS with what is on the mipsel repos. Even when specfiying the arch’s directly.

deb [by-hash=force arch=mips64el] https://professional-packages.chinauos.com/desktop-professional eagle main contrib non-free
deb [arch=mipsel] http://deb.debian.org/debian buster main contrib non-free

I tried.

So the good news is that I asked around and found a solution that I’d never heard of, “debootstrap”. The general page is here:

What it boils down to is that it’s a script set that will download enough DEB’s and extract them onto a directory and prep it out as a chroot/jail. And you can specify whatever architecture you want, you can even use qemu to run totally alien stuff! I’d never heard of this before, such a shame.

From my rough notes I did something like this:

/usr/sbin/debootstrap --arch mipsel buster /usr/local/mipsel http://deb.debian.org/debian

This will install the mipsel platform of Buster into /usr/local/mipsel

running the following gets me into the chroot/jail/container..

LANG=C.UTF-8 sudo chroot /usr/local/mipsel /bin/bash

YES it’s that simple! Although there is some house cleaning to be done:

apt install makedev
mount none /proc -t proc
cd /dev
MAKEDEV generic

Making the devices sure took long enough, but now I could do the regular update, add in some compilers and stuff, X11, and whatnot and get things going. Remember to mess around with xauth to get X11 forwarding from chroot working

Now for the ‘fun’ part of linking the libs…

ln -fs /usr/local/mipsel/usr/lib/mipsel-linux-gnu /usr/lib32
ln -fs /usr/lib32/ld.so.1 /lib/ld.so.1

Then you need to ‘config’ ld.config with

cat > /etc/ld.so.conf.d/mipsel-buildroot.conf
/usr/local/mipsel/usr/lib/mipsel-linux-gnu
^D

Phew we are almost there!

$ file /usr/local/mipsel/bin/dash
/usr/local/mipsel/bin/dash: ELF 32-bit LSB shared object, MIPS, MIPS32 rel2 version 1 (SYSV), dynamically linked, interpreter /lib/ld.so.1, for GNU/Linux 3.2.0, BuildID[sha1]=22877e3a9a83675b22a121c9d2f8943d7339e7db, stripped
$ sudo ldconfig;/usr/local/mipsel/bin/dash
$

And just like that we now can run dynamically linked 32bit MIPSEL binaries on UOS.

As a bonus (from stackexcahnge) here is how to run Xauth to get forwarding from the chroot. From the ‘base’ physical machine run:

$ xauth list
latitude/unix:0  MIT-MAGIC-COOKIE-1  d4474d13c

Now with that cookie run this in the chroot:

# xauth add latitude/unix:0 MIT-MAGIC-COOKIE-1 d4474d13c
# xclock

and the 32bit Xclock should pop up on your 64bit desktop.

Wasn’t that fun?!

Annoyance with the MIPS linker: relocation overflows

gcc disasm.o audio.o configuration.o dialog.o file.o hostcall.o keymap.o main.o memAlloc.o misc.o screen.o screenConvert.o sdlgui.o shortcut.o scalebit.o input.o fe2.o ../fe2.part1.o ../fe2.part2.o -L/usr/lib/mips64el-linux-gnuabi64 -lSDL -o ../frontier

/usr/bin/ld: ../fe2.part1.o: in function <code>load_binfile': fe2.s.c:(.text+0x180): relocation truncated to fit: R_MIPS_CALL16 against</code>fopen@@GLIBC_2.2'
/usr/bin/ld: fe2.s.c:(.text+0x19c): relocation truncated to fit: R_MIPS_CALL16 against <code>fseek@@GLIBC_2.0' /usr/bin/ld: fe2.s.c:(.text+0x1a8): relocation truncated to fit: R_MIPS_CALL16 against</code>ftell@@GLIBC_2.0'
/usr/bin/ld: fe2.s.c:(.text+0x1c0): relocation truncated to fit: R_MIPS_CALL16 against <code>fseek@@GLIBC_2.0' /usr/bin/ld: fe2.s.c:(.text+0x1e4): relocation truncated to fit: R_MIPS_CALL16 against</code>fread@@GLIBC_2.0'
/usr/bin/ld: fe2.s.c:(.text+0x1f0): relocation truncated to fit: R_MIPS_CALL16 against <code>fclose@@GLIBC_2.2' /usr/bin/ld: fe2.s.c:(.text+0x280): relocation truncated to fit: R_MIPS_GOT_DISP against</code>stderr@@GLIBC_2.0'
/usr/bin/ld: fe2.s.c:(.text+0x284): relocation truncated to fit: R_MIPS_CALL16 against <code>fprintf@@GLIBC_2.0' /usr/bin/ld: fe2.s.c:(.text+0x290): relocation truncated to fit: R_MIPS_CALL16 against</code>exit@@GLIBC_2.0'
/usr/bin/ld: fe2.s.c:(.text+0x2b4): relocation truncated to fit: R_MIPS_CALL16 against `__assert_fail@@GLIBC_2.0'
/usr/bin/ld: fe2.s.c:(.text+0x2c4): additional relocation overflows omitted from the output
collect2: error: ld returned 1 exit status
make[1]: *** [Makefile:18: ../frontier] Error 1

I’d never heard or seen this before, and yeah it’s some MIPS’isim.

Apparently it’s something called a “global offset table” which of course has a 64k entery limit which can cause an overflow if you are doing something crazy like running a disassembler and having tens of thousands of instructions.

Looking at the GCC MIPS options page, there is hope, one can opt for a more iniffecient and larger table with the simple option of -mxgot

FrontVM-2 20061120

And now I can link frontvm.