ERYING HM570 Motherboard with i9 11900HA
I found out about the board from some YouTube videos. An i9 laptop chip on a PC motherboard?! And for cheap! Intrigued, I looked around on AliExpress and sent away for one. The board retailed for £123, of course you need to add a tariff and shipping, bringing it to around £150.
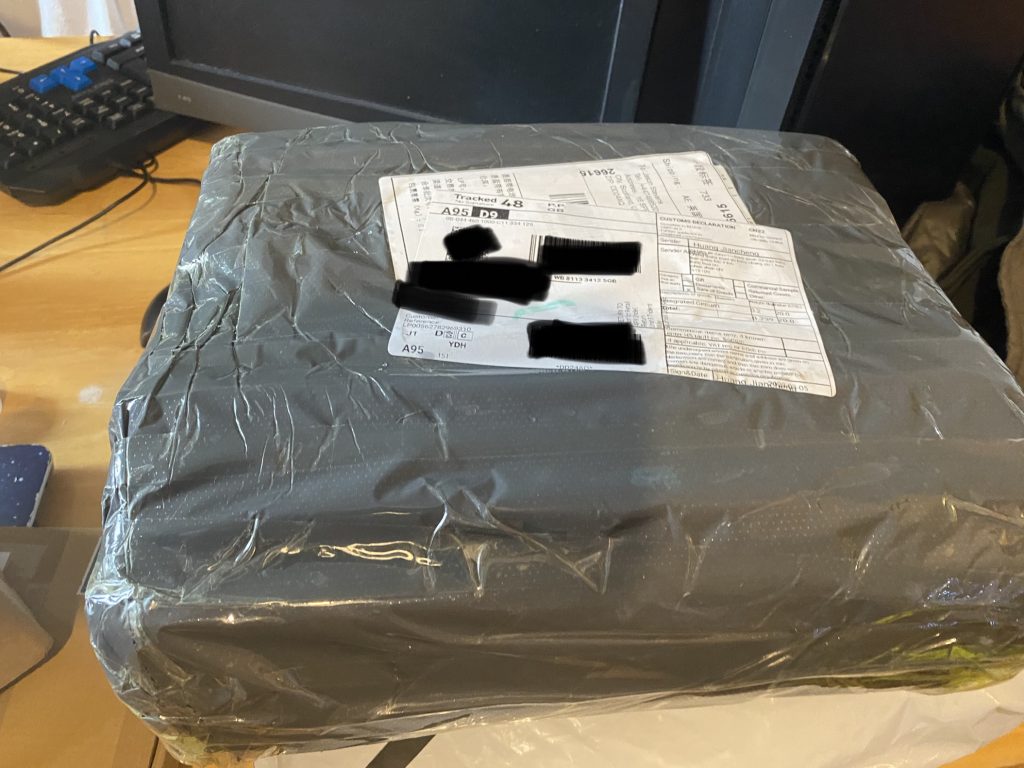
After two weeks it arrived!. Despite the garbage bag packing, it was wrapped in some strong bubble wrap, and the box was fully intact, no issues.
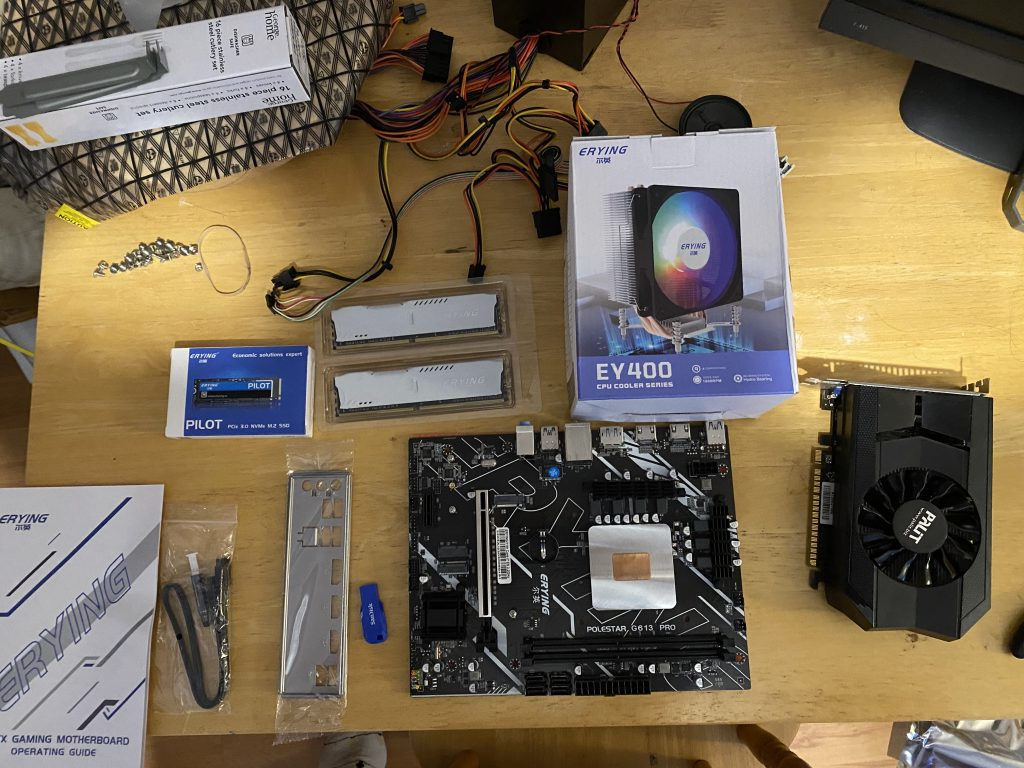
Since I don’t have much in the way of PC detritus on hand, I got the machine memory & CPU cooler for the system. Anyways yes the big outstanding feature is the big copper slug that sits between the processor and the height of a normal CP cooler. It’s a laptop processor so it doesn’t run that hot so I’m not all that worried. As expected, assembly is a snap, but because of the absolute paranoia of shipping lithium ion batteries, be sure to bring your own CR2032. Just don’t ask how it made it’s way to you.
The board is very basic, 2 DDR4 slots, a single PCI-E x16 slot, a hand full of USB 2/3 built in audio, and a single LAN jack. This is not a very expandable system, but we didn’t come here for that, it’s all about the performance per $
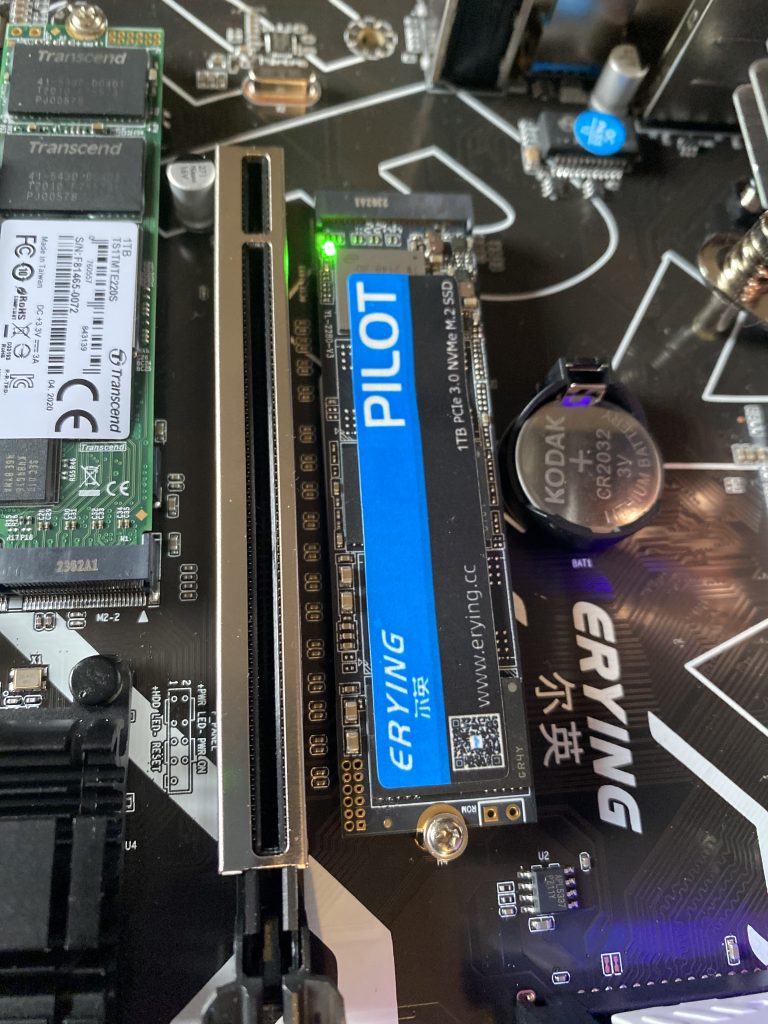
I have to admit, one nice surprise feature of the NVMe is that it does have an activity light on the unit. Nice!
So what has been the downside? The integrated video only works on ONE level of the driver. So if you are going to use the integrated iGPU, you want to make sure you get one of those patched drivers that’ll block windows updates.
Ive read a few things about raising the thermal envelope of the system beyond the stock 45 watts for additional performance, but to be honest the stock config seems fine enough to me.
The other catch being no Hyper-V, so that also means no WSLv2 either. VMware player however works fine, as does nesting VM’s so I was able to move my VMware ESX 5.5 install and run it on the Erying no problem.
I have to say that overall I’ve been happy, especially at the price point, as a normal user it’s a fine machine, but I think the next time I’ll avoid engineering samples as I do like WSLv2/Hyper-v.
When 0 is greater than 1.0
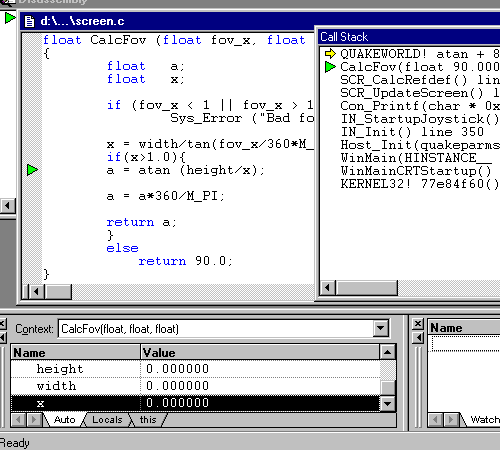
I came across this fun thing debugging a QuakeWorld client on a RISC machine. I think something is failing as I’m using terminal server. For some reason width is being passed as 0. Not sure why I didn’t debug it enough to care, so I setup a quick block to only evaluate the Fov if the calculated x was greater than 1.0
And Microsoft C did not disappoint.
I think it may have been some incremental linking issue? I’m not sure I purged the build directory and re-ran make and didn’t experience the crash again. I had to get the screenshot or even I wouldn’t believe it.
In the end I got it running:

Of course among the eagle eyed you may notice this is version 13.00.8499 of the compiler. But the last compiler for the Dec Alpha / Windows NT was version 12…
More on that later!
OpenVMS x86 hobbyist finally here!
(This is a guest post by Antoni Sawicki aka Tenox)
After years of waiting, VMS Software finally released OpenVMS x86 for hobbyist use. Luckily I was able to download the install media and a hobbyist license pack from the Service Platform portal. So lets have some fun with virtualization!
OpenVMS x86 has pretty strict hardware requirements. It only works as a VM (no physical hardware support). It wants a recent CPU. The VM must have EFI BIOS and E1000 NIC. As for storage controller – both HDD and CDROM must be on the same SATA controller.
The ISO image boots to a fancy new loader screen:
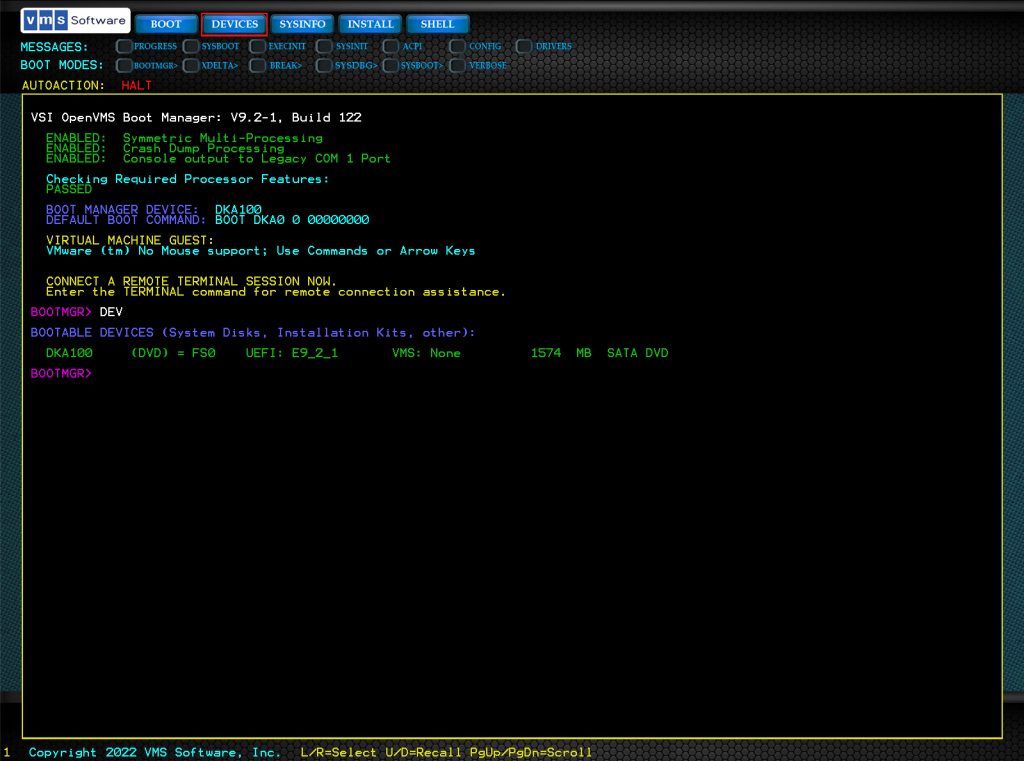
However as cute as it looks, don’t have your hopes up for a real GUI. That’s as far as it goes:

Once the OS boots up, it switches to a serial console for the rest of installation and operation. Being a VM and having no access to physical serial port, I hooked it up via named pipe to another VM’s serial port.
Just for fun let’s use a recent build of C-Kermit by David Goodwin!
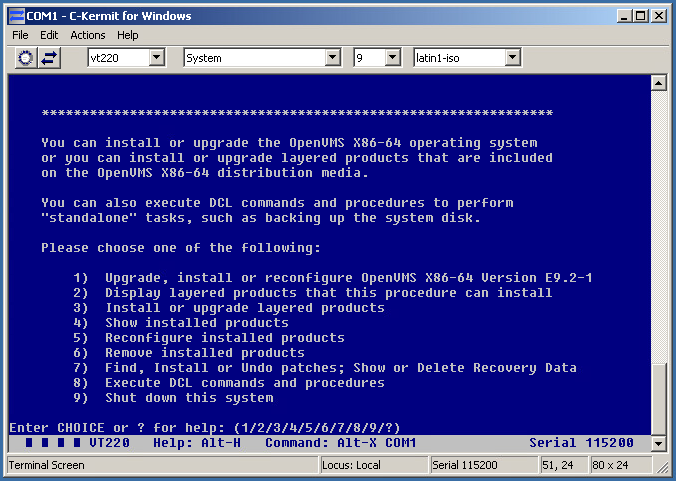
The installation is pretty straightforward. I picked all the defaults and off you go.
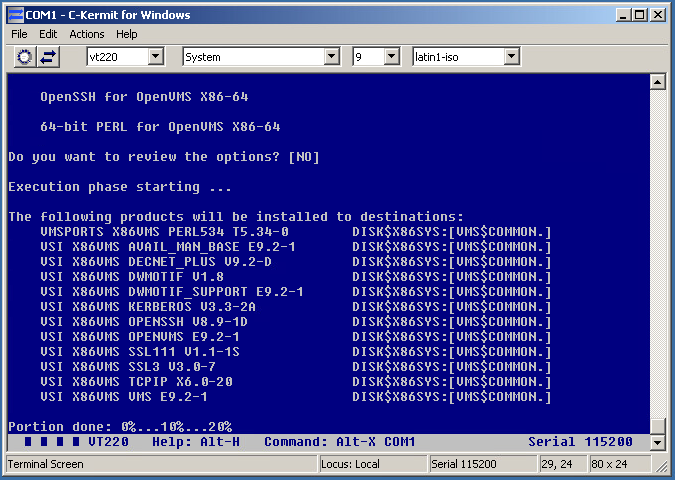
The system installs under couple of minutes. A boot takes just couple of seconds and it’s extremely fast end responsive. This is somewhat expected as the VMS dates back to 1977 and hasn’t grown in bloat much like more “modern” OSes.
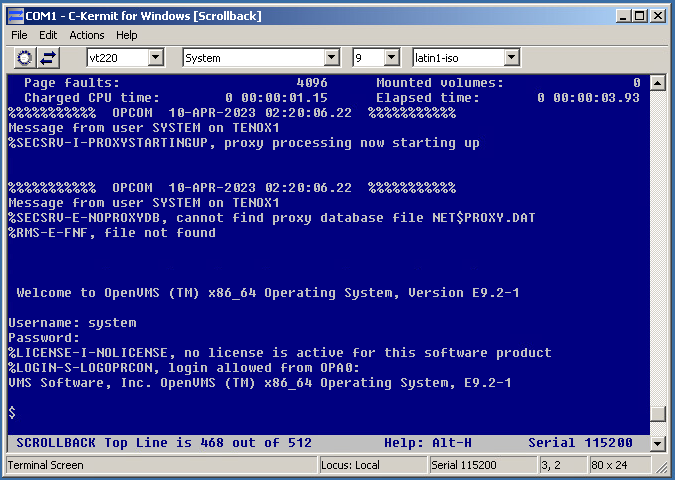
One of first things to do after installation, is to register the license packs and configure TCP/IP.
For license pack I added the “BOE” pak by hand and transferred the rest as a `.com` file after TCP/IP was setup.
To configure IP you simply run @sys$manager:tcpip$config and go through the steps. Networking doesn’t start by default, so you need to edit sys$startup:systartup_vms.com file and uncomment line saying @sys$startup:tcpip$startup.com. After that you should be able to telnet to the VM at every boot. Also note that OpenVMS comes with some unix commands for the tcpip subsystem, you can find them in help under TCPIP_Services -> UNIX_Commands
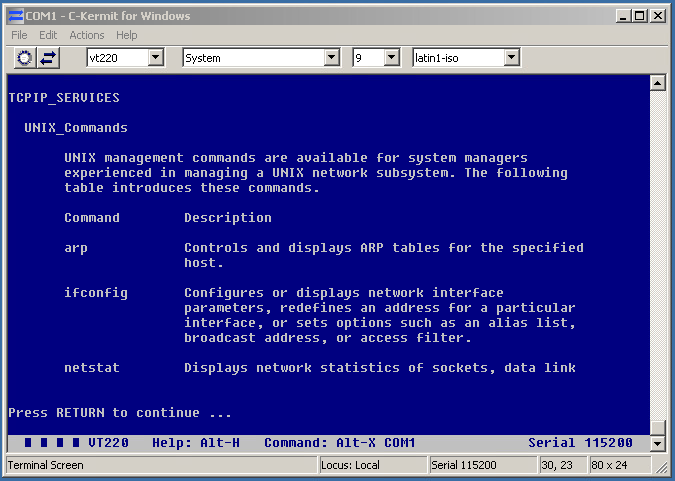
You can setup auto boot in the graphical console by typing “auto boot”, this way you never have to open the graphical console to type boot.
Browsing through software packages on the VMS service portal you can find a C compiler, Fortran, as well as some typical OSS packages like OpenSSH, SSL, Samba, Git and many more.
Apparently there also is a WebUI for VMS?
I’m hoping that in future OpenVMS will be available on some public clouds like AWS, Azure and GCP. This would open some interesting possibilities.
I’m going to go and port some apps to x86 VMS!
A wild Macintosh Plus appears!
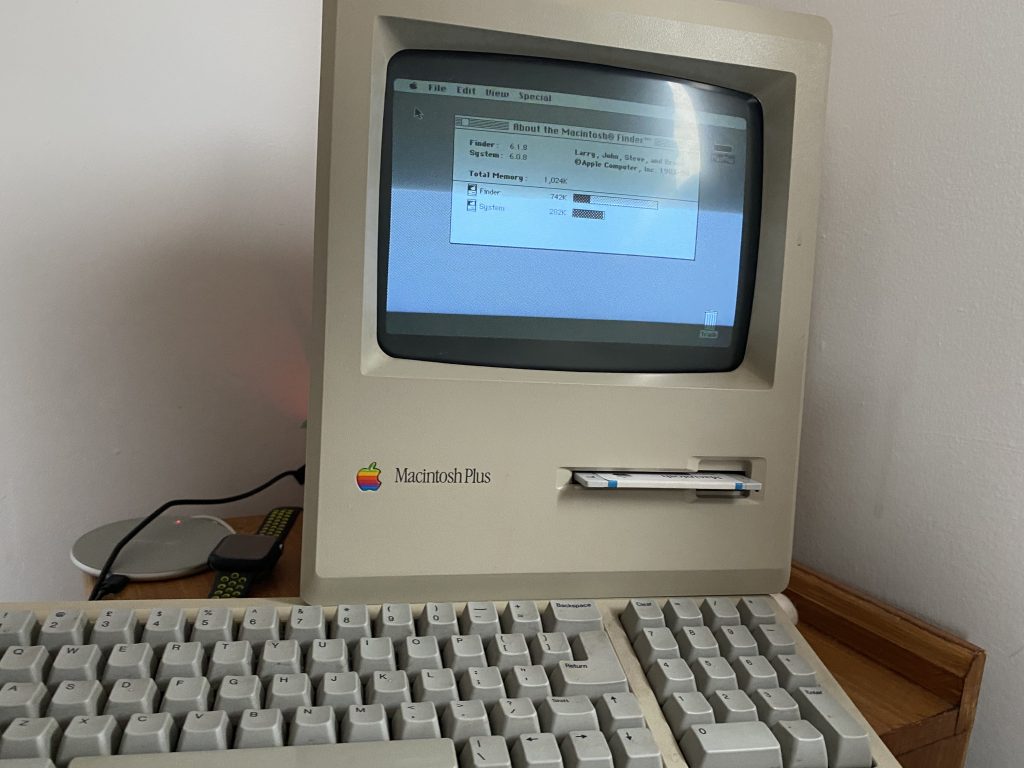
This was rather unexpected, but this auction for a loaded Macintosh Plus had shown up, and it was shipping local, and very cheap for what it was. It included the larger keyboard, original mouse, and an external 20MB hard disk.
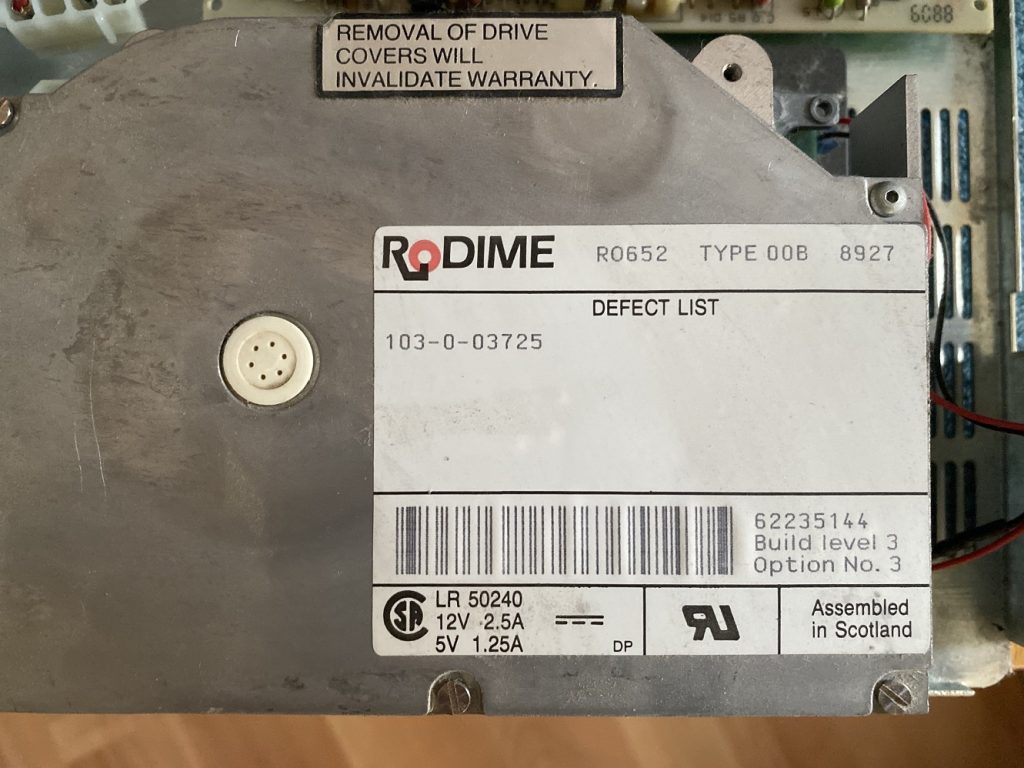
Sadly, the hard disk is dead. And not like dead dead, but dead dead dead! After I freed the disk from the external enclosure, and tried to power it on, stand alone, the PSU refused to start as the disk has a hard short in the board somewhere. And I can’t say that I’m all that surprised that a hard disk from 1989 is broken. I’m more surprised that someone was using this in 1989 and didn’t take the plunge and upgrade the machine to the full 4Mb of ram.
Anyways I have this chunk of plastic and glass on a desk, but I can’t do a thing with it. I’ve heard of various SCSI emulators out there, and decided to go with a bluescsi v1 with a DB25 interface as they are generally cheaper, and the Macintosh Plus isn’t exactly all that fast so the effort of the v2 is mostly lost.
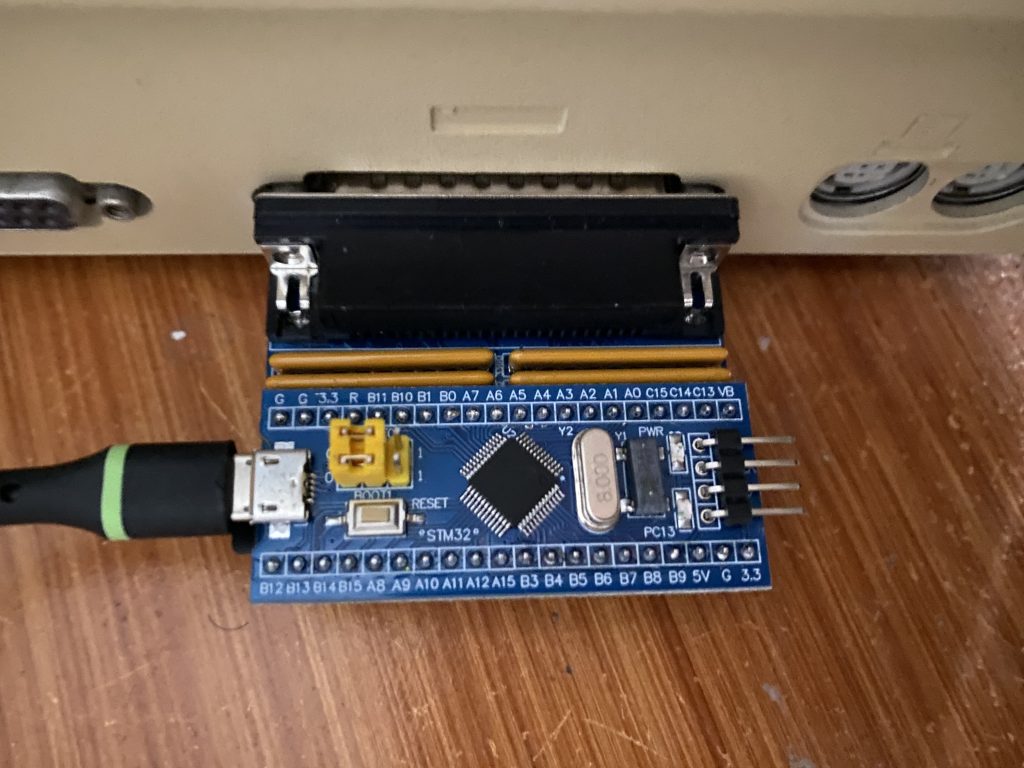
Documentation on the bluescsi is scant, but it seems that a diode needs to be soldered onto the Macintosh Plus motherboard to enable bus power, so you don’t need an external USB power source. I’m a bit worried about opening up this thing as I’ms suspecting the plastics are a log weaker than they look, so I opted for just using a USB cable to power the device.
Anyways let me cut to the chase, I have an 8Gb Micro SD card that I formatted ExFAT (the documentation says Fat32 will work, but I found it might work once, but it’ll definitely never work after a reboot), with a single file emulating a 100Mb hard disk (Luxurious!). I named the file simply ‘HD10_512.hda’ which specifies it’s a hard disk, SCSI ID 1, target 0, 512 bytes/sector and it’s a ‘hda’ image. It’s what the Bluescsi want’s so don’t fight it!
To prepare the virtual hard disk, I used Cockatrice III, since the Macintosh Quadra 800 emulation includes SCSI, which let me create a raw disk image, partition it, and format it under MacOS 8.1. The real trick was installing the operating system.
I first tried MacOS 7.0.1, but it would boot up greeting me with the error that needs more than 1Mb of ram. I tried installing a MacOS 6.0.8 manually, but it crashed saying the system folder was corrupt, and then it just went empty disk mac on further boots.
I’m not sure what the problem was, it’s possible it was the filesystem on the card, or some other issued with the Macintosh, I have no idea.
So I broke down and ordered a pre-installed diskette with MacOS 6.08.
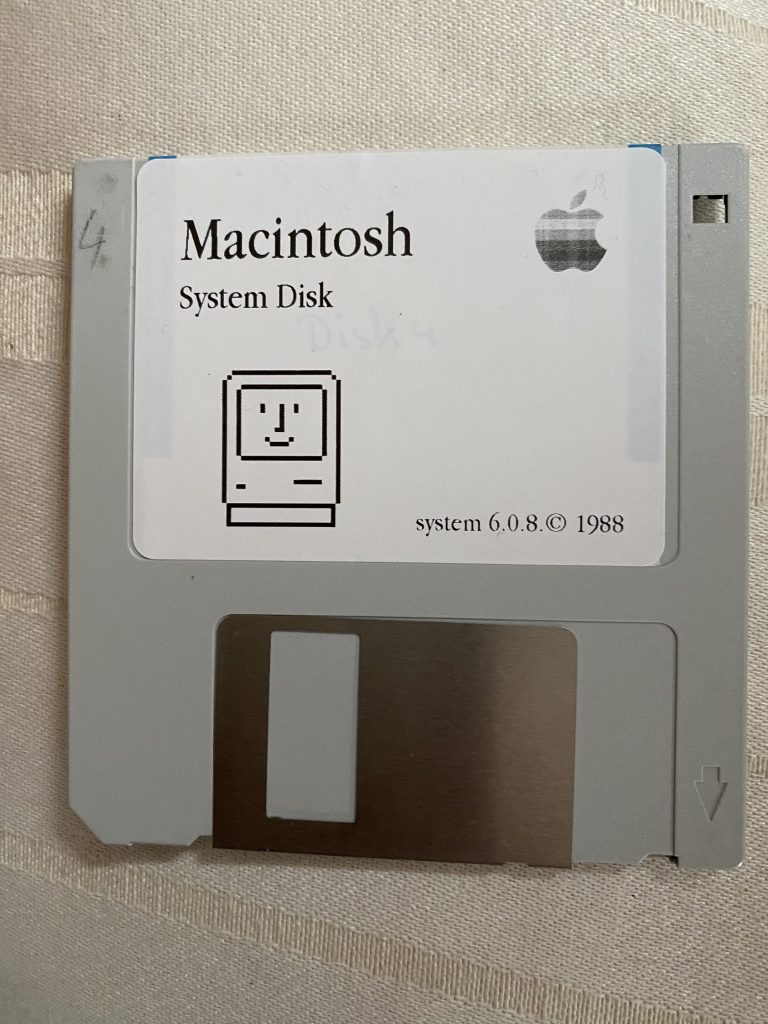
I booted off the diskette, and amazingly the floppy drive worked! And in about a minute I had booted up, and it saw the hard disk! I dragged the System folder over the hard disk, and rebooted, and yeah it booted right up!
Obviously, the next step will be to get a proper screwdriver to open this thing, figure out how to discharge the CRT so I don’t kill myself, and add some additional RAM. I know it’ll be slow but I do want to see MacMiNT run on this thing! Maybe I’ll find/order the needed diode and make the DB25 bus powered eliminating one cable.
A long long long time ago I did own a Macintosh Plus, with 4Mb of RAM, although I mostly used it as a terminal, since it powered up quickly (it was the mid 90s!) and doesn’t take up that much space, so maybe I can slave it to an ESP32?
**UPDATE
I had been using some generic 8GB microSD card on this, and while it seemed mostly fine on the Macintosh Plus, I had since managed to score a Performa 6400. I had been using this Kingston generic 8GB card, and it had frequent timeouts writing/reading on the Performa. As a matter of fact if the SD card was plugged in at powerup with an ISO image it would crash the Mac.
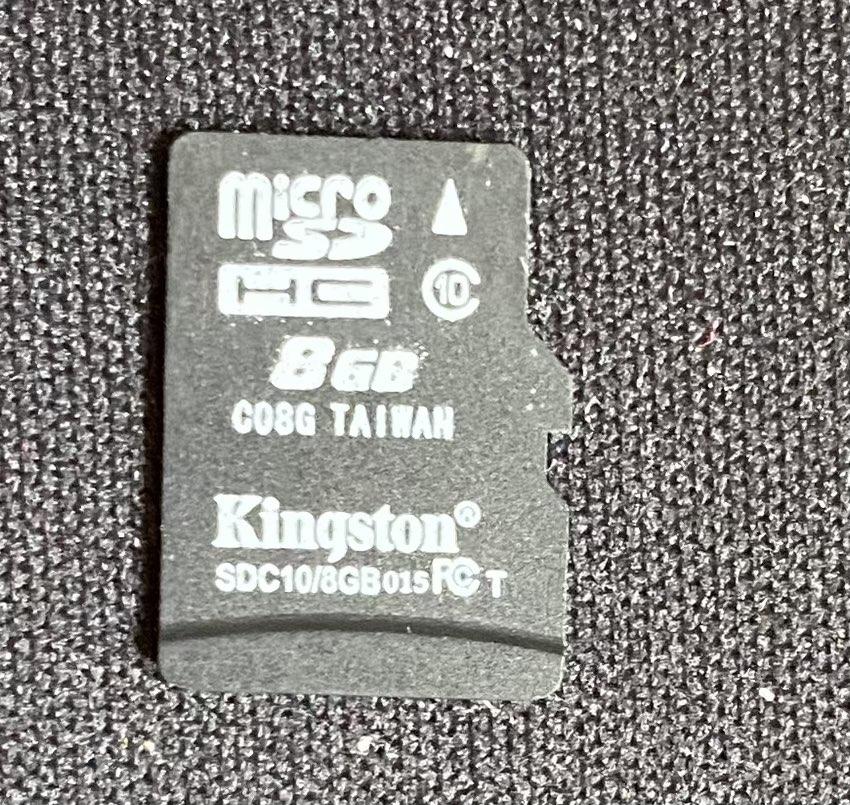
Kingston SDC10/8GB 015FCT C08G… no good!
I scored this SanDisk Extreme 32GB for £15. A bit pricy but it turns out totally worth it!
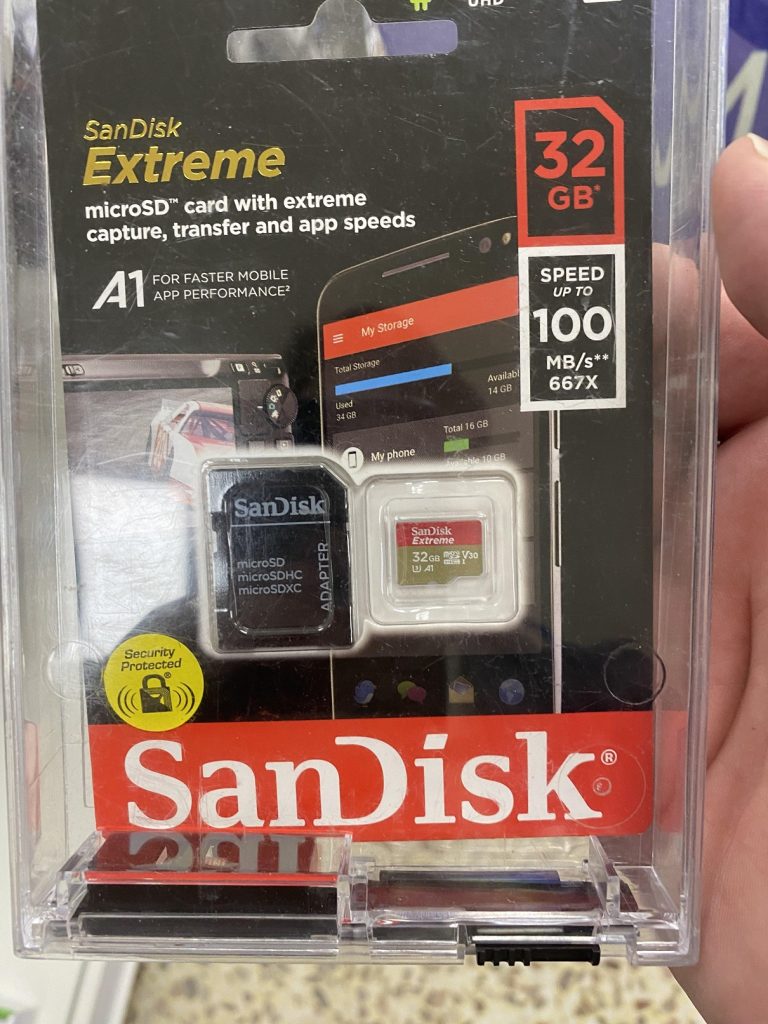
£15 SanDisk Extreme!
Not only does the Performa not crash with an ISO image but it’s pretty darn quick! Well worth the purchase as all my weird issues seemingly just disappear!
So yeah, lesson learned, don’t go cheap on flash.
39 years ago, the dawn of home 32bit computing.

Much like the ZX Spectrum the Sinclair QL was a machine largely unknown to me growing up in Canada, then moving to the Miami area as a teenager. While the ZX 80/81 were pioneers in low end home computers barely able to do anything the ZX Spectrum with it’s 80kb of RAM (48k usable, as half the 64kb was defective), the QL announced in the start of 1984 was announced to the world as a very serious business machine. No gaming around to be found here!
While the IBM PC had been released in 1981 with it’s 16bit Intel 8088 processor utilizing a much slower & cheaper 8bit bus, the QL went one step further utilizing the Motorola 68008, a hybrid 16bit processor with 32bit registers, also using an external 8bit bus. However, being always on the cheap sifde, the QL only offered a single expansion slot, unlike the IBM PC. Also it eschewed floppy disks in favour of it’s endless loop ‘micro drive’ cassettes. Every corner that could be cut was, and sadly the resulted in a machine that just wasn’t ready as one has to wonder if the word of the Macintosh launch the following week was out, and Clive knew that it was either announce it now, or be a meetoo going forward. For better or worse he launched.
On paper it sounds fantastic, 128kb of ram, 32bit capable processor, and 2 drives all for £399! The IBM PC was an eye watering £3,325 by comparison, while the similarly spec’d Macintosh was £2,698! Indeed the QL stood for Quantum Leap, as the jump from 8bit to 32bit home computing was going to be phenomenal.
But how could it all go so wrong? Within a year the price had been slashed to £199, and stores were said to be further marking them down to a mere £99 the year afterwards. How could a seemingly on par machine fail so badly? The 128k Macintosh also was limited to a paultry 128kb on it’s motherboard, while the more expensive, and expandable IBM PC/XT maxed out at infamous 640kb, and it supported up to two floppy drives, and 2 hard disks although the IBM AT would be announced later that year, and it could go well beyond 640Kb, but the lack of protected mode operating systems & software would hinder the platform for quite some time.
If the trades are to be believed it was a combination of announcing too early, and failing to deliver burnt people on the QL. Additionally the ZX Spectrum had been busy wining apps at the time (games), but Sinclair wanted so much to be a serious company, not the man who brought you jet-set “fucking” willy. Sound and video capabilities of the QL were no match for the Spectrum, just weren’t there, and also missing was the incredibly cheap European storage of choice the audio casette. Many people were also dismayed that the operating system was much larger than expected and it needed to occupy both internal ROM sockets, and the cartridge port. And of course, the microdrives themselves were seen as easy to corrupt, stretch and tear. Not the kind of thing someone in business wants to hear. The ironic thing about the QL was that in my opinion it was too cheap. The PC/XT offered plenty of expansion at the base price (albeit a high one), and Apple also quickly added a much more realistic 512kb model Macintosh. The QL never got a ‘big brother’, basically condemning it at launch as nothing more but a toy. Which is a shame.
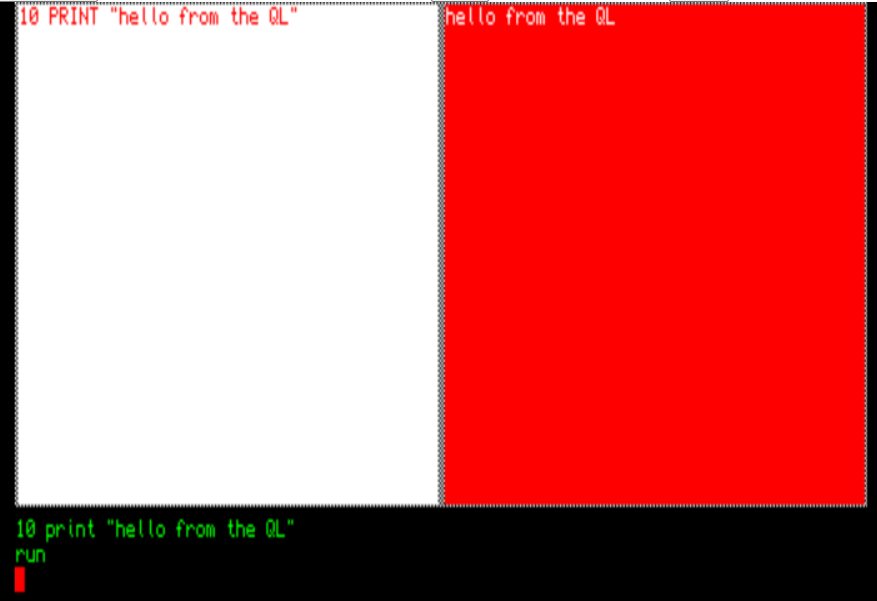
The operating system, burnt into ROM feels kind of 8bit as it has a basic interpreter built in, and it’ll open several hard coded windows in which you are expected to interact with. However, it feels more like a minicomputer with input on the bottom, running lists on the left, and output on the right. Indeed, it can feel outright baffling. And certainly nothing like an 8bit machine, or like the later home 32bit machines like the Amiga, or Mac. Even the TOS based Atari ST felt more ready for the world with its GEM burned into ROM.
Building my dream system
Despite all of these downsides, I was still intrigued by the machine, and I have to admit I really love the look of it. When I’d first read Neuromancer around the time of the video game, and this is what I’d imagined a cyberdeck to look like. While I was wasting my youth with an 8bit machine I wanted to experience this seemingly parallel universe where affordable 32bit micros were a thing.
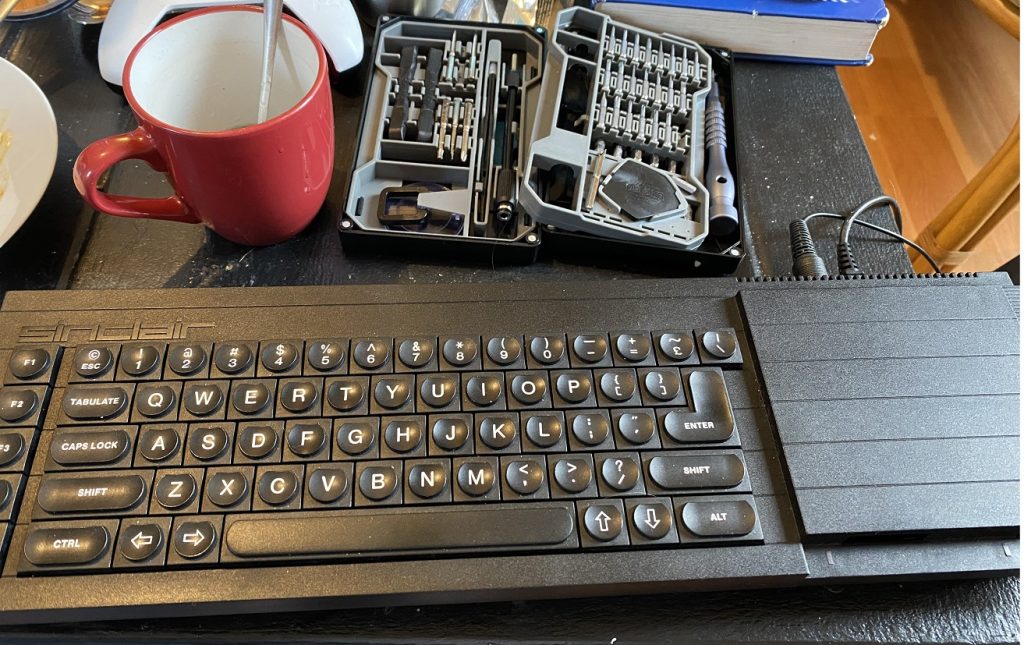
Since I’ve heard of the machine, I’ve been trying to get one. Surprisingly for such an unloved machine they are incredibly hard to find, and they do go for quite a bit of money. However, thanks to making contacts on the QL User’s forum, I had managed to get my hands on one, so I could start my journey. I sent it off to RudeDog Retros, luckily located across the bridge from where I’m staying and within a week. I was able to get back a working system. I also had managed to get a tetroid ram expansion/CF card addon as well for my QL bringing it up to 880kb of RAM, and an 8MB CF card, making the machine a top of the line experience. Although the card was given to me with known issues, for the most part it worked, except when it didn’t, and it was always the same, bad ram at the 128kb boundary. Which is a shame, having mass storage certainly gets around the microdrives, but 128kb of ram just isn’t enough when factoring in mass storage.
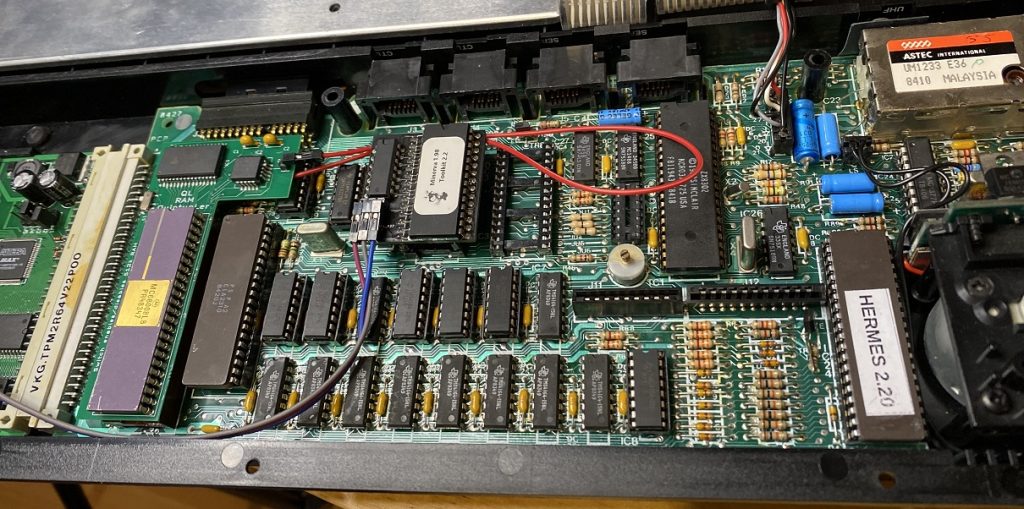
Much like other 68000 based machines, the Sinclair QL is no stranger to hardware modifications. I ordered a 512kb memory expansion unit (Sinclair QL 512KB Internal Memory Expansion from *der_englaender*) to fill in the 128k gap from the Tetroid card (plugged into the left). The red 68008 socket is a real pain to deal with, and it took an unreasonable amount of force to get the RAM expansion into the QL. No doubt nearly 40 year old sockets are just not that flexible. I had thought the board was in, but I was getting a buzzing black screen, it only took a bit of reassuring and swapping in another 68008 to verify the machine was fine, and more pressing to get it to seat into the socket.
You can also spot the Hermes 2.20 co-processor upgrade to support 19,200 baud serial operations, along with the Minerva OS upgrade, and you can see the numerous RAM chips that had to get replaced to make the unit functional. With an appropriately upgraded system it can begin to feel like a real machine.
Thanks to the folks over at The Sinclair QL Forum, I was able to complete the upgrade!
With enough luck my machine now has reliable memory, mass storage, and faster communications with the outside world. Everything you’d want in a modern computer! I now have a capable machine to do the one thing I always worry about when doing cross compiling, actual hardware verification.
SIxteen/Thirtytwo into EIght dreams…
The 68000 was used by Stanford University in it’s project based motherboards, that gave way to the 68010 based SUN-1/SUN-2 based machines, where other companys also used the 68000 line of processors in their Unix based machines. While the QL with it’s cost conscious 68008 was not going to run a ‘real unix’, it was however capable of running real programs. The big AT&T compilers (PCC!) can target the processor, just as other new and upcoming compilers, even GCC, although even 880kb of ram is probably not enough for running GCC natively. But going back to 1985 this leaves room for something more restricted to mini-computers, Hack.
While Hack had been ported to 16bit machines like the IBM-PC, or sixteen/32bit machines like the Amiga, I was surprised to find that it had not appeared on the QL. For someone like me that first meant getting a cross compiler in place to target the QL. Thankfully xXorAa had done a lot of the hard work in xtc68, qdos-libc, and Dilwyn Jones had saved the GCC patches by Richard Zidlicky, Jonathan Hudson, Thierry Godefroy and Dave Walker. With a working cross compiler, time to get hacking!
From the mini-computer to the 32bit home micro-computer
Doing my thing I put together a simple cross compiler so that I could begin work. With enough RAM, the QL is in the surprising league of many a minicomputer of the early 1980’s. It’s incredible to think of what a missed opportunity this is. When I had decided to try to get Hack-1.03 up and running, I went for the Unix version, bypassing the probably more apt PC port, as despite Hack-1.03 being free enough to be still part of OpenBSD, PC Hack however has a more restrictive license. I know it’s weird.
Using a VT library that gives the QL, something akin to ANSI.SYS functionality and another library to set environment variables (yes QDOS doesn’t have either…) a simple basic program to setup the screen type and point Hack where to find it’s files, and we are suddenly off to the races. I didn’t have to restrict or cut anything down, it’s running the same code that effectively would run on a VAX-11/780 mini-computer, or a SUN-2 workstation. It’s crazy how this machine didn’t fill the home 32bit gap that took Microsoft/Intel quite a few years to fill.
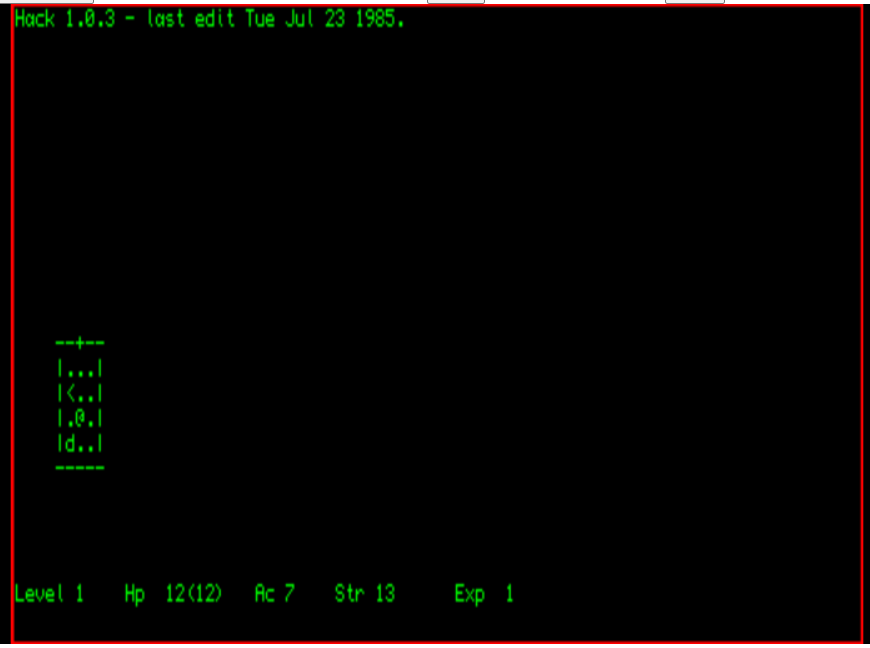
For those into the javascript, you can download a disk image: hack.win here, and test drive it on ppe/xXorAa‘s emulator here sQLux – MIN198.rom, 4096K (qlforum.co.uk)
Another great program, COM, the 8080 CP/M emulator can also happily run on the QL, again with libvt, emulating a vt52 it opens up an entire ecosystem of software, much like it did on the Commodore-128. If it had been available perhaps it would have greatly helped out things for the platform as it languished.
While the QL was marred with it’s too early announcement/pre-orders, and terrible primary storage medium, and far too restrictive motherboard design, there was great potential in that tiny little machine. I’d like to have thought if I’d known about the QL, I’d have bought one, even though the 128kb is super restrictive, thanks to it’s processor it really was an incredible machine for 1984.
In the days of cheap arm machines, and who knows what the downstream effects of those will be, it feels like there was a much earlier missed window with the Sinclair QL.
Old Qemu builds
Since I was kind of surprised this morning to find someone looking for my old vpsland builds of now ancient Qemu versions, I’ve put all that I can find online on archive.org
Various old builds of Qemu : Free Download, Borrow, and Streaming : Internet Archive
Not sure if they are of value to anyone, as they are incredibly old.
But then again, I do enjoy the olde stuff.
Apple Lisa source released
As expected from Apple it’s under a super restrictive license. I guess they are scared of people using this incredible tech. Namely this provision:
- publish benchmarking results about the Apple Software or your use of it;
So weird.
The link to the download is here:
86Box PS/2 model 60 emulation
As a quick aside, on my exploring early OS/2 betas I thought I’d try to emulate the machine that I’d clearly lay the blame as to why OS/2 was fundamentally a failure, the IBM PS/2 model 60.
So IBM machines don’t use built in ROM config programs, but rather you need the reference disk. And this being a Microchannel PS/2 machine you also need the config files to support things like more than 2MB of RAM, the ESDI controller, or even an AdLib/SoundBlaster card.
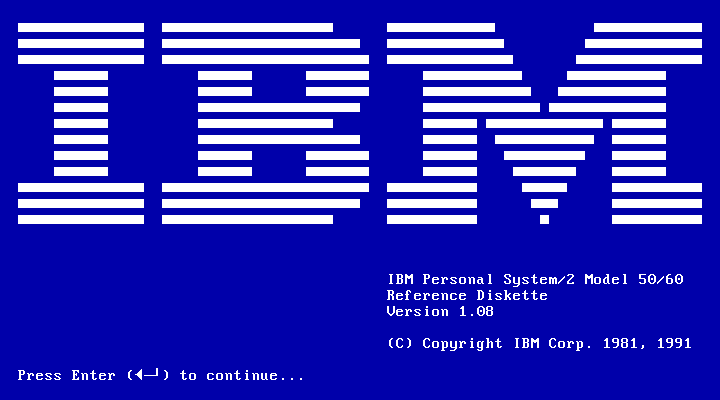
Adding in the RAM card, and a sound blaster adds the following cards:
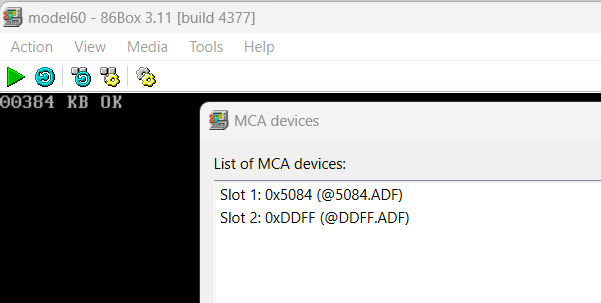
However it’s worth noting that the default ESDI config/driver on the MCA confg disk won’t work on 86box. You will need an updated version.
So inside the diag disk the config will appear like this:
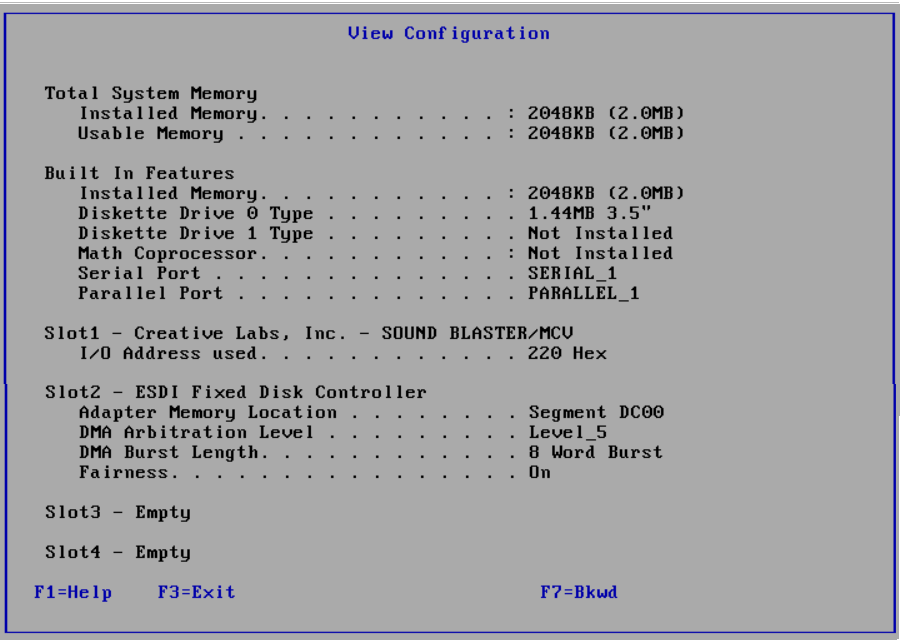
I’ve uploaded the reference disk on archive.org here: 86box PS/2 Model 60 Reference Disk : IBM : Free Download, Borrow, and Streaming : Internet Archive.
Unfortunately, at this moment 86Box’s PS/2 model 60 can’t run OS/2. The model 80 however has much better luck. But for anyone who want’s to play Wolf3D on an emulated 10Mhz 286, well this is your big chance.
Looking back at MS-DOS 4.00M, or in the beginning before there was OS/2
With the pre-christmas release of the Microsoft OS/2 betas 1.00, 1.01, 1.02, 1.03 & 1.05 on archive.org, and helping Ncommander with an upcoming video, it seemed like a good place to start, not with OS/2 but rather with MS-DOS 4.0.
From the book INSIDE OS/2 ( ISBN 1-55615-117-9 )
Microsoft started work on a multitasking version of MS-DOS in January 1983. At the time, it was internally called MS-DOS version 3.0. When a new version of the single-tasking MS-DOS was shipped under the name MS-DOS version 3.0, the multitasking version was renamed, internally, to MS-DOS version 4.0. A version of this product–a multitasking, real-mode only MS-DOS–was shipped as MS-DOS version 4.0. Because MS-DOS version 4.0 runs only in real mode, it can run on 8088 and 8086 machines as well as on 80286 machines. The limitations of the real mode environment make MS-DOS version 4.0 a specialized product. Although MS-DOS version 4.0 supports full preemptive multitasking, system memory is limited to the 640 KB available in real mode, with no swapping.2 This means that all processes have to fit into the single 640 KB memory area. Only one MS-DOS version 3.x compatible real mode application can be run; the other processes must be special MS-DOS version 4.0 processes that understand their environment and cooperate with the operating system to coexist peacefully with the single MS-DOS version 3.x real mode application.
Because of these restrictions, MS-DOS version 4.0 was not intended for general release, but as a platform for specific OEMs to support extended PC architectures. For example, a powerful telephone management system could be built into a PC by using special MS-DOS version 4.0 background processes to control the telephone equipment. The resulting machine could then be marketed as a “compatible MS-DOS 3 PC with a built-in superphone.” Although MS-DOS version 4.0 was released as a special OEM product, the project–now called MS-DOS version 5.0–continued. The goal was to take advantage of the protected mode of the 80286 to provide full general purpose multitasking without the limitations–as seen in MS-DOS version 4.0–of a real-mode only environment. Soon, Microsoft and IBM signed a Joint Development Agreement that provided for the design and development of MS-DOS version 5.0 (now called CP/DOS). The agreement is complex, but it basically provides for joint development and then subsequent joint ownership, with both companies holding full rights to the resulting product.
As the project neared completion, the marketing staffs looked at CP/DOS, nee DOS 5, nee DOS 4, nee DOS 3, and decided that it needed…you guessed it…a name change. As a result, the remainder of this book will discuss the design and function of an operating system called OS/2.
– Inside OS/2.
Although MS-DOS 4.00M disk images have been floating around for quite some time, either a 2 360k disk set, or a single 720k disk image, I don’t think anyone (including me) really tore into it that much. It does have the ability to freeze DOS 3 programs, giving the illusion of running more than one. The session manager is pretty sparse but hitting left alt twice will pop it up giving you the ability to toggle through programs with ease.
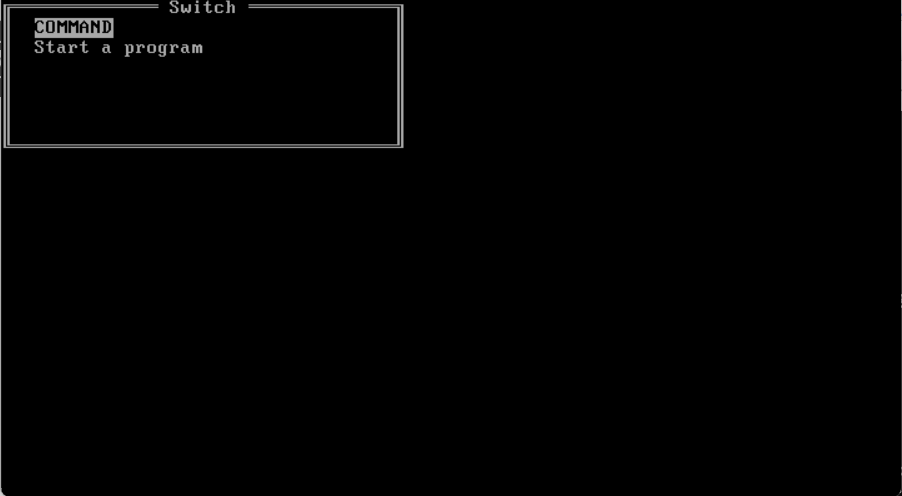
There is a FDISK, FORMAT & SYS command making it straight forward to setup a hard disk, and copy the files over, I didn’t see any installer.
there is a PS command to show running processes. Also there is a DOSSIZE to show the memory partitioning and how much is available. Although there is a SWAPPER program I’ve been unable to get it to actually fun.
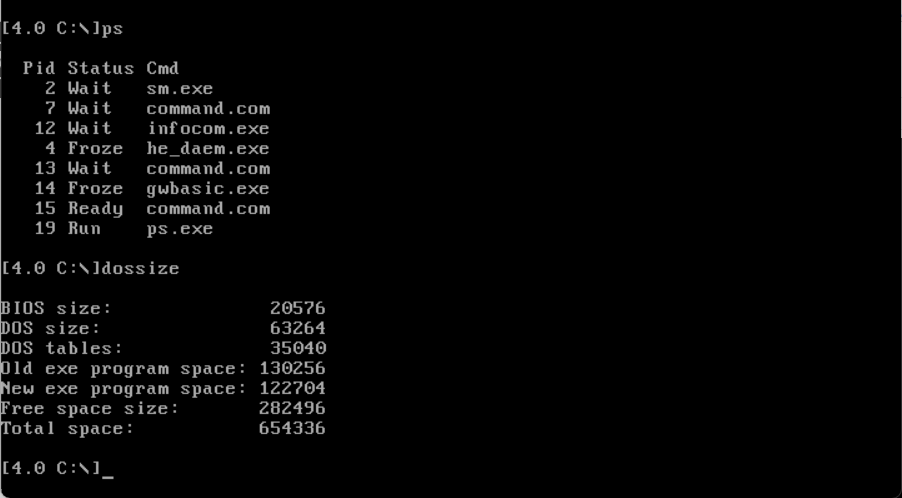
Another interesting thing if you run the unix ‘strings’ command against all the EXE’s you’ll find the string:
C Library - (C)Copyright Microsoft Corp 1985Implying that not only was DOS 4.00M a ‘new’ DOS, but it was also written in C. No doubt this contributed to a larger file size than DOS 3, however it would also give that holy grail of portability, at least to new CPU modes. Also many files have the name of the source files baked in such as:
@(#)append.c    1.1 85/10/09
@(#)assign.c    6.1 85/10/23
@(#)attrib.c    6.1 85/10/24
@(#)fdisk.c     1.1 85/10/09
@(#)fddata.c    1.1 85/10/09
@(#)fdlow.c     1.1 85/10/09
@(#)fdsub.c     1.1 85/10/09
@(#)joinsbst.c  6.3 85/11/08
@(#)sysvar.c    6.2 85/11/08
@(#)cds.c       6.2 85/11/08
@(#)dpb.c       6.1 85/11/08
@(#)label.c     6.1 85/10/24
@(#)newdef.y    6.2 85/10/14
@(#)ms4bnr.c    1.1 85/10/15
@(#)mode.c      6.2 85/10/24
@(#)getkey.c    6.1 85/10/25
@(#)pifmes.c    6.1 85/10/25
@(#)advpscrn.c  6.1 85/10/25
@(#)advescrn.c  6.1 85/10/25
@(#)usrscrn.c   6.1 85/10/25
@(#)rangers.c   6.1 85/10/25
Okay so far, so good. But we’ve all seen this before, and scratched this OS about this far, because what else can you do? It’s not like there is any dev tools to do anything fun!
Well the tool hidden in plain sight is LINK4, which in retrospect is specific for MS-DOS 4.00M.
Microsoft (R) 8086 Object Linker  Version 4.01
Copyright (C) Microsoft Corp 1984, 1985.  All rights reserved.

Object Modules [.OBJ]:
There is no SDK for MS-DOS 4.00M, but they were kind enough to leave the linker in place. A quick check of the Windows 1.01 SDK shows that it also includes LINK4:
Microsoft 8086 Object Linker
Version 4.00  (C) Copyright Microsoft Corp 1984, 1985

Object Modules [.OBJ]:
It appears that if the dates and versions are to be trusted they are of the same vintage, but the Windows linker is older, and that they both output to a NE or New Executable. So to start the experiment I created a simple hello world exe from a simple:
void main(){
  printf("Hello from MSC 3\n");
}
To compile this I used Microsoft C 3.0 (more on why later), and used LINK4 to create an EXE:
C:\dos\msc3>cl /c hello.c
Microsoft C Compiler  Version 3.00
(C)Copyright Microsoft Corp 1984 1985
hello.c

C:\dos\msc3>msdos dos4m\link4 hello.OBJ

Microsoft (R) 8086 Object Linker  Version 4.01
Copyright (C) Microsoft Corp 1984, 1985.  All rights reserved.

Run File [HELLO.EXE]:
List File [NUL.MAP]:
Libraries [.LIB]:
Definitions File [NUL.DEF]
Okay, everything looks fine so far. Attempting to run this under MS-DOS just results in the error:
Program too big to fit into memoryWell now that’s odd. Checking the EXE with the Linux ‘file’ command reveals:
file HELLO.EXE
HELLO.EXE: MS-DOS executable, NE (unknown OS 0) (EXE)
So obviously it’s a NE, but it is an older/unknown version to the file map database. There is no stub so I suppose that is why MS-DOS is getting confused.
Now let’s try MS-DOS 4.00M
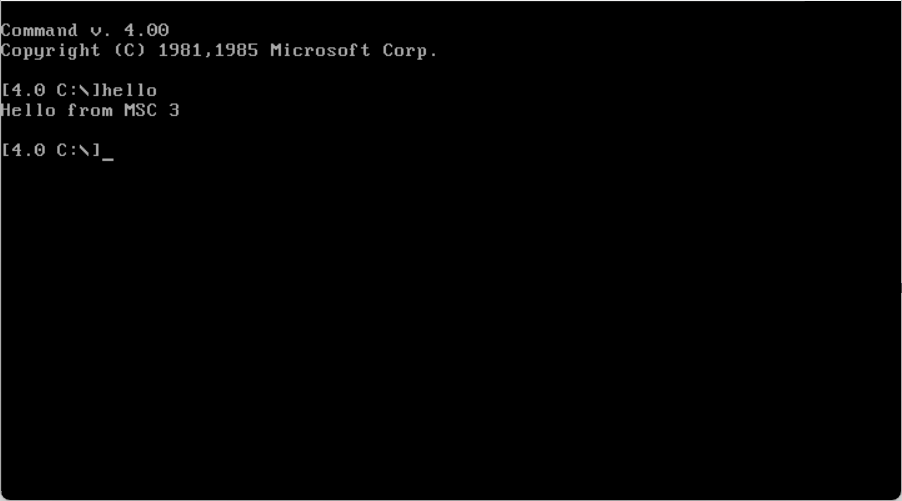
Well now isn’t that interesting?!
Excited with the ability to create special MS-DOS 4.00M programs, I get my favorite vintage ’87 Infocom interpreter, InfoTaskForce 87, and get it building on MSC 3.0. However instead of using the MS-DOS 4.00M linker, I thought I should try to use the Windows 1.01 linker and libraries for the exe:
C:\dos\msc3\infocom>msdos ..\win101sdk\bin\LINK4.EXE @infocom.win.lnk

Microsoft 8086 Object Linker
Version 4.00  (C) Copyright Microsoft Corp 1984, 1985

Object Modules [.OBJ]: FILE.OBJ FUNCS.OBJ INFOCOM.OBJ INIT.OBJ INPUT.OBJ +
Object Modules [.OBJ]: INTERP.OBJ IO.OBJ JUMP.OBJ OBJECT.OBJ OPTIONS.OBJ PAGE.OBJ +
Object Modules [.OBJ]: PRINT.OBJ PROPERTY.OBJ SUPPORT.OBJ VARIABLE.OBJ TERM.OBJ
Run File [FILE.EXE]: INFOCOM.EXE/ALIGN:16
List File [NUL.MAP]: INFOCOM.MAP
Libraries [.LIB]: MWLIBFP MWLIBC/NOD
Definitions File [NUL.DEF] INFOW.DEF;
And for those interested this is my .DEF file:
NAME    Infocom

DESCRIPTION 'Infocom 87 interpreter for Planetfall(83)'

DATA    MULTIPLE


HEAPSIZE    1024        ; Must be non-zero to use Local memory manager
STACKSIZE   4096        ; Must be non-zero for SS == DS
                        ; suggest 4k as minimum stacksize

SEGMENTS
    _INIT   PRELOAD MOVEABLE DISCARDABLE
One thing to save you the horror is that between MS-DOS 2 & 3 the way command line arguments changed. I forget the details but no matter what I tried I was unable to parse the CLI or the environment in this setup. I suppose if I had documentation of the product there would be some hint as to what tools or setup to use. Instead, I took the easy way and hard coded to load Planetfall.
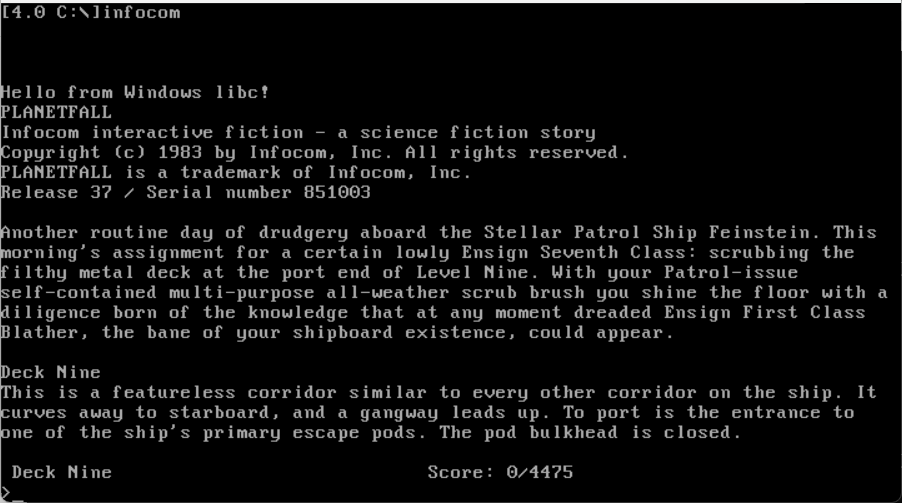
Unfortunately, this success would prove to be the exception to the rule. I took trek, converted it to K&R C, as Microsoft C 3.00 from 1985 is well. old, and sadly it just won’t run. Likewise, I took Hack 1.03 and although it runs on MS-DOS it will not run on MS-DOS 4.00M. I am sure there is some fundamental reason why it’s not working, and probably tied to creating a proper DEF file. I’m sure it was all written down somewhere but I don’t know. And yes I tried specifying either floating point emulation via library or inline, and it made no difference.
Looking at OS/2 1.00
Loading up the infamous $3,000 OS/2 1.00 beta, and hitting ctrl+escape you are greeted with session manager!
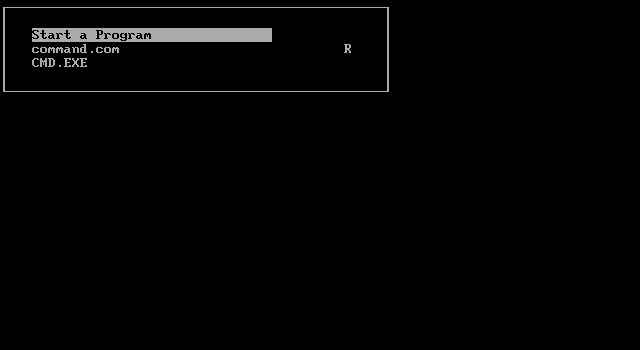
Notice the R for real-mode. With the obvious implication that everything else is protected mode. Going one step further on the excellent site pcjs.org there is OS/2 betas SIZZLE and although there is no OS/2 development bits on there, the directory DOS3TOOL reveals that the C compiler for this era for at least MS-DOS is MSC 3.0. Also included is our friend LINK4.
I create a simple def file that contains the single word ‘PROTMODE’ which should give me my OS/2 binary.
So let’s run that through hello world:
msdos sizzle\DOS3TOOL\link4  hello.OBJ,hello,,,hello.def;

Microsoft (R) Segmented-Executable Linker  Version 5.00.21
Copyright (C) Microsoft Corp 1984, 1985, 1986.  All rights reserved.


C:\dos\msc3>
However attempting to run this just crashes amazingly.
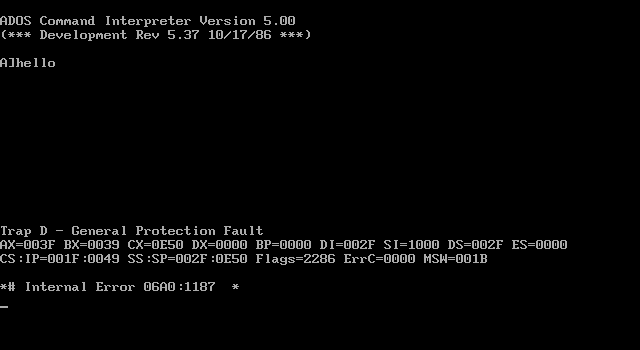
No doubt it’s because the real-mode libc is using interrupt 21 calls, which OS/2 sure wouldn’t like. I’m pretty sure it requires an OS/2 libc that uses DOSCALLS.DLL to function, which I just don’t have any pre-release versions, nor any libc source code to really make it possible. And attempting to port one to OS/2 pre-releases just doesn’t seem so worth the time.
So for the heck of it I point the LIB variable to the OS/2 1.00 SDK’s libs and re-run the link:
C:\dos\msc3>msdos sizzle\DOS3TOOL\link4  hello.OBJ,hello.exe,hello.map,C:box0\x\MSC\LIB\slibc5.lib box0\x\LIB\DOSCALLS.LIB,hello.def;

Microsoft (R) Segmented-Executable Linker  Version 5.00.21
Copyright (C) Microsoft Corp 1984, 1985, 1986.  All rights reserved.
By default it’s trying to link in EM.LIB, SLIBFP.LIB, SLIBC.LIB. Trying to add them all in the command line link just hangs LINK4 maybe a response file is better suited. Anyways:
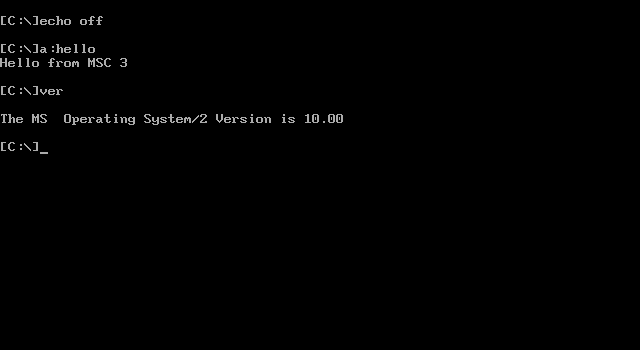
It does run on OS/2 1.00, which I guess isn’t surprising as the LINK4 & libraries are from/for this version.
As an interesting note, OS/2 links against doscalls library/DLL to interface to the OS. While MS-DOS 4.00M doesn’t have a seperate DLL, rather it’s baked into IBMDOS.COM
DOSCALLS
ALLOCSEG
REALLOCSEG
FREESEG
LOCKSEG
UNLOCKSEG
GETSEGSIZE
GETDSHANDLE
CRITENTER
CRITLEAVE
FCRITENTER
FCRITLEAVE
PBLOCK
PRUN
SUBSCREEN
GETPIDS
DOSDISCARDCODE
DOSGETHANDLE
DOSHANDLEJUMP
Noticeably absent is file I/O, No doubt allowing programs to use the standard int21 interface to the kernel for file I/O. No doubt this is in its primordial state, as the OS was going to evolve a bit more until it became OS/2. Unfortunately I have no idea how to link or call into this. Without any SDK it’s impossible to say. And even then is developing for a real mode OS worth the effort?
So what have we learned? LINK4, aka the MS-DOS 4.00M Linker, probably should have been called LINKNE for the NE format. Also there is references to it having it’s own virtual memory paging system, and being able to link larger EXE’s than the traditional link command. Sadly I was unable to get any non trivial programs running. I don’t think it was a memory model thing, although the C compiler has issues with InfoTaskForce and the large memory model for some reason, but small & medium work fine. I’d like to think that DOS 4.00M could support massive EXE’s much like Windows 1.01, however despite being from the same company and using the same tools, the memory manager for DOS 4.00M & Windows is fundamentally different.
With all these exiting OS/2 betas now available I’ll have to take some more time to explore them in more detail.
But until then I thought this genesis of DOS 4.00M was worth the look.
