Zork for the PDP-11 / RT-11 recreated

I know this is a weird one, but I’ve always wanted to run Infocom games from ever since I found out it was a thing.

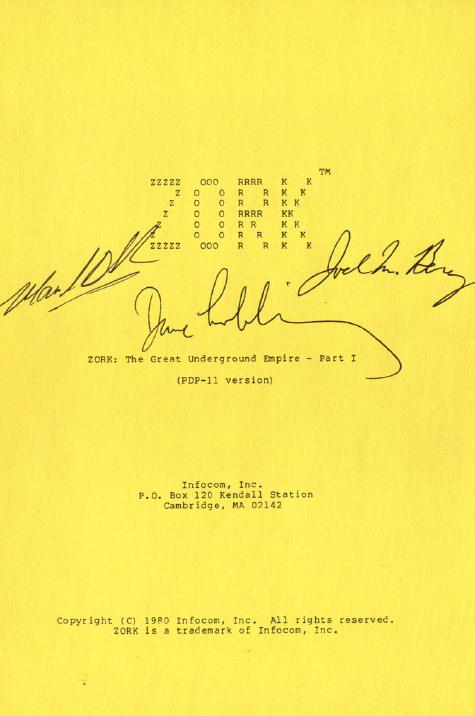
The cover of the RT-11 Zork that sold on ebay for $2,348.31

I know you maybe thinking of the FORTRAN port of the full Zork game, which does run on the same system. But this is NOT the FORTRAN reverse engineered game, rather it’s a port of the Z-Machine to the RT-11 / PDP-11.

Also this is NOT a 3rd party reverse engineering effort, it is the official Infocom Z-Machine source.

;       Proprietary documentation of:
;
;               Infocom, Inc.
;               55 Wheeler St.
;               Cambridge, MA 02138
;
;       Copyright (C) 1982, 1983 Infocom, Inc.  All rights reserved.

Yes it’s the real deal!

Ok so what or where to do this?! First you need SIMH or any other good PDP-11 emulator, a copy of RT-11, and of course the source to the interpreter oddly enough named PDP11.ZIP. Just keep in mind that this is NOT a pk-zip file, it’s a text file. It’s Macro-11 assembler source.

First you need a very simple config/type in to the SIMH PDP-11 emulator:

attach rk0 rtv4_rk.dsk
attach ptr pdp11.zip
boot rk

All being well you should boot into RT-11.

Now we copy the source into the machine through the paper tape reader. Just type in ‘COPY PC: ZIP.MAC’

.COPY PC: ZIP.MAC
 Files copied:
PC:            to DK:ZIP.MAC

.

This will create a .mac or macro assembler source file. The extension matters as it will tell the compiler what file it is and what to do. But luckily this is a single file, and assembles quite easily. As a tip to Unix folk, I found that making the assembly source in MS-DOS CR/LF made life easier.

Compiling & linking is very straightforward

.COMPILE ZIP.MAC
ERRORS DETECTED:  0

.LINK ZIP.OBJ

. 

Now we need to import a game file. I usually test with Planetfall, so I grabbed the data file, and placed it into the working directory and then attached it to the emulator

Simulation stopped, PC: 152644 (BR 152622)
sim> att ptr planetfa
sim> c


.COPY PC: PLANET.IML
 Files copied:
PC:            to DK:PLANET.IML

.

Notice the filenames are short, very 8.3 for some strange coincidence! Also I named it planet.iml, as that is what the interpreter is expecting. Now we can just run the zip and point it to the game data file!

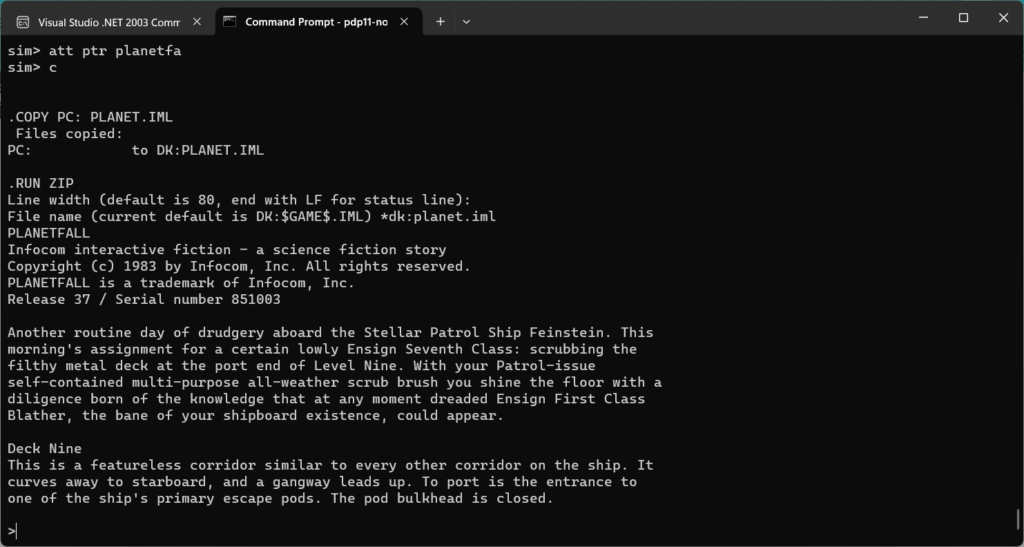
.RUN ZIP
Line width (default is 80, end with LF for status line):
File name (current default is DK:$GAME$.IML) *dk:planet.iml
PLANETFALL
Infocom interactive fiction - a science fiction story
Copyright (c) 1983 by Infocom, Inc. All rights reserved.
PLANETFALL is a trademark of Infocom, Inc.
Release 37 / Serial number 851003

And there we go! We are now running Planetfall on our simulated PDP-11!

There is quite a few great 80’s systems in the github repository, I have no doubt the rest can be built, but I thought I’d tackle a system that was another bigfoot, a thing of pure legend!

Undocumented Madness – 2.9BSD on XHomer

This is a guest post by Seal331

Since I’ve been dealing with XHomer a lot lately in order to get the two dumped VENIX/PRO versions to work, I noticed that the XHomer documentation mentions a thing called “maintenance mode” and the DEC Pro port of 2.9BSD, so I was interested.

After doing a bit of searching around I found some install notes on www.frijid.net from real hardware, so I decided to adapt these notes for XHomer and install it. TL;DR – I did it, here I’m explaining all this stuff.

Step 1 – Acquiring XHomer

XHomer is a DEC Pro 350 emulator that can run P/OS, Venix, 2.9BSD and possibly RT-11, but I didn’t get to installing the last one yet. There is a statically linked binary but, since I’m a Gentoo Linux person (but I didn’t use Gentoo for this particular install)and prefer compiling everything I can, I grabbed the source code (https://xhomer.isani.org/xhomer/xhomer-9-16-06.tgz) and quickly compiled it on my Linux box. It was pretty simple, just install a development toolchain (build-essential on Debian based systems), the libX11 development package (libx11-dev on Debian based systems) and the XShm extension which is included in libxext-dev on Debian based systems. During make it spit out a bunch of warnings but I got a working xhomer binary. Also it kind of messes the xterm settings a bit after being closed, so I’d recommend running it in a separate xterm window. Since there’s no install target in the Makefile I just copied the xhomer binary to /usr/bin, and that was it. From here on, I will assume that the XHomer binary is called xhomer and is somewhere in your PATH, if not just modify the way I run XHomer.

Step 2 – Acquiring the distribution

Thanks to the people at the same www.frijid.net site I mentioned earlier, I was able to easily piece together a distribution set. Since we don’t really rely on how many physical floppies we have with an emulator, I grabbed the recommended root disk set and the 15 disk usr set with the source code, although we won’t be compiling the kernel in this post. Maybe next one? We’ll see.

The site with the floppies is http://www.frijid.net/download/pro350/bsd/raw/ and here’s what I used for my install:

box#0/maintenance0.img
box#1/usr+k00.img
box#1/usr+k01.img
box#1/usr+k02.img
box#1/usr+k03.img
box#1/usr+k04.img
box#1/usr+k05.img
box#1/usr+k06.img
box#1/usr+k07.img
box#1/usr+k08.img
box#1/usr+k09.img
box#1/usr+k10.img
box#2/usr+k11.img
box#2/usr+k12.img
box#2/usr+k13.img
box#2/usr+k14.img
box#2/usr+k15.img
box#2/root1.img
box#2/root2.img
box#2/root3.img
box#2/root4.img
box#2/root5.img

The 3 disk usr set in box#2/ doesn’t include the source, so I didn’t grab it.
The maintenance disks are all the same, so I just grabbed the one in box#0/.
The 6 disk root set in box#0/ does include some extra dev files and something that appear to be leftovers from the development DEC Pro, but it’s missing /bin/ed and /bin/passwd, so I suggest using the 5 disk set instead.

There is also box#2/procomm.img which was labeled as containing “PRO/COMM terminal emulation” but when I mounted it to install, there was only an empty lost+found directory. Perhaps the original disk had gone bad over the years or someone accidentally reformatted it? We may never know.

Step 3 – XHomer configuration & serial port preparation

Since the maintenance (install) floppy uses a serial terminal interface over the printer port and XHomer only allows us to send its output over serial, I had to do some searching again since most PCs nowadays don’t have a serial port to use. Thanks to cantoni over at StackOverflow I managed to find instructions for using socat in order to generate a pty, which actually worked for me. At first you need to install socat (bruh) and then run “socat -d -d pty,raw,echo=0 pty,raw,echo=0”. Something like this will be printed out on the terminal:

Then we do a quick test. I use putty to connect to the pty’s output, in my case it’s /dev/pts/3. Just use the default settings for serial connection with speed 9600 and the device as /dev/pts/3. If everything goes well, you will get a blank putty terminal window. Don’t panic, the fact it’s blank is normal.

Let’s test if our serial port works. Echo something in the pty’s input, in my case it’s /dev/pts/4. For example, “echo “Test” > /dev/pts/4″. If the word “Test” appears on the screen, congratulations, you have successfully set up the pty to a point where BSD will happily talk to it when we set up the connection later. !! DO NOT CLOSE THE PUTTY WINDOW AT ANY POINT DURING THE INSTALL UNTIL WE NO LONGER NEED IT (at the initial hd boot) !!

Now we configure XHomer. At first, let’s make a disk image. BSD only supports RD51 or RD50, we’ll use RD51 as it’s slightly bigger. If you get the hard disk wrong, BSD will silently hang at boot. Here’s the command to make a 10MB RD51 disk image for use with XHomer:

dd if=/dev/zero of=29bsd.rd bs=10027008 count=1

Let’s make the XHomer config file. Note that everything after the symbol | including the symbol itself does not need to be inputed, it’s just my notes.

screen = window | make the emulator window mode
window_position = 0, 0
window_scale = 2
full_scale = 3
screen_gamma = 10
pcm = on
framebuffers = 0
serial0 = /dev/pts/4 | change to your needs, pty input
la50 = null
la50_dpi = 300
kb = lk201
ptr = serial0 | DO NOT CHANGE, we'll replace it later when we no longer need serial
com = null
rd_dir = ./
rx_dir = ./
rd0 = 29bsd.rd, 4, 306, 16 | change if not using suggested disk
force_year = 99 | fix y2k bugs by forcing year to 1999
maint_mode = on | DO NOT CHANGE, bsd install uses maintenance mode for terminal
int_throttle = off | random workarounds for clocks or older linux systems, we don't need this on new stuff
nine_workaround = off
libc_workaround = off
lp_workaround = off

Save the file as xhomer.cfg.

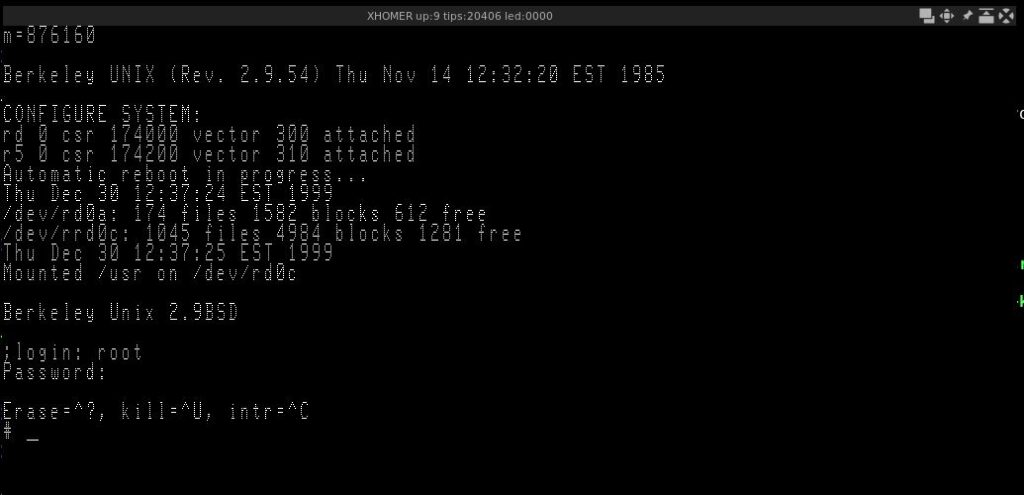
Now run the xhomer binary. If everything goes right, you should have something like this on your screen:

If you didn’t run the test documented above or changed the string, the “Test” string will not be in the terminal or will be some other text, this is all okay.

Step 4 – BSD install

In order to feed floppies to XHomer, you have to use the XHomer control menu. In order to get to it, press Ctrl+F1 when the emulator window has focus. The two floppy drives we need are rx0: and rx1:, these are equivalents of A: and B: in DOS. Insert the maintenance0.img disk in rx0. If all goes okay, the floppy disk picture should disappear from the display window, leaving just the DIGITAL logo. The putty window should then display something like this:

40Boot
:

(all following input is in the terminal unless otherwise stated)

If all is okay, congratulations, you have booted from the installation diskette. Now type the following in the putty window after the : symbol:

r5(0,0)rdfmt

Then, if you inserted an RD51 10MB disk in the emulator as suggested, type 0 when asked for drive type. If you inserted the 5MB RD50 instead, type 1. If you don’t know the exact disk sizes and types, refer to the XHomer documentation, specifically the Emulated Hard Disk part. The formatting shouldn’t take long, then it will dump you back in the 40Boot prompt. Now you need to boot the UNIX kernel, type this in the putty window:

r5(0,0)unix

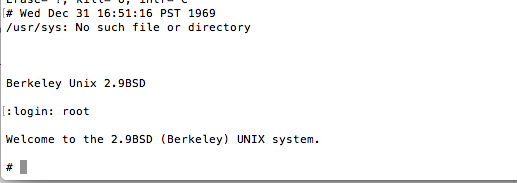
If everything goes okay, you should have something like this now:

If you get a boot hang instead (like me), restart both XHomer and putty, connect putty back to the pty, then in XHome insert the maintenance0 floppy back and boot the UNIX kernel again. DO NOT FORMAT THE DRIVE AGAIN!!

Install time!

At first, create the root filesystem by running:

/etc/mkfs /dev/rrd0a 2240

Then insert the root1 disk in the 2nd floppy drive (rx1) and restore the root filesystem dump from the 5 root set floppies:

restor rf /dev/rr51 /dev/rrd0a

When it says “Last chance before scribbling on /dev/rrd0a.” just press Enter.
When it says “Mount volume N”, just insert the right floppy and press Enter. Volume number == floppy number in this case.

After the “end of tape” message, verify the rootfs:

/etc/fsck /dev/rrd0a

If it succeeds, create the usr filesystem by running:

/etc/mkfs /dev/rrd0c 6528

Then insert the usr+k00 disk in the 2nd floppy drive (rx1) and restore the usr filesystem dump from the 16 usr set floppies:

restor rf /dev/rr51 /dev/rrd0c

When it says “Last chance before scribbling on /dev/rrd0c.” just press Enter.
When it says “Mount volume N”, just insert the right floppy and press Enter. Floppy number == volume number – 1 in this case.

After the “end of tape” message, verify the usr fs:

/etc/fsck /dev/rrd0c

(all following input is in on the Pro display unless otherwise stated)

If everything is okay, run sync two times and shut down the emulator. Restart it with only the maintenance floppy in rx0, then type this in the terminal (NOT the Pro display):

rd(0,64)unix

This should boot up Berkeley UNIX (BSD). We’re not done yet, but it’s close.

Type the following to install the hard disk bootblock:

dd if=/rdboot of=/dev/rrd0h count=17

If everything goes okay, set the root password:

passwd root

Congratulations, you have successfully installed 2.9BSD. Here are the cleanup and hdboot prep stuff:

Bring the OS to single user mode:

shutdown +1

(you can close putty now)

Then run sync two times and shut down the emulator.

Step 5 – Booting the OS

In order to boot the OS, you need to do the following:

Open the xhomer.cfg file;

Remove the serial0 = line;

Change the ptr = serial0 line to ptr = null;

Change the maint_mode = on to maint_mode = off.

Then save, after running XHomer you should be able to just log in.

Congratulations, you have successfully installed 2.9BSD for the DEC Pro 350! Sadly it’s pretty unstable, and due to emulation issues in XHomer vi completely crashes BSD, but there’s always ed 😉

Appendix A – Transferring Files

In order to transfer the files (up to 400KB per file) you will need some additional utilities. Here’s a guide on how to install them:

(the following steps are done on the Linux host side)

  1. Grab the following files:

https://xhomer.isani.org/xhomer/BSD/f2rx
https://xhomer.isani.org/xhomer/BSD/rx2f.c
https://xhomer.isani.org/xhomer/BSD/lbn2xhomer.c

  1. Apply the following patch to lbn2xhomer.c:
--- lbn2xhomer.c   2015-07-05 07:51:19.000000000 +0300
+++ lbn2xhomer.c        2021-12-30 17:13:28.539768500 +0300
@@ -25,6 +25,7 @@

 #include <string.h>
 #include <stdio.h>
+#include <stdlib.h>

 #define SECSIZE                512
 #define SECTORS                10
@@ -66,7 +67,7 @@
   if (fptr_v == NULL)
   {
     printf("Unable to open %s\n", argv[1]);
-    exit();
+    exit(1);
   }

   fptr_x = fopen(argv[2], "w");
  1. Compile lbn2xhomer:
cc -o lbn2xhomer lbn2xhomer.c
  1. Set up f2rx for operation:
chmod +x f2rx
  1. Make a floppy image with the BSD side utility:
./f2rx rx2f.c
  1. Run XHomer and attach the generated rx2f.c.dsk to rx0

(the following steps are done on the BSD side)

  1. Grab the file from the floppy:
dd if=/dev/r50 of=rx2f.c skip=18 bs=1 count=891
  1. Compile the utility:
cc -o rx2f rx2f.c

You’re now ready to transfer files.

Short file transfer handbook:

  1. Run f2rx FILE on the host box, FILE being the file to use;
  2. Insert FILE.dsk into rx0 on XHomer;
  3. Run rx2f on the BSD side.

Appendix B – Init: no more children issue workaround

On some hosts, programs from the install floppy may randomly die with the “no more children” message. A workaround is to disable RTC mode and enable IOTRACE mode in the XHomer Makefile and recompile, leading to a much more slower (due to accurate timing) and working XHomer. After the installation, you can revert to normal settings and it should work, as the programs installed on the hard drive to not appear to suffer from the same issue.

Appendix C – Sequels

Possibly coming soon to VirtuallyFun:

Undocumented Madness 2 – Big hard drives on 2.9BSD XHomer
Undocumented Madness 3 – Custom Kernel on 2.9BSD XHomer

Confessions of a paranoid DEC Engineer: Robert Supnik talks about the great Dungeon heist!

What an incredible adventure!

Apparently this was all recorded in 2017, and just now released.

It’s very long, but I would still highly recommend watching the full thing.

Bob goes into detail about the rise of the integrated circuit versions of the PDP-11 & VAX processors, the challenges of how Digital was spiraling out of control, and how he was the one that not only championed the Alpha, but had to make the difficult decisions that if the Alpha succeeded that many people were now out of a job, and many directions had to be closed off.

He goes into great detail how the Alpha was basically out maneuvered politically and how the PC business had not only dragged them down by management not embracing the Alpha but how trying to pull a quick one on Intel led to their demise.

Also of interest was his time in research witnessing the untapped possibilities of AltaVista, and how Compaq had bogged it down, and ceded the market to the upstart Google, the inability to launch a portable MP3 player (Although to be fair the iPod wasn’t first to market by a long shot, it was the best user experience by far).

What was also interesting was his last job, working at Unisys and getting them out of the legacy mainframe hardware business and into emulation on x86, along with the lesson that if you can run your engine in primary CPU cache it’s insanely fast (in GCC land -Os is better than -O9).

The most significant part towards the end of course is where he ‘rewinds’ his story to go into his interest in simulations, and of course how he started SIMH when he had some idle time in the early 90’s. SIMH of course has done an incredible amount of work to preserve computing history of many early computers. He also touches on working with the Warren’s TUHS to get Unix v0 up and running on a simulated PDP-7 and what would have been a challenge in the day using an obscure Burroughs disk & controller modified from the PDP-9.

Yes it’s 6 hours long! But really it’s great!

IOCCC 2018 Best of show, aka PDP-7 emulation in under 4kb!

The most incredible thing about this PDP-7 emulator is that it not only can run Unix v0 as recovered by TUHS, but for kicks there is also a PDP-11 emulator coded in PDP-7 assembly that is capable of running both Unix v6 & 2.9BSD!

So if I have a PDP-7 emulator, how do I run operating systems that expect a PDP-11? Simple… I emulate a PDP-11/40 on the PDP-7. I have written PDP-7 assembler code to emulate a PDP-11/40 with the following equipment:

PDP-11/40 (KD11-A)
EIS instruction set (KE11-E)
Memory management unit (KJ11-A)
Line time clock (KT11-D)
124 Kwords of memory (244 Kbytes)
RK05 fixed disk drive (RK11)
Console TTY (DL11)

And as you can see, here is the PDP-7 running 2.9BSD via the emulated PDP-11!

You read that right.  And yes, here it is running 2.9BSD.  This is nothing short of amazing!

Read about Christopher Mills’s entry here:

http://ioccc.org/2018/mills/hint.html

And yes, the source has been stylized like a paper tape…

It really works best on a ‘real’ Unix like system.  I’ve run it on Debian 9 & OS X 10.13.14 … It does consume 100% of a CPU core.  But it’ll run a PDP-7 with v0 Unix, PDP-11 with Unix v6, and the aforementioned 2.9BSD. The Linux subsystem for Windows 10 didn’t handle the terminal control so well.

So, yeah kill your CPU and bask in the 4k glory!

Apout on Windows

I read somewhere that kids these days are interested in games where you can modify how the game operates with sub programs written in their own languages etc.

Hello from Unix v7

Hello

So while this does sound interesting, it does remind me of that good old fashioned syscall emulation, where you emulate the CPU, load an executable, but any system calls that are made, are handled by the simulator, little if any hardware is actually emulated. Yes Basilisk II is an example of this, but so is Wine, WOW, NTVDM, i386 code on x64 platforms, and various others. The major advantage is that they typically can access your native file system so you don’t have to mess with virtual disks. Of course it all depends on the implementation.

I did remember this old simulator, Apout, which could run UNIX v6, 7 along with BSD 2.9 stuff on modern Unix. The emulation layer here being LIBC, and how pretty much the basics of how UNIX operates hasn’t changed since those ancient days in the 1970’s.

So I thought I’d try to see how much of this works on Win32 using Microsoft Visual C++ 5. And surprisingly I didn’t have to glue in that much, the biggest thing I had to do was trying to detect if a file about to be opened was ASCII or BINARY as the UNIX platform doesn’t distinguish these two but Win32 with it’s MS-DOS legacy does. As you can see I did get the banner program running, some of the games work ok, although I had to comment out the sgtty functions as there is no immediate equivalent on Windows, and I didn’t think there would be that much of a demand for such a thing anyways. I can even run the login program. Which brings me to the issue which is that it’ll spawn new programs fine, but when an exit is called Apout just exits. Even on Linux it’ll just do this. I tried doing something with setjmp/longjmp but it crashes shortly afterwards… No doubt some stack unwinding fun. As such trying to compile things just bomb out. I went ahead and took the source code to cc and made a native Win32 version that then calls apout for the various parts and that almost worked except I then found out that the assembler on the PDP-11 is a 2 pass assembler, written in assembly. And yes, when as calls as2, and unwinds all hell breaks loose. Which is another problem that UNIX likes to share file descriptors among itself and children, but children like to close things when they die. I guess the solution is to give each child it’s own descriptor table as everyone likes to close stdin/stdout/stderr and even #4, which the simulator uses for logging. it’s very annoying so I just prevented it from closing handles under 4.

But running each of the phases manually does get me an executable but it doesn’t seem to do anything, the only syscalls are closing all the file handles and exiting.

So close!

I don’t think anyone will care, but here is my source/binary along with Unix v7. It’s hard coded to dump stuff into c:\temp for temporary files, the Unix v7 must be in c:\v7 … ugh.

Hunt the wumpus on NT

Hunt the wumpus on NT

But yeah, you can play that thrilling game from 1979, hunt the wumpus!

As part of the retrochallenge 2012, there is a PDP-11 running 2.11 BSD out there!

No, really!

You can get an account, just sign up here!

Sander Reiche has setup a MicroPDP-11/83 with the following specs:

So far there are FOUR users.. which means you can get in on the action for sure!

For those of you who want a sandboxed version at home, you can download my install here, which of course I touched on a while back.

For those unfamiliar, here is what retrochallenge is all about!

  1. RetroChallenge commences July 1st, 2012 and runs until July 31st, 2012.
  2. In order to qualify, computer systems must by approximately 10 years old (or older!)… in general, this means 486 or below, 680×0 and pretty much everything with an 8-bit processor, but we’ll also let you in if you have an old Cray kicking about, and exceptions can always be made for exotica!
  3. Gaming consoles and PDAs qualify if they were made in the previous century.
  4. Where appropriate, replica hardware and emulators may be used.
  5. Entrants are responsible for adequately documenting their projects and submitting occasional updates during the contest.
  6. Projects may encompass any aspect of retro-computing that tickles the fancy of the individual entrant.
  7. Winners will be carefully selected and thoughtfully chosen prizes presented (hopefully before the next challenge commences).
  8. Have fun!

Sadly I don’t have anything physical around here that really qualifies.  A G5 mac is too new, and I recently picked up a Pentium 150 based IBM Aptiva, but its too new apparently….

Follow up on Dungeon (zork) for RT-11

I have documented the install steps back here, a long while back.  However recently I did get a request for a binary for this for someone to try to load up on a physical PDP-11.  The steps sure are daunting and of course time consuming for a first-time user, so while I was building dungeon again, I thought I should take this opportunity to package this up and make it more accessible for everyone.

This is the output of my ‘effort’ although the real thanks to this goes to Bob Supnik ,not only for writing SIMH making it possible, but also for porting Dungeon to Fortran way back then.

Extract the archive using 7zip, then run pdp11.exe and it should boot you up into RT-11.  Then just type in

RUN DUNGEON

And you should be teleported to the open field west of a big white house with a boarded front door…

Open Mailbox

RetroBSD!

2.11 BSD Unix for PIC32, build #826:
     Compiled 2011-08-07 by [email protected]:
     /Volumes/Users/vak/Project/retrobsd/trunk/sys/pic32/compile
phys mem  = 128 kbytes
user mem  = 96 kbytes
root dev  = (0,0)
root size = 16384 kbytes
swap size = 2048 kbytes
standard daemons: update.
Sun Aug  7 16:47:45 PST 2011

2.11 BSD UNIX (pic32) (console)

login: root
Password:
Welcome to RetroBSD!
# _

Wow isn’t that cool? Who needs a ‘basic stamp’ if you can have UNIX!  Not to mention it’s from Serge Vakulenko, of DEMOS fame!

From the main site:

RetroBSD is a port of 2.11BSD Unix intended for embedded systems with fixed memory mapping. The current target is Microchip PIC32microcontroller with 128 kbytes of RAM and 512 kbytes of Flash. PIC32 processor has MIPS M4K architecture, executable data memory and flexible RAM partitioning between user and kernel modes.

Main features:

  • Small resource requirements. RetroBSD requires only 128 kbytes of RAM to be up and running user applications.
  • Memory protection. Kernel memory is fully protected from user application using hardware mechanisms.
  • Open functionality. Usually, user application is fixed in Flash memory – but in case of RetroBSD, any number of applications could be placed into SD card, and run as required.
  • Real multitasking. Standard POSIX API is implemented (fork, exec, wait4 etc).
  • Development system on-board. It is possible to have C compiler in the system, and to recompile the user application (or the whole operating system) when needed.

DEMOS on the PDP-11 in SIMH

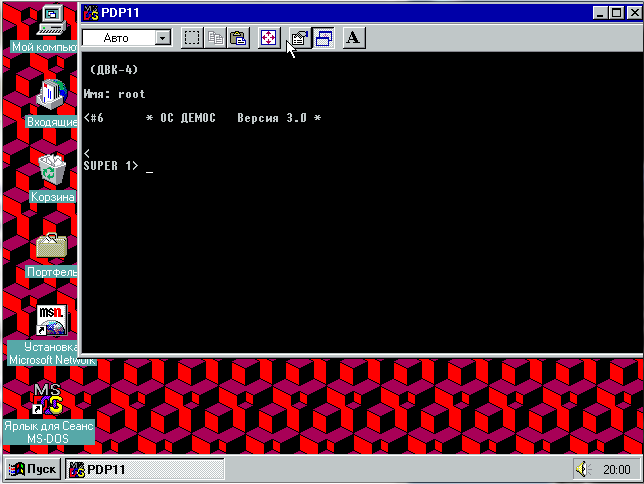
DEMOS 3 on SIMH's PDP-11 / on Windows 95 Russian

While looking around again for more DEMOS stuff (not to be confused with ‘demo’ argh!) I found Serge Vakulenko’s ready to run DEMOS 3.0 for the PDP-11/SIMH package! And I think this is the corresponding source code. More information can be found on what I think is Serge’s blog.

Now on to running it.

The good news is that I only needed msvcrt.dll from Visual C++ 4.0 to get it to run under Windows 95.. The ‘bad’ news well for me is that I couldn’t think of a good telnet to do Cyrillic/KOI8-R properly. I’ll admit it’s probably me not knowing how to do it correctly. At the same time, I figured the ‘easy’ way out is to just install some Russian version of Windows. Naturally there is the ‘dual keyboard’ layout thing in Windows, which if you can’t read the default language… well. it’s too intimidating. But with enough mousing around I pulled the Russian keyboard out and it seems to operate fine.

There is of course some information here, but the mechanical translation is rought.. The wiki page still talks of 68020 and VAX ports of Demos (among others) I wonder if they’ll ever surface?

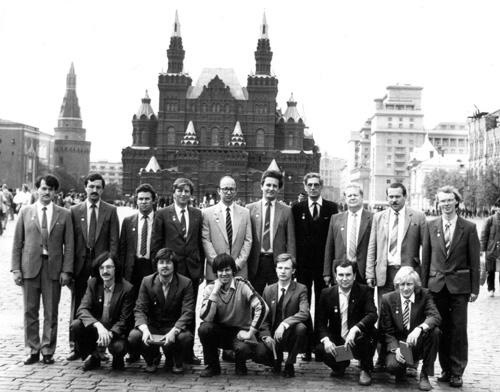
Demos Team in Moscow

The DEMOS team.

I’ve even found comprehensive documentation for both Демос and Xenix of all things here.

And to round things off, here is a mechanical translation (thanks google!) of the readme….

1. SETTING THE OPERATING SYSTEM DEMOS
====================================

This section describes the procedures to be you-
satisfied, as when you first install the system, and in the case
“Complete destruction” of the root file system or replacement
hard disk is described by the root file system and non-
which directories.

The process of preparing the system for operation can be separated by
pour into the following stages:
– The primary installation (or recovery) system
distribution set to floppy disks (FDD);
– Loading system and checking its integrity;
– Set up the system files.
If “partial destruction of the” filesystems recom-
is to try to restore the integrity of the program fsck
(See Annex 2).

1.1. Initial installation of the system
===========================
For the initial installation of the system must:
– Tumbler “NETWORK” to include personal computers;
– Insert a floppy disk with the number 0 (the starting disk) in the
top device (null);
– Received an invitation to “@”, press (b), and then
in response to an invitation, “$” (dollar) to introduce “MY0” (or “MY” and
press (VC));
– After a while the screen will receive invitations
of “BOOT :…”; in response to it, you must press
(VC);
– The query “installing DEMOS requires erasing infor-
tion on the hard disk … “to answer” Y “(YES) and on-
press key (VC); cancel mistyped character (up to
pressing (VC)) may be using the (BZ);
– On request “Enter the time …” necessary to introduce 10
digits and press (VC); time is given as follows-
Thus:
ggmmddchchmm,
where he – the last two digits of the year (eg, 90);
mm – month number (from 01 to 12);
dd – day of the month;
hh – hour (00 to 23);
mm – minute (00 to 59);
– The query “capacity hard disk drive …”
must enter the number – the number of drive type and press
key (VC); type of drive is defined as follows:

1. 5 MB 153 cylinder / 0-152 / – Set Database RUBIN impossible
2. 10 MB 306 Cylinders / 0-305 / – Set the database RUBIN impossible
3. 10 MB 306 Cylinders / 0-305 / – Set the database RUBIN possible
4. 20 MB 612 Cylinders / 0-611 / – Set the database RUBIN possible

– More on request “format the hard drive?” necessary-
necessary to introduce a “Y”, if you want to reformat the drive or
enter “N”, if not required;
– After loading the mini systems on the hard drive would you-
given a message to her perevyzova from this disc;
after a while you will be prompted “@”;
– In response to this invitation must type “B”, and
then, in response to an invitation, “$” (dollar) to introduce “DW0” (or
“DW” and press (VC));
– After a while the screen will receive invitations
of “BOOT :…”; in response to it, you must press
(VC);
– After the system is triggered, it will ask for a floppy disk from the N1
basic set, it must be inserted into any drive
on floppy disks, enter the number of drive and press
key (VC);
– After reading the floppy disk system will ask the following;
necessary to remove the floppy disk with the number 1 from the drive
and insert a floppy disk with the number 2, then number 3 and
so on;
– After the floppy will be read by all base
set, the system will automatically reboot and check the File
lovuyu system on your hard drive (this can happen
Re-Boot);
– After rebooting the system will prompt “Name:”;
enter the name of the root user to perform
administrative functions in the DEMOS.

If you are logged on for the first time after the initially-
initial installation or complete restoration, it is necessary-
necessary to do the following:
– Set a password for the root user command
passwd;
– Duplicate the distribution set GMD.

To copy a floppy disk you can use cpfd
(See 4.6.2).
Before turning off the PC user must perform
command:
/ Etc / reboot-h (sure!)

Diskette distribution set should be pasted
markers of protection record. This is to ensure that due
equipment malfunction or careless use is not
destroy information on floppy disks.
During the boot from the floppy disk with the number 0, it
should be without a marker.

1.2. Download and check the integrity of the system
=======================================
To load the operating system must DEMOS:
– Turn the power on the PC;
– Received an invitation to “@”, press (b), and then
in response to an invitation, “$” (dollar) to introduce “DW0” (or “DW” and
press (VC));
– After a while the screen will receive invitations
of “BOOT :…”; in response to it, you must press
(VC);
– On request “Enter the time …” necessary to introduce 10
digits and press (VC);
– Further to the request “Check for file system?” need-
Dimo press (VC) (if you want to check file
system), or enter “N” and press (VC) (if not the friction
buetsya check file system);
– After checking the file systems will receive invitations
of “Name:”, enter the name under which the user
registered in the system after its processing realized
login.

Example Remark and e. When checking file systems
may happen to re-reboot.

If the answer to the query “Name:” enter “user”, a Loss-
zoydet login PRACTICE (system description PRACTICE
See Section 3 “Guidebook”).

After completion of the work in the system, on invitation of the
solution to enter commands to type “/ etc / reboot-h”; after
how the system responds “SYNCING DISKS … DONE”, can be switched off-
chit powered PC.

2. ADVANCED FEATURES DEMOS OS Version 3.0
===========================================
1.
Generating core demos contains the following items change
towards increased efficiency and optimality of the kernel:

a). A new, fastest, and very bright
in the hard disk drive such as “Winchester”, re-
presses of the program is configured rwset.

b). Adjusted and optimized driver floppy
disc.

c). A new superuniversalny printer driver
supporting the work of printers such as:
EPSON FX-800, EPSON LX-800, SM 6302, DZM-180, SM 6315,
SM 6900, ROBOTRON SM 6329, D100, D100M, etc.
full ob_eme their functionality
and taking into account the errors in the ROM EPSON FX-800. Modes of Operation
driver software is configured lpset.
For details, see READ_LP file in the root directory.

d). This version of the kernel supports the controller KTSGD
as with ROM KR18101RE2-181 on the board KTSGD and with ROM
KR18101RE2-182, operating in 8-bit character mode.
(Note that the kernel version 2.0 is not capable of work-
a thief with KTSGD on ROM KR18101RE2-182). However, the supplied
graphic protocol / etc / graf, is loaded into RAM KTSGD
and designed for ROM KR18101RE2-181 will not be over-
gruzhatsya in ROM KR18101RE2-182. Currently,
developed a new graphics protocol
latest ROM.

In order to save memory parameters changed
The kernel configuration:

e). Number of I / O buffer.

f). Number of processes in the system.

g). Number of concurrently executable programs.

h). Number of file descriptors.

i). Number of simultaneously open files.

j). “Trapped” statistics on I / O buffer, the sub-
pumping at boot time, for the teams.

k). Reduced the number of overlay core demos.

l). And other stuff …

2.
Fix bug in the loader boot, which allowed
work on different types of hard drives.

3.
Fix bug in intermediate loaders
rwuboot, fduboot.

4.
The new version 4.1 of multiscreen editor red
contains the following changes and additions:

a). (PF1) (i) (VC) set / reset insert mode.

b). (PF1) (b) (VC) set the 132 characters on the screen.

c). (PF1) (l) (VC) set the 80 characters on the screen.

d). (PF1) (g) (VC) set the drawing symbols
pseudographics. Press the (F4) (F5), (F6) (F8)
You can “draw” and “erase” vertical and horizontal
tal solid lines.

e). (PF1) (^ 0) set / reset mode drawing / erasing pseudographics.

f). (PF1) (n) (VC) Exit from the pseudo-graphic.

g). (F1) move the cursor on the word forward.

h). (PF4) move the cursor to end of line.

i). (F5) delete word to the right of the cursor.

j). (PF1) (2) (right arrow) move the cursor
in the right extreme position of the current window.

k). (PF1) (2) (left arrow) move the cursor
in the leftmost position of the current window.

l). (PF1) (2) (up arrow) move the cursor
the upper extreme position of the current window.

m). (PF1) (2) (Down Arrow) move the cursor
the lower extreme position of the current window.

n). (PF1) (octal) (2) (^ 0) input specials. characters
where the number has three digits.

o). Optimized output to the screen with
use shortcuts (F7) (PF1) (F7), (2) (F7) (PF1) (2) (F7)

p). Undo the (FI), as the tab back

5.
Corrected program graf (file etc / graf).
Graphics protocol can now be downloaded as
in compatibility mode (VT52), and in the extended
pulsed mode (VT100) displeya.V file etc / termcap include
Chen esc-sequence installation of roll band from 2
at 22 lines screen, which improves the visibility of pa-
Editor’s red boots, and other minor changes.

6.
Make a convenient initial installation of OS DEMOS on your hard drive
(See above point 1), taking into account their different types and database RUBIN.

7.
Minor changes to the index.html file etc / rc
(Associated with the programs of fsck, mount).

8.
Graphics library libgraph.a is
directory usr / lib and a functional analogue of graphite
cally Library Company “Borland International”. The file
READ_GRAF describes the graphics functions.

* * * * *

9.
Opint program determines the optimal interleaving of sec-
tori, surfaces, cylinders and formats vinchester.Kontrol-
Noe testing after formatting the hard drive with an optimal
interleaving shows that the efficiency of working with hard drive
increased on average by 25-30%. opint program should be run
from floppy disks (the OS is loaded at the same time as floppy disks of numbers under-
rum 0). opint program has the following items keys:

Usage: opint {-i [N] |-f [-q] [-bN] [-lN] [-sN] [-cN]} [-r]

-I [N] to calculate the optimal interleaving factor of
Sector / surfaces / and the cylinders. N-number
working cylinder, the cylinder is also used N-1
(Default N == 152)

-F format the hard drive

-R does not store information on your hard drive (in the informal
matted hard drive, this key is mandatory!)

-Q no questions asked

-BN set the start formatting with the N-cylinder
inclusive (the default cylinder N == 0);
this cylinder (and previous) is used in
as working to find the optimal Interlachen
Ving by a key-b0, or any absence
exists at all, then the worker becomes a 152 cylinder.

-LN set end of formatting to N-cylinder
inclusive (default to the cylinder N == 152)

-SN set interleaving factor N by sektoram/po-
surfaces, (default N == best)

-CN set interleaving factor N in the cylinders
(Default N == best)

10.
Rwset program is used to adjust operating modes
hard disk drive and has the keys:

Usage: rwset [-cN] [[-] w]
-CN – enable precompensation to the N-cylinder
w – include checking account
-W – disable checking account

11.
Lpset program is used to adjust operating modes
printer driver. All inforamatsiya Printing
contained in a file READ_LP.

* * * * * * *

3. OPERATING SYSTEM DEMOS/306
==============================

DEMOS/306 operating system designed for installation and
operation on a single hard disk drive (“HDD”, 20MB) with
operating system RT-11. Hard disk capacity of 20MB
between the two operating systems is as follows:

RT-11: from 0 to 305 cylinder (10Mb)
DEMOS: from 306 to 611 cylinders (10Mb)

Initially (power-on) are loaded OS RT-11,
and hard disk drive must be configured to work with
10 MB free disk space (the cylinder to 305 inclusive).
After downloading the RT-11 operating system called DEMOS/306 team DEMOS.

Initial OS installation DEMOS/306 from installing OS DEMOS different
only a single boot floppy N0; the other five disks
distribution N1-N5 are identical for both operating systems.

User tired of two-wheeled scooter RT-11
pressing five keys is transplanted into a strategic
Bomber DEMOS/306!

OS DEMOS/306 – THIS IS A BREAKTHROUGH IN THE FUTURE!
OS DEMOS/306 – just fantastic!

POSTCRYPTUM 1.
————– The directory / TEST contains kontolno-demonstration
tional tasks and tests that are run co-
executing / TEST / main.

POSTCRYPTUM 2.
————– In the supplied distribution into a directory bin /,
usr / bin /, etc / contains utilities and files
(In particular:

c7t10 nroff autoconfig termcap
chgrp pp clri timstat
chown pstat cron ttys
dump restor dostat utpm
dumpdir rline getty wall
edit rmail graf
egrep setcolor group
false smbl group.std
fgrep startcode init
gets starttext iostat
login su lp_daemon
lpf tfd0 mknod
lpset wermit psdatabase
lx accton savecore
mix admclean shutdown

and others …), which are not descriptions of documents
orientation, because description on the tools and files that need-
dimye system administrator or system programming
Misty and not directly related to the work of Paul
transducer outside the scope of this documentation, I have-
ing goal is to give the most relevant information for the user-
converter. Descriptions can be found in various literature
on UNIX operating systems as Most utilities and service
Files are generally accepted in the family of UNIX names.
On the other hand, not all utilities (in particular:

ardos from mkmf splineg
banner hier mm strings
blank hostname prmail sum
checkobj ident rab unifdef
ckdir indent rcs units
colcrt install rcsdiff uptime
ctags last rcsintro uucpc
cxref lastcomm rcsmerge uuxc
ddutok lex rev whoami
error lint rlog badsect
expand look script ncheck
fold merge spell

and others … ) Described in the documentation contained
in the distribution, because documents constitutes a
taking into account further developments.

POSTCRYPTUM 3.
————– The distribution is not included and are available
otdelno:

a). DBMS “RUBIN”. / With complete documentation /

b). Integrated envelope “Demos Commander” –
analogue of the “Norton Commander”.

POSTCRYPTUM 4.
————– On a version 3.0 OS DEMOS worked:

Yudin, KE
Sudakov AV
Ryzhonkov KS
Bragin, DN

~~~~~~~~~~~~~~~~~~~~~~~~~~~~~~~~~~~~~~~~~~~~~~~~~~ ~~~~~~~~
Copyright 1991 by Research Institute “Scientific Centre”,
lab 462 / 2. All rights reserved.

PHONE: 536-56-42.

~~~~~~~~~~~~~~~~~~~~~~~~~~~~~~~~~~~~~~~~~~~~~~~~~~ ~~~~~~~~
Moscow, Zelenograd, Research Science Center (lab.462 / 2)

Phone: 536-56-42.

~~~~~~~~~~~~~~~~~~~~~~~~~~~~~~~~~~~~~~~~~~~~~~~~~~ ~~~~~~~~