Hosting Minecraft as an experiment

In the latest gamer news, everyone is freaking out about Valve allowing mod developers charge.  It’s amazing how quickly it’s fragmented the community in what was at 2 days before a Valve/GabeN worshiping reddit. (here/here/here/here and a rebuttal)

In the middle of all of this I saw this comment in passing:

Remember how that made me leave Mojang?

Remember how that made me leave Mojang?

So yeah, I never followed the whole Minecraft community thing, but apparently people were hosting servers, then asking users to pay for using mods, and even for using basic items.  And since most people who love Minecraft out there are kids, they were paying with their parents credit cards all over the place for server time, and server mods and whatnot, the parents would find out, and them blame Mojang over the entire thing.  So they banned paying servers (at least from what I understood).

So out of curiosity, since I’ve only really played single player, I thought I’d see how hard it is to run a Minecraft server.

First, I’m going to create a Debian 7 VM on my ESXi server.  Nothing too fancy, I have an 8 core box with 8GB of ram, so I was thinking 2 vCPU’s and 384MB of ram, and a 4GB disk.  I mean it’s a simple game, how much can it need, right?

Turns out, it wants a LOT more.

So the install of the OS went pretty smooth, then I have to install Java, which is pretty simple:

apt-get install default-jdk

With that done, the next thing to do is download the server jar file from the download site, or for the purpose of my test, I’m using version 1.8.4.

When I went to run it however, I saw the recommended flags:

java -Xmx1024M -Xms1024M -jar minecraft_server.jar nogui

Ouch.  Yes this thing does expect 1GB of ram.  Ok, so I have to RAM and CPU to spare, so I went ahead and gave it 2GB (since I installed the x86 version of Debian..) and 4 vCPUs.

The next thing for me to do was to set it up on the internet, since I’m not in the office.  I have a VM out on the internet, with an OpenVPN back to my ESXi box for my email.  So without trashing my nat I could get xinetd do the dirty work with this simple entry:

root@VPS:/etc/xinetd.d# cat minecraft 
service minecraft
{
    disable         = no
    type            = UNLISTED
    socket_type     = stream
    protocol        = tcp
    user            = nobody
    wait            = no
    redirect        = 192.168.1.139 25565
    port            = 25565
}

Then restart xinetd like this:

 /etc/init.d/xinetd restart

Now with Minecraft running on my ESXi server, and my VPS now configured to forward traffic to the ESXi box over the OpenVPN connection I was all set to go!

And I was able to connect, and all was ‘good’.  But then checking the server…

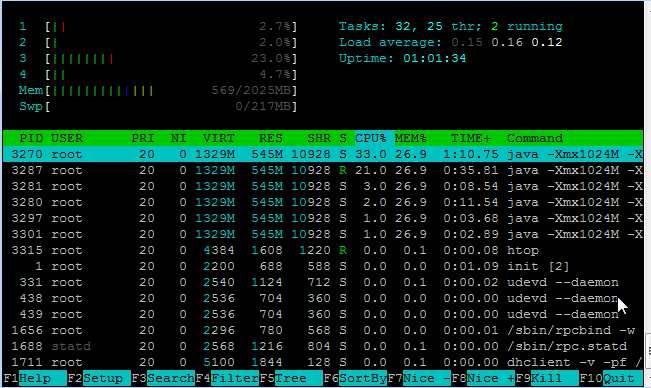
htop on my Minecraft server

htop on my Minecraft server

545Mb of RAM!  And this is with one user!  And look @ the CPU.  Wow no kidding!

And then I noticed something else, the email performance went from OK to horrible.  I spent a lot of time playing with MTU’s receive and send buffers, and other ‘magic’ trying to get something working.  Since my ESXi server doesn’t have a direct internet connection (yuck) I’m in a shared office so it’s not only behind NAT, but I have a DLINK that I use behind their NAT.  And while the UDP protocol ‘works’, changing it to TCP gave me a 5x speed increase.

Very unexpected.

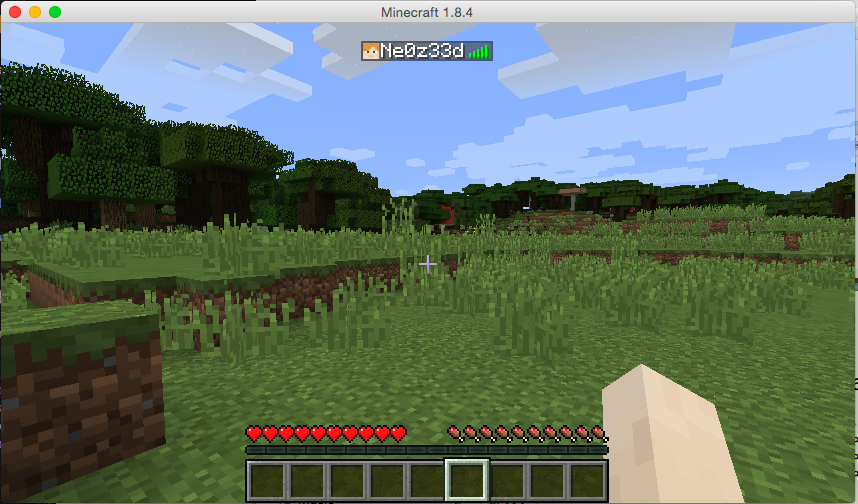
My own world..

My own world..

And not to forget, some helpful stuff for the server:

How do you shut down safely, from the console?

stop

What is the best way to run the server?

Probably behind screen. I started it from /etc/rc.local like this:

/usr/bin/screen -dmS minecraft /usr/local/minecraft/start.sh

start.sh is simply:

#!/bin/sh
cd /usr/local/minecraft/
java -Xmx1024M -Xms1024M -jar minecraft_server.jar nogui

How do I connect to the console?

screen -r minecraft

Remember in this case we gave the screen session a name so it’s easy to find.

How do I disconnect from the console

CONTROL+A+D

Why am I doing this?

I have no idea why. Honestly, I find crafting in a game kind of tedious, but setting up a VPN, server and whatnot is more fun to me.

How about network performance?  Since it’s just me, I thought I should look inside the tunnel for a minute and see how big the capture file is:

# tcpdump -s 1520 -w 1.cap -n -i tun0 port 25565 & sleep 60;kill %1

This will run tcpdump for a minute on the default minecraft port, then after 60 seconds end the capture.

# ls -alh *.cap
-rw-r--r-- 1 root root 1.6M Apr 26 16:00 1.cap

Wow that was bigger than I thought. No wonder Minecraft people are always crying about latency! That translates to 213,33 Kbps or 0.21 Mbps.

Can it be compressed?

# gzip 1.cap
# ls -alh *.cap.gz
-rw-r--r-- 1 root root 680K Apr 26 16:00 1.cap.gz

Which then translates into 91,11 Kbps or 0.09 Mbps. Why people don’t compress their network stuff is beyond me, but then again what do I know?

I guess the next step would be to combine this with stunnel, which not only can encrypt the traffic, but compress it as well.

Getting Qemu’s NetWare 3.12 onto the LAN with Tun/Tap

I could also call this ‘going with the flow’… So instead of fighting the system, like I usually do today we are going to do things the way everyone else enjoys doing things, and that is building stuff with tun/tap and bridges.

YUCK.

Ok, so I’m using Windows, and that is what I’m assuming you are as well for this ‘guide’.

The first thing you’ll need is the tun/tap driver for Windows, and the easiest way to get that is via OpenVPN.  The next thing you’ll need is Qemu, again I’m just using the pre-compiled stuff right here.

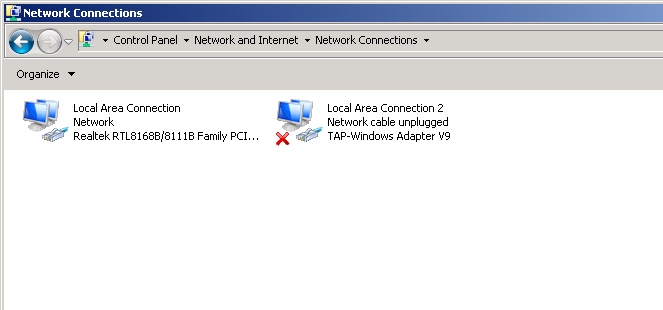
Go ahead, and install them both.  With OpenVPN installed, when you open your control panel, and check out your network interfaces you’ll see something like this:

One NIC, One Tap

One NIC, One Tap

Good.

Now for my example, I’m going to add another TAP interface.  TAP’s are only good for a 1:1 relationship with the VMs.  Yes, that is why I prefer something else, but again we are going to do things today the way everyone else does them.

Now for me, I run the ‘addtap’ batch file located in the C:\Program Files\TAP-Windows\bin folder as Administrator, and this now gives me two TAP adapters.  I highly recommend disabling TCP/IP v4 and v6 on the TAP adapters, along with the MS client/server stuff.  We are only using these for bridging the VMs so we dont’ need the host computer to participate in this network.

Now for the fun part.  I’m assuming you have your NetWare server and client images all ready to go (I guess I can go over installation again some other day), and now we get to bind each one to a SINGLE TAP instance.  Also don’t forget that each machine needs a UNIQUE MAC address.  One of them can use the default settings, but the other one cannot.

I’m going to start my server like this:

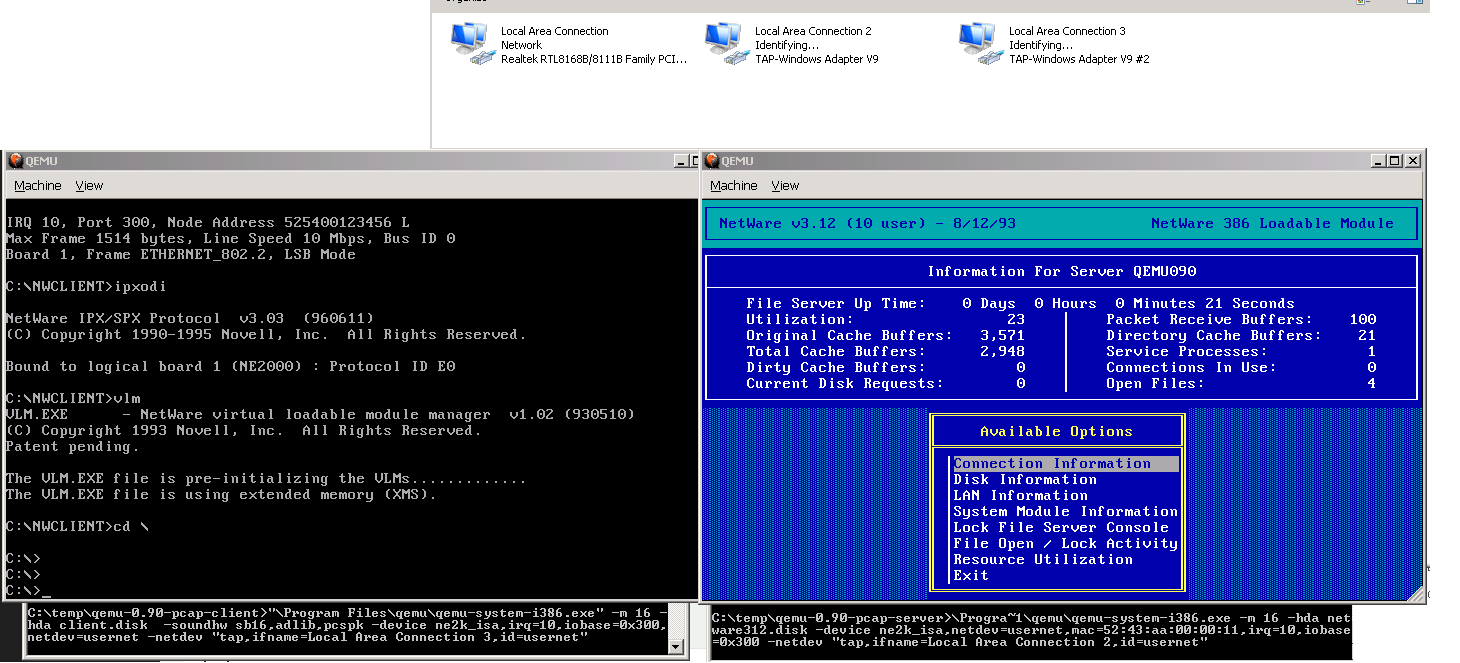
\Progra~1\qemu\qemu-system-i386.exe -m 16 -hda netware312.disk -device ne2k_isa,netdev=usernet,mac=52:43:aa:00:00:11,irq=10,iobase=0x300 -netdev “tap,ifname=Local Area Connection 2,id=usernet”

As you can see, this gives me a NE2000 on port 0x300, IRQ 10 and sets the MAC address to 52:43:aa:00:00:11 .  And this sets it on the first TAP adapter, lovingly called “Local Area Connection 2″ because the primary adapter is called “Local Area Connection“.  Also take note of the quotes in this command line, as it’ll encapsulate the full default name of the TAP adapter.  The other alternative is to just rename the adapters, but where is the fun in that?

Now for my client:

\Program Files\qemu\qemu-system-i386.exe” -m 16 -hda client.disk -soundhw sb16,adlib,pcspk -device ne2k_isa,irq=10,iobase=0x300,netdev=usernet -netdev “tap,ifname=Local Area Connection 3,id=usernet”

As you can see the primary difference here is that it’s connected to “Local Area Connection 3” which is my second TAP interface.

Now with both virtual machines running the interfaces will turn on!

But as you’ll quickly discover, neither machine can talk to each-other, as they are islands so to speak.

Two virtual machines on islands.

Two virtual machines on islands.

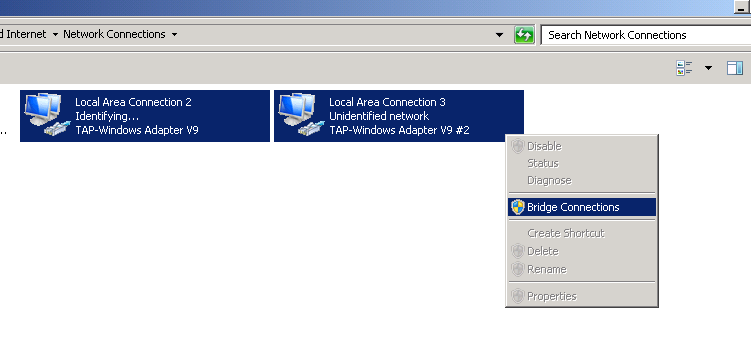
Now for the fun part, we highlight the two TAP interfaces, right click, and turn on the built in bridge function of Windows!

highlight and select

highlight and select

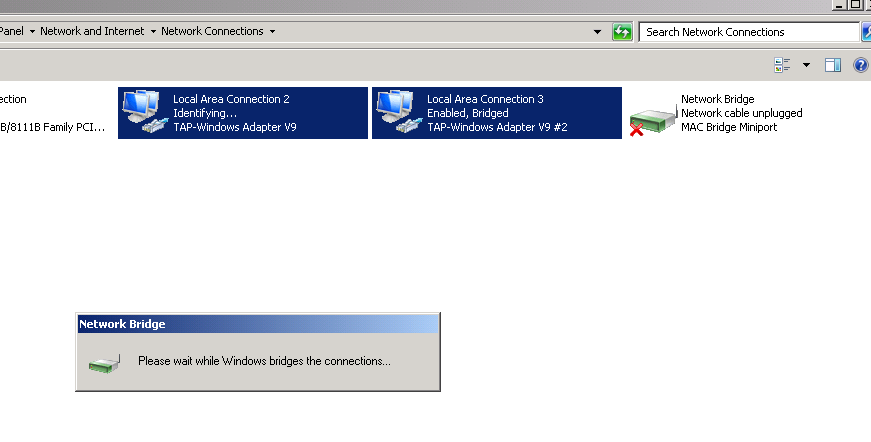
And once that is done, a new Network Bridge interface will show up, transfer what layer 3 settings there are, and then setup the layer 2 bridge between the TAP interfaces.

Bridge activating...

Bridge activating…

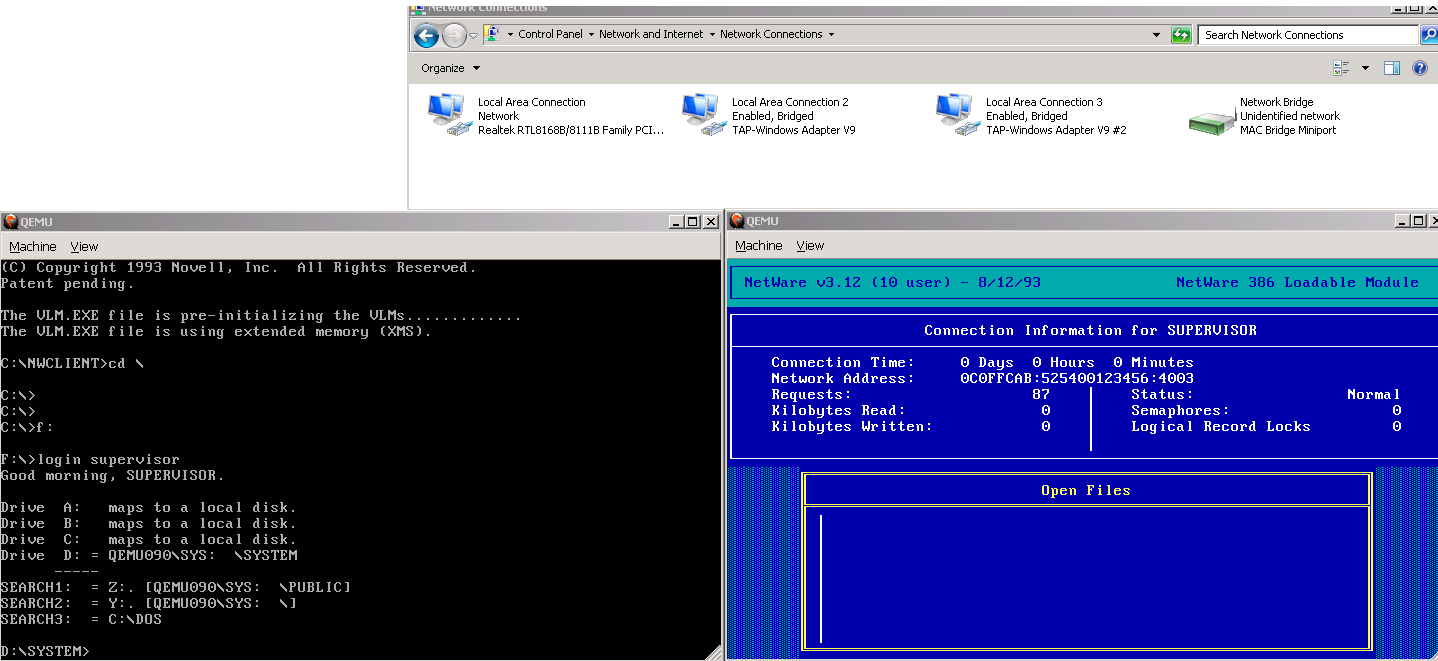
And once the bridge interface has gone live, give spanning tree 15 seconds to do it’s thing, and YES you can now login to the NetWare server!

Logging in from the MS-DOS VM to the NetWare 3.12 VM

Logging in from the MS-DOS VM to the NetWare 3.12 VM

And there you go!  This is the ‘approved’ way to do virtual networking with Qemu.

Now I know what you are thinking, this is great for VM’s and all that jazz, but what if I say have an office FULL of old PC’s and I want them onto my new fangled ancient server?

No problem, right click on the bridge, and select delete.  This will put everything back the way it was, sending the VMs back to their own TAP interfaces.  Now select all the interfaces, and then setup a bridge (I suppose you could edit the existing one to include the physical interface…) and now once the bridge has been setup, it’ll now be talking out the local Ethernet interface.

One quick note, bridging and WiFi tend to not go hand in hand.  Some interfaces will work, but the rule seems to be the vast majority of setups will not.  So don’t complain if yours didn’t work, you are just part of the 99.99999%.  And if you did get yours to work, well good for you.

OpenVPN on OpenBSD 4.8

I just setup an OpenVPN connection for someone, and I ran into this error:

ksh: ./vars[29]: /etc/openvpn/easy-rsa/2.0/whichopensslcnf: not found

Yeah, weird, turns out you have to edit the vars file, and tell it the full path & name for the openssl.conf that it’s going to use… Oh well more of a tip down the road.

Anonet

Ok, this isn’t emulation, exactly but it does involve virtual networking…

I’m talking about Anonet! it’s an internet style network that is encapsulated over OpenVPN.

From the site:

In early 2005, a few people fed up with the way the Internet was heading, began in earnest to create a large wide area network that was secure and lived in its own space. On this new network anyone would be free to do as they saw fit – roam about, host services, or just be social without fear of being monitored or even worse censored. The first step to bring this network to fruition was to encrypt the information that normally travels across the Internet. What they ended up with is known as anoNet.This network was inspired by MetaNet, another “dark” network on the Internet, that used similar techniques to reach their goals. A few “core” members of anoNet were once a part of MetaNet but due to their strict nature, peering with MetaNet was lost and they became an “island”. anoNet has already surpassed what MetaNet had in membership, and is on its way to being a viable alternative to the “Internet” you currently know, whether you love it or hate it. If you are feeling adventurous check it out. If you are feeling really adventurous you can help; there is still lots to be done.

http://anonet.org/

So how does it work? Basically each ‘node’ runs OpenVPN connections to other peers, and they redistribute all networks over BGP. It’s very much in the same style as the real internet. I’d recommend checking it out. As for getting on the Anonet, it’s pretty simple. Just follow the instructions here:

http://anonet.org/quickstart/index.html

It will run on any platform that runs OpenVPN. I’m using Windows 2000 Pro in a VirtualPC VM. I hang out on the anonet IRC server from time to time ( 1.0.9.1 #anonet) if you are feeling brave, load up openvpn, retreive the client configuration and drop by!

If you are feeling real brave, try to become a peer onto the network!