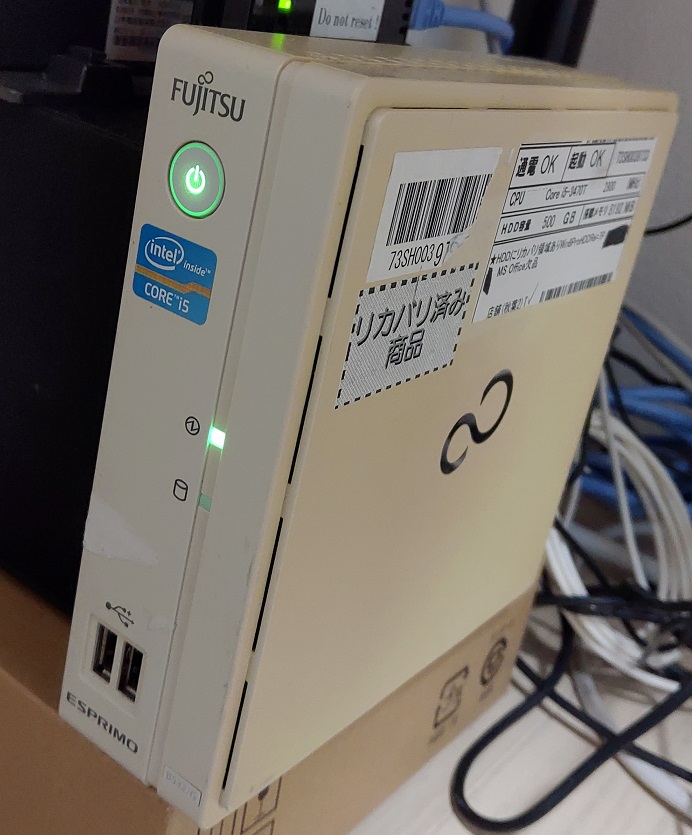
So while I’m in Japan, I bought this tiny and borderline useless Fujitsu Esprimo B532, powered by an i5, and not very much else. I upped it to 8GB of RAM, and put in a SSD and upgraded to Windows 10 to make it slightly tolerable.
i5-3470T
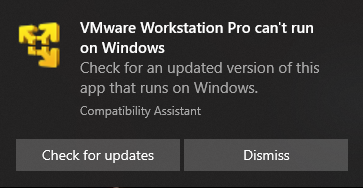
The i5-3470T is ancient! And so old that newer versions of VMware and Hyper-V won’t run on it. The old solution was simply to use an older version of VMware. In my case the highest version that’ll run is 12.5.9, however when trying to launch it I got this fun message:
VMware Workstation Pro can’t run on Windows!
Well wasn’t that a big bust.
I guess there is something hidden somewhere, but I just renamed the executable, and set it to Windows 8.0 compatibility mode, and wow it works!
Windows NT 3.1 October 1991 pre-release
And there we go! Now the latest version of NT can run the first public pre-release of Windows NT. YAY.
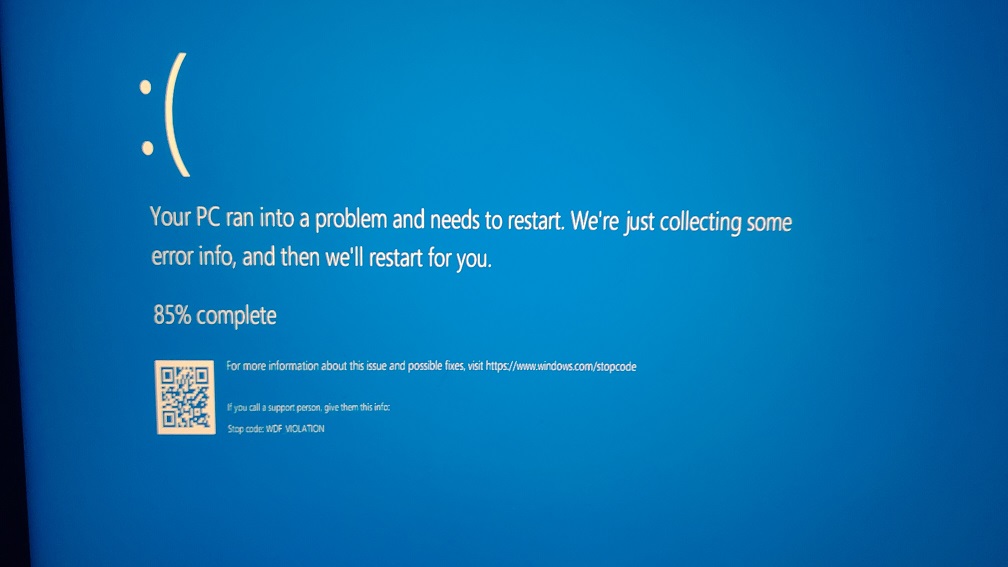
So I bit the bullet and updated to Windows 10 build 1903. And then the fun started on my glorious 2006 MacPro. It finished the update, and on reboot I get the login screen, and then almost immediately a blue screen.
Naturally the QR code is useless as it doesn’t specify any stop codes, and the minidump… Well that requires gigabytes and gigabytes of crap to download to get a tool to read it. (I still haven’t finished that rabbit hole, like COME ON! why isn’t it included?!).
However after hitting F8 a million times, I found that safe mode & networking work just great. Searching online was basically useless as there was no specific stop code to go with this WDF_VIOLATION. Further looking around I did notice one thing, and that it was all Macintosh machines that crash out to this WDF_VIOLATION error. It must be something specific to the Apple hardware running Windows 10!?
Armed with this (dis)information, I went ahead and disabled all the Apple specific drivers & startup items.
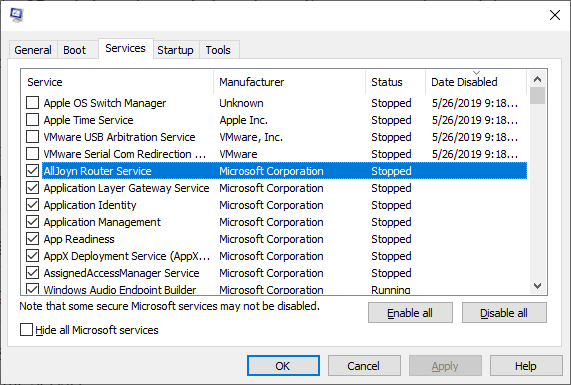
From msconfig.exe:
From MSCONFIG.EXE I disabled the following services:
Apple OS Switch Manager
Apple Time Service
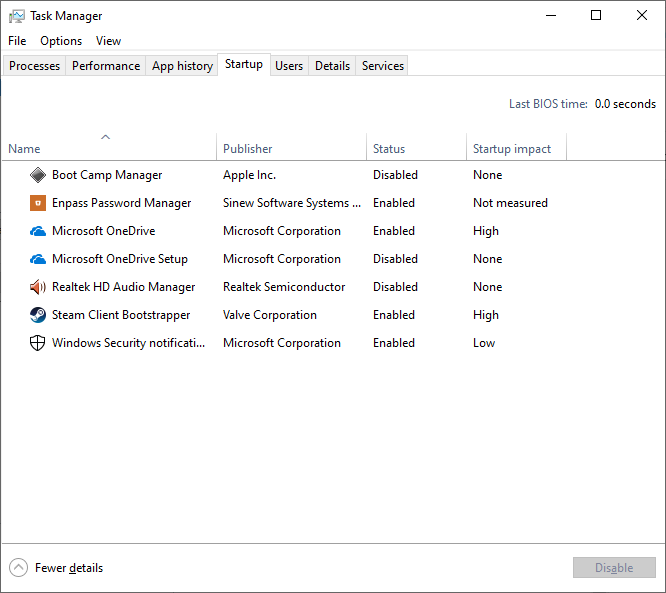
And in the task manager, I disabled the following startup items:
Realtek HD Audio Manager
Boot Camp Manager
I had the other VMWare serial & USB hook previously disabled, as I just don’t want them at all on my setup. The big upshot is that after rebooting out of safe mode, I’m now up and running on Windows build 1903.
Considering the BootCamp stuff was so woefully out of date, don’t expect Apple to fix this anytime soon. And since I’m on a MacPro 2006, I certainly won’t be getting any updates from Apple. But at least I can struggle to keep this thing up to date otherwise.
Now I can enjoy that ‘new command prompt’ everyone keeps telling me about.
***UPDATE***
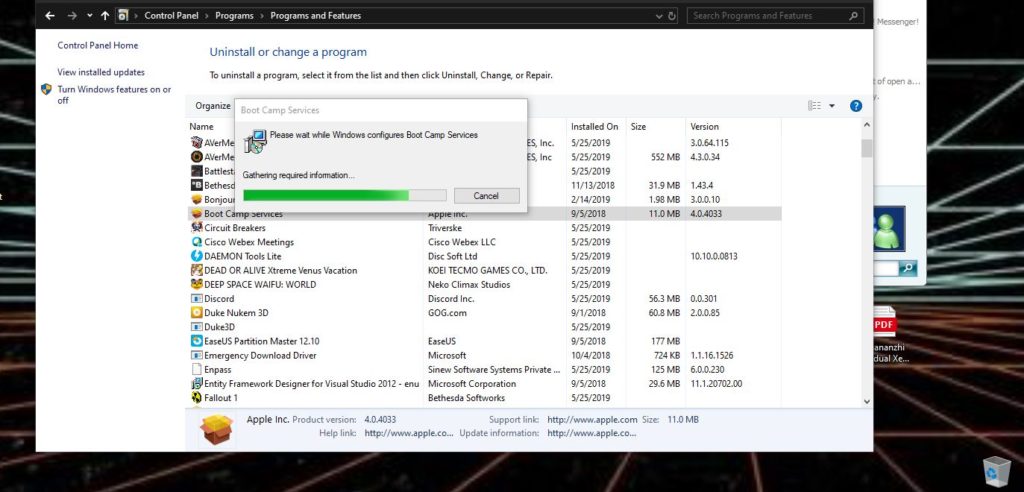
I went through this on another Bootcamp Mac, and what I had to do was uninstall the “Boot Camp Services”. It’s startup component triggers the bluescreen as it’s doing some nonsensical inventory, banging around on the drivers in a not friendly way. I had version 4.0.4033 of the Boot Camp Services installed.
Uninstall Boot Camp Services version 4.0.4033
Removing this kept all the old drivers, which continue to work just fine.
Once more again I’m confronted with a situation where I needed a SQL, but I don’t have direct access to the data. The machine I’m able to run some stuff on is not only insanely out of date (yay!) but doesn’t have enough disk space for even something like SQL Server 2000.
Enter SQL 4.21a
I “installed” 4.21a on this 32bit 2003 server in much the same way I transplanted 4.21a onto Windows 10. However I did use the srvany utility to load up the SQL Server service, much like how I used it to run an instance of Qemu in the background elsewhere. Now I have my intermediary SQL Server running like a normal service, and set a password for the SA user.
Now for the fun.
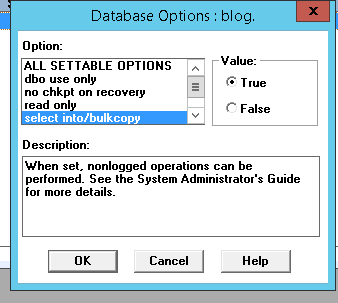
First be sure to set your target database for ‘bulk/load’ and I’d also set it for ‘truncate log on checkpoint’. If you don’t set the bulk/load then you cannot BCP data into the database.
Using the SQL Explorer tool I could view the tables I wanted, and export them as ‘SQL CREATE’ giving me the table layout. I then quickly converted them into something acceptable for 4.21a. Now it’s a matter of establishing a connection to the old server from the new.
First I tested with the ISQL command. I needed to copy the DLLs DBMSSOCN.DLL & NTWDBLIB.DLL into the directory to get the command to fire up. Since my strategy here is to do a BCP dump/BCP load the first thing I need to do is purge the data.
This of course assumes that the server address is 192.168.1.42 and that in this case I’m deleting the firewall_mapping table from the network database. If you’ve made it this far that means we are 1/4th of the way there!
I found this ‘one trick’ to get the BCP command from the SQL 4.21a tools to connect to the 2016 server and dump the table as a trusted connection. I’m not sure how much longer this kind of thing will work, but I was pretty amazed it did. I didn’t even bother trying to see if the 4.21a BCP tool could read a 2016 BCP dump. Maybe it would if you keep the formatting the same, but I find ‘like to like’ much easier. I renamed the old BCP.EXE to BCP42.EXE so that they won’t collide in any way causing weirdness. At the same time I run them from a directory that is NOT in the system path.
bcp42 "[Network Database].[dbo].[firewall_rules]" out c:\temp\1.csv -t, -r= -P
The notation looks weird, as my source database name has a space in it. This initially caused endless frustration, but it was just a matter of using the fully qualified name, which is in quotes
"[database].[role].[table]"
I set the field delimiter as a comma, and the row terminator as an equal sign. I tried not setting it but I was getting ‘spiraling data’ as it was not picking up the end of row correctly at first.
The first time you run the BCP without a format file it’ll walk you through the specifics of the fields. I just blindly accepted the defaults, and saved the file as firewall_rules.fmt . Now on subsequent runs, I can run the export like this, which uses the saved formatting:
bcp42 "[Network Database].[dbo].[firewall_rules]" out c:\temp\1.csv -t, -r= -P -ffirewall_rules.fmt
Great so if everything is going well, we have no exported our data! Now the next step is to import the data into our old server. Since we have that format file, this “should” go pretty smoothly. Notice the server is an IP address which implicitly has it connecting by TCP sockets, not named pipes. As such there is no implicit ‘Trusted connection” as there was when talking to the local 2016 server.
bcp42 network.dbo.firewall_rules in c:\temp\1.csv -Usa -PPASSWORD -S192.168.1.42 -t, -r= -ffirewall_rules.fmt
Naturally change PASSWORD to whatever password you have for the SA user.
Starting copy...
1000 rows sent to SQL Server.

1892 rows copied.
Network packet size (bytes): 512
Clock Time (ms.): total =   2216 Avg =      1 (853.79 rows per sec.)
And there you have it, all being well you’ll see the program update every 1,000 rows as it inserts data.
Originally I wanted to use the data transformation wizard thing (whatever they renamed DTS to) however the ODBC is limited to the newer .NET 4 stuff, which won’t use the old SQL Server 6.5 ODBC drivers. I really didn’t think the SQL Server 4.21a BCP command to work on a modern server against a new(ish) version of SQL Server, but it did!
I guess you could neaten it up with a command file to drop tables/re-create if you wanted, or at the least delete data/checkpoint and set the load options, dump/load data, and then turn off the load state for the database. I’m not doing reports or anything fancy, just visualizing data as they say.
Although things like ODBC have drifted out, it’s still kind of interesting that ancient BCP can still communicate over named pipes as an implicit trust.
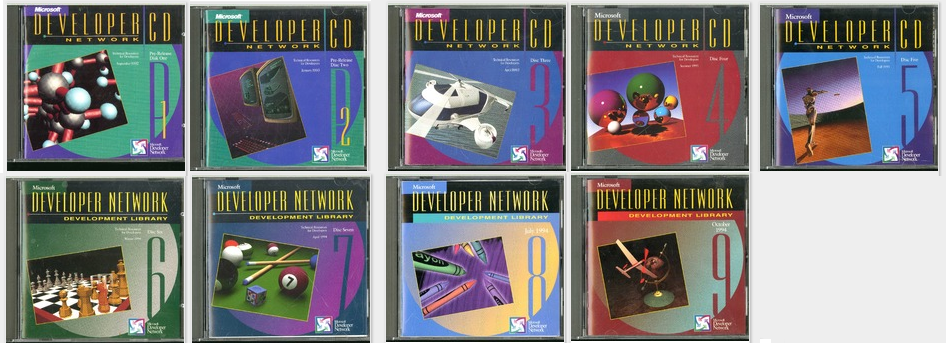
I ran across this, and thought it was cool. These CD’s are getting harder and harder to find, and unless you want the old physical disks, getting ISO images is, of course the next best thing.
Granted these disks replaced the much older Microsoft Programmer’s Library. The new CD’s use a Windows based search & interface program removing the clunky old MS-DOS program that made it feel like trying to view the world through a straw. (Although the up side of the MS-DOS version is that you could easily dump the video RAM and save the contents to plain text).
And in this brave new post Windows 3.0 centric world of Microsoft just about everything regarding OS/2 was dumped, and the seeding of Win32 via Windows NT had started.
Naturally after winning this war, Microsoft withdrew many low end products and just couldn’t compete with the tidalwave that was GNU/Linux.
At any rate for the curious kids down the road that want to see what all the fuss was with Win16, and how Windows 3.0 had changed the landscape removing the force of IBM it’s worth a look.
So I have this 2006 Mac Pro 1,1 that I’ve had laying around and I wanted to put my old Nvidia 1030 into it, along with Windows 10 for a newer (stronger?) home machine.
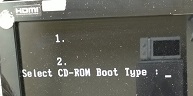
So I burnt the downloadable ISO from Microsoft onto a DVD, tried to boot it up and got this:
Ignore the microwave…
I got stuck at this “Select CD-ROM Boot Type : ” prompt, which you can’t type anything into. Apparently it’s a common and known issue with 64bit boot code, as the older Intel Apple Mac’s are of course 32bit only. So there is a fix, you have to use something called “oscdimg” to rebuild the ISO with a 32bit friendly loader.
So first I just used 7zip to extract the downloaded ISO, and then create the new 32bit ISO with the following:
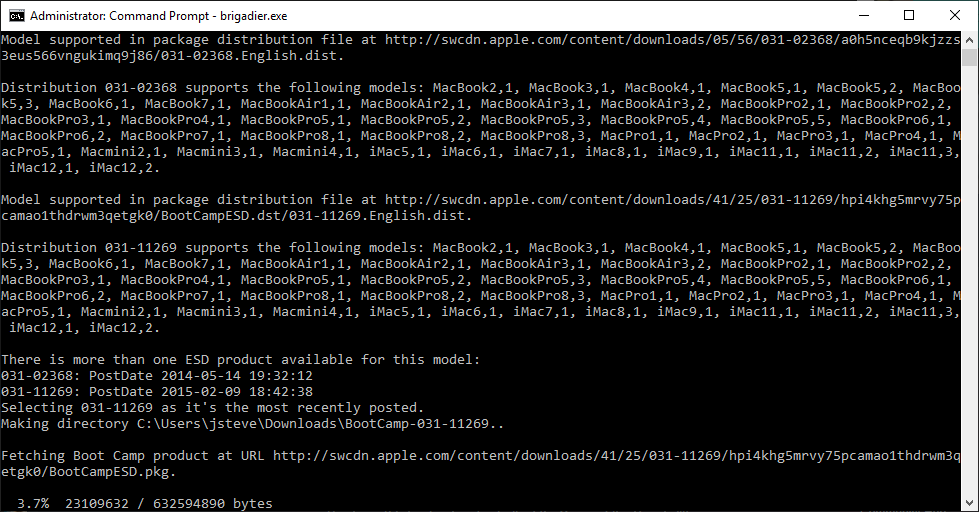
Now what about those special ‘bootcamp’ drivers? Obviously under Windows 10 there is no nice way to get the ones you want. And what about which model/download package to get?
Then I found Brigadier!
It’ll probe your hardware type and grab the drivers for you!
When I’d bought this 1020 in question, I picked it up from an AT&T customer with the intention of basically using it as a camera. Well it was kind of okay but it had been upgraded to Windows 10, which technically is unsupported on the 1020 hardware. And no wonder as the 1020 specific camera applications aren’t available, nor is performance all that great on Windows 10. I’m guessing there is a laundry list of reasons of why Windows 10 was not available for the 1020.
So I saw this website, lumiafirmware.com that not only has an incredible amount of firmware saved, but it sure makes the process of loading different firmware pretty simple.
Download the firmware form this site only the ffu.
And now open CMD as administrator
Type “cd C:\Program Files (x86)\Microsoft Care Suite\Windows Device Recovery Tool” /Â (32 bit pc) “cd C:\Program Files\Microsoft Care Suite\Windows Device Recovery Tool”
Connect now your phone to your pc
Type in cmd “thor2 -mode uefiflash -ffufile “C:\the location of the ffu\file name.ffu” -do_full_nvi_update -do_factory_reset”
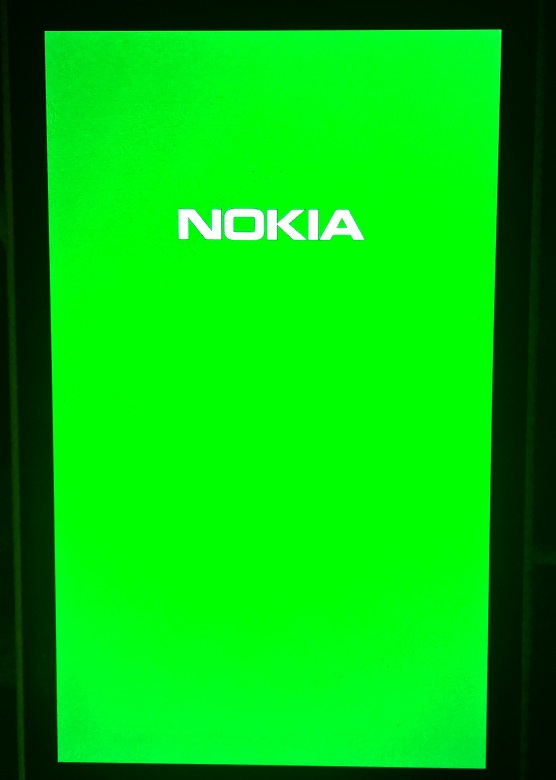
Wait now until your phone gives a green screen
Type now in cmd “thor2 -mode rnd -bootnormalmode”
Really doesn’t that sound not that difficult at all?!
Except it wasn’t.
Looking at the incredibly extensive list, I see that the AT&T 1020 phone in yellow colour is the RM877. So I download the appropriate ffu image and run:
Start sending payload data V2Sbl in async mode...
Percents: 0
Device responded a message that has invalid size!
Expected: 16, Received: 0
Exception during programming: 262150
Safe write descriptor index reached: false
Payload data transfer speed (0.22 MB/s) Elapsed time 40.83 sec
Payload data size 9.000123 MB
[IN] programSecureFfuFile. Closing RM877_3051.50009.1451.1_RETAIL_nam_att_205_01_473928_prd_signed.ffu
programming operation failed!
Operation took about 1 minute, 6 seconds. Average transfer speed was 0.11 MB/s.

Unknown error code.

THOR2 1.8.2.18 exited with error code 262150 (0x40006)
Unknown error code! What the hell does that mean?
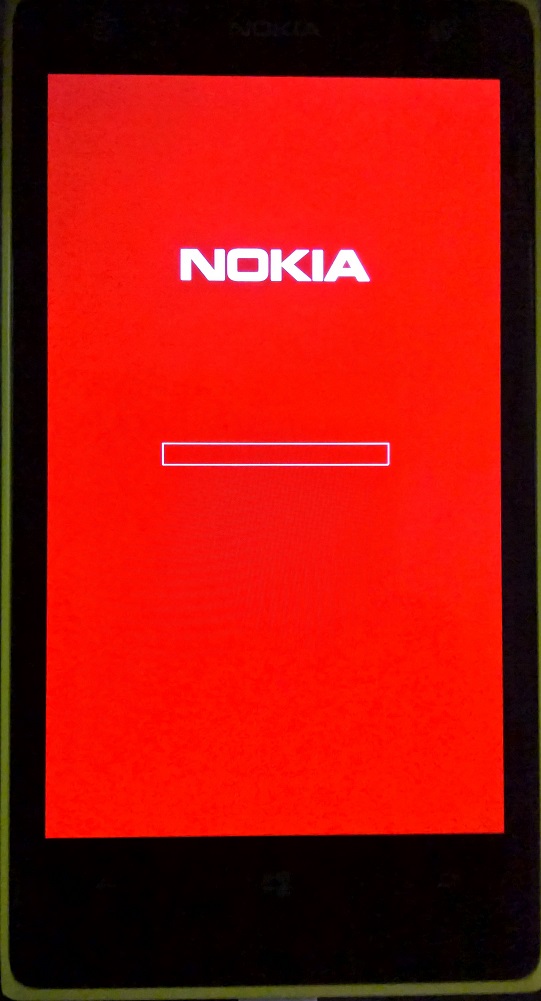
Glancing over at the phone I’ll show you what it means.
Nokia Red screen, waiting to be programmed
So the phone was stuck at the red screen waiting to be programmed, but obviously that failed. Re-running the programmer just gave me this:
Detecting UEFI responder
Send HELLO
Send HELLO
Send HELLO
Send HELLO
Send HELLO
Lumia UEFI Application did not respond to version info query
Device is not in Lumia UEFI mode
Reading device mode failed
Failed to detect UEFI responder. 84017

THOR2_ERROR_TO_COMMUNICATE_WITH_DEVICE

THOR2 1.8.2.18 exited with error code 84102 (0x14886)
So I thought I’d hold down the volume down button & power and do a reset. Except now my device was nearly bricked. The display wouldn’t turn on at all, and there was no haptic feedback on powering up and or down.
HOWEVER plugging in the USB would make the connection noise, and how me a “QHSUSB_DLOAD” device. So I could try to talk to it in emergency mode.
Apparently on the same download page, there is a hex file and a mbn file. Downloading those and running:
And this looked like it was going to work… but then as always it failed.
Sending OPEN_MULTI_REQ
Received valid response to OPEN_MULTI_REQ
Programming image R
Image opened successfully for reading
SAFE hex file was used and unallowed memory address was being written.
Reset the device and use the correct HEX file.
ALPHA EMERGENCY FLASH END
Emergency messaging closed successfully
Operation took about 11.00 seconds.

Unknown error code.

THOR2 1.8.2.18 exited with error code 85034 (0x14C2A)
Use the correct HEX file? But it was the one that I downloaded from the right page! Great now my phone is dead. Unplugging it in and out however gives me a little hope as it’s still showing up as a QHSUB_DLOAD device.
After a lot of searching I see Joemar Serrato went down the same road, and they did something weird where they split out the mbnfile from the ffu file themselves. So I ran the following command to split out the mbn files:
Sending OPEN_MULTI_REQ
Received valid response to OPEN_MULTI_REQ
Programming image g
Image opened successfully for reading
Uploading MBN image 70
SAFE hex file was used and unallowed memory address was being written.
Reset the device and use the correct HEX file.
ALPHA EMERGENCY FLASH END
Emergency messaging closed successfully
Operation took about 11.00 seconds.

Unknown error code.

THOR2 1.8.2.15 exited with error code 85034 (0x14C2A)
And it appeared nothing changed at all. Great. In disgust I unplug the phone and hold down the volume down & power button for 15 seconds, but this time it vibrated. I couldn’t believe it! Within a few seconds it powered back up to the red screen, ready to load new firmware!
Size of system mem: 2097152 KB
Send backup to RAM req...
Clearing the backup GPT...SKIPPED!
Successfully parsed FFU file. Header size: 0x000c0000, Payload size: 0x00000000572e0000, Chunk size: 0x00020000, Header offset: 0x00000000, Payload offset: 0x00000000000c0000
RKH match between device and FFU file!
Option: Skip CRC32 check in use
Start sending header data…
Start sending payload data V2Sbl in async mode...
Percents: 0
Percents: 1
Percents: 2
Percents: 3
Percents: 4
Percents: 5
I was astonished! The progress bar was slowly moving, and the phone was doing what it should have been doing about 2 hours ago. I dared not move, so unfortunately I don’t have any pictures.
Payload data transfer speed (9.79 MB/s) Elapsed time 142.41 sec
Payload data size 1394.893921 MB
Read flashing status..
[IN] programSecureFfuFile. Closing RM877_3045.0000.1325.0001_RETAIL_nam_att_205_01_223461_prd_signed.ffu
Get EMMC write speed...
Get EMMC write speed, SKIPPED!
Get data verify speed...
Get data verify speed, SKIPPED!
Send restore backup from RAM req...
programming operation completed!
[THOR2_flash_state] Post programming operations
[THOR2_flash_state] Executing factory reset
[Factory reset result] 0
Factory reset done
[THOR2_flash_state] Executing Full NVI Update
Write flash options ( WriteNvi: Full )

Write parameter to device via UEFI Flash App
Write parameter Ok
Flash options set successfully.

[Full NVI update result] 0
Operation took about 2 minutes, 24 seconds. Average transfer speed was 10.16 MB/s.

Exited with success
And then just like that, the phone rebooted itself, and then brought itself up to the ‘green screen’
Nokia green screen (firmware loaded successfully)
All that remained to do was to tell the phone to boot up normally
thor2 -mode rnd -bootnormalmode
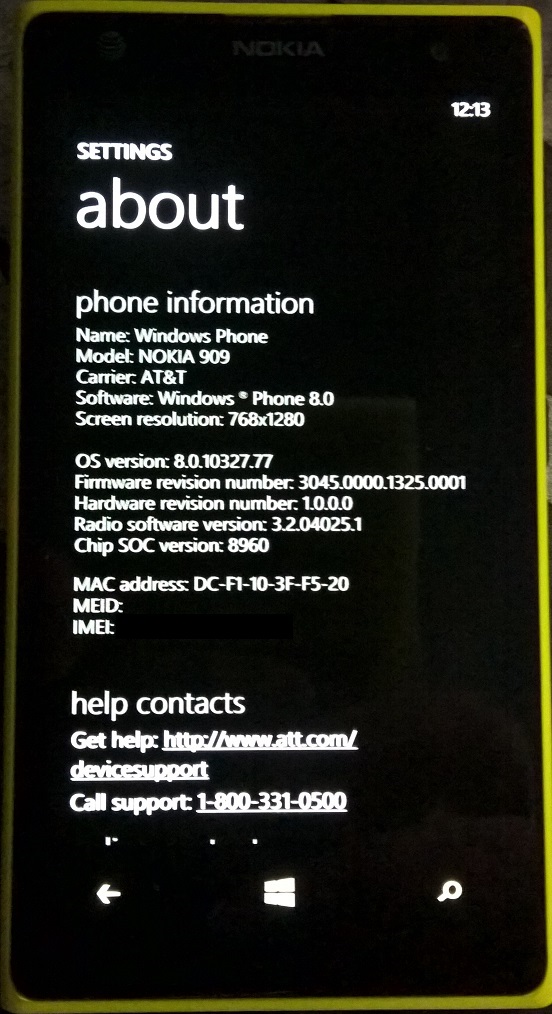
Version 8.0.10327.77
And that was it!
My 1020 is now running 8.0, which includes not only the special Nokia phone apps, but all the AT&T bloatware of 2012. I can’t believe there was a yellow pages app. How are they still a thing?
I’ve been pretty dismayed for the longest while that newer versions of Windows bundle newer versions of ODBC that refuse to talk to any version of SQL Server prior to 2000 (at the moment). Of course if I were ‘professional‘ Id be upgraded to the latest version, maybe even running on Linux. But I’m not, and you didn’t come here for how to upgrade/update but rather how can you use tools from the 90’s in the 10’s.
If you try to use the current SQL Server driver, you’ll get this message. Don’t be fooled, SQL Server 7.0 isn’t supported either (probably because of the SUN vs Microsoft Java debacle), it will only work with SQL Server 2000 or later versions.
SQL Server version 6.5 and all previous versions are no longer supported
It’s been this way since Windows 7, and I’ve just given up and gotten used to having to have a VM to access older databases. That is, until today.
While I was dumping data and moving stuff for my blog (something I need to write about another BCP adventure), I wanted to do a simple Access database to make sure it’s looking sane. And I figured I’d jump down to Windows 95, and load up Office 95. Well sure enough there was no proper SQL Server ODBC driver. Popping in the SQL Server 6.5 CD, naturally there is no ODBC drivers for Windows 95, but rather a 16bit driver for Windows 3.1, and 32bit drivers for Windows NT. I installed the NT version, and was still unable to connect until I installed the SQL client which then let me run WINDBVER.EXE so I could configure the appropriate transport DLL (TCP/IP) and then I could connect.
Access 95 using the SQL 6.5 NT ODBC Driver + Client
And this got me thinking, is it possible to just take those DLL’s and move them onto Windows 10? Well naturally that won’t work as the driver sqlsrv32.dll is a system protected file, and you can’t overwrite it without a lot of pain. However this got me to thinking that it should be possible to just tell the system it’s a new driver with a different name.
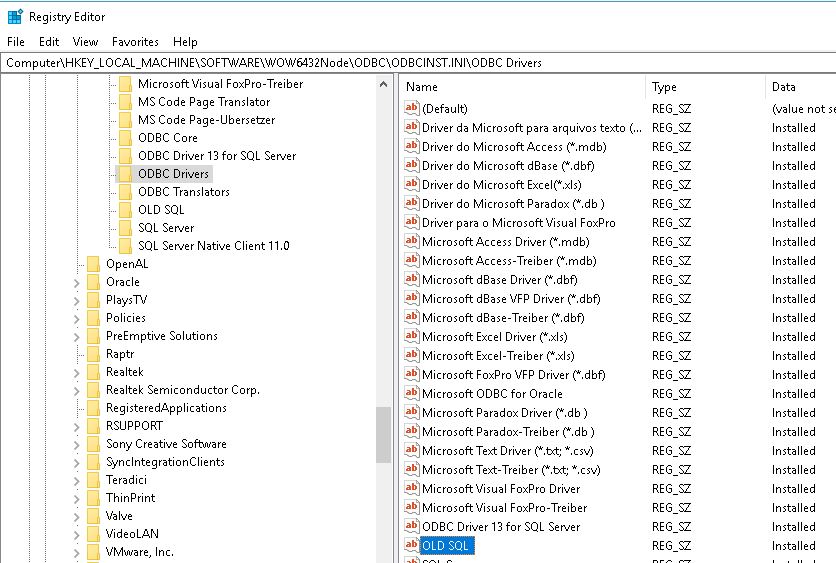
Looking through the registry I notice that HKEY_LOCAL_MACHINE\SOFTWARE\WOW6432Node\ODBC is where the 32bit ODBC stuff is stored, so this is where I’ll make my ‘OLD SQL’ driver. I simply used the existing one and renamed the driver/setup DLL’s to sql65-sqlsrv32.dll so that way the 2 DLL’s can co-exist without freaking out.
OLD SQL Driver
With that done, the key Computer\HKEY_LOCAL_MACHINE\SOFTWARE\WOW6432Node\ODBC\ODBCINST.INI\ODBC Drivers will need a new SZ string saying the ‘OLD SQL’ driver is installed.
Add the new driver to the available list.
I also copied the following files from the SQL 6.5 client into a subdirectory of SysWOW64 so I could configure the transport:
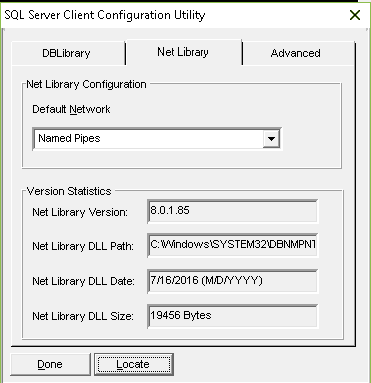
Now if you are going to use named pipes it’ll just work out of the box. Running WINDBVER you’ll see that it’s set that way by default.
Named pipes, and notice it’s version 8.0.1.85 from 2016!
to change it to TCP/IP I coped the files DBMSSOC3.DLL & DBMSSOCN.DLL into the SysWOW64 directory and re-ran WINDBVER, and then selected TCP/IP.
TCP/IP via DBMSSOCN.DLL
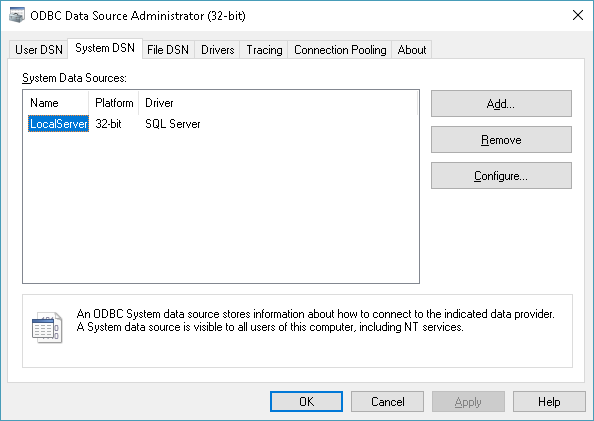
Now we can go ahead and add a SQL DSN. Remember to use the 32-bit ODBC Data Source tool
Note this is the 32-bit version!
If everything is setup correctly you should see the ‘OLD SQL’ Database driver. Scrolling to the right you’ll see that it’s version 2.65.02.01 dated 7/7/1997
Use the ‘OLD SQL’ driver
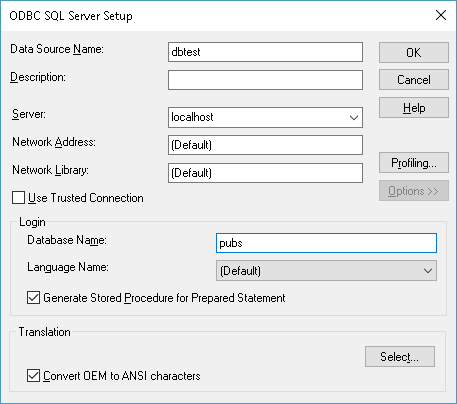
Now we just need to configured the driver. Be sure to hit the Options button and type in the database name, otherwise it’ll just go to the default database. Since I’m just using the ‘sa’ user that would be the master database, but I want Access to instead use the ‘pubs’ database.
Configure the old driver
Sadly these old drivers don’t have any test functionality. So there is no real way to know if it is working at this point, however I would imagine it should as we have added a regsitery key for the driver, added it to the available driver list, selected (if needed) a transport DLL, and populated the needed fields. The next thing to do is to try to use it.
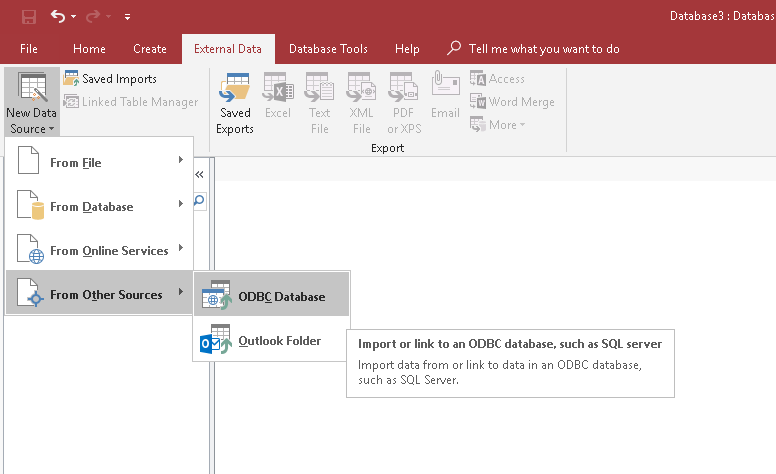
The ODBC option is in the ‘Other’ sources now.
Start Access, and select a blank database. Go to the External Data tab, and then choose the New Data Source, and the From Other Sources option. This will bring up the ODBC database wizard.
Link to the data source
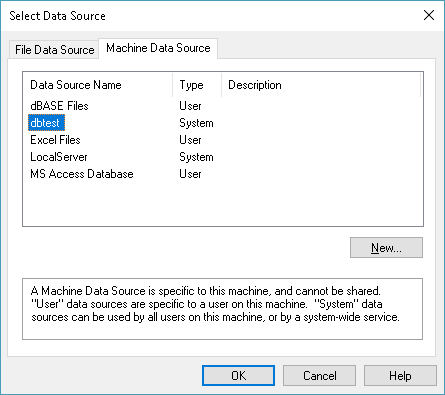
I’m going with linked, as I want the data to be used from the SQL Server all of the time. You will be then prompted to choose the Data Source
The dbtest ODBC connection should be under the Machine listings
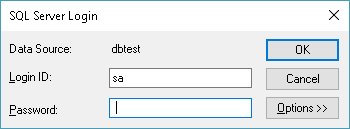
You can select the DSN we setup earlier, and then it’ll prompt you to login.
Login to the SQL Server
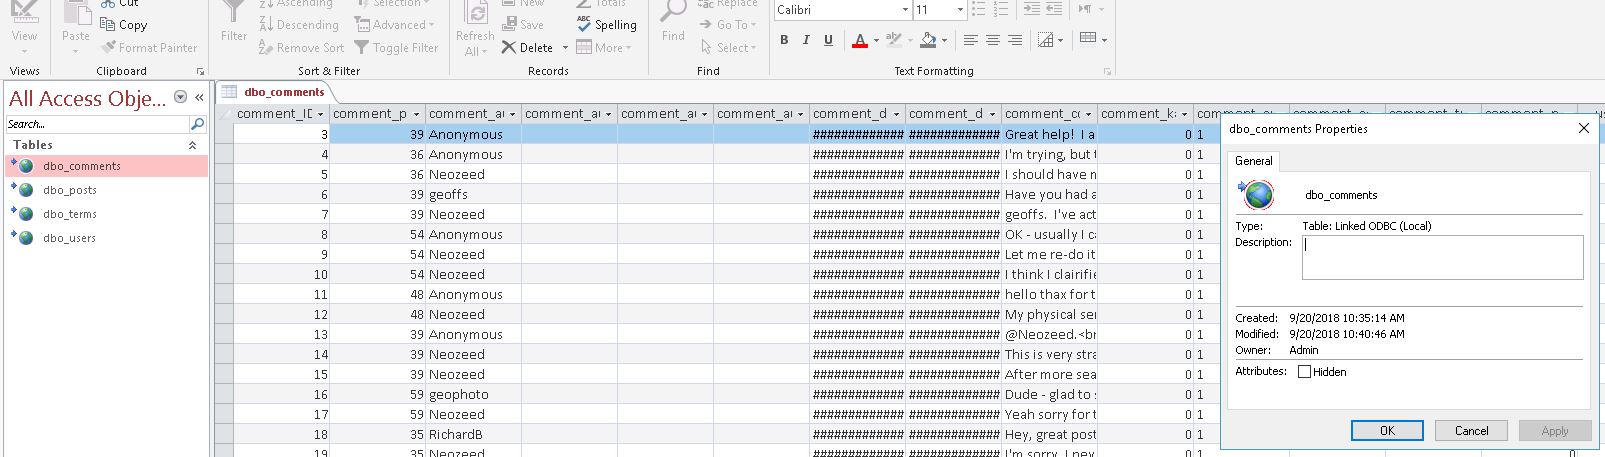
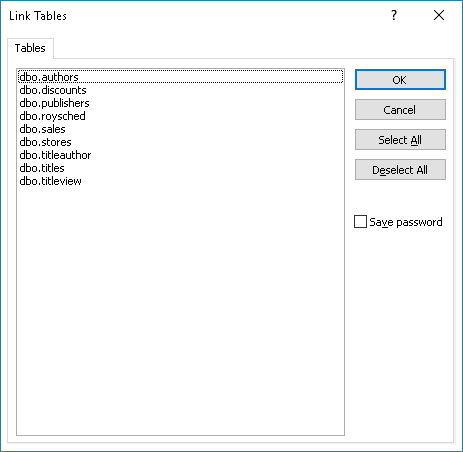
Again I’m using SA because… why not. And now for the moment of truth, if everything is correct you’ll be presented with the list of tables! This means that it’s working!
The pubs database from SQL 4.21
You can choose to save the password, and if needed select unique fields, or just leave it as it is. Now you should be able to access your SQL 4.21 database!
The Authors table from the pubs database
And there we have it.
If anyone is brave/crazy enough I extracted the driver here: sql65odbc-files.7z SQL Server 6.5 should not only be able to access 4.21, and 6.0 but I think it ought to be able to access SQL Server 7.0, although I haven’t tested it out yet.