Manually adding ncurses & VDE support to the Linux Qemu build

For some reason I had issues for this to automatically pick up building Qemu 2.8.0 on Ubuntu 16.10 (Which is really Debian)…

Anyways, be sure to have the needed dev components installed.  If you have a FRESH system, natrually you’ll need a lot more.

apt-get install libvdeplug-dev
apt-get install libvde-dev
apt-get install ncurses-dev

editing the file config-host.mak, I found I needed to add the following to turn on ncurses & VDE:

CONFIG_CURSES=y
CONFIG_VDE=y

And lastly add in the following libs to the libs_softmmu, to ensure it’ll link

-lncurses -lvdeplug

And now I’m good!

From my notes on flags needed to run Qemu the old fashioned way:

-net none -device pcnet,mac=00:0a:21:df:df:01,netdev=qemu-lan -netdev vde,id=qemu-lan,sock=/tmp/local/

This will join it to the VDE listening in /tmp/local

Obviously I have something more interesting and more evil going on….

Installing VMware ESXi 5.5.0 Update 3 on KVM

Well I had no luck with the boot process hanging during initialization.  I searched a little, and came across this thread, stating :

The line that says “Running inside a VM; adjusting spinout timeout to 180 seconds” would suggest that KVM implements enough of our backdoor interface to make it look like we’re running under a VMware hypervisor.  When we’re running in this environment, we use the backdoor to get the host TSC frequency.  I suspect that KVM doesn’t implement the “GETMHZ” backdoor call, so we are confused about the TSC frequency.  The 30ms delay turns into … 30 hours?  30 years?

So they had a source code change for QEMU 1.7.0, however it obviously doesn’t work in 2.x.  It was rolled up stream, and then made into a switch to disable with a simple flag to add into the command line.

-machine vmport=off

So with that set I ran the following:

kvm -vnc 0.0.0.0:1 -cpu host \
-machine vmport=off \
-m 4096M \
-smp cpus=2 \
-drive file=esx-1.qcow2,if=ide,index=0,media=disk \
-serial telnet:127.0.0.1:5001,server,nowait \
-monitor tcp:127.0.0.1:6001,server,nowait \
-cdrom /root/VMware-VMvisor-Installer-5.5.0.update03-3116895.x86_64.iso -boot d \
-net none \
-device vmxnet3,mac=00:2e:3c:92:26:00,netdev=esx-0 \
-device vmxnet3,mac=00:2e:3c:92:26:01,netdev=esx-1 \
-device e1000,mac=00:2e:3c:92:26:02,netdev=esx-2 \
-device e1000,mac=00:2e:3c:92:26:03,netdev=esx-3 \
-netdev socket,id=esx-0,udp=127.0.0.1:10000,localaddr=127.0.0.1:20000 \
-netdev socket,id=esx-1,udp=127.0.0.1:10001,localaddr=127.0.0.1:20001 \
-netdev socket,id=esx-2,udp=127.0.0.1:10002,localaddr=127.0.0.1:20002 \
-netdev socket,id=esx-3,udp=127.0.0.1:10003,localaddr=127.0.0.1:20003

And now I can boot up, and install VMWare!

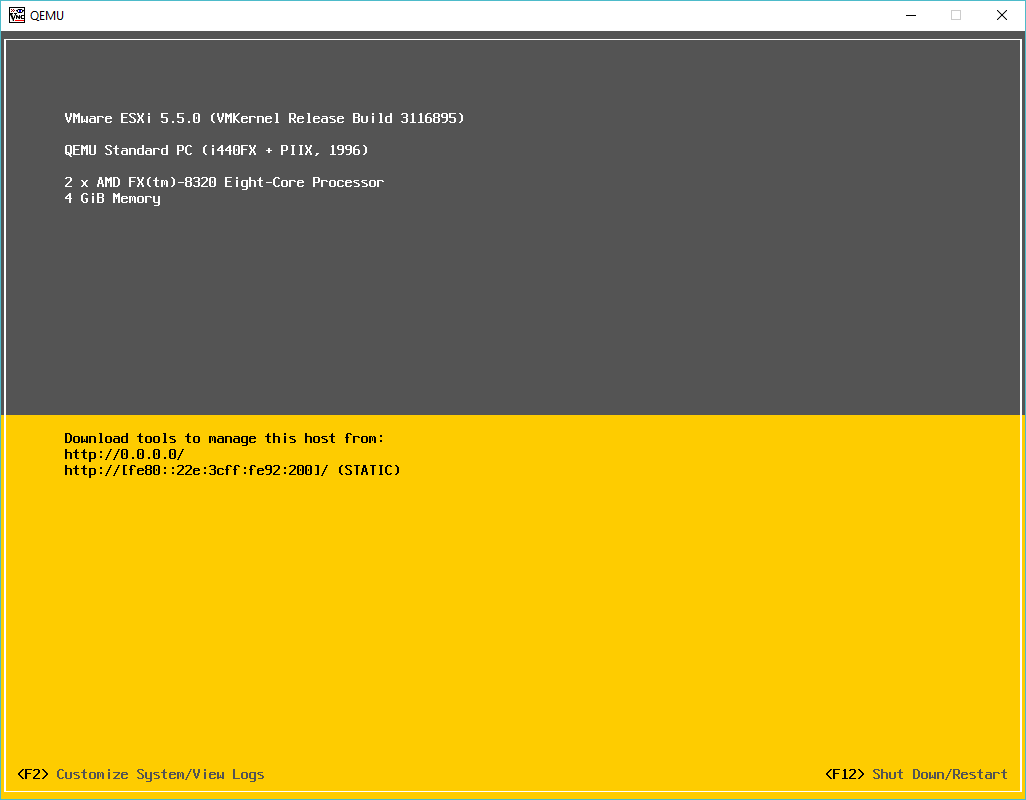
ESXi 5.5.0 on Qemu KVM

By default you will not be permitted to start any virtual machine.  To get around this you have to enable VMWare to run nested.
Add the following to /etc/vmware/config under ESX:

vmx.allowNested=TRUE

And then you are good to go!

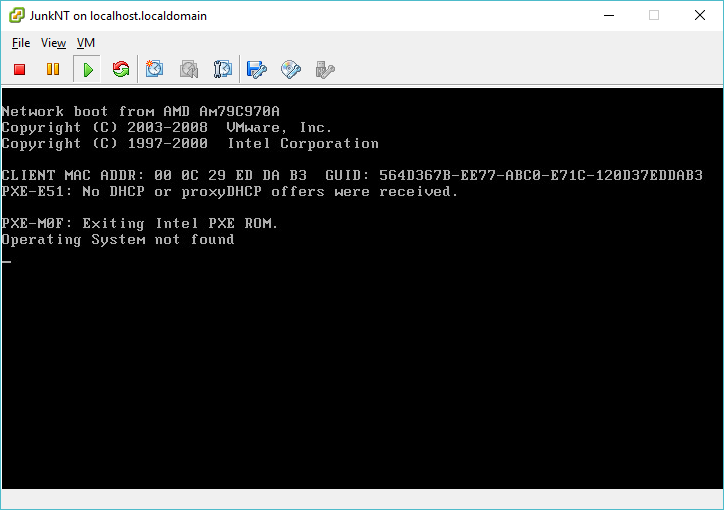
VM running on nested ESXi 5.5.0

Running VMWare ESXi 6.5 under Linux/KVM!

So with VIRL in hand, the next thing I wanted to do was play with some LACP, and VMWare ESX.  Of course the best way to do this is under KVM as you can use UDP to bounce packets around between virtual machines, like the VIRL L2 switch.  I went ahead and fired up 5.5 and got this nice purple screen of death.
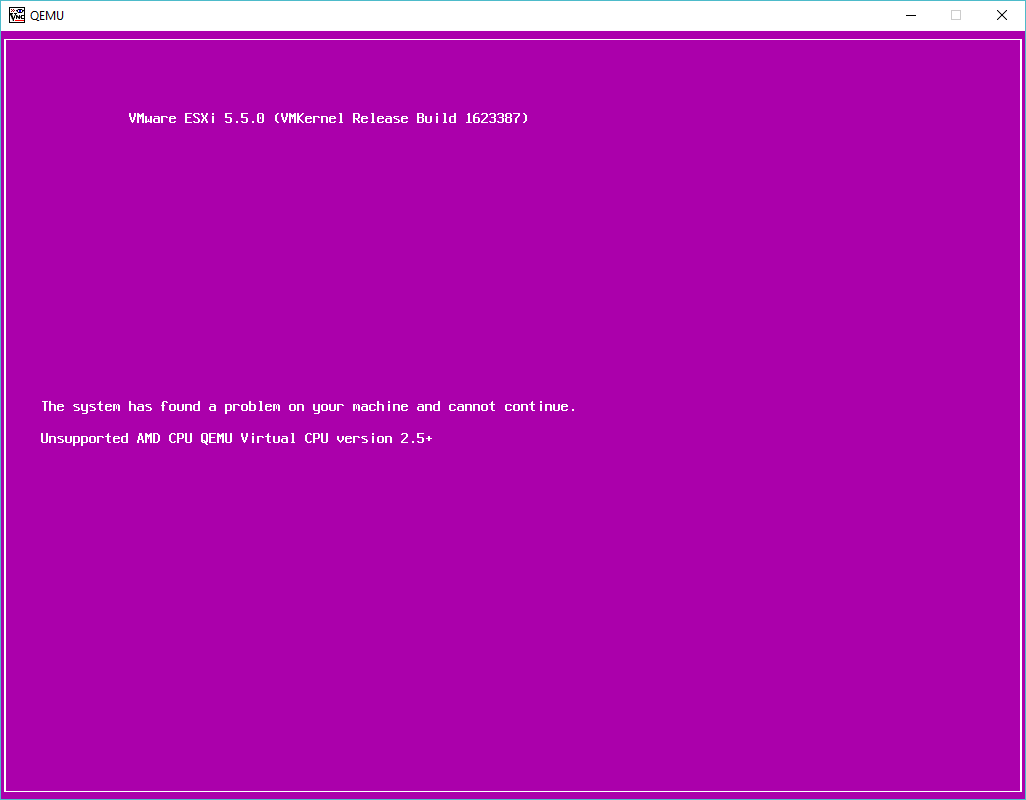
Purple screen of death!

So naturally I need to force the processor type.  Also after reading a few sites, I needed to turn on a nested & ignore_msrs settings:

root@ubuntu:/etc/modprobe.d# cat qemu-system-x86.conf

options kvm_amd nested=1
options kvm ignore_msrs=1

Naturally if you are using an Intel processor the statements need to reflect that.  All being well you will see something like this in your log file:

Mar 7 11:34:38 ubuntu kernel: [ 14.802132] kvm: Nested Virtualization enabled
Mar 7 11:34:38 ubuntu kernel: [ 14.802134] kvm: Nested Paging enabled

I got a little further trying to install VMWare ESXi 5.5 update 3, however it just hangs on Intitializing timing…
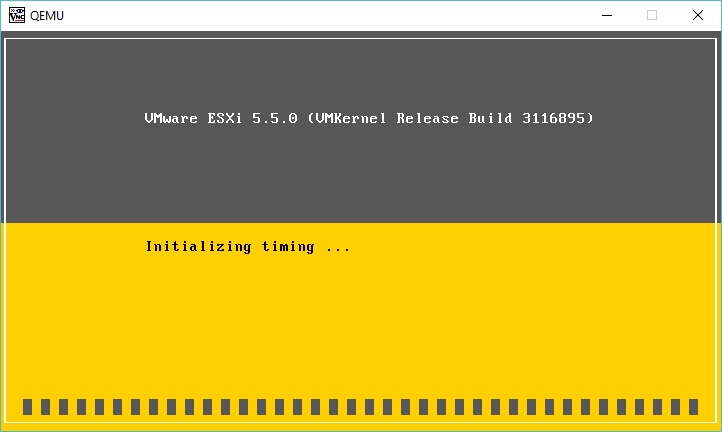
vMWare 5.5.0 update 3 hanging

(I did later solve the 5.5 problem in a follow up here!)

After going nowhere with that, I went ahead and downloaded VMWare ESXi 6.5 which as of today is the latest version, and that installed just fine!
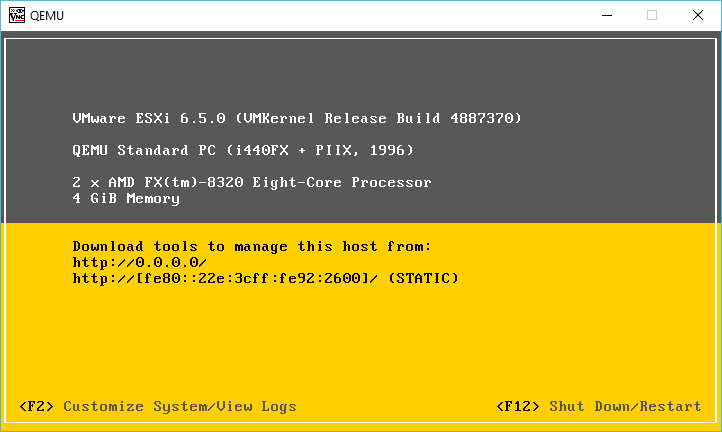
ESXi 6.5.0 running under KVM

For anyone brave or crazy enough to think about reproducing this, here is my install command line (yes Im doing this old school way on purpose)

kvm -vnc 0.0.0.0:1 -cpu host \
-machine pc-i440fx-2.1 \
-m 4096M \
-smp cpus=2 \
-boot order=d \
-drive file=esx-1.qcow2,if=ide,index=0,media=disk \
-serial telnet:127.0.0.1:5001,server,nowait \
-monitor tcp:127.0.0.1:6001,server,nowait \
-net none \
-device vmxnet3,mac=00:2e:3c:92:26:00,netdev=esx-0 \
-device vmxnet3,mac=00:2e:3c:92:26:01,netdev=esx-1 \
-device vmxnet3,mac=00:2e:3c:92:26:02,netdev=esx-2 \
-device vmxnet3,mac=00:2e:3c:92:26:03,netdev=esx-3 \
-netdev socket,id=esx-0,udp=127.0.0.1:10000,localaddr=127.0.0.1:20000 \
-netdev socket,id=esx-1,udp=127.0.0.1:10001,localaddr=127.0.0.1:20001 \
-netdev socket,id=esx-2,udp=127.0.0.1:10002,localaddr=127.0.0.1:20002 \
-netdev socket,id=esx-3,udp=127.0.0.1:10003,localaddr=127.0.0.1:20003 \
-cdrom VMware-VMvisor-Installer-5.5.0.update03-3116895.x86_64.iso \
-boot d

As you can see it really isn’t that involved, well once you get the formatting to make some sense.  And to run it normally I run it something like this:

kvm -vnc 0.0.0.0:1 -cpu host \
-machine pc-i440fx-2.1 \
-m 4096M \
-smp cpus=2 \
-drive file=esx-1.qcow2,if=ide,index=0,media=disk \
-serial telnet:127.0.0.1:5001,server,nowait \
-monitor tcp:127.0.0.1:6001,server,nowait \
-net none \
-device vmxnet3,mac=00:2e:3c:92:26:00,netdev=esx-0 \
-device vmxnet3,mac=00:2e:3c:92:26:01,netdev=esx-1 \
-device vmxnet3,mac=00:2e:3c:92:26:02,netdev=esx-2 \
-device vmxnet3,mac=00:2e:3c:92:26:03,netdev=esx-3 \
-netdev socket,id=esx-0,udp=127.0.0.1:10000,localaddr=127.0.0.1:20000 \
-netdev socket,id=esx-1,udp=127.0.0.1:10001,localaddr=127.0.0.1:20001 \
-netdev socket,id=esx-2,udp=127.0.0.1:10002,localaddr=127.0.0.1:20002 \
-netdev socket,id=esx-3,udp=127.0.0.1:10003,localaddr=127.0.0.1:20003

So it’s basically the same, just no mounted CD-ROM image.  Now this is all fun, but what about networking?  As I had mentioned before, I bought a VIRL license, which includes a l2 Catalyst image, so why not use that, instad of a ‘traditional’ Linux bridge?  Sure!  In this example I’m going to connect the 4 ethernet ports from the ESXi into the first 4 ports on the cisco switch, with the last port connecting to a Linux bridge, that I then route to, as I wanted all my lab crap on a seperate network.  To start the switch I use this script:

kvm \
-m 768M \
-smp cpus=1 \
-boot order=c \
-drive file=vios_l2-adventerprisek9-m.vmdk.SSA.152-4.0.55.E.qcow2,if=ide,index=0,media=disk \
-serial telnet:127.0.0.1:5000,server,nowait \
-monitor tcp:127.0.0.1:51492,server,nowait \
-net none \
-device e1000,mac=00:2e:3c:92:26:00,netdev=gns3-0 \
-device e1000,mac=00:2e:3c:92:26:01,netdev=gns3-1 \
-device e1000,mac=00:2e:3c:92:26:02,netdev=gns3-2 \
-device e1000,mac=00:2e:3c:92:26:03,netdev=gns3-3 \
-device e1000,mac=00:2e:3c:92:26:04 \
-device e1000,mac=00:2e:3c:92:26:05 \
-device e1000,mac=00:2e:3c:92:26:06 \
-device e1000,mac=00:2e:3c:92:26:07 \
-device e1000,mac=00:2e:3c:92:26:08 \
-device e1000,mac=00:2e:3c:92:26:09 \
-device e1000,mac=00:2e:3c:92:26:0a \
-device e1000,mac=00:2e:3c:92:26:0b,netdev=gns3-tap \
-netdev socket,id=gns3-0,udp=127.0.0.1:20000,localaddr=127.0.0.1:10000 \
-netdev socket,id=gns3-1,udp=127.0.0.1:20001,localaddr=127.0.0.1:10001 \
-netdev socket,id=gns3-2,udp=127.0.0.1:20002,localaddr=127.0.0.1:10002 \
-netdev socket,id=gns3-3,udp=127.0.0.1:20003,localaddr=127.0.0.1:10003 \
-netdev tap,id=gns3-tap,ifname=tap0,script=/etc/qemu-ifup \
-nographic

Now as you can see the udp sockets are inverse of eachother, meaning that the ESX listens on 10000 and sends to 127.0.0.1 on port 20000, while the switch listesns on 20000, and sends packets to 10000 for the first ethernet interface pair.

By default VMware only assigns the first NIC into the first virtual switch, so after enabling CDP, we can see we have basic connecitivity:

AMD-kvm#sho run int gig0/1
Building configuration…

Current configuration : 99 bytes
!
interface GigabitEthernet0/1
media-type rj45
speed 1000
duplex full
no negotiation auto
end

AMD-kvm#show cdp neigh
Capability Codes: R – Router, T – Trans Bridge, B – Source Route Bridge
S – Switch, H – Host, I – IGMP, r – Repeater, P – Phone,
D – Remote, C – CVTA, M – Two-port Mac Relay

Device ID Local Intrfce Holdtme Capability Platform Port ID
KVMESX-1 Gig 0/0 155 S VMware ES vmnic0

Total cdp entries displayed : 1

And of course the networking actually does work… I created a quick VM, and yep, It’s online!

AMD-kvm#show mac address-table
Mac Address Table
——————————————-

Vlan Mac Address Type Ports
—- ———– ——– —–
1 000c.2962.09e5 DYNAMIC Gi0/0
1 002e.3c92.2600 DYNAMIC Gi0/0
1 76b0.3336.34b3 DYNAMIC Gi2/3
Total Mac Addresses for this criterion: 3

And of course some obliguttory pictures:
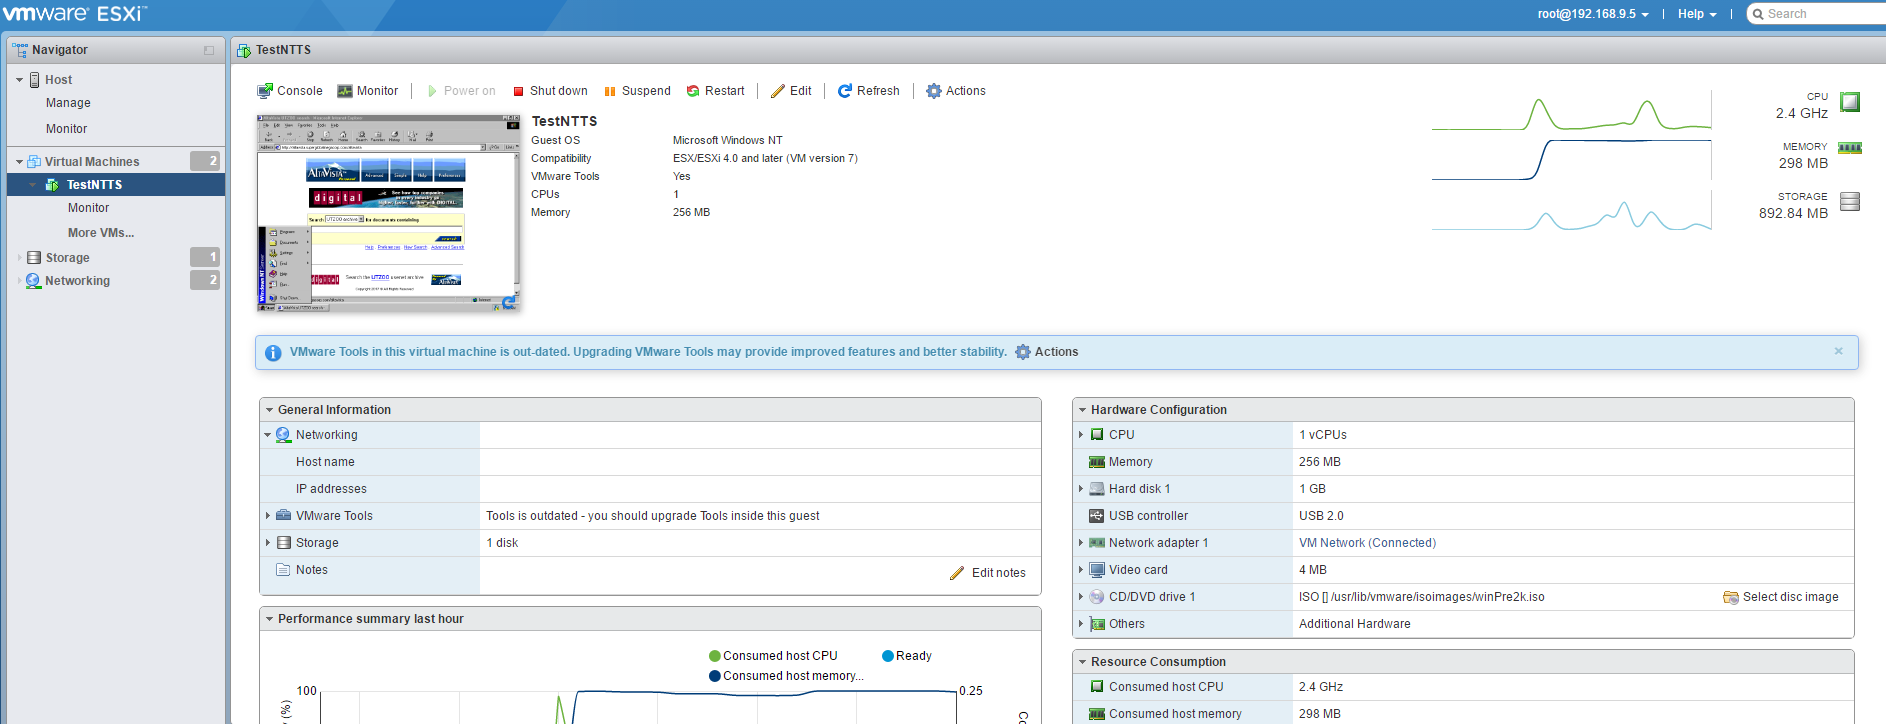
Nested ESXi running a simple NT 4.0 server

And:
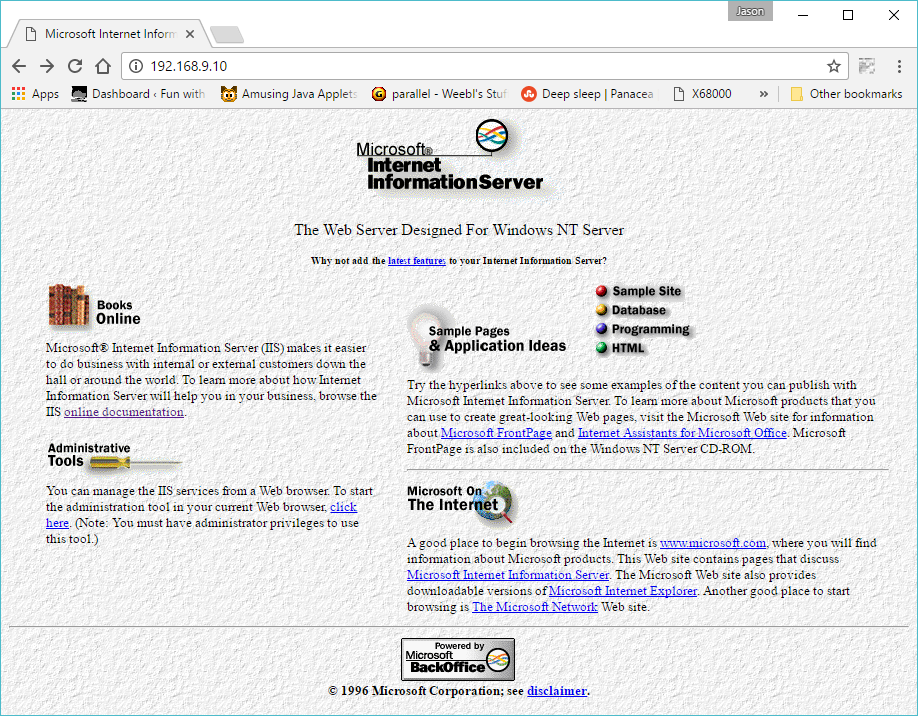
Welcome to IIS 2.0

With ip forwarding turned on my Ubuntu server, and an ip address assigned to my bridge interface, I can then access the NT 4.0 VM from my laptop directly.

Nex’t time to make the L2 more complicated, and add in some L3 insanity…

Firefly-Host-6.0-CloudSDK fun in “modern” times

Getting started

Ugh. nothing like ancient crypto, major security vulnerabilities, and ancient crap.  So first I’m going to use Juniper’s SDK (get it while you can, if you care).  Note that the product is long since EOL’d, and all support is GONE.  I’m using Debian 7 to perform this query, although I probably should be using something like 4 or 5.  Anyways first off is that the python examples require “Ft.Xml.Domlette” which doesn’t seem to have a 4Suite-XML package.  SO let’s build it the old fashioned way:

 apt-get install build-essential python-dev
wget http://pypi.python.org/packages/source/4/4Suite-XML/4Suite-XML-1.0.2.tar.bz2
tar -xvvf 4Suite-XML-1.0.2.tar.bz2
cd 4Suite-XML-1.0.2
./setup.py install

Well (for now) and in my case I could reconfigure tomcat to be slightly more secure. Otherwise running the examples gives this fun filled error:

ssl.SSLError: [Errno 1] _ssl.c:504: error:14082174:SSL routines:SSL3_CHECK_CERT_AND_ALGORITHM:dh key too small

Naturally as time goes on this will not work anymore, and I’ll need a stale machine to query this stale service. Using ssl shopper’s Tomcat guide, I made changes to the server.xml file on the vGW SD VM. (Don’t forget to enable SSH in the settings WebUI, and then login as admin/<whatever password you gave> then do a ‘sudo bash’ to run as root, screw being nice!


# diff -ruN server.xml-old server.xml
--- server.xml-old 2017-01-14 18:20:07.000000000 +0800
+++ server.xml 2017-01-14 19:31:36.000000000 +0800
@@ -98,7 +98,7 @@
enableLookups="false" disableUploadTimeout="true"
acceptCount="100" scheme="https" secure="true"
clientAuth="false" sslProtocol="TLS" URIEncoding="UTF-8"
- ciphers="TLS_RSA_WITH_AES_128_CBC_SHA, TLS_DHE_RSA_WITH_AES_128_CBC_SHA, TLS_DHE_DSS_WITH_AES_128_CBC_SHA, SSL_RSA_WITH_3DES_EDE_CBC_SHA, SSL_DHE_RSA_WITH_3DES_EDE_CBC_SHA, SSL_DHE_DSS_WITH_3DES_EDE_CBC_SHA"
+ ciphers="TLS_RSA_WITH_AES_128_CBC_SHA, ECDH-RSA-AES128-SHA"
keystoreFile="/var/lib/altor/cert/public_keystore" keystorePass="altoraltor"/>

Naturally don’t forget to restart Tomcat, which does take forever:

bash-3.2# /etc/init.d/tomcat restart
Stopping tomcat: [ OK ]
Starting tomcat: [ OK ]

And now I’m FINALLY able to run  one of the sample scripts

# ./policyToXML.py –grp 1
<?xml version=”1.0″ encoding=”UTF-8″?>
<policy xmlns=”urn:altor:center:policy”>
<revision>340</revision>
<name>Global Policy</name>
<id>1</id>
<rev>1</rev>
<type>G</type>
<groupId>-1</groupId>
<machineId>-1</machineId>
<Inbound>

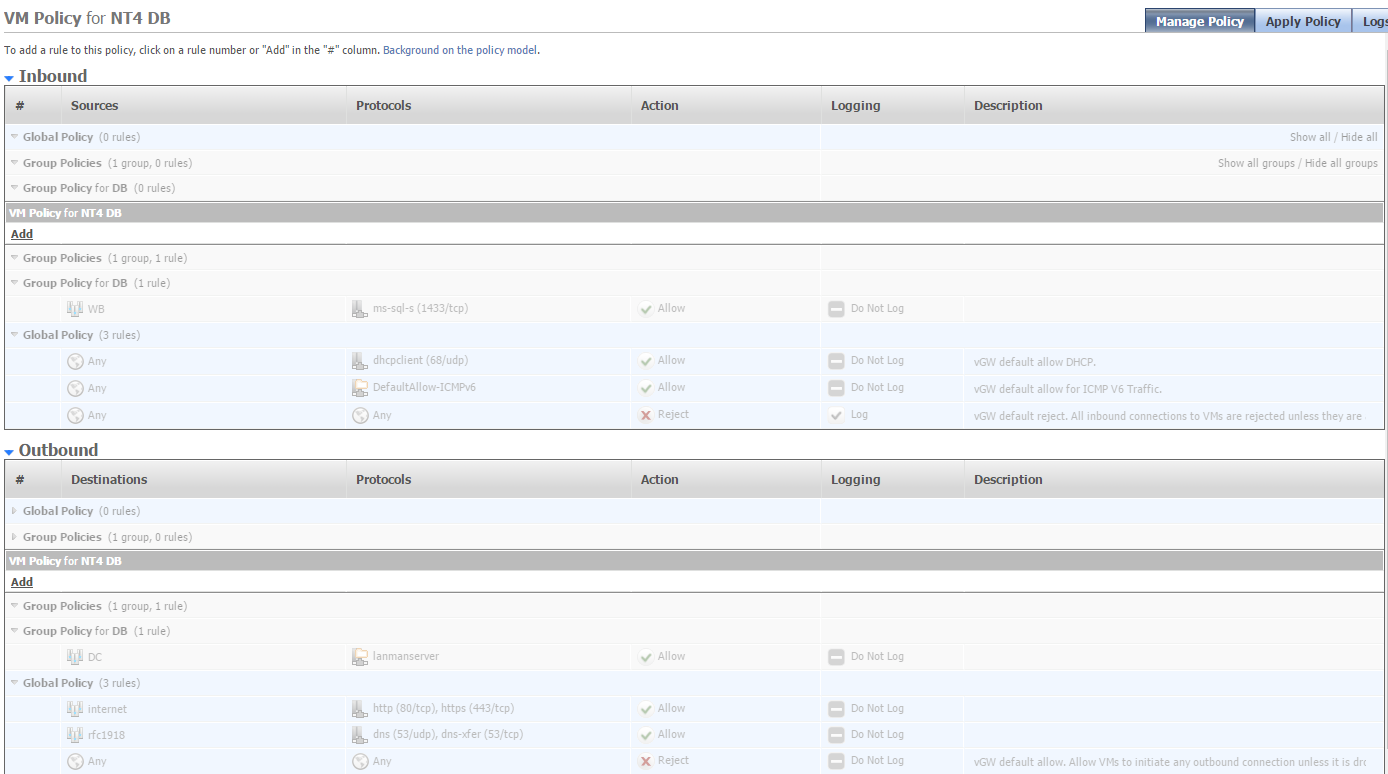
And you get the idea.  Certainly on the one hand it’s nice to get some data out of the vGW without using screen captures or anything else equally useless, and it sure beats trying to read stuff like this:

vGW VM effective policy for a VM

What on earth was Altor/Juniper thinking?  Who thought making the screen damned near impossible to read was a “good thing”â„¢

I just wish I’d known about the SDK download on the now defunct firefly page a few years ago as it’d have saved me a LOT of pain, but as they say, not time like the present.

Naturally someone here is going to say, upgrade to the last version it’ll fix these errors, and sure it may, but are you going to bet a production environment that is already running obsolete software on changing versions?  Or migrate to a new platform? Sure, the first step I’d want of course is a machine formatted rule export of the existing rules.  And here we are.

Adding virtual disks to User Mode Linux

Running out of disk space

Well, my good ‘friend’ with their inappropriately provisioned Linux VPS that runs UML (User Mode Linux) inside of it, ran into an issue where he needed to add a second virtual disk device.

Creating the disk file is no big issue, adding a whopping 1GB is pretty simple!

Using the ‘dd’ command it is trivial to make a 1GB file like this:

dd if=/dev/zero of=node1_swap.ubda bs=1M count=1024

And then just append it to the script that they are using to run the UML:

/virtual/kernel ubda=/virtual/node1.ubda mem=384M eth0=slirp,,/virtual/sl1.sh

to this:

/virtual/kernel ubda=/virtual/node1.ubda ubdb=/virtual/node1_swap.ubda mem=384M eth0=slirp,,/virtual/sl1.sh

Of course the real fun comes from trying to find the devices.  Having to dig around I found that the device major is 98 for the UBD’s and that they increment by 16, so that the first 3 devices are as follows:

mknod /dev/ubda b 98 0
mknod /dev/ubdb b 98 16
mknod /dev/ubdc b 98 32

Adding to that, you can partition them, and then they break out like this:

mknod /dev/ubda1 b 98 1
mknod /dev/ubda2 b 98 2
mknod /dev/ubda3 b 98 3
mknod /dev/ubdb1 b 98 17
mknod /dev/ubdb2 b 98 18

You get the idea.

With the disk added you can partition the ubd like a normal disk

node1:~# fdisk /dev/ubdb

Command (m for help): p

Disk /dev/ubdb: 1073 MB, 1073741824 bytes
128 heads, 32 sectors/track, 512 cylinders
Units = cylinders of 4096 * 512 = 2097152 bytes

Device Boot Start End Blocks Id System
/dev/ubdb1 1 245 501744 83 Linux
/dev/ubdb2 246 512 546816 82 Linux swap / Solaris

etc etc.  And yes, you can then format, mount and all that.

First let’s setup the swap:

mkswap /dev/ubdb2
swapon /dev/ubdb2

Now let’s format the additional /tmp partition

node1:~# mke2fs /dev/ubdb1
mke2fs 1.40-WIP (14-Nov-2006)
Filesystem label=
OS type: Linux
Block size=1024 (log=0)
Fragment size=1024 (log=0)
125488 inodes, 501744 blocks
25087 blocks (5.00%) reserved for the super user
First data block=1
Maximum filesystem blocks=67633152
62 block groups
8192 blocks per group, 8192 fragments per group
2024 inodes per group
Superblock backups stored on blocks:
8193, 24577, 40961, 57345, 73729, 204801, 221185, 401409

Writing inode tables: done
Writing superblocks and filesystem accounting information: done

This filesystem will be automatically checked every 24 mounts or
180 days, whichever comes first. Use tune2fs -c or -i to override.

Now adding the following to the /etc/fstab so it’ll automatically mount the /tmp directory and add the swap:

/dev/ubdb1 /tmp ext2 defaults 0 0
/dev/ubdb2 none swap defaults 0 0

Now he’s got a dedicated swap partition, and a separate /tmp filesystem.

Starting on an ELF cross compiler for Windows

I’m using Slackware 4.0 as a starting point, so it’s Binutils 2.9.1 and GCC 2.7.2.3 .. I verified that I can build a static hello world executable, and it runs! …

However Linux 2.0.40 has the same issue, it starts to decompress, and triggers a reboot in both Qemu and PCem.  Going in circles I guess.  I suppose the next step is to use the exact version they have in Slackware to see if Qemu can actually run that pre-built kernel, and if I can create one via cross compiling.

I should add that on Debian 7.1 I got GCC 2.7.2.3 running, and it too produces the exact same thing.

Not that I think anyone cares, but here is my pre-built toolchain with some source (The binutils was built under Linux, using a MinGW cross compiler) elfgcc_2.0.40.7z

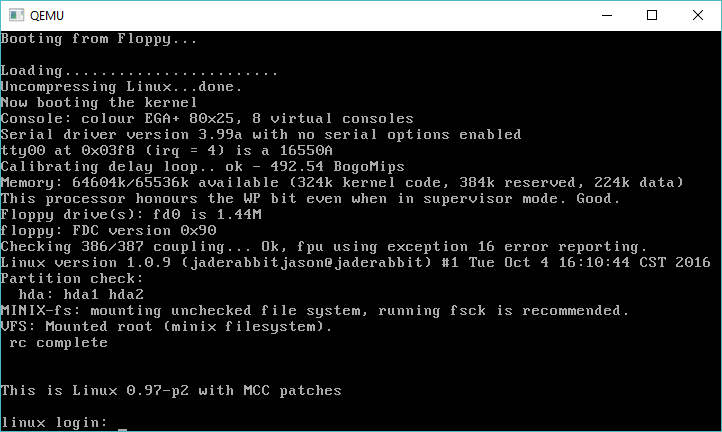
Cross compiled Linux 1.0.9!

Linux 1.0.9 running!

Linux 1.0.9 running!

After getting Linux 0.98 to compile, I thought I’d take a stab at Linux 1.0.  I vaugely recall when it was released, and I just remember a much larger push to 1.1.  So I guess it really comes as no surprise that in the Linux kernel archives, there is simply the 1.0 tar, and 9 patch files.

I went ahead, and patched up the release, and then tried to build with GCC 2.3.3.  This however proved not to be up to the task, as 2.3.3 has issues with some of the assembly macros, so delving into the readme shows that you need to use GCC 2.4.5 or higher.  Since I wanted to keep at least the tools on par, I went ahead and build 2.4.5, and once more again used the gcc driver from 2.6.3.  I further ended up relying on headers, and checking tool versions from Debian 0.91, which also revealed that they were still using GAS 1.38 back then.

One interesting note while building piggback, which takes the compressed system object, and wraps it in an object file, is that it directly uses the magic “0x00640107”, which is for a later “Linux/i386 impure executable (OMAGIC)” filetype.  But because my binutils is so ancient, I needed to change it to “0x00000107” so that the linker would recognize it as a “386 executable not stripped” file.  As always when having no idea what I was doing, it was easier to have it make an empty object file, set the type for 12345678 and look for where it occurs in the data stream, and just match it with a known object file.  As you can see, it worked.

I don’t know if it is of any interest, but the kernel source, along with a binary is available to download linux-1.0.9.7z, and the same goes for GCC gcc-2.4.5.7z.

And of course, you’ll want the latest download, which includes the pre-built tools, qemu, and build environment to get you started.

User Mode Linux revisited (UML) aka SLiRP networking

So my uh ‘friend’ that got into trouble when he found out that his ‘dedicated’ machine turned out to be a VM which he couldn’t launch nested KVM VM’s, and instead found that User Mode Linux (UML), would allow them to run their touchy ancient Linux application in a psudo VM/Container.  Well they finally bit the bullet and decided to move to something better.

And by better, it was cheaper.  And why was it cheaper?  Because it is even a more restricted VM.

Great.

So naturally the panic call was made, because TUN/TAP networking was not permitted in this new VM.  So what to do.

Well, keeping in mind how Qemu gets around this problem, it binds in a copy of SLiRP.  And it turns out that UML can actually call SLiRP directly!  So cool we have an ‘out’.  First things first, we need SLiRP on the host machine.  I’m old, so that means I build it from source.That means I’m downloading slirp-1.0.16.tar.gz, along with the 1.0.17 patch.  I’m not sure if I need to go into how to extract source, patch, running configure and compiling.

One thing of note is that you really really really want to set the “FULL_BOLT” option either in the Makefile, or in config.h

With SLiRP built, I just copy it into /usr/local/bin .. I’m sure there is packages and stuff out there, but heh I’m old.

OK next up I make a small script to call SLiRP, in this case, I’m going to redirect port 80 directly into the VM.  And for a test port 2323 which then goes into port 23 (why not ssh? .. sigh don’t go there).

So my script looks like this:

#!/bin/sh
/usr/local/bin/slirp “redir 80 80” “redir 23 2323”

Pretty simple right?  I’m using a script as there will be more than one VM, so relying on .slirprc isn’t a solution for me.

./linux-2.6.24-rc7 ubd0=junk.ubda eth0=slirp,,/virtual/sl.sh

And away we go!

Inside the VM we can configure it with the usual SLiRP config:

ifconfig eth0 10.0.2.15 255.255.255.0
route add default gw 10.0.2.2

And now we can access the internal http server!

Add in some magic to /etc/resolv.conf such as:

nameserver 10.0.2.3

and it’ll automatically use whatever the host is configured to do.

Torbjörn Granlund’s Excellent resource on running free OS’s on Qemu

Ever get tired of x86 on x86?  yeah me too.

How to solve that problem?

Simple, grab QEMU, and jump off into all those cool RISC processors of the 1990’s that were going to save us all from the WINTEL hegemony!

Lots of instructions, samples, images, and hints here:

https://gmplib.org/~tege/qemu.html

It’s really more comprehensive than I’ve sat down to do, so yeah it’s awesome!

Supported platforms include:

mips32,mips64,sparc32,sparc64,ppc32,ppc64,arm32,arm64,s390x,alpha

Cross compiling Linux 0.95c+ & 0.96c from Windows

The first thing is to build GCC 2…  I couldn’t find any of the Linux patches for 2.0, 2.1 or 2.2.. I only tried to build 2.0 from source as targeting a.out i386 but it looks like the 2.0 files on the FSF’s site are missing files?

Anyways GCC 2.3.3 actually includes builtin support of Linux!  I was able to build most of it, but just like GCC 2.5.8 for OS/2 EMX, But this time I used the gcc driver from GCC 2.6.3, which added support for Windows NT 3.5 native builds, and I now had my GCC cross compiler!

D:\aoutgcc\src>gcc2 -v -c hi.c -o hi
gcc version 2.6.3 -Linux 2.3.3
cpp2 -lang-c -v -undef -D__GNUC__=2 -Dunix -Di386 -Dlinux -D__unix__ -D__i386__ -D__linux__ -D__unix -D__i386 -D__linux hi.c C:\Temp\cca09324.i
GNU CPP version 2.3.3 (80386, BSD syntax)
cc12 C:\Temp\cca09324.i -quiet -dumpbase hi.c -version -o C:\Temp\cca09324.s
GNU C version 2.3.3 (80386, BSD syntax) compiled by GNU C version 5.1.0.
a386 -o hi C:\Temp\cca09324.s

Thankfully the prior binutils and assembler I was using in my GCC 1.40 cross compiler, still cooperated just fine, and I could happily build and link just fine.

From there it was a matter of fighting the makefiles as for some reason as make calls other makefiles they are not passing variables, so I just cheated, and changed the paths, along with editing the dependencies to finding stuff in a more sane manner.  Plus all the Makefiles have include paths hard coded into the build process as expected.  After fighting for a while, it linked and even better, it runs!

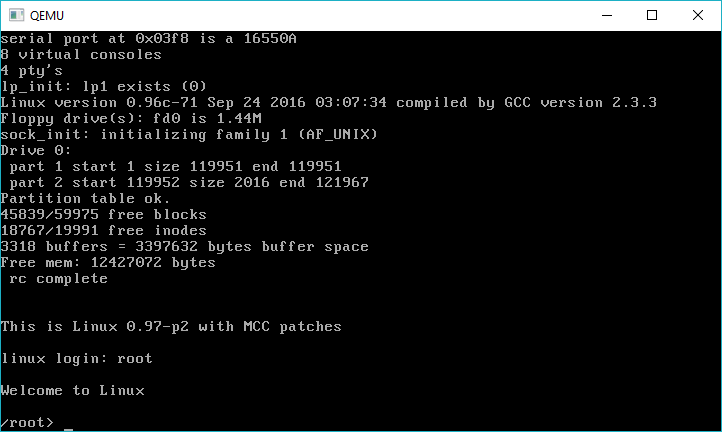
linux-0-96c-71-cross-compiled-from-windows

Linux 0.96c-71 cross compiled from windows

So yeah, using the MCC hard disk image from oldlinux.org and it boots!

Cool stuff, indeed!

As an added bonus I was also able to get 0.97 & 0.98 to compile as well!

Download your copy @ MinGW-aout-linux–001_010_011_012_095_096_097_098.7z.