I’m xorhash, a guest poster, here to talk about my tale going down a trip on the memory lane with QuakeNet’s service bot Q. If you’re not interested in IRC, you can probably skip this one.
On the Trails of Q
As far as I know, QuakeNet’s service bot Q went through these three major codebases:
a. the old Perl Q,
b. the first version written in C, and
c. Q as part of newserv.
There’s a reason I didn’t have anything to link for (a). That’s because to the best of my knowledge and research, no version has survived these past decades.
As for (b), it seems only the linked version 3.99 from the year 2003 was saved.
The CVS repository and thus commit history has been lost.
If anyone has either actual code for the old Perl Q or the CVS repo for the old
Q written in C, please reach out to me via `xorhash ++at++ protonmail.com’.
I’m most interested in looking through it.
However, not all hope was lost with the old Perl Q. As it turns out, most likely, the old Perl Q was actually based on an off-the-shelf product called “CServe”. What makes me think so?
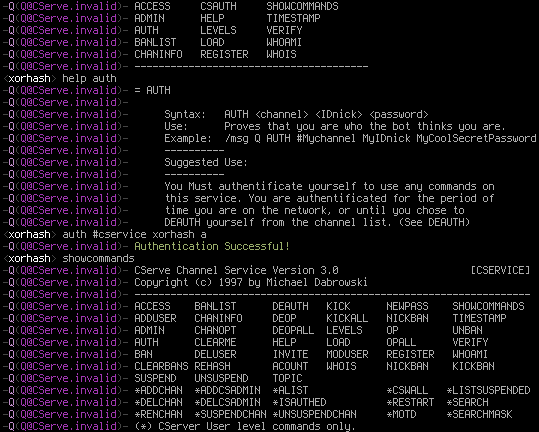
Let’s take a look at [the QuakeNet Q command listing from 1998.
I picked the command “WHOIS” and googled its use “Will calculate a nick!user@host mask for you from the whois information of this nick.” This lead me to a help file for StarLink IRC. At the top, it reads:
CStar3.x User Command Help File **** 09/10/99
Information extracted from CServe Channel Service
Version 2.0 and up Copyright (c)1997 by Michael Dabrowski
Help Text (c)1997 (c)1997 StarLink-IRC (with permission)
Wait a second, “CServe Channel Service”? I know that from somewhere.
[email protected]
So the commands between that help file and the QuakeNet Q command listing match up and so does Q’s host today. Most likely, I’m on the right track with this. What’s left is to track down a copy of CServe.
Note: I’ve been on the old Perl Q for a while and this strategy didn’t use to work. It seems Google newly indexed these pages. For once I can sincerely say: Thank you, Google.
I found that CServe was hosted on these websites:
a. Version 3.0 on http://www.cs.cuc.edu/~mdabrows/cserve/,
b. Version 3.1 on http://www.wam.umd.edu/~devy/cserve/,
c. Version 4.0 on http://www.othernet.org/devon/cserve/, and
d. Version 5.0 and above on http://www.ircore.com/.
The only surviving versions are 3.0 and 5.1. CServe got renamed to “CS” starting with 5.0 and was rewritten in C by someone other than the original CServe author, going by the comments in the file header of CS5.1 `src/show_access.c’. CS was actually sold as a commercial product. I wonder how many people bought it.
QuakeNet most likely took a version between 2.0 and 4.0, inclusive, as the basis for the old Perl Q. Which one in particular it was, we may never know. If you have any details, please reach out to me at the e-mail address above.
I can’t make any clever guesses anyway since the only versions that the web archive has are 3.0 and 5.1. The latter is written in C, so it quite obviously can’t be the old Perl Q.
Making It Run
So now that I have CServe 3.0, I wanted to actually see it running.
There are three ways to reasonably accomplish this:
a. port CServe to a modern IRCd’s server-to-server protocol,
b. port an old IRCd to a modern platform,
c. emulate an old platform and run both IRCd and CServe there.
I chose option (b).
Once upon a time, I did option (a) for the old UnderNet X bot. It was a very painful exercise to port a bot that predates the concept of UIDs (or numeric nicks/numnicks as ircu’s P10 server-to-server protocol calls them). There’s nothing too exciting about doing (c) by just emulating a 486 or so and FreeBSD, just sounds like a boring roundtrip of emulation and network bridging.
Fortunately, the author was a nice person and wrote on the CServe website that version 3.0 requires “ircu2.9.32 and above”.
It seems the ircu2.10 series followed right after ircu2.9.32. While I’m sure there’s some linking backwards compatibility, determining which ircu in the ircu2.10 series still spoke enough P09 to link with CServe sounded like an exercise in boring excruciating pain. Modern-day ircu most certainly no longer speaks P09. Besides, what’s the fun in just doing the manual equivalent of `git bisect’?
So after grabbing ircu2.9.32, I tried to just straightforward compile and run it.
There’s a `Config’ script that’s supposed to be kind of like autoconf `configure’, but I’ve found it extremely non-deterministic. It generates `include/setup.h’. I’ve made a diff for your convenience. It targets Debian stable, and should work with any reasonably modern Linux. There are special `#ifdef’ branches for FreeBSD/NetBSD in the code. This patchset may break for BSDs in general.
Do not touch `Config’, meddle with `include/setup.h’ manually. Remember this is an ancient IRCd, there are actual tunables in `include/config.h’.
The included example configuration file is correct for the most part, but the documentation on U:lines is wrong. U:lines do what modern-day U:lines do, i.e., designate services servers with uber privileges.
U:cserve.mynetwork.example:*:*
Excuse Me, But What The Fuck?
Of course, I’m dealing with old code. It wouldn’t be old code if I didn’t have some things that just make me go “Excuse me, but what the fuck?”
Looping at the speed of light
aClient *find_match_server(mask)
char *mask;
{
  aClient *acptr;
  if (BadPtr(mask))
    return NULL;
  for (acptr = client, (void)collapse(mask); acptr; acptr = acptr->next)
  {
  if (!IsServer(acptr) && !IsMe(acptr))
    continue;
    if (!match(mask, acptr->name))
      break;                                                                                                    continue;
  }
  return acptr;
}
See that `continue’ way on the left? What is it doing there? Telling the compiler to loop faster?
Carol of the Old Varargs
So apparently some of this code predates C89. Which means it uses old-style declarations, but that’s okay. It also uses old-style varargs, which is adorable.
The hacks around not even that being there are adorable, too:
#ifndefUSE_VARARGS
/*VARARGS*/
voidsendto_realops(pattern, p1, p2, p3, p4, p5, p6, p7)
char*pattern, *p1, *p2, *p3, *p4, *p5, *p6, *p7;
{
#else
voidsendto_realops(pattern, va_alist)
char*pattern;
va_dcl
{
  va_list vl;
#endif
  Reg1 aClient *cptr;
  Reg2 int i;
  char fmt[1024];
  Reg3 char *fmt_target;

#ifdef USE_VARARGS
  va_start(vl);
#endif

  (void)sprintf(fmt, ":%s NOTICE ", me.name);
  fmt_target = &fmt[strlen(fmt)];

  for (i = 0; i <= highest_fd; i++)
if ((cptr = local[i]) && IsOper(cptr))
  {
  strcpy(fmt_target, cptr->name);
  strcat(fmt_target, " :*** Notice -- ");
  strcat(fmt_target, pattern);
  #ifdef USE_VARARGS
  vsendto_one(cptr, fmt, vl);
  #else
  sendto_one(cptr, fmt, p1, p2, p3, p4, p5, p6, p7);
  #endif
  }
#ifdef USE_VARARGS
va_end(vl);
#endif
return;
}
These functions were declared like this (the example chosen above actually has
no declaration because why not):
/*VARARGS1*/
extern    void    sendto_ops();
Whatcmp
There are `mycmp’ and `myncmp’ for doing RFC1459 casemapping string comparisons. `strcasecmp’ got `#define’d to `mycmp’, but in one case `mycmp’ got `#define’d back to `strcasecmp’. It seemed easier to just remove `mycmp’, replacing it with `strcasecmp’ and forgo RFC1459 casemapping. This is doubly useful because CServe doesn’t actually honor RFC1459 casemapping.
Waiting for the Cookie
ircu uses PING cookies. I was rather confused when I didn’t get one immediately after sending `NICK’ and `USER’. In fact, it took so long that I thought the IRCd got stuck in a deadloop somewhere. That would’ve been a disaster since the last thing I wanted to do is get up close and personal with the networking stack.
As it turns out, it can’t send the cookie:
/*
 * Nasty.  Cant allow any other reads from client fd while we're
 * waiting on the authfd to return a full valid string.  Use the
 * client's input buffer to buffer the authd reply.
 * Oh. this is needed because an authd reply may come back in more
 * than 1 read! -avalon
 */
Nasty indeed.
I lowered `CONNECTTIMEOUT’ to 10 in the diff linked above. This makes the wait noticeably shorter when you aren’t running an identd.
CServe Isn’t Much Better
Not that CServe is much better. I have to hand it to Perl, I only needed to undo the triple-`undef’ on line 450 of `cserve.pl’ and it worked with no modifications. God bless the backwards compatibility of Perl 5.
That said, it has its own interesting ideas of code. This is the main command execution:
foreach $i (keys %commands)
{
if($com eq $i)
{ $found = 1; break; }
}
if($found == 1)
{
open(COMMAND, "<./include/$com");
@evalstring = ; close(COMMAND);
foreach $i (@evalstring) { $evals .= $i; }
eval($evals);
}
else
{
¬ice("�2No such command� �1[�4$com�1]. /msg $unick SHOWCOMMANDS\n");
}
Yep, it opens, reads into an array, closes and then evals. For every command it recognizes. Of course, this means code hot swapping, but it also means terrible performance with any non-trivial amount of users.
Oh, and all passwords are hashed. But they’re hashed with `crypt()’. And a never-changing salt of ZZ.
End Result
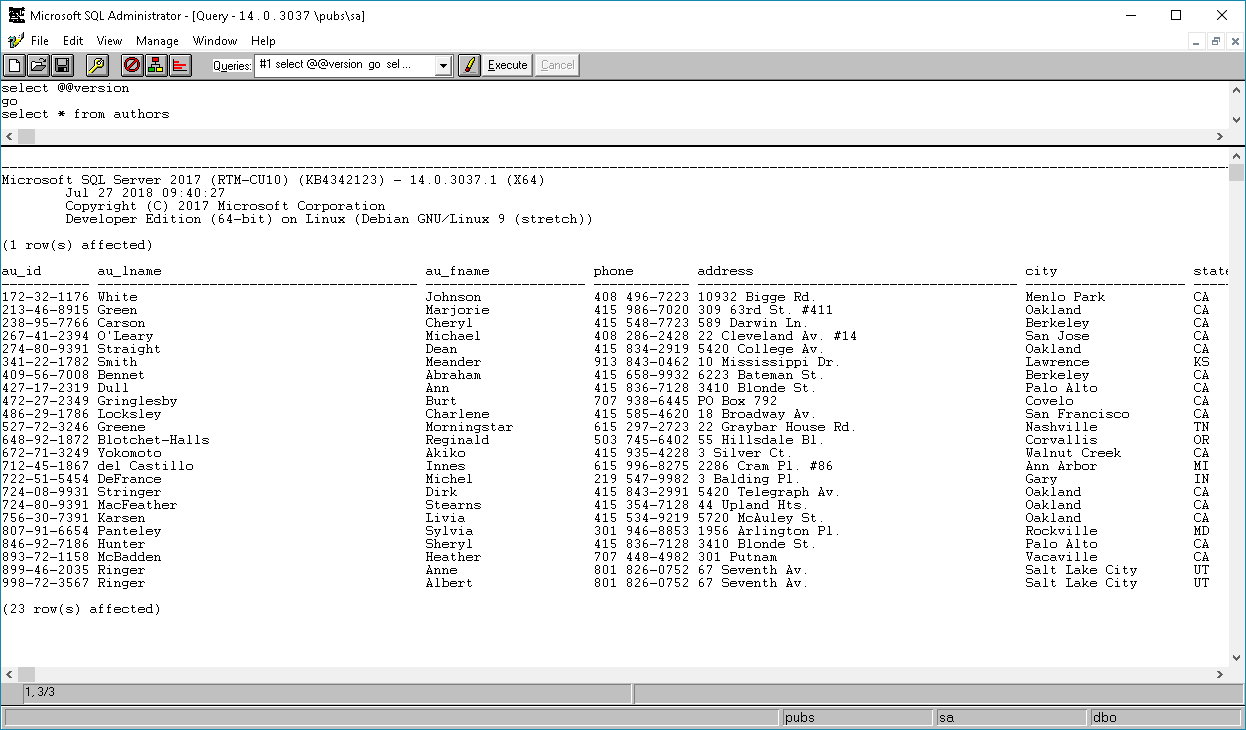
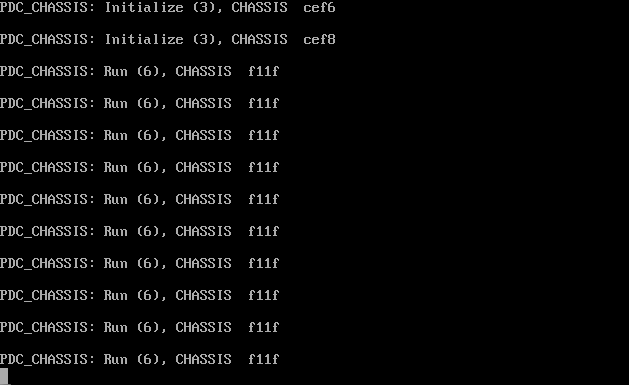
up & running
Was it worth it?
No, not really.
Would I do it again?
Absolutely.
You probably do not want to expose this to the outside world.
The IRCd code is scary in all the wrong ways.
Further Links
Some other things if you’re into ancient IRC stuff: