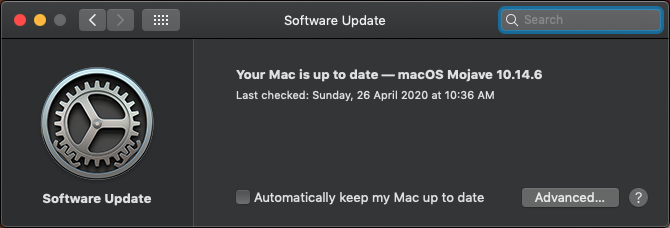
I don’t know how unique my experience is, but Catalina is so unstable it’s totally unusable. Downgrading to Mojave (which was it’s own thing) has made the trashcan a far better Mac experence.
You have to do this from an elevated terminal, but it’s a quick fix to block the stupid Catalina upgrade:
I know it’s been a long time coming but here we are. Such a shame compatibility isn’t a priority. No more crazy stuff like running GCC 1.3 on OS X.
I got this email yesterday :
If you use CrossOver for macOS, this information is VERY IMPORTANT for you.
Earlier today, Apple released the new macOS Catalina. Catalina does not support 32-bit applications. Currently, CrossOver still uses pieces of 32-bit code for every function and will not launch or install any Windows apps in Catalina. If CrossOver is critical to you macOS experience, we ask that you wait on upgrading to Catalina until we release a Catalina compatible version.
At this time, we anticipate that an alpha version will be available sometime in the next 30 days. We will continue to update you as development progresses.
It’s a rainy day, and I didn’t feel well enough to wander around outside, and check out the ‘spyware street lights’. Although that’s the latest rage at the moment along with the usual stuff.
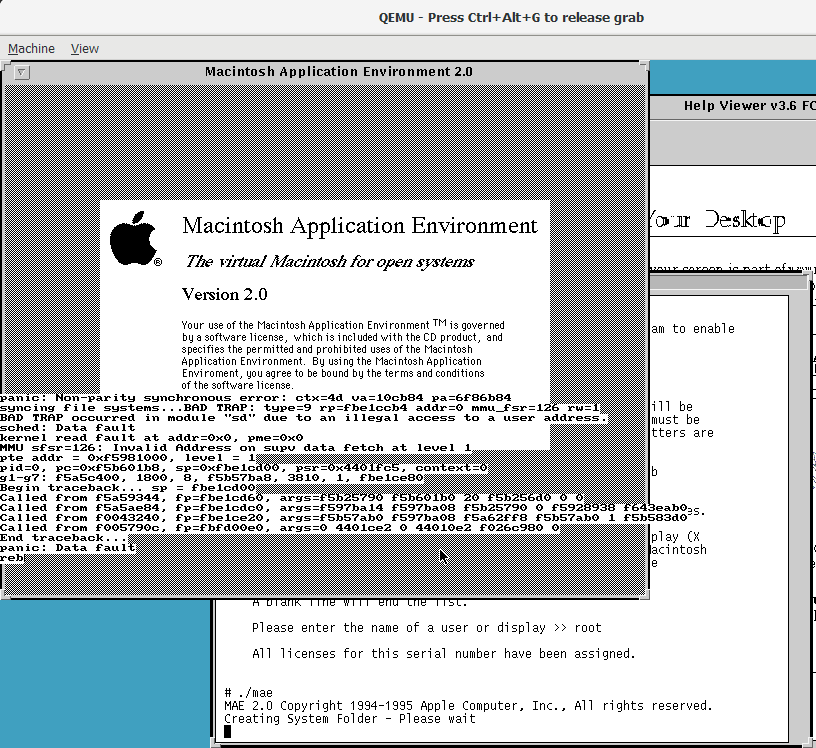
Instead I thought it’d be fun to try some ‘undercover’ software like that time when Apple thought it would be a good idea to port the ToolBox to Unix and run it as a competitor to programs like SoftPC as people with $30,000 workstations clearly needed a virtual Macintosh.
So I spent way too much time letting my 2006 Mac Pro grind out a Solaris 2.6 install, and then using the latest Tenox dump on archive.org I installed MAE 2.0! For anyone wondering the actual serial number is: 192c4838330166201b
And after serializing the app, and running it, I get a nice kernel panic. I thought I was playing it safe by opting out of the kernel module stuff as I don’t care about reading MacOS formatted diskettes.
I guess I really need Solaris 2.4 and those weird patches.
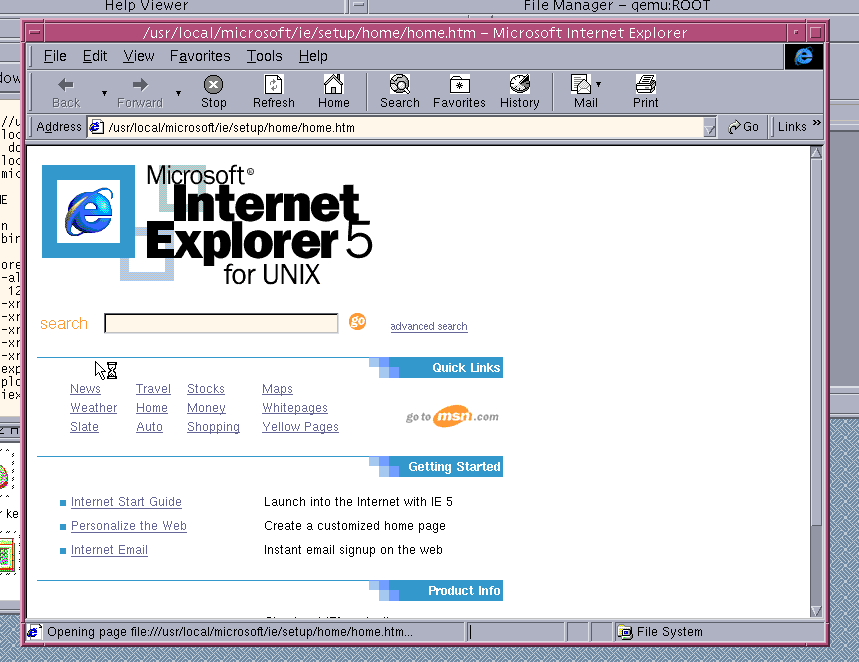
Internet Explorer. For Unix. Really.
Meanwhile you can rest assured that Internet Explorer 5.0 loads up just fine. It is painfully slow, but there it is. I was even able to download stuff with my ‘http backdoor’ thing to vpsland. So at least that works.
Hard to imagine a time that Microsoft was going cross platform under Gates, but Internet Explorer 3/4/5 were available on MacOS & OS X, with 4&5 under Solaris and HP/UX. Then of course there was that SUN Java lawsuit and they pulled the rug out from interoptability. Although I was a Linux on SPARC user in this era, having it available on Linux would have helped a LOT, but naturally Microsoft didn’t entertain that Linux market thing as it was cancer to them. Meanwhile Chromium Edge is only a Windows / OS X thing.
I was hoping to go further, but it appears not today.
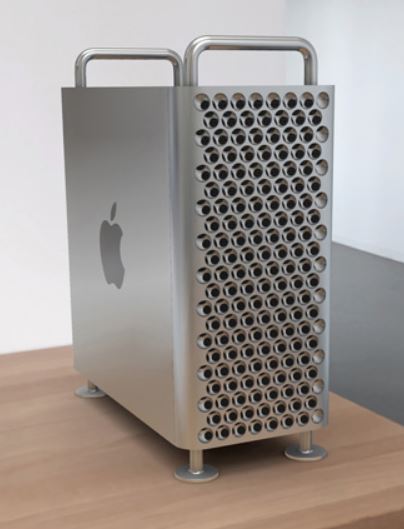
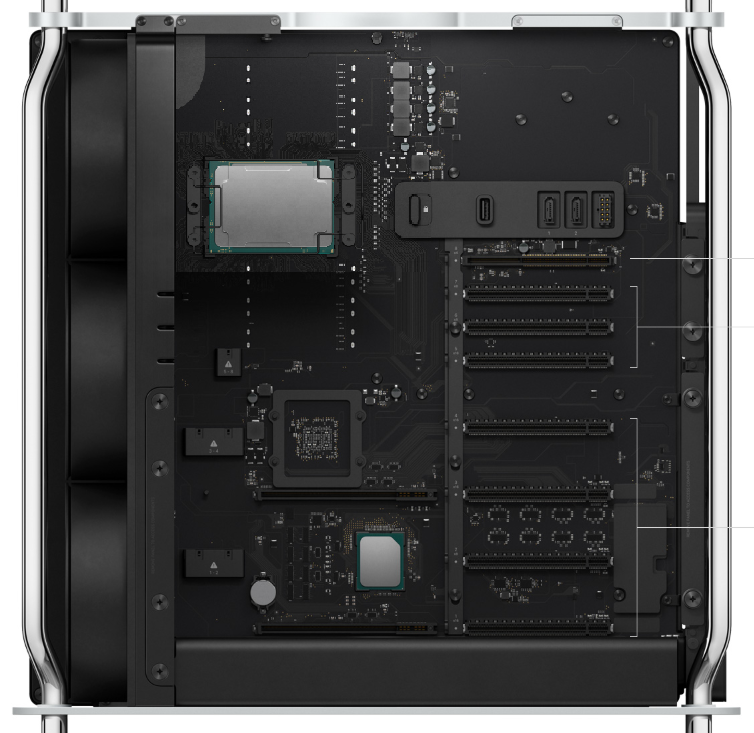
As someone who’s owned a few G5’s over the years, and 2 intel ‘cheese grater/Mac Pros’ this is like exciting news! Although I don’t see why this machine took YEARS to churn out after the trashcan fire, but here we go!
Mmmm Cheese
Somehow the aesthetic is even more cheese grater than the prior G5/Pro’s. Almost a desperate call back to pros saying you missed the grater, so here it is again! Now with more grating action, and like the iPhone now with rounded corners!
Single Processor!
One thing I’ve heard time and time again is that XNU really struggles with multiprocessor setups. And I guess we’ve hit that peak as that 2013 Mac Pro was single processor, and the new Mac Pro continues in this trend with a single processor, a Xeon from the ‘W’ or workstation lineup. Which I guess isn’t all that surprising.
The real great thing is expandibility is back! SLOTS SLOTS SLOTS! Although there is no front 3.5mm RCA audio (lol remember that?!) there is 2 USB-C on the top of the case for somewhat accessible ports. Still not too bad.
Another quick to open and upgrade machine. Just like the good old days of the cheese grater!
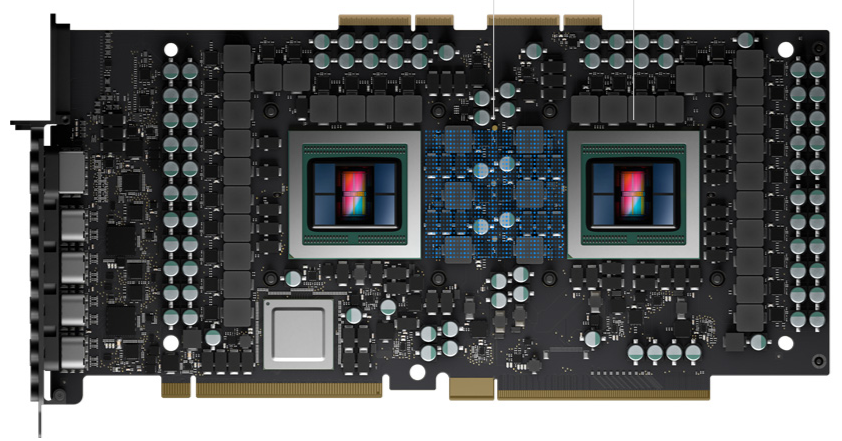
Although many were hoping for an end to the NVIDIA embargo, bringing CUDA to the table, there was no such luck. Instead the whole ‘dual GPU’ thing was doubled down on.
Radeon Pro Vega II Duo
Bundled is the Radeon Pro Vega II Duo card, featuring dual GPU’s on the same card. Although the case is now large enough for two of these cards giving you 4 GPUs in the box.
So far, so good right?!
And then there is the expected MSRP. $5,999 USD. For the cheapest ‘base’ model featuring a bare 8 core, 16 threaded processor clocking in at 3.5Ghz.
However this does mean for people who want to collect old Mac stuff, the trashcans are no doubt going to crash in price. If you enjoy having a stack of external peripherals, and wires and cables everywhere. Kind of like the old Power Mac G4 Cube.
I’ve had this 2006 MacPro for quite a while. I’ve taken it home as didn’t have a ‘good’ home machine as I have my better stuff in the office. Anyways the machine is far obsolete with 10.7 being the last official release supported, and although you can treat it like a hackintosh and go much further, Apple is making their binaries tuned heavy enough that all the spectre/meltdown patches broke the old Xeons.
So I installed Windows 10, and found I can go all the way to 1809 without any issues. I put in a GT 1030 with DDR5 RAM and it can even game to extent, although the 13 year old 2Ghz processors were certainly holding it down. Upgrade processors have always been available when I had this machine but they were expensive, and I wasn’t sure if they’d work. Well I picked up a pair of Xeon x5365 for $88 RMB each and pulled the plug.
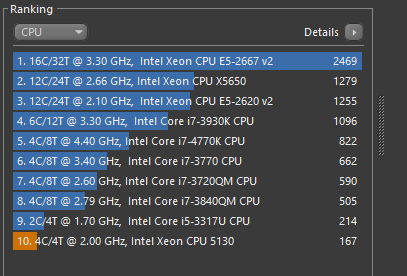
I thought the thing to do was a quick benchmark of before and after. I was getting a whopping 167! That means if Cinebench scales to 100% efficiency I get a core score of 41. While my ‘newer’ machine’s E5-2620 v2 was scoring 52, and the current E5-2667 v2 is scoring 77.
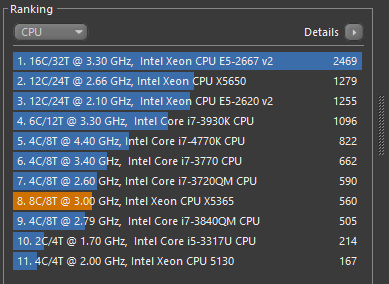
It took two hours, but I finally got these 2 Xeon x5365’s installed giving me a score of 560, or a score of 70 per core. Nice!
If you are expecting to run new and exciting software that requires SSE4/SSE4.1/SSE4.2 and the infamous POPCNT and LZCNT instructions you will be disappointed. Sorry Apex Legends fans. This also means that VMware Player is capped to version 12.
Another thing worth noting is that it’s worth looking at the TDP of the various sSPEC of Xeons. I was lucky and I was able to source the SLAED variation which has half the idle TDP of the SLAC3 variant.
So yeah, this is basically as far as this thing can go CPU wise. Although I have 16GB of RAM, apparently it can go to 32GB, which means buying all new memory modules. I guess I can do a better video card. I’m hoping that I can run more stuff at once, I was hitting a point with all 4 cores were maxed to 100% way too much.
I was going to show off the new CPU’s but apparently the pictures didn’t come out and I wanted to get this upgrade over with, as I had mentioned it did take 2 hours. The plastic retainer in the memory cage, and that stupid cover for the processors was the hardest PITA to remove. I probably spent at least 30 minutes pulling that damned thing off. I never removed the CPU shield before and 13 years, 3 nations, 2 continents worth of dust was unreal. Maybe it’s just as well the pictures didn’t come out, as it was pretty disgusting in there. It’s also no wonder the old CPU’s were running hot.
I wonder if this machine counts as being vintage now? Apple’s sliding scale of support is a weird thing.
So I have this 2006 Mac Pro 1,1 that I’ve had laying around and I wanted to put my old Nvidia 1030 into it, along with Windows 10 for a newer (stronger?) home machine.
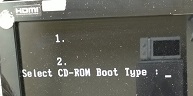
So I burnt the downloadable ISO from Microsoft onto a DVD, tried to boot it up and got this:
Ignore the microwave…
I got stuck at this “Select CD-ROM Boot Type : ” prompt, which you can’t type anything into. Apparently it’s a common and known issue with 64bit boot code, as the older Intel Apple Mac’s are of course 32bit only. So there is a fix, you have to use something called “oscdimg” to rebuild the ISO with a 32bit friendly loader.
So first I just used 7zip to extract the downloaded ISO, and then create the new 32bit ISO with the following:
Now what about those special ‘bootcamp’ drivers? Obviously under Windows 10 there is no nice way to get the ones you want. And what about which model/download package to get?
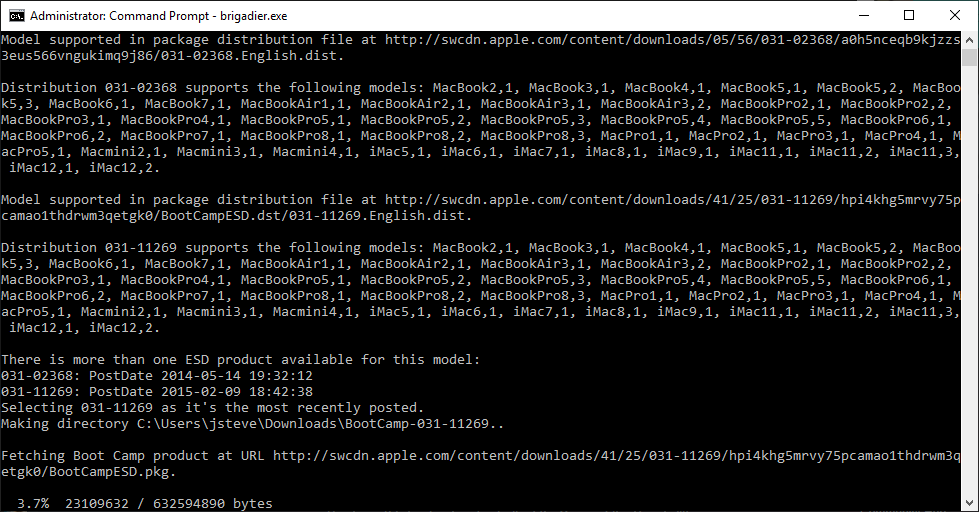
Then I found Brigadier!
It’ll probe your hardware type and grab the drivers for you!
I just got another PowerBook, and the disk had been wiped by the prior user, and all it did was boot up to the blinking mac face. So not very useful. I did luckily buy some CD’s from a user on reddit a few months ago, so I had 10.4 install DVD, and an install of 9.2.2 for the emac.
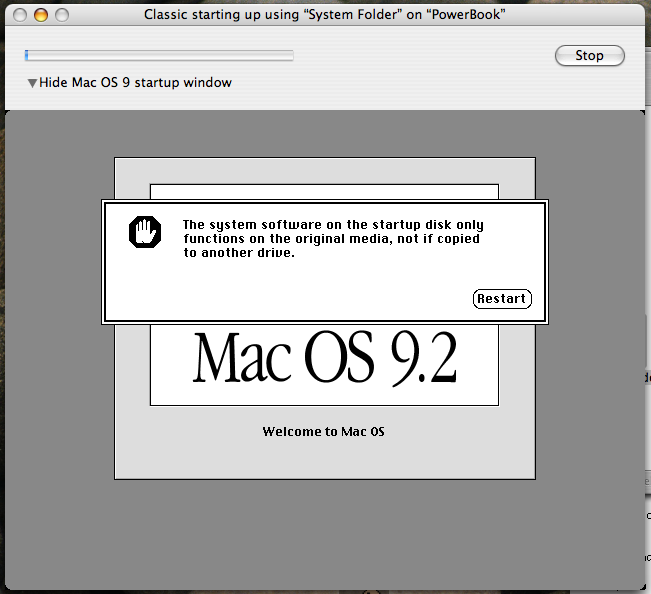
Now the OS 9, is an install disc, not one of the recovery discs, and naturally the aluminum powerbooks don’t boot OS 9, so I’m kind of out of luck for getting Classic working, or so I had thought. I copied the System Folder from the CD onto the hard disk, and told the classic applette to boot it, and it updated some system files, and then gave me this fine message:
The system software on the startup disk only functions on the original media, not if copied to another drive.
So this got me thinking, back in the Sheepshaver days when trying to boot from an ISO as a disk file, it fails the same way because the image is read/write. If it’s read-only it does boot up however. So I used disk util, and made a new read-only disk image from a directory, and pointed it to a directory that I’d moved the CD’s system folder, desktop to. After mounting the read only image, it booted!
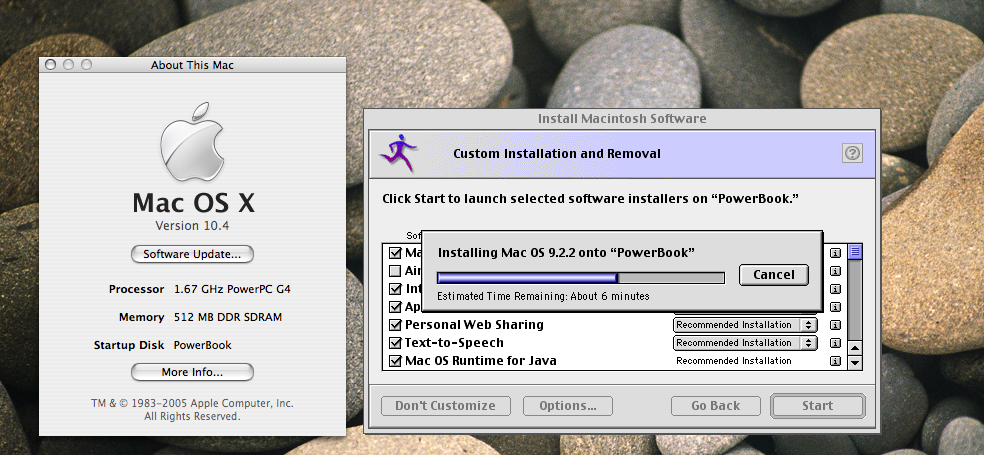
Now for the best part, I then kicked off the installer from the CD, and had it install a copy of OS 9, onto the OS X disk.
OS 9 Installer running under OS X
It’s worth noting that just about every optional install fails. It’ll come back with an error, and you can skip the component. It’s probably just easier to install the minimal OS image.
But rest assured it really does install.
After the install you can eject the CD, unmount the read-only copy and tell the classic to stop and then boot from the new installed copy of OS 9 on the OS X disk. It didn’t interfere with my OS X from booting, although the ‘sane person’ would probably have disk image make a small (1gb) read/write virtual disk, and have the installer install to that.
So to recap, copy the system folder from the CD onto read-write media, and let classic update it. get it to the point that it’s not happy about being mounted read-write. Move it to a read-only disk image and have classic boot from that, and then run the OS 9 installer to install itself to whatever target disk you need or want.
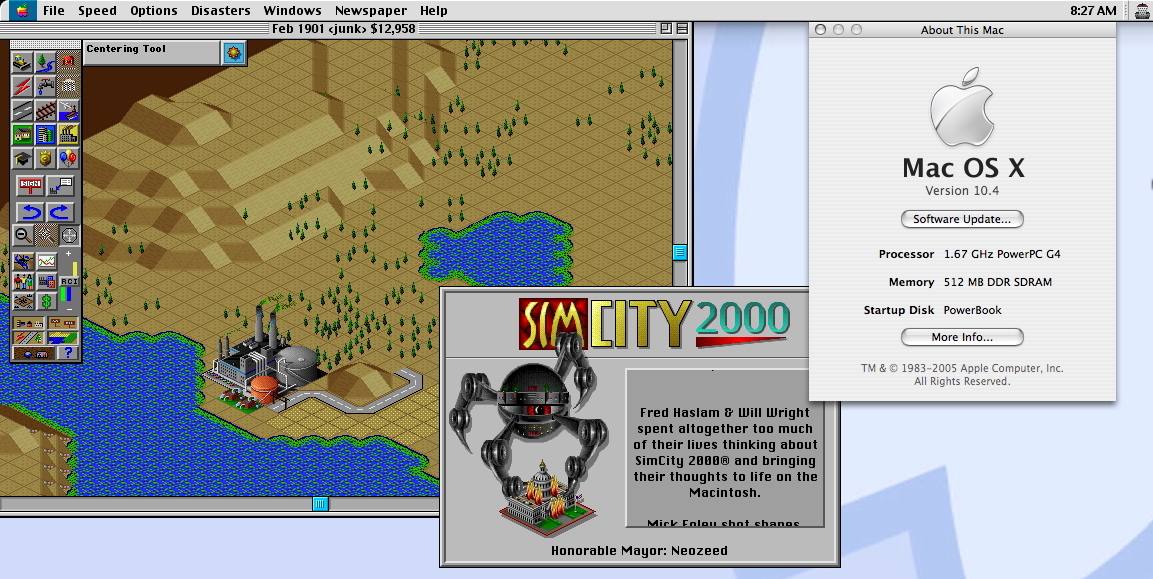
SimCity 2000 on Classic / OS X
I’ve run Netscape 4, IE 3 & 4, QuickTime 4, and the SIMS version 1 (the OS 8/9 carbon version). using 10.4.0 on an aluminum powerbook.
I don’t know if anyone else has done this, I couldn’t find any real concrete guides for installing OS 9 from OS X. So here we go.
;  LOGO Language Interpreter for the Apple-II-Plus Personal Microcomputer
;  Written and developed by Stephen L. Hain, Patrick G. Sobalvarro,
;  and the M.I.T. LOGO Group, at the Massachusetts Institute of
;  Technology.
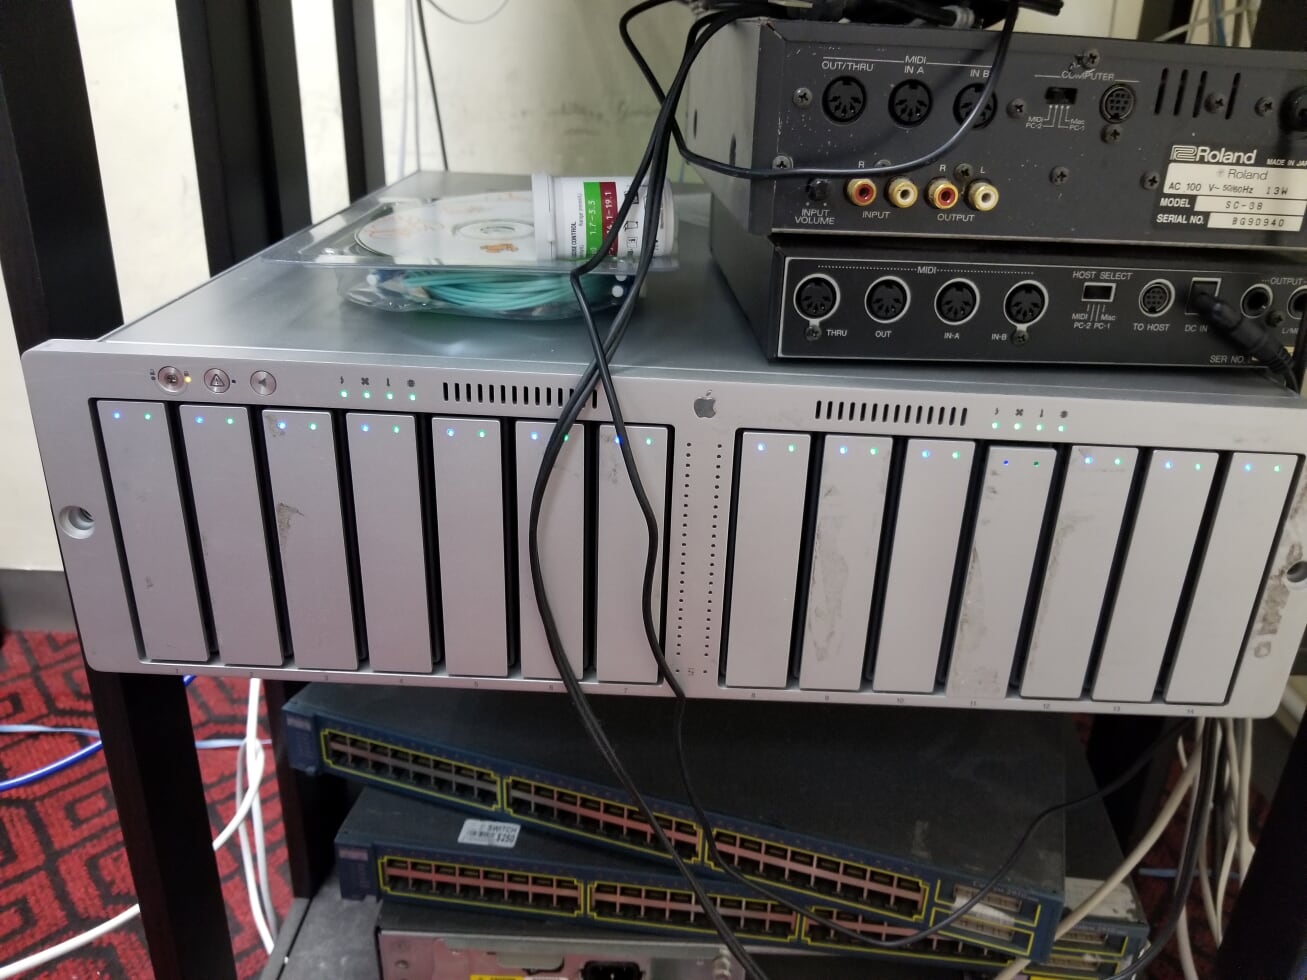
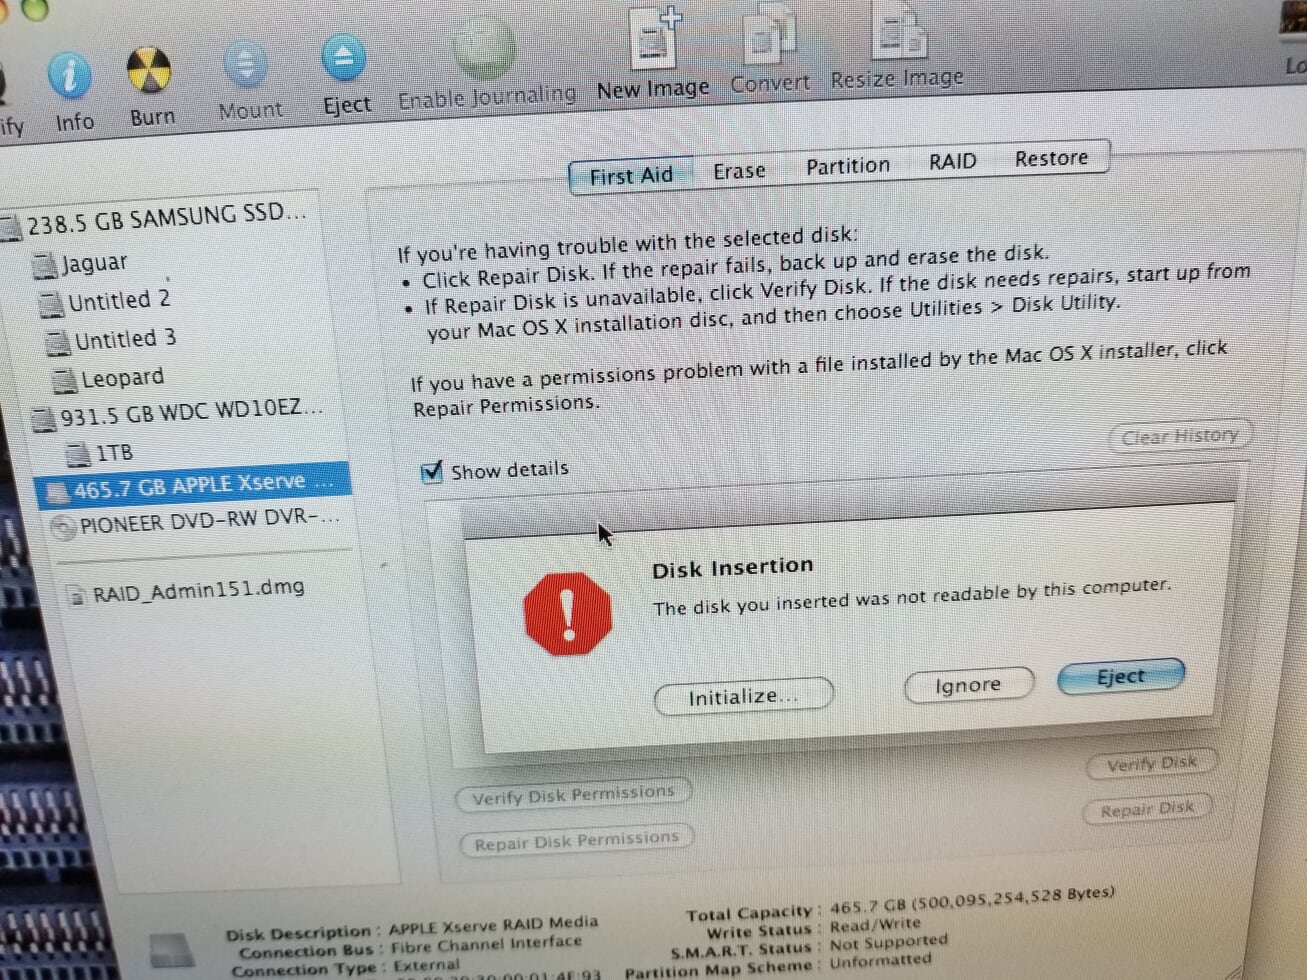
So yeah, I wanted to get a ‘real’ SAN for a while, but they always cost too much. So I just decided to look for something older, like a MSA-1000, which are surprisingly still expensive. Failing that I thought about how I could get that MacPro 2010 for ~$300 so I said what the heck and picked up a super cheap 7TB fully loaded out Xserve RAID.
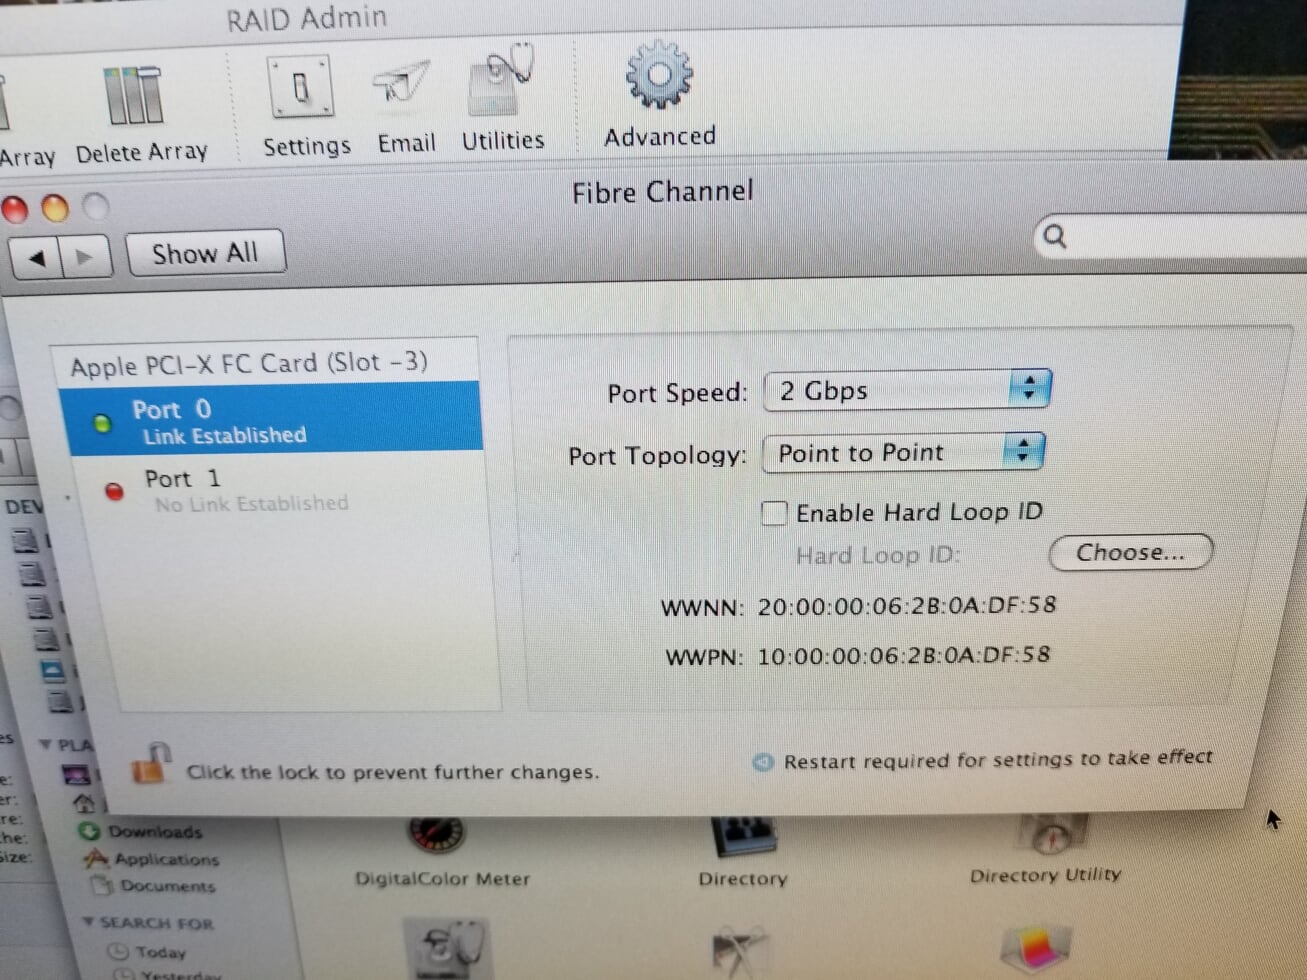
I got a PCI-133 LSI Logic “LSI7202XP” Fiber Channel card for my G5, as I figured that this stuff was of the same era, may as well configure it with a PowerPC.
Configure the LSI
After setting the LSI to 2GB and in point to point mode, the system needed a reboot, and it would report a link on the FC adapter. Great.
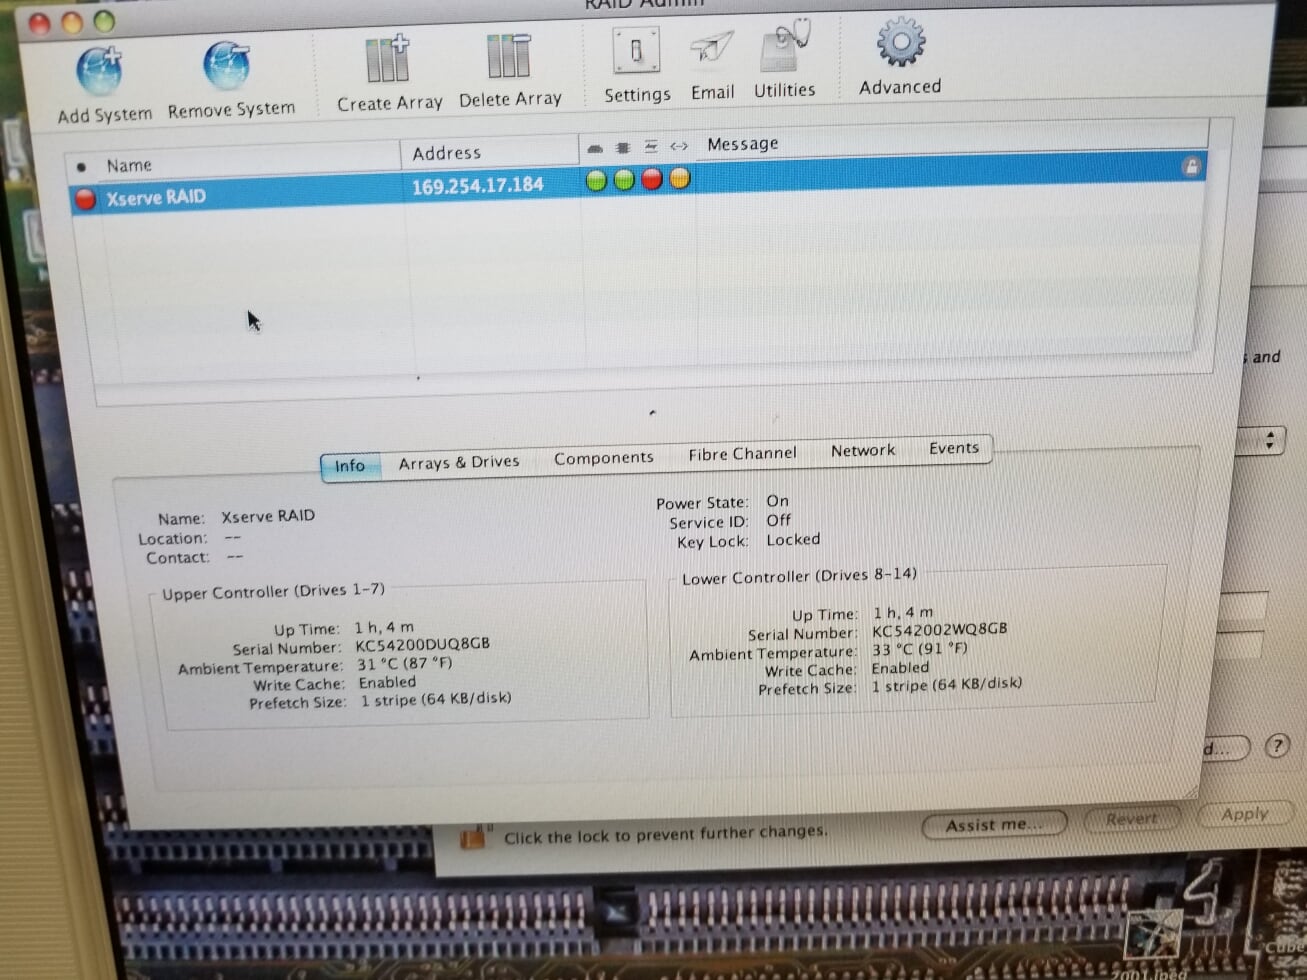
To actually configure the array, you need the Xserve RAID admin tool, along with a working copy of Java on your machine. I downloaded version 1.5.1 which is thankfully still on Apple’s site. It runs fine from OS X 10.5, although the readme does make mention of 10.2, so perhaps it’d run there, although I didn’t feel like booting into 10.2 to find out. By default the password for read only access is ‘public’ and for admin control it’s ‘private’. Yes just like SNMP community strings.
Finding the array
You need to connect the Xserve RAID to an Ethernet network. I’ve only used the MSA’s and they let you configure them over the FC, but no so with Apple, it’s a Bonjour enabled service, so you don’t have to setup the Ethernet, just plug it in, and that’ll be good enough.
Creating the array is straight forward, however the SAN with it’s two controllers aren’t redundant, rather it’s really 2 SAN’s in one chassis with a left & right hand side.
A new disk appears!
So the solution is to use 2 connectors to the dual card, I have 2 DAC cables so I’m set.
But for now it’s just more so messing with the unit. I’ll probably just set it in JBOD mode, and pass it up to something like Solaris 10 with ZFS exports.
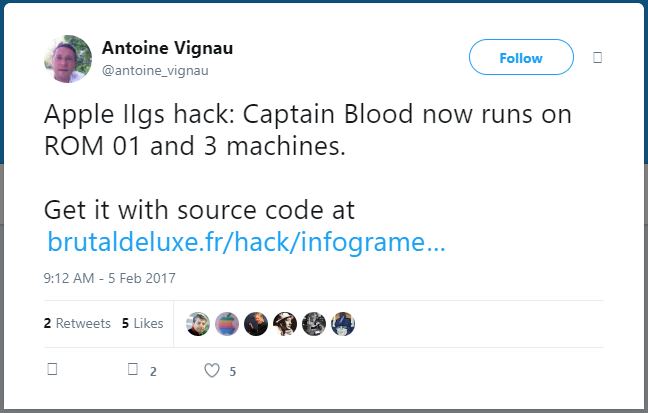
It’s no secret that I always was fascinated with the 1988 game Captain Blood. Last time I played it through was when I’d modified it to run with a virtual floppy drive on an Amiga 600. While the game had been ported to numerous 8 bit and 16 bit platforms, it basically vanished into the haze that was French 80’s SciFi body horror.
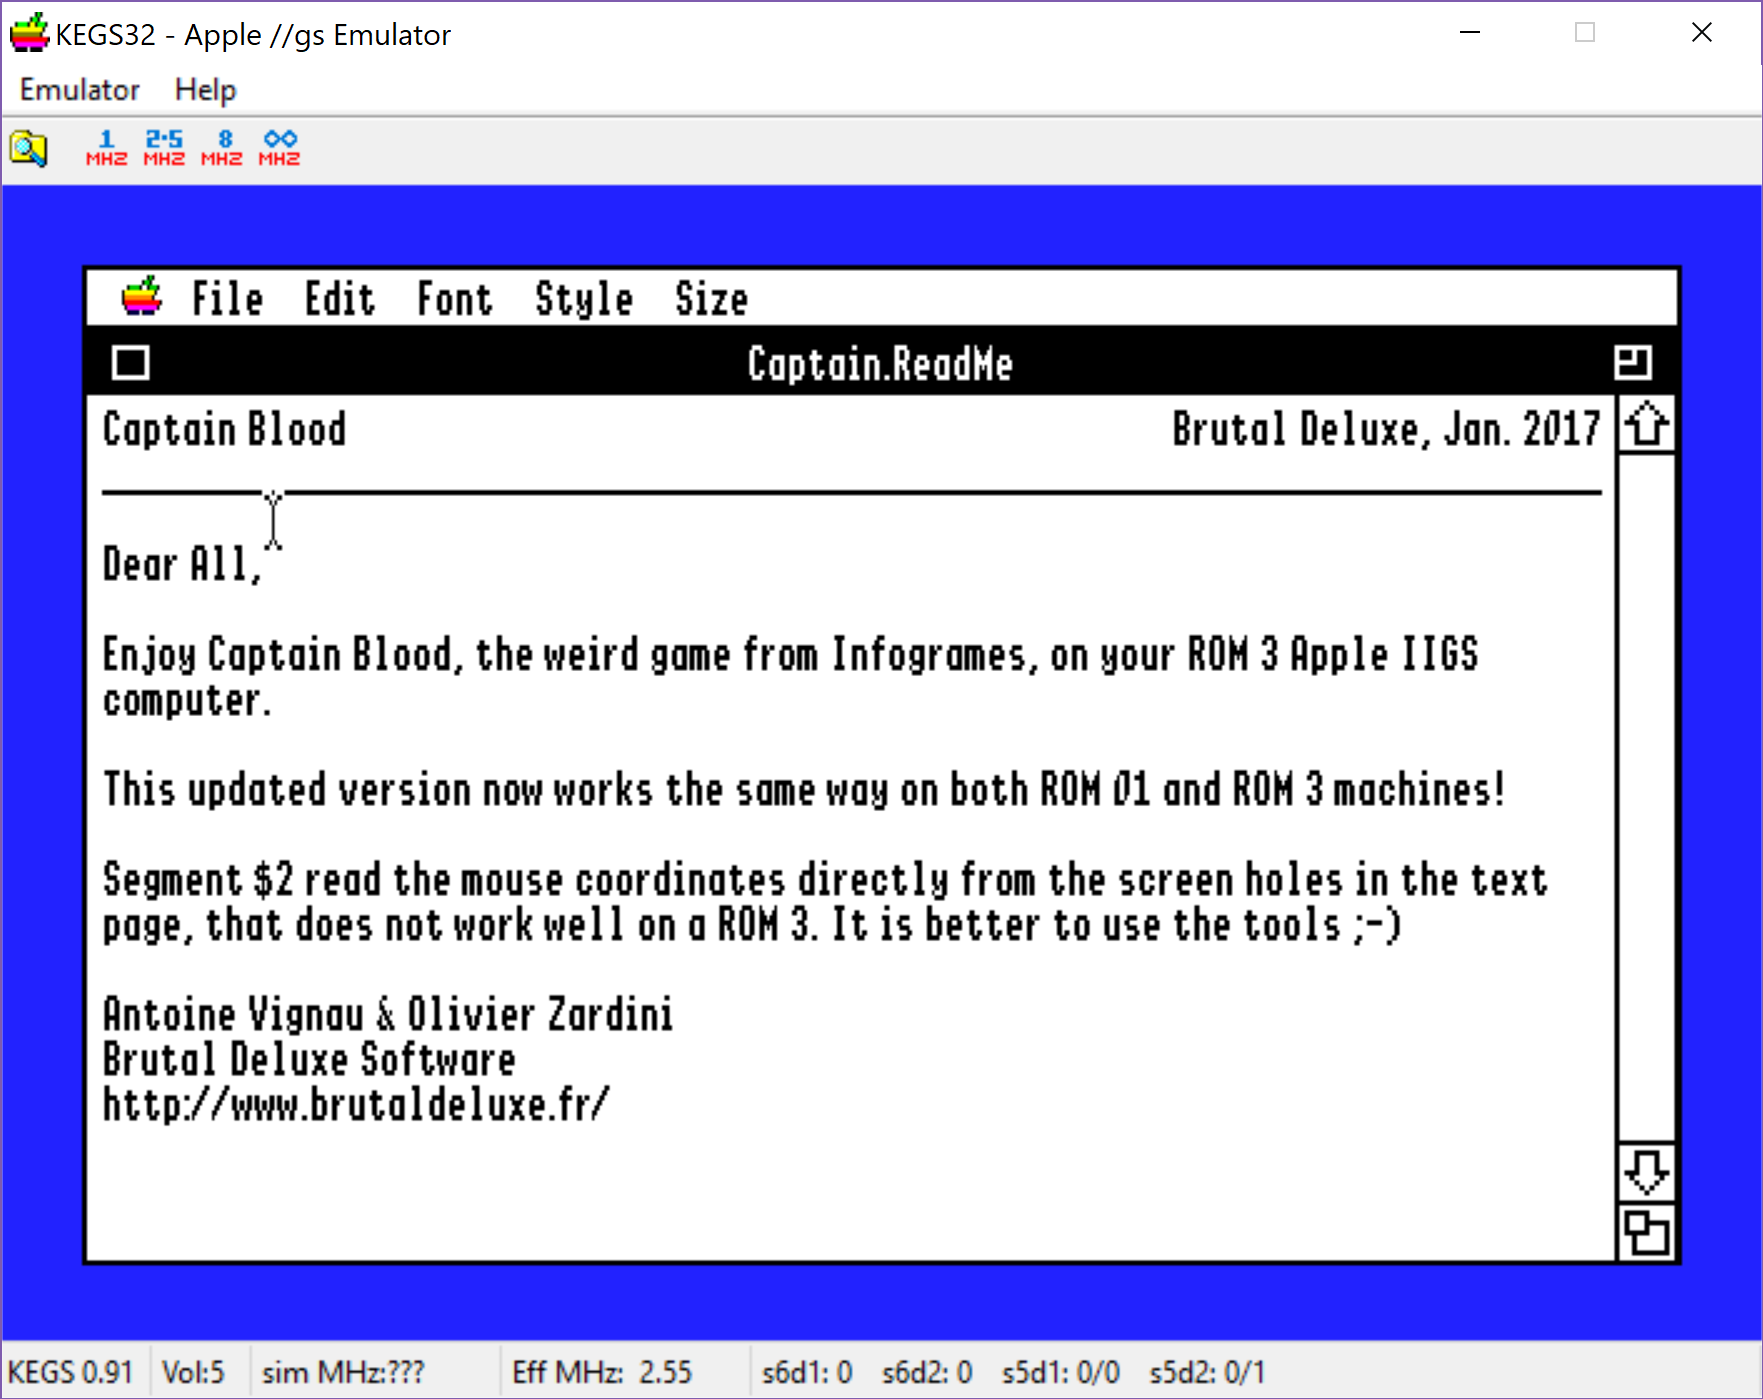
And sure enough I grabbed a copy of the IIGS emulator KEGS32, the ROM, an OS disk, and booted up System 6.0.1 after putting the OS disk into slot S7D1. I then mounted up the source code diskette found at brutaldeluxe.fr
Captain Blood source code release
Great right?
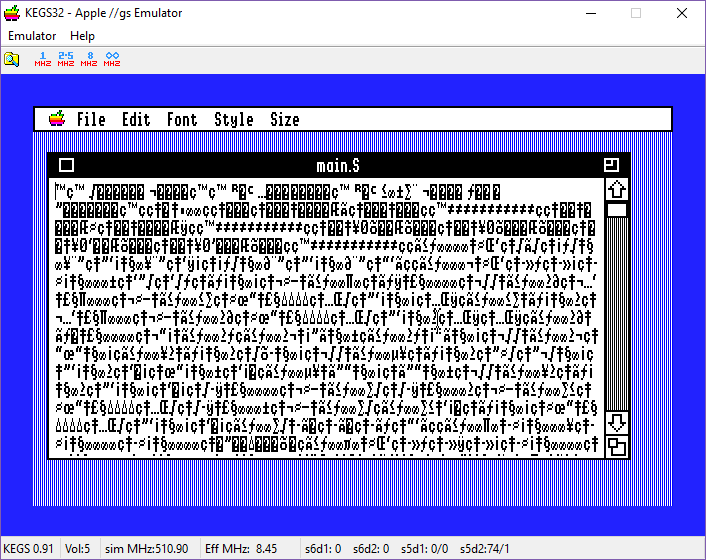
Well it’s a bunch of assembler files. Ok, so when I try to open one from System 6.0.1 I get this:
Corruption
So not giving up just yet, I loaded up a program called CiderPress that can read the IIGS disk image files, and using that I was able to extract the source.
CiderPress extraction
And then I saw this gen scattered in the ASM files that were.. well honestly pretty bare of any comments. Or sane labels.
TFBD generated externals
Which of course is the output from The Flaming Bird Disassembler, a product of Brutal Deluxe, aka where this ‘source’ came from. Although apparently it can be re-assembled into a working executable, as Antoine had fixed it so the mouse used toolbox calls for the mouse for ROM 03.
I put the source code online in CVS. Although I don’t think many people would care, as it’s reversed and VERY terse.