(This is a guest post by Antoni Sawicki aka Tenox)
Today’s catch – FrameMaker 5 for UNIX… and not just one:
- SunOS / Solaris
- HP-UX
- Digital UNIX
- AIX
- IRIX
- SVR4 x86 (Dell Unix, ODT, UXW)
https://archive.org/details/framemakerunix
Enjoy!

(This is a guest post by Antoni Sawicki aka Tenox)
Today’s catch – FrameMaker 5 for UNIX… and not just one:
https://archive.org/details/framemakerunix
Enjoy!
(This is a guest post by Antoni Sawicki aka Tenox)
DEC Multias are known for notoriously overheating. Someone even coined a term “Multia Heat Death”. The typical folklore recommendation of the time was to only run it vertically and replace the built-in fan with a more powerful one.
In modern times one can inexpensively acquire a thermal camera that attaches to a mobile phone. So why not take a peak inside the inferno.
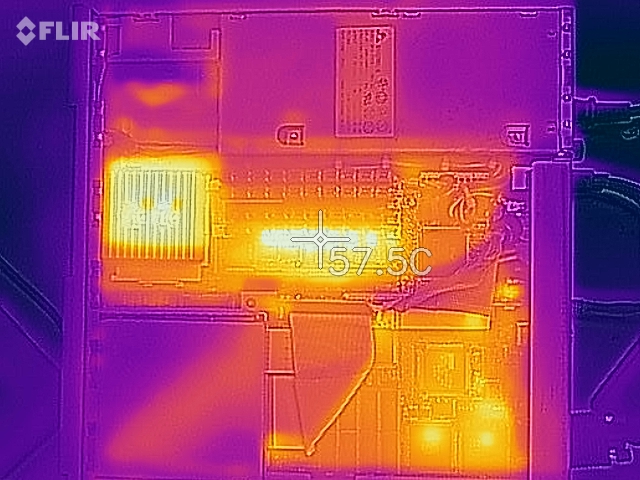
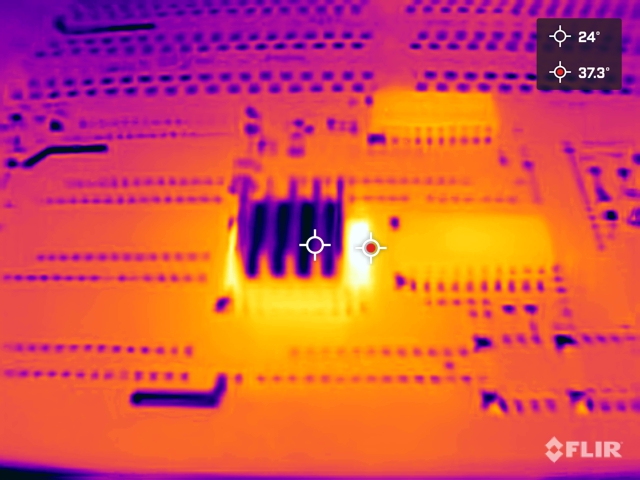
This is how Multia looks like in a thermal camera. PS is on top right. CPU on the left. FDD/HDD bottom left.
The CPU, Alpha AXP, runs at around 60C, not great, not terrible.
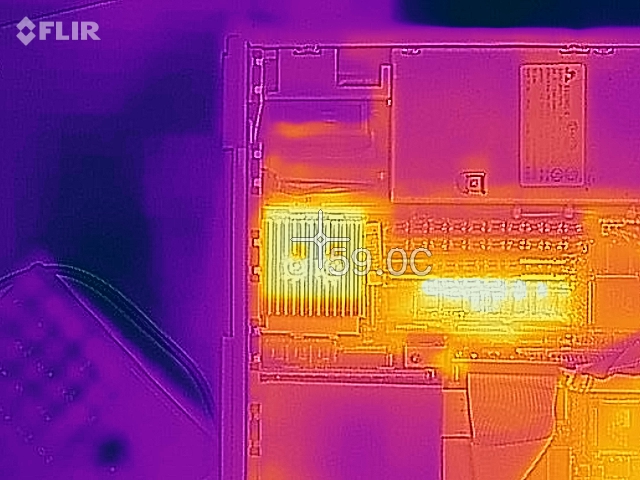
Scanning up close through individual chips I found this curiosity:
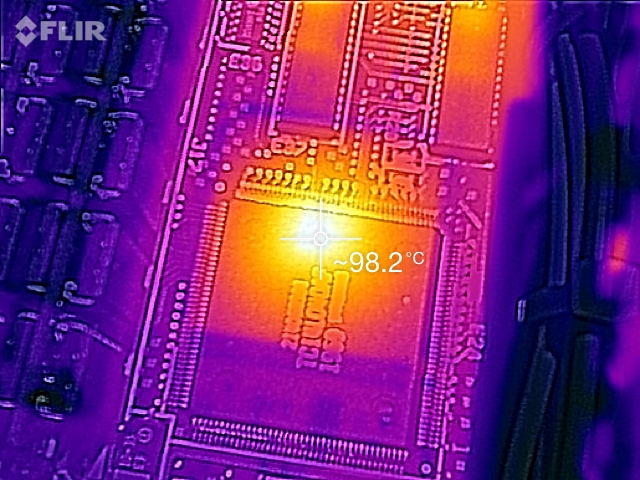
Wedged between the memory chips and the power supply is a little chip that generates almost 100C. That’s a boiling temperature of water. Note the thermal image is shifted in regards to the visual part due to close range.
What does this chip do? I have no clue. Perhaps someone can help here. What I however did to it is this:
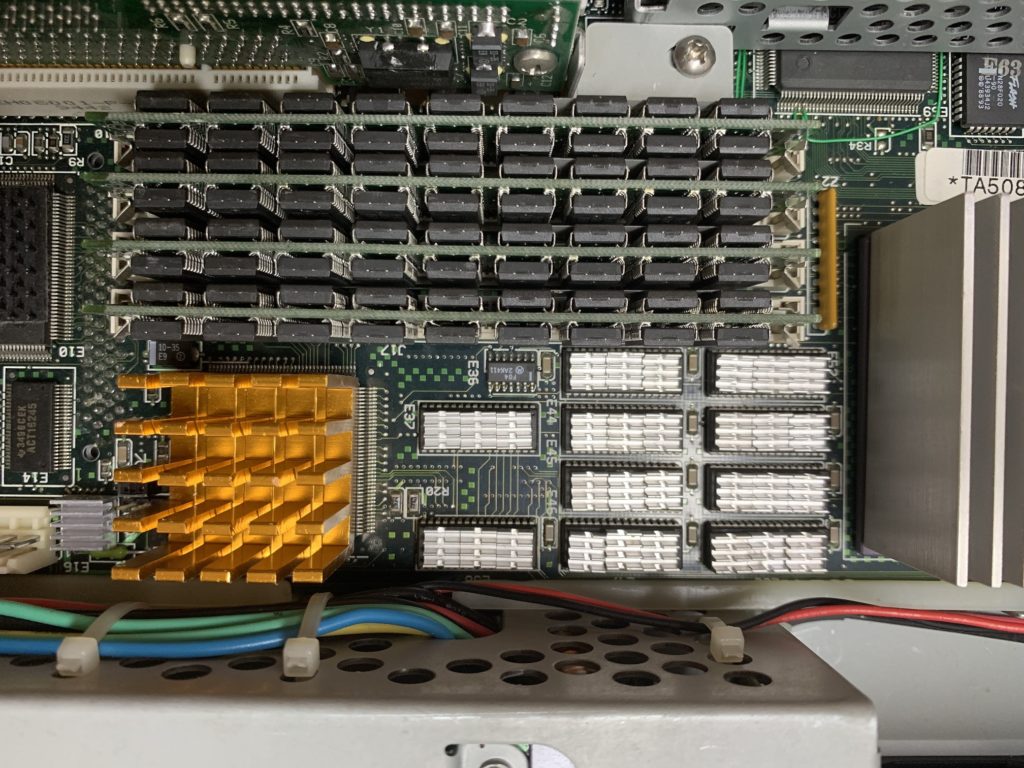
Slapped on this really nice radiator. In fact I added little radiators you can buy for Raspberry PI to all the chips generating tons of heat.
This is how the motherboard looks like right now:
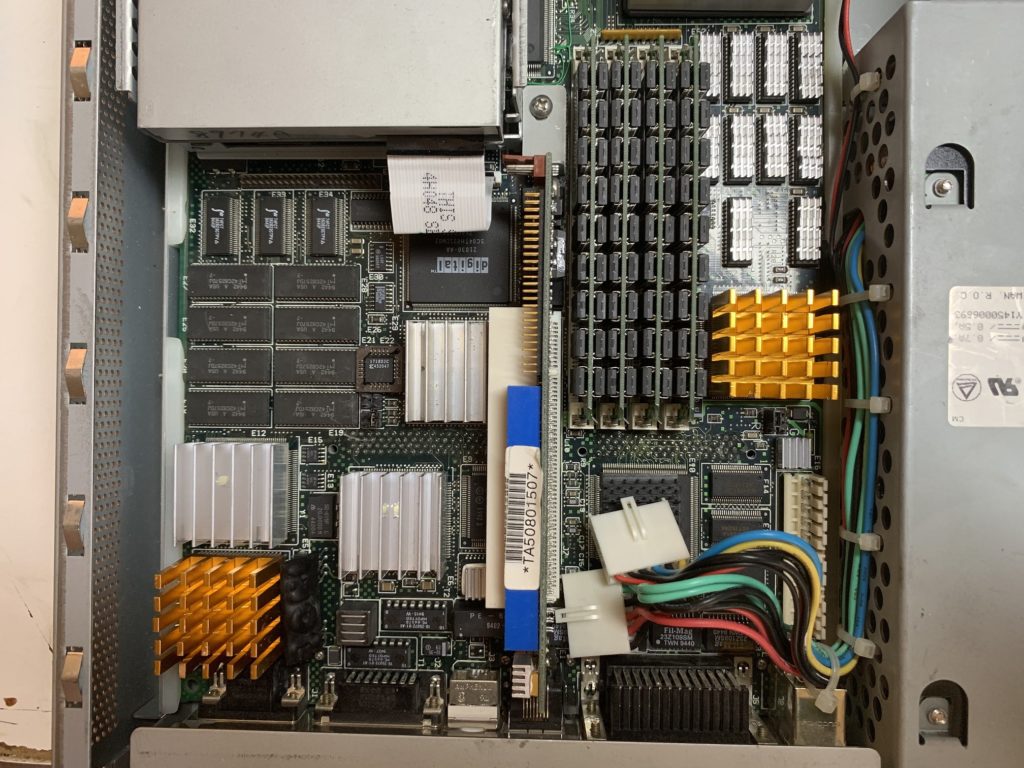
I also added a tiny fan on top of the CPU. Drilled some holes in the case and of course replaced the main fan with a highest air flow I could find.
Time will tell if this resolves the heat death, but my Multia now runs much cooler with help of all the radiators and extra fans.
UPDATE in 2022:
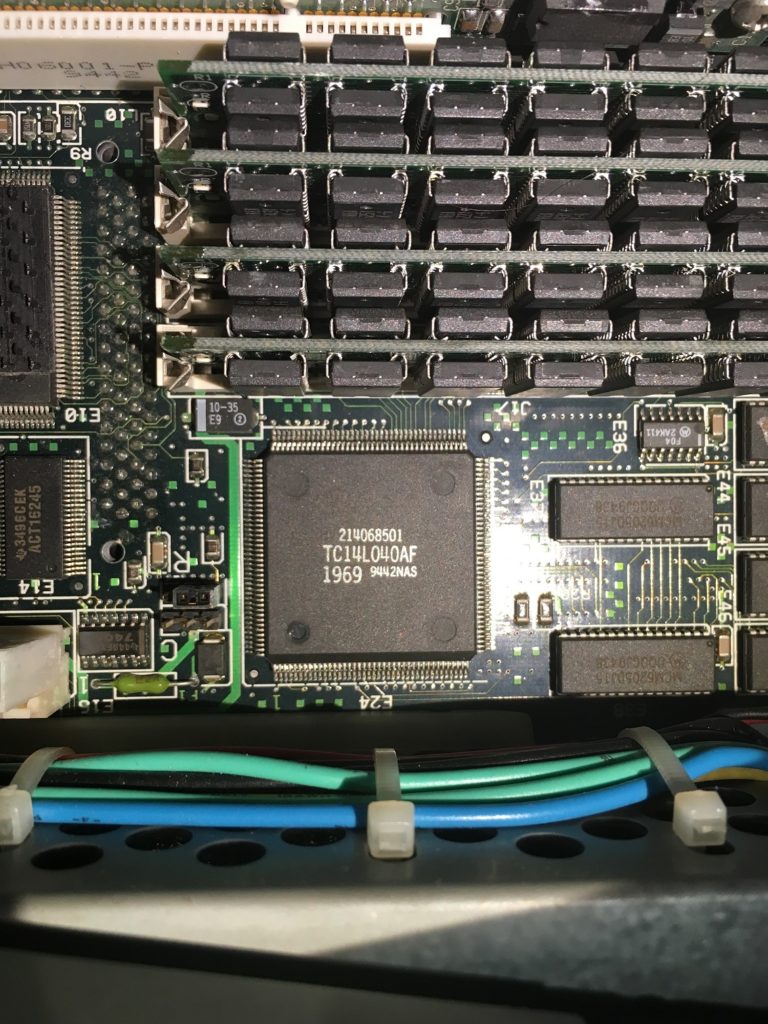
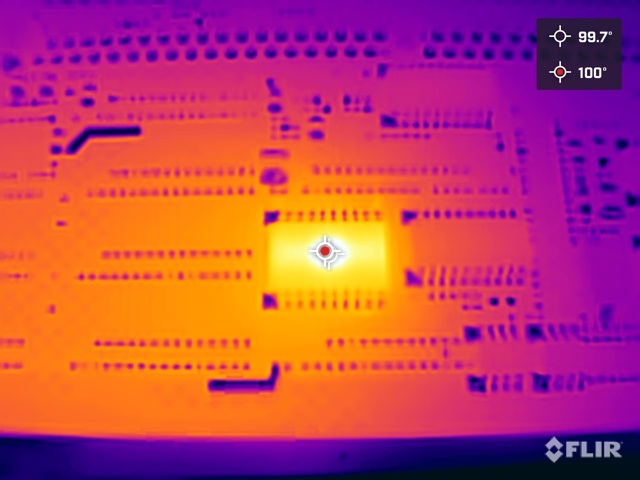
Readers frequently asked “what about the heat death chip?“. Multia indeed has one specific chip that is a source of most of Multia casualties. According to NetBSD Multia Page the chip is 74F623 and is located on the bottom (flip) side of the motherboard.
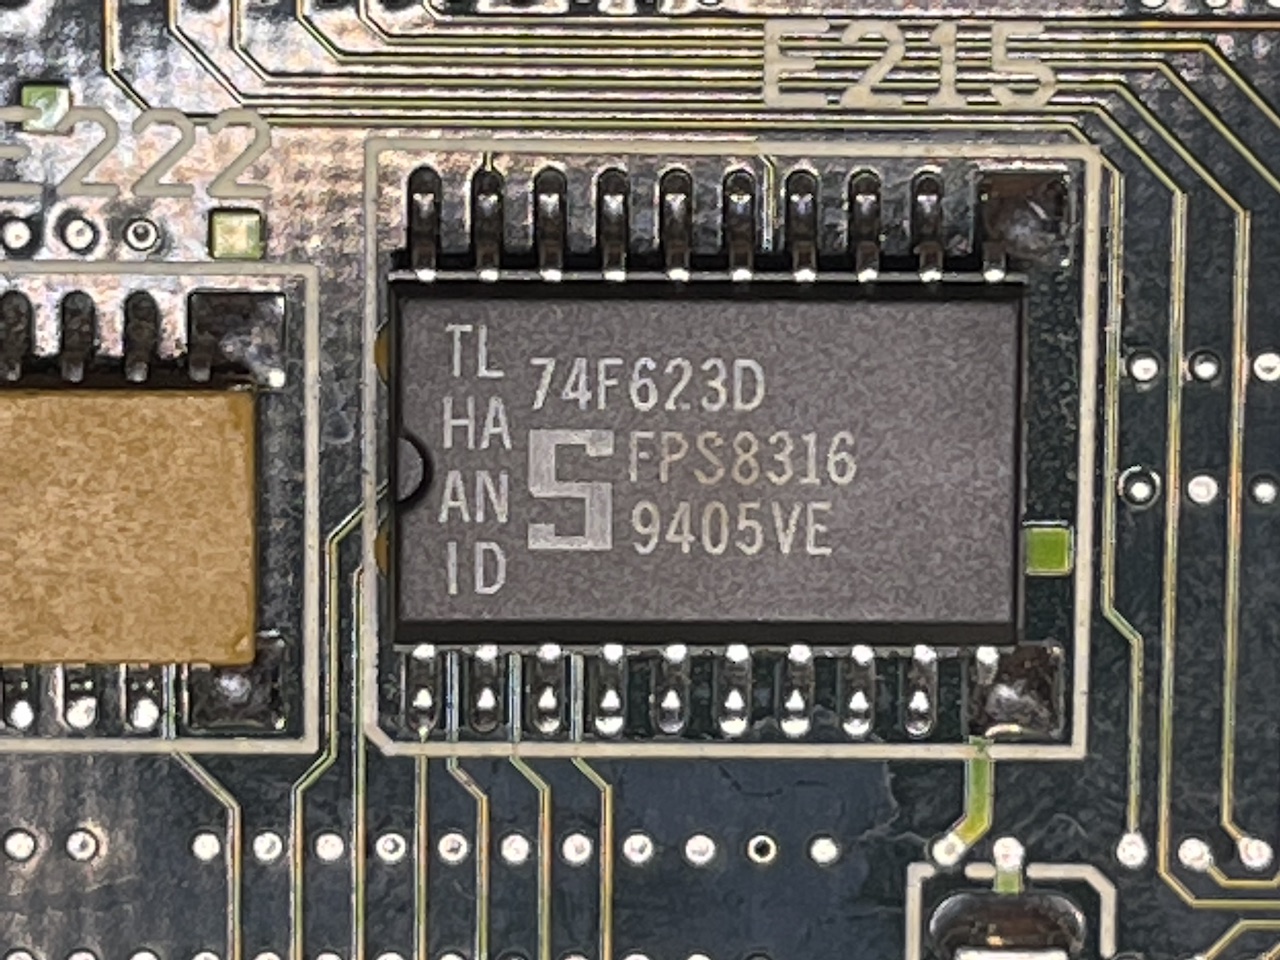
You can tell it’s little charred. I so I went to take a peek with a thermal camera:
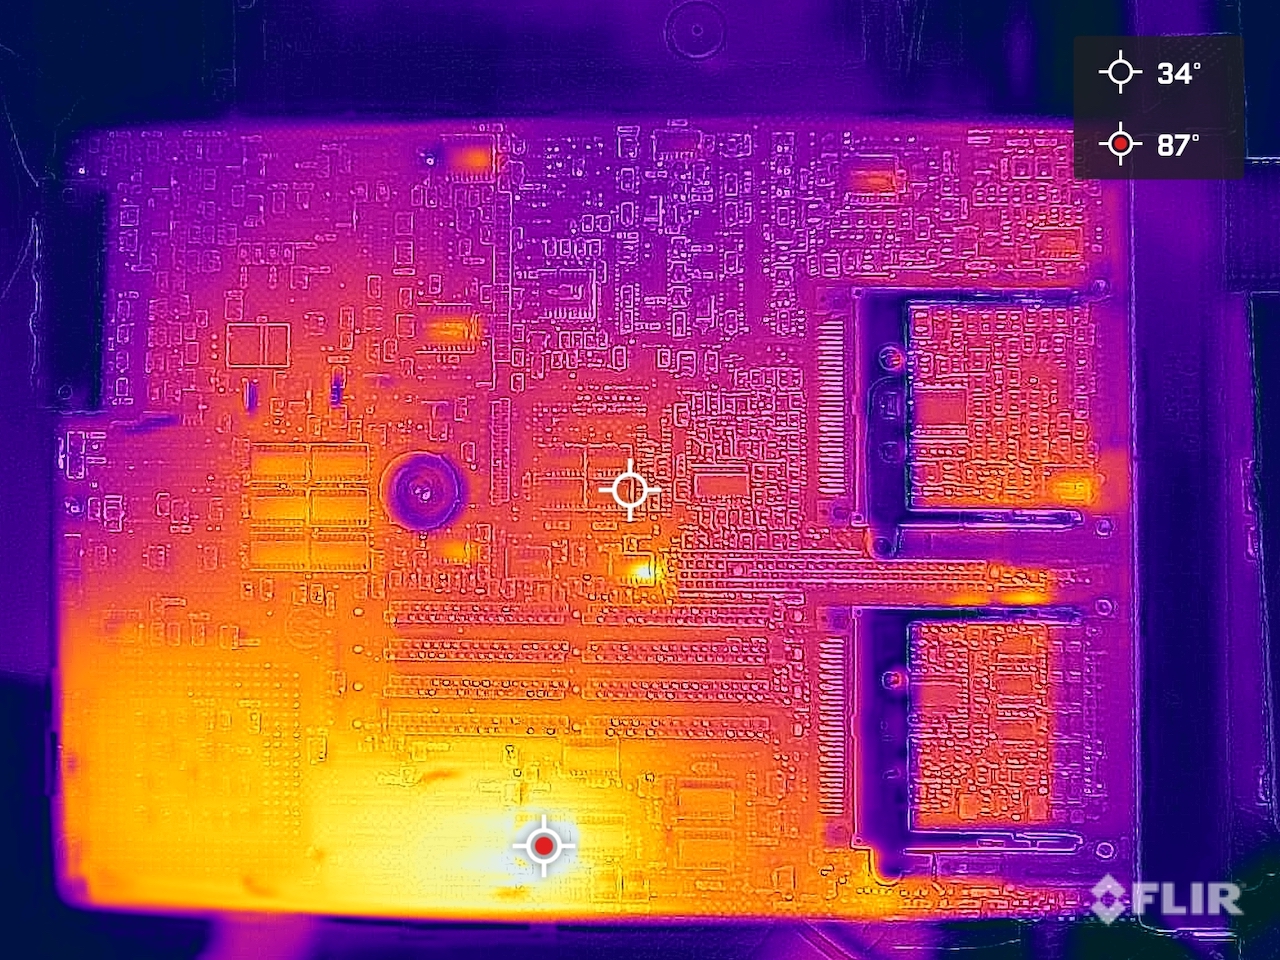
Can you locate it? FLIR found it immediately… Up close the chip goes above 100C:
I have added a small heat sink to it and now looks a little better!
Time will tell if it helps or not.
(This is a guest post by Antoni Sawicki aka Tenox)
Just released WRP 4.1 beta. It can do this:
Download here.
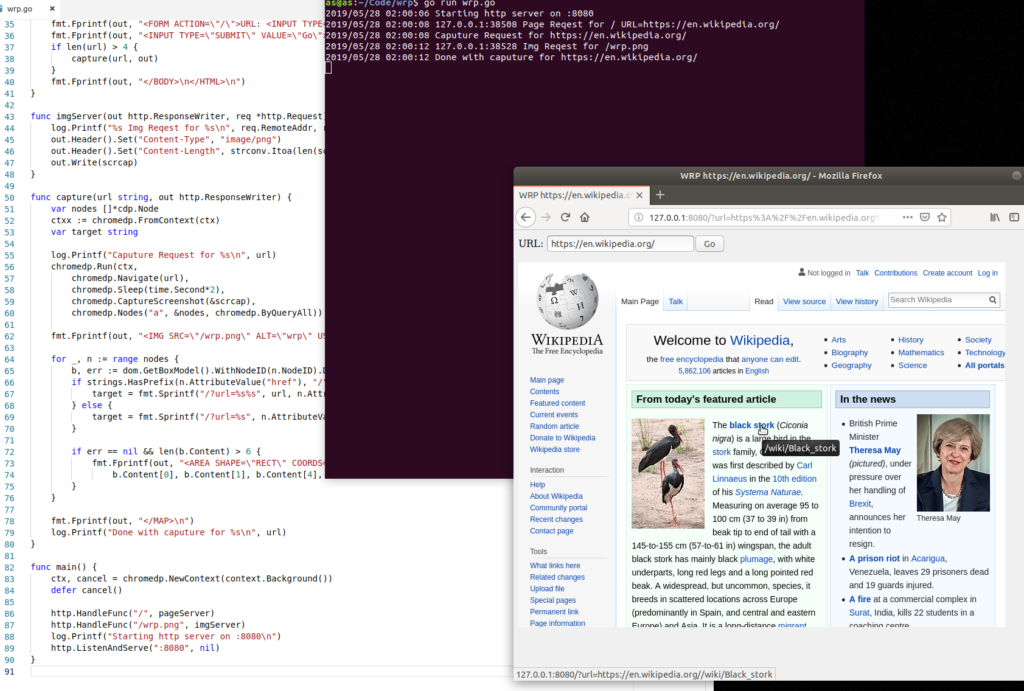
(This is a guest post from Antoni Sawicki aka Tenox)
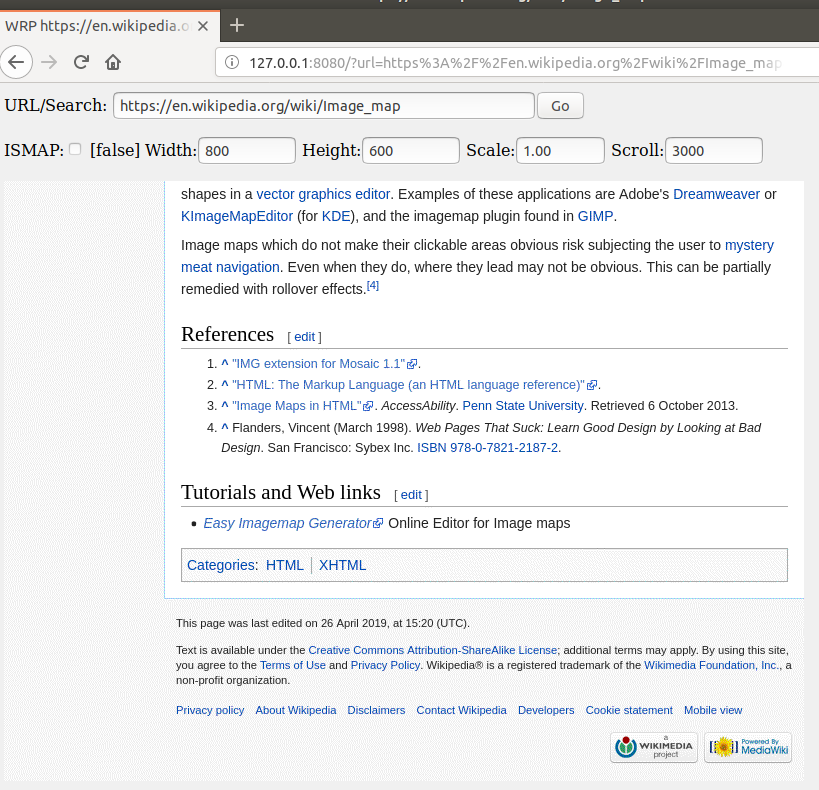
Welcome a completely new and absolutely insane mode of Web Rendering Proxy. ISMAP on steroids!
While v3.0 was largely just a port from Python/Webkit to GoLang/Chromedp, the new version is a whole new game. Previously WRP worked by walking the DOM and making a clickable imagemap out of <A HREF> nodes. Version 4.0 works by using x,y coordinates obtained from ISMAP to perform a simulated mouse click in Chrome browser. This way you can click on any element of the page. From annoying cookie warnings, to various drop down menus and even play some online games. Also pagination has been replaced with a clickable scroll bar.
Enough talking, you can watch this video:
Or download the new version and try it yourself!
Please report bugs on github.com. Thank you!
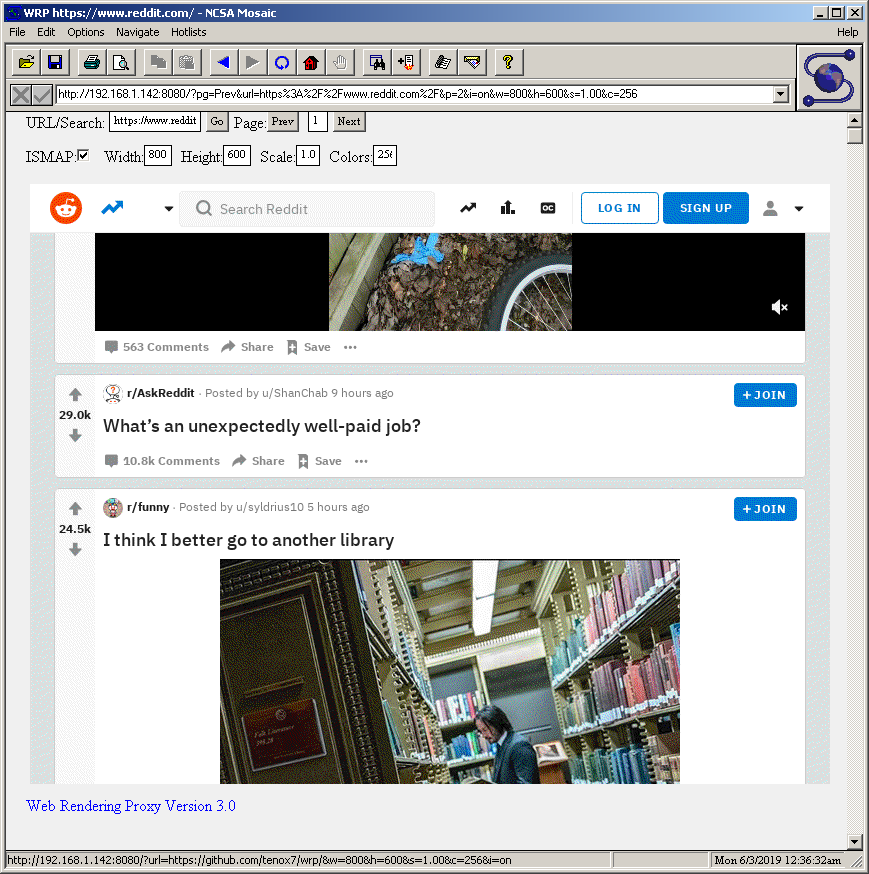
(This is a guest post from Antoni Sawicki aka Tenox)
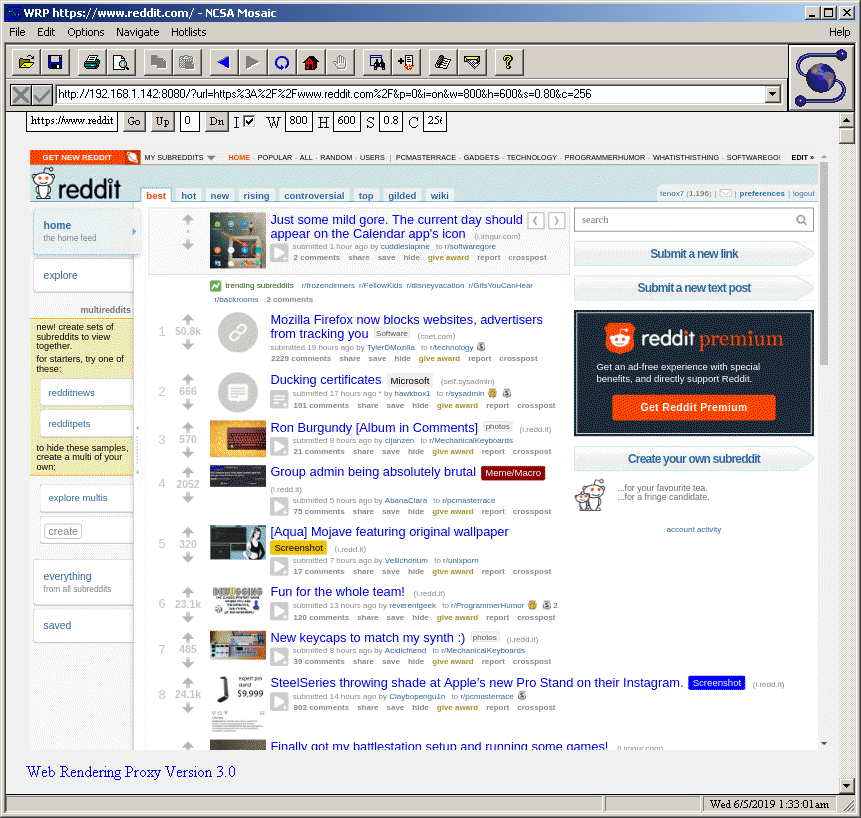
I have released WRP 3.0 for testing. It’s currently a browser-in-browser server rather than a true proxy, but that’s in the works. Please try it out and let me know. Usage instructions are on the main github project page.
Today using trickery I was able to login to my reddit account from Mosaic:
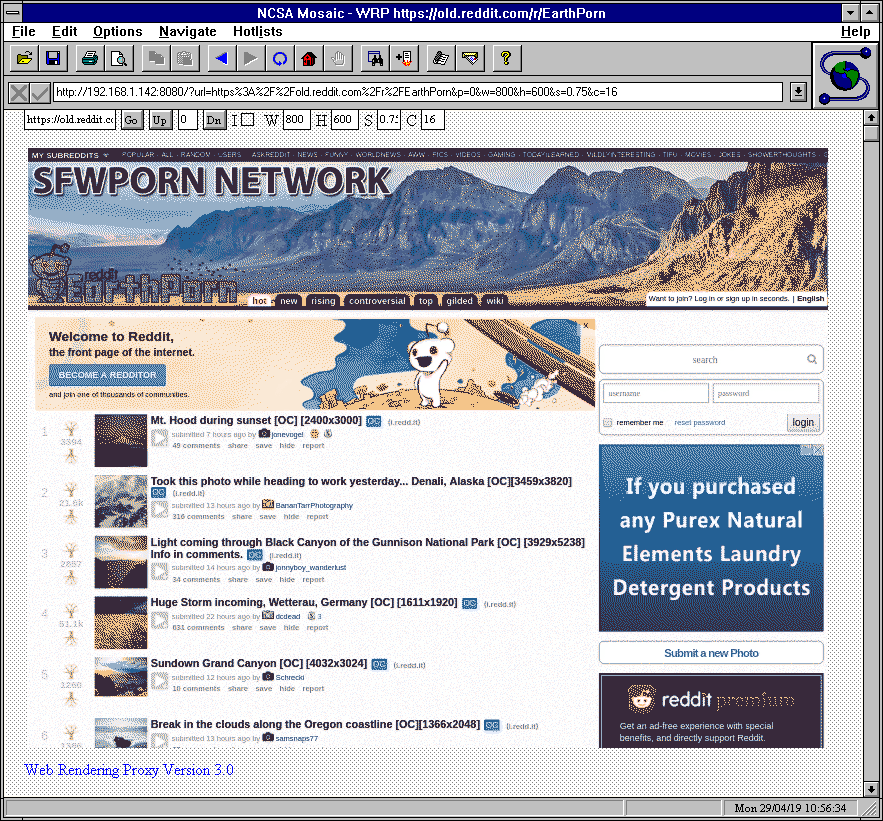
Update: just added the missing image quantizer so that the color number input box actually does something useful. Now you can browse porn even with 16 colors:
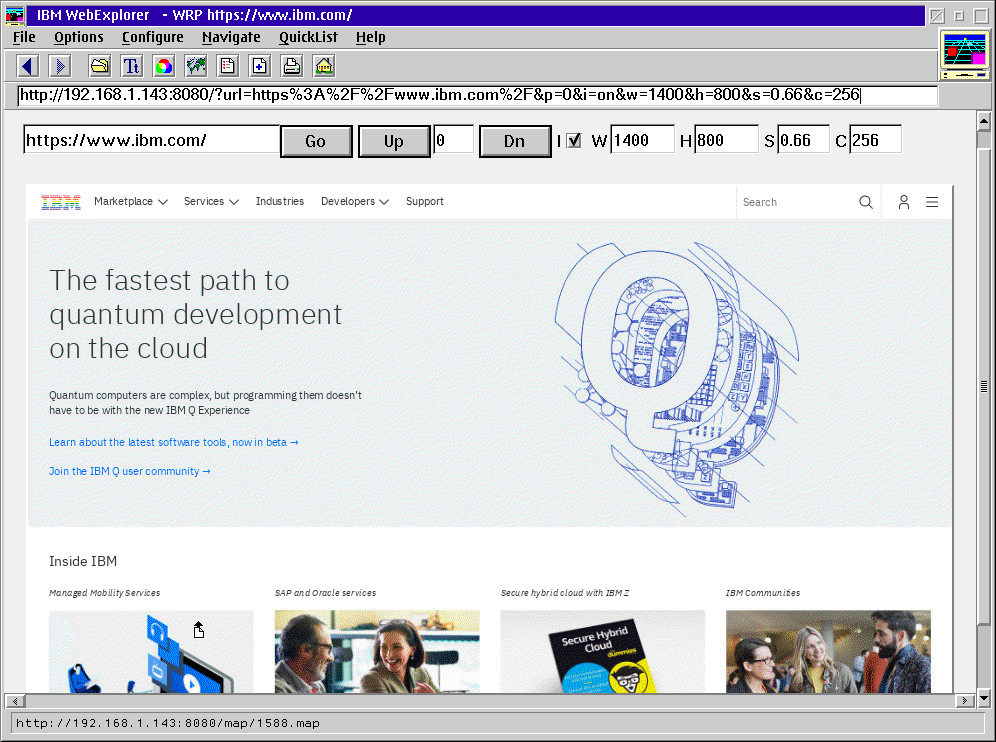
(This is a guest post by Antoni Sawicki aka Tenox)
Thats right, the new beta version of Web Rendering Proxy runs natively on Windows. Single EXE, no libraries or dependencies required. Only Chrome Browser.
I took a Internet Explorer 1.5 for a spin today while WRP was running on my Windows 10 PC. Worked just fine.
I have added Prev/Next buttons so that you can easily “scroll” through long pages.
ISMAP support has been added, proof:
You can download a preview build on github.
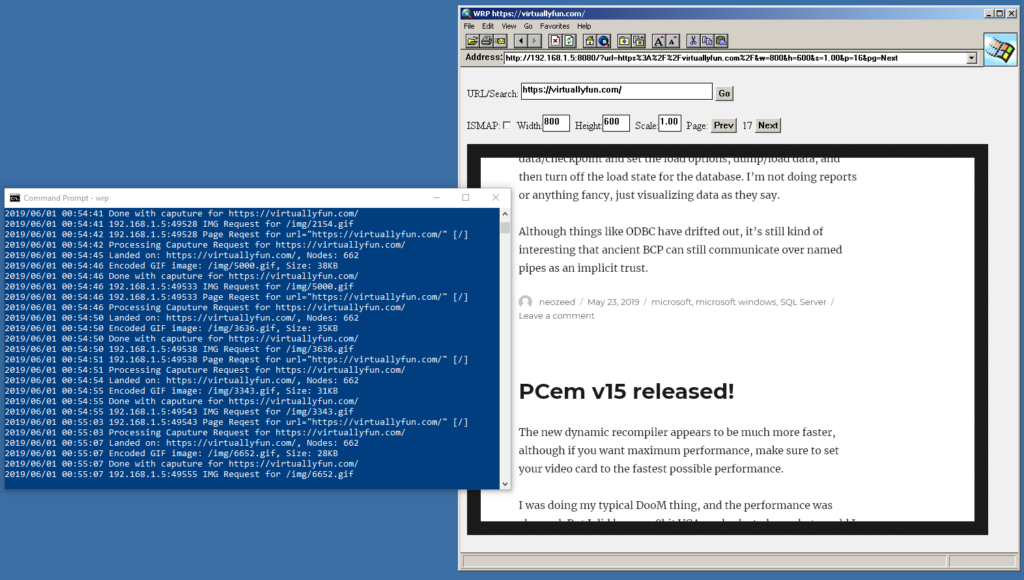
(This is a guest post from Antoni Sawicki aka Tenox)
There hasn’t been a major update to WRP (Web Rendering Proxy) in 5 years or so. Some new features have been added thanks to efforts of Claunia but the whole project was mostly impeded with mass migration of the whole Internet to SSL/TLS/https. It does semi work somehow thanks to sslstrip but the whole stack is an unmaintainable pile of crap which I’m not going to update any more.
A new rewrite from scratch is well under way. This time written in GoLang and using Chrome DevTools Protocol. Things should be much more stable and future proof.
Far from complete but I have a fully functional prototype now working in just under 100 lines of code:
UPDATE 1: You can play with it if you want. Please do not submit any bug reports just yet, as this is just a development version. Note that WRP is currently not a true HTTP proxy but rather browser-in-browser. Proxy may be supported later.
UPDATE 2: As of today online setting of size, scaling and scrolling is supported. I’m specifically happy about the scrolling feature albeit it probably needs a better user input, like prev/next page.
Windows version still doesn’t work due to an upstream bug, which is probably easy to fix.
ISMAP is currently in development.
(This is a guest post by Antoni Sawicki aka Tenox)
Apps for Windows NT RISC… Alpha AXP, MIPS and PowerPC. Happy downloading.
(This is a guest post by Antoni Sawicki aka Tenox)
Today I have discovered Yori. So should you. No one can be told what Yori is, you need to take the red pill and see if for yourself.
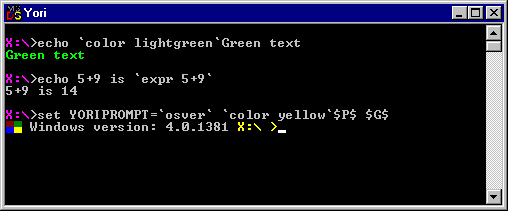
Also more stuff from malxau.
(this is a guest post by Antoni Sawicki aka Tenox)
This is a lame duck, low effort post. If you already know it’s 🤦 obvious. However this question seem to be asked a lot on the intertubes. I was stupid and searched for it too. I hope this will help someone else, as there is no good readily available answer out there.
Problem: I want to have SNMP on my Comcast/Xfinity/AT&T router so I can monitor current bandwidth usage.
Research:
Nope or very hard / unsupported.
So is it possible at all? Yes, but with a separate device.
Comcast/Xfinity routers have so called “Bridge Mode” which essentially turns them in to a DOCSIS modem without the router / firewall / wifi access point. AT&T has a passthrough mode which works similarly.
Solution: Turn on Bridge/Passthrough Mode in your vanilla router and buy a WRT firmware router / access point. I got Linksys AC3200 for $99 on Amazon. Ssh to the router and run: opkg install snmpd. 🤦
Done.