(This is a guest post by Antoni Sawicki aka Tenox)
The title is little complicated so let me explain! Ever since dawn of the web I been running some web server to host various websites. In the beginning it was a physical machine under my desk, then a colocated server, then a VPS Virtual Machine, then a container. Eventually all the websites that I look after or host for friends/family ended up in “the cloud”. Storage buckets to be precise, as they offer a super cheap and simple way of hosting static websites. I no longer have to maintain machines, look after updates, security or configuration. Just upload HTML and done.
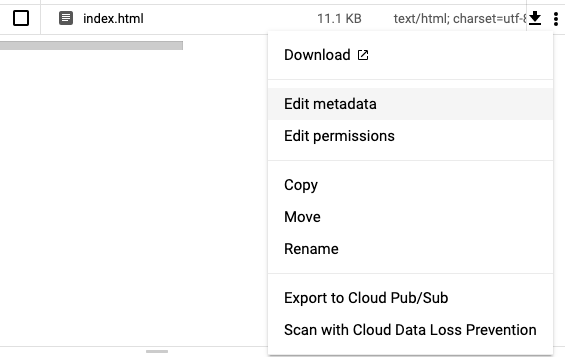
However here lies a problem. You can’t just “edit” a file in a bucket, you can only download it, edit locally and re-upload. This typically is done via Storage Browser UI or gsutil cli utility (in case of GCP). Or some sophisticated IDE with storage API support or sometimes a FUSE client. In any case it’s hard and cumbersome. Why can’t there be a simple Edit function in the UI?
Why isn’t there a File Edit Option????
I have recently discovered that there even is a brand new Cloud Shell Editor which is a VScode instance bound to your “cloud shell instance”. It allows you to virtually edit files “in the cloud” but of course not in storage buckets! WHY NOT?
While this been bothering me for a while I also got interested in so called “cloud functions” which are small pieces of code that you can run “in the cloud” without need for a VM or even a container (although surely they run in one behind the scenes). Just paste the code and run… somewhere. Cloud Functions or AWS Lambdas have been notoriously abused by crypto miners. I wanted to play with these for legitimate reasons and finally decided to create a simple web based text editor that would allow to edit text files in storage buckets. So CFEdit was born.
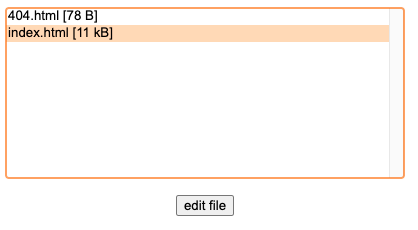
The editor is super simple, no frills, just a file selector and textarea for editing files. You deploy it by creating a new function, either via the UI or CLI. You can restrict it just to a single bucket or allow editing in any bucket within a project. It doesn’t use IAM and thus doesn’t require Google accounts. I specifically wanted to avoid complexity of that and just went with own user database and HTTP Basic Auth.
Now I can create account for family members or friends and allow them to edit their web pages via simple web based editor rather than asking for uploading files or resorting to ftp/sftp GCS gateways or stuff like that.
In future I’m planning to add other function like create blank file, directory, upload/download etc. Let me know what’s needed.
CFEdit can be downloaded from github.com/tenox/cfedit, the readme describes in steps on how to deploy it.
(This is a guest post by Antoni Sawicki aka Tenox)
This was previously well covered by Gunkies and Neozeed, however as almost a decade passed, some improvements could be made and annoyances fixed.
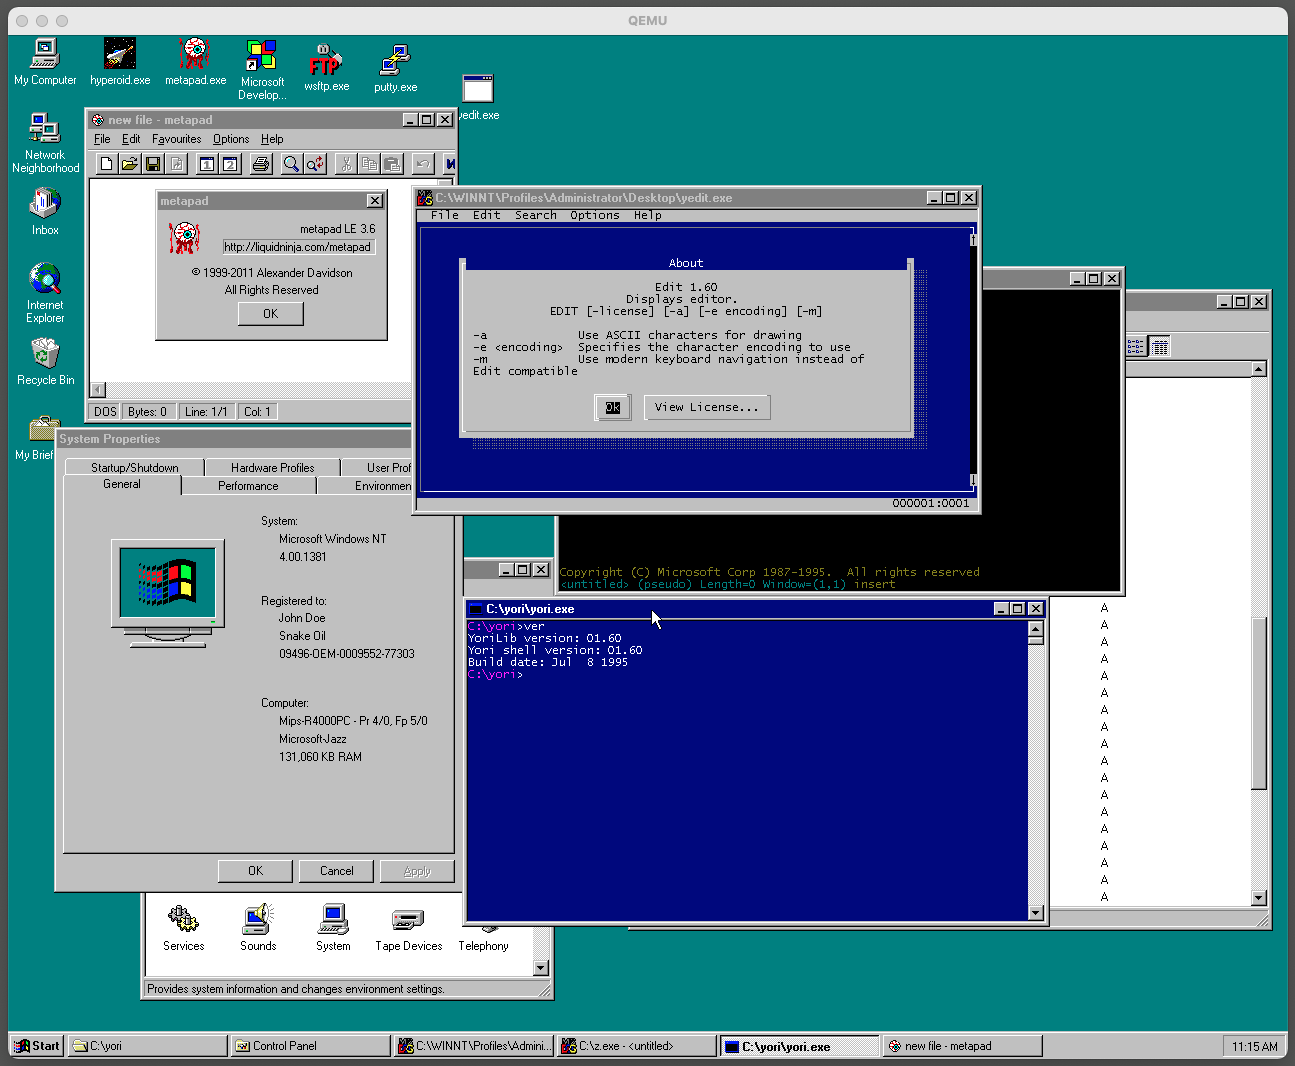
Firstly NT MIPS now works in 1280×1024 resolution under QEMU. It previously had issues with mouse tracking, but this is now fixed. So the new image has a higher resolution.
Secondly the old images were made with FAT filesystem which I didn’t like too much. The reason for that is the infamous RISC NT osloader needs to be placed on a FAT partition. Then, if NT is installed on a second NTFS partition the default drive will be D:\, C:\ being the just the osloader drive. This was super annoying in practice. So a common procedure was to just have one FAT partition for both osloader and winnt. I have fixed it by supplying a pre-partitioned disk and specified the second partition for osloader and the first for NT.
Also I only had just a bare/vanilla image with no additional software installed. The new image includes most of the available apps, including IE3, some editors, Reskit and Visual Studio.
Lastly I wanted to figure out all the right settings and flags for qemu as they were discrepancies between different sources and nothing seem to work smoothly. The correct flags seem to be:
The -rtc flag is not really needed if you are ok with having the current date in the guest.
Thanks to Neozeed for figuring out the network settings! Unfortunately the old/legacy -net nic -net user is no longer working while the new -device doesn’t like dp83932. The documentation was quite helpful.
Thanks to reader Mark for pointing out the correct NVRAM settings! See comments below.
The new image with all the apps preinstalled is here and a plain “vanilla” here.
Curiously this now works right out of the box on QEMU 6.1 and is pretty smooth and stable compared to what it was before. Good job QEMU team and thank you! Just in case I still keep the old binaries for Windows made by Neozeed here.
Update: I built Yori for NT MIPS! You can download here!
(This is a guest post by Antoni Sawicki aka Tenox)
While everybody is busy buzzing about Windows 11, I wanted to commemorate the finest operating system ever made by Microsoft – Nano Server.
For most of people Nano Server was esoteric, distant and unapproachable. It had a rather high entry barrier, requiring you to build it on a Windows Server 2016 host using PowerShell magic spells. You couldn’t just simply download and run it. Even if you managed to get it running, there wasn’t anything you could actually do with it for fun. People didn’t bother to even check it out. My goal is to demystify this a bit, lower the entry bar and made it easy for people to hack it.
Background info (you can skip it)
Nano Server was an interesting attempt at creating a datacenter grade OS that’s not managed via local GUI, keyboard and mouse, but rather full automation, remote tooling and code. It went one step further than Server Core or Windows PE by completely removing GUI components and local shell. Hence it’s not actually called “Windows” or “Windows Nano” but rather simply “Nano Server”. Rumor has it, it started as MinWin. The OS has a rudimentary text mode console with functionality similar of VMware ESXi console. However Nano was much more than a bare metal hypervisor. It was a fully fledged operating system. Unlike ESXi you can develop and install services/apps for it and hypervisor wasn’t even it’s default role.
Ever since I first saw a demo on Microsoft Ignite (previously known as TechEd) I wanted to run aclock on the text console. Much like the WinNT BSOD edition. This article started around my efforts to run (or port if needed) aclock to this platform. At the time of writing, the technology has been dead for several years now. However all the artifacts and documentation are still available on Microsoft’s website. Probably not for long, so a good moment to do it now, before everything gets deleted in to oblivion.
How to quickly deploy Nano Server and run command line apps on the console
Microsoft provides (soon to be deleted) Nano Server Quick Start. However the steps are trivial so you can totally skip that and just do this:
Launch PowerShell terminal window on the WS2016 host.
Run: Import-Module D:\NanoServer\NanoServerImageGenerator -Verbose (D:\ drive being where Windows Server CDROM is mounted)
Run: New-NanoServerImage -DeploymentType Guest -Edition Standard -MediaPath d:\ -BasePath c:\nano -TargetPath c:\nano.vhdx -ComputerName nano -Development (c:\nano folder and c:\nano.vhdx image will be created for you)
Done! This will build a .vhdx image that can be run under Hyper-V as “Gen-2” VM. For Gen-1 or to run it on any other hypervisor change .vhdx to .vhd in -TargetPath while running the PowerShell command.
The easy way: you can just download a pre-built VM image from here. There are VHD for Hyper-v Gen-1 and VHDX for Hyper-v Gen-2 and OVA for everything else.
First Boot
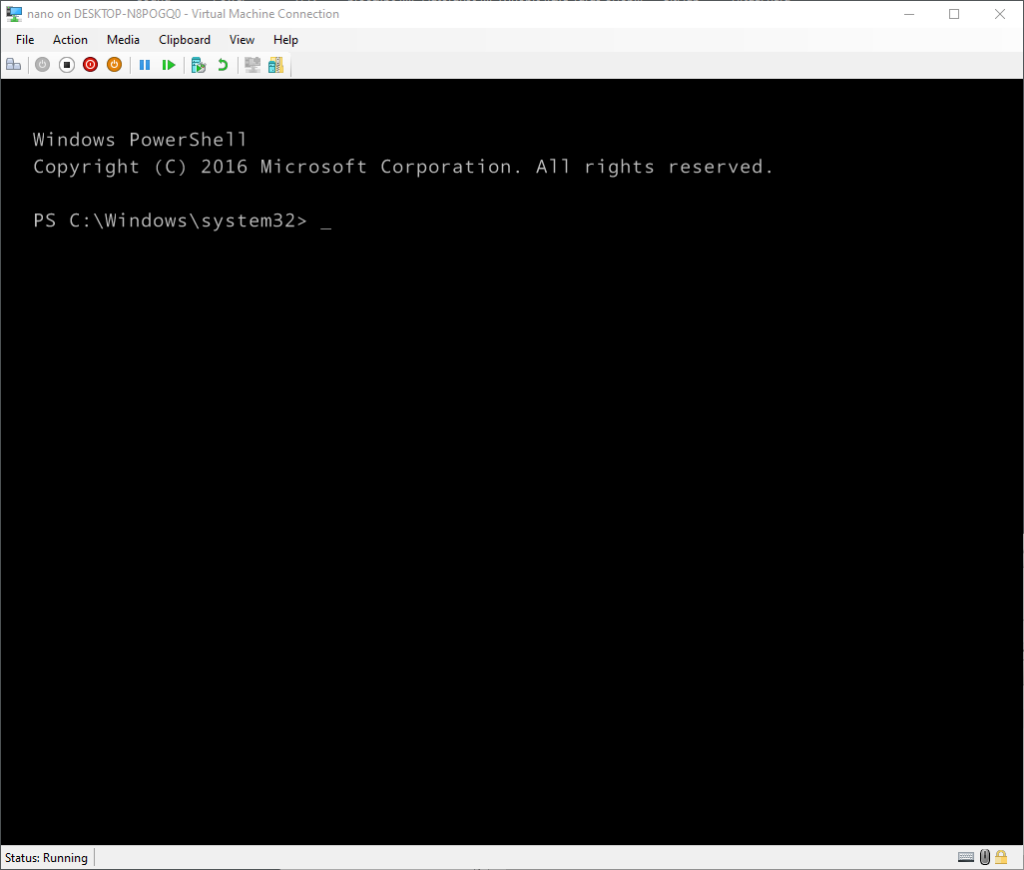
Once you boot it up you will be greeted with a PowerShell prompt. Just like that! You can type cmd to launch the good old cmd.exe shell. MS-DOS 2016?
Keep in mind, this is a developer mode (see -Development flag). Normally you would be greeted with a login prompt and a boring menu that allows to change some networking settings and not much beyond that. In production mode you need to resort to hacks (or this) to get stuff running, fortunately nothing like that needed here.
So what can you run on it?
Firstly in order to get some external utilities going, you can mount a SMB share using net use in cmd or New-SMBMapping in PS world. Nano being a server and all, you can also share out a folder via net share or use C$ (you may need to create a user by using either net user /add in cmd or New-LocalUser in PS). Alternatively you can install Posh-SSH and use SCP to transfer files. If you don’t have working network you can just shut it down, mount the vhd image on the host and copy stuff in to the image then detach the VHD.
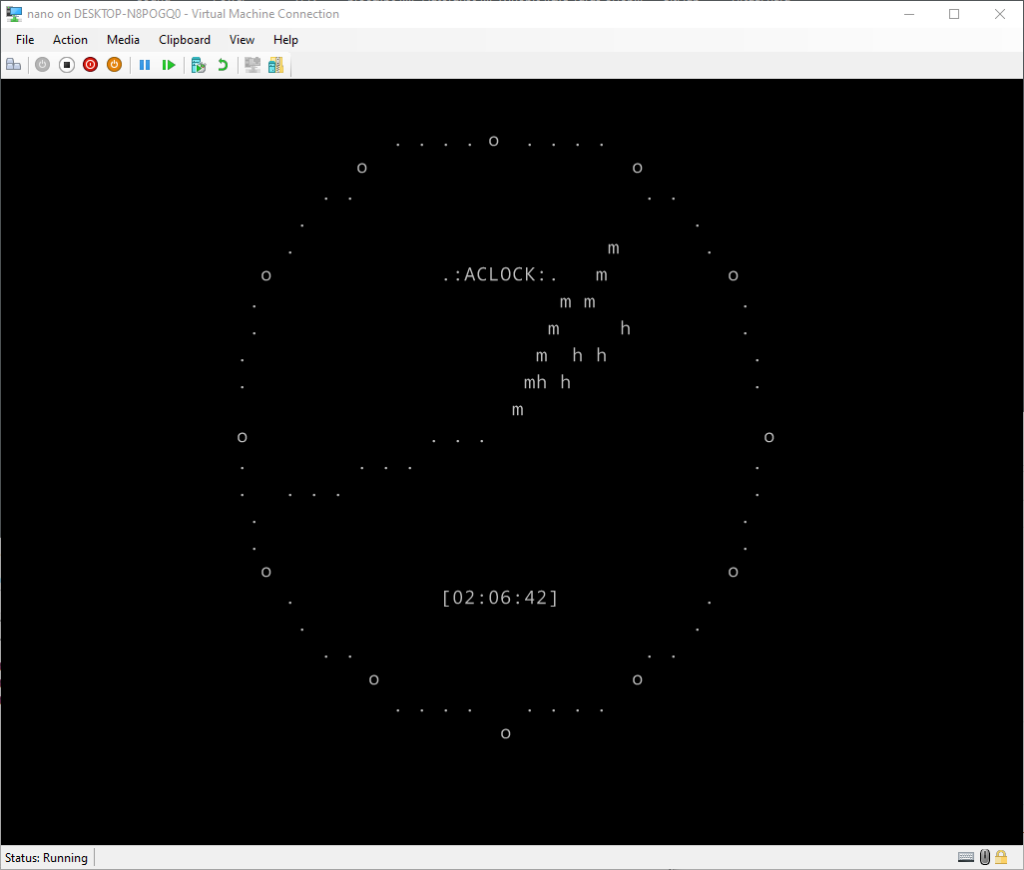
Aclock worked on the first run, no issues, using standard win64 exe:
aclock running on Nano Server Console
Wow! So looks like Nano console does have basic terminal controls. That opens quite a lot of possibilities. But can you run more complex apps? Text editors? Web browsers? GAMES?
Well, yes…, but likely not, but it really depends – on dependencies (read: DLLs).
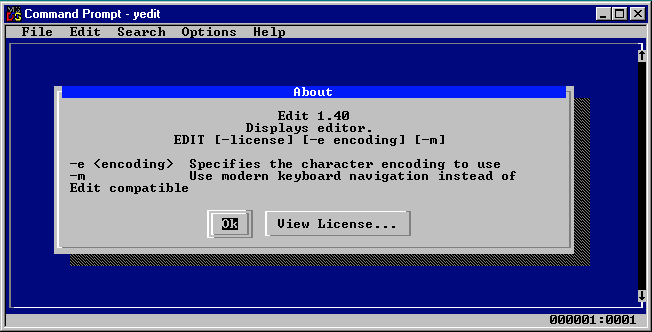
The font is lacking line drawing characters. Some editors like YEdit allow to use ASCII drawing characters fortunately.
There is no reverse video. This manifests mostly in menus, etc. however it also applies to the cursor.
There is no cursor, or rather the cursor is an underscore and not transparent cell. Moving arrow left in the CLI doesn’t actually move the cursor it erases characters. There is no line editing.
Also related to reverse video, it appears Nano console has some weird issues with colors.
Missing DLLs. Nano Server not being a “Windows” OS is missing a lot of Windows DLLs and it has its own nano DLL hell. This has actually been acknowledged in MinWin. As such a lot of apps will not launch due to dependencies.
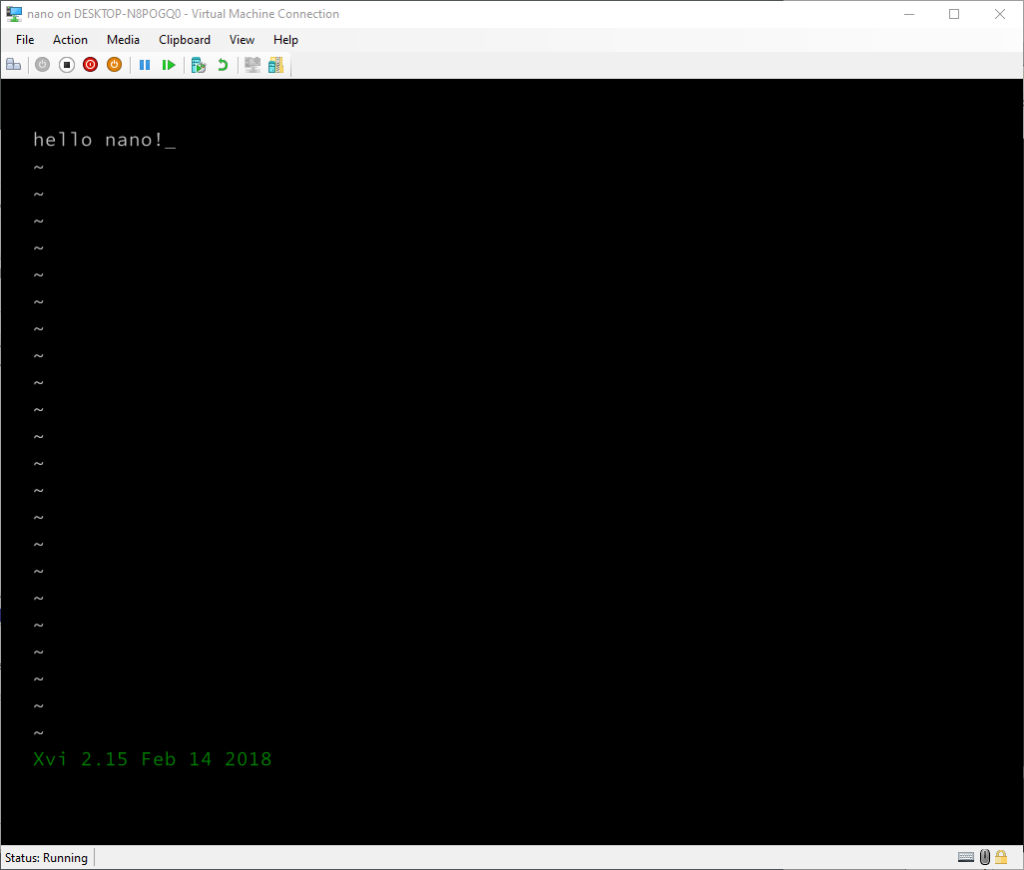
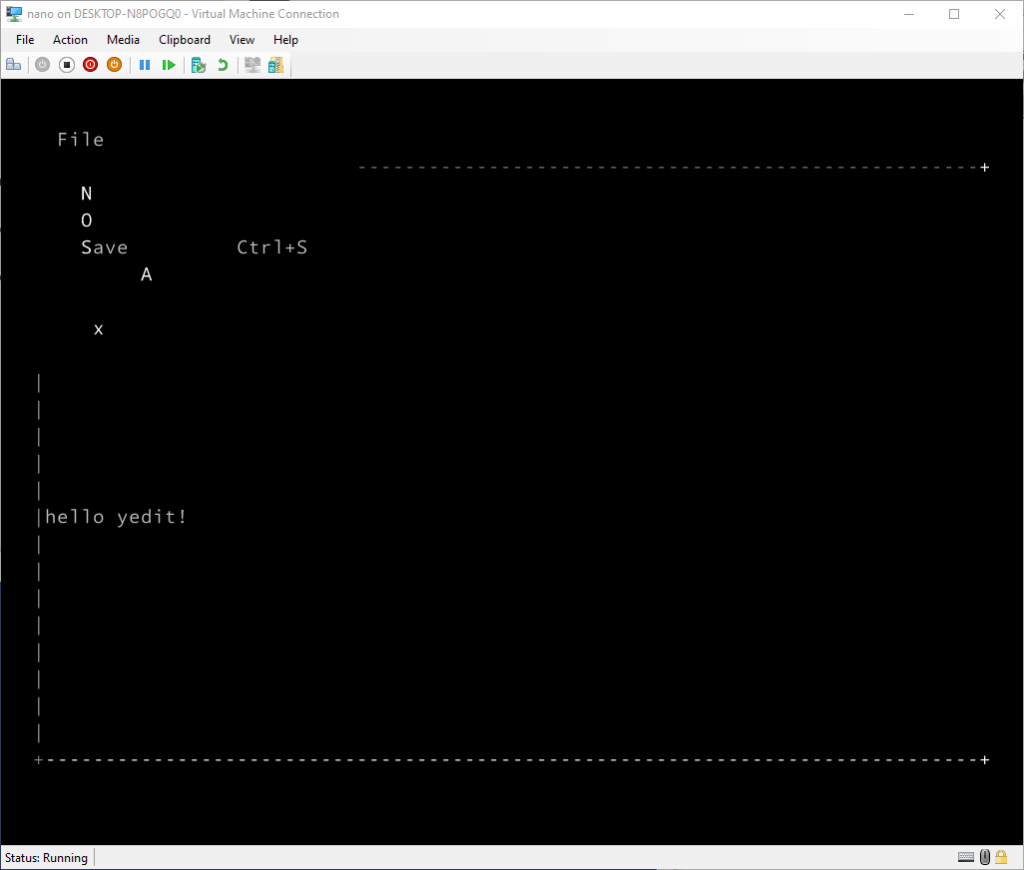
For example YEdit works remarkably well except for the menus, which use reverse video:
YEdit running on Nano Server Console
Update: Malcolm has fixed it in latest version of YEdit! Thank you!
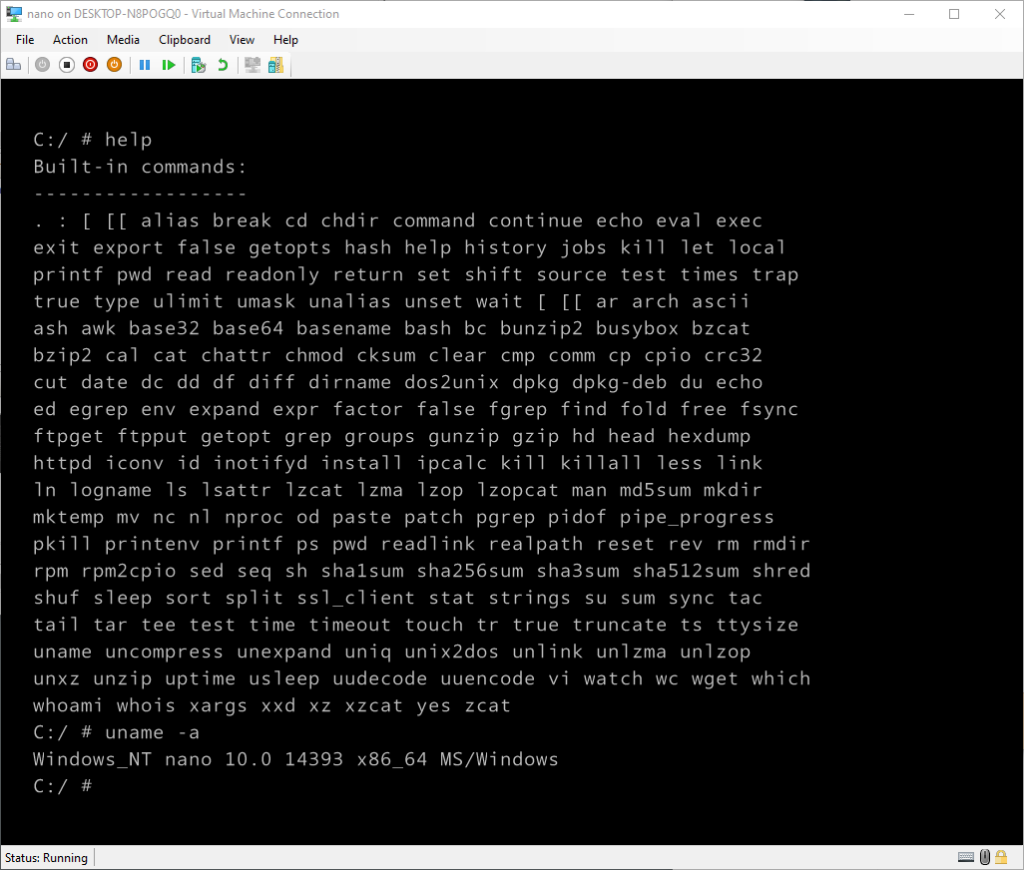
Update: thanks to Ron Yorston you can also run BusyBox on Nano! All you need to do is get the 64bit version and before you run it set an environmental variable to disable ANSI emulation. In CMD set BB_SKIP_ANSI_EMULATION=0 in PS $env:BB_SKIP_ANSI_EMULATION=0. Done!
BusyBox on Nano Server
You even get ls colors and vi editor works flawlessly! Unix shell on Nano, thats awesome!
So what about games?
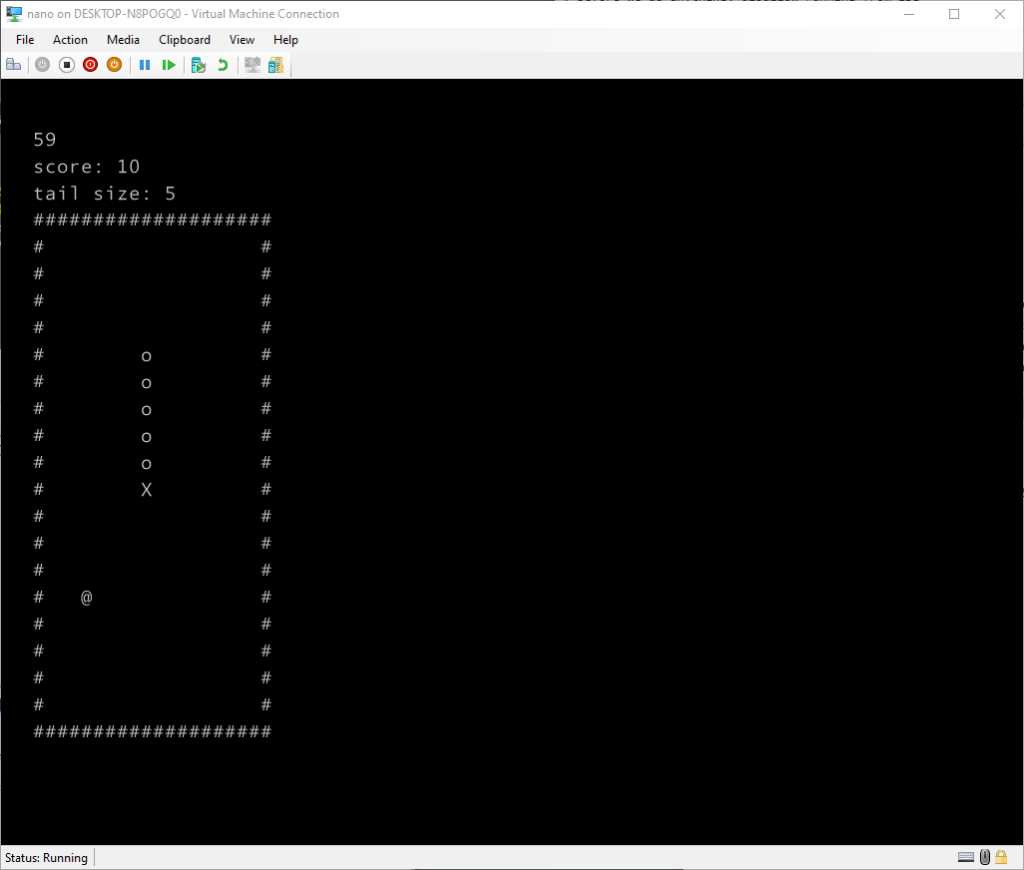
Initially nothing worked as expected. Either due to line drawing, colors or previously mentioned DLL hell. There was one game that actually worked – PowerShell adaptation of snake:
PowerShell Snake running on Nano Server Console
But I wanted something better. I had high hopes for ascii-patrol, which is pure text mode and they build it for win64. Unfortunately the game requires a bunch of multimedia / sound DLLs from Windows which are not present in Nano.
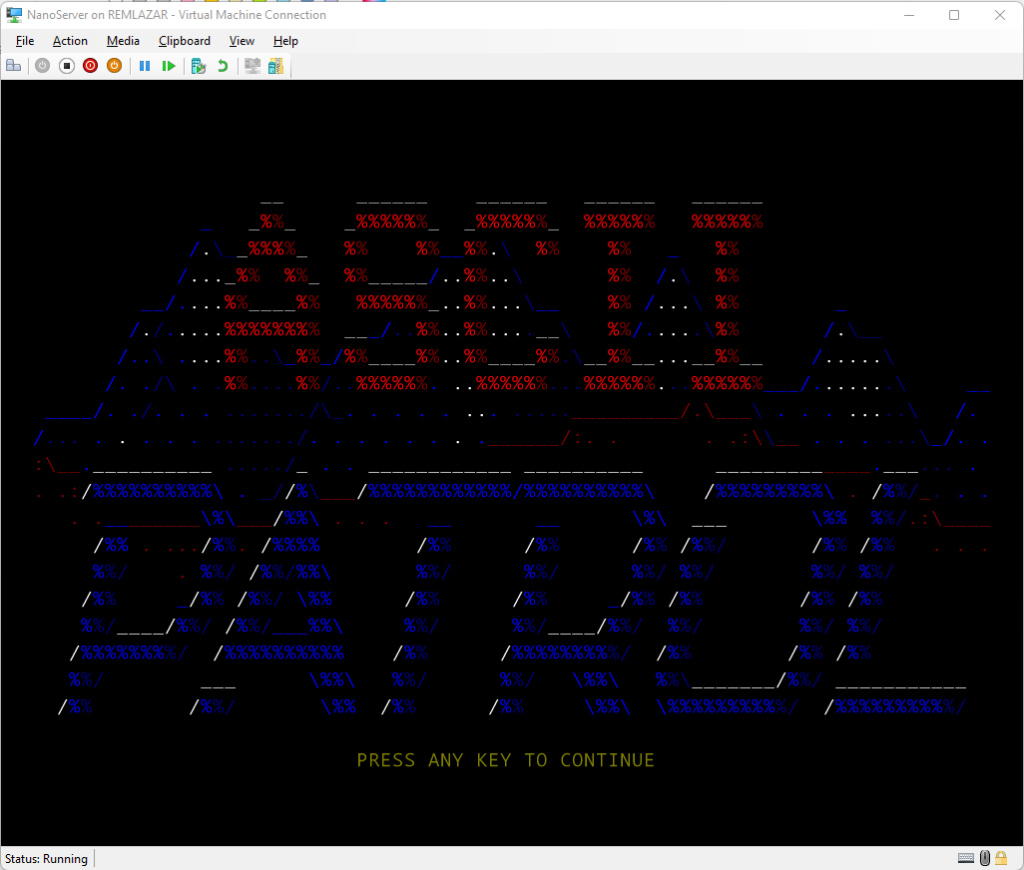
Thankfully Neozeed has stepped in, took the source code, amputated all the multimedia stuff, borrowed the Unix clock code and gettimeofday, and used an older Visual Studio to build it. But he managed to produce a fully working and playable version!!!! Truly amazing stuff!
ASCII Patrol Running on Nano Server Console
The binary is available here. To play the game scroll down one screen to start a mission. If you enter profile customization simply press ESC to get out. Thanks again Neozeed!
I’m hoping readers can find more text mode/ascii apps and games that will work on the console. Please comment and send links!
In another dimension, having a working text editor, Yori shell, smb/scp, maybe with help of mingw64, sdk tools or borrowed compilers from Visual Studio, one could have a self hosted developer workstation with this.
For now please just download the pre-build image, or make one yourself and run it in your favorite hypervisor and have some fun with it!
With this, goodbye Nano Server! You will be always remembered. I know folks at Redmond tried really hard to make it such beautiful gem.
(This is a guest post by Antoni Sawicki aka Tenox)
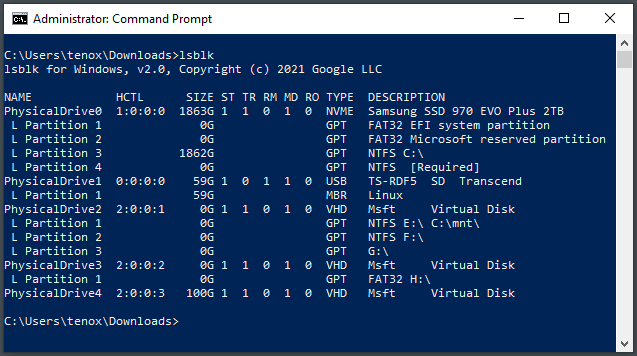
Pleased to announce that lsblk utility for Windows is finally released. This is not entirely new, the original code was on github for a few years now, but it was lacking major features of printing drive letters, mount points and filesystem types.
Why would anyone even want lsblk for Windows? There are many other “native” ways of displaying disks and volumes. For example in PowerShell: Get-Disk or Get-PhysicalDisk or in cmd: wmic diskdrive list brief. Not to mention diskpart or disk management UI. There are a few answers to this.
Firstly the output format of lsblk on Linux is rather intuitive and useful, which can’t be said about previously mentioned utilities. People with Linux background find it more like at home.
PowerShell and wmic lack ability to combine disk and volume information, unless you want to write a larger script. This is now part of lsblk.
Lastly lsblk uses low level function to list objects directly from the kernel (think WinObj), rather than going through various high level services, management interfaces and relying on VDS (Virtual Disk Service). As such it’s super fast and you can use it even with VDS stopped or inoperable. Finally it’s yet another of these native Linux tools now also available on Windows.
Finally, some of the column names may sound cryptic, so here is an explanation:
ST – Status 1=healthy 0=unhealthy TR – Trim / Unmap / Discard Capability RM – Removable Media MD – Media changed (for removable media) RO – Read only
(This is a guest post by Antoni Sawicki aka Tenox)
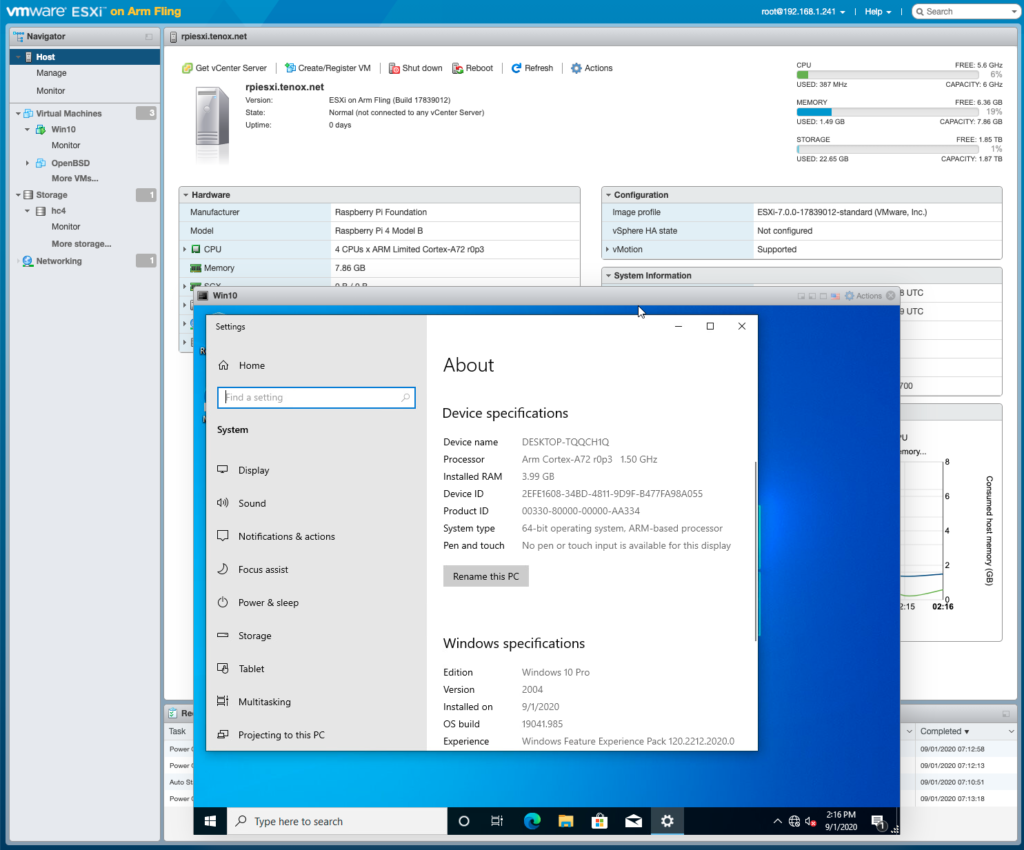
Just for fun with virtualization I wanted to try out VMWare ESXiforARM64, most specifically Raspberry PI. ESXi for ARM has been around for a couple of years now. Since PI4 packs 8GB of RAM and has a reasonably fast CPU it can be a worthwhile experience. Also more OSes for Raspberry PI are now available in UEFI boot mode.
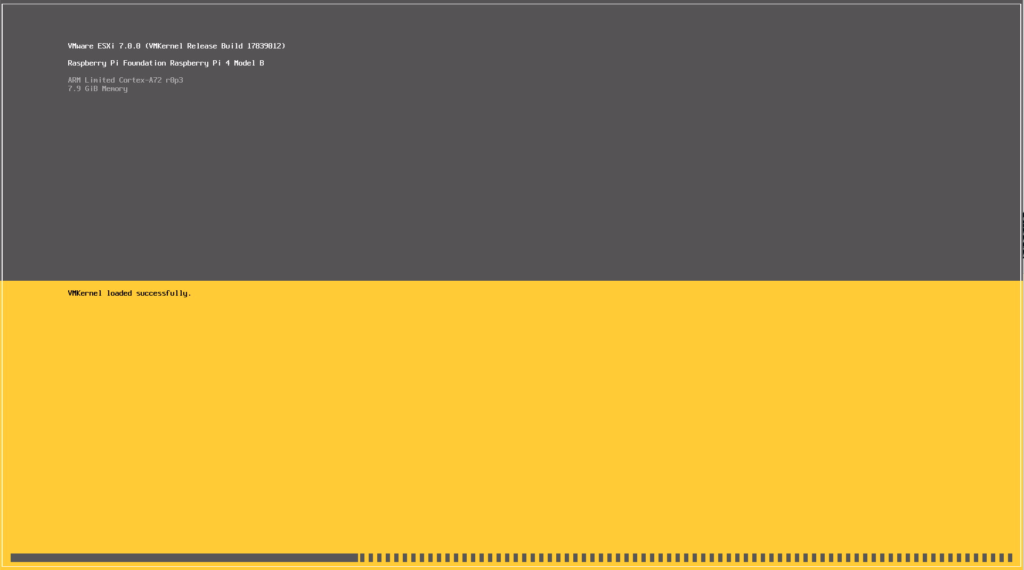
Not going to go through exact installation steps as these are all around the web and youtube. Just to summary you will need to download an image from VMWare website as well as bunch of UEFI firmware files from github and combine it all together on to a SD card. When you boot it you will go through an install process which is straightforward. You can overwrite install media and use it as the target so no need for multiple SD cards. Once it boots you will see familiar ESXi boot screen:
ESXi booting on Raspberry PI 4
In order to get it going you will obviously need to add some storage. You can use NFS, iSCSI or locally attached USB drive. For the latest you need to disable USB arbitrator.
# /etc/init.d/usbarbitrator stop
# chkconfig usbarbitrator off
What can it run?
ESXi ARM only officially supports only UEFI boot based OSes. Fortunately this is a default option for Ubuntu PI, Free/Net/OpenBSD also work and so does Windows. But what about OSes that use U-Boot? Since ESXi-ARM Fling 1.1 you can boot oses in a “direct” mode with no UEFI! This is a huge step, but unfortunately as of today it doesn’t support UEFI-less VGA, only a serial port. Hopefully this can be fixed in future. I would love to have a RISC OS and/or Plan 9 VM. On the other hand Plan 9 supports EFI boot so an image could be made.
Windows guest install was also much easier than I expected. Thanks to UUP dump you basically roll your own bootable ISO. I think it’s actually easier to get it going on ESXi than natively on RPI hardware or QEMU.
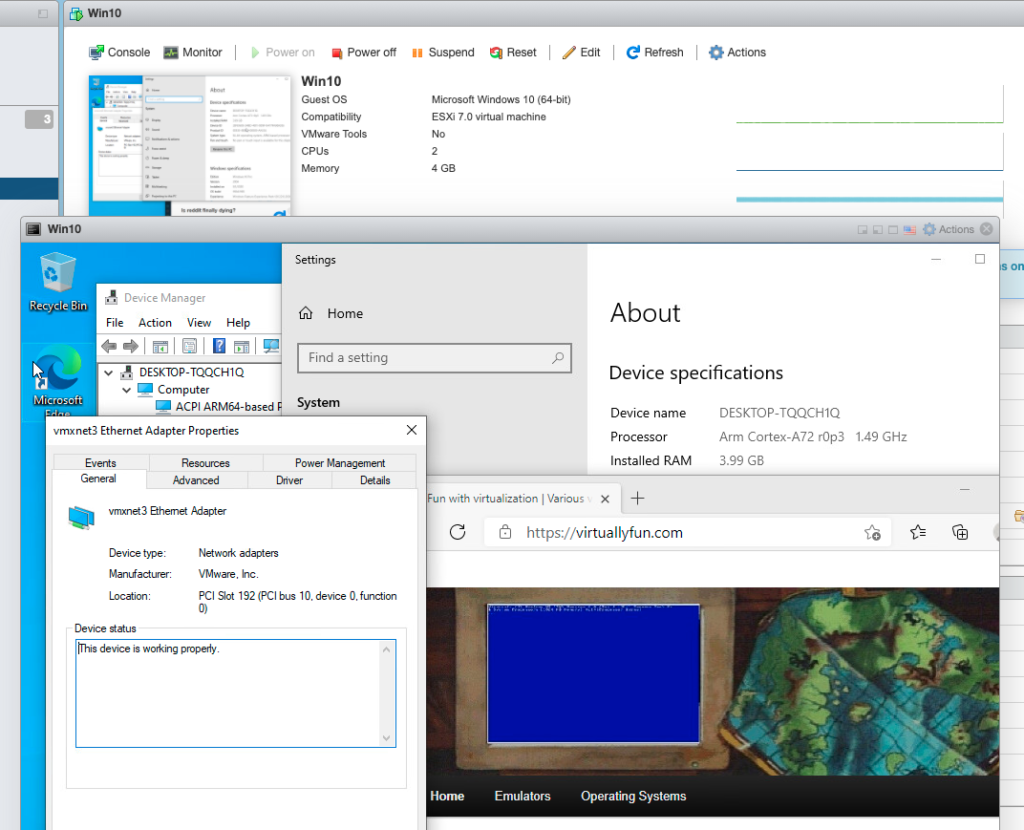
Windows 10 Guest VM on ESXi Fling Raspberry PI
NIC driver obviously did not work by default, but there is a VMXNET3 ARM64 driver in the wild:
VMXNET3 for Windows 10 ARM64 on ESXi Fling on Raspberry PI
What is it good for?
Right now probably just for fun. But I can easily see datacenters filled in with ARM servers running ESXi. Future is bright and free of Intel! Personally I will keep it around for development purposes if I need to make builds for ARM on various OSes.
(This is a guest post by Antoni Sawicki aka Tenox)
Pleased to announce WRP version 4.5.2. This is just a bug fix release however it also contains two frequently requested features:
UI customization via HTML template file. This has been requested by many users and it makes total sense. To use it download wrp.html from github, place in the same directory as wrp binary and edit to your liking. WRP will load built-in version if file is not present.
This should enable easy development of more modern UI for never browsers. Potentially with JS and CSS. Please send PR if you make something!
Second most frequently asked feature – re-capture (retake?) of a screenshot without page reload. For example if the page did not capture correctly or if something is changing on the page.
I have also updated Docker Hub and gcr.io repos.
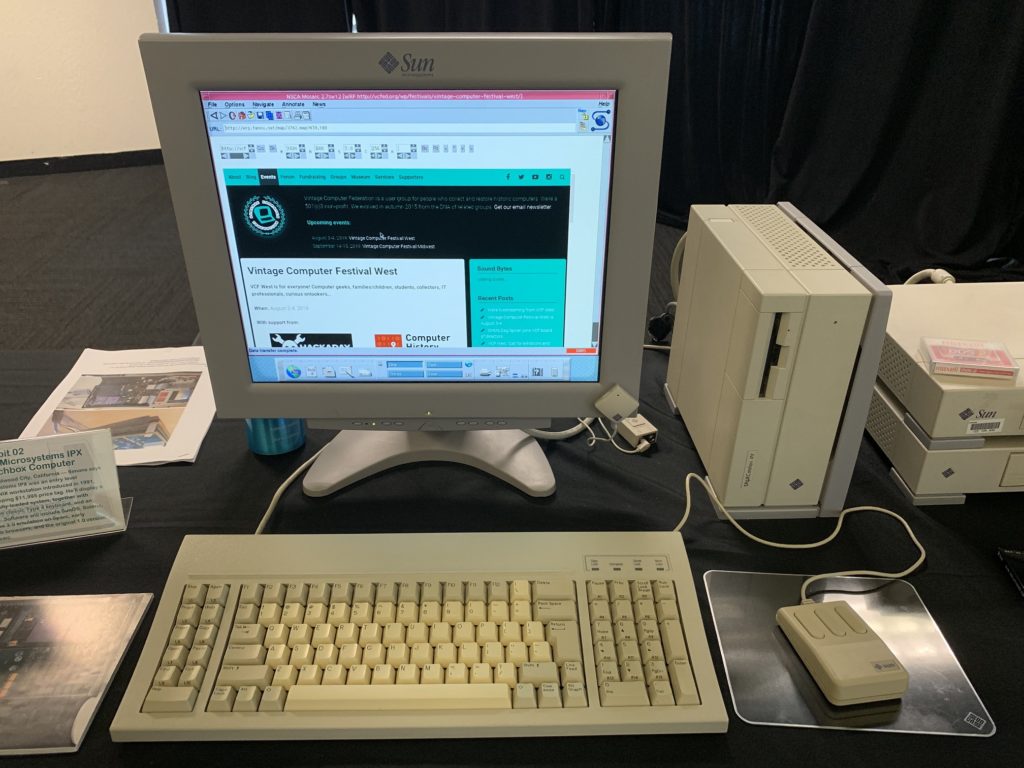
Sun IPX using WRP at VCF West
As usual please test and report bugs!
The next update will focus on issues with page size, viewport and rendering full length pages (h=0) which is currently very broken.
(This is a guest post from Antoni Sawicki aka Tenox)
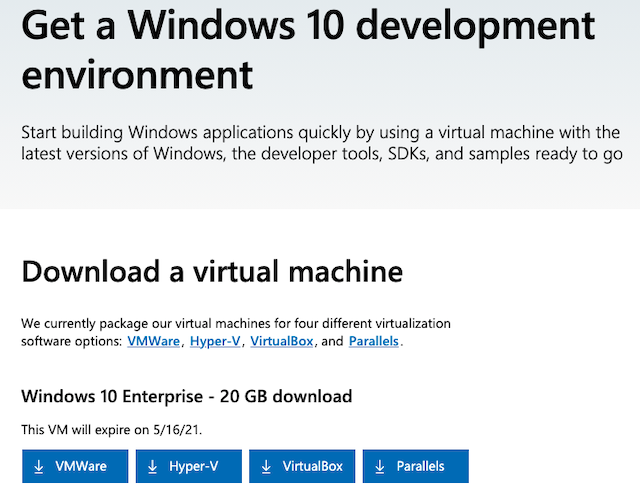
I have been living under a rock for several years now when it comes to Windows development. Recently wanting to do some maintenance on couple of my projects I needed to download Visual Studio and Windows SDK. Poking around the download page I have discovered that Microsoft now provides a fully pre-installed VMs with Visual Studio, SDK etc. for VMware, Hyper-V, VirtualBox and Parallels. That’s actually super cool and handy. Thank you Microsoft!
Looks like this has been available for 3 or 4 years now. Oh well.
(This is a guest post by Antoni Sawicki aka Tenox)
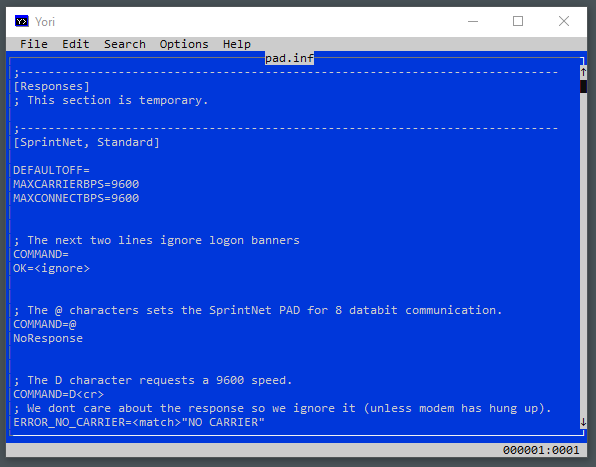
I previously lamented about lack of a small text editor for Windows text mode console. Something simple to just edit a text, configs, .ini, .reg or .cmd/bat files. Kind of like edit.com in MSDOS and Windows 3.x/9.x. Edit.com could even run under Windows NT up until XP inside NTVDM DOS emulator. I seen plenty of people use it this way. Sadly, instead of porting it to the modern Windows it was just whacked. While there are plenty of 3rd party editors to choose from none of them is perfect. They are either expensive, overly complicated, poorly ported from Unix, VMS or TOPS20, no longer maintained or require a steep learning curve for a casual Windows user.
There really isn’t much to talk about Yori. It has no special features. It doesn’t try to be an IDE, word processor, hex editor or an operating system. It’s just a perfect replacement for edit.com. Thank you Malcolm! I really wish that Microsoft just put it in Windows 10 now.
Yedit on Windows 10
While checking out Yedit you should also give Yori a try. It’s really a fantastic CMD replacement shell.
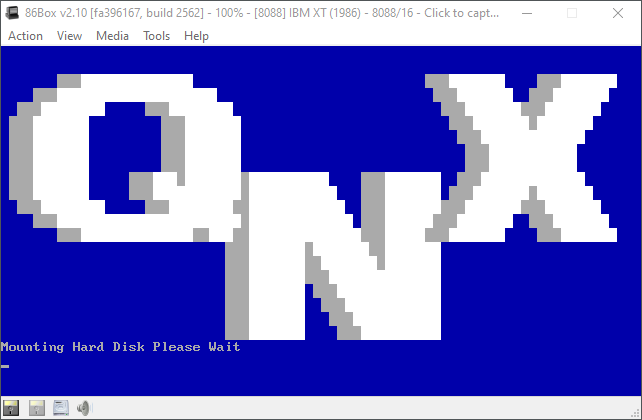
Since a lot of people (especially Zir Blazer) tried to use the available QNX 1.2 / QNX 2 tools to install a HDD boot loader and load the existing kernel, I decided to take a different approach and build a new loader. At first I was under the impression that maybe a BIOS disk driver was already present in the kernel. After realizing that there was no HDD driver included, I decided to try reverse-engineering the relevant parts of QNX.
Starting from the start (boot sector) helped me extract the kernel from the boot diskette and analyze it just enough to validate that it’s the right thing and the assumed entry point is correct.
In order to make things easier (and because it was a fun project per se) I wrote a somewhat simple QNX filesystem access tool that enabled me to extract files from the diskette and HDD images.
Going for mount
Afterwards, my main activity was centered on mount. As opposed to typical Linux/Unix mount, here it also loads the HDD driver. After finding out the executable file format (ftp.qnx.com/usr/free2/technotes/qnx_load) I wrote another small tool to extract the code and data segments of QNX executables. Analyzing the disassembly, I have determined what operations mount performs in order to install the driver and mount a QNX partition. The main steps are:
load the driver file contents into malloc-ed buffer (inside the data segment of mount)
send a TA_ALLOC_SEG message to task in order to allocate a separate segment and copy driver there
build a DEFINE_DRIVER message using data from driver file and the allocated segment address and send the message to fsys (part of kernel, but separate task)
send a SET_ATTR message to fsys that has the side-effect of initializing the driver
use the driver to read first HDD sector (partition table)
send another SET_ATTR message to adjust disk size and offset to values read from partition
Knowing this gave me an idea to what my loader would need to do beside simply loading the kernel from HDD. However, this still depended on having an already running kernel to send messages to.
Back to kernel
The kernel is split into 5 parts:
task (task and memory management)
fsys (disk and filesystem)
dev (terminal devices)
idle (CPU arbiter)
shared (int 72 handler, mostly libc and other shared functions)
Description in parenthesis are my assumptions.
The copy protection routine (tries to read the last sector from diskette and if the read succeeds resets the computer) provides a good entry-point into the fsys part of the kernel. I assumed it can be replaced with some code to emulate what mount does. However, trying to allocate a segment (via TA_ALLOC_SEG message) hangs. I think this is causing a deadlock, since fsys initialization is called from task before it finished its initialization. Fortunatelly, while digging into this I noticed the header structure of the kernel, thus enabling me to increase its size in order to fit the xt driver at the end of fsys (it would have been slightly easier to put it at the end of shared, but that didn’t occur to me at the time).
Failing to use syscalls (DEFINE_DRIVER and SET_ATTR) meant I had to determine what those messages actually did. I disassembled fsys separately and proceeded to manually follow the code path in order to determine the effect each of those messages should have in the context of mounting a disk. Eventually it emerged that almost all of the data structures can be prefilled in the kernel image, leaving only the call to driver initializaion function.
I modified the kernel to add the xt driver at the end of fsys (modifying the header by hand), replaced the copy-protection routine with code to call its initialization, and indeed the harddrive was available from the start, without the need to run mount. I was still booting from diskette at this time but I was past the most difficult hurdle.
Finishing touches
Loading the kernel proved somewhat simple (I still have some knowledge about 16-bit assembly and real-mode BIOS) but the kernel “insisted” in trying to run /cmds/sh from floppy. At first I solved this by an ugly hack, modifying the command line string in kernel image from “/cmds/sh” to “3:/xi/sh” and “/config/sys.init” to “3:/xi/sys.init” (3: being the HDD identifier, similar to C: from DOS). The xi was needed in order to keep the same string length, or at least not making it larger since there was some other importand data just past this.
This mostly solved the challenge (there were some other minor mistakes and fixes), except I disliked that hack and went on to analyzing that first start of /cmds/sh, disassembling fopen (in shared) and finally finding the memory location where of the search system variable (somewhat similar to PATH). Modifying that variable eliminated the need for starting the first shell with “3:”.
Room for improvement
At present some parameters are hardcoded and the kernel is just placed at the end of the HDD, outside of QNX parition and its position and size is written in the boot sector (somewhat similar to the original QNX diskette approach). The partition size itself is hardcoded (by hand) in the kernel data structures instead of being read from the partition table on boot. Still, for something that is unlikely to ever run outside an emulator, I deem it good enough (for now).
Thanks
to Zir Blazer for putting a lot of effort into his approach and documenting each step
(This is a guest post by Antoni Sawicki aka Tenox)
A couple of months ago we hosted VIrtualization Challenge for QNX v1.2. I expected that the hard part would be to circumvent the copy protection and the rest would be easy. It turned out to be quite the opposite! The copy protection was worked around in no time by several people independently. What turned out to be impossible is to install the OS on a hard disk.
QNX 1.2 does have several drivers for different hdd controllers including BIOS mode. It has fdisk, can create partitions, install MBR, format fs, mount hard disk volumes… but it cannot install boot code. Apparently this functionality has been added only in QNX 2.x. After a long debate we settled for a solution where you boot kernel from a floppy disk and use the rest of the os from a hard disk. This was implemented by Forty who won the challenge which was outlined in this post.
In a rather unexpected turn of events Dan Dodge, co-creator and CEO of QNX Software Systems himself reached out to us and offered to extend the contest to finish the process properly. Dan is offering $2000 prize for making QNX 1.2 boot from hard disk without use of the boot floppy disk. I have confirmed the details in an email exchange.
Rules: As always the winner will be the first person who provides a working image in the comments. Any emulator/hypervisor is allowed. You can use boot loader from QNX 2.x, or write your own or anything else you come up with. There are some tips in Dan’s comment. Ask away for more details. The QNX repository is here. Good luck! 🙂
Update: The challenge has been completed! The winner is Mihai Gaitos and this is the winning entry also a post on this blog. I will work with Mihai to get a more detailed blog post of what has been done and Dan to hand out the $2000 prize. Congratulations!!!