I have been using the MacOS CLI version of RAR for a very long time. I have a bunch of aliases and shell wrappers but every so often I just want to right right click on a file or folder in the Finder and create a RAR archive from there without dealing with the terminal.
There are a bunch of apps like Keka, BetterZip, Unarchiver that can extract .rar files. The app store is littered with a bunch of shady “rar extractors”. But nothing can create a rar archive. I think Keka did have support but it was removed.
As a stop gap I have been using an Automator Quick Action RAR script. This sort of works for basic stuff but falls apart pretty quick. Firstly you can’t specify any options, secondly there is no progress bar or any output from rar binary so you dont know if this thing worked, failed or even still running. I experimented with various options but nothing worked to my satisfaction.
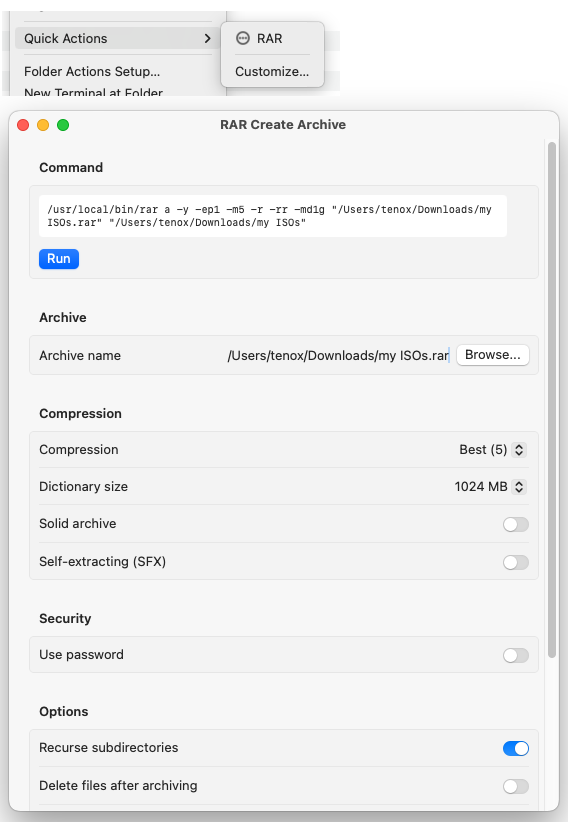
Claude Code to the rescue I vibe coded a more complete extension in Swift UI:
It allows to specify options and parameters, but most importantly the rar command output is printed in a window so you can see it running.
I admit this overall is pretty lame but it works better than any alternative I tried so far.
(This is a guest post from Antoni Sawicki aka Tenox)
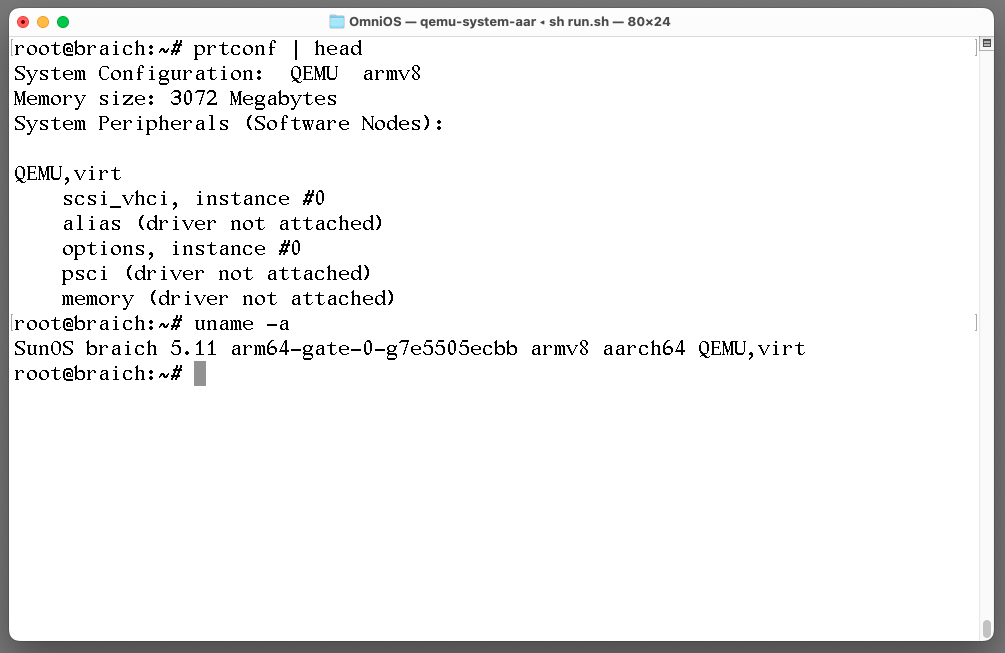
Ever since inception of Illumos I always wanted to get it working on ARM / AARCH64. But being under development it was somewhat difficult task. I previously tried building arm64-gate but there always was something not quite right. Turns out OmniOS has a ready to run image that one can boot under QEMU!
(This is a guest post by Antoni Sawicki aka Tenox)
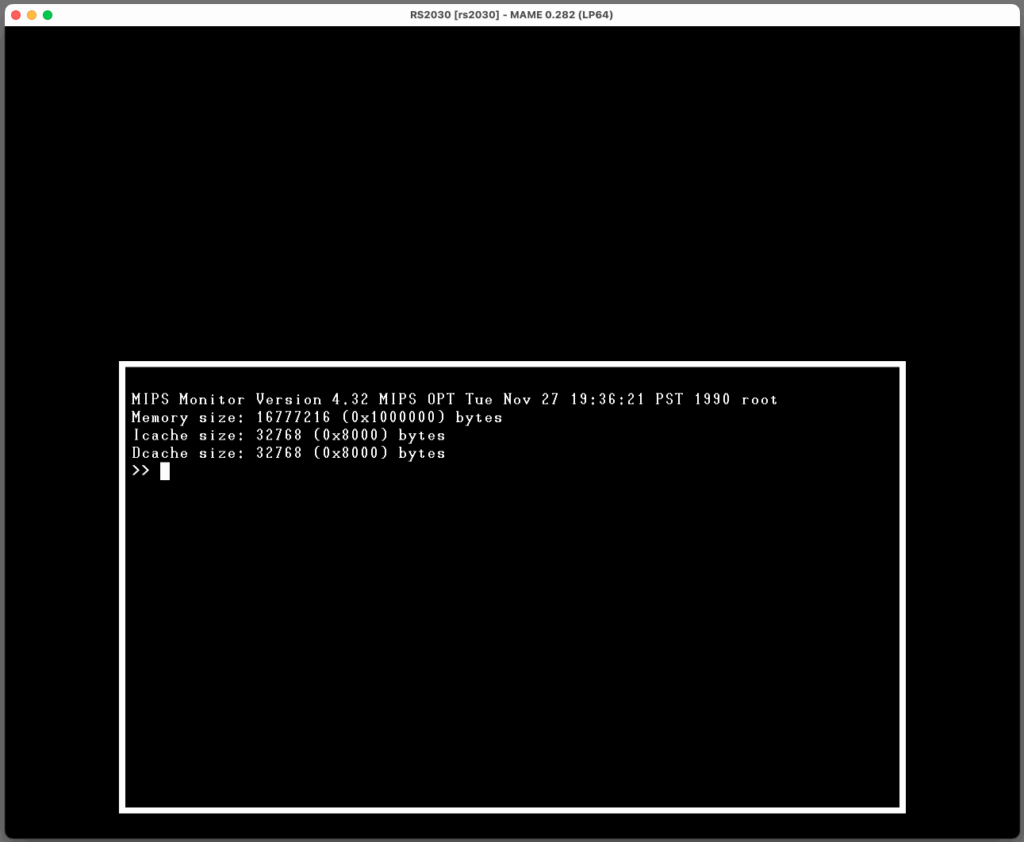
This is a very lazy post. I didn’t do anything here… I don’t exactly remember where it came from but I had this HDD dump of a pre-installed RISC/os 4.52 for MIPS Systems RC2030 lying around. It might have came from bitsavers and/or here? I was recently contacted by Enrique Tejeda Canobbio who managed to convert the image into a chd format and boot it up on MAME which has MIPS support!
MIPS Systems RC2030 on MAME
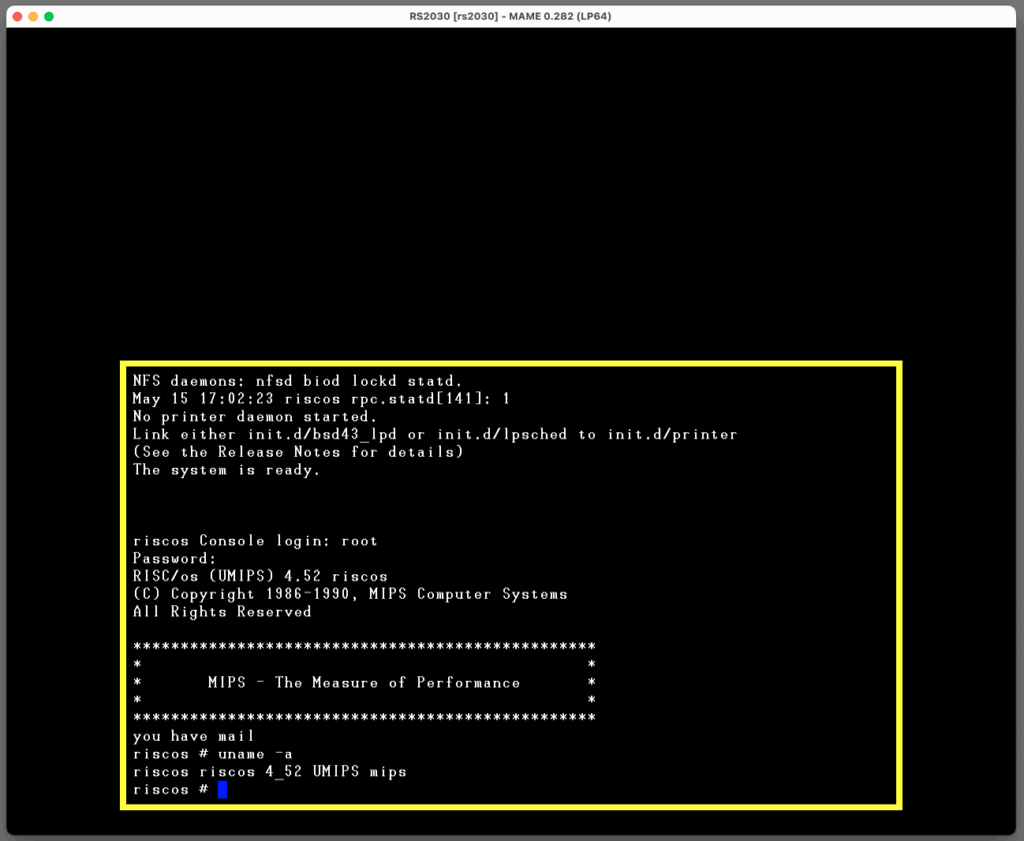
It turns out the disk image had some non trivial password set for the root account, but with help of hashcat and a decent GPU we got it cracked in 20 minutes or so. Here for your viewing pleasure is the fully working OS:
MIPS RISC/os 4.52 running on RS2030 on MAME
The system comes with a working C compiler and there are known some ports of various applications, also X11R5. I will post an update once I add some more stuff to the base image. For now just wanted to get this out in to the wild!
Download from here! Login root/root. The root password for the original image is Wivvle1!
Please post comments or ping me on Discord if you get networking or X11 working!
(This is a guest post by Antoni Sawicki aka Tenox)
Definitely not the first person doing this. In fact this has been quite widely documented, in particular by astr0baby and openpa.net. Just my personal observations and tweaks.
I installed mostly the defaults, removed Java spyware and Web based management.
I recommend using advanced mode and editing File Systems to your desired size or just leaving /stand and / and deleting everything else. Otherwise, if you do defaults, you will be facing resizing them in single user mode later.
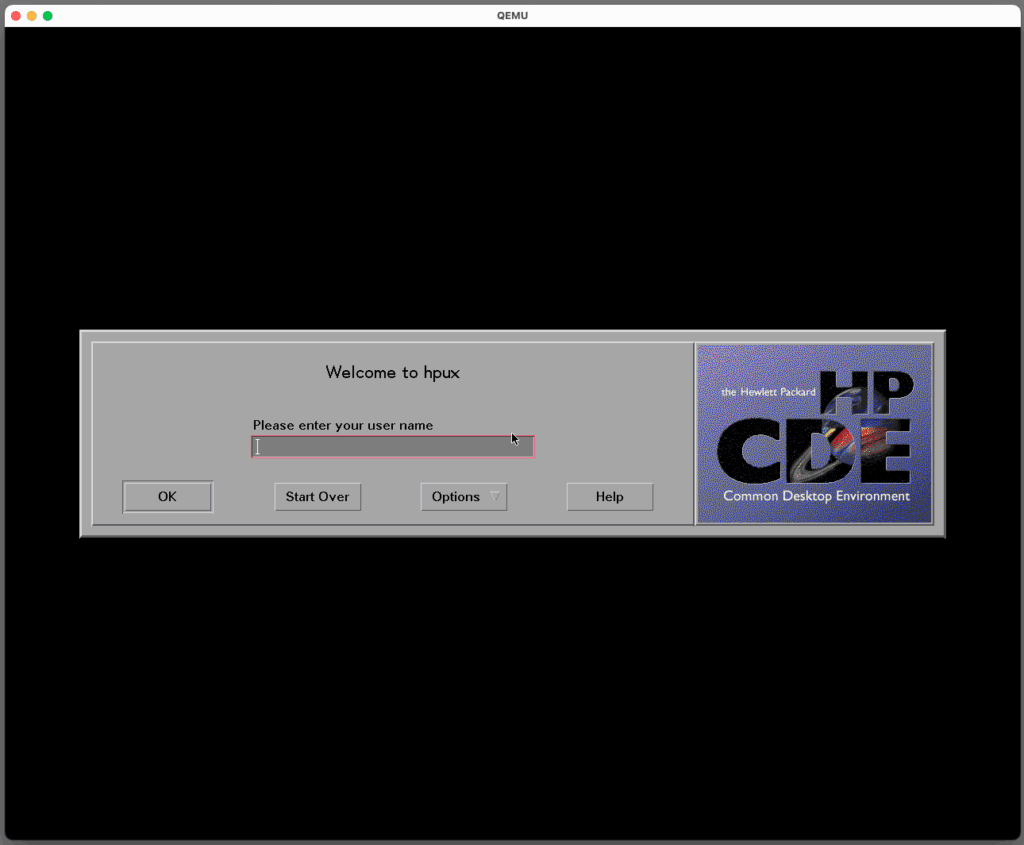
Forget any serial console, telnet stdio or forwarding X over SSH nonsense. Graphical console now works fully end to end without any issues, except for nsswitch.conf.
When trying to login via CDE you will get an error about unable to start desktop messaging system. Login either via text console or failsafe session. Copy /etc/nsswitch.files to /etc/nsswitch.conf. Also make sure that your hostname can resolve via /etc/hosts.
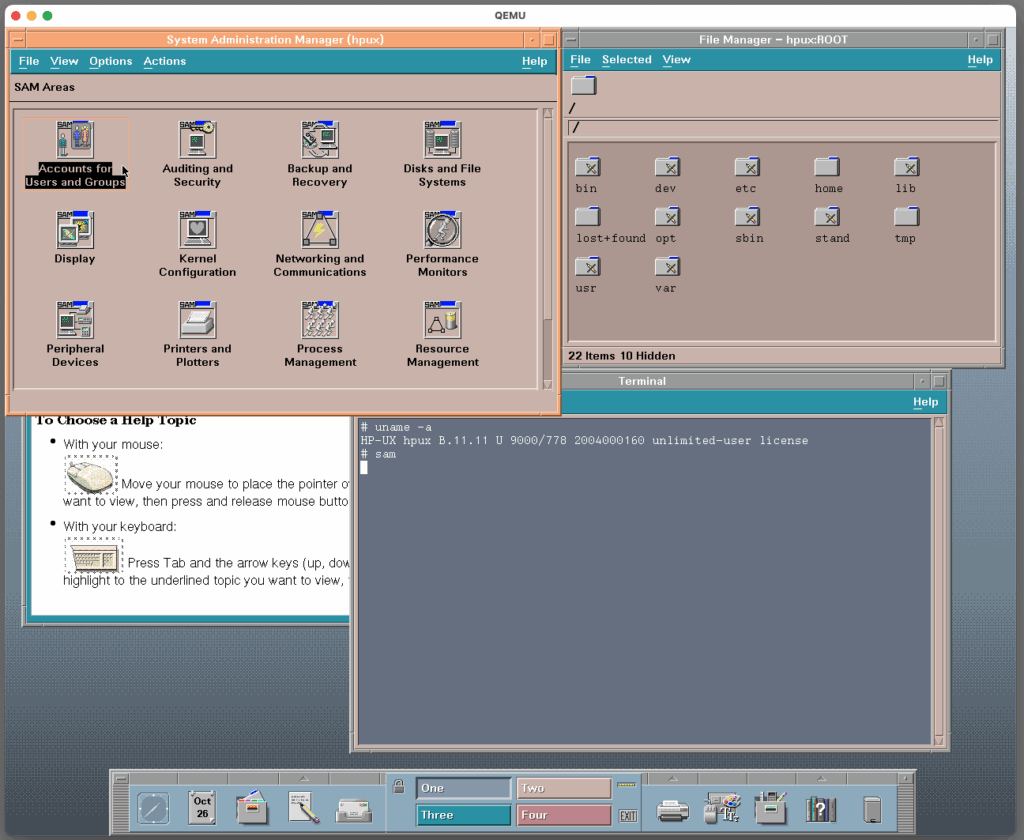
Once this is done you should be able to login via CDE:
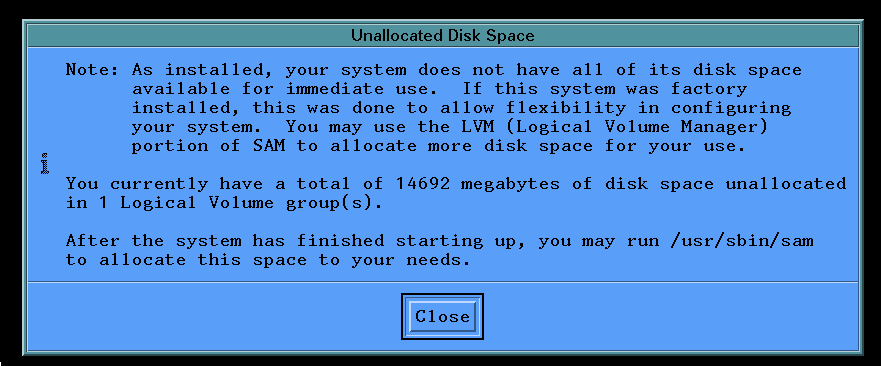
If you left filesystem defaults, you will be facing this:
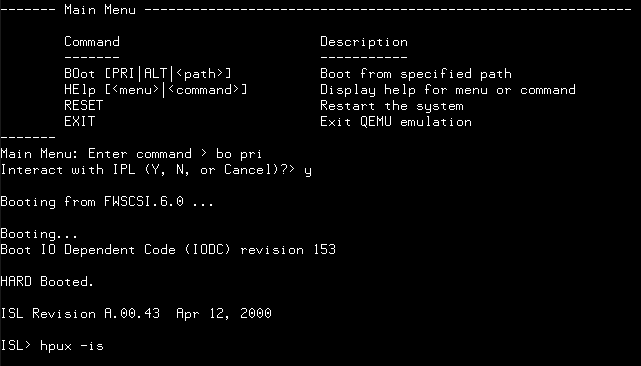
To fix this, add -boot menu=on to qemu parameters, run boot pri then answer yes to interact with IPL and then type hpux -is.
This will land you in single user mode where you can extend volumes like so:
But ideally this should be done ahead of time during install in File Systems tabs (advanced mode).
I like to disable some slow starting and unnecessary services on startup, to do so go to /etc/rc.config.d and edit bunch of files changing value from =1 to =0. I typically disable SNMP, CIM and Mailserver, Webadmin, Diagnostics, EMS, nettl, icod, etc at minimum. Also some stubborn services need to be disabled by renaming or removing them from /sbin/rcX.d …
Software Install
Note that this emulates PA-RISC 1.1 (32bit) and software built for PA-RISC 2.0 (64bit) will not work. Very little software is marked which platform is it for, so your mileage will vary. You will encounter errors and crashes. To avoid confusion check the binary with file(1) utility.
I have a bunch of handy tools like bash/gmake/gzip/gtar/ncftp bundled up here. There is GCC 4.0.2 here as a depot and here as a tarball. I also installed a bunch of tools and enhancements from Soft Pack and Apps cdroms.
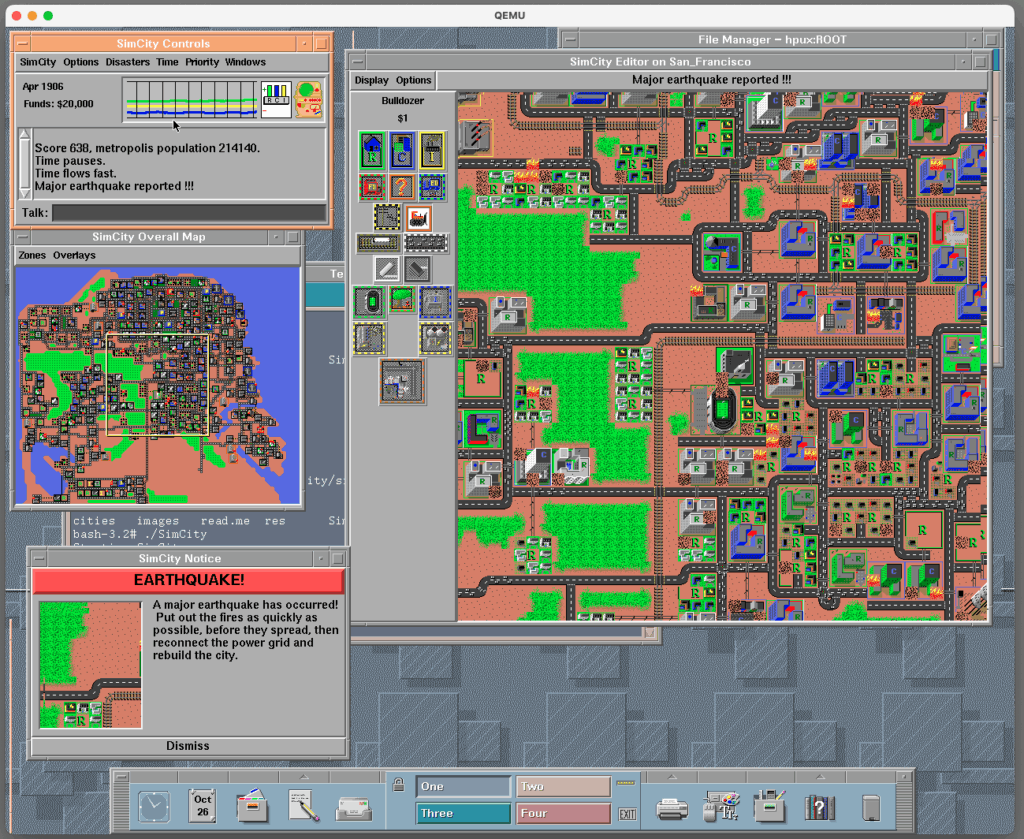
Most importantly SimCity!
More games can be found here. However this emulated HP-UX doesn’t have working OpenGL so don’t expect much.
Finally, to shut down the os:
reboot -h
The ready to run image is available here. It works with QEMU 10.1. It has bash & gcc pre-installed. Login as root/root.
(This is a guest post by Antoni Sawicki aka Tenox)
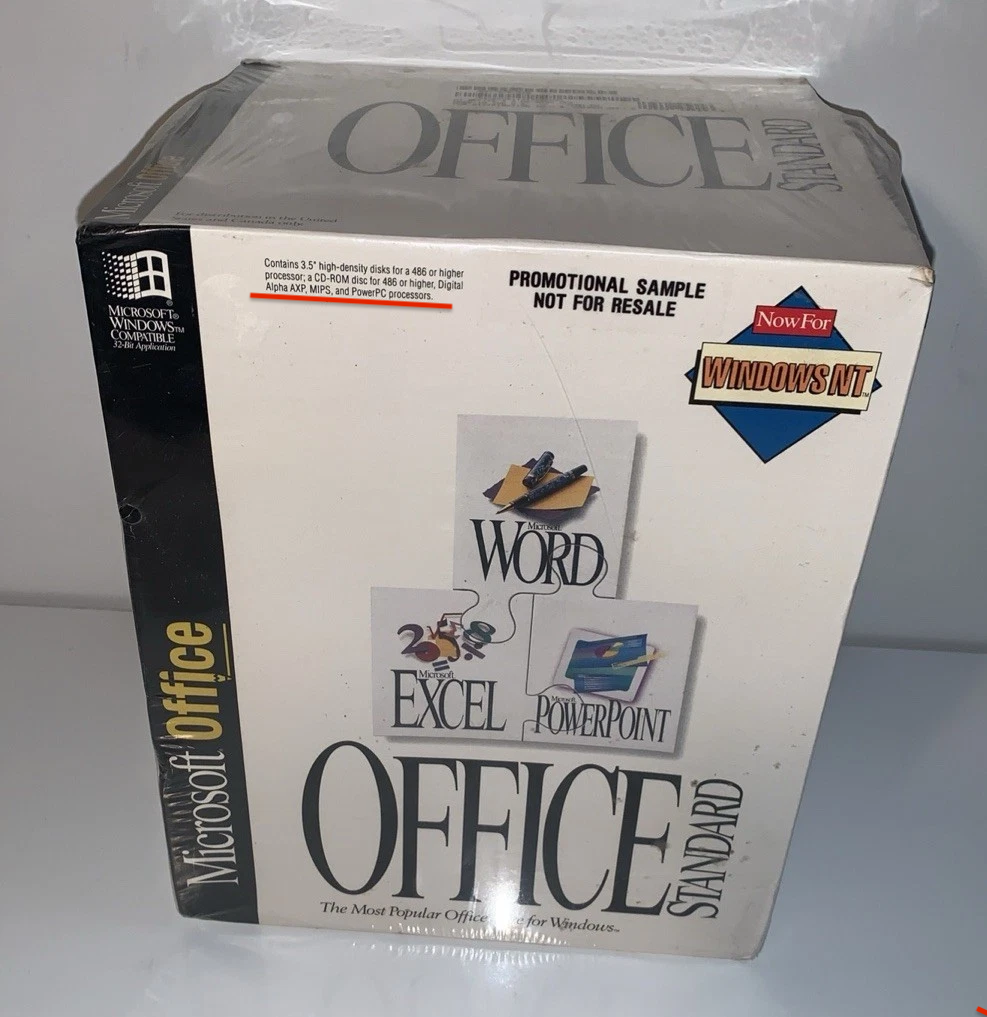
It appears that up until just now we did not have archived copy of MS Word 6.0 for PPC. There were copies floating for Alpha and MIPS, for example https://archive.org/details/ms-word60-nt. However PPC version was nowhere to be found…
Until Term24 pointed me to this eBay auction:
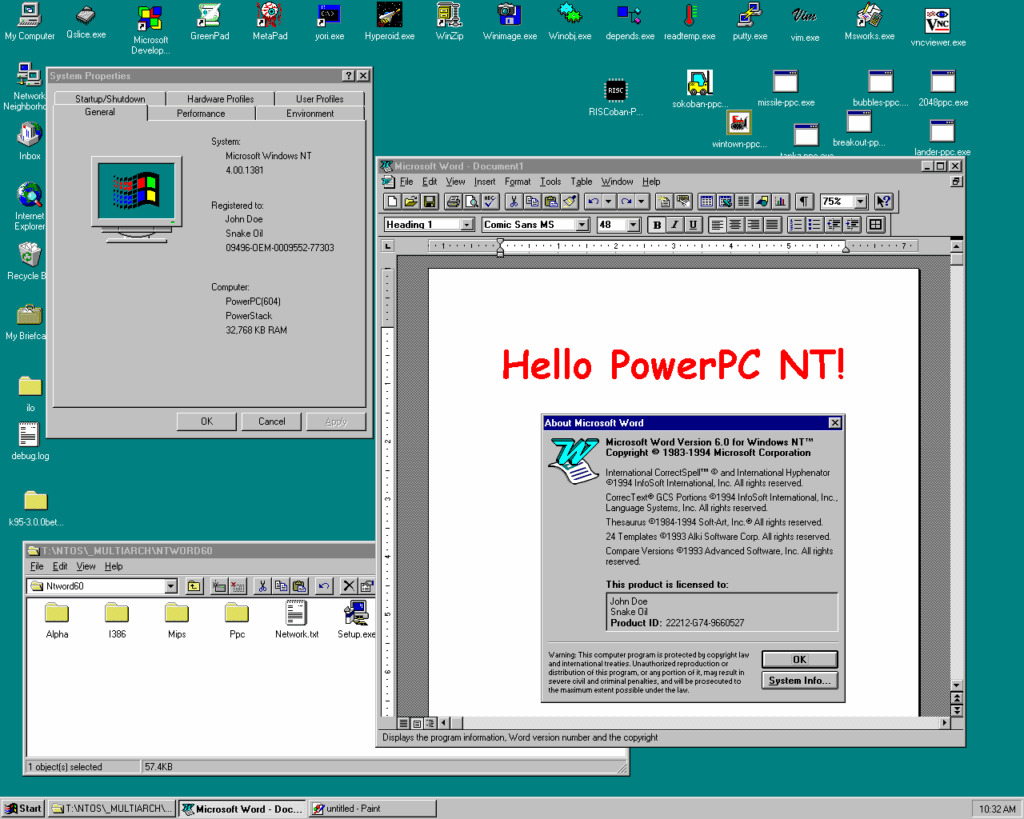
Since it clearly said PowerPC on the box I got it… and here it is:
MS Word 6.0 on Windows NT 4.0 PowerPC / PPC
Now thanks to Rairii you can enjoy it on a PowerMac or WII!
(This is a guest post from Antoni Sawicki aka Tenox)
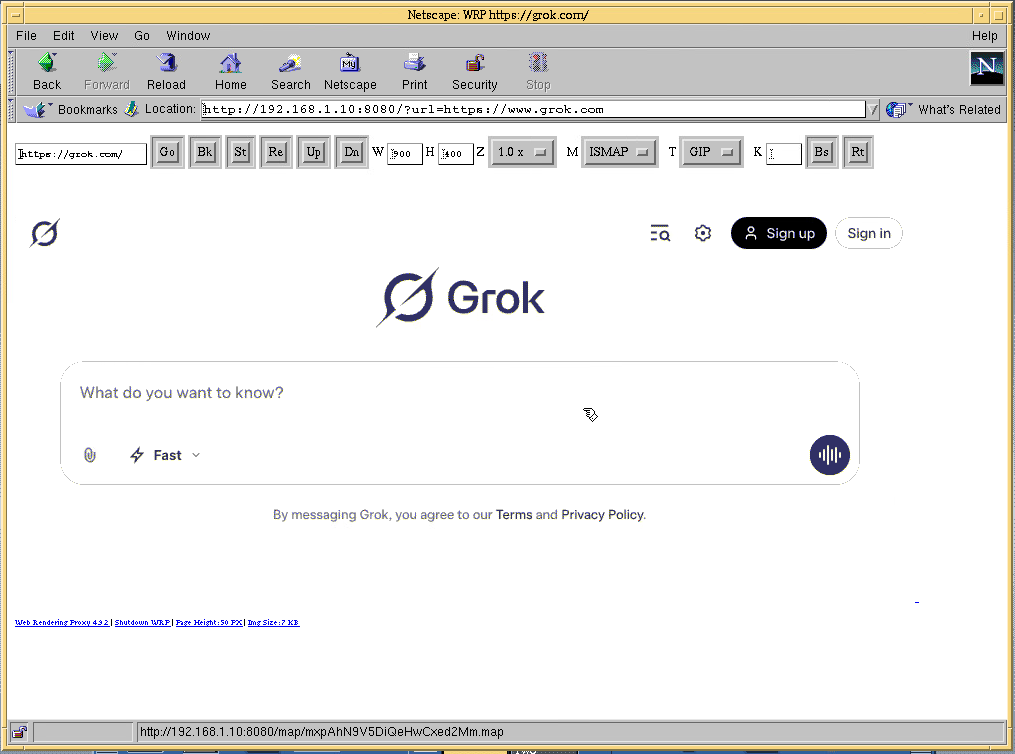
For those not familiar, WRP is a “proxy” that allows vintage web browsers to surf modern web. Some details in old post and another one.
It works pretty well for casual use, however it always been a little slow, and not only on the old computer side. Screenshot capture and encoding to GIF image has always been little time challenged. As of version 4.6, Hill Ma added a fast gif encoder with optimized palette. This has been a game changer. However the image encoding was still single threaded bottleneck.
In v4.9 I have added a parallel, multithreaded GIF encoder that uses Hill’s fast palette optimization. The improvement is about 100x faster encoding on my 20 core Mac Studio. In addition the file size is also about 30-40% smaller than the original. It’s actually faster and smaller than PNG image! This encoder works both in ISMAP and Simple HTML mode. It finally allows for fast and snappy browsing experience!
In addition I have added support for Brave Browser, DuckDuckGo search, as Google had Captcha nightmare. Finally the default, automatic “headless” User Agent has been replaced with jnrsbsn allowing some rudimentary anti-headless browser detection.
This is a guest post by Antoni Sawicki (aka Tenox)
This is a guide on how to install Windows Server 2008guest on HP Integrity VM. Yes, Itanium and HP-UX are involved. Unlike installing HP-UX or OpenVMS guests, this procedure is not widely documented (or at all) and rather an obscure process. I suppose Windows on HP-UX was never popular in first place and only maybe saw some use in the enterprise. Mid 2000, HP offered virtual labs where one could spawn their very own Win2k8 IA64 guest, but that is now long gone.
Lets say you have a HP Integrity server like rx1600, rx2600 or higher. You have HP-UX 11.31 installed on it and want to setup a Windows guest VM just for fun…
Firstly, if you have already installed Integrity VM from a recent Apps DVD, you will likely have 6.x version. This absolutely does not support Windows guests. You will need to downgrade to 4.x. To do that, start by removing the packages. You will need to uninstall the main HP VM package, as well as several others: Guest/Host AVIO, VMGuest*, VMKernel and VMProvider. You will also need to delete folders /opt/hpvm and /var/opt/hpvm. Otherwise you will run in to remains of some 6.x configs and databases that are unreadable to the older version.
Then you will need to install earlier version, for example 4.2.5, which is the last version that officially supports Windows guests. However HP VM 4.3 also works pretty well and has an added benefit of a “Virtual iLO” (but don’t get your hopes for a graphical console. Virtual iLO or not, all you get is a serial console to the guest. In case of Windows – SAC. (In practice ViLO only really provides telnet access to hpvmconsole) You can download earlier HP VM versions from here. The install is pretty straight forward, just unpack the tarball and point swinstall -s /path \* at it. I did encounter a small issue with 4.3 HPVM_1105. You need to create swlock file inside catalog directory of the extracted package to get past a lock error. Reboot and run this this to verify:
hpvminfo -S
hpvmstatus
If all good, the next step is to create a virtual switch and boot it up:
In this case -n 0 indicates lan0 interface from ifconfig.
Then you create a blank disk image, like so:
hpvmdevmgmt -A -S 20G /vm/windows.fd
Finally you create a VM and attach all the goodies:
hpvmcreate -P win64 -O windows -c 1 -r 2048
hpvmmodify -P win64 -a disk:scsi::file:/vm/windows.fd
hpvmmodify -P win64 -a dvd:scsi::file:/vm/w2k8.iso
hpvmmodify -P win64 -a network:lan::vswitch:switch1
hpvmmodify -P win64 -K x.x.x.x -L 255.255.255.0
The last bit with -K and -L is virtual iLO, only available in 4.3 and above. If using earlier version skip that part. The IP address can be on the same segment as vswitch / lan0.
Also FYI VMs are stored in /var/opt/hpvm/guests/
Before you boot it up, I will remind you again that THERE IS NO GRAPHICAL CONSOLE. You can’t boot to the setup and click through the setup screen.
HP offers 3 types of text only mode installation:
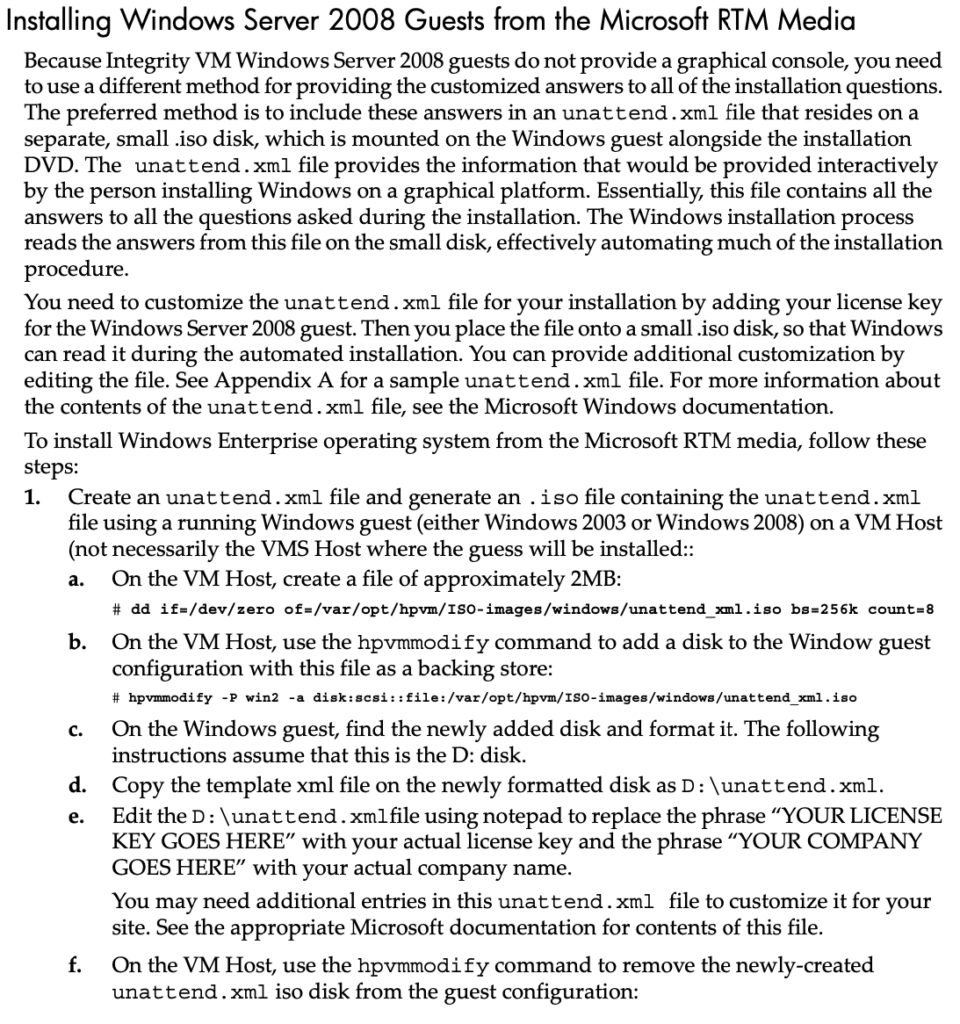
Option A. Using something called HP Smart Setup Media from HP Integrity Essentials Foundation Pack for Windows. I miraculously found it on HP Support Website and archived here. Insert this .iso image instead of w2k8.iso above:
hpvmmodify -P win64 -a dvd:scsi::file:/vm/smartcd.iso
If you ever need to remove it, the command is:
hpvmdevmgmt -d gdev:/path/file.iso
Then boot it up:
hpvmstart -P win64
hpvmconsole -P win64
CO
If you have virtual iLO you can also telnet to the IP address of the virtual iLO configured earlier with -K.
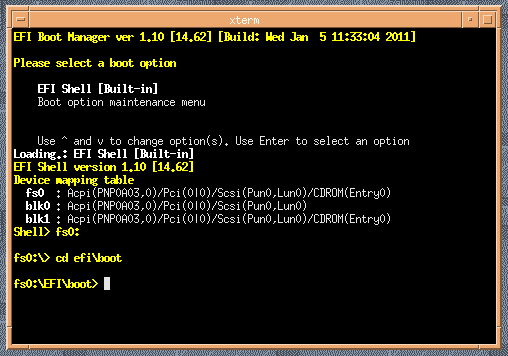
In the EFI console you open shell, then navigate to fs0: and efi\boot folder then launch bootia64.efi file.
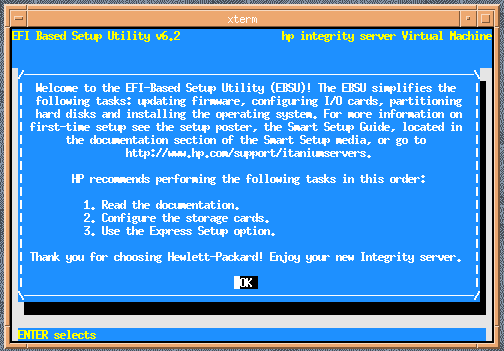
You will be presented with this lovely screen:
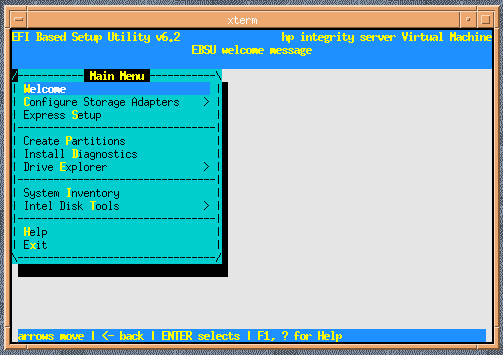
Pick the Express Setup option:
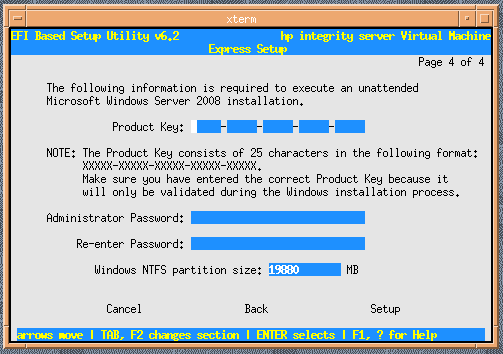
After few screens later you will be see this somewhat familiar form:
You will be asked to swap the iso image in to a Windows 2008 IA64 Install CD:
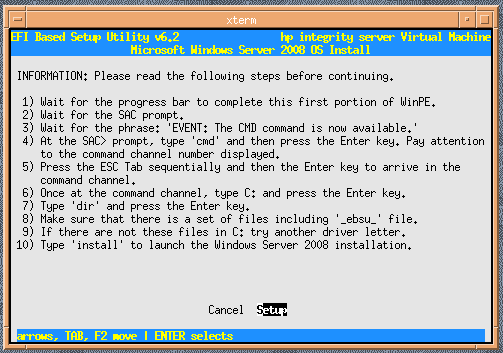
Once it loads up, you need to type some magic spells. Wait till you see a message that says “The CMD command is now available”, type cmd, enter, then press ESC+TAB to switch to it. Then navigate to drive C: and run install. This is the information screen for reference:
The install process takes quite a while. Fortunately you can play SimCity on HP-UX IA64 while you wait!
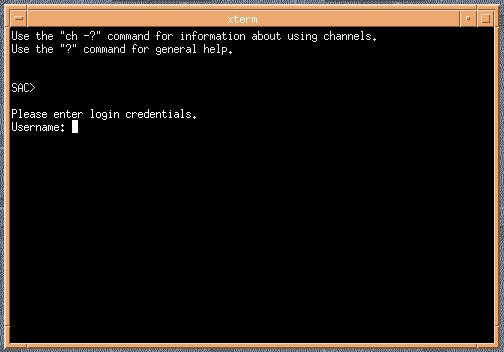
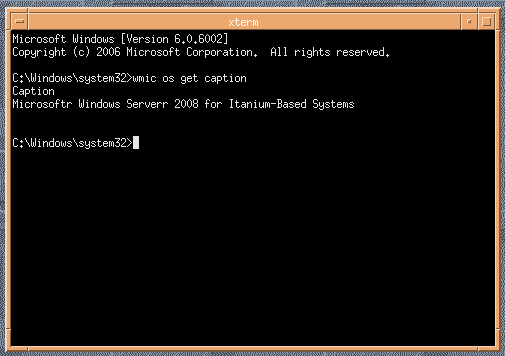
Eventually the VM will reboot and auto load to SAC prompt again. Repeat the process where you see cmd is available, launch it then switch using ESC+TAB. You will be able to login to Windows IA64 Guest VM!
Hurray we have Windows IA64 VM Running!
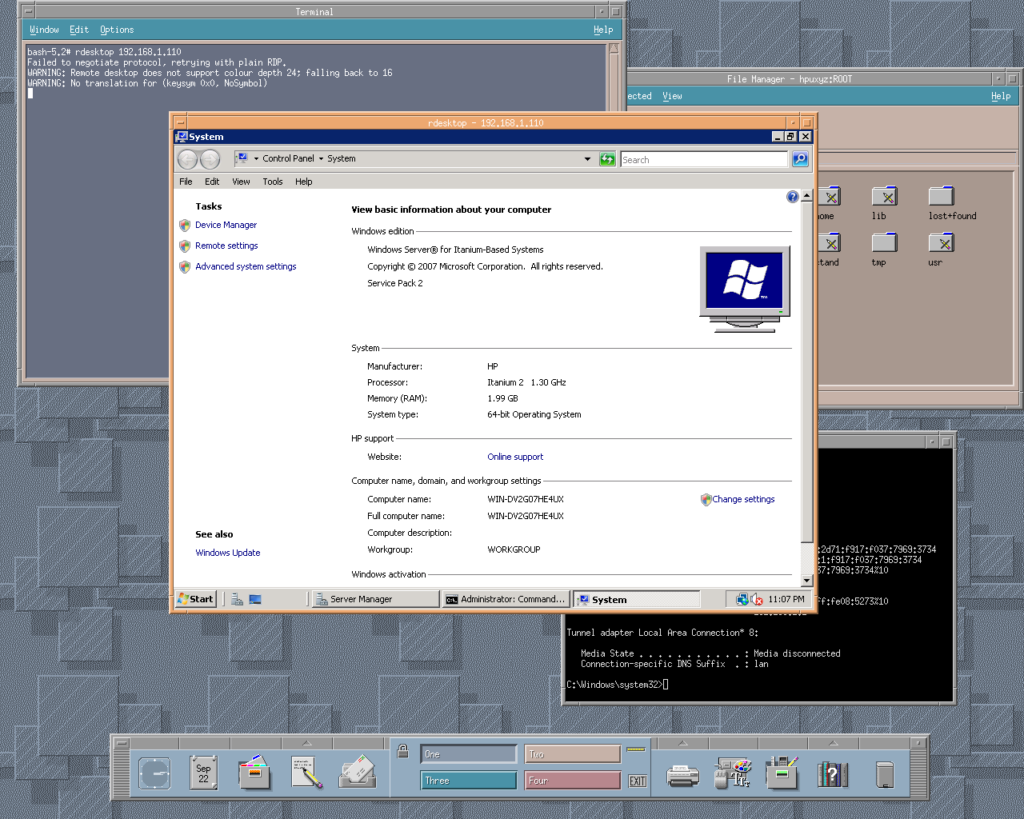
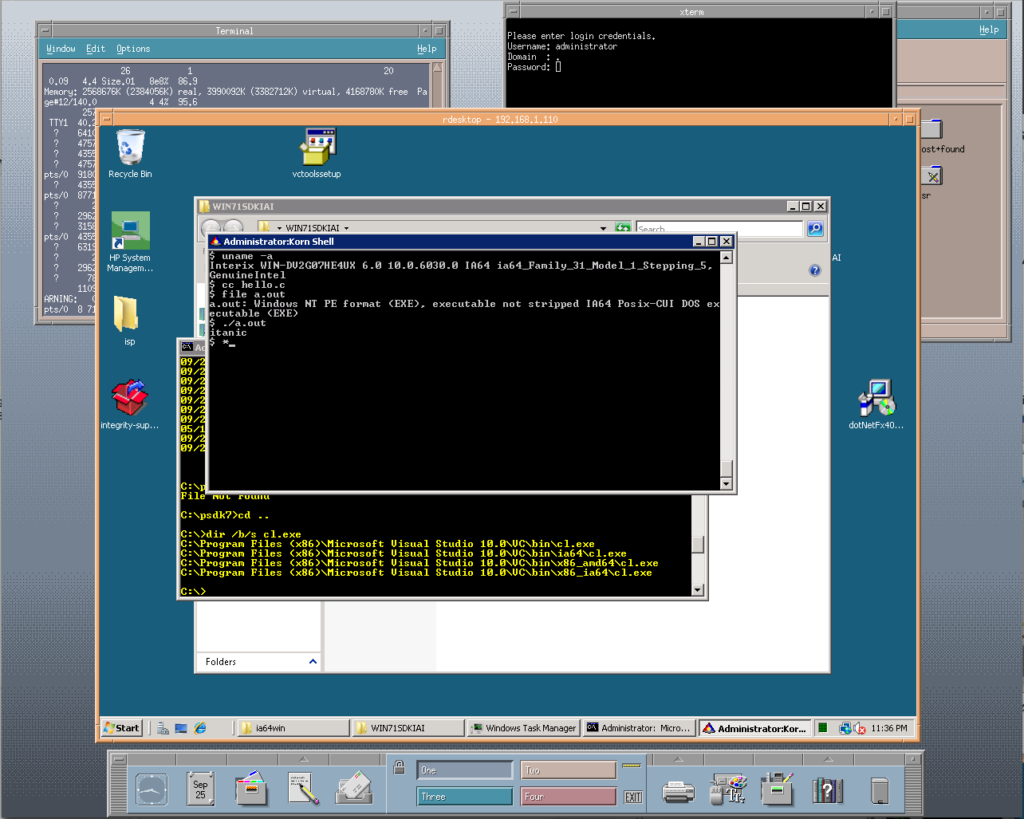
Next simply run ipconfig to get the IP address and you can RDP to it:
Windows 2008 IA64 VM running on HP Integrity VM on HP-UX 11.31
You can also get the IP address from SAC> by running i command
Option B Using Windows RTM media + unattend.xml file. The HP VM admin guide provides a sample unattend.xml file in an appendix. I have extracted and archived it here.
This is the original instruction:
The above is complete bullshit as you need an existing VM to perform this. Starting from scratch this is no go. I have opted out to just adding the unattend.xml to the original iso image using PowerISO. Simple and easy.
The rest of the procedure is quite similar to option A.
hpvmstart -P win64
hpvmconsole -P win64
CO
If you have virtual iLO you can also telnet to the IP address configured earlier with -K.
In the EFI console you open shell, then navigate to fs0: and efi\boot folder then launch bootia64.efi file.
Then at some point you will get to the SAC prompt where you will have to type cmd then press ESC+TAB to switch to it. Then in cmd.exe prompt you launch setup /unattend:d:\unattend.xml. and wait for it to do it’s job.
Once the system reboots, you will have to do the cmd esc+tab thing again, but this time you will get a login prompt. Login as administrator with the password from unattend.xml.
netsh advfirewall firewall set rule group="remote desktop" new enable=yes
The Smart Setup CD does this automatically.
Option C PXE+RIS etc. Which is not covered here.
Post Install Steps
You basically get the IP address either SAC> i, by running ipconfig in cmd.exe of SAC or simply from your DHCP server. Then RDP to the VM. Login in as administrator with password you set either in unattend.xml or EFI install tool.
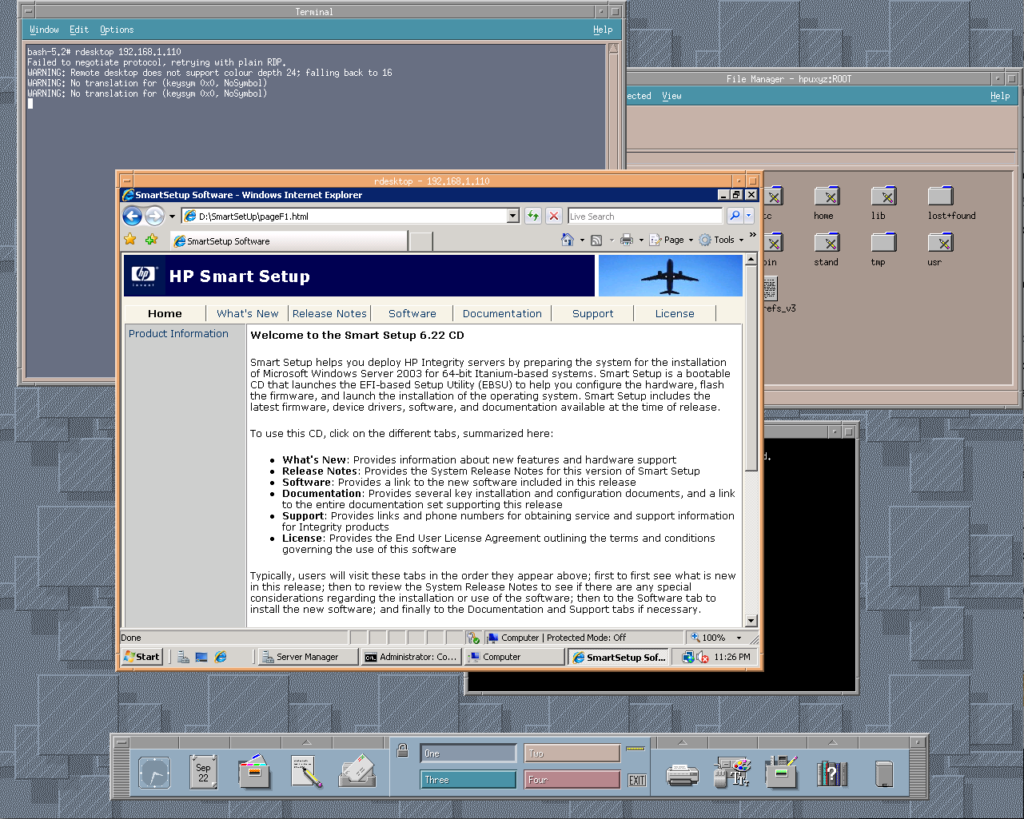
The Smart Setup CD has some drivers and components that can be installed on a VM.
What can you run on this?
Not much. From the “big apps” there’s MS SQL server, SAP, Oracle and whatnot. 7zip and bunch of utilities from Sysinternals to C-Kermit. You can port more apps by installing Platform SDK and Visual Studio Tools. The latest known is Windows 7.1 SDK for IA64. It requires .NET 4.x to be installed. All archived here.
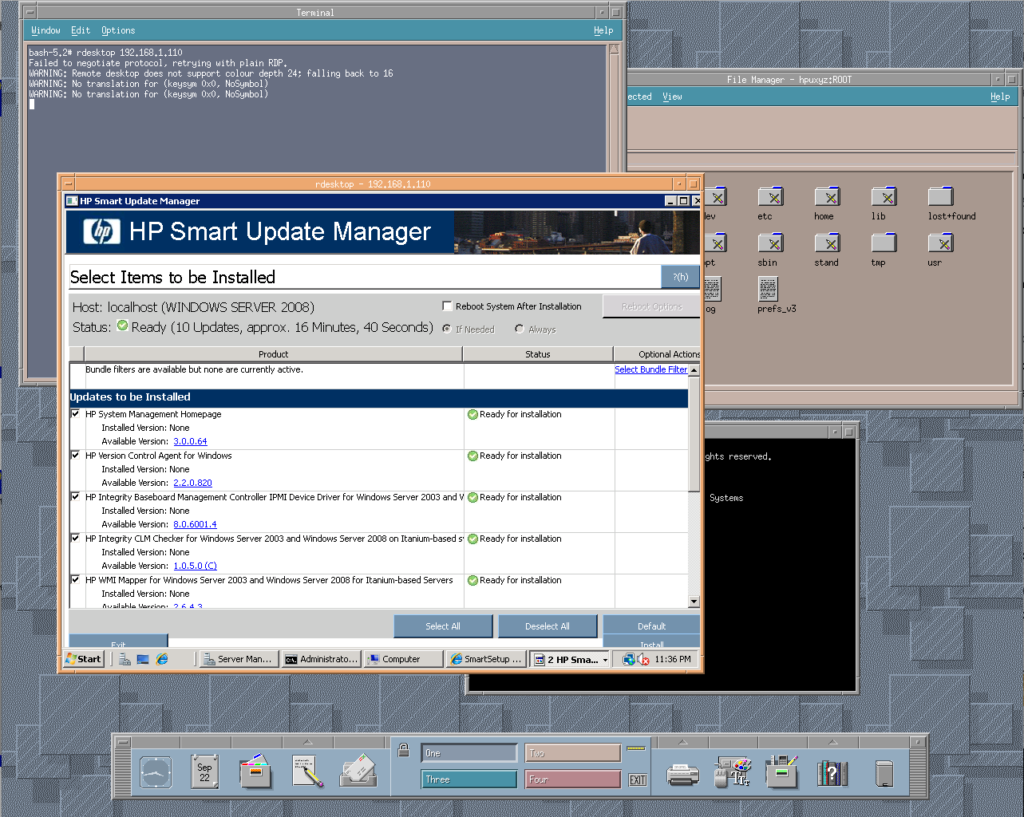
From lesser known items there’s Services For Unix, aka Interix, which has a cc wrapper around cl.exe and can be used to port posix apps:
Services For Unix on Windows 2008 VM on a HP-UX 11.31 IA64 host.
Updates:
If the HP VM throws error “Integrity VM Unsupported Evaluation Version has expired” just move time back with date command and everything will work just fine.
To activate 2008 Server VM use GVLK key 4DWFP-JF3DJ-B7DTH-78FJB-PDRHK published on this Microsoft website.
(This is a guest post by Antoni Sawicki aka tenox)
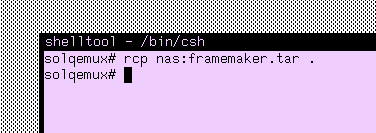
TL;DR RCPD plays nicely with NAT, re-implemented as a stand alone daemon, from scratch, without ined, r-daemons. Fully open, no security or authentication. Docker friendly.
I often find myself needing to copy a file or two, in or out of an emulated system with some weird networking setup like qemu net user, SLiRP, NAT, etc. Or from/to a physical machine, but having server running in a Docker container, sometimes on a Mac, which has even weirder network contraptions.
Most of the old file transfer protocols like FTP have tendency to open a reverse connection from the server back to the client, which doesn’t play very well with NAT. Even TFTP (who would have thought!) requires nf_conntrack, STUN, proxies, connection helpers, punching holes, UPnP and other nonsense. While they can be individually worked out, it’s rather not universal. Vintage OS SSH/SCP is either non existent or ciphers are too old to play well with modern SSH server. NFS is mostly OK but it has it’s own quirks and you can’t run it in a Docker container. I seen people doing shit like this. I’m also guilty of using Kermit to transfer files over network from time to time. Overall quite frustrating situation.
It turns out that the rcp protocol is very easy on NAT, as it uses just a single, outgoing TCP connection. Not only it worked in all my use cases, but also Berkeley r-commands are ubiquitous on pretty much all vintage OSes that I work with. From Unix, VMS to Windows NT. There are ports to OS/2, DOS and everything else. A recent practical example was how Neozeed and I copied a VBScript in to Windows 2000 64bit install.
The server side however is somewhat of a challenge. It has been obsolete for quite some time now. For starters, R-daemons require inetd, which is mostly not a thing on modern Unix. Then there are actual rshd/rexec/rlogin/rcpd daemons. I spent several hours trying to hack netkit-rsh and rsh-redone to play nicely in Docker, without good results. Even if it could be done, there still are /etc/hosts.equiv, ~/.rhosts and other bullshit “security” contraptions to deal with.
Annoyed with all this nonsense decided to write RCPD from scratch. Docker friendly, fully open, no security or authentication of any kind. I also didn’t want remote shell (rsh/rlogin/rexec), just the file copy part. The original rcpd was using rshd under the hood. This is now completely eliminated and the shell stuff is synthetically generated to satisfy the protocol.
Now if I want to copy a file in to a vintage system I can simply do this:
That’s it. It just works™ with net user and Docker on a Mac vmnet.
The best part that the whole thing has been written and debugged entirely by Claude!
I often work on vintage Unix Workstations and other obsolete systems. I have a need to browse modern web on old computers somehow. In the past I developed Web Rendering Proxy to help with this. While WRP is awesome as a showcase, and some light browsing, unfortunately it falls little short of being practical for a daily driver.
Like many others I have been cheating and using a VM with a web browser and remotely connecting to it via VNC or RDP. This is rather obvious and mostly works, but a VM is hard to run and upkeep. Takes time to boot and eats resources. You need to customize it, install updates and other nonsense. I wanted something much simpler, leaner and not requiring any maintenance. I also need to run it on ARM based hosts like a Mac or Raspberry PI.
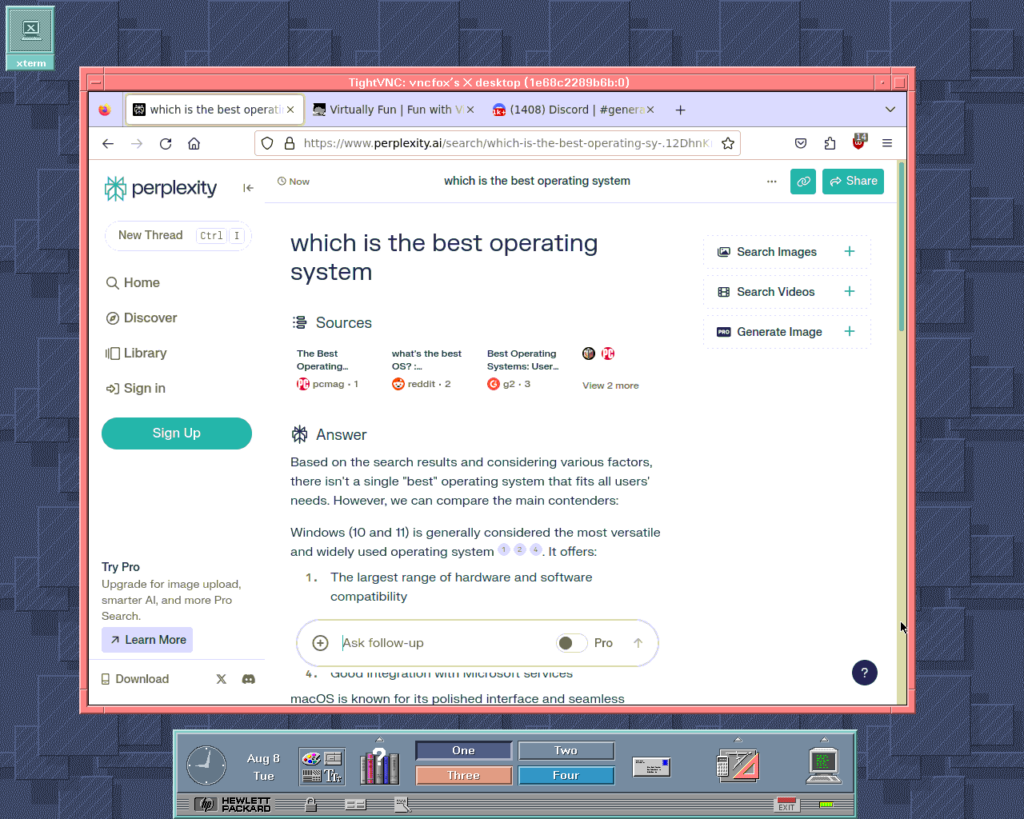
Enter VNCFOX – a Firefox browser with TightVNC server packaged as a Docker container. It’s small, lean, easy to run and there is no boot time and lengthy updates. You can mount Firefox .mozilla profile in a Docker volume to preserve your settings, plugins like uBlock, history, cookies and cache, across container restarts! I also typically bind mount a folder exported over NFS in to /home/vncfox/Downloads.
VNCFOX on HP-UX 9
TightVNC version of VNC is rather crucial, especially for older computers. Without the “Tight” protocol, VNC screen refresh consumes a lot of CPU on the client side and the session is laggy. TightVNC works incredibly smooth. For ease of use I have compiled clients for some older operating systems.
Overall this approach works really well, including stuff like Perplexity/ChatGPT/Claude, Google Docs, Email, even Discord and other web based chat clients. I regularly now post and edit this very blog from a HP-UX workstation!
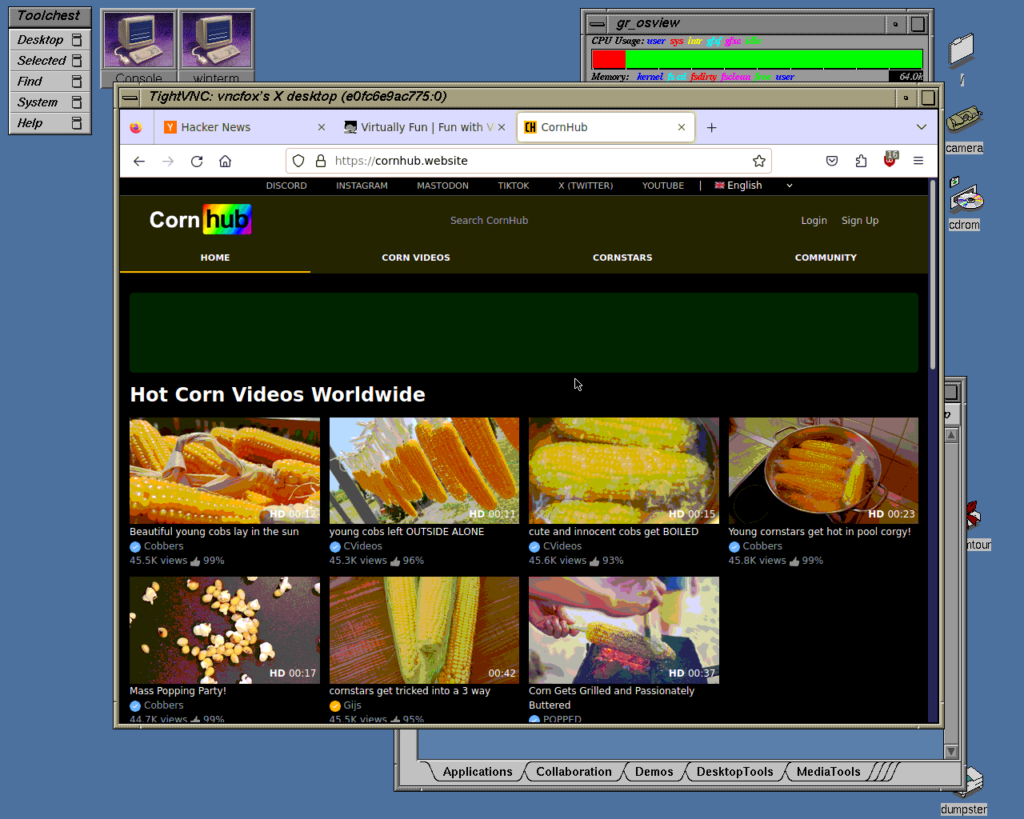
VNCFOX on IRIX 5.3
The container is dual platform for both AMD64 and ARM64. It can be run even on Mac host with Apple Silicon. Raspberry PI maybe?
Is it future proof? Maybe. Apparently Wayland supports VNC, including Tight protocol. Some day I will migrate the server. But for now x11 vncserver works pretty well.
Useful keyboard shortcuts:
F8 – TightVNC Menu – Including clipboard transfer etc
(This is a guest post by Antoni Sawicki aka Tenox)
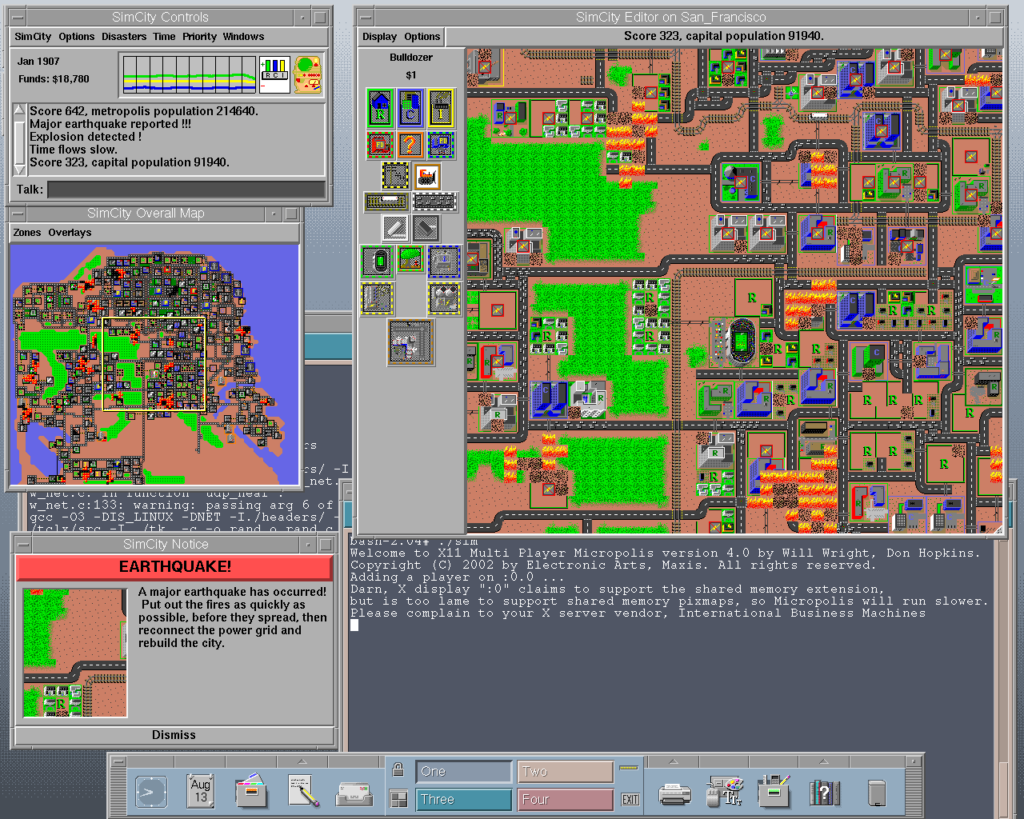
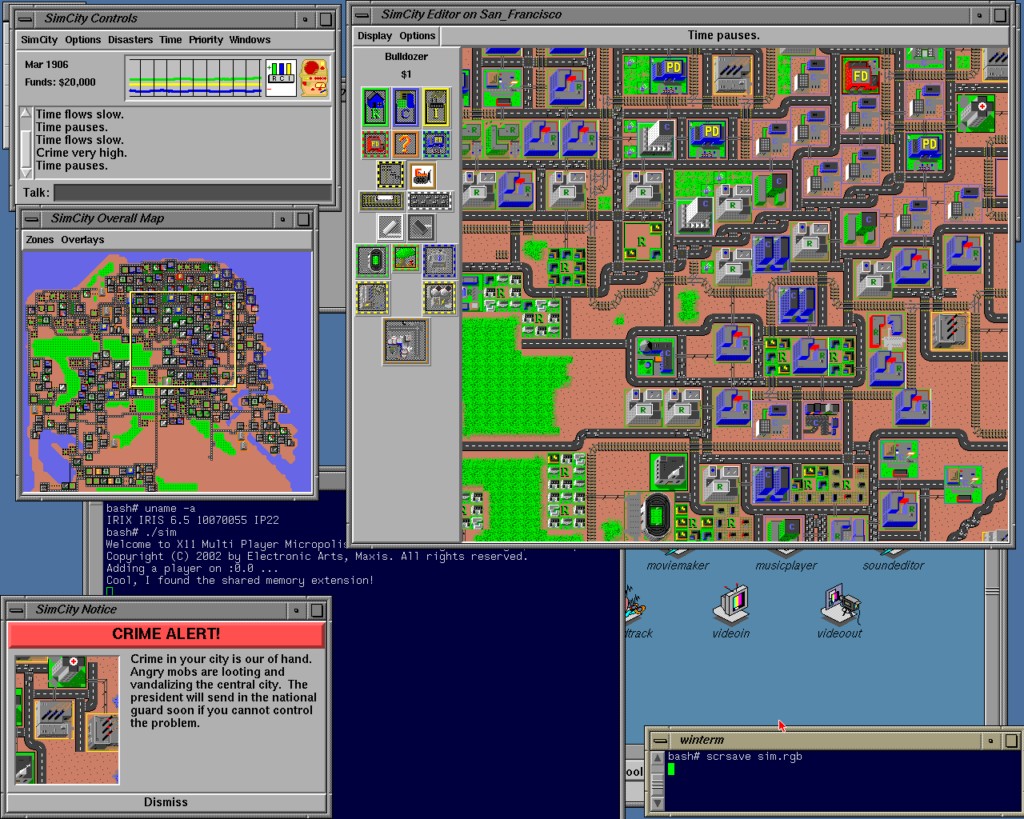
Previously I managed to crack and unlock the demo version of DUX SimCity for UNIX. It worked just fine on the original pre-built platforms, DEC Unix, HPUX, SunOS and IRIX. Unfortunately the IRIX binary is for 5.3 in COFF format and doesn’t work on more modern ELF based IRIX like 6.2 and above. More importantly however, there never has been a release for IBM AIX! Inability to play SimCity on RS/6000 is excruciating. Not to mention several other Unix systems of that time.
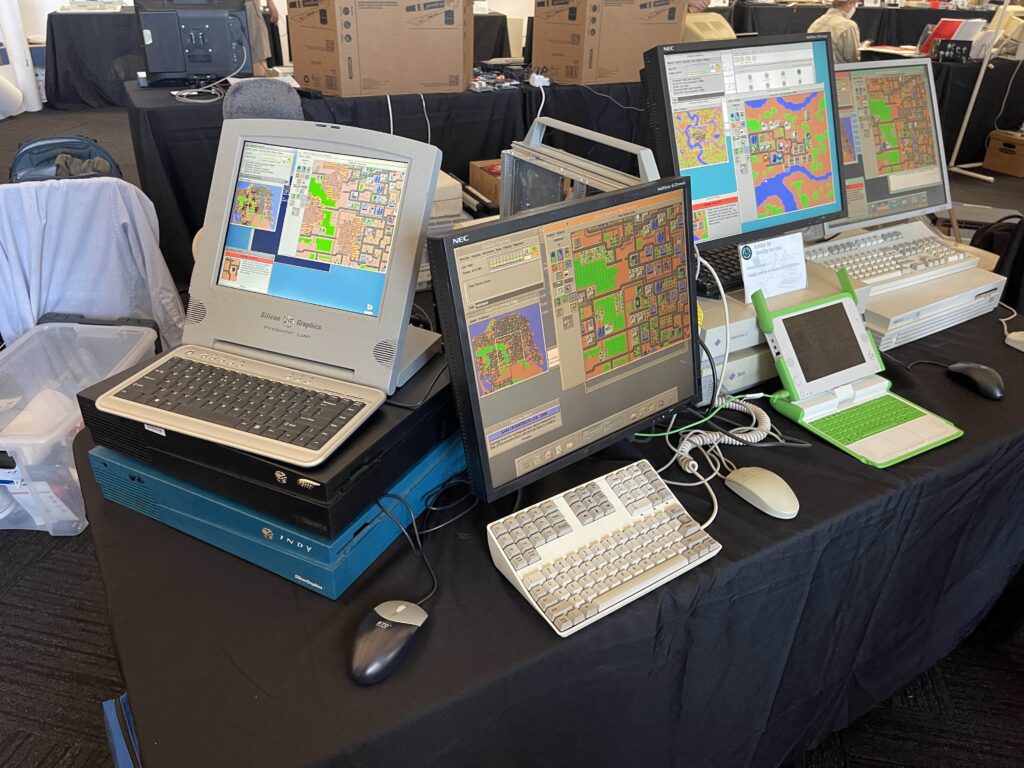
SimCity for UNIX Exhibit on VCF West 2024
A few days ago I ran a VCF West 2024 exhibit showcasing this important piece of software history. I got to chat with many people about these shortcomings and decided to see if something can be done about it.
On the right of the picture above, you can see a OLPC XO. This laptop plays an important role of SimCity history. During conception of OLPC, the game has been open sourced under a new name “Micropolis”. This was insanely fantastic endeavor, kudos for everyone involved. Unfortunately the software has been “enhanced” to run on XO Sugar GUI thing, ported to C++ Python and otherwise defaced in several different ways.
Fortunately there survives a very early source code of Micropolis, aka old gen. While GPL and under a new name, has only minor, cosmetic changes compared to the original source code. With some minor tweaking and working around funnies with xlC and MIPSpro compilers, I was able to build old-gen Micropolis for AIX 4.3, 5.1, IRIX 6.5 and HP-UX 11.31 on IA64.
Most importantly however, in the process, I discovered that the original DUX SimCity assets, including TCL/TK GUI cruft was directly usable with just a few small changes in sim.c. Effectively undoing all the changes mentioned in DONE and making it almost the original, except for name. A hybrid GPL Micropolis – DUX SimCity Demo Asset build has been born!