Packages so far on Uwisc 4.3BSD

I’ve been compiling quite a bit of stuff.. Looking back it was something I intended to do back in October of 2007… Well no time like the present then! I’ve done my best to include all the relevant bits for each of the following packages. It’s entirely possible I’ve missed stuff, so feel free to re-build the stuff as you wish. Some of the packages require you to build them with GCC as the default CC won’t work. However if you are going to build it yourself you won’t be able to jump to gcc 2.7.2.2 as it requires gperf which in turn requires a working c++ compiler. So far here are the following packages:

bash-1.14.7
bash-2.0
binutils-2.8.1
bison-1.25
flex-2.5.4
gcc-1.42
gcc-2.4.5
gcc-2.5.8
gcc-2.7.2.2
gdb.3.1
gzip-1.2.4
hack.1.0.3
irc2.8.21
ircii-4.4
lynx-2.8.2
make-3.75
pine-3.87
screen-3.7.1
unzip522

All of these can be downloaded from here. I’m keeping all the source code (unaltered) in tap format for the SIMH emulator right here.

To get the C compilers going I had to build gcc 1.42 with the system compiler (cc/PCC) then use that version of GCC to build the next version. Once I had gcc 2.5.8 building, then I was able to build binutils 2.8.1 without issues, then rebuild gcc 2.5.8 to use binutils instead of the default system assembler so that I could build lynx and it wouldn’t barf because of the massive switch statement…

And no, -J didn’t help.

Speaking of lynx the search ability is broken because the function simply isn’t in 4.3 BSD (bsearch), and for pine, I had to make a fake tmpfile function that uses the /tmp/pinebox directory.

The gcc 2.5.8 package includes the C++ components, and I’m pretty sure I did with 2.7.2.2 as well. I’m not sure if GCC 3.x kept the VAX cpu so I haven’t pushed forward, but seeing that the cc1 exe is over 1mb it doesn’t seem worth it to push ahead.

I’ll have to see about including more games. The selection in this 4.3 release is kind of weak,

aardvark* boggle* hack@ monop* snake*adventure* ching* hangman* quiz* snscore*backgammon* cribbage* hunt* robots* teachgammon*battlestar* doctor* lib/ rogue* trek*bogdict* fortune* mille* sail* zork*

I’ll have to see what’s missing from where.. Also I notice that the arrow key bindings in terraterm are not working… I’ll have to dive into that as well. It may end up with a new re-relase of the emulator or a patch thing. I’ll have to see.

I should add a quick note on how to unpack these tap files. First you will need bzip2 on your native pc. You should be able to get one here.

Now just uncompress the file..

C:\Program Files (x86)\uwiscbsd>bzip2 -d lynx-2.8.2.binary.BSD-4.3.Uwisc.tap.bz2

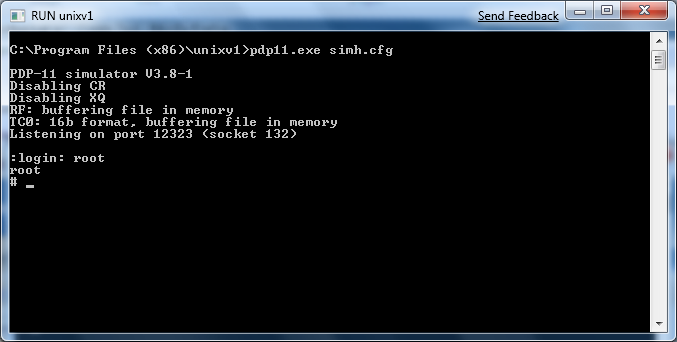
Now you need to go to the SIMH console window. It will say something like this in it:

VAX780 simulator V3.8-1
Listening on port 42221 (socket 376)
Waiting for console Telnet connection
Running

Hit Control+E and it’ll interrupt the simulator. Then we need to attach the tap file like so:

Simulation stopped, PC: 800018A3 (MTPR #0,#12)
sim> att ts0 lynx-2.8.2.binary.BSD-4.3.Uwisc.tap
sim> c

the att command will attach the tap file to the ts0 device. the c will tell the simulator to continue. Now just switch to a tty windows (or attach a pty), then it’s a simple matter of running the following commands:

myname# cd /
myname# mt rew
myname# tar -xvmf /dev/rmt12
x /usr/local/bin/gzip, 66560 bytes, 130 tape blocks
x /usr/local/bin/lynx, 949248 bytes, 1854 tape blocks
x /usr/local/lib/lynx.cfg, 97203 bytes, 190 tape blocks
myname# rehash

Thats about all it takes, now you can run lynx. If you so wish, you can run back to the SIMH console, and tell it to “det ts0” which will detach the tape image.

Announcing Research Unix v1 for Windows


Today I have decided that I should make a windows installer for the Unix v1 restoration project’s efforts on getting Unix v1 running.

For windows users this is a simple click & install project. This version of Unix v1 will support up to 8 simultaneous users on the system. Please note that this is a ‘rework’ of the v1 kernel from printouts to run a v2 userland, and the earliest C compiler from somewhere around v3-v4. It is not ‘pure’ per say as almost all v1 Unix documentation, tapes have been lost.

Simply install with all options, then click on the “RUN unixv1” link, and the kernel will load up (quickly!) to a login prompt. Login as root, and you should be good to go. Additional users can telnet into the host PC on port 12323 and they will be prompted to login. You can also use the “attach a pty” link, and it will launch teraterm pro onto the port 12323.

Because of the age of this system lots of commands that you take for granted did not exist back in 1972. A quick survey of my own use led to this:

Sync –doesn’t exist-
Reboot –doesn’t exist-
Vi –doesn’t exist-
Clear –doesn’t exist-
Cd –it’s actually chdir
Finger –doesn’t exist-
UUCP –doesn’t exist-
TCP/IP –doesn’t exist-

Remember it’s on a system with 32kb of ram. Don’t confuse Unix’s humble beginnings with the later v7 on the VAX, or the BSD releases that added TCP/IP networking.

I have included the PDF for the 2nd edition programmers guide. Since the userland is from this generation it is as close as you will get to a system manpage.

To exit the emulator, you can just close the SIMH process window, or hit Control+E then q to quit. I’m not sure of a ‘clean’ way to reset a Unix v1 machine. If there is significant disk corruption, I’d just recommend un-installing this program, then re-installing. It is no doubt the saving grace about running this emulated. As far as I know nobody has run this on a physical PDP-11. You would require an actual 11/20 because of how the multiply / divide instruction is handled. I won’t run on any of the bigger PDP-11’s.

The project page is:

http://sourceforge.net/projects/bsd42/

You can download this release from here:
https://sourceforge.net/project/downloading.php?group_id=204974&filename=Research-unixv1-0.3.exe&a=32102074

Updates on my sourceforge BSD/SIMH packages

On my project page I have made some new packages for 4.3BSD & 4.2BSD. Both of which can be downloaded here.

The updates include:
-moving to 3.8-1 of SIMH
-turning off unnecessary services in BSD
-moving from putty to Tera Term
-fixing PDF documentation links..

While not a major update, I figure since people are still downloading the 4.3 BSD RENO version as of TODAY I figure an update for these people wouldn’t be such a bad thing…

As before they are windows install packages, although I guess if you were so motivated you could extract them on some kind of *nix box..

xv6

While adding pages & stuff to http://gunkies.org/wiki/Unix_System_6 I came across this thing called xv6 at MIT.

http://pdos.csail.mit.edu/6.828/2006/index.html

What it is, is a port of Unix v6 to the x86 cpu. Before this, apparently they were using actual v6 on a PDP-11 emulator, however for their uses it would be easier to use something more i386 like. Now the cool part is that it’s SMALL. It harkens back to the day when people could actually read the code to their OS..

# cat *.c wc -l
6384
cat *.h wc -l
1019
cat *.S wc -l
311

Yes, that all there is to it! It litteraly takes 4.5 seconds to compile the whole thing, and setup a boot/root disk image on a 1.5 Ghz P4. The only ‘catch’ is that you need elf tools to build the thing.. Most Linux/NetBSD/OpenBSD folk ought to be in luck as they have been elf for quite some time now.. For windows people it’s just easier to install an OS into a VM that contains an ELF toolchain.. Don’t feel bad about compiling it in a VM as it will not be that big of an ordeal.

Download the inital source from here: http://pdos.csail.mit.edu/6.828/2006/src/xv6-rev0.tar.gz

If you feel brave go thru the labs.. They have stuff to add like virtual memory and whatnot, but they do walk you thru it, with guides and stuff… Remember this is out of a class, they don’t throw the kids to the wolves as it were.

Naturally since it’s v6, there is no TCP/IP, heck it doesn’t even have native tools… But it *can* run exe’s so it’s got enough to get your feet wet.. It’s dammed near tempting to complete the course work to flesh it out, grab 32v and start building a userland then bring it to 3BSD levels… But then I guess that is missing the point of a small readable Unix.

Anyways I found it interesting, no pictures on this one but either way its… different. Oh and the disk images run great under Qemu for what it’s worth.

MacMiNT

MacMint

MacMint

Recently I came across a Power Macintosh 5400/120 at a garage sale for the bargain price of $12! I couldn’t believe my luck, for under $20 I had a fully working computer!

Except that it won’t run OS X 1.0
And it only has 8Mb of ram.

Because of its memory restrictions it can only run Mac OS 7.6

What to do….

MacMINT!

MINT back in the day for AtariST’s was a UNIX like layer that ran on top of TOS (The Atari MS-DOS like OS) and provided basic Unix services. With the program aptly called JET (Just Enough TOS), the Macintosh 68000’s can setup a TOS compatible interrupt vector table, and run TOS procedure emulation to run the MINT binaries under MacOS!

So, it’s UNIX!

Sort of.

First you need to disable Virtual Memory… That’s bad.
Next it doesn’t support TCP/IP so it’s like being on Unix v6. But it’s fun at any rate.

You can find the binaries at my mirror of sra.co.jp here.

It includes gcc 2.5.8, and a somewhat basic environment. It does have lots of potential, but the biggest gripe is that 8Mb of ram just isn’t enough to do any serious compiling, and yes it will crash with virtual memory enabled. Also since it is 68000 programs it is running under emulation.. I have to admit that I am tempted to buy some kind of 68000 based Macintosh to run MacMiNT.

I know this may not be terribly useful to people, but then again someone has to do something fun/weird on a $12 machine. I fully expect to either get a ‘bigger’ 68000 box, or more ram and run something like simh on it. I can only wonder how usable the PDP11 or the Interdata32 are.

And for anyone, like me wants a ‘clear’ program, just because, here is a simple one, just remember to link with -ltermcap.

#include <stdio.h>
#include <stdlib.h>
#include <termcap.h>

void main()

{

char buf[1024];
char buf2[30];
char *ap;
char *clearstr;

ap=buf2;
tgetent(buf,getenv(“TERM”));
clearstr=tgetstr(“cl”,&ap);
fputs(clearstr,stdout);

}

Unix v7 for the x86!

Ok so this isn’t exactly emulation, since you can already run Unix v7 via simh’s PDP11 emulator, however you cannot overlook the coolness factor of this. They have ported v7 to the i486 cpu.

http://www.nordier.com/v7x86/index.html

In other news I’ve done a very preliminary port of the SLiRP stack from Qemu to SIMH. What is cool about this, is that it allows user mode networking so that you do not have to configure any drivers on the host. Currently I have 4.3BSD-Reno running under the MicroVAX II simulator. I’m going to add some extra utilities (gzip/gcc/gnumake/ircii-4/lynx?/wget?/apache?), convert the SMM into PDF’s, and make it into an install package, much like the 4.2BSD on sourceforge.

If anyone want’s to alpha test it, let me know, otherwise the next post will most likely be the release of 4.3BSD-RENO with NAT!

Happy Thanksgiving!

Running Xenix on qemu

Neither Bochs nor Qemu can boot the Xenix floppy diskettes all the way. Virtual PC & VMWare seemed to have no luck when the kernel transitions to protected mode. While on the way to work I had an idea. What if you had an old hard disk and a machine capapble of installing? Simply imaging the hard disk may be enough, since after that point you don’t need any floppy disks!

So this is what I have to show for the work today:

Freaking awesome, if I do say so myself.

OK, now how to do it? First you need an existing system running Xenix. If you have any plans on migrating an existing installation take note! This will preserve your install, just don’t format! On the Xenix boot screen take note of the geometry of the disk. We will need the geometry for later. Although I did a test boot without it, its a good thing to preserve it.

For virgin users, you will need a small disk to install on. I had a 2.5 GB disk that was too big, and 132MB disk that worked fine. I used a dell pc with 2 ide controllers for this. The longest task honestly was installing Xenix. I think that ran about 20 minutes. Once I was done, shutdown xenix, and put the disk in a machine running Windows (Linux fans can put it in their box, and just dd the Xenix disk into an image). Us poor Windows users don’t have dd. Anyways take not of what disk # it is, as Windows of course will not assign it a drive letter since it does not understand Xenix’s filesystem.

As you can see it’s disk #2 in this computer. Ok now we need to read the disk and write it into a disk image. I couldn’t find a util offhand to do it, so I wrote one real quick. Here is the source code, you’ll need a C compiler on your PC to compile it. I guess I could ‘neaten it up’ some, but for now here you go:

Source code

Executable

Yes I know its horrible, and blogger does a wonderfull job of formatting my program. Anyways compile it & run it. Now you’ll have a disk image of your hard disk!

Now for the fun part, running Xenix! We simply specifiy the hard disk geometry that we got earlier, and pass it the disk image that we created! I’m using an Quantum Pro drive ELS with the following geometry:

919 Cylinders
16 heads
17 bytes/sector

That translates into the following command:

qemu -M isapc -m 16 -hda xenix386-2.3.4.disk -hdachs 919,16,17 -L .


Let the good times roll!

–Update from 2011!

It is *NOW* possible to install Xenix in Qemu 0.14.0. You can read more about it here.