Running SWGEmu Core3

You probably don’t want to do this. Unless you enjoy giant empty islands. Maybe you just want to play it on an inaccessible network. Maybe your social anxiety is so bad that you like the idea of playing a MMO alone. It’s probably not a good idea to do this, in that at the end you’ll get bored quickly, but here we go!

Using Ubuntu 16.04 the steps on github.com/TheAnswer/Core3 got me running quick enough. It is rather intense to built, and for the most part it’s pretty easy, although running documentation seems to be … elsewhere. I’m sure it is somewhere, but I have no idea where.

The big thing to do is update the galaxy binding in the mysql database to reflect either the LAN address for local play, or the WAN address if you are natting/hosting on the internet.

mysql -uswgemu -p123456 swgemu -e “update galaxy set address=’192.168.13.128′ where galaxy_id=2;”

And for the heck of it, I thought I’d build swgemu for both 16 (swgemu-binary-Ubuntu_16.04.6_LTS_x86_64.tar.gz) & 18 (swgemu-binary-Ubuntu_18.04.2_LTS_x86_64.tar.gz). Keeping in mind for 18, that mysql was dumped for mariadb, so you need different packages. For a fresh 16 server, it’d go something like this:

apt-get install openssh-server
mkdir /tre
chown swgemu:swgemu /tre
(from a client machine)
pscp *tre [email protected]:/tre
apt-get install mysql-server screen libatomic1 libmysqlclient20 liblua5.3-0
tar -zxf swgemu-binary-Ubuntu_16.04.6_LTS_x86_64.tar.gz
cd swgemu
./sqlstuff.sh
mysql -uswgemu -p123456 swgemu -e "update galaxy set address='192.168.13.128' where galaxy_id=2;"

For version Ubuntu 18, you want the package mariadb-server & libmariadbclient18 instead of the mysql versions.

Make sure to set the TrePath!!!
vi conf/config.lua

Run the server, either under screen (./run.sh) or directly ./core3 if everything is going well, the [Core] will come up initialized..

(27 s) [AuctionManager] bazaar Checked 0 auction item(s) and updated 0 item(s)
(27 s) [AuctionManager] Bazaar terminal checks completed in 0ms
(27 s) [AuctionManager] Checking 0 vendor terminals
(27 s) [AuctionManager] vendor Checked 0 auction item(s) and updated 0 item(s)
(27 s) [AuctionManager] Vendor terminal checks completed in 0ms
(27 s) [AuctionManager] loaded auctionsMap of size: 0
(27 s) [FrsManager] ERROR - Unable to initialize frs manager, yavin4 disabled.
(27 s) [StatusServer] initialized
(27 s) [Core] initialized
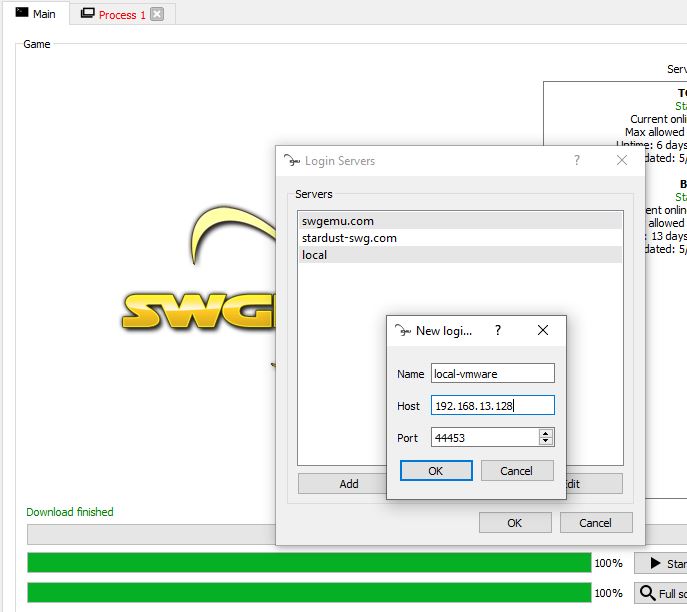
After that, you can add the new server as a login server from the swgemu launcher, and start it up. By default it will allow anyone to create a user with any password.
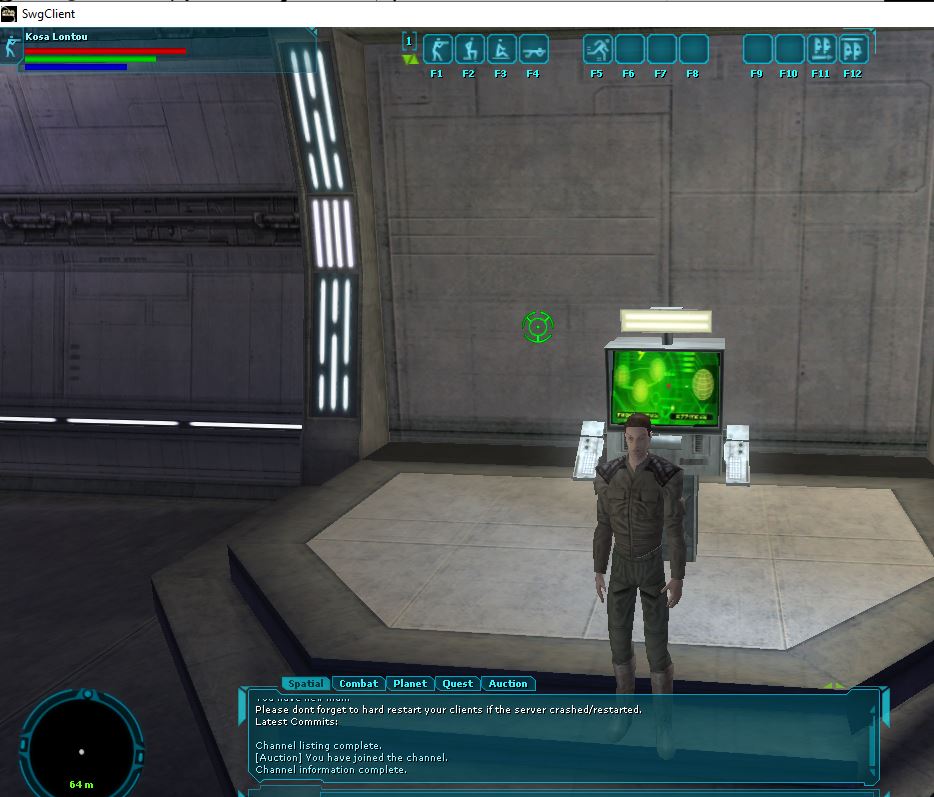
self hosted swgemu!

And here we are, all alone.
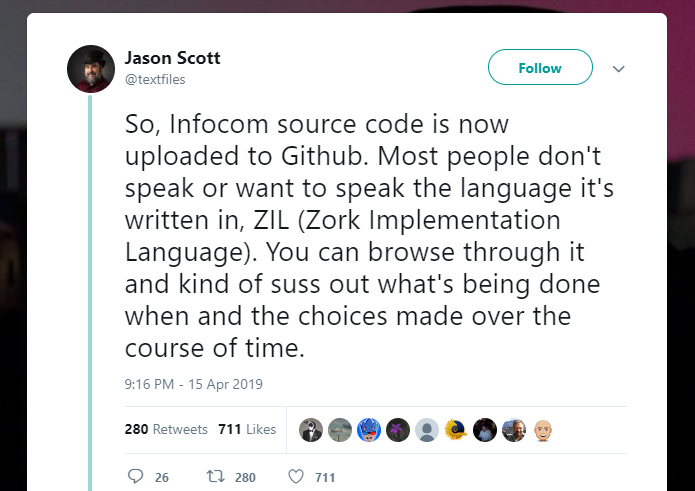
So the Infocom source code base was just ‘released’.

https://twitter.com/textfiles/status/1118005126457888768

So I woke up to this incredible news. Jason Scott at the most excellent archive.org had just uploaded the old Infocom source code to github. It’s from the infamous ‘found hard disk’ that has been mentioned going back to the failed game ‘The restaurant at the end of the universe’.

So looking at the repos here, you can see the latest ones are all Infocom. It’s best to get them all via git for reason below:

git clone https://github.com/historicalsource/abyss.git
git clone https://github.com/historicalsource/amfv.git
git clone https://github.com/historicalsource/arthur.git
git clone https://github.com/historicalsource/ballyhoo.git
git clone https://github.com/historicalsource/beyondzork.git
git clone https://github.com/historicalsource/borderzone.git
git clone https://github.com/historicalsource/bureaucracy.git
git clone https://github.com/historicalsource/checkpoint.git
git clone https://github.com/historicalsource/cutthroats.git
git clone https://github.com/historicalsource/deadline.git
git clone https://github.com/historicalsource/enchanter.git
git clone https://github.com/historicalsource/hitchhikersguide.git
git clone https://github.com/historicalsource/hollywoodhijinx.git
git clone https://github.com/historicalsource/infidel.git
git clone https://github.com/historicalsource/infocom-sampler.git
git clone https://github.com/historicalsource/journey.git
git clone https://github.com/historicalsource/leathergoddesses-gold.git
git clone https://github.com/historicalsource/leathergoddesses.git
git clone https://github.com/historicalsource/lurkinghorror.git
git clone https://github.com/historicalsource/minizork-1982.git
git clone https://github.com/historicalsource/minizork-1987.git
git clone https://github.com/historicalsource/minizork2-1988.git
git clone https://github.com/historicalsource/moonmist.git
git clone https://github.com/historicalsource/nordandbert.git
git clone https://github.com/historicalsource/planetfall.git
git clone https://github.com/historicalsource/plunderedhearts.git
git clone https://github.com/historicalsource/restaurant.git
git clone https://github.com/historicalsource/seastalker.git
git clone https://github.com/historicalsource/sherlock.git
git clone https://github.com/historicalsource/shogun.git
git clone https://github.com/historicalsource/sorcerer.git
git clone https://github.com/historicalsource/spellbreaker.git
git clone https://github.com/historicalsource/starcross.git
git clone https://github.com/historicalsource/stationfall.git
git clone https://github.com/historicalsource/suspect.git
git clone https://github.com/historicalsource/suspended.git
git clone https://github.com/historicalsource/trinity.git
git clone https://github.com/historicalsource/wishbringer.git
git clone https://github.com/historicalsource/witness.git
git clone https://github.com/historicalsource/zork-german.git
git clone https://github.com/historicalsource/zork.git
git clone https://github.com/historicalsource/zork1.git
git clone https://github.com/historicalsource/zork2.git
git clone https://github.com/historicalsource/zork3.git
git clone https://github.com/historicalsource/zorkzero.git

NEW the ‘gold’ versions of various games, these are the ones with built in help systems

git clone https://github.com/historicalsource/wishbringer-gold.git
git clone https://github.com/historicalsource/planetfall-gold.git
git clone https://github.com/historicalsource/zork1-gold.git
git clone https://github.com/historicalsource/hitchhikersguide-gold.git

The reason being of course that if there are multiple versions they are stacked. Now why is this important? Who cares? it’s all in ZILL which there is no compiler for, as the TOPS-20 tools are still lost?

Enter ZILF!

Written by Jesse McGrew in an apparent vacuum, this toolchain can Z3 machine based ZIL source code. Yes that’s right it’s a compiler!

I know Zork will get all the headlines, but back the 80’s I preferred Planetfall. I’m not even going to talk about the insanity that was the Hitchhiker’s guide to the galaxy.

Zilf is really only suited for Z3 compilation, and looking at planetfall there are two commits of note:

$ git log| tail -11 commit e85ca899aac575e74a4b3845f44d09a891c1563a Author: historicalsource Date: Sat Apr 13 21:35:51 2019 -0400 Final Revision commit 281bd3417faada8011397244d4bfaad562cb7bfc Author: historicalsource Date: Sat Apr 13 21:34:42 2019 -0400 Revision 37 (Original Source)

The source for the Final version won’t build with ZILF. However the Revision 37 source will!

$ git checkout 281bd3417faada8011397244d4bfaad562cb7bfc Note: checking out '281bd3417faada8011397244d4bfaad562cb7bfc'. You are in 'detached HEAD' state. You can look around, make experimental changes and commit them, and you can discard any commits you make in this state without impacting any branches by performing another checkout. If you want to create a new branch to retain commits you create, you may do so (now or later) by using -b with the checkout command again. Example: git checkout -b HEAD is now at 281bd34... Revision 37 (Original Source)

Ok, now let’s trash the directory! (you did backup the repo first, right?)

C:\temp\zilf\zilf-0.8\planetfall>..\bin\Zilf planetfall.zil ZILF 0.8 built 3/19/2017 1:34:17 PM Planetfall [warning MDL0417] C:\temp\zilf\zilf-0.8\planetfall\MISC.zil:509: ROUTINE: only 3 routine arguments allowed in V3, so last 2 "OPT" arguments will never be passed in INSERT-FILE called at planetfall.zil:14 in IFILE called at planetfall.zil:25 [warning ZIL0208] C:\temp\zilf\zilf-0.8\planetfall\SYNTAX.zil:143: preaction routine mismatch for 'V?ZAP': using PRE-ZAP as before [error ZIL0113] C:\temp\zilf\zilf-0.8\planetfall\MISC.zil:150: SETG: argument 1: bare atom argument must be a variable name [error ZIL0113] C:\temp\zilf\zilf-0.8\planetfall\MISC.zil:315: SETG: argument 1: bare atom argument must be a variable name [error ZIL0113] C:\temp\zilf\zilf-0.8\planetfall\MISC.zil:317: SETG: argument 1: bare atom argument must be a variable name [error ZIL0113] C:\temp\zilf\zilf-0.8\planetfall\MISC.zil:319: SETG: argument 1: bare atom argument must be a variable name [warning ZIL0504] C:\temp\zilf\zilf-0.8\planetfall\PARSER.zil:244: treating SET to 0 as true here [warning ZIL0502] C:\temp\zilf\zilf-0.8\planetfall\VERBS.zil:156: RETURN value ignored: block is in void context [warning ZIL0204] C:\temp\zilf\zilf-0.8\planetfall\VERBS.zil:1879: no such global variable 'WHERE', using the local instead [warning ZIL0505] C:\temp\zilf\zilf-0.8\planetfall\COMPTWO.zil:3035: COND: clauses after else part will never be evaluated [warning ZIL0308] : too many parts of speech for 'PORT': Object (C:\temp\zilf\zilf-0.8\planetfall\GLOBALS.zil:78), Adjective (C:\temp\zilf\zilf-0.8\planetfall\GLOBALS.zil:224), Direction (C:\temp\zilf\zilf-0.8\planetfall\GLOBALS.zil:11) [warning ZIL0306] C:\temp\zilf\zilf-0.8\planetfall\GLOBALS.zil:224: discarding the Adjective part of speech for 'PORT' [warning ZIL0308] : too many parts of speech for 'BRUSH': Object (C:\temp\zilf\zilf-0.8\planetfall\GLOBALS.zil:548), Adjective (C:\temp\zilf\zilf-0.8\planetfall\GLOBALS.zil:549), Verb (C:\temp\zilf\zilf-0.8\planetfall\SYNTAX.zil:283) [warning ZIL0306] C:\temp\zilf\zilf-0.8\planetfall\GLOBALS.zil:549: discarding the Adjective part of speech for 'BRUSH' 10 warnings 4 errors C:\temp\zilf\zilf-0.8\planetfall>dir *zap Volume in drive C is BOOTCAMP Volume Serial Number is 903B-72D4 Directory of C:\temp\zilf\zilf-0.8\planetfall 04/17/2019 08:32 PM 247,803 planetfall.zap 04/17/2019 08:32 PM 162,476 planetfall_data.zap 04/17/2019 08:32 PM 1,336 planetfall_freq.zap 04/17/2019 08:32 PM 40,495 planetfall_str.zap 4 File(s) 452,110 bytes 0 Dir(s) 238,542,704,640 bytes free C:\temp\zilf\zilf-0.8\planetfall>..\bin\zapf planetfall.zap ZAPF 0.8 Reading planetfall.zap Reading planetfall_freq.zap Reading planetfall_data.zap Reading planetfall_str.zap Measuring.. Assembling Wrote 121952 bytes to planetfall.z3

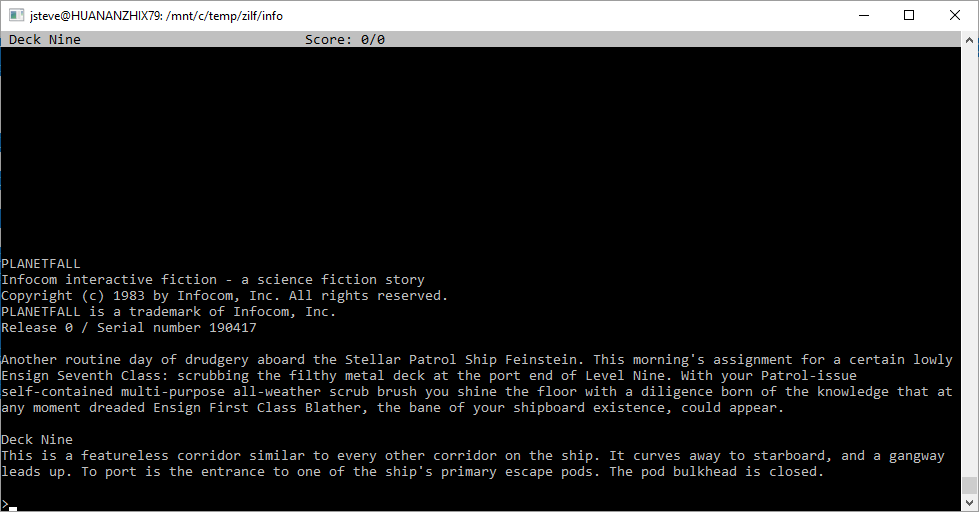
Sure it said 4 errors, but it compiled! Using a z3 or higher interpreter we can load up Planetfall

Planetfall!

At first glance it may look the same, but check the serial number. 190417. That’s today!

I’ve played it about 1/5th of the way though. There is a walkthru here.

There seems to be so much in flux about this source dump. replicate while you can!

Wasting some cycles on FrontVM

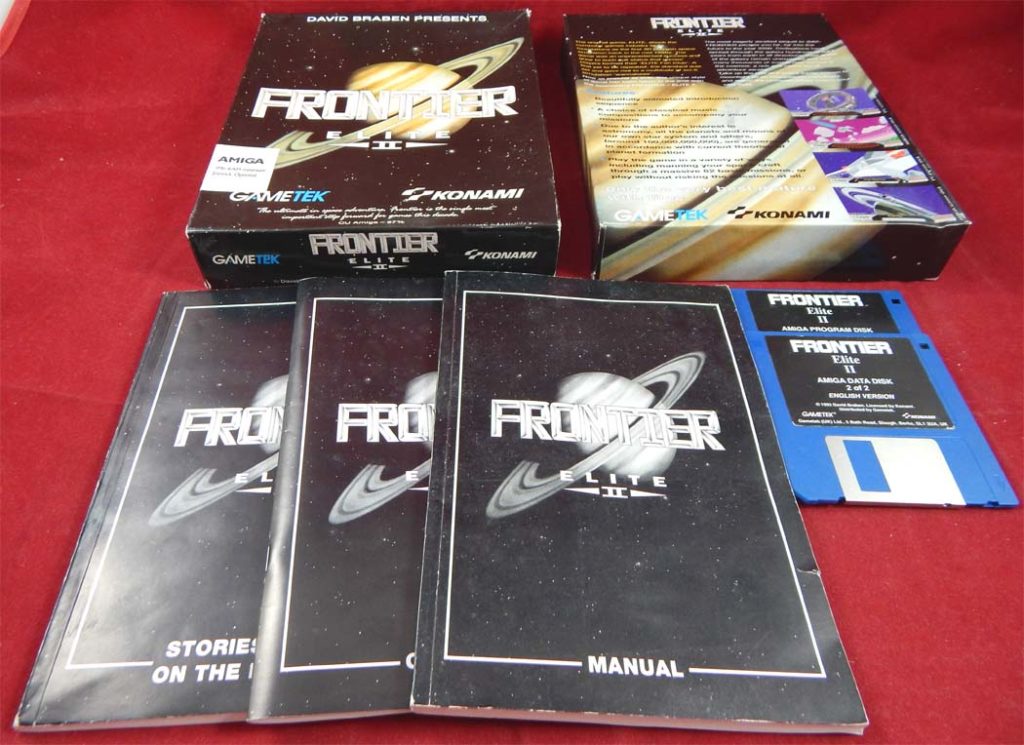
Frontier!

A while ago I had chased FrontVM to moretom.net and found 2 links. One from 2003 which is a dead link, and the 2004 version which was archived by the wayback machine!

It was an interesting build, as it still used 68000 emulation from Hatari/UAE this pre-dates the 68000 to C or i386 ASM. However since it ran (mostly) the original code, it was more ‘feature complete’, although loading save games is broken for some reason (I think the decryption was not disassembled correctly). It was actually a stupid file mode setting. I just updated the source & put out a new binary, testing save games between Linux &Windows.

Anyways, it originally built on Cygwin, so I filled in the missing bits, and have it building on both MinGW & Visual C++

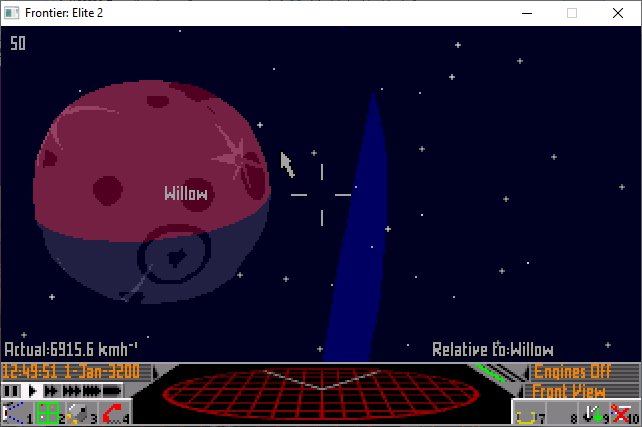
Parked outside Willow in the Ross 154 system

So yeah, it’s Frontier, for the AtariST with the OS & Hardware calls abstracted, still running the 68000 code under emulation. I think it’s an interesting thing, but that’s me.

I put it and the other original versions I found over on sourceforge.net

Download Frontvm

Oddly enough it’s already been downloaded, so go figure.

ttyplot – a real time plotting utility for the terminal

(This is a guest post from Antoni Sawicki aka Tenox)

I spend most of time in a day staring at a terminal window often running various performance monitoring tools and reading metrics.

Inspired by tools like gtop, vtop and gotop I wished for a more generic terminal based tool that would visualize data coming from unix pipeline directly on the terminal. For example graph some column or field from sar, iostat, vmstat, snmpget, etc. continuously in real time.

Yes gnuplot and several other utilities can plot on terminal already but none of them easily read data from stdin and plot continuously in real time.

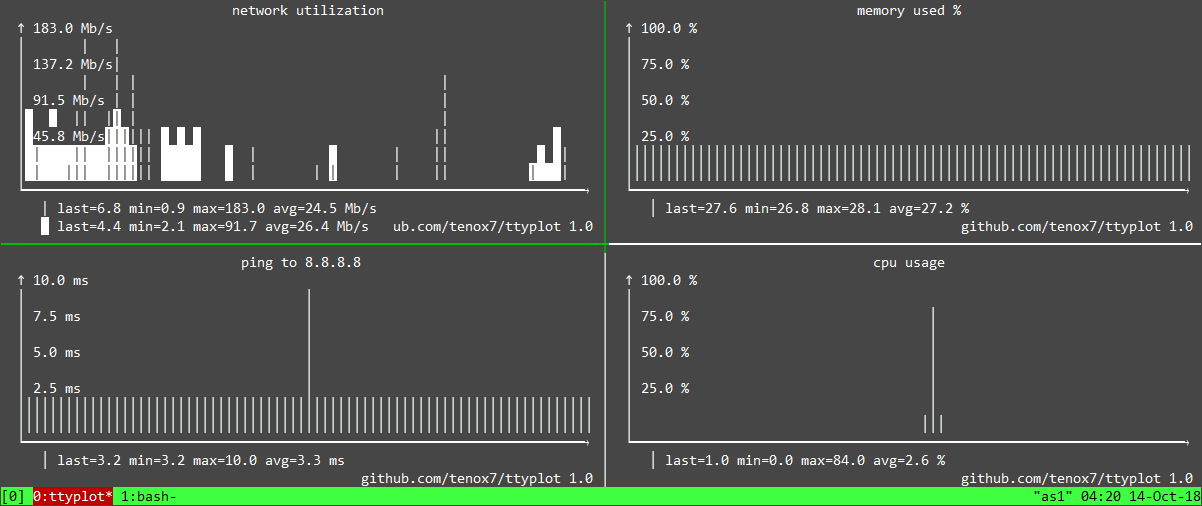
In just couple of evenings ttyplot was born. The utility reads data from stdin and plots it on a terminal with curses. Simple as that. Here is a most trivial example:

To make it happen you take ping command and pipe the output via sed to extract the right column and remove unwanted characters:

ping 8.8.8.8 | sed -u 's/^.*time=//g; s/ ms//g' | ttyplot 

Ttyplot can also read two inputs and plot with two lines, the second being in reverse-video. This is useful when you want to plot in/out or read/write at the same time.

A lot of performance metrics are presented in as a “counter” type which needs to be converted in to a “rate”. Prometheus and Graphana have rate() or irate() function for that. I have added a simple -r option. The time difference is calculated automatically. This is an example using snmpget which is show in screenshot above:

{ while true; do snmpget -v 2c -c public 10.23.73.254 1.3.6.1.2.1.2.2.1.{10,16}.9 | gawk '{ print $NF/1000/1000 }'; sleep 10; done } | ttyplot -2 -r -u "MB/s"

I now find myself plotting all sorts of useful stuff which otherwise would be cumbersome. This includes a lot of metrics from Prometheus for which you normally need a web browser. And how do you plot metrics from Prometheus? With curl:

{ while true; do curl -s http://10.4.7.180:9100/metrics | grep "^node_load1 " | cut -d" " -f2; sleep 1; done } | ttyplot

If you need to plot a lot of different metrics ttyplot fits nicely in to panels in tmux, which also allows the graphs to run for longer time periods.

Of course in text mode the graphs are not very precise, but this is not the intent. I just want to be able to easily spot spikes here and there plus see some trends like up/down – which works exactly as intended.I do dig fancy braille line graphs and colors but this is not my priority at the moment. They may get added later, but most importantly I want the utility to work reliably on most operating systems and terminals. 

You can find compiled binaries here and source code and examples to get you started – here.

If you get to plot something cool that deserves to be listed as an example please send it on!

MS-DOS v1.25 and v2.0 Source Code now on github

This repo contains the original source-code and compiled binaries for MS-DOS 1.25 and MS-DOS 2.0.

These are the same files originally shared at the Computer History Museum on March 25th 2014 and are being (re)published in this repo to make them easier to find, reference-to in external writing and works, and to allow exploration and experimentation for those interested in early PC Operating Systems.

License

All files within this repo are released under the MIT (OSI) License as per the LICENSE file stored in the root of this repo.


At first I just thought it was simply just another mirror of the original source that had been released that had some incredible restrictions.

Original license:
To access this material, you must agree to the terms of the license displayed here, which permits only non-commercial use and does not give you the right to license it to third parties by posting copies elsewhere on the web.

However the restrictions have been lifted, and MS-DOS 1.25 & 2.0 are now available under a MIT license.

So this is actually very awesome!

You can download it here: https://github.com/Microsoft/MS-DOS.

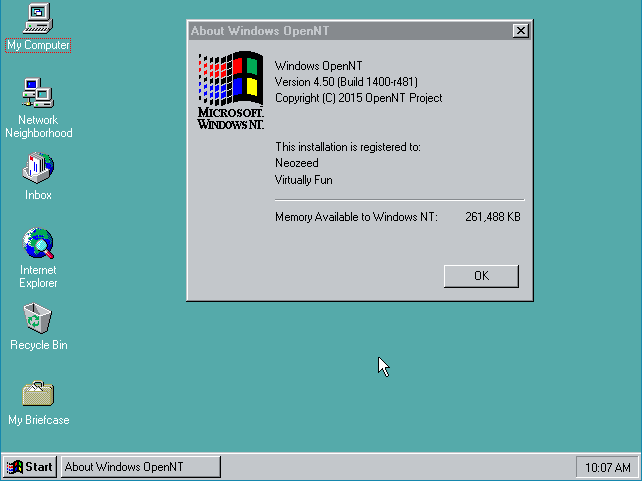
OpenNT 4.5 revisited

OpenNT 4.5 installed

It’s been a few years since Tenox had mentioned OpenNT 4.5, and in that time the project pages, repositories and well just about everything has vanished.  It seems that the hardest thing to do with OpenNT had become finding it.

Then I found this over on vetusware, and with my curiosity piqued, I thought I’d check it out.

As mentioned the first thing to do is combine the parts, and create the single 7zip file, and then extract that.

copy /B "OpenNT45(Source).z00" + "OpenNT45(Source).z01" + "OpenNT45(Source).z02" "OpenNT45(Source).7z"

Extracting that will give a simple ISO file, weighing in at 1.7GB!

While not obvious at first, there is a readme in the ISO that provides instructions on how to compile it.  Basically it boils down to a few main points:

  • xcopy the CD onto a ‘W’ drive, or subst any other drive to ‘W’ as apparently the build process requires it to be on W.  Did I mention that the CD needs to be copied onto the W drive?
  • Run the ‘setup.cmd’ file to configure the environment and get the build process ready
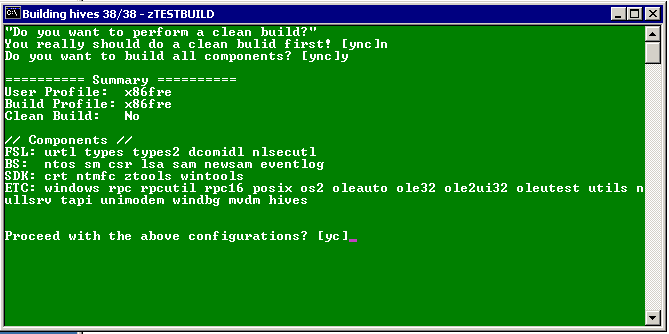
  • run zTESTBUILD and do a clean build.  It will run and eventually fail.
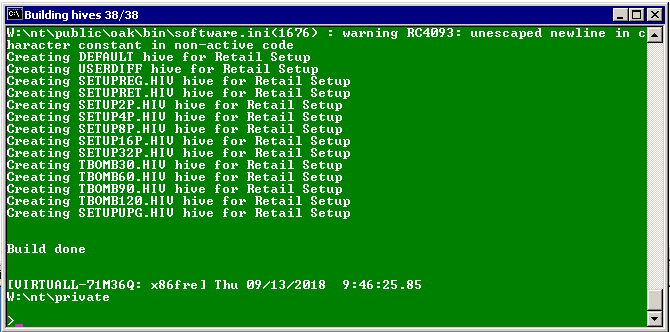
  • run zTESTBUILD again, but do not do the clean build, and it should finish
  • run \cdimg\genall to create the ISO image

So with those points basically figured out after the fact, let’s go!

The first thing to do is either create a VM to compile this in, or just xcopy and go.  The big requirement though is that it must be a 32bit version of Windows, as part of the build process requires the ability to use NTVDM.  For simplicity sake, I chose Windows 2000 server, so I could allocate 2GB of RAM, and 4 CPU cores.  During the build it doesn’t use that much memory, cores are more so important during various phases of the build that can seemingly use any and all cores, while various other parts only run on a single core.

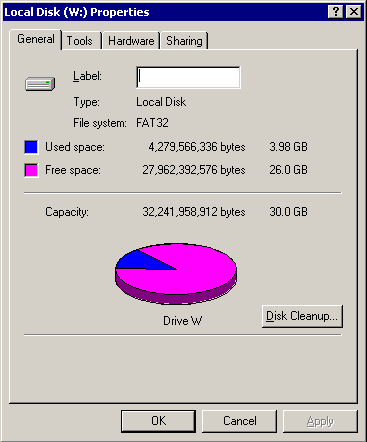
OpenNT disk space after a build.

I chose to use a separate ‘C’ drive, and ‘W’ drive for the 2000 VM.  With no idea how much space to give it, I setup a 32GB W drive, which after the build takes up just under 4GB of space.  

With the VM installed, and the W drive formatted, and the contents of the CD copied over, it’s time to start the build.

Phase 1

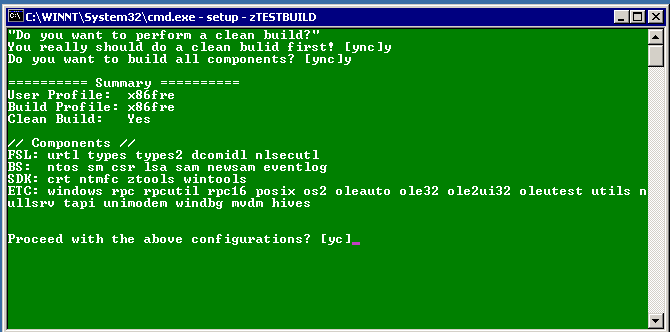
So basically you just answer ‘Y’ to zTESTBUILD.cmd and it’ll do it’s thing.  For me this took about 42 minutes for this to run until it failed, as expected.

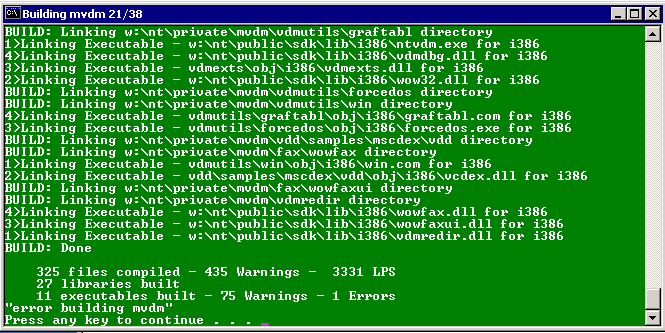
Failure building MVDM

Looking at the \binaries\nt directory there was now 1,274 files currently built.  Naturally with the failure this is not a complete build.

Starting phase 2

After this failure you then re-run zTESTBUILD.cmd but this time answer ‘No’ to the clean build.

This step took about 15 minutes to complete.


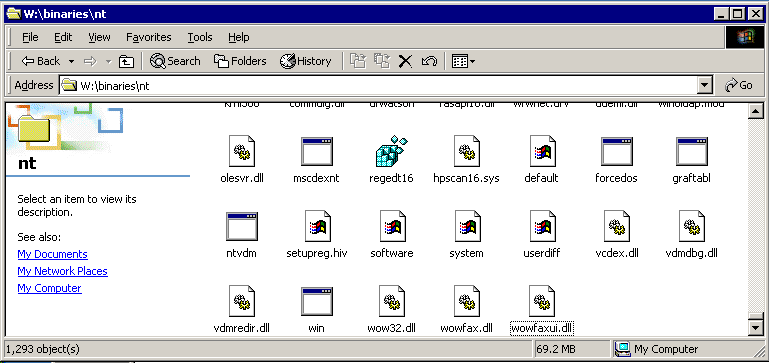
The \binaries\nt directory now has 1293 files.

Checking the binaries\nt directory there is now 1,293 files and looking at the entire directory there is 2,624 files taking up about 120MB of space.

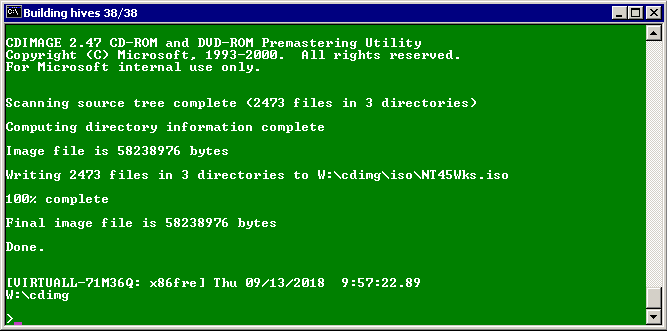
With the OS compiled, all that remains is to create an install CD and boot it up.  running \cdimg\genall.cmd will create the ISO image.

Creating the ISO with CDIMAGE 2.47

This will compress almost all the files, and took another 15 minutes to create the CD.  After this is all done it’s just a matter of setting up a VM to run the NT45Wks.iso file.

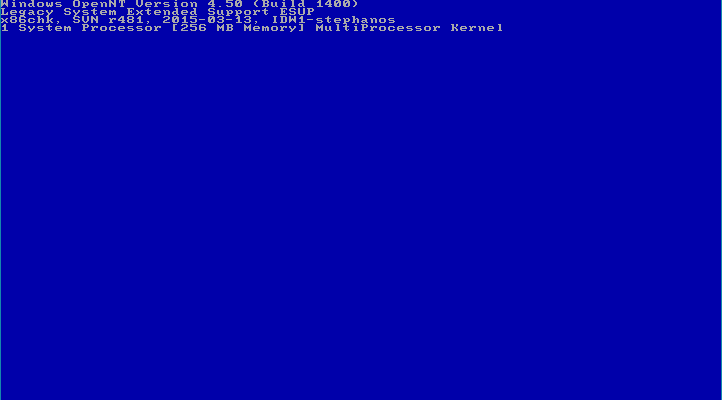
Bluescreen bootup of OpenNT 4.5

The first thing you notice is the extra banners on OpenNT 4.5, when compared to a retail copy of NT 4.0.

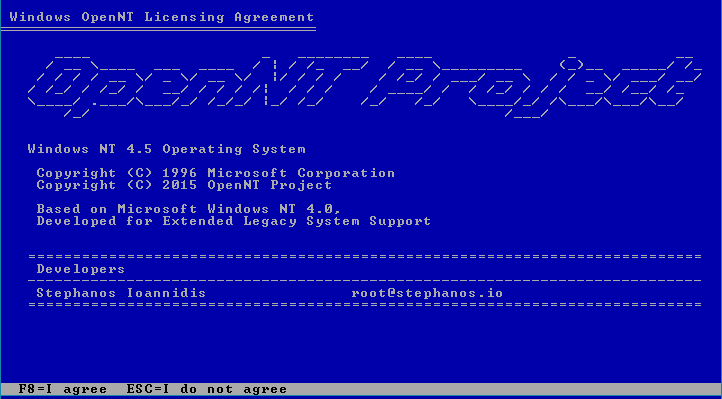
OpenNT Project

And of course the different branding during setup.  One of the nice things about OpenNT is that it can format filesystems directly as NTFS, instead of the old way of first creating a FAT partition, and converting it to NTFS.  This ought to bypass all the limitations of disk/partition sizes for the older NT.

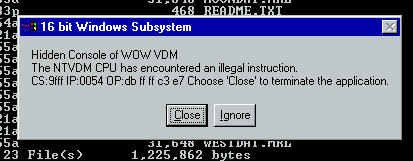
WOW Crash

Running OpenNT 4.5 on VMWare seemed to run the Win32 stuff okay, although Win16/WOW stuff immediately crashed, and MS-DOS was incredibly slow with screen redraw issues. I know that NT 4.0 builds prior to SP 6 have issues with many newer emulation/hypervisors even when CPU levels are set to regular Pentium.

MS-DOS DPMI stuff like DooM are incredibly slow, and seemingly lock up when launching.

Oddly enough the OS/2 subsystem works just fine.

So there it is, the nearly vanished ‘OpenNT 4.5’.

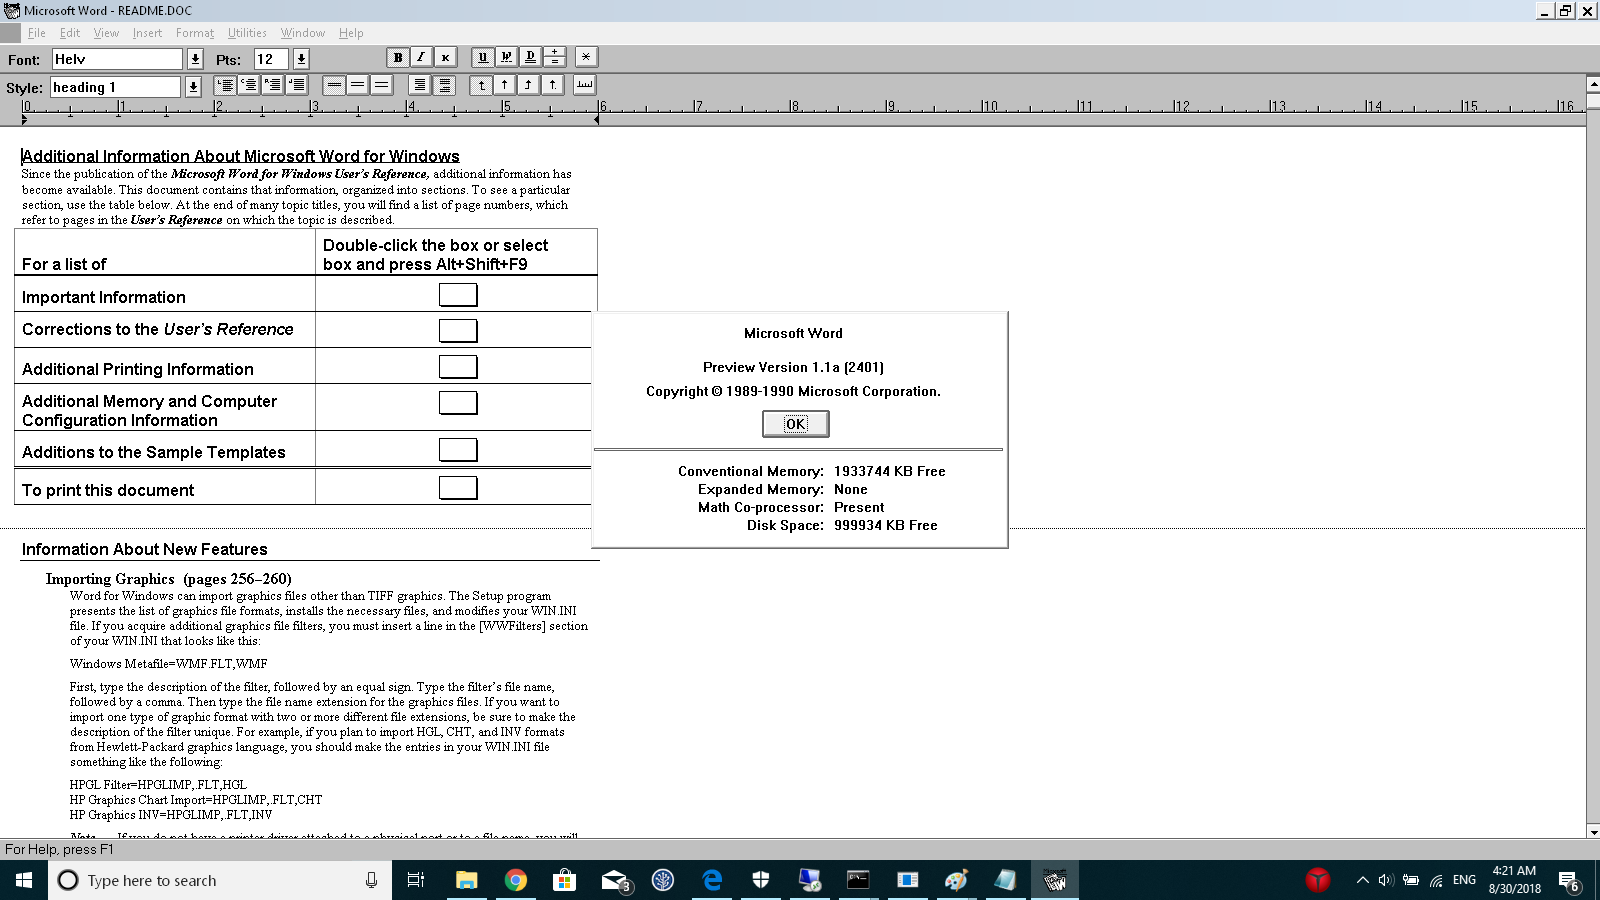
Compiling Microsoft Word 1.1a for Windows

A while back, Microsoft had famously released the source code to Word for Windows 1.1a (and OS/2 as well!), to some fanfare.

People were excited, but then kind of dismayed as they couldn’t really do much with it.  Oddly enough the source code release really didn’t have any notes on how to build it, although everything needed is included.  I went looking for information on how to build Word to see why it keeps doing weird things on WineVDM, and I came across this thread on betaarchive: 

https://www.betaarchive.com/forum/viewtopic.php?t=31096

Special props to yksoft1 for getting it to build in the first place, and Ringding for noticing that the OS/2 supplied compiler binaries can be re-bound to run under MS-DOS using a MS-DOS Extender.

So I went ahead and fired up Qemu and within an hour I had done it!

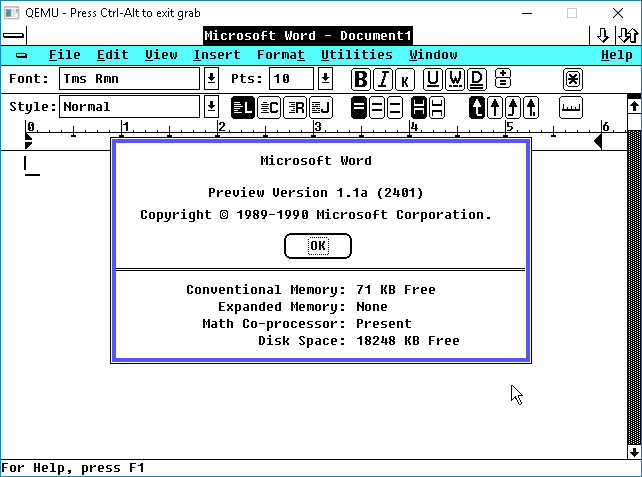
Word 1.1a compiled and on Windows 2.11

Well this is great fun, and all, but there isn’t a heck of a lof of people with Windows 2.x around anymore.  And of course Word 1.1a really wanted to have 2.11 or higher.  It has some hooks for what would be Windows 3.0 although I think it was much more.  Although it certainly doesn’t want to run (unmodified) under debug release 1.14.

So now that the world has gone beyond Win16 OS’s what can you do?

Well the tip of  WineVDM will run it!

Word 1.1a on Windows 10 using WineVDM

So now there is some new life for this old word processor.

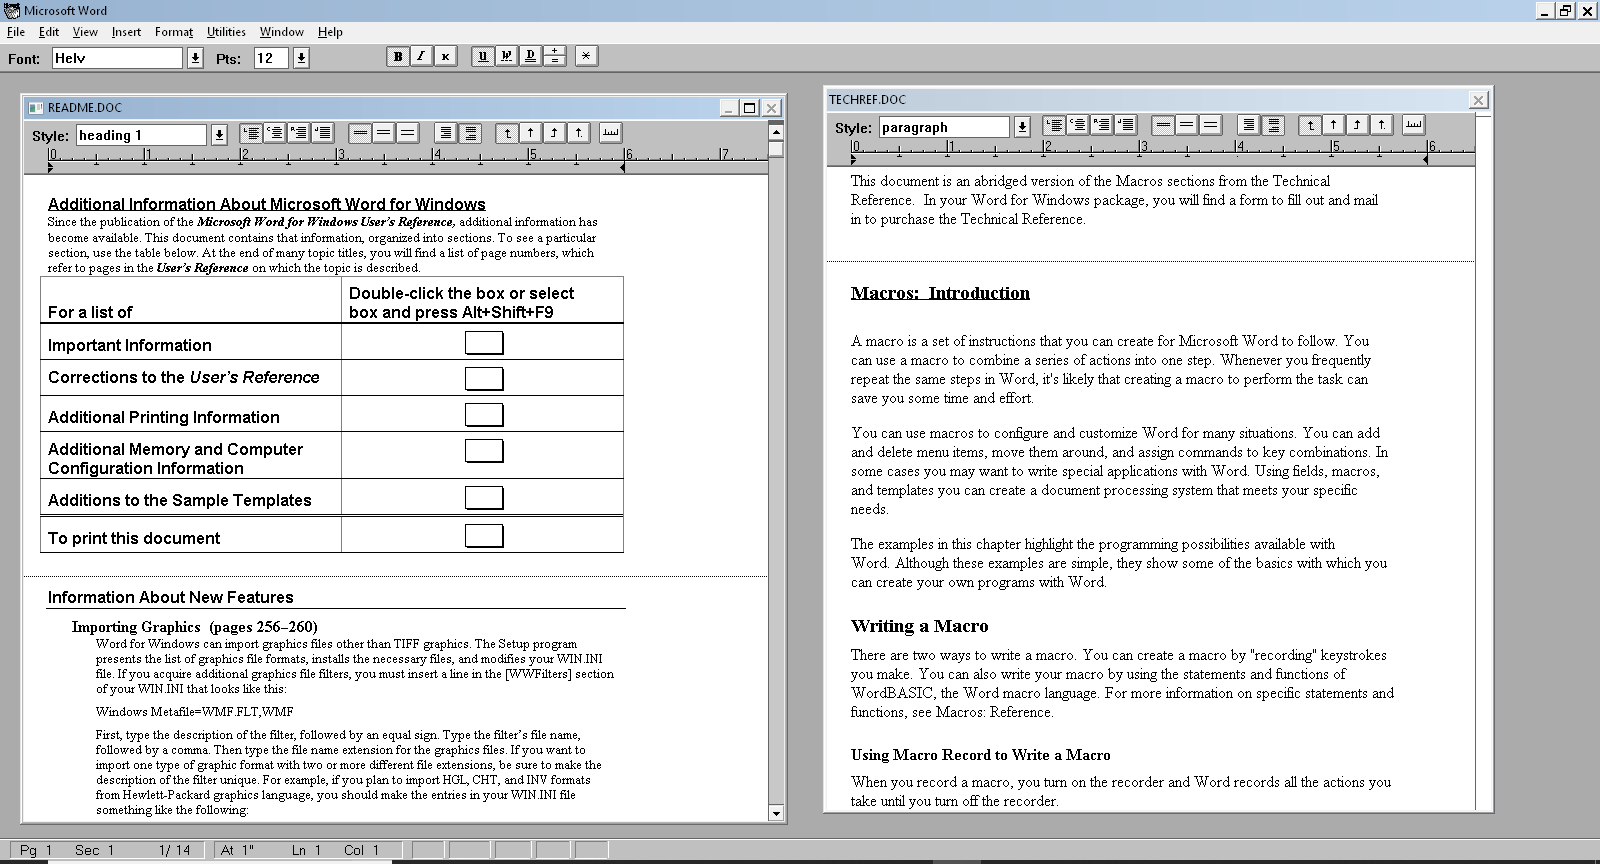
Another fun thing in Word 1.1a is that it has an early implementation of MDI letting you view and work with several documents at once.  Naturally you would need a massive monitor, which we all have today.  Although people tend to just launch more than one copy of Word to accomplish this.

Early MDI

So now on my 64bit machine I can not only play with the source to Word, but I can run it at unimaginable resolutions on my modern machine!

My crappy CVS archive of old crap is now online via pserver!

So yeah HOURS of fun.  Even though the database is only a few gigabytes, it took a while to rebuild everything as ‘cvs pserver’ package for Debian runs in a chroot of /var/lib/cvsd which doesn’t play nice when your archives are all created in /var/lib/cvs .. The cvs-web VM doesn’t seem to care, but the logon process for anonymous sure does.

Anyways the following archives are online:

  • 32v
  • binutils
  • cblood
  • Corridor8
  • CSRG
  • darwin0
  • darwinstep
  • djgppv1
  • dmsdos
  • doom
  • dynamips
  • frontvm
  • gas
  • gcc1x
  • gcc2x
  • gcc130-x68000
  • gdb
  • linux001
  • linux
  • lites
  • mach
  • MacMiNT
  • MiNT
  • net2
  • nextstep33examples
  • pgp
  • plan9next
  • qemu
  • quake1
  • quake2
  • research
  • rsaref
  • sbbs
  • simh
  • TekWar
  • tme
  • truecrypt
  • uae
  • winnt
  • WitchavenII
  • Witchaven
  • xinu
  • xnu

Say you are interested in Research Unix v6, you logon to the CVS server:

cvs -d:pserver:[email protected]:/research login

And in the case of research & CSRG there is multiple modules (directories) and it’s probably best to list them to see which one you want.

$ cvs -d:pserver:[email protected]:/research ls
CVSROOT
researchv10dc
researchv10no
researchv3
researchv6
researchv6id
researchv6kw
researchv7hs
researchv7kb
researchv7ni
researchv7th
researchv8dc
researchv9

Which in this case I tried to keep it somewhat sane with each found distro with some initials when there was more than one… As always its easier to look through the web interface (for me) and then decide which one to checkout.

And then you can checkout v6

cvs -d:pserver:[email protected]:/research checkout researchv6

Of if you wanted the Emacs that was in Research Unix v9:

cvs -d:pserver:[email protected]:/research checkout researchv9/cmd/emacs

Ok, that’s great, but how about something that has all kinds of source overlaid in varous branches, like my doom repository?  First login, and then check out the default repository:

cvs -d:pserver:[email protected]:/doom login
cvs -d:pserver:[email protected]:/doom checkout doom

Now we can run this quick thing I threw together to get each of the branches.

cvs -d:pserver:[email protected]:/doom log -h | grep -P ‘^\t’ | awk ‘{print $1}’ | sort|uniq| sed -e ‘s/://g’

And now this will tell us there is the following branches:

djgppdoom
heretic
hexen
iD
jagdoom
linuxdoom
windoom

So, let’s say I want to look at the Jaguar port, with the branch name of jagdoom:

cvs -d:pserver:[email protected]:/doom checkout -r jagdoom doom

You will get errors about not having write permission into the CVS repository to set your current tag level, but that is fine, because you don’t have permission.  And now if you check the directory it’s at the Jaguar port level, as the 68000 based assembly is now in the directory:

$ ls doom/*gas
doom/decomp.gas doom/music.gas doom/p_sight.gas doom/r_phase3.gas doom/r_phase7.gas
doom/dspbase.gas doom/p_base.gas doom/p_slide.gas doom/r_phase4.gas doom/r_phase8.gas
doom/eeprom.gas doom/p_move.gas doom/r_phase1.gas doom/r_phase5.gas doom/r_phase9.gas
doom/gpubase.gas doom/p_shoot.gas doom/r_phase2.gas doom/r_phase6.gas doom/sfx.gas
$

I don’t think many will care, but well for those who do, here you go.  Anyways the web browsing from unix.superglobalmegacorp.com should be working just fine.  Although I did move a bunch of stuff around, so people who like to deep link, I guess you are kinda screwed.