Manually converting a Proxmox VM to Qemu

I know this is a weird one. I got handed a backup of a broken VM and have to fix it. I was given a vma file which of course you basically need a Proxmox machine to use the vma command to unpack it.

Luckily you can happily install Proxmox into a VM that can’t properly run Proxmox, but it’ll give access to the utility to extract it.

It’s pretty self-explanatory other than the ‘tmp’ directory to extract to mustn’t exist. Weird.

vma extract vzdump-qemu-101-2024_10_07-12_26_33.vma tmp

In this case it extracted 2 raw files, and a config file.

disk-drive-sata0.raw
disk-drive-sata1.raw
qemu-server.conf

And looking at the config file we have:

boot: order=sata1;sata0;ide2;net0
cores: 4
cpu: x86-64-v2-AES
ide2: none,media=cdrom
memory: 8192
meta: creation-qemu=8.0.2,ctime=1691052188
name: KSA-ZABBIX-01
net0: virtio=C2:39:27:42:56:6B,bridge=vmbr0,firewall=1
numa: 0
onboot: 1
ostype: l26
sata0: local-lvm:vm-101-disk-0,size=500G
sata1: local-lvm:vm-101-disk-1,size=10G
scsihw: virtio-scsi-single
smbios1: uuid=6e0757ff-565e-429d-8f47-3b425b89253e
sockets: 2
vmgenid: 70b4cbfe-de9f-4690-b7a1-64e68f4c5c30
#qmdump#map:sata0:drive-sata0:local-lvm:raw:
#qmdump#map:sata1:drive-sata1:local-lvm:raw:

Ok the first thing is those raw files are ENORMOUS. Convert them to a better container, I went with vmdk because … reasons.

qemu-img convert -f raw -O vmdk disk-drive-sata0.raw disk-drive-sata0.vmdk
qemu-img convert -f raw -O vmdk disk-drive-sata1.raw disk-drive-sata1.vmdk

I then could copy the VMDK’s to my machine and then destroy the Proxmox VM.

Since I’m weird I’m going to do this on Windows, using the Win64 port of Qemu. Because, why not? Also, I’m going to setup a different NAT network, and some port redirect:

"\Program Files\qemu\qemu-system-x86_64.exe" -net none -serial none ^
        -m 8192 ^
        -device virtio-net-pci,mac=C2:39:27:42:56:6B,netdev=net0 ^
        -netdev user,id=net0,net=192.168.1.0/24,dhcpstart=192.168.1.10,hostfwd=tcp::8080-:80,hostfwd=tcp::8022-:22 ^
        -device ahci,id=ahci ^
        -drive id=disk,file=disk-drive-sata0.vmdk,if=none ^
        -device ide-hd,drive=disk,bus=ahci.0,bootindex=2 ^
        -drive id=disk2,file=disk-drive-sata1.vmdk,if=none ^
        -device ide-hd,drive=disk2,bus=ahci.1,bootindex=1 ^
        -boot order=c,menu=on ^
        -smp 2 ^

So, I managed to keep the virtio network device, bind it to a DHCP network of 192.168.1.0/24 with the first address starting at 192.168.1.10. I also redirect port 8080 to port 80, along with 8022 to 22, allowing basic HTTP & SSH access into the VM.

The weird requirement is the 2 SATA disks, where the 2nd disk is the bootable one. I don’t know why it was configured this way, but I just preserved it.
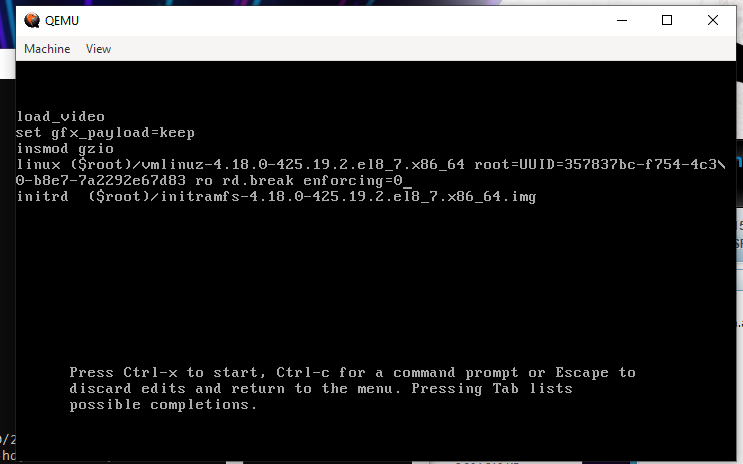
I had to reset the root password, so this was a bit weird as I had to clear so much nonsense of the boot setup, basically pruning everything after ro, to add “rd.break enforcing=0”
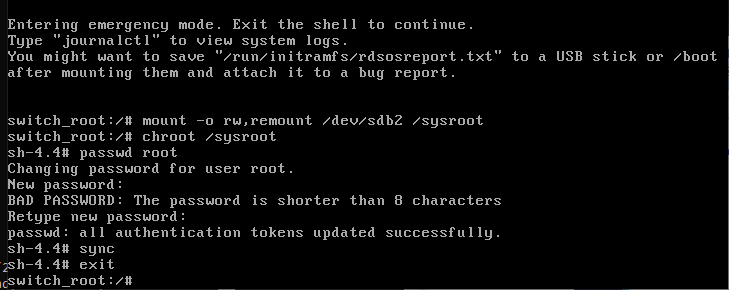
With that, it was a matter of mounting the /sysroot as readwrite, chrooting into it, and then setting the password. yay.

Now I can reboot the VM on my desktop and have it running on Qemu, where I could bring up the WebUI for the mystery product and have it all running as a tame user mode application.

Nice!

The CLI syntax is always evolving and getting complex but don’t give up hope!

Installing Windows NT 4.0 on Proxmox/VE

Proxmox/VE

Proxmox/VE

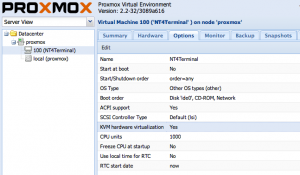
Ok, Ok I know 99% of the world won’t care, but here we go.  I just setup a Proxmox/VE server on a friends PC, and felt like installing a NT 4.0 Terminal server.. So after getting the ISO onto the server, I went through the setup to get a quick blue screen.  Much like Qemu, KVM won’t work out of the box, you have to first nudge the CPU level down to ‘pentium’ or 486, and for the install you have to disable the KVM (accelerated) version, and use the generic Qemu installer.

Also I would alter the config file, along with a global config to turn on the AMD PCNet network adapter.

In the  /usr/share/pve-manager/ext4/pvemanagerlib.js file, just go ahead and add in your NIC’s entries:

[‘rtl8139’, ‘Realtec RTL8139’],
[‘e1000’, ‘Intel E1000’],
[‘pcnet’, ‘AMD PcNet’],
[‘ne2k_pci’, ‘NE2k PCI’],
[‘virtio’, ‘VirtIO (paravirtualized)’]

And in the /etc/pve/nodes/proxmox/qemu-server directory, you will see stuff like 100.conf, and look for a line like this:

net0: rtl8139=56:65:DB:52:7F:F2,bridge=vmbr0

And change it to the AMD PCNet ..

net0: pcnet=56:65:DB:52:7F:F2,bridge=vmbr0

See, easy right?  Then you can mount up your ISO, and install!

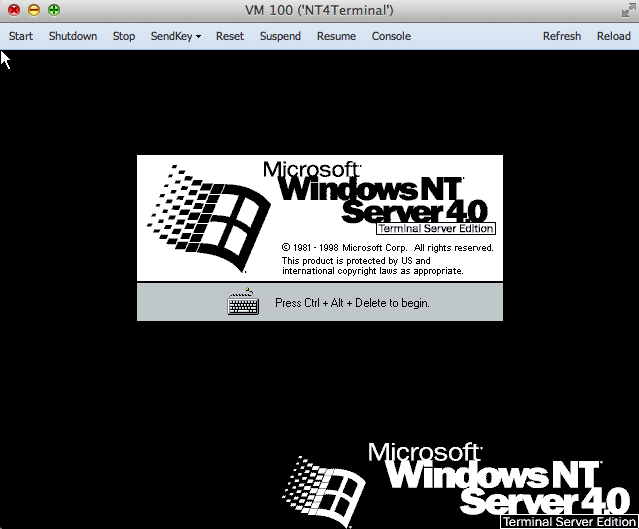
Once you’ve installed, and applied service pack 6, you can then turn on KVM acceleration, although I’d leave the CPU level knocked down to a Pentium.


NT 4.0 Terminal Server on Proxmox/VE

NT 4.0 Terminal Server on Proxmox/VE

So far, so good, yay!

VMLimited….

What about people who want to leverage the ‘cloud’ for ancient/legacy systems..?  No doubt I’d imagine there would even be a call for that kind of thing.  I mean hell I still run Exchange 5.5 at home, are there other people/companies that would want to continue running their old software, but instead of doing it a home, run it in a real data center?

Anyways, I’m looking forward to Proxmox / VE 2.0, they’ve even dropped a beta.

How to fix weird mouse issues with VM’s migrated from MS Virtual PC/Virtual Server/Hyper-V

I had this issue with one VM where the mouse would either play dead, or it’d just hide in a corner.  While I did have RDP access, it was.. quite annoying.

So some googling around I found this.

1. Do it all over again, but make sure to uninstall the Virtual Machine Additions before you convert the machine.
2. Install VMWare tools without the mouse driver (choose custom installation)
3. Open regedit, and use your mad keyboarding skillz to navigate to
HKEY_LOCAL_MACHINE\SYSTEM\CurrentControlSet\Control\Class\{4D36E96F-E325-11CE-BFC1-08002BE10318}
..then remove the value msvmmou and any adjacent spaces from the Regvalue UpperFilters, leaving whatever else is there, then reboot.

And it actually worked!

Migrating Windows 2000 servers to Proxmox/VE

I’m not going to get into the a super amount of detail here… Maybe the next server I do, but not right now. The mergeide registry addition didn’t work for me. Maybe it’s because this was an old server that was converted to VMWare?

It was Windows NT 4.0 when it was physical, then it was converted to VMWare 2.x back when that was new, then upgraded to Windows 2000, then migrated across to VMWare 3.x where it sat dormant. However it now needed to be brought back to life, so the first step was to remove the old VMWare tools. And that proved to be an episode on it’s own (make copies of all your VMWare Tools ISO’s!!).

Once that was squared away, I kind of expected to load mergeide.reg, then shut down SQL Server, fire up SelfImage, and transfer away. But I was instead greeted with a BSOD, the infamous *** STOP: 0x0000007B (0x818B51B0, 0xC00000010, 0x00000000,0x00000000) INACCESSIBLE_BOOT_DEVICE

So I tried manually adding in the IDE drivers, and then using BartPE to quickly copy the c:\winnt\system32\config\system* files. Well that didn’t work either.

Much to my luck, Proxmox/VE includes SCSI emulation, because it’s based on KVM which in turn uses the hardware framework from Qemu. So it can use the sym_895a.sys driver from LSI which can be downloaded from here. So within Windows 2000, on VMWare I was able to load up the LSI/SYM scsi driver (which hides in the miniport directory on the zip file).

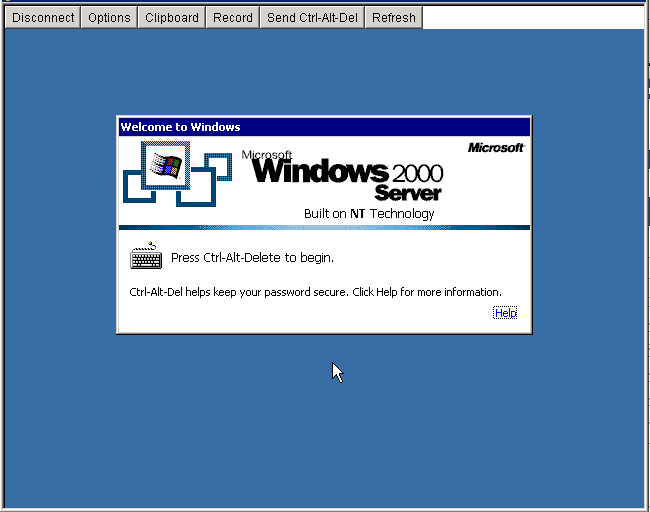
With the driver loaded, I shut down the VM yet again, booted back up with BartPE, and re-copied over the system registry files (c:\winnt\system32\config\system*) along with the scsi driver (c:\winnt\system32\drivers\sym_895a.sys). Now with those in place, I could then finally reset the VM on Proxmox/VE and get this….

So in the end it is finally transfered, I used the ‘pcnet’ Ethernet adapter to maintain the same NIC drivers. So far all seems pretty snappy with it.

Windows 2008 & Proxmox VE

Just a quick tip to people running Windows 2008 under Proxmox/VE (I know this applies to the amd64 x86_64 version probably i386 as well) sometimes when you reboot it’ll come up and crash saying that there is no available hard disks. Then it’ll go into recovery mode and … somehow claim you have no hard disks.

Turn the VM OFF.

Wait a few seconds.

Turn the VM ON.

I had this issue after installing antivirus software in the VM, but I guess there is other things that may set it off. Anyways after a shutdown, power cycle of the VM it’ll boot back up.

That’s it!

Migrating Windows 2003 servers to Proxmox/VE

So I’ve had this Microsoft Virtual Server 2005 install that has been chugging along since.. Well 2005. On hardware we scrounged around at work from 2000. So as you can gather, it’s getting OLD. Real old.

So now after a panic, we are finally at the crossroads of what to do from here.

Now most people would expect us to just “migrate” the server to Hyper-V but there is some major shortfalls I’ve had with Hyper-V. First you can’t remotely manage it very easily. God help you if you are on the road, on a notebook, or even… On your parents computer. The idea that you must be on a domain, and install some 300MB+++ file is totally insane, and completely unacceptable.

The other catastrophic issue we’ve had is that running the x64 version of OpenBSD has been met with failure so that enterprise is virtually over.

So, let’s revisit Proxmox VE.

Now to start small, I’m going to migrate the 2003 domain controller. Luckily it’s configured for IDE disks (phew!) and basically doesn’t do anything else other then act as a DC. The steps to do this in a quick and easy manner is something like this:

1 Remove those blasted MS extensions! You can ONLY do this while you are under MS Virtual Server. Really. I expect this also holds true for Hyper-V.

2 Next run the mergeide.reg, file which will tell 2003 (probably 2000 and above…) to enable all the IDE controller types on boot, so you don’t get locked out…

3 Next download and install this GREAT program, selfimage (sorry for the lame download thing), and go ahead and run it.

Make sure you set the source to being a WHOLE DISK, not a partition… Start with the C drive. (I always try to get the OS going before going after data drives & whatnot….).

Next you can set the target to NBD and point it to your proxmox server, and set the port to 1024.

I didn’t know this, but NBD is a network block device! So instead of playing with intermediate disks, formats, and all this other painful crap, we can instead basically dd from one disk to another over the network, with little effort. I would imagine for the WindowsPE crowd this would be a massive win, to say image disks out of other servers, or even LIVE servers.. Although if it were SQL I sure would shut down the database server at this time.

On the proxmox server go ahead and create a ‘destination’ VM, that you will copy the VM into. It’s recommended you make the destination disk larger then the source disk, so there isn’t any nasty rounding errors.

Now putty into the proxmox machine, and then you have to launch the nbd server. The syntax is something like this:

qemu-nbd -t /var/lib/vz/images/xxx/vm-xxx-disk.qcow2

The filename may be slightly different, so don’t sweat it too much, but basically you are telling qemu-nbd to ‘serve’ this virtual disk.

With all of this in place, you can now hit the start button on the SelfImage application and it’ll start to block copy!

I have a slow network where I’m doing this so it took me about an hour to do 32GB.

Once it is done, you can terminate qemu-nbd with a Control+C, then try to start up the VM on Proxmox.

Two things I ran into:

Some error about processor.sys, and a 0x000000CE error code. For me the easy way out of this is to shut down the VM, and re-configure it to disable KVM. In this mode it will be SLOW. But once booted up, you can issue the following from a command prompt:

sc config processor start= disabled

Shut down the VM, turn on KVM, and start it up again. Also the start= isn’t a typo, it really is entered that way.

The other error I had was a INTERNAL_POWER_ERROR blue screen. I tried playing with the ACPI, and some other stuff to no avail. The only way to seemingly ‘fix’ it was booting up again with KVM disabled, and when I tried to login, windows immediately started to shutdown.. Re-enabling the KVM option then let me boot normally. I’m still a little lost as to what this was all about.

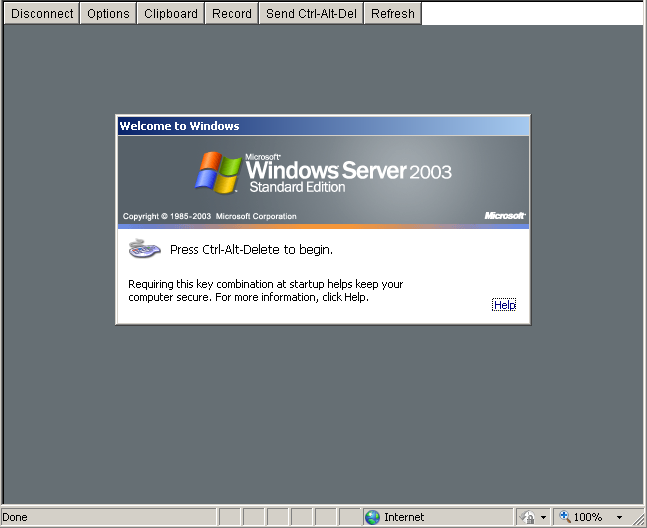
So with all the little stops here & there, my VM is now running on Proxmox VE.

Proxmox 1.4 is out

I’ve been rooting for proxmox for a while now, and I’ve just installed it on a DL385 with a 1.7 TB FC NAS…. This version is SO MUCH BETTER then the prior ones with regards to storage….

I’m installing a Windows 2003 server right now for some basic tests, but I’ll have to post back later with far more testing…

So far, so good though.

Also if you are going to install with a SAN of some kind, make sure to have it disconnected on install.

I’ve been slacking

Ok, I’m still unpacking stuff in the new apt, so I don’t have anything that exciting.

I’m hoping that this blog will become more interesting as the guy fills out content… Ah yeah, remember the ‘good’ old days of 16 bit development? Ok they weren’t *THAT* good, but we all know the pain of legacy code.

I don’t know if it’s worth mentioning, but yet another version of Qemu has been released, 0.15..

And it would appear that proxmox has been updated to 1.3… I’m going to have to upgrade and give it a whirl… I just hope it doesn’t trash my raid.

And finally you can view Warren Toomey’s presentation about recovering an ancient version of UNIX…

Video of the presentation is here:
http://minnie.tuhs.org/Z/toomey.mov

Paper: http://www.usenix.org/events/usenix09/tech/full_papers/toomey/toomey.pdf
Slides: http://www.usenix.org/events/usenix09/tech/slides/toomey.pdf

Have a fun weekend!

Proxmox VE hits the 1.0!

Proxmox – VE has hit the 1.0 today! Without fail, I’d say this is the best combination of full system emulation, and logical partitioning available as of today. I have been playing with Xen on Solaris 10, and frankly it SHOULD have been better, but it’s been so much worse.

Although Solaris Zones, coupled with ZFS & Xen should be a clear winner, you’ll find out real quick that Zones do *NOT* easily allow for independant tcp/ip stacks (hope you have v3 nic drivers), the Xen networking again is a mess (v3 drivers anyone? Also those interfaces better be TCP/IP enabled on the host!) and get ready to edit the /var/lib/xend/domains directory files a LOT…. And be ready for gegrep fun. Afterall domain names like “0aa811ef-3bd0-9140-583f-d5e09f93658e” make life all the easier. I will say that Xen does use Qemu disk images so there is an easy ‘upgrade’ path to/from KVM (the linux hypervisor found in ProxmoxVE). What I don’t get is the massive disconnect between virsh & the xend process.

And if you are running Xen, the you’ll want SOME print documentation… I just wish I didn’t think it’d be that intuitive. So at least creating this:

(device
(vif
(bridge iprb0)
(uuid c0e47a99-70e5-1ebe-44a4-54895cb24a15)
(script vif-vnic)
(mac 00:16:3e:56:df:81)
(model ne2k_pci)
(backend 0)
)
)
would have been easier.
From my notes, how to tell if your nic is new enough to drive Xen/Zones:

/usr/lib/vna NIC MAC
bash-3.2# /usr/lib/vna e1000g0 0:2:a5:4c:76:74
vnic5

If you don’t get something similar, you are screwed. Additionally this guide is invaluable as it’ll be your ONLY quick guide on how to get around xen on Solaris 10.

Anyways enough Xen bashing for now, but I have to say I’m excited about going back to ProxMox VE. Just remember to leave your base OS alone…. like a mainframe.